Transcripts
1. Introduction: Have you ever spent a long time using a certain design technique without questioning it? But then realize you could have achieved the same result in a fraction of the time. If you'd use a different method or come across a great tip was opened your mind to a whole range of possibilities. Well, I think if we're honest, we all had those moments and that's why as graphic designers, we love tips. We tend to collect your walk over time and it seems as always of better, faster, more efficient ways to do some. Well, I've created this class to share my top ten tips, the local design with you for Adobe Illustrator CC. And you'll find these as helpful and essential as I have. So here's a quick overview of some of the tips I'll be sharing in this class. So we'll look at using the shape builder tool to best effect rotating to create unique abstract design elements that we'll look at balancing hacks. How you can snap your out where to add grids to quickly create unique shapes. How to use contrasts, the best effects. Recall your artwork without doing it piece by piece, will have a look at the new improved Gradient tool and what a long way that's come from this original versions. And lastly, we'll look at how to outline and customized types to create something truly unique and this spoke to your clients. So the class projects is going to be to use these tips. It could be all of them or your favorite one or two on your own ME that logo design projects. So this doesn't have to be for an actual client. The idea is just to relax and have some fun and then share with the class the results you've had. If I added up the combined time that tips have saved me over the years, it wouldn't be hours. It would be almost a weeks of time every year. I'm saving like doing things using these methods. So if you're ready to trade them an hour or so, watching this class to save potentially weeks of your time over the next year, then hit play on the next lesson. And actually before you do, make sure you follow my profile of created a whole range of useful classes for logo that brand identity designers say, please post any questions, any comments you have, and I hope you enjoy the class.
2. Shape Builder Tool: So the shape builder, I think is one of the most time-saving tools I've come across in Illustrator, CC. And it really is fantastic if you're creating logos and you want to combine or subtracts elements one from the other is an invaluable tool. So I'll head over to a new art boards just to show you very quickly how this works. So we're going to create a few objects, ensuring that they overlapped. Believe in, create some type and outline that type. And to illustrate how this works, if I select all those objects and use the shortcut for the shape builder tool, which is Shift M. You now have the ability if you click and drag by default, to combine V shaped into a single object, where if you hold the old modifier key, you can click and drag to subtract. So by adding and subtracting, you can imagine the possibilities. You're able to create completely new compounds, shapes, and just remember too, group Vn result if it has a cutout as I've done here. So it's a logo designer. I'm sure your brain is already racing away with a possibilities when you're creating custom type or logos. And so in effect, I like to create some times as a cutout on type, I think it's quite a nice way to create a modern symbol. So first of all, taking this piece of type, we have to outline it. If I were to open the shape builder tool, now, I just get this stop sign appear. So we're VA outlined. And a shortcut for that is control shift. Oh, I want to oh, drag to duplicate it. And the idea is I'm going to cut out a little portion of VA to create a, a nice effect. And as you hover over, you can see that's going to give me a nice crisp edge. Select both objects. Open, V-shaped builder tool, Shift M. And if I hold the old modifier to subtract, as I drag, you can see it's subtracting one shape from the other. And that gives me the perfect angle that I'm looking for. Effortlessly. I quite like the consistency. If I'd subtract the same width here as we have for this part of VA. But I'm just gonna get rid of this little piece. Stick out of the bottom. De-select, identify, select here. It keeps these grouped as objects. So if I select V, VI had duplicated and delete everything that remains with that. You can zoom out and that's quite a nice little cutout shaped for VA. So you can imagine the possibilities if that's something you'd like to do with type, to cut out portions to create something that's a little more modern or edgy. That's one way you could use a shape builder tool. Another way you can use it. If I come down here to something I created earlier, I really like this symbol for the career aspects monogram. It's just a simple C with an EVA, has no crossbar. And to create that using perhaps the Pathfinder could be quite tricky. So this is some way to shape builder. It's really useful and I'll walk you through this step by step. So here we start with our two characters, the sea and VA. And I've already remove a crossbar here. To do that. You could drag Va down, bring it to a position where you've got a nice overlap of. And again, use this shape builder just as subtracts the crossbar. And once you have that, you'll notice if we just wanted to pop them together and perhaps use the Pathfinder to combine the two shapes. It's not very attractive. We've actually got a nasty little overlap here where part of the C, Even if I bring it so it's touching precisely. And part of his SSI is sticking into VA. You've got a lipid verboten. So it'd be quite a bit of work to try to tidy this up just using the Pathfinder, but using the shaped builder tool. I come across a variety. Here's a version of outlined and you can see there's not really a very pleasant way to have this shape blends seamlessly one into the other, which is what I'm trying to achieve. If we look at the end result, I don't mind it changing from from the rounded part of a C to a, a straight edge. But I really wanted to kind of end where I tell it to end and a little bit more of the C2 to come around at the bottom there just to lead a little more seamlessly into VA. So this is how I did that. If we look at these outlines shaped here, I've actually taken the sea and reflected in which he can do using the shortcut. Oh, I'll click on an anchor point at the top of the arc of the sea and when alt drag to reflect it. So that's how we've ended up with this unusual shape here. Then I've simply outlined VA. And what doing better visi means is using shape builder. We're able to now kind of carry on the exact curve of the sea and create the kind of edges that we're looking for. So I'll select both objects. Open up the shape builder tool. And what I'm gonna do is subtract this little bit of it's hanging out here and subtract this part of the C. And then we want need. This. So before we delete v reflected, See that's on top. If we zoom in just to check everything is nice and seamless. So actually we want to, you can see it's jumped down here. The C we're going to use, the AAC is just slightly unbalanced if we reflected C And I'd like to use back edge. There we are. And that path to create something that runs a little more smoothly. So again, if we select whereas objects open V-shaped builder tool and hold Alt or subtract, it lets us just remove that little piece. There would have been really annoying. And if we zoom in even further, I've got another one here. So that's because that particular c for that phone is not a 100% symmetrical. So it wouldn't quite have lined up as we wanted it to. Let's zoom in up here just to check. And again, not quite perfectly aligned. So we can deal with that at the end. Let's select and delete the sea we reflected. I'll select and u-shaped builder again and just combined v-shaped for the left now. And this is what I'd recommend just going in with a fine-toothed comb and anything you come across like this where you've not had perfect alignment. Well, I'm going to remove one of those anchor points. And if we check it's got yeah, that's a good point to a line to this. Remove number one, and remove that loss one. And now we've got a perfectly straight line to connect those two points. So you can see how useful is to create the exact element you're looking for when you're combining type for monograms and base, we end result there. When we fill in and in the context of a logo. That's really quite powerful. So to show you one final way, I would use a shape builder if you wanted to create this kind of monogram. So this is the end result. And you've probably often seen this where you take two characters and you create this intertwining effect where it seems but one is overlapping the other. And when as it comes back around, is heading underneath. So it creates the illusion, but the two are really intertwined. Now to do this using the shape build at all is really easy. So position V2 characters as you want them to appear. Select them. Control shift to outline them. As mentioned before, shaped builder won't work unless you've outlined the type. And then we want to create an external stroke to create this negative area we're going to cut out. So let's do that. Let's make it five-point. Align the stroke to the outside. By clicking stroke, you get that option. And I'm going to color it in white. So it's a little closer to the result I'm looking for. And let's increase fat by a few points. Something like that, around ten points. I think that's what we're looking for. So if you select both objects and you want to go to object, Expand Appearance. And once you've done that, you see that the strokes are now expanded into solid shapes. This allows you to use the shape, build a tool to interact with them. So to make that a 100% clear the shape, build a con, edit strokes. But once you expand appearance and you turn a stroke into a solid shape, and the shape builder can interact with them. So let's again use the shortcut Shift M. So open up the shape builder tool and you need to just keep a mental track of what you're doing here. So we want to Fred the top of VS over the top of a p. So holding the ALT key, we want to subtract not just the negative space surrounding the S and the P, but we're actually going to intersect this part of a p. But we want to cut out here. And I'll deselect there so that I've always got the option to undo. And the same for this part here. Just selects while holding the ALT key. And it's going to subtract all of this. Now here, if we look again at the reference, we want this to stand out on top. So again, it's going to be the p, It costs aware. So we hold Alt and we're removing that there. Now as the S curves and it overlaps with p again, this time, we want the P to stand out in front. So holding old with time, instead of clicking here, we're going to click and remove this portion of VS and follow that down. And the same on the left-hand side. And follow that down. This negative space we can remove. And these parts we can remove to tidy lumped. And now we want to add a few of the shapes just to create one seamless object. So I'm going to click no modifier Klee's held this time and drag up to make sure the stem of a p is solid. So just add that little portion there at these portions and hold Alt again. Remove that portion. And if we deselect and come away, you can see we've done that quite quickly. And once you're familiar with the tool, you'll be able to work really fast. And you have to go in with a fine-toothed comb and you're doing your final versions. But even for the sake of testing how an idea works, using the shape builder tool to create an intricate overlap like this is really easy. It's something you can eventually do in just a few minutes. So hopefully already you can see the many possibilities. Using the shape builder tool opens up. And if you're working with type, with icons, it's really an invaluable tool.
3. Rotate to Create: So for this tip, I've titled, they rotate to create. And that's exactly what we'll be doing. And if you're someone that likes slightly abstract brand marks that are loosely related, maybe it's a logo type or some other part of your logo. This is a really effective way to do that. As you can see from the example I've got on the screen now. So for this example, barber books, we've simply taken VB from, from the brand name. I'm rotated that in place, 90 degree angle. And that's given a, a really effective custom Brahma. Ok, so I'll show you how to do that using the rotate tool. And to walk you through the steps. If you start as I have with a letter of choice, will replicate that. And I would outline the type first. So the shortcut is Command or Control Shift. And when you've done that, the shortcut to open up the rotate tool is on. And you'll notice there's a little turquoise anchor point icon you can see that starts off in the center of the object. Now to achieve the desired effects, I want to rotate it on this axis. So just at the base of a be, ignoring the Serif to the left. So if we zoom in a little, that's where I want to place in. It doesn't have to be exactly precise. You can always get a little at the end, but let's get it as close as we can to begin with. So I'm going to left-click at that point and then holding the modifier, so that creates a flicker. I'm going to drag. And as I do that, you can see is rotating that objects around the anchor point. If you also hold the Shift modifier key, as you rotate, you'll see a snaps to a 45-degree increment. So we won't 90 degrees o position at their release. My click but not the modifier keys and replicates in place. If you hit Control Command D, we'll repeat the last transformation. So we'll do that twice. And where you can see we've got the core of the shape we created there, which is quite effective. Now personally, I can still really clearly see the baby because it's completely upright. So if I select all very shapes and just using a regular Free Transform of rotate by 45 degrees. And again holding Shift and make sure it locks it exactly to the increment. That's now as it's still a B, but it's less obvious. And when you place fat within another shape. And it does become quite abstract. It's a nice touch, but when you look closely, you see they've used a b varies as the core of that Mach. But I like to not make it too obvious. So if I had two annexed all boards that you can see where I've done that. And I think a nice touch. He's just mirroring the aesthetic of OB. So we've got abroad the stroke and the narrow stroke. Not just mirrored by creating a key line. But again, it's not precisely aligned to the shape. You can see what the effects would be. If I align the more or less precisely around that mark. And it's nice, but I quite like putting it at odds with the Django. So again, it's a little more abstract. And I think that's a really nice end result. We have to play with them. So you can use that principle and create all kinds of custom marks. You don't have to use. A character is the base. You could use something else. But it's a really effective way to create something new. If you're keen on abstract, I'll show you one more example. And this rotation of VS would result in something like this shape. We've got server right here and Vietnam have placed it inside a bed sheet, not placed it in the exact center, which is irritating me now. When a group for his objects and just to center a line. But this time we've got six points of rotation. So how did we achieve that? Because if we off the outlining the yes and hitting rotate, use the same trick as earlier. And hold shift to snap the increments of 45 degrees. Well, we can only achieve even eight points or four points of rotation. So something else she can do, whatever Rotate tool. And I'm first of all, just going to use an object as a place holder so that it can you see where the magenta line shows me I'm over the exact sense OVS, I'm going to drop it there. And that's if you've got smart guides turned on. And I'm going to create just a little something here. So I've got a reference point to place an anchor when I rotate this. And I'm going to with the S selected hit. So you can see the rotate tool were selected. And this time before clicking, if you hold the modifier key, and I'm going to hit the point where those two shapes intersect as my reference point. You'll see it pops up now of a dialogue box and allows you to enter the exact amount you want to rotate, which is really handy. So 60 degrees, that's gonna give me six points. But divide 365, the desired number of points of rotation that will give you the angle you need to use. So for me that's 60 copies of copies of shape. And again, if we use the trick Control D or Command D, we can duplicate that transformation. And where we have V6 points, I can delete that guide. Now you'll notice that's a little more spaced out. And then the example I created earlier on the right. So if I wanted to achieve something a little closer to that, and I've deliberately left his reference point. If I shift it up, select VS. And we'll try again by clicking 60 degrees and copy. Duplicate VAT with command or control D. You can see that's a little closer. And that's just to illustrate the fact. You may have to play with a little trial and error to see what what kind of spacing you want, exactly what kind of effect you're looking for when you're very tight, any shapes in place. So that's how you use via Rotate tool to create something new and unique. And to me the result is really stunning. And it's not something that's going to work with every project where every letter, every experiment you try, but it's well worth exploring and it's a really useful tip that's a half up your sleeve.
4. Start With Fonts: So this is a tip that saved me a great deal of time when it comes to logo design, particularly at a stage where you're exploring initial concepts. All too often I see designers sketching out letter by letter, logo type without doing any kind of initial exploration using fonts. So it takes a long time if you're sketching out letters by hand to even gage loosely, what kind of direction is appropriate for the brand. And I find that by creating a page like this where you've got a range of potential fonts, some variation between them. It saves so much time to be able to home Min and say, well, something like this. Nice and crisp and modern is going to be more fitting for my brand. Or perhaps something like this. More traditional uses serifs. What kind of weight is going to feel right? You can do this as I have on the screen at the moment, in just a few minutes, by pulling out your favorite follows. This isn't to say this will be the final selection, but by the time you finish this page, you've got a sense of a general direction you might head. If you compare that to the potentially an hour, you could spend sketching this out by hand. For me, it's really no comparison is, is a technique that can save a lot of time. And so you could pull via the font that you feel is most appropriate and take about forward. When you begin fleshing some concepts out. But start with fonts. It really saves time. If I had along to the next ot boards. These are the kind of things I would sketch out. So if I'm looking at a single letter or brand, Marc, and I just want to quickly fleshed out different ideas. I've really got to start from scratch and play with what works and what doesn't work. That's why I'd recommend sketching everything. But certainly when it comes to the logo type of fonts you're thinking of using. Even if later ROM, you decide that you're going to do something bespoke, unless it's a script or handwritten logo. I really recommend getting a starting point by standing on the shoulders of these professional forms. Now for this particular project, if I move you on to the next stage of my development. So in this example here, you can see I've picked this out. I felt this was heading in the right direction is future repeat T. I've spaced quite widely and I'm loosely happy where I can see immediately. It's got v tone, the look and feel that would be appropriate for the brand them creating. And then you could choose to bespoke it. So in this case, I've substituted the E for something a little more special. I quite like this. We've just got free horizontal lines. We've removed the stem of B, and that just makes it feel a little more custom. I've popped London in place below. Again, Futura, but this time more widely spaced. By doing this, I'm kind of making some real progress. We've looked for fear of a tone. And it would take such a long time to sketch all of this element by element, character by character, by hand. So I guess for point of this tip is give yourself a best headstart and you can create something that looks and feels as you want it to. And then you can invest in real time. Then you can start deconstructing things and creating custom elements. And the, if I skip ahead, hit vertex upward, you'll see I did that for a lot of a concept. That exploration. I'm just pulling in fonts that I feel are loosely the most appropriate. And I'm pairing them with VCE fleshed out concepts. And it just means very quickly. You can begin to get a sense for what has the right tone and what doesn't. So for me, there's a time and place to sketch things. And that was for this portion of the initial concepts. When it comes to the type itself, to the fonts. This is a much faster way to quickly gauge the direction you want to head.
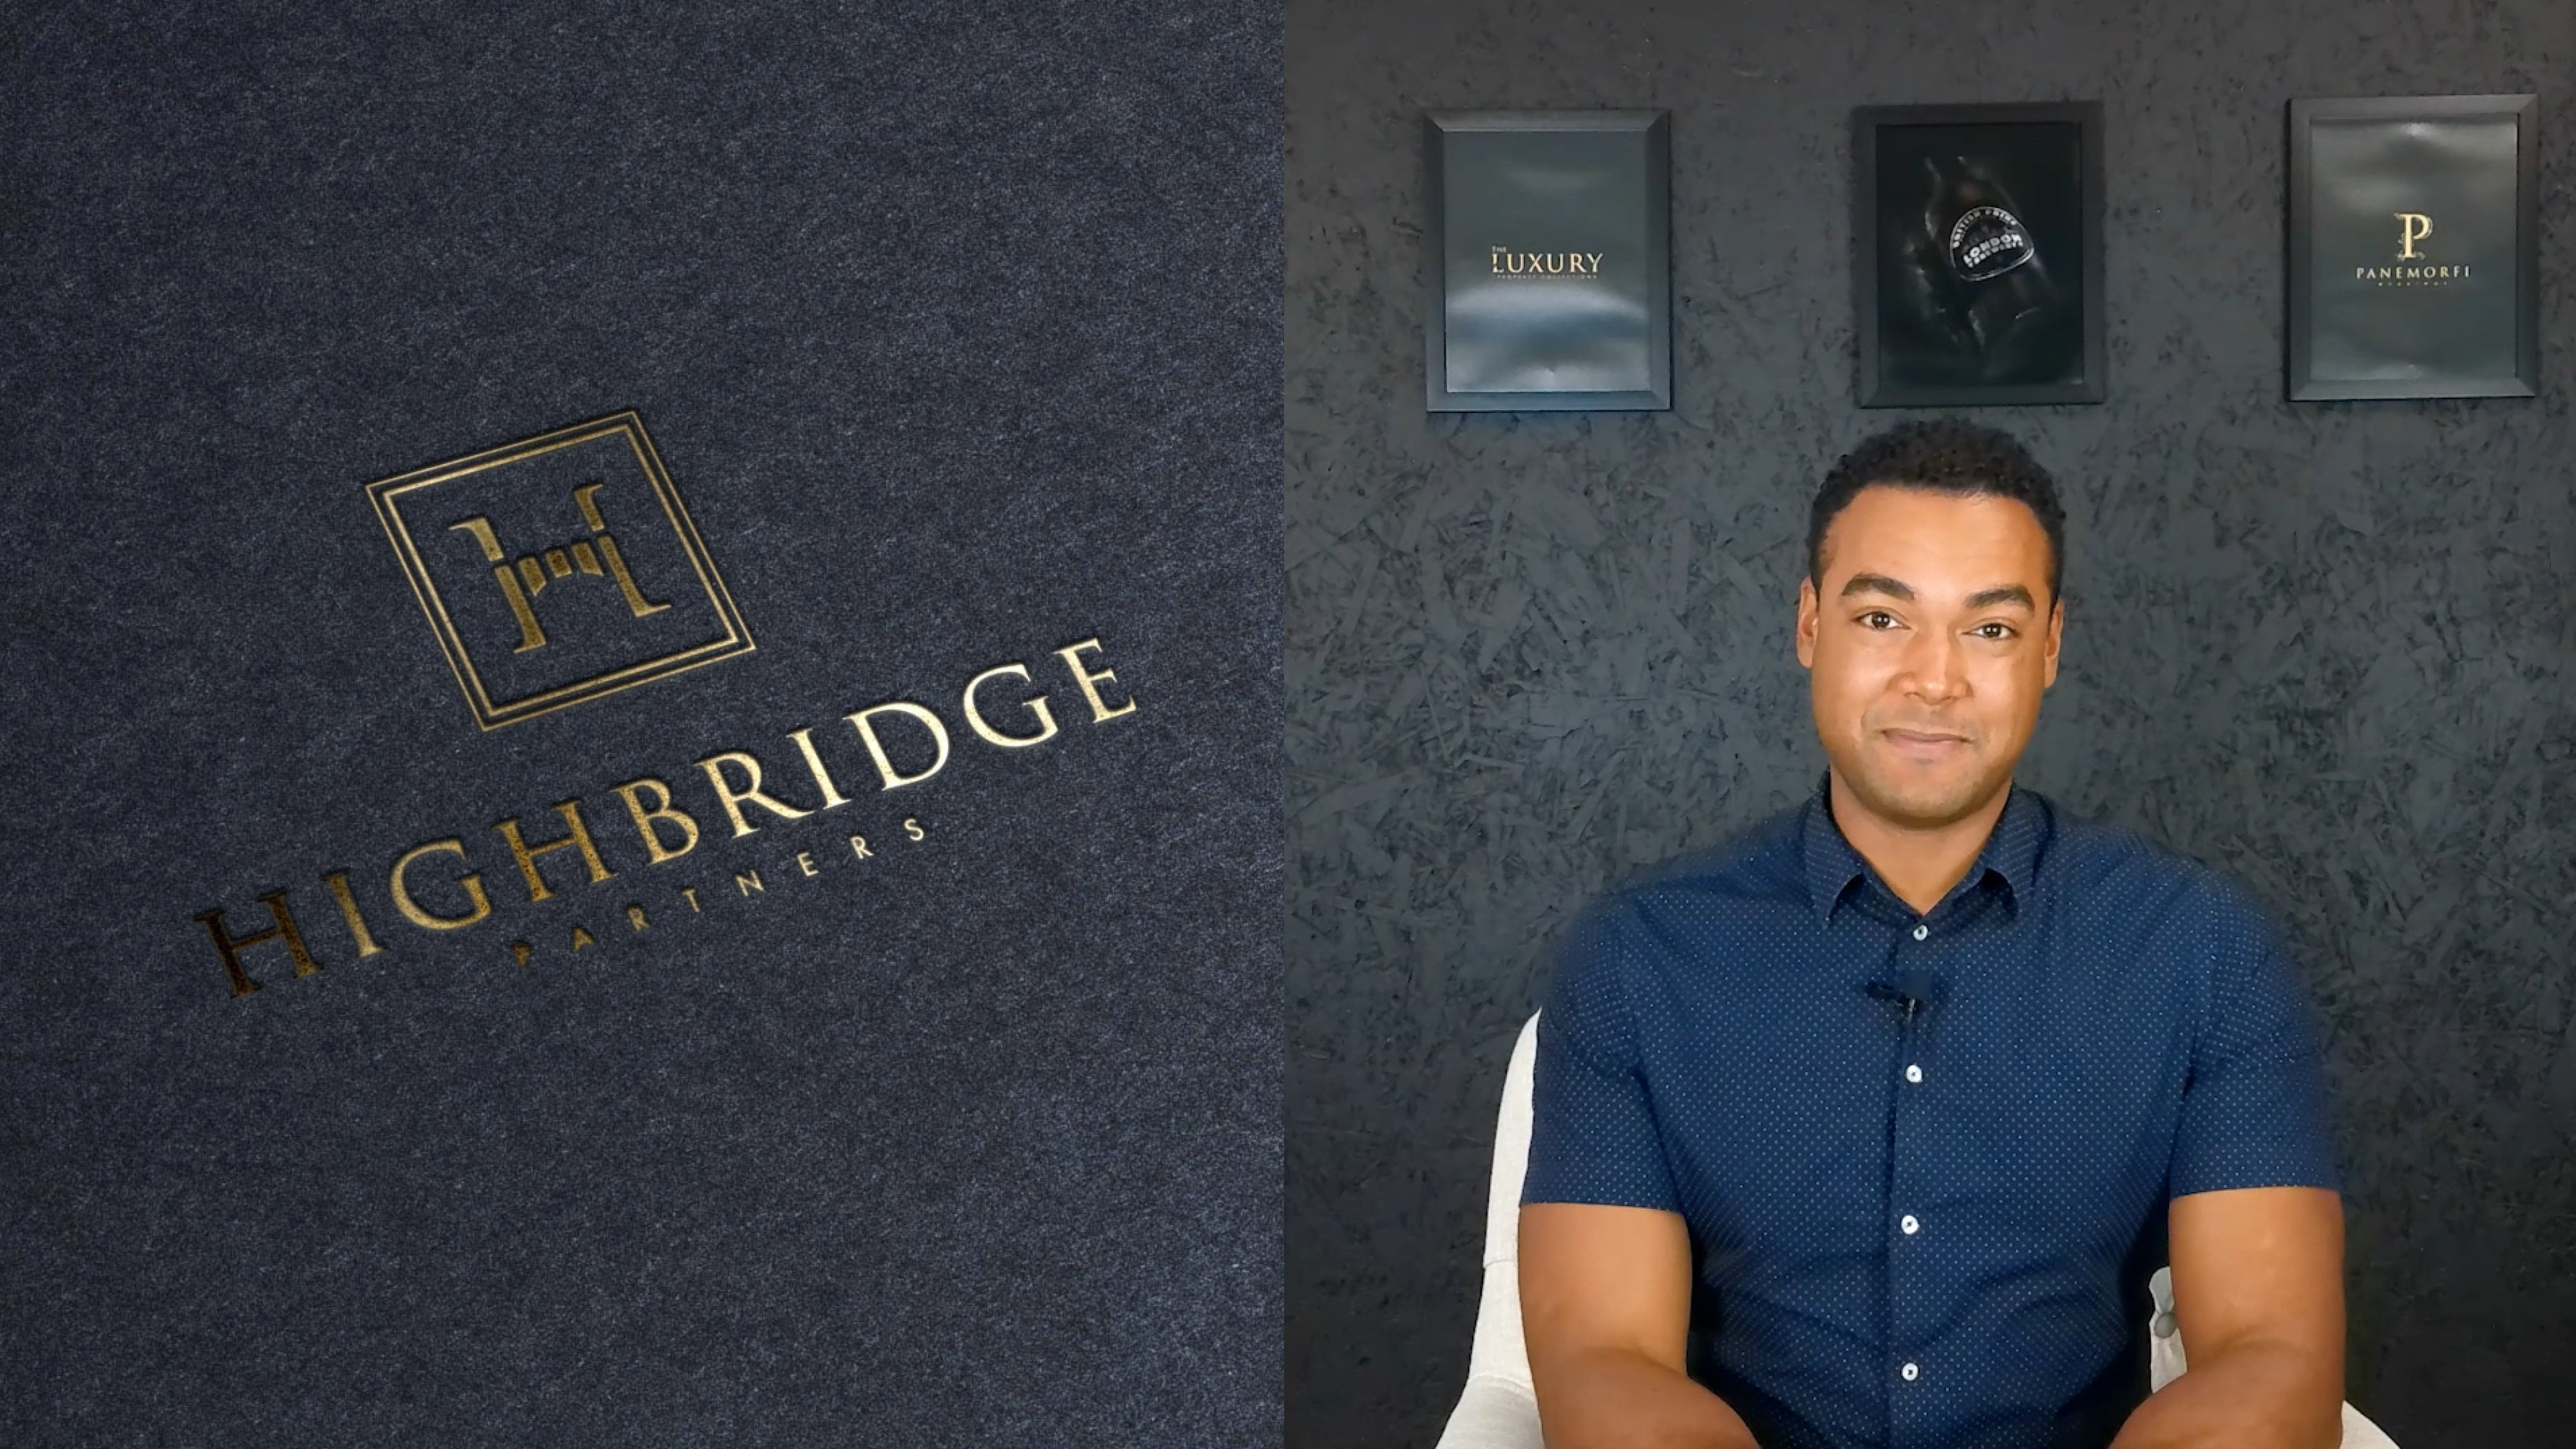
5. Balancing Hacks: So if you've ever found yourself looking at something like this or this golden ratio, I'm wondering how on earth do I use this to balance or to improve my logo design? Then this next tip is for you. This tip is all about balancing. And although there's a reason we're designing logos and not machines or AI. We want to optically balance things. This can give you a really good starting point if not make the final decision for you. So what tools do we use to balance logos? Well, you may have seen this before. It's the golden ratio, and it really spirals down in size. The basic idea is that in this spiral, v2 objects that are lower on the spiral equal the diameter of V. Next object going up in a spiral. So you can see these two circles. They perfectly match for the diameter of this one. And then these two circles, they match the diameter of the next one. And so on, going up and up onto infinity. So how do you use but how is that useful when it comes to logo design? Will, before I show you, let's just go on to another example of this golden spiral. And there's many courses showing you how to create this. In fact, I think on skill share. Whereas if class showing you how you can create these starting points. But once you have them, and this is another of created earlier, you want to use them as a useful reference. So I'm going to create a shape just to capture. And I want to make sure I get this spot on the width of, I'll use F3 segments. And it's a little rough, but it's just for the sake of showing you in this video. So I've colored VCE, and this is the way I like to use them when I'm looking to balance my work. You can copy and paste these objects. Maybe save a document, call it balancing, and then you can always cut and paste bees as a reference into your work. Now, how do we use these as a reference? Well, if I had along to the next board, and you'll see a logo I created earlier. And the general idea is that aligning things, it could be spacing, it could be weight to this golden ratio. It creates something that's more visually pleasing. So I'll show you how that might work with a relationship these elements have with each Java. So it's sometimes known as the rule of thirds. It's not quite a third. If I take the smallest segment and I duplicate it three times in a row. Let's do it like that. So you can see, you'll notice it doesn't quite equal. That larger shape. So each segment is almost a third but not quiet. You could, if you want to just do this quickly and you could work with farads, but we've taken the time to create this with a golden ratios. Let's use it. And you'll notice if I take these segments and what I'm gonna do is positioned them in such a way that the largest segment aligns with the height of the main logo type in their brand here. Then what it would be interesting to see, the spacing and the overall balance follows this golden ratio. And remember it doesn't have to align precisely. We want it to feel right optically. But this gives us a really good starting point. So if a main logo type aligns to for high of this segment here. If I replicate down the next segment, you'll notice that for balanced is not far off of two thirds over next segment down, invite golden ratio and through our rise that just looks pleasing. It's balanced. And then if we take the smallest segment and we placed alongside this word London, again, is not precisely aligned, but it's roughly 1 third or another segment down. If we look at the spacing between the main logo type and London, again, it almost aligns to this segment of this grid. So we could use this to find chamber balancing. I could align that so that the spacing for London is exactly one segment. And if, and if I really wanted, I could even transform the word London. Laughter Recent to this. So that it's precisely one segment in the height. I'm going to group these independently just so I can center aligned map. And if we remove these guidelines, that looks really well-balanced optically. So that's how in practical terms, you actually use these golden ratio grids that you may have seen. And by creating those little colored segment guides is a really quick and easy way to drag it into different positions in your artwork. And as I say, I would trust your instincts and your URI. But to perhaps create the initial layout V-I relationship in size with spacing. It's a really good way to go. I'll show you another tip when it comes to balancing. And again, we're looking at the same brand here. And visit with is when it comes to kerning between your letters, particularly in logo type, which is an important part of a logo. So again, I'm using this color system. All of the shapes are created that are this grey color by heavy exact same width. And I've just positioned them in the spacing between the letters. So that you can see. Here, I've actually ignored the geometric spacing. And I've put this little colored marker, whether some optical compensation required. Now that's because if you look at the logo over between the top of the T and the E, there's quite a small space. There's a massive gap at the bottom because the profile of a T opens right up. And we get the same hey, between the T and the Yah. We also to a lesser extent gets it because of this curve at the top of VR and the o and between o and the L. So when you're thinking about Kerning, and again, this is just a quick tip. I'm not teaching a class on kerning, but this is a way I kind of quickly drag these colored shapes in to help me with the optical balancing is just a quick, easy reference. Drag these into place and you are able to compare like for like. So in the spaces where I've noted that I need to compensate, I'm just ignoring via a little the geometric spacing, but in other places I'm honoring him. So another helpful guide, just a little trick, you can use an Illustrator using these colored coded, color-coded objects. That's, uh, help you balance things. And you can see when we look at the end result, you feels really nice, really well-balanced to VI. So another example. Here we've got a brand mark and I'll show you the end result for this brand high bridge. And just looking at a brand mark here. Well, how could we use the rule of thirds or the golden ratio to kind of help us with a wave. This is balanced. Well, again, if we drank in as little useful guide shapes, and we're not looking for this to align perfectly. But I wonder what the relationships are if we expand this so that it matches with scale. The value V lower pot for Branemark is exactly one segment above the upper Paul O'Brian walk, which is what causes it to feel so well-balanced. If we rotate this way and we look perhaps at these segments, I'm just going to duplicate this. I'm going to just ignore that little tip of a serif because that's really not having a great impact on the overrule profile of a shape. And then we drag this inside. You can see again for it to feel well-balanced is very closely following this golden ratio. So when you're creating something like this, it could be any kind of Branemark shape type object. If you just dragging helpful grid as a guide. Sometimes it helps you to just nail the balance before you find tuna optically, for me, looking at these spiral grids is quite scary. Trying to somehow drag vase over your work and make sense of it. It tends to get me in a mess. But by using that tip, if you just color code just a few of these segments and you've got the diameter there. You can drag and you can position by over your work. And it really is a useful, effective guide. And the same when you're looking at spacing. When I'm looking at compensating optically is really helpful to just color code things and make a visual note of a places I need to compensate. So I hope you find that tip as helpful and as time-saving as I have.
6. Snap to Grid: A popular trend at the moment is to create these very geometrically balanced, attractive, modern brand marks. As an example you can see on my screen. So that's what the next tip is going to show you how you can use grids in Illustrator to easily create something like this. And because of a level of consistency it gives you, it's easy to explore different options and iterations. So to begin with, we're going to come back up to this, which is going to be a helpful reference. You need to make sure with a properties window 12 open, you have your grids visible. So you can see that now appears in the background. And when you need to have the snap option to grid toggled on. Now we've had in place and this is a reference. I'm going to show you how we can create a similar effect. I'll just make sure I'm on an active layer. So consistency is key and you want to have some idea of what you're looking to create beforehand with us a sketch or a rough draft. You could even create a letter in the background and perhaps put it to a layer, oh, via Pasiphae down. Just to give you some idea of what you're creating, some kind of path to follow, but we add whichever method you prefer. First of all, using the rectangle tool. I'm going to do the flats areas of this MOOC. And we want obviously the same starting point. And the trick is to make sure, and you could decide to use, to use two squares on the grid or just one. I'm going to use one part to keep it consistent. So I'll spacing between elements is always going to be one square. And the width is always going to be one square. So I'm just duplicating that across there. So there we have what's going to be the base of this mark. And we've created those vertical lines. And remember, having snap to grid on is essential if I turn off snap to grid and we try to do the same. That may look right. But when you zoom in, you're going to notice is not quite perfect, is just going to have a guideline there. So please make sure you've got snap to grid. Safely turn DOM. Next. I'll do UV. And we'll actually before we give a horizontal lines, we really need research was in place as a guide. So we'll use the Ellipse tool. And you can see it starts from just one square to the right of this rightmost vertical line. So we want to use that as the anchor point. And we'll just click, hold and drag to create our first ellipse, going to de-select. So that ends up interfering with that shape. Then we'll click and drag again. And this time we want the width to spend an extra square. So you can see covers roughly four squares. And this next one is going to cover, while four-by-four. De-select, gonna change the color here just so it makes it easier to track what we're doing. And I'm going to send that layer to the back. The select will do the same again. And of course, if you wanted, you could copy and been transformed. And that's had a back change the color. And so for this one I'm going to copy paste at back, which is Control or Command B. And then our transform holding old to transform from the center, change recolor. And that's another way you can achieve this. So keep going and it seems a little tedious at first. But ultimately this is giving you the framework for the shape you're going to create. I'm going along. It's just transforming, keeping that anchor point the same each time. And we've now got these concentric circles that are exactly one square in width because we've kept the anchor point consistent. And as we've increased it each time were snapping to a square. So we're getting that level of consistency. Now already. Perhaps you're thinking of some of the options we saw opens up when creating graphics. But next we're going to create the horizontal lines. So let's go back to the rectangle tool. And unfortunately the filled shapes are hiding the grids. But we've got snap to grid on. So we want to start from here and we'll drag. And you could go as far as you like with this. But to give us a crisp edge, we're going to snap it to there, so just two squares away from the edge. And then I will simply click and drag to duplicate that once, twice. And you can see that's going to form the top and right most edges of our shape. Lastly, to achieve this kind of effect here. And to take one of the circles. Let's take this 1 first and we'll drag it down. And take the next size down and position it in place. And that's going to give us the curve that we want to form this movie F. Move out a little further down because he could play with his afterwards if you wish. And then we'll just take a horizontal bar and position in place that we're mirroring the same effects we've got above. Now the more you do this, the more you'll get used to kind of understanding and playing with this and the effect you're going to achieve in the end. But we now want to use the shite build a tool. So with this framework in place, we select all of the objects. And as you will have learned in an earlier tip, if you press Shift M opens up shaped builder, and we now will take it just one line at a time, so it's easy to follow. We're going to click and we're going to start merging these shapes. You can do it in stages if you like. So that we create for lines we're looking for. So that's given us for outermost line will now work another line in. And if your hands not steady or you're worried, you might go over just Davis in steps. And the next line. And now you can see we've got these three lines that are going to form the base of my F mark. Now we just need one more, which is this one here. So for that we need to be careful. We need to make sure we start from a shape we can isolate. And we will do that. To merge their shapes. They're deletes a wave of parts we don't need. And you can see we're left with fabulous geometrically sound mark that we've created here. And how you choose to stylize this is completely up to you. I quite liked to mirror this curve here to put a little shadow, which gives it an extra piece of perspective. So really how you choose to stylize it is up to you, but it gives you a great starting point. And what I really love about this vis, illustrates a trick is that the possibilities are endless. It makes it so easy to create a range of mocks where you want that geometric precision and where you want to quickly and easily construct something that perhaps has complex elements.
7. Contrast For The Win: For this next tip, one of the most powerful tools we have to use as a graphic designer is contrast. Now this can be contrasting color, contrast in weight, contrast in spacing, contrast, interrelationship between elements. And it's a great way to improve was any design, even if you don't use it to improve something, you're happy with. At least test out we options. Try exploring the contrast. And sometimes you've really surprise yourself with the results you can achieve. So in this example on the screen, and first of all, notice how you could use contrast. This is a brand I'm working on at the moment, PR films to separate these two words without having to have a jarring space. If we select PR. And we turned my element too bold, so that we've got to so slight contrast in weight. Already we begin to read a little easier as PR films, rather than coming across as one word. If we change the color to add some more contrast. Well now we've really quite easily read that as two words. But the spacing is nice and tight and locked up. So that's a trick I often like to use to create something that's a little more cohesive. What about the tagline? Well, if we look at the spacing, is default as almost no custom tracking for these characters. And as an element that is not a great deal of contrast, way smaller than the main logo type PR films, but I wonder if we could push it to make it a bit more exciting. Well, if we do that, there's not the spacing right up to something high. Let's put 680. And now if we bring that scale, keeping the spacing all the way back so that they line up flush with the Type above. Well, look how much more exciting that looks already. Because you've created this increase contrast in the spacing, the size for treatment, it's got a greater sentence sort of drama to it. Then it hadn't perversion before. If we had a cross here. And we look this time of a contrast between the characters in the background. So this can create a completely different tone and feel to your, to your brands. So this fuel is quite soft because it's got such a light contrast. It also means it's fairly difficult to read, which is an ideal. So I'm not going to tell you what's right or wrong, but look at the difference it makes if we begin to change the background to increase the contrast. The GIT suddenly the words feel a great deal sharper and easier to read. But there's more of a sense of drama to the logo where before it fell soft, it now fills quite exciting, quite dramatic. So depending on the projects and the tone you wish to set for your logo. And you can really use contrast in these different ways to create these different, these different tones, these different fuels. So never leave contrasts a chance, always explore it pushes boundaries. And let's provide another example here. So this time, let's use perhaps a form similar for both. She's book way for both and the same color. So what could we do to improve this? Well, there's quite a pleasing bit of contrast because of the difference in size. Although technically we've got the same font weight. One is very different to the other. What happens if we start to bring that a little closer is certainly easier to read. But there's a little bit less drama there. Less of a jump between one and the other sometimes, but it's a good thing. Sometimes that's something you want to exaggerate. But again, it's about exploring the options. We could exaggerate the spacing a little bit more. That's a bit too tight. But just to illustrate the point between one and the elbow, you of course don't have to have these aligned perfectly or I should say, end. Perfectly aligned as if a fully justified, something like that is acceptable. But notice where it has a completely different dynamic. If the weight is optically the same versus when the weight is optically different. So these are all elements to have fun experimenting with. And you get a sense of what tone you can create by using which feature of contrast. But certainly you want to make sure in your logo design process, you're really taking contrast into consideration and exploring the boundaries.
8. Recolor Artwork: Now this is a tip that saves a massive amount of time when you're coming to the stage of a project where you want to propose colors. And you may create something like this have on the screen at the moment. And this is a very simple color route. We've just two colors. And I would usually create some mockups epistle later on in the brand identity process. There may be patterns we've developed supporting graphics. And there's quite a lot going on here to try and give the client a real taste of the look and feel. They're going to get an impact with scholars going to have on their branding. So you can imagine to go through all these, all boards and try to recolor each element. You can't simply select everything and re-color because you see this little question mark icon overfill, which means you've got a mixture of colors. So it's quite tedious. And perhaps this is what you've done until now. You go through trying to select similar relevants and recolor them one at a time. While there's a much, much easier way. And to do that, I would select all of my artwork and actually just duplicate the art boards. But in this case I'm going to copy for artwork on to art boards that I have in place already. And let us say for the client, this was to be colored root two. I would take the opportunity to create the new color palette here. I've actually come up with one earlier, but I'm going to use in this example. So the same ivory whites, but it's going to be a soft green. And if you were just experimenting at this phase, you could select those two objects and create a new art board from our board and new colored group from them, which would appear up here. That's important because to use this tool, you need to have a color group ready to select from. So once you have excluding this first page, we're going to select all of our artwork we wish to recolor. And you simply go up to the top. And you have this option, hey, recolor artwork. And you'll see a number of options at first. You can play with vcc what they do. But for the purpose of this demo, I want to recolor everything. But once you become familiar with this and please play with the different options. The result is that you can recolor pages of your artwork by using that simple tool. And you've got fine control over choosing exactly which color will change into a substitute color. So it's hugely useful and you can see just by clicking a few options, I'm able to provide an entirely different color route for the client to see. What if you've got something more complicated. So in this example down here, because we've actually got a gradient at play. And if I click on VR work here, you can see we've got a gradient less using five different spot colors. So how on earth, without pulling your hair out to you, recolor something like this to show alternative calories. Will thankfully, the recolor outwards who writes really well in this situation, again, if you select over artwork, you'd like to be recall it. And you'll notice I've created a color group that has enough options. If I know there'll be able to. I'll be able to swap a substitute for each of the colors present in this. So you will need to create a palette. Before you click this button. When you click to recolor artwork. And I select Color group five. I don't want it to change this blue. And as soon as I do that, you can see intelligently it's tried to give me the best match it thinks is appropriate. But I can drag and drop if I want to reorder this. And it's actually affecting the gradient. Which is awesome. So even if you have a complex artwork and you want to change around and explore different color palettes. Vis tool makes something that can be a huge headache. A quick and easy step, as long as you create some color groups for yourself beforehand.
9. Pathfinder: Next tip is using the Pathfinder tool. Now, this isn't as as fine tuned. It doesn't give you quiet the control of a shape builder that I shared earlier. But sometimes it's just what you need when you want to perform quick actions between different objects. So I'll give you a few examples. First of all, taking this letter a, if I outline them, Sita is viewed as an object rather than a character. And I just drop it to overlap this square. Let's say I wanted to copy a out of the square using par, fine. If I select the two together. You see appears on the properties if you're using the latest version of Illustrator CC, at least at the time of recording this. And on the Pathfinder you've got these first few options. Unite, which in this case we're not interested in, minus front. Now as long as the a is the topmost object, which it wasn't. It now is when I click minus front. You can see that subtracts VA. And we now have, if I move it above this block with v-shape of our choice removed from the front. So that can be quite useful in some applications for, for logo design. Or perhaps objects you want to create as part of a brand identity to show you what else it can do. You've got this option which is intersect. So that will only keep the shape in the area, but an overlap occurs. So that's done nothing but if I were to bring it to here and use of adoption, intersects is only going to leave us with area is intersecting. And that's going to be just this slice of VA. So perhaps that gives you some interesting options and applications. Or another option. If I select these two circles have created here is exclude. And this time it's going to subtract any area where an overlap occurs. So you can use the Pathfinder with multiple objects. I find you get best results where you're just using one or two, but you can add lots of shapes. And there's really no limit to what you can use this to do.
10. Gradient Tips: New Gradient tool in Illustrator CC is amazing. If you're old enough to remember earlier versions. It was quite painstaking. Even impossible to create the exact effect you were looking for some times. But now you can take complete control and you can customize the way a blended color, and that's why I like to call it, is applied across even a complex shape like this one in this example. And you no longer have to merge every element together. And for simple gradients, you can actually apply a gradient across a group of objects, which is really useful. So starting with this, if I click risk graphic and then I open the gradient window and finally edit gradient. If I zoom in, hopefully you can see these spot colors and these have been dragged on service objects. And this is all one single object. This isn't a group. And I can actually add as many spot colors as I like. I could add a new one here. And that's given me white at the moment. But I could change that to and just about any color of my choice. And it does quite a good job attempting to blend it to the nearest spot color. You'll also notice vez range, if you could call it that, you can see as I drag my cursor away, there's a little key line showing. And if I were to click allows you to add further points almost like a bus stop. And so by doing now, I've kind of controlled re area, but this color stays dominant. And then it fills in the gaps by blending as seamlessly as it can between each stop and the next. So editing is very easy. I could select and hit delete to remove a step. You can double-click to alter your stamps and you can draw on swatches as well. This is really useful, particularly for more complex artwork in getting exactly a fine treatment result that you're looking for. And if you look at the previous two options in a gradient panel, the linear gradient and a radio gradient. Even with the option to adjust the steps, the capacity of the location, and the angle, you simply couldn't achieve anything close to the kind of effects you can get now with these new free-form gradients. So it's a really exciting tool to use. I would recommend using gradients subtly, especially for logo design, because when that logo goes to smaller sizes, even extra stop I've added there with a vibrant blue. The big of a change you have, the more likely it is to get a little messy, smaller sizes. So a subtlety for me is key. And if you use it to create the illusion of perhaps lighting, playing differently on an object, universal, really effective use of it. So for me, subtlety is key. And I'll show you the other US I alluded to earlier, which is if we take a group of objects and I can actually ungroup fees. So we've got lots of individual characters, some group type, a group of objects here. These are not stroked by the way, these are now converted to shapes. I could take all of these objects together. And this is something else you couldn't do in previous versions of illustrates that you can now, i'm going to remove the stroke is to simplify things. And then if I use the linear gradient, you see by default is applied a gradient to each individual objects. And that's really the effect we're looking for is quite irritating, but you couldn't apply gradient. For example, a lighting effect that you wanted to span the entire object or a group or objects. Well now you can do exactly that. So if you open up the gradient tool, you can see at the moment lots of little processes going on. But if you simply drag and drop, you can select an angle of your choice. You can now in fact, control for gradient object by object, but applied to the entire group of objects. So this opens up some very exciting possibilities. It means, for example, you could achieve something like this. I'm gonna create a little bit of a metallic sheen. I have too much flare in the middle, which is a school boy era. Let's get rid of that. And we'll just duplicate that slightly lighter version there. And look over a really subtle, quiet, classy silver gradient we've created there and it's applied to the entire objects. So that's something else you can now do an Illustrator CC, I'm excited about. And it's a, a two, a shortcut, a tip I frequently use when applying color to logo designs.
11. Outline & Customise Type: So this last tip is all about customizing type by outlining it. And in Adobe Illustrator, when he outline type, you do lose the ability to edit the text, but you gain the ability to make bespoke customizations. And often it's these professional touches a client is really looking for. When they come to you to create something for them. It means it's no longer an off-the-shelf logo. Someone can't find the same font, put the same name in and arrive at the result you've come to. You've really created something far more tailored and special. So I'm gonna share with you in this lesson a few v, common changes I might live to make. These are examples from previous projects. And hopefully you learned something along the way so that you're able to edit and customize your type. And the good news is it's really easy to do this. So as mentioned, you begin by making sure your type is outlined. So with it selected the shortcut for that is Command or Control Shift O. And once you'll type is outlined, you first begin taking a look at it. What might you want to change? What elements could you improve? So in this example, you can see I've identified up here that I wanted to make the n sharper as we have in the word London down below. So we were looking to create a shop around. And you can see I've just wire framed in the changes. First of all, I've needed to take care and that's what these blue guidelines are for. The width remains consistent. And I think just use the pen tool to create this wireframe to give some guidance. But when it comes to altering the actual shape, well, if we select based outlined n, sitting behind, we want to start trying to pull its elements to fit this guideline we've created. So I can see I've got two anchor points or they're going to use the pen tool and just remove one of the anchor points. And the same down here so that we've got a completely straight line and then hitting a so that we're on the direct selection tool. I want to click to select just for this anchor point Festival. And I'm going to drag it down. So it intersects with rip-off, my guideline. And when I'm going to head up here, and this time we're going to delete all of these anchor points because we no longer need the straight section. So we'll go ahead and delete these. And when we turn our attention to the other side. So you can see I'm directly editing the outline of this type. Quick and easy way. By removing anchor points, the shape was simply attempt to connect to the nearest point. And by doing that, we'll remove this point as well. It really gives you control over the shape and form the entire type takes. And I'm gonna snap this up with this need to zoom in. We'll take it to about there. Are the little lower. Yeah. Just so it's meeting our guideline. And then if I delete the guides that I made, you can see we've successfully made the adjustments, so we've sharpened up Vn, we've kept the width consistent. And that was by directly editing net shape. So that's one adjustment you may like to make to a font like this one for consistency. Or to make a particular letter stand out as a little different. So in this case, giving it sharper angles. And then if we look here at this board, savy originally, this is often the case with ease and the arms and the different points. And here I've decided I'm going to create a straight endpoint and then elongate them. I think a little in the end for balance. So to do that, you could use the shape builder tool. And if you select a guideline you've made and the original shape as long as it's outlined. If you use for shape builder, which is Shift M and hold all to subtract. You can just cut away portions you want to remove. Zoom-in together at one. And now we've neat and upper edge on the E effects for kind of style you want to create for the font. And let's say that's now a little unbalance. We just want to elongate them slightly. If you use the direct selection tool and click and drag to make sure you're going to hit all these anchor points on the end. Simply use the right arrow key to notch. And obviously the arrow key will correspond to the direction you want to take this. So you could not get just a few steps to elongate it if that was the desired effects. So that's another little tweak. You can easily make characters if we come along here. Well, this was an earlier version and you can see from the original font, which felt in a general direction we want it to take this. There were a lot of tweaks we made. So you're actually seeing a few of the steps in the evolution of this type face. So you can see where I'm heading with v suggestions. We wanted to chop off Visa, do endpoints on the sea to give it a, a CRISPR edge. Bn where me, and that's quite bizarre, but this was part of the original font. Obviously we want straight hard edges. V0, as we just saw, making more regular shape. The tea I think was a little unbalanced. So we wanted to trim the edges v all we wanted to, to kind of make it a more regular curve there around the central circle. V0 we wanted to make more regular. Vl fell a little unbalanced and we wanted to improve await said there would be different methods to make each of those adjustments. For VL. We might select just the anchor points on the edge and not from. And that's given the desired effect for that one. For V o, well, you could redraw V o using a circle to fill the correct height. That's the method I'd recommend using for that. And he are perhaps the shape builder, just to trim the edges, so very little neater, so they fit a circle shape builder for vt. And in fact, if we select, we could do that right now. And the same for the end. And this is where the shape builder, oops, wrong modifier key. Shape builder can be so handy. In fact, we would need to add a shape there. And now we can merge it and the same op here until it intersects a show both for selected and managed. And so it's those kind of little adjustments. The, I'd make my way fruit of a font making to make sure I'm happy with him. And this was a different font below. I think this was the runner-up. And these are some suggested changes for this font. So again, a more regular geometrically sound. Oh, some tweaks to the n, and some tweaks to this. C would jump across to the London type for this. And funny enough, we decided to go the other way with London. In fact, if you look at the original n, See if I can isolate that for you. It's quite unusual and I think this is a, this is a well-known font. This is future PT. But if you look at the N v tip of it, is way, way higher than the flat point. It's across from it. So if I call these just to illustrate the difference, that's miles below the baseline. And depending on the way you are using this, that could really mess things up visually. If you've got quite a tight lockup, you kind of notice these little points sticking out. So in this case. We wanted to create this type of n. And so using really the reverse of the first technique I shared, we would tweak that, making sure that you keep a width consistent. Just selecting anchor points, nudging things into place, and adding an anchor point or two if you need to create that desired effect. Let's have a look at this one. So this was for Stanley Gibbons, their heritage company. They've been around for and over a 100 years in the UK. And they wanted to create a really memorable monogram, but had to be perfectly balanced. So you save it. A version of a light had these little serifs. And they actually preferred, for lack of something that had all the features of the interior of these characters. But they didn't like for waivers serifs kind of bent one way, invented Java on the outside. So we wanted to ask you remove the outer serifs and we achieve that. You can see the circles of overlaid to make a framework achieved by using the shape builder tool to customize these. So if I take just Fe2 in isolation together, you can see that this would be the new root we've plotted for VG to remove that Serif. And that's how it looks when that's been filled in. So those are the kind of tweaks and adjustments that you should feel confident to make if you have an outlined version of a logo, it's quite easy to do. And if I use a shape builder here, first of all, you have to make sure the paths intersect. That's not quite touching. So if I try to use the shape builder to feel this, you can see it's actually connecting through that tiny little connected space here. So when you're positioning, you've gotta be really precise. And just make sure there's at least a little overlap so that you can isolate and join one parts of the other. So by doing that, you're able to completely be spoken and customize that type. Which was a goal here to achieve this result in the end. And there was an earlier lesson showing you how to create this kind of effect with the intertwining of letters and the shape builder as well. Let's come to one loss example. And this time this is a, a script font. And sometimes you will find this script fonts. So we've got a brand name signature and just some of the characters, they're not as legible as we'd like them to be, or perhaps aesthetically were not pleased with him. So I've circled vat to show the client the changes I wanted to make. And you can see we've got a better top part for the G. We're going to swap in here. And the same here for VR. I quite like this element. And if you look, I've actually just grabbed flows this from here. And this I had grabbed from vn. But it makes quite a nice are because of Vioxx follows. So again, this is using the shape builder tool. I would have isolated this letter, drag something over it. Selected shape builder, subtract. And there we have our element that we're able to use over here. So again, it's lots of little steps, but just using the shape builder to take bits and pieces and customize as we need to have been the result. You can see down here, when we've swapped rows in, we've now got a far more legible and bespoke piece of type. So I hope this tip has helped you is one I use quite frequently. And once you become familiar with this, when you look at type, you'll no longer just accepted as it is, but you'll be dime to fine tune it, to bespoke it to you. And of course, your client's requirements.
12. Conclusion: Well, I really hope you found these tips and techniques as useful in logo design as I have. Some of them would likely save you hours of time. Some will open your eyes to completely new ways of doing things. But whatever the case, please remember to try these techniques out as soon as you can on your own logo design. It could even be a made-up brand. But the sooner you start putting these things in practice, the more likely you are to remember them. Please let me know what you like best by leaving a comment or the, and I really look forward to seeing you in the next class.
 Jason Miller, Freelance Graphic Designer