Transcripts
1. Intro: Hey, What's up team? This is Eddie gray and we probably presents you Logic Pro training. This is a day that we have been looking forward to because we believe we have the very best resources in the game. Today. I do want to introduce myself to those of you that do not know me. I am a composer, producer, educator in LA. I've had the great privilege of working on such shows as the Kim Kardashian West Justice Project documentary. The head composer on that. Same goes for the Emmy Award winning show born this way. That was my first break. But I would not have been able to take on any of these accomplishments if I did not have a working knowledge of Logic Pro, when I first started, all I wanted to do was play guitar, be on a stage. But when I wasn't able to monetize my music, I got on the path of learning. And I discovered that when I started learning Logic Pro, there weren't a lot of resources out there for somebody like me who was basically coming in the conversation without a lot of contexts or experience. I knew how to play guitar, I knew how to sing, but I did not know anything about the technical aspects. Because of that, I'm now teaching others how to successfully and succinctly learn the program in the very best way possible. If you want to check out the rest of my real go ahead and scan this QR code and it'll take you to my resume as an educator, my latest course has over 4500 downloads, been able to help so many different people all over the world. Some of you already know that I created the Logic Pro curriculum for a company called Learn quest, who was an apple training provider, the YouTube channel, doing great things with it. We're seeing a lot of improvement, fan engagement, things of that nature. And some of you also know that I've been able to work with companies such as beat academy, who has perhaps the biggest music production channel on YouTube. And so with all that being said, I look forward to spending time with you and learning Logic Pro. I believe that this program is made up of six categories. Number one, navigation and transport. How do I see the program? How do I play back? How do I record? After that? We then look into audio and recording. When I do record the information, how do I edited, how do I create composites? We also need to learn Midea and affects how do I quantize Midea? How do I use effects to enhance the overall production? From there, we're going to want to take a look at drummer, step sequencer, all things percussion after that, flex time and flex pitch because we're living in a time where we can quantize Midea and we can quantize audio as well. Live loops is new to the scene, and although you may not be a live performer, it is very critical that you learn this new piece of technology simply to generate new ideas and perhaps create an alternate space and an alternate workflow for yourself. The promise is this, if you select something, an event, a window, a plug-in, and then you perform the action that your productivity will improve. We like to call this the logic pro power user workflow. And when you adopt this methodology, it will greatly decrease the margin of error, and hence, it will improve your performance as a whole, as your speed increases, of course, your efficiency will also grow. And when you experience these two things in tandem, you will start to feel and conduct yourself like a professional when you start to feel that level of professionalism, of course, that's going to increase your speed and your overall efficiency and productivity. And so you can see that we're creating a new cycle here as we develop our workflow, I need you to do me a favor if we're gonna do this and we're gonna take this on, I need you to take notes while you are in session. Please spend a minimum of one hour outside of class time practicing so you can maximize your time. This is very important because if you are a passive learner, you're, you're not going to pick up all of the details that you need to pick up if you're really going to understand this program, it's absolutely critical that you learn the information and then you apply it immediately. If you avoid this step, you will merely intake information and then it will just dissipate over time. So it's extremely important that you do the work and you stay consistent and you develop the habit. Okay. The time is come. Let's get this started. Thank you again for showing up, for being committed and for being all in. I will see you on the next video. As always, keep learning, keep growing, keep evolving, and keep your frequency higher. I'll see you soon.
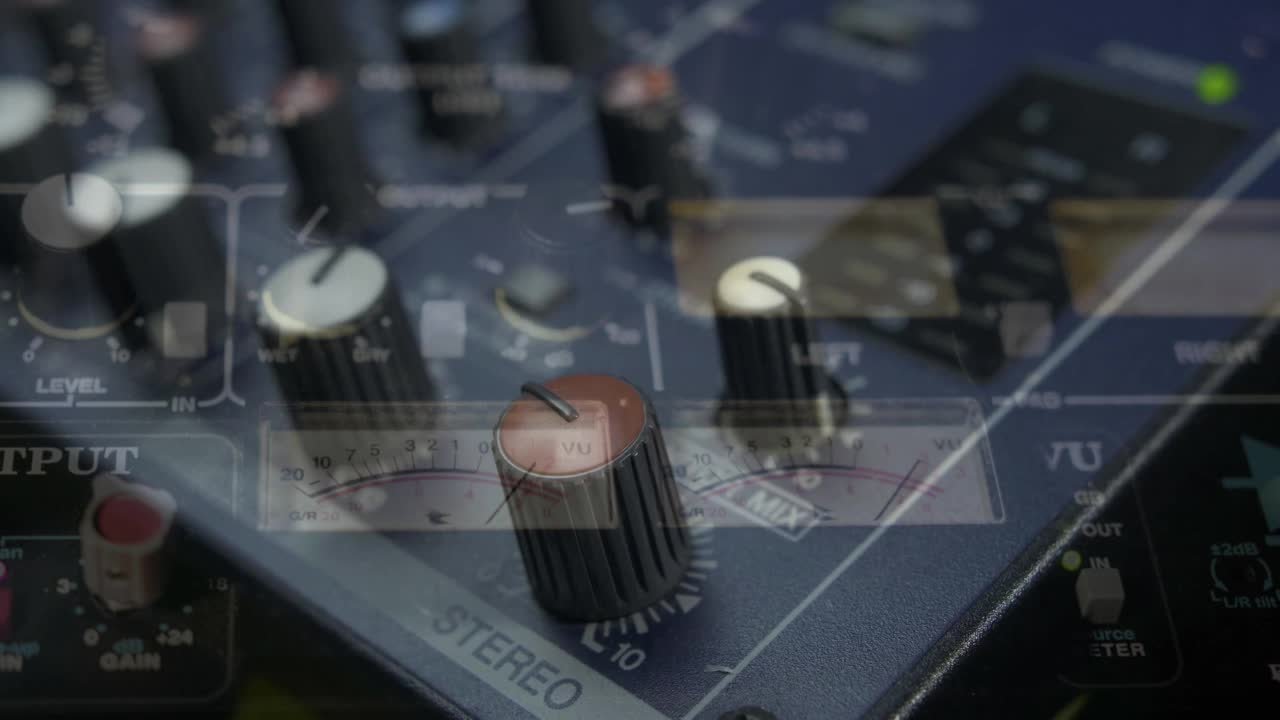
2. Key Focus Behavior: Welcome back to Logic Pro 10 training. This is Eddie gray. Let's get right into this session. Remember the back your mind. I always want you to think about what I like to call the Logic Pro power user workflow. Today we are actually focusing on the core concept called key focus and how it essentially dictates every single behavior within the program. So let's look at it from top to bottom. This is a part of navigation and transport. If you want to better understand how to use this program, I highly advise you to first learn how to look at the program. And of course, to really hone in on playback and recording features. So when we look at key focus, it really is a multifaceted concept. And so we're going to break this down step by step. When it comes to the overall GUI we're talking about the main interface. The windows must be highlighted in order to receive any kind of commands. Whether this means I am selecting tracks, whether this means I am previewing loops. In the loop browser, there is always one window that is constantly active. This is called key focus in the context of the windows. So if you look at my screen here, you can see that the main area, what's called the tracks areas, sometimes referred to as the arrangement area, is in key focus. There is a kind of pulsation happening centered around this area. When I hit the key command tab, that focus goes from the tracks area and has now shifted into the library. The apple loop browser is now ready for functionality. Again, we can preview. We can search within the loop browser. The attention is solely placed within this area. If I now hit the key command Up and Down Arrow menu, rather than selecting tracks, as would be normal if key focus was centered around the tracks area, when I hit the Up and Down Arrow menu, we're now previewing various loops. And so there's an entirely different behavior that is inherent within key focus being centered around either the tracks area or the Apple Loop browser. If I hit Tab, again, that focus is now centered around the editors. Now of course, depending on which editor I have, open the piano, roll, the audio track editor to the audio file editor, I can have the sequencer open, smart controls. This is all happening the bottom of your screen. Let me give you a quick working demo of what this looks like. As of now. The primary window is open. As mentioned, this is logics main workspace. And if I hit the key Command 0, immediately now you see a blue rim has been centered around the loop browser. And so when I start to use the Up and Down Arrow menu, the focus now is inside of the loop browser. If I then hit tab, you can see that the focus has now been centralized around the tracks area. And so if I hit the down arrow, now, I am going from track one to two to 3229. And if you're wondering, how did we go from three to 29, we can talk more about that later. But essentially what's going on here is we have a track stack when we select certain kinds of instruments within Logic Pro. And so we have a basic underlying foundation when it comes to key focus. Let's open up another window this summer opened up the mixer. And so in essence, we have three window panes that are open. And we can open and close them all at the same time. The only thing that we cannot close is the tracks area. It is kind of always open at all times. Now there is one disclaimer. You could make mistakes, such as having, let's say, an EQ open. And then let's say my key focuses around the tracks area. And I don't know by mistake hit Command W. This could happen to you here, in which case, all you have to do is go to Window, open main window, or just hit the key command, command one. I'll click on this Command W. And so now we have three windows. I will hit tab. The focus is now around the tracks area by hit Tab again, we're now in the Apple Loop browser. And then if I hit Tab again, key focus is now in the mixture. And if I hit the left and right arrow key, you can see that reflected as I am selecting the channel strips, if I hit Tab and key focus is in the Tracks area, if I hit left and right arrow key, look at what happens depending on which track is selected. In this case, track number 2. I'm going from region to region. Check this out. Right arrow key, left arrow keyhole. I'll make sure key focuses up here in the left arrow key, right arrow key. So depending on where you are focused, this is drastically going to affect how you work in, operate in Logic Pro, I want you to take a couple of minutes, experiment, try a couple of things are within your session. Hit tab a couple of times. Hit Shift tab so that you can move counterclockwise with key focus. And I will see you in the next video.
3. Track, Region, and MIDI Events: Hey there, welcome back. So we know that key focus is always centered around one of the windows. So right now, key focus is centered around the library. I hit tab, it has now shifted to the tracks area. But let me ask you this. Even though key focus on a macro level is around the tracks area, which one of these tracks is in focus is a track number one, track number 2, or track number three. Well, as you can see, track number three has a bit of a highlighted nature to it. And so we can see that track number three is the one that's in key focus. If I then hit the up arrow key, key focus has revolved around track number 2 and also the regions have been selected. So if I select track number 1 and this could be by way of key command, or I can use the mouse trackpad to select Track 1. You can see that these regions are also in focus. Let me explain myself further. Let me close the mixer x, the loop browser 0, and the library. Why? Okay, So if I click the background of the workspace, you can see that the regions themselves right here, they no longer RNA key focus. But because of the nature of the program, one track has to be selected at all times. So let's differentiate the regions themselves from the track itself. So if I declare no regions are selected, there is still a track in focus. So if I hit the down arrow key, I'm now on track to the behavior of the way it's set up right now is that when I select a track, it automatically selects regions. If you want to play with bad set-up, Favorite, go to General inside of your preferences, editing and de-select bees and play with the behavior. Because if you enable them every single time you select a track, it's going to select regions and vice versa. So play with these settings, see where it is you like, but let me go ahead and deselect them. I click on this window, make sure it's in focus, and then hit Command W. You can always hit that little red circle as well to close that window. And so the now we can differentiate tracks election from region selection. All right, so I'll select the region on track 3, which is a drummer region. But track number one has been selected. In essence, you will need this, believe me, there are various scenarios when, let's say you're tuning vocals and you want to bounce something out to a composite track, there are a number of different scenarios when sometimes you're going to want to independently select tracks from regions. And that's why I want you to know about this menu item here. Okay? So with bad conversation in mind, we know track number one is in focus, but none of these regions are in focus. So if I zoom in a little tighter, I'll hit Control Z to zoom in on the track a little bit tighter here. Which track is in focus? Right now? Track one, but which region is in focus is at region 1, region 2, 3, or 4? Well, you guessed it, region number 2. You can see that it has a bit of a highlighted nature to it writes a little bit brighter than the rest. And so this is what I would like for you to focus on. On this next exercise. The regions themselves must be highlighted in order to receive commands. It doesn't matter if it's audio midi drummer or the newly formatted pattern region, something has to be in key focus in order to receive a command. If I select this region and I hit Delete, Of course, that is the region that will be deleted if I hit this region here. And let me go ahead and get rid of that track zoom that I had set up. If I select this region here and I hit Control M, You can see that I have muted the region. The track itself is still on per se, but this region has been muted and I will have a lot more on this later. So this doesn't necessarily apply to individual regions. We can do something like this. I can select what is called non-contiguous regions. I can hit this region here, make sure that that one is in key focus, hold Shift, and select an entirely different one on a different track altogether. If I then hit Delete, you can see that those two separate regions have been deleted. Doesn't have to be from track to track. It could be on the same track. I can select the first region and the third region. And I can again hit Delete and get rid of both of those. In effect, this doesn't pertain just two regions. I just want to be absolutely clear about this, okay? This also pertains to midi events. So if you have a performance, how do you distinguish the ones that are in key focus? They have a darker hue. The focus is now centered on the three midi events on the right hand side. Let me elaborate further. If I double-click on this midi region, this is a software instrument. The Piano Roll will come up. I will resize it by hovering the pointer tool. Okay? And so once I have focus here, you can see that the key focuses around the piano roll, okay, if I hit tab, it will then go to the Tracks area, but we don't wanna do that. And so what I'm gonna do now is select this region. Now, I don't want to hear the playback. And so what I'm gonna do is turn this feature off. This is called midi out, so that when I select the No, I'm not hearing the no and the playback now bear in mind if I play the track as a whole. If I press play and the play head starts to move, you, you will hear playback, but this is more for demo purposes. And so now I've got that one, midi events in focus. And in the next series we will be talking about something called nudging, where I'm using a key command to move my events or regions. And so now, because this midi event is in-focus, it has taken the attention of the program and so hence, anything I do by way of key command, by way of local menu bars, by way of knowledge or snap, something will happen. And so what I'm gonna do right now is purposefully click the background of the workspace to de-select that note. So let me create a selection. I'm gonna select these two nodes. And I don't want to select the third note, in this case the yellow one. I'm going to hold Shift, create a non-contiguous selection, and then I will hit Delete. And so what I want you to do for this next section is just start playing with the concept of key focus with the midi regions for playing with midi events. Play with audio regions. Look at the behavior of feel that out. I want you to really get real-world experience. I want you to understand and grasp it on a whole new level. For one last thing that we should clarify here is that if I hit up in, down while key focuses inside of the piano roll, essentially, you're just going to be switching tracks even though key focuses inside of the piano roll. And the reason that is, is because in order for you to start selecting notes within the piano roll, you actually have to select 1 first. And then I can start to use the arrow keys, right arrow key, right arrow key, right, in order to select various selections in the piano roll. If you then want to create a group selection, you would hold Shift and you can start seeing the creation of a group selection. So at this point, I will deselect these by clicking the background of the workspace one time over, I'll hit P to the piano roll. And then depending on which track I want to select our use the up and down arrow keys to get me to where I need to be. All right, so your assignment, what you should be working on right now is understanding key focus, how you can use an implemented utilizing your mouse, trackpad and arrow keys. Be sure to open up the loop browser dragging a couple of loops, all kinds of loops. The more the merrier and start to get control of your Logic Pro, user experience. I'll catch you in the next video.
4. Making Selections: Let's take a minute to talk about making selections. It's very simple. You can use the normal click action behavior that we're all used to. We have access to the up and down and left and right arrow keys. If you have an extended numerical keyboard, you can create Lasso Selections. And then finally, if you would like, you can hold a keyboard modifier such as shift or command in order to create selections. Me show you a little bit more. So if I want to select Track 1, 2, and 3, I hold shift as I create those selections. And now all three of these are selected. Now remember, because of the behavior inside of my preferences, all the regions are also selected, but it doesn't have to be that way. I can hold Shift and deselect one of those regions in order to remove it from my overall selection that pertains to the tracks. If I just want to select regions, again, I would have to modify the behavior here. And then I can select, let's say this one, that one, this midi region and this drummer region. And then of course we can either nudge, which we'll get into in the next series, Control M to mute, delete, et cetera, et cetera. So that is the beginning of selection. I want you to play with clicking one time understanding that behavior, differentiating, track selection from region selection. And then on top of that, learning how to create contiguous selection by holding shift. This is with regions, this is with tracks, but also this will also pertain to de-selecting regions D selecting tracks. But please don't forget to also utilize this with midi events, right? So in the case of this midi region, I hold Shift and I click Hold, create a lasso selection. And now I'm selecting three notes. In effect. Well, let's go back to the piano roll. I can select that one midi event. I can hold Shift and select that one as well. I could then de-selected by continuing to hold Shift and then clicking on the midi event. When you're in the mixer, the behavior is more or less the same. I click on one track, I hold Shift, and then I can hold all of them at the same time. This allows me to make volume changes as a group. Also pan changes. And let's say I was trying to route track 1 through 3 all the way over to bus number 15 or something. All of this can be done with ease. So it's very important to get clear on how to create selections, single click selections, how to then select Regions, midi events within Logic using the arrow keys. Please learn how to make Lasso Selections. This can be individual Lasso Selections and then again, contiguous selections by holding Shift and then utilizing shift and other key commands in order to navigate your way around the program. One more thing here. There are times where you can hold Shift create group selections, and then again, hold Shift to deselect, but you can also just hold Command D to de-select as well. So you're going to have to kind of find your way around the program and figure out what does what. But if I tried to do that inside of the tracks area, wouldn't hold over. And that's simply because when I hold command, I access the secondary tool that we have available to us within Logic Pro. Again, we will cover more on that later. But for now the important thing is to start spending time creating track selections, region selections, and then of course, midi events, elections. Alright, spend some time doing that. Really locked this in, and I will catch you on the next video.
5. Key Focus for Plug-Ins: So up to now we've talked about key focus on a macro and on a micro level. We know that it controls the windows. We know that it controls the tracks, the regions, and the midi events. I want to get a little bit more specifics and I want to talk about something called the text entry box. Now in order to rename something appropriately, we need to be able to understand when and how this works. When I go into logic and I look at the overall picture, I can see a couple of things. Tracks themselves can be renamed, Bye double-clicking, or Shift, Return, clicking the track header. And so we can rename here. Also. If you want to access the text tool, this allows you to rename regions. This is helpful for a collaborative purposes. And maybe just to remind yourself of a core change that is coming up. Something else that you can do when you're not utilizing the text tool is to rename the region inspector. So let's say I want to rename these four regions. We can't see that because they're selected. The region inspector appears telling us there are four regions selected. I will click one time over and I will call this or regions. And so now each and every one of these is named appropriately. So there's a lot of control and power here. I do want to show you one thing that I feel can be helpful. If I click on track number one and I hit Shift Return, I have entered into the text entry box and I will name this track one before hitting Return or clicking outside of this space. I'm going to go ahead and hit Tab. What that's gonna do. It's going to take the text entry box and shifted over to track number two. And so then now I can call this track to, let's say I call this track 3 and I make a mistake and I don't notice it in time. Well, if I hit Shift Tab, I can go back in time. So I'll hit Track 3 and then we'll name this track for in effect. All right, So if I want to access again the text tool, I hit T to access the tool menu. This brings the tool menu to me rather than me having to go all the way up here. And so you can see that my key command for text tool is Shift T. And so then now I am going to rename this one. Okay, I will click here 234. And so that's one workflow that I want you to get very much acquainted with. Very important. The next thing that we have to look at is key focus, but not around the tracks, but actually the plugins. So let's read here. Plugin window must be selected as indicated by the white frame. So in this scenario, which plugin is in key focus is the one at the top or is the one at the bottom? Horse, it's the one at the bottom. And this is best illustrated when we are in logic and we start to bring up plugins. In this case, I don't have many instantiated. Let me go ahead and open up the EQ here. So right now there is a white frame. You can see pretty clear. It's right around the frame when I click on the window. So count of three, I'm going to click on it. And I want you to see what that looks like. Okay, one to go. All right. So the now, rather than having this kind of distant Bu, it's up front, close and personal, so I will DIE click. You'll see that it kind of blends into the background to some degree obviously. And then when I do click on it, he focuses now centered around this plug-in. If I have another plugin open, of course, key focus can only exist within one of these at any in all time. So I'll click on the EQ. I do my work here if I shift my attention over to the Auto Filter, now of course I know that I am working on this login. I'll come back to the Filter. Now I want to close this plugin. So in order to do that, I can't go over here, make sure it's in focus and then hit Command W. That's one thing I can do. Or I can also hold Shift. Click the top left of any plug-in inside of that small circle. And that will basically get rid of all of those for you at the same time. If you ever want to hide plugins, if they're in focus or not hit V like Victor, and that should do the job. Okay, So we have focused for the text entry box. We have key focus for plug-in windows, but we also have key focus for the windows themselves. So in this situation, which window is in key focus? From at the very top? The one in the bottom, course, one on the bottom. You see the color. You know, that essentially that window is in key focus. Now, in this case, I only have one window open, but let's say I open up the mixer and a separate window. Let's say I have a setup that allows me to be able to look at two things at one time or something. Well, That's fine if you have different screens, but if you have it all in house in one screen set in, on one desktop, you need to be able to navigate these waters. Now if I hit Tab, that's not going to shift the focus. But if I click on this specific window, logic is telling me, Hey, this is the mainframe, this is what we're working on. If I then go back to this track, this is now the main track. Because it is the main track. If I hit a key command, such as command W, which closes the window, or even Command M, which will, I believe, minimize this. Now, that is out of sight, out of mind. Focus is around this primary window here and we can get back to work. I do want to point out one more thing. If I create a group selection, by default, the first track that was selected will be the primary track, the one that logic is focusing on so that if I record enable, basically this is the one that's going to be in focus. If I want to change that focus from track one and track two after hold shift, and click on the color bar here. And then you can see now that the focus is changing. Okay, So be sure to work with that. If I want to change this, I have to hold Command and click on the track that I want to be in focus. So in other words, we can have all the various tracks in focus, but one of them has to be the leader of the pack. And so if you wanted to determine track to being the leader of the pack, then hold Command selected, and you should be home free. This is important when doing multi-track recording. At the very least, I just want you to be able to troubleshoot and really understand the inner workings of the program. Play with all those concepts. And I will see you in the next video.
6. Customize the LCD: To wrap up this module, I would like for you to try this. This is a great exercise. So you can access menu items, key commands from all over logic. So it's very easy. I want you to navigate the entire GUI, hold Control and click, and also just right-click anywhere. So I'm going to start doing this, appear in the control bar. And so you'll see that I have a couple of options here, customized control bar and display. Okay, this is something that I can learn from. This is something that I could investigate. Let's continue. Let's do the same thing inside of the track. Header. Track header contains the track and the regions they're in. So we, I will hit Control click. And now we see some menu items. I can create new audio tracks, rename them, create tracks tax. If you ever forget how to do anything, you should learn the key command. If you don't remember the caveman or you don't know it, you can simply control-click, bring up the contextual menu, and then your last recourses to go into the main menu bar and try and find some answers here. Something I do want to point out is that the Edit tab in the main menu bar directly reflects the same information you could find in what's called the local menu bar, which is right here. And so the information here is the same that we just saw up there in the main menu bar. So that's something I want you to try out again, control click in the inspector. All right, we're seeing some different options here. Different options there happens if I control-click here inside the region inspector, okay, we have some more options. Nothing here. What happens when I open the mixer and I control-click aright, I started seeing some more options. The more you familiarize yourself with the contextual menu and how it can best serve you, be better prepared you are for any situation because you'll come to find that this contextual menu really has most of the answers that you will need in your Logic Pro journey. Okay? So that's the first thing that I want you to do. And the next thing is I would like for you to focus some of your attention on customizing your control bar and display. This is the very first thing that you can do to optimize your Logic Pro, user experience. Then we can control-click the control bar can also access this down arrow menu here, hover to the bottom of the menu and customized control bar and displayed. Here we literally have access to everything that you see in logic pros GUI, all of the various views. You want to leave all of these on, on the right-hand side. You will find all of these icons reflected inside of the views tabs. So the list editors, which would include tempo, signature, your marker list. We have a notepad available to us in Logic Pro, the Apple Loops as we've talked about. And then be browsers. Transport has to do with all playback and record functions. You have the custom tab here, which is very important, probably the most important thing that you can get in terms of customizing your user experience. If you want to check out my settings, you can go ahead and take a screenshot here. I really want you to take the time to learn what it is that you need to learn. I don't believe you're going to need to learn every facet of the program. But we need you to pick up on exactly what it is that you need to propel your music production, propel your career forward. Once you find a setup that really works for you, do me a favor and hover down here the bottom left, and save this as a default so that every single time you open up Logic Pro, you can apply as a default and you won't ever have to set this up ever again. The very beginning, I recommend you make things as easy as possible. And if you want to start adding to your plate, you can do so. But the last thing you wanna do is bombard your eyes with a bunch of stuff and hence overwhelming your brain. We don't want that. We want you to be clear. We want things to be easy. So if your screen looks like this, do me a favor. Learning the most basic key commands. Y to the library I for the Inspector, x For the mixer, and 0 for the Apple Loop browser. So we're going to start there. I want you to do those two things. I really do think that they will make a big difference. Taking the time to familiarize yourself with the control bar and display in logic, it normally is not going to look like this, just to be clear, it'll probably look more like this. And so please make sure that you customize that to fit your needs. Make sure that you control-click everywhere on the GUI so you can better understand the shortcut and contextual menu. Again, the promise is that if you go through the course, that if you do get your repetitions in, you spend time with the program, your speed, your efficiency will increase drastically, making you more of a professional and preparing you for the world out there at large. Wanna make sure that you are well equipped when you get out there, when you start producing, make sure now that you've taken this first-class, that you spend a minimum of one hour outside of learning. Here is some reading for you guys. For those of you that are really new, I would love for you to read this free PDF that I have put together for you. It is called Logic Pro and introduction PDF. Go ahead and check that out and it will fill in the blanks. For those of you that need a little bit more support. Go ahead and download this PDF, and I look forward to seeing you again. All right, Cheers.
7. Move Through Windows: So now that we're on
the topic of key focus, we should shift our attention
to not just plugins, not just Windows themselves, but how to go back and forth
between both of these. I think most of you
know that if you click on the thumbnail, it will pull up an EQ. And so if I click on this
horizontal bar here, that's going to pull
up a compressor. Let's change the size of this. Just for screen real estate, we have a couple of things
that are inaction right now. And obviously the EQ is currently in key focus by click on the compressor
that's in focus. If I click on the tracks
area that is in focus, the next level is to
hit Command Tilda, that's the key right
below the escape key. And so if I click on that, you can see that
the focus goes from the tracks area to the
compressor by clicking again, shifts over to the EQ. And of course, if I
click one more time, we're back inside the
main tracks area. If I hide the plugins, you can see that
this is in-focus. Why don't I open up the mixer? Again, I'll hit V. Again. What's in key
focus is the mixer. But if I hit Command tilda, the EQ is back in action. Command tilde again
back to the compressor, but I want to pass that
back to the channel EQ. I hit Shift Command Tilda, and then this will start
moving in the other direction. So just be aware, this
works like key focus, but if we want to go from the window area into
the plug-in windows, we're going to have to utilize command tilda to get there. So this is about
moving your Windows. And if we go up here to Window, so this is about cycling
through Windows command Tilda. And again, if you want to
move in the other direction, Shift Command tilda. Alright, go ahead
and practice that. I hope that helps. See you later.
 Eddie Grey, http://vimeo.com/eddiegreymusic