Transcripts
1. Introduction: When I speak to a lot of
budding music photographers, a lot of the time, they consider music
photography to be the act of photographing
a musician, a performing artist, performing. And whilst that's
not strictly wrong, it kind of misses
the wider context of why we engage in
music photography. Most of the time,
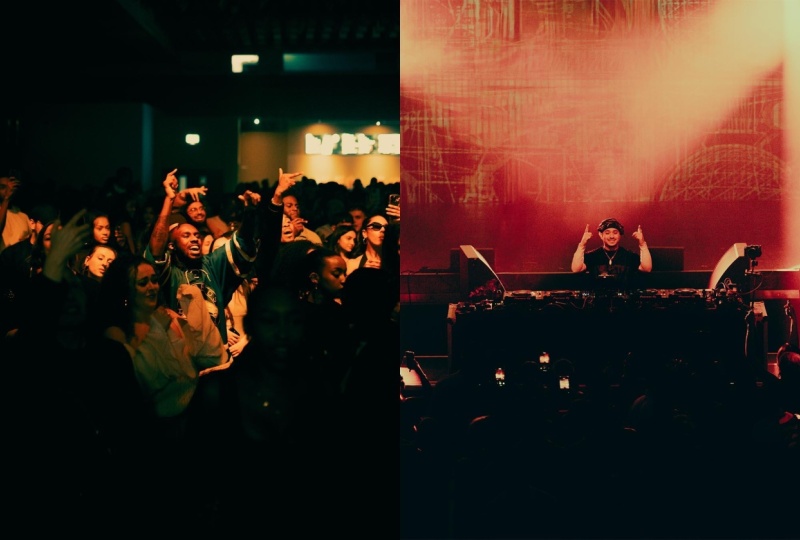
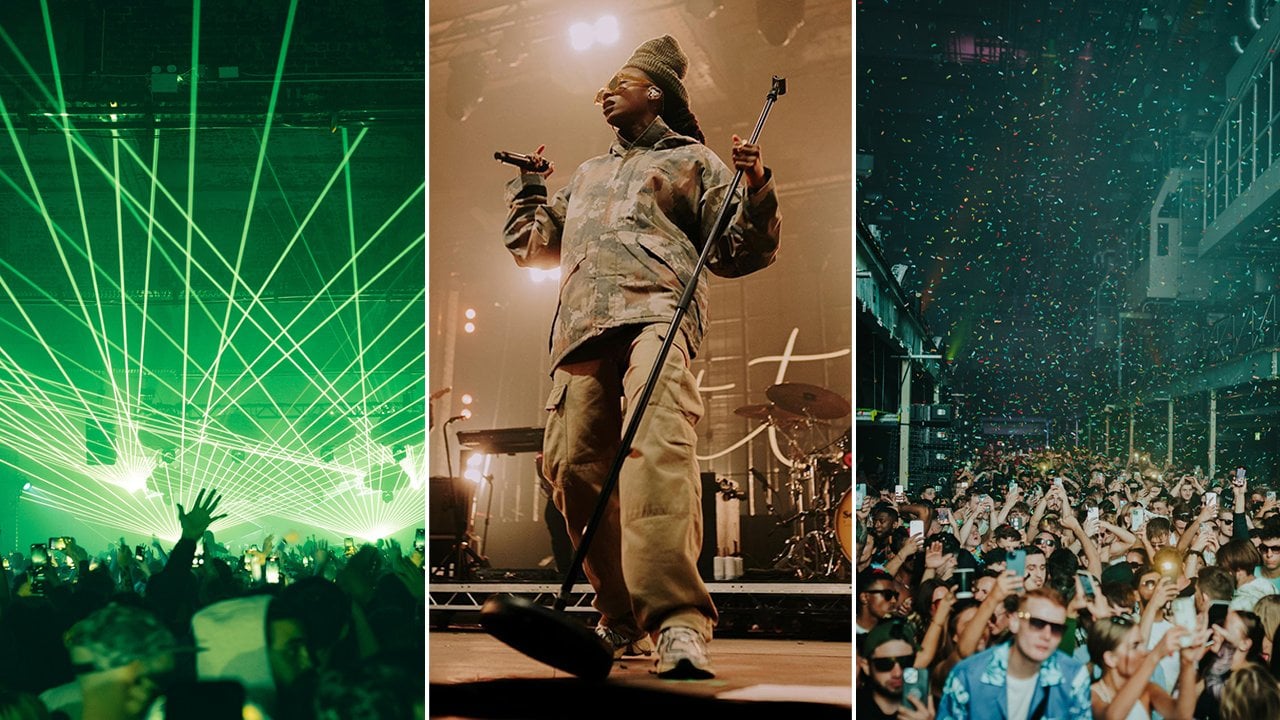
music photography is designed to help the viewer feel they were at that concert. They were at the gig,
they were in the club, or they were at the festival. My name is Sophia Carey, and I have been working as a music photographer
photographing gigs, clubs, and festivals
for the last ten years. And from my experience, one of the most
important parts of music photography is actually your ability to tell a
story with your photos. If we look at this from
a commercial point of view, music photography is designed to encourage a consumer to buy a ticket to that rave, to buy a ticket to that
concert or to that festival. It's an integral part
of marketing when it comes to selling tickets, promoting an artist
and their music and creating that intrigue
around the event. And, of course, from an
artistic point of view, if we look at this solely from the idea of wanting people
to engage in our arts, telling a story is only going to make your work more immersive. When you photograph
music, you're not just photographing the
artist performing. You're not just photographing isolated moment. You're building a narrative arc
almost like a film, a play by play of the night. And don't get me wrong. You're thinking about
those performance shots. You're thinking about
those big hero shots. But you're also
considering how you can create a series
of images that give the viewer an overview
of the event of the night. So in today's class, we're
going to be exploring that idea. We're going to be looking at story
beats of a live show. What are those
narrative moments that you want to capture from
a live music event, and how best do we position
ourselves to do that? And what techniques can we use to try and tell that story? We'll be exploring
examples from my own work across tours that I've
done with artists, to festivals and cub nights, working for the
artists directly, working for promoters,
working for venues. So you have a clear overview of how you can go about
building a narrative different ways
depending on who you're shooting for and what your
kind of objective is. So if you're interested
in elevating your music photography from a singular good shot to
a series of photos that tell a story of a night
that help to convey the emotion behind maybe one of the most emotional types of events that you can photograph. Then join me in the next
lesson and get stuck in.
2. Class Project & Sample Storylines: Welcome to the first lesson in this class all about creating stories with your
music photography. This is truly one skill that I think will elevate your work, will help you create a portfolio that attracts
prospective clients. It's also a massive skill
across all event photography. So if you're shooting weddings
or other kinds of events, you can use these
similar techniques throughout those different
types of photography. And of course, the
class project for this class will help you
to create that portfolio. It will give you a perfect
example to be able to show future
clients to be able to put on your portfolio website or your Instagram or wherever it is that you show
off your work. So for the class projects, I
want you to take photos from a singular event that you photograph and sequence
them to tell a story. This could be a gig that
you've shot in the past, or maybe you take
this project into the next gig that
you keep in the back of your mind when you're
photographing your next event. I'd recommend
selecting somewhere 6-10 photos to tell this story. And when you've built
your sequence, of course, you can upload it to the
class project gallery so that I can offer feedback and the rest of the students on this class can also offer feedback and look
at everyone's work, and hopefully we can have a
little bit of insight from looking at each other's examples and sharing what we've
learned in this class. Of course, throughout
this class, there will be examples of
my own work to help you have an idea of how you might be able to create this sequence. But to get started,
I want to talk about two specific
story lines that are, let's say, typical story lines. They're story lines that are maybe most natural to come by. You can keep these in mind as
we move through the class, but we will be
talking a little bit more in detail about
different types of narratives and story beats that you can use
throughout your sequence. So the first story line is
the artist's point of view. So, this one is great if
you work closely with an artist or you have access
to working with an artist. And this tells the story of
the night from the scope of, you know, the artist's journey. So we start off maybe
with some, like, backstage rituals,
pre show nerves. We go into the
performance and then into the aftermath. Of
the show itself. This is a great way to show
a narrative throughout the night if you're already
working with artists. Don't worry if you're not
working with artists, if you are working for a venue, if you're
working for press, or maybe you're
just headed down to your local venue to
take some photos, then this next narrative
structure might be for you. It's a lot more accessible, and it's taking the idea of telling the story from
a crowd's point of view, which is arguably more commercially viable than the artists point
of view, as well, because telling the story
of a crowd is really what festivals look for
when they're hiring their in house media teams, what venues and promoters
look for to tell the night from the
point of view of the crowd in order
to sell tickets. You can access this
kind of narrative by heading down to the venue, you know, as the doors open. If you get there
when the doors open and you stay until the very end, then you are able to kind
of access this narrative. Because bigger venues
usually have restrictions on the types of cameras
you can bring in, I would recommend if you don't already have access to a venue, then start just
with a small venue that allows you to
bring in a camera. Or even just use your phone
to take these photos. The point of this class
isn't actually about the technical skills it takes to take a photo or the
camera that you're using. You know, the best camera they say is the one that
you have with you. This is really just about
learning how to tell a story, and you can do that
with any camera. So if you're at an event that
doesn't allow cameras in, you can practice
the skill just by taking photos on your phone or a point in shoot or
any other kind of camera that you're allowed
to bring into the venue. I would recommend checking with a venue before you
take in a camera. A lot of the time there's
rules on venues websites, promoters websites as to what kind of cameras
you can take. Ing this narrative. You
want to think about starting when the punters are entering the
venue, you know, those quiet shots,
those establishing shots that tell the
story of where you are, who the artist is, what
the crowd is like. The energy in your photos should kind of lift as
the night goes on. And one of my personal
favorite ways to kind of end out
this narrative to close it out is to
stay right until the end and photograph
people leaving. This creates kind of like
a circular structure. We go right back to
the beginning where the empty venue of people
entering and then, you know, we end the empty
venue of people leaving. With these ideas in mind, we're gonna jump into
the next section, and we're going to be talking about deciding your narrative. The two narrative options
that I've outlined in this lesson are
just two examples of the many narratives you
could tell over night. The options are really endless, but I would like you
to keep these in mind as we move through
the next lessons, because they will help
you when it comes to completing your
class project. But let's jump into
the next lesson.
3. The Narrative Mindset: So with our class
project firmly in mind, let's take a look at
how we can identify a narrative from an event
that we've photographed. In this esson, we're
going to be exploring the mindset behind
designing your narrative. So when I'm choosing
a music event, the story that I'm
trying to tell is the story of someone
that couldn't be there. So whether that is a fan of the artist or a prospective
customer for the venue, I'm thinking about how I
can sell this experience. So we've all heard of Fomo
yeah, the fear of missing. And this is kind of
what we're playing on. We're kind of playing
on the emotion of, I really wish I was there, and next time, I'm going
to make sure I am there. So when we are
telling the story, we want to look at the
relationship between what we're documenting and how it shows
the experience of the night. Which photos tell the story
of how the night feels? Which photos can you
feel the energy through? Which moments are
moments that you've captured noticed that someone else didn't or couldn't notice. The photos that best capture the energy and feeling of what it is like to be an event
rather than just what happened, are going to be the most
important and effective in evoking emotion and
eventually selling the artist, selling the venue,
selling the event. When we're at school, we
learn about storytelling, and we learn that it's not enough just to tell
people what happened. We have to show, not just tell. We need to think
about the senses. We need to think
about how things taste and sound and feel. We learn that you really have to encapsulate all of
these different things to put someone in that story. And in photography,
the same rules apply. They just look
slightly different. We want to show
the viewer a story in a way that leads
with emotion. Can we document how it feels to be somewhere in a
series of photographs? And, more importantly,
how do we do that? So in the next lesson,
we're going to be exploring something called story
beats or narrative beats. No pun intended, although I do appreciate a good music pun. We're going to be
looking at some typical beats within a story. And then we're also
going to be moving on to looking how you can use
technique to tell these stories, to start thinking about the
narrative you've designed, to start really communicating
with your audience, how it feels to be there so that when you look
at a photo of an event, you can almost hear the music. You can almost feel what it feels like to
be in the venue. So join me in the next lesson. We're going to be talking
about story beats and getting into the real thick of, you know, how do we tell
a narrative using photos.
4. The Key Story Beats: So welcome to this lesson
all about Story Beats. This is going to be a phrase
that you have heard me reference multiple times
already throughout this class, either story beats
or narrative beats. Really, this is the
juiciness of narrative. This is really where
we get down to, how do we tell a story? Or at least how do
we identify a story? But first of all, what is a
beat within this context? So a beat is a moment that
moves the narrative forward. So it's a small unit of a story, and each story consists of
multiple different beats. In this lesson,
we're going to be exploring kind of a
typical pattern of beats that you might experience to
be able to tell a story of how a typical music event
is structured, almost. Of course, every story
looks different. And because of that, a
lot of these beats will depend on the type of story
that you are telling. But this is a good set
of sample beats that I think a lot of people will be able to identify
within a music event. So we're going to be
looking at five beats, and the first beat is
the establishing shot. So when you watch a film, a lot of the time, it opens with something called
an establishing shot. This shot is something that might be a really wide
shot of the location. It tells you immediately
as the viewer, Where are you in this story? When we're designing
our narrative, we want to think about
it in the same way. Our establishing shot is
the opening atmosphere. What does the venue look like at the
beginning of the night? What does it feel like at
the beginning of the night? So for this type of shot, I will often prioritize
wide room shots, empty room shots, people
entering the venue, maybe crew members adjusting different elements
of the staging or the lighting or
the production, depending on, you know, who you're shooting for, how much access you
have to the venue. You know, if you're working
for an artist, for example, your establishing shot might
even be the artist backstage or entering the venue
before the doors open. It's this first element of the story that tells
the viewers who, where and what your
story is about. Beat number two is really where we start to introduce
the artist. This is a really natural
second beat for your story. Depending on the genre of music, your access to the artist or the venue or the type of music event that
you're shooting, this could look very different. So, for example, if you're
shooting a festival, often there are opening acts. So this could be
photographing an opening act. That could be your second
beat within your story. If you're shooting a
show for an artist, this could be a point of view of them entering the
stage, you know, coming out from backstage and actually coming onto the
stage for the first time. If you're shooting a gig for a venue or a press,
then this could be, you know, the moment
the lights come up and illuminate the
artist for the first time. Your second beat is essentially
like a slow moment that bridges the gap between your first beat your
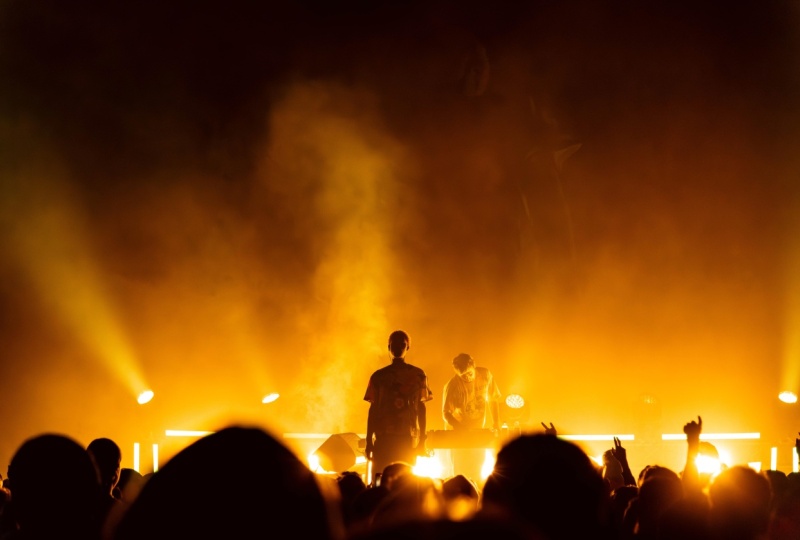
establishing shot, and your third beat. So the third beat is most likely going to come most
naturally to you. This is the peak of the energy. If you're photographing
just one artist, then this could be the peak
within their set, you know, their biggest song or if you're shooting a festial where
there are multiple acts, this could be the headliner set. It's the biggest
part of the night or the time in which the
energy is the highest. And the most
important thing about this beat is that you
capture the energy. Shoot a mixture of
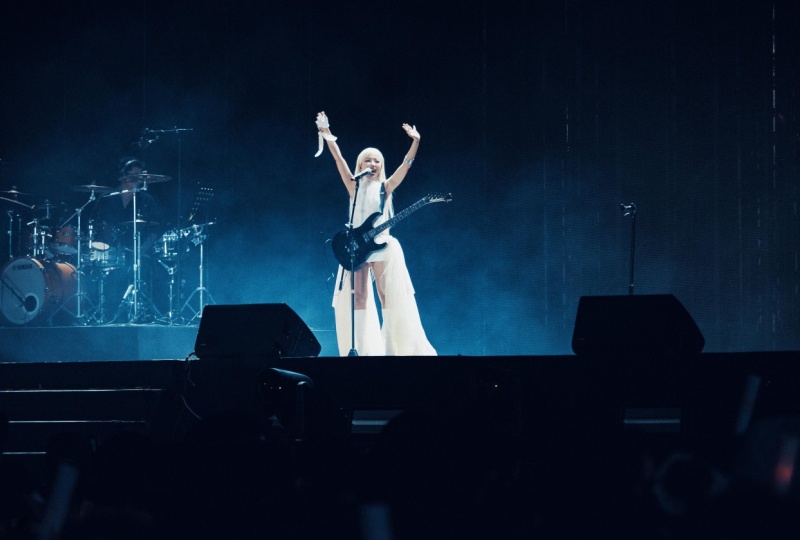
the crowd reactions, the artist performances, embrace the chaos of the crowd and the energy
of the performer, looking for, like, large
gestures, you know, if artist moves
their arms in a way. People dance with their
arms in really grand ways. There are maybe mic swings. There are maybe hair flips. Anything that kind of shows energy is a great
thing to look out for. Another thing I love to do
is looking for interactions between band members or the
artist in the audience. For this, you're going to
want to mix up your framing, get those tight angles, get those wide angles, and just try to explore the
energy of this section. Beat number four is focused more on those intimate moments. So this one, you know, you could slip this in
before number three. It could come higher or later, like sooner or later
within your narrative. Depending on the type of story that you are
trying to tell. These intimate moments could be as, you know, the dancers, as the party goers
start to leave, and it's just, you know, less people on the dance floor, or it could be during a slow ballod the
reaction of the crowd, you know, people
holding up signs, anything that shows more of a slower pace in contrast
to your peak energy beat. A great way to capture
this could be like a focus of hands on instruments or
thoughtful expressions. This contrast between your
high energy beat and then this slower intimate
beat is going to give your narrative depth and help to explore the story
that you tell. And also, you know,
with anything that you're creating contrast, it strengthens the other. So, for example, if you have your high energy beat and
then you have your low quiet, intimate moment
beat, it's going to make the other feel stronger. You know, the quiet
one's going to make the energy one feel
more energetic, the energetic one's going
to make the quiet one feel, you know, even slower paced. And then our final
beat is the finale. A lot of the time, people pack their cameras away way too easy. But the story continues
after the last song is sung. So some of my favorite
ways to capture the finale are the final
pose or the final bow. Especially if you're
touring with an artist, this can be great because
you can focus on kind of, like, the narrative structure
of the entire tour. You know, this is not even
just within one event. It's over a series of shows
and getting that final pose, that final bow closes out
that narrative of the tour. But you can also do
this on a smaller scale if you're just shooting
like one show. You can close out the narrative
of that show with a bow. Fans filtering out of the venue. This one is one of
my favorite ways to close out a narrative. You know, when the lights come
up and people are leaving, those moments are sometimes
some of my favorites. One of the photos
I took recently was I spotted this girl as
she was leaving the venue. She was like, jumping
on the cans on the floor and, like,
squashing them. And it's just a moment that
kind of stuck with me, and I thought, you know, that is such like a fun moment
at the end of the night. Like, her fun hasn't stopped. She's still got that energy
at the end of the night. Another really
natural way to close out a narrative
would be with any, like, big production moments, you know, Cavetti shots,
anything like that. These are sometimes harder
to come by because they tend to be when shooting
like bigger shows. But like I said before, if you don't have access to
those bigger shows, but you maybe have a ticket, this is a great one to photograph on your
phone, you know? Most of us take photos
on our phones when we're at big arena
or stadium gigs, and these big
production moments are a really great way
to kind of close out our narrative with
a high energy beat. And then if you're
working with an artist, a great way to close
out that narrative is kind of like your backstage
smiles, you know, greeting friends and
family after the show, maybe even letting be and greet with the crowd after the show. But now that we've explored some typical beats
within a story, we're going to be jumping
into more technical aspects. In the next sternoon
we're gonna be talking where to actually
stand or where I stand within an entire set to access these moments
and help me tell my story.
5. How to Move Through a Set: So in the son, we're going to be talking about how I
move through a set in terms of my physical
positioning within a venue to capture the story beats that
we've spoken about. The example that I'm
going to be giving is going to be an example of where I would be if I had kind
of full access to a venue. So remember that you can adapt to this depending on the
level of access you have. I'll try to suggest alternatives
and tips for people who maybe doesn't have
the same level of access. But just keep that in mind
that these things can be adapted depending on
what you're shooting, who you're shooting
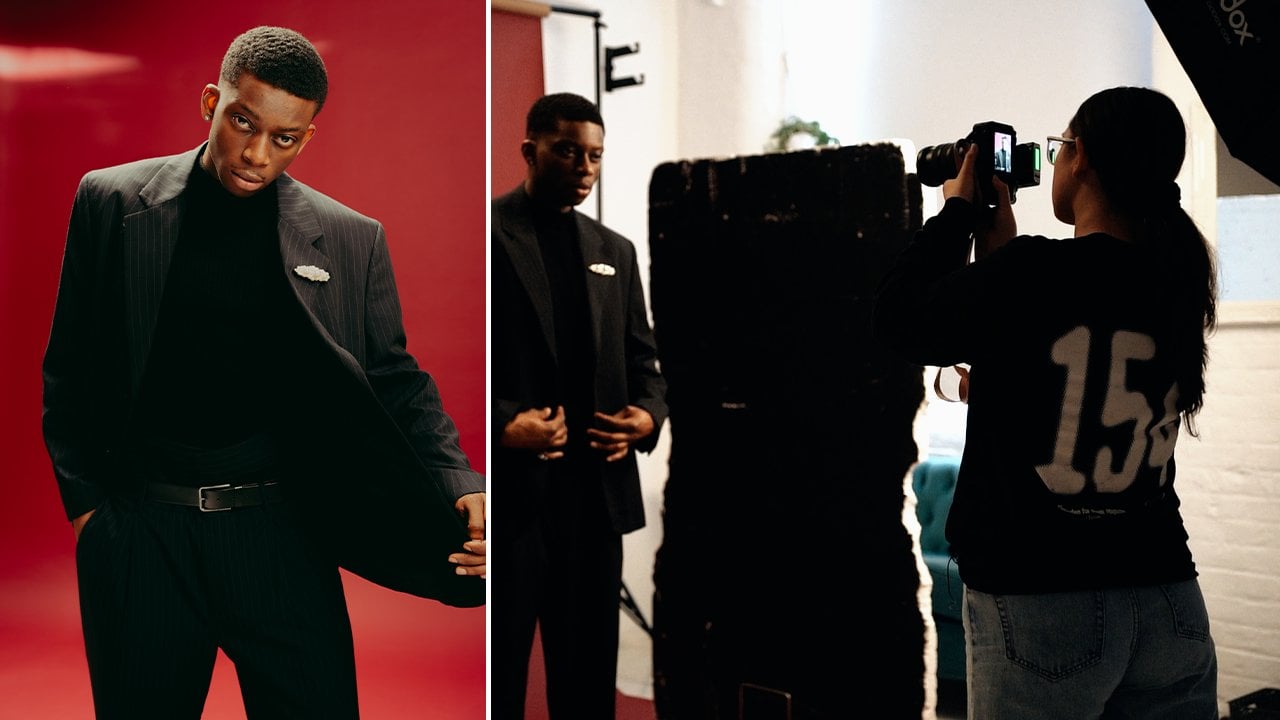
for, and the story you're trying to tell as ever. So pre show pre show, you will likely find me
in one of two places. Either I'll be in the green
room, the dressing room, capturing kind of the behind
the scenes of the artist, or I'll be somewhere
in the venue that is close to the entrance. For the first track, I will
usually be in the pit. This is because if
you're shooting for a venue, if you're
shooting for press, then the likelihood of pit access tends to happen
in the first three songs. So you really want
to capitalize on this time that you're
allowed to be in the pit. If you're working with
an artist, for example, you can access the pit most of the time throughout
the entire set. So for the first three songs, sometimes if I'm
working for the artist, I'll appear somewhere
else in the venue. This is for two reasons. There might be a big
production moment that I want to get from the back of the venue at the
start of the set, you know, as the artist enters and also
the press photographers, the venue photographers
that only have access to the pit for
the first three songs. I don't want to be in
their way when I can have the pit for the
rest of the show. So if I'm working for an
artist, usually not in the pit, if I'm not working
for the artist, usually in the pit
for the first song. The middle of the set so for the middle of the
set, I usually roam. This is when I try out all
of those different angles. Going up to balconies,
going to front of house, shooting from the
crowd point of view. It's the best time to experience different angles
because it tends to be, you know, the moments in which there are the
least pressure. If you're working
with an artist, this might differ
because you might have a production schedule that tell you that certain
things are going to happen and you can
kind of decide where you need to based on
that. Final tracks. So for the final tracks, for the finale of the set, you'll usually find me
at front of the house. This is because a lot of the time you can't
be in the pit, and a lot of the time, big production moments happen
at the end of the set. So front the house tends to
be at the back of the venue, kind of where the
lighting decks are. If I'm working for an artist, I also might be on
stage for these moments because that's when
you kind of get the artist taking, like, a bow or kind of coming out to the front of the stage and greeting fans
and stuff like that. So this again, will depend
on who you're shooting for. But usually stage or
back of the venue. So, if at the end of
the show, I usually linger near the stage
exit or backstage. That's to kind of
capture the artist interacting with people
or going backstage, interacting with
friends and family. If I'm working for
the venue, heading to the actual venue exit is always good cause you
get people leaving. And yeah, so just trying
to think about where naturally the story ends, and that tends to
be in the exit. In the next assoon,
we're gonna be looking at which photography
techniques you can use to convey your story,
to convey emotion.
6. Creating Emotion Through Technique: Defining and
identifying your story is really only half
of the battle. The other half is actually
being able to tell that story. And there are three techniques that I want to talk
about that are great when it comes to conveying emotion
with photography. The first one is
utilizing color. Color is super important
when you're working in any kind of photography
because color holds emotion. You know, there is a psychology
behind the colors we use. Color psychology,
color theory is something that is used
throughout everyday life. Blues, cloting
tranquility and peace, reds connoting
danger or passion. Considering the types of colors and the emotions
that they convey is a really important element to photography and creating
emotion with your work. Not only can you use color in the actual shooting
process, you know, looking out for certain
colors that are going to help you tell
that part of your story, you can also utilize color
within your editing. So adding different colors within your shadows
or your highlights, tweaking colors and
temperatures of your photos to help you to connote the emotion that
you're trying to tell. For me, color is one of the most important
aspects of my work. I believe in using strong
color within my work. That is something that
I really enjoy using, but you don't have to use
it in the same way as I do, but consider how
the use of color or the absence of color
affects your storytelling. The second technique
I want to talk about is the use of motion blur. So motion blur is often achieved by using a
slow shutter speed. And this can be a really
great way to convey energy. A really good example of
this is a tour I recently went on with an artist
who their whole thing is, you know, how passionate and
chaotic their crowd are. And within this tour, I wanted to show the chaos by connoting the fast
pace of movement. And I use this both within my artist shots and also
with my crowdshots. So, if the artists moving a
lot, the crowds moving a lot, using a slow shutter, is
going to capture a lot more of that motion and convey
that to the audience. So you're automatically
conveying this energy, this speed, this chaos within your photos by using
slow shutter speeds. The actual speed that
you want to use is going to differ depending on what
you're trying to achieve. For me, I usually
find around, like, 1/3 is a really
nice place to be. But sometimes I'll go slower. Sometimes I'll speed
it up a little bit, depending on how much motion
I am trying to capture. And the final thing to
think about is cropping. Sometimes a good photo is not just about
what you capture, but also what you emit. Removing distractions, removing things that don't
serve your narrative, by cropping or cropping and zooming into a
certain emotion or a certain moment can be a great way to help
facilitate your storytelling. These are just three techniques
that I think are really effective in exploring
and conveying emotion. So keep those in mind. You want to be
thinking about color, you want to be thinking about motion and how you capture that, and you want to
be thinking about what you include in your crop. In the final lesson that
we're moving into now, we're going to be looking at sequencing your photos and we're going to be
doing a little bit of a recap on everything
we've spoken about in today's class. But
7. Sequencing Your Photo Set: So welcome to the
end of today's class all about telling a story
through your music photography. In this class, we have explored the idea of identifying a story, creating a narrative by looking
at different story beats, where you can move around the venue to access
these story beats, depending on different clients
that you're working for or different objectives you
have with your storytelling. And we've also looked
at techniques such as color and cropping to actually be able to convey the emotion
behind your story. In this final lesson, we're going to be
look at sequencing. We're going to be
referring back to our initial breakdown
of the story beats, our initial ideas
surrounding the narrative, and looking at how I
would sequence my photos, and this one is
going to be helpful for you for your class project. Remember, after this
lesson is done, I would love it for
you guys to upload your class project to the
class Project Gallery, so I can take a look, and
this lesson is definitely going to one that helps
you with that one. So how do we sequence? I think it's really important here to refer back
to our story beats. Each photo is going to represent
a different story beat. So, for example,
your first photo could be that establishing shot, that first moment that the venue opens or people
are entering the venue. Your second beat could be the introduction of the
artist. Who is the artist? Who's playing? Your third photo could be as the Energy Builds. And then your fourth one
your slow intimate beat and your fifth one, the finale. Think about this as like
a end credit of a film. So you're going to
take each one of the beats that
you've identified. It might be the same beats
that I've identified, or it could be something
completely different. I would say anywhere
6-10 photos is great, but I would focus on
maybe five story points. So, for example, you could have five points and have two
photos for each one, bringing you to kind of
ten photos in total, or you could have maybe
one establishing shot, one introducing artist shot, two high energy moments, one quiet energy moment, and then your finale shot. Or you could have an
establishing shot, introducing the
artist, high energy, quiet energy, finale,
and then aftermath. So you could have that big production
moment as your finale, and then a quiet
moment of everyone leaving for your aftermath. So I would recommend somewhere 6-10 is a good way
to tell this story. When you've selected
your photos, upload them to the
class Project Gallery and bonus points if you are able to identify those story beats
that you are telling. I would love to kind of
see the thought process behind the sequencing, as well as the
sequencing itself. And of course, when
you are selecting your photos for the sequencing, really think about is this photo telling
a story in itself? Am I using techniques
such as color, such as motion,
such as cropping, such as capturing
high energy moments, such as capturing
intimate crowd moments? Am I using these things to tell a story within
this one photo? Because if you can tell a
story within one photo, then creating a sequence is a lot easier because you
have more to work with. And if you enjoy
this class project, consider maybe even creating
two alternate stories. You know, one is a
high energy story. One is a low energy
story line, for example. Or maybe you go back to our initial class
project lesson and you look at one story from an artist's point of view and one from a crowd point of view. How many stories can you
tell from the same event? I think that's always
interesting because we're looking at how selecting different images alters or
shifts the tone of a story. So it could be the same event, but the selection of your images changes the story
that you're telling. It changes the way that I understand the event as
someone that wasn't there. But I really hope you've enjoyed this class all about
storytelling in live music. I really do believe it is one of the most important aspects
of live music photography, and I'm so excited
to see what you guys produce and the stories
you tell within your work. Remember to upload to the
class Project Gallery, and I will see you guys
in the next class.
 Sophia Carey, Photographer