Transcripts
1. Introduction: Welcome to live music
photography 101. This course is the basics of live music photography whether
you are a photographer looking to go professional
or you're a casual gig-goer who's looking to
get a little bit better at taking photos at live gigs. We're going to be looking
at all of the things that I wish I had had spell out to me at the beginning of
my career from shooting in low light venues to how to
account for interesting shots. My best tips for
pre-production and of course what to pack in
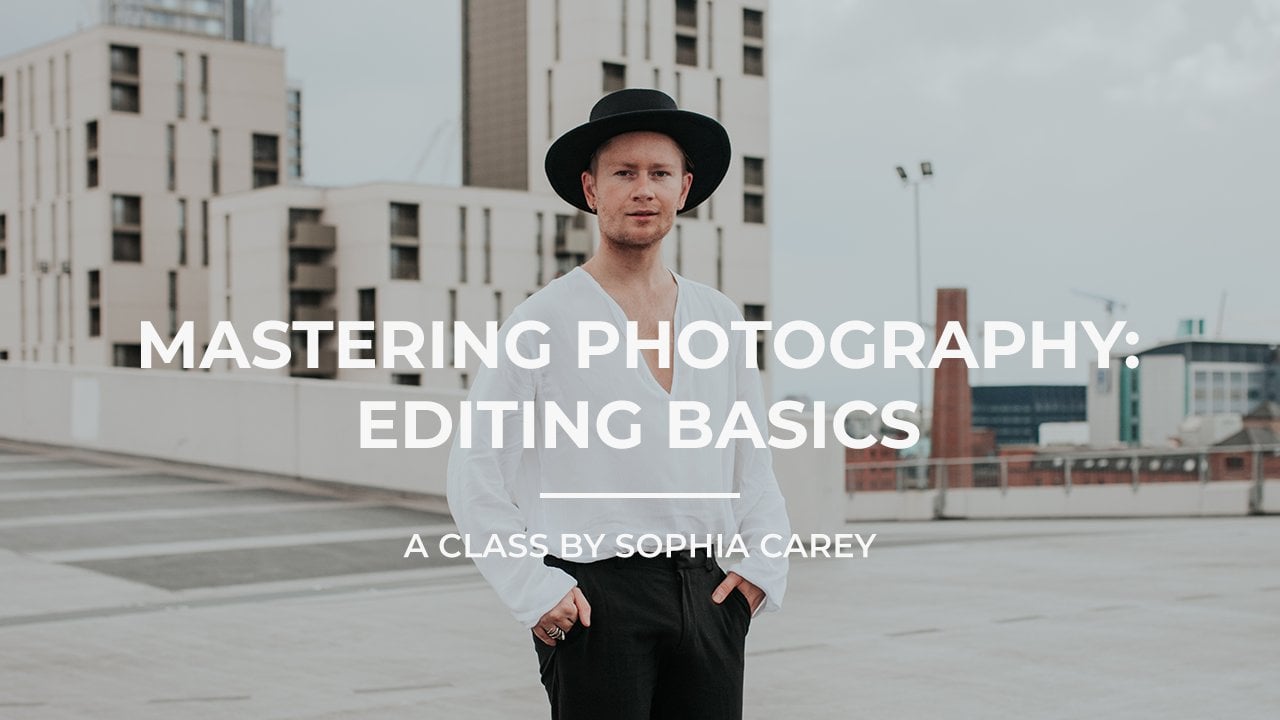
your photography bag. My name is Sophia Carey and I am a photographer who specializes
in live music photography. I started my career
photographing small venues and gigs
in my local area, mostly in grime and
hip hop genres. Before moving on to capturing the live
music scene in the UK, as well as some of the
biggest UK festivals. I've worked in a
range of venues from small clubs to large
outdoor festival venues. I'm going to be going through
the best tips that I've learned in almost a decade
of working in this industry. This course will be
broken down into three sections, pre-production, the shooting process itself and then post-production
so that we're able to cover everything
from before the event, during the event and
after the event, right into the culling, editing and delivery process. By the end of this
course, you should feel comfortable to go into any live music gig event of any and captured the moments that are unfolding
in front of you. I won't say much more.
Let's get stuck straight in dreaming the next lesson
where we're going to be discussing the class projects.
2. Class Project: Thank you for choosing to
join me in this class, all about Live
Music Photography. Throughout the class,
we're going to be touching on every element of the live music
photography process, from pre-production all the
way to post production. For the class projects, I'd
like you to head to a gig, whether in your local area or something a
little bit bigger, and snap three photos; one that focuses on the crowd, one that focuses
on the production, and one that focuses
on the artist. When it comes to production, that could be anything from
set design to lighting, but we will get into that in a little bit more detail
later on in the class. You can take these three photos on the newest mirrorless camera, or you can take them on a
iPhone, or similar phone. What you use to take the
actual photos doesn't matter. Throughout this process,
we're going to be exploring how you can use a variety of different equipment to capture live
music photography. This class should give
you a great idea on how to nail these three shots. Let's dive straight in and get started with pre-production.
3. Intro to Pre-Production: Pre-production is the
first natural step to any photography process. It refers to all of
the work that you do before the event or the shoot itself that helps that process go as smoothly as possible. Preparation as in any
photo shoot is really important because of the
unpredictable nature of photography, especially when it
comes to events. If you can prepare as much as possible for the things
that you can control, the things that you
can't control will be a little bit
easier to deal with. In this section of the class, we're going to be
looking at how you can secure your press pass, your photo pass, which
allows you into the venue. We're also going to be
talking about venue access, what that means,
why you might be allowed to be within the venue. Then we're going to
move onto understanding your shortlist and
your schedule. I think that ultimately the
pre-production process is the most important aspects
of any photography process. If you get the
pre-production right, everything else will
slow it into place. In the next session,
we're going to get started with the
pre-production process and explore how to get
your photo pass and gain access to shooting
inside the venue.
4. Getting Your Photo Pass: Before we get stuck into all of the details of the
pre-production process, it's important to understand
when you can and when you can't bring a professional
camera into a venue. For those of you
who are shooting on your phone or small
pocket-sized point and shoot, this often won't be an issue. But some venues,
especially bigger venues, don't allow you to
bring in DSLRs, mirrorless cameras, or any kind of professional
looking camera. Usually the rule is if it has a detachable or
interchangeable lens, you can't bring it in. That being said, some
small venues don't have this rule and you can
bring your camera in, but it's important
to check beforehand. Usually places have
it on their website. They have it all detailed
as to whether or not you can bring a camera into a venue. If you're in doubt, then you can always reach
out and ask them. In order to gain access to those bigger venues
with your camera, you need to get what we call a photo pass or a press pass, which essentially is a piece
of accreditation that lets the security and the
staff there know that you are okay to bring a camera in. When it comes to getting
your photo pass, there are three ways that photographers would
usually gain access. Either by shooting
for a publication, whether it's a magazine
or an online blog, shooting directly
for the artists. You might be hired by
the artists themselves, their management or their label. Or thirdly, shooting for the promoter or
the venue itself. Often it's easiest to gain
access via publications, which is how most photographers would get their press passes. But of course you
can try to reach out to any of the three, whether it be publications,
artists, or venues. Just make sure that you
include your portfolio or link to your online portfolio
within your email. Once you've secured
your photo pass, which should be confirmed to you via some sort of
written communication, it's time to wait for
the day of the event. Unless you've been asked to
arrive at a specific time, if you're shooting
the whole show, it can be a good idea to arrive around the same time
that doors open. If it's one artist that you're
shooting in particular, then maybe 20
minutes, half an hour before that artist
goes on stage. When you arrive at the venue
you're going to need to request the
accreditation entrance. Usually security will be really
helpful in directing you towards whichever door or entrance you might
need to head to. Once you're at the entrance, security would then basically
just check your name against a list and see if
your name is on there, give you the correct
pass which will give you access to wherever you are allowed to be
as a photographer. Once you've got your pass, if you're not really sure about where you're
allowed to go, then just ask security and they'll be able
to point you in the right direction and let you know where you can access
and where you can't. For your pass secured, it's time to head
into the venue and head towards the stage
where you'll be shooting. Join me in the next
lesson where we're going to be talking
all things venue.
5. Exploring the Venue: In this lesson, we're
going to be talking about all the things you need
to know about a venue, starting with venue access. As mentioned in the last lesson, understanding what access
you're going to have within the venue is
really important. It's important so that you know where you're going to be, where you're allowed to be, and you can plan your
shots accordingly. This is going to help
inform so many of your decisions in the
pre-production process, such as choosing your lenses, or what equipment
you're going to bring. You should be able to ask
whoever's hired you as to where you're going to
have access on the day. As mentioned in the last lesson, if whoever hired
you doesn't know, then you can always ask security
on the day of the event. Ordinarily, you're going
to have greater access if you are shooting
for the venue, or an artist than you would if you were
shooting for publication. The different types of
access that you want to be aware of are stage access, where you'll be able to be
onstage with the artist, pits access where you'll be
positioned in an area that is usually directly between
the crowd and the stage. Front of house, which is
usually towards the back of the venue and gives you a view of the crowd
and the stage. Depending on the venue, there may be other
less common areas and vantage points that
you have access to. But these three are
often the most typical. Lots of venues will
only allow you to shoot for the
first three songs, especially if
you're shooting for our publication and
you're in the pit. This means that
you're going to need to get all of your shots within the first three songs of an artist setup before either
dispersing into the crowd, heading home, or heading backstage to starting your
edits before the next art. Which one of those things
you do will depend on your ticket type and what
access you have at the venue. For example if I was
shooting for the venue, I might be able to head back sage style my edits
before the next app. However, if I was shooting
for the press and only had access to
that one artist, I would likely head home after
those first three shots. As well as understanding the actual access you
have within the venue, I find it really useful
to try to understand what the venue actually looks
like before you get there. If you haven't been to
a venue beforehand, a quick search on Instagram, or Google should give
you a good idea of a, the size and type of rooms
the venue has and b, what kind of shots you can
maybe expected to capture. In the next lesson,
we're going to dive into schedules and shot lists to work out what you're actually going to be capturing.
6. Schedules and Shot List: In this lesson, we're
going to be talking about schedules and shortlists. Aside from having a good
understanding of a venue, it's also important to understand what you're going
to be doing on the day. I work a lot in
dance music where you have a lot of
acts during a night. You might have
between five and 10, maybe more acts throughout a given set period
that you're there for. So having a good idea
of who is going to be where and at
what time is really important to ensure that
things run smoothly for you in the night
and that you don't miss any key moments. I usually compile all
of this information in a format that is easily
accessible for me. For example, I might create a screensaver or
screenshot my schedule and have that as
my phone wallpaper so that I can quickly
take my phone out, check the screensaver
and know where I need to be for which artist. Alongside the actual
schedule for the artists, is also really useful if
you can try and get access to some sort of schedule
for the production moments. This could be like any
big special effects such as confetti or pyro or big lighting effects that the crew have
planned for you. Getting access to this kind of information can
sometimes be a little bit more tricky than getting access to an artist schedule. But if you're working for
a promoter or a venue, then you could always head
to the lighting crew, the sound crew or
production manager and ask them if they have a schedule that they're
willing to share with you. All of this information
can be used to ensure that the process is as smooth as possible for
you and you're not stressed about where you
need to be and at what time. If you're not shooting professionally and
you're just heading to a gig with your phone or
a point-and-shoot camera, then you don't need
to worry about all these schedules
in the same way. However, it can be really useful to try and find
this at times which are usually around the venue on posters or maybe
on social media. In the next lesson we're
going to be looking at camera settings and how to get the most out of your camera.
7. Camera Settings: If you're just starting out
with live music photography, it can be really
important to understand the basics of shooting in
low light environment. The most important thing to get right is your
camera setting. Make sure you know how
to adjust your ISO, your aperture, and
your shutter speed for different
lighting condition. ISO, shutter speed, and aperture make up what we refer to as the
exposure triangle. Three elements that
make up any photograph allowing you to balance the amount of light
that's laying. ISO refers to the sensitivity of your sensor or
your film stock. The higher the number, the more sensitive your sensor
or film stock is to light. This means it will allow
for a brighter image, but the image will
be grainier than an ISO of a lower number. Shutter speed refers
to how quickly or how slowly the shutter
opens and closes. The shutter speed
we use units of seconds or fractions of seconds, for example one is one second, whereas 1/250 is one
250th of a second, meaning that the shutter
is open for longer at one than it is at 1/250. The longer your
shutter is open for, the more light is allowed
in to hit the sensor, brightening your
image, but in return, the more motion is captured. Alternatively, shorter
shutter speeds that less light into images but able to
freeze the motion. Aperture controls the depth
of field in your photographs, or in simple words, how blurry or how sharp
your background is. Aperture refers to the hole in your lens that lets light in. We measure this in
whole numbers and decimals such as 16 or 2.8. It feels contradictory but
the smaller the number is, the larger the
hole in your lens, meaning more light enters your images and there's a
shallower depth of field. This means that your
background will be blurrier. The higher the number,
the less light, but the greater depth of field, meaning your background
will be sharper. When we're shooting
in low light venues, often it's best to shoot with a wide aperture such as 2.8, but to keep your
shutter speed at a fraction close
to 1/200 or 1/250, so that we don't capture
too much motion blur which can be tricky as performers like to
move around a lot. In terms of ISO, indoor settings can often
be quite dimly lit, and so we want to opt
for a higher ISO. For a lot of good photography, I tend to use some range
between 1600 and 2500. But how far you can
push your ISO will really depend on the
type of camera you are using and how well it
handles a high ISO. When you're shooting in venues
with more light available, you can usually afford to set
your ISO to a lower number, reducing the amount of grain, as well as setting
your shutter speed at an even quicker units such as 1/800 for example and that further reduces the
chance of motion blur. The thing to remember
about your camera settings is that these three things, your aperture, your ISO, and your shutter speed,
they work in unison to create the perfect balance,
the perfect exposure. It's really important to fully
understand how all three of these elements not
only work individually, but also how they work together. The best way I've found to fully understand
how these elements work is to head
out and shoot and practice using all three
different settings. You can do this with a
camera or you could use your phone with an app
such as ProCamera, changing the different elements, and seeing in real-time how
that affects the image. In the next lesson,
we're going to be diving into camera gear, and what I would
recommend when choosing your camera bodies and lenses.
8. Camera Gear: Now we've got a good
understanding of the settings that we're going to be balancing when shooting live music. It's time to get stuck
into what we're actually going to be using to
shoot those images with. When it comes to live
music photography, it's always better
to be over-prepared. One thing I always recommend
is having backup gear, so I always take two camera
bodies and multiple lenses, as well as spare SD cards
and spare batteries. What other considerations
do you need to take when it comes
to your camera gear? Let's start off by talking
about your camera body. When it comes to
the camera body, one of the main considerations will be how it
performs in low light. I personally opt for
a mirrorless system that performs notoriously
well in low light. This means I can push my camera to much higher
ISOs than I could, otherwise, I use both the Sony A7 IV
and the Sony A7 III. Other camera brands,
such as Nikon and Canons mirrorless
range in particular, are also great at
performing in low light, so they are great options. Another thing that
I like to consider is whether or not my camera has more than one
slot for an SD card. I find that having a
camera that has two slots, meaning you can
backup onto one of your cards is really useful because you don't
know what's going to happen. If a card was to malfunction and you were
to lose all your photos, then at least you
have everything backs up onto your
second SD card. I personally like to
have two camera bodies with me for reassurance really, and mostly because if there was a problem
with one of them, then I have a backup to use. But also it can be
really handy to have different lenses on
different cameras, meaning that you're
not going to have to switch lenses mid performance. However, for a
really long time I shot with only one body, so don't worry if you
can't splash out right now and afford two, having one is a great
way to get started. Next up, let's talk lenses. In the next lesson, we're
going to be talking more specifically
about focal lengths, what that means, and how to choose which focal lengths
you're going to be using. But right now we're talking
about the lenses themselves. So me, the considerations are really narrowed down
to two factors. Firstly, a lens that
has a wide aperture that allow me to let loads
of light into the image, and secondly, a lens
that has auto-focus. I don't want to be worried about manual focus when it
comes to live music. It's a really
fast-paced environment, and having to worry
about manually focusing each shot is just something that for me wouldn't work
within my workflow. When it comes to a wide
aperture, of course, it's great to have a lens
that let's loads of light in. When we're working in
low light environments, that's not really
a worry and we can drop down our aperture rather than compromising shutter speed or making a really grainy image. Aside from these
two main factors, another consideration would
be whether or not you use a prime lens or a zoom lens. A prime lens is essentially
a lens that doesn't zoom, it's fixed focal length. I tried to shoot with
one prime lens on one camera and a zoom
lens on the other camera. This is because
prime lenses often stop down to a wider aperture, meaning you can
let more light in. But of course with zoom lenses, you have a little bit
more flexibility, you can shoot at
different focal lengths, and so having both with you at all times is a great way
to find a great balance between letting
loads of light into your images and not having to compromise
on your focal length. In the next lesson,
we're going to be diving deeper into
the topic of lenses, talking all about focal lengths.
9. Choosing Your Focal Lenghts: Now that we have a
clear understanding of camera settings and camera equipment, let's
talk focal length. Focal length
determines the angle of view captured by lens with shorter focal lengths resulting in wider
angles of view, and longer focal
lengths resulting in narrow angles of view. It also affects how much
of the image is magnified with longer focal lengths producing greater magnification. Different lenses have
different focal lengths. Prime lenses, as I mentioned in the last lesson are fixed
to one focal length. For example, a 35
millimeter prime is fixed at a 35-millimeter
focal length. Zoom lenses on the other hand, has the option to move between a range of different
focal lengths. For example, a 24 millimeter to a 70 millimeter has
a range of 24-70, which means it can have any focal lengths
within that range. When it comes to choosing
your focal lengths, there are certain
considerations. Firstly, your vantage point. Where will you be shooting from? Will you be in the pit quite
close up to the artist, or are you going to be right at the back, in front of house. For example, if you're
shooting from a far, you may need a focal length that allows you to zoom
in closer to the action. For smaller venue,
something like a 24-70 is a perfect lens
for these scenarios. Then for bigger than venues, maybe something like
a 70-200 millimeter. Another consideration
is how many people are there on stage. If there are multiple
people within a band or a DJ Collective, then you might want to opt
for a wider focal length just to ensure that everyone can be in the shot at a time. For a recent tour that I shot with four DJs
going back to back, I opted for an
18-millimeter lens, which helped me to
ensure that all of the DJs were able to
fit into the shots, even when I was shooting at quiet close distances
in quite close spaces. Thirdly, what type of shots are you going
to be focusing on? If you're focusing
on crowd shots, then something like a wide lens, a wide focal length is
going to help you out here. Personally, I like anything from an 18 millimeter to a 35
millimeter for crowd shots. But some people like
to go even wider, maybe shooting with fisheye
lenses for crowd shots. In the next lesson,
we're going to be looking at other equipment, things that aren't your cameras, things that aren't your lenses, and what you might
need to take with you to shoot a live gig
that isn't camera oriented.
10. What to Pack & Wear: In this lesson, we're
going to touch on equipment that you
might want to use or you might want to take with you that is not camera equipment. Let's get started with
things that you want to wear and common etiquette when it comes to shooting live music. For most events in
particular with music, you're going to want
to wear all black. We call this stage black, which essentially ensures that
you blend into the crowd, you blend into the stage, and you're not standing out not only to not distract the crowd
from the performance but also so you're not in
other photographers and videographers shots by
as a really intrusive, bright figure or wherever. I personally tried
to wear lots of items or clothing that have pockets for room
for extra SD cards, batteries, even lenses
if I can fit them in. It's also useful to you
layer your outfits. Some venues are really hot and some venues are really cold. Having layers that you
can remove easily or add easily is also a really
great consideration. Probably the most important
thing when it comes to what to wear is your earplugs. Other than your
camera equipment, having earplugs with
you is probably the most important thing
that you're going to need to remember to bring for the night. But if you do forget
you can usually get spare earplugs at most venues, if you just ask the bar star. Protecting your ears
in live music venues, especially when
you're going to be spending so much time, so close to speakers
is really important so that it doesn't affect your long-term
health, your hearing. I also like to wear a small
bag that goes across my body, meaning I can again fill
it with spare SD cards, batteries, tissues, lens cloths, lens wipes, anything that I might need to access
really quickly. Sometimes you'll even
find a flash gun or a prism within this bag depending on the size of
the bag that I'm wearing, I'm going to be touching
on both flash guns and prisms later
on in this class. The more shows you shoot, the more you'll get
used to what you need, what works well
within your workflow. But these are some
great considerations to get started with. In the next lesson, we're
going to be looking at the typical shots you need
to consider at a live gig.
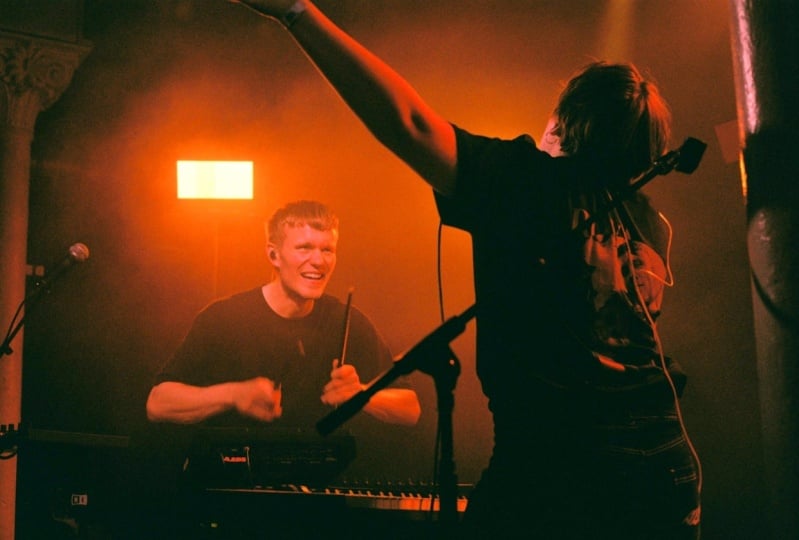
11. Typical Shots: When it comes to what kind of photos to take during a show, I like to categorize this
into four categories. Firstly, artist shots, secondly, production shots, then crowd
shots, and hero shots. In this lesson, we're going
to be talking about each one of these categories
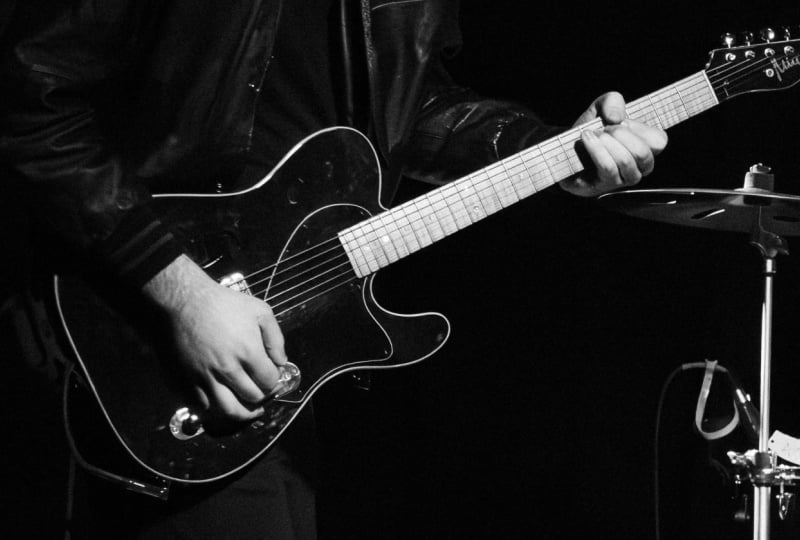
and what they look like. Let's start with artist shots, probably the most
self-explanatory of the four categories. Artist shots refer to
the photos that you get of a band or DJ or musician. These could be wide
shots that encompass the whole band or the whole
group of DJs or it could be closer cropped
shots that just focus on one member or if there
is just one artist, then a specific
detail or a mid shot, something close
up of the artist. Next up we have
production shots. Production shots
refer to the shots of the visual production. This could be anything
from stage design to special effects such
as confetti or pyro. These shots tend to be
most effective when you shoot them from a wider angle, encompassing the vastness
of these production pieces. The third category
is crowd shots. Again, really similar
to artist shots in that it's pretty
self-explanatory. Crowd shots are photos of the crowd and they usually
come in two forms; one being wider shots that encompass the vastness and
the scale of the event, and secondly, shots
that hone in on individuals or groups of
individuals within the crowd. Finally, we have hero shots. Hero shots are the
shots that I like to think of as like
the ultimate shot. It encompasses a little bit of all three of the
other categories. You have the artist on stage, you have the crowd, and you have production moments. These are often shots from wide angles maybe in
front of house looking out over the crowd towards the stage or from a
higher vantage point. In the next lesson,
we're going to discuss what to
look for in each of these shots and how to know your shots within
these four categories.
12. What to Look for in a Shot: In this lesson,
we're going to be talking about what
to look for in a shot for each of the four categories described
in the last lesson. Firstly, let's
discuss artist shots. For artist shots there
are two things that you really want to consider
or pay attention to. Participation and
interaction being the first. This means any shot
where the artist or a musician is interacting
with other people on stage, whether that'd be a friend
or a fellow musician, or anything where they're
interacting with the crowd. Secondly, interesting movement. Anything where the
artist is moving in an interesting or strong
and striking way, this can make a great shot. For production shots, it's
important to be able to predict when production
moments are going to happen. Of course, you can speak
to people beforehand, get a timetable of when certain production
is meant to happen, but you can't always predict the exact second that
these are going to happen. You're going to need to keep
an eye in the air out for when you think production
moments are likely to happen, and there are a few ways
that you can do this. One way you can do
this is by getting familiar with an artist's
music or set list. This isn't always
possible, but when it is, it can be really useful
to try and predict when the biggest part of a song or
a set list is going to be. These biggest parts of songs and set lists tend to be the moments in which production release
that special effects. You're going to have
the confetti shots on the biggest song
on the set list. Secondly, you can listen
to the music and try to work out the beat of
the music and listen to the beat as these are
key moments in which they might release
special effects or change writing, for example. Thirdly, and this one is
a little bit of a cheat, is to keep your eye on whoever is doing the
special effects. Often you'll be able
to tell when they're going to press a button
or pull the lever and you can use this guidance
by looking at them every now and then to work out when they're going to
release the special effects. As long as you've
got your shot ready, you've got everything
ready to go, you can keep watching
them and as soon as they go to press the
button or pull a lever, you're ready to take that shot. The crowd shots I take a similar approach
to artists shots. Looking for any interaction
either with other members of the audience or with the
artists on stage themselves. I also look out for
people who seem to really be enjoying the music as these are the shots that your client is really going
to want to be able to see. I personally prefer a
more candid approach to crowd photography. Preferring shorts where the
audience aren't looking at me and maybe aren't aware
that I'm taking a photo. But this is definitely something
of personal preference. Some people prefer more
posed crowd photography, and it's definitely
a time and place for both. The hero shots. You want to consider
a little bit from all three of those categories
and throw it into one. In the next lesson, we're
going to be talking about output and why that is
important to consider.
13. Considering Output: In this lesson, we're
going to be discussing the output of your photos, where they would end
up, and how does that affect the shooting process. This is arguably one of the most simple but important
aspects of any photo job. But when you're
shooting for yourself, what considerations
do you actually need to take when
you're taking a photo? It can be really useful to understand where you're going
to be putting these photos. Are they for social media
or are you going to print them out for that
your bedroom wall? Understanding where
your images are going to end up
will help you when it comes to naming the
composition of your image. Do you need to compose it in portrait orientation or
in landscape orientation? When it comes to
working for a client, this will often be dictated within the brief,
but where it's not, it's a good idea to get a variety of different
compositions and different compositions for different aspect
ratios just in case. For example, photos that
might be needed for web or billboards tend to be shot
in landscape orientation. However, photos for
social media will usually be short in
portrait orientation. To further this, when it
comes to social media, often you have two aspect
ratios to consider, 9*16 for Instagram
stories or real covers, and 4*5 for Instagram grid post. This can be something to
consider when it comes to composing your image and thinking about what
the crop will impact. In the next lesson,
we're going to be discussing the idea
of shooting with purpose and how to make sure you get everything
you need covered.
14. Shooting with Purpose: In this lesson we're going to be discussing how to
shoot with purpose. Shooting with
purpose is important to make sure you
find that balance between getting
everything that you need to capture, but
not overshooting. Firstly, don't just
spray and pray. This term refers to
shooting aimlessly and just hoping that you get something good out of what
you've captured. Instead try to make what you're shooting a
little bit more considered. Think about what we've
discussed in previous lessons, such as what to look for
in a short or the output. Another good way to ensure that your work is considered is to think about the brand of
the artist or your client. Can you find a way to
incorporate their personal brand and their visual identity
within your work? This is a big part of
shooting live music. The way that you shoot
rappers is likely going to be different to the way in which
you shoot a folk singer. Ensuring that you're
capturing enough of photos can be something that is a little bit tricky to judge. How I try to do this is
ensure that I've got at least three solid shots for
each item on my shot list. This way I know
that I definitely have enough to deliver
to the client. Once I've now the shot list, I can use the rest of the time remaining to get creative, try techniques that I
haven't tried before, or things that aren't
on the shot list but I want to try anyway. Understanding how to shoot with purpose and be
more considered in your approach is
really important to ensure that you get
everything that you need to get, but then you don't end up
with thousands of images that are likely not going
to make the cut at the end. In the next lesson we're
going to be talking about how to shoot lasers at a gig, and what you might
need to consider.
15. Shooting Lasers: Lasers are a firm
favorite for big shows, especially when it comes to
genres such as dance music, but effectively and
safely capturing them can be quite difficult. In this lesson, I'm
going to outline some of the things
I've learned in the years that I've spent shooting shows that
include lasers. First up, you're
going to want to be aware that lasers can cause damage to your
camera sensors. This happens if the laser hits the camera sensor directly, so you're going to
want to try and avoid any kind of laser's going
directly into your lens. Thankfully, most
lasers are mounted on a stage pointing
above the crowd. So if you can stay crowd-level, you're mostly going
to be safe from this. You also want to consider
that the longer that the laser hits your sensor for, the more damage it's
going to create. If you're shooting with
really slow shutter speeds, then the damage is
going to be higher than if you're shooting
at faster shutter speed. That leads me nicely
onto shutter speed and how to adjust your shutter speed when
you are shooting lasers. I found that working with
slower shutter speeds is a lot more effective than shooting with higher
shutter speeds. Of course, you don't
want it to be too slow so that you minimize
laser damage, but you do want to
find a point somewhere between maybe 1/15 and 1/100, as I found that this kind
of range usually generates the best images for
capturing lasers. Experiment with
different shutter speeds as you work to try and find that sweet spot as
different lasers are fired off at different speeds
and so there's not like a one-size fits all for the shutter speed when
it comes to lasers. However, if you do shoot lasers at too high
a shutter speed, you'll find that the laser
display might look weak as the camera won't
capture all of the lasers. Meaning you might end up with
a photo of just one laser captured instead of an array
of 20 across the image. When it comes to
shooting lasers, I like to offer a wide shot, usually shot from the
crowd or front of house focusing on vast crowds
in an attempt to lose any motion blur thanks to the slow shutter speed rather than focusing directly on the artist who is going to
be moving around a lot. In the next lesson,
we're going to discuss flash photography and when it's appropriate to
use it during live music.
16. Flash Photography: In this lesson,
we're going to touch on the topic of
flash photography. When is it appropriate
to use and how do you use it
when you're able to? Within most live music, it's not really
customary to use flash. However, there can be some
exceptions to this rule, and this usually depends
on the artist and the venue and the
rules that they have. In my experience, for some smaller
venues and artists, it has been okay for
me to use flash. When I've used it
I've used it in a direct light kind of
way, which essentially, means that you're directing
the flash directly at your subject and creating
quite harsh light. Alternatively, you can
also bounce your flash, which entails
shooting the flash, let's say onto a
ceiling and bouncing the light off of the ceiling
down into your subject. The thing is that this
usually works better when there's a white ceiling that
you can bounce it from. Most venues have dark ceilings
or really high ceilings. If you're going to use flash, it's probably best to use
a direct form of flash, but to reiterate,
it's not really that common that
you are actually able to use flash within
music photography. Most of the time, you're
going to be expected to use available light, whether that is natural light at different outdoor venues or the strops that they have
specifically for that venue. Other instances
where flash might be appropriate is if
you're shooting backstage behind the
scenes content with the artist and you're
away from the stage. In these instances, bouncing your flash or using
direct flash would be appropriate and just depend on your personal preference and the style that you
want to go for. In the next lesson,
we're going to discuss shooting with prisms and reflections and how
you might want to do this.
17. Prisms & Reflections: Using prisms and reflections in your photos is a great way to add an additional
creative element and there are a few ways
that you can do this. Presumes are essentially
pieces of glass that come in different shapes
and sizes that you can use, or attach to your lens if
you're using a presume filter. They used to distort your image, or to create interesting
reflections within your photos. If you don't have a prism, I like to use my phone as a
reflective surface instead. You essentially just need
to put the reflective side of your phone underneath your lens and that will reflect an image into your photos. Different types of prisons
can have different effects. It can be fun to experiment
with the different shapes and the different sizes and find the ones that you'd
like to use the most. A top tip for working
with reflections is to really consider what is being
reflected into the image. For example, you don't
want the sound desk, or yourself reflected
into the image. Instead you want to
focus on reflecting things like production moments, lighting into your photos. In the next lesson,
we're going to dive into the post-production
process, chatting about how to choose your final
photos for delivery.
18. Choosing Your Final Photos: Creating your final slacks or calling as it's also
commonly referred to, is it an important aspect of
the post-production process. In this lesson, I'm going
to be talking about two of my favorite ways of narrowing down the photos to
my final selects. The first calling method
is to call in camera. This can be done on shoot
or maybe on your way home from a shoot before you get into the actual editing process. The way that I prefer
to do this is to write my images with a
star rating in camera. Often during the
shooting process, you will take a photo
and you'll know that photo is one of the photos I'm going
to deliver at the end. It's one of the best photos
that I've taken tonight. These star ratings are saved
into the photos metadata, so that when you
import them into something like Adobe Lightroom, a piece of cataloging, and editing software
that we're going to be looking at in an
upcoming lesson. The star ratings remain, making it easy for
you to instantly identify your favorite
photos of the night. When it comes to
shooting on your phone, you can use similar tools to cope during the
shooting process. For example, iPhones
have this option where you can favor an image
once you've taken it, and this just sends
that image into another folder which you
can access at a later date. Next up, let's talk about
calling in Adobe Lightroom. There are a lot of
different ways that you can call in Lightroom and deciding which method is best for you is usually a matter of
personal preference. To me, the main ways that
I like to call is to use the star system where you
can write an image 1-5, or to use the flagging or
quick collection options. Each of these three options are effectively one and the same. In essence, they each
help you to separate your selects from the rest
of the photos you've taken. Play around and see
which system is easiest for you and what's
best within your workflow. In the next lesson,
we're going to jump into the editing process, starting off with cropping
your compositions.
19. Cropping: Whilst is definitely easier
and more effective to get your compositions
right in camera, this doesn't always happen, and so using cropping
as a tool of fixing and editing your photos
is a really powerful idea. In this lesson, we're
going to be looking at some top tips to consider when it comes to cropping
your photos. In terms of equipment,
when it comes to cropping, you could use anything
from the photos app on your phone to a software
like Adobe Photoshop. The equipment you use for
this doesn't actually matter, it's just actually what
you do with the crop. Firstly, think again about
output, for example, do these photos
need to be cropped into a specific aspect ratios such as 1*1, 9*16, 4*5. This will instruct
you as to what aspect ratio the photos need
to be cropped into. And then you can consider
cropping for a variety of different reasons
including cropping to create a focal point. Cropping is a powerful
tool and the cropping create a focal point can be
a great way to utilize it. This means designing the crop of your photo to draw attention to a specific area or
part of the photo. A really common way to crop
to create a focal point, is to position your focal point in the center of your image. Another great way
to utilize the crop is to crop things out of frame. As much as image-making is about what you
include in the frame, it's also about what you emit. Cropping distractions or
items that don't serve your composition or
narrative can be a useful way of using
the cropping tools. Now, that we've covered
the basics of cropping, arguably the most important
and powerful tool when it comes to image editing, let's dive into some
specific software that you can use within
your editing process, starting out with
Adobe Lightroom. Join me in the next lesson, as we jump into Adobe
Lightroom and some of the key features when it comes to
image editing. Next lesson.
20. Editing in Lightroom: Adobe Lightroom is my personal
favorite editing software, perfect for color
grading as well as cataloging all of your photos. You can access Lightroom using an Adobe subscription which
allows discounts for students but if you don't
want to purchase a subscription the
editing options that Lightroom has are common options across loads of different
editing software. This tutorial will give
you a good idea of what each of the options do and
how they affect an image. Lightroom also offers
a free mobile app which we'll be getting
into a little bit more in another lesson available
for both mobiles and tablets which don't require a subscription or any payment, they offer a lot of
the same editing capabilities as the desktop bar. In this lesson I'll be using the Adobe Lightroom classic
version on my Macbook. I think this is a
2015 but you can use it on Mac or Windows. Let's dive into some of
my favorite options. Welcome to Adobe Lightroom, this is our workspace
for this lesson. Adobe Lightroom is essentially a photo editing and
cataloging tool, so you can import your
photos into Lightroom, you can edit your
photos into Lightroom, and then you can export
them from Lightroom. In this lesson we're
going to be jumping into some of my favorite
tools or some of the most powerful tools
that Lightroom has to offer and we're going to be
starting with temperature. Temperature is a really simple
and really effective tool that you can use to really
transform your image. To show you an example
of this I have this image that I shot
a few months back and we're going to
just edit it using just temperature and see
what that does to the image. As you can see over here
on the right-hand side, you can see the temperature
and the tint sliders. Just a preface we are
in the Develop tab, so if you are in your
Library tab you need to switch to your Develop tab to be able to edit your images. But back to the sliders. This section here is
what we call white balance and that essentially changes the temperature and tint of the colors
in your image. As you can see, Lightroom
has made it really easy for you to identify what
these tools actually do, so you can see here
temperature will make your image either
warmer going towards a yellow tone or
colder going towards more blue hues and then tint on the other hand control your
magenta like your pinks, and purples, and your greens. We're just going to play around with the temperature bit to start with and see what that
really does to an image. Straightaway, this image
is quite a cold image that is based on the
lighting in image. As we change the temperature you can see that not only does the temperature change but actually how bright the
image also changes. So you can see as I go warmer it loses a little bit
of its luminance, a little bit of its brightness. But as I go colder, it introduces a lot more
brightness into the image. Again, we can do
the same on tint. If you go towards
green it's going to make that image a
little bit darker, but as we go towards pink
it's brightening it up. The idea here is to really find a nice balance not only on color but on how bright
you want your image to be. For me I'm going to go for something in the mid tones here. If you don't actually like
the blue colors that's where other tools in Lightroom are
going to come into play, so we're going to stick on this right-hand side and let
me just close with these. We're going to go
into this section here which is your
color grading section. Color grading
essentially allows you to add colors into
your mid tones, your shadows, and
your highlights which will change the balance
of how the colors look. You have these little
dials and this will determine what
color you're adding to what part of your image. If we start with highlights, you see I can add a really vibrant green into the
highlights of the image. By going towards the center it's going to double
that green down, it's still going to
be there but it's not going to be saturated. When it comes to color
grading I usually like to use complimentary
colors or contrasting colors. So this means
choosing colors that are opposite each other
on your color wheel. Since we're putting
in this greeny yellow into the highlights, let's go into your shadows
and see what we can do with this roughly opposite and how that changes the image. You'll see that most of this
image is actually shadows. As I go around, whatever I'm adding
to the shadows is really affecting
most of this image. I'm going to add something roughly around here in
the purple section. It's opposite our
green and yellow, so it is complimentary, it does work well
with this tone here, but it just adds a
little bit more contrast away from the main
blue of the image. When we come up into
the mid tones, again, I'm going to want to go in
with something similar to the highlights just to create a little bit more of contrast. You can also change
the brightness here of these sections using
these sliders. If we have a look at it without the highlights,
without the shadows, and without the mid tones, we've added a little
bit of contrast here by adding some brighter colors
into the highlights, darker colors into the shadows. Then if we're not 100 percent certain with it we
can come back into our basics and play around
again with our temperature. For me, I'm quite happy with this all blue image but another
way that you could change this about is by opening
up your HSL section. HSL refers to hue, saturation, and luminance. Hue is the color, think of hue as the
color of your image. You have red here in a slider from a pinky red
to an orangey red. This is going to change all
the reds in your image, there's not many
reds to show you. Let's go further down into a blue because we have a
lot of blues in this image. If I wanted to make it more purple I would drag it this way. If I wanted to make it
greener you drag it that way. Your saturation is how
saturated those hues are, so we can see if
I drag this down it's going to take out the
saturation of the blue, if I drag it up it's
going to increase it. Your luminance is your
brightness or your lightness, so bringing this up is
going to lighten my blues, bringing it down is
going to darken them. You can play around with the HSL sliders to really
get the color that you want but let's jump
into another image to see how we would
use the similar tools. This image here is pretty dark, so we're going to start with your temperature moving that about and seeing
where we want it. I'm going to make it a
little bit warmer this time. Add a little bit of pink and then I'm also going to increase the exposure just to
brighten the image up. These sections
here, your shadows, your highlights
also will help you change your exposure and create different
levels of contrast. Let's jump into
our split toning, our color grading again. If we add a green into the mid tones and maybe
something a little bit similar, let's go for a blue or green in those highlights and then in the shadows put something in that's a little bit opposite, maybe like a pink or a red. Now we go. We can
again jump into this HSL sliders if you want to tweak the
colors even more. Another thing you can do is
if you don't really know what color you're
trying to identify is you can click
this little button, you click it and then you come over to whatever color you want. Let's say we want
this color here, click and then drag up
and down and it will drag whatever color that
Lightroom detects that is. Again, you could do it
down here in the blues. You see that it's
changing the blue and the purple because that's the hues that is detecting within the color
that we've selected. Then let's open up
a larger scene. Again, you can really see how your temperature
is going to change, the mood, and the
vibe of an image. It's all about playing around
and experimenting really and finding a way that
you enjoy using colors. Something you can
do in Lightroom as well is create masks and masks essentially select certain
parts of your image and only affect the parts selected within the
mask for your edits. There's different ways in
which you can do this, you can either draw
your mask on with the brush tool or these
ones are my favorite, you could either use the linear gradient or
the radial gradient. So for example if I
wanted to brighten this section of the
image up I'd use a linear gradient
and I would just create a mask that affects that. You can see that this
red section is the mask, I can change the
color of the overlay, if I want to say
maybe something, I don't know like a really bright yellow,
so you can see. This is what the mask.
You can also turn overlay off so you can see what the
image actually looks like. Then what it's going
to do is it's going to create this little section here which allows you to make
adjustments just to this mask. I can use the
Exposure tool and you can see that it's not
affecting all of this image, it's only affecting this
section within the mask. Another thing that we can do in Lightroom is we can
copy and paste edits. Let's say the lighting setup
was exactly the same between this photo and
another photo and I wanted to take the
edits that I've taken in this photo
and put them onto another photo for speed
or ease or consistency, you can copy and
paste your edits. Down here you can click copy
or Command C if you're using a Mac or Control C if
you're using Windows. You can select all the different things that you want to copy, so you could even copy your mask, you
could copy your crop. For me I don't tend
to do that because the compositions of different
images are different, so the things that I tend to copy along are your basic staff, your colors, and press copy and then we can go
into another image. This image actually isn't
the same lighting setup but let's pretend it is and you can paste and you can see
that now that edit has come into this image. In my opinion these are some of the most powerful
tools in Lightroom. You have your HSL color sliders, you have your color
grading section, then your white balance
with the bits of that in the basic section on Lightroom that affects
your exposure, and then of course you
have your masking. These are all
really great tools, really powerful tools
that all can help you a lot when it comes to
editing your photos. Lightroom is a great tool
for editing and organizing your life music photography
and I definitely recommend using it if you're looking to go professional with your
music photography. For those of you who
are more interested in casual photography,
casual good go ahead, and just taking photos
at live music events, join me in the next
lesson where we'll be editing on my iPhone using a mixture of two different
free apps that you can use.
21. Editing on your Phone: In this lesson we're going to be looking at two
different apps that you can use on your
phone to edit photos. Firstly, let's get started
with VSCO or VSCO. VSCO is a firm favorite of mine. It's an app that
not only offers you multiple presets to choose
from but it also allows you an array of different
tools to be able to alter your photos from hue saturation and luminance sliders to split tone controls. Let's take a look at some of
the most common tools within VSCO or VSCO and how to use them, starting
with exposure. Let's jump into VSCO. Let's open up this photo that I took quite a long time ago. I can't remember what
phone this was on, I think an iPhone 7. We're just going to start
by adjusting the crop. Let's go for a one-by-one
just to make things simple. The first thing we're
going to do is we're going to open up
the exposure tab. An exposure essentially makes
an image darker or lighter. Next up you can move
along to your contrast. These tools are already
similar to what you have in Adobe Lightroom for desktop. You also have H and S under your tone section here that affects your highlights
in your image. You can't really see in this
one because there's not many highlights to edit and the shadows which you can see a little bit more makes them
either darker or lighter. You also have your
white balance tools. Not only do you have
that, you have a tool called vignetting
which essentially makes it darker around
the edges of your image. That helps to create some
focal point in the image. Next up, let's move
into your split toning which is essentially your color grading
section from Lightroom. You can add different
colors into the shadows and into
your highlights. Alongside split toning you
also have your HSL sliders, so similar to when you're
working in lightroom. VSCO also has a ton of
different presets that you can use if you don't fancy
editing things from scratch. Next up, let's dive into the mobile app of Adobe
Lightroom mobile. The tools in lightroom mobile
are similar to VSCO and also very similar to
light room for desktop. They offer more advanced
features than VSCO similar to the desktop
version of Adobe Lightroom, including masking
and color grading. Let's look at a few of my
favorites within the app. As you can see down here you have a lot of the same tools as VSCO and as Adobe
Lightroom for desktop. You have this cool tool which
is called Auto and that essentially predicts how
the image should be edited. You can however
overwrite this though. We're going to head
into the light section which will open up our exposure contrast
and highlights, etc. You can see that
things have already been edited thanks
to the auto setting. But as I said, you can
overwrite these settings. I prefer to have
a little bit more contrast so I'm going to bring some of the darkness
back into those shadows. You also have something called
a Tone Curve Tool which you also have in Adobe
Lightroom for desktop, is a little bit
more advanced tool but essentially what it
allows you to do is it allows you to put points into a curve and affect different
parts of the image. For example, this top
right corner will affect the highlights
in your image, the bottom-right will
affect the shadows. You can also add different
colors within those shadows, so within the red tone curve, you can add either red into
the highlights or blue or the same into the shadows, and the same for
green and also blue. This is a bit more
advanced tool and it does take a little
bit getting used to, so do play around with that. Next up we have your color
section and color will include your white balance and it will
also include your grading. Grading will be what we did
in VSCO in your split toning and what we did in
Adobe Lightroom desktop with your color grading. So you can add a color
to your shadows, your mid tones, and
your highlights. When you come into mix, this will introduce
your HSL sliders, so the same as in other software
we've been using and of course you can also crop from
different aspect ratios, straighten, etc, and
zoom in this app. In the next lesson we're
going to be looking at a really common editing
technique used in live music photography and
jumping into Adobe Photoshop.
22. Double Exposures in Photoshop: In this lesson,
we're going to be diving into Adobe Photoshop. We're going to be
talking about a really common editing
technique that is used a lot in live music
photography, double exposures. Double exposures
originated back to when film photography
was the norm. It really consisted of two or more photos being
exposed onto the same frame. Nowadays, this technique
is commonly replicated in a digital form using software
like Adobe Photoshop, where photographers
can layer one image or multiple images over
the top of another. Let's take a look
at how this can be achieved layering two
photos that I took at repercussion in 2022
at warehouse project. When it comes to creating
a double exposure, what you want to look for is
images that are contrasting. So we're going to be overlaying this image and this image. Firstly, I'm just going
to copy this image and create a new canvas
to work from. So we're going to
paste that image in. And then I'm want to come in
and take this crowd image, which is quite
contrasting image, and also add it in. Next up, I'm going to
just make sure that both images are the same size. So we're just going
to resize this image. To resize really quickly, I press Command T. You could
use Control T if you're using Windows and that will
open up this Resize box. Next, I'm just going to lower
the opacity of this image. I'm going to lock the
layer at the bottom. I'm locking that layer
so that I'm not moving the bottom layer when I'm experimenting with
the composition. Then on Layer 1, I'm going to be able
to drag this layer. What I want do is just make sure that this image and this image are lined up properly and
that they look good together. So I'm just going to again
transform it and play around. Then I'm going to set this
back to 100%, lock that layer, drag Layer 1 above Layer 2, unlock it and reduce the opacity so that I can
line this layer up next. So now I have my two images. What I want do is experiment
with layer styles. So I'm going to unlock
both images, both layers. Click the top layer, increase the opacity,
and then click into the section
where it says Normal. This will give me a ton
of different options, and I'm just going
to scroll through and see which looks better. So I think I want to go with
something like Lighten, but I want this silhouette to be the main focal point
rather than this focal point. Because of that, I'm
going to select it back to normal and drag
that to the bottom layer. Then I'm going to do
the same on this one. I'm going to select this to Lighten or Screen or
something like that. Then I can drag it so that the shadows are behind the silhouette so you
can still see it. Alternatively,
what I could do is have this as my top layer. Work so that the shadows of the bottom layer
eliminate my silhouette. I think in terms of
this composition, this will work better having the crowd closer to
the main silhouette. Creating double
exposures is really just playing around with the
different layer styles, seeing what you like, the look of best, and experimenting
with composition. But it's a really fun
and simple way to create interesting compositions out of images you've already taken. You can, of course, then come into your brightness
or something like that and edit a photo more to
really enhance the technique. These tools are just going to be really similar
to everything that we've played around with
in Lightroom and VSCO. They're just in different
places, essentially. When you're happy
with your photo, you can just save your photo. When you're looking
for photos to overlay, I like to look for contrast. So you have a big image of your artist and then an image
where the crowd is small, or you have contrast in lighting between the
darkness and the light, the light in the darkness. Anything with contrast
will help you to create a really interesting
double exposure. You can even perfect a double
exposure by using things like the Subtract or
the Erase functions. So click your Erase
brush and then you can take out any of the textures or things that don't
really serve the image. Bring me in the next lesson
where we're going to be staying in Adobe
Photoshop and we're going to be looking
at how you can create an Instagram Carousel when it comes to the delivery
of your photos.
23. Creating Instagram Carousels in Photoshop: Creating Instagram
carousels can be a really interesting way to display your photos
within your portfolio. It's great for live music
because it allows you to not only include more than 10
photos within the carousel, but also a mixture of
landscape and portrait images. In this lesson,
we're going to be looking at how we can create a really simple Instagram
carousel using Adobe Photoshop. To create an Instagram carousel, the first thing we're going
to do is open up a new file, a new canvas in Adobe Photoshop. The dimensions for a
normal portrait image in Instagram is 1,080
pixels by 1,350 pixels. However, we want to have 10
images within our carousel. The height isn't
going to increase, but the width is because
we're going to have 10 photos within the carousel. What you're going to do
is you're going to simply put an extra zero on to the end of your width
and click "Create". This now has created us a
really long canvas that is going to be able to
fit in 10 frames appropriate for Instagram. The next thing to do to set up your canvas is to head over to your View panel and click
on "New Guide Layout". What this will do is
essentially create columns within your canvas that will help you to understand where each new frame
begins and ends. Since we're having 10 frames, we're going to put
10 in on columns. We're going to
leave the width and the gutter clear and also keep rows unchecked.
Then click "Okay". Next up, it's time to add the actual images to the canvas. How I like to do this
is open up my finder, find the shape that
I want to use. For this example,
I'm going to be using photos from the
Arthi Hard party. Then I will usually just make these images a
little bit bigger so I can properly see them and choose
a selection of my favorites. Don't worry about there
being exactly 10 images to choose from to start with, that's not really important and we can narrow that
down later on. You can select a
mixture of landscape and also portrait,
that doesn't matter. That is the brilliance
of using carousels. I have 11 items selected, I'm going to drag them
all into my canvas. You replace them with the Enter on your keypad or with
this little tick here. Once all of the
images are placed, you can start moving them about and deciding what order
they're going to be in. For me, I personally know that
I really like this photo, it's likely going to be the one that I want at the
beginning of the post. This is just really
playing around with how you want the images to look. For me, I like to put my favorite images
towards the beginning. You can also include
landscape images, so I could just
drag this out over the two images and people will be able
to swipe to see both. This image is probably not
the best to do that for, so I'm going to keep that
as a portrait image, compose it as a portrait image. I'm going to remove this image because I've already got a photo of him in here and I don't want too many of the same people. Then what I'm going to
do is I'm actually going to remove that image, recompose that image, and then jump back into my finder to find a better landscape image that I want to use
for the final post. What I'm going to do is
I'm going to opt for using this crowd photo and I'm going to place
that so that it covers both of the last frames. I could have this as
two separate frames, but what I'm going
to do instead is I'm going to add other photos within these images so that
I can fit in even more. I'm on a hunt now for
two more and what I'm looking for here is
contrast in colors. Either something that
is pink to contrast the blue or something that is
maybe black and white. Once I've got my
final two images, I'm going to make sure that
these are the right height. I'm going to click
one with the Shift button held down and then click the second to select both of them
at the same time, then Command T to transform. If you're using Windows, you can click
"Control T" instead. Then I'm going to resize
these so that they will fit in the
middle of this image, maybe a bit thicker than that. Then I'm going to separate them. Personally for me to be able
to create them dead center, I will create a
little box that is the same dimensions
as that frame. I will move that behind the
layer so I can see the image. Select that layer and my photo, and then use the align tools. Then I'm just going to
drag this box over to the second image, drag it down below again, and then do the same thing. Then I can delete the white box. I actually want to
switch these images over just because they're
facing the wrong way, I want them to face inwards. We're just going
to do that again. We move them across, then delete that one layer. Now I have my carousel, it's time to export it. Next up, what I'm going
to click is I'm going to find the Slice
tool in Photoshop, which is usually just
behind the Crop tool. If you can see the Crop tool here and there's a
little triangle, press and hold that triangle and it will open
up the Slice tool. Then what you want to click
is "Slice from Guides". This is going to
create separate frames where your guides are. Next up, I'm going
to click "Export", "Save for Web" and
then I'm ready to save it as the Arthi
Hard carousel, and that is going to
export for me my carousel. Once I come back into
the Arthi Hard folder, they'll be a new one
that says images. When I click that, I
can see all my images, I'm going to select them, and I'm going to send
that to my phone. You can do this, however
is easiest for you, emailing, drop-boxing, etc. For me, I'm going to
add Drop to my phone. Now that I have the
photos on my phone, I can open up my Instagram
and then select the photos. In the next lesson,
we're going to be staying on the
topic of delivery, but talking a little bit more about how you actually
get your photos from yourself to your client or whoever is you're
delivering the photos to.
24. Delivering Your Photos: So you've successfully shot
and edited your photos. How would you now go about delivering those
photos to your client? In this lesson, we're
going to be covering the best methods of transferring your photos to your client. Alongside my top tips for labeling and naming your photos. Let's get started with naming
your files for delivery. So naming your files
can be done within the export or saving process, or you can rename them once
you've already exported them. But clearly, naming your files is really important
for two reasons. One of which is archiving, making sure that you
and your client can find those photos in the future by searching for
the artist's name or the date or
something like that. But also making sure that
you are accredited properly. I recommend naming your
files with a structure such as artist's name
underscore your name, underscore, number of
sequence of the photos. Once you've appropriately
named your files, it is time to send
them off for delivery. In the modern world, there are so many
different ways in which you can transfer files
to your clients. My personal favorites
are utilizing cloud storage and file transferring softwares such as Google Drive, Dropbox
or WeTransfer. All three of those services, offer free versions
of their platforms, which is great, no
matter what level you're at in terms of
photographing gates. I also find all three really useful if you don't have
access to something like Apple's AirDrop to actually get the photos from your
laptop to your own phone, to post on Instagram,
or wherever. In the next lesson,
we're going to be wrapping up today's class and I'm going to be leaving you
with a few of my final tips.
25. Final Thoughts: We've come to the
end of the class. First off, I want to thank
you for sticking with me and staying all the way to
the end of the process. Throughout this class
you've successfully mastered the pre-production, shooting process, and post-production of
shooting a live gig. From understanding how to
secure your photo pass, to learning what to
look for in a shot, and how to use various
different tools to enhance the shot in
your editing process. I hope that you
found this class not only interesting but
also feel as though it's prepared you and given
you the confidence to get out there and
shoot your first gig. Before I sign off I want to leave you with a
few final points. Preparation as with
anything is always key. In a genre that can
be so unpredictable, focus on controlling
the things that you can control and everything else
should slot into place. Have fun with it,
photographing live music is one of the best aspects
of being a photographer. It's one of the most
enjoyable jobs out there, so make sure that you are
enjoying the whole process. Feel free to reach
out to me at any time whether through Skillshare
or other social media. If you need any
help with anything, any pointers when it comes to live music photography or
any other photography. I have other classes here
on Skillshare that cover a range of different things from color theory to
shooting portraits. If that's of any interest to you then head over
and check those out. I can't wait to see what you
create from today's class. Feel free to share it in the project gallery
so I can take a look. But thanks so much for watching and good luck with
shooting your first show.
 Sophia Carey, Photographer