Transcripts
1. Introduction: Photography is the art
of capturing light. But what happens when you're lighting conditions
aren't ideal? You can't always wait for the perfect moment
to capture a photo, and you might not always have access to professional
lighting equipment. But with a solid
understanding of the manual settings
of your camera, you're able to adapt to
any lighting condition. Shooting winter portraits is a great way to enhance
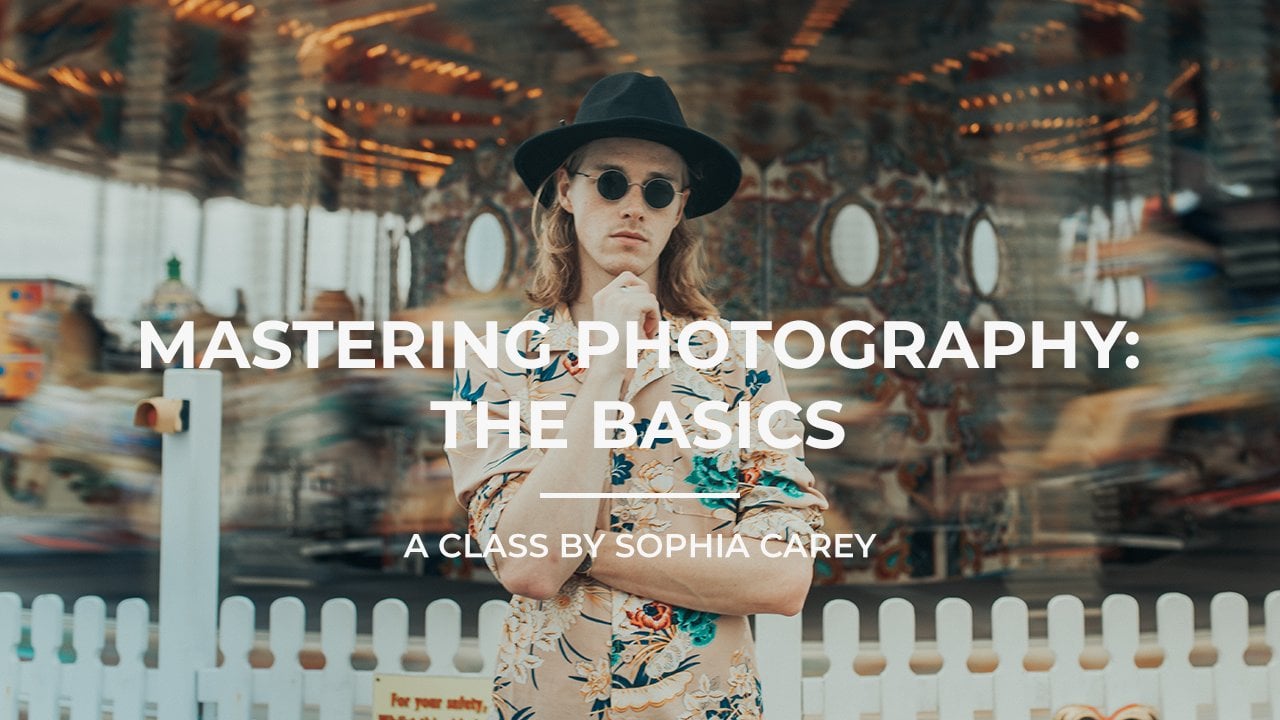
your photography skills. Hi, I'm Sophia and I am a fashion photographer
in the UK. I have worked with
clients across fashion, across music and more commercial genres from
clients such as Leon Pinot, Reebok, to Panasonic, to name just but a few. My work is deeply rooted within environmental
portrait shot. Mostly preferring to shoot
my subjects outside of the studio due to both the diversity
of working location, and also the element of problem-solving
that it can entail. Taking portraits in and
environmental setting gives you as the photographer added
elements to play around with. Often creating more interesting and
creative compositions. However, many locations
are outdoors, they're in public spaces. We can't always adjust those surroundings to
make our job easier. Instead, we have to adjust the things that we can control, our camera settings, our work flow, and our use of the available light and
environment around us. In this class, we're
going to be exploring the intricacies of shooting
portraits in the winter. From learning about
the appropriate camera settings for low light, rain and snow, to
understanding how to create a workflow that works
best in the winter months. This class is perfect
for beginners. If you are new to photography, you don't really understand how manual mode works
or even if you are a more seasoned photographer
that just hasn't had the opportunity to shoot much outdoors or in
the winter time, then this class is for you. Equally if you're not
a photographer at all, but you just want to get some great photos
of your friends, your family in the winter
for the holiday season, then you're definitely
also be able to use this class to help you out. For your class project,
you're going to create a striking winter
wonderland portrait regardless of the outdoor
challenges that you might face. By the end of this class, you'll not only have a
better understanding of the technical
elements of photography, but you'll also be able
to design your workflow based on the lighting
and weather conditions, as well as deal with common
issues that might arise when it comes to editing
your winter portraits. Mastering low-light
photography and photography in difficult weather conditions
is bound to make you a better and more comfortable photographer regardless
of the situation that you find yourself in. Let's grab our cameras
and get started.
2. Class Project: Thank you guys so
much for taking the time to enroll
in this class. I can't wait to get stuck
in and help you sort out those little intricacies that come with sheeting
in the winter time. For the class projects, I'm asking you guys
to take a photo, a portrait,
photographed outdoors using just your
available lights. Bonus points if you can shoot your portrait using manual mode. The portrait can be utilizing the harshness of a winter sun, it can be in a heavy
downpour rain, it could be if you're lucky enough to have snow
this winter then in the winter wonderland that you might have
in your back garden. The exact environment, the exact conditions that you
shoot the portrait in don't matter too much in this project because the whole idea is
about being able to adapt and overcome any challenges
that you're faced with when you step
outside and you see what kind of lighting
or weather conditions you are dealing
with on that day. Keep the class project
in mind throughout the class and then
once you're ready to, you can submit the class
projects in our little section. But without saying much more,
let's get straight into the class and join me
in the next lesson where we're going
to be talking about the actual challenges of
shooting in the winter time.
3. Identifying the Challenges of Winter Light & Weather: Natural light, regardless of the season, can be challenging. It's constantly
challenging and you're constantly having to adapt. It's one of the trials, but also the thrills
of shooting in an environment that you
can't completely control. In this lesson,
we're going to be identifying what some of
those issues that you might run into when shooting
in the winter time are, from the low winter sun to the sun only appearing
for 1-2 hours. The challenge is
that winter lights pose can be challenging for a variety of
different reasons. People often underestimate
how much light they have to work with
and for how long, and also don't take
into consideration the impact that the weather can cause during
the winter months. To be fully prepared for any circumstance that you are posed with
during the winter, some of the things that
you might want to consider are cold weather to start with. Whilst this one may be a given, the cold weather can cause you
all sorts of problems from uncomfortable working
conditions for you and your model to
malfunctioning equipment. We've all heard of
batteries that just stop working during
winter months. This is definitely something
you want to consider. We're going to go straight
in with a fast step, and that is over-prepare with the equipment
that you're bringing. If you can bring
extra batteries, if you can bring extra SD cards, if you can even bring
an extra camera, then that is going to set you in good stead just in
case things get wet, things get cold, or any other eventualities
that might happen because of
the wintertime. Cold weather can
also affect things such as the actual
aesthetics of your photo. You don't want your
model to look too cold. Sometimes skin color can
change and go more pink or blue depending on their
skin tone in cold weathers. You've also got things like
chapped lips, dry skin, all of those things
are things you want to try to avoid as
you get into a shoot. Throughout this class,
we will be talking about ways that we can avoid some
of those things happening. Of course, alongside
cold weather, especially if you live
in the UK like I do, we have wet weather. Similarly, to cold weather, this can affect all sorts of things from your model
to your equipment. You want to avoid your
equipment getting wet, you want to avoid your
model getting wet, you need to also
consider your locations, is there space to go
undercover if needs be? You need to make sure that
there's a backup plan, if the weather is really wet
and it creates a muddy path or it's cold and wet
and creates ice, then maybe you can't use that location because
it's a health hazard. Well, because you don't want your models get covered in mud. You need to have backup options. Thirdly, one of
the biggest things about shooting in winter, one of the biggest
challenges shooting in winter poses is the
unpredictable lighting. In the winter, at
least in the UK, it gets dark quickly. For me right now it's 5:00 PM, it's completely
pitch black outside. In the winter in the UK, the sun sets as early
as 3:30 some nights. Unpredictable lighting
doesn't just start and end with it
getting dark earlier. Even if you're already expecting
it to get dark at 3:00, you might go out at midday, be expecting this bright
sunshine just to be greeted with a really overcast day and no lights play
around with it all. In this class we will
be talking about how to deal with situations
like that when you are dealing with overcast light, when the sun just can't
break through the clouds. You're dealing with a lack of light even before
the sun has set. Understanding how to shoot in low light and how to adapt
when the lighting isn't perfect is essential in becoming a well-rounded and
adaptable photographer. Over the next few lessons,
we're going to be talking about how to adapt to these challenges
if they do arise. Join me in the next lesson where we're going
to be talking about your camera and your
choices of a lens. [MUSIC]
4. Your Camera & Lens: When it comes to
cameras and lenses, I am a firm believer
that the best camera that you could
possibly use is the one that you have
available to you. That being said, in this lesson, we're going to be talking about the optimal equipment,
the optimal cameras, and the optimal lenses when it comes to shooting portraits
in the winter time. First up, let's
talk camera bodies. Throughout this class, we're
going to be discussing how you can shoot
in manual mode. That is going to help us deal with the difficult lighting or weather conditions that we outlined in the previous lesson. In order to use
manual mode and take advantage of the manual
settings of a camera, you're going to need
one that can be switched into manual mode. Most SLRs or DSLRs do have a setting to put your
camera into manual and you can even download apps on
your phone that override your phone settings and allow you to shoot in
manual on your phone. To be honest, having a camera
that shoots in manual is the most important aspect
here when we're talking about it in the
context of this class. But if you really want
to push the boat out and investing in a mirrorless
camera is a great investment, especially if you're
going to be shooting in low light situations often. The reason for that is that mirrorless cameras
generally have a larger sensor and those sensors will allow for better performance
when you have low light. Moving onto lenses, one of the most important
things when it comes to picking your lens
is opting for a fast lens. A fast lens refers to the minimum f-stop that a lens have. We're going to be
explaining a lot more about f-stop in the next lesson, but for the purpose of just
searching for your lenses, the f-stop is generally
the number that the lens has on it on the name of
the lens and it usually reads F/S before or
after the number. For example, 35-millimeter
1.4 F/S has an f-stop of 1.4. That lens is faster than a lens that has maybe
an f-stop of 2.8. If a lens has an f-stop
of a smaller number, that means it's a faster lens. Join me in the next lesson where I'm going to be
talking a little bit more about f-stop and a bit
more about why having a small f-stop number will help you out in
low light situations.
5. Manual Settings: Exposure Triangle: In this lesson, we're
going to be exploring a concept called the
exposure triangle. As simply put, the
exposure triangle consists of three elements
that are going to help you find the correct
exposure within your image. An exposure is how evenly lit
or exposed your image is. If an image is too dark, we say it's underexposed. If an image is too bright, we say it's overexposed. If an image is just right, then we say it's
correctly exposed. When we're talking about
exposure, we deal with it in metrics of stops so maybe one stop overexposed
or one-stop underexposed. If you are shooting
on a digital camera, you should have a
little exposure line through your viewfinder that indicates whether or not your image is correctly
exposed or not. Of course not everything
has to be so technical, you can't just expose by eye, especially with
digital photography if it looks well exposed, then it probably is,
and you're good to go. You might be wondering why we shoot in manual when nowadays in most cameras have the opportunity to
shoot in automatic, which automatically
set your exposure, your shutter speed, your ISO, and your aperture for you. Shooting in manual
really does give you a lot more control
over your image. However you imagine
it in your head, you're able to capture an image in that way
because you have a full and better understanding of your camera and
the way it works. Similarly, if you
can shoot manual, you can shoot anything so whatever is thrown at you
in whichever situation, whatever job, you can use
your understanding of the exposure triangle
and how to shoot manual to solve these problems. That is especially important
when we are dealing with situations such as
winter and low light. As I briefly mentioned before, the exposure triangle
consists of three elements. Your ISO, your shutter
speed, and your aperture. Starting with shutter speed, shutter speed refers to the length of time that
your shutter is open for. We work in metrics of seconds
and a fractions of seconds. For example, if your shutter
speed is 1/400 or 1/400th, that means that your
shatter will be open for 1/400 of a second while
you're taking the image. If however your shutter
speed reads one, then that means one second so your shutter will be
open for one second. When we say a faster shutter
speed, it freezes motion. If you're working in
sport, for example, and you've got someone
running past you, you don't want
your subject to be blurry as they move
past you so you set a faster shutter speed which helps to freeze
that motion in the frame. But because the shutter isn't open for very long as light is entering the camera and exposing your image
because of this, your image is going
to be darker. On the other hand, when you
have a slower shutter speed, obviously you're going to
be capturing that motion so if you wanted to do something like and
we all get exposure, which essentially
refers to having your shutter open for a
longer period of time, then you're going to set your shutter speed to a longer time, such as one second and any motion or movement in
your frame is going to blur. Because of this, you're
going to want to consider using a tripod so you don't have the camera shake of holding it handheld and in some cases, if you're doing a
really long exposure, you might want to
get a cable release, which essentially pumps air into the shutter and
triggers it that way. ISO historically refers to
the sensitivity of your film. When we are talking about
digital cameras, however, we are referring to the
sensitivity of your sensor. With ISO, we work with whole numbers so it's
definitely a lot easier to grasp than when we're using fractions and decimals
and things like that, we're using whole numbers, usually in increments
of about 100. When it comes to ISO,
the lower the number, the less sensitive to light
the sensor or the film is. We use lower numbers when there is plenty of
light and we don't need the sensor or the
film to be as sensitive, and we use higher
numbers when we need that extra bit
of sensitivity. The drawback of using
those higher numbers in increasing the sensitivity
is that you get more grain. How far you can
push your camera, which whatever ISO you can
put your camera to does depend on the model of camera and when you're
shooting on film, you'll get a film that usually
has a pre-determined ISO. Simply put, a higher ISO
means more sensitivity, more light, but more grain. A lower ISO means
less sensitivity, less light and less grain. The third and final element of the exposure triangle
is aperture. Aperture refers to the little
hole that's in your lens, and it opens and shuts to change how much light
is entering the camera. We work in decimals when
it comes to aperture, and we call those f-stops. You might have heard f-stop used when you're
buying a camera lens. Camera lenses are
generally named with their focal length followed
by the widest aperture. For example, the lens
I'm using today is a 35 millimeter F1.4 lens. That means that the
focal length is 35 millimeters and the
widest aperture is 1.4. When it comes to aperture
and the numbers, it can feel as though it's working in the opposite way
to how things like ISO work. That is because the
smaller the number means the wider the aperture or the wider the
hole in your lens. What this does is it lets
more light into image, but it also decreases
the depth of field. Essentially depth of field
controls what is in focus. If you have a smaller depth of field then less will
be in focus and if you have a wider depth of field
the more will be in focus. For example, if I take a
portrait with a lower number, so a wide aperture, that would mean that the
depth of field will be shallower and the background will probably not be in focus. However, if I wanted
the background to be in focus as
well as the object, I'd increase the number so that the aperture gets narrower and so does the depth of field. But because I've done this, obviously the hole has gone
a bit smaller and it's letting less light in so your image is going
to be darker. This smaller the
f-stop, the more light, but the less in focus. The larger the number, the less light, but
the more in focus. As we can see, ISO, shutter speed and
aperture will have their individual pros
and cons, I guess. Because they each have
their own drawbacks, it's important to use them in unison and use them
so that they balance each other to create the
perfect exposure whilst also meeting the needs of use of photography and the image
that you're trying to create. If for example, we were taking a long exposure in the
middle of the day, so there's plenty of light already and we open
the shutter for, let's say a second, obviously a lot of
light is going to be flooding into the camera
within that second, but to capture the
long exposure, we can't adjust the shutter
speed and make it any faster. This is where we're going
to be needing to adjust the ISO and the aperture
to counteract that. On the other hand, if you
want to take a portrait and you needed to reduce the grain in the image
as much as possible, so you are going to use
the lowest ISO you could, then you're going to have to
use the shutter speed and the aperture to let more
light into the camera. But essentially it's
all a balancing that. You just want to play around and try and find
a good midpoint. At this point in the class, I would recommend
taking a little bit of a break from watching, head out with your
camera and experiment. Take a few photos with different settings
and then you can hopefully see how those
different settings affect the image and affect
the results that you get in. Before we finish this lesson, I will put up some photos on screen with the
settings next to them, which will hopefully
illustrate to you what those three elements
actually do to an image. When you join me in
the next lesson, we're going to be talking about working with your model and your whole workflow
when it comes to shooting outdoors in the natural light
during winter time. [MUSIC]
6. Your Model & Workflow: When it comes to
portray photography, understanding how to use
your camera and all of those technical
aspects of photograph. Actually, the other half
consists of working with people and organizing the
logistics of your shoot. So in this lesson, we're going to be
talking about working with your model and designing a workflow that are
going to help you tackle some of
those challenges we outlined in an earlier lesson. In the winter, it's
arguable that designing a solid workflow for the day of the shoot is more important than any
other time of the year. If you can get your
workflow right, then you can always
guarantee that your shoot is going to run a
lot more smoothly. So what are some of the
things that we can do to our workflow to assist our
shoots in the wintertime? One of my best tips for
shooting in the winter is to shoot earlier on in the day because it
gets dark earlier on, at least here in
the UK, you have less light to work with
as the day goes on. To give yourself the best
chance and the easiest time, shoot earlier on in the day. Then you have access to more available light
during your shoot. Secondly, you're going to
want to consider using locations that are undercover
into the end of your shoot. This is mostly for two
different reasons. Maybe most importantly, if
it's raining or it's snowing, then you don't want to use
the locations without cover first because your model
is going to get down. They're going to get soaking
wet before you even go into the full swing
of the shoot. No, I mean, this is going to impact
how they're going to look visually for the
rest of the shoot. But it's also probably
going to make them feel very uncomfortable,
really cold. You don't want them to stock an ill or
anything like that. But aside from the bad weather, another reason we want to avoid shooting undercover right
at the end of the shoot, is because shooting undercover often restricts the
amount of light you have. So you can imagine
if I'm undercover, I've not got the light
coming from above me. Depending on the
location you're using, it might also be blocking
light from other angles. Because of this, you're
going to want to shoot undercover when you have
the most available light. If you already don't have a
lot of light and then you put your model undercover and you restrict your
light even more, then you're going to
have a lot more of a difficult time using
what little light is left. When it comes to working
with your model, there are also things
that you might want to consider when it comes
to their comfort. For example, it's often nice
to bring your model towels, warm clothes, hand warmers, anything that's going to
increase their comfort, especially if it's cold or wet. Aside from the models comfort, if your model is cold,
it's also going to have a visual effect
on the photos. Only were they likely
look uncomfortable. But things like skin tone can be really
affected by the cold. So you're going to
want to make sure that model's hands or any extremities are really as warm as they possibly can be, because these are the
first things that will change you as it gets colder. You also want to consider what kind of clothing
they're wearing. For example, if I was wearing a light gray t-shirt and it starts to rain really heavily, you're going to see all of
that rain on my t-shirt. Whereas, if I'm already
wearing a dark color like black and then the rain falls
onto a black top or jumper, then it's not going to
be as evident as if your model was wearing
a lighter color. Starting in that case is a really important
element to your workflow. To recap, to make the most
out of your available light, make sure you're starting your shoot earlier
on in the day. Make sure that you are
also saving locations that aren't undercover until
the end of the shoot. Especially if you're
working with bad weather. Of course, it's really
optimal to make sure that your models are warm and dry. If you can bring hot drinks, if you can bring hand warmers, if you can bring towels,
changes of outfits, all of those sort of things are going to not only
make the shoot better, but going to make
your relationship with your model a
lot stronger because you're not putting them in a really uncomfortable
situation. In the next lesson, we're
going to be talking about the times of day and how that corresponds
with the type of light.
7. Types of Light & Times of the Day: In the last lesson, we spoke about your workflow, when to do your shoot, when to best utilize the lights. But in this lesson, I want to talk a little
bit more in detail about the types of light that
you get on a typical day and when they are most likely to appear in the
timescale of a day. Firstly, we're
going to talk about something called direct light. Direct light usually happens when there aren't many
clouds in the sky, it's quite a clear
day, the sun's out. Usually, this is
when the sun is at the highest point in the sky, so around midday, depending
on where you live, it could be earlier,
it could be later. Shooting in direct
light is great in terms of the exposure to light, you get plenty of
light in your image, which makes it a lot easier
to adjust your settings. However, there are
some drawbacks. For example, direct
light can often cause a lot of heavy shadows. In portraiture,
you're going to get these shadows often
underneath the eyes, around the jaw, or anywhere where naturally light would fall on your face. For example, here
you can see that I have direct light on
this side of my face, and there is a shadow here
that my hair is casting. Dealing with those
shadows can be difficult, especially when it comes
to nailing your exposure. As a general rule of thumb, if you're shooting
with a digital camera, you want to expose
for the highlights which are the brightest
part of your image. This is because digital
cameras find it easier to retain information in
the shadows of an image. If you underexpose your shadows, then more information will be kept than if you
overexposed your highlight. However, when it comes
to film photography, it's the opposite way round. You want to expose
your shadows because it presents more information
in your highlights. You're going to
want to overexpose those shadows to make
sure that you're not losing detail
in the shadows. When we're talking
about exposing for highlights or shadows, that's essentially setting
your exposure so that the highlights or the shadows
are correctly exposed. Because it's very difficult
to get an exposure with true harsh lighting
where both the shadows and the highlights are
both correctly exposed. However, there are things
you can do about this, and one of those things
is by using a reflector. You can buy reflectors which are essentially reflective
surfaces that bounce the light into wherever
you're bouncing it, so onto your model or onto
your background, etc. You can also make your own. You can make your own
with a whiteboard paper or some tin foil, anything that is
going to reflect light back into the image. Alternatively, you can also
use natural reflectors. By this, I mean if there
are white walls nearby, or water in your location, anything that is naturally within the environment
you're shooting in, that can reflect light. A great example of how easy it is to create a
reflector is I have this packaging from
a tethering cable and it's white, you can see. If you can see the
shadow here that I've got on the edge of my jaw. When I lift the white
cardboard to the edge, the light bounces
off the cardboard and into that
shadow, filling in. The shadow is there,
the shadow is softer. That's what you
really want to do. You just want to use a surface, any surface that is a light
color that would bounce or reflect the light from that
surface onto your subjects, and that will help you fill
in some of those shadows. There are also
other ways that you can avoid these harsh shadows, and that is by
shooting backlight. Shooting backlight
essentially means that you're shooting
into the sun. Your subject is stood
away from the light. That means the light is
coming from behind them. Often you get this ring of
light around your subject. Alternatively, you can
shoot in the shadows, so in any shaded area. Shooting in shaded areas, essentially blocks
that harsh light, so then you don't have to deal with all of those
really harsh shadows. On the other hand,
from direct light, you have overcast lighting, which generally occurs when
you have a cloudy day. There's a lot of clouds in
the sky that are acting almost as a natural
soft box for the sun. This lighting can be great
because it's really even, you don't have all of those
were really harsh shadows. It can be useful to try and
search for little bursts, little pockets of
light to utilize to add an extra
depth to your image. Because sometimes having really even lighting can make it
look a little bit flat. Similarly, you can create directional light by
using your surroundings, just as we did with using
natural reflectors. Not only can we use natural
reflectors like water or white walls or surfaces to
add light to your images, you can also use things like
trees or buildings that are casting shadow to add an
extra shadow into your image. The next type of light we're
going to be talking about is a time of day
called blue hour. It's actually a time of day
that occurs twice in a day. It generally refers to the
time just before the sun is about to rise and just
after the sun has set. During this time you
get a bluish light. You also have considerably
less light during this time, so it is important to
keep that in mind. Similar to blue hour, you also have something
called golden hour, which you might have
already heard of. Golden hour is shortly after sunrise or shortly
before sunset. If you imagine a timeline
and you've got blue hour, sunrise golden hour, then
you've got your daytime, then you've got golden
hour, sunset, blue hour. Golden hour is what
it sounds like. It is a lot of golden light. The sun is usually quite
low at this time and it's giving off that
really warm light. During golden hour,
my favorite type of shooting is to
shoot backlight, where you have that ring
around your subjects. It can create quite
an ethereal feeling. Golden hour is a beautiful
time of day to shoot at, but it is quite
difficult to capture. My personal recommendation
would be try to end your shoot with golden hour and not have your whole entire shoot
surrounding golden hour. Because if you miss that window or it's a really overcast day, then you're going to
run out of light a lot quicker and you won't have
time to do your shoot. I'd recommend starting to see a little bit
before golden hour, get all the shots you need. Then if you can add
golden hour onto the end of your shoot,
then that's a bonus. Direct light, overcast
light, blue hour, and golden hour are some of the most common types of light
throughout a typical day. In the next lesson,
we're going to be talking a bit more
about the weather. We're going to be
talking a little bit about how the weather and how the lighting affect your shoots, and how you can understand what that might look like
prior to your shoot.
8. Understanding the Weather: In this lesson, we're
going to be talking about how we can
understand the weather, how we can track the weather, how we can turn ourselves
into mini forecasters to really understand
what the weather and what the lights do to shoots
and how to deal with that. When we are considering
the weather and the light, as photographers, we
have to be really in chain with the weather forecast. Of course we're not mind readers and forecasts aren't
always the accurate, but we want to be as
prepared as possible. First and foremost, we're
going to want to check the weather forecasts often and also use
different providers. We know that weather forecasts aren't always that accurate. If you can check
different providers, then you can have a more
well-rounded overview of what the weather
is potentially going to be looking like. In the UK, for me personally, I usually use a mix of Apple weather forecast and the Met Office weather forecast. Both of these apps usually read different things but I find
that that could be quite useful because I
then have an idea of all of the eventualities that are likely to
happen on the shoots. The great thing about
weather apps like these is not only do they tell you if it's going
to rain or snow, they tell you the speed
of the wind and they also tell you when the sun will rise and when the sun will set, which can be really
useful in understanding your workflow and
when you're going to be organizing your shoot. Not just understanding the rain and the snow and the light, by understanding strong winds, can be very important as well. Look out for any
weather warnings or any sign of strong winds
because of course, strong wind can cause
equipment to fall over, can mess up your
model's hair, clothing. You're going to want to have a clear idea of
whether or not this is going to be happening, whether it's going to be a health hazard and you're
going to need to call off the shoot or whether or not it's just going to be
something you're going to need to adapt to. If it's something that you
going to need to adopt to, you can get an assistant in to help you out with that
added element of the wind. You can also organize
your locations in locations that are
not wind tunnels. It might have a wool up that blocks the direction
of the wind and minimizes the effects of
the wind on your shoot. Of course, weather isn't the only thing you'll
want to consider. Understanding when the sun will rise and set is so instrumental. Like I said, you can use
these forecasting apps to map that out and plan it. You need to know
when blue hour is, when golden hour is, and how the weather might affect how much light you
have on any given day. Things like lighting are
almost easier to prepare for the weather because most
days they are quite similar. You can prepare in advance. You might want to consider
the general time that the sun rises and sets
at that time of year. For example, in the
summer in the UK, the sun can set as late
as 8:00 or 9:00 P.M., but in the winter it
could be as early as 3:00 or 4:00 P.M.
You're also going to need to understand that
there's a window of time before sun sets where you're going to have
significantly less light. At the height of the winter
in the UK that I know that the light quality begins to diminish usually
around 2:00 P.M. It can also be really
useful to actually visit your location prior to your shoot on similar time of day that you're
going to be shooting, so you can have a good idea
of where shadows fall, what the light might look like. You can take your camera,
test the light so you're well-prepared for when the
shoot actually comes around. It's also important to also
expect an overcast day, like we spoke about when we were talking about the
different types of lights. If you have an overcast
day where the sun can't quite break
through those clouds, you are going to
have less light than maybe if it was a
really sunny day. Making sure that
you prepare all of this information
beforehand just gives you a clearer overview
of what you're actually going to be
working with on the day. One of the biggest things
about photography, especially when
you're shooting on location with
environmental portraits, with people in the mix
that you can't just change everyone's schedules
at the drop of a hat, is making sure that your
preparation is on top form. Checking forecasts
and understanding the weather and the light
and what that's going to do to your shoot is really important in that
preparation process. In the next lesson, we're going to be talking
about how to shoot in snow and how to shoot in rain and how they
differ from each other, including some of my top tip. Join me in the next
lesson to talk about probably the two
most common forms of weather during the winter.
9. Shooting in the Snow vs Rain: In the last lesson, we discussed how to
preempt the weather. Checking your forecasts, understanding if
it's going to snow, if it's going to rain, if
it's going to be sunny. But what actually
happens if it is going to snow or
is going to rain? How do we deal with
those situations? When it comes to
shooting in the Snow, one of the things
that you're going to want to think about most is how cold
it's going to be. This is where it's going to be useful to have
gloves for yourself. Feel model, to avoid
those pink hands or to avoid your hands
seizing up entirely. You're also going to
want to ensure that your equipment doesn't get too cold and start
working altogether. If you can bring spare
batteries then that is really important when you're shooting in
cold temperatures. You also might want to adapt your locations based
on the weather. If it's really
snowy, if it's icy, and your location
isn't fit for taking your model or taking yourself
even to that location. If it's going to be
a health hazard, then you might want to
consider changing at that location or having a
backup vacation in mind, other than actually dealing
with the cold weather and the logistics of shooting and
cold weather when it snows, there can also be some visual
effects to your image. Like we discussed
in earlier lessons, you can use natural reflectors. Natural reflectors
tend to be white or light surfaces that reflect the sunlight back
into your image. What color is the snow? Of course, the snow is white. If you're shooting in the snow and you've got a lot of sunlight and you've got a ton of
white snow around you, then that sunlight is
going to reflect from the snow back into the image. You can use this
to your advantage if you need that
extra bit of light. But more than anything, it's
just something to consider. You're going to
make sure that you don't blow out your highlights. By that, you want to make
sure that you're not overexposing your
image too much. Especially if we're shooting
on a digital camera. Like I said before, digital cameras can't save that much information
in your highlights. It's important not to overexpose the image too
much when you've got all of that added light
being flooded into the image reflected
from the snow. But what about if the
snow is still falling? You're not just dealing
with the aftermath of whether you're
dealing with whether happening that and then dealing with falling
snow or falling rain, very similar in terms of how
you're gonna deal with it. First of all, you
might want to consider using rain covers. This can be anything from an actual rank of it
that you buy online, which tends to be
a plastic sheet that you can put
your hands in and hold the camera and the camera from within
like a plastic cup off. Well, you might want
to consider having an umbrella to hold your camera. Make sure it doesn't
get too wet. Of course, you want to avoid your equipment getting
wet when you can. Some lenses are weather-sealed, but it doesn't always
mean that weatherproof, and just generally
a good idea to try not to get your whole equipment
too wet just in case. Of course, when it
comes to location scouting for those
undercover locations is a great idea to have a backup if the rain or snow is really heavy and you don't want
your model to get too wet, like I spoken earlier
lesson as well. You again want to avoid
your model wearing really light-colored
clothing because that is going to be ruined in the
rain or the heavy snow. Similarly, you're going
to want to consider how the rain or the model
getting wet is going to change, the styling does
add to the shoe. Is it something that
you want to avoid? How is the hair going to
respond to the weather? These sorts of things are probably things you
want to consider before the shoot and
if the answer is yes, it is going to ruin the shoot, then you're going to
want to consider, again, undercover locations or
changing your styling and hats, umbrellas, anything that's going to help your model stay dry. One of my favorite ways to shoot in the rain is
to shoot backlit. What happens when
you shoot backlit in the rain is you can get this nice ethereal look where the light goes
through the rain, lights up the rain and you get this kind of like much a cool
texture to your image when you're trying to
capture that rainfall or snowfall and you want to freeze it in frame so that you can see it
within your image. That's where you're
going to be wanting to use a faster shutter speed, something like one over 600. If you can be
shooting that fast, then that will hopefully, depending on the speed
of the rainfall, that will hopefully freeze
the droplets in the air and help out to that ethereal image. Those are just some
of the tips for shooting in the rain and
shooting in the snow. In the next lesson, we're
going to be going through my recommendations on what
to pack in your camera bag.
10. What to Pack in Your Camera Bag : Now, we've spoken about dealing with all these
different types of weather, all of these different
types of lighting that you might experience
in the winter months. What do I recommend you
pack in your camera bag? In the winter months,
I recommend packing a mixture of things
to help your model, help create that comfortable
working environment, and help the logistics
of the shoot. To start off, you're
going to want a camera body that
shoots in manual mode. You're going to want
at least one lens, ideally a fast lens, one with a wider aperture, so you can let more
light into the image. Some of my favorite lenses for portrait photography
are the 35 millimeter, which is very similar
to what your eye sees, so it's a great
way to transition between what you're
seeing in an image, and how you're taking the photo. I also love 50 millimeter lens, which is often referred to colloquially as the Nifty Fifty because it's such a cheap,
great portrait lens. Similarly, you're going to
want some extra batteries, and extra SD cards. If your batteries get
cold and stop working, you're going to want
backup ones to use, if they drain quicker because of the cold
weather, then again, you'll want extra ones to use; in terms of SD cards, I've even dropped SD
cards in puddles before. Having extra SD cards is always useful regardless
of the circumstance, but definitely in winter time. Then you're going to want
to think about bringing umbrellas in case it rains
or it's snowing actively, to not only protect
your equipment, but protect your model
in-between the photos. You're going to want to
think about bringing towels, again, to dry off your equipment, but also to dry off your
model, and keep them warm. Spare outfits for models
are a great idea, especially if one
outfit gets wet, and you can't shoot
in it anymore, or just because your
model might want to change into something warmer
to travel back home in. If you can get hand warmers, those little packs
that you squeeze, and they activate the heat, those are great for
in-between locations, in-between shots, for both
you and the model to use. If you can't get a hand warmer, you can also consider
just packing some spare gloves for
you and your model. Then lastly, you might want to consider a rain cover
for your camera, which helps to
keep the rain out. Most of these are transparent, so you can still see what
you're doing in your camera, which is always a great thing. In terms of actual camera bag, I like to take a backpack that has a rain cover
over the top of it, because that helps to
just make me feel as though there's that
added safety measure. My stuff in my pack
isn't going to get wet, and I can also keep it on my
back whilst I'm shooting, so I didn't have to lay it down, and get the camera bag, and everything in it,
damp whilst I'm shooting. Those are just some
of my recommendations on what to fill your
camera bag with, when you go out to take
your winter portraits. At this point in the class,
I think you're ready to head out and start
taking your portraits.
11. Shooting on an Overcast Day: Behind the Scenes: I'm joined today by
my lovely model Alex and we are going to be
shooting some portraits. It is surprisingly, a lot warmer than I thought
for the middle of December, and a lot drier
than we expected, but it is quite
foggy [inaudible]. [MUSIC] Throughout the
shoot, I will be shooting with a range of
different cameras. The main ones being the Mamiya
RZ67 and the Fuji GA 605, both with a portrait 800 film. The 800 speed ISO will help
me if we start to lose light. In terms of digital cameras, I'll be shooting on
the Sony a7 III with a 35 millimeter 1.4 F stop lens. This fast lens means that
I can shoot wide-open, allowing plenty of light into
the camera if I need it. The 35 millimeter is also a great focal length for
portrait photography, as things look quite similar through the lens as they
do through your eyes. So it's quite easy to transition between looking at an image
and capturing an image. The mirrorless body
with the Sony a7 III, also means I can push the ISO higher if we start
to run out of light. If you remember, I said that mirrorless cameras are great
for low light situations because the sensor tends to
be larger than other DSLRs, so you can push the ISO
a little bit higher. Since we're shooting on
a really overcast day, there isn't a lot of
definition in the sky. One of the things we
want to be mindful of is the fact that the sky is
almost completely white, in places, it is
completely white. It can be useful to
try and add elements of the background and
further away into shock. As we can see, because it
is a little bit foggy, there is a natural separation between some of the
elements at the background. For example, if there is
trees in the background, that depth can be enhanced by the fact
that it's quite foggy. You can further
enhance this effect by using a wide aperture, which creates a shallower
depth of field, and really hones in on this separation between the different
background elements. The great thing about
it being overcast is that we have really
even lighting, which is really easy to use. We don't have to
worry too much about balancing your exposure like
we would in direct light. But because there
are no elements of harsh light or shadow
because the lights are even, we want to create
directional light. In this shoot, I've
used white rules to bounce light into the image and also used undercover areas to create shadows in places. [NOISE] Perfect. [inaudible]. I mean for now and then
we'll do one away. [NOISE] Perfect and
then looking away, [NOISE] I'll do this angle. Just come forward a
little bit for me. Nice. [NOISE] Perfect, let me get the other camera. Nice. Cool, I'm going to get
you maybe you see where this little hole is? Yeah. Can you sit in there, see what that looks like. Nice. [NOISE] Perfect. [NOISE]
This one will be close-up. You should bring this hand
up. Perfect. [NOISE] Cool. For the last idea, I want to see how
quickly we can move Jonas and do another light
long exposure if you spin in. Okay [inaudible]. Okay. Ready? Oh my God. [LAUGHTER] [MUSIC] In terms of the
workflow for this shoot, it was important that we kept sitting on wet surfaces
until the end, especially because Alex was wearing light-colored trousers. Like I said in another video, light color trousers can
be an issue when shooting in the winter months because
if they get damp or wet, then the damp patches show a lot more than if you're
wearing dark colors. Because of this, we wanted
to keep any sitting on wet surfaces and stuff until
the very end of the shoot. We also made sure to plan
our locations close to each other so that we could utilize the time before it got
dark most effectively. With this shoot, we only
had a couple of hours. So it's really important
that we didn't spend too much time walking
between locations. In the next lesson,
we're going to be looking at a few shots from this shoot and a few shots from previous shoots
that I've done, and going through some
editing techniques, we can use on editing
winter portraits.
12. Editing: Enhancing Your Photo: In this lesson, we're going
to be exploring how to use tools in Adobe Lightroom to enhance your
portraits at wintertime. If you're not already familiar
with Adobe Lightroom, I'm going to link
some resources in the class description
for you to get to grips with the software as I'm not
going to be going through the basics of the
software in this lesson. We are going to be
talking about how to brighten up your image, how to bring more
life to the colors, how to remove things like raindrops from your
model's faces, all those little bits that can be quite annoying
when it comes to shooting in the winter
and maybe you can't always fix when you
are taking the photo. So we're going to
be jumping straight in and go through
some of the tools and techniques that I use when
I'm shooting in the winter. So first up, we are
going to be looking at how we brighten up an image. Often, when we are
shooting in the winter, when we're shooting
in low light, we're going to have an image
that is maybe underexposed, maybe a little bit dull
because there isn't that light that
you'd be used to. In this image, what we're going to do is we're going to start by brightening up the image
using our exposure here. As you can see that that does
bring back a lot of detail. One of the important things
when you're shooting any time, but in particular in the winter,
is that you shoot in raw. Raw means that you are shooting in a format that saves
more information, opposed to a JPEG which is
compressed information. It's very flat. It doesn't save all that
information that you can play around with in post. So as we can see, this image is still quite dull. What we're going to do now
is we'll zoom in and have a look at which parts of the
image need brightening up. Straight away, we can
see that it's mostly the shadows that are being
recovered by the exposure, and we've got the blacks quite high up as
well so we can't really do much more here. If we bring up the exposure
on the highlights, then you can see that
this is brightening up the model's face. If we bring the whites up, we're seeing in this image
that it's not really making much of a difference. I generally like to keep
my whites quite flat. That's just my style. You can choose how
you prefer to do it. The next thing I'm
going to do is to try and brighten this image up and bring it a
little bit more to life is I'm going to
change the temperature. The temperature is pretty
cold image right now. But if we start
making it warmer, you can see how some life
comes back into the image. Similarly, we can come
down to the saturation. We can play around with
bringing up certain elements. For example, this purple
and red hue is dull. If you click this
little circle here, and it allows you the
option to go into image and select
particular colors to move. If you can't identify by eye
what color that is exactly, then you can just click and drag and change the
saturation there. The reason we have all of these shadows on
the model's face is because there isn't any light being shown on to the model. In this instance, it would
have helped us if we had a reflector to be able to bounce that light
into the shadows. Again, we can bring
the exposure up again and even flatten those highlights to try and maintain some of
that information. The next image we're
going to look at is this image where we can see the model is backlit and it's a very overcast day,
so it's been raining. We've got a few things
we can do here. It being a very overcast day, we can see that the sky is
almost completely blown out. So what we want to do there is balance it a little
bit so that it doesn't look as contrasting to the
model's head as it does. I will start by moving
down my highlights, and my whites, and bringing
back some detail here. Another thing we can do in
this instance is using Dehaze. That just brings a
little bit more life back into the subject
of the image. Of course, we've also got
these speckles of rain. One of the ways you could
remove this if you found you wanted to would be
by Spot Healing. Spot Healing is essentially where the software,
such as Lightroom, detects all the pixels in
the image, duplicates them, and creates a sense of mask
for that part of the image. If we zoom right in, we can change the
brush size here. Just select that bit of rain and it creates a duplicate
of where to heal from. If I want it to be fine tuning this and duplicating it on his hair texture onto his face, then I just drag that
bit to the hair. But of course, I'm
just trying to duplicate his skin texture. We can do that across all of the different rain speckles
that we want to get rid of. I personally don't mind
it too much when you have rainfall in front
of [inaudible] space. But if you do, then this is a really easy, simple technique to get rid of that rain. In the next image, we can do the same
thing again with the rain on the model's face. So we can see here that
there's a droplet of rain. It's very easy to remove that
with the spot [inaudible] . We just draw a little
shape around it and duplicate from the skin
texture and it's gone. The Spot Healing tool, the Clone Stamp tool is very useful for tons of things when
it comes to shooting, especially in the rain and snow. In this image, we
can see that we have backlit the subject. This creates a really
ethereal look, but it can also create this effect where the sun comes through and creates a
bit of a haze in your lens. Again, like we did in
the previous image, we can just use the Dehaze
tool here to create a little bit more
contrast and bring that clarity back
into the image. In this image in particular, we want to really
brighten it up, maybe subdue some of these
highlights in the sky, warm it up because it is
particularly cold in the image, and also brighten up this
section here of the image. What we can do to start
is bring up our shadows, and straight away this
is making an effect, it's brightening up this
section as you can see. If you didn't want to do that, you could use a mask. By masking an image, you can do loads of
different things. You can brush them
on and you can use the AI within Lightroom
to help you out here. But we're going to brush in and just for the sake of this. We can just brush into the image the bits that you
want to brighten up. Lightroom allows you loads of
tools to be able to change the size and the feathering of this mask to make it look
a little bit natural. For example, with this brush, it's a little more feathered. As we add it, it's
going to transition into the image a little bit more nicely than where we
used the strokes here. Then I'll just turn
off the overlay so I can see what I'm doing. Then you come down
and you can just directly select this selection. Of course, you're taking care in masking your image and
making sure it's neat, but for the process
of this video, I've just set it
very roughly to show you how you can use this to brighten up
one section of an image. When we bring this back, we can now see that we have
brightened up this section, but we still want to warm
up the overall image. Again, I'm just going to
use temperature to do that. You can also use tint
if you think it's going too yellow or something, you can bring it
a bit more pink. Then we can just bring down
the highlights to bring back some of this depth in the sky. In this image in particular, we can notice that the model's
fingers are quite cold, they're red and they've
taken on that red hue. That is something
that I spoke about before about something
you might want to avoid. Income arts are a little
easier to warm up your model's hands on shoot
than it is to fix it post. But we're going to
give it a go anyway. There's a few things
you can do here. Firstly, we can work with
masking again so we can draw in on the hands where
we want to mask, where it's particularly pink, and we can work here with the temperature sliders to try and warm up the hands a bit. As we can see, we probably need to draw the mask on a
little bit further down as well because the wrists are
now looking slightly odd, a little bit too
pink for the image. That's how you would alter
just the fingertips, you draw in your mask and you would do all of your
adjustments in the mask. You can also change
the hue here. For example, you can see
how that would work. However, in this
particular image, you can see that the
face is also quite red. We're going to remove that mask and I want to show you
how you would change just generally all of the
skin tone on the model. What we'll do here is
we're just going to very straight down to our Hue, and Saturation, and Luminance sliders, we're going
to click on "Hue". We're going to click
our little dot again, we're going to select the color of the skin that we want to change and we're just going to drag it until it looks
a little bit warmer. So we can see that's
very fine adjustment, but it looks a little
bit warmer than before. In this lesson, we
have covered how to use tools such
as temperature, hue to alter skin tones when they're a little bit cold or hands are red, stuff like that. We've also looked at how
to use the Dehaze tool to bring life into an image where you
might have backlit it. The sun might be clouding
the view of the model. We've looked at how to
bring back your highlights, add a little bit more depth into those clear gray
and white skies. We've also looked
at how we can use retouching tools
such as masks and Spot Healing brushes to really enhance the image and get rid of those things that we
don't want in the image. Join me in the next lesson
where we're going to be recapping the things that
we've learned in this class.
13. Wrap Up!: That's us wrapped up. I hope that this
course inspires you to get out and capture some portraits regardless
of the weather. Come rain, come shine, that itch to create that itch to go and take portraits always
exists at least for me. I know that feeling well
equipped to shoot in these difficult scenarios is the first step to really having the confidence
to go and do it. Hopefully, you now feel
confident enough to get out and shoot your portraits
in the winter time, regardless of how cold it is, regardless of how dark it is, and regardless of the tricky
and unpredictable weather, the winter too often
brings with it. The great thing
about this class is hopefully is applicable
all year round. Especially in the UK, we aren't always blessed with the best
weather or the best lighting, even in the summer months. I even did a campaign, a summer campaign back
in the summer while we had an insane hailstorm. You can use these tips
throughout all of the year and regardless
of the season. But please do share your
portraits with us in the class project
section of this class. I'd love to take a look and
give you some feedback. It's always great
to see how you guys are engaging with the class, but thank you guys
so much for taking the time to enroll
in this class. I hope you found it useful. Thank you guys so
much for watching. I can't wait to see
what you create.