Transcripts
1. L1 Introduction: What's up? My name is Ian Jukes. I'm an English photographer
based in Kaohsiung, Taiwan. I have a bachelor's degree in visual communications,
specializing in photography. I have been an Adobe
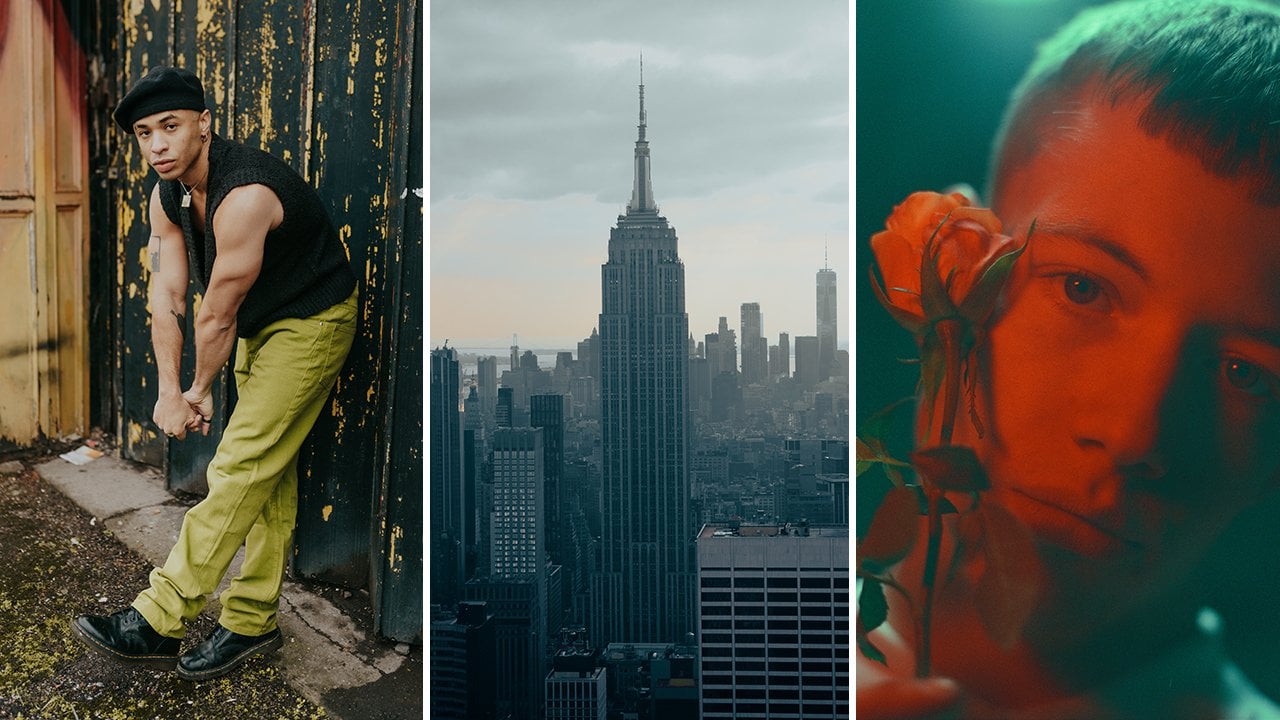
Lightroom user since 2007, which is when it was released. Here are a few photos that I've taken during my time in Taiwan. This course is designed for anyone who wants to learn about the
photographic workflow. Anyone who wants to use Lightroom in a more
productive and effective way. My philosophy on photography
is to keep it simple and spend more time shooting
and less time editing. With that in mind, I have
developed a workflow system that utilizes the smart collections
within Adobe Lightroom. This workflow encourages you
to be fast and efficient. Now I want to share that
workflow system with you. This is what you will learn. The principles of digital
asset management. These will help keep
your images safe and find them in the
future when you need to. How to incorporate
apps and plug-ins into Lightroom to make
it more efficient. How to build a series of smart collections that
really boost your workflow. How to set up your
screen to make the culling process
lightening fast. How to better apply
keywords and metadata. How to apply the workflow to
shoots you did in the past. Are you ready? Let's
jump right in.
2. Class Project: Let's talk about
the class project. For this class,
it's very simple. All I would like you to do
is go out with your camera, take some
images and then add them to Lightroom
and work through the workflow as I show you. Okay, and then afterwards at the end you will have a number
of images marked as done. Simply create a contact
sheet and then share it. I'd like to see what kind of
images you can come up with. See you in the next lesson.
3. The Principles of DAM: The principles of digital
asset management, the first one obviously, don't lose the images. We need to keep our images save. Secondly, find the images
when you need them. This might sound stupid, but trust me, in a few years, when you want that image of the dog with a cute
bow in its hair, you won't find it unless you carefully add keywords
and metadata. Next one, save time. If you have a good
system in place, a good workflow in place, it will save you time
in the long run. The next one is
software independence. Obviously, this course is
based upon Lightroom, but what happens if
you decide to change your mind five years from now and switch to a
different software. You want to be able
to take your images out of the system we
use now and use them. Systems in the past, such
as Aperture from Apple, often locked the images
inside of the software. And if you wanted to change,
it was very difficult. So software independence
is important. And forward compatibility. We want to know that
ten years time, 20 years time from now we can still open the
images that we have. And finally, peace of mind. If you have a system
in place that is keeping your images safe, helping you to find them. And you know that
everything is in order. You feel much more relaxed
about your photography. Okay, let's move on
to the next video.
4. Workflow Overview: Okay, time to discuss
the workflow. Step one, copy
images to a folder. So insert the memory card and copy the images over
to your computer. I typically use a folder that
I created called Import me. The benefits are it creates
an initial short-term backup. We can add multiple
memory cards, and it makes the next stage simple. The next stage is
to add geotags at GPS metadata to our images. For this, I use software
called Geotag Photos Pro 2 This makes the process
very simple and effortless. Moving on to import
into Lightroom. So we open Lightroom and plug-in
the external hard drive. This external hard drive is the home for all of my images. The images in the
Import me folder get copied across photo library. During this process,
Lightroom will add, or auto create folders, rename the images, and it will also apply global metadata. Now we get to the main
part of this workflow, which is the smart workflow. Using a series of smart folders, the images get processed
through the system. So the first part of the
system is the initial cull. So we use pick flags. We use pick and reject flags to decide which
image is moved through. So only pick flags progress. The next stage is
rate using stars. And only images that are three-star or better will
progress to the next stage. The next stage is to add
keywords and metadata. I only add keywords and
metadata to good images. There's no point spending time adding keywords that all of your images only add this stuff to the images
that are important to you. Next step, edit, and
finally, mark them is done. The final part of the
puzzle is the backup. As mentioned, all
the images live on the photo library hard drive. So I use software called
Carbon Copy Cloner to make an exact copy
of this photo library. I also have a Western Digital. My Passport Wireless Pro. This has a built-in
SD card reader. This enables me to take
the memory card that we imported earlier and
inserted into here and copy across
all of the files. So even if I choose to delete the rejected images
in the photo library, I will still have them
here on this drive. The final stage is to
have a Cloud backup. You can use a service
such as Backblaze to make an online backup
of your computer, your hard drives,
keeping everything safe. Okay. Time to move on
to the next stage.
5. Recommended Tools: Okay, it's time to
talk about tools. These are my recommendations. You don't have to use them. But I find that they
speed up my workflow and make my images
is more secure. The choice is yours. The first one I use
is Geotag Photos Pro. This adds geotags
to my Images and helps me to find them based
upon location information. It's simple to use, and I find it brilliant when
it comes to keywording. This is one of the
areas that people often overlook or they struggle with because it's
very tedious to do. Wordroom is a plugin
that can automatically suggest up to 30 keywords depending on the
photo is free to use, and I like to use your,
I think it's wonderful. Keeping our images safe
is very important. So I use Carbon Copy Cloner, so make an exact copy
of my photo library. So my photo library lives
on at least two drives. This is Mac only. So I did some research into Windows software and
came up with this. They offer a free trial so, for you Windows users. Give it a shot, check it out. Let me know what you think. The final tool is a Cloud backup service
called Backblaze. This backs up everything. He packs up your computer, your hard drives, and keeps
them safe on the Cloud. I'm not sure whether it does
network attached storage. I don't think so. If you use a network
attached storage solution, I suggest that you contact them. Okay, That concludes
the video on tools. Let's move on to the next stage.
6. Workflow Setup: I'm inside of a new
Lightroom catalog. And before we get started
on the actual setup, I just want to check
a few preferences. So we go to Lightroom
Classic Preferences. And in the general tab, I like to make sure that
the show import dialog when memory card is
detected is unchecked. I don't want Lightroom to open every time I plug
in a memory card. That's the first
one to check. And the second one, is in Catalog Settings
on the third tab. So general file
handling metadata, I like to make sure that
automatically write changes into XMP is checked. This helps if we
decide to move our images to a different software. Then the next thing to check
is the address lookup. So make sure that
these two are checked. The first one,
lookup city, state, and country of GPS coordinates
to provide address suggestions is really
helpful because you remember that we
are adding geotags. So when images have geotags and they get
imported into Lightroom, Lightroom will
automatically look up the address and insert it into the location
fields in our metadata. Next, we will actually talk
about the collections. We're getting to the most exciting
part of the course really, because a lot of the workflow
hinges on the collections. So before we set it up, I'm just going to show
you just a quick recap on what collections can do. So if we tap on the
collections there, you can see that I have
the smart collections is like a default one. This is what Lightroom
makes by itself. But the one above it is
the one that I made. So this is the
Skillshare workflow. As you can see, we have a number of collections inside of this. Before I show you
exactly what these are, I'm going to just
do a quick recap on what collections
are and how they work. If we click on the Plus, you'll see that we
have some options. The first one,
create collection. This just creates a
standard collection. So we can choose which images go inside
and which ones don't. Simple as that. We can choose. The next one, create
smart collection. Smart collections. The images displayed are dependent upon the
criteria that we set. So images only get displayed inside if they
match the criteria, if they match the parameters. And the third option here
is create collection set. A collection set is
like a folder or a box in which other
collections can live. For example, here, this
Skillshare Workflow is a collection set and the
job is a collection. And the others here
are smart collections. Sort by name, sort by kind, I leave it on sort by name
purely because if you look at the structure of mine naming of these collections,
it started 0,1,2,3,4,5. So if we change it to kind, watch what happens. I lose this flow because
Job has gone to the bottom. It's better to keep it set to sort by name. And the final option here is to show the
collection filter. That's just this
little box at the top. Okay, So let's dive
into this workflow. We have a collection
set called workflow and the first one
inside is called job. This is just a
standard collection. You can't do anything to it. You can't open it, all you can do is transfer images to it or
take images out of it. You'll notice there's
a little plus here. This plus means that this
is the target collection. If I right-click this, you will see that set as
target collection is ticked. That means if you want to add
images to this collection, if you press B, while the images are selected, they will be added
to the collection. If they're inside
of the collection and you select them and press B, they will be removed. So it's like a toggle to put
images inside and put images outside this folder,
this collection, sorry, is crucial to the workflow
because we only want the workflow to actually work upon the images that are
inside of this collection. Let's move on to the
first smart folder, which is called cull. If I double-click it, we
can see what's inside. So this one looks
fairly simple, right? So it's number one cull. And the first parameter
here is collection. Now, if I expand this, you will see that we have
loads of options here. The first one is source collection and contains
all the job name here. So this basically says only look at images that are inside
of this job collection, don't look anywhere else. And what we want to cull is at the pick flag is unflagged. Next one is rate. So after we've
culled our images, the next step is to rate them. So again, the first parameter is the collection
because we only want, as I said before, images in this job collection
to be referenced. So this time, the
pick flag needs to be flagged and the rating needs
to be less than a star. That means is that once we've, once we've culled the images, we put them into here and
then once we start adding, adding stars to them, they will start
disappearing from the rate and go to
the next stage. This is like a workflow is
stage that we go through. The reason I created this
is because I was very, well, it wasn't disciplined when it
came to processing images. I would be jumping
around from one thing to another and I'd
leave things half, half flagged and half
rated and stuff. And I'll just edit the
images with the best. And it just wasn't a very
methodical workflow. This one's much better. Okay, so the next step is
keywords and metadata. This one starts to
get complicated. I have to warn you, it gets
complicated from now on. So the first one is the same, the collection, job,
pick, flag picked. This time, the
rating needs to be greater than or equal
to three stars. Because what I want to set up is the fact that we
don't want to be adding keywords and metadata
to all of our images. We only want to add them
to the best images. That's a key, one of the key
fundamentals to the system. Because adding keywords and
metadata takes a lot of time. So don't add them to
images that are mediocre, only add them to
your best images. Okay, So let me delve into
this in a bit more detail. So this first one, match
all of the following rules. So the collection,
pick flag and rating. It must match all of these. Now the next one is different. It's if any of these, sorry, if any of the
following are true. Now, to access this, you have to have a modifier key. On Mac you hold down Option. Pretty sure that that's
gonna be Alt on Windows. And watch what happens
to the plus sign here. Because let me just
show you something. We can add parameters and
we can take them away. Just by clicking on the
little plus or minus. So this one, if you want
to get this option, you have to hold down the
Option or the Alt key. And then this changes
to a hash sign. And if I click on
this and expand it, but you will see now
I have another one of these conditional things. Okay? So if I click on this, you'll see any of the
following are true. We can have all of
the following are true or none of the
following are true. Now, for images to go
to the next stage, they have to be what I
would consider to be done. So they must have a title, they must have a caption, they must have keywords, and they must have GPS data. This is the only way that we can do it is using this system. So title is empty,
caption is empty. Keywords are empty,
GPS data is empty. Okay, so if any of
these are true, it will not pass
to the next stage. That's crucial to
understand this. It might take you a little bit of time to get your
head round it. So I'm going to
say, I'll actually, I'll just cancel so I don't
bother messing it up. The next one, edits. Okay, let me expand
this just a little bit. There we go. So this is a bit simpler than
the previous one actually because there's less, less parameters to worry about. This time it must be in
job, must be flagged. It must have three stars. The title is an empty caption is an empty keywords or an empty. But next time, any of
the following are true. If it doesn't have adjustments and if it doesn't
have a green label. Okay, So this is
the same principle. We have to hold down the
option key or the Alt key to get the special menu. But the reason I have this is because we need to have a label, because has
adjustments is false. So if we didn't have the label and we started to make
adjustments to the image. As soon as you change
one little parameter, maybe the exposure or
the shadows or whatever, the image would then be classed done because it's got an a, it's got one adjustment. So we need to keep it held in this state
until we're ready. So the key is that we have
adjustments is false. And then we can adjust the
images to our heart's content. And once we're happy with
the adjustments we've made, we just apply the green
flag to that image and then it will go through to the
next stage, which is done. Let me show you that one
now. This is the done. So as you would expect, this one is pretty straightforward. It's just a long
list of parameters. So collection is job, flagged three stars,
title isn't empty, caption is an empty. Keywords on empty has
adjustments is true, labor color is green, and GPS data is coordinates. Okay, So you have a choice. Now folks, you have a choice. You can either have an
attempt to copy this system. So go through each one
step-by-step and copy it. Or what I've done is I've actually exported
this catalog out. Exporting the catalog
is the only way that I can share smart
collections with you. So you will find
it as a download. What you can do is download the catalog and then
you go to file, import from another catalog and then choose the
downloaded catalog. This will put this
collection of collections, if you like, inside of
your Lightroom catalog. It will also add one
thing which is one image. This one, which just says, just says, thank you
for taking this class. You can delete it. Don't worry about this image,
you can just delete it. That's the collection
setup complete. Let's move on to
the import stage.
7. Initial Copy: It's time to do
the initial copy. As you can see, I have
to finder windows open. My memory card is inserted. I'm going to copy
the images from my memory card to a
folder called Import Me, which lives inside of the
Pictures folder on my computer. So I select the images by
selecting the first one, then pressing Command-A to select them all. And that's Control-A on Windows and then drag them across. There are several reasons
why I prefer to do this. The first one is it creates
a backup to start with. The second reason
is that you can add multiple memory cards this way. And the third reason
is it makes it easy to add the geotags
to our images, especially if there's more
than one memory card. Okay, see you in the next video.
8. Add Geotags: A geotag adds the location where the photograph was taken. This can be incredibly
useful when used in conjunction with the Map
module within Lightroom, I use Geotag Photos
Pro 2, to add tags. This is a two-stage process. The first stage
uses a phone app to record GPS locations
during your shoot. The second stage uses a desktop app to apply the
geotags to the images. Let's see how it works. Tap the plus in the top-right
corner to start a new trip. Then give the trip a name. I go with the
suggestions the app provides. Then tap Done. Make sure your cameras
date and time is set. Next, set the logging interval. I normally use thirty-seconds
tap start to begin. The app will run in the
background so you can do other tasks or lock your phone and put your
phone in your pocket. When the shoot is
over, tap Stop. Check that the data has been uploaded. Now onto part
2, the desktop app. The second part of
the process to add geotags uses the desktop app. Click here, navigate
to the directory, Import me, select
it, and press open. The software will
compare the photos to the data we recorded earlier
using the phone app. Then it's just a matter of
clicking Start geotagging. Then the software adds the
geotags to the images. It's quick, easy,
and very reliable. Okay, Next up is
importing into Lightroom. See you there.
9. Lightroom Import: It's time to bring those
images into Lightroom. So click the Import button, find the Import Me folder
inside of Pictures. Then we choose the
method here at the top. So I'm going to choose Copy
to leave the originals there. I don't want to
import duplicates. I don't want to
make a second copy, but I do want to
add to collection. And I want to add to
the job collection. Renaming is fairly
straightforward with one caveat. And that is that I add the
original file name at the end. Why do I do this? I hear you ask? Good
question and that is because at the end
of each shoot, after I've imported the images, the memory card goes into another separate external drive. Those images never get renamed, they never get touched. It's just the
original file names. So should I want to find one, I need to know what
this filename is. Moving on. The next one, applied during imports. I have a basic metadata
presets that just puts on my contact details and
the copyright notice. The next one is the destination. So I organize by date and
then year, month, day. For this example, I've made a separate folder
called Skillshare library. And inside of that
Lightroom will organize these files based
upon their captured time. So it goes inside of 2022. May. And if you see this little grayed-out
folder with a plus, it means that
Lightroom is actually making this folder for us. So we don't need to
make the folder. Lightroom will do that for us. Then it's a matter of
just clicking Import. And if you see with the
collections is open now, it's currently showing nothing. If I click on job, we have to wait for the
images to be imported. There's not many, only
about 47 images, I believe so. It
shouldn't take long. There we go. The image are now inside of the Lightroom catalog and they're inside of
the job collection. And as you'll see, we
have 47 images in Job. Remember the first stage, the first stage is to cull the
images, and they are here. So we have 47 images
ready to be culled. That's for the next video.
10. Processing Overview: Processing overview. Before we use the
workflow for real, I want to explain a few things. So the collections are open and the images are currently inside of the
collection called job. When we use collections, images are not physically
located inside of them. It's just a reference. If I right-click the image there and then go to
folder in library, we can see exactly where in
the library this image lives. Likewise, if I right-click
and put Show in Finder, we can see that it's
on the photo library, hard drive, skillshare
library 2022, 05,19. Back to collections and
to the job collection. So this is the process
we have Job, Cull, Rate, Keywords, Edit, and
oh, by the way, if you have jumped to this lesson and didn't
do the previous ones, I strongly suggest that you go back and look at lesson six. Because in lesson six I go
through the actual process of setting up these
smart collections. So we have job. The first stage is cull, where we use pick flags
to pick or reject. The next one, we
use star ratings to choose which ones will
progress through the system. So only images that are
three-star or better, weill go to the next stage
of keywords and metadata. Then once keywords, a title
or caption has been added, then we can actually move
to the Edit stage o. And GPS geotags needs
to be added too. Then we can actually edit them and then finally
mark them as done. Okay, Let's move on to part one of the
workflow which is culling.
11. Culling: Now we start the process of
actually culling the images. So make sure that the first
smart collection is selected. Culll. Now, most people
would at this point, probably press E on their keyboards to go
to the first image. And then they would
go through the images either using P or X. Like this. I used
to do it this way, but I don't think
this is the best way. And the reason for that is
that you can't really see very clearly the images
around this one. So if there are a number of
images that are similar, It's very difficult to see which one possibly is the best. So what I do, I go back to that and I go back
to the Grid View. And I like to go as big
as possible with this. So I would hide the panels by clicking Shift and Tab
that hides everything. And then I even go full screen. In my case, I have to
press function and F that takes it full screen. Then I go one stage further
by actually zooming in this view by pressing plus, I can actually come down. So I've only got like six
images on display now, I'm using a 27 inch monitor. So it's quite good for this. If you're on a small monitor, it probably won't be
quite as efficient. But now I can see six images. So the first one selected, and then all I have
to do is choose. Do I want to keep it or
don't want to get rid of it. Simple, a simple choice. And that's P or X
on the keyboard. So just one finger on P, one on X, and away we go. So this one, I'll keep
that one, I'll keep. Yeah, I like that one, that one, most of these I'll probably keep actually, pick that one's
a bit of a nothing shot. X. Pick, pick, pick, pick, like beer so, pick this one. Yeah, pick. Be true, be your true self. Have to keep that one. This is a Vespa that's
being used as a fence. I'll keep that one. And that and this is a very
strange little parking lot, very small, only a few spaces. I think I'll just
keep one of them. This one, not that one. That one's like an
establishing shot for the market, So I'll keep it. Keep it. That one no. That one, no. Yes. Yes. Keep pick . Need two here I think so. pick. Reject, pick. Keep it. Keep it. Keep it. Yeah, I'll keep it on that one. This one no. That
one, No. That one. This one didn't work out
the way I wanted. So no. This one? No. That one, yes. For sure. Yes. Yes. Yeah, I like that
one and that one. I have some similar here, so I think I'll get
rid of this first one. Do I need a girl
using her phone? No. And yeah, I'll keep
that one on that one. So that's pretty much it. And if I just open up
the panels at the side, let's see what's happened. So over here, the Job folder obviously
still has 47 images in. But now the cull folder has gone to 0 because we've
gone through them all. And the next one, the
rate folder now has 34. One thing I didn't mention earlier is that there's a separate collection
set here called status. If I click this one, there are a number of
extra smart folders here. So I can see obviously
47 minus 34 is 13. So I can see there are
13 rejected images. If I click this one, I could, I could, if I wanted to revisit these and go through them
again for a second time. But I'm not going to for
this video. This one's done. Let's move on to the next stage, which is rating the images.
12. Rating: The next stage is
to rate the images. Once again, make sure that this smart collection
is selected. And then it's just a matter
of going through and deciding how good
the images are. Personally, don't judge
me on these images. I went out just literally the other day
to just shoot these. So there's nothing
special in here. But nevertheless, this is just to give you a demo
of the workflow. So we go through them and only only images there
are three stars or above, will pass to the next stage of having keywords and
metadata added to them. So bear in mind every time you click a
three or four or five-star, it's giving yourself more work. So only assign those stars
to images that you are prepared to put keywords
and metadata run. So be, be wise at this point. Don't, don't just, like, say yay, That's three stars,
that's three stars. You have to be smart here. Okay? So let's start with
the first one. I'm going to do the
same as I did before, where I will go to the
go to the full-screen. This first one. Actually,
I do, I do like that one because it's kind of both
of the bikes together. So this one's going
to have three. Don't forget, as soon
as you put a star on these, they will disappear. That one's going to
be three, two, three. To that one is a two, two, two
two the Vespa, quite like three to two. You can do this very quickly. It makes it very efficient
to work like this. That one I like It's a three, that one's a three,
that one's a two, that one's a three to two. Nothing special, really. Nothing special.
Nothing special. That one's special like that. And the rest of these,
I'm just going to leave them at two because nothing really stands out at me,
really. Nothing goes. Yeah, you know,
I'm a three-star. Okay, so let's have a look
back to the workflow. And now we have gone
from 47 images in the job down to eight. Only these eight need keywords and metadata apply to them. Okay, Onto the next video.
13. Keywords and Metadata: The next stage is to add
keywords and metadata. This is the stage
that most people find difficult and problematic,
but it needn't be so. Let's just see. So I'll just select
one image here. The first thing to do in
my opinion is to clean up this area because we have far
too many things open here. If we select one
of these headings, we can actually
right-click it and then we can hide it so we don't
need to see comments. We don't need to see
the keyword list. We don't need the quick develop. This just simplifies the
process for me anyway. So the top one is where we add the keywords and this one is
where we add the metadata. You see we have different
kinds of presets here. So this is the default one. The ones I typically
use our defaults and I'll check the location
one from time to time. So the location
where you will see this data here has
been automatically added because this image has geotags attached when
it was imported. So Lightroom automatically puts this information in for us. Let's go back to
the default one. Now this likely
looks different to yours because I only have
two things selected here. If we click customize, we can actually choose
which options we show here. So I only have caption
and title selected. Caption is inside of basic info and the title is inside
of IPTC status. Click Done. So that's the
basic overview of how the, how the setup should
be to start with. Next up is the Wordroom. The plugin Wordroom is a plugin that helps
us to keyword images. So select an image, go to library, plugin
extras, auto keyword. We have the option now to choose which of the keywords
is appropriate to the image. Some of them are good, some of them are not so good, but it gives us a good start. So I typically de-select
them all first and then go through one
by one and add them. So motor vehicle, vehicle, engine, wheeled vehicle
transportation, conveyance, road, wheel, metallic transport, motor, metal,
machine, and classic. You could add extra
keywords here, but I choose to add them
actually over here later. So next up is just click the Add to keyword
tags and click Close. I'm just going to add an extra keyword and
I'm going to call it scooter because there's
no scooter tab there. So scooter and I will
also add the name Vespa. Okay, I'm going to show
you how to make it more efficient because having
to go to library, Plugin extras and
also keyword is quite slow if you have
to do this many times, as you can see, I have a
keyboard shortcut here. I'm going to explain
how to do that now. Unfortunately, Lightroom
doesn't allow us to change keyboard shortcuts, but we can do it with
inside of the Mac OS. I think windows also
has a similar option. So to do it means go to the System Preferences
and choose Keyboard. Shortcuts. And down at the bottom
we have App Sortcuts. This is the one that I created. So to do it, you just click the
little plus here. And then you choose the
application that you want. So for example, this one,
Adobe Lightroom Classic. Then in the menu title, you need to add exactly
three spaces, 1,2,3, and then enter the exact name of the menu command
that you want, plus the keyboard shortcut
that you want to use. So this one is Auto-keyword. Let me show you where that is. So library plug-in extras. And then here you have to
do it exactly as this. Capitalize the a, don't and
don't miss out the hyphen. And then that will
allow you to just use the keyboard shortcut
instead of having to search through
the menu like that. Okay, so back to this image. To complete the image, a title and a caption
needs to be added. So this is a scooter that's
being used as a fence. So I'll just go in here
and I'm just going to type in scooter fence. Then go to the next, next
field by pressing Tab. Okay, there we go. As you can see, I've
been practicing an old Vespa being used
as a fence. There we go. So when I press Enter now
to complete the caption, this image will disappear. That this means that that one is now moved
on to the next stage, which is the edit over here. Okay? What happens when there are multiple images
that are very similar, that could use the same
keywords and the same metadata? Well, what I do is I select the first
one because we have three here that
are very similar. So the first one, I would use Wordroom again to
add the keywords. So let's use the shortcut this
time command and tilde. And we have some keywords here. I'm just going to
add these without changing them
because it's faster. So keywords have been
added. Click Close. Now, I don't want to put the title and caption
yet because if I do, this image will also disappear. So just select all
three images and make sure that the selected photos is chosen here,
not target photo. Okay? And then you can just go
down here to sync metadata. And then you have to go through and see
which ones are inside, but you can tick them
or not tick them here. Down at the bottom
should be keywords. Down here. Yeah, keywords. This is checked, so
click Synchronize. And now each of these images
will have the same keywords. And a similar process
can be used for the title and the caption. So let me show you, click the first one. Shift-click to
select all of them, and then we can
put in the title. So old, old Kawasaki, press
Tab to go to the next key. And old Kawasaki's in Kaohsiung,
Taiwan, press Enter. And that applies them to
all three at the same time. Then the same process
is applied to the rest of you are
rated images until you have no more
images inside of this smart collection like this. So now the next step is
to edit these images. Because each of them now has the metadata and
the keywords added. See you in the next video.
14. Keyording Update: Hello folks, I've decided to add an extra video to
this course because I found a better way or
a different way to do keywording or to automate
the keyword in process. So before we use Wordroom and we'll
room works pretty well. But I find this solution now that I'm going
to show you to be better or different,
shall we say? Okay, so I have
an image selected here of the Statue of Liberty. As you'll see, there are
no keywords applied. So go to File, plug-in extras and
any vision analyse. We are presented with a
number of options here. I'm going to select Labels, landmarks and safety, and
then just press, Okay. And it's very fast. And I think you will agree
that this is a better, a better option than Word room, because you can actually do multiple images
at the same time. Wordroom's a bit
clunky when it came to actually doing
many images together. Let me show you what I mean. Let me take an example of, let's go through one. Let's do a number of
images like this. If I click file, plugin extras, analyse,
keep it the same. Press. Okay. You can see he was busy. We see many, many keywords here because
they're all selected. When it's finished,
I'll just go through one-by-one to see
what we've got. It's almost done. Okay, Let's finished. The first one. So this one
is found, it's a sign. It says exit on
there, which is good. The next one, statue of liberty, should be similar to the previous one.
Let's go for this one. What do we get? Apartment
building cityscape. Yeah, it's pretty
good, isn't it? And this one is the
history spear flag. This is the 911
memorial. By the way. This one commercial building. Didn't really notice that
it's actually a fire station. This one it should notice
emergency service, emergency vehicle,
fire apparatus here. Good. This one should be
the same. How about this one is one
of the weird one. Yeah. Cone. It's found that it's
found that it's a cone. So strange image,
isn't it? Look at it. Anyway. Not to worry about that. Yeah, so I think this one works better because
purely because we can actually add keywords to
more than one image easily. And it seems very, very good. I'll show you where the plugin
is, file Plug-in manager. And this one, any vision. Okay, I will now switch over to Safari and show you
how to get this plugin. So open up Google. And then there's type
in any Vision plugin. And it will be the first hit. John R Ellis. Now this website is very good. He goes into full detail
about how you need to link up with Google to make this work
and what you need to do. So let me just show you. You can try it for free, limited to 50 photos, and then you need to buy a
license at a price you name. Now there's two parts to this. The first part is the
pricing of the plugin, which is this one by
licensed with a plugin. And I think it defaults
to $10 or $9.99. But you can choose whatever
price you want when you pay. It's like donationware
once you've bought a license, you then need to link
it up to Google. And if you follow the
instructions here, actually, it tells you everything
that you need to know to download and
install the plug-in. And then you need to actually
get a Google Cloud key. But if you go to
this website and follow the instructions
on this page, you should be good to go. Give it a shot and let me
know what you think. Thanks. See you in the next video.
15. Editing: The next stage of the workflow
is to edit the images. This is not a class about
how to edit in Lightroom, so I'm not going to do
too much of a fancy job. I'm just going to show
you the process, okay? So just bear in mind one
thing, bear in mind one thing. I'm just going to open up this smart collection
before we start. And do you remember
that obviously, it needs to be inside of
job flagged three stars. Title isn't empty, caption isn't empty, keywords aren't empty. So now it's being kept
in this collection because it has these
two parameters. Adjustments is false. Color label is not green. So we start off by
doing the edits. Once we're happy with the edits, then we hit the 8 key, which will apply
the green label, and the image will disappear. So let's start with
the first one. Go to D, to the develop module. And let's start simple edits. I'm just going to
use the Auto key. Then I'm going to add a little
bit of presence over here. Then a bit of vignette. Just to bring the eye in. Actually, I might change the I, change this to Acros. It's quite nice
in color, isn't it? But now I'm going to keep it. I'm gonna make it Acros. I like the red one. There
we go, Acros Red. So there you go. A little bit of a zoom in, a bit of sharpening, maybe a little bit of
noise reduction actually. Okay. So I'm going to say that that image is what I
would call to be done. Now to save time. To save time, because
these images, these first four,
are pretty similar. I can just click the first one. Click on this one here. And then you can
just sync settings. Click Synchronize. And all of them now
have a similar kind of an edit to them. Yeah. Okay, good. So now these four, if I press the
8 key to apply the green label, they disappear. And they go from
being in the edit smart collection to being in
the done smart collection. So we're looking
at this guy here is go to the develop module. Basic tab, auto. Okay, again, some presence. This just puts
50 and 25 respectively. Quite like that. A
little bit more. Lift the shadows, a bit more. Bit of a vignette
around the outside. And I want to say
that one's done. So now you would just
hit the 8 key. And the next image appears. These are not wonderful
images, are they? It's got to be said, white
balance on this one, shoe, something that
should be whitish. It's better, I think. Maybe 3500. Okay. And then again, a bit of a
vignette around the outside. Don't like this woman here, so I'm going to crop
crop her out, sorry. But you have to go and a bit
too much space on the left. Here we go. Okay,
So that one's done. So press 8. This one. Auto. Presence. More. Raise the shadows.
I like how the light comes through the money. Here. This stuff is disgusting, looks disgusting, isn't it? Oh, well, each to
their own, I guess. More sharpening. Sharpening. Noise reduction. Okay, zoom back out. That one I'm going
to mark as done. This one. Basic presence. Okay? Just some quick edits so
you guys can get the idea. You can be as elaborate as you
want when you're doing it. Crop a little bit. Incidentally, it's one thing to notice about this process. If you solely crop an image, if you'd just crop the
image and do nothing else to it as far as
adjustments are concerned. That does not tick
the adjustment box. So it wouldn't progress. You would have to you have
to change something else. So that one's done. There are and then
hit the 8 key. That's it. All the photos have
now been processed. If we go back to the, back to the Library module, we will see that we still have 47 photos inside
of the job folder. And we have nothing
left to do here. The eight final images
are actually all here. Let me zoom out a
bit. And they've all been finished as far
as I'm concerned. Okay, let's move on
to the next lesson.
16. Existing Images: In the previous lesson, we edited these images down
and mark them as done. So what happens now? How can we use this workflow
to do other things? So let's see. So if we go to the
job collection, we still have the
47 images inside. So we really want
to remove these now from here so we
can do other tasks. So select the first image, press Command a or Control
a on a Windows PC, and then we just press
B on the keyboard. If you remember, b
is the shortcut to add and remove things
from a collection. So when I press B, all of these will disappear. That doesn't mean to say
that they're deleted. They just no longer live
inside of that collection. So what we need to
do now is to add some images into the workflow. It just so happens that
if we go to folders, I have some more images
that I didn't process yet. So if you have existing
images on your hard drive or in your catalog
that you would like to clean up
using this workflow. All you have to do is go to the folder that
they're contained in. And then you just click
on the first one, select all of them and press B. So all of these have been
added to the collection now. So these four are in. Now let's go to the collections. You'll see that we have four
here and there already. To start with culling. Let me just add the
other ones too. There's another 48 here. So you can add multiple
folders at once if you like. There's no rule that says
you can only do one folder. You can add as many or as few images to this
workflow as you like. So CMD-a, press B, and they've now been
added to the collection. One thing that's happening
that I wanted to just check is do as it gone. Also advance. Yeah. We don't need to have
auto advance on. Okay. Let's go back to collections. And now we have
52 inside of job. It's sometimes good to check
the status of these things. So we can see if we go to this other collection we have status because like imagine
that you've done a, done some work two
or three years ago and you want to
process like this, it's often good to check them
to see what the status is. So we can see here that we
have we have no keepers. We have one with no GPS then the rest of that just have
no keywords and no metadata. So this is interesting here. One is, one has no GPS. So we go to this one. If you want to add
some GPS to it, I say the best way or
one of the easiest ways to do it is to highlight it. Go to the map module. Then you just find it, excuse
the Chinese language here, but obviously I'm in Taiwan. Let me just zoom out a bit and I'll find the
location where this was. It was all here. It was a Huangbu Park. So if I zoom in there like this, I know that image was
taken right about here. And you can choose the
roadmap or you can switch to the satellite view if
you find that easier. Yeah. That image was taken. Let me just pull up the bottom. Filmstrip view so you
can see the image. Here's the image and
if I make that bigger, it's in front of a gate, and that gate is right here. So I can just take this
image and drag it into that location
and drop it. Now that image is gone.
And why did it go? Because if I go back to the library module and
look in collections, she let me go to the,
why did it go to the library look in collections? Let's just go back to the map. So why, why did it go? Because it no longer
fulfills the criteria for the smart collection
because now it has GPS. So then it's a matter
of going to the first section
which is the cull. And then let me just hide the
bottom filmstrip for now. And then just go into
the same process again. So just going through
cull, cull and then rate and so on
until you've finished. Then when you've,
when you're finished, you can just add and remove
these things as you see fit. Let me just process one quickly. Let me just process
must choose one. You do. Which ones any
good, I don't know. None of them probably, you could say lets us
process some clouds. This one. Okay. I'm going to hit
pick for that one. Go to the rate flag. I'm
going to hit this one. I'm going to have three stars. Keywords, metadata. Zoom in big. Can go with this one. Just going to click add
keyword tags, close. Switch to default,
zebra crossing. Cmd all. Copy and paste. Zebra crossing with clouds. And edit. Edit. Go to the develop module. And basic black on white. Clothes. Also. Quite a bit
more texture in this, a bit more a bit more contrast. Okay Yeah. Okay, that's good for me. So let's go back to the so it's still edit because I didn't
put a label on there, so add the green label. It's now clusters done. Right? So if you remember before
we add eight images from the previous session. So now we've got one
here from this session. So one of the cool
things about this is we can have some
global filters. So if I just show you, if I close this and go to
the smart collections, I actually added
one inside of here, and it's called global. Global done. So this will show it, show us any images that we've
processed in this way. So this could be, let
me just show you. So now we have nine images. If I go see we have nine because we did
before and just done one. Now, this is very powerful
because we can use this to, to see exactly which images we've processed in
which we haven't. If you wanted to publish
them online based on this, you could actually have
a collection that, that you know is just
contains you're done images, and you can modify
this in many ways. Let me just right-click and
duplicate smart collection. So now we have an exact copy of this one. Double-click it. And we could say Done. Let's think, done in
the last 30 days. Done last 30 days. Or you need to do now is simply click on
a plus sign here. And then you just go in and
you change this to date. Capture date is in this month, or let's think in
the last 30 days. In the last 30 days. Obviously, nothing's
going to change because these images were all
captured in the last 30 days. But you could have many
different versions of this folder. And then you can
use this data to really find out where
your best images are. Okay, it's time to go
onto the next part of this class which
is about backup. See you there.
17. Backup: Let's talk about backup. This is not very glamorous
and this is the thing that many people often overlook. And it can be very painful
when you lose files. I know I've lost several years worth in one go when
a hard drive failed. So don't put all your
eggs in one basket. So I have a number
of hard drives here. Let me just explain
them. Samsung T7. That's just like an extension of my main hard drive
because this Mac mini only has 500 gigs
of storage on it. So this is like an extra
storage space for the Mac. The photo library, as you know, is where my images live. And this one touch drive is
a copy of the photo library. So if the photo library fails, this one has exactly the
same things on it as this. So the software I use is
called carbon copy cloner. Here it is. And this software allows
us to make copies. So what it will do,
it will look at your drive and it will
see what's different from the last time and
just add the new stuff so it keeps both
drives synced up. You can add a number
of tasks here. So it's not just
for the one thing. Like for example, this course. This course here is this is backed up as well
because I wanted to keep this safe because there's a
lot of a lot of work went into this and I didn't
want to risk losing it. So literally you just
add your source drive, you add your destination drive, and then you just click start. And it'll just do its
thing and very easy. So if I've done a shoot and everything has been
processed, so it's finished. All the images are on
the photo library. I will just come here and open up carbon copy
cloner click start. And I know that this is going
to get copied across to the, to the OneTouch. One thing for this, this is just for Macs. This doesn't work on
Windows computers. If you go back to level less than six and look
in the workflow setup, I did a little bit of
research and found that there's some windows options. If you're a Windows user, I would suggest that you find a program that
is good for you. So this handles the
drives locally. I would also recommend
keeping an online backup because should
anything disastrous happened in like in your home, I mean, I hope it doesn't, but should there be a fire or a flood or
something like this? And both of you
drives get wiped out. That means all of
your work is gone. And this is very important
if it's client work. So I think it's
important to have a Cloud backup service too, so I can recommend this one. It's called Backblaze. What this does. It backs up everything
to the Cloud. Well, actually, you can choose what
you want it to backup. But in my case, it backs up the, the Mac and it backs up the photo library and
it backs up the T7. So should anything happen like my computer gets
stolen, there's a fire, there's an earthquake, some disaster happens, and
everything's destroyed. I could still go
to Backblaze and just download everything
to a new computer. I also use a Western Digital
my passport wireless probe. This is a standalone
portable hard drive that has a built-in
SD card reader. And if it's good to just take
with you when you're travelling. And it is also at the
end of every shoot, I take the memory card inserted into here and
make an additional backup. So this keeps original
copies of all the files. So even if I delete some from my photo library on Lightroom, I still have another backup
of the original file. Okay, that pretty much wraps
up the section on Backup. Guys, it doesn't sound very glamorous, but make it part of
your workflow because one day something will happen and I don't want
you to lose all your, all of your images and
all of your memories. Okay, see you in the
next lesson. Bye.
18. Project Completion: Don't forget to complete
your class project by making a contact sheet
out of your finished images. Okay, so to do that, go from the library module
to the print module. And then on the left-hand side inside of template browser, if you expand the
Light Room templates, you will see that we have
some pre-existing options. So click on the
first image, shift, click to select all of them, and then choose which
one works best for you. So let's see, 4x5, 5x8, I think I'm going to
try the 4x5. And then we can change some parameters over
on the right side. If you don't see
these parameters yet, you have to expand them. So under layout, we
can choose how many, how many rows and how
many columns we have. I think I'd like to have more. Let me say try and
make them bigger. So let's go to two. And you can just
play around this until you get something you like the look of I think
this one's pretty good. At the moment. We have the file name selected. We can change that by going
to down here and we find it. Yeah, photo info. You can turn that
on and off if we don't want invading,
turn it off. But I'm going to change
it to, let's think title. You can have caption. I'm going to change
the title though. So title there. And then when it's finished
and you're happy with it, go down to the bottom, and you can change it here from printer to print to JPEG file. So print to JPEG file. You can choose your
resolution, your quality. Don't worry about the
settings for now. This is more for printing
to an actual printer. Then is click print to file and then save it somewhere,
you will find it. And I'm just going to
call this one projects. And let's click Save. This is a nice way
to view your images together just to see what
they look like overall. If you have a printer, it's, it's nice to print these off so you have a record of
your best images. Great. Okay, see you in the next class.
19. Conclusion: Well, you got to the
end of the course. Fantastic. I hope you had fun. I had a load of fun making the course and look forward
to doing the next one. Don't forget Lightroom. It's very personal. This workflow was my method. You can tailor this
method to suit yourself, but hopefully, the speed that you will have
gained will help you take your photography
to the next level. Because at the end of the day, we want to spend time
out there shooting, not time on our computers
editing the photos. So I wish you well in your photographic journey and hope to see you
again in the future. Bye.
 Ian Jukes, The world is a beautiful place!