Transcripts
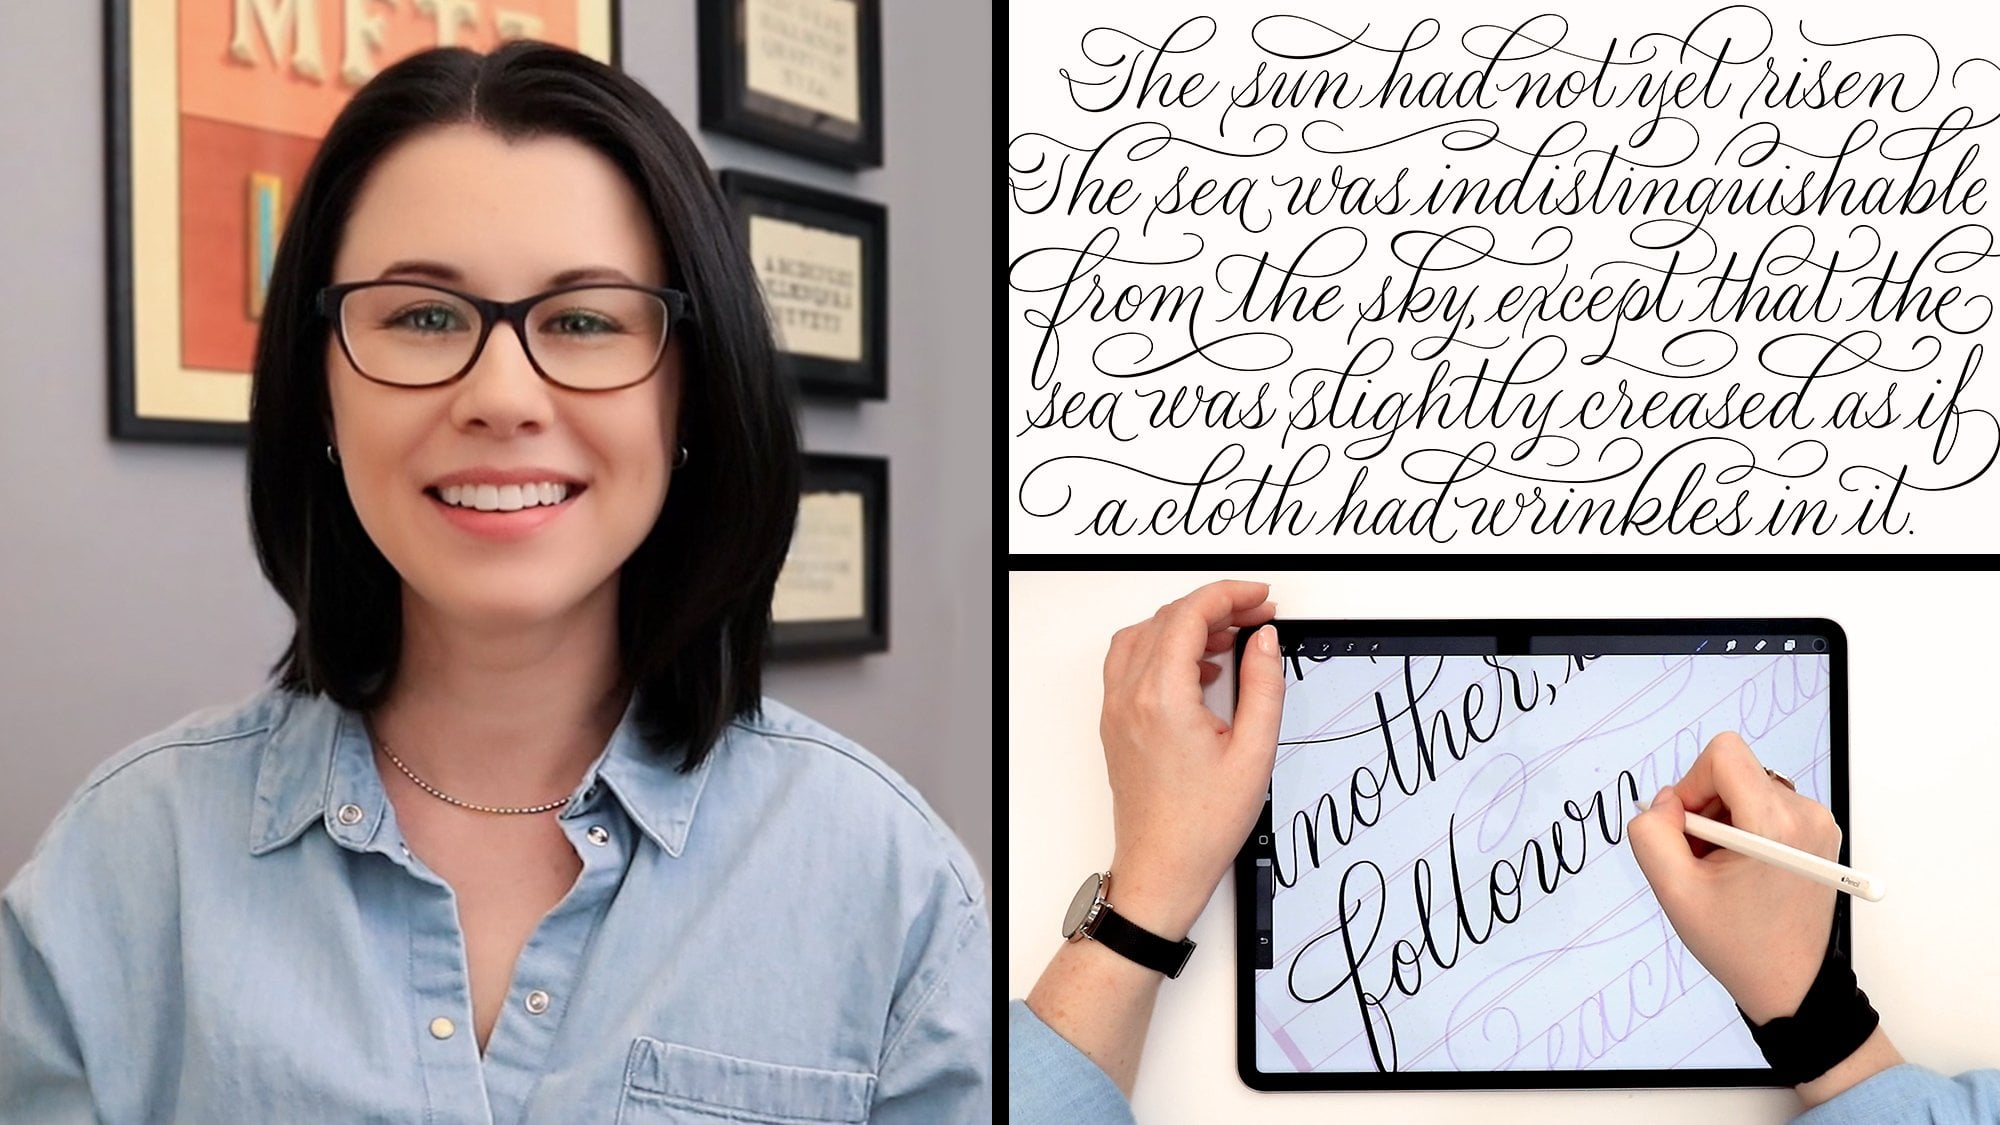
1. Welcoming to Flourishing Masterclass!: He. Welcome to Lettering
Flourishes Master Class. I'm Molly Suberthorp. I work as a professional
calligrapher and procreate brush designer, and I'm also a
teacher of lettering. In today's lesson, I'm going to share what I've determined are the key principles to successful flourishing in hand
lettering and calligraphy. The bonus download that
comes with today's lesson is this 26 page workbook. It's also what I'm
going to be using to give my presentation
to you today. So you can follow along
at home with a lot of the same flourishing practice sheets that I've provided here. You can trace the common shapes. You can experiment
with different styles. You can train your hand to
get the smoothest strokes, and you can even print
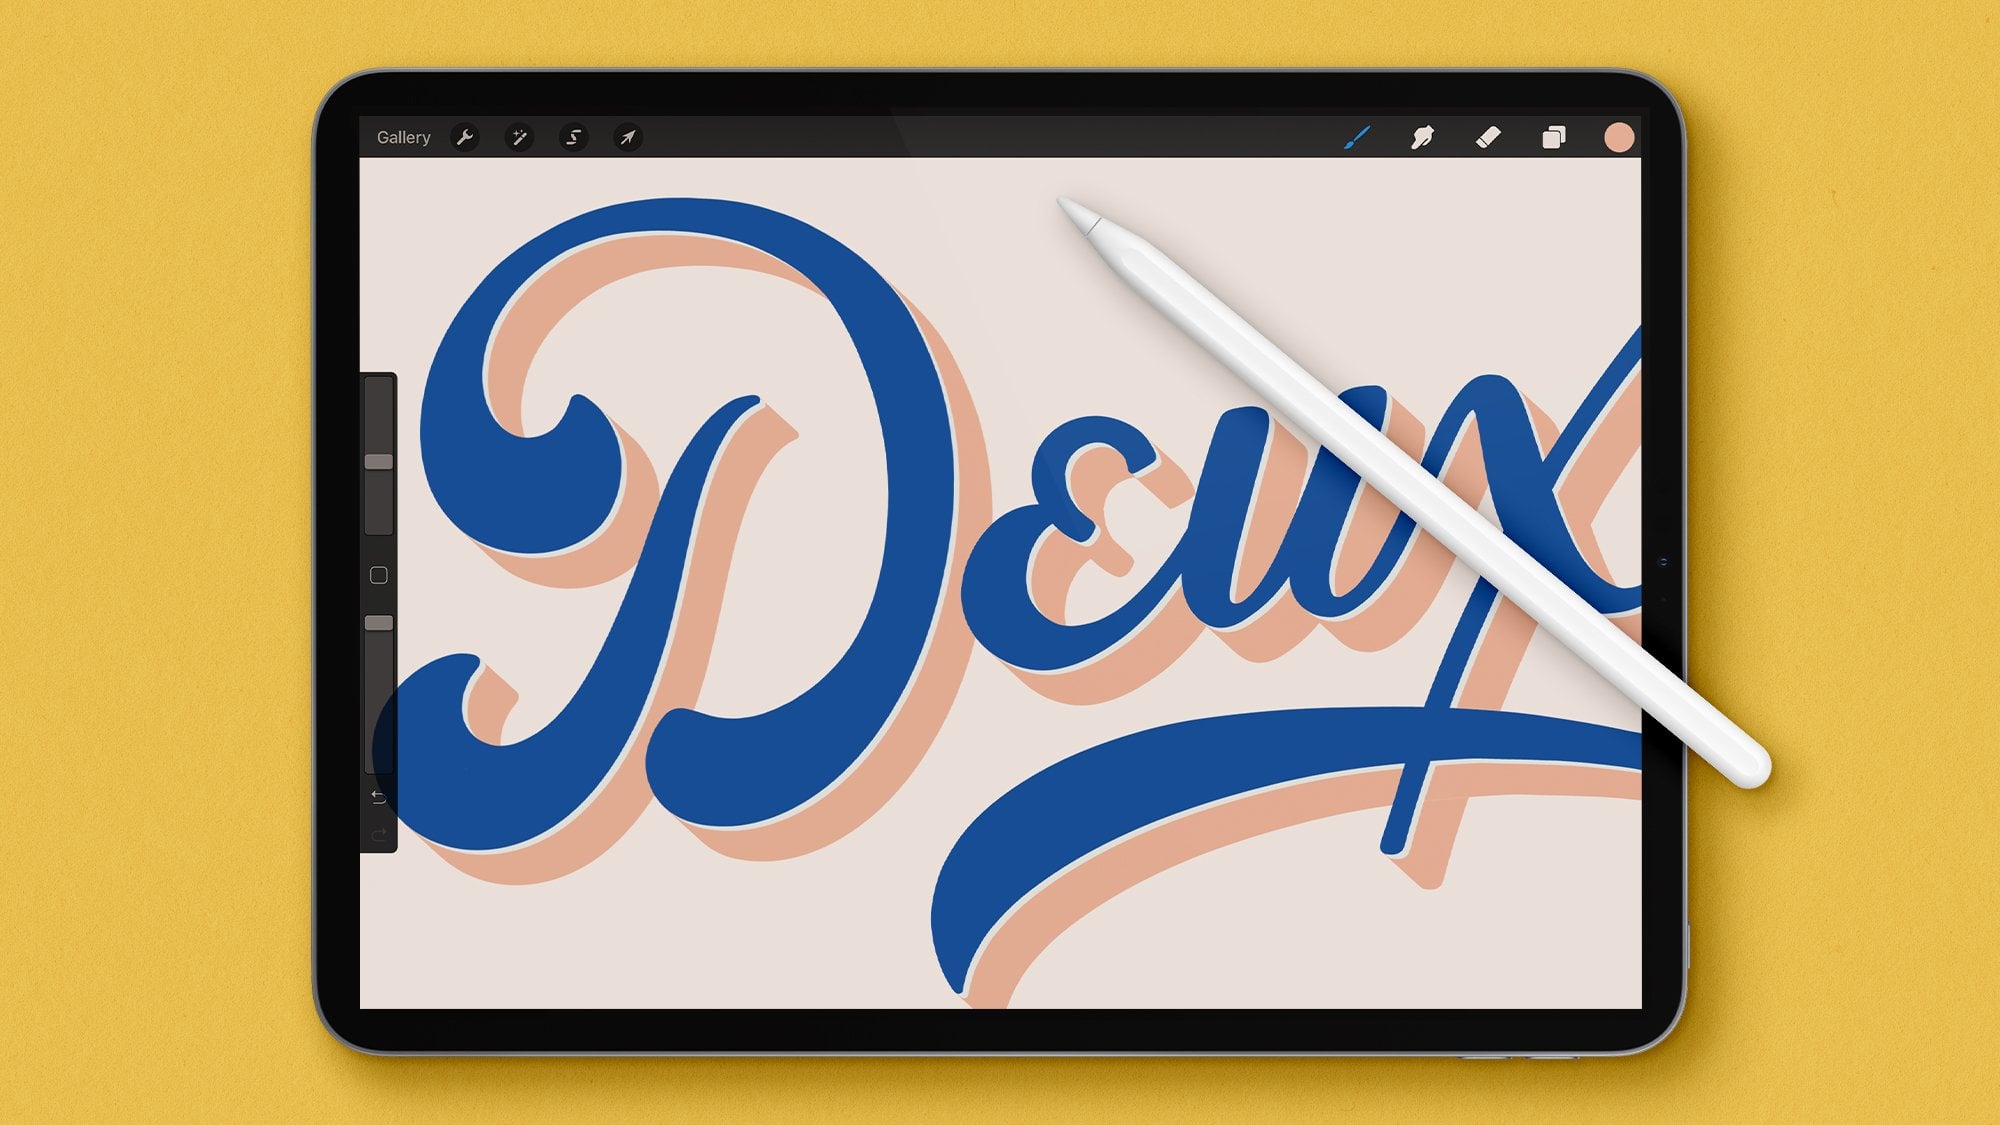
the PDF versions. All of the principles
I'm covering today apply to analog and digital
lettering equally. When it comes to the
key considerations of thoughtful flourishing that
ends up looking effortless, the exact same principles apply, no matter which
medium you're using. You can follow along with
income paper or with your iPad, and I've provided this
downloadable workbook in both of those formats. And finally, I want you to
bear in mind as we go that successful flourishing
combines all the principles that I'm going to be discussing, which did make it a little
bit difficult for me to choose which order to
present everything in. So as we get to the end
of the presentation, you may find yourself having the desire to go back
to the beginning and rewatch how an earlier
principle would then integrate with one of the
later ones we're learning.
2. Principle 1: Intention: The first flourishing
principle I'm going to cover is intention. This should not be
confused with style. It's a broader
principle than that. While it might be an unexpected
addition to the list, I actually think
it's so important that it deserves
to be number one. Flourishes can be used
to add elegance to increase the formality of a calligraphy or
lettering style. Fancy flourishes can be used to make lettering
appear elegant, more old fashioned, or just
more decorative in every way. Other times, flourishing
is used to add drama. This is much more common in bold styles of hand
lettering than in script, but it can simply mean it's
more common in lettering, which is drawn rather
than calligraphy, which is more written
like handwriting. So where intent comes in is that before even creating
your flourishes, you really must have a sense of the overall impression that your flourishing must
convey and create. How will your
flourishes elevate and impact the base letter forms?
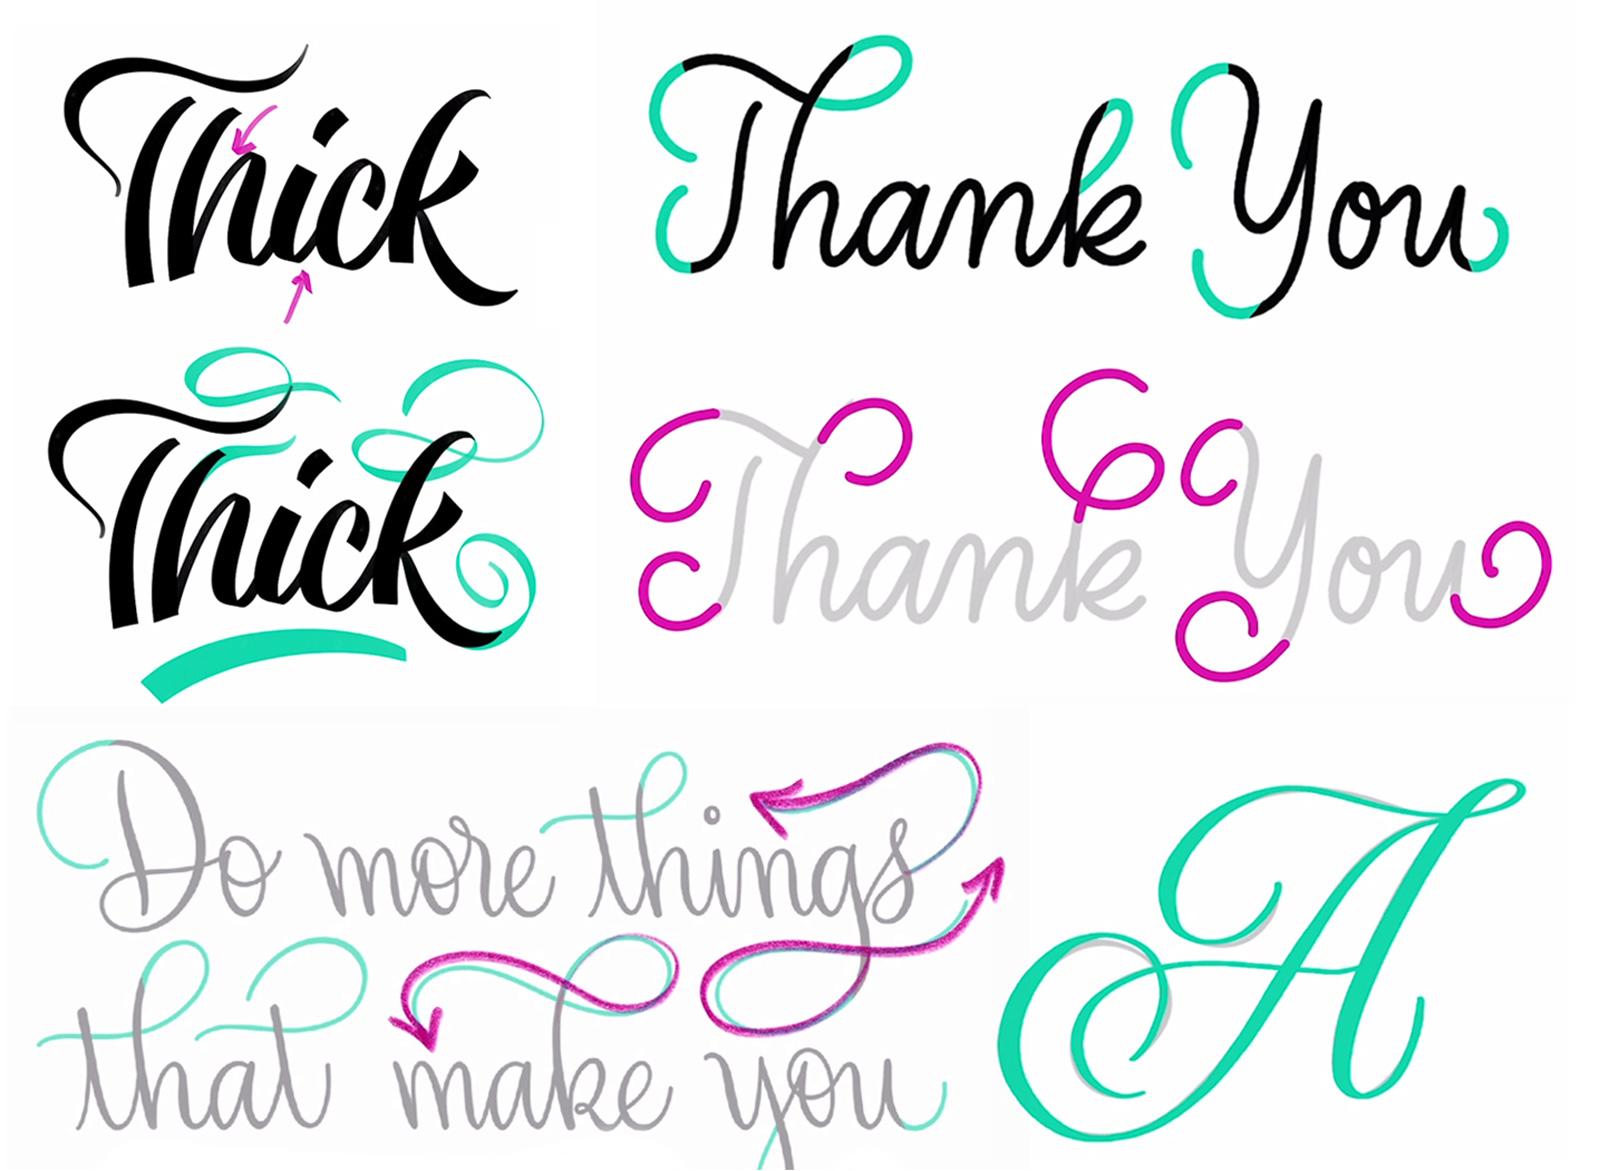
3. Principle 2: Placement: Principle number
two is placement. The most common placements
for flourishes, whether formal or
playful or bold or modern are a letters
ascender strokes, a letters descender strokes, meaning those that go
below the baseline, the entry strokes
leading into a word. The exit strokes leading out of a word or
out of a phrase, you don't necessarily want to
flourish every exit stroke. Like, in this case, this one on the T would probably
be a little bit much. Then, of course, the
crossbar of the letter T, which some might categorize
as a type of a sender, but really because it
is horizontal and it usually sits only slightly
above the X height, it's considered to
be its own category. There's also a category of flourishable areas like the
connection out of this O, namely areas within letter forms or within the
connections between letter forms that have
opportunities to add extra flourish or extra curves. So now that we understand
where flourishes go, let's talk about where
they should fill. So flourishes tend to fill either negative space or
overlap other flourished loops, primarily other
parts of flourishes, but occasionally open loops
in letters themselves. The exception of the
crossbar of a T flourishes should rarely overlap the
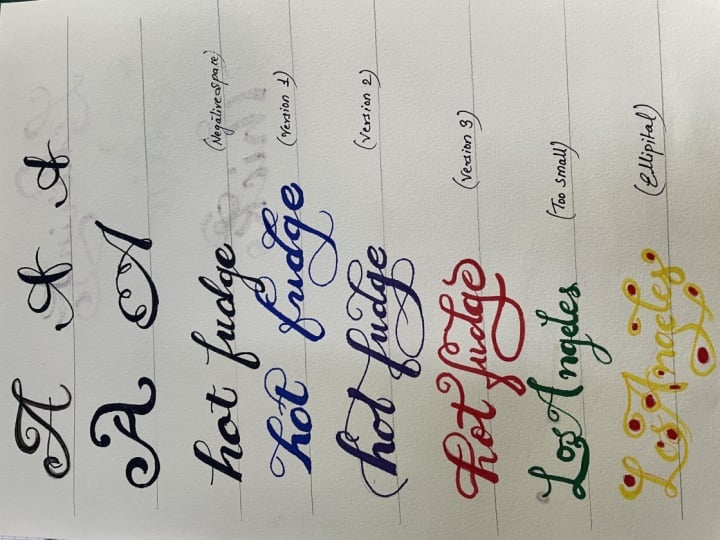
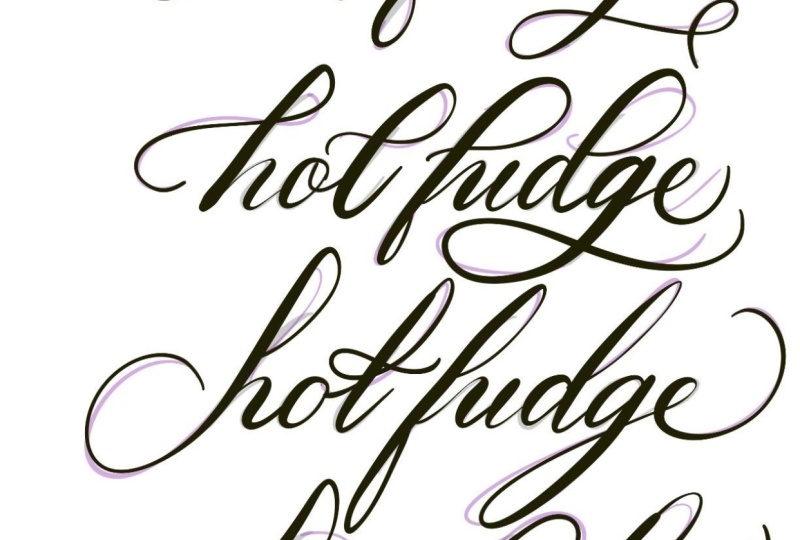
primary strokes of a letter, simply because that can really reduce legibility quite quickly. So here I've shown you the negative space of
this particular phrase, which I consider to be prime real estate and territory for filling
with your flourishes. So having written this phrase, hot fudge in a basic
Caligraphic alphabet, I can then evaluate what areas of this can
I use for flourishing? I don't have to
fill all of them, but flourishes would work well in these particular spaces. So combining essentially the negative areas
that I have to fill with the specific letter
regions that I can use, I can come up with a number of options of how I can flourish this filling in
my negative space and utilizing the entry, exit, a sender, descender strokes to create
a more flourished design. I flourished most of
the regions that I previously laid out in
the initial diagram. So for example, on this ge, I removed that initial curve, the symbol curve, and instead, I came around and filled
up the negative space here and some of the negative
space in front of the H. For the crossbar of the T, I filled up a lot
more negative space above it and to the right of it. For this O, rather than
this simple connection, I turned the connection
into a loop, which really complements
these loop shapes I've created in the
other flourishes. For my F, this was
all I had before. I was a very simple
descender stroke on the F, but I added a second curve
to it by filling in some of the negative space
to the left of the F. For the top of the F, I had this quite simple curve, and I replaced it
with a curve that filled up the negative
space to the right of it. My D's A sender, which was your classic
A sender loop, that filled up a lot
more negative space, both to the left
and to the right, and it even increased the
height of the letter too. So I chose just one of many options of
flourishes for that one. My descender of the G, of course, was originally
a little loop like this, but I just really
extended it out to fill up that negative space to
the left and to the right. Decenders very often give you a lot of opportunity
to fill up a lot of space because
the florist shapes for descenders tend
to be pretty wide. And then I just did a
very simple exit stroke on this E. The end result, if I were to write this all out together would look like
me writing like this. Unless I already know exactly
the flourish I'm doing, I often start with
the base shape and then add the flourish once I have a little bit
more sense of the word. That's pretty common. But again, unless I already know in
advance or I'm tracing and I know exactly what
flourish shape I want, I tend to draw them
in that order. Now you may be thinking, how do you know what shapes
and all of that? That's going to come later. Remember how I said
that these things go hand in hand and there's not
really a particular order I can teach them in that
will cover everything that you need to know in one
step after another. All of this is going
to be covered. But yeah, first, we're just
talking about where you're going to put your
flourishes and then we'll talk about
how to shape them. So here are some more
examples of placement. I had just shown you
one way to flourish it, but here are two more. We have, for example, if we just compare these two, I made a choice on
this one to fill up the negative space
and move a little bit below the baseline
with my entry stroke. But here on this H, I didn't do anything to the entry stroke. I only flourished the acender, but I filled up the negative
space to the left of the H with my Asender
so in that sense, I added space to the
left of the word without playing at all
with the entry stroke. So that is one
crucial principle, and we're going to get
to that more later. But you don't have to flourish every available opportunity. Sometimes choosing some and leaving others
unflourished is what creates the appropriate
contrast to make for really effortless
impressive flourishing. So I did some simpler
things on these. You can see that here this
T bar is pretty short, whereas this T bar not only is so long that it
actually incorporates into the flourish of the F. Here I did something similar
making the flourish of the F incorporate into
the flourish of the D. And then I did some
fancier stuff with my G and made a couple different options for the descender of
the F. So like I said, with this workbook,
you're going to be able to come in here and
trace these on your own, build up that muscle
memory to really get a sense of movement, shape, size, and pressure,
how to press down to keep the thin strokes thin
and the thick strokes thick. Here I have this base phrase without any flourishing
whatsoever. And you're going to get the
opportunity on your own, and here with me a
little bit to play with ways that you can flourish these words
to your own liking. So, for example, I'm
just coming in here. I like to sketch things out like this and sort of play
with their legibility, knowing that I can, you know, change them around before
I trace the whole word. And each time I'm
going to try to do something just a
little bit different. Yeah, let's see what
I think of that. Here in Procreate, I
can make my sketch, and then I can reduce its
opacity and then trace that original template and my flourishing together
in one design. See how I just made
that edit as I went. I realized that because I had created this large flourish
at the bottom of the F, I lost my F's crossbar. So it was going to
look more like an L than an F. So off the cuff, I just created this F's
crossbar to connect the U, and that kind of solved the legibility issue
I was going to face. And again, if this overwhelms you and
you're just thinking, but how do I come up
with these shapes? That's where we're about to get. Okay, cool. So this is an exercise that I want you to play with at home on your own. Nothing is a better way
to practice flourishing than just diving right in and
experimenting on your own. So challenge yourself. How many ways can you
flourish this short phrase?
4. Principle 3: Size: Next up, principle
number three is size. The best piece of
advice that I can give anyone starting out with
flourishing is this. Flourishing should almost always be much larger than you
think it should be. The most common
issue I've seen over the years among my
students is that since flourishes are considered
to be accents and therefore secondary to the
letter shapes themselves, the instinct is to make them
smaller than the letters to keep them discreet
and unobtrusive. After all, we want the letters
to stand out most of all. So why would we make the flourishes as
big as the letters? Well, flourishes when they're
proportionally too small, they have the opposite
effect of being discrete. The eye tends to be
drawn toward them, and they actually detract
from the words themselves. They're distracting.
Here's an example where the flourishes
are too small. These loops and curves
look completely out of proportion with the overall
size of each letter. This uppercase letter
is pretty large. But this flourish takes
up, what, let's say, less than 25% of the
height of the letter, more like 20% even. To me, this gives
off the impression that these loops and
curves were created with a scrunched hand
that didn't have much movement going when the
flourishes were created, but sort of added
the flourishes by rote with the sensation
should add a curve here, but I'm not really sure
what to do with it, so I'll just stick
in a roundish loop. You really want flourishes
to take up real estate. Remember how we talked about
all that negative space? Look at how much negative
space is lost here. So many places with
opportunities to flourish. How can we make that better? Well, here's one way that I created an
alternate solution. These two have the
same base letter form. You can see that I used much different opportunities
for flourishing, and I really did my
best to exaggerate these flourishes so that
they were not too big, but just simply proportional
to the letters themselves. This fills up all that
negative space a lot more. It really gives
more of a sense of forward movement and
sort of upward movement, which is much more
satisfying to the eye. Also, the open spaces
left by the flourishes really complements
the open spaces left in the letter forms. Here in the workbook, I
give you the opportunity to trace that same
design that I created above so that you can
sort of get a sense with your hand of the
size of movement and the amount of distance
your hand really has to travel to make
flourishes of this size. But then I'm giving you, just
like on the previous page, the opportunity to play with adding flourishes
of your own. And then you can just
come over and create a more polished design by tracing the combination of the template and your
sketched flourishes. At the bottom of each of
these pages, by the way, I have provided a
caption that shows exactly what procreate brush I originally used to
create this design. However, I would urge you to play around with different pens. There's absolutely no
reason you have to use the exact lettering
brush that I use, because each brush is going to give you a different style. With that said, I
really do strongly recommend that you choose
a real lettering brush or a brush optimized to
lettering when you do this practice because
procreate brush designers who design lettering brushes
put a lot of thought into some very specific programming
elements that involve, for example, pressure
sensitivity, which is crucial
to letter forms. The way that the flow and the
tracking of the digital ink can follow the
movement of your hand and get smoothed out
and all of that. So not every art brush works well for lettering,
especially for flourishes. So if you feel frustrated that you can't get
smooth strokes, the first question I
would ask myself is, am I using a brush, whether it's a procreate brush or a real analog marker or pen? Am I using one that is really optimized to flourishing
or am I using an inadequate tool
that is the reason I'm being hindered in my
skills that maybe it's not me, maybe it's the tool.
5. Principle 4: Shape: Next up is shape,
principle number four. This goes hand in hand
with our first principle, intention in the
sense that playing with the underlying
shapes of flourishes, the actual shapes of the curves
themselves and the loops, has a huge impact on the mood and impression
that they convey. As a general rule, the more elliptical or oval shaped
the flourishes are, the more formal the
flourishing style becomes. Conversely, the more circular
a flourished shape is, the more modern, playful, whimsical the style becomes. So I have here for you two
traceable versions that show very elliptical
shaped flourishes and circular, more
round flourishes. I would love for you to
be able to practice these both and get a
sense of which one matches your personal
aesthetic more. This is an example of
where you can make a conscious change to your flourishing to suit your aesthetic one
way or the other. Play with these
and ask yourself, do I like this more
playful style that comes with the more
circular shapes or do I prefer this more formal
traditional look that comes from making longer and more
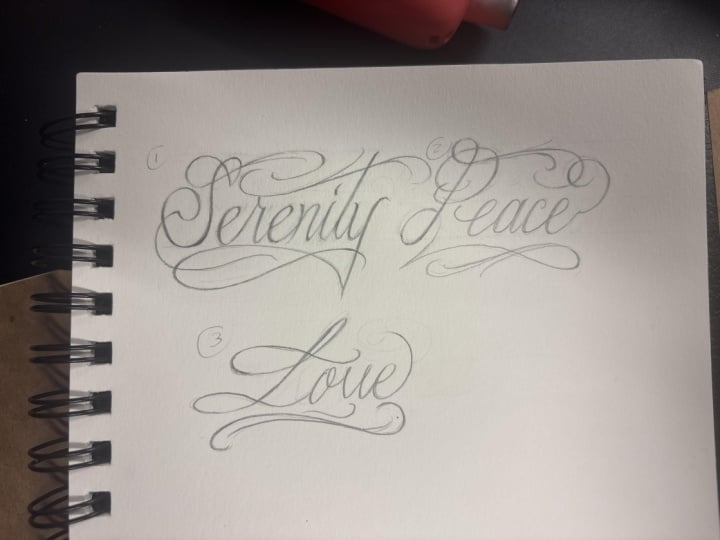
elliptical flourishes? Here is an exercise specifically
for playing with drawing your own flourishes in either elliptical
or circular shapes. So my initial example, and this is done
with a monoline pen, I'll use my truest monoline
from my monoline pen set. In this particular one, I use elliptical but almost
circular flourishes. So you can trace over
that if you'd like, but the real challenge
here, I think, is going to be that I want you
to play around with making truly circular shapes and
making truly elliptical shapes. So these would be
considered very circular, and these would be
considered very elliptical.
6. Principle 5: Style: So on the subject of style, we have principal
number five style. It only makes sense that the
style of the letter forms themselves and the style of the flourishing should
complement each other. I think this is probably
a pretty obvious one, but in practice, it does deserve a little bit
more explanation. Here we have an example of a pretty heavy lettering style. This was done with
my flex pointed pen. So let's head over
to that, actually. So this was done with my
flex pointed pen that has a pretty wide range from thin to thick based on
minimal pressure. So when you have a
lettering style like this, this breaks the rule
that lots of people have that flourishes should be sort of fine hairlines
and just very elegant. If I were to flourish this
word with very fine hairlines, the flourishes themselves would be weak, by contrast, right? You wouldn't get
that same sensation that they're truly
part of the letters, that they were created
with the same tool, that they were
created effortlessly and off the cuff
by the designer. If your pressure on
the letter form itself is to create thick strokes
that are roughly that thick, then your flourishing
should probably have some accents that are at
least mostly that thick. Change up the flourishing
shape if you want, but really making sure
that that weight and that style consistency
remains the same. Here we have very fine
point calligraphy. Here I use my stiff pointed pen, so let's just switch
over to that. All of this flourishing
is that very fine, classic, formal,
traditional hairline. You can even come
over here and just trace the flourishes
that I created. And just get a sense of
how very little pressure on a calligraphy
pen is required. You can, of course, also use a calligraphy marker for this, but I would use a fine point or stiff marker to achieve
this because any very, very flexible or soft brush
is going to make it a little bit too easy to get strokes
that are much too thick. So this is a pressure
sensitive brush, but it's just barely
sensitive enough to create slight contrast between the fine hairlines and
the thicker swells. So I want you to come in
here and try to emulate the style of my base
lettering in your flourishes. Maybe even instead of playing
so much with their shape, kind of do something fun. Don't worry if it
looks good or bad. But just practice making these big sweeping strokes using the same pressure or weight
as you found in the letters. And lastly, I have a
monoline example here. And with this, I used my
truest monoline brush again. And, of course, with monoline, by its very definition, you have no option for weight. So this is almost like the trick question
version because you actually have no option with any monoline pen to change
the weight based on pressure. You'd actually have
to adjust the size of the brush here or
in analog writing, choose a different pen entirely. Still, this is to really
drive home the fact that making sure that
that consistency is complementary or matching
is what's really going to create the
effortless flow that flourishing relies upon.
7. Principle 6: Quantity: All right, next up is a
very crucial one quantity. The key rule here is
that you should employ flourishes thoughtfully
and strategically. I very, very rarely flourish
every single letter. In most words, that
wouldn't even work because a word that
has a descender letter like a Y right in the middle of it takes a little
bit of talent and creativity to flourish
that descender and still properly connect to whatever the next letter in the word is. So for the most part, at least for beginners, I would suggest don't
flourish every letter. Find the areas once you
draw your basic style, find the areas where
flourishing would be possible. Remember that first
exercise that we did? So locate those areas, locate your negative space, and choose just a couple. Do not go in here with
the sense that, okay, now that I've
identified these five, six places, I need to
create six flourishes. That might actually
reduce the legibility. So here I've shown you
one common approach, which is that words that have an uppercase letter
frequently make very flourished versions
of the uppercase and leave the lowercase letters
that follow very simple. Just adding this flourishing to the uppercase is already going to just start
you off with a bang. It starts and sets a mood of fancy and flourished right from the beginning of the word. In fact, it can be so dramatic
because it's a large, tall uppercase letter that
it can carry this show. You don't really need, usually, to add flourishes in the rest of the word for someone to have the overall impression that the entire word is flourished. However, if you want to do
a little something more, you could flourish
your upper case and then choose one other spot. I chose this second
Asender because I felt it did a good job
of two birds with 1 stone. It filled in negative spaces on the top area by just
flourishing one single letter. Now, here's an
example where I've flourished literally
every single letter. This happens to remain pretty legible, but
I will tell you, it took me a few tries to make flourishes that were
not so overlapped and so cumbersome that the word became almost buried by the flourishes that
surrounded it. I think that, for
example, flourishing, this E is completely
unnecessary. Even if you create a flourished descender for
the Y, as I've done here, it would have been completely appropriate for me to nix that flourish and just go
straight into the E. It's unnecessary and, in fact, distracting to have put
that initial entry stroke flourish into a letter that
is in the middle of a word. Let's talk about some ways
that you can flourish this. So again, these are the regions
that I have to flourish, and taking into account
this principle of quantity, I'm going to experiment with different combinations
that I could use. So let's see what
happens if I create a very minimal flourish
to my uppercase letter. By contrast, you
can see up here, this is a much more
dramatic flourish. So we start with a
minimal flourish there. What if we do essentially no flourish here,
just a classic. What about this flourish on the L that fills up only
this negative space. Now if we flourish the W, it could be very
minimal, a little loop. So there we have one example. Now let's flourish this
a lot more than before. Yeah. So we have
that a lot more, and let's just do all out
here with the decender. Now coming in, I'm going
to do my suggestion from before of not flourishing the entry stroke to that E. This is a classic
way to flourish L's. When you have a double L, you can make the first one, sort of encompass the second. So you can come into your
L like this and then make your second L lower and sort of encompassed under what
you might think of as an umbrella of the first. So let's try that style here, and let's not even
loop the second one. So no flourishing whatsoever. Let's not even loop that.
Let's keep this simple. Let's just see what happens if we don't flourish
the O at all, either. No loops at all. And then on this W,
let's do something to fill in a bit of this space because here on the left side, we come quite far to the
left with our flourishing. So why don't we think
about flourishing this word off to the right
for a sense of balance? That's one option. Not
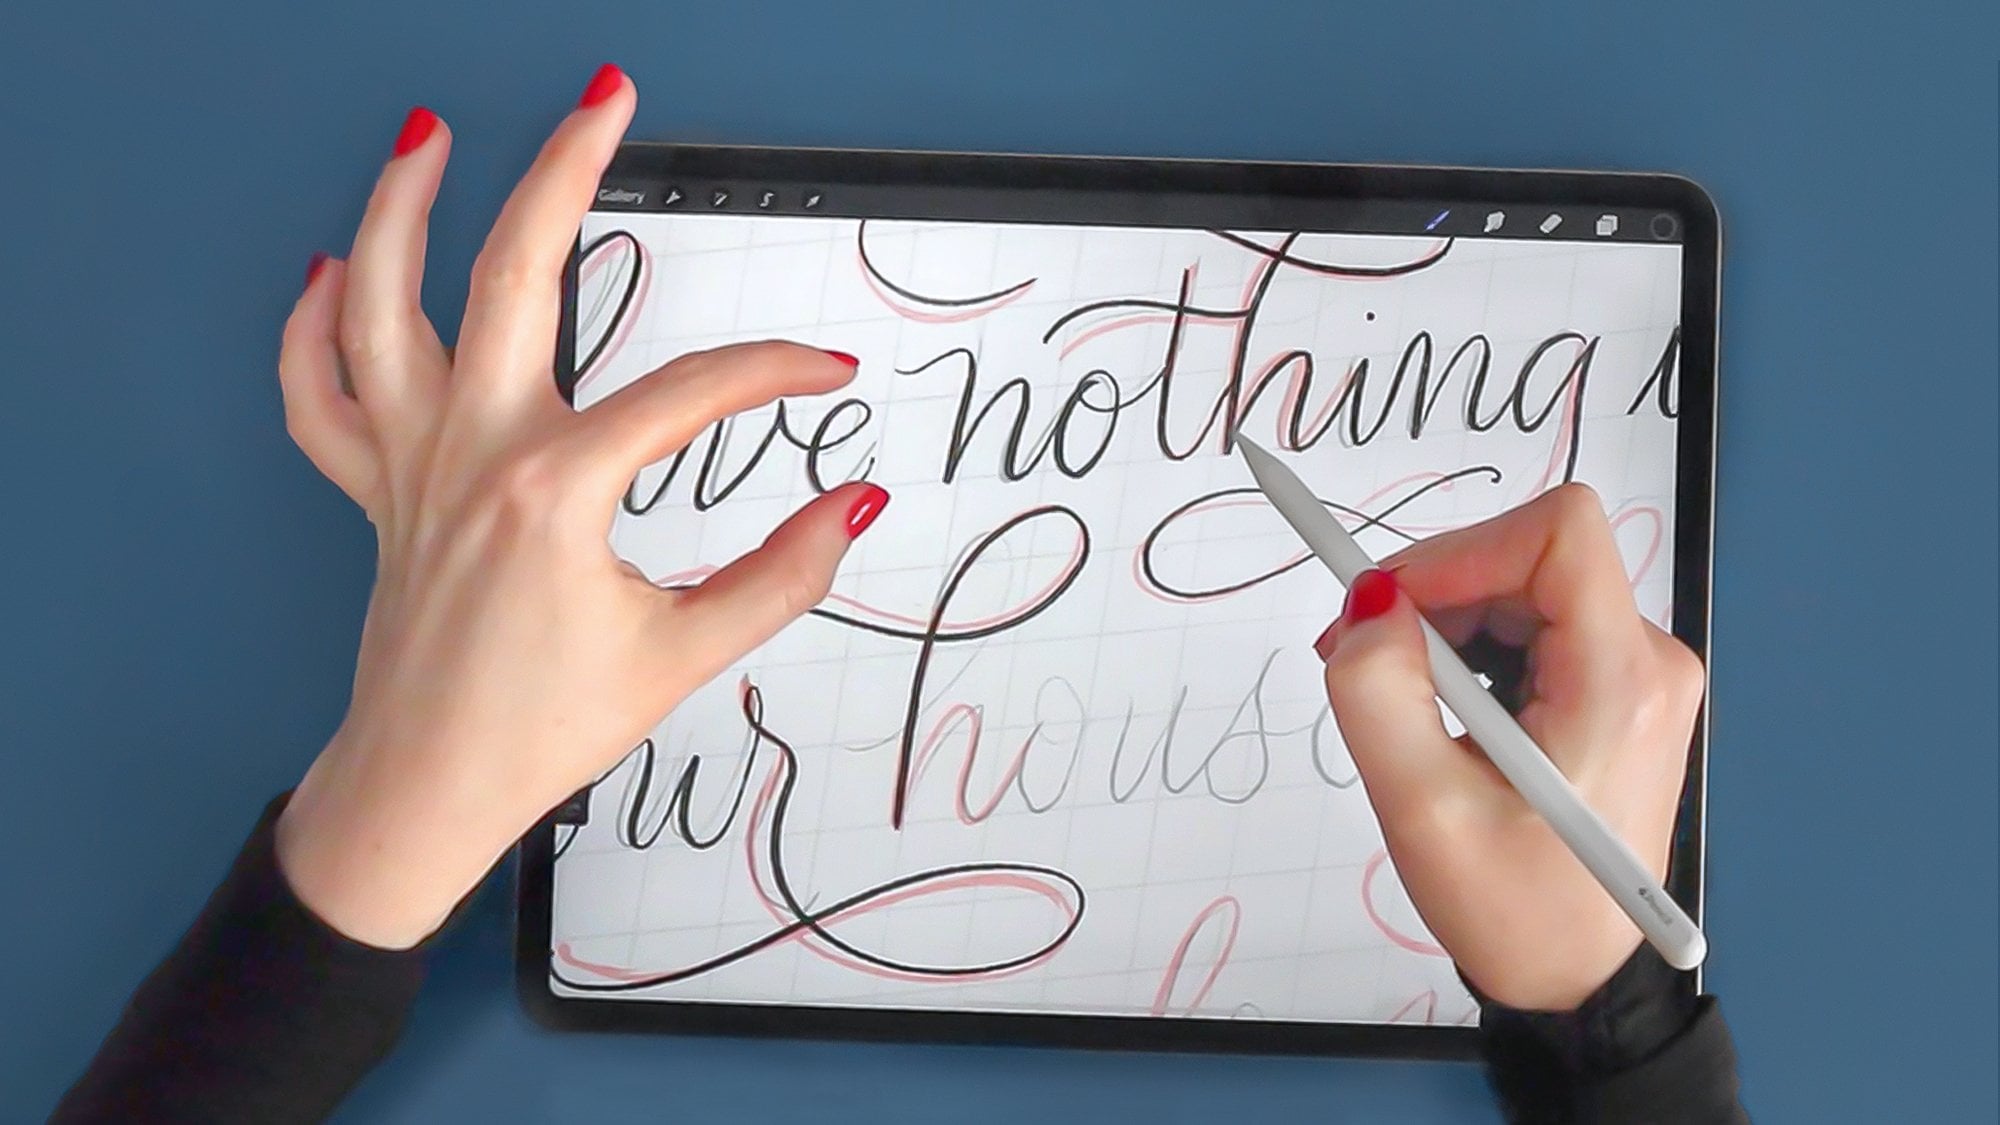
a fan, I don't think. Although, yeah, it's really not bad if we come up like this. Yeah, that would be good. Now, let's polish that
one up a little bit, trace it again just so that
we have a sense of, you know, the entire word without a lot of sketches and overlapping. Now, you can see
that because I'm moving my arm very loosely, I am not tracing exactly
over my previous flourishes, because if I waste a lot of energy really trying to emulate or trace over the exact location of my previous flourishes, I'm going to find myself having a stiff arm, shaky strokes. Really, that loose
effortlessness cannot be achieved
if I'm working too hard to sort of track the exact location of
the strokes I'm making.
8. Principle 7: Weight: Now let's talk a little bit
more about weight itself. So let's say that you
have a very more simple. This has some light
flourishing to it, of course, but some very simple
lettering like this that overall gives off
the impression of being thin or light weight. So let me switch my pen here. I used my ribbon
pen to create this, so I'll just move over to that. It's in my flat tip pens. And essentially,
this is a brush that goes from thin to thick really nicely with both
pressure and direction. I want you to look at how I added additional
flourishes here, sort of extra decoration. So I took this same
design, and down here, I decided to add additional
flourishes. Oops. And the point of this
exercise is about weight. So I think it'd be helpful
if you came over to trace these and you really worked
on getting the weight, the pressure that you
exert on your pen to match mine and to match whatever lettering
you are decorating. So again, you can come and
trace my original design or you can trace over
the letters themselves, really get a sense of the weight used to create the letters, and then challenge yourself
to add some flourishing. So for example, one
kind of fun way to add even more visual interest
to a design is to add what I call these little
highlights or movement accents to make the word really
look like it's moving or, you know, shaking or dancing
or something like that. I have here more examples for you of weight, in
this case, thick. I use the exact same brush to create this thick
lettering, by the way. But you have this
thick lettering. The thinnest part of these letters is still
relatively thick. In fact, it's probably
just about as thick as that fine lettering
that we saw before. So that's the thinnest
part of this thick style. And the thickest part is quite dramatically thicker, right? So when you get a
brush in here to really draw in extra decoration, do not hesitate to really
push down and add drama. Remember how I was saying
that I see a lot of calligraphers
thinking that since flourishing is an accent, since it's an add on, it really needs to
sort of fade into the background and not distract. Well, if I created a flourish to this K that was really
small, like that. Even if the weight
was sort of correct, we are not talking about a
complimentary flourish here. Something about this looks
much too small for the style.
9. Principle 8: Legibility: Alright, here's a super
important one legibility. Take a look at the very
top word that I have here. What does that say? What do you first see when you read it? I think some people
would first see clean. Some people would
first see lean, and others still might
actually be back and forth between the two to the point they have
no idea what it says. This is a common problem
with flourishing. Because flourishing
contains loops and because so many
letters contain loops, you can find yourself almost creating letter like shapes
with your flourishes. And that is something you
have to strongly avoid. I'm not in a habit of
telling people that one style of lettering is
right and another is wrong. But the only two key principles that always have to remain with good lettering are you can read it because
it is lettering, after all, and you like it. If you, the artists like it, and it's legible,
then that is right. In this case, though,
this is not legible. This particular flourish could read as a C, and so therefore, because it is at the
same baseline and at roughly the same height
as the lowercase letters because it has the
same thickness in downstroke right there
as the letters themselves, the eye could easily read
another letter there. So, it doesn't pass
the legibility test. Here are a few better ways that we could have entered
into that word with a flourish that would not be distracting or mistaken
as another letter. In these two, I've chosen
to create a sense of forward movement and really move the letter Ls flourish to
the right up into the right. In this first one,
I just went with the very classic
unflourished script L that starts down at
the baseline and enters straight up
into the asender loop. And here I have kept that same sense of a
single entry loop. I've just raised it up higher, and I haven't given
it any weight. So rather than this large
thick baseline flourish, I've just raised it up and
taken away the thickness. Now it's your turn.
There are so, so, so many flourishes
that you can do here that are going
to be more legible. This can look like a lowercase
E a lot of the time, but I do see it sometimes
utilized like a flourish. And again, that just
immediately becomes illegible. Is that an E or is that an L? Another common one is when
the letter H gets flourished. I see sometimes people doing this for their H. For example, does that say hello or
does that say bello? This is a very common way
of writing a script H. I personally find that
very hard to read, given that a very valid
form of script B is this. So if you want to
make a flourished H, I suggest keeping
that second stroke, the second down stroke, pretty straight, not
curving it in like this. But keep it pretty straight
and make your flourish move out into the right rather
than in and up, right? So that second part of
the H would be like, this would be more legible, this much less legible. There are lots of examples,
and as a general rule, I tell people when you're
creating a final design, especially something
very important like a logo or a tattoo, where there's not a
lot of easy going back it becomes if
it gets implemented, I suggest to people run this
by a fresh set of eyes, a friend, a colleague, ask them, Can you read this? If there is any hesitation
in that person, that means that other
people will hesitate, too. If there's any question at all, I suggest to tweak it until
nobody has any doubt.
10. Principle 9: Drills: So the next section of this free packet that I've given you provides a lot more
targeted exercises. We've talked now a lot about
different principles of what makes good
flourishing successful. But drawing flourishes
themselves is a daunting task, and that's going to start
with movement in your arms. So I provided these drills here that are going to
get your arm moving and build muscle memory for really common
flourished shapes. I suggest using a pencil. You can even print
this sheet with the PDF I give you and
use a real pencil. Nothing better, honestly. I do this in my own
doodles all the time. And just go over them. This
is the speed I'm looking for. I'm not looking for
you to carefully trace around each shape. No. The point is, with a loose shoulder,
a loose elbow, a loose wrist, can I just quickly move around and
create these basic shapes? That's what successful
flourishing is going to require. So follow the arrows. In this case, for example,
this is a clockwise movement. Here, I'm asking you to make the same shape in a
counterclockwise movement. These are counter clockwise. I am not planting my hand on my screen and just using my
fingers to create this shape. No, I'm moving my
entire shoulder. In fact, I'm barely
moving my wrist at all. Go through these. Do these as many
times as you need. Do them in the morning when
you sit down to practice. Just get these
shapes in your hand. If you play an instrument
like I grew up playing piano, practicing your scales was that way to work
out your fingers, but while also learning sound combinations, this
is the same thing here. You're going to be
working out your arm, getting those basic flourished
movements in there, while also learning how
your arm needs to move, where the movement
needs to come from, to create these successful
flourished shapes. Hint it's your shoulders and
a little bit your fingers. Then when you get into
doing real letters, you're going to find that, um, that practicing that I
did with the drills, that's coming in handy here
because I don't even have to think anymore about
how to move my arm. My arm just knows, I just embedded that in the
brain of my arms.
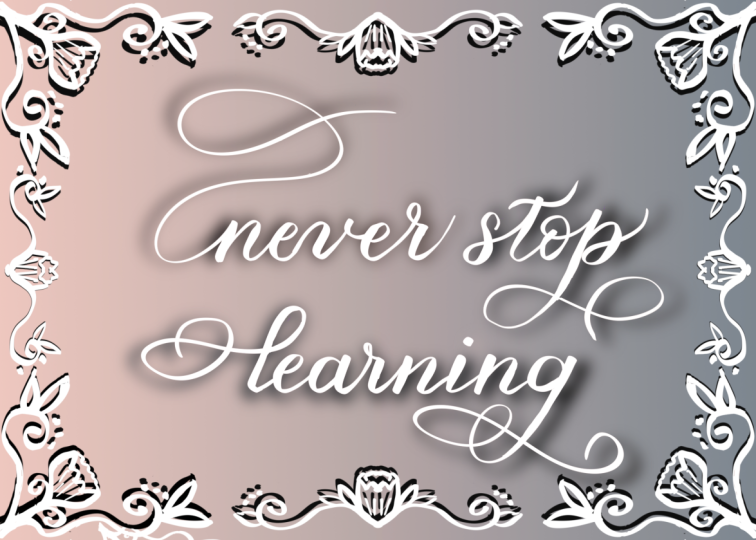
11. Principle 10: Layouts: Next, I've given you three
layouts to practice, which utilize different
lettering styles, different types of pens as well. This is a traceable layout
showing a monoline style, and you can see where I
created the flourishes, and then I want you to create your own flourishes based on all the principles
previously covered. So try different styles, try more elliptical, try
more circular, try longer, try more minimal, do
all of those things, and just really get a
sense of what is possible. Here's layout
exercise number two. This uses my almost
monoline brush, which has an overall kind of modern monoline vibe to it without being
strictly monoline. There is some contrast
in stroke weight. So this is a slightly
fancier flourishing, but still really
modern because there's a lot of circular shapes
in the flourishing. But there's also a
lot of movement. I tried to make these
feel like they really are moving in a
lot of directions, you know, down up
left, et cetera. So there's just like this sense of energy to this
overall design. And the third layout is this much fancier,
more formal one. This is maybe advanced
level because I have here really fancy fancy,
fancy flourishes. These can actually
be helpful for you to trace maybe
over and over because these are some of the
more flourished shapes that you'll be able to find. There are a lot of glyphs here, and by that I mean, for example, this T and this H
are a single glyph, meaning that they
are inextricably linked, this T as well. So this one flourish
connects this T with this H, with this T, as well. Here's another
glyph. The flourish coming off the uppercase W turns into the Asender
flourish of this K.
12. Bonus: Guidelines: The final set that
I've given you the final section of
this workbook are five different lettering
guides of various angles, baselines, ascender
heights, descender heights. Maybe you already have a set lettering style, and
that's wonderful. But if you're playing around
a lot with proportions and ratio and using grids is
still really helpful. By the way, grids are not just for beginners. I use
grids all the time. If you're in Procreate, throw a blank layer up above it and, you know, do a bunch of
your practicing on here. I want you to be
able to go through these and just use
them to practice. If you're doing this on paper, print them out and put some tracing paper
over them so that you can reuse the same gritted
sheet over and over and over, or use a light box, for example, with a normal
piece of paper over it.
13. Keep Learning…: Thank you so much
for following along. My sincere hope is that this class has
inspired you to get experimental with
your flourishing and even try out Procreate
if you haven't already. I invite you to share images of your process in the
class project section. I know I love to see
the many creative ways that my students
interpret my lessons, and I believe that you love to see each other's
work as well. If you do want to follow along with this Procreate packet, using the exact same
brushes that I use, head over to this short
link and purchase my ultimate lettering and
calligraphy Procreate Kit. If you're interested in learning various other modern
calligraphy styles, I offer a library
of free downloads, where you can find dozens of printable and Procreate
practice sheets. I call it Molly's
lettering toolkit, and I've linked to it in the
description of this class. I also encourage
you to check out my other classes and my books
as you continue learning. Thank you so much,
and I hope to see you back here again
for another lesson.
 Molly Suber Thorpe, Calligrapher & Designer