Transcripts
1. Let's Get Critical: [MUSIC] Are you an artist, creator, or graphic designer? Do you want to improve your work but don't know where to start? Hi, my name is Shayna South. I'm an Artist, overthinker, and your instructor for today's class. But in all seriousness, being an artist, creator, or designer comes with a lot of fear and self-doubt. But getting critical with your work in a productive way is a skill that will make you a better artist in the long run. Unless you have an art director on standby, or currently in art school, it can be hard to find feedback from others, especially if you're pressed for time. In this class, I want to show you how you can apply a critical lens to your word, and edit yourself. You'll be able to make better, quicker decisions as you're working, using things like the Principles Of Design, the Principles Of Art, and some tips and tricks that I've come up with as I've honed my process. I'll show you some examples applying this process to my own work with a finished piece, and some works in progress. Critical doesn't mean negative. It means being able to step aside from your own ego and inspect a piece of artwork objectively. My hope is that you will not only be able to edit your work yourself, but you'll be able to appreciate what makes your work so great. Even with all these tools, sometimes you just can't compete with outside feedback. I'm also going to show you how you can ask family and friends, who may or may not be creatives, how they can look at your work in a critical way that's actually productive. Get those red pens ready, and let's get critical. [MUSIC]
2. Your Critique: [MUSIC] For the class project, you'll pick a piece of your own that you'll apply this process to go through the checklist from this class, taking notes as you go. You can do this after you watch the class or go through the process along with the lessons. In the project gallery, post an image of your work and share what conclusions you came to after your critique. You can add as much or as little detail as you want, as long as you include some positives along with any areas to be improved. As a bonus, the first five students to post a class project will get a full critique from me. Let's go ahead and get started. [MUSIC]
3. Stages of Editing: [MUSIC] Right off the bat. I want to clarify one very important thing, and that is that you shouldn't wait until you're done with the project to look at it critically. Throughout your process, you should be asking yourself the questions that we're going to go over today. To the end I'm going to show you a critique of a finished project. [NOISE] I'm also going to show you some samples of some works in progress, and unfinished projects to show you my logic and how you can apply what you'll learn in this class to works in progress, not just finished pieces. [NOISE] The finished project that I'm going to be working with today, is a greeting card that I made for work. This is what I'll be using as the through line in every single lesson. Then I'll integrate some different works in progress as we go along. When it comes to editing for graphic design or illustration or other forms of art, I would think of it like writing. You have your outline, a rough draft, maybe a second rough draft that you share with someone. Then you have something that's close to final. That's how I look at editing as I go throughout my work. In the next lesson, we'll talk about zooming out and getting into the right headspace to critically look at your work. [MUSIC]
4. Zoom Out: [MUSIC] Before we get into the nitty-gritty of our critique, I'm going to ask you to do one very important thing and that is to zoom out from your work. We want to zoom out now we're physically but mentally. That means taking a step away from your project and clearing your head. That means going for a walk, cleaning the house, cooking dinner, painting your nails, just do whatever you need to do to get out of your head a little bit. You want to come into the critique, refreshed, and with a new perspective. Chances are you've been working on your project for a while. We want to get out of that headspace, come into this as though it's something you've never seen before. After you're done clearing your head, it's time to dive in. The first thing I like to do is to print out my work. Now if you're working digitally and your final project is going to be digital, maybe printing it out, doesn't make sense. But I like to have that physical piece of paper in my hand. I like to physically take a step back from my work. But of course, you can also zoom out in Photoshop or Illustrator or whatever program you are in. But the point is to take in your project all at once. Instead of focusing on one little detail on this one corner, we want to start out by looking at the whole thing. I like to move from the outside and so we'll get to those little details later. Now we're ready to get into the critical part of this process.
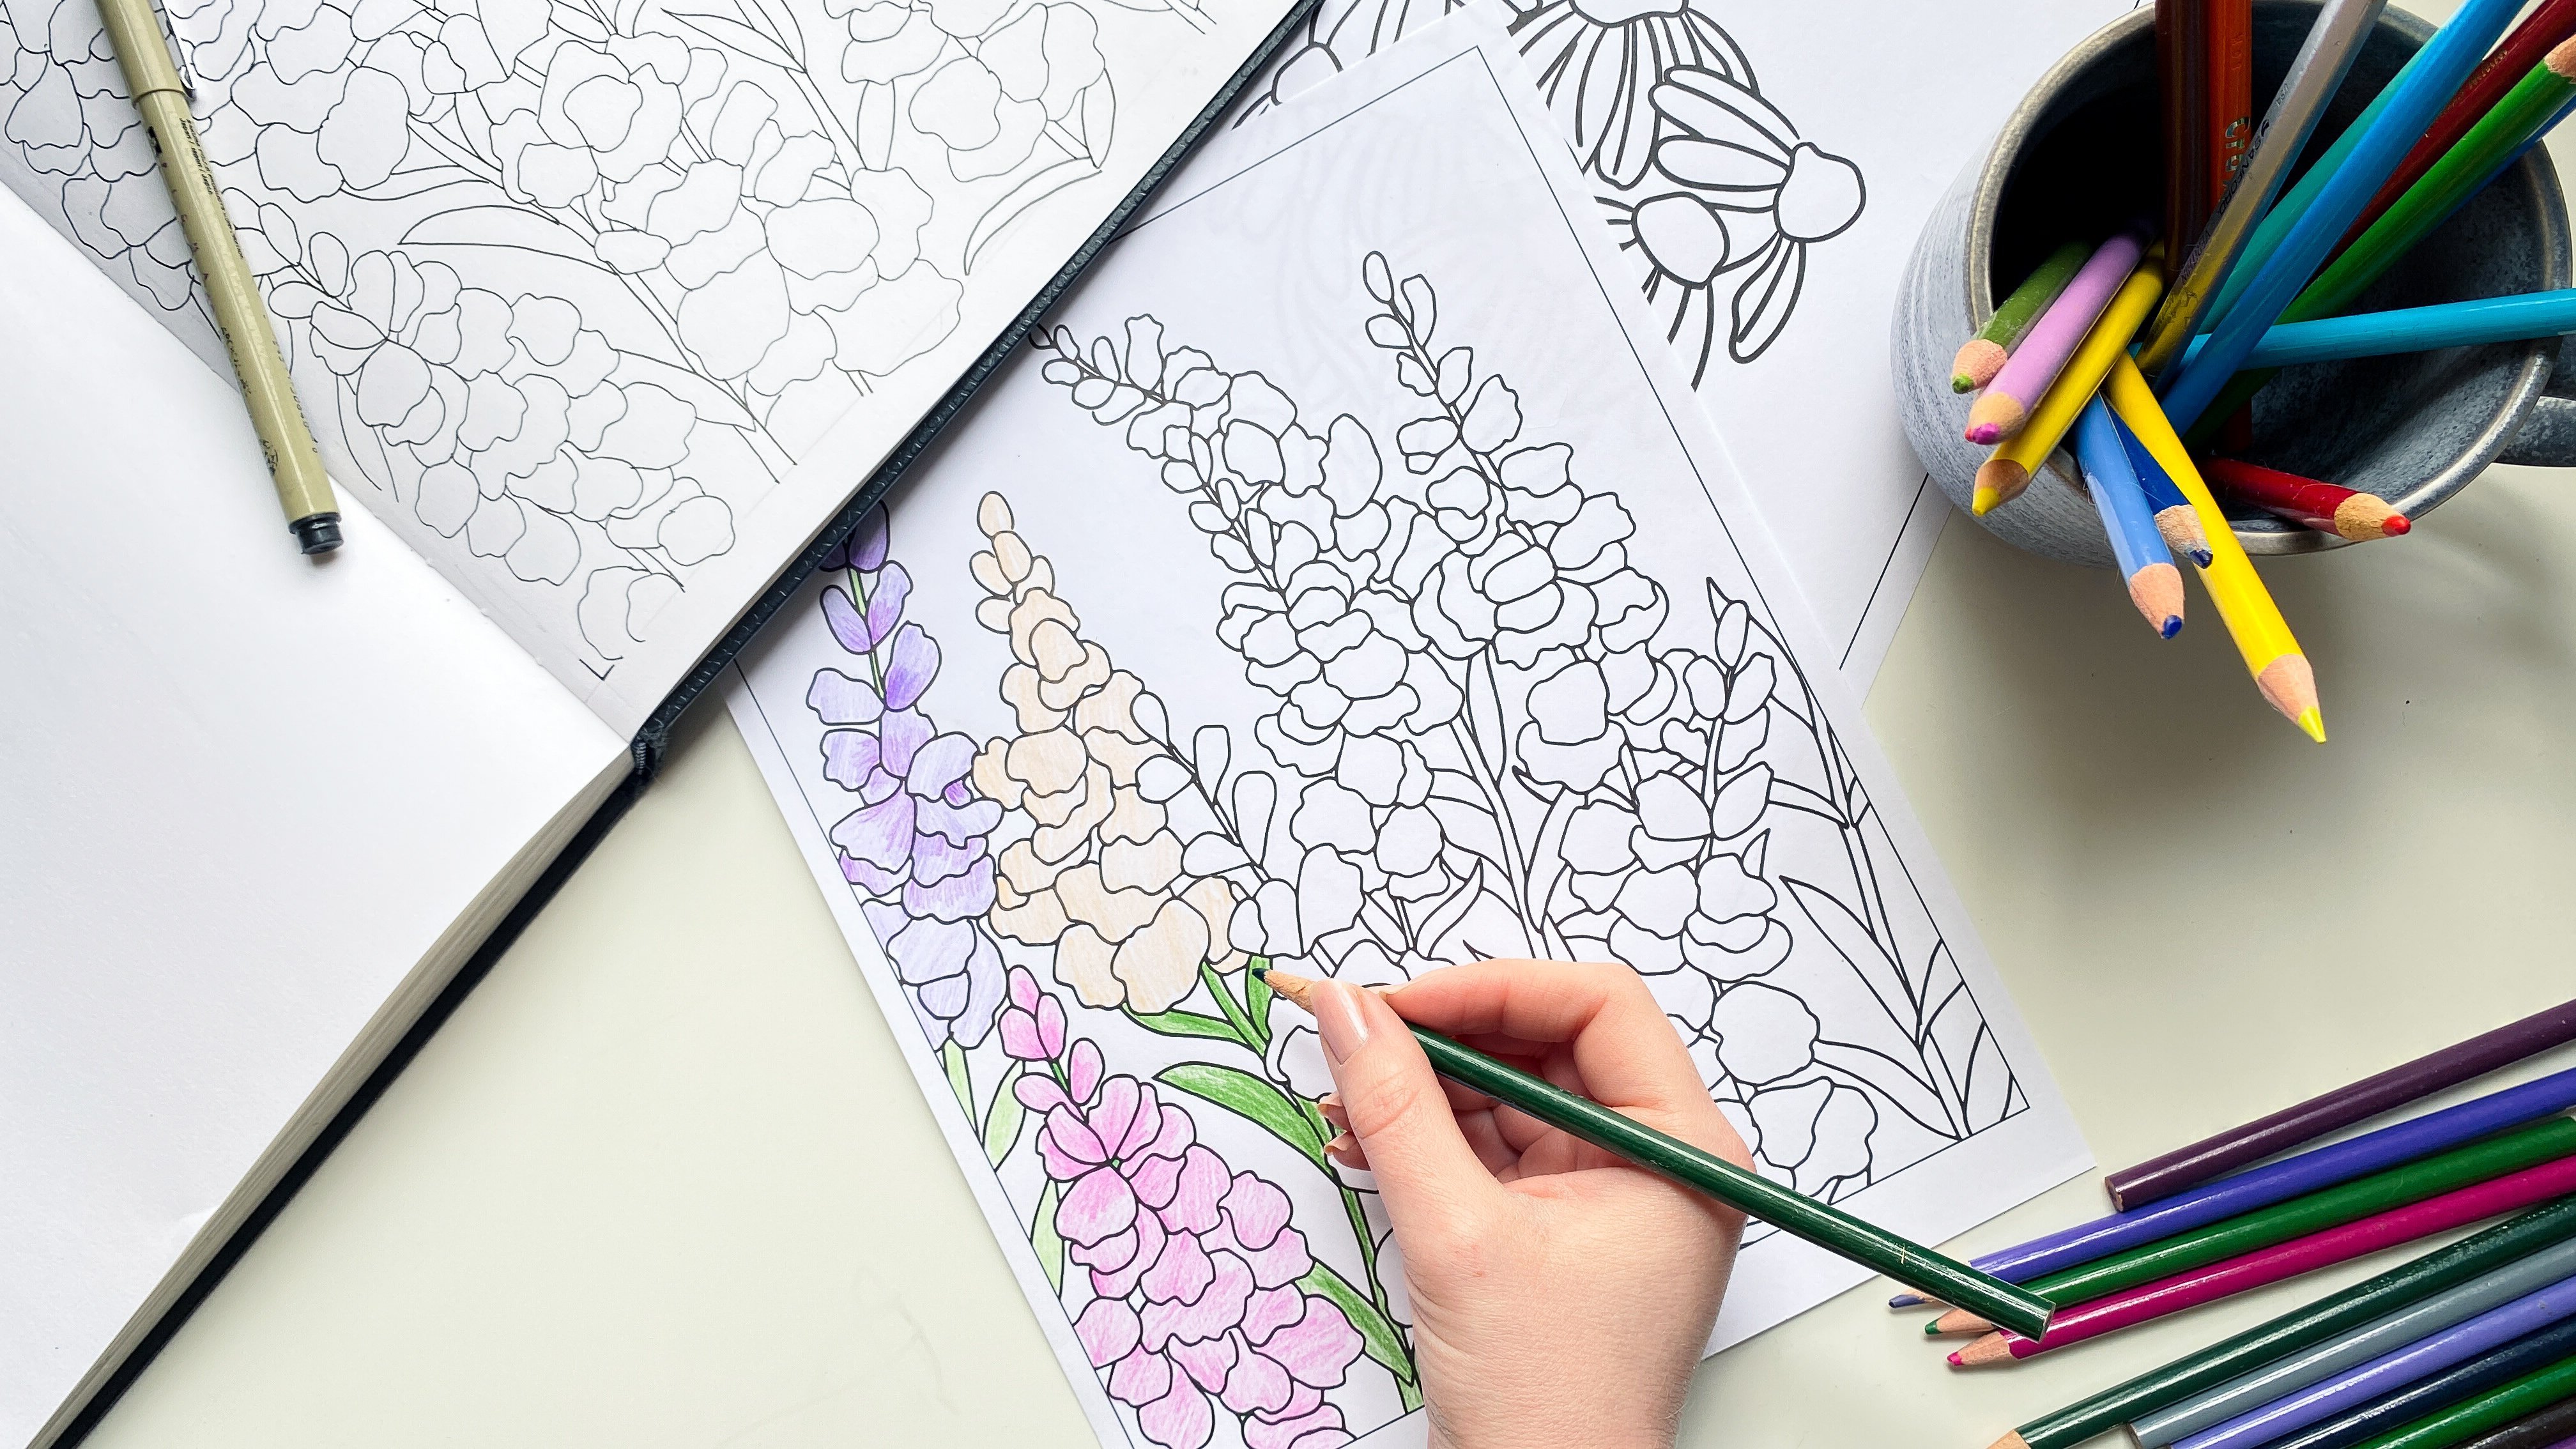
5. Mission/Goal: [MUSIC] Now you should have a clear head to look critically at your work. The very first thing I like to do is look at my piece overall and see if it's fulfilling the mission of the project. If you're looking at client work, the question would be, does this fulfill the brief that I got from my client? If you don't have a client and you're simply working for yourself, so maybe you've created a new piece for your portfolio, write down what the goal is of that portfolio piece. Maybe it's to showcase your lettering skills, or maybe you're showing off your graphic design abilities by creating a logo and a style guide. Even if it's a made-up project, go ahead and write down their brief, so there we have some north star to follow. Finally, you could have a piece that you've just created for yourself. You're just trying to improve your skills or maybe you're making art for art's sake. At the end of the day, the goal is to make sure that you are achieving what you set out to do. This is my example. It's a greeting card that I made for work. I just want to note that I have blocked out the logo, so that's what these black squares are. Where those are, there would be a logo, so pretend that's there. Anyway, this was an assignment at work where they were looking for a greeting card to send for the new year, and this was at the end of 2020. I feel like I don't have to explain why everyone was glad to see 2020 leave, but it's important to note the timing. The assignment was to create a new year's card that reflects New Year's Eve following 2020. Something that's lighthearted but not tone-deaf to the reality of what life looks like during a pandemic. The card should feel like insert brand name and use brand colors. Personally, I wanted to design something that I could share my point of view as an artist without distracting too much from the brand. I wanted to create something that I could also showcase in a portfolio, how I work within brand guidelines or standards. The concept here was developed alongside my team and one of my colleagues had the idea to make a greeting card that looked like a video call. That's the concept we ended up going with, and this was the final result. Even though we're apart, we can still celebrate together. The first question I would ask myself is, does this achieve the goal? Do you get that message? For this project, I can say yes, I'm very confident that I achieved all of those bullet points. It's fun, it's lighthearted. It acknowledges the pandemic without focusing too much on it and focusing on the bleakness of the past year, but it also isn't too frivolous. We're not just pretending that nothing happened and everything was the same as usual. This definitely achieves the goals of the assignment. The second part of my goal, my personal goal, was to create something in my style that still worked within the brand guidelines, and I think I definitely achieve that. These are all brand colors, but there are just some small touches that are a little bit more personal, like the little line drawings for the faces. I also added texture here and there. It might be a little hard to see here, so I'll overlay a picture from my computer. This is just something that I printed for my home printer, so it doesn't look exactly how the final piece ended up looking. I can confidently say yes that I achieved my personal goals with this project as well. I already answered this a little bit, but another important question that I would ask myself, what emotions does this project evoke? Looking at this with my clear head, stepping outside what I already know, it looks very joyful to me. Everyone's smiling and waving, celebrating, everyone's having a good time. The colors are cheerful. I'm getting just a really happy, joyful scene here. Some of these questions might sound silly to ask yourself if you're really invested in a project, but they are important because you have to understand how other people will perceive your work once it's out in the world. The 3rd question that I would ask myself that relates to the overall goal is about the style. Does this match the intended style, and is it consistent? Overall, I would say yes. I don't suddenly change from a little bit of shading to heavily shaded areas. The only lines here are for needed details, so distinguishing the fingers here. The line that separates the top and bottom of the grill. Just essential things. That part, definitely, yes. I had a specific style that I was working with, and I followed that. The 2nd part of the question, I do think I could've done a little bit better with, because the style isn't totally consistent in some areas. For example, here, this is supposed to be Detroit. We have a building here, the Renaissance Center. I didn't have any windows. This building has windows all throughout, so I really just kept these lights that change at the top of the buildings, but then here I have windows, I have windows that are lit up. Here, I actually have windows that are dark, that are unlit, and see more of those over here, so that's not super consistent. If I were to go back and do this again, I might update that by adding maybe some windows here and there, even if they're darkened windows. Something else I could have done is maybe adding a little bit more texture in some of these backgrounds. They're very flat, which is okay because that does create some contrasts between the figures in the foreground, but looking at it now I am wondering if some texture may have helped to set the scene a little bit more. That's something I might do differently next time. But overall, I'm still very happy with how this turned out. Sometimes you can't spend too much time on one project, you have to evaluate how important it is. I have a lot of other responsibilities at my job, so even though there's some things maybe I could have improved, I'm still happy with the card overall. Now I'm going to take a look at a work in progress. [NOISE] I am working on creating a pattern collection for my portfolio. I'm trying to move more into an illustration and pattern design career. That's something that I've been building up. Just more patterns and pattern collections. The collection I'm working on right now is inspired by a garden life cycle. This is a pattern that I'm going to make inspired by seed packets. My overall goal with the entire pattern collection is to create something that represents the life cycle of gardening and a gardener's work. I want my seed packet pattern to reflect a specific style that would include some hand-drawn elements like these ink lines that you see here. I also like things that aren't totally perfect, so I like some of the sketchiness of these initial sketches that I made. These were just loose sketches based off of actual seed packets. Even though I'm not applying my entire critical process right now, I am always thinking about my goal for this project. Even though I really like the messier look of these, that's not the ultimate look I want. These are just some practice sketches. After those practice sketches, I have these. Here you can see I'm playing around with different styles. Here, I have some scribbles to represent text, but I do say that they are radishes. Here, there's no text at all, you can see that. It's just blocks of color, messy ink lines over it. Then here, this is just all color, there's no lines at all. This represents something that looks almost like a printed piece with layers of solid color. Basically, I was just playing around with different approaches to see what direction stood out to me and how this pattern might look in the end. Also, please excuse these crazy ink blots down here, I may or may not have spilled an entire new bottle of ink. There we go. We're all human. I think you can see here that I'm really just working things out as I go along so that I don't end up with a final pattern that doesn't look anything like the rest of the patterns in the collection. I'm always evaluating and assessing and seeing what direction I should go in. I think we have this goal section covered and we're going to move on to the next lesson and talk a little bit more about readability and texts. [MUSIC]
6. Readability, Legibility, and Text: At the end of the last lesson, I said we're going to talk about readability and texts. We're also going to discuss legibility. Now you may be wondering why I'm talking about that with this greeting card. When I say readability, I'm talking about how something reads, aka how it's interpreted. Even though the only text on the page is this button that says leave, down here, I'm looking at how someone would interpret this. Are they interpreting what I want them to? Some questions for this project that I would ask myself would be, one, does this read for the brand that I'm creating it for? I know it might be tricky with the logos blacked out, but I think it clearly does with those brand colors and the multiple placements of the logos, it's also a very clean and simple design like many of our branded designs. Another question for this particular piece is, does this look like a video call? I would say yes, I think it does. That's why this bar down here is so necessary. If I didn't have that bar, this will just look like maybe a collage of people in different places saying hi, but by having that bar there, that indicates that this is a video call. I'm using very common symbols here to reflect that. Another important question is, is it clear that these people are in different locations? That was something I was cognizant of as I was working. Here it's nighttime, this is somewhere on the East Coast, maybe New York City, but you can see that from the background in the windows, you can also see that here, this is supposed to be the Detroit skyline. Here we have palm trees, it looks like maybe the sun is setting but the sun is definitely still out, and then here we can see this window in the background is showing a cold climate, and it's not quite as dark as these two places. Maybe it's somewhere right in the center of the country. So yes, to me it reads that these people are all in different locations. I am going to make a distinction here between readable and legible, technically those words are interchangeable, but I'm going to use readable in this context to describe how something is interpreted, and I'm going to use legible to describe how clear something is in particular text. Here, if I were to say, is this legible, this little word leave down here. I'm asking, is there enough contrast that I can see the word leave? The contrast between the color of the word and the color of the background, maybe is it too small? Is it hard to read? That's what I mean when I'm seeing legible. But other than that, I think I'm ready to move on to one of my works in progress. Let's get back to the seed packets. With these seed packets, I want it to be very obvious that's what they are. I'm going to ask myself, do these read as seed packets? Would someone looking at a pattern made from these designs understand that these are supposed to be seed packets? If I'm being totally honest with myself, I don't think some of these do. For example, this tomato seed packet here looks like just so cool vignette of tomatoes. I don't think someone that didn't already know my intentions would understand that this is supposed to be a seed packet. But I also don't want this project to be super text-heavy. Here we have a brand name of a seed packet and the type of seeds that they are. I think that's just a little bit too much, I don't want the words to distract from the design, that's why I was testing out some of these with no words at all. By asking myself these questions, I decided to come up with a compromise and that's what we have down here. This butternut squash, it says what it is, it's still a simple design. I have my ink hand-drawn elements but it's still simple and not so busy. I'm not opposed to some busyness, but I really don't want texts to overtake the seed packets. By asking myself these questions, I've avoided some headaches further on, and then I was able to make these more refined sketches that combine both those elements. The only text on these will be either the name of the plant and then maybe some prices here and there which actually I don't even think I added those. It's just going to be the name of the plants and then my illustrations. At this point, I think you should have a good handle on what I'm talking about when I talk about readability, so let's talk now a little bit more about legibility. When I'm asking myself, is something is legible, I'm asking if it's clear. I feel like these are two really good examples, next to each other. These are two illustration paintings that I made as part of a 100-day project last year, 100 days of containers. On the left, it's very clear here this says Gumption, and then there's like a little tagline that says be bold on this, either bottle of cold brew or beer or whatever your poison is, but you can clearly see the word Gumption. It's distinct from the background, we know exactly what it says so it's legible. Here, this one's a little bit more difficult. The word I was playing of was Gusto for this spice container, I know that's what that says but if I were making this for an actual project, it wouldn't be very good. It's hard to see what it says. I don't know if someone looking at this without any context, without me telling them, would know that is what it says. This G looks like a C. This S has this extra swirl here, that's maybe a little inconsistent, and this was just a practice project so I'm not too heartbroken by it, I like the look overall, but is this legible? Not really. It's not very legible to me. That's something to keep in mind. Especially if you're creating for a client or for a portfolio piece, you have to make sure that people can read your words. There are some artistic instances where maybe it's okay if they don't, but for the most part, the goal is for people to be able to read words if you're including them in your work. Then I have a couple more examples for you which are even better. When talking about legibility here, I think it's very obvious that both of these are not very legible, they're not very clear. This word, Stubborn, that looks okay. I can see that but here it says rubber cement and these lines in the background or really distracting. There's not a ton of contrast and also doesn't help that rubber and cement aren't super thick letterforms, so it's difficult to read. Then here, this is a different example but the word Abundant. There's nothing really going on in the background but the issue here is that this pink and this green are very similar in value and vibrancy. These colors here, they're vibrating against each other so you can see it but it also reminds me of those obstacle illusions that used to look at when you're a kid. The kind that you have to pull up close and then pull back so that you can see the scene, that is what reminds me of. No, I would say that this is not very legible, neither is this. As I said before, these are practice projects so I'm okay with that, but if I were to maybe scan this and turn these all into something else, that is something I would have to fix because what's the point of having the word there if no one can read it? I've already been talking about text, but let's talk a little bit more about the text itself and copy. As I mentioned at the beginning of this class, we're going to move outward in. From that zoomed-out perspective to zoom in. This is going to apply more to graphic design than maybe other types of art or illustration, but it's definitely important. When I'm looking at the text, I might start out with looking at the hierarchy. What are the most important things on this invitation? Looking at this right now, the names stand out first to me, then I see this dinner and dancing to follow, and then I see the date here. That's just naturally where my eye went to. These very big words, the script font is not only is it script which is different from the rest of the text but it's bold, it's got these thicker lines so that's where my eye went to first. If I were to redesign this, I don't know if maybe I would switch this up a little bit more, but dinner and dancing to follow doesn't seem quite as important as some of these other items here. Maybe there's something I could have done to help with the hierarchy. If you're working with text, maybe you're creating a poster or a flyer, maybe it's a book cover, that's something that you're going to have to consider. What's the hierarchy? Where does my eye go to first? If my eye does go somewhere first, is it to the most important piece of information or is it just something that's maybe not irrelevant, but not as important as something like the date, let's say. Something else that's really important is if you're getting texts from someone else for a project, if you're the graphic designer, maybe it's not your responsibility to think about the grammar or the spelling, but it is your responsibility to copy something over the way it's supposed to be copied. If something needs to be italicized because it's the title of a book, you might have to reformat that because you transferred over something from a Word document to InDesign. That's part of the checklists that's really important for any design with text, making sure that it matches exactly what was supplied to you. Then even if it's not your responsibility, I do also like to look for spelling errors just in case. If your client or your boss or someone sends you some text, it's still probably a good idea to look it over and see if there's anything that stands out to you. Like I said, especially if it's a client and I'm sure you would have something in your contract that says that you're not responsible for spelling errors if they supplied texts that had an error in it, but it's still a nice thing to do. That's always part of my checklist. But for now, I'm going to move on to the next lesson and talk about what blind spots are and how to look out for them.
7. Blindspots: This next lesson may be one of the most important for self-editing. This involves looking out for blind spots in your work. Blind spots are basically different things that you may not see yourself. When you're working on a project, you're involved in every step of the way, it's a personal project. You are coming at your work from your own unique perspective, your own worldview, your own culture, your own sense of humor, your own understanding of the world. Basically, you are part of your work and because it can be hard to distance yourself from it, there might be things that you just don't see. But at the end of the day, it is your responsibility to look out for any of these blind spots because you are putting work out into the world and when you put work into the world, that means that people can react to it and will interpret things whether you mean them to or not. My first example of a blind spot would be an unintended meaning. I have a piece here that I've been working on for a while and I just haven't gotten around to finishing it. I should have noticed this way earlier in my process. I think this will reinforce for you the importance of checking in on your work as you go along. I have this quote here from a movie and it's supposed to be wouldst thou like to live deliciously. It wasn't until I actually showed it to someone else and they were confused and they said, it looks like it says, wouldst like thou live to deliciously or wouldst like to thou live. You can see the confusion here and this is an example where I'm so familiar with the quote. I had done a series of sketches. I really liked the layout and the design and I just miss that it could be read another way and I think it's just because I was so familiar with the quote already. But for someone like me who isn't a graphic designer first, I'm more of an artist and illustrator, I got so wrapped up in the design. I completely missed that. You'll probably see examples of this out in the wild. One good example that I've seen on the internet, I'm filming this during Halloween season is the sign at a craft store and it says trick or treat or that's what it's supposed to say. I'm just going to insert a picture of it here. I don't think it will take you long to figure out what it looks like it's saying. These are both good examples of blind spots. Luckily for me, I didn't share this anywhere. I'm not even done with the design yet. I caught it early and even if I didn't catch it, I don't think it's that big a deal. It doesn't totally change the meaning. I think a lot of people still would get the idea. However, the sign is probably being sold in thousands of stores across the US so the stakes are a little higher there. Some other things to look out for are our images or symbols. Maybe a symbol that means something that you don't want to be seen in your design and maybe you didn't even create that symbol on purpose. Maybe it's just the way certain shapes look together. Maybe part of a design ends up resembling some human anatomy. That happens from time to time. If you've seen that documentary about the legging company, you might know what I'm talking about with those hamburger leggings. I would categorize all of those under unintended meanings that have probably pretty simple solutions. There are two main points that I'm going to hit on when it comes to representation and inclusivity. An important question to ask as you're working in, as you're doing a critique is, are you unintentionally reinforcing any stereotypes or tropes related to race, age, gender, sexuality, religion, all of the above. I'm probably missing some things, but that's something you want to be aware of. I like to think about some of those things that will go viral sometimes. There might be a social media post or an illustration on a website for a really big company and everyone looks at it and says, who approved this? How did this get by? That's the tests that you want to do with your work. Is there something that could be misconstrued? Some of those viral examples, nothing is misconstrued. Maybe someone made a tasteless decision and it's as simple as that. But I'm going in with this class that you have pure intentions and you want to make sure that your pure intentions stay that way. Because intentions don't really mean anything once you put work out into the world. Then as far as inclusivity, that just means being aware of the people you're depicting in your work. Now depending on an assignment, if you're working for a client, that may vary. If you're designing a brochure for a retirement savings accounts, you're probably going to have a pretty clear audience and everyone's probably going to be maybe in the same age range. But maybe there are some ways that you can have broader or better representations so instead of showing, grandma and grandpas with white hair, calling the grandchildren, and holding knitting needles, maybe you can move beyond those stereotypes. There are many people, 60-up, 70-up, who live completely different lifestyles. I really encourage you to remember to think of people as people and there are different ways to show that in your work, whether you're working with illustrations or photographs. The third blind spot I'm going to cover is misrepresentation. I think this one is pretty straightforward and this one applies maybe a little more strict lead to client work or any branded work. For my current position, we have very clear guidelines on how to use our logo. We also have very specific rules about the colors that our logo can be on or the colors we can use. We would try to avoid color combinations that might resemble our rivals. We also tried to avoid any color combinations with our logo on top of specific colored backgrounds so sometimes our logo might look like one for another company because it's very simple. As far as misrepresentation in a broader sense, that could mean making sure your work maybe doesn't copy someone else's work or to closely resemble it. Or maybe you're working on a lettering project and you have a script font that's white and it's on a red background and you think it looks amazing. You're so happy with how your lettering turned out and people look at it and they think it's supposed to look like some parody of the Coca-Cola logo, maybe the white on the red. Some of your little star details end up making it look like it's a Christmas greeting card. This is just a simple example of how a combination of things can add up to look like something you're not trying to create. That's why these blind spots are so important to look out for because that's something you could easily miss, but easily fix with a couple of small tweaks. Then the final blind spot that I'm going to touch on are trends. We all know trends come and go. There are trends in colored choices, there are trends in illustration styles. There are trends in logos. We see them all the time and they're easy to get sucked into. Sometimes without even realizing it. Especially if you're still working towards an established style, it may be easier to fall in and out of trends as well. We'll say that these illustrations follow a trend a little bit. I think with the curvy lines, this is very common in a lot of digital spaces. I feel like they have a lot of illustrations like this that are fun, but the people are a little bit wonky. They're not meant to look super realistic. There's not a lot of linework, it's a lot of shapes. I will say I do have some texture here, which right now we're still in this very flat design trend right now. I did mix up a little bit by adding some more texture. But I am kind of falling in a trend here. And that's totally okay as long as you're aware of it. For this, this is a temporary piece of artwork. This is a greeting card that I made for one year for a specific place and time. I'm okay with following the trend. However, if you are working on a logo and creating a style guide for a business, let's say it's a bank that's been around for a 100 years and they plan on sticking around for another 100. That's when you move away from the trends and you're trying to find something a little bit more timeless. So a lot of it depends on the work at hand. Even if you're creating for yourself, do you want to stand out and develop your own style more? Or are you trying to play into a trend? Part of my work is running social media accounts, if I design a graphic to post there, it makes sense to hop on a trend to get visibility and I know that it's fleeting, it's temporary. Things that I'm posting on those social media accounts, they might stay up there for a while, but no one is looking back and critiquing the design and saying this is out of date unless I'm posting it five years too late. Now if you're starting out with graphic design or illustration, I would be careful of relying too heavily on trends as well or letting those seep into your work. Something I've seen a lot are these logos that are pre-formatted. They have maybe someone's initials and then it's surrounded by a circle with flowers. At this point, it's so overused that it looks generic. It doesn't mean anything. If all you need is a logo because you're going to sell work at a craft fair and you just want something pretty simple. That's totally okay. However, if you are trying to branch out or start a business, if your logo looks like everyone else's, it may not stand out. There's nothing wrong with following a trend as long as you're aware of how you're using it and how it may come across depending on the context and how long you want to be relevant. I've covered four different areas of blind spots here, but there are probably others that I haven't mentioned that didn't come to mind when I was planning this course. If you do have any additional, feel free to leave notes in the discussions of other areas where people might overlook things or miss things in their work. In the next lesson, we're going to cover some of the basic principles of design and art.
8. Principles of Art & Design: Part 1: [MUSIC] For this lesson, I'm going to go over the principles of art and the principles of design. Now, this is something that I could have started off this class with, however, I wanted to set this up the way that I work. I mentioned at the beginning how I like to zoom out and move inward. This is part of that process for me. All of these principles of art and the principles of design that I'm talking about, I am working through as I create my work. They're just part of me and my process by now. They probably are for you whether you know it or not. If you're brand new to art, or design, or anything like that, you may not know that these exist, but you're probably using them as you work already. I like using this as the last step in my process because there probably aren't major changes I need to make, but maybe there are small tweaks here and there that I can use to make my work better. For this lesson, I'm going to use the greeting card and a few other examples. First things first, what are these principles? As I mentioned, I'm going over the principles of design and the principles of art. There is quite a bit of overlap here, but there are some variations between the two. I'm going to start with what they both have in common. Both sets of principles include balance and alignment, contrast, movement, and repetition. Then emphasis, proportion, and white space round out the design list. Rhythm, harmony or unity, and variety complete the principles of art. Something important that I want to emphasize is that these aren't necessarily strict rules that you have to follow, they're more like guidelines and language to use when talking about your work. First, I'm going to start with what these two have in common. The first is balance and alignment. That means everything in your work has a weight to it, and we want to keep things in balance. That could mean text if it's a text-heavy document or design, colors, textures, things like that. Then alignment can also affect the balance by shifting the weight around. Here we have, I won't say a center alignment, but they're divisions in this piece. There's almost a line running here and here on the card, there's these four different rectangles. I've played around with the placement in the scenes. This couple here, they're in the center of this scene. Here, they're spaced out. It's a little asymmetrical. But I have some alignment here. There's an invisible line with the top of her head. He's got the spatula and then the tops of these palm trees. Already we're looking at this a little bit differently than we were before. You can see that, I think that this does have a pretty good distribution of what I would call weight. Some things that represent that would be this yellow color. It's very bright, so it catches your eye. You can squint your eyes even to see this little bit better. Although something I'm noticing now is, this has an alignment. There's almost a straight line going from this space between these windows down to the curtain here. If I were to edit this or redo it, that might be an area I would change. Maybe I would add another part of the curtain or something to break that up because that wasn't what I was going for. I want things to look natural. This almost looks like I did that on purpose, and I definitely didn't. I'll show you another example real quick. [NOISE] These are part of the 100 days of containers that I talked about earlier. Here I have little can of peaches. I like this example because it's balanced in a different way. Even though this area takes up so much more space compared to this little strip at the bottom, this is heavy. Simply by having this dark green background carries a lot of weight. This white background and this lighter orange colors, they do add up to a certain amount of weight because of the space they take up. But it's actually quite balanced in my opinion. Then to top it off, I repeated the green with this little tab here. Then even this example here, if we're talking about balance, I think that this is like the little pump, this is the perfume bottle. I think this balances out the top heaviness of the perfume bottle. All the weight is at the top here. Simply by having this rope or tube, I guess you would say, and having the pump down here, it just adds a little bit of balance. It doesn't look like it's going to topple over. Our next principle is contrast. I feel like this one is probably the most self-explanatory, but basically low or high contrast can completely change design. You'll always need some amount of contrast to differentiate elements from one another and text from the background. The more contrast between elements, the more they will stand out. It's important to remember that contrast can refer to more than just color. It can refer to textures, patterns, fonts, so on and so on. I think these are two interesting examples to look at together. Here we have some pretty high contrast between the words here and then this very light-colored background. We have this dark black charcoal color and a cream background. Then we have a much more subtle contrast between this, I guess, maybe a sticker, this is a label on a package, and then this would be the bottle. It doesn't stand out quite as much. There's still enough of a difference to deduce that this is a label on a package. Then this is a little bit more of an experiment in low contrast. If you're someone who wears make-up, that sometimes brush or bronzer will come in a color combination that's very close to one another and you mix it with your brush. That's what I wanted to replicate here. From a distance, you're not really going to see this, but this is an example of intentional low contrast. Then a little less intentional is this word, ruddy, here. I used a metallic paint and it's hard to see. I'm not sure if you'll be able to see this on the video or not. You can really only see it if it catches the light a certain way. Up next, we have movement. Movement refers to how your eye moves about the piece. What do you see first, and then where does your eye go next? In something that's more illustrative, it can also refer to how action is demonstrated. Looking at this piece, there isn't necessarily a ton of movement as far as something standing out to me right away because things are balanced, the colors, the contrast. It's a pretty organized scene. There's not a ton of movement, I would say, around the whole piece. But within these individual scenes, there is movement. There's very clearly movement with everyone. They have their hands raised like they're waving. We also have some movement here in the snowy scene in the background. That indicates some movement. It looks like it's actively snowing. This one might be a little bit more static because other than his hand, which is covered a little bit, there's not a ton of movement here. Maybe that's something I would consider if I were to redesign this. But I would say overall throughout, there are little hints of movement in these different scenes. Just to show you an example, I don't have a ton of examples that are really text-heavy, but I think it would be helpful to show, this is just the checklist from this class. Even though this isn't heavily designed, there is still a sense of movement. Part of that is, if you're an English reader, you read left to right, so we tend to always look in this upper left-hand corner first and then we go down from there. Since they're bolded, those will stand out. But there is movement here because my eye immediately jumps to this title and then to all of these subtitles. Next, I skip this because this is grouped together, so I actually see this second. Then I jump down here, and then I jump around a little bit more. It's not a great movement. This isn't a heavily designed piece, but there is still some direction and hierarchy here. Next we have pattern or repetition. Repeated elements in your design create consistency and a visual language. This can include consistent fonts, repeated shapes, lines, and symbols, repeated colors, and the list goes on and on. Repetition can help stabilize the design. This is a balanced piece here, when I was talking about movement, and part of that is because of repetition. The repeated hand-waving, that's a theme throughout, and then the repeated pops of color with this yellow, and then, even though it's blocked out, the logo was also repeated throughout. Without having a logo slapped in the middle of this, we have the logo peppered throughout so you never lose sense of what the theme is. Another form of repetition is simply by having these four rectangles. That creates a sense of balance and stability. I think this might be one of my favorite principles just because it sneaks up on you. I wasn't necessarily thinking as I was creating this, "Oh, I'm going to repeat these rectangles, or I'm going to repeat hand-waving." It made logical sense for the design. Repetition doesn't mean that everything you make has to have stripes or polka dots on it. It can mean a lot of different things. Those are all of those shared principles. I'm going to go on and continue with the rest of the design principles, and then we'll move on to the last three art principles.
9. Principles of Art & Design: Part 2: The next design principle is emphasis. This is basically asking, what's the hierarchy of your design? What do you see first, second, third, etc. Then a follow-up to that would be, is the first thing you see the most important? We looked at that invitation example earlier when we were talking about readability, legibility in text. This is another opportunity to look at the hierarchy, see what's being emphasized in a design. One of the things that can emphasize something would be contrast. Another area would also be repetition. For this design, I would say the logo actually does stand out quite a bit, even though you can't see it here. But that's something that I think it's very obviously emphasized, maybe in a little more subtle way, but it stands out pretty quickly when you look at the card. I think this is another good example of emphasis, even though there's really only three words on this. But first you see gumption, then you see the tagline, Be Bold. Now, if I were to add the name of the product, cold blue coffee somewhere on here, I would want that to stand out, maybe even before this little Be Bold tagline. That's something I would think about. I think the reason emphasis is included in the principles of design is because design is a little bit more about problem-solving, than maybe art for art's sake. Next we have proportion. Proportion refers to the relationship between the size and weight of different elements. Going back to my greeting card, you're going to be sick of looking at this, but I have this class, I bet. But we have plenty of examples of proportion here. We have the people are the main focus. Proportion is used to show where they are in space. We can tell that the buildings in the background here are further in the distance. By the placement of the buildings, we can tell that they're actually maybe higher up in the building themselves. If they were lower down, maybe we would only see buildings going all the way up in the background here, but we can actually see the tops of them. I have variation in proportion here. We can tell that she is closer to the camera. He's further back, ghrelin away. Then we have the sunset and these palm trees in the distance. For an illustration our proportion can basically create optical illusions. This is all in your one flat piece of paper, but we still get a sense of the scene and where things are because of proportion and scale. Also helps us focus on the main point. Even though there's a lot going on in the background here, because of the proportions, we know that these people are more important than what's back here. Another area where we can look at proportion would be the proportion of the bright yellow to blue. Overall, this is a blue green card. There really aren't as many pieces of yellow here than there are shades of blue. Let's say this window frame was yellow and maybe this poster over here was yellow. Maybe their walls are painted yellow. This would feel completely different, but the ratio of yellow to blue here is pretty significant. That's another example of proportion, even though I'm not talking about size, that might relate more to the weight of the bright yellow. It carries a lot of weight here. Then our last principle of design is whitespace. Now that's not quite as applicable here. White space or negative space creates a sense of balance. It can be used to surround an object or element to give the eye some breathing room and is necessary, especially when working with texts. Vast amounts of whitespace can also help balance out heavy text or designs. This isn't the greatest example. There is technically no whitespace here, but there is some negative space. Negative refers to background space except you're treating it as a shape. For example, here we see the skyline, but this is its own shape technically. This is dark blue night sky is a shape. That's what we're talking about. Here I don't have a ton of empty spaces, but they are sprinkled throughout. Here there's really nothing on the land. The sky is pretty open and empty. Instead of drawing a sun and a full sunset, I'm just alluding to there here because I did want there to be somewhere where the eyes can rest. I didn't want to make this super busy or detract too much from the scene. That's what I tried to do in all of these. Really this is the one with the most detail because there's a little plan on the window sill here. That does help to create a sense of space. But I tried to be very aware of not making this overly cluttered. I want people to understand what the scene is pretty simply without going into too much detail. But I do have a better example of some whitespace for you. Bringing back this invitation, you can see that we have plenty of white space all around here. Part of that is to offset this really thick heavy text by having this space, we have room to breathe. We're not overwhelmed by the text. There's even a lot of whitespace around this text here because I use such a lightweight font. If I did use something heavier and darker, I would be reducing the whitespace and this would appear much busier. But I have reduced some whitespace at the same time by having everything in all caps. If this were regular text with capitals and lowercase letters, there would actually be a little bit more space here. Here everything is in all caps. I do think it makes it a little bit tricky to read. We leave this example here as we move on to our final three principles of art. The first of those is going to be rhythm. Rhythm is the relationship between different elements working together despite differences in size, shape, color, etc. Similar to movement. But you can have movement in a piece without rhythm. That's where rhythm is little bit different. It's almost like movement plus a little bit of judgment there, you're judging if there is rhythm or not. I think the way that I see that in this piece is because we have this hat here with the same pattern as the coat, but it's broken up by her face. There is a sense of movement and rhythm here. But by having her face here to break up the hat and coat combo. There is little more interest here than there would be if this was just a drawing of a coat or even if you got rid of her face, let's say this was just a floating hat and the coat. There would still be a sense of rhythm there because of the whitespace there to be like this weird gap. Then suddenly the coat, it would be intriguing and maybe a little mysterious. But I think there's definitely a sense of rhythm here. Not only is her face shown, but her face has a little bit more detail too, so there's kind of some shading and that kind of contrasts against this kind of flat white with a pattern. There's no shading details here, it's pretty simple. Let me see if I can find another good example of rhythm. I think this actually has a really good sense of rhythm too. We have very clear movement here. I look at this piece and I follow this line here. This curve sort of mimics a little bit of this curve. Not exactly, but it definitely moves down this direction from the top right to the bottom left. Then the rhythm kind of comes from the repetition of the umbrellas and these ocean waves. I will say this one is one of the hardest to put into words for me, and I don't think I'm the only one that that's difficult for because it's so subjective. But I feel a strong sense of rhythm with this. Next, let's talk about harmony or unity. That would refer to the repetition of forms, lines, shapes, colors, etc, as they create a sense of unity in a piece. I think we can just look at this same example here. Think there's a strong sense of unity and harmony, and that is reinforced by the repeating elements. We talked about repetition and patterns before. Those go hand in hand with unity. There's a unified look here. I would also describe it as maybe like a sense of peace or wholeness. Not that all art needs to be peaceful, but it can be a way to understand it. You could have harmony in a very dark piece simply by the repetition of certain shapes. Just looking at another example here, I think there's definitely a sense of unity with this blush example again, because of the repeated motif of the plad. We've got the circle here, this circle, then the circle of the blush. Just these kind of subtle things that come together to make a harmonious little piece. Then going back to the greeting card real quick, I'll touch on rhythm. I think there's definitely a sense of rhythm here. I've mentioned it before, but I think part of that is kind of the repetition of the repeating hand wave paired with the variations of the different scenes. None of them are the same, the people aren't all posed in the same way. It's not four different couples paired up. We have one paired up, both raising their hands. One, he just has his arm around her and he's smiling. They've got their party hats and gear on, so there's enough repetition and variation here to create a sense of rhythm. Then as far as unity, I feel like I don't need to hit there on the head with this project anymore. But there's definitely unity here. Basically, everything I said before about repetition in this piece really creates a sense of unity. Nothing stands out as being completely out of place. I would say the only thing that does a little bit for me is the texture on this tree here, just because there isn't as strong of a contrast between textures anywhere else. There would really be the only area that might be a little out of line with unity. But other than that, I think this is a very nice, unified, harmonious piece. Then finally, our last principle of art is variety. Variety mirrors that proportion section that we talked about in the principles of design. Variation is what makes qualities like emphasis, proportion, or contrast possible by mixing up sizes, shapes, textures, colors and more. As we talked about earlier with proportion, variety is going to work in a very similar way, a variety of scenes, a variety of alignment and setup. This would be incredibly boring if everything looked the same. Variety is really crucial to this piece, just like it is too many others. I'll show you another example. Going back to our little peach can here, I could have all of these peaches facing one direction and being very static and still. Actually there would be nothing wrong with it that might look really pleasant. But here I mix up the variety by having them turned over and flipped all around. The leaves are placed in different spots. They're not all upright peaches. They're not in super straight lines. It's a little bit haphazard. To me, that creates a fun whimsical vibe. If I had them in strict diagonal rows like this, all the leaves are pointing to the right and up, I think it would look really cute. I'd be happy with it still, but it would have a different feeling, a different mood. Returning to our invitation, variety is really important here because that's part of what is creating emphasis and that sense of hierarchy that I talked about earlier. If this was the same font, the same size, it wouldn't stand out at all. It wouldn't really look like a designed piece. I'll leave you with one final note before I wrap up this lesson, and that is that these are guidelines. These are meant to help you create good work. These are tried and true methods for creating art and design pieces. But you can definitely break these rules and guidelines. This was a pretty quick overview. There are classes on Skillshare just about this. If you want to hone up on those skills, I'd highly recommend seeing what else is out there on Skillshare. My goal is to arm you with these tools to edit your own work. But there is a lot more to your work than following the principles of art and design. Let's get into the next lesson where I'm going to cover how to ask friends and family for feedback, especially when they're not creatives.
10. Feedback: [MUSIC] Even this class is all about self-editing, critiquing your work on your own. I would be remiss if I didn't give you some tips on asking for feedback from others. As much as we can try to get out of our own heads, you still can't replace feedback from people that are different from you, that have different perspectives, different life experiences, that's all really important. Even if you don't have a bunch of creatives in your life, you can still ask family and friends for help as long as you are giving them very specific instructions and taking their advice with a grain of salt. First, I would think about who you're going to ask for feedback. For example, maybe your mom loves everything that you create and everything you do. She might not be the best person to go to for critical feedback. Or maybe you know someone who is super judgmental and hates everything. They'll find something wrong with everything they're shown. They may also not be the best go-to person for feedback. Those are all things to consider when you are asking someone for help. Next is to make sure that you're asking for very specific feedback. When you are sharing your work, you don't want to just present it to someone and ask if they like it or not, or a lot of yes or no questions. Sometimes someone may really like something, but they can't articulate why. The same goes if someone really doesn't like something. This can happen when you're asking for feedback from relatives and friends, or even sometimes a boss or a client. That's why it's always important to ask for specific feedback. One example is that you can say, ''Hey, please look at this poster I designed. I want to know, is the message clear? Can you tell me what the most important parts of this poster are and are there any typos?'' By asking those questions, you're not really asking for feedback on the look or the color palette but they're plotting questions that people will be able to respond to. Other questions to avoid, like do you like this are, what do you think of this design? How do you like it? Is this good? Things like that are all very opinion-based. If you're asking for feedback from these people, you can ask for their opinions, but just know that you're going get a different kind of feedback that might be very subjective. Some better questions to ask would be what emotions does this make you feel? How does it make you feel? Do you see a message behind this piece, if so what is that message? Does this style remind you of a certain place and time? If so, when and where? Something that's important as part of this process is to remember, especially if you are asking friends and family for help, is that they are doing you a favor. You're asking them to look at something and look at it with a critical eye. You don't want to get defensive if they say something that you disagree with or maybe hurts your feelings. As an artist and designer or any kind of creative, you're going to have to expect a certain amount of negative feedback. Even if their feedback seems negative, try to look at it objectively and zoom out once again. They're not trying to hurt you or attack your work. It's important to try not to take things too personally. Now, someone could be a total jerk to you. That's always possible. But chances are they really are trying to help you. Something might be hard to hear, but may be it's the feedback that you need to hear. Finally, as I said before, take everything with a grain of salt. This is your project. You're the one in charge. You can take and leave certain pieces of feedback and decide how crucial or beneficial they are. I know I'm saying two things here. Keep an open mind, listen to others but the main point is just to keep a cool head. Take the feedback and move on as you see fit. If you're still not sure about how to go about asking for feedback, I do have some sample language in the class resources, so be sure to check those out. One final note on asking for feedback is that you can always seek out artists groups on Facebook or Reddit, or may be even in your community, groups that meet in person. If you want feedback from other creatives, there're definitely resources out there. [MUSIC]
11. Class Project: Now it's your turn to apply all of these principles, and the tools and tricks that I shared with you to your own project. First, pick a project to critique. It can be a work in progress, or something you made a few years ago. The point is to look at it with fresh eyes using what you learned in this class. Then go through the process in the class to assess your work. To add to your class project here on Skillshare, go to the class projects tab, and upload an image of your work, and clearly state what your mission, goal or project brief was. Then share some discoveries and conclusions you made, what's working well, and what could be improved. Don't forget that the first five students to post a class project, will receive a full critique from me that I'll share with you privately.
12. Conclusion: That's it for today's class. I hope you feel more confident critiquing your own work and self-editing. Don't forget to check out the class resources tab of this class. That's where you'll find a critical checklist that you can use to do this process on your own. You'll also find links in there to the principles of art and the principles of design. I also want to leave you with a reminder that this is how I work. This is the process I use to critique my own work. As you become a more developed artist or designer, you'll come up with your own ways of editing yourself. Feel free to add and remove from this list. I recommend that you take notes and be observant as you work. Maybe you'll find some things that you want to add and remove from this process that work better for you. Thank you so much for getting critical with me today. Please take a moment to leave a review. By taking this class, I'm sure it goes without saying that your feedback is very important to me and to all of the teachers here on Skillshare, so we can make sure we're always improving our classes. You can follow me here on Skillshare for new classes and visit my page to check out all my past courses. You can also follow me on Instagram @ShaynaSellArt for the latest updates. See you in the next class. [MUSIC]
 Shayna Sell, Illustrator and Creator