Transcripts
1. Course Introduction: Hi, my name is Ben raise. I will give me all for this course that we get goes on. Vsd is a video editor. In this course, you will learn step is the video editing process. You will learn in detail about nonlinear video editing software, VSD, CBD or detail, and the software downloading process to final video output creation. This course covers all necessary lessons and tools which makes you as a professional video editor, manipulation of various multimedia elements in software, color corrections, green-screen removal, video effects, video transitions, audio editing work, audio and video synchronization and other all unique features about this video editing software. Let us start our course.
2. What is Video Editing: Hi, In this lesson we are going to see what is video editing. Video editing is the process of manipulating and rearranging video shots to create a new work. Have you seen the Zinder cutoff justice leakage in 2021? If you have a look at 2017, Justice League is released. Can see the difference between rearranging and manipulation of video shots. That video editing is more important for creating any video-based work. There are two types of edi editing is available. The first one is linear video editing, the second one is non-linear. We do editing post. We're going to have a look on linear video editing. When you're using manual film or tape for creating video editing work that works comes under this linear video editing. This is the first video editing method we have used to edit our videos. The second one is nonlinear video editing with the help of computers, if you do any editing work in digital form, which comes under nonlinear video editing. Not only with the help of computer, if you are editing videos with the help of laptop or mobile phones, like smartphones, that will involve tablet, PC, that all comes under this nonlinear video editing. Nowadays we are using only this nonlinear video editing methods to edit our video projects. The video editing process has lot of works. It has the addition and removing the video clippings. It includes the video effects and enhancement of video, and it includes the video transitions and color corrections in video editing. So these are the basic things you have to know in this lesson. What is video editing?
3. Video Editing Process: In this lesson, we are going to see the video editing process. The first step of your video editing processes, select the best to short from me, we're exiting all shots because you may have multiple takes for each and every shot. So you how to pick the list is short for your video editing work. You have to remove the unwanted prodigious before you start your video editing work, you may do this. And during that video editing process also, you can remove unwanted or segments at the beginning or the end or in-between the video footages. We can add your video effects are getting too you need for your video. For example, if you want to add some snow effect, you can add, if you want add some fire up active can add. So based on your needs, you can add video of X2 over video footages. You can add a text, graphics and animations are cutting into your need up the video project work. You can add background music and video effects during the video editing work. So after editing your footages, you can add your background music and audio effects borrower, we do process. You can do audio video synchronization, which is one of the most important. But if you are creating any video editing project, you can do color corrections according to your need, and also you can add video transitions in between the shots and scenes. Finally, we will create a single combined video just called output in the form of any video file format like MP4, RGBA based on your requirement. So this is the video editing process and it finish with the final output.
4. Applications of Video Editing: In this lesson, we are going to see what are the applications of video editing work. Let us see. First, we will have a perfect flow in our storytelling work. So if you're creating a video editing project for any industry, like if you want to create a video editing work for an architecture for creating educational content, video editing is one of the best way, gives you a proper artists to your video. And you can add other elements to your video editing project, which gives you better storytelling to your students or audience. Video editing is a time-saving factor because if you have a 2 overs a video and you have to reduce the two of us video into ten minutes. Video editing is the only way so that you can show the necessary segments from this video for ages from sources, and you can remove all unnecessary segments from those source put edges. Finally, you will have a 10 minute session shell video footage. So this is possible because of only this video editing. If you are watching a compete source video, you had to spend two hours time. But if you are editor the source video as a 10 minutes, all ancient, she'll video footages. You can spend only 10 minutes to watch the entire video. So that is a major advantage why we need to edit videos. The other most important feature of this video editing is you can highlight the important part of the video segment. So if you want to gain the attention from the audience, you can give some different colors or different effects to those shots. So that's another best opportunity we have in this VSD video editing. We can enhance your quality of the video. For example, if you have shake with your video can stabilize the beauty of with the help of video editing process. And if you have blur inverse source video, we can add sharpness with the help of video editing process. So that is another important best futures. The most important feature of this video editing processes, the visuals, speaks those inverts. You don't need to tell each and everything in the form of text or words. If you show things to the audience or to students, they can easily understand what is going on. So we do communication is another best way to do communication with this bird. That is another important obligation why we are choosing video editing first, social media, education architecture in all industries.
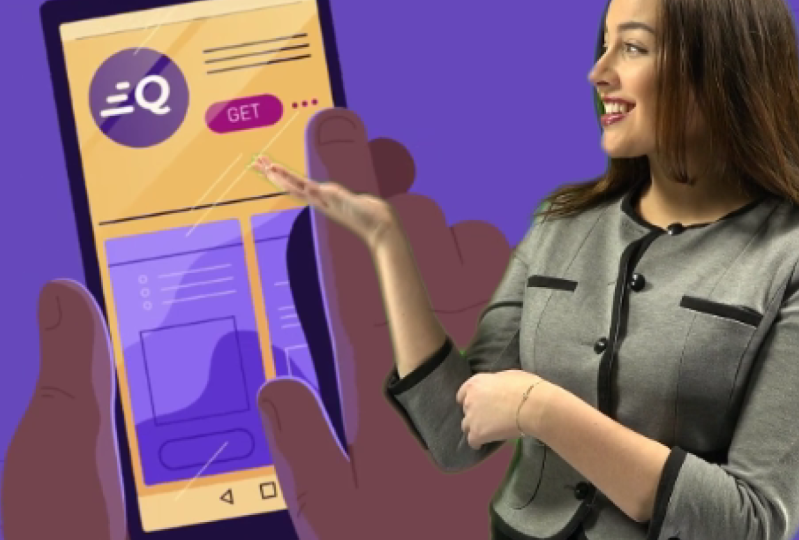
5. Why VSDC Video Editor for Video Editing: In this lesson, we are going to see why we need VSDs, EVDO data software for creating video editing works. Let us see. First thing, it's a completely free nonlinear video editing application. So you can do all your professional works in this free software itself without any issues. The second most important thing is VSDs. A video editor never gives you a watermark on your videos because there are so many softwares available for free, which gives you watermark when you are exploiting those project files as a video. But VSDs, a video editor, never gives you any watermark over videos or any cost. Vsds, a video editor has a promotional features that are so many features available in this VSDs, a video editor. First it has four K video editing capabilities, and it has chroma Keying options. It has a 360 degree video creation capabilities. It has motion tracking, which is a Monod, the most essential part to create any visual effects. And it gives you audio effects features, a video effects futures, we do transitions. You can also capture the external video with the help of your web camera or HDMI capture God, using this VS distribute your data. You can also capture your systems green with the help of this means dizzy video editor. Another important part of this VSDs video detail is it gives you a lot of ways based output resolutions. It gives you the profane like PCI or a verb, or an iPhone or the ion line. So it gives you a lot of opportunities to export the video for a different various devices. So that is the another important thing you have in this VSD see video data. So you have lot more other opportunities in VSDs, a video editor. That's why we are using this VSDs, the video data for learning video editing.
6. Download VSDC Video Editor: In this lesson, we are going to see how to download these DZ video editors from your computer for so I'm opening your browser. I was opened Google Chrome. I'm here, I'm going to type VSD, see video editor. So if you type VSDs a video editor, then press Enter. You can see we have the website which is VDO soft dev.com. So this is the official website for download vis-a-vis the editor. I just visited the website and you can see here we have a website homepage here how a lot of options and information regarding this VSD is a video editor. I choose downloads button from this navigation bar. I'm going to choose a video editor. So after choosing this video editor, I will have this HTML page. So here you have two options. You can download a VSD CBD editor. 64-bit version are 32 bit version. Remember, you need 64 bit version for better performance. So how do we know whether we have 64 bit OS or 32 bit operating system? Let us see. First I'm going to choose my computer and from this micrometer, I'm going to choose a system properties. Here you can see what kind of operating system you have chosen. A system type is 64 bit operating system, which is X 64 base processor. So according to your operating system, it can choose which one you want. So I choose a download video editor. You can see the file size is very low. It's only 89.4 MPI, and the recent version is 6.6. So I choose a download video data, which is a 64 bit version. I just click here. So you can see we have started the downloading process. So in this way, you can download a vis-a-vis the editor. This is completely free 3D editing software. There is no any watermark of the rendered video.
7. Install VSDC Video Editor: In this lesson, you're going to see how to install the VSDs edi editing software. In last lesson, we have seen how to download the software through your browser. So now I'm going to install this software. Installing software is AC process. If we are using a frieze of royalty free software, you can easily install that particular software. The thing what he had to use, we have to answer out cosines during the installation and you have to give positive answers that say, it's a very simple one. I'm going to show you, I just open this software. Now you can see I have the window with chose, select Setup language. So I'm going to use English or if you want to use some other languages, you can choose which one you want. So I use English and I choose, Okay? Now I'm going to choose next. As I mentioned earlier, you have to choose a positive answers like yes, Next, next, yes. Okay. Accept. And finally you are going to press Finish button. That's it. It's a very simple process, so I'm going to choose Next. And here I have a license agreement. I choose, I accept disagreement, I choose next. Remember it's a completely free video editing software without watermark. So I choose Next. And I was using the default installation folder and choose Next butter. And I'm going to choose Next. And I'm going to choose the next. If you want to go back, you can choose a back button. And if you want a shortcut in your desktop and you can add the extra recorder screen icon your desktop if you want, you can enable all those options and the way so you don't want to do anything else, just plus Next button. And at the end I'm going to choose Install. So we can see it was automatically installing Visual C plus plus, which is not available in my computer. So it installs additional futures works. I didn't store like anything. Just wait for a couple of seconds. And finally, it's going to get finished. Okay. So it's going to finish? Yes. So are the inductance so installation you can see it shows thank you. Message through web page. I just close this message. So if you press Finish, you can launch via video editor. And the ways you can disable this launch BSD see video editor and you can choose finish. So after choosing this finish, the integration was successfully come data. So in this way, you can easily install this software, VSDs, a video editor.
8. User Interface: In this lesson, we are going to see the user interface of v is DC video editor and go into type V is dizzy. So I just take v is d say in my status bar. So I opened this software, can see he has a sort of screen shows the software was currently loading in my desktop. Bottom you can see what are the things that the software was currently loading. So after a few seconds, we'll get this screen so it shows explore pro solution. Remember, VSD as a video editor, is completely free. The third, any watermark if you want to upgrade into pro version, definitely you can do it has some additional features, but without accessing this upgrade option, you can access all the options in this race disability or detail. So I simply test this close button. You can see here we have the VSD see video editing software. I just maximize this and this is the complete user interface. What we have in AVS is a video editor. At first, we have the VSD is a video editor software. I come immigrants this icon you can see I have Project Menu here. So after this we can see we have a quick access toolbars for creating an opening the existing projects. And after this quick access toolbar, at the top we have menu bar. It has project seen EditView editor, expert project tools and activation. Menos. Meno has its own options like you can see project manual has all project settings and seen minnow how the settings of scene edit may know View. So the Asian every menu has its own futures. And after this menu bar, you can see we have the work area here. It shows how to create a new blank project, how to create slides, show how to import a multimedia content. How to capture your web camera or any other external camera source, how to capture your screen. It shows all those projects, startup icons after this project though at the bottom you can see it shows get to know top futures. So it shows water are the top features available in this vis-a-vis to editor. So they are going to see each and every options available in this vis-a-vis 282. At right-hand side you can see it shows the recent files. If you access any recent files, it shows the list of recent files, what we have accessed in our previous sessions. And at the top of this red answer, it shows the options if we press this option, so you can see it shows all gender options, acceleration options, timeline options. If you want to enable or disable, we can do all those things in this options. If you want to reset everything, what do you have changed? Can choose Reset to default. And you can choose the yes. And after that I'm going to choose, okay, so this is the user interface of VSDs, a video editor. In next lesson we are going to see how to create a new project with the help of VSDs, a video editor.
9. Setting Up the New Project: This isn't you're going to see how to set up a new project with the help of this race disability editor. To set up a new project, you have a lot of options. First one, you can use a menu bar. In this project menu, you can see new projects or you can use this stored project now option here we can see we have a blank project. So I'm going to use this metal bar. I choose projects Minow, and I'm going to choose new project. When I click new projects, it shows the project title. It's the automatic one. You can give your own title. For example, if I'm going to create any document, your work or advertisement editing work, I can give a name according to the color. What I'm going to do is I'm going to give it a name, sports promo. So that's this project name. So I'm going to give us a sports promo and I can give out the name like according to your need, according to your information. You can give your author name, publisher name, corporate name, and as far as you can give a description about this project. So often, given a project et al and rest of information, you can come to this device area here you can choose which platform you are going to use. So I'm going to choose YouTube. If you want to create a video for YouTube, you want to edit a video for Facebook? Definitely, I can choose facebook in this device. So apart from those online platforms, we have iPhone, iPad, I handwrite DVD. So according to you and aid, you can choose which database you want. If you want to set up your own free configuration, you can choose free configuration. After setting up the device, you can come to the resolution part, which is the second one. So here you can see we have a lot of resolutions here. We have ultra HD resolution for editing ultra HD V2s, which is four k videos, we have full HD resolution. So in ultra HD as well as validity resolution, we have both fours, three, as well as assisting mission and ratio. We all know what is falsely ratio as fixed, N is 9 ratio. We have had to d dimensions for four is 360 nation and ratio, we have quadratically the solutions. So we have a lot of different resolutions with flexing is 94 is three ratios. If you want to set up a customer solution, you can choose Customer solution and at right answer, you have the custom resolution values. By default it is 12, eight different certainty we want to customize. You can choose 12, 30. So according to you or need, you can customize the width as less than height of the video editing project. If you want to reset these values, definitely can choose a solution matches you want. For example, I know I'm going to choose full letter D with the 16 is 9 ratio. So it useful, Let's do 19202, 1080 pixels. And you can say that width as Alyssa Haidt was inserted according to my name. And after the resolution we have frame rate. You can define your own frame rate for your videos. If you want to maintain that the frame per second, you can choose that in the West, you can choose 24 or 25. So based on your requirement, you can choose what frame rate. You need. A truce 30 frames per second, right? And after this frame rate and setting up width and height, at right-hand side, you have audio properties, shows the frequency of the audio in hertz. By default it will be 44,100. We can keep it in 44,900. This is a default one for MP3 audio. And I'm going to choose the channels into Studio. So you don't want to use mono unless you record, you have to choose studio by default it will be still use so you don't want to do any changes in this audio settings. And after this device information and the frame size of this video, the audio properties at the bottom you have the background color option. So by default, the video editing project background will be black. If you want to change, you can do for that. What he had to do is you have to come to this background area, had to press this place, and you can choose which color you want for the background. So by default you can use that. Then we better look for your video. So after this background color, I come to this opacity. So by default we have a 100 percent opacity for this background. And after this opacity, we have choose template if you want to use any predefined templates with the help of VSDs, a video editor. You can use this option, choose template. So if we choose Choose Template and you can choose, Choose Template. You can see it shows we can import the template from online, but you had to pay the money for accessing this waste is a video editor library. So if you have, definitely, you can do other ways. You can ignore this. I just press cancel. So if you want to access the store from VSDs, a video editor definitely you can access. Otherwise just close this and press Cancel. So after setup all those values, I choose Finish. So now you can see we have successfully created a new video editing project setup. I just close this file sequence reserve. So here you can see we have all resources and other options to do any video editing project.
10. Menu Bar: Hi. In this lesson you are going to see the minimum Birra waste is a video editor as each and every software has its own menu bar, v SEC video editor. I also had the same kind of Minos. If you look at the menu bar at the beginning, you can see we have the file minnow in File menu, we have project managing middle. We have a lot of options here. If you want, you can use these options directly from here. Otherwise you can access from these areas. So after this file middle we have new project open exiting project Minow and SEO project menu. You can also see scene preview, the help of this previous thing. And if you want to customize this toolbar, you can use Customize Quick Access Bar, can choose this arrow and you can get this options. Apart from these icons, we have separate menus here. So first we have project Menno, project window have all the options to create a new project or export a project. You can see we have a new project option here, opening existing Dodger. And if you want to create a project with a template, you can choose these templates. If you want to close this project, close all projects. You have all those options. Care to make a scene preview to export our project into the video file. So all those options available in this project menu after this project money, we have scenes. So cms has lot of options like within a project, you can create multiple scenes. So if you want to create a multiple seen, you can use this a new scene. And if you want to load existing seen with another document, our project, you can use this loads a day and if you want to save the scene separately, you can use this Save As the same. If you want to pack a particular scene with the multimedia elements would have used in that scene. You can use this option vaccine. And after this we have removed saying remove all and producing option. So all these options are available in this scenes Minow. And after that we have edit minnow, The third one in Edit, menu, Cut, Copy, Paste As usual, those options, and you have align options here. For Elaine, you are a video or multimedia elements like a shapes, text and everything. And apart from those, we have Object Arrangement options here. If you want to move our object above or below, you can use these options. So all these options available in the Edit menu and after it is going to be held, view Meno. So in View menu right now you can see all these options or enable condition. Apart from this Zoom tools, all those options in enabling condition, we want to enable this zoom tool. So I can just click here and just click here. You can see because the zoom option here. So if I want to disable this zoom tool so I can press Save icon, disable those. So all the rest of the things or enabled here, if you want to hide, it can hide. You can see, if I select object tools, you can see those tools are right now not visible. And if I click again, I can see those tools are visible. So if you want to hide or show any window here, tools and other all Windows, you can use this View menu. After this view middle we have the Meno, which is editor. So editor menu has all options to edit your video. At first you have a run wizard. It's just one of the important option in this editor, amino. If we click this Run wizard, you can see I can access this file sequence visit. So with the help of this file sequence wizard, I can add multiple files here. I can apply any transitions and I can press a place settings. So I will get the all sorts of images and videos as a single timeline content here. So for that you can use this wizard. And after this run wizard we have IAD object option. So if you want to load any object in your screen, you can use this. Inside this object you can see you have all elements. You can add text, we can add subtitles, you can add charts, Avy just audio, video. So the help of this art objects a submenu, you can add all multimedia elements into our project. After this add Object menu, we have video effects. If you want to apply any video fx bar of our timeline, you can use this video apex options. So it has review as well as a separate sub categories. So after this video effects, we have audio effects Minow. If you want to add any audio effects, you can use these audio effects option. And after audio effects v. How? Video editing tools. Here you can see we have the cutout fragment tool. We have split into parts, which is eraser tool, and we have crop tool, we have Rotate tools. So it can use these tools according to your need for editing a video. You can also use the quick style option. If you want to apply any quick style for your video, you can use this option, will see that later in our projects. After this editor middle we have export project. Export project has lot of options if you want to export a video for different platform, definitely you have a lot of options here. For example, first I have PC. So if you want to export a video for a PC purpose can use this PC, or if you want, optimize the video for web, definitely you can choose the, and if you want to create a video for iPhone or iPad, you can choose iPhone or iPad. If you want to create a video for Android or DVD, you can choose according to your need. So this is not the best option we have in VCV DVD turn to export our video into different platforms. Can see all those formats available here. After this expert project may know we have conditioned minnow. So after Export project we have conversion Minos. It helps us to convert a video into different file formats. After conversion, we have tools Meno, in Tools menu, we have a lot of important options. First one, we have video stabilization. So if you want to stabilize any video, you can use this option. Second, we have video converter. So if, if you want to use a VSD is a video editor as a video converter can click there and you can add a particular kind of video and you can mention the format and you can choose export. So this is one of the best feature we have in tools and we have video capture. So if you have any camera input or web camera input in your computer, you can capture the video with the help of this video captured option. You can capture your screen with the help of this screen capture option. We will see that how to do the help of VSD, CVD or detail in upcoming lessons. And we can record our y's with the help of this VSDs video detail. We can burn disk with an IV of this waste is a video editor and you can upload a YouTube video directly from this VSDs EVDO data. So we have all these options available in the Tools menu. After this tools may know we have activation. Now, if you want to buy the license of the software, definitely you can go for this activation software. Otherwise, it does not require that because we actually see video data. Free software itself provides you all options without any watermark. So without purchasing this software still you can access all the options in this VST CVD editor and you can produce a video without any watermark. So these are the minnows and options available in this VSD CB2 editor.
11. Projects Explorer: In this lesson, we are going to see Project Explorer in BSD is a video retail product Explorer, has all the scenes. What do you use? A newer single project. If you look at this left-hand side of your VSD is the PTO detail. We can see Project Explorer. Right now we have only the document name, which is sports promo. Now I'm going to add a new scene when you are creating new project, that time itself you will have a default scene which is seen 0, but I was deleted now. So once again, I'm going to create a new scene for that. What I'm going to do, I just right-click in this project explorer. You can see I have a list of menus. Here. I'm going to choose new scene. So here we have a lot of options. I'm going to choose a new scene. And you can see they've seen them is 0. So you can add any number of scenes. For example, I'm going to add one more scene, c1 and c2. So your project may have so many scenes. In each scene you can have a separate footages according to your needs. You can edit those scenes. You can unpin this project explorer for that, you can use this pin icon. If you press this pin icon, you can automatically hide this project explorer. You can see right now it was here and I roll my mouse over this project Explorer, I can see what are the scenes I have in this project. And if I come outside this place, it will automatically hide on the particular place. That's why it is auto hit option. If you want to show you have to pin this icon so that it will be there forever. If you want to delete any particular scene, what you can do is you can select that particular scene. We can right-click and you can choose Remove scene. Then you have to confirm I choose S. So that scene will be deleted. And if I want to move the scene above our bottom, you can choose a particular scene. You can right-click and you can choose a scene up. So with the help of this option, we can move the scene up. You can move the scene down. In this way. You can manage all your scenes for the heap up this project explorer.
12. Objects Explorer: In this lesson we are going to see Object Explorer. So in VSTS video editor, we have the option which is Object Explorer, height no, you can see we have Project Explorer. This project Explorer, how three scenes seen 0, S2 and S3. And we have deleted scene one in our last class. If it choose seen 0, I just select and I double-click this scene 0, we double-click, I will get the window which is called Object Explorer. You can also see here. Here we have Object Explorer and here we have a project explorer. Project explorer will have all the scenes what we have in this current project. In Object Explorer, we will have the current scene objects what you have University in. For example, I choose Project Explorer I have right now choose to seem 0. And in seeing 0, for example, I'm going to add a rectangle here. I just click the rectangle tool here. So I'm going to add a rectangle when I was placing the rectangle, if it was showing object position setting. If you are going to add any object in VSD is a video editor. It will show you this object position setting, how to choose from value on to add this particular shape in your timeline. So I was choosing from cursor position and I choose, okay. So what does this default one? And you can see I can add multiple shares, like I can add rectangles, circles, or ellipses. So these objects are available in scene. If I click s2, can see it was empty right now I don't have any object here. And if I choose seen 0, you can see multiple objects I have in this particular scene 0. And if I want to know what are the objects we have in this scene 0, what I can do is I can go to the Object Explorer. Otherwise, I can jump object explorer from this project explorer. It's for that what I'm going to do is I'm going to double-click the same 0. If I double-click seen 0, we'll get the object explorer that it will show what are all the objects we have in that particular scene. What are the shapes or all the images, water or the video and text information. All those objects will be available here. So with the help of this object explorer, you can see what are all the elements we have in this single scene. And you can edit, you can modify according to you that need.
13. Tool Bars: In this lesson, we are going to see the tool bars available in vis-a-vis 282. We have so many tools available in this VSDs, a video editor. You can see the monitor preview here. In left-hand side we have one vertical toolbar, which is object tools. At first we have selection tool. I can choose this direction to, and by default, this selection tool will be selected in this race disability editor. And above the selection tool you can see we have daughter line. If you click and drag this particular dots, you can keep toolbox in a separate place. We can relate this object tools as per your need. For example, I just click and drag over this monitor view. You can see I was placed those tools here. Or if I want to place on my lap and said I can just drag and drop that we want. So with the help of this option, we can align your toolbar anywhere. And at the bottom of this selection tool, we have a lot of objects. For example, I'm going to add rectangle, means I have a rectangle for adding ellipse. We have add ellipse and for adding text, we have an extra tool for adding multimedia elements like images, audio, and video. We have separate icons. So with an Alpha of these tools, we can add any multimedia elements to this particular scene. So at the top also the healthy set of tools. Right now, at first, I'm going to just drag and drop this. These tools are called editing tool. So, so editing tools has tools to edit the video are a sequence of image. So here we have Tune and we have copy tool and we help paste tool, and we have undo and redo tools here. After that, we have set of tools called layout tools. So layout tools will help us to align the particular shape layer within our scene. We have so many options here. For example, we have left alignment, right, center, and align top, middle, and bottom. We have an option to align with the same kind of way, with the same kind of hate and at the same size and at the same portion of the object. You can move the layer up or down with the help of this up and down. And if you want to keep a particular layer above all other layers, we can use this to top, or if you want to move to bottom, you can use this to bottom option. And if you want to group objects, we can use these two options, group objects and ungroup objects. So after this layout tools, we have almost adopters, which is called pebble tools. So these pebble tools will help us to align the object within a single frame. It will snap with each and every object what we have used in the particular frame. So we have three different set of tools to edit videos with the help of VSTS EVDO data, all those options available at the top of this monitor view. You can customize those toolbars and you can place wherever you want.
14. Video Preview Monitor and Status Bar: In this lesson, we are going to see the video preview monitor and aids status bar. Right now at the center you can see we have black colored rectangle shape. So this area is called video preview monitor. What all the videos, images, and objects we have in this particular scene. It will be available in this particular screen. I can control this screen. I can zoom in with the help of control and scroll your mouse. So you can zoom in and you can zoom out the help of control plus your scroll mouse. We can also control this with the help of tools. So, so in this video is a video data at the bottom of the softer here you can see the status bar of this particular scene. You can see the current version of the cursor, and you can see the start section and the end section. And after this, here we have some controls to view ever monitor view. And here, the help of this zoom out, I can zoom out the monitor view. The help of this plus zoom in. You can zoom in the monitor view and here you have Zoom To Screen option. If you click this particular place, you can fit the particular monitor screen view within your window. And apart from this, if you want to set a particular person days of Zoom can use this option. It started with 25 percentage and we have 50, 60. So if you want a particular person, a zoom level, you can use this option. And if you want to fit, you can use this Zoom to screen. It will fit within the window. So this is set as well, will help you to set the particular video preview monitor question.
15. Timeline and Timeline Tools: In this lesson, we are going to see timeline, timeline tools in VSDs, a video editor. At the bottom of this preview monitor view, see the timeline which has the title seen 0. So right now I have seen 0 in this project. Here you can see we don't have any files. So I'm going to import on video file, I just import the help of my tool. And when I was placing the video, it shows a list of options for me for positioning the video. Right now it shows from cursor Persian. So if I want to add from my cursor Persian, I can choose discussion question. So right now the timeline is empty. Can see, and I choose. Okay. So that video was added here. You can see how timeline needle, which is also called cursor. It shows how the video looks. So I can move my needle. Are the cursor anywhere I want. You can see. So this particular layer is my video layer. And if I want to add multiple video layer, I can add the tail of the same option. And in this timeline, you can see we have a lot of options here. We have visibility option, we have blending mode, and we have layer name. If we want to change the layer name here, I can double-click and I can change the layer name to handle the timeline in VSD is a video editor. We have set of tools at the top of this particular time when you can see we have a lot of tools here. And now at first you can see I have set up tools. So these tools are called Timeline scale tools. With the help of this particular tool bar, I can zoom the timeline itself. I can zoom out the help of this plus I can also, I can zoom in and I can zoom out. So the shortcut keys plus and minus, plus plus icon, you can zoom the particular timeline view. And if you plus minus icon itself, you can zoom out the timeline view. That is a shortcut key, and you are in Zoom in level or zoom-out level. If you want to keep the zoom level into a 100 percent, you can use this icon, a 100. So the help of these timelines scale tools, we can handle the particular timeline. And after this timeline scale tools, we have setup tools. This is called timeline play tools. So with the help of this timeline plate tool, we can play a video. For example, right now you can see it shows the quality of the video is original. So if I choose 360, that video quality in the preview monitor will be turned into 360 pixels so that I can easily read it and I can see the preview. You can see I just press play our PaaS seen butter. I know the quality was reduced. I just pause the video again. Now I'm going to change the video quality in 2004, four pixels. So now you can see the difference in a better way. You can see that video was having more blurry since it has 144 pixels quality. And if I choose a PhD or for legitimate according to my need, I can choose which kind of review quality I need. And also I can adjust the volume of the video if we want to reduce or increase the volume. So those options we have in this timeline played tools. After the timeline play tools, we have tools which is called a timeline cursor tools. So with the help of these timeline cursor 2's, we can adjust the particular customer. For example, we want to adjust the particular cursor into left-hand side, one frame. I can press this icon, so it moves a frame-by-frame. With this timeline. I can also use the shortcut key, which is left arrow. So the left arrow will move the particular cursor into frame-by-frame in lepton side. The same way you can use this right-hand side icon next to frame. And you can use right arrow. So these are the play controls. And with the help of these previous second, you can navigate the previous second time. And with this, we can navigate next a second time. After this we have previous keyframe cursor option. So the help of this, we can move to the particular keyframe, the beginning to yen. So these are the timeline cursor tools. Apart from this timeline constitute we have some motor, which is timeline blog with tools. So these timeline blog post, we can align the particular selected layer. For example, right now I have cancer in this portion. If I click this particular icon, move blocks to the castle portion. You can see I can move the video sequence into the particular location. So from this place one lead that video will distorted. So with the help of these are tools we can control all timeline elements in this VSD video editor.
16. Resources Window: Hi. In this lesson we are going to see about a resources window. So in your VSD see video detail at right-hand side you can see resources window. So this resource Pinto will keep all the multimedia elements. What do you have used in this complete project? For example, if I'm going to import our VT0, going to input a VT0, choosing to home videos, and I'm going to choose images also. So I just choose Open, choose, add two layers. So you can see within a layer, I have all those multimedia elements. I have a two images here, basically image. And another video shows two people skating with skating boats. So all these four multimedia elements like two images and two videos, I have in this particular timeline inner resource window, you can see we have two images and we have two videos. If you double-click the particular image or video, it will show you the preview of the element. For example, I double-click this place. It shows what particular image we have in that name. Here also you can see for video also will have the preview here if you want to make the preview on so you can do that. So this resource Pinto, we'll have all the multimedia elements. What do we have used? Another important advantages, even if you have deleted those multimedia elements from you or seen, these resource window will have all those multimedia elements so you can reload at anytime, for example, going to place the cursor at the beginning. So I'm going to drag and drop the particular video here. And I choose add as a video. You can see I have added the video here from the resource we do. So at anytime I can load the particular video or image with the help of this resource window. Even if you deleted from this time, then it will be available in this resources window. That is the one of the biggest advantage of this resources window envious DCB to editor.
17. Properties Window: In this lesson, we are going to see properties window. The properties window will have the properties of the currently selected object in this preview monitor, our timeline. For example, I was elected this particular layer in this preview monitor. And I choose Properties window. You can see in Properties window we have all properties about this particular layer. For example, here we have the type of this particular element is VDO and the object name is here. We can rename whatever I want. For example, I was given a name, flash, so I can rename that particular object whatever I want, and it shows a conversation mode of the particular layer. So if you want to create any competition mode, you can use this option so that you can leave it. And you can set the coordinates which is left and right pushing out the particular object, For example, how this particular layer, which is a video layer, I just move this. So you can see the position was changed and you want to keep this in a 00 means I can type and I can ensure the portion of the particular object into 00 and the width and height of this particular video is 19 to 0 pixels and 1080 pixels, which is also called full HD resolution. If you want to reduce the video size, which isn't a diamond, you can see what is the current size here. And if I want to reset, we can add the original value of the video so that it will be receptor. So here we have a left-hand right coordinates and we have width and height of the particular video line. And after this we have object creation time and object drawing creation. So this object creation time was the beginning of the video, and this object drawing duration is the end of the video. If you want to begin with some duration, like for example, I want to start with the three seconds in this video or four seconds in this video, I can do that with the help of this particular options. Choose the particular layer and it shows the total duration is seconds and 0.5 milliseconds and the starting time is at 000. That starting time. I want to start from the second one. And you can see in timeline it was started from the second one. And I was making this again into 0. And you can see the entire video here in this timeline. So you can set the starting and ending time in this object creation time as well as object joint duration. So after this we have video object settings. So if you want to know from where this video is important, you can use this option. It shows from there This video was important. So after that we have the resolution of the video and video duration. And after this video objects settings, so we have crop borders. So if you want to crop the video, you can use this crop tool. I choose this tool and I can crop as per my need. And I choose. Okay, so you can see that video was crop. Again, I'm going to crop so that you can see in a better way. And you can see right now I have only those text area. So that video was completely cropped. And if we want to change that value, again, I can go there. And here I can choose what I want and I press Okay. So you can see the complete a view right now. In other way, you can make these values into 0, so that will get the original video. So this will crop the borders option. We can crop the VT0 And we have one more option which is stitched video. So right now if I adjust the video dimension, you can see it maintain its proportion. But if you want to make this video stretchable, what I can do is I can choose this video no into a yes so that this video will distinguishable. You can see I can stretch as per minute. But most oftentime we don't use this stage option. So by default it will be no. And I was keeping this frame into 19 200 into 1080. So this is the right size. And after this stretching options, we have background color option. When you are reducing the video dimension, we have black colored background here. So if you want to change the background color, you can choose this option color. And here I can choose which color you want. You can see we have the background color here. And if I don't want to add any background color in this field background I can choose, no. So it will be empty. So if you want to fill any background color, you have to choose CSP and you have to choose which color you want. So according to your needs, you can choose your own color. So this option is called filled background and background color. And after this, we have some more options like we have playback speed. For example, right now, have sector that value to 200. By default it will be a 100. You can see what was the current
18. Basic Effects Window: In this lesson, we are going to see basic effects window. So in this user interface at right-hand side, you have basic effects window if you choose to any one layer in your timeline. And I come to this basic corrections in this basic graphics window. You can see I have a lot of basic actions here. I can change the angle here. If we want to set a particular value like 45, I can set that particular value here. I may want to set the ITA can do the same thing here. Here also we have the icons to set the rotation value. So a protein, the video into 90 degree in both clockwise as well as anticlockwise. If you want to reset the value, I can choose this race that I can here. Here also we have a horizontal flip, which will flip from left to right and right, left, and vertical, which will flip the video from top to bottom and bottom to top. So this options, we can rotate the particular Selected Layer Video. And we have LUT effects are so LUT effects are pretty different effects you can use if you want. Otherwise you can leave. Leave this, I have to choose. Don't use LUT. And after this we how dangerous option. So if you want to adjust the brightness of the particular selected video layer, it can adjust the brightness in minus or plus. We want to insert the value for each option like brightness contrast, and how the result at the end of that particular effect. You can see it. Can I just add contrast? And I can reset if we want. So we can adjust the gamma value here. It cannot just a particular tone like red or green or blue. So you can adjust the individual channels with the help of this color adjustments. So based on your needs, you can choose which color I just want. Do you want for this video? Can adjust the temperature. It can saturate or D saturate the vdu layer. It can sharpen if you want. If you have blurry video, you can use a sharpened option. Or if you want to burn the short video, you can use Blur option. So this will make a blur appearance for your video. So according to your needs, you can use which option you want. So I know it was resetting all the changes what I have done. So this is the wisdom of video and after this basic corrections, so we have RGB curves. So I'm going to choose this RGB curves. So in RGB, because we have templates option which has predefined values. For example, I have colored negative. It shows the complete negative value of the colors and we help cross process. So here, lot more predefined color values here, right? All of us choosing none. And here we have RGB. Value adjustment also may want to adjust all the three channel colors. I can use this icon. I can select this particular icon and I can adjust the color values you can see. And if I want to reset, I can do Reset corruption. If you want to adjust only the tones, I can use this red. I can select a particular channel and I can adjust the color value. And if we want to adjust only the green, I can choose the green. I can adjust. The graph shows which is red channel and which is green. And if you want to just only the blue I can add just so based on your need, you can adjust which color you want to adjust. So right now I'm going to reset this class again. So in this way, what you can do is we can adjust all those colors. So this original color, you can use this option, RGB curves. So after this RGB curves, we have hue and saturation curves here also, we will have the same options. So here we have the color wheel with the help of this color wheel so you can adjust your color values. For example, I just click over this particular circle and I can see I have the point. So with the help of this point, I can adjust the color values. They want to add more point, definitely I can add. So based on your need and can add the more points and you can adjust according to your need. So here we have hue and saturation curves. If you want to reset, you can use this Insert option. It shows the warning message, yes, I want to reset those values. And if you want to adjust a particular color itself, we can choose the particular color here. And you can adjust the color value here, so I can see the difference here. So for adjusting these color wheel based adjustments, we can choose Hue Saturation curves. So after cue saturation house we have UV curves. So with this OU, because we have the same kind of adjustment values and templates. And I can adjust according to my needle. I can add extra points if you want overhead. So these four options available in basic effects window to adjust colors and other options in this timeline video.
19. Importing Audio, Video and Images: In this lesson, we are going to see how to import audio, video, and images with VSDs, a video editor. We have two ways to do this. First one, we can use editor menu. So in editor menu has the option add objects. If you click add objects, you can see we can insert all objects with the help of this Add Object menu. And in this, you can see at the bottom we have three important options. For store image. You can see the shortcut keys shaped 2 plus I. And the second one is audio. The shortcut key is shipped to plus da and that one is video. The shortcut keys shift two-plus be. Normally the software's may have the shortcut key like control plus V, control per say something like that. But InVEST CBD or didn't they have shifted key with this supposed to, I'm going to import the video. You can come to the editor menu and you can use IR objects and you can choose video are other ways we have one more option, which is we can also import with the help of your tools. So here also you can see we have the same three icons. Add Image, add audio and video. So I'm going to press this icon, add video, I click Add video. Here I have one video example. For example, this video was downloaded from the website Pexels.com. And it shows me a message where I want to add that particular video in this file. So by default, it will choose from cursor position. And if you want to select from scene beginning, you can choose for most of them, you need to choose firms in beginning if you want to add from the beginning, and I choose, okay? So you can see that video was added here at the bottom. You can see in timeline, we have that particular video preview. And if I press Play button, you can see it's a blurred video. So this video itself was perfectly inputted within this VS disambiguated or so in this way, you can input any video with this waste is a video editor. Next I'm going to show you how to import any audio using this VSDs, a video editor. So we have the icon here or we can use the shortcut key which is shifted plus EA. If I press Shift plus yj, I will get the option to import audio file. So here I'm going to choose an audio file. This one was downloaded from YouTube audio library. It's royalty free one. I choose on a choose Open. Now you can see when I was adding this audio track itself just shows the same message box. So I want to choose this from the beginning and I want to add a new layer for this. So what I'm going to do is in this layer, I'm going to choose, Add new layer and I choose, okay. So it's a length Audio. You can see. And look at this place. You can see the current video file duration. I press Plus icon so that I can zoom in. So this is the audio track what we have, we have importer. And if I play. So you can able to hear the audio preview. And that audio file was successfully imported. So in this way, you can import audio file within this VSD is a video editor text. I'm going to show you how to import image file with the help of this waste is a video editor. For that we have the shortcut is Shift 2 plus I R S. I had to click this button. So I choose Add Image. Now I'm going to choose own image here. And it shows open. And it shows the same message box I want to add from the same beginning, I want to add a separate layer. So I choose Add new layer, and I'll choose, okay, so now that image was added perfectly and I'm going to rescale this image. So what I'm doing is I was re-scaling that image. So in this way you can import images within this race disability rotator. Now I'm going to play this video. We have successfully imported all three multimedia elements, which is plus 20, so video and secondaries audio. Then we finally imported image file. So these are all the ways you can import video, audio, and images within this rehearse distributivity.
20. Scene Timeline vs. Object Effects Timeline: Hi, In this lesson we are going to see in detail about the timeline concept. We already know what is timeline when I input any one object, like I'm going to add a video here, so it choose video and I'm choosing this video, can see I'm going to choose from the scene beginning. And by default I choose Add new layer. And you can see we have imported that particular video sequence here. So now what I'm doing is I'm just playing this video after loading this. Okay? So now I'm going to play this video. Can see that this video plays very well. And if you look at this timeline, right now, this is the scene 0. And when you look at nearby the scene 0, you can see we have one more tab. If I click that tab, you can see the name of the tab is the current video file name. So here also we have some kind of frames which are empty frames right now. And we have the cosine of needle here. So what is this place? Let me show you. So in this scene 0, right now we have only one video. So in Object Explorer you can see we have only one video here. And I'm going to add some video effect for this. So I just right-click and I choose Video effect on, I'm going to choose Adjustments, and I'm going to choose Grayscale. I'm going to upload that video effect for that, I'm going to do is I'm going to choose this scene beginning. If you look at the timeline right now, after choosing that particular layer, I just right-clicked and I choose the particular video you have picked, which is grayscale. And when it choose Grayscale, I got this dialog box and look at the timeline. Right now we are in this separate timed n, which is the particular video timeline. So here I'm going to apply the particular effect. So I choose from the scene beginning, I choose, Add new layer and choose, Okay. So we got this video effect itself in a separate layer. This tab seen 0, so a three and have all the elements what we have in this particular scene. But if you choose any one particular layer and apply any effect, that object itself will have this upgrade timeline, which is the object time when you can see right now I have only one layer. I have a timeline for that layer. I have applied a grayscale effect for that timeline. We can see that effect was started with this 0 and ends with the same duration of the video. For you want to reduce the effects duration. Definitely I can do. I can reduce the effects duration. So you can see from the seventh seconds to 15 seconds only, I need the particular effect. So in this way, you can customize the particular effect for your video, going to show you here. So insane, 0, right? No, This video was color. And when we do reached the seventh second, you can see after seven seconds, that video itself turn it to grayscale. So that affects will start to function according to our placement. So in this way, we can add any number of effect for this video and you can customize based on that timeline. So each and every layer in this particular scene will have separate object timeline. Let me show you another example. Go into input or more image here, Let's use our object and I choose image. So here I'm going to choose this strawberry image. Choose Open. I want to add from the beginning, and I want to add on a separate layer, and I'll choose, okay, so we got that particular object here. Now, if I choose this image, you can see nearby ever seen 0 timeline because the separate timeline, right now it was empty like how we got in our video layer. So if I select this particular video layer, you can see we've got the properties of the particular video layer in a separate timeline. So if you want to add effects or a removal fix, it will be automatically moved into this object timeline. Definitely it looks differ, but it has lot of advantages like we can customize the particular video effect for our own timeline duration. So in this way, at the same time when the object diamond works in VSDs, a video editor.
21. Adding Text and Shapes: In this lesson, I'm going to show you how to add shapes and text with VSDs, a video editor. First, I'm going to add a line for that. What I'm going to use, I'm going to the tool bar. I choose Line tool and choose Line Tool. I will get this option object pushing setting. So as usual, I'm going to choose from sane beginning and I'm going to choose OK. So now I'm going to draw the line here. I just click and drag. You can see I got the line here. So I just place where I want and I can choose this line. I can again move this line. If you want to change any properties of this particular line, you can go to the Properties window. Here you have all properties of the line. You can adjust according to your need. And if you want to change the color or thickness of the line here, it can do in this pin option. So I'm going to choose thickness into six. So I'm going to reduce the thickness from six to three. So I'm going to reduce the thickness from six to two. I can use these arrows are I can directly type here. So if I type ten, I'll get the 10 thickness. And if I'm going to, I'll get it to thickness for the line. So in this way you can set the properties for any object you are adding. They'll pop this toolbar. So next I'm going to add on rectangle. So here I have add rectangle, I choose rectangle and I'll choose Object portion setting from sin beginning. And I'm going to choose OK. So now I'm going to add a rectangle here. You can see added a rectangle. And if you want to set any property of this rectangle, I had to go to the Properties window. So here I have the Properties window you can see. And we have pen stroke color as well as blush color here. So I can choose which color I want to fill inside. I can choose here. And I can select which color you want. So based on your needs, you can feel any color you want inside of this particular shape. And if you want to adjust any other property here, you can adjust our options here. If you want to say the field background from solid gradient, you can choose Gradient and you'll get the gradient option here you can see we have color and color 2. So in collaborative can choose which color you want as a second column. So here we've got the gradient color. So in this way, you can add any object from this toolbar or from Editor and odd objects. And you can select the object and you can change the object property with the help of properties window. And here I have some more tools like we can use an ellipse tool. So if you want to use a ellipse or circle, you can use this tool. You can see it can create ellipse. And if you want to create a circle shape, you have to hold Shift D key when you're drawing the circle, and you will get this cycle here. So in this way you can add cycles also. And at the top of this determiner you can see we have the properties and other options for this circle. So I can choose Stroke alone, alone together. So for each object you'll have this option. So if you want only stroke alone, you can choose a stroke, or if you want to only fill color alone, you can choose this fill color. I'll, if you want both, you can choose the first one. So in this way, you can add any shape within this particular VSTS, a video editor workspace. And if you want to add a custom shape, you can use this option. I can choose this ad reshaped so that you can customize your shape. You can draw anything, looks like almost like a pen tool. You can see how it works. And I finish where I started. So now we can see a whole lot of points, but choose Select tool. I can adjust those points. And if you want to choose a fill color, I can do with the help of this properties window. So you can create any shape with the help of this add custom shape tool. And after these tools we have Text tool. So with the help of the text tool, we can add a text, choose the object pushing, sitting, and I choose okay. So I just click here. Here I'm going to type the text. For example, I'm going to type the text folder. So after adding the text, we can see at the top of this menu bar here we have all text properties and choose the text. And I'm going to change the style. So you can see I've just changed the text from Arial, Arial Black, and I select the textbox. Again, I'm going to change the size of the text. Can see, based on my selection, can change the size. And if you want to change the color or so it can do for them. What have to do is we have to come here to the editor Meno, and here we have text color. So I choose text color. I'm here, I'm going to choose which caret 1. So please join your needs. You can choose which color you want. And if you want to add a background color, you can choose this brush cursor, I can choose whichever you want. So in this way, you can choose both text color as well, blush color, and you have Carter color also, if you want to add a counter color, you can choose which color you want. And if you want to increase the size of the canto, can do so. You can see the counter appearance here. So in this way you can adjust all the texture properties with the help of this editor Meno. And you have all properties here including alignment and other things. So in this way, you can add shapes and text within this VSDs, a video editor workspace, which is essential for adding text-based content as well as shapes. So async texts and shapes in VCC video editor is much more easier to compare other all softwares.
22. Blending Modes: In this lesson, we are going to see what is blending mode, how we can use blending mode in VSDs, a video editor. You can see right now I have two layers in my timeline. A tough layer, you can see someone was slicing the strawberry. And in second layer a house I'm on applying claim for the cake. If you look at the timeline, you can see I have two layers. Each layer, how the option called blend. So this is where we can set the blending mode in this list is a video editor. So right now I was choosing the top layer and I come to this blend option here you can see you have a lot of options here. So I'm going to choose the option plus. So when I choose the plus allele, we have pixels at the bottom. So at the bottom layer we have a strawberry and the top where we have cake video. So when I choose plus, you can see that blending mode works very well. You can see top layer was blended with the background layer. I'm going to choose ONE more option which is minus. So when I choose minus, you can see I can blend with the background layer and a dark mode. So you have a lot of options here. You can choose Multiply. You can see both layers blender very well. So in this way you can choose which particular blending mode you want, and that will give you result. And that will give you best output for this video editing work. If you want to add more blending mode, here you can have the option more, and here you have a lot of options. We can choose a soft light or hard light. So based on your needs, you can choose your own blending mode. So in this way you can add blending mode for video editing work in these disability, editor.
23. Quick Styles: In this lesson, we are going to see what is quick style in VSD CBT. Quick style is a kind of video styling options we have in VSD as a video editor, it has so many predefined FX only thing you have to use her to select the particular object in our timeline and how to apply that particular effector. Further, what I'm going to do is I'm going to choose this particular video in my timeline. Then I go to the editor menu, and here you have the option called quick styles. So here you can see here a lot of quick cells here. You can choose which one you want. For example, I'm going to select this outer levels. So when I select Auto values, you can see we have changes in this particular video. And if we go to the Object layer, you can see here that particular effect here, which is Auto Level 1. So if I want to delete that particular topic, they had to come to this particular time n, which is the particular layer timed it, and they removed this particular layer. So you can see this is the original video. And now I'm going to choose a ONE more option, which is I'm going to choose a grayscale. This also quick styling can see I can turn the particular layer into a grayscale. So in this particular layer timeline, you can see they have that particular effect. So in this way, you can apply any quick style with the help of this quick style option, I can add a medium blurb. You can see we can have the blood, can press the Control, is it for undo? And I heard a lot of options here, like I can set the old flame effect for this video and I can press Control is it? Let's use old film T2. You can see how it looks. I choose Exclude 2. So when you add multiple quick styles for single particular video layer, you can see in the timeline, it adds continuously. So if you want a particular effect to only, you have to remove other epics, other quick styles, and you have to add which one you want, then only you can keep the particular effect in that particular layer. Otherwise, all fx will be combined and that looks pretty awkward. So in this way you can add any quick still with the help of these, VSD is a video editor. You also have Instagram style Beethoven settings, which is controlled is it? And I'm going to choose a particular layer here. I'm going to choose the rest of the options and choose Apollo. I can see how it looks that color correction work and I want to remove that style. I delete that. I'm going to say one more, which is cave. So in this way you can add any quick stem for your time blend layer using VSC video editor.
24. Video Effects and Video Transitions: In this lesson, we are going to see how to use video effects and media transition in VSTS, a video editor. Right now I have ONE video in my timeline. I'm going to apply 3D effect for the same. What I'm going to do is I'm going to the editor window and I'm going to choose Video Effects. So here we have a lot of video effects and I'm going to choose that just mass. So here we have adjustment based all video effects, for example, I have are two levels. So if I choose Auto Level, I can apply Auto Level effect for this video. So you can see the color change there. And if a disabled the outer level so you can see what is it a cell. And this is the result of outer levels. In this way you can add any V2 effect for your timeline video. We have another way to add a video effect for your video that is heterocyclic, the particular layer. And I'm going to choose a video effects. So here also you can access Video Effects. I had a lot of video effects. So in this adjustment, so you have all our JSON-based Video Effects, hue and saturation adjustments like the help of this, I can adjust hue saturation values to adjust that I choose the particular effect I go to the Properties window. So here we have the adjustments up hue and saturation. I can add just so based on my need, I will get the colors. So in this way you can saturate our D saturate your particular time, n v to u. So this is a hue and saturation values. And I'm going to add on more different effect. A lot of effects here you can see I have filter effects. And so a lot of effects. I'm going to choose Noise. I'm going to choose from the same beginning. You can see we have the noise here and we can adjust the noise in my Properties window. So in this way, you can add any video effect for your videos. A whole lot of options here. I can transform a video clip so that it can flip my video. And if we want to adjust the property, I can come to this Properties window. It has a direction. So if you want to flip vertical or horizontal, it can do occurring to you and neat. So in this way, you can add any vdu effect for your video. Remove that, and I'm going to add on more effect. So here we have transparency. We have fade in, fade out. So all those periods of x we can use if you want, I'm going to choose a fire. Choose from the same beginning, 42, okay? So you can see we have a small flame here. If I play the video, you can see the fire. So this is a kind of VEGF IT. We have InVEST CAPTA data. So in this way, you can add any video effect for our timeline video, we held a lot of options here. And now we're going to see how to add video transition for your video. So in this VSD, see video editor, video transition works little bit different. I'm going to show you. So first right now I have one layer, I'm going to add one more layer in this timeline. So for that, I'm going to choose a resource window. Here, have some more videos. I just drag and drop one more video here. So I'm going to add as a video. So I got the video. You can see it's a full length video. Going to eat this. It's a full length video. I just shorten the video. So you can see we have two videos right now. The one hand to people and another one have aerial view of agricultural land. So I'm going to upload a video transition right now. So what I'm going to use, I'm going to select that first video. And after selecting the best video, I'm going to choose Video Effects. And this I'm going to choose video transition. The bottom you can see the how the video transition. So we have seven a video transitions here. First I'm going to choose wife. So after choosing this wipe, it shows where I want to add. So to see an end, which means the current particular objects in it. So it was by default selector to see an end. And I'm going to choose just okay. So from the 2.822 for that particular effect to us applied, if I go to my scene timeline, I just press Play button. And you can see how that particular transition was performed. But for that, what do you have to do is we have to move the second video layer below that layer. Because then only you can see that particular video effect, which is that antigen, remove the particular video segment into the same layer. You cannot see that transition like what we have in our premium. So this particular v is disability works little bit different in this transition option. So you have to update the transition to the end and you have to move the layer below that particular selected layer. So now you will have the transition effect here without any issues. So in this way you can add any transition without any issues. For example, I go to my transition of i 1 and remove that. And now I'm going to add one more transition here. For this video. I just right-click and I choose V of x. The bottom I have transition going to choose. Let us see. Here you can see the object version is hitting. It will be selected by default. I just press OK. So you can see a tail, that particular video segment, the end up to four frames, up to four seconds. We have that particular effect. It can move cursor or the needle. Then you can see the result here. And if I come to the scene timeline here also we can see the same result. So in this way, you can add video events and video transitions per videos in VSD CVD editor.
25. Color Corrections: In this lesson, we are going to see how to do color correction in vis-a-vis 282. First I input a video and that video in timeline. Now what I'm going to do is I'm going to choose VTA fx and this, I have the adjustments. So here you have all color adjustments for your video. For example, I'm going to choose this brightness contrast. So I choose brightness contrast coma, and I choose the object pushing setting from Saint beginning. They choose, okay. So now you can see I got that effect and in my Properties window you can see I will have the adjustments for this effect. Here you can see how brightness contrast and gamma value properties. Here I can adjust the value of my brightness or quarters, whatever I want to adjust. For example, in going to adjust the value contrast. So default, you have one value going to change that into 20. And you can see the result. So in this way, if you want to do the color correction with the brightness contrast, we can use this option. I'm going to use another one. I just remove this. Now I'm going to choose the same layer. I'm going to choose Video Effects, point to such judgments. And here I have another option which is hue, saturation and value. I choose this option and choose from the same meaning they choose. Okay? So here when I choose this particular hue saturation and value, I'll have the color wheel here. So right now we have the default color here. Here we have a white colored circle. It represent the current color value of this particular video. If I adjust this particular color value, it just click over this particular white circle. And I can see all over this particular video, the color value was completely rise. And if I reduce the particular circle value, you can see I can reduce a color value in this entire video. Can see. So how it works. I'm going to show you now, for example, I just want to adjust only the green color value in this video. So here you can see we have adjusting the value using this circle. We can adjust the value, but when you have only 1 in this white circle, the circle will add just the value of all video pixel colors. If you want to adjust a particular color itself, what do you need to do is you have to add more points. For example, here, if you want to adjust the green value, what I'm going to do is I'm going to add point here. I just double-click so I will get a point. So the current point indicate that red color. So the red color indicates that particular point was selector. So now I'm going to adjust the value. But when you are adjusting the value, I don't want to disturb other colors. So what I'm doing is I'm going to add two points before and after this particular middle point. Now I'm going to adjust the column. Just look at the video. I'm going to adjust the color towards the color so I can rise the VDO color value for a green. You can see how it looks. And if I reduce the value for green, you can see how it looks. So if you want to adjust any one particular color, you can add the color point and you can add just a particular color itself. I'm going to show you one more example here. I have some imagined that base color. So I'm going to adjust the color value for that. What I'm going to, I'm going to add one more point here, and I'm going to add a middle point here. Here I'm going to say value. You can see how that value affects the video colors. So in this way, you can set the color value for any part of the video. You can see how it looks. And I'm going to increase the green colors. So here we have the video before completing the color correction. And here we have the video after computing the collaboration, you can see this current footage was vibrant because of color correction only. So if you want to create a perfect vibrant color videos, definitely, we have to use this color options in this way, you can add any color correction work with VSDs, video editor.
26. Audio Effects: In this lesson, we are going to see how to do sound effects with VSTS EVDO data. First I'm going to import a sound. So I go to the Add Object and I choose the audio. Here. I'm going to choose a background music. I choose Open, and I want to add that particular layer from the same beginning I choose, Okay? And just move down that particular layer so that I can able to see both my a layer as well as the background layer. So now I'm going to play this video. So you can see I have a perfect sound. So what I'm going to do is I'm going to trim audio here. I just cropped the audio till the video. And here you can see currently how much audio we have. We have only 18 seconds audio. I just cropped. So we got the audio. Now we are going to add audio effects by this audio. This music itself looks really good, but if you want to add any audio effects, definitely you can add. We're going to see how to do at that audio effect with this particular audio track. So I choose this audio track, like come to this editor Meno. Here we have VEGF x. After that we have audio effects. So here we have audio effects. We had a lot of options here, for example, we have options to amplitude or the audio fade in, fade out. And after that we have audio delay out properties like we can add audio delay effects for this particular audio track. And we have filters and we have timestamps pitches, and we have a special reverse often also. So I'm going to choose this amplitude first. Here at first we have normalized audio. So if you have high and low band audio together in a single track, if you want to normalise audio, you can use this option. And second we have amplified. If you want to amplify the audio, just want to add that particular effect and a separate layer. So if I want to amplify the audio, I can add this effect to amplify and just play this audio again. So right now we don't have any change. I choose this particular effect on a come to the Properties window. Here you have the current volume and just as 0. And if we want to increase a 20 decibel, I can increase. Now I'm going to play the audio that much louder. And if we want to just again from 2210, you can able to see that result that amplifies my audio. And I said that 0 value again. So if you want to add any effect you can add. I had just choose to amplify. And I'm going to choose some of the audio effects. You want to add audio effects. We can also choose the particular audio layer, or you can right-click and from that person itself, you can, you can access audio effects. So I choose fade in. So when it's just fading and from Saint beginning I choose. Okay. You can see that fade music is there. Just play the video. So at the beginning we have the fade in. I hope you hear that. And if you want to add Fade Out, Definitely I can add a Cesario tag again, I quote The audio effects and choose amplitude and its use fade out. So when I was adding fade out, that should be at the end of the audio. So by default it shows to seed and yes it is. And I'm going to choose, okay? So you can see in a new layer we have that effect. If we want to keep the effect in the same layer, I can just drag and drop. That is no issue with that. And I'm going to play that video again. So you can hear that audio. We have the fade out there. So if you want to add any RU, effect, you can choose a particular track and you can go to the audio effects. And here we have a lot of options. You can add whatever you want. So in this way, in VX DZ video editor, you can add audio effects for your audio.
27. Cutting and Splitting Tools: In this lesson, we are going to see how to use cutting and splitting tools in VSDs, a video editor. First I'm going to input two videos. I'm going to choose add objects, go to Choose video, going to choose two videos here. So in HE video, we have the girl with the red colored this. So I'm going to edit this video. The total duration is 46 seconds. I want to shorten this 46 seconds video into ten seconds. So what I'm going to do, let us see. First I'm going to play this video. Can see the girl with the red colored dress. So we have the short from front view. And after that, I come to the second shot. Camera was moving from right to left slowly. So freehand moment, you can see. And the girl was looking the camera alone. So she doesn't have any distraction. You can see she was perfectly looking the camera. Now I'm going to edit this video. So I'm going to choose the first segment. So I choose this video. Tell me five seconds. So seconds, I want to edit this video. So I just want to remove the video after the five seconds. So what I'm going to do, I'm going to use the editing tools at the top in a determiner, we have a lot of options here. So at first we have K2 fragment tune. So in cutoff fragment tool inside itself we have two more tools, trim start and trim end. If you want to trim the area before the particular time in needle had to choose the trim start. And if we want to remove the area after the time the needle, I have to choose Trim me and so right now had to choose Jamie and I just click Trim yen if you want to use the shortcut key also you can use TO shift and close. So I'll just click this. And you can see I can trim that particular video. And I'm going to join this video again. And in this also I'm going to add only five seconds duration. So almost up to this. So I'm going to cut here. So in the same, I'm going to use a tool which is split into parts. I just click here. You can see after I click that particular tool, I got two segments in this particular video. I just de-select. And I select again, can say this segment is separated from the enter VT0, And this is also a separate segment. I want to remove this, I just click and delete. So now we have our most 10-second duration video. I just play from the beginning. So we have phi second now for the first video. And after that we have the 5 second or the second video. So with the help of these two tools, you can edit any video in VCV to detail. You can also crop your video in this video is distributivity. Here you have the crop tool, I click here, and you will get a separate window to crop your video. You can crop in which way you want. And after that I can choose, Okay? And you can see the result. So if you want to do a cropping work, definitely you can do and just press control is to give undo. And if you want to rotate your video, you can do that. They'll pop this rotate 90 degrees clockwise or anticlockwise or counter clockwise. So there's only 18 you can rotate your video. Vsd see videos you to have another important option which is cutting and splitting. I'm going to choose this particular segment of the video, which is the second segment of the video. And I'm going to choose this cutting and sculpting right now you can see we have the single segment video here. If I select against, say we have the single segment. Now I'm going to choose this cutting and splitting option. And when it choosing the cuttings and splitting option, here we have a separate window. So in this window what you can do is you can play your video. Here we have the timeline needle. So can set the position of the particular needle where you want to cut your video. And I just want to add, Add Marker and it just add marker. Here you can see we have the separate version where we have the marker. And I'm going to place the needle again in a different duration, like three seconds. And I'm going to add on more marker with the help of this Add option. Also I can choose, I can add marker. So right now we have two markers, which means I will get three segmented video. So after adding this to Marcus or I'm going to do, I'm going to choose Apply changes. So after update the changes, I will have this Choose Files fitting parameters I just use. Okay. So right now you can see the single segment video was transformed it to the 37 video. So based on our marker, we have the segments of video. Here we have a separate segment, and here we have this a bit segment. And here we have a separate segment. So we got three segment videos because of this cutting and splitting options. So these are the options we have in VSD is a video editor to edit any BTO.
28. Project Export Settings: In this lesson, we are going to see how to export our project in vis-a-vis digital as a video and how to do project setting for exploiting a file. So here I have the video. So this background music as these two voltages we have used in our previous lesson. So I'm going to export this video. So further what I am going to do is I'm going to choose the Meno export project when it choose expert budget will have this preview here. And we have the value of the particular video, the frame per second, that resolution. And at the bottom, you can see we have a lot more options. At first, you have to choose the profile, which one you want. If you want to export for web RPC, you have to choose which one you want to go far. So by default it will be a PC. I choose PC itself. And at the bottom here you can see where you want to save your output file. So right now I'm going to save this file in my desktop. If you want to change the name or the destination, I can choose this change name option here. So I choose the change name. And here I'm going to type the title of this video is the girl. And I'm going to choose Save. So after that, you can see that girl title was updated. By default. We will have the profile of Hatch point 26 for ABC. In this profile, we want to change. You can do otherwise, you can leave it into this default one. After that, we have the quality of the video. So here I have three options. Alter quality, high-quality, and normal quality. So by default it will be ultra quality. We're going to see what kind of changes we have in this altar quality. And I'm going to come back to that normal quality video also. So by default, it was ultra quality. Now I'm going to choose Export budget for that. What I'm doing is I come to this export project, Meno. Here at the end we have exports budget option. I just click here. And it shows if you want to purchase the software, you can purchase and can get the Guardian acceleration, but you want to use a free user. Not necessary. You can just click Continue. We don't want to worry about these things. I just click continue. And that video was started to processing. And at the top of this particular menu bar, you can see current percentage off that video was exporter. I'm here also. You can see that particular current status. 81, 85, 90, 95. Yes. It's going to finish. It was completed. So it was exported in altar quality. Now I'm going to choose normal quality and I'm going to change the name, the girl, normal quality. So let us see what kind of difference we have. Again, I choose Export project and I choose Continue. Remember, the dimension of the video is same, the height and the width that I just changed the quality of the video from ultra quality to normal quality. So we'll see the difference. It's going to finish. Yes. So now I'm going to minimize it. I'm going to choose the particular folder. So here we have two videos. The first one is the goal, which is ultra HD quality, and the second one is the girl with just normal quality. First I'm going to play this video, the girl ultra HD quality video. You can see the file size is 4.89 MB and the same duration. And here the normal quality video has on 0.47 MB only. So it can't see the file size difference going to play this ultra HD quality video. So next I'm going to play this normal quality video. So lot of differences there in I'll talk quality. You can see those areas are very clear. Those areas have more detail. But in normal quality, we don't have such a detail there. They can see the blur there. So if you have selected Alto quality by default, it will be better for your video output. So in this way, you can export your project in VSD CBD editor with the different qualities.
29. Chromakeying Effect in VSDC Video Editor: In this lesson, we are going to see how to do chroma Keying or green-screen removal. The VSD is a video editor. First, I'm going to import a video with the green color backbone, going to import a vdu. So I choose Add Object and I choose video. Here I'm having a video, a girl with a green mat or green background. You can see it just going to play the video. So she was acting like she was demonstrating something or she was talking about something, what she has on item 0, lepton, say something like that. So I'm going to use this PDO and I'm going to use image background. You can also use a video background. So for that what I'm going to A's going to choose Add and choose image. And I have the picture of landscape. And I choose the object pushing setting from the same beginning. And I got the same layer. You just forgot to add a new layer. So I just drag and drop below that particular green MAC layer. And I expand that particular image layer up to the green MAC layer. So at the bottom we have that particular landscape. That's what I'm going to do. I'm going to hide that particular landscape player with the help of this, my timeline. So now I'm going to do green screen demoed for this video. So how we can do this green-screen removal we are going to use, we do a fx. So first I choose this particular video. Now I go to V2 effects. In this, I have the option called a transparency. In this transparency category, I have background remover option, so I choose this background remover option, 1 to 2 comes in beginning, and I choose OK. So now we have a played that background remover filter or background remover video effect for this green screen background. And now I'm going to do the settings for removing the green screen. So I choose that particular effect. After that, I'm going to choose Properties window. In Properties window, you have the option here, which is chromo key color. I choose eyedropper tool and I'm going to choose the particular green curve. What I want to remove. So in this time, what you can do is you can zoom. You will monitor view further. I'm going to press Control and I'm going to scroll memos so that I can zoom the current monitor screen. Whenever you are going to select the chromo color from this object, we can choose near bay color for the subject. So I'm going to choose eyedropper tool. I'm going to choose the color which is nearby the subject. I was to successfully. You can see we got that color here. Then I'm going to do other chromo key values here. So right now the minimum brightness values 0, going to set that into a 100. And you can see we have some changes outside. After that. What I'm going to do is I'm going to set the minimum chromaticity values. So going to increase the value from 0, you can see the changes. Going to increase the value from 0 to 1234. And you can see the values are changing, going to set that into 50. And after that, what I'm going to use, I'm going to set the minimum chromaticity value. This should be a 100. So based on this value, you can see we got the chromosome keying effect. And if you want to add this chromo King more, you can increase the value here. Also, you can adjust this minimum chromo V threshold. So whenever suggesting that threshold, you can see what kind of changes we have around the edges of the screen, right? And if that affects this object, we can definitely have to reduce. So I'm going to reduce from 66 to see the entire video. So now it looks better. I'm going to play the video. Yes. You can see that the wrinkled was gone. And if I want to add a background, we already have the background. So I come to the timeline at the same time when, you know, I was already added a background layer, which is the image or the image having the landscape. So I just want to show that image again. So I'm going to enable this layer visibility, and this is the result. Now I'm going to play this video from the beginning. You can see we have very good keying with the help of this VSDs EVDO data. And if you feel that a message was having the issue, definitely you can choose that particular video effect, which is a chroma key background remover. And I'm going to reduce a minimum chromo V threshold. So you can see now it looks better. And based on the resource, you can set the settings. Now it looks really good. So with the help of this previous DC video editor itself, you can do a best chromic effect since it's a background remote option. You can also remove the green or blue screen background with the help of this VSDs EVDO data. So in this way you can do a grow mugging effect with the help of VSD. See video editor.
30. Screen Capturing Function: In this lesson, we are going to see how to use this VSD CVD editor for capturing our screen. First, I'm going to open the software. So after getting the software at the user interface, you can see we have the option to screen capture. After choosing the green capture option, I will get this window. You can see VCC Free Screen Recorder. So here I'm going to choose the recommended format. If you want to change the format you can choose and you can set which one you want. Otherwise, you can choose a recommended a format which is the default one. Here you can see what is a video format and the audio format. And after that, you can choose where you want to save that particular regarded video, which is a screen capture video. And if you want to set the shortcut to enable the recording or pause the recording or end of that occurring, you can use this option. You have five, shift your file. You can customize this shortcut key. And after this settings, we have one more tab here, video and audio sources. In this video and audio sources, you have some other options. We have Video setting. So if you want to capture a full monitor, you can do some monitor. And if you have multiple monitors, you can choose which one you want to capture. A lot of us to monitor our second monitor or that monitor, you can choose the destination that the video you want to capture. And after that, you have the option which is a screen recording with the cursor. So if you want to capture the cursor, you can choose this one other ways you can disable this one. And if you want to use overlay, video overlay, you can use this, use overlay and you can go to the settings here, you can choose whichever you want. Otherwise, you can just disable here. And you have audio settings here. So if you have multiple audio sources in your computer, you can choose which one you want. And you have audio input value here. And you have audio input value adjustment for your audio. And after setting this, all things what you can use this, you can just start recording. When I choose Start recording, you can see I can set the current, the screen capturing area. So I'm going to expand this. You can see it shows the value here. What was the current value of your screen dimension? So I can expand. It can mention what was the coverage area. Can see I was selecting my screen value. And after this here you have one more button, which is record button. So I just click here. And you can see my screen was started that occurring. And if I want to mentioned anything about my desktop bottle, what you have in my current screen, you can use this option, start drawing. So when I click Start drawing, we can get the pin here. So I have a pencil and if you want to tell about anything, what I have screen like, I'm going to talk about this rock, what we have inside the water. And I can use this pencil option. And after that you have a line. So you can create line here if you want to change the color of the object, what you are drawing or the pencil color. You can come here and you can choose which color you want. So in that way, you can change the color of the object. And I want to erase all those things. I can use this Clear button. So I just completed the erasing process. And if you want to stop the recording, what I can do is I can press this stop. So that video was successfully saved. And I'm going to start the recording again. I just choose Start Recording. And this time what I'm going to use here you can see it shows the message show panel when you are start triggering. At the bottom we got a panel which shows the pencil tool and colors or the other all things. We don't want that particular panel. You can disable that because that will be also recorded in your screen. So I just disabled that. I'm going to choose this record button. And here I'm going to mention about or what I have in my software. I have a video folder and I have those video files here. And these are all things that will be recorded. And when I want to stop the recording, we have seen that the default shortcut keys shifting of five. I'm going to press Shift here phi, and that ends here. So now we're going to see how was that the recording was done. So here we have two videos. First one was regarded with the panels, and second one is without panel. I'm going to pay the first video. So I was reducing the volume into 0. And you can see how good this video quality that was recorded with this panel can see that was visible. And I just close this, I'm going to play the second video. So second video we have without any panel. So if you want to record with or without panel, you can't do both things with the help of these VSD CBD editor. So in this way, you can record any monitor screen view, the helper VSD video editor.
31. Slide Show Video Creation: In this lesson, we are going to see how to create an image slideshow with the help of this VSD, see video data. After opening the software, I'm going to choose this option creates slideshow. I just click here. And I'm going to give the name for that. Sudden going to give a name Sports. Going to choose the full HD resolution, going to choose Finish. And after I choose the Finish button, here you have the separate box which is shows file sequence wizard. So here I'm going to add my source images. I choose Add Files, and I'm going to choose a images. Here. I have all images. I choose, all my images and I choose open. So you can see right now I have inputted all the images here. So the images will be played on by one and in-between when the image was moving from one to another, we can add any transition. Here we have list up transition effects. You can see it shows the preview here how that transition works. And here we have different category of transitions. We have fade, we have Mosaic, and we have page turn. So we have a lot of transition styles here. You can choose which one you want. So for example, I'm going to just and this transition between the image one and image two. So I'm going to spiral in. I just drag and drop in this particular arrow. So right now you can see I got that particular transition here. So in this way you can apply it. You can just drag and drop the particular transition effect in between those images. And you can see the preview here how the particular transition was works. After completing all those works, what you can do so you can choose a place settings. So we'll get a separate single timeline. And I'm going to play this particular video. And it shows the particular transitions on day one. So if you want to add any background music, you can add. So I'm going to choose a background music from this computer. I have the video, I have the audio, which is museum. We have already used that in a separate lesson. And I'm going to play now. Definitely we have to choose anyone, any energetic music. Now I'm going to export this video. We know how to export this video. I'm going to choose Export project. I have a PC settings. I choose Export project. And I'm going to choose the particular output folder. Going to choose. After that, I'm going to choose Export project. So I just press Continue. And that process was shorter. Was completed 18, 21, and 24 plus lit. Here you can see the preview. So the task was completed. Now I'm going to show you the output folder. Here we held the output and the total video duration is 33 seconds. But remember the total file, since it's only 3.12 MB, I was increasing the volume. So it's really unbelievable we have that three seconds duration and still we have only 3.14 MB. That's really good. And the frame size of this video is full st. That's another important thing. So in this way. So in this way you can create any image slideshow with the help of this waste is a video editor.
32. Video Capturing Process: In this lesson, I'm going to show you how to capture our use the webcam. You are HDMI capture card view with the help of VCC video editor. So in VSD is a video editor, we held a special feature which is Media Capture. So I choose this video captured option. So after choosing this video captured option, you will get the VSD is a free video capture option. So in video and audio sources, I'm going to choose the video capture device. I'm going to use my mobile camera as a webcam. So I'm going to choose this urban webcam, the software, what I was used to capture my mobile view. So after choosing this particular webcam, you, I'm going to choose my setting again. So here you can see that particular value was changed, going to choose a full HD view with the 30 frames per second. And here you can see how that particular way it looks. So after choosing the particular web camera, you have to adjust the settings according to your need. So after choosing this particular video is I think what I'm going to do, I'm going to choose Audio settings are so right now it's chose do not record any audio. If I want to choose audio from my computer, my microphone, or any other medium I can choose, or cutting to alternate. So I'm going to choose my microphone audio device. So after choosing this, I can adjust the input balance of the volume in left and right and the input level up the audio. So we have a lot of options here. They're getting the audio settings. You can see. So after setting all those audio things, I'm going to start recording. So when it chooses start triggering can see the cutting was started. And whatever we have in this particular webcam review it really be captured as a video and it will be stored in a destination path where we have choosed here in this destination path. So after done, you are recording, you're done your video capturing. We can choose stop. So when you choose stop, that process will become detached and chose recording is completely right. So right now I was having a green-screen in my background view and let us see how that particular regarding was worked. So I'm going to choose the folder. So in my computer, in videos, it shows the recorded videos. Here you can see we have the recorded video sorted and what so it has audio as well as the video. So you can see this recorded their evil. So in this way you can capture your video with the help of V is the CBD you Editor.
33. AI Art Generator: In this lesson, we are going to see a special feature in this way is a video editor that just, Hey, I thought generator, which is artificial intelligence or generator. So with the help of this AIR generator, we can convert your current footage as an art. Let me show you how to do that. First, I how to import my video. Here you can see I have one clean met video. You can see the girl there. And I'm going to add the defect file that I want to choose that particular segment. I choose that footage from this timeline. I'm going to choose Video Effects in this video because I have the option which is a special effects. And in special effects I'm going to choose a generator. So when it choose AIR generator and I choose the object version from sin beginning and I choose okay, so that, that particular effect to us appear there. So how to enable arching the particular off-topic I'm going to show you. I'll choose this object effect. And after choosing this object effect, I come to this Properties window. Here you can see we have the properties of this odd generator, which is AIR generator. And here I have a lot of options. You can see I have AIR generator settings. So in this space I have three options. So you can download those settings from VSD is a video editor website. Now I'm going to download, I just click this Download now and you can see it loads the particular page here. So these are all the artifacts we can download and you can use it for you or any video. So I know I have this three Video Effects I was downloaded. And after downloading those videos, what I'm going to do is come to this is a video editor. And here I have this folder icon. I had to grow those effects. So you have to keep those video effects in a separate folder. So how to blows from this place. Now you can see I'm going to choose the epic what I want, I'll just choose an a plus open. And you will get that particular effect here. So here I have this small arrow, if you click this arrow will get that effect here. So I have imported three effects here. This candy and secondary is for this and third one is triangle. So right now I have applied that particular candy effect. So I'm going to choose feathers, can see how that background was changed with this all elements. And I choose triangles. So you have different appearance according to you what need. Now, I'm going to have the preview and see how it looks. So it's very slow. So based on your need, you can set which a generator you need, you can download and you can load, and you can now play for you or any video footage.
34. Audio Graphic Representation – Spectrum: In this lesson, we are going to see how to use audio spectrum future in VSD, a video editor, if you want to represent your audio in the form of graphics, you can use this audio spectrum option. I'm going to show you how to use that. First, I'm going to input on background. So I'm going to import the image, going to use this image and choose from the scene beginning. The object version setting is saying beginning and next I'm going to add on audio track here. So I choose add audio. And here I'm going to choose a June Bob Richards. And this is an MP3 audio I'm going to add from the beginning of the scene. You can see I've added that audio file here, and I add that audio file in a separate layer. Can see I had two lists here. So I'm going to extend the duration of the image, and I'm going to play this audio. So now I need to add a graphic representation of this current audio. So how to do that? I'm going to show you. So we have added audio track in your timeline and we got that sound. No, we need only the graphic representation of the same audio for that or am going to succumb to this toolbox. And in this, choosing this audio spectrum future, and I'll choose a spectrum. You can see we have two options here. So I'm choosing the first one, spectrum and output using this spectrum, I'm going to choose the same audio song, what I have added in my timeline. So I'm going to choose the same and I choose Open snow. I want to add the same object from the beginning of the scene. I choose foci, and after choosing this, okay, you will have a cursor like this and you have to draw a rectangle. So when you draw the rectangle, you can see we have a boss here. I'm going to have the preview. So we got audio representation in the form of graphics. So I can customize this entail graphics with the help of properties window. Let me show you. So I'm going to have this particular audio spectrum graphics at the bottom of this image. And I'm going to choose Properties window. So interprets window. You can see you've got a lot of options here giving you a spectrum futures. So I have choose to the particular spectrum auction in this timeline, not the audio. So I was chooses particular spectrum and after choosing this particular spectrum becomes a property wall. And here you can see we have a lot of options. We have the coordinates of those graphics, correct tunnel. And after this, we have so many informations like the duration of the particular audio track and the frames in duration. And after that you can see we have some more options here. So if you want to mix both channels left and right, you can choose a mono 0 channels are the ways you can choose mono one channel. By default, you can give them mixed channels. So we have three options here. And after that, you can come to this type. In type we have multiple options here you can see, I know we have gradient. You can see I'm going to have a preview. So it has the appearance like this. And when you play at the bottom, we will have some different color. At the top you will have this yellow color. You can see here two colors here, green and the yellow. And if I want to customize the color, I can do, I can use this, the start color and middle color. See where I'm going to choose on this one. Going to choose which color I want. For example, if you want a stock color as the blue, I can choose to do, and I can choose. Okay, so here you can see there's changes of colors. And after this blue for the milker, I'm going to add some other colors like violet. So now we'll have the preview. So we got both colors there, and the integral is red. If you have extreme or volume of the audio, you'll have that particular color there. So otherwise you will not see that color. And after changing those costs, I come to the bottom of the options here to help Peek caps. So if you want to show be caps, you can show, going to show this. Now. I choose simple line. And here you can see it shows the peak caps. I can see the colors there. So if you want, you can show the ways we can simply make it turn shoe. If you want to show the door so you can choose dots. We can see we have small dots there. So what I'm going to do, I'm going to choose don't show. And you can customize the number of bars, what you have here. So I know does that E2 going to use the value 100? So now you can see better coloration and it shows a better graphic representation of the audio. And here we have the block size into auto so it can customize the block sizes according to your need. So based on your needs, you can choose how you need them. So we want to give a default value. You can choose auto. And after that we have max threshold can change that according to a. And if you want to increase the show, you can choose Mac there should. And you can see we have the rectangle here within the rectangle B has a transparent background, and we have those graphic representation of the sound. If you want to feel any color for this rectangle, you can come to the bottom of this properties window. You can see Jacqueline. You can see the background color and it shows the bag-of-words. Know if it's yes, you can feel the custom color here, so I know it has a black color. I can change the color according to my need. And if you don't want to show the backend where I can choose known. So in this way, you can add audio spectrum, wrapping the presentation in VSD, video editor.
35. Video Converter: In this video, I'm going to show you how to use VCC video editor software as a video converter. So I choose tools minnow in this tools meno at second we have this video converter option. I click that video of a neutral option. So here we have the window which is showing the SDC video editor. So here I'm going to choose the file. I choose Open file. Here I'm going to choose the file I was choosing the very first to file. The girl will lead no, Are we have created this file, choose open. So the source video file formalist dot aba, and you can see the duration is around nine seconds and the frame per second is that T. And the resolution is 19, 200 into 1080 pixels, which is full HD. So here I can choose what is the output file name and output profile. So here I'm going to choose a verb. So if you choose web, we have all those web-based profiles and web-based equality here. And if I choose the device as a DVD, will get a DVD based profile here, for example, if I choose PAL or NTSC. So based on your needs, you can choose which properly for want. And after choosing your profile here you can see we have aspect issue. So if you want for us to three aspect ratio, you can just force three hour. If you want to keep that intersection is nine, you can choose 69. And here you can choose. If you want to add any co-op value we can add here after choosing all those things. If you want to do some more modification with output file, you can come to this place and you can choose Edit Profile. So I choose red prefer here you can see all those informations. So here if you want to change the resolution on the default decision here you can change, otherwise you can leave it. I can also change your aspect ratio and the rest of the all informations. So after computing all those things ought I'm going to do is I'm going to choose Export project. So I'm going to export the project and the same the source folder, but it'll create a separate folder with just the girl new. So I'm going to choose Export project. The process was started and since it's only 9 second duration, the project was completed. I am since I was converted that particular video as a DVD file. So if you want to write a DVD directly, you can write with this option if a plus, yes, it will go to the DVD burner option. So I had to put my DVD inside my drive and the burning will distort or so if you want to directly start the burning process, we can test. Yes. Otherwise you can choose know. Now I'm going to have a look on the destination folder. So here we have the folder which is the girl going inside. Here you can see as a DVD structure of file allocation. We have audio in a separate folder and we have video on separate folder. So in video we have the proper order of the files. So at the end we have that particular file. So as we mentioned, the aspect ratio of 169. And if I look at that particular frame size, can see it's a 720 into 576 pixels. So it was perfectly converted as a video. So in this way, you can use VSDs, a video editor software as a video converter.
36. Voice Recorder: In this lesson, we are going to see how to use VSS EVD editor software as the audio recorder. Let me show you first choose the minute tools. And in tools, you have a lot of options. And you have the option which is voice, I gotta, after that you will get this window. We used to see free audio voice recorder. So here you can see, we can record the audio in different formats. By default it will be MP3, but if you need more quality, you can choose veil, so occurring to you or need, you can choose which file format you'll need to record audio. So I choose avail right now after that you can choose where you want to save your file. So I browse in desktop, I'm going to save this audio in this video folder I choose, okay? So I have selected my output directory. After that, I'm going to choose the profit of the audio. So here we have three different audios. You can choose the highest quality and you can choose normal quality. Or if you want lawyer files, you can choose lower-quality. So I choose higher-quality. And here we have audio devices. So if you have multiple audio input, you can choose which one you want. And after choosing all those things, we can adjust the volume. So I need a 100 percent audio in this recording. Once if you have completed all those things, we can start your recording. So here we have the option to start your recording. I choose Start recording. So now the recording was started. I'm going to talk about something like Hi everyone. So this is when Grace was regarding my audio. So something like can talk or you can record your lesson, you can record your podcasts. So whatever you want to record this audio you can record. Now I'm going to stop this recording. So the duration is 22nd, it was recorded. I'm going to play here. Choose this particular audio track. I'm going to play this. So now the recording was started. I'm going to talk about something like Hi everyone. So this is a grace was regarding my audio. So something like can talk or you can Recording what lesson, you can record your podcast. So the audio is really good. And here you have the filename. I choose this particular file if you want rename this file here itself, you can rename that. And it can get the file information. If you, if you're not satisfied with this file, you can delete this file. If you're not satisfied with the aldose fails, we can delete all those files. So you can do all those things from the screen Cerf, and I'm going to have a look on that particular destination folder now. So I was open that folder. And here we have that particular file which is a record. So now the recording was started. I'm going to talk about something like Hi everyone. So this is how you want to record us audio you can record. So the file was perfectly stored in that particular destination folder. So in this way, you can record any audio with the help of this PSD free audio voice recorder.
37. Pack Your Project: In this lesson we are going to see the concept called packaging. So packaging is not the future we have in this race disability editor. Almost all professional video editing softwares has the same feature, which is packaging. So why we need packaging? I'm going to show you a demo. So here we have the radio documentary production video file as well as other resources. And during the project editing work, sometimes you may access to videos and images or audio files from different folders. Also, if you have worked in that way, you have to recollect all those files for your project folder. Further, you have on special option industry is a video editor which is packaging. So if you come to your project explorer, you can see we have the current project file name and you have different scenes. So if I right-click over any scene and you'll get these pop-up menu. And in this pop-up menu you can see we have the option which is vaccine. So if you click back scene, you can pack the current scene, all elements, the audio, the video, and images. It will be stored in a separate folder. In the same way if I choose the project and if I right-click over that, I'll get the pop-up window. And in this I can back project. So if I choose, I have to mention where I want to pack my projects. So in my desktop, I'm going to choose folder which is video editing. Inside this folder, Video Disney, I'm going to pack my project, so I choose Save. Before that I'm going to give the name radio documentary package. I choose. As you can see, the process was started and those files, and it saves the project files and it's finished. So now I close this particular application and I come to my video editing folder, which is available in desktop. So here we have the Package file. I right-click here, and I can see that what kind of file name is this? It's a V dot product. And if I double-click here, you can see it was opening the software. And we can load all the multimedia elements within this single file itself. The project was opening. It has three scenes. We know. So it opens all the multimedia elements within the package alone. So in this way, you can do packaging for any your video dealing project if you want to move, Roger, from one piece to another R1 location to another through Google Drive or cloud computing, you can do with help of this packaging option in VSDs, a video editor.
38. Face Landmarks: In this lesson, we are going to see how to use face landmarks in VSDs EVDO data. First I'm going to create a new blank project. Going to choose a full HD resolution, and I choose Finish. And I'm going to import a video. So I have a folder here. So I'm going to import this girl video. I can import through my resource window. Otherwise, I can just drag and dropped into my project. So this video will be automatically added into our project resources. So I just drag and drop on our monitor view. And here we have the video go into play. This can see a girl was dancing. Now I'm going to use the phase landmark option. So a chooses video, I go to the video effects. Here I have a special effects. And in special effects I'm going to choose a face landmarks. So APA choosing faced and must go into 2s the whole parent originally choose, Okay? And here you can see the effect of I choose a particular effect and I come to the Properties window. So here we have phase landmark effect settings. So if you want to download those face landmarks, you can go to this download icon. So if you press Download icon, that will take you into the VSD video editor website. And from there you can download those effects. If you want to create yourself, we can create the ways you can download from here. So I have downloaded or those effects are, so I'm going to import those effects from my computer. So I choose Browse icon here, outage, choosing those. So again, I'm going to choose the phase model. Here I have a free pack from VSTS video editor website. So I choose Christmas back, but I choose open. So often imported the phase model. I'm going to choose this arrow. And here you can see I have a Tupac's Christmas back 12. So I'm going to choose the first one and I come to the second attribute, which is template. So in template, I will have this mile arrow that shows the arrow. I will get the particular effect here. So I'm going to choose the santa. This is one of the landmark. And here you can see we have the face landmark effect going to reduce the quality of the preview. And I'm going to play this video. So you can see that particular effect was there. And I'm going to own more option. Just copy it. So here you can see how their particular effect was added in our video. So after adding this effect, what I'm going to do is I'm going to export this video. So let us see how that particular effect to us updated in our video. So I'm going to choose Export project, and I'm going to choose Export project, choose Continue. Then I'm going to choose, Okay, now I'm going to play the video. Let us see how is the output. Here. You can see we have the output video. Girl dots does have a look at this video. And you can see how that was added with this video. In this way, you can add this phase landmark with the VSD is a video editor.
39. Particle Effects: In this lesson, we are going to see how to use optical effects in VSDs, a video editor. Here you can see we have the video here. I'm going to add snowflake particles with this video. In this video you can see there is no any particular snowflake out. They're going to use this one snowflake. And here I think you can see that. And I'm going to show you how to use this InVEST CVD ureter. So I opened VSDs, a video editor. And here I'm going to create a new document. I'm going to choose a full St. And here I'm going to add the video. So I choose Add video. So here I'm going to use both snowflake as well as a video. So first I'm going to import the video. Can see I'm going to choose from the same beginning. We got the video. I'm going to have the preview here. So now I'm going to add a snowflake particular animation for this video. So I choose the particular video. Now I go to the video effects in this video of x, I'm going to choose the future, which is nature. And in nature we have a lot of options. I'm going to choose particles. So after choosing this particles, I'm going to choose from the beginning. You can also choose the whole parent duration, which covers the entire video duration. And I choose, okay. So after choosing the whole parent duration, I'm going to choose this particular object effect, which is particles. So after choosing this particular, I'm coming to this Properties window. And in Properties window you can see we have a lot of options here directly. I'm going to play this video. And after applying the particular vase, you can see we have some particular moment here. So I'm going to choose my custom made particular, the custom particular. So I'm going to choose the image here in properties into you can see under this particular effects settings, we have image option. So in this image option, what I'm going to do, I'm going to choose those icon. So auto choosing this close I can, I'm going to choose the snowflake and I choose Open. And here you can see those snowflakes are replaced with this, my custom snowflake. And I'm going to have the preview here. So it looks really good. And if I want to do any corrections or modifications I can do with this helper properties window. So I'm going to do a lot of modifications. So I choose this object affected. And here you can see we have a wind angle. So right now wind angle is 0. You can see the particles are coming from right-hand side and it moves to say, lepton side. So if I change the angle, let us see how that most going to choose 1980. So I'm going to have the preview again that moves from the bottom. So if I choose ONE AT, in other result, that particle will come from left to right. And if I choose on the angle 270, it will be from the top to bottom. So a zone you need, you can choose which particular angle you need. And after these angles, I'm going to choose the winter strength. So based on the wind strength, you will have the particles moment can see how that particular was moving. So if you want the strong wind, you can choose a strong wind of the wrist. You can choose according to the moment of the video or frame. So this is enough for this particular video. And here we have the linear moment. If we want to choose false, you can see how that particular particle was moving. It moves naturally. And if I choose true, you can see that was moving from one to another based on the wind direction. Here we have the particle size. So right now it is 2.5. It can increase the value or register value according to one year. So you can see that value as giving the result. So it's pretty good. I'm going to choose the value into one. And I'm going to reduce more 2.5. So this will give a natural look for this snowflakes. And if you want to increase the amount of snowflake, you can come to this Properties window. Here we have maximum number of snowflakes. It is 128 right now, going to choose three and then, so let us see how it looks. Now I'm going to increase the value again, 1000. So you can see we have more snowflakes out there. 1000 is the maximum value, so carat increase more than 1000. Now, this looks pretty real. If you want to add more blood for those snowflakes, we can add this blurred with the help of this blood level. Can see it's a 15 going to change the value and 250. So here you can see the results. Those blue arrows appeared on the snowflakes. Now if I reduce the snowflake blur value to one, can see the original structure of the snowflake, what we have used as an image. But I'm going to give the value. So this looks criteria to compare the previous blur value. So in this way, you can add any particle for your video with the help of VSD is a video editor and also you can customize your own particle.
40. Course Conclusion: Hi, We are at the end of the course. Thank you for choosing this course. Now you can do a professional video editing work with 0 investment. Since all nonlinear video editing softwares have similar kind of user interface, you can use any software after using this VSDs, a video editor, I'm sure this course will help you to get betterment in your carrier. Thank you.
 Venkatesh B, Professional Instructor