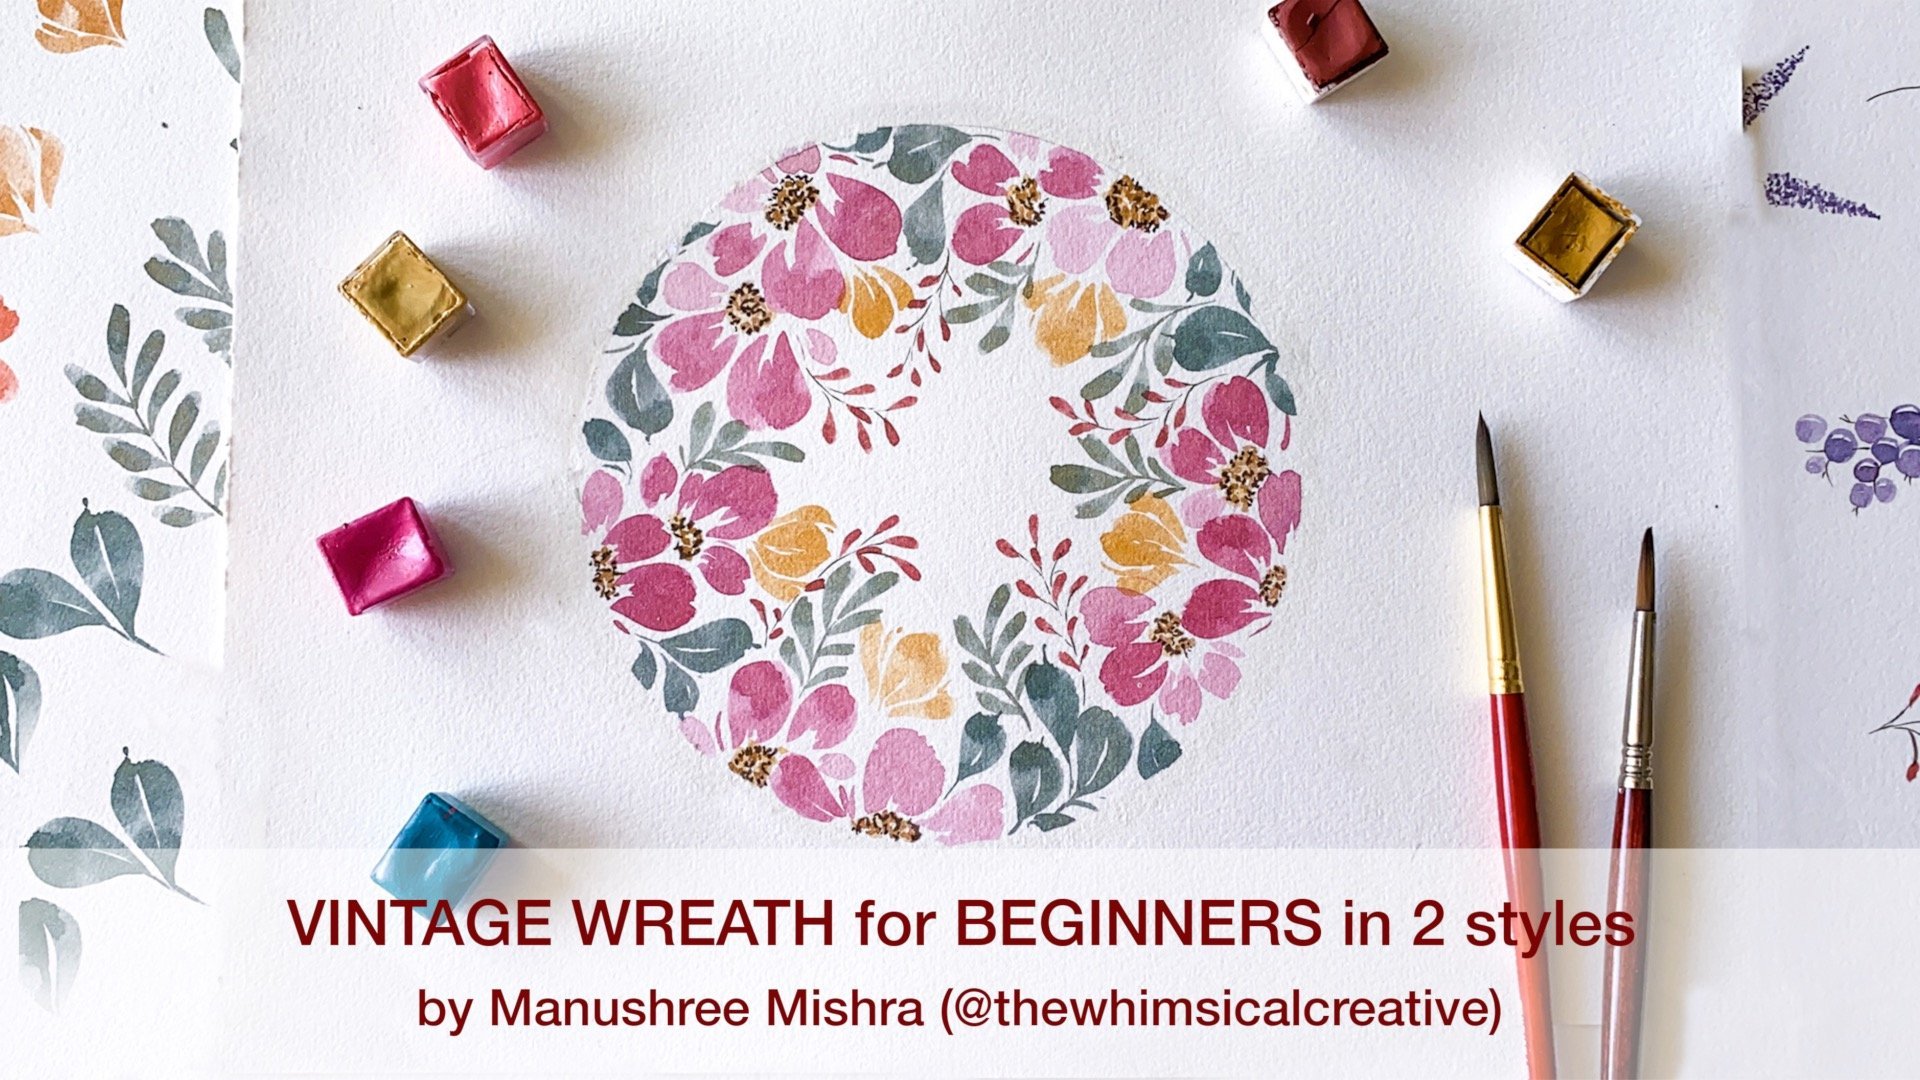
Transcripts
1. Introduction : Her creatives. Welcome to my Skillshare class. I'm so happy that you're here. In this class, we'll be painting loose snap dragons with watercolors. I'm going to take you through the entire process of having a reference in front of us. And how do we observe and look at it so that we can capture, it's the sense in watercolor. I'm also going to break down the process of picking colors and matching them as closely as possible to our real snap dragons. We'd be sorting those colors out, creating different values and consistencies. And finally, we'll see the basic strokes that are required to create individual flower heads. And it's going to look something like this. And then we'll combine all of these together. And finally paint of Snapdragon stem. And it's going to look something like this. This is super easy and quick class, perfect for beginners and intermediate artists. It's a great class if you're looking to dive back into watercolors or you need something really relaxing and fun to do over the weekend. So grab your supplies and I hope to see you in the class.
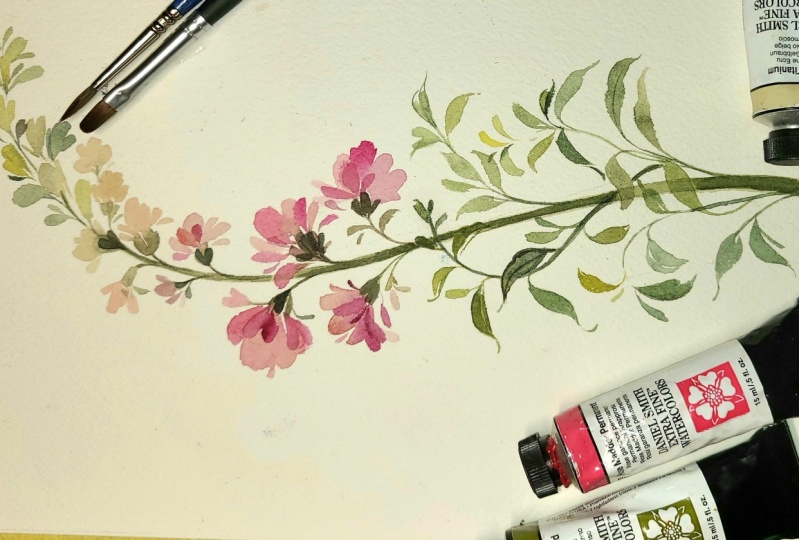
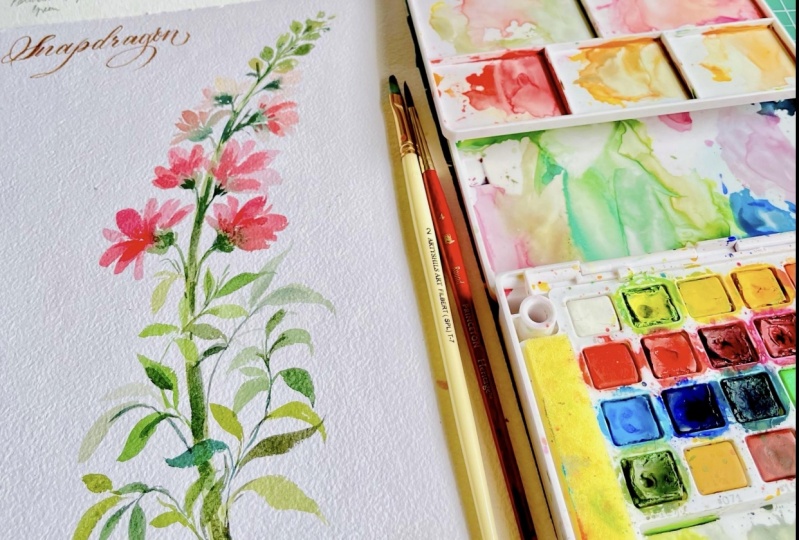
2. Supplies: Thank you so much for joining me today. I'm so happy to have you here. Let's have a quick look at all the supplies that we'll be needing. So we'll be painting these snap dragons. And let's start with our watercolors. I'm using Winsor and Newton professional watercolors, Sennelier and Daniel Smith. I'll be listing each and every big one that I'm using today in the project resources section. So make sure to check that out. The colors I have here are rose madder rules DO permanent rose, green, gold, cadmium free lemon yellow, greenish, amber by Sennelier, undersea green by Daniel Smith, and then permanent sap green. So these are all the colors that we'll be needing. You can see that these snap dragons have sort of like things, whites and greens on them. So you can go ahead and pick colors which are similar to these and our closest to what we see here. I have another example of a stock which is this one. It has this gorgeous deep being gallery, which is again so beautiful. So if you'd like to create it in this color, by all means, go ahead and pick some darker versions of pink as well. Next up is I'm pressures, so we'll be using our Facebook pressures. I have a selection of three different filbert brushes like so. And I'll also be using to John pressures which are in similar sizes. Now if you don't have filbert brushes, don't forget, you can always use John pressures. They will also work fine for our paper. We are using watercolor paper. It's 300 GSM and 100 percent cotton. So make sure whatever paper you are using, It's 100 percent cotton and 300 GSM. Apart from that, you also need a jar of freshwater and a ballad to mix our colors. I'll be using this ceramic palette. You can even use a plastic or metal ballot. Whatever you have on hand, it will work fine. And additionally, a beverage of your choice, I have my coffee here. You can choose to sip on some IST or maybe some hot cocoa, whatever fancies you. Lastly, we'll also need a paper towel to dab off the excess water. That's it. Let's get started with painting our snap dragons.
3. Colour Palette: Let's watch out and make some Gullah ballot for our loose watercolors, snap dragons. The first Gullah, the die half here is permanent rose. And we'll be using a very light consistency of this, meaning mostly water and very less pigment. And this is how it looks when swatch. I'm also going to be mixing a bit of buff titanium with this permanent rose. And that's gonna give us sort of like a nice peachy color. And this is how it looks. And then we'll also be using our Bowman intros As and it's a value which is much darker as you can see here. Same for our rose madder. Let's go ahead and swatch this one. I'm going to be using a darker value of rose madder. And what we'll be doing is, I'm gonna take a little bit of sap green and mix it to the rules matter. And that's gonna give us a desaturated version of rose madder. Now, if muting colors or desaturating them is something that interests you. I have an entire class on solitary where we go in great detail on how to create those muted vintage colors. So make sure to check that class out. That's my color mixing and color theory class. So I'm actually going to be mixing the rose madder with the permanent rose and SAP cream mixture. And this is what we get. It's gonna look something like this. Some basically adding hint of this permanent rose and sap green mix to get this gorgeous color. And at all points, I'm going to be varying the values of these colors. By this, I mean, we'll be using two sorts of consistencies. One which is slightly lighter and more like honey. So think of creating a pigment to water ratio, which feels more like honey. And then the other is pretty watery, much like milk or orange juice consistency. For that we'll be using a lot of water and less pigment. Similarly, we have little bit of yellow here, which is our lemon yellow. I'm going to add just a little bit of this into R because it's too bright for me. I'm just going to dig down at saturation slightly by adding a little bit of Bowman intros to it. And that's going to make it much more warmer than how it looks without it. This is what we'd be using for our yellow areas. We also need a lighter value of this. So I'm going to be mixing it here with more water. And this is how it looks. Let's make some creams. I have my undersea green here. I'm going to uses as is, and this is how it looks watched here. This is a gorgeous color and I want to retain its true hughes. I'm not going to be mixing it with other colors. Next step, I have my green gold. This is something we're going to be using for our last sentence. And lastly we have our sap green. So let's watch that out. Oh, and sorry, the last one that we have, this greenish amber, which is this color right here. It's sort of like a small key, dusky Green Gallery. So this is how it looks. A good tip that I can give is try to divide your ballot into halves. Because we'll be using do major consistency is one which is much like honey and then the other consistency is much watery. And yeah, that's it. This is it for our color palette. Now, let's move on to our next lesson.
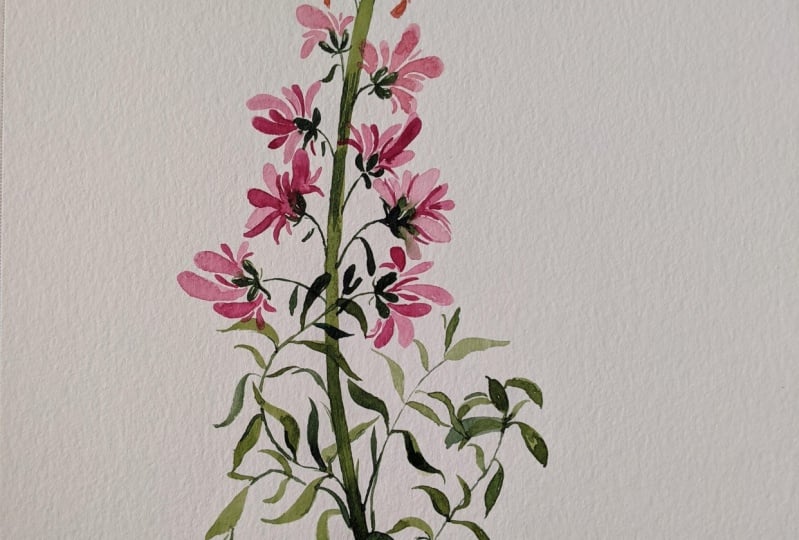
4. Basic Flower & Leaf Strokes: So before we begin, I want us to take a moment and really have a good look at the snap dragons and tried to understand how their leaves and petals different from other flowers. So what I observe is they have this gorgeous dining curvy, nice stems which burst out in these beautiful delicate leaves. There's just so much movement at the bottom of this entire flower. The flower but starts from here. And then before that, it's just these gorgeous stems and leaves. And then I think there is a small bud here as well, you can see, and the stems are going in all sorts of directions. I'm particularly intrigued by these stems which curve around the central stocks. So that is something I'm mentally making a note off. It's just so beautiful. And of course, these thin stems have tiny leaves at the top and then larger ones at the bottom. So do make a note of that as well. Now coming to our flowers. So what we see is that it all staples to a point. Now I have one more stock here. Let me get that. So how it is we have the darkest color flask at the bottom. And as the flowers continue to bloom towards the top, the colors change. That is a gradation from dark to light, pinks to whites. And then finally the white modules into these greens, which we can witness right here. Another thing worth observing is that these beautiful flowers have ruffled petals and the edges. So that's truly interesting. Then there's one more find the deal that I can see. There are always three visible leaves at the base of these flavors. So I think there are actually five of these copying the base of the flower. However, from my viewing angle, I can only see three at a time. And then there's a slight yellow color at the bottom as well. Fact, I'd like to share, perhaps you already know, but here we go. I recently read somewhere that if you pinch these two petals together, It's sort of like the dragon's mouth opening. And I found it so very interesting. I spent about five minutes doing this. Okay. All right, so to summarize our observations about these flowers, very peculiar and clustered leaves at the bottom, and then the gradation of the colors from the dark to light as we move upwards. And of course, these gorgeous ruffled edges. So these are the points will be mindful of when we approach interpreting them in a loose style. Let's have a look at some basic strokes to paint these. So I'm loading my green color in this brush. Let's have a quick look at the leaves stroke that we'll be needing. So for the leaves of the snap dragons, as we noticed earlier, they are very thin and curvy. So for the most part, I'm going to be using one stroke leaves. We start with the tip of my brush and I press down slowly and gently. Then we come up, this is the sort of leaf will be using. Let's do that once again. This is a number 4 brush by the way. So we begin at the very tip and then we press down and we come up keeping the shape irregular. I'm not too fussy about if it's perfect or not, because that's not the intent here. The intent is to capture the gorgeous movements that we saw in those cluster of leaves. So keeping that in mind, just creating a small cluster here. And it's going to look something like this. Basically they will be too simple, basic stroke leaves that we will be requiring. And the first one is the holdup brush at a 45 degree angle, just touching the tip of the brush onto the paper. And then we press down. And finally we come up. And the second kind of leave is for the base of the flowers. So for that, again, putting our brush at a 45 degree angle and gently stamping and lifting up, stamping again and creating this sort of tiny leaf, just tip of the brush, pressing slightly down and Up. We do that a couple of times again. And this is how we create these bottom leaves. I make sure to vary the values just to distinguish between all the three leaves. So you can see these are kind of the leaves that we are trying to create. And here's another tip I can give because these leaves are sort of like in a cup shape. They are holing or rather the flower emerges from them as a guide, we can create a C or U-shape. So this will mark the area in which we have to place. Needs and it's going to be contained within this shape. And that will ensure us getting this particular u or C-shaped write like this. Okay, Let's practice our simple leaf funds again. Touching with the tip of our brush, going, pressing down and coming up. And that's all there is simply using the tip of the brush, touching, pressing, coming down and lifting up. This is if you want to do it the other way around, see whichever way works for you. For some people, it's more easier if they do it the other way around, meaning coming from top to the bottom, touching and pressing down again and then again lifting up. And for some people, this motion has more natural if they start from the bottom of the leaf, press down and gradually come to the top of the leaf. Now let's also have a quick look at our pedal strokes. I'm going to be using this particular fly here as an example. Before we do that, I'm going to be taking some yellow because if we observe snap dragons have the sort of slight yellow color right next to the bottom of the flowers. So we'd be adding some yellow here. And then we can begin our pedal strokes. I'm using a brush and the four-stroke that will create is I'm using the edge of the brush, not so much the belly. Then we alternate and start utilizing the spin. Then again we're using the belly of pressure, varying the values all throughout and back to the edge of my brush reading the value. And we are particularly interested in getting that graph will look at the top of our flowers. So just make sure to build that up. So this is like for one of our flowers. And for the dynein stem, again, we touch the tip of the brush gov it because we can see that the stems come out slightly curved and then just filling it in and adding some darker color at the base. That's it. Let's do it one more time here. So let's start with the stem and B will take the tip of our brush like so. And now we're going to make sort of like a GSC to guide our tiny leaves at the bottom which hold the flower. We observe that there are total five petals, or sometimes we can choose to make 45 or three, and it's totally up to you, make sure to vary them. And now we need some amount of yellow. So let me get that. Adding a little bit of yellow here. If you can add it while the green is wet, you can get some beautiful yellow green bleeds. Then we are going ahead with the lighter value of this rose madder mixed with tiny amounts of sap green and using the belly of the brush, switching to its side and back to the belly and leaving it as is. Let's practice it one more time starting with the stem, creating the guide for the Bethel Bayes marrying the values, adding a little bit of yellow right at the bottom. Adding the thing, letting it bleed towards the greens, alternating between the tip of the field but the belly and back at the deck and making sure to retain these rough edges. And that's about it. You can choose to connect, fly to these tiny leaves here. And yeah, that's it. We're done with the flam. Another thing is it might be a bit challenging initially to know when to stop creating these loose strokes to complete our flower heads. But do remember that the more you practice, the more you put brush to paper, the easier it will become for you to know. All right, so let's move on to our next lesson.
5. Final Project Painting Flower Stem and Leaves: Alright, we have arrived at the most anticipated part of our class, our final project. So I'm just going to take a pencil and mark roughly how the overall shape is. It's sort of like starts very straight and then it calls a legal. So let's mark that just like this and the stem and slowly take. And then we go up and it keeps on becoming thinner. Next, let's capture this tiny stems that have lots of leaves on them. And then this is where our floss begin. So let's loosely mark that. I'm not too worried about getting these flower shapes exact. Instead, I'm just trying to capture their position. And that's all we need as our guiding pencil sketch. Okay? So we have a very light guide of dispenser, which gives us a general idea on where, what begins and concludes. So we will be following that. If you'd like to go a bit more detail than this loose sketch, feel free to do that because if that makes the entire process more approachable for you, then it's definitely worth giving a shot. Let's dive in and start with a lighter wash of this green color and round brush. Be mindful of having to vary the value a bit and also leaving some white spaces here and there. So as I move across the stem, I am dipping my brush into the pigment. And then I would also go ahead and rinse it with some water so that we have a lighter value. And that's that. Now we're going to take a moment here because after this we have the buds on top of the stem. So we'll be approaching it slightly differently. What we'll be doing is we'll be painting these buds, keeping in mind that they are on both sides of our flower stem. First like this, and then we also have them in the center. So let's quickly go ahead and paint that. And then as they go, as the stem curves, these buds also becomes smaller. And I'm going to attach them to tiny stems like so. And then we have the diastema fall off Lama curling like this with these. But at the very top, while these, but I bet you have a chance to drop in some darker pigment. So make sure to capitalize on that. And next up we have leads which are at the base of Aflac like here. So I'm going to capture the full stem at the bottom more stem. It has a slight curve to it and it's very delicate and thin. So I'm just using the tip of my brush here. And for our leaves we will be using the belly of the brush as well. And these are R1 stroke leaves that we practiced earlier. So just going ahead, reinforcing that tiny stem and then taking time to really understand where to mark all the leaves, just make sure that it's not due symmetric. Tried to have the sort of movement in it and randomness. But yeah, plan randomness rather. You don't want to go in all random and random because then it's going to look a little wild. However, just noticing that, okay, You know, how I approach it is I look at this tiny stem and see that, okay, we have couple of leaves on one particular side, and then on the other side, I don't want to essentially have the same amount of leaves. Instead, I would go ahead and have a little less or a little more, just to have in this sort of asymmetry. Next up is this really interesting stem that I'm marking out. It's sort of curves and goes over our main stem. So just lightly marking that out and then going ahead with the leaves. Again, rather making the leaves too stiff will try and bring in some movement and variation in the individual leaf-shaped too. And these are all our single stroke leaves. So just start with the tip of our brush and push down as we create the most thickest Spotify leaf. And then we again come back to a point. Again, adding little bit of darker color here and there. If the leaves are wet, you can choose to drop in the color into the leaves. And let's go ahead and create one more stem. That's going to be our final stem here. And I'm just keeping it very simple because the attitude stems, as you saw, they were heavily guarded and they were warping around our main stem. But this one, I'm keeping it simple, slightly swayed towards our left, and then giving it random leaves.
6. Final Project Painting Flowers : The colors that I'm using here are a mix of undersea green, all by itself than undersea green mixed with greenish amber. And for my darkest areas are the areas where I want to communicate shadows will be using purely greenish amber. Now taking a little bit of greenish amber and just adding hello dot leaves. Just so that we have value difference in our different leaves as well. Moving on, I'm going to utilize our Latin dried watercolor techniques, especially for the lower part of our stem. Simply because that is the stem which has this gorgeous leaf cluster around it. So right now it looks a little lighter. And once we use a light wash of greenish amber mixed with undersea green and layer it over our dried lower stem. It's going to add that depth and shadow. So that's what we'll be doing right now. Just load up your brush with the mix of undersea clean and greenish amber doesn't have to be a very darker valued mix. Even a lighter valued makes good, give phenomenon results. And just take it across the entire length. Wherever you feel that the leaves of this cluster, the Wharton cluster leaves. And once we're done with that, we'll start creating our flowers. So we'll start with the dynein stem and the cup shape. So for the cup shape, you can choose to create 34 or five leaves as much as you like. Make sure to vary them. And then we'll start with darker pink color. So here I'm taking a mix of rose madder and undersea green with my filbert brush. And this is a relatively lighter value. So I create these ruffles strokes by alternating between the tip and belly of the skull boat brush. And once I'm done creating couple of them, I go ahead with our darker value and we'll add that, do certain areas of this flower again to bring in some dimension. We'll continue this further and create another flower on the opposite side. And right now, we will create the opposite side flower with the similar value of the pink color. So again, let's create a cup shape. Here we'll just use three leaves for our bottom cup shape. And we'll start creating our flower head. Again, alternating between the edge and the belly of a filbert brush. You can also use a round brush for this, make sure to alternate between the tip and the belly of the brush. And of course, just ensure that there is a good variation of values between these ruffled edges. Now, as we have observed, these flowers actually start with a deep dark pink color at the bottom. And as we approach towards the dark part of the stem, they become lighter in color. So for our next flavours will still be using the same cream, however, will read the value of the pink. So now we will use a very lighter value of the sprinkler. If you'd like, you can go ahead and mix tiny amount of white or buff titanium to this pink color and achieve a lighter value. However, I personally feel for this couple of next flowers. Let's go with a lighter value of the sprinklers. So I'm adding lots of water and less pigment. And creating these flowers. Since it's a loose style, don't worry too much about the brushstrokes or how the flowers are actually looking. The more looser and natural they look, the better. So just go with the flow and have fun with the process. Next step, because we want to achieve even lighter shade of this bank, will mix buff titanium. And that's gonna give us our very light, peachy best to the shade of pink, which is something you can see in the reference of our snap dragons kept on the left side. Again starting with the same mix of green for our stems, slightly curving them. And this time we have a mix of buff titanium and rules matter. And it's gonna look something like so. Of course, will still be going ahead and adding tiny amounts of pink towards the ruffled edges just to bring that edge a bit more. And finally, as we approach our next set of flies, they're going to look a lot like white mixed with our green gold. So again, mixing buff titanium with slight amounts of green and gold. And since the flowers will be such lighter valued or light colored, I'm actually taking a mix of greenish, amber and green goal with more amounts of greenish on board so that we have a contrast in terms of stem and the GOP shape that we create with these three leaves for our lightest flowers. And do also observed that these topmost flowers will also be a little bit smaller in size in combat addition to our big flowers at the bottom.
7. Final Project Adding Final Details: Now that we're done with our flowers, Let's go ahead and add some darker details with our greens. So I'm going ahead with my number 4 brush and this mix of nice greenish umbo and undersea green. This is mostly undersea green. And it's a very darker value, meaning less water. And let's add couple of strokes here and there. Wherever you feel that there would be a shadow casted below these flower heads, make sure to add this darker color. And this is actually what brings lot of dimension into any BCE for that matter, this interplay of light and shadows. We'll also be taking on darker color. And you can choose to add some more stems or leaves. It's totally up to you. Let's go ahead and add two different stems. So since the stems are Dhaka with leaves, Let's go a little lighter in terms of value. And just to watch the bottom part. Again, going ahead with this darker shade and utilizing the wet-on-dry technique and reinforcing some shadows towards the bottom of the stem. And whenever we are approaching this, adding of details, be mindful that always less is more. So when we are going to add these details, we start slowly and then build up. So gradually we keep on adding more details. If you were to ask me how to know when exactly do stop. There is actually no right or wrong to it. It's totally personal preference. But what I can tell you as the more you practice, the more you put your paint brush to paper, the more you get a better understanding of what in your eyes translates as complete or enough. And that's what's going to be the guiding light behind knowing when to stop adding these details. And now we go ahead and add some darker pink details. So for that we are mixing our role as Maddow, my little amounts of undersea green That's going to give us a darker color. Just randomly choosing sunspots, mocking without brush these darker areas. That's going to give us a sense of which peddlers of the flaws are in front of us and which are behind. To be honest, I feel it's this process of adding details which really brings in diabetes to get that kind of brings it to life and do take your time with it. See how things pan out. Add a little bit of detail here, add a little bit of detail there. Wherever you feel that it told low, most apt, and then dig a step back and observe it. If you feel something's missing, you can always go back and add more. If you feel that it's enough, you're happy with towered loads. That's when you know that the pieces complete. And that's it. And that's it. We're done with our gorgeous Snapdragon. And I hope you can see that this little process of adding these layer details kind of brings floss to life. He has the reference on the left, and I'm pretty happy with what we have created so far. I can't wait to see your version. Thank you so much for joining me today. I hope you had lot of fun creating this gorgeous loose style Snapdragon. All right, I'll see you in the next lesson.
8. Next Steps: Thank you so much for joining me in today's class. I hope you had lot of fun if you liked this class and how we approached loose watercolor florals. I have seven other classes on Skillshare. I hope you'll give them dry as it. I look forward to seeing your beautiful creations from this class. I look forward to seeing your beautiful lose snap dragons that we learned in this class. If you choose to upload them in the project resources section here on Skillshare, I'll be super happy to provide you feedback. And if you choose to post it on social media, please do tag me at the whimsical creative. I'd love to admire it and share it with others. If you'd like to learn more step-by-step watercolor, loose florals. Make sure to check out my other Skillshare classes. You can also find me on YouTube. My channel is the whimsical creative. That's it for today. Thank you so much for joining in and I hope you have a lovely day or night and I'll see you in my next class to Lin, have the creating.
 Manushree Mishra, Watercolour Artist