Transcripts
1. Welcome to the Class: When I was a kid, I
loved paper craft. Back then, I used to watch tutorials and follow
these steps one by one. And I used to enjoy the entire process
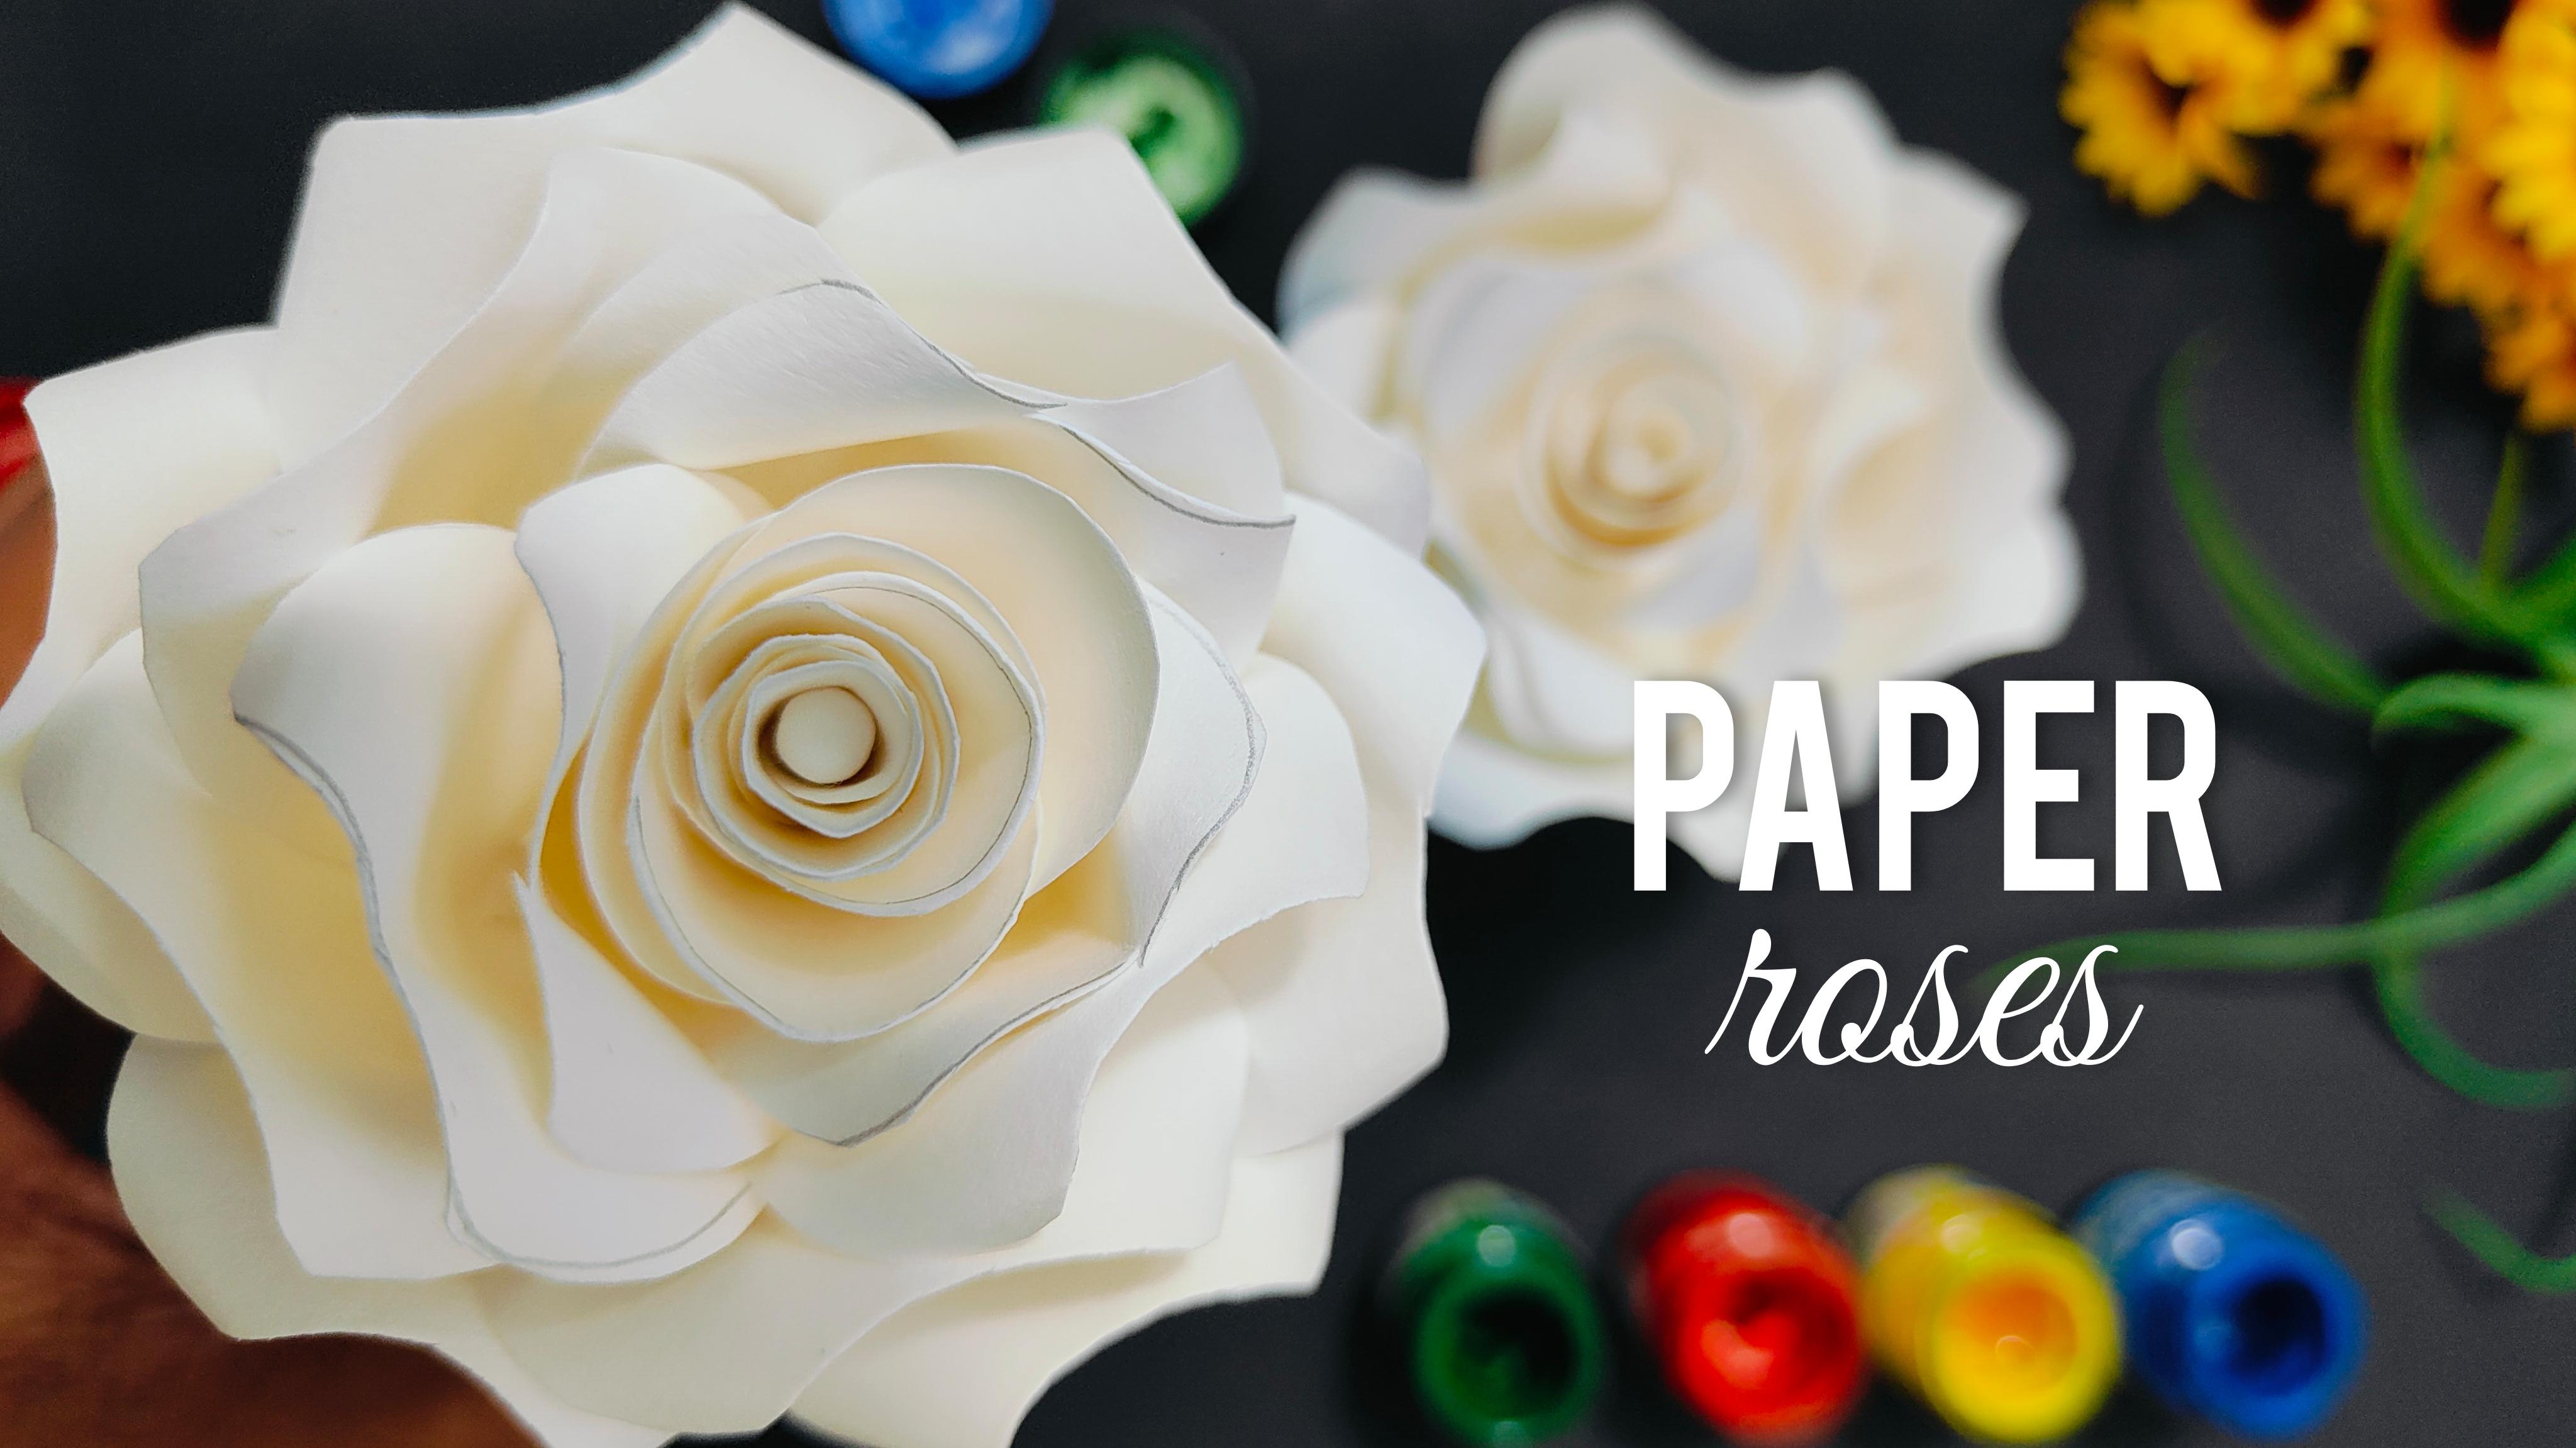
and the final output. In this class, we
are going to create a beautiful realistic paper rows using easy and simple steps. Hey, everybody, you
are most welcome to my new class, myself Ruth Patel. I'm a self taught
independent artist and an interior
designer by profession. I personally love to explore different art mediums and styles and not stick to
one particular thing. So if you're joining
me, you'll find a variety of classes
that I create. We are going to start
by understanding about all the art supplies that you will need for
the entire class. No need to worry at all. In case you're missing out on
any particular art supply, you'll find it very easily in
any nearby local art store. We are going to start by creating the internal
petals first, which is going to
be the first step. Using an A five size paper, we are going to divide it
into eight equal parts, and we're going to create a
beautiful petal out of it. This particular
petal is going to be in the inner portion
of the entire rows. Then the next step is
going to be creating an A four size paper
into 16 equal parts, and then there is going to be this outer petal that
we are going to create. This particular petal will
have a lot of variation in it, and we are also going to create some nice depth
and details in it. There is going to be some
easy craft work that we will use to make the
petal look a litt bit three D. Once we are done creating both the inner
and the outer petals, we are going to
assemble them together, forming a beautiful rose. No need to hurry at
all. You have to observe these steps carefully
and follow them one by one. Combining all the
petals together, you'll get a beautiful,
detailed paper rose. No need to hurry at all, and no need to worry
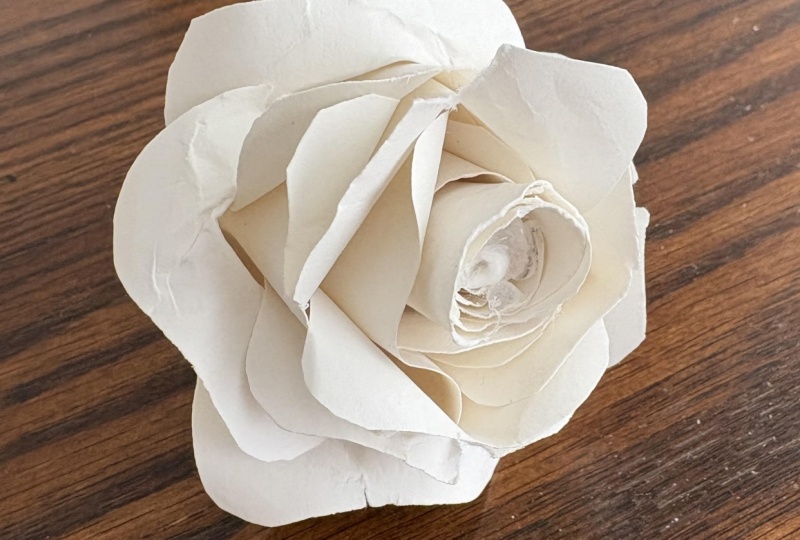
about the output, enjoy the process of creating. And by the end of the class, you'll have a
beautiful, realistic paper rose in your hand. You will enjoy the paper craft
and how to work in detail. The class is absolutely
suited for beginners and also intermediate and advanced
level artists can try it. So without any delay, grab your art supplies, and join me on this
creative journey.
2. Art Supplies: Everybody, now,
let us talk about all the art supplies that you will need for
the entire class. No need to worry at all. In case you're missing out on
any particular art supply, you'll find it very easily in
any nearby local art store, or you can go for any other
good alternative as well. So here is the realistic rules that we're
going to create. And the best part
is that you will not need a lot of art supplies. So let's start with
the first one. So this is a simple
hot glue gun, for which you will
require an electric plug. But no need to worry at all, in case you do not have a glugon, you can use a simple
glue as well. This hot glugun will help you to paste the outer petals
in a very quick manner. Now the next art supply is
a simple A four size paper, which is a cartridge paper
basically of 170 GSM, we do not need a
very thick paper. So that's why 170 GSM
works completely fine. Make sure that your paper
is not very much thick. It should be thin so
that you can make the folds in a very
comfortable manner. Then we have the
next art supply, which is a Fevicol, which is basically a
simple glue that you can use to paste your
inner and outer petals. In case you do not
have a hot glue gun, you can use this
simple glue as well. It will just take a little
bit of more time to dry. Then I have a simple
ruler of 15 centimeters. Which we can use to make a
perfect fold on the paper. Then I have a simple pencil, which we are going
to use to draw the petals so that we can cut
them in a perfect manner. Then next up, I have a simple
round brush of size fur. As you can observe,
we are not going to paint anything in
the entire class, but we are going to
use the back side of this particular brush to make a beautiful curve on the outer petals so that it looks a little
bit more realistic. It's okay if you
use a round brush of size zero or two as well. Then I have a simple pair of
scissors that we're going to use to cut the petals and the
paper whereever required. Then next to, I have a very important art supply that everybody must be having. It's a simple cotton ear bird that we use generally
to clean the ears. So we are going to use the
bird as a center element as a supporting element as well so that we can put all
the petals around it. These are all the art supplies that you will need
for the entire class. No need to worry at all. In case you're missing out on
any particular art supply, you'll find it very easily in
any nearby local art store, or you can go for any other
good alternative as well. Now, let us move
towards the next part.
3. Inner Petals: Hey, buddy, you are most
welcome to the first step, which is creating
the inner petals. So here I have my A
four size papers ready. It is 170 GSM, and these are basically
cartridge papers. So these are basically
very much thin, and you do not need
a very thick paper to create the craftwork. So make sure that you have a nice thin paper
before you start. So let me take out one sheet and let me show you
how it is going to be. Right now I'm having a
single A four size paper on the desk surface. Now you just have to simply
fold it into equal halves. Just try to match the
corners carefully. No need to hurry at all. Just try to do the step
very much carefully. Match the corners
and then simply use your fingers to
create a perfect fold. You can also use your thumb or a simple ruler to
create the fold. Now simply open it and you find that you get
two equal parts. Now we just require
an A five size sate. That's why I'm going to
cut it into equal halves. I'll be using a simple
pair of scissors. So you can already
observe the fold line, so you do not have to
draw it using a pencil. Simply follow the fold
line and cut it carefully. Be very much careful while you're using a pair of scissors. Now we have a simple A
five size paper ready. Now we need eight
petals which are going to be in the inner portion if you observe the
rows carefully. And these petals are not
going to have any variation. It is going to be completely. We're just going to place
it in this curved manner. That's why we need
an A five size paper because we only
need eight petals. Now I'll just divide
this particular A five size sheet into
eight equal parts. You can observe these
steps carefully. We will start by dividing the paper into two equal halves. Let us put the paper vertically, match the corners together. Now, simply use your fingers or a simple ruler to make the entire fold a
little bit perfect. So I'll just use my thumb initially to create
a simple craze, and then I'll use my ruler to make the fold
completely fine. And then when you open it, you get two equal half. Now I have placed the paper
in horizontal manner, and we want eight equal parts. Again, match the
corners together, and simply use your finger, apply some pressure and
make the fold solid. Now, I'll open the
entire paper and you'll find that you get
four equal parts right now. Now, observe carefully, take one side of
the paper and match it with the center where both
the lines are intersecting. Now again, use your thumb or finger to make the
entire fold solid. Now you get four equal
halves on one side. Similarly, you have to repeat the same step on the
other side as well. Now open the entire fold, and you'll observe that
you get four equal parts. It's not at all complicated. You just have to observe
these steps carefully, and you'll get the four parts of the paper in this
perfect manner. Let me take you a
little bit closer so that you can observe
the lines carefully. So these are basically the eight inner
petals that we want. Now using a simple
pair of scissors, we are going to cut them.
No need to hurry at all. Take your time, cut it with a lot of patience, be
very much careful. Now you get this eight
beautiful rectangles. Now use a simple pencil, and we want to create
the inner petal. Observe these steps
carefully and draw this simple curved shape, which is the inner petal. Now we want to cut it. Take four papers
together so that you do not have to cut every
individual paper separately. You can easily cut this
stack of four papers together so that you do not
have to cut them separately. Now I get four beautiful simple petals which
are inner petals. I'll place them in
the bottom portion. Similarly, we want four more. Again, I'll be taking
another rectangular piece. Take your pencil and draw
this simple curved shape. Now take all the four pieces
together, put them together. Hold all the four papers
in a tight manner and simply use your pair of scissors and cut
the entire petal. In one cut, you can get
four beautiful petals. Now you can observe that we have created all the
eight inner petals. I hope that you
got an exact idea, the way you have to create them. Now you can take all the petals together and place them aside. The next step is to
create the outer petals, which is going to be 16. It is completely a
similar process. It is going to have a
little bit of variation, and the petal is going to
be a little bit three. So I have kept all the
eight petals together. Now place them aside, and let us move towards
the next step.
4. Outer Petals: Hey, everybody,
now, let us create the outer petals
of our paper rows. So here I have my A
four size white paper on the desk surface. Now this time, you will
need the entire paper. If you observe the
rows carefully, there are these
beautiful outer petals, which is having a
beautiful variation in it. There is going to
be a nice three D effect that we are
going to create. So you have to follow
these steps carefully. But before that, we
are going to divide this particular A four size
paper into 16 equal parts. It is not at all a
difficult process. You just have to observe
these steps carefully. So I'll start by creating two
equal halves of the paper. Place the corners together. Now, use your fingers to create a perfect fold.
Apply some pressure. You can also use a simple
ruler to create a nice fold. Then when you open the paper, you'll find two equal halves. Now again, I'll be taking
the edge of the paper, match it with the center line. And then again use your thumb, apply some pressure and create
a nice fold, and open it. So you get again
two equal halves. Similarly, we are going to take the next side of the paper, match it with the center line, apply some pressure
using your thumb. Then simply open
the entire fold. So you get four equal
parts right now. Now, we are going to just flip the paper,
make it vertical. Again, match both the
corners together. No need to hurry at
all. Take your time, do it with a lot of patience. Mat the corners together. Now apply some pressure
using your fingers. You can use a simple ruler as well and create a nice fold. Now, I will simply
open the entire paper, and you get eight
equal parts right now. Now we want to create
them into 16 equal parts. So we're going to
create two more folds. I'll just take the edge of the paper from
the bottom side, place it to the center line, match the points together, and simply apply some
pressure using your fingers. Create a nice fold. You can use a ruler as well, and then open the fold, you'll get eight equal parts
in the bottom portion. Now, similarly,
we want to create these eight parts in the
bottom side as well. Take the edge of the paper, match it with the center line. And apply some pressure
using your fingers. No need to hurry at all and just use your fingers carefully. I will reapply my ruler on the fold to get
a perfect fold, and then open the
fold and you get 16 equal parts in this
rectangular manner. You can observe the
shapes carefully, you can observe the lines. Now, using a simple
pair of scissors, just follow the line and cut all the rectangulars
separately, and you get these little
rectangular shapes, which are the outer petals. Now, if you observe
the rows carefully, we have a lot of petals
in the outer portion. That's why these are 16, and the inner petals are
less. That's why it is eight. It is not compulsory that
all the petals will be used. There might be some left,
but it is completely fine. Now, I have taken four petals which are four rectangular
shapes basically, and we are going to use a simple pencil to create the
outline of the outer petal. So I've taken four papers together so that we
can consume some time. Now I'll be using
a simple pencil. Now, this time, it is not going to be a simple curved shape. You have to create
this nice variation in the topmost portion. It almost looks
like a teeth shape, but you have to create
this particular shape. Now let me take your
a little bit closer so that you can observe
the shape carefully. There is a little
bit of difference on the topmost portion
of both the petals. You can observe them carefully. Now I have four rectangular
pieces together. Hold them in a tight manner, and we're going to
cut them together. In one cut, you'll get
four equal petals. So follow the pencil
line carefully and cut them in a careful manner.
No need to hurry at all. Whenever you're working
with a pair of scissors, always be very careful. So we have completely
removed the extra part, and you can observe that
we get four equal petals. So these are the
petals that we're going to place on
the outer portion. The work is not yet completed. We have some more
steps to do as well. But before that, we
are going to convert all the rectangular shapes into these particular petals that
we have created right now. So we still have remaining 12 rectangular sheets
that you have to convert into these
particular petals. These steps are absolutely same. You can take a combination
of four papers together so that you can cut them together and you can
consume some time. So just repeat the
same step and convert them into these same
petals that we have done. Let me show you
once more how you have to create the outer petals. I'll take a stack of four
papers together again. You have to use a simple
pencil and create this beautiful shape on
the topmost portion. Now once you draw
the entire petal, just take a pair of scissors
and follow the pencil line. Slowly start cutting it
from the bottom portion. Remove the extra part
and be very much careful while you're
using a pair of scissors. Once you remove the extra part, you'll get this
beautiful outer petals. So now we have a combination
of eight petals together. I hope that you
got an exact idea, convert the remaining petals into the same petals
that we have created. Now we have 16
beautiful outer petals. We are going to have a next
step that you have to do to these particular petals
to make them look a little bit treedy
and in detail. You can observe these
beautiful outer petals is having a nice curved shape, and it is a very simple and easy process that
we are going to do. So to convert the petals into
some nice three D petals, we are going to need a pair
of scissors and some glue. So I'm going to
take a single petal and you will need a
pair of scissors. Make a cut in the
center portion. You do not have to
make a huge cut, just a simple cut, which is not covering
the entire petal. In the bottom portion,
you can create this cut. Now you will need a
little bit of glue. So take some glue and apply it on either sides of the cut. Apply it on one side, basically. Use your finger to spread
the glue carefully. Now, you have to just
overlap the part on other and just apply some
pressure using your thumb. Hold both the edges for a while so that it
gets stuck completely. Now, you get this
beautiful curved shape in the entire petal
as you can observe. It creates a nice three D
element to the entire petal. You can observe it carefully
in the back side as well. Now, I'm going to create some nice depth in the outer portion of the
entire petal as well. Now to do that particular thing, you will need a round
brush of size fo, and we are going to use the
back side of the brush. In case you do not have a
round brush of size fo, you can use a size zero or
size two brush as well. Now, using the back
portion of the brush, we are going to just
apply it in the edge of the petal and
make a nice turn. So you'll get this
beautiful curved shape on the outer portion
of the entire petal. Similarly, you have to do that
on the other side as well. Hold your brush in this
tilt manner so that you get the curve in
this particular area. And this is how the entire
outer petal is ready. So you can observe
and compare it with the petals that I have
placed in the rows. This is how we are going to place it on the outer portion. Now, let me repeat
the entire step again so that you can
get an exact idea. You can observe these
steps carefully. No need to hurry at all. I'll place this
particular petal aside. I'll take another simple petal, make a simple cut in
the bottom portion. Using a pair of scissors. Now we are going to apply some glue on either
side of the cut. You can apply it on either side. It is absolutely fine. Just apply some glue and just use your finger
to spread the glue. Now just overlap the edge of the paper and press
it using your thumb. Hold it for a while so that
it gets completely stuck. Now, once the edges are
stuck to one another, we are going to use
our brush of size fur, and we are going to apply some nice variation
in the outer portion, which creates some
nice realistic effect to the entire outer petal. You can observe the way
I'm holding the petal so that the edges get
stuck completely. Now you can use your brush. And you can simply fold the paper using the
entire edge of the brush. You'll get this
beautiful curved shape. No need to hurry at all.
Use your fingers well. You can observe
this beautiful turn and the curve that
is being created. On either side, we
have both the curves, and this is how the
entire petal looks. I hope that you
got an exact idea of how you have to
create the outer petal. The steps are very easy. You just have to
follow them carefully. And this is how
you have to repeat the same steps in
all the 16 petals. It is not necessary that we are going to use all the 16 of them, but mostly all the
petals will be used. So we are done with the
inner and outer petals. Now let us move
towards the next part.
5. Assembling Together: Hey, everybody, so let us assemble all the
elements together. We are done with inner
and outer petals. As you can observe. I have placed them on the desk surface. So here is our
realistic paper rows, and I am using a simple
cotton bird over here. But before that, we
are going to just make these simple petals that
we created initially, which are the inner petals
into these curved forms. So you just have to use
your round brush of size. Wrap your inner petal around it and make it in
this curved shape, and then place some glue on the bottom portion and simply wrap it around
the cotton bird. Now while you're doing
this particular step, you have to keep a lot of
patients because you have to make your inner petal completely stuck with
the cotton bird. And the glue will
not stick instantly, so take a little bit
of time and just apply some pressure using
your thumb and fingers on the bottom portion. Now we have completely
attached the first petal. We are going to
repeat the same step. Let me repeat the entire
step again for you. So you have to wrap around the entire petal on
your round brush, apply some glue on
the bottom area. Now, again, wrap the entire
petal around the cotton bird. This is how we are
going to create an entire combination
of the inner petals. One thing that you
can keep in mind is, you have to apply a
little bit of pressure using your thumb and fingers
on the bottom portion, press it a little bit so that the petals will get completely stuck with the cotton bird. Now we are going to repeat the same steps again and again. You have to roll your
entire inner petal and make it in this
curved manner. You can do this particular
step to the entire petals, the eight inner petals
that we created. Now once you give this curved
shape to the entire petal, slowly apply the glue on the bottom portion
and one by one, wrap it around the cotton bird. No need to hurry at all. You have to do this
particular step in a very slow and
steady manner. Try to have a lot of patience. The glue will take a
little bit of time. In fact, you have to give a little bit of time
for the glue to dry and the petal to get completely stuck
with the cotton bird. You will slowly
observe a beautiful, detailed inner
portion of the entire rose as you move attaching
these inner petals together. Also, slowly, the volume of the entire inner
portion will increase. So we have basically wrapped around four petals on
the entire cotton bird. Let me take you a
little bit closer so that you can observe
the details carefully. This is how the inner
portion will look. Now, slowly we will add
four more inner petals to the entire cotton bird so that we get a little
bit of more volume. So now you can observe
that we have created the entire inner portion
of our paper rows. And this is how you have to
place your inner petals. It will take a
little bit of time, but no need to worry at all. You have to do this
particular step with a lot of patience. You can observe it with
the realistic rows aside. Now we are going to
place the outer petals, which is going to be
a little bit of task. So before we start
placing the petals, there are two things
that I want to tell you. You can use your simple glue
to paste the outer petals, but it will take a lot of time, and you will need
a lot of patience. So that's why I'm
using a hot glue gun. It will help us to
paste the petals around the inner portion of the entire rose in a
very quick manner. But in case you're
missing out on a glugon, it is absolutely fine. You can use your simple glue
to paste the outer petals. Now, if you observe
the rows carefully, we have a nice cluster of outer petals around
the entire rows, and this is the simple glue that you can use to paste the petals, but we are going to
use a hot glugon so that I can show you the process
in a very quick manner. So I've attached the glu gon to an electric socket so that it gets a little bit hot initially. One more thing I would
like to tell you all is that you are
going to definitely enjoy the entire
process because you are going to attach each and
every petal one by one, and it is also going to be
a very satisfying process. Now we are going to
take one of the petals, and we are going to place some hot glue on
the bottom portion. Make sure that you
apply the glue on the bottom portion only. So I'll just press the gun and take out some glue from it. In case you are
using a simple glue, then also you have to
repeat the same step. You have to apply the glue
on the bottom portion only. Now, simply attach the first
petal with the inner petals. No need to hurry
ato, since we have applied the glue on
the bottom portion, you can use your thumb and fingers to apply
some pressure on the bottom area so
that the petal will get completely stuck with
the entire cotton bird area. Now, I'll apply some more
glue on the bottom portion. Now, place the petal a little bit separate
from the first one. So you can observe
we have placed two outer petals around
the inner petals. Similarly, I'll be taking
one more outer petal, and I'll place it in a
combination of three petals. You can observe a
beautiful combination of outer petals in
a number of three. And slowly, you will
also observe that the volume of the entire
rows will increase slowly. Now, similarly, we are going
to repeat the same steps. We are going to attach
the petals one by one. There is no specific
way of attaching them. You can randomly
apply some glue in the bottom portion and place
the petals one by one. Just make sure that you
apply a little bit of pressure on the bottom portion using your thumb and finger. It will help the glue to get completely stuck with
the inner surface. Also give some time
for the glue to dry. Oh. So now you can observe that
we have applied a lot of outer petals and the structure of the rows is getting
formed slowly. The entire process of attaching the outer petals is
really, very satisfying. You will feel a sense of happiness when you
come towards the end, completing the entire rose and
attaching your last petal. You can observe the way I'm slowly completing
the entire pattern. You can also observe that the entire volume of the rose is getting
very much bigger now. For the entire class, I personally used
the white paper so that you can observe
the details carefully. It is not at all compulsory. You can use a different
colored paper also, or in case you want
a specific color, you can use a spray paint to make the entire rows
in a different color. It is absolutely fine. You're free to explore
and experiment. Now we are left with
only few petals to attach and increase the
volume of the entire rows. I'll just finish
the entire step. So now I'll be attaching
the last petal, and you can observe that we are done with the entire rows. Apply some pressure using your fingers on the
bottom portion. Now, let me take a
little bit closer so that you can observe all
the details carefully. You can observe how beautiful
the entire rose is looking. And I personally love that we create the entire
rose using a paper. So even if you want to
gift it to somebody, you do not have to
use an original one. So I hope that you enjoyed the entire process of creating and got to
learn something new. Now let us move
towards the next part. Oh.
6. Class Conclusion: Hey, everybody. So
I hope that you enjoyed the entire class and
got to learn something new. While I was creating
this particular class, I made any number of mistakes, and that is something
that I always tell my students never to be
afraid of making mistakes. You're free to
experiment and explore. Just enjoy the entire process of creating without worrying
about the output. I will be very excited to
see your class project, so feel free to add the project
into the project gallery. In case you have any questions or doubts related to the class, feel free to ask them into
the discussion section. It would be really great if you leave a review for
the class as it encourages me a lot and my class can reach many
more students like you. At the end, I would like to say, keep learning, keep practicing. Thank you so much for joining the class and happy painting.
 Rutvik Patel, Artist and Instructor