Transcripts
1. About this Class: [MUSIC] Welcome. I'm Chris Ruff and I'm a surface designer. That means I've made hundreds
of repeat patterns and Adobe Illustrator
that I license or sell to manufacturers to
use on their products. This is a follow up class
to my previous one, which was learn everything about creating repeat patterns
in Adobe Illustrator. In this one, I'm
going to show you how to diagnose and fix any technical problems
that you might find in your patterns because things don't always go
perfectly smoothly. If you've ever made
a repeat pattern and expected it to look
like this but instead, it looks like this or maybe you've
discovered that there are tiny hairline breaks between your pattern tiles and you're not sure
what's causing them. Or maybe you discover that your motifs don't line up
perfectly in your patterns. Every designer, eventually comes across some of these problems. I'm going to give you the
tools and techniques to diagnose and fix
problems like these. Now this is an intermediate
level class and I will give a really brief review of how to make a repeat pattern, but you'll get a lot more
out of the class if you've already made some patterns and are familiar with the process. It takes a little practice to identify and fix these
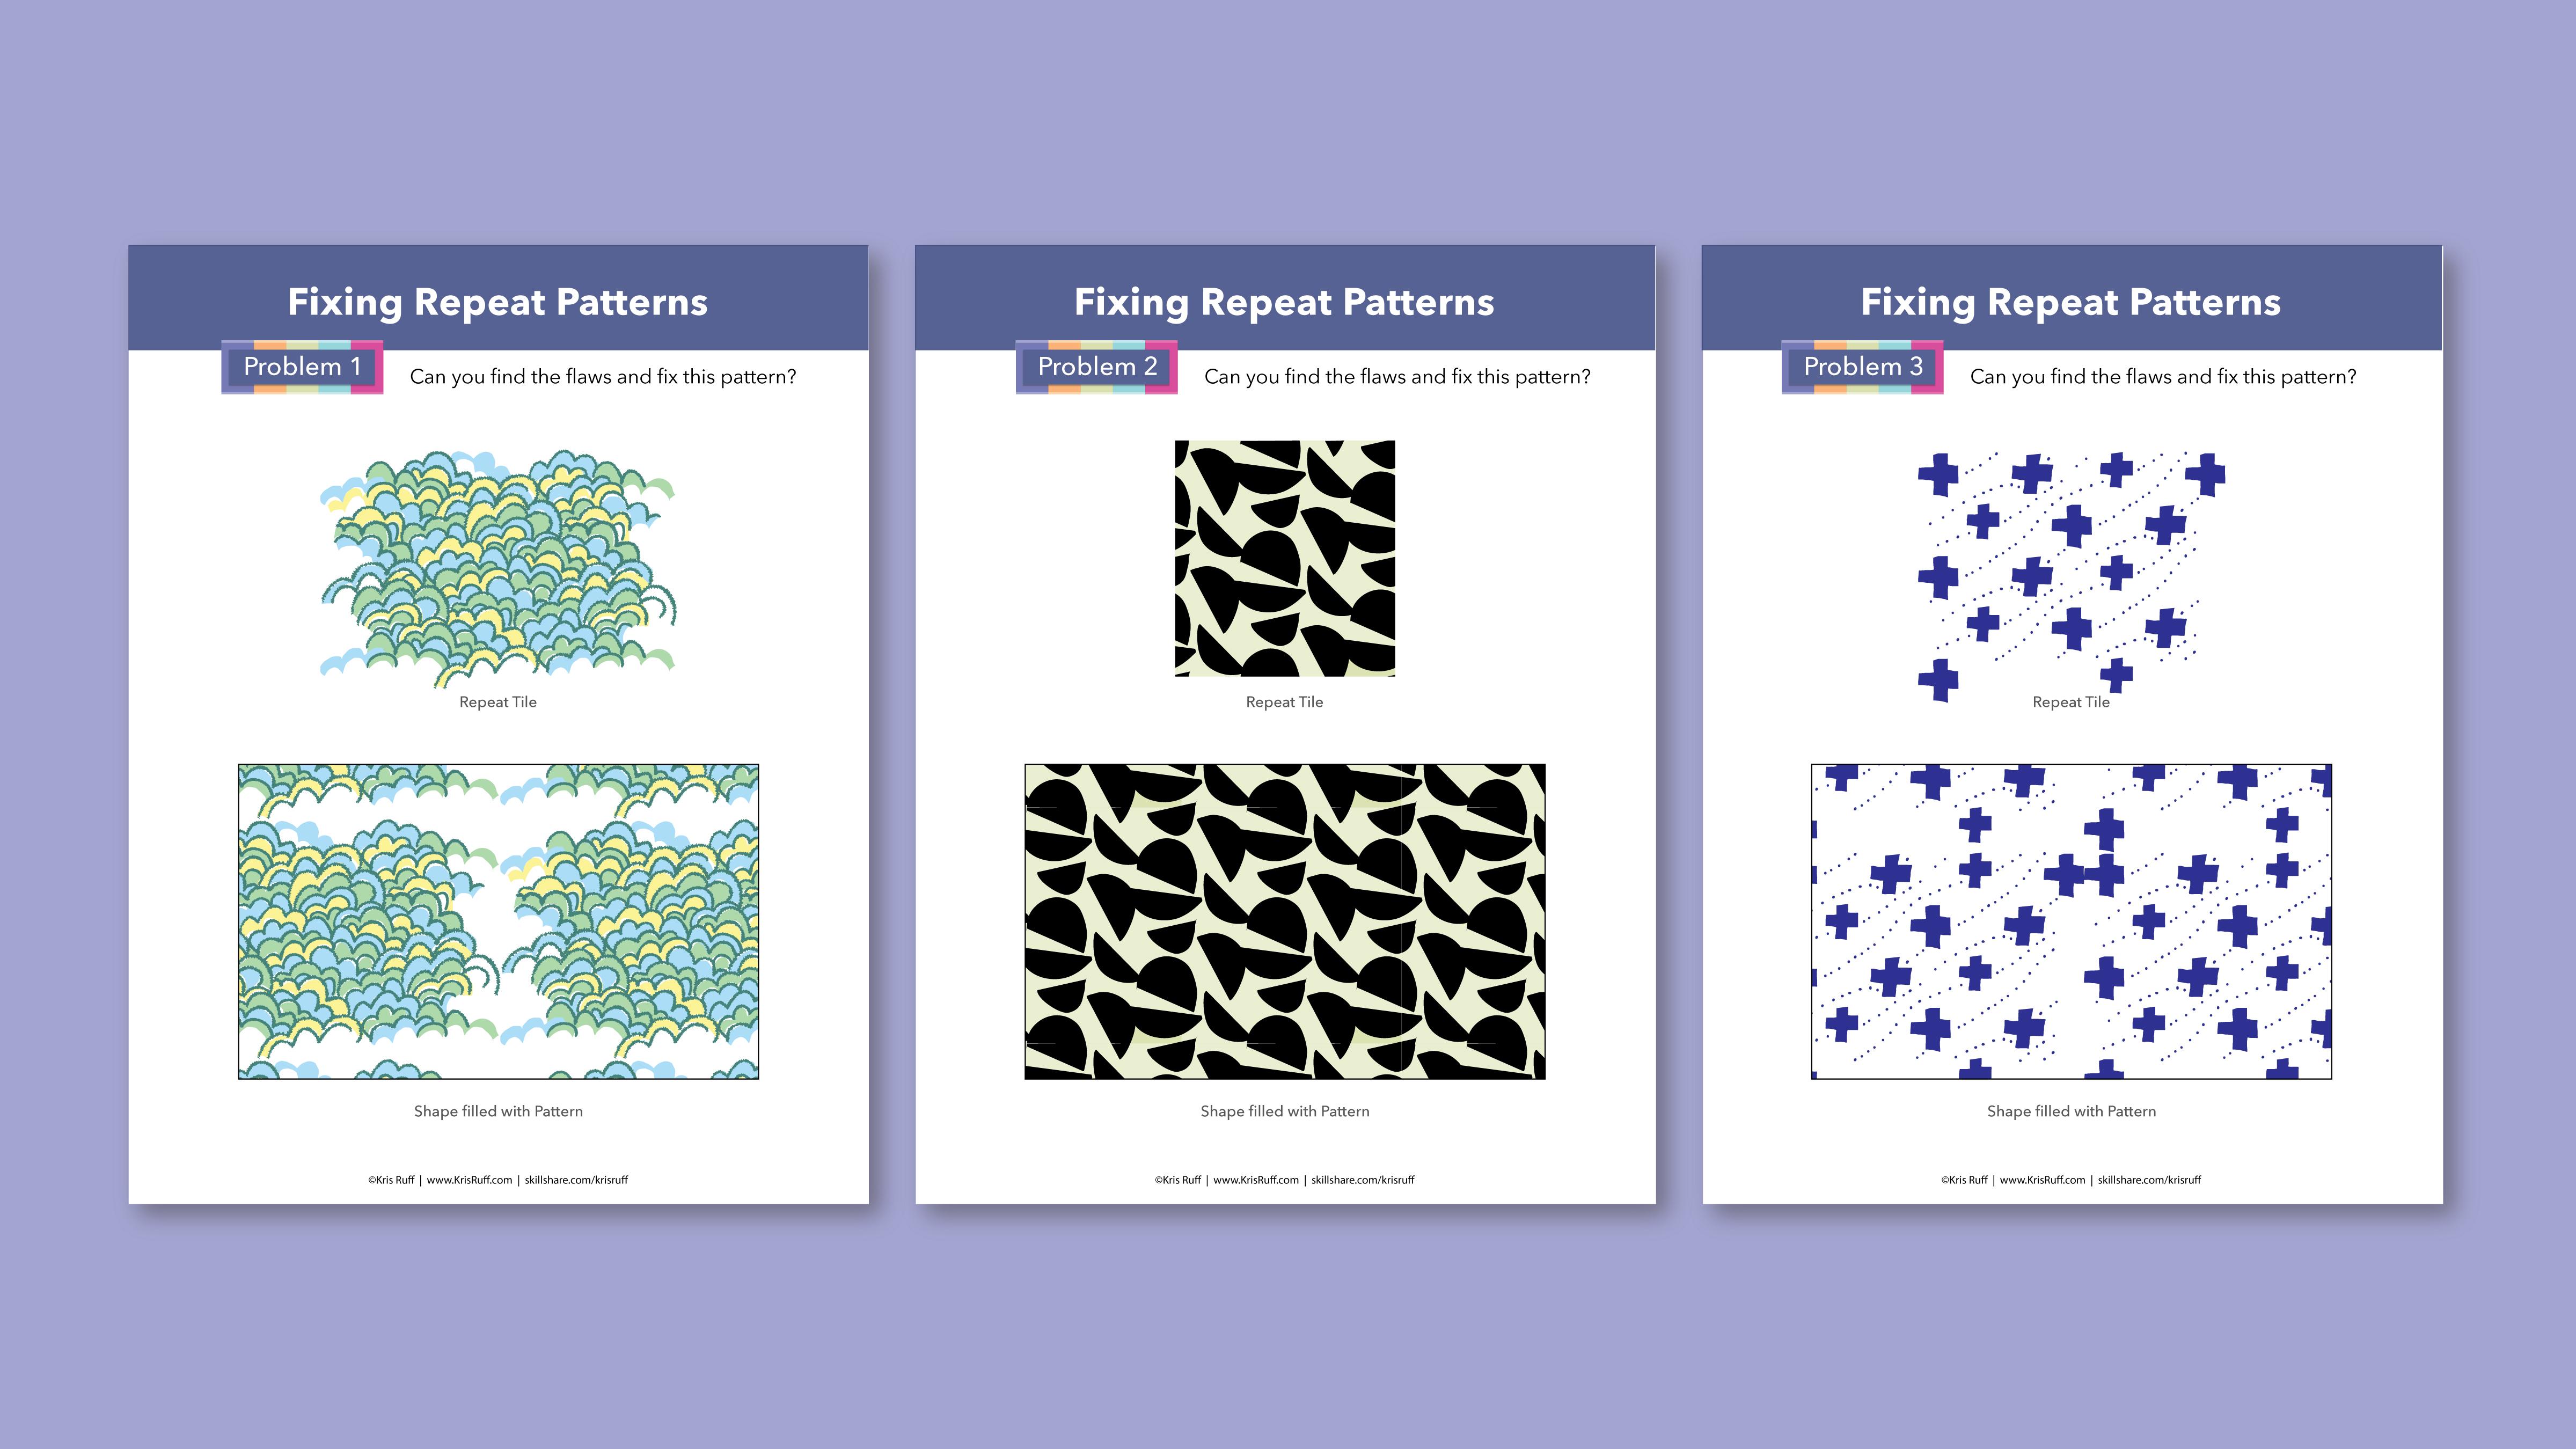
kinds of errors, so as a project, I'm going to give
you an opportunity to practice a little bit. I've created three
repeat patterns that all have flaws in them
and I've uploaded that Illustrator file to the projects and
resources section of the class so you
can download it, look at the patterns, figure out what's wrong with
them and fix them. That'll be great practice
and if you get stuck, there is also an answers
sheet to give you some hints about what's
wrong with the patterns. I think that's about it.
Let's go get started.
2. Pattern Making Review: Here's a really quick review of how you make a
repeat pattern. Every pattern starts
with a bounding box. This one happens to be five
inches by five inches. But it can be any size and it
doesn't have to be square. Then we just fill
our box with motifs. If there are any motifs that
cross the edges of the tile, then we need to
copy them or clone them onto the other
side of the tile. We choose each of them. We can right-click and
go to Transform, Move. Since our bounding box is
five inches by five inches, we want to move it horizontally five inches but zero
vertically and hit Copy. Then we do the same
thing top to bottom. We choose these motifs, right-click, Transform, Move. This time we want
zero horizontal and five vertical, and Click Copy. Now we just need
to make sure that the bounding box has
no stroke or fill, and that it's at the
back of the tile. We can right-click again. This time click,
Arrange, Send to Back. Now we just select
the whole thing and drag it into
swatches palette. It shows up right there. We'll create a shape and click on Fill and
fill it with our pattern. There it is. It's a really
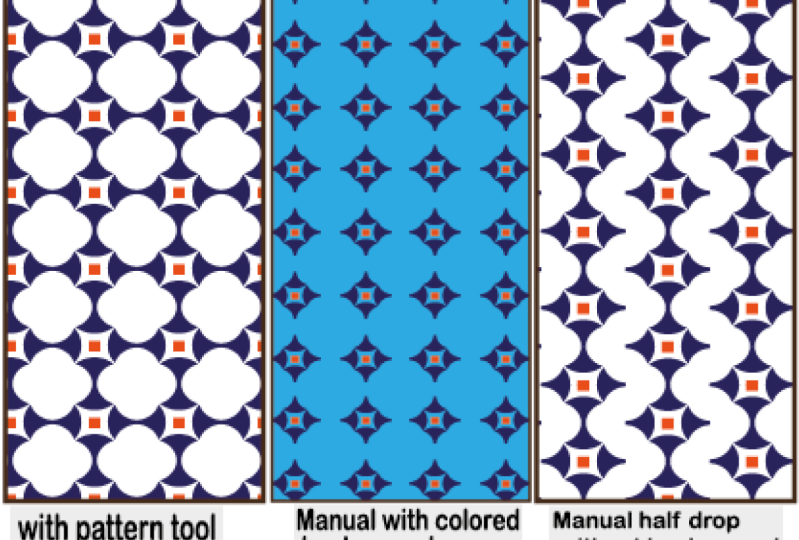
pretty easy process. You can also make patterns with the Illustrator
Pattern tool. I'm not going to go into that in this class, but I'm
a big fan of it. I think it's a very
powerful tool. If you want to learn
how to use it, I encourage you to take
my previous class, learn everything about creating repeat patterns in
Adobe Illustrator. When things don't go
perfectly smoothly, like this one did, you may come up with some
technical issues. Let's go through those and figure out how to diagnose them.
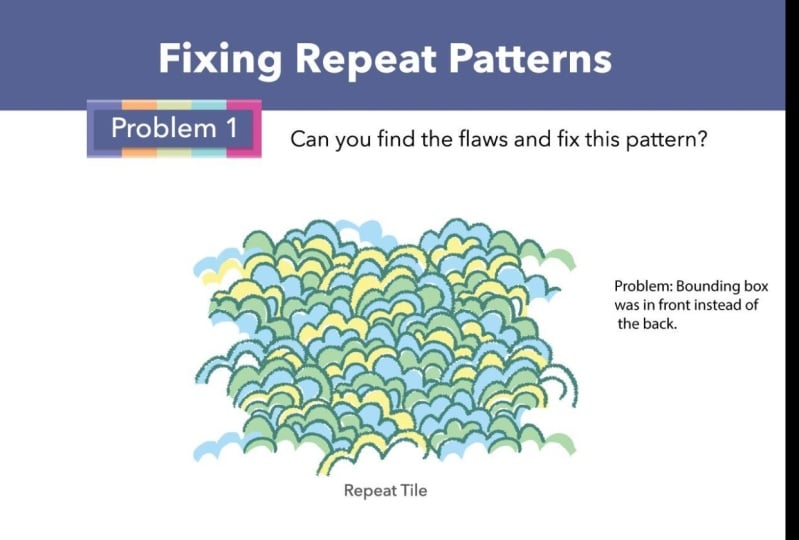
3. Fixing Bounding Box Issues: The most common problem that you're going
to run into with repeat patterns is issues
with your bounding box. Let's start there. Here's a floral pattern. This is the repeat tile here, and this is how it's
supposed to look. Here's what it looks like
with a bounding box error. When you see big gaps like this between your pattern tiles, you probably have a
bounding box error. They're really easy
to diagnose though. There's three things
that you need to check. First, is there a bounding box or did you
forget to put one in there? Two, is the bounding box invisible so that it has
no stroke or no fill? Three, is the bounding box at the back of the repeat tile? Let's check those things
with this pattern. I'm going to go into
outline mode Command Y. The first question is, does it have a bounding box? Yeah, there it is right there. Second question;
is it invisible? I go up here and confirm that the fill is invisible
and so is the stroke. It must be that the bounding box is not in the right place. If I add a fill to it, it's clear that it's
not at the back. The way we need to
repair this one is right-click and go to
Arrange and Send to Back. Now, we can see that all
of the motifs are in front of that bounding box
and now we just make it invisible and drag it back
over to the swatches panel. Now, when we use it
to fill our shape, it all works perfectly. Let's go back to the one
that wasn't working and figure out why does it
look like this exactly. If we remember the idea that every pattern needs
to have a bounding box, if we set ours up wrong, it doesn't qualify as a
bounding box then Illustrator treats it just like it would any other motif that's
in that pattern, and instead, creates
its own bounding box. If I get rid of
this one and drag our faulty repeat tile out
of the swatches panel, you can see that this
bounding box has been added. It bumps up against this motif here and along these edges here, and bumps up against that
one and this one too. You can see that
these motifs fit exactly into this bounding box. If I add a border around this
one and drag it in here, now you can see that our repeat is exactly what it is here. That's why it looks so crazy. When you make a
pattern and it looks something like this,
don't freak out. Just go back and ask
those three questions. Is there a bounding box? Is it invisible?
Is it in the back? If you solve those three, you should be golden
with one exception. Let's say I've made
this pattern and I decide that I want to add
a background color to it. I can go over and find it in
my swatches, drag it out, and then make a
background by just making a rectangle that's bigger
than the bounding box, fill it with a color, and then send it to the back. Now, of course, we need the
bounding box at the back. I'm going to go
into outline mode and grab it and then
send it to the back. Now we should be
good. Drag that over here and fill our rectangle. But it didn't work. Why is that? Well, it has to do with groups. Imagine a bunch of kids
waiting for the bus, and this group of kids is from the same class
and the teacher says, stay together as a group. Then if the teacher
says it's one of them like Zack to the
back of the line, that should be over here, except he needs to
stay with his group so he ends up lining
up right here. In order for him to line up
at the true back of the line, he'd have to be released
from his group. That's what's happening
with our pattern swatch. Whenever you drag a swatch
out of the swatches panel, Illustrator automatically
makes it into a group. When I use this selection
tool and selected that bounding box and tried to send to the back like Zack, I could only send it to
the back of the group and not really at the true back. There's two ways we
could handle this. We can take this selection
tool, click on everything, right-click and choose
Ungroup and now I can choose just
the bounding box and send that to the back. I want to show you another
tool that's useful to diagnose problems and
that's the layers panel. Open it with window layers and then let's see
what we've got. There's just one layer and in
that layer is our pattern, which is in this group, and a rectangle that we've
been using for filling to show the pattern and then the background color
that we just added. Let's look for the bounding box. If I click on it over here, we can see by the blue dot that it's in the layer
and in this group. If I open the group, we see a list of every single
path that's in our group. At the bottom is the blue dot so that rectangle layer
is the bounding box. But it needs to be below
the background color. I can do one of two things. I can drag it out of the group and put it below the
background color. Or I'm going to go back here, I can drag the background layer into the group and put it
above the bounding box. Now, everything is in the
order that it needs to be. Now, when we drag it
to the swatches panel, our pattern works just fine. Now you've got several
tools that you can use to diagnose bounding box problems.
4. Checking for Alignment Problems: In this lesson we'll go
over some alignment or color errors that can be pretty common in your repeat patterns. I'll show you a
good trick to check each of your patterns for
these kinds of errors. Here's a simple pattern and it's got some problems.
Can you see any of them? I can see one of them, but that's only because I made the patterns so
I know where it is. Let's go ahead and check it, and the easiest way to do so
is to fill a shape with it. Let's turn it into a pattern. I can see that the bounding box goes behind all of the motifs, so I know it's in
the right position. So all I need to do is make it invisible and then bring
it into the swatches. Then I'll make a
shape to fill it. Right away, one of the
problems is obvious. The clones for this motif
are not lining up properly. But that isn't the only
problem with this pattern. If I zoom in, you'll see that this motif
isn't lining up either. Sometimes the misalignment
can be really hard to catch. Let me show you a trick that I do that makes it a
whole lot easier. Let's go back to our swatch and I'm going to go
into outline mode. I'm going to make a circle in this upper left-hand
corner to use as a marker. I'll get my circle tool. Wherever you want
to put it as fine just as long as it crosses both the side and
the top of the tile. Then I'm going to
fill it with a color that's not in the pattern. In this case, let's make
it like a bright green. Now I'll take that
and bring it into swatches and fill my
pattern with the new one. That green circle marks
the edges of our tile. I know if there's
alignment problems or color problems which
we'll get to in a minute, they will fall along
this line or this line. To make it even easier, I'm going to put some
guides along those edges. You'll need to have
your rulers out. If the rulers aren't visible, you can use the
keyboard shortcut Command R, R for rulers. Then I'm just going
to drag a guide out and put it along this edge. Not right along the
edge perfectly, but just offset and do the same thing on
the vertical side. Now when I zoom in, I know that any problems that I have will be along this line. Let's start over here. I moved this way and
look right here, you can see there's a very
subtle one along here. I would have missed
that totally, and I would've missed it if this guide had been
right along this edge, I probably wouldn't
see it either. That's why I offset
the guide a little bit so that I can see these
subtle ones happening here. I know I need to fix that one. Now I'm just going
to scroll along. This was the obvious
one that we saw before. Now we've gotten to
the other marker, so we know we're at
the edge of the tile. We've seen everything on the horizontal axis, that's
going to be a problem. We'll check the vertical axis. There's another problem. We keep going down. That one looks okay. But this one, we're
missing the edge of it. That means we forgot to
make a clone on this one. We keep going. Now we've
gotten to that green marker, so we know we've
seen everything. We'll need to go back to our repeat tile and
redo the clones. We'll delete them
from the bottom and one side and then redo them. So duplicate them from top
to bottom and side to side. I'm going to leave
the marker there for now so that we can check it again and bring this
new one over here, fill it with the new pattern, and then we'll go in and
check it one more time. We'll move right
into that marker and carefully run
along that edge. That one looks good. We've hit the marker
so we can go down now. That one looks good and
that one and that one. Once we reach to
the marker again, we know we've
checked everything, so this pattern is now perfect. Then obviously we just go back, get rid of our marker and
save the new one without it. Here's another example. Obviously a much more
complex pattern this time. This time it's got
some color issues. I made the bounding box
invisible and we'll select it all and drag it into
swatches as usual, then make a shape and
fill it with the pattern. The complexity of
this pattern makes it almost impossible to check it. It's a really good
example of why that marker trick
is so valuable. There are some problems in here, but I can't really find them because there's
so many motifs. Let's go back and do
the marker trick. In this case, rather
than make a circle, this motif right here crosses both the top
and the side line, so I'm just going to
use that as my marker. I'm going to select it
and let's pick a color. Let's make it a
deep blue because we don't have any dark colors
like that in the pattern. Select it again, drag it
over, fill the swatch. Now we can see just barely our blue marker
right here, right here. I need to see four
of those markers. I'm going to have to
make a bigger box. I'll use this tool and select one edge and just drag it until I can see that new marker. I know that I need to check
this whole line along here and this whole line here. I'll move it over so it
doesn't bump into my swatch. Make my guide along here and make another guide right along that edge and go
in and check it. If I move along that edge, here's a problem here. See these colors don't line
up. Here's another one. The rest of these
look pretty good, so I just keep looking
until I get to that marker, the blue dot on the
other side. There it is. Now I know I've looked
through that whole top edge and there was two
problems I need to look for in my swatch. Then I'll go down here. If you look really closely here, there's a problem there. Here's another one, there's
one, there's another one. Now I've made it
back to the marker. Now I've seen all of it. I know I've got some
problems in here. I would just need to
go back to my swatch, make those changes
where there are issues. Then of course, don't
forget to change your marker back to the color
that it was originally. That's the trick for catching color issues or
alignment issues, and you should do that on
every single pattern you do, even if you make them
in the pattern tool because just things happen or if you accidentally change the size of the bounding box or something like that, those things can happen. So always use this before you send your
pattern for output.
5. Solving Hairline Troubles: Have you ever made a pattern and when you go to fill
a box with it, you discover that there's little breaks in between
your pattern tiles? Sometimes they might
be light like these, sometimes they can be
dark and you can't figure out for the life what's
wrong with your pattern. The good news is there probably isn't anything wrong
with your pattern. What this is, is
something called an artifact that's
just a flaw in the way the pattern
is being rendered on your screen but
when you output it, it's not going to show up. The best way to test
whether it's an artifact is to zoom in and
as you zoom in, if that line comes and goes, sometimes it's there, sometimes not especially as you get really close to it that means it's artifact and there's
nothing to worry about. Now they are a pain and there's a couple
of things you can do to remedy the problem
or try to prevent it. The first and easiest
thing is just to go to Illustrator Preferences and go down to Performance and make sure that GPU
Performance is checked. That should get rid
of most of them. Now there are ways to minimize the chances of those
hairlines happening. The first is how you add
your background color. A lot of people, when
they make a background, they'll select their bounding
box and Copy it Command C, and then Paste it in Back and fill it with
their background color. Now there really
isn't any advantage to doing it this way, and there's a couple
of problems with it. It's more prone to
having hair lines between the pattern
tiles plus if you accidentally bump
either the bounding box or the background
box out of position, then you truly will get
a white gap between your pattern tiles that will
show up when you output it. I really recommend
that you extend the background beyond
the bounding box edge. That way you'll have less
problems with hairlines and less problems bumping
things out of position and getting
an actual white line. Also, it helps when
you're exporting patterns to JPEG or a PNG file because sometimes
if your background is the same size as
your bounding box, you will get a white hairline
on your JPEG or PNG file. This is really a
better way to do it. There are times
when hair lines in your pattern will show up on your output and using transparency is one
of those situations. If I were to take
my background color and change the opacity, let's put it at, I
don't know, 50 percent. When I fill the box, you'll see this little
dark line in here. It's really tiny, but
hopefully, you can see it. No matter how much I zoom in, that line is still there. Notice where it is. When we had the artifact, it went through the entire tile, but this time looking at it's just through the background. It doesn't go across
the leaf motifs. That's a good clue for you. That means that the
background is the problem. Having a transparent
background is causing it to overlap just a tiny bit and
cause that little line. In this case, if you want
a lighter background, rather than changing
the Opacity, change the color up here. Here's a tip if you don't
know this if you hold down Option Command and start to
move one of the sliders, all of the sliders will move. The hue will stay the same, but everything will
get a little lighter. That's a better way to make
a lighter background in that same color
than using opacity. Now the same is true
if we were to make our motifs have a transparency. If I select all of them, make them, let's say 50 percent. I get this. Now
because our background is transparent and
so are our motifs. Now that line goes
through everything. In this situation,
there really isn't a good fix for the problem so I really avoid transparency
in my patterns as much as possible to
avoid this altogether.
6. Cropped Repeat Tiles: Some designers, as a final step in their repeat pattern making process will crop their
final repeat tile. To do that, you would go in, find your bounding box, and then right-click
and arrange, bring it to the front and
now select everything, go to Pathfinder
and click on Crop. Now I can understand
the appeal of this it's really clean
and simple looking. I actually used to do this too
with my patterns because I didn't fully understand
how bounding boxes worked. But I recommend not doing this. It's a lot more prone to
having those artifacts, the hair lines in it
and it's also easy to introduce mistakes.
Let me show you. Here's a box filled with our
pattern and it looks great, except there's a
little line down here, maybe that's an
artifact so we go in and every time I zoom in, that line is still there. We've got a problem with our
pattern so as we did before, I'll go along here and see
if we can figure out what's wrong and there it is. Somehow this element
has been nudged out of place beyond the edge of the tile and so that's
what's causing the line. There's also a vertical
line that won't go away so if we zoom way in, you can see that right here is a little tiny spot
that's out of place too. If I go back to my pattern tile, that was this item here
so if I zoom in you can see that it's out of
place but in this case, it's actually not out of place, it has a stroke on it and the stroke is pushing it
outside the bounding box. If I get rid of that, now it all lines up and that
part should be just fine. But remember there was
that other spot too. It's really hard to see, but this one point here
is out of place so that tiny little movement that can
happen so easy when you're editing something and you just bumped something out of place, it can take so long to figure out what is
wrong with the pattern. It's so much easier if you
don't crop it like this. The other thing to
understand when you crop it, you're changing each
element so over here, each element is grouped and so if I wanted to
move this flower, I can and it doesn't change
anything in the background. But over here, first
it's all grouped, so I'll ungroup it
by right-clicking. Now I go into move that
flower and it's not connected to its stem anymore but when
I drag it out, look at it, I've just cut the
outline and now each of these elements of that flower are a separate shape and it's cut out from
the shapes underneath. Over here, the background is a solid square of black but
over here after cropping, it's cut out little
pieces of the background. Once you crop your tile, there really isn't any way
to make changes in it. If you do for some
reason have to crop it, always duplicate it and keep the original so if you do need
to go back and make changes, you can do it on
that original one. Like I said, I
understand the appeal of a neat and tidy cropped
repeat pattern tile. But if you're wondering
if your client will be confused when you send
them a pattern tile, looks like this then consider these examples of hand-drawn
early 20th century repeats. They're definitely
not neat and tidy, but they also share a lot of same characteristics
as our floral repeat. Just trust that when you send a repeat that looks like
this to your client, they will know what
to do with it. If you're still not convinced
there is one other option and that would be to create a clipping mask for your repeat. To do so, you'd go in and find your bounding box
and copy it Command C, right-click and paste in front. Let me give that a
fill so I know it's in front and this is why. Sometimes when you
say paste in front, it just means paste in front of the element
that you copied. In this case, it's still not in front so I'm
going to right-click again and arrange
and bring to front. Now I'll select everything
and go to Object, Clipping, Mask, Make. Now we get that crop look but
if I look at the outline, you can see that all the
elements are still there. If the client or you
need to make changes, all you need to do
is go into Object, Clipping Mask, Release, and now you're back
to the full pattern. That gives you a lot
of different options for your pattern tiles.
7. Project & Review: Well done. Congratulations
on finishing the class. Now you should have
a lot more knowledge and techniques that you can use to diagnose and troubleshoot any technical problems
with your repeats. To review, you know that if you've got a really
wonky looking pattern, that is probably a
bounding box error you need to make sure
there's a bounding box, make sure it's invisible, and make sure it's at the back. You have a trick now with
the marker to be able to check for alignment
and color problems, and you have a better idea
when hair line breaks between your pattern tiles are there
going to be a problem or when they're just merely an
artifact that you can ignore. You learned that it's better to extend your background
colors beyond the bounding box and to avoid
cropping your repeat tiles. Now these skills may
take a little bit of practice. For your project. I have created
three patterns that all have multiple
flaws in them and I've uploaded the Illustrator
file for those to the projects and resources
section of the class. You'll find them
on the right side of the page right here. To download, just
click on the file. If you're on a Mac, you'll
have this icon up here. Just click on that, you'll find the file here. Now if you just click
it and open it here, it will open as a PDF and you want it to open up
as an Illustrator file. Instead of doing it that way, just take that file
and drag it down across your Illustrator
icon in your dock, and it will open in Illustrator. You can download them, look them over, figure out what's wrong with them
and correct them. If you get stuck, there
is an answer sheet too. You can get some hints as to
what's wrong with repeats. Thanks for taking the class. I do have one favor to ask. If you could take a minute
and review the class, that helps me out a lot. Skillshare release
stresses having good quality classes
on the platform. Reviews are important
part to this community. If you want to know when I publish other classes,
please follow me. You can also get on
my emailing list, where I also provide lots of tips and tricks for both making mockups from my mock-up
academy classes and also things about
surface design. You can do so on my
website, chrisruff.com.
 Kris Ruff, Surface Pattern Designer & Coach