Transcripts
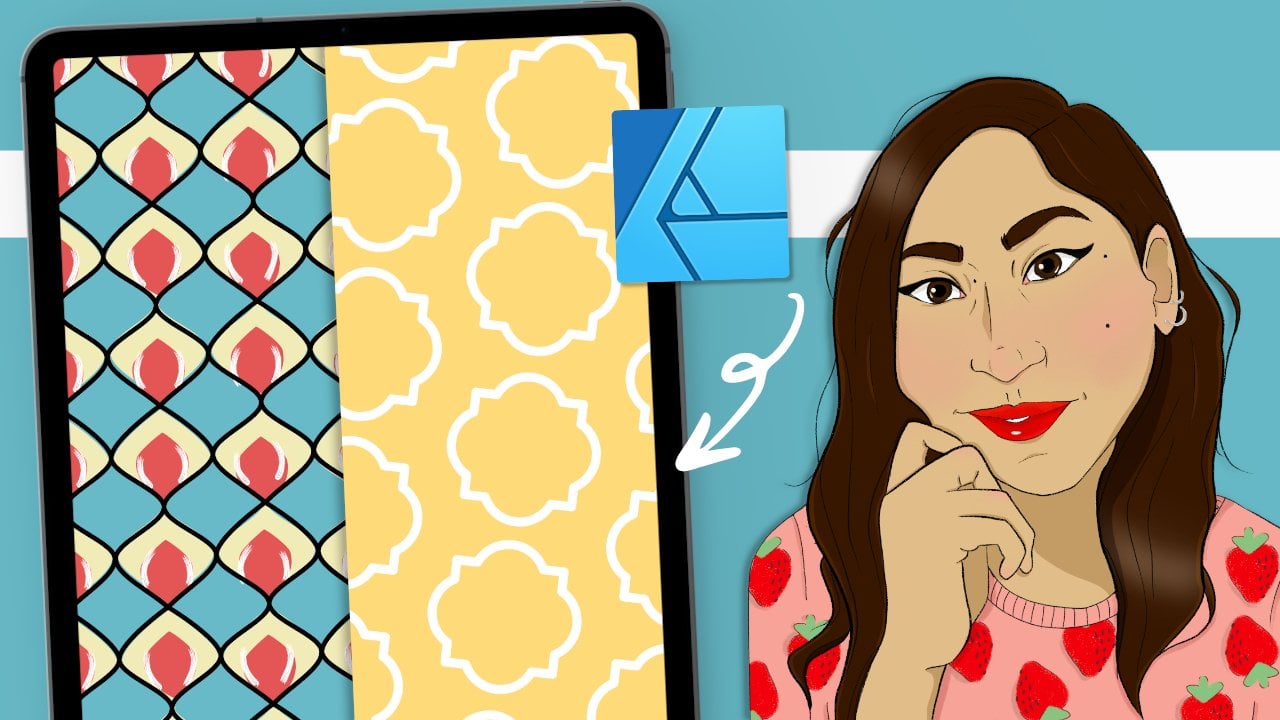
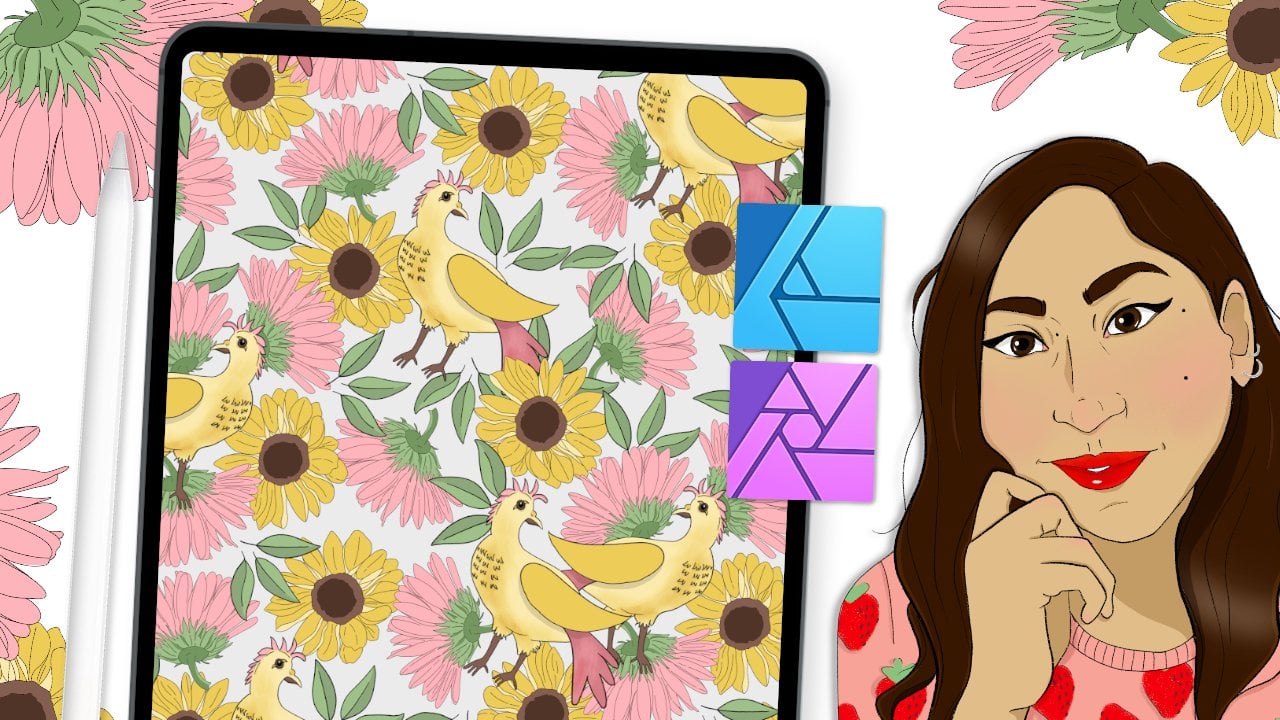
1. Course Intro: Hi, everyone. Welcome to my latest class. If this is your first class with me, welcome. I'm Jen Veguilla-Lezan and I'll be the one guiding you through this creative course. I'm a freelance graphic designer, illustrator, and educator based out of the Midwest, and I run Bella and Sophia Creative Studio. If you want to learn more about me, check on my YouTube channel, the Freelance Life. You will get a behind-the-scenes view of the work that I do as a creative freelancer and the work that goes into making classes just like this one. I am a huge advocate for sharing knowledge in accessible ways, and places like Skillshare and YouTube allow for that and help me to connect with a diverse group of people looking to learn and grow. This month, I wanted to build off of last month's class and keep exploring our creative skills in surface pattern design. Last month we worked on learning how to build four different repeat styles in Affinity Designer for the desktop. This month, we're going to learn some similar concepts but how to do them in the Affinity Designer app on the iPad. I wanted to share this process on the iPad as the interface is quite a bit different than the desktop interface. I know how important it is for those of you who work on the go to be able to utilize the iPad in your work process, and it always helps to keep things streamlined if you can work in the same software but in different environments, like desktop versus iPad. If this is your first foray into my classes relating to surface pattern design or your first time building patterns on your iPad, I highly suggest you check out my previous surface pattern design-intensive course. In that course, I show you the basics of surface pattern design and building repeats on the iPad. In today's class though, we will take that process a little further and explore how to create two of the most common surface pattern repeats. The full job repeat, but with a twist, as we're going to be creating it in a rectangle format rather than just the square format that's typical, and a half drop repeat. Expanding on the types of patterns you can create helps to add visual interest to your patterns. Choosing the right pattern repeat for your design will depend on what look and feel you're going after, but the wonderful thing is that once you get the hang of things, you can keep experimenting with your repeat layouts until you get the result that you're looking for. What is this class about? In this class, I'll walk you through my process on how to make two of the most common surface pattern designs in Affinity Designer on your iPad. This course will help you understand the process using the interface on the iPad app. The two repeats that we will review are the full drop in rectangle format and the half drop repeat. We will create a template and we will work on designing these patterns and creating a seamless repeat using illustrative motifs. We will also touch on some really helpful tips to help establish creating really strong repeats. This course is designed to give you all the technical skills that you need to start designing the full drop in rectangle format and the half-drop repeat using the Affinity Designer iPad app. Keep in mind though, it doesn't go into as much detail as that surface pattern design-intensive course that I mentioned earlier. This class will get you comfortable building a repeat pattern template as well as help you learn more about the tools and the studios on the iPad app, as well as familiarize you with some of the layer effects, geometry functions, and transform options that will aid in building a repeating pattern in Affinity Designer right on your iPad. We won't be going through the entire process of surface pattern design from concept drawing to final pattern though. Instead, we're going to be focusing on understanding the mechanics behind and constructing each of these pattern repeats. If you want to learn the very basics of surface pattern design using your iPad, Affinity Designer, and Affinity Photo, feel free to check on my surface pattern design-intensive course. I'll make sure to leave it linked in the description box below. Make sure you also check out the class resources for your project template, a helpful resource guide on surface pattern design, and links to a Pinterest board with surface pattern design inspiration. If you want to check out some more of my surface pattern design work and other design and illustration work, make sure you check out my shop on Etsy, Bella and Sophia Creative. You can also check out my website at www.bellasophiacreative.com, or you can find me over on Spoonflower.
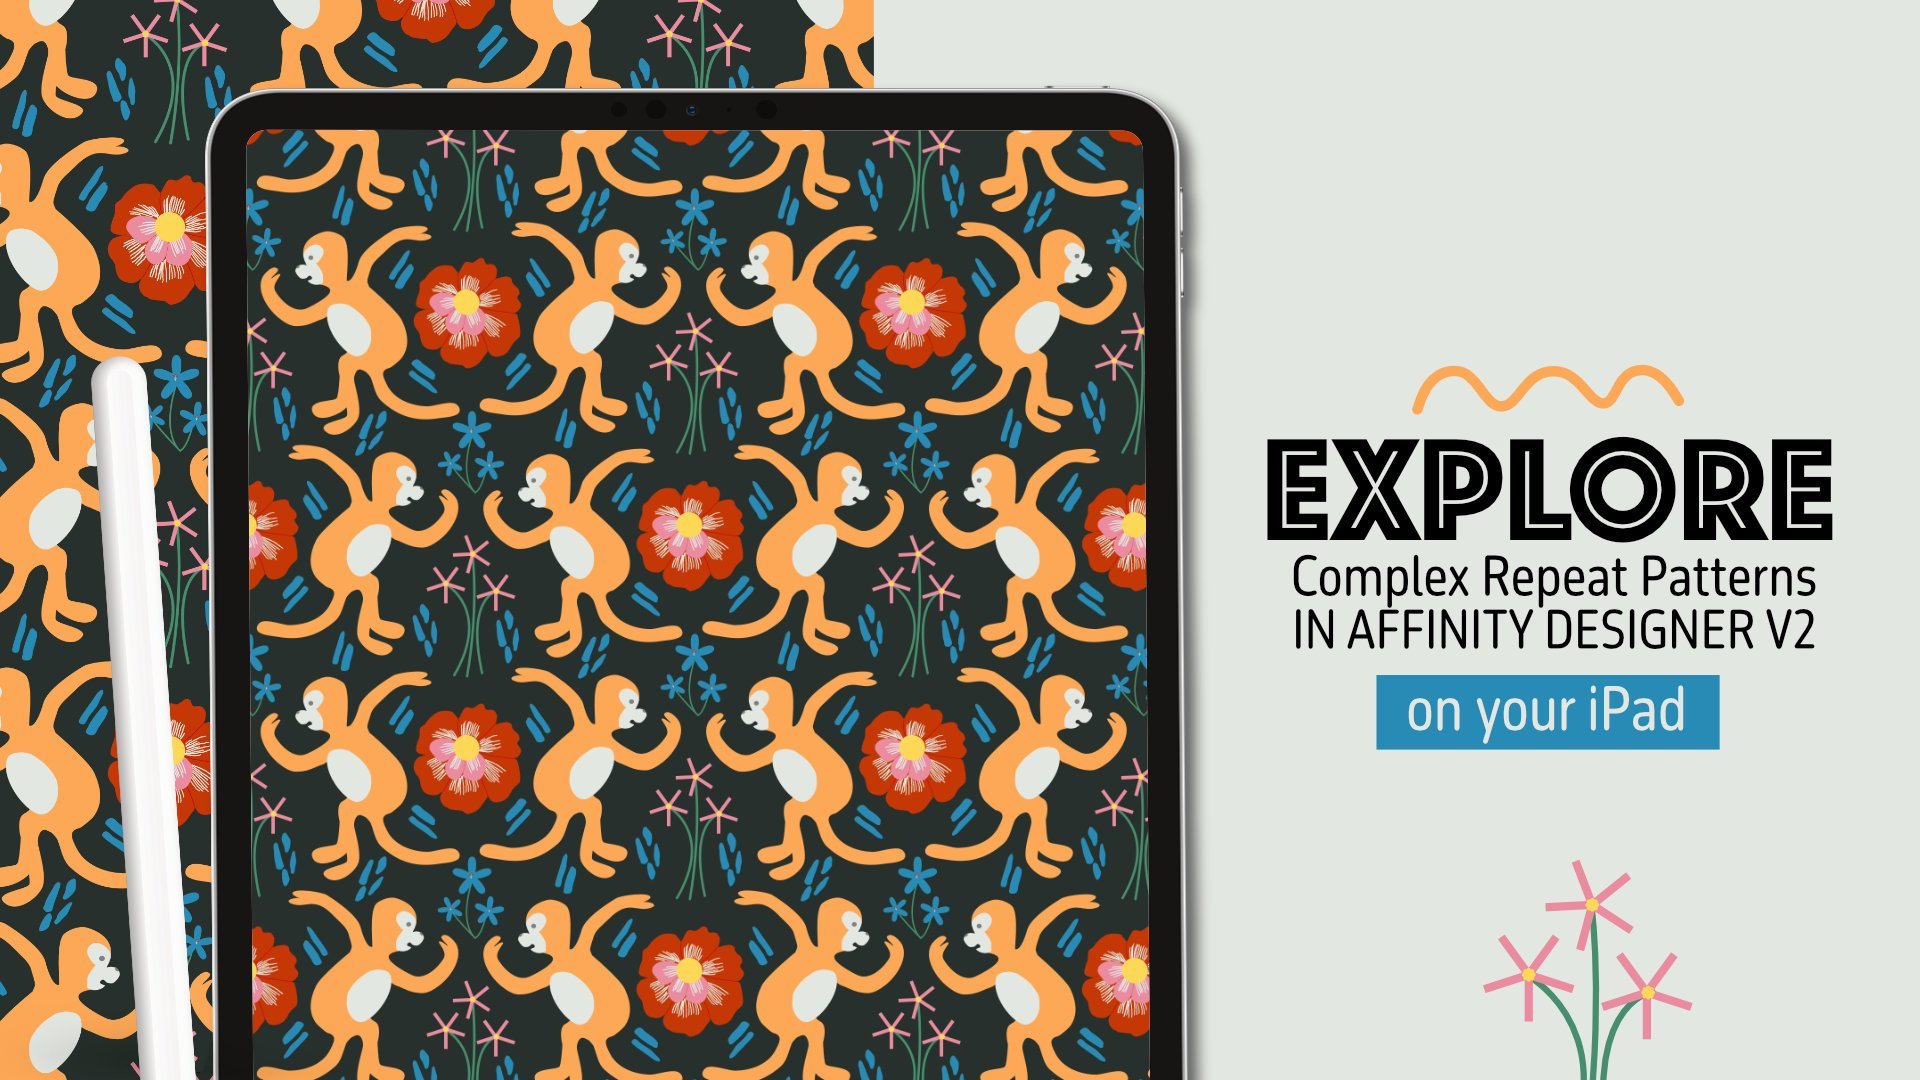
2. Tools + Class Project: When it comes to the tools that you will need, all you need to take this class is an iPad, an Apple pencil or a stylus of your choice, and the Affinity Designer iPad app installed on your iPad. When it comes to your class project, we're going to be creating two different pattern repeat cells. A full drop repeat with a twist, as we're going to be creating it in rectangle format and a half drop repeat. They will both be designed in Affinity Designer on the app right on your iPad. Once you complete them, you can submit these to the course project gallery to share with your fellow classmates and myself. For your deliverables, when you're ready, upload the following to the project gallery. Your two final patterns of full drop and a half drop showcased in your final project template. Don't stress about this, I have a part of our course that's going to go over how to use the file. Then you can share it as a JPEG file and upload it to one project within the class gallery. I'm really excited to see the beautiful, seamless repeats that you all create today. Who is this class geared towards? This class is geared towards anyone interested in learning how to create surface pattern designs using Affinity Designer on their iPad. Whether you're a seasoned pro in surface pattern design or someone just learning how to use the Affinity Designer app, I try to ensure that you will feel comfortable on the app and the course. I also know that having a portable workstation can be really important to those who freelance or who work remotely. I found that there's literally a seamless transition between working on the Affinity apps right on your iPad and the Affinity software on your desktop. This is why I wanted to make sure to walk you through the process of creating these repeat styles also on your iPad. I also know that surface pattern design can feel a little overwhelming when it comes to using software and technology. But for this class, I wanted to show you how to create some of the most popular styles of repeats in a really easy to follow manner that can help you grow your surface pattern design portfolio. I truly hope that you find it helpful. I'm looking forward to creating with you today. Let's get started.
3. Tips for Designing Strong Repeats: Before we begin to design all of our templates and the full drop and our half drop repeat, I want to share some things to note when it comes to understanding the mechanics and how these repeat patterns work. When it comes to a full drop repeat, in a full drop repeat, artwork is repeated along the horizontal and vertical lines. The motif repeats perfectly along the vertical line of the fabric. It also repeats perfectly along the horizontal line. This is called a square repeat because the repeat often forms a perfect square. But as we're going to see with our project, we're going to be creating a rectangle shape repeat. Rectangle shape repeats are also considered full drop repeats. If your horizontal repeat, for instance, is a bit longer than your vertical repeat, the overall pattern would create a type of rectangle. The same thing would happen if the vertical repeat was a bit longer than the horizontal. Either is a perfectly acceptable style of repeating pattern and they're still considered a full drop repeat. We'll see this as we're working on building our pattern. The next thing I want you to note is when it comes to understanding a half drop repeat, the artwork is repeated along the horizontal and vertical lines, just like in a full drop repeat, but this time however, the horizontal repeat is staggered. The motif repeats perfectly on the vertical line, but then it drops exactly half of the vertical repeat along the horizontal line. Looking at this from a visual perspective, the idea is that essentially the top and bottom of your repeats are exactly the same, just like what we see in a full drop. But when you're looking at the left and right, whatever you put on the left will go on the right, only it's going to go down half a step down as we see in this visual. Now I'm going to share some helpful tips when it comes to making your patterns. My 1st tip is make sure your elements are cohesive and balanced. Balance will help your design feel visually complete and harmonious. You want the elements within your design to work together as a group. Make sure your colors work together, that any textures you use blend nicely, and that the layout works with the motifs that you created and that you are looking at the size of your motifs in relation to one another. The 2nd tip I want to share is using contrasting elements to create visual interest in your design. Counter your concepts. For example, softer colors might blend really nicely with a pop of color. Textured areas might work really nicely with plain areas of focus. Large and small motif designs combined to help create something interesting to look at. Think about contrast and how you can utilize that within your overall design. Tip number 3 is create an area of interest in your design or a focal point. The idea is to have one area draw the viewer's eye in more. This helps to ensure that your design isn't too overcrowded or busy. A focal point can be created with a specific motif or colorway. One motif can be more detailed than the rest, or color can stand out within your overall design or pattern. My 4th tip is to play around with your pattern repeat design type. You're learning two different styles today, but I do have classes that teach four different styles. You can definitely check that out. But don't be afraid to change things up. If something doesn't feel right as a full drop, maybe try it in a half drop or maybe check out something like a brick repeat, which I share in my last surface pattern design class. By changing the repeat type, you can change the look and feel of your overall design. Remember, half drops tend to make it harder for viewers to find where the repeat starts and finishes. That's always a good option to go for. My last and final fifth tip is play around with size and placement of your motifs. Try creating your layouts with two or more motifs in varying sizes. Also, you can flip and rotate your motifs so that they're not all facing the same direction. Personally, in our 1st layout that we're going to be creating, I show you a directional print, but that's just because I want to be really obvious about the placement of that top and bottom so you can see where those repeats start and end. But if you flip and rotate your motifs so that they're not all facing the same direction, this can actually help give the illusion of your layout being random, even if you're placing things in really specific areas. Also, keep the spacing of your motifs balanced and equidistant if you're going for an airier feel to your layout, but if you want to really dense feeling layout, don't be afraid to overlap items. That's it for the tips to help make your pattern stronger. Now let's jump into creating our 1st repeat, the full drop but in rectangle format.
4. Setting up Your File in Affinity Designer: To start with, we want to launch Affinity Designer. Depending on if you just downloaded the app, it may be somewhere within your gallery or if you're like me, you've placed it on your doc for easy access. Affinity Designer is the blue icon here. We're going to launch it. What we're going to be doing is setting up our file for the template. If this is the 1st time that you've used Affinity Designer, there may be nothing in your gallery. But I use this professionally for work, for freelance projects as well as for some of my other surface pattern design work. What we want to do is go to the upper left-hand corner here and we're going to select the plus sign. This is going to take us to the new documents menu. You can select new document, but there's also other options here. You can select new from clipboard, new from template. You can open from your cloud in your file system. You can import from photos and things like that. But what we want to do is select New Document. What we're going to do is set this up so that it is a rectangle shape. Because we're going to start on our full job first and then we'll get into creating our template later for our half-drop when we start in that section in the class. What we want to do is set up the dimension so that they are in pixels, so it's easy for us to read. You can also do it in inches if you prefer. But for now I'm just going to do pixels so it's easy to set up something along the lines of like a high-definition size range for maybe a background, for a computer or a background screen or something like that. I'm going to do pixels and then I'm going to go to my right-side here and select dimensions and I'm going to update my width and my height and my DPI. I'm going to change my width to 1,280 and I'm going to change my height to 720. Then I'm going to change my DPI from whatever it is right now it's a 144 and I'm going to change it to 300 just so that I have a nice high-quality image. Then what we want to do is make sure our orientation is landscape and that we want to select transparent background and we are going to select Create artboard and then hit "Okay". This is what your screen will look like once you have your artboard setup. What we want to do next is basically set up our preview. Since our artboard is 1,280 by 720, what we want to do is double that number and we're going to create another artboard to the side. Let's double that so that we can see this print in preview or we can see this pattern in a preview like a live preview off to the side here as we're working. What we want to do is go into our menu bar up here and it's important to know and orientate where you are in the software. I think when I did this class originally, I did Affinity Designer on the desktop and I know things look just slightly different on the iPad. Up here in the upper left-hand corner is your main menu options. You'll have your document menu, your edit menu, things like that. On the left-hand side here, you'll have all of your tools and on the right-hand side here, you'll have all of your studios, which includes things like your color options, your layers, your brushes. Then what we're going to be using most, which is the transform tool. I'm going to click on my little tool option here, my studio option, and I'm going to have it pull it back in just so that we have space and we can see. Then we're going to go up to our main menu here at the top, we're going to select our document menu. What we want to do is scroll down to artboards and we're going to click on that. Basically what you'll see is this little menu popup at the bottom. What we want to do is just hit "Insert artboard". What that does is basically adds another artboard in the exact same measurements as the original artboard. What we want to do is update this though. Essentially, this is our tile and this is going to be our preview. But what we want to do is double this new artboard inside. We're going to go on the right-hand side and we are going to select our transform studio, which is at the very bottom. It looks like a square with a quarter cut out of it. What we want to do is update our width and our height. All we have to do is double that in size. So 1,280 times 2 is 2,560. We'll go to our width here and we'll click on it and then we will update it to 2,560. Then we're going to double our height, which is 720 by 2, and that's going to be 1,440. We'll update that to 1,440 and then hit "Okay". Then what you'll see, I'm going to click on our transform studio again. It'll pull it in. What you'll see is that it's doubled our original artboard in size. The idea is that this is our tile. If we divided this in half going horizontally and vertically, each tile will take up a quarter quadrant of this full area.
5. Setting up the Live Preview: So now what we want to do is set up the live preview. So we have our Artboard set up, now we need a set up the live preview in Artboard 1, and in order to do that, we're going to be utilizing the symbols options. Your symbols options are on the right-hand side here. It's in the right-hand studio here, and it looks like a rounded Mercedes Benz icon, it's the easiest way I can think of describing it. So in order to update this Artboard so that we can utilize these symbols functions in the studio on the right-hand side. What we need to do is go to the left-hand side and we're going to go to our shape tool. Right now the rectangle is the option that's selected. But if you have a different shape tool, all you have to do is click and hold on that and you'll see a pop-up that gives you all of these additional options. We just want the rectangle tool and I'm going to go to the right-hand side and update my color options here. I'm just going to make it so that it's a color that's easy to see to start with. Then I want to make sure I don't have an outline. So if you notice you have an outline, just click on the outline, and then you'll go to your Quick Colors here at the bottom and there's a circle with a blue line through it that removes your outline. So just click on that and then just make sure you select your fill color so that it's on top again. Then I'm going to click on my color options again so it drags it in. Then I'm just going to take my pencil or my stylist and I'm going to drag it so that it goes all the way across the Artboard. If you're having any issues making sure it's the exact same size of your Artboard, you can always adjust in your transform tool. I'm just going to undo by taking two fingers and tapping. I'm going to make sure magnetics is turned on. It's on the lower left-hand side, it's right underneath the X and right above the garbage can and you're going to select that and that will allow my shapes and anything that I put on the string to click into place. So I want to make sure I have my square, my rectangle tool selected and I'm just going to drag from the corner making sure I'm as close as I can be and what's nice is that the magnetics will make sure that everything is in place because you'll see this little red and green guideline pop up and you'll know everything is in place. Then you can also double-check by going into your transform studio by clicking on it and then just looking to see that the dimensions of the rectangle that you created are 1280 by 720. If that's the case, everything is in the 0.0 position for x and y, you are good to go. So you can just click back into your transform tool. Select your move tool, click off of your Artboard 1. Select your move tool, and then just make sure that your rectangle is selected. You'll know it's selected because you'll see these blue guidelines around it. What we want to do is turn this little selection into a symbol. So we're going to go to the right-hand side, select our Symbol Studio, and then what we want to do is click on the little hamburger menu and we're going to select Add Symbol from Selection. That'll create the symbol for us and just make sure Sync symbol is turned on as well. You'll know it's turned on because it'll be highlighted in blue there. Then what we want to do is copy that and we're going to paste it four times over here into our bigger Artboard 2 for a live preview. So making sure the rectangle on Artboard 1 is selected. We're going to go to our Edit menu, and then we're going to select that three-dot menu which is basically like our Edit menu, and we're going to select Copy. Then what we want to do is go over to Artboard 2. We're going to click on Artboard 2 making sure it's selected. You'll know it is selected because you see that blue outline. What we want to do is go back into our three-dot menu and we're going to paste this four times. So 1, 2, 3, and 4. The idea is we're going to drag each of these rectangles into the four corners of the larger rectangle. So take your Move Tool and you can just click on your symbols for now and move it back into the studio and you can just select your Move Tool, that little arrow, and you can just drag your first square into the upper right corner and you'll see everything's in place because you'll see the red and green guidelines popping up. But there's also a way to check and I'll show you how to do that in a moment. Go back to the original square and then we're going to drag it down and into our left lower hand corner. Then go back to the original again and we're going to drag this to the lower right-hand corner. You'll know everything is selected because you'll see your guidelines pop up in all four corners. Then you can also go back and just double-check your work here. This original square here should be at 0.0 in your x-y coordinates. So we can go to our Transform tool again, it's that third option from the bottom that looks like a square with a quarter cut out. If you go to your x and your y here under position, this first one should be at 0.0. This second one should be at 1280.0. This third one in the lower left-hand corner should be at 0.720 because again, keeping in mind our original size is 1280 by 720. So this will be 0.0, 0.1280, 0.720, and then this one should be 720, 1280. So 1280 in our x and 720 in our y. That's how you know everything is in the exact place that you needed to be. Then what I like to do is just go into these options and lock them in place so that they don't move. So what I'll do is I'll go into my layers studio here, I'll select it. Then I'll go under Artboard 2, which is what we're on right now and I'll select each of those symbols by clicking on the first one and then dragging across right to select the second, the third, and the fourth. Then I'm just going to go into my layers options, which is this little circle with the three dots in it. And I'm going to select my lock option and it will lock everything in place so it doesn't get moved. Then what I like to do now is just test everything to make sure it looks all right and that it's working properly. So I'll just go to my tools on the left-hand side here, select my rectangle tool, and then I'll just update the shape. I'll just select this cloud. Then I'll update the color in the right-hand color studio just so that it's easier to see. Then I'm going to go back onto this Artboard. Then I'm going to create a shape on it. The easiest way to check to make sure this works is to do this and if you're seeing like I'm seeing right now that the shape isn't popping up. That's because we need to go back into our layers. It's important to keep in mind that with this Artboard, we need to make sure that the cloud or whatever shape we're creating or adding in is underneath our symbols options. So what we need to do is take that element, click on it, and drag it so that goes on top of our symbols tool and you can just click on it. I'll do that again, we'll go to our layers. We'll select that cloud layer that I just created and I'm going to drag it so that it goes right on top of my original symbol, right on top of my symbol shape. Basically, it's going on top of the symbol shape because you'll see a blue line that goes through that layer. Also, you want to make sure it goes where that orange line is. Once you do that, you'll see it pops up on all four quadrants. Basically whatever you do to this tile here will happen over here on the right-hand side.
6. Importing Your Motif Elements: I'm going to get rid of that and I'm going to actually update my color of my symbols here just so that I can start to pull in my motifs and I want to make it easy to see. I'm just going to change it to white. Like I said, whatever you do to this symbol is going to update all the rest of them. That's the beauty of this whole entire process. What I want to do now is start to import my motif elements. Like I said, this isn't showing you the entire process from start to finish. I want to focus more on how to work this template in the Affinity Designer app on your iPad, so I've pre-made motifs. The easiest way I find is to place or open up your file in Affinity Designer. I'm just going to click this little back arrow here. It's going to take me back to my gallery. I already have some motif elements that I created that I was working on for some other projects that I think will work really nicely for this, but you could also just open up a file. These sketches I originally did in Procreate. I can open up a PSD file in Affinity Designer. I just saved it. I exported that Procreate file as a PSD file, and then I can open that by going to my upper left-hand corner, selecting the plus. Then I can open from Cloud and then I can just find that file that I've created. I exported it as a PSD and that's this file right here, and then I'll be able to open that directly in Affinity Designer. That's what I love about this is that it's very flexible in terms of the file types that you can utilize and open. I have all of these files in different layers. I don't want the white background layer, I just want the outline in the color layers. I also want to make sure these are all separate elements. When I was drawing this, I didn't keep in mind having each of the elements on its own layer and I have a feeling a lot of people tend to do that. I'm just going to select my outline layer and then drag across to the right on my color layer. I'm going to select those two elements and then I'm going to go and group these. This little puzzle, icon here groups your elements. I'm going to go into my persona options, which are right next to my menu options here in the upper left-hand corner, and I'm just going to select "Pixel Persona". What this does is that it gives me the Affinity Photo options right within the app and I'm able to then utilize the Freehand Selection Tool. What you want to do is once you've grouped them, you want to go to this little stack option here, which gives you the options to flatten your image. I do this because in order to cut the pieces out individually, I need to make sure that the PSD file is flat. What I want to do then is select "Merge Down", and it will then create a pixel layer so that I can pull each of these elements out. What's nice too is that I don't have the background turned on, so I don't have to worry about having a white background or anything like that. Then I can go to the left-hand side and go to my Tools and select my Lasso Tool here, making sure that that correct layer is selected. I'm just going to click back into my layers so that is pulled in. Then I can go through and select each of these elements individually. Then I can go to my three dot menu here and I can select "Cut", and it'll cut it out. I can just go back to that three dot menu and select "Paste", and I'll paste it in. It'll create a new layer for just that element. Then you'll want to go back down to your next layer and select the next item that you want to utilize. Then go back to that three dot menu, select "Cut", and then select "Paste", and then just repeat this process. Obviously, a way to bypass this is to just make sure when you're working in something like Procreate or if you're drawing directly here in Affinity Designer, which you can in drawing color directly in here, create all of your motif elements in here. I just started working in another app and ended up deciding I wanted to use this for this project. But the easiest way to bypass this is just to make sure each of your elements are on its own layer, but if you don't, that's okay and you can just follow this process like what I'm doing here and basically cutting out each of your motif elements and pasting them so that they're all on their own layers and then you can select those elements. By going back to your designer persona, you can just deselect. Once you're done, just click on your Freehand Selection Tool and then just click on your screen anywhere and it'll de-select. Then you can go back to your designer persona and you can just utilize your Move tool and select your element and you'll see each element is individually selected. To select multiples, you can just click on one, hold your finger down on your screen and click on the additional ones that you want. It will select all of them at the same time. Then you can just go to your Edit Tools here and select "Copy", and then go back out into your gallery, go into your new file, go to your Edit Tools again and select "Paste". They might be much larger than you're needing them. You can just resize them. To resize with everything in proportion, you can just hold your finger down and pull from the corners. Everything should be resized in proportion to what you need it to be. You can just start to place elements where you want them once you've done that, or you can just work on the file in your Affinity Designer app like I was doing here. Then you can just select everything and just copy it all and past it into your file. I was already working on this. I'm going to take all of these elements, they've already all been removed from the background. I'm going to go into my three dot menu here. I'm going to select "Copy". Then I'm going to go back out into my gallery and then I'm going to go into my original file, and then I'm actually going to move this off to the side really quick and I'm going to paste everything here so that it makes it easier for me to drag-and-drop elements that I need. I'm going to go to my three dot menu and I'm going to select "Paste" and I'm going to drag everything over. I might just resize things as needed as well. Once I've dragged everything off to the side, I can just go in and individually resize things so they're just a bit smaller and so that they'll fit better in my art board here. I'm just going to click on each element individually and dragging from the corner to keep the constraints and then just resize everything as I need it.
7. Creating the Full Drop: Once I've resized everything, then I can just start to play around with placement. Remember that when we're working with a full drop, it's really important to note that whatever you you on the left-hand side has to be placed in the exact same place on the right-hand side. Whatever you put on top has to be placed right in the exact same place on the bottom. I'm going to just start with building my edges and then I go into the middle and build out the center. Let's pull this in. I'm going to start pulling some of these elements and then remember we have to make sure that the elements are placed within the correct layer so that they are right within our symbol option. We're going to go down. I just placed this like Long John doughnut sketch here. I'm going to go into my layers I want to make sure that that layer is selected and then I drag it. It goes right on top of our symbols layer. Then that way it'll pop up on all the different centers here. I think I'm going to just place the elements that I want first and then we'll go in and start building our corners. As I pulled them in I noticed they're very large, I'm just going to resize things down a bit and just figure out the different elements that I want to use in this and pull them in. Then maybe this cupcake. Again, resizing elements as I need them. Some of these additional sprinkles as well. I think I like these elements to start with. We can repeat them and copy them and paste them as we need. What I think I'm going to do, because keep in mind the length and the width. Then keep that in mind as I decide where I want to place some of these elements. I think I'm going to start with the sides first and then do the tops. I think I want to play around with placing each of these elements here on the left-hand side. I need to select all of these [inaudible] first and then go into my layers here and then make sure I drag all of them so that they are on top of this symbols and so that they show up on all of the different elements here within our preview. Let's start with building our sides first. I'm going to take this like juice box here, move it to the side. I think maybe I'll have that be my corner. Then remember, keep in mind that whatever you put in one corner has to be in all four corners in the same place. Since I'm putting this in this corner, I'm just going to copy it and then paste it. Then I'm going to go into my transform tool and I'm going to right away pull it to my first corner here. We know that the width here is 1280 so we're going to go into our x position because we're moving from left to right. We are moving in our x position. If we were moving from top to bottom, we'd be moving in our y position. We want to go to our x position and we'll click on it and then you'll get this pop-up. Then you're going to select plus 1280 because that's the full width of our rectangle here and then hit "Okay". Now what I'd like to do is just select that one and then just hold my finger down so I can select the other one and have both of them selected at the same time. I can copy those both and then move them together. I'm going to select both of them and then I'm going to go up to my three dot menu and I'm going to select copy and then paste. It's going to paste it right on top of it. Then we're going to go to our y position. Since you're going from top to bottom, we need to go to our y position. We are going to click on that, you'll get that pop-up. We're going to select plus 720 because we're going down and we know our full width going down on a rectangle is 720. Then hit "Okay" and it will place it exactly where we need it. Then if we zoom back out and you'll see that the placements are already starting to pull up in this preview. I think I'm going to also put this little cake here and maybe the strawberry as well. Then keeping in mind the placement of these both, I'm going to select them both and copy them and then move them right away to the right-hand side. Then what I want to do is go to my edit menu. I'm going to select Copy, and then I'm going to paste it. It's going to paste right on top. Then what we need to do is go to our transform studio here on the right-hand side. Then I'm going to go to my x position because we're moving from left to right again, I'm going to click on the x. I'll get this pop-up and then because we're moving from left to right, we just have to keep in mind the width of our rectangle, which is 1280. We just have to select plus 1280 and then hit "Okay" and I'll move it exactly to the other side where we need it. Then you'll start to see the edges of our print beginning to take shape. Now maybe again to build out this top portion. Because this is such a long width, I'm going to go in and utilize some of these longer shapes here. I'm going to select that Long John doughnut. I'm just going to move that up top here. Then I'm just going to finish out this edge and then I'm going to copy all of them and pull everything down to the bottom. I think I'm going to also just utilize the rest of the elements that I have to fill in space. Then I think I'm going to duplicate that doughnut as well. I'm just going to click on it, select my edit menu, that three dot menu and select Copy and then go down and select Paste. I'm going to drag it over to the right side here. I think this will be a nice way to give some uniformity. Keep in mind as you build this out full drop repeats, you can have them also be non-directional. I have everything going up and down right now. But you could have things flipped and turned around and rotated. But I just want to highlight how this edge is important. I'm keeping in mind direction, I'm making it a directional print. Once I've place that, I'm going to find things and move elements around. I just want to make sure everything has a good amount of space between it. Nothing's too close, nothing's too far away. Then once I've placed everything you can see them start taking shape here. Then what I'm going to do is select all of these, copy them and bring them all directly down so that we can complete the edges and then we can start to fill in the center. I'm just going to move some of these sprinkles out of the way. Then I'm going go into my layers and I'm going to select the items on this upper edge here. I want to have everything close together that need to be selected. I'm going to select that cupcake and bring it up so that it's right here with the rest of the elements that are on our top edge. Then this little milk jug here as well. Then down here on the side edges here, I'm going to go into those layers I'm going to select them. Then I'm going to group them and lock them so that they do not move. I'm going to select my first and then drag across the rest of the layers to the right to select all of them together. You'll see that they're all selected because they're all outlined in blue. Then I'm going to go back into my layers. I'm going to select the group function here, that little puzzle piece. It's going to group them all together. I'm going to select that group. I'm going to click on my three dot menu my layers options here, and I'm going to rename them. I'm going to change it from group by clicking where the word group is. It's going to give me this pop-up. I'm going to rename them by clicking inside where it says Enter name. Then I'm going to select this little button here and then click on the little keyboard and I'll get my keyboard, and I'm just going to name this group edges, side edges. Then return and hit "Okay". Then in our Layers menu here, if we go back out of our Layers Options, you'll see that they're all grouped together and this way, what I can do is then go back to my Layers Options and I can lock it so that they're locked in place and they don't move anywhere. Now we'll go back into our Layers again, out of layer options, select the top elements. I'm going to click on that first layer and then drag across the next layer to select it so that these all get selected together. I'm going to select all four of these elements. I'm going to go into my Edit menu, I'm going to select Copy, go back into my Edit menu, select Paste, and then I'm going to then go into my Transform studio here and I'm going to go to my Y position. Since we're going from top to bottom, remember we have to select the Y position and what we're going to do is select plus. Since we know that the length is 720, we just have to tap in 720 and then hit "Okay". It'll drag it exactly where it needs to be positioned, but on the bottom side of our tile. Then you'll see that everything's created this nice clean tile so we can preview what that looks like in our live preview here. Now we can then just start to fill in this center area here. I'm going to use a combination of all of the elements I've already used, plus these little sprinkles just to add a fun effect. But before we do that, just like what we did with the side edges, I'm going to group the top and bottom and I'm going to lock them in place so that they don't move. I'm going to go into my Layers, I'm going to go into Artboard 1, and I'm going to select all of the different motif elements that I have placed on the top and bottom. I'm going to select the little puzzle piece option, which is basically a group function and it's going to group them all together with that layer group still selected, you'll see it's highlighted in gray. I'm going to go to our Layers Options, that little three dot menu, and I'm going to select Lock. Then I'm also going to click where it says Group up here and I'm going to rename this, and I'm going to rename top bottom edges. It's just so that I know what it is, where it is, and it's just a nice way to keep my layers organized. As you see, we start to organize all of these elements within that Artboard 1, which is our tile piece. Now that we have all of these elements, you can begin to pull in different elements if you want different motif elements or you can reuse the same ones that you already have. I think I'm going to pull in this donut and just resize it down a bit and utilize that as an option and then repeat some of the elements that I already have, but I think I might also want to pull in this little baguette bread as well. I'm going to pull that in over here, resize it because they think this shape will lend itself well to what we already have here. Now that I have that then what I want to do is just make sure these layers are in the correct symbols layer. I'm going to select it, drag it down, place it right on top of my symbol layer so that it will pop up the rest of our preview. Then I'm going to go back into my Layers once more and I'm going to duplicate some of these elements that are in the top and bottom and sides. What I think I'm going to duplicate is I'm going to go into the group, with those elements, I'm going to select my drop-down arrow and then I'm going to duplicate the elements that I want. I think I'm going to duplicate the milk here, so I'm just going to select it, click "Duplicate", and then I'm just going to drag it out and then I'm going to go back into my Layers again. I'm going to close that group by clicking on the little down arrow and it'll close it. Then I'm going to go down to my side edges, I'm going to click on the little down arrow to open this up, and may select those different elements that I want to copy as well. I think I'm going to copy the milk, the strawberries, and the little cakes. I'm going to select the cake first, go into my three dot menu, select Duplicate. I'm just going to drag it out, go back into my Layers, select the strawberry, go into my three dot menu, select Duplicate, and then I'm going to drag that out as well. Then go back into my Layers, select the little juice box, go into my three dot menu, select Duplicate, and then just drag that out as well. Now I have all of these elements and if I need to duplicate them a few more times, I can but for now I'm just going to see how many I can use and where I'm going to place them just to start to fill up space. I'm going to go to this donut first, I'm going to move this up here; I think that'll look nice there. Pull some of these sprinkles over, resize some of these sprinkles so that they're not so big, so that I have a variety of both big sprinkles and small sprinkles just so that, again, it just creates visual interest. Then I'll just start to fill in the center with the additional elements that I've duplicated. Then I'll just continue to fill in this space and just periodically go back over to my preview so I can make sure everything looks the way I need it to look like as I'm placing it and that nothing feels like it's too close together or like it just feels out of place. Once I've placed everything where I'd like it, I'm going to go back through and just fill in some additional little spaces with some of these other sprinkles. I'm just going to go back through and duplicate them and then just bring them to some key places. Just to add some, again, visual interest, rotate them as well and I think that is it for our tile. Let's drag everything over and see what this looks like. You can see now that we have a seamless repeat. There is a little bit of some striping going on here with the long John, but I think I can I like that. If you did want to go back through say, you had something that felt like it was drawing your eye specifically and it can decipher where the print starts and stops, what you could do is just go back through and edit those areas. I could just angle this upwards a bit if I wanted, and all I'd have to do is go back into that layer group and adjust and edit those elements. But I think I'm going to keep it just as it is, I like that vibe that I get but I think this looks really nice. I think this turned out really fun and colorful and bright. If you wanted to, you could go back into your Layers and edit the background color once you've placed everything. I could go back to Artboard 1, go into my Symbols, select that drop-down arrow, and scroll all the way down to my rectangle and then I can update the colors. You can utilize the RGB sliders or you can just click where that little option is, you'll see a left and right arrow, and you can just change it to a different option to the color wheel can be helpful too. You can play around with the color to see what it looks like with different colors and options. I like this pink more than the white, but I worry that it's going to get a little overwhelming. You could do something like yellow and you can just play around with the different colors within the color wheel. If you're interested in a little bit of color theory, definitely check out my last surface pattern design class where I do this whole process. But in Affinity Designer, I do have a really comprehensive section that's all about color and color theory and how to select different colors that work well together, but I think I like this purple. I think I'm going to stick with more of a purple option here for this set, a really nice lilac color and then this is what the final print will look like. I'm going to pull that in just so you can get a better view of it. I think it turned out really nice. It's fun, it makes me hungry, and I think it definitely gives off that summer sweets kawaii style vibe. That is how we create a full drop pattern in Affinity Designer. But again, that full job with a twist because we're creating a rectangle tile versus the traditional square tile that we're used to.
8. Testing the Tile: So now that we've done that, let's export this file and then we can test it. So we're going to go into our document menu and we're going to select Export. What we want to do is update our filename so we can just click where it says Untitled, select your keyboard here and then update it. I'm just going to name this sweet-treat-tile-1. Then I want to go down to where it says area and I'm going to click on it so that I get this pop-up and I'm going to select Artboard1. That's our tile. Then I'm going to hit "Return". Then I'm going to hit "Okay". Then you can save it wherever you have a file. I'm just going to save it in my file system on my iPad under Affinity Designer and then select Save. Then what we can do is just go back out into our gallery here. We can just test this out really quick. I'm going to select the plus icon in the upper right-hand corner. I'm going to select New Document. I'm just going to make a bigger document than my original tile. My tile is 1280 by 720. So I'm just going to double that. We're going to have bigger space to work with to test out this tile. So my width is going to be 2560, my height is going to be 1440. Hit "Okay". Make sure that your orientation is horizontal. So landscape, don't worry about creating an artboard. Don't worry about transparent background. Change your DPI to 300. Select Create artboard. You don't have to worry about transparent background. Then you can select Okay, and I'll create the new file for us. Then this is where we're going to test our print. So what we'll do is go to the left-hand side, select the rectangle tool. We're just going to create a rectangle, fills the entire shape of this. If you need to just make sure you can turn on magnetics, if you can't get it to lock into place. Then what we want to do is go to the left-hand side and select our fill tool. This allows us to actually fill a shape with a pattern, so we can utilize a bitmap. You'll be able to select either that JPEG or PNG that you exported. Once we've selected that, you'll see this little pop-up. What we want to do is change our type to bitmap so we can just click those little right arrows, the right and left arrow, and just click until we get to bitmap and then you'll get a pop-up. This is our file system. I'm going to go find my file. I have it on my iPad under Affinity Designer. Then I'm just going to scroll until I find my sweet-treat-tile1, which is right here. So I'm going to click on that and it's going to basically place this tile in. Obviously this is really big. So what we need to do is size it down. So what you'll see is these two arms that come off of your shape. If you pull those in, it'll resize your pattern and you can also rotate it. This just allows you to test to make sure that your print is working properly. From what I can there's no issues with any of the repeats looking jagged or anything like that. I think our repeat is fine, so that tile is what you'll want to export that within our template there on the right-hand side. We'll go back out so we can see this again. So this tile is what you're going to want to export as that's what's repeating this right here. This life preview is just a preview for you to see what this tile looks like as you're creating it. I always still test it even though I have this just so that I can double-check to make sure that, that repeat function works with the pattern fill tool that we have here on Affinity Designer. That is it for this section. Now let's jump into creating our half-drop.
9. Half Drop File Set Up + Live Preview: Now that we're done with creating the full-drop repeat, let's get started on creating our half-drop. Just like what we did before, we're going to go into this upper right-hand corner. We're going to select that little plus icon, and we are going to select new document. Just like what we did with the full-drop, we are going to be creating a template preview with the half-drop. The only difference this time though, is that instead of working in a rectangle format, we're going to be working in a square. We're going to go to the left-hand side underneath our Document options, we're going to click where it says "Point" and we're going to select pixels. Then we are going to change our width and our height to 2000 by 2000 pixels. Then we're going to change our DPI to 300. Then we want to make sure our transparent background is selected and that create art board is selected and then we can hit "Okay". This is what our art board looks like. It's just going to be a square, and like what we did before, we need to create a second art board. We are going to go into our Document menu up here. It's that little page that looks like it has a dog-eared corner, and we're going to select Artboards. Then this pop-up will show up at the very bottom. We want to keep our preseted document and then we're just going to hit "Plus". Since we know that our document is 2000 by 2000, again, remember we have to do a little bit of math and we have to double this. This new square is going to be 4000 by 4000. But since we just hit "Plus" with the document element, I just copied and pasted the same exact thing. But what we need to do then is go into our right-hand studios. We're going to select the transform studio, which is that little square with a quarter color out of it. We're going to go into our dimensions and we're just going to double these numbers for our width and our height. We're going to go to our width. You're going to get this pop-up and you're going to change it from 2000 to 4000, and then we're going to go to our height and we're going to change that from 2000 to 4000, and it will have doubled our square. Remember essentially, the idea is that this square on the left-hand side is our tile and it's going to be repeated four times to show our preview here. Now before we get into creating the template for our half-drop, I just want to explain the mechanics in a visual format. The last repeat we did was that full-drop, and what we did was make sure that our edges, whatever we put on the top was repeated on the bottom in the exact same place, and that whatever we put on the left edge was repeated in the exact same place on the right edge. The only differences from this image that I'm showing here is that we did it in a rectangle format. Both work either rectangle or square when it comes to full-drop, it still will work as a full-drop as long as you repeat your elements on the top and bottom, and left and right. I made it really easy to see how the repeat works here. But now what I want to explain is the half-drop. This is a full-drop, and this is how the half-drop works. Basically, we are repeating elements on the top and the bottom in the exact same place. But the only difference is that on the left and right, we are moving things down a half drop. So it's important to note that whatever you're going to have on the lower left-hand side is actually going to be in the upper right-hand side and then whatever you have in the upper left-hand side will be in the lower right-hand side. Because basically what you're doing is you're taking your tile, you're moving it over, and then you're dropping it down by a half. This is how you get that half-drop repeat. That's what we're going to be setting up. Keeping in mind these parameters, we're going to be setting up our template with these tiles. Instead of just four tiles, we're actually going to end up needing five when we build this out. Let's get out of here. Let's go back into Affinity Designer. We're going to be utilizing the symbols again. We'll click in our transform tool so it pulls it in, and then what we want to do is go to the left-hand side and we're going to select the rectangle tool. Making sure Artboard 1 is selected, you'll know it's selected because you'll see these blue outlines. What we want to do is make sure that Magnetics is turned on. You'll see that little magnet icon in the lower left-hand corner here. What we want to do is go to our rectangle tool and we're going to create a square that goes exactly across our artboard size here. What's nice is that with magnetic selected, you'll see these little guidelines, it's read and green guideline that pops up as you're creating the shapes so that you know everything is in the exact place that you need it to be. I'm noticing this top part here isn't exactly where it needs to be, so I just have to bump it up a little bit. I'm going to change the color of this just so that it's easy to see. Even with Magnetics turned on, I'd like to still check and make sure everything is exactly the size I need it to be. I can go into my right-hand studios here, and I can go down to my Transform tool and I can just double-check. We know that this tile is 2000 by 2000 so we can just go into our dimensions here, making sure that shape is still selected because you'll see it's highlighted in blue. What we want to do is just double check our dimensions here, which they are correct, 2000 by 2000. Then what we want to do is go back down to our symbols, it's that little icon that looks like a curve Mercedes-Benz icon so we'll click on that. We want to go into our little Hamburger menu, the little drop-down menu with three lines, and we're going to select, making sure that that square is still highlighted. We're going to select "Add Symbol from Selection", and it's going to create this as a symbol. Then just make sure Sync is turned on. Let's click back into this so that it pulls it in. What we want to do is copy this and then we're going to paste it five times here. I'll show you why in a second. We're going to select this, making sure it's still highlighted, go to our three dot menu, and we're going to select "Copy". Then we're going to go over to Artboard 2, and we're going to click on it. We are going to paste into this artboard five times. We're going to go to our three dot menu here. We're going to select Paste ones, do it again, do it again, and then do it two more times, so that you have five squares total. What you'll notice is that a square will fit in each quadrant if we were to split this up across the horizontal line and the vertical line. But we want to make sure we have five squares because again, we're doing that drop-down. If you go to your layer studio on the right-hand side, you can just count to make sure you have 1, 2, 3, 4, 5 squares and that they all have that little orange line next to them. That's how you know that they are synced with the symbols. While we're in the layers here, I actually would like to go through and just update and rename elements to keep things organized. We know Artboard 1 is our tile. What we'll do is go to Artboard 1 in our layers panel here. We'll go down and select that little circle with the three dots, that's our layers options and this pop-up will come up. At the very top you'll see it says Artboard 1. What we want to do is rename Artboard 1 and we'll just call it pattern tile. In order to rename it, we just have to click where it says Art board 1, you'll get this pop-up, and we'll change the name of this. That will go back out of our layers options by clicking the back arrow. Then we'll go to Artboard 2, and this will be our live preview. We'll click on that and then we'll go to our layers options. Then where it says Artboard 2 we'll click on that and then we'll change the name from Artboard 2 to live preview. This is just a nice way to keep your files organized and you know what you're doing, where everything is, so things don't get confusing. I'll just click the back button from our Layers options and then click on our Layers again to pull that in. Now what we want to do, making sure that [inaudible] still turned on, we're going to move each of these elements into their places. But to make things a little easier, what I want do is divide this square up so that we can see exactly where we need to place things. I'm going to go over to the left-hand side and select my Pen Tool. All I'm going to do is divide this square in half horizontally divided in half vertically and then I'm going to divide those horizontal areas in half once more so that we know where to move for that half-drop. Again, my little guidelines will come up making sure that I'm in the exact middle. Then I want to make sure I have my stroke turned on. Then I'll go to my stroke menu and just increase this in size a bit so that we can see what we're doing. Once I create that first line, I'm just going to go into my Move tool, make sure it's highlighted and then I'm just going to copy it and then paste it. Then I'm going to use that little arm here to rotate it 90 degrees so that it is right up and down. Then it'll divide this for me and then I'm going to go back to that original line again. I'm going to go back into my three dot menu, I'm going to copy it again and then I'm going to paste it. Then I'm just going to move it with my stylus here. I'm going to move it up and then again, keeping in mind those little guidelines, it'll show me exactly where the middle is for that top section. Then I'm going to go back to that original line, I'm going to copy it again, I'm going to paste it. Then I'm going to drag it down to the bottom section. Now that we've added the lines, and it's okay if they're not perfect because we're just going to double-check our placement. We're just using them to guide us to double-check our placement with our squares. We'll be able to be more precise once we place and move the squares within the quadrants by checking in our Transform tool here. But first let's start moving elements. Just like what we're doing with our full drop will be moving the squares into key quadrant. Let's just start with this first one. What we're going to want to do is move the elements into their half-drop place as we go across the board. We'll select this first one and then making sure magnetics are still selected, we're just going to drag our square over to the right. Then what we want to do is drag it down by half a step. Keep in mind those green and red guidelines as you're moving your elements. Once everything pops up like that, then you are good to go. Then we're going to go back to the original and we're going to move over to the right and then all the way down to the bottom corner here. We're going to move this to the right, we'll see those guidelines pop up and then we're going to drag it all the way down, making sure both those red and green lines pop up. What you'll notice is when you're pulling items into the quadrant, if we go back to the Transform tool, what you'll see is that we want to move this all the way across 2,000 and then down half a step, so it'll be 2,000 by 1,000 in terms of our x and y. Then this next one will be 2,000 by 3,000. We'll go back to this original and we'll move it to the right, and then we'll move it up by half a step. We're going to click on it, making sure magnetics is turned on, drag to the right and then we're going to pull it up. Then again, paying attention to those guidelines and making sure you see both the green and the red pop up. Then you can double-check. This one will be 2,000 in our x position by negative 1,000 in our y position because we're moving up. Whenever we move up we're moving in negative format, and then whenever we're moving down its plus. Let's go back to that original square again. Then in this one we're just going to drag it down a full step because remember top to bottom is always the same, you're going to match exactly. This will be 0 by 2,000, and then this will be 0,0. Then you are done setting up your file and you can just double-check all of your quadrants just to make sure. This first one should be at 0,0 for your x and y, the one in the upper right-hand corner should be 2,000 by negative 1,000 in your x and y. This one here should be 2,000 by 1,000 and this bottom one over here should be 2,000 by 3,000. Once you have everything in place, we can go in and lock them as well. We can delete these black lines. Once we've deleted the black lines, we can go into our Layers options here. We can just lock all of these little elements in place. We can go to Artboard 2, and we can just select it. Then we can go into our layers options and we can just hit that little lock icon and it'll make sure that nothing can move on Artboard 2. We can go back out of our layers options, go to Artboard 1, click on our symbol, and we can lock that rectangle in place by clicking on it. Then just going into our Layers options and hitting that ''Lock'' element, that way, it won't move around.
10. Creating the Half Drop: Now that we have our tile set up, what we can do is begin to pull in the motifs. I'm going to update this color though really quickly. I'm going to go into my layer, want my Art-board 1, my pattern tile. I'm going to go to that rectangle and I'm going to change the color from this blue to something a bit brighter that I think will work nicely with the sweet tree motifs that I have. I think I'm going to go with an orangey yellow and then I'll click back into my color options so it pulls it in. Then I'm going to go back out into my gallery. We'll go into our original artwork file and then just select the elements that we're going to utilize for this one. I'm not going to use all the same one just so that I can get a different feel for the layout. I think I'm going to add in some of these candies and this ice cream, but still use a few of the same elements. I'm going to select that ice cream, these little candid elements, the little cake over here, the strawberry, the doughnut again and this little juice carton. Once I've selected all those elements, I'll go into my three dot menu, I'm going to select "Copy" and then I'm going to go back out into my gallery and I'll go into my new file. Then I'm going to go into my three dot menu and I select "Paste". I'm not going to paste them into these areas here, I'm just going to drag them off to the side so that it's easier for me to utilize them, copy them, paste them, and pull them into my tile. I'm going to group them together for easy access over here on the left-hand side. Then I'm just going to copy them once more. I'm going to go into my three dot menu, select "Copy", and then select "Paste", and then just move those off to the side so that I have a bunch to work with. You could also just select "Duplicate". Once you select an element, go into the three dot menu, you can select "Duplicate" as well. Once I have all of the elements that I want off to the side and duplicated a few times, then I can start to build out this original tile here. What I'm noticing is that I'm worried that this yellow is going to conflict with the yellow and the candy and in the popsicle. I'm going to update this color a bit. I'm going to go into my layers. I'm going to go down into my rectangle and select that under my pattern tile layer. Then I'll select my color options here at the top. Actually for now, I'm just going to select ''White'' as my color just to make it easy and then I can go back in and play with the color after I lay out my tile. I'm going to select my color wheel here, click on it and then it'll pull it in and we can begin working on the tile. Keeping in mind the layout for this half job, I want you to remember these placements as we're building this out. We know that we're doing a half-drop that goes down half and then also up half within that preview. We have to keep in mind that whatever we put on one side, it's not just going to be duplicated on the other side, it's going to move up half or down half. Again, if we were to create a line here, whatever we put on this lower side here is going to be up on this upper side and then whatever we put in this lower right-hand side is going to be in our upper left-hand side. I'm just going to keep that line there just as a little guideline as we start to place some of these elements. I think I'm going to place the smaller elements on the sides and then the longer pieces will go in our top edges. I'm going to take these little cakes, I'm going to take these strawberries, I'm going to take the juice carton and we're going to use that to start building out these sides here. I'm going to take this juice carton. Again, these elements, we need to make sure that they're within the symbol. If you're noticing that whenever you play something in your tile, it's not showing up on the preview, that's because we want to make sure it's in our symbols area. For example, if we look at this, our line that we created as showing up, but we don't want that to show up so let's go into our layers. Let's go to where that line curve is. Let's drag it out of our symbols so that way it doesn't show up and then let's go back into those layers and then let's drag these additional elements that we just added in. Let's select the first one and then drag across to the right to select the next one and do that for the next item below it. Then click on it, you'll see a little three pop-up because it shows that you have three layers you're moving and then drag it right on top of your symbols. It'll show up in your preview. Let's start with just placing this juice carton here. Let's place this little cake up top and then the strawberry here. Remember with this lower half here, it's going to have to go up here. We're going to select this element, we go into our Edit menu, and then we're going to select "Copy" and then we're going to go back to that Edit menu and we're going to select ''Paste''. It's going to paste right on top and then we're going to open up our transform studio. What we want to do is go across 2,000 but then up 1,000. We're going from left to right exactly 2,000. That's going to be our x position. We're going to click inside of our x position. You'll get this little pop-up and we're going to select plus 2,000 and it's going to move it exactly across, but then we want to move it up 1/2. Now we're going to go to our Y position. We know 1/2 of 2,000 is 1,000 and since we're moving up, we're moving in a negative direction so we're going to select minus and then put it in 1,000 and then hit "Okay". It'll move it into that position up top. Now, we need to do the same thing with these elements over here. I'm going to select both of them by clicking on the first one, holding my finger down on the screen, and then selecting the second one. Both of them will be selected. I'll go into that Edit menu select "Copy" and then go back into that Edit menu, select "Paste". We're going to do the same thing. We're going to go over by 2,000, and this time we're going down by 1,000. We're going to go to our X position first, and we're going to select plus 2,000 and then hit "Okay", and it's going to move it exactly to the right. We need to go to our Y. Since we're moving from top to bottom, we're going to move in a positive direction. We're going to hit plus 1,000 and then hit "Okay". It'll move it exactly where we need it on this right-hand edge. If we go look at our preview, we start to see everything building itself out. For this one, I don't want it to be a directional print. I think I'm play around with the placement in our top and bottom areas and play around with the overall placement of each of the elements. Fills a little bit more tossed. What we want to do then is lock all of these elements in place. We'll go into our layers and we're going to select all of these elements, and we're going to group them together. We're going to click on the first one, drive it across right, to select the rest of these. Then we'll go to that little puzzle icon, click on it, and that's going to group everything together. Making sure that group is still selected, go to our three-dot menu on layer options. We're going to select where it says group, and we're going to rename it, and we'll just rename it side edges. This way we can keep track of what is what. We'll go out of the layers options, and then we will click on our layers again. It pulls that studio in and then we'll go and select some additional elements to utilize in this. I'm going to select this little ice cream. I'm going to pull it in over here. I'm going to select this donut, I think as well. I'm going to make a few copies of it first though. Then I'm going to pull it in here. Then again, keeping in mind that I don't want this to be directional, I think I'm going to rotate my little popsicle here. Then I'm going to put this donut at an angle. Keeping in mind the placement of this and because these are larger elements, you could resize them down, but I think I like how large they are in relation to some of these other items here. I think it's okay to just place two here. Now that I have these placed, I just want to go in and double-check that they are in my Symbol Studio. I'm going to select that layer with the donut and then drag across to select the layer with the popsicle. I'm going to tap on those two layers. You'll see the number two pop-up and then I'm going to drag it so that it's right on top you have that blue line straight across this symbol layer. It will place everything where we need it so that we could see it in the preview. Now that we have this bottom element, we know that the bottom and the top are exactly mirrored, so we'll just have to copy these. With them still selected, go to our three-dot menu here, Select "Copy" go back to that three-dot menu and then select "Paste." We know since we're going from bottom to top, that we're moving our y position, and because we're going from bottom to top, it's going to be in a negative direction. Let's click on that y position and we'll select negative 2,000 and then hit "Okay" and it'll place everything exactly where you need it in the top portion here. Now we can go in and look at the preview, see how that looks. I think I'm liking it. I know these elements are a lot bigger than the rest, but again, the idea of playing with contrasting elements, so smaller elements against bigger elements. All of it still flows nicely because of the color story. Let's start working on the center. But before we do that, let's lock the top and bottom really quickly and group them together. Go into our layers, and then let's select the donuts and the popsicles, and then let's group them with that little puzzle icon. Then with that group selected, go into our layers options, click where it says group and then rename this top and bottom, and then hit "Return." Then you can click back out of your layers options and we can tap into our layers to pull that in. Everything is set up. We can go in now and remove this little guideline. We can click on it and then hit that little garbage can in the lower left-hand corner and it'll delete it. We can start to fill in our center areas here. Again, the idea is piecing a puzzle together, what fits where, what looks like it'll work nicely against whatever is already on our edges. I think I'm going to utilize some of these candy pieces in here because I think they'll fit nicely here without feeling overwhelming. Then I think I'm going to repeat some of these smaller elements and pull in things like the strawberries and the cake and just more candy, so that way it doesn't feel overwhelmed with the boxy-ness of the actual juice boxes. I think just having the ones on the edge we'll make this feel a little less boxy by not pulling them into the center here. I'm just going to repeat like the little cakes, the strawberries, and the candies in these areas. Then again, you want to make sure that each of these elements that you're pulling in are showing up on your preview. You'll have to go to your layers, once you pull those elements in and select them, and then click on them, and then you'll see the number of elements or layers that you selected and then just drag them so that they go right on top of your symbols. You'll see that repeat starting to come to life in this area here. I'm just going to keep playing around with this and fill in this center. Then we'll come back in a minute to review. Again, I'm rotating elements as well just so that things don't feel they're all going in the same direction every single time so that it feels a little bit more like it's a tossed pattern versus a directional pattern. If you're noticing you're having any issues with placing these elements, moving them around, you can turn off your magnetics now and it'll give you more fine-tuning in terms of the movement of your pieces. Periodically, just go back to your square to check to make sure everything is looking okay. I think that is it. I think this towel looks great. I played around with rotating elements, flipping them just so that things fill more tossed versus directional. I just played around with the placement of each of the additional pieces, keeping in mind elements have already used so that things don't fill too prominent and then keeping in mind contrast. I have two bigger pieces and a bunch of smaller pieces to help draw the eye to certain areas. I think I like the way this turned out.
11. Testing + Exporting Your File: Now that we're done creating the tile, what we want to do is test it. Let's go back in and let's export this pattern tile and then we can go in and start to test it out on a new file. Before we export our file, we can play around with the color of this background. We can keep it wide if you want, or you can play around with a different color. Let's go back into our layers, scroll down to our rectangle, and then click on that layer, and then click on our color wheel here. Then we can just play around with this color so that we can see what it looks like. Find something that we like that doesn't hurt our eye that's really nice with this color wheel is you just experiment. I think I like this light light yellow, it doesn't feel like it conflicts with this brighter yellow too much and it doesn't blend in too much. I think it goes nicely with the blues and the pinks. I think I'm going to stick with this yellow. Now that we have this done, what we want to do now is export this tile and then we can test our file. Making sure that our pattern tile is selected, we can click in our "Color" icon to pull that through. We can select our pattern tile, you know it's selected because it's outlined in blue. Then what we'll do is export this. We're going to go into our document menu. We're going to select ''Export'', we're going to export it as a JPG, and then we're going to update the file name. I'm just going to name it halfdrop-sweets. I'm going to hit Return and then, I'm going to change my area from whole document to pattern tile, so we know that it's just the pattern tile that's being exported. Then we're going to hit ''Okay''. Then save it wherever you plan on saving it in your documents, and then we're going to go back out into our gallery by hitting that back arrow. We're going to test this tile out really quickly. We know our tile is at 2,000 by 2,000, so let's test this on a 6,000 by 6,000 file. Let's go into our upper right-hand corner, hit the "Plus" icon, select ''New Document". We're just going to change our document setup a bit. We're going to change it from points to pixels, and then update our width to 6,000, and then our height to 6,000. Then our DPI should be 300. Then we don't have to worry about transparent background, select ''Create Artboard'', and then hit ''Okay''. While we're testing this file, the thing to keep in mind is that, unlike our last file, that full drop where we can utilize the Fill tool, the Pattern Fill tool, we can't do that with this half drop. It doesn't read the same because of the fact that we have to drop the tile down by half a step. We have to actually build this out manually. The easiest way to do this, to test it is go into your document menu, select ''Place Image''. You're going to import it from the cloud or wherever you ended up saving your file. I saved mine on my iPad in Affinity Designer. I just got to find tile really quickly. It's right here, halfdrop-sweets. Then I'm just going to drag to place it. I think this is going to be a good size for now. We're going to make it a little bit bigger so it's easier to see. What you'll notice is you just have the tile, we didn't export the preview. What we're going to do basically, is build this tile out, creating that half drop step repeat in this square. The easiest way to do that is to deselect your icon or deselect your pattern tile, turn on your magnetics, and then you'll be able to utilize those magnetics, those guidelines, to figure out what you're placing and where. I'm just going to duplicate this a bunch of times. I'm going to select this tile, and I'm just going to duplicate it a bunch of times to start with, and then I'm just going to start moving them. Remember, when we're moving them, we're using magnetics, but you can't just move it directly across because it doesn't match up. What you need to do, is once we move it across, then we need to move it down by half a step. Then you'll see those lines start to pop up those guidelines. You can move in really closely as well, just to make sure and double-check. Then you can just keep moving your elements by hand to create the print for you. Then as you need to just keep duplicating this tile, till you have enough pieces to fill this in. The idea is that you're working this like a puzzle piece. This allows me to just check my file to make sure there's no issues with the repeat and it works nicely. I don't see any broken edges. That is it. Our half-drop works really nicely. We can export this if you'd like so that you have a tester that you can load to on your class project template. I'm going to save it to my Affinity Designer files. I'm going to rename this though first. I'm going to rename it Tester, hit ''Return''. I'm going to select "Artboard1", and then I'm going to hit ''Okay'', and then I'm going to save it in Affinity Designer and then hit ''Save''. Then I can utilize that file to place in our project template. That is the half drop. Let's jump out here and then we'll get into setting up a project template so that you can upload it to the class gallery.
12. Using the Project Template: Now that we've finalized our patterns, I'm going to walk you through really quickly how to add them into your project template. You'll want to first download your project template. I've downloaded it and I have it on my iPad, it'll be in a file called Class Project. You'll have fonts and templates. You'll want to install the fonts that are included in this so that you can utilize them in the actual template. To do that, you'll want some font reader. In my case, I have a program called iFont. If I click on any of these fonts, I can select them, I can select "Share" and then I can select my iFont app, and then it'll pop up on the left-hand side here. I'll just have to select "Install," and select "Allow," and then it'll show all the steps that you need to actually install this. I'll go into my Settings and then I'll select "More for Your iPad." Then I'm going to go down to Profile Downloaded and then select "Install." Then you have to put your code in. Then select "Install" and then install once again, and then you can hit "Done." You'll repeat this process for all of the different fonts in this file so that you'll be able to read the file properly. Once you've installed all the files, you can go back into the Class Project folder and then you're going to select "Template" and then you can open up either the Final Project Template or the Final Project Template that's the Affinity Design file, either one will work. Once I open this up, it's going to load. If you're missing any resources you can just go and select Yes, and then you'll be able to link from the folder. You'll just be able to find the file in your Class Project and you can just selected and it will relink it, and then you'll be all set to go. I'm going to turn my iPad long way so that we can see what this looks like. Basically, what I've done was I have set up space for you to place your full drop and your half drop, and your little pattern tiles all on this file. You can update any of the visuals I just had it so that it matched what I created, but you can update this however you'd like it. What we'll do in order to place these elements, we're just going to go in and we'll select, for example, this first full drop pattern. Then we're going to go into our Document menu, and we're going to go down and we're going to select "Place Image" and we're going to import from Cloud. Wherever you saved your preview file, that's where you'll be able to access this. For example, I saved all of my preview files here in Affinity Designer, so I'm just going to find them really quickly and I'm going to select this first full drop here. Then I'm going to basically drag-and-drop wherever I like this image. I'm just going to make it a little bit bigger than my original tile. It's okay if it overlaps, because what we're going to do is we are going to set it up so that the rectangle here creates a clipping mask so that the actual print will fit inside. To do that, we just want to go into our layers on the right-hand side, and we are going to select that Test Your Print Layer. Then we're just going to take that and we're going to drag it so that it goes right on top of that rectangle that it was underneath, and it'll create a clipping mask so that it fits that shape. Then we can go to this pattern tile and do the same thing. We can just go to our Document menu, select "Place Image," "Import from Cloud," and then just find the tile that you created for that. You can just drag it on top and you can place it there so that you have the matching tile to go with it. You can clip it into that square if you like as well. You just need to drag the image layer so that it is right on top of the rectangle layer here, and it will clip inside of it. We'll go into our Document menu, select "File," "Place image," go "Import from Cloud," and then find your second tester for your half drop or for your full repeat. I found it, I can just drag my Apple Pencil and then resize it so that it will fit inside that square. Then, again, we have to go into our Layers, select that new layer, and then we need to clip it into that original rectangle that we've created. We'll go down, we'll find that layer, drag it, and then clip it by dragging it right on top, you'll see that blue line and it will clip into that area and then we can add your pattern tile next. Let's go into our Document menu, select "Place Image," "Import from Cloud," and then just find that tile for that full drop. Remember it is going to be a rectangle. It's okay to just select that square pattern tile and delete it, and then you can put the pattern tile underneath. Then you can update any text here. For example, I change this, this is actually our half drop, I'm going to double-click inside where the text is; just double-click, and then I'm going to type in half drop. Then I'm going do the same thing over here, double-click inside of this text and change it to full drop. Then I can export this now as it is. I'll go up into my Document menu, select "Export" and then export it as a JPEG. Name it whatever you want to name it. Select "Artboard1" and then hit "Okay," and then save it wherever you plan on saving it. Then you can upload that final document to the Class Project galleries. That is it for this class, let's jump into the outro.
13. Course Outro: Thanks for showing up, learning, and creating alongside me today. I really hope that you found this course helpful and that you're more comfortable designing these two seamless patterns that was in Affinity Designer on your iPad. I hope you learned something new or a new way to do things that you already know today. But before I let you go, don't forget to submit your final project deliverables to the class Project Gallery. Remember to share the two final patterns that you are showcasing in your project template for your classmates and for me to check out. Also feel free to share your thoughts as well in the course reviews. I genuinely read all of the comments, I check out the project uploads and reviews as they all help me to really continue to evolve my courses and grow as an educator. If this is the first class that you've seen of mine and you want to learn more about me and my work, visit me online at www.bellasophiacreative.com. You can also check out more of my courses relating to the fashion and creative industries right here on Skillshare. I'll be sure to leave links for some of the classes that relate to this one in the class description below. Thank you so much for watching and creating with me today, I'll see you in the next one. Bye.
 Jenny Veguilla-Lezan, Latinx Designer & Illustrator