Transcripts
1. Introduction: Hello, and welcome
to this class. My name is Heidi, and
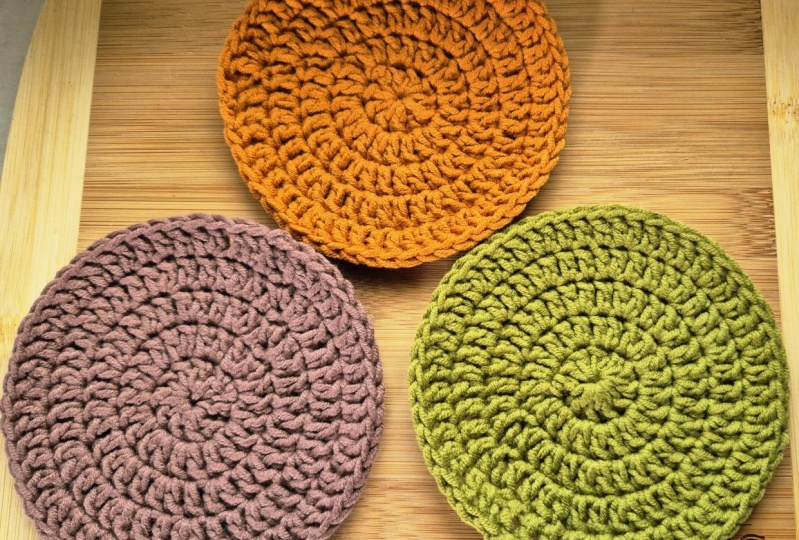
today I am going to teach you how to crochet a
flat round coaster. I will guide you through
the whole process learning all the basics as teaches
as chain double crochet. And slip stitch. By the end of the class, you are going to be finishing
a round flat coaster. I am also teaching
you how to make it flat using the
technique wed blocking. It is a very fundamental
part of the process, and I hope you join
me for this class to have this beautiful new
decoration for your spaces. You know, I teach
watercolor classes, gouache classes, and
art related classes, and I am super happy to be
introducing you to new ways of using your creativity and learning new skills as
crochet, in this case. I also made a PDF with a
written instruction for the class just so you
can download it in the resources tab
for this class. I invite you to follow
me here in scripture, so you don't miss any class, any new update or any news that I share with
you in the community. Thank you for being a
part of my community, and thank you for considering
taking the class. I am happy to have you in class. I hope you join me, and I will see you
in the next video.
2. The Supplies: To start the class, please download the Britain
pattern for the class, which is in the
projects and resources, and you go down, and then you click
here in this link, and it will take you to
the Britain pattern. So you can print it and
have it easily to read. For the supplies
that you need to complete this class,
you need jar. And I recommend you use
a cotton jar because we are making or
crocheting a coaster, and you will use this in your
table or in your office. And I prefer this one. But you can use a
grill if you prefer of you had more access to that. This bowl is 100% cotton. Is a small one to
make small projects, and I have many colors. You can choose whatever
color you have. This is a 25 grams of jar, and it gives 57.5 meters of jar. So you have enough to complete your project or your
coaster in this case. Another thing is every
jar label will tell you exactly what size of a hook you will need to
use with this jar. This is a decay jar, which means it's a little
bit heavier in size, so you have more stability
in your projects. And that brings us to
the next tool or supply. You need a crochet hook. Depending on the size
of the jar you are using the label of the ja
will tell you what you need. For me, it is a four
millimeter hook. I am using a four millimeter
hook for this one. You also need scissors
to cut the jar. And a stitch marker. If you are taking a
break for your work, you can put it on your work and a darning needle to
finish the work, and that looks very nice. When you finish your coster, then you need to block it, so it looks very
define and prettier. For that, you will need two towels and a
water spray bottle. I will see you in
the next video.
3. Technique: Magic Circle: The star or coaster, we are going to be learning
how to make a magic circle. I have here my jar, and I pull a little
bit of the jar, the working yard jar, and I have my crochet hook. So we can start working, and I am using a number, a four millimeter hook for this size of yarn
which is decay. To start making
our magic circle, we are going to take the jar and wrap around or three
fingers like this, making an X and then turning and with our pinky finger
holding the ya. Then we took our crochet hook. We go under the fi a
string of yarn under it, and we grab the second one. Then we do a twist
and we continue grabbing the jar behind it and passing it through
the loop like this. And here we have it
or major circle. I know this can be a little
bit tricky to understand. For that reason, we are
going to be doing it again. We grab the ya a
considerable size, and then we wrap this jar
between these three fingers, wrapping it around like this. And then we form an egg below, and then we go above our three
fingers on the other side, and we take the jar with our pinky finger
and then with our hook, we go under the
first string of jar, and we pull the second
one and we make a twist. And then we grab the jar, the second one, and we pull it through the loop like this. This is the major circle, and now we are ready to start
to construct or coaster. I will see you in
the next video. I
4. Fake Double Crochet (DC): Crochet 2 Chains: When we finish our magic circle, now it's time to make
a fake double crochet. I will pull the string
here to make the circle a little bit stable and small. And now I will do two chains. How? Pulling my working jar
through the loop like this. My working jar through the loop. We will do this again so
you can see it clearly. I have my magic circle here. My hook is in the loop. Now I took the working jar and I put it through
the loop one time, and I pull it through
the loop a second time, and now I have two chains. This is a fake double crochet that will help us
in the next step. See you in the next video.
5. Round 1: Double Crochet (DC) - Basic Crochet Stitch : Now we are going to be
adding the double crochet. This is how we do it. We jar over, put the hook
inside the magic circle, grab the yarn and pass it
through the magic circle. And now we have three
loops in our hook. Now we grab the yarn and we pass through the
first two loops, and now we have two
loops in our hook, and then we grab the yarn and pass it through
the two loops. This is our first double
crochet. Let's do it again. Ja over, pass the hook
into the magic circle, grab the working jar, pass through the
magic circle again, then we have three
loops on the hook. Now we grab the jar, pass through the first t loops, and then to the rest
of the two loops. And this is our second
double crochet. We are doing ten of them. Ja over, pass to
the magic circle, grab the yarn, three
loops on the hook. Now we grab the jar, pass to the first two loops
on the hook and again. This is third Double crochet. Again, jar over, go
into the magic circle, grab the yarn, pull through, and then pull the working jar
into the two first loops, and then into the
second two loops. And this is four double crochet. Continuing, we are going to do the same steps until we
complete ten Double crochet. Three loops on the hook,
then grab the yard, pass through the
first two loops, and pass through the
second two loops. Now we have five double
crochet in or magic circle. Let's do the 61. The same procedure. Jan over, pass through the magic circle. Grab the yarn going through
the magic circle again, and then pulling in the
working jar to the loops. First the first, and then the two last
loops. This is or six. Lext to the seven, jar over, pass through the
loop magic circle, grab the yarn, pass through
the first two loops, and then to the
second two loops. If you feel that your
work is getting fdally just tighten the circle. Magic circle, pulling the jar. We have seven. Double
crochet, let's do the eight. Ja over pass to the magic
circle, grab the jar. We have three loops on the hook. Then we pull the working jar
through the first two loops, and then the two second loops. And let's double number nine. Ja over, go into
the magic circle, grab your jar, pull
through, and pull through. And let's do the last
one, the number ten. The same procedure, Jar over
going into the magic circle, grab the yarn, pull through the tulips and pull
through the tulips. Now we have completed
our ten double crochet. You always need to count
so you don't get confused. To tighten the circle, just pull the yarn on your
left side very tight. So now we have a center for
our coaster tomato circle, and we are going to be joining the two sides using a stitch that is called
the slip stitch. And we do this by
inserting our hook in the top of the
first double crochet with it. Nother change. You count one, two stitches, and then the next will be
your first double crochet. There you will
insert your hook and then grab the ya then
you have a stitch, and this same, you
will pass through the other stitch
on the right side. And this is or circle, the center of the coaster. And now we can continue
with the next steps. I will see you in
the next video.
6. Round 2: Double Crochet (DC) Increases: So far, we have completed
our first round, making the center
of the coaster. I will pull a little bit
of a jar from my butt so I can crochet easily.
And let's count. We have here one,
two, three, four, five, six, seven, eight, nine, ten, double crochets. Now, we need to make
the coaster bigger. For that, we need to
increase our sizes. And we do that by placing two double crochets
in the same stitch. But first, we need to make a fake double crochet
by chaining two. So let's chain one, grabbing the Jan and pass
it through the loop. And then, again,
grabbing our jan and pass it through
the looper hook. And now we have change. And now we are going also
working here with this jar, bringing it to the front
so we can hide the jar, the leftover jar
inside the circle. Now, in the same stitch, we are going to be
making a double crochet. Jar over, pull, insert your hook into the same
stitch as we did to change, grab the jar, pull it through. The first two loops. We have three loops in the hook. Grab the yarn, pull it
through the first two loops. And then now you have
two loops in the hook, grab the yarn and
pull it through. And you have completed your
first two double crochet. And we are hiding
our leftover jar. Let's do it again. We are
increasing two double crochets in each of the stitches
we have on our center. Insert the hook into the loop, grab the yarn, pull it. The stitch, and now you have
three loops on your hook. Pull the yard through
the first loops, and you have now two loops in your hook and pull the yard
through the t loops again. This is one double crochet. We need to make two double
crochets in the same stitch. Maintaining your leftover
ja always at the front. Again, jar over, insert
the hook into the loop, grab the yard, pass
through the loop, and now you have three loops on your hook and then grab the yarn going through the first loop
and then to the two loops, rest in your hook. Now you have two pairs of double crochet in
the same stitch. Continue with the sequence. This is a batter repeat here, two double crochets
in every stitch. Now you have three loops on
your hook, grab the yard, pass it through the first
two loops and pass it through the second two loops. We are making the double
crochet in the same stitch. This is the third stitch. Now we are completing
six double crochets. By the end of the round, we are going to be having
20 double crochets. Next stitch, we are making
a double yarn over, insert your hook into the loop, grab the yard, pass
it through the loop. Now you have three
loops on your hook, grab the yard, pass it through
the loop and go through. Again, the second double
crochet in the same stitch. Jan over, insert the hook
into the loop, grab the ya, pull it through the
first two loop, and pull it through
the second two loops. Next stitch. By now, we have one, two, three, four, five, six, stitches left to make the two
double grochs in then. Let's do it again. Jan over, insert the hook into the loop. Grab the yarn, pass
it through the loop. Now you have three
loops on your hook. Pull it through
the first two loop and pull the jar through the second tloops and a second double crochet
in the same stitch. Jan over, insert the hook, pull the jar, pull it
through the loops, and pull it to the two loops. Now we have five stitches left. We have been doing
this for five times, so we have ten double
crouches already. We have five stitches left. Okay. Jan over, insert
the hook into the loop. Grab the yard, pass
it through the loop, and now grab the yard and pass it through the two
loops, and then the loops. Again, the second
double crochet. Ya over, and by now you have
memorized all the steps. You will be dreaming
after this class with the double crochet and all the steps
you need to follow. It is always recommendable
that you have enough jar out of the bowl of the jar so
you can work easily. Let's do it again the next two double crochets
in the same stitch. So we approach or final stitches on the
center of the coaster. Jan over, insert the hook
into the same stitch. Pull the jar through the
first two loops and pull the jar through the
last two loops. Jan over next stitch. We are making the next
two double crochet. Insert the hook into the loop, grab the jar, pull it
through and pull through. Second, double crochet
in the same stitch. And we have completed
eight stitches. Now we have two stitches
left and we need to make two double crochets in
these two last stitches. This is one, and this is
two in the same stitch, the number nine, and
we have one stitch left to complete or
center or increases. First double crochet and the second double crochet
in the same stitch. Okay. It might feel like
tighten the coaster. But don't worry when
we block the piece, it will gain more
flexibility, the fabric. Now we are going to
be slip stitching to connect or join or two sizes as we did in
the previous round. You count one and two, these are the two chains you chain at the beginning
of the round, and you will look for the top of the first double crochet
to D. And you will insert your hook in that loop to
make your slip stitch. Then grab the working jar, pass it through the loop, and pass it to the stitch. Like this. Yeah, you have it. You have joined your coaster. If you are taking a break from your work or from the glass, you can then take your hook
out of the work and use your stitch marker to prevent
your work for unraveling. This is very helpful. And it is good to
take breaks as well. So like this, I will see
you in the next video.
7. Round 3: Increases 1 DC, 2DC: Have completed the
first increases row, doing the two Chess in every
stage on our centered. And now we have 20 stitches
or working process. Now we are going to
be increasing again. But this time, we are making
one double crochet and then making two double
crochets in the next ditch. Then one double crochet and
then in the next ditch, two double crochet, and we will do that till the
end of the round, starting with chaining two to
make a fake double crochet, then we are going to be placing a double crochet
in the same stitch. Jan over, insert your hook
into the same stitch. Pull the jam through. Then you have three
look in your hook, pull the jam through
the first loop, and then pull the jam
through the second loop. Now we are placing one double
crochet in the next stitch. Like this, Ja over, pull through and pull through. In the next stitch, we are placing two
double crochets. This is the first one. One, and this is the second double crochet
in the same stitch. This is the pattern repeat
we are going to be making. In the next stitch, we are
placing one double crochet, and in the next, we are increasing with
two double crochets, one double crochet here, and in the next stitch, increasing two double
crochets in the same stitch. This is one double crochet. And this is the second double
crochet in the same stitch. In the next ditch, we are
placing a double crochet. And in the next ditch, we are then placing an
increase to double crochet. Or leftover jar is
almost covered. And then we place the
second double crochet in the same stitch. We are repeating the same
butter over again ten times. Let's continue. In
the next stitch, we place one double crochet. And in the next stitch, we place two double crochet. Uh, one and two. And we continue
repeating the pattern. Let's pull a little
bit of jar so I can work easily and comfortably. Now we are making the
fifth pattern repeat. We place one double crochet in the next stitch after
the two double crochet, and then we place two double
crochets in the next stitch. One double crochet
in the next stitch, two double crochets
in the next one. One double crochet
in the next stitch. Two double crochets
in the next stitch. One double crochet
in the next stitch. Two double crochets
in the next stitch. Try to keep your jar
out of the bowl so you can easily work
your double crochets. This is like a meditation. And next, one double
crochet in the next stitch, two double crochets in the next stitch one double
crochet in the next stitch. And now we're done
with the round repeat. This make 30 stitches. Now we need to join
or both sizes, and we do the same. We count the two chains
we did at the beginning, and then we place a
slip stitch on top the first double crochet you make the real double
crochet, not the fake. And now we are complete
with this round, and by now, we have
30 stitches on count. You can count your
stitches to make sure you didn't misplace the
double crochet. You can count with
me or you can count by yourself in
your own coasters. So 30. So I will see you
in the next vivi.
8. Round 4: 1 DC, 1 DC, 2DC : Let's recap what we have done. We have done the center with ten double crochet
into the magic circle. Then we did the increases, we placing $2 crochets in
every double crochet stitches, and then we did the first
round with the increases, placing $1 crochet
in the stitch and then $2 crochets
in the next stage. And now we are ready to
continue the increases. Starting with
chaining two to make the fake double
crochet so we can work the next double
crochet easily. And then we place a double
crochet in the same stitch. The pattern goes as follows. Double crochet, one stitch, double crochet, one stitch, two double crochets,
next stitch. So we are working on three stitches and doing
one double crochet, one double crochet, and two double crochets
increasing at the end. And we will be repeating this
until the end of the row. Like this, we place one double crochet
in the first stitch. Then one double crochet
in the next stitch. Then in the next stitch, we place two double crochets in the same stitch to
make the increase. Let's do it again. So we do one double crochet in the next stitch one double
crochet in the next stitch, two double crochets
in the next stitch. One double crochet
in the next stitch. One double crochet in the next stitch and two double crochets
in the next stitch. One and two in the same stitch. One double crochet
in the next stitch. One double crochet in the next stitch and two double crochets
in the next stitch. One and two. One double crochet
in the next stitch. O double crochet in the next stitch and two double crochets
in the next stitch. One and two. One double crochet
in the next stitch, one double crochet
in the next stitch. And two double crochets
in the next stitch. Once you has memorized
the pattern, it will become very
automatic and easy for you to just repeat
it in this round. Now we are continuing
with the same pattern until we reach the last stitch. Let's continue with the pattern. One double crochet
in the next stitch, one double crochet
in the next stitch. And two double crochets
in the next stitch. By the end of the round, when you complete all
the pattern repeat, you need to have 40
double crochets in total. This is because we
are increasing by ten stitches or ten
double crochets. Okay, now that we have finished
our last double crochet, let's join or, coaster
with a slip stitch. You count the
change one and two, and then you place a slip stitch inserting your hook in the top of the first
double pressure to make. And then you pass the jar through this
loop and pass the jar through the loop in your hook and this make or coaster round. Don't worry because
we are going to be wet blocking our coaster, and it will flatten as we do the technique later when
we finish the next round, I will see you in
the next video.
9. Round 5: 1 DC, 1 DC, 1 DC, 2DC: In this round, we are going
to be increasing again. And this time, we are
placing one double crochet, one double crochet,
one double crochet, and then two double crochets. One double crochet
in the first ditch, one double crochet
in the next stage, one double crochet
in the next stitch, and then two double crochets
in the next staich. We are going to be doing this around until we
complete the round. We start by chaining two and then placing a double
crochet in the same stitch. In the next ditch, we place one double crochet. In the next staige, we place another double crochet. In the next ditch,
another double crochet. And in the next ditch, we place two double crochets. This complete or pattern. And we are going to be repeating this same pattern until
the end of the row. Let's do it again. One double crochet
in the next stitch. One double crochet
in the next stitch, one double crochet
in the next stitch. And in the next stitch, we place two double crochets
in the same stitch. This is our increase. One double crochet
in the next stitch. One double crochet
in the next stitch, one double crochet
in the next stitch, and two double crochets
in the next stitch. One double crochet
in the next stitch. O double crochet in
the next stitch, one double crochet
in the next stitch, and two double crochet
in the next stitch. One double crochet
in the next stitch. One double crochet
in the next stitch, one double crochet
in the next stitch, and two double crochet
in the next stitch. I pull a little bit of jar because it is getting
short on jar, one double crochet
in the next stitch. One double crochet
in the next stitch, one double crochet
in the next stitch, and two double crochet
in the next stitch. One double crochet
in the next stitch. One double crochet
in the next stitch, one double crochet
in the next stitch, and two double crochet
in the next stitch. One double crochet
in the next stitch. One double crochet
in the next stitch. One double crochet
in the next stitch. And two double crochets
in the next stitch. By the end of this round, you need to have 50
double crochets in total. And this is our last
increased round for the size that I am
aiming for this coaster. Now we need to
join or two sizes, and we count the
chain one and two, and then we place with insert or hook in the top of the first
double crochet we make. And then we pull the jar
through the stitch and then we pull the jar again
to the loop on our hook, and we complete like
this or coaster. Let me place a stitch marker so I can show you
what we have done, and it is looking a little
bit wonky, but don't worry. When we block it, you will
see the magic happen. I will become very
flat and round. I will see you in
the next video.
10. Weaving the Yarn : Now it's time to
complete the coaster, and we are going to be removing
first the stitch marker, and then inserting my
hook in the loop and chaining one to secure
all the stitches. I closing off or
binding off my my work, and then I will cut a
good amount of jar, and then I will pull the jar
through the loop like this. And with this, we are
securing all the stitches. Keep your hook around because maybe you will need it and grab your needle and insert
the jar into the needle. I have this tool to help
me thread the needle, and then we are
going to be weaving the jar into the
back of the coaster. Go just like this, insert the needle into the stitches and pass
the jar through. Until you have done like six or seven depending on
the length or your tread, and then you can go back. The idea here is to hide this jar and preventing your
coaster for unraveling. There are many
methods to do this. I use this, and
sometimes I help myself with a hook as well. When the jar is too
short to use my needle, I will charge you, of course. I am going now back in the
direction that I started, and this will make sure that the thread doesn't
get unraveled. Now I will use my hook and
continue hiding the jar. Very easy. Busy. Do this
until you don't have any left and then your coaster will
be done or almost done because we need
still to wet block this so it becomes
flat and round. Perfectly hiding in the yard and then getting ready to
wet block or coaster. I will see you in
the next video.
11. Technique: Wet Blocking : Time to web blog or coaster. I have here the two towels. I place one on my surface, and then the other one
on top of the coaster. I have the coaster here. And now with my spray butter, I will spray the coaster in both surface now on the right
side and in the wrong side. Make sure you spray it evenly
so all the fabric gets wet. And then on the
right side, again, and I replace the
second towel like this. And then I will put
something heavy, not extremely heavy, like a
book or my journal like this. That make it flat, and I will live this overnight or until it
dries in your case. If you live in a warmer climate, then maybe you can wait a couple hours
and it will be read. So now let's see the magic. I have here my um coaster, and it is now dry and blocked. Can you already see
the difference? It is very flat in
comparison with the other one that is finished, look at this, and look at this. This look very wanky and
these look very flat. Let me show you how it looks. I put a cup in here a glass, and the ends crawl up onto
the glass or onto the cup. But in the flat one, everything looks
flat and beautiful. I will do the same
with the other one, so we have the two
coaster blockage. I will see you in
the next video.
12. Round Flat Coaster Final Reveal: This is the final piece or coaster is done, and now we can use it
to beautify our spaces. Can it be or table
or just to put a glass with flowers or pot
with a plant or for anything, you would like to use it. You can choose any color you
want and you can make it bigger or smaller and use
it at your convenience. Acquiring new skills is
always a plus and a wing. So I hope you have fun with the class and I can wait
to see what you create, what color you choose for your coster and how
you will use it. Let me know in the
class project section for this class when
you upload your work, I can wait I can wait to
see what you have created. I will see you in
the next video.
13. Class Project: For your class project
is super simple. You just need to check a picture of your
work in progress, your materials or
supplies your final piece with me in the class project
section for this class. It is very easy to just upload the picture and you share
some comments about your process of creating this beautiful crochet
round coaster. I can wait to see
what you create. What color did you use and any comment
that you want to make about your process and how you find the glass
and the explanations. I came with to see it. I am super, super happy to have you and I will see you
in the next video.
14. Congratulations and Thank You: Congratulations.
You made the class, and you have finished another beautiful time together creating
something beautiful. I'm so happy that you take the time for yourself
and to learn anything, and I hope you enjoy the class. Please let me know in the
comments for the class. How did you find the glass? Did you learn something
new? Was easy? What was the most
difficult part, and what was the most fun part? Let me know I want to
get in touch with you. You know, you can always follow
me here on a skill chat, so you don't miss any new
class or any update that I made through the emails
and the comments. I am super happy to have you
in class, and, you know, you can always check
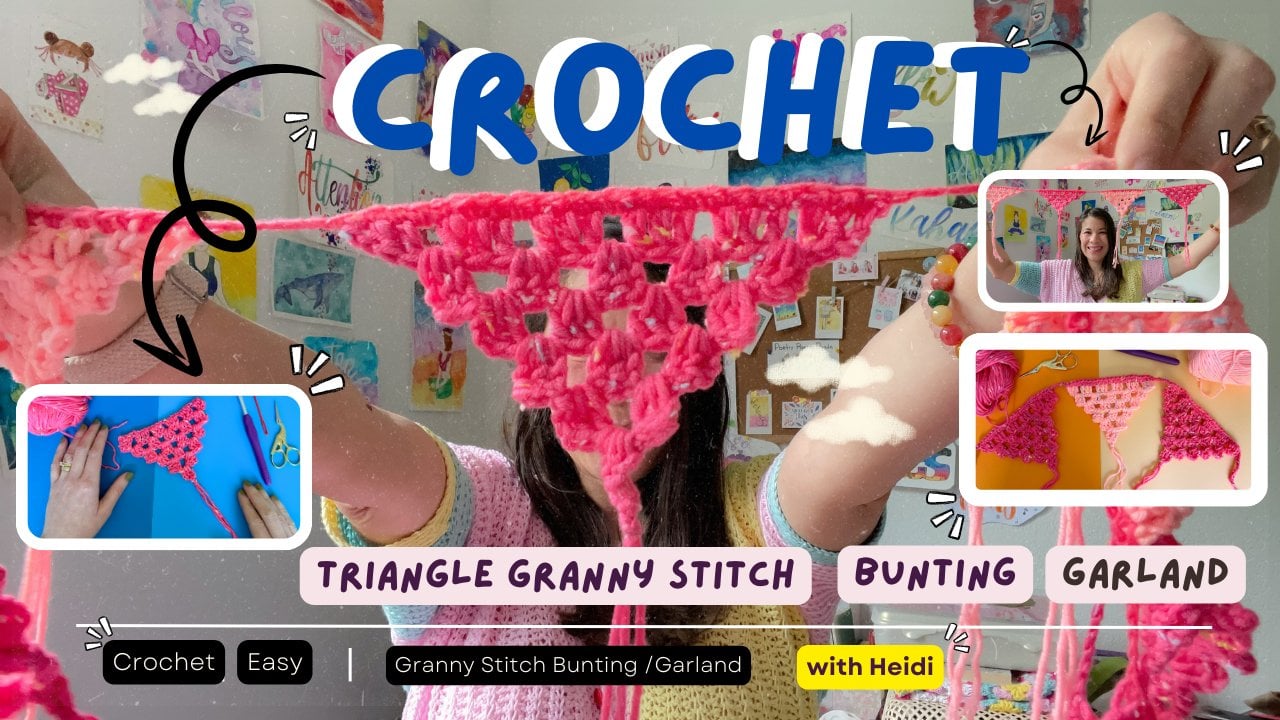
out my other classes, including the crochet
class before this one. That was this one, the garland using
the granny stitch. Or you can join me
in my watercolors or in my wash color
classes to have fun, make something
really beautiful and meaningful to you while
you learn something. So I am super grateful
to having you in class, and I can wait to see
what you created and to have you in my other classes
and in my future classes. Thank you so much
and keep creative. I will see you in my
next class. Bye bye.
 Artjourneywithme Heidi, ARTIST AND FACILITATOR