Transcripts
1. Introduction: Hey everyone, My name
is Daniel and I'm a digital artist and
Photoshop teacher. In this class, I'm going
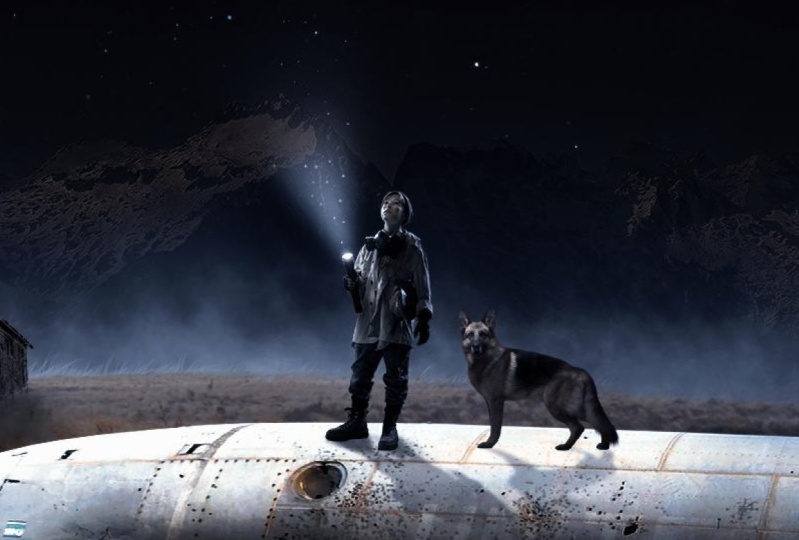
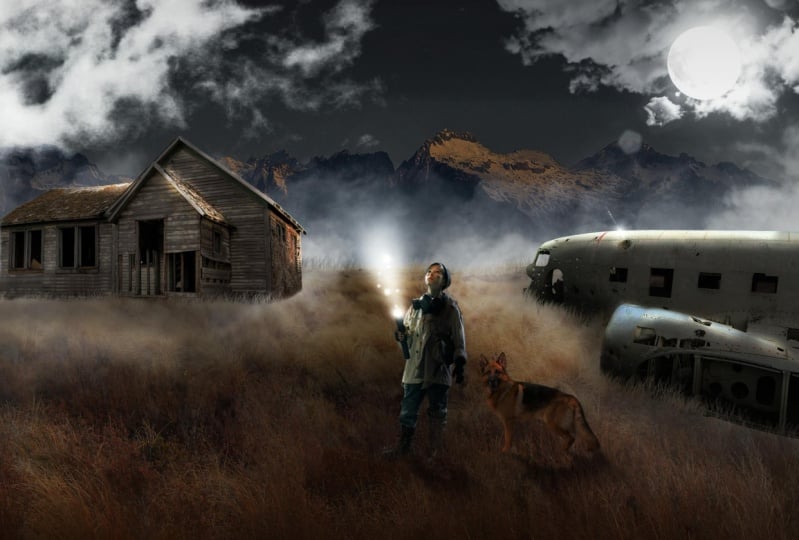
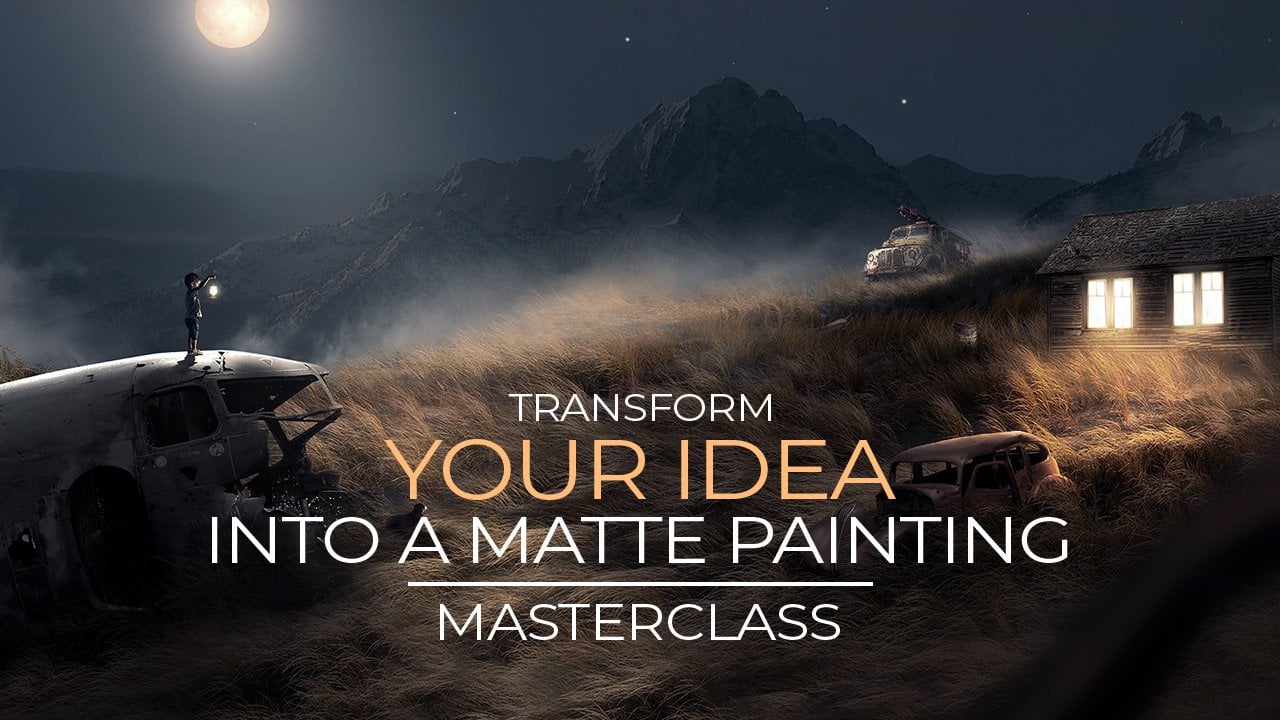
to show you how you can transform this
photo into this 1. First of all, we will start with making a sketch of our idea. We changed the sketch
into real photos. F3 of the forest
in our composite, we will make this like a real painting and blend
everything together like this. You don't need any
furniture experienced. This class was made for
beginners of Photoshop. So if this is your first
time in Photoshop, this class will be
perfect for you to start with creating digital art. Besides making this idea, you will learn how to start with blending photos together,
changed the lighting, brushing shadows,
brushing, missed, creating light effects,
and finalizing your image to make it
look like a painting. So I hope to see you in class. It will be a lot of fun.
2. Removing Backgrounds in Details: All right, welcome
to this course. And the first thing obviously what you need to do is
to open up Photoshop. Now, I have the latest
version of Photoshop. You might have a different one. It doesn't matter. Everything can be done in
every version of Photoshop. First of all, let's open
up the image of our boy. You can simply take the image and drag
it inside Photoshop. Go to File, Open and open
up the image of the boy. Now, when we create digital art, we need to remove
backgrounds from images. A lot of times we can use
the image in our artwork. So this is the boy here. Let me zoom in a bit. I'm going to click my mouse
and move to the right. And you can see here we have
a background of this image. We don't want to use
this background, we only want to use this
voi in our composite. What we have to do
here is we have to move the image from
the background. Now, there are some couple
ways to do this in Photoshop. Let me first show the first way you
don't have to do this, but sometimes this is a
way to select the subject. So if you go to Select Subject, especially in the latest
version of Photoshop, this works pretty well. If I'm going to click on this, it's going to try to
select the subject. And you can see here, it does a pretty good job on this one. Maybe some parts here
that it didn't select it. We can manually select
if you want to, but this is already a pretty
good thing from Photoshop. If you want to do this quickly and this
works for your image, of course you can use it. Now. We have our selection here, and the only thing
we have to do is to take this from
the background. And the way to do this is to go down here while
this is selected. You can see here we have
the option to mask. And if we click on Mask, it's going to make a mask and we don't see in the
background anymore. That's really easy way
to remove backgrounds. But you can see here
it doesn't really do a perfect job sometimes,
but not always. So let me press Control
Z or Command Z. If you're using a Mac, go back and let me
select this one. Brush right mouse, this select. It's going to de-select this. Now we're going to remove the background
with the pen tool. And the Pen tool
is the best way to obviously make
adverse selections and through move backgrounds. This is what I always use. You can also use brushes
to maybe burst some parts, but I would not recommend it. Tried to use the pen tool always it's the best way to
remove backgrounds. And you can remove backgrounds without even seeing the two. Cut it out. You can make it look
really photo realistic. First of all, let's
select the Pen Tool, press red mouse pen tool. Now, we want to
make sure you have selected apart and nuts shape. Because we want to
make a path around our subject and not draw
a shape or something. Let's select the pen tool, make sure it's part,
and let's just pick 1. It doesn't really
matter where if you, if you hold down Alt on your keyboard or Option on Mac and scroll your
mouse, you can zoom in. Let's really easy. Hold down Alt, scream a bit thin because zoom in
and out if you want to. Now if you want to move
our artboard around, I want to, for instance, see the top part here. I can see it anymore. I'm going to hold down
space on my keyboard, click the mouse and move it up. And that will be could easily move to our image
so we don't have to zoom in out and move
around with this thing here, because that takes
a lot of time. We want to do this
fast and don't want to spend lot of time on
it. Let me hold on. Alt again, zoom in. And let's start with making offers point. This
is where we start. Now. The next point,
obviously it should be somewhere where
this part will go. So this goes like this. And if you click here,
Let's click here. Now, if I click
and hold my mouse, I can make this curve. You can see here it doesn't
work so well on this one, I'm going to release it, press Control Z or Command Z, and click a bit closer to it so we don't take too
much area at once. We take a little part first. So let's do a little part
here. Let's click here. Hold down your mouse, make a
little curve and release it. So that's our first
line we graded. Now let's make the second one. So we go on. Click, hold the mouse, make the curve and release it. Now you see this anchor point. This is where let me
show this one, the end. This is where our
selection will go. So if you want to
make this selection, just make sure this anchor
point goes the same direction. The next click
somewhere would be. This is fine for now. Now,
let's move on a bit here. Let's move it here. Let's put it there and let's
make this corner like that. Release it, lets it. Now, if we get to a point this where you have to
go the other way. So we're going down here. If you see closely n
goes the other way, then we have to click here. Hold the mouse. If I'm going to, wow, I'm still
holding the mouse. I'm going to click
Alt on my keyboard. Hold down the Alt and we can. Because here we can move
this anchor point around. So I'm holding down
the mouse Alt. I'm going to bring
this to the center. That will be can start
from the beginning. So we can make like a
really hard corner here. Because we want to
make a hard corner and let's move out there. Without the outcome, I'm
going to click again. They're there. And you can see here we are
going in the other direction. Now again, we have a
bit of a corner here. Still hold the mouse, press Alt, hold Alt, and take this corner
and bring to send them. That way, we can create some, some hard corners here. And let's go there. You can see how easy I can
make these selections. And this is a perfect
selection of our subject. And when we do this, we're going to create
photo-realistic selections. And people won't even notice that we got it out
from the image. Now, you can see here I
have to go the other way. So if I'm not going
to hold that out, it's going to go
like this curve. I don't want this
curve. I want to go here directly that way. Let me press Control
Z to go back. Let's do this again. Hold on Alt or Option on
if you're using a Mac and bring this anchor point to the center, release everything. And then you can
start from this side. And you can see
here, we're going that way instead of
making this curve. So this is good to
make these corners. Now let's move on. There. There. After some time. Of course, this is really zoomed in. You don't have to really
zoom in that much, but I'm just going to
zoom in like this. So you can see it is very good. And after sometime when
you do these selections, when you make these
selections in Photoshop with the pen tool, you get used to
this and you will make perfect selections
of your whole image. Do this around the whole image. Especially if you
are going to use this image like small
in the background. You don't have to do this
like this precisely. Of course, if you'd
like to do it, you can do it, but
it's not so important, you won't even notice it, but I'm doing this perfect Now. The artwork will look perfect. So here again, bring it back. Let's do it like that. You can also take bigger
parts on some areas. Or you can click pretty
fast if you're used to it. Like I do sometimes I just
hope and it's a bit too much. Sometimes I click
very fast like this. And this will easily
make quick selections. And you can see
here I don't have to spend much time on is, of course it takes a little
bit of time to do this. But because this boy is pretty, pretty important
in our composite, I want to make sure he doesn't
look like bad cut out. I want to make sure he looks good in this image
that we are grading. So let me go down here, here. Here. They're these parts here. I can even take
bigger parts of this, maybe even hold down Alt here because I can see here
it goes pretty good here. I have to do exactly like
it's like a shared here is going I couldn't
go a little bit inside is does it really matter? As long as it looks real? It's fine. Here. I will talk on how
to bring it back because we have this
little corner here. Let's see, let's go there. This will do around
the whole image. It takes a bit of time. Of course, it's not the
most fun part to do. I don't like doing
this, of course, because you can also
find the images online that are already cut out. Sometimes I just
go on Google and I search for something
like for instance, tree. But I don't want to cut
out the whole tree. I wanted to have it
without the background. So if you search for
images, like for instance, a tree and you put P
and G behind the text, you will find images
without backgrounds or PNG transparent,
something like that. You will find a lot of images that are without a background. So that's really easy trick
to find some stuff with it backgrounds if you don't want to waste too much time on it. But if you have the
time in the future, it of course it's better to do it this way because
then you have an original image that
you cut out and it's really unique from everything
else that's available. Now let me try. This is here, here
is pretty okay. Then here you can
see here I do this and then I press
based on my keyboard and I can move this around
so I don't have to zoom out, move the art board
to up and down. I can just easily move
it with the space. Now let's do here. Here. Obviously this is going to
take a little bit of time, but we're not in a rush. We can do this precisely. Let's see. We have the light
here, some shoe there. You can see here I'm already
halfway done with this. If you want to zoom
in or out some parts, you better zoom
into cities better. Let's see, This is fine. Hold the Alt again. I'm just gonna do this a
bit quickly here. Let's take a whole
part here like that. Hold the Alt button
in the flesh side. I want to make sure
it's a bit good cut out because it's a bit
lighter than the rest. So I want to make sure
this is a nice guide, so I'm not going to
make mistakes here. Because you will obviously see it when we are sunlight parts. If we have darker parts
like maybe shoes, you probably won't
notice some bed got out. These parts are a bit lighter, so make sure the lighter
parts are good selections. Let's move on. Let's see here. Here. All right, I'm almost there. If you break this, this with different images, you get better at
this at some time. Of course in the beginning
you probably want to make good selections because
you are new to this. But after some time
you get used to it. And you can do this really fast. Sometimes I just do it
really fast because, well, it's not so fun to do. So you just click very fast. Let's see. We're almost there. Let's do a bit there. You can see here that we get to the darker parts like his shoes. I don't want to
waste time on this. I'm just going to
do this quickly. Maybe I don't even need
the stuff that's here. I'm just gonna skip that one because this is the bottom part. We have dark composite
like evening. These parts. You can do
this precise if you wanted. I'm just going to do it
like this because this darker parts you won't even see. We also have grass
in our composite, so this will be
behind the grassy, probably won't even see this. I'm just going to
do this quickly. Don't need that part. If you want to save some time, just skip these
parts IT department. All right, we're almost there. Then let's see. This needs to be a
bit more precisely. Because if we're going to do it really quickly
on all the parts, probably will look a bit sheep. We don't want to have achieved
this and we still want to have a professional design, like it's done with care. But some parts you just hide. People won't see
you did it first. But you actually did it. Let's see. If you make a mistake,
you just press Control or Command Z to go back. You can even press a couple of times if you want
to go back a lot. You can actually also
move these points around. I will show within a minute. If you, for instance, finished the whole
selection like this. Let's see, I will almost there. Let's finish this first. Maybe you see 1 is not
where it's supposed to be. You can always move that
point a bit around. That's the best thing about this selection
with the pen tool, you can always just points. Alright, once you
get to the first, you want to close the selection. So now it's closed because
we got to the first. Now I'm going to press
right mouse click. And here we have make selection. And with Make Selection, it's going to make a selection of our path that we created. Now, the feather radius is how soft you wanted to
have this if you want to have a really hard edge
without a bit of a blurred, you can use 0. I don't use zeros, zeros maybe for something like if you cut out a
square or something, I don't know, but
I barely use 0. I used to use it, but
now I don't use it. I always use 11, makes it a bit more software and a bit more photo-realistic. Now press Okay, and it made this selection,
you can see here. Now what I want to do now is I want to create
a mask of this. So it's make the selection. And to do this, I can simply go down
here and click on Mask. And we have the
background throw moved. And you can see it's a lot
better than we did with the automatic stuff
from Photoshop with Select Subject dead
was a bit not, not perfect and this
is almost perfect. There's a little part here
that we also have to do. So I'm going to zoom in here. While this mask is selected, I'm going to start here. And also make a little
selection of this part. We can also move this. So don't forget
these parts that are not in your first
selection because here, this is still the background
from the original image. We want to remove that one. You can see here this
is just a little part that we can quickly do. Close the selection, press
right mouse, Make Selection. Give the federal one again. Now, if I press D, D online my keyboard, it's going to bring
the colors to default. With black, weaker,
remove stuff in the mask and with white,
we can bring it back. I'm going to click, Make sure
the mask is clicked here. And if I press Control
Backspace or Command backspace, it's going to make this
black because we have here black select this
background color and black removes stuff. So when the mask is selected,
so now it's removed. Now I'm going to select this
tool press right mouse, de-select, so we
deselect the selection. Now, if I hold on Option or Alt on Windows, I
can zoom in and out. You can see here let's
take the move tool. We have this boycott
out and it's perfect. There is a way to
remove backgrounds. You can use this method for all your images and
get used to it. And let's move on to
the next chapter.
3. Sketching Idea: All right, so let's start
with creating our artwork. We have selected our boy
from the background. We remove the backgrounds in previous chapter and now it's time to actually start
creating something. Now, to start a new file, we need to create a new file because we want to
create something new. We go to File New, or you can press Control or
Command N on your keyboard. Now here we can set the size and the resolution
and color, etc. So we want to create something for the screen not to
print right now, right? So we want to use
pixels in this case, Let's create something
like 1920 by 1250. This is okay size for now, you can use another
size if you want, but I think this is fine. Now if you're working for print, you want to use
different resolutions. 72 is for screen is fine
if you make 300 and nothing changes because we only do this for the
screen right now. Let's leave with that Sandy to make sure to have
the color mode. Rgb, CMYK is for print. The other colors. I wouldn't
worry about that now. Now let's create. We have our art board now, the first thing I would
like to do here is to, let's make a basic
idea of what we want. So I want to draw a sketch. Let's first select a brush here. If we go down here,
select the brush or press B on your keyboard,
we have the brush. Now, if we go down here, we have the settings
for this brush and you want to select the
general soft round brush. This actually right now,
does it really matter? Because we just want to
make a sketch of our idea. And let's bring up the heart. And so here, let's say around
8090, something like this. Make sure you have
black selected because we have a
white background. And let's make a new
layer, Greater, new layer. If I'm making the brush
bigger and small, I press these two buttons next to the letter P
on your keyboard. I'm not sure how they caught, but they make the brush
bigger and smaller. I just always press them
instead of using the size here, you can also use this, but
this is obviously faster. Next, right from the
letter P on your keyboard. These tools just try them out. Now let's first make our idea. Let me zoom out a bit. I wanted to create
like grass here. This will be our grass.
Brush a bit there. And let's create a new layer. And this time I'm going
to change the color here. Let's make it a bit grayish. The lighter it will be, the better we will see
it on top of this one. Here I'm going to
place the plane, maybe the record the plane. Let's create a new layer again. I'm going to make another call again for something different. For instance, here
will be our house. Let's draw a little house. Of course, the image
doesn't look right now. This will be a house. This is just a sketch. And let's make another one. And here will be the
boy that we created. You can see here I'm not
the best sketcher there, but it doesn't really matter because we are only grading
the basic idea now. Maybe if I'm selecting this
layer, I can bring it down. Maybe I want to have something. If you hold down shift and move it down, you
can bring it down. All right, Let's shift
necessarily two layers. You can also bring it down. Maybe this will be a
bit down like that. Alright, this is our basic idea and let's create a new layer. Again. This will be the background. Let's make another
gray background will be mountains like that. Alright, this is our idea. It looks like a child is sketch, but it doesn't
matter because we're going to replace
everything with images.
4. Replacing Sketch With Photos: Now, let's start with
importing our images. We have our boy here. The first thing I
want to do here is I want to make sure
it's a smart object. We have this now. And if I press red mouse, I can convert this
to a smart object. What that means is it's going
to create one layer out of it instead of the mask
and the original layer. And every time I'm
press Control T, I can resize this. Make it smaller,
make it big again, it's not going to
ruin the quality. If you don't create
a smart object, It's going to make
the pixels look better if you make it
small and big again, quality is instantly ruined. So always use smart objects, free images for all majors. Always use smart
object because it's always takes the first
image to calculate how much it needs
to be smaller and bigger and not every
time from the image, from the less time,
if that makes sense. If you would do this
without smart object, it would instantly look very pixelated because it
made it really small. Enter, it doesn't
look right anymore. So don't forget, make
our smart objects. Now let's take this and
just drag it in our file. Let's press Command
or Control T on your keyboard and hold down Option. Scroll them in animals. So zoom out a bit
and take one corner. If you have an older version of Photoshop and it's going
to stretch like this. Hold down shift on the new
versions you don't have to hold on shift will not sure
if we make it smaller. Now, again, hold down Alt, zoom in or Option on Mac. And let's place the boy here. This will be a boy. Now, the next thing is, let's make sure this
bottom here, a bit better. Let's first take
the pen tool here. And let's create a new layer. Let's draw, make sure
you have path here. Of course. Let's take this outside
our board and this, and let's make
something like this. The bottom doesn't
matter because we don't see this in his image. Press right mouse,
make selection. If that one. And press Control Backspace. To make this, this
one we don't need. And you can see here it makes it better because we have
straight line here. Alright, let's import our grass. For the grass, I have
this grass here. You can simply just
drag it like that. Let's put it above the layer
of the one we just created. And now let's see. Can just select this. Sometimes if you click and
it's moving stuff around, you have this selected
outer select. So usually I have this off because if you have
this selected, click accidentally something and you think why is it moving? Because you have this
selected, de-select this one. It's better. You
can use control. If you hold down Control
and click on something, it's going to select it,
then you can move it, or this one, you can see it. It's really easy. Alright, let's move on
to our glass. Again. This grass here. And if I hold down control
and click on this layer, is going to make the
selection of this layer. Now, make sure you have the grid selected and make a mask. And I can see it's like inside
this grass that we made. Now we can disable this. We don't need that one anymore. And here you can see it's
locked between these two. That means if I'm going
to click on this, move it around, It's going
to also move the mask. So if I click on it, it's
going to move that and I can move it inside
our selection. Now we need to fix this grass because it
doesn't look real. First of all, we
need to make sure it fits this whole area. I'm going to click
on the grass layer here and press
Control or Command T to bring up the free transform and just
simply make it bigger. If you hold down alt is going to make it bigger on both sides, sides. So that's easy. Now let's move it around.
Let's see a nice place. I think if we hold down shift and take the top
part hold down shift, we can flatten it a bit so it looks a bit more
flattened like that. I think it looked
better in this one. Press Enter and that's okay. Now, obviously you
can see the nth year. It doesn't end, right?
It doesn't look real. What do we have to do here is click on the mask of this grass, then go to Brushes. Here, we want to
select a dune grass, grass or some grass breaths
to make this look more real. So you have these brushes, these are standard in
Photoshop, the grass brushes. And inside the legacy
brushes you can click here. You have all these brushes. These are from Photoshop
and therefore, good, good grass brush
which you can use. I think these verses are
inside the default brushes. Let's try to find them. There it is, dune grass brush, and this is really good too. Drought gracing image. You can also just use the
search dune grass or regress. And you can see I have also
some other brushes for grass. But in older versions you don't have the
search bar there, so you can just try to
find it in the default. Alright, so let's use
the dune grass here. Dune grass, that's
right There it is. Here we can set the size. Now let's click on this icon here to bring up the
properties from this grass. And we want to disable
Color dynamics like that. Just disable it,
doesn't need that one. Now, let's make the brush a bit, a bit bigger. Let's see. Whereas the brush,
oh, there it is. It's a bit big now, going
to make it smaller. Now we can also rotate
the brush here. I want to make sure
it goes up and down. So I'm gonna vote
varies with depth. So make sure these graves
goes up by group risk. Now, if we click on the
mask here from this layer, let me click these ice here. If you click this, it's
going to disable them. They are still not image
but you can see them. All right, so let me
click these eyes. Now click on the mask. Let's zoom in here and make sure you have white selected
the non-black. If you have, black is going to move and
white it's gonna show, make sure to click
this and not this. So the mask. And if I hold on Alt and zoom in here,
scrolling minimize. Let's start with making grass. You can see how easy
this is to make realistic grasp on the
backside of our image. You want to make sure
this a bit smaller. Press these two buttons next to the letter P on your keyboard
to make it smaller again. Let's start with brushing
a bit of progress there. You can see here it looks really good compared to
what we had before. So with this, we can make this
look real photorealistic, maybe even make it smaller
here if you want to have like really detailed grass
in the background, like it's really a real image. The farther you go away,
the less you will see. So those are probably, they'll do this like that. Try to do it a little bit
more precise. Just like that. And if I zoom in, This looks a lot more real
numbers we had before, right? So you can even make it bigger. Let's make this a
bit bigger here, like the big press Control Z to go back and
make it a bit bigger. For instance, there tried to
make this look more real. Alright, we have our grass. Now, let's see
what we have here. We wanted to plane
wreck of our planes. So what I'm going to
do now is I'm going to select the plain fabric
and it's a PNG file. There's no background.
So you can see here I'm, let me disable this. It instantly has
no background in. It looks already really good. Now, if I press Enter, it's going to place it here, because here even the
windows are transparent, so that's really cool. So that's why when you
try to find images, try to find PNG files. These have no background. Alright, so let's
press Control T to bring up the free transform. And let's make this
a bit smaller. Let's place it somewhere there. Obviously we need to fix this, so we will need it later. We have a ball here. Let's make them smaller. We can also maybe placed
him here or there. We can all decide this later. Let's leave them here for now. So I'm pressing Control
D to make them smaller. Like that. Maybe there. Let's also import our dork. We have our dog here. Let's also just make
it smaller like that. I think that looks
a bit smaller now. I'm just going to place
them randomly for now and later on we will
move stuff around. Let's also import
our background. We have mountains here. I'm going to place
them behind him like that and press quantity to resize it like that. Let's see. We pick a nice spot, maybe something like this. What we have here,
we have a moon, Let's import our moon. Let's place, you can
see here we have this black stuff around it. The easy way to remove
black from images, the goal here, and select Screen and black
is not feasible anymore. Of course, it's a
bit transparent, so you might want to
not want to place it above stuff where you
can see something. But in the background if
it's black, it's all fine. Now, you can see here, you can see a bit of this black because it's
not really black. It's a bit gray. If I'm pressing Control or Command L to
bring up the levels, select the black picker to
make this area real black, and now it's gone.
Press Okay, multi-bit. Let's press Control T
and make this smaller. Again. Place it somewhere there. Then we have also our house. You can see here this house has a background that is white. For this one, it's
really easy to remove it because it's all white
and house is darker. So I'm going to select
the magic wand tool. And just select this. Then select the rectangular to press right mouse
selected first, because we wanted to select the house and at the background. And click here on the mask, and the background is gone. Now let's move this up
above press quantity again. Let's make this a bit smaller. Maybe we want to have a big, Let's leave it like that. Because here this corner we
need to remove that one. So I'm going to click
on the layer here, the mask of it, the house. Then select this rectangular to make the selection of this. Press D on your keyboard to
bring up the default colors or select the
background to make it black and press
Control Backspace. Now the same goes for this. Select it, Control
Backspace and it's gone. And that's easy. Alright, let's see
what we have here. We have the moon, we
have the mountains. So I think we have
everything now. For now. Now we can move stuff
around how we want it. So if we wanted to have this
boy bit in a foreground, obviously it needs to be bigger. So let's place them here. Let's make this a bit
smaller, Dare like that. Let's see. Let's place the dog
somewhere there. Let's make this all smaller. Try to take some time
to find the right size. You want to use everything. I'm going to make this
boy a bit bigger here in the foreground, like that. And it may be smaller. And this moon, Let's make
it smaller like that. Alright, so this
is our basic idea. Of course, we need to make
everything look real. We will do this after, and maybe even smaller.
I'm going to background. This is fine for now. I will now start with making everything look more real and it will happen in
the next chapter.
5. Starting With Blending: Right now our image looks, it doesn't look real. We have to make sure
everything is going to look like a real image,
like a real painting. First of all, we need
to make sure the grass, the images of the house
of the boy of the plane. It goes inside the grass
between the grades, however you want to call it. So let's start off with, let's remove the layers
from the sketch. We don't need them anymore.
So I'm going to hold, Shift, select these sketches and just
drag it to this bin here. And it's gone. Don't
need that one also. Just remove them. That's also move these
to clean this up a bit. Now we have some layer share. So when you work in Photoshop, you obviously want
to organize things a bit better because if you
lay them on to change stuff, I want to make sure
it's organized. We will do that after this. Let's first make sure
everything looks a bit real. I'm gonna hold down
Control or Command on Mac and click the house. So we select this layer, or you can just
click on this layer. Click on the mask, not the layer but the mask. Then go to Brushes here or
press B on your keyboard. And let's select the
grass again, dune grass. You can also use a normal grasp. It doesn't matter. Let's
make this smaller. Let's click the property. Mixture color dynamics
is de-selected. Let's take black
as the color here. You can also click this
and just make a Gleick. Make the brush a bit smaller. I'm going to rotate this again. The grass goes up, going
to burst these parts. You can see here it looks
like it's behind this grass, which makes it look
obviously realistic. Just do this on the bottom
part of your house. It's behind this grass. You can see how easy and fast
I created this image that's inside this grass and this looks really like a real
image now already, just by doing these
little things, you can also play
around with it, make it a bit big
and maybe on some, some more grass here. Here. Just don't do it too much, still have to look real. This is done maybe a bit
more here like that, so it goes inside the scratch. We can also do this. We have to do this
for the plane. Let's take the plane, the plane. The plane doesn't
have a mask yet, so I need to make a mask
by pressing the mask here. Click on the mask here. And let's select the
black brush again, the same doom brush. And let's make this
a bit smaller. Press those two buttons next to the letter P on your keyboard. The make this
bigger and smaller. And let's start with brushing this part
inside this grass. Let's see, Let's do
a lot of grass here. I don't want to see
much of this part. I want to add some grass here, like it's really
in-between the grass. Maybe you can even go up like
this if you want to make it look like really
3D inside this grid, somewhere there. Like that. Alright, let's see
the top part here. I think the plane
goes a little bit up. So you might want to leave
this out or do it. Let's see. I think this looks fun. Adult. Maybe the play would
go up a little bit up. So accidentally removed. If the plane would go a bit up, you could also leave
it, but let's do it. It makes it look more like
dense grass here now. I did. Now you can see here I've
got a bit inside this area, so I'm going to select
the white brush and remove this part. Like that. Let's take black brush again. Let's
do a bit more here. Like that. Alright, this is fine. Now. Now the same goes for the boy. Let's select the boy. Make a mask. And remember in the beginning I said
you don't have to cut out the bottom part of the
boy really precisely. And this is why, because we
are removing it now again, at this point you
won't even see. I think the grass here will be even more so I'm gonna make the brush bigger because
the rest is bigger here. And I'm going to make like
that. I think this looks fine. The boy looks a bit big, so I have to press Control
T and make them smaller. Now, we need to make sure
it's realistic sizes. Probably is a
little bit smaller. Maybe like that. Alright, the house
can be a bit smaller. So I'm going to make this a bit smaller because it's in the
background somewhere there. Again, I see this white line
here from the house layers. I'm going to press the mask. This selection again, maybe selection press D on the keyboard tray of
black as a background. Press backspace.
Let's move this up. Now we have our realistic
grass between our subjects. So this is the first part.
6. Changing The Lighting: To make stuff look realistic, we have to blend everything
better at the getter. So the first thing
of blending is obviously like we did
with the grass to make the object look like it's in the real world
that we create it. The other thing that we have
is to work on the lighting. The lighting is the same
everywhere in the image, and also the colors and also
the quality of the images. The quality doesn't
really matter here because everything is like
a bit in the background. It might be blurred out a bit. Let's work a bit on the colors. The colors here, you can
see a wave like this. Doom grass, which is yellowish. Plane here is a bit more bluish. I'm going to click
on the plane wreck. And I'm going to go down here to select
adjustment layers, and we're gonna select
Hue and Saturation. Now the best way to
blend things together with a color is to get
rid of some colors. If you, getting rid of colors, you blend them better together. If you make everything
black and white, it's gonna look instantly egg. It's altogether, but we don't want to make it black and white. We want to have colors in this. I'm going to remove some
color from this first. You probably won't
even notice it, but remember to do that, remove some situation from it. Now, the next thing to
do is to press this. N. Don't forget to press this
because we only have one, the effect the plane, we don't want to affect
the whole image. Now let's create a
new adjustment layer. And this time I'm going
to select color balance, but the color bands, we
can adjust the colors. If you want to make
display more red. We can move this to the right. You can see here it gets all red from blue more to the left. Now we obviously want
to make it a little bit more yellowish because we have this dune grass shadow. So I'm going to move
this one around. You can see here, I'm moving
this a bit to the ghetto. Not too much, just a bit to
blend this better together. Now, let's close
this, this is fine. Now let's stand to make
sure we use folders because we're getting
a lot of layers now and we can get confused. What is, we want to place every subject in one folder with all the estimates
of that subject. So first of all, let's hold our Shift while having this
plane wreck selected, let's click these three
layers that we have. And then we click
on the group here, on the map, like that. And it's gonna make a group. If we double-click on this, you can change the
name to plane. And this will be applying. And every time I
click on this folder, I can move the
whole thing around to another place in our image. Maybe we want to have
it there or something. You can easily move it. Now, let's do the
same for the boy. This is boy. It's
only one layer, so it doesn't go in this group. So I just select this layer and drag
it inside this group. And I can close it,
open it for the edited. Do the same for the dog. Get there. You can disable enabled
if you want to see it. And let's do the house. This is our house. Let's move it inside the house. Grass we have here. We have our moon
and the mountains. Let's call this background. Now if you want to have
it really organized, you can also press right
mouse and give it the color. I don't really do
it, but sometimes people like Dude it so
maybe you won't get it, but I'm okay, would help colors. Now, let's start with also blending the image bedded
together with the lighting. First of all, we have to
define what is a light source. Our light source is our moon. You can see here the background. Mountains have light
on the left side. So we want to make
sure the moon is on this side because the light
comes from this side. I think it's even from the sun, but whatever, we will
change the colors later on. So let's place
obviously the moon on the left side because
it's refracting the light. We can see the background
lighting is there. Don't want to place it there. Let's place it on the left side. Let's make it a bit smaller. All right, let's
work on the lighting of the other images. Let's start with the house. I'm gonna click on
the house and to change the lighting of
stuff we use curves. I'm going to create a curves adjustment layer
on top of those. Don't forget this. We
only affect the house. Let's move this a bit there. Let's take the highlights
and bring this down. You can see here we
made those darker. Let's first make
everything a bit darker, like the background,
something like this. It's really dark. Let's do the same for the grass. Curves. Click this and make it dark. You can't really see it
looks a bit more real. Now, let's move
on to the curves. Click this, bring
the highlights down. Try to find the same range
for the darker tone. So something like this is fine. Obviously the plane
curves, bring it down. You can see it.
Something like this. Also the dog curves
bring it down. All right, everything
is super dark now, but that's good because we are
going to make stuff light. And now let's start with, let's close these folders. Let's start with the house. Let's select the house here that we have and click
on the Mask of it, not the layer mask. Now go to your brushes
again, the burst tool, and this time we want to select the normal price,
not the grass brush. So let's scroll up all the way here and select the
normal soft, soft brush. Let's make sure we
have hardness at 0. So we have a soft brush. And let's leave the
best the flow of 100. Make sure this like this. Then make sure to, sorry, this one from the mask of the dark color that
we made, right? So select this one. Let's select the break brush. And you can see
here, if we select the black brush and
we brush over it, it's going to make it light. We want the breast,
some areas slider. We have our light
source here, our moon. So this part,
obviously we'll get a bit lighter because it's going to get light
from the moon. Let's brush there. And maybe a bit here. That's pretty much it. This is the only part that's
going to get sunlight, maybe this roof also
here, a bit light. So if you wanted to
do this precisely make your brush a bit smaller. Parts slider. This is already, think this is enough
light for this. All right, now let's move on. We have our first
lighting graded. This is really easy
as you can see. Let's move on to
our next subject. So let's go through the plane. Let's open up the
plane and let's find the layer that's making this thing darker
the curves here, you can enable, disable
this to find it, click on the Mask of it, zoom in and eventually
that domain. So we can see this
better with this moon. And let's do the
same for displaying. And you can see
here gets lighter. You have to think a little bit which area is going to get
light if it's coming from, they're properly the top part because the moon is on the sky, the top part will be lighter
like that, just like that. And also, let's zoom in here. Also this part, also two-part, probably a bit less here. If you wanted. That is precise. Let's bring the
opacity down here. Let's look a bit here. Make bits off the edges. Here. I'm bringing the opacity down. And let's zoom in
here because we have this round corners
on this plane. So some parts lighter, some parts.com like that. This already is lighter. Now, this is a bit
too light, I think. So. What I'm going to
do is I'm going to create another curves
layer on top of this. So let's create curves again. And let's make this a bit darker so we can make the
whole thing bid data. I think it's too light. Let's see. Let's make this
a bit darker like that. This is already better. Now we have also our doc here. Let's also do the doc. Let's click on the mask here. And let's also brush the dark obviously on this side because we have the
moon on this side. And the top part, maybe a bit of a spouse here. Just like that. That's already better now that the
duck is a bit too red. So I'm going to create
a huge situation here and make sure this is selected so we
will effect the dock. And let's bring the color down. I don't want to have
this orange color doesn't look real.
Something like this. Alright, let's see. Let's move on. Now. Let's take this boy. And let's also, some parts of
him ladder is really dark. Now, I'm going to click
on the mask again, select the black brush,
make it a bit bigger. Let's bring the opacity
up to a 100 again. Let's start with
brushing him later. We have the moon
on the left side. So we're going to make sure that the left side of
his face is slider. Left side, the Fisk
clothing like that. A bit more here in front so
it doesn't get too dark. You also has a flashlight. You can even make
this a bit lighter. Let's also do here. This is a bit too
much, just a bit here. Just like that. We already have this better
validity, this image. Now also this boy has a bit too much color for
this time of the day. So I'm going to create
a union situation also for this boy, and bring the
situation a bit down. All right. This looks already a lot better
than we had before, but it's still not done yet, so we need to move on now.
7. Brushing Shadows: There is one thing
that is missing this image to make this
look a bit more real. Of course, there's a lot of stuff that still
needs to be done, but to make it more real, we need to have shadows. We don't have any shadows, especially when we have
this kind of lighting, you will see some shadows here. So let's start with
making shadows. I'm going to close these
folders here a bit so I can see this bedroom because I wanted to create every shadow
in the right folder. Let's first go here. I'm going to click the
layer here on this one. So I want to edit the house. But if I'm going to click
here, I'm going to do this. It's going to go between
these, so I don't want that. I'm going to click
underneath it and create a new layer and
then just drag it. Theorem three, you
see that blue stuff and it's inside this folder. Now, for the shadows, we can just use a
brush for the shadows. We want to click
on the cobalt here first and see where is the shadow is going
to be on this gray. So I'm going to click the grass. So it's going to select the goal progress and
make it like really dark. From this selection,
almost the black. Change the blend mode
to multiply here. Select the normal general brush. But we need to bring the opacity down because if I'm going
to press like this, it's going to get real dark. It's not real. We need to bring
this down a lot. I'm going to bring this down
to somewhere around 15. And also the flow, which really, really a little bit
if I'm brushing now, you can see here I
have to click a lot of times and it's better
because we can do this like step-by-step
and not at once. It's there. It's gonna hit this house. We will have some
shadows on this side. Let's start with brushing
these sides here. These areas here, some there. Let's British bit there. And I'm brushing a
lot of times now. You can see here it gets darker and that's
exactly what we want. We want this area a bit darker. Just like that. All right. Now it looks a
little bit like this house is floating in the air
and that's because we don't grade the
channels on the house, it only on the ground. We also need to create obviously some
shadows on the house. But first let's do
here a bit darker. This is already nice
dark shadow we have. Now let's click on the house. And this term are gonna create a new layer
inside his house. Because I only want
to affect the house. I'm going to do the same here. I'm also going to
brush these parts of the house with darker like that. Just like that. All right, now this shadow, it's a bit too dark. So what I'm gonna do is I'm
going to drop the best here. Like that. I'm going to, let's see, this one is a bit too dark, so I'm gonna bring this down. We need to increase the contrast because it doesn't
blend well together. Now, what I'm going to do is I'm going to create a curves. Here. I'm going to take
the mid tones and bring them a bit down like that. The same goes for the grass. We need to make the grid
as a bit more contrast. I'm going to create the curse. Take the mid-term, so I'm
bringing them a bit down. Just like that. This
already is better. Now. I don't want to have
this dark area, their backgrounds, so I'm
going to take the black brush, Let's bring the opacity
and flow up again. I'm going to brush there. We only have like the
shadow here unless they're maybe just a bit
these areas around the house. That's also the year. If you like, it's too dark now. I only want they
have dark there. Alright, that's already better. You can see the difference. Let's get rid of it there. Okay, let's move
on to our plane. Let's give applying
a bit more contrast. I'm going to create
the curse again. It doesn't really
matter where it's here. Let's move it here. And we're going to take the midterm
and give it some, let's see, let's do
it a bit like that. And bring the highlights
speed up just like that. All right, let's give
this dog a shadow. Sometimes you can also
just take this doc here. Let's take the whole
folder and press Control J or Command J to duplicate this. So forward this press
Control E or Command E. We rasterize this
layer into one, drag it underneath the dog. Then go to Edit, Transform, Flip Vertical, and then it's
going to flip this vertical. If I hold down shift
and can move down exactly on the same
place like that. Now press Control Command U and bring the lightness
down to make black. You can see here we
have a shadow fall dog. Now it goes a bit too much down. So I'm going to press Control T to bring up the features
from hold down shift. Take the bottom part
and move it like that. And if I hold down Control
or Command to make, take one corner and begin
stretch out a bit to debt side. Because we have the
moon on the left side, the shadow would go a bit, bit to the right, right. So let's move it a bit there. Just like that. It
doesn't have to be precisely just a little shadow. We have bringing the
best the bid down. So it looks more real. Just like that. Now let's make a mask here. And let's select
the black brush. And let's push it
a bit away there. So we have our shadow for dog. And this is okay. You can also just make
it more precisely I did. This is nice. All right, the next thing is some
shadow for the plane. Let's make a new
layer here and drag it underneath applying,
take a brush. Bringing the opacity
down again to, let's say 20, maybe 15 even. Let's again, we still
have this color. Let's change this to multiply. I'm going to brush some
areas darker here. I don't want to burst too much, just a bit of fear to make it a bit more real. I
think this is enough. Maybe a bit here. Alright, don't brush too much. This is enough. I'm going to drop the best
even on the one ever too dark. The next thing is our boy. For the boy, what I'm
going do is I'm going to do the same as with dog. Let me close all these folders. You can see why it's good to create this folder here
for a lot of layers. Now, let's duplicate this
by pressing Control J. Then press Control E
to rasterize this. So we have one
layer press control or command you will make, bring the lightness
down to make it black. Then go to Edit,
Transform, flip vertical. Hold our Shift while
dragging it down. Put it underneath the boy, makes sure it's in this folder. Let's zoom out a little
bit and press Control T. And you can hold the Control and stretch
it out like that. Just to make some sort
of a shadow here. Just like that. Now I'm going to bring
the opacity down. This grass here. It's not like straight floor, it's going up and down with all these all these
grids between. So we have to blow this out. So what I'm gonna do for
this layer is going to go to Filter Blur and add
some Gaussian blur. And this way I can blow
this out like that. I don't want to cheat. I'm going to blow this
really outer lot. Let's move it there.
Let's Make mask here. So press on the mask on
this layer from the, from the shallow and
take a black brush. And let's increase this again. We can for normal brush. And let's brush a
bit away like that. You can see with graded
a little shadow here. It makes this image look a lot more real than
without the shadow. Alright, this is good for now. Now we have to move on
to the next chapter.
8. Brushing Mist: When you get to a
point like this, when you have the most of
the stuff, your images, you can also start with maybe make things smaller or bigger to make them look more realistic. So for instance, this dog
is obviously a bit too big. So what I'm going to do is I'm just going to
select these layers. Maybe that's too small. What? I'm going to select
these layers and make the dog bit smaller to try to find some
photorealistic sizes, maybe move them around. You can also place them on
other parts if you want. But I'm going to make
this a bit smaller. I'm going to move this
boy a bit to the right. I think. I think I'm going to make
this image even like that, or maybe even make them bigger. Place them closer
to the front here. Take this house this
house bit to the right, make it smaller if I want to. I can just move
stuff around life or maybe even there somewhere
on the top of the hill. Think this looks better. Let's see. I don't want to
move this too much round, just a bit smaller maybe there. Alright, now we can start with
moving on with this image. I wanted to add some
missed in the background. To make this a bit
more mysterious, what I'm going to
do is I'm gonna create a new folder here. Let's call this mist. Mist. I'm going to use
the midst brushes. These are also in this project to import MS versus you can go down here and import purchase and select the MSB
worksheets that I have here. I'm going to use
these myths brushes. I'm going to select some of
these which I want to use. Obviously, we need to create a new layer to use
dismissed for the color. Let's sample something
from the sky here. This grayish color,
maybe a bit lighter. Let's move up. You
can see it's liquid. It's a lot of myths.
This is too much. Let's make the brush smaller. This is way too big. Let's make sure to miss
this on top of our grass. So I'm gonna move this folder above the grass because we want to make sure that Mrs.
on a grass Let's see, for a car maybe bit like
this, grayish color, like they're obviously
this is too much, so I'm going to
drop the base here, so I don't see it too much. So let's drop the base
new flow bit more down. Just click a couple of times. And you can see here
I am creating miss. Now. Let's come back like that. This will make the
image more mysterious. This is first for
the background. Let's try another one. Try to use different mismatches. That would be better. So you don't see
better and you can see a bit of a pattern and
don't want to see that. You can also change the
color of the MR bit. Let's change this to, let's
make it a bit darker. Let's brush again. Compress a lot of times
the great dismissed. Change the color again, maybe a bit lighter, you
can barely see it. We have now a bit of
mist in the background. I also want to create a bit
of mist in the foreground. So not too close to the
camera, but around the house. So I'm going to
create a new missed. Let's call this
mist into mise en, place it above the plane. Greatly new layer. Let's also create
a bigamist here. Now we have some mystery
around the plane, around the house and
just brush again. Make this a bit more
mysterious. There. Let's see. Now let's
leave it there. Just a bit there. Alright, I have used too much
of the same message. I'm going to change
the brush again here, you have some different
brushes here. Try it out the different ones
instead of using the same. Like that. This is the midst. We have mispriced. You can do the same for using other stuff like trees
in the background. There's also a lot
of tree versus tried to search on Google. For instance, free
brushes, free three Vs, and play around with all these different
types of brushes. They are really good
to make your composite look more like the
painting molar grill. Instead of this flat
images without depth. This also helps with
depth in your image. Now, I think we have
a lot of myths now. Maybe a bit more here. Alright, I'm gonna leave
them missed for now, or else we're going to
get too much missed, it's going to get,
they might shop. You can also drop the
pasty here, a bit there. Alright, so we have our midst. Don't forget to save your work. I forgot to mention this, but every time you
work on the image, you need to save your work. Because Photoshop can do crazy things sometimes.
So save your work. Don't forget that.
9. Creating Light Effects: All right, Now it's time to. One of my favorite
parts in creating editor is doing
some light effects. So we have, we have a flashlight
that the boy holds here. I'm going to make
the boy bit smaller, I think is too big for
this flashlight here. And obviously when you
have a flush and they will go a little bit lining up. So what I'm going
to do is instead is Boyd layer above all
the other layers, I'm going to create a new layer. Now, let's go down here. Let's select the
Polygonal Lasso tool. I want to create the area that's going to grade the light. So obviously, let's start here. The light will go
something like, let's not do too much,
something like this. This, this, this. So we have this selection. This is how the light will go. Now if I press D on my
keyboard for default, it's going to make the default
colors background white. And if I press Command
or Control Backspace, I can create this. Now obviously this
doesn't look right, so we have to make
this really soft. Now, the first thing to do
is to go to filter blur. And let's select Gaussian Blur. We can blow this out. And let's build this
out really a lot. Something like, let's
see, let's try it out. Let's see, maybe I think this
is pretty good. Already. Something in the
range of this click. Okay, and that's it. Now, if I press Control T, and if I'm going to press Control T and then hold down
command or control make. Because stretch out a bit and then hold Alt Shift
to make it a bit smaller, maybe a bit like that. We have this light beam. It's coming from
this from this lamp. Just try out
something like this. Now obviously it is a bit too light so we need to drop it. I'm going to drop the best here. I don't want to have debt
much color, that much light. Sorry. I'm going to press
Control T again and take these corners while holding down control too, make the center like
really small and the outer parts a bit more
to the right and left. You can see here we can
play around to make this look more real. Press Control T
resizes the bait, tried to make it
a bit more real. Let's make this a bit less. Don't want to have
this too much. It just a little bit of light. Now, let's make a bit more
light at the beginning. So I'm going to
create a new layer. Again, I'm going to select the normal brush
here, general brush. Let's see, let's make
the brush smaller, weight vague now and bring the opacity need
float to a 100 again. Let's click there. We have
light there is the big. So press Control
T. Research this. Make sure it fits
the image like that. This is his light. Let's bring the best bid down. Change the blend mode to screen. That's better for this
kind of lighting. Maybe even less, just a
little bit extra light. Alright, we have our lighting. Of course, the lighting
is like going up. So it would be interesting if he is actually
looking at something. So let's make some
sort of fireflies. I'm going to make like
these little things here. I'm going to select
great new layer. I create a new layer. Let's call them light stuff. I'm going to make the
brush really small. And let's increase
the hardness a bit. Soft edge and make the
brush really small. Make these things here. I'm not sure what it sounds.
Maybe those are five lives. Maybe something magical. But he is watching something
that's flying around here. Let's make make sure
it's a bit smaller. Because when it's too big, it just looks like we're dots. I'm going to make
small stuff here. Let's also bring some
here because you will probably see a bit move this
inside this light beam. Now, if I'm gonna
take the brush, I can remove some that
are to bake them, make them too big or else
it just looks weird. This one is also
probably too big. Just a little bit of
these things here to make this whole composite
more interesting. Let's do a bit more there. Like that. Something like there. All right.
10. Changing Ratio: All right, We have like
this widescreen image. I feel like we have a
lot of empty stuff here, but if we are going to
add a lot of stuff here, can take for hours for adding staff blending
and stuff together. So what I'm going to
do now is I'm going to change the size
of this image a bit. So we created this
wide screen size. I'm gonna make it smaller so
we can grab it a bit, right? So first of all, I'm gonna move this stuff
around the house. I'm gonna take the folder, hold down Shift so it doesn't go up and down and
move it to the right, just a bit like that. Then do the same for, let's see, the plane here, this one and also the dogs or hold down
Control or quantum mech. And bring those to the right. We have a bit more, everything in the
center like that. Bit less. Let's do it like this. Alright, the moon also here. Now if I go down here, let's see this one, the crop tool, I can
make this smaller. So I'm gonna take this part, going to take this part. And I'm going to press Enter. We fill this area
a bit better. Now. We don't have to make the
whole image widescreen. We don't have that
much stuff now. Let me make this a
bit smaller there. Alright. Now, first of all, let's try to blend this better. I feel like this boy is a bit
too much with black tones. So I'm going to create curves. And I want to have
a bit more gray. I'm going to take the mid
tones and bring them, bring them up like that. Just a bit. Not much. Let's take these and
bring them a bit down. So he's a bit more grayish, which will fit better
in this image. Now, let's also make them
a little bit darker. I'm going to create
another curves. I'm going to bring this
a bit down like that. Blend better.
11. Finalizing: Alright, now it's time to make
this look better together. First of all, I'm going to
correct some things here. The boy, For instance, I feel like he can stand a
bit more inside this gray. So I'm going to take the
layer of this boy, the mask. And I'm going to go
for the dune grass again and just brush a bit more. Don't forget that the
semi-colons dynamics. This all depends on how
your image looks now. Maybe your images already good. I don't know, but
I think for mine I will I will brush
a bit more here. So it's like really
standing inside this grass because I feel
like it doesn't look real. Wind. Feet are feasible. This is a bit better now. All right, of course
the shadow of him doesn't look right now. So I have just move
this a bit up. Maybe. Put it like that. Just a bit shadow here. Like that. Not much is standing
in-between the grass. Alright? The next thing to do is to get some more
lighter, fix this. So first of all, let's make sure we have enough
light here from the moon. So let's go through and
create a new layer. Then select General brush. Let's pick something white. Let's make a dot like that. Put it what ammonias, and change the blend
mode to screen. And you can see here we created
a nice sliding from moon. Of course it's too much so
bring the opacity down, so we have just a little
bit of glow from that mode. Alright, so this is okay. Now the dog is a bit too dark. So what I'm going to do is I'm going to add some
curves to the dog. Makes sure to press this. And I'm going to bring
the highlights a bit up so it's a
bit more feasible. There are LLCs, just somebody who bet on
you can barely see him. Maybe a bit less like that. All right, this looks
already a bit better. Now. We need to do some color
adjustments to this. What I'm going to do
is I'm going to create a new layer on top of everything and
select Color Balance. Here I can change the
color a bit on F, a bit more bluish, because at night you will
see a bit more blue. I'm going to add
some blue to this. And also better of that one. That's it. Not much, just a bit. Now I'm also going to
add some curves to this. I'm going to bring
up the highlights, make it a bit lighter. Let's see, maybe we can
make the darks a bit darker. Let's try it out. Just a bit like that. We have a bit more contrast. This looks already better. Now for the background, we have these mountains. I think they're a bit too light. So first of all, I'm gonna make this background press Control I, to make the background black. Select this layer
from mountains. Let's make them real
dark in the background. I don't want to see if too much. You can play with this round. Maybe you want to have
it like real dark. This is also pretty cool. Let's make them like
super dark there. Alright, and this is a moon. Let's move on a bit there. Something like this. The moon is a bit too
bright dish. This one. Maybe a bit less glow. All right, so this is already
better. Let's move on. Now. One, you have everything
in your composite. It's time to move on to
do final adjustments. For final adjustments,
I'm going to create a new layer on top of everything and press Command Alt Shift E. Now we have everything
in one layer. If I press right mouse
converts to a smart object, It's going to make smart object, which is obviously good thing. And then go to filter,
select Camera Raw, Filter Camera Raw, we can
do final adjustments. So I made this a smart
object because I can always do some changes here. Press Okay, and later on, you can change these settings. Let's start with
doing changes here. Let's first go to, let's see basic first. Let's play with
the settings here. Maybe a bit more exposure
to make this a bit lighter. At the contrast here. I think if you make the contrast a bit, Let's contrast first. Blend this better altogether. Then let's see, let's add
some highlights here. It can see stuff a bit better. The shadows a bit to the
left to make darker shadows. This is also the pencil
on the screen here using, so try to play out with the settings to make
this a bit more, more real or make it look better because this is the list step in your composite to adjust all these lighting and colors and contrast, stuff like that. So if you're going to bring
down here the fixture, it's going to make the
image look really soft, which is maybe pretty
good for this one. But we also want to
see that detail so we need to increase the
clarity a bit here. If we do that. Like that. Let's see. Let's not touch that one. Let's move on to curves. Here we have highlights again, we can make stuff like this
lamp, really light here. Let's make this highlighted. I'm going to really crank this up so we can see the
light of the lamp. Now let's see this one. This is also interesting when you play with
all the settings, you can create the kind of different image from your
one you started with. Let's see, Let's
move it a bit to the right. We can
make this dark. I think we can make the
dark a bit darker now. That should probably
be submit to that now. And let's see, let's move the shadows bit to the right.
See how this looks. I think this looks
pretty good already. Let's move on to detail. We don't really have noise, so we can increase
some sharpening here. Some lotion reduction, not
much nice night image. Usually at night you
will see some noise, but we don't have nice. Alright, so what the
column mixture we can play around with the colors. We can get real creative here. Usually I just slide this from left to right to see
how this changes. Nothing changes much because we don't have this
color in this image. This one, the F you can
see here, the blues. I'm gonna move the blue
submit to the right. Let's leave those and let's
move on to saturation. Get rid of this red, orange. The orange bit. Some
nothing, nothing. This is the blue we
have in the background. We can make it a bit
more dark color. I think this is enough. The last one I don't
really want to mess with, maybe just a bit like that. All right, let's move on. These don't need, you can add some vignette to
this to create more, more focused on the
center of this image. And let's move on this other vignette
to make it even more. Just like that. Now with calibration, we
can also play with costs. We don't have that much color. So if I'm going to
change the styles that you can barely
see anything happen. Because we have
this night setting. There is not so much
color in this image. And let's see. Let's move on to this one. And I think this is fine. I like this one. I'm going to press
OK. Now this is, you can compare this
if you enable disable, you can see the big
difference it makes. I think this is a
lot better already. Now, let's create a
curse on top of this. Here. We can even make this
slider for one thing, maybe just a bit lighter. Then we change this to red so we can change the red ones here. Whenever a bit more bloom, I'm gonna move this
way to the right. The green one here,
the blue one here. Let's leave this one. You don't need that one. There is another
trick I always do. And let's select Color Lookup
and select three strip. And this will bring, gives us a bit more color. Just a bit, just like that. I think this is
pretty much done. So this is like basic steps
to grade something like this. Obviously you can
do is better if you submit more diamond
is practice a lot. Do like realistic sizes, but you get the point here. How to create lighting, how to blend things a bit
better together, how to make stuff like mist, but try to create
a lot of stuff, different composites
and eventually they will become better and
better if the Sometime, I hope you enjoyed this course, I hope you learned something new and I hope to see
you in the next one.
 Zenja Gammer, Digital Artist & Educator