Transcripts
1. Intro: My name is Teo,
and I'm an artist, graphic designer, and urban
sketcher, in this course, I'm going to teach
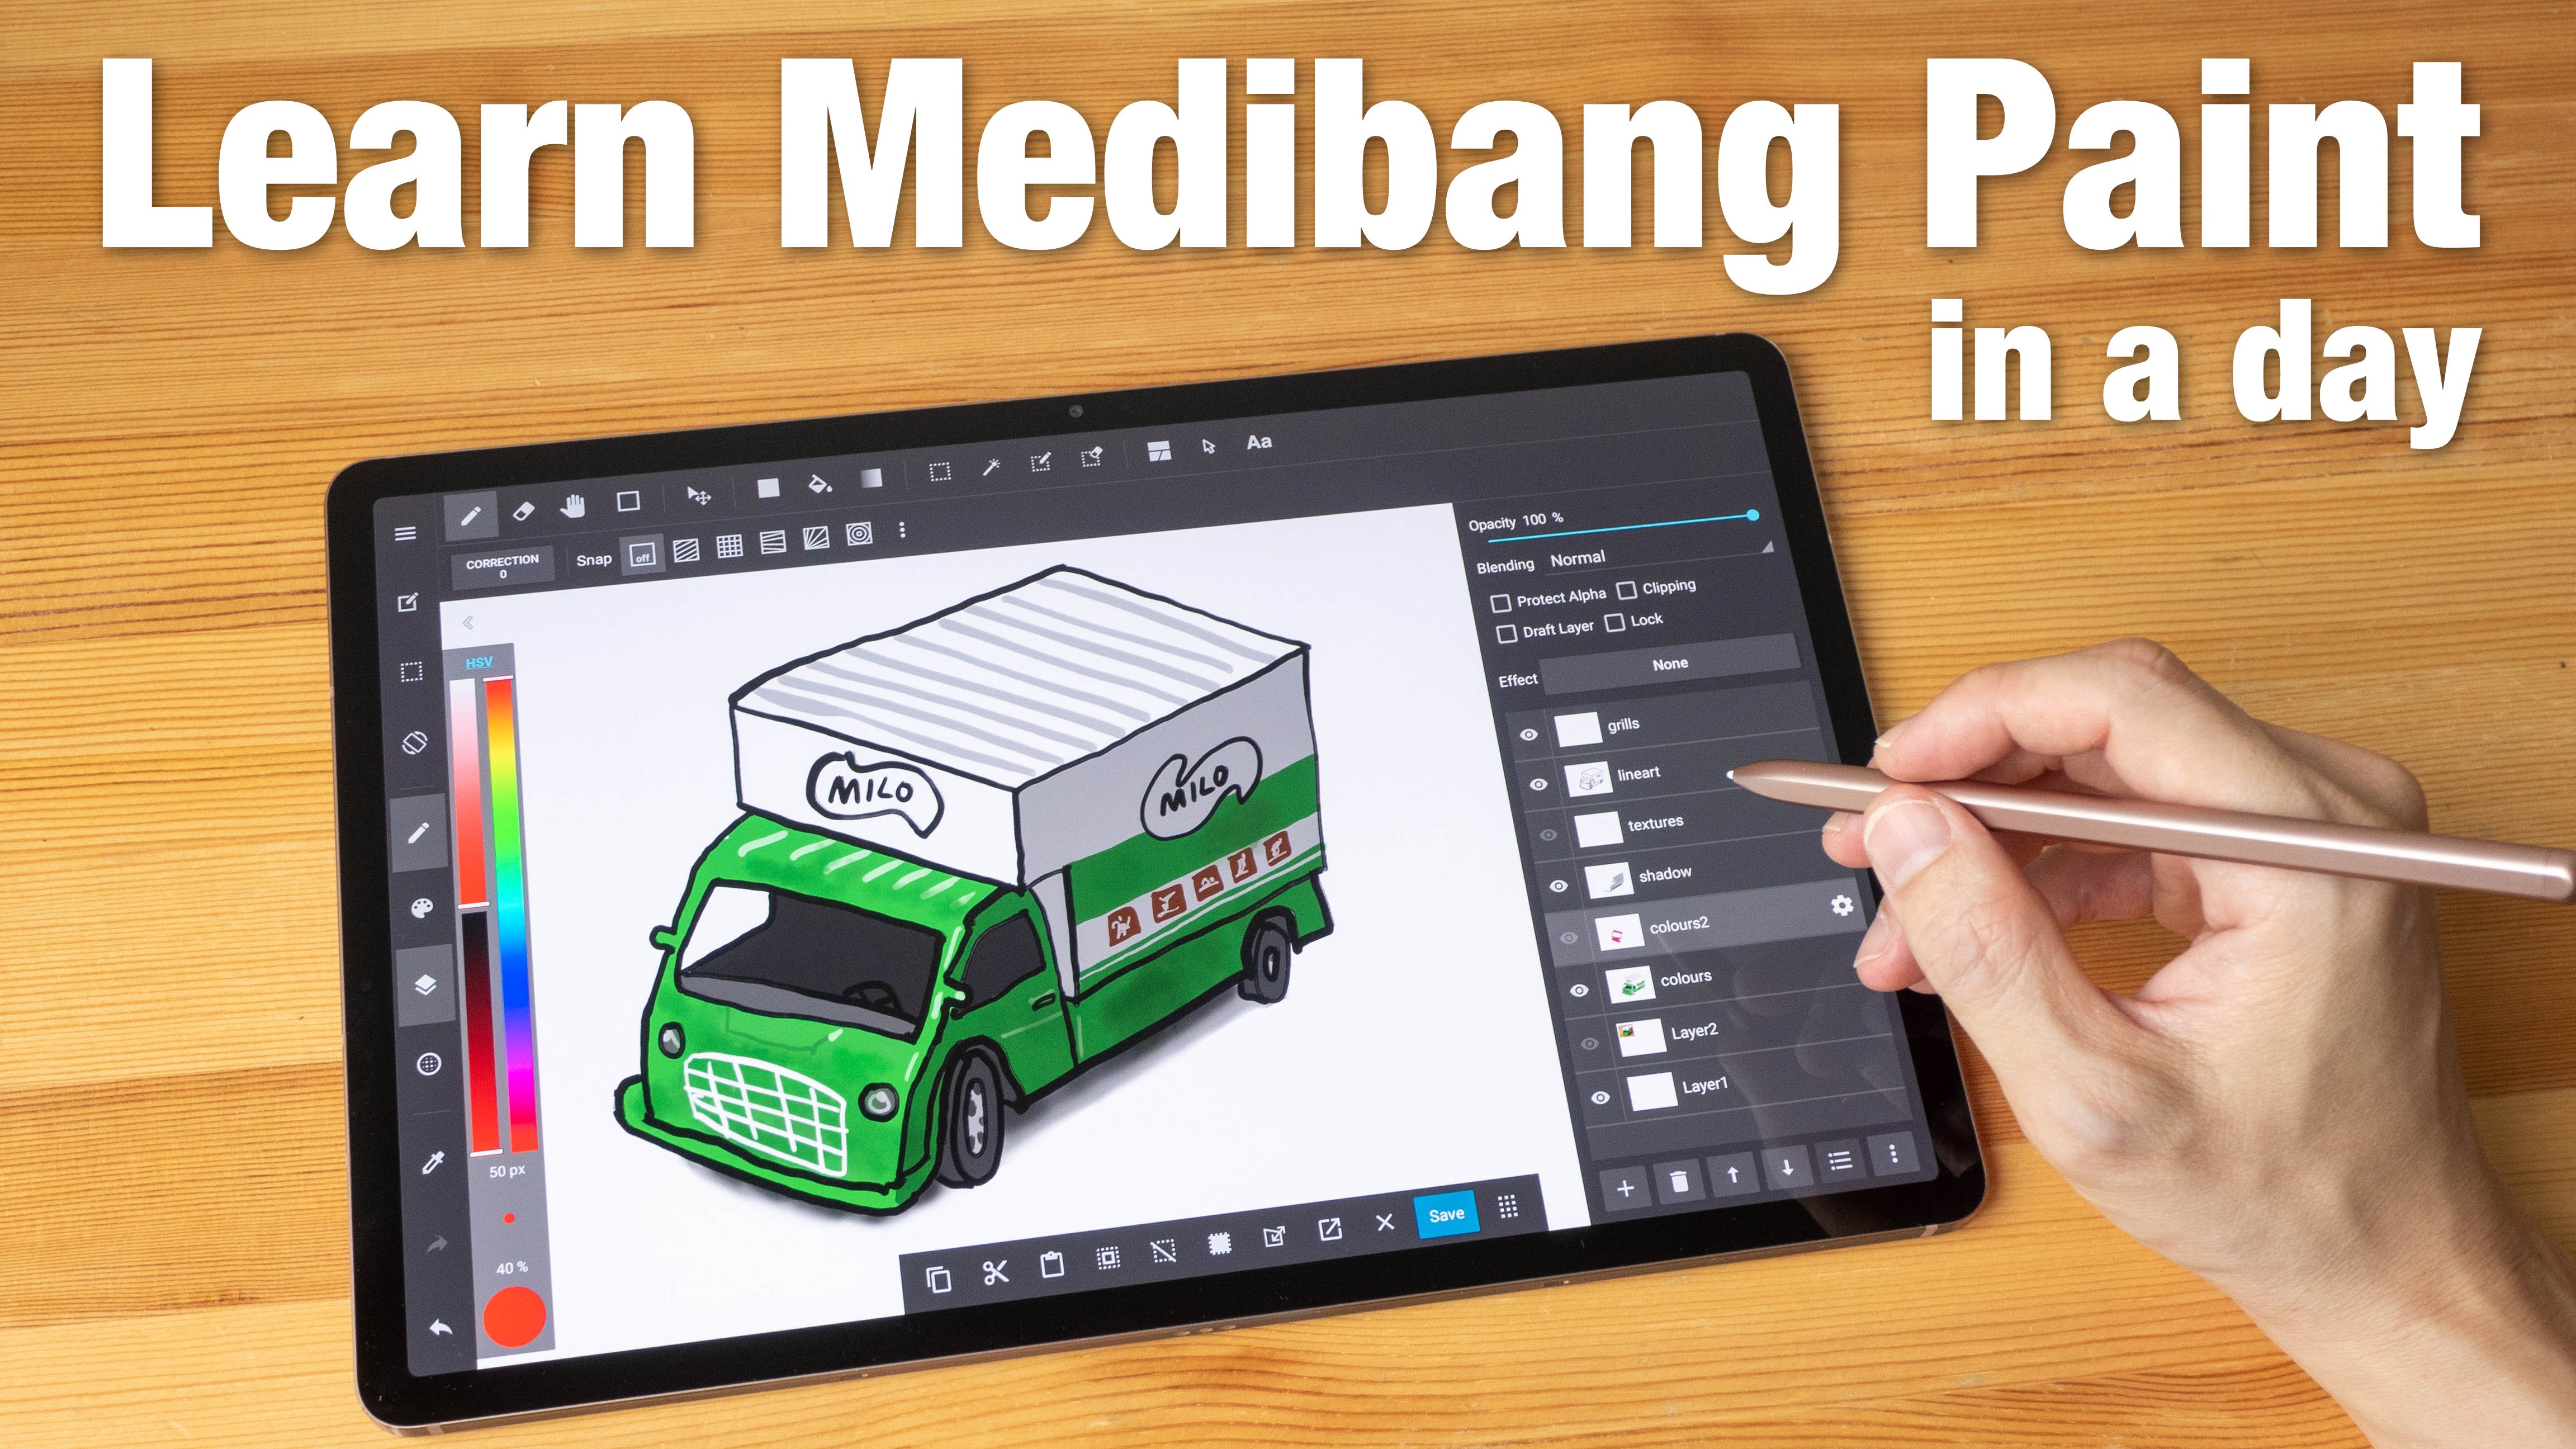
you how to create digital art using MDibankPaint, that's running on the desktop, either with Windows or Mac OS. This course is
suitable for beginners because this app is actually
quite easy to learn. You can learn it in a day, but it's also
rather capable app, so it's a good app to learn. Now one thing you need to
know about this app is it runs on iPads, Android tablets, and desktops. This course covers
MibankPaint on the desktop. If you want to learn
how to draw with MDiBankPaint on iPads
or Android tablets, do check out my other cost because the user
interface is very different for
MDibankPain running on desktop versus running
on a portable tablet. I will not be able to
cover everything with this app because there are
just too many things to cover, but I will show you
the essential tools and techniques that you need
to create an illustration. I will show you the UI and explain where you
can find the tools, how to select colors, what colors to use, how to work with the layers, how to create line, how to navigate around, how to paint within shapes, how to create shadows. How to add details so that your artworks look
more three dimensional. And also I will
give you a project so that you can practice on your own to get
more practice. MinibankPaint is a fun app
to use, and I like it. So I hope you will
enjoy this course. Now before we head over
to the first lesson, I have a favor to ask from you. If you find this course useful, do leave a review for
this course so that you can help other students
discover this course. Alright, let's start
the first lesson.
2. Software requirement: Come to the first lesson, and this lesson is
for those who do not really have the software, MDibankPaint installed
on your computer. To find the software,
you just have to do a search online
for MDiBankPaint, download, press Enter, and
look for the download link. Let's go to their website. Now, there are actually several
versions of MDibankPaint, so for the desktop there is the Windows
and MacOS version. For iPad, there is
MibankPaint and MibankP. For Android tablets,
there is MibangPaint. So what we want is
the desktop version, either the MacOS or
the Windows version. Now, at the time of
making this video, there are the paid
versions sold from Microsoft webstore and
also the Steam Appstore. And there are the
free older versions, the MacOS version and the
Windows older version. Now, if you want to buy the app, which used to be free
and ad supported, but now it's not free
and there is no ad. Let's take a look at
the pricing first. This is the Microsoft Store, and this is selling the app
for 72 Singapore dollar, which is around $57. If you look at steam, the price is actually lower. It's 42 Singapore dollar, which is around $33. So do compare the pricing on the Microsoft Store
and the steam store first before you purchase so that you can save some money. I have already
purchased the app. From the Microsoft store. So there is no longer
the purchase link here. Another thing you
may want to know is MibankPaint also sells subscription plans which can give you different
amount of cloud storage. Now, if you have purchased
the desktop version of MDibankPaint, you will get a minimum
amount of Cloud storage. So you don't actually need to purchase the
subscription plan. But if you want additional
cloud storage or more brushes or
textures or materials, then you can consider getting
the subscription plan, but this is not necessary if you already have
the desktop app. In the next lesson,
I want to talk about the hardware that you can use for drawing
with Mibank paint.
3. Hardware requirement: This lesson, I want to talk
about the physical hardware that you need so they can
draw with MinibankPaint, and I'm talking about pen
displays and pen tablets. If you already have the tools, then you can skip this lesson
and go to the next one. In order to draw
with MinibankPaint, you need either a pen display, is what I have here
or a pen tablet. A Pen display is essentially a monitor that you can draw on. This has pen support, so I can actually use
this pen to well, not just draw but also
to do other things. So this needs to be connected to the computer and
the computer needs to fed the video output to the
pen display so they can see. Pen display obviously will have pen input so they can draw. Now, pen displays are
actually more expensive compared to pen tablets which
do not have the display. This is more affordable and this has to be connected
to a computer so that you can draw on the pen tablet while you look
at your computer monitor. This pen display
that I have here happens to have a touchscreen. So touch is a nice feature, but it's not necessary
because for my tutorial, I will be talking about how you can use keyboard
shortcuts instead. So if you are using median paint on a Windows touchscreen device, that's great, but touchscreen
is not necessary.
4. User interface: Welcome back. Let's look at
Mibank more specifically the user interface and
where you can find the tools and the commands
to help with creating art. The UI for the desktop version for Windows and Mac OS is very different compared
to MDIbankPaint on iPad and Android tablets. For the desktop version, you get the menu bar
at the top here. And when you click on a menu, you can see all the options for tools and commands
that are available. And some of these options may have a keyboard
shortcut associated. For example, if you want
to use the Brush tool, you can actually press
the keyboard shortcut B, and if you want to
switch to eraser, you just press E. This is a very quick way to switch
between brush and eraser, and it is very helpful to learn all these keyboard
shortcuts which can help you work much faster. Now, if you look at some
of the options here, you may see a
letter in brackets. For example, with
color bar here, there is this letter B. So if you take a look at
this option here, color, and then there's bracket C, to assess this menu, you just press the keyboard
shortcut, alternate. Let me just click away. Alternate C, and this will pop up and you can
see the letter B. So when you press B,
this will switch the two to this color bar. If you want to switch
it to some other tool, you can press alternate C for this manual and maybe change
it to the color wheel, press W. This is really quick for
switching between tools. By the way, if your
UI does not look the same as what I have
here, for example, if some of your
palettes are missing, by the way, you can actually
drag the palettes out. For example, some of the
palettes are missing. Maybe the color
wheel is missing. You can go to
Window initial line and this will reset the UI. Now all the palettes are
at their default location. And while I'm at it, maybe we can remove some of the palettes that we
are not going to use. Let's drag out the reference
palette, close it. If you want to re enable those palettes that
you have closed, just go to Window and
enable them again. They are not gone.
They are just hidden. We do not need brush size, so let's close that. We do not need this
color swatch palette, so let's close that. Now, the color wheel
here is too small, so let's move the cursor to the intersection here and Oops. By the way, even though
this pen display that I have supports touch, the desktop app does not
support touch shortcuts. So to undo, you can use the button here to undo or
keyboard shortcut Control Z. So move your cursor
to the intersection, this line here and drag to
resize all the palettes here. So now we have a
larger color wheel. Okay, so brush settings
can be useful. So let's leave it here, and we have the brush
options here at the bottom. Now, this menu is kind of small, so maybe I want to move the cursor to the intersection between these two palettes, and there will be a small
double arrow that appears oops. By the way, if you drag out
the palette accidentally, don't be afraid
just put it back. So when the double arrow
appear, just drag it up. You know what? Let me
just put this here. Maybe it's easier to drag the bottom here down
rather than drag it up. Under the menu options, there is one row of additional
icons and shortcuts. Now, these are actually options, additional options for some
of the tools that you select. For example, with
the brush selected, I actually have
selection for grids for perspective grids or rectangular grids or other type of grids so that when you draw, you can have some line assist. Now if I switch to the
gradient or the field tool, you can see the menu bar here. The options here
actually will change. If I switch to eraser,
this will change again. If I switch to the selection
tool, this will change. Depending on the tools that are selected on the left side, this will change and
give you more options which you may sometimes
need to tweak or adjust. If you want to get
more drawing area, you can hide the UI by pressing
the keyboard shortcut. Tap and this will hide the
pallets on the left and also on the right if there are
pallets on the left and right. To bring back the UI, just press tab again. That is pretty much all you
need to know about the UI, how to navigate and where to find the
tools that you need. In the next lesson, let's create a file and
talk about file management.
5. Creating a new file: All right. In this lesson, we are going to
create a new file and look at some of the
options that you can get when creating a new file and also how to manage files. Let me just close this file
that I have by pressing the keyboard shortcut Control W. It may prompt you to save, so I don't have any
changes to the art, so I don't have to save. Talk about
preferences. Go to FL, look for preference and
settings preferences. The keyboard shortcut is
Control. Click on it. The options that you see here are slightly different
compared to those that you can find with the iPad and Android version and you can actually leave
most of this at default. If you're using a
touch screen device, you may want to enable gestures so that you can use
finger gestures. Another setting that
you may want to change is how to zoom by dragging. I'll show you this later, but now you can leave
this as default. Setting that is missing from the preferences is there is no pressure
curve adjustments. If pressure sensitivity for the pen that you're using
is not working as expected, you may have to adjust
the pressure curve using the driver for
the pen display or pen tablet that you are using because you cannot adjust the pressure curve
using the app. So to create a new file,
just click here menu, file new or press the keyboard shortcut Control,
which I'm going to do so. There are two options
for creating new files. You have standard or comic. Now for comic, there
are comic settings, and for our tutorial,
we'll be using standard. So here you can choose between the different units to set. We will use pixels for both
the width and the height. Or you can choose from the
preprogram canvas sizes here, which sometimes may be faster. And while there is this
drop down list with all the presets,
so for tutorial, maybe let's create a 4,000
by 3,000 pixel Canvas. And you can set the
background color. In this case, let's have it as white or you can have
it as transparent, and I think you can leave all the other settings at
the fault and click Okay. So just follow me, create
your new file first and press Controls or go to
the file here to save. And save this file
somewhere on your desktop. The file name I
want to use is Toy, and you may see the
file format, MDP. That's the MDBankPaint
file format. You can choose to save
in other formats, but if you want to have all the features of
MDBankPaint for the file, save it as a MDBankPaint file. Let's click Save and now
you have a Wow Canvas. Now, instead of saving your artwork to your
internal storage, there is an option
for you to save your artwork to the Cloud. So you will have a minimum amount of Cloud
storage with minibankPaint. So if you want to save it
to Cloud, just click here, save to Clouds and enter
the file name and options. Once you have saved your
artwork to the Cloud, you can go to the
menu option here, open from Cloud to
find your file. Saving to Cloud is
useful if you work on multiple devices such as you're
working on your desktop, but you also need your file on an iPad or Android tablet
so you save to the Cloud. These are all the
artworks that I have on MDBandPaint Cloud. This is the list view. Let me click the icon view. These are some sketches
that I have created. I have some character sketches here with red as the main color. O MidbanPaint on my iPad, I can go to Cloud and
open the same file. This will download the file from the Cloud and now I can
continue working on my tablet. This is actually very
convenient because I can actually bring
my tablet out for sketching and then come back
home and close this app, once I save the file, close it, and I can continue working
on the file on my desktop. Cloud storage
capacity is limited, so once I'm done with the file and I no longer
need it on the cloud, I will just download
that file and save it to my computer and delete
the file from the cloud. In the next lesson, we will prepare a reference
photo that we will be using for our drawing.
6. Working with reference photo: Let's take a look at
the reference photo that we will be using for this tutorial and I'm going to open the reference photo
using MDibankPaint. Let's press the keyboard
shortcut Control O, or you can go to
the menu file open. And you can download this
photo from the link that I have provided or from
the download section. So it's here, let's open. Okay, so this will open
as a separate file, and I want to draw this lion, but I don't need the
extra toys by the side. So by the way, notice
I'm using touch. Now, you don't have
to use touch if you do not have touch
support for your tablet. So to zoom in and out
using keyboard shortcut, it's Control plus
and Control minus. Control minus will zoom away. Control plus will zoom in. But for the Windows
version of this app, sometimes you may have to press Control Shift
plus instead of Control plus because
there are some bug that prevents Control
plus from working. Another way to zoom in
and out is to press Control Space bar
and drag up or down. Oh. Okay. Yeah. Yeah.
This is smooth scaling. So let me press
Control Zero to fit the artwork or the photo
to the screen again. If you don't want
that smooth scaling, you can actually
press Control K to go into the preference
and tap here Zoom by preset and
hopefully that will disable that with
smooth Zooming. Another way to zoom
in and out is to press Control Space
bar and click. You can press Control Space
bar and drag like this. Notice the Zoom is no longer
smooth and this is in steps. Another way is to press
Control Space bar and click click click, click Control Space bar alternate to click
click click click. Yeah. Let's say I want to
zoom into this ring here, I can actually
Control Space bar, click at this ring here. This will zoom to the place
where I am clicking at. Another way to zoom is to press Control Space bar
and draw hoops. So you can draw
scroll up and down. Those are the different
ways of zooming in and out. And you can press space
bar to move around. Yeah, so Spacebar is
actually the hand tool here. Or you can press H for the hand tool and
you can move around. But generally speaking,
when you're using the brush and you are drawing, you will want to press Space
Bar to temporarily switch to the hand tool or
the move to to move around and to undo
its Control Z. Okay, so those are the ways you can zoom in and out and move
around the canvas. Let's crop this lion because I don't need the
extra toys. Let's press. Let me see where's
the select shortcut. But we need the rectangular
selection tool, which is M. Try to remember
all the shortcuts here. Go to tools and look at all
the shortcuts and sorry, look at all the tools and
their corresponding shortcuts. To select, it's M. I can
draw a selection here. Please follow along,
draw a selection here. And now I want to go
to edit and crop. Remember earlier I said that you can actually
use your keyboard shortcut to access
all this menu. There is no keyboard
shortcut for crop, but there is this
letter M beside. What you can do is you can press, let me just press aways. Let me do a selection first. You can press a turnip E to co up the edit menu
and then press M, which is the letter beside crop. And this will just click here. Okay. This will crop the photo to remove
the unwanted parts. Now you can save this file, save a not save. If you save this will
overwrite the original. If you save a, you can
save this as a copy. So we'll just rename
this Ty lion. I will save this as a JPAC choose the file
format, JPEG, and save. You can adjust the
JPEG resolution or compression here. Click Okay. Another way to save this
is to go to File export, and you can also
choose JPEG here. You can also export the artwork or the photo into
different file formats. JPAC is universal, and
JPEG is very useful, so you can choose JPEG here as well and choose the
size and resolution. There are many options
here that you can twit. For our tutorial, I will
not be able to go through all the different options
for all these file formats because there are just too
many things to talk about. Now that we have a reference
photo that we can use, we can actually
close this and bring our reference photo
onto our artwork. So let's press the keyboard shortcut Control W
to close that file. So this is our blank
canvas. You know what? Let me try and remember to use only keyboard shortcuts so that you guys can also follow me
and use keyboard shortcuts, which is actually the
more productive way to work with MibankPaint. Okay, so to bring the
reference photo in, there are two options. You can go to File. You can import image to new layer and look for the
file that you saved earlier, which is the toy lion and open. This will bring the
image onto a new layer. A new layer is created
for the photo. If you want to move this around, you can click here
on the move tool. This is the directional move
tool or the transform tool, you can move this around. Now, the downside to
creating or importing an artwork like this is let me just draw
something really quickly. The downside is
when you zoom in, control let me just use the keyboard shortcut
Control Space bar. If I zoom in, notice I no
longer see the reference photo, so This is the downside with importing a reference
photo like this. So what you want to do
now is to click here on the photos layer or
the layer with the photo, click here at the trash can under the layers palette,
delete that layer. So we will import the reference photo using
another method, go to Window. Click here reference to
open the reference window here and click here to open. Oops, that's the wrong button. By the way, there are
just too many buttons and some of the buttons
are quite small, so sometimes I may
click the wrong button. If you click the first button, which is to import an
image from the Cloud, which is what I do not want, I can see the Cloud icon now. Click on the folder icon, select the JPAG, click
Open this will open, will, in this case,
a tiny photo here in the reference palette
so what you can do now is you can resize
the reference palette. This is a vertical photo, so just resize this palette
until it's vertical. Click here, which is the feed photo or feed
the art to the canvas. And again, resize
resize the canvas here. I think the touchscreen
is is misbehaving. So just resize this. You may not need to resize, but it's good to resize, especially if you're using a display that is kind of small. So you can resize this to
something that is much smaller so that it doesn't block whatever you are drawing. So now when you are drawing, as you zoom in to draw, you can still see
your reference photo.
7. Let's draw: When it comes to
creating digital art, there are many ways to go
about doing the same things. For example, if I want to delete this quick sketch that
I have on the canvas, I can actually press
the delete button, or I can press
this clear button. This is the one with a lot of little dots in a
circular manner. I can press this or I can
select the eraser eso two here. And select the thing that
I do not want to erase it. So there are many ways
to do the same things. So creating digital art
is sort of like a puzzle. You have to find how you can
create and after a while, you will get used to the
workflow and it will be smooth. It's more about practicing, experimenting and
finding your workflow. Let me just do a select O, Control A, and press delete. That's another way to delete. I'm going to hit the
keyboard shot card B to have the brush tool selected, and make sure on the layer palette you are
drawing on the correct layer. If the layer palette
is not visible, go to Window and click
layer, so that's visible, and I usually have
my layer palette at the bottom right side. Now there is only one layer
and I'm going to create another layer for the
color. Maybe another layer. Maybe layer one, I can
rename it as draft. Click on the settings icon, the very small icon there. That will open up this option where you can rename the layer. So let's call this draft. For the second layer or
the layer in the middle, I call this color. Or you may call it
something else. Try to name the layer. Try to make the layer
name descriptive. Maybe I should not have
called this color. Maybe I should have
called this body. Because later when
we are drawing, we may want to have a
layer for the head, a layer for the whiskers, a layer for the details, a layer for the leg, different layers for
different objects. And you'll understand
why later on. For the top layer, let's call
it line for the line art, press enter, and now
we have three layers. Okay. Let's click
on the draft layer, select your brush here or
press the keyboard cart B. I'm going to select
a light blue color. The blue color doesn't
matter, so just follow along. Just, um, you know what, create a draft for the lion
that you see here. By the way, I'm choosing a toy to draw so that you
don't have to worry too much about copying
the exact look. What I want you to focus on when following
the tutorial is to know that some
of the tools exist, some of the workflow exist. Yeah, that is more important than replicating the exact look, especially when you
are a beginner. So just create a draft
of the lion first. Okay, we have bigger
leks here at the bottom. Use Spacebar to move around, Spacebar and click
to move around. If the image is not
in the correct place, you can use the move tool here. And you can click that, or if you don't
know the keyboard shortcut of the move tool is actually V. Sometimes I would actually forget the
shortcuts because I use too many drawing software and the shortcuts the keyboard shortcuts are
actually different, sometimes different
across different apps. Press V and you can move this draft to different
areas on the canvas. So let me just put it here. Next, I want to reduce the
opacity of of the draft layer. And I can see there is this
purple thing that's going on. So it seems like I am
in selection mode. So if you see dotted lines and you see the white canvas
and there is purple, it means you are in
the selection mode, so you may want to go
to select D select. Yeah, that's keyboard
shortcut Control D. Okay, so now we have a draft line art, and we have set the opacity down so that when
we are drawing, we won't be too
distracted by this. And now we should draw. Oh, by the way, I forgot to tell you about the pen
that we should use. If you have selected
a pen earlier, great. But if you have not
selected a pen, maybe let's take a look
at the brush palette now. These are the different
brushes that are available. So the brush that we will use
for this tutor will be pen. And I have some
favorite brushes here. To test the brushes, select the line art layer, select the brush that
you like, and just test. I'm going to switch
to black here. And under brush preview
or brush settings, you can increase the size
of the brush so that you can see how the brush
actually looks. Or you can increase
the brush size using the keyboard shortcut
square brackets. So this one is to
increase brush size. This will decrease
the brush size. And using keyboard shortcut
is actually much faster. Okay, so this is the
solid pen brush. Let's try the ink brush. Yeah, so just test different brushes and
see how they look. And if you want to
clear the brushes, just click here to clear. I mean, control space
bar to zoom in and take a look at the ink brush. This looks like a nice brush. There is texture, it looks nice. If you want to
download more brushes, you can click here on the Cloud Download and look
for more brushes to download. Some of the brushes are
free, some are not. One of my favorite
brushes is called fill. By the way, when
you have located all your favorite brushes, it may be good to
do a screenshot of all your favorite
brushes and save them somewhere so that when
you reset your UI, or reset the brushes, you will still have that
list that you can refer to in the future to re
download those brushes. So I'm going to look
for the field brush that I like, and it's here. I hope I can download
this because it says here it's premium and usually premium
means it's not free. So it says here that
double clicking will enable add a brush. So Okay, it's downloading. I actually added the brush
accidentally two times. Let me just delete one
of the extra brushes. This pop up will
appear, click Delete. If you accidentally delete a brush that you actually want, you will have to go
to the brush library to find it again. So Field brush is a brush
that I use quite often, so I'm going to click
on this and drag it all the way up so that
it goes to the top. Where is it? Oh, it's
still at the bottom, drag it all the way
to the top here. And, for our tutor, we'll be using the pen and the field and we may use
other brushes as well, maybe the airbrush
or the blue brush. Okay, there is the
airbrush here. Maybe we will drag
this up as well. Yeah, drag the brushes
that you use more frequently up and you can actually create a folder
of your favorite brushes. I will highly
recommend you ducate the brushes and then put them
in your favorites folder. I accidentally dragged out
the brush preview palette. Anyway, this is not useful, let me just close this so that I can have more space here. When you click on
some of the brushes, you can actually see additional
settings at the bottom, so you can actually
tweak those settings. And one of the settings
that I tweak very often is the brush size.
Let's draw now. If there are any straight
lines on the line art layer, just Control A to
select everything, Control X to delete. Control X is actually to
cut so that you can paste, but you can also use
Control X to delete stuff. There are just many
ways to go about doing the same thing
with digital art. Let's select the
brush, select the pen, and let's select
the correct layer, the line art layer, and draw. For this lion, we have
the face like this. If you want to undo,
you can press Control Z or use the button here. For touchscreen, there
is no double tap undo, which is quite unfortunate here. Okay, so it looks like my
line is not that smooth. Let me just undo a few times. Yeah, just try to
draw a few times. Anyway, you don't have to
copy exactly what you see. I just want you to get a
good feel of the workflow. Okay, so just try and draw the different
shapes that you see. Let's have the main. We have the body
which is smaller. And when you're drawing, try to close up the lines don't draw like this
where there is a gap, try to close up the lines so that there is clarity so that your drawing
is easier to read. We have the hand here. We have another hand here. I'm using the space bar. Space bar, click to
drag to move around. It is very easy to move
around the canvas like that. If you want to zoom in and out, it's Control Space bar. Control Space bar
will let you zoom in. Alternate space bar will
let you zoom out like this. Practice the space bar movement. Nops Okay. So, we just need to
draw the basic shapes just to understand the workflow. Okay, we can see that my body is kind of big, but it's okay. Maybe I want to delete the face here so that I can draw a bigger face.
Maybe I can do that. I'm going to select the
eraser Lasso tool here. Now, if you look at
the manual for two, there is no keyboard
shortcut for eraser Lasso. This is a tool that
I use quite often. So you can actually
set a keyboard shortcut to some of the tools that do not have
keyboard shortcuts. I'm going to control, sorry, I'm going to click here and I'm going to go to preference
and settings and look for shortcut settings and look for two because
eraser Lasso is under two. This window is a bit too small, so let me just track this and
look for eraser Lasso two, which does not have
a keyboard shortcut. I'm going to click
here, click and did, and now I can input
my keyboard shortcut. I'm going to put R. I'm going to have it
as R and press Okay. For the eraser two, the keyboard shot cut is E, and for the eraser lasso, I have it as R. Now I can
press brush to change to eraser to change to eraser and R to change
to the eraser lasso too. This will allow me to
select what I want to erase and erase it instantly and switch back to
the brush, press B. Now I can maybe
draw a bigger face. I'm actually not sure whether
this is as big as earlier. Okay, this looks, I
would say, good enough. Remember, it doesn't
need to be precise. Draw the shapes as you see.
8. Colouring: Now let's color the drawing. So we no longer need
the draft layer, so we can actually click
here on this little circle here to disable the visibility
of the draft layer. But the draft layer is
actually still there. So if you still need to drop, you can enable this layer. But if you no longer
need this draft layer, you can just click the layer, select the layer and click here on the trash icon to delete it, which I will do because I
no longer need that layer. Okay, so let's color. So for the lion
face, it's yellow. Let's select yellow. So the color wheel that I have here is, I mean,
looks like this. You can actually switch to
different color palettes. So there's the color bar, and there is the color wheel. I like this and there is also
the color wheel triangle. This is also good. Let's
just go with this. So let's select a yellow that looks kind of
like this yellow. Or you can actually eye drop. So click the eye drop
here and click here. Once you click the Eyedropper, this will highlight and
you can click anywhere on the reference photo to select a color from
the reference photo. For example, if I click here, you can see the color is black. If I click here, the
color is yellow. If I click here,
the color is red. So let's go with the yellow. Before we color, let's
make sure we are working on the correct
layer, the color layer. Select the color layer and I'm going to select the
field bucket two here, or you can press the keyboard
shortcut G to switch over. Now, some of these
options will appear. What you want to do is to select there are two options here which are quite important. For reference, you can
use Canvas or layer. If you choose to fill with the layer reference and you have the color layer selected and there is nothing on
the layer right now. This is what's going to happen. It's going to fill everything. What you want to do is to
click here under reference, select Canvas so that you
can look at the canvas and all the layers so
that you can look at everything to determine how
the field bucket should work. I want to fill the face
and now it's filled. Now, after you fill, please zoom in and have a look and see whether the color
will go to the edge. So let me just undo this because I actually
have the setting set here to expand
to three pixels. If you fill, and you can
see some white edges. So you can see some
white edges here. It's not that clear,
but it's a bit of white because if I switch to
the brush tool and I color, I can actually add
some color here. So if the color does not
fill up to the edge, click here to expand
it by a few pixels. I'm going to expand
it by three pixels, and I'm going to control
minus to zoom zoom down, and now I can fill this and just fill all
the different parts. With the yellow as necessary, we have the red, press the eye dropper, keyboard shot is I and select the red and switch to
the field bucket G, click here, and
now we have this. I realize that the
head should be bigger, but it's fine, we should
leave this as it is. Okay, so I have a
straight dot here. Let me sometimes to find out
where the straight dot is, you can enable or disable
the layers palette. So the straight dog is actually
on the line art layer. So let me press R to use the lasso eraser
and delete this. Okay, let's move back
to the color layer. For this lion, I
actually use line art to draw the things
that affect form. For things like the eyes which
are actually on the face, it's not protruding, I will not use the black
line to draw that. Instead, I will I will
draw a shape instead. Let's press the keyboard
shortcut B to go to select the brush on the color
layer, we can draw the I. Let's just draw Ops wrong color. You can press D. You press D, the color will reset
to black and white. Oops, this is black. You can press,
what's the shortcut? You can press X to switch between the primary
and secondary color. The color at the top
is the primary color. The color at the bottom
is the secondary color. You can press X. I actually
wanted to press Shift X, but that's a shortcut
for another app. Let me press X to
switch to white and now I can draw the Is. Okay, so if you have to undo, just press Control
Z or the short cut. So let's fill the I with white, press G again, click inside the area, click
inside the area. So this will only work
if the line is enclosed. If the line is broken, let me show you what
happens. Let me press. If the line is broken like
this, it's not enclosed. When you press the fuel bucket, the color is going to leak out. So it's very important to close the line properly like this
so that when you feel it, this will feel properly.
This is not smooth. We can zoom in,
control space bar to zoom in and smooth this out. We can switch to black, press D, and this will switch to black, and we can throw an I
here G, fel bucket. Bush G, brush X for
the white. And here. So by using keyboard shortcut, you see that you can actually
work really quickly. Okay, I want you to save
your file right now, Control and save it. So you should make
a habit of saving your files every
once in a while. Next, let's draw
the purple belly. So another way to use the
eyedropper is to Press turn it. When you are using the brush, you can press turn it to enable the eyedropper
temporarily. So let me show you. This is the brush
and I can press alternate and I
can click here on the purple to select
the purple color. If the purple is
not to your liking, just use the color wheel here to select the
correct purple. So for the color wheel here, you can select a lighter purple, darker purple, or
saturated purple. Let me just zoom in
here and draw this. I think this looks good enough. So let's press G and fill this. If you want to make this bigger, you can press brush
and draw another shape here and press G
to fill it again. Yeah, so to feel it
again and again. Now, this purple is actually
replacing the yellow behind. Because if I want to, let's say, erase, let me
press the eraser button here. If I erase, this will actually
erase to the white canvas. If I want to have more
orange or yellow back. I have to press a turn it. I drop this and just
try and pin this back. If this happens, it means
it's in eraser mode. Sometimes when things
are not working well, it could mean you are not
using the correct tool. I selected the wrong tool
and undo, switch to brush. Let me just try and
smooth this out with the yellow brush hoops.
This looks fine. I can press D X for
the white label here. Press G to fill. So next, I want you
to do the same and draw the nose and mouth
and the whiskers. Let's add more details. So we can see some color
stripes here for the leg. Let's zoom in. And let's just let me show
you a technique. So I'm going to fill
this with yellow. I'm going to press I for eye dropper and G to
fill this with yellow. So now I'm going to create
all the what's that? The different colors.
You know what? Maybe I can undo and redraw the leg to make this longer so that
it's easier to see. This is where
working with layers is going to be very useful. Now, if I disable
the color layer, you can see the line art, but I cannot disable the legs. I want to make the legs longer, which is to say that because of the drawing that I have here, all the lines are connected, I have to erase the
leg to redraw the leg. Let me go to the
line art layer and press the R for eraser less. Let's redraw this. Let's just erase this first. Let's perform some surgery
to erase and redraw. This is you can see the erase is not perfect. But it's okay. You can actually go in
and press the eraser to E and try and
smooth out this. When you press E, or you
can choose the eraser here, you can adjust the brush size. Try to smooth this out. You may not need to
do this, but you can do it if you want to sometimes to smooth out the line
to make it smoother. Okay, let's click a new layer. Let's create a new layer.
Let's call this link. Enter, let's have the leg below the line art,
which in this case, I'm going to call change it to a different name
called line body, and the leg, I'm going
to call it line leg. Okay, now I can switch to black, press D, press B for brush, and draw a longer leg here. Oops. Is it working? Okay, I have the eraser
selected as a brush, so that's why it's not working. Let's draw a longer
leg here like this. Okay, I still have
some space beneath, and let's draw this feed
here like this to give the illusion that this fit is actually behind
this part here. Okay, let's enable the colors. You can see the
colors are wrong. So press R for the eraser
lasso. Select this. Oops, I deleted the wrong layer. So always work on
the correct layer. So that is how you perform
some corrections if need to. Okay, so now I'm going
to press B, sorry, B. Actually, I'm going to press I to select the color yellow, G to feel the color here. Okay.
9. Alpha lock: Now I'm going to
teach you how to use the Alpha lock feature to make
coloring a bit more easy. To color the stripes
here on the leg, you can actually let's just choose some random colors here. You can actually just
color like this. Oops. Notice the color
actually spill out here. If you color like
this, the color can actually spill
out like this. To make sure I am
coloring only on the correct area and
within the selected area, I can enable Alpha lock. Alpha Lock will lock
the Alpha channel. Alpha channel contains data regarding the
opacity for pixels, color or paint on a layer. I'm going to disable the
line art so that you can see the pixels
or in this case, the paint or color more clearly. The colors that you see here are actually on a
transparent background. But this transparent
background is made to appear white so that it's less distracting compared to the real transparent
background, which you can enable
by going to the menu, view transparent background. So when you have that enabled, you will see checked marks, and this is actually the
real transparent background, which you can see can
be quite distracting. So let me just
press alternate V T for the shortcut to make
the background white again. When you have Alpha lock, this will lock the transparency, so you will not be able to
draw on the locked area. And when you have the cursor
over the locked area, it will show you a cross. So now you can only draw
on existing pixels. So now I want to switch
to a different color. Let's have red, and
I can paint here. As I paint across like this, I paint from outside across. It doesn't paint outside
because I can only paint on existing
colors, which is here. This allows me to paint
within areas very easily. And this is great for coloring
precisely within areas. As I reach the bottom
here and I color, notice the color will
still spill out. That's because I am painting on existing color and there
is existing color here. At this area here, I will need to be a bit
more careful and try to paint slower so that the
color is within the line. Let me go back to
white and paint here. Maybe I can add a
white here as well. Yeah. So this, I think,
looks good enough. And now you can do the
same for the other leg. So let me just color just
with a few different colors. Okay, so this is
what we have so far. I can see some orange here, so I will want to maybe
eye drop the orange, press I, click here
for the orange. We are still using Alpha lock, so let me press eye again. I lost the color when I zoom in. I can paint here. If the brush is too small, just press the square bracket, the right square bracket
to make this larger. Yeah. Like this, or
you can do this, use the green too and
feel it like this. That's pretty quick. By the way, after you're done
using the Alpha lock, it's a good habit to disable it.
10. Cut and paste: I want to draw the colorful
ribbons that are coming out from the exterior
of the yellow face, and this is going to be a
bit challenging because the yellow ribbon
is supposed to be coming from underneath the face. But with the line
that I have here, I actually want the yellow
ribbon to go across this. Let me show you what will happen if I create a new layer
on top of everything. Let me select a
different color here, select the brush and draw. Yeah. You can see as I draw, this does not look good. I want the ribbon
to come out from beneath the black line and go
above the black line here. This is where using
layers earlier will help. Sometimes before
you start drawing, you should try to think
about the sequence of drawing so that you can
create the look that you want. Now I have to think
about how I can extract the face and have the
face above the lion man, which is red and later I can create the ribbons
between these two layers. Maybe I can extract
the line art. The line for the face definitely
needs to be extracted. What we can do is disable
the colors first, go to the line four D, and we can use the
lasso two here. It's here and we can select
the line art like this. We can press sorry, Control X to cut the line art, create a new layer and
control V to paste. This will actually
paste onto a new layer. Actually, I don't even need
to create a new layer. I will paste onto a new layer. So to make this layer clear, let's call it line face. So for the layers for
the layer beneath, let's call it ribbon since
the layer is already there, and let's enable
the colors again. It may seem like
nothing has changed, but we now have the line art for the face
on a different layer. Now if we try and paint the
ribbons in, let's use brush, a green brush and paint the ribbon in
but notice as I draw, I am drawing below the line art of the face but above the
line art of the body. I can draw like
this and I can use G for the field
bucket to fill fill. Do this for all the
other whiskers. No whiskers, sorry, the ribbons. Yeah, draw all the
ribbons that you see using this method. It is good to have
overlapping elements because they will make your drawing
look more three dimensional. Okay, so I need to add another viscer on the bottom
right to balance this out. GG, that's the field bucket. I realize I had forgotten
to draw the year, so let's draw the years
on the face layer. If I draw it on the face layer, the years will sorry, the line will be
above the ribbon. So I will want to draw it on the line body layer so that I can draw the
year behind like this. This one is a bit
clearer and go to the color layer and
use a turnip for the temporary
eyedropper and color this or just use
the fill bucket. G, color this. And I noticed there is some darker gradient,
darker color inside. So let me make this
darker two oops. Press brush for the correct
two and color the year this. Okay, this is what
we have so far.
11. Clipping mask: Now I want to show you another
tool called clipping mask. I can see some pattern on the purple belly and the
pattern was drawn with white. If I switch to a white
brush and draw, Notice, it's difficult for me to draw the pattern because the color will spill out of the purple. So this is an issue and you have to figure
out how to solve it. Let me just undo
undo, undo, undo. The reason is now the purple is actually on the same
layer as the yellow. So what we can do is
we can use the less. You know what? Let's use the gradient
and see if it works. Use the gradient to,
select the gradient to. Press turnip to get this
yellow and fill this purple. That will remove the purple, remove the white label as well. Create a new layer on top, call this belly
and select brush, turnt to get the purple again. This purple seems to
be a bit too dark, so let's have a lighter purple. Okay, this looks good as
in the color looks good. Press G for the fill
bucket again to fill this and maybe I want to
extend this out slightly. Okay. I think this
looks good enough. Okay. So now that the purple
belly is on its own layer, we can draw the white pattern. Let's press D X to switch to white and select the
Alpha lock to draw. So we're just going to draw very simple patterns
like circles. I think leaf pattern,
but we can draw circles. You can use Alpha lock to
draw within the shape. This will draw onto
the existing pixels. But let's see if we want
some different pattern, maybe we want to
switch to a star. We want to try to see whether stars or
circles will look better. If we do this, we won't be
able to switch to the star. We have to duplicate a new
layer and draw the stars. So what you can do is you
can create a clipping mask. Click here, new layer, and we will name
this ball circle and click here, clipping. This will push the layer
slightly to the right. This will clip onto
the belly layer. Now anything you draw will only appear on the existing
pixels of this layer. It looks like Alpha
mask or Alpha lock, but it's a bit more versatile.
Let me show you why. Let's draw some circles, patterns. You know what? Let's have a lighter purple, not white because
the label is white. Okay. We have some
small circles, big circles, small
ones, big ones. Okay, this looks good. Let's say we want stars instead. So we want stars,
create a new layer. Clip it. Let's call this layer. Star. Hide circle the belly with the circle and
draw on the star layer. Let's just draw
some stars. Oops. So now we have a star
layer and a circle layer. And when you draw outside, you will not be able
to draw outside because this is clip
onto the circle, the belly layer, so you can only draw on within the
area of the belly. If you don't like
all these designs, you can create a new layer, clip it again and create a new design just to test
out different designs. So for this design, we will have triangles
and squares. So this is very flexible
because you can enable or disable those layers just to
test out different designs. So maybe let's go with
triangle and squares. And now I want to draw
the label on top. For the label, let's create
a new layer and do not clip this time here and just
rename this layer label. And now we can switch to brush. The easiest way to switch
to a white brush is press D X for the white, and throw this shape here. Okay, so let's see if we can use the
field bucket G to fill this Let's use the brush
to touch up the rest. Okay, so there are some
words on top. You know what? Let's just write whatever
you like to write. So let me just reduce
the brush size. Let's write name of the app, perhaps maybe bank, and you can, you know, add some colors
here for design purposes. Yeah, add some colors. So this is on its own layer. So if you need to change if you need to change
something on this layer, you can actually
change it very easily. So working with layers
gives you the flexibility. So if we don't need the
layer, we can disable it. The toy that we have
here so far looks flat because the
coloring style is flat. Maybe we can use some shadows to make the toy pop a bit more. For the shadow, I will want it to be below
the color layer. Let's create a new layer called shadow and drag it
below the color layer. There. Now I'm
selecting a brush. Maybe I can have a big brush, use the slider here. Okay, we have a big brush
here. This is nice. Let's select a shadow, maybe 50% black there. Yeah. So I can add a big
shadow behind like this. Let's have the light source
coming from the left. So the shadow will be on
the right. Like this. We have shadows here. Here, oops. Yeah, I
think it looks okay. Doesn't have to be very precise, remember, as it's
just a practice. We need the shadow for
the ribbon as well. So let me just reduce
the brush size for the brush and add some
ribbon design here. Use the fill bucket
to fill this.
12. Blending mode: Now that we have the layer
for the shadow of the body, let's select a 50% shadow here, and draw let's create some
gradation on the right side, like the shadow on the body. So if I paint like this, notice notice is just gray. It's not a darker shade
of orange or yellow. So what you need to do is to
set the Blending mode here. Go to the layers palette, select blending,
switch it to multiply. Now when you add No, try not to add outside. Remember earlier,
I teach you how to paint onto existing layer. In this case, you
cannot use Alpha lock. You have to use some other
technique to help you paint within the
existing pixels here. Let me just undo to paint onto the existing layer
without using the Alpha lock. You can control, press
control and click on the existing colors
that you want to paint on. In this case, I want to
paint onto the body. I press Control and click
onto the color body. And now we are in a mask. So outside of the purple area, we will not be able to paint, but we can paint on the highlighted or the
unhighlighted areas. So we still have
the brush selected, and now we can paint. So now as I paint, I can only paint onto
the yellow body. Now, this shadow is kind of you can see the
line is kind of solid, so it's not that natural. I want a natural fall off. So maybe I can use
the air brush. Yeah, so notice as I
apply the airbrush, we can see some
shadowing effect. You may have to adjust
the brush size. Yeah. So as I paint
here, notice oops. So just paint the right side of the toy to give
some shadowing effect. And this will make the toy look more three
dimensional very easily. Yeah, so just paint
onto the right side for all the all the toys. For the face, you
notice as I paint here, it actually goes onto the face, but I actually wanted
to paint the red area. So let's see what we
can do. You know what? Let me just deselect
everything first just to let you see whether the
shadows actually work. Control D to deselect. With some shadow effect, now the toy looks more
three dimensional. To paint the shadow
on the red men, I will disable the
layer with the ribbon. And I just want to paint the
shallow on the red main. I don't want to paint
it on the yellow face. So what I can do
is press the wan, which is W for magic wand. I can also set the expand
here to two pixels. So when I click on the red area, the selection will
expand out onto the black so that now when
I paint with the airbrush, I can paint onto the red
and onto the yellow. If the brush is not dark enough, you can actually make it darker. Let's just paint here. I can have some shadow beneath the year as well like this. I think this looks
good. Okay, let's control D. Now we can see
the shadow of the face. Now, the face is actually, how should I say, kind of flat, we do need some shadowing effect on the face. Now
here's the thing. If I press the one to select, um I need to be able to paint across on
top of the whiskers as well. So we have another problem. We have to think about
how we can paint on top of the whiskers. Or we can just paint, you know, instead of
painting only on the red, we can also paint here. Yeah, this will work.
Yeah, this will work. This works quite nicely. Yeah, so now we have
some shadowing effect, and let's enable
the ribbon again. Okay. So it looks good, looks more three
dimensional now. To make the shadow
even more convincing, we need some shadows beneath
the ribbons as well. So we just want to
paint onto the red. So same thing, press
Control and click onto the color body so that we can paint onto the we can use the selection of the color body to
paint our shadow. Put some shadows here ops, shadows here beneath the ribbon and make sure the shadow
goes down as well. Yeah, we can have some kind
of shadow here as well. This will actually
make the drawing look more three dimensional. Yeah, this looks good. Oops. Remember the light
source is coming from the left and the select
to see what we have. Okay, we can see some
shadow spill onto the face. So let's erase. Use the eraser two,
I'll switch to erase or use the eraser Lasso two
and select the area to erase, which is actually much faster.
13. Masking: This lesson, we will look
at the layer masking tool. Layer mask, Alpha lock
and clipping mask can give you the same result, but we go about doing
it differently. For example, let's say I
want to adjust the shadow, I want to remove
more of the shadow. I can try to use the eraser. Let me select the
eraser here and erase, but you can see the the
eraser has the hot edge. And even for the
soft eraser here, it also has the hot edge. So because there is no actual soft eraser to
make this shadow soft, I will have to use
some other tool. So I want to use
the masking too. So let me just, you know what, paint hot shadows here first. Let me just use the lasso eraser to erase
the hot shadows here first. Oops. Okay, that's good. Let me just erase all this. Now, bear in mind that
what I'm doing now can be achieved by other means. For example, if you want
to adjust a shadow, you can always repaint
the shadow with airbrush, this and slowly get the
look that you want. So to make this example
clearer to see, I'm going to use the
field brush with this 50% black wall. Grey, and I'm going to
draw this area here, which is the shadow area. Now we have the hot shadow, and to make this shadow soft, I'm going to use the masking
tool to hide the shadow. I'm going to click here
and add layer mask. Now, make sure you select
the shadow layer first, and when you click
that a shadow, sorry, a layer mask will appear on the layer that you
selected earlier. Now you can work
on the layer mask. To work on the layer mask, I'm going to use a brush
and I'm going to set the brush to maybe 100% black
and see what will happen. Okay. So as I am drawing here, I'm actually drawing
on the layer mask. I am actually masking
out the shadow. Yeah, I can mask out the shadow. And if you see the adjustment
is not what you want, you can actually just Control A, control X to delete the mask and now you're
back to square one. This can give you
final adjustment. Yeah, so this makes it easier
to adjust the shadows. Or you can skip the layer mask and just use the airbrush to
paint the shadow. So there are just different ways of achieving the same
result, the same look. Layer mask is about hiding, about masking things away. So for example, if you want to make holes in the ribbons here, you can hide parts
of the ribbon. So now I'm on the ribbon layer. I've selected the ribbon layer. I can add a layer mask and the layer mask
will appear on top. Now let me just choose a brush, a pen, and draw with black. Black will mask, and white
will bring back the mask. You can just test
it all yourself. Now if I want to
create holes here, I can just hide the pixels
here by creating a mask here. Let me increase the
brush size like this. Yeah, so see, I'm hiding the ribbon here and I can see through because there
is a mask here. Of course, if you don't want
this, it looks strange, you can just select the layer mask and click
the delete button.
14. More on masking: Here's a bonus lesson
on when you should use Alpha lock clipping
mask or layer mask. Let me draw two letters. Letter A. Let me fill
this on this layer, create a new layer and draw
letter B using another color. Let's have B here and let
me fill this as well. Okay. So Alpha lock will let you paint
on existing layers. If I want to change the
letter A to another color, be green. Let me select green. I can use Alpha
lock here and I can select a brush and start filling this and turn this green. This is going to
take a long time, so let me just use
the field brush, select everything
and turn it green. This will replace
the existing color, and if I want to go
back to blue I can't. I have to select blue again. And paint it. That's Alpha log
replacing color. Now, for clipping mask, let me just create a new layer here and set this layer to clip. So let me switch to a brush
and to a lighter color. For clipping mask, this
is non destructive. So let me just
draw circles here. This is the clipping
mask with circles. And as I am drawing, it only shows up on
the existing pixels. But this is actually
on a different layer, so I can disable this and I can create a new layer and
set it to clip as well, clip for this new layer, we have triangles, Hooks. I can create another layer and have a clip and this
one will have stars. So this is non destructive. It's good if you want to test
out different variations. And if you want to change
the color of the letter A, you can still do so, go back, use Alpha lock and
change the whole thing. Now, for layer mask, layer mask will hide things. Let's say I want to show
more of the letter A, which is to say that I
have to erase letter B or height parts of letter B.
I can select Letter B here, select here, at layer mask. So a layer mask is created. Let me change to a
brush that's black, and I'm going to use the
black brush to hide parts of late letter B. I can
create marks like this. This is quite interesting. Have a cutout like this. You can see as I draw, it seems like I am erasing, but I am actually not erasing. I am hiding because I can disable the mask and
bring back letter B. So this is basically how
the three tools work, Alpha lock, clipping
mask and layer mask.
15. Adding details: So the drawing is
actually already done, and if you want to, you can
still add some details. So I see some shadowing
effect here on the left side of the belly and some highlights here
on the yellow body. So I have the belly
here, the pattern here. So what I can do is I can
actually have the shadow. Let me see if I can
push the shadow oops. Yeah, I need to have a
shadow for the belly itself. Let's create a Shadow.
You know what? Let's create a clipping mask. Let's create a clipping mask. Let's create a new layer. Have a clipping
mask for the belly. Yep. Rename it Shadow belly. And now we can use brush,
airbrush, correct. Let's set the blending mode to multiply because
it's a shadow layer. And let's reduce the brush size. It's a bit too slow, so
let me just use the slider here and just apply some
shadowing effect here. So this will only apply to
the to the what's that? The belly layer like this. Notice the shadow is
beneath the pattern, so we need to move
the shadow layer above the belly pattern. Oops. Move it above
the belly pattern. But not out of the clipping. If it goes out, just clip again, and this should go back. Now on the right
side for the yellow, we need some
highlights, click on the yellow body, the color body. Brush, use brush, and
use the eyedropper, press a turnt for the
temporary eyedropper, select the yellow
here and select a lighter yellow zoom in and just what it's
not that obvious. Let me just make it white. Just to have some
highlights here. Okay. Just some little detail. Okay. Looks a bit more
three dimensional. You can also add some
shadows to the label. Okay, where's the label
or the label is here. We can we can
duplicate this layer. Okay, let's duplicate it. This is the button to duplicate. And let's call
this shadow layer. Sorry, shadow label. And have this shadow
beneath the label, and we can use the V two, sorry, to move two, which is the V and move the
shadow beneath. You can see that
this is a duplicate, so it's not exactly shadow. What you can do is use Alpha
lock, click Alpha Lock, press B for the brush, or you know what? You
can use the field brush. Let me use the field brush. And fill the whole thing, set this layer to multiply. This is the shadow for
the label and press the V key to move the
shadow back here. Zoom in and just move it closer just to give
it some detail. Yep. Maybe we can. Another way to move
is to use the oops. I actually wanted to
use the arrow too, but that's for a different app. So yeah, just use
the V key to move. Let's zoom out Control minus. You can see the
purple thing again, press Control D to D select. Now we have completed
the drawing. We don't need the
reference anymore. And let's see where our toy is. Our toy is on the right
side of the canvas. So if you want to
move, you know, everything to the left
side of the canvas, you have to select everything
everything and press V. Yeah, it's really. To move it to the left side. So that's how you
move everything. If there are too many layers, you can manage the layers by creating folders for the layers. Let's maybe put all the belly related
layers into a folder. Click on the folder
here, rename the folder, let's call this belly and just drag all the
belly related layers. In. Let's see if we can drag everything in at a go at once. Yeah, I can. If I
disable just now, yeah, it looks okay. Let's collapse the layer. Let's have another
folder for the label. Select the two and drag it
into the folder for the label. This will help with matching layers if you
use too many layers. Oops, what did I press? Control Control T is
the transform tool and unfortunately the UI for transform tool is
not that visible. Let me zoom in for
you guys to see. The anchor points are small. When in Transform tool, you can use this to move
the layer or folder around. You can have the cursor outside here and there is a circular tool that
appears to rotate. Or you can have this big
white arrow here and you can click when the arrow is
white and you can use this to scale the selection. Once you're done, press Okay.
16. Export and share your art: Now that you have
completed your artwork, you may want to
share this online. Before we share it, we will want to remove
the unwanted white space. Press the key for the rectangular
selection tool and draw a selection over the
area that you want to keep. Go to Edit crop and click yes, and this will remove
the white space. Now you can go to FL export and Export as the
following file format. You can export as JPAP, which is the most popular
file format or PNG. Now, one downside with
the export format here is when you enter the
resolution to export, it doesn't actually scale the other option
proportionately. For example, if you
adjust the width, it doesn't scale the
height proportionately. So it limits to one of the two, which is not clear. So what you may want
to do is go to edit. So there are these
two options here, image size and canvas size. The keyboard shortcut for
image size is Control turnt I, so with this pop up, you can resize the dimensions perfectly and make sure you
constrain the proportion. Let's say I want to resize the artwork to
1,000 pixels white. I can do so here by typing
in the number. Click Okay. Now when I export this, I can have the 1,000
pixel white J pack file. Now, do not save this
file yet as MdibankPaint, because remember,
you just resize this from a larger file
to a smaller file. Let me just undo this and go back to the
original resolution. You will always want to keep the highest resolution possible. But when you're
exporting for web, you can reduce the
width or the file size, the dimension, the resolution, but do not overwrite your original artwork with
the higher resolution. Let me show you the canvas size. Now, the keyboard
shortcut for this is Control attornt C.
For Canvas size, you can do the same thing. But this also allows you to
increase the canvas size. Let's say you want to increase
the width of the canvas, maybe you want to
draw additional toys by the left and right side. Just click here. Under with. Let's maybe
have it expand up to 4,000 pixels up from what we have here right now,
about 1,800 pixels. Click Okay. And now we have a larger canvas,
hence canvas size.
17. Your project: This is the last lesson, and I want to give you a
project that you can do to get more practice with the digital artworkflow
with MinibankPaint. I want you to download
this reference photo that I have also provided and I
have a few more toys here. So just draw this
toy and this time, draw it without the outline. I have drawn this
toy with the outline just using the same
method as I did earlier. But I want you to draw the toy without the outline
because the look and feel of an illustration or drawing with outlines and without
outlines is very different. And use the same techniques that I have taught you earlier. Use Alpha lock or clipping mask to add the
details within shapes, have the layers overlap
to create depth, and you can use Alpha lock or
clipping mask to create uh, lines like this and use the color palette to
create highlights and shadows. Yeah, try and recreate this
toy using another style, a style without line art. And do upload your
project so that I can see and maybe give you some critic on how
you can improve.
18. Outro: So we have come to the
end of the course, and thanks for following along. I hope you have a
good understanding of MibanPaint the digital art
workflow with this app, and I hope you have completed
your project and do upload your project so that I can have a look and see what
you guys have created. Thanks for watching. Do
check out my other courses. See you guys in
the next one. Bye.
 Teoh Yi Chie, Sketcher, watercolour lover