Transcripts
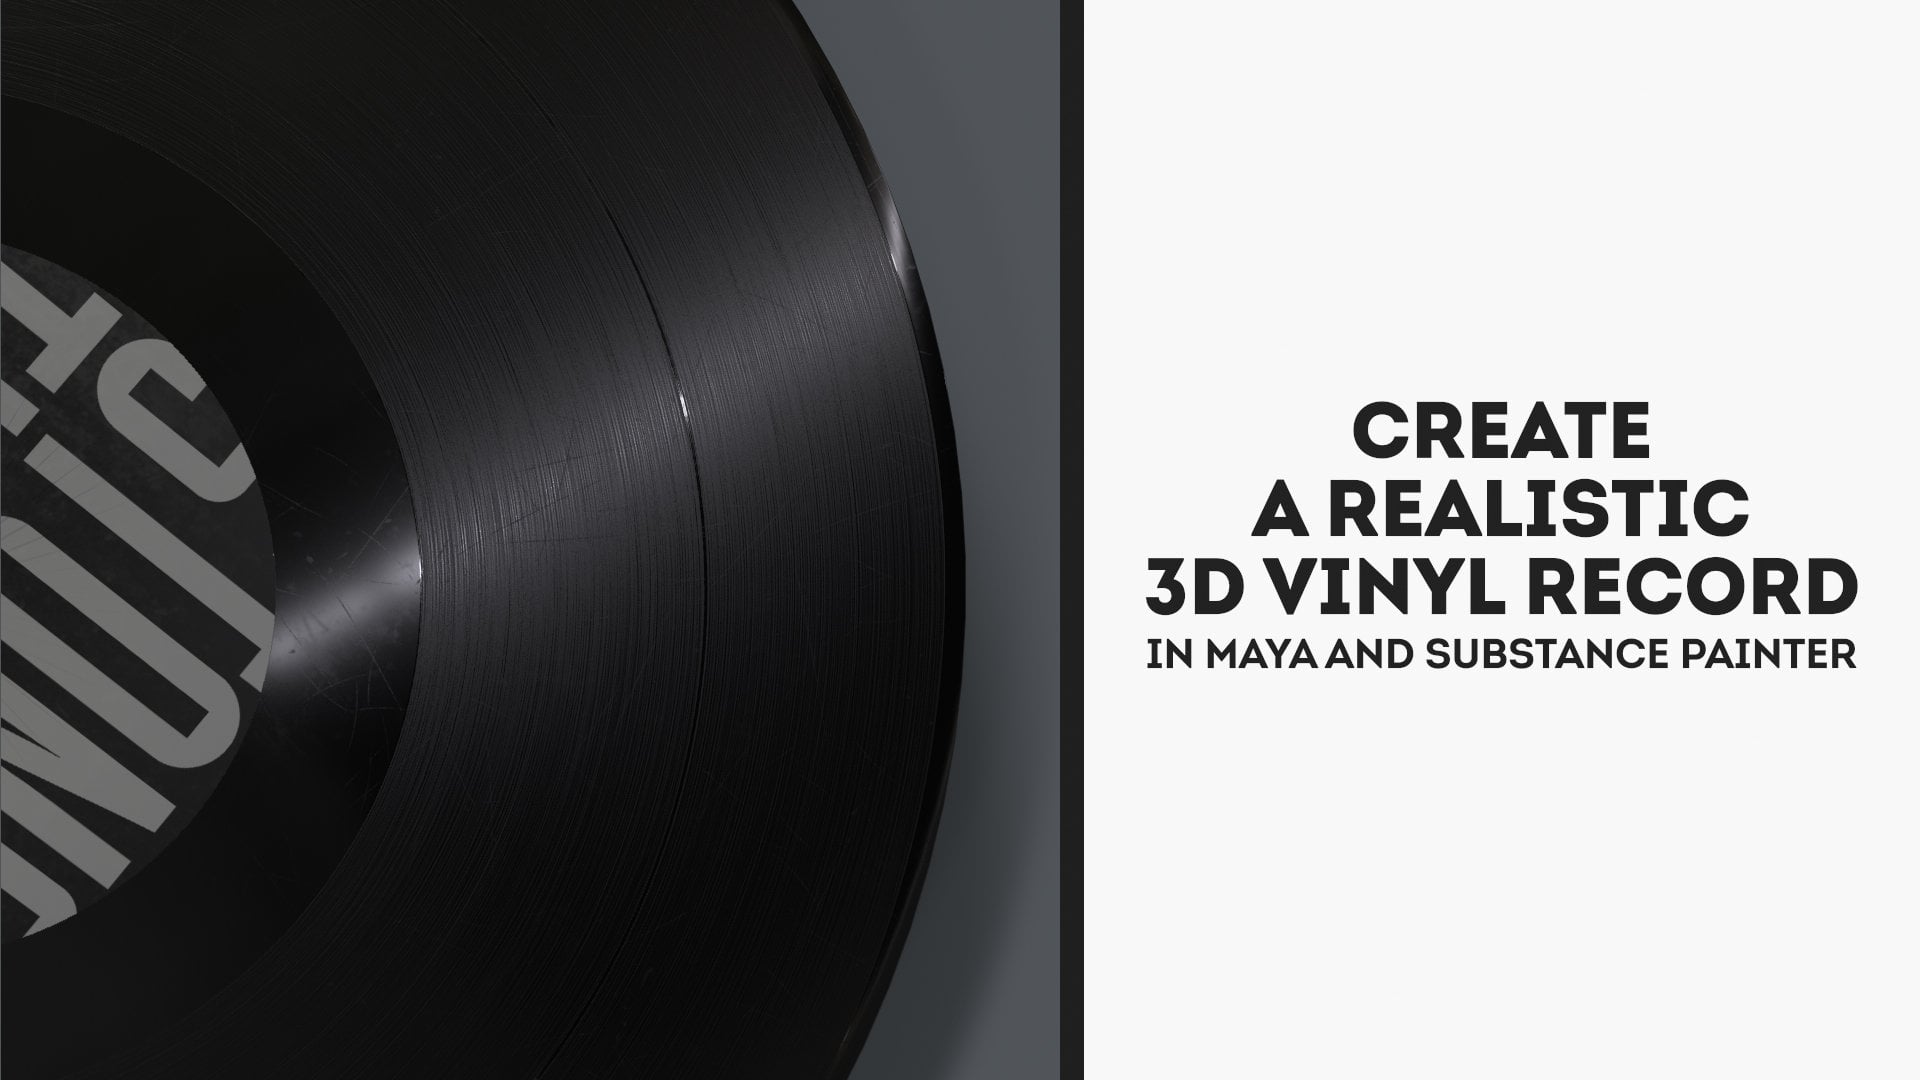
1. Course Overview: Hi, I'm Shane, and in
this course I'll get you open running in Maya
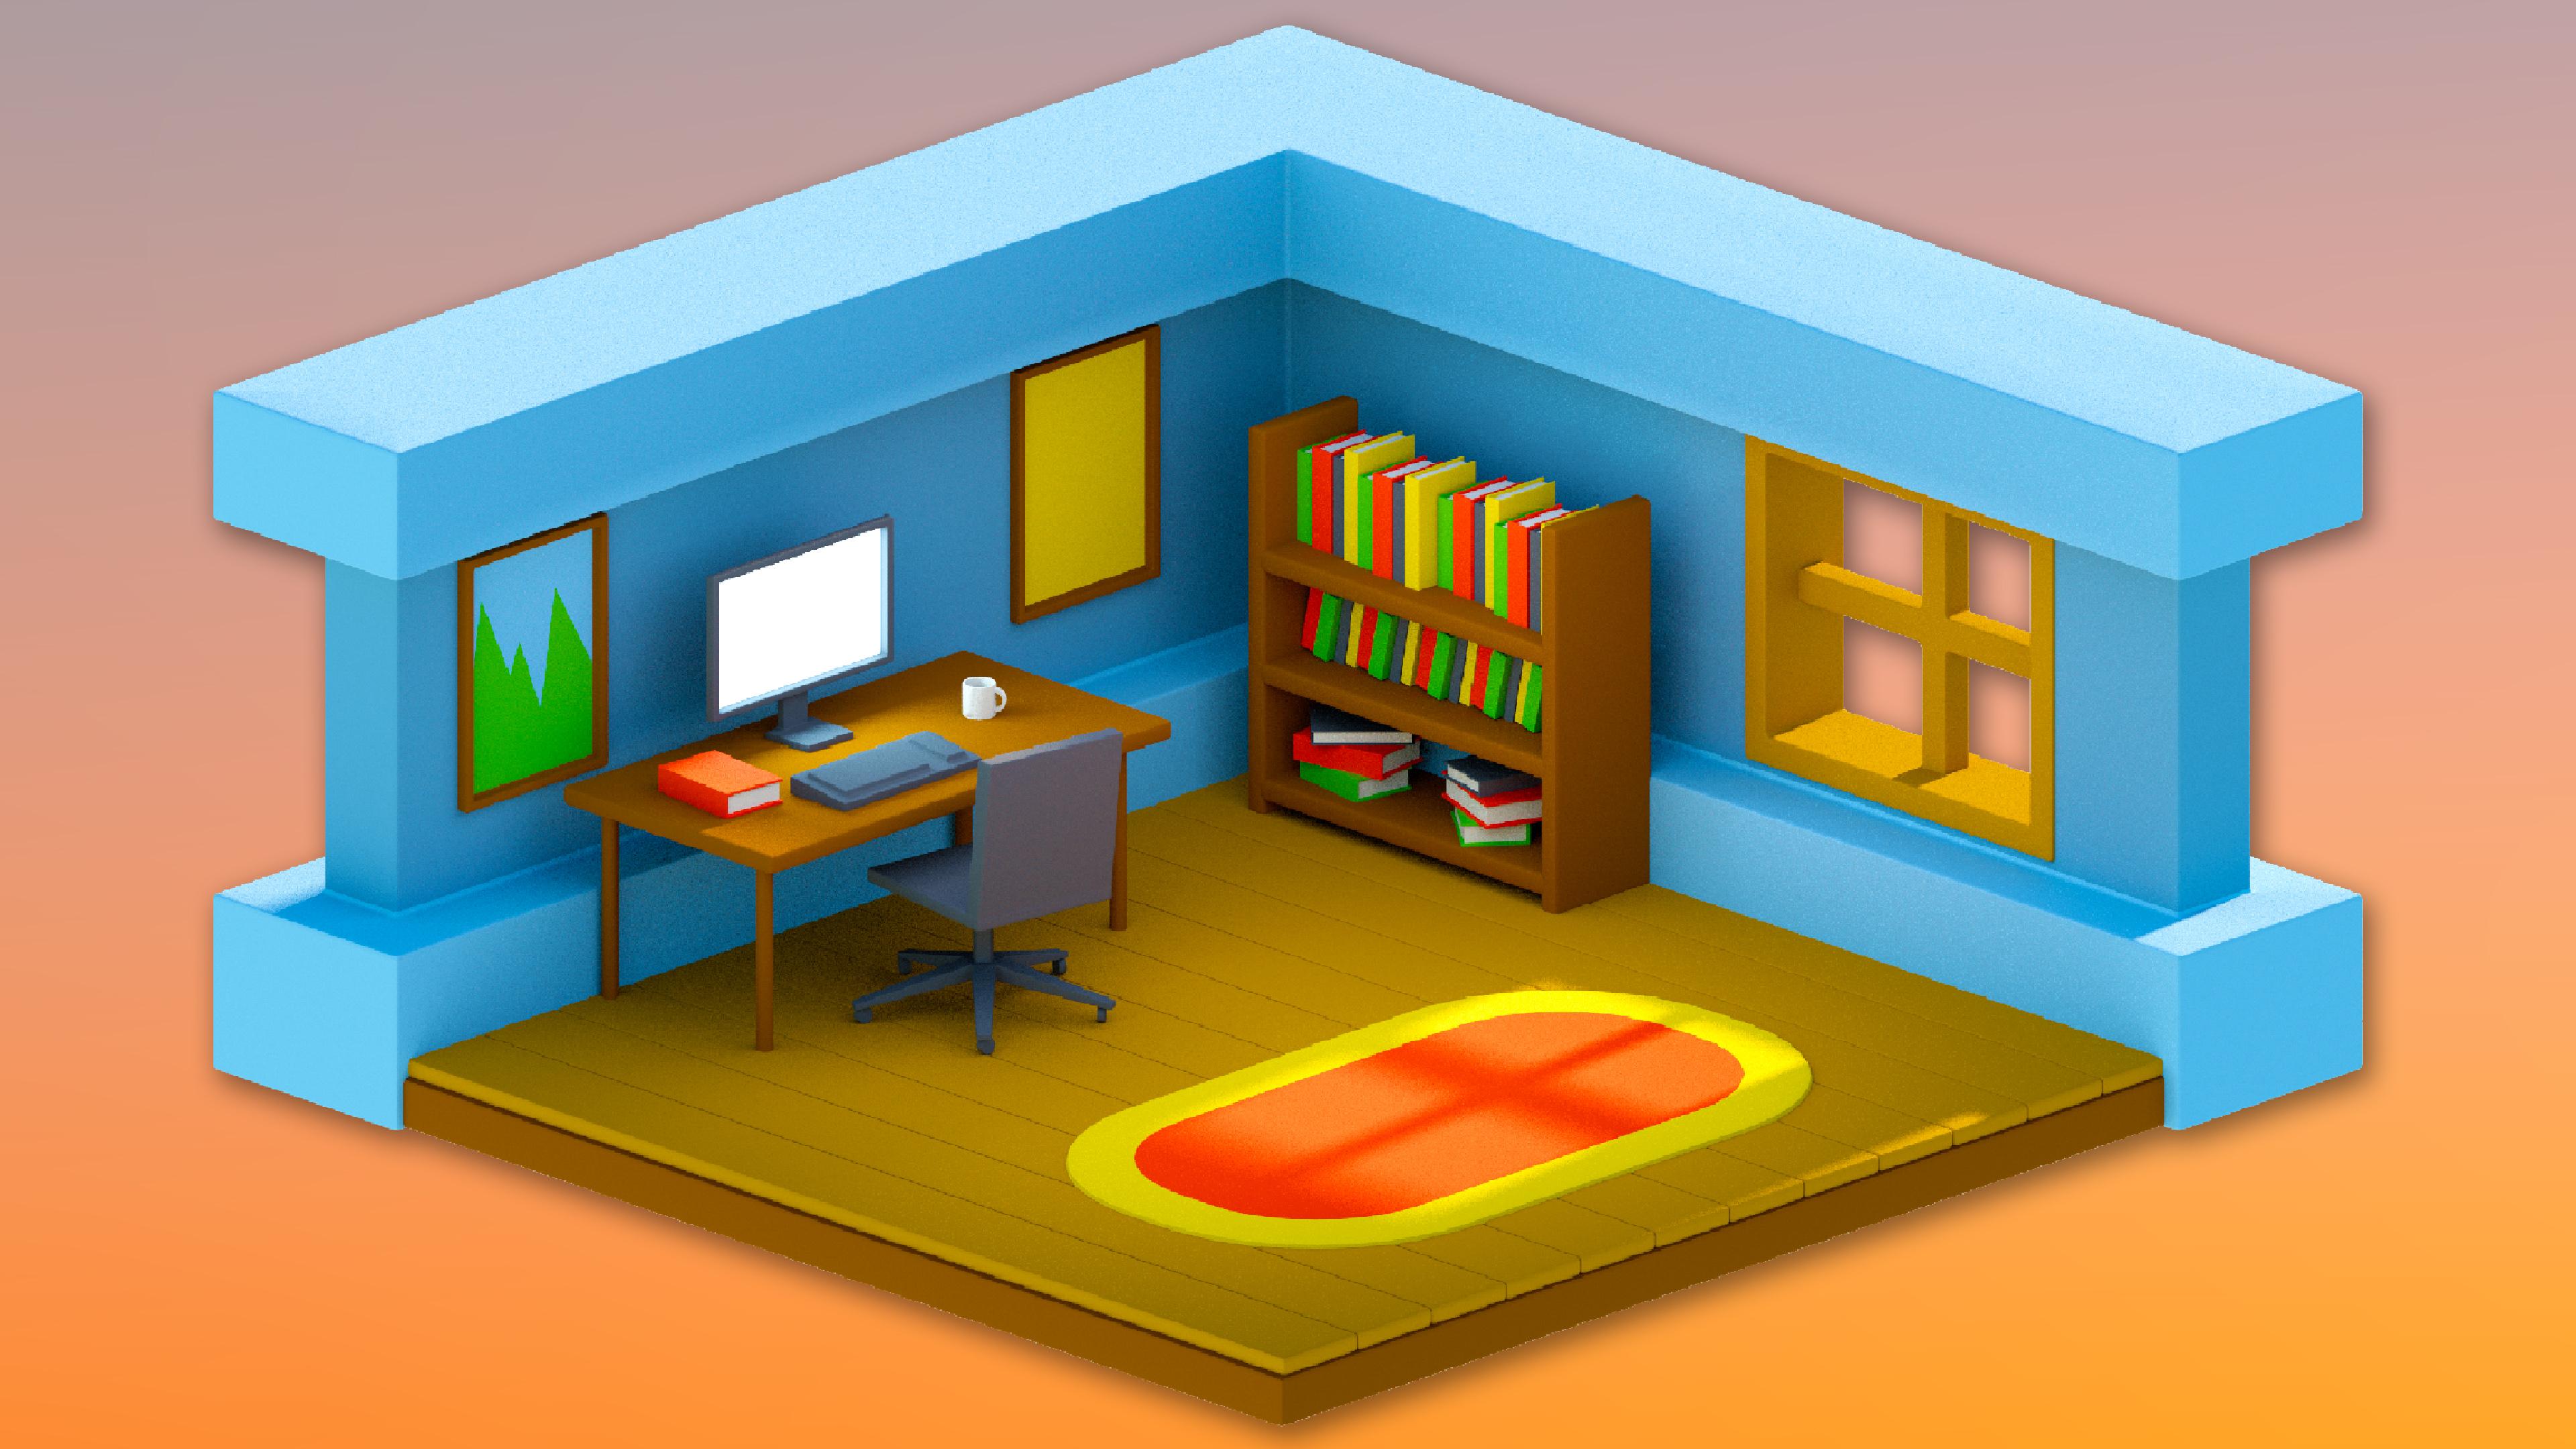
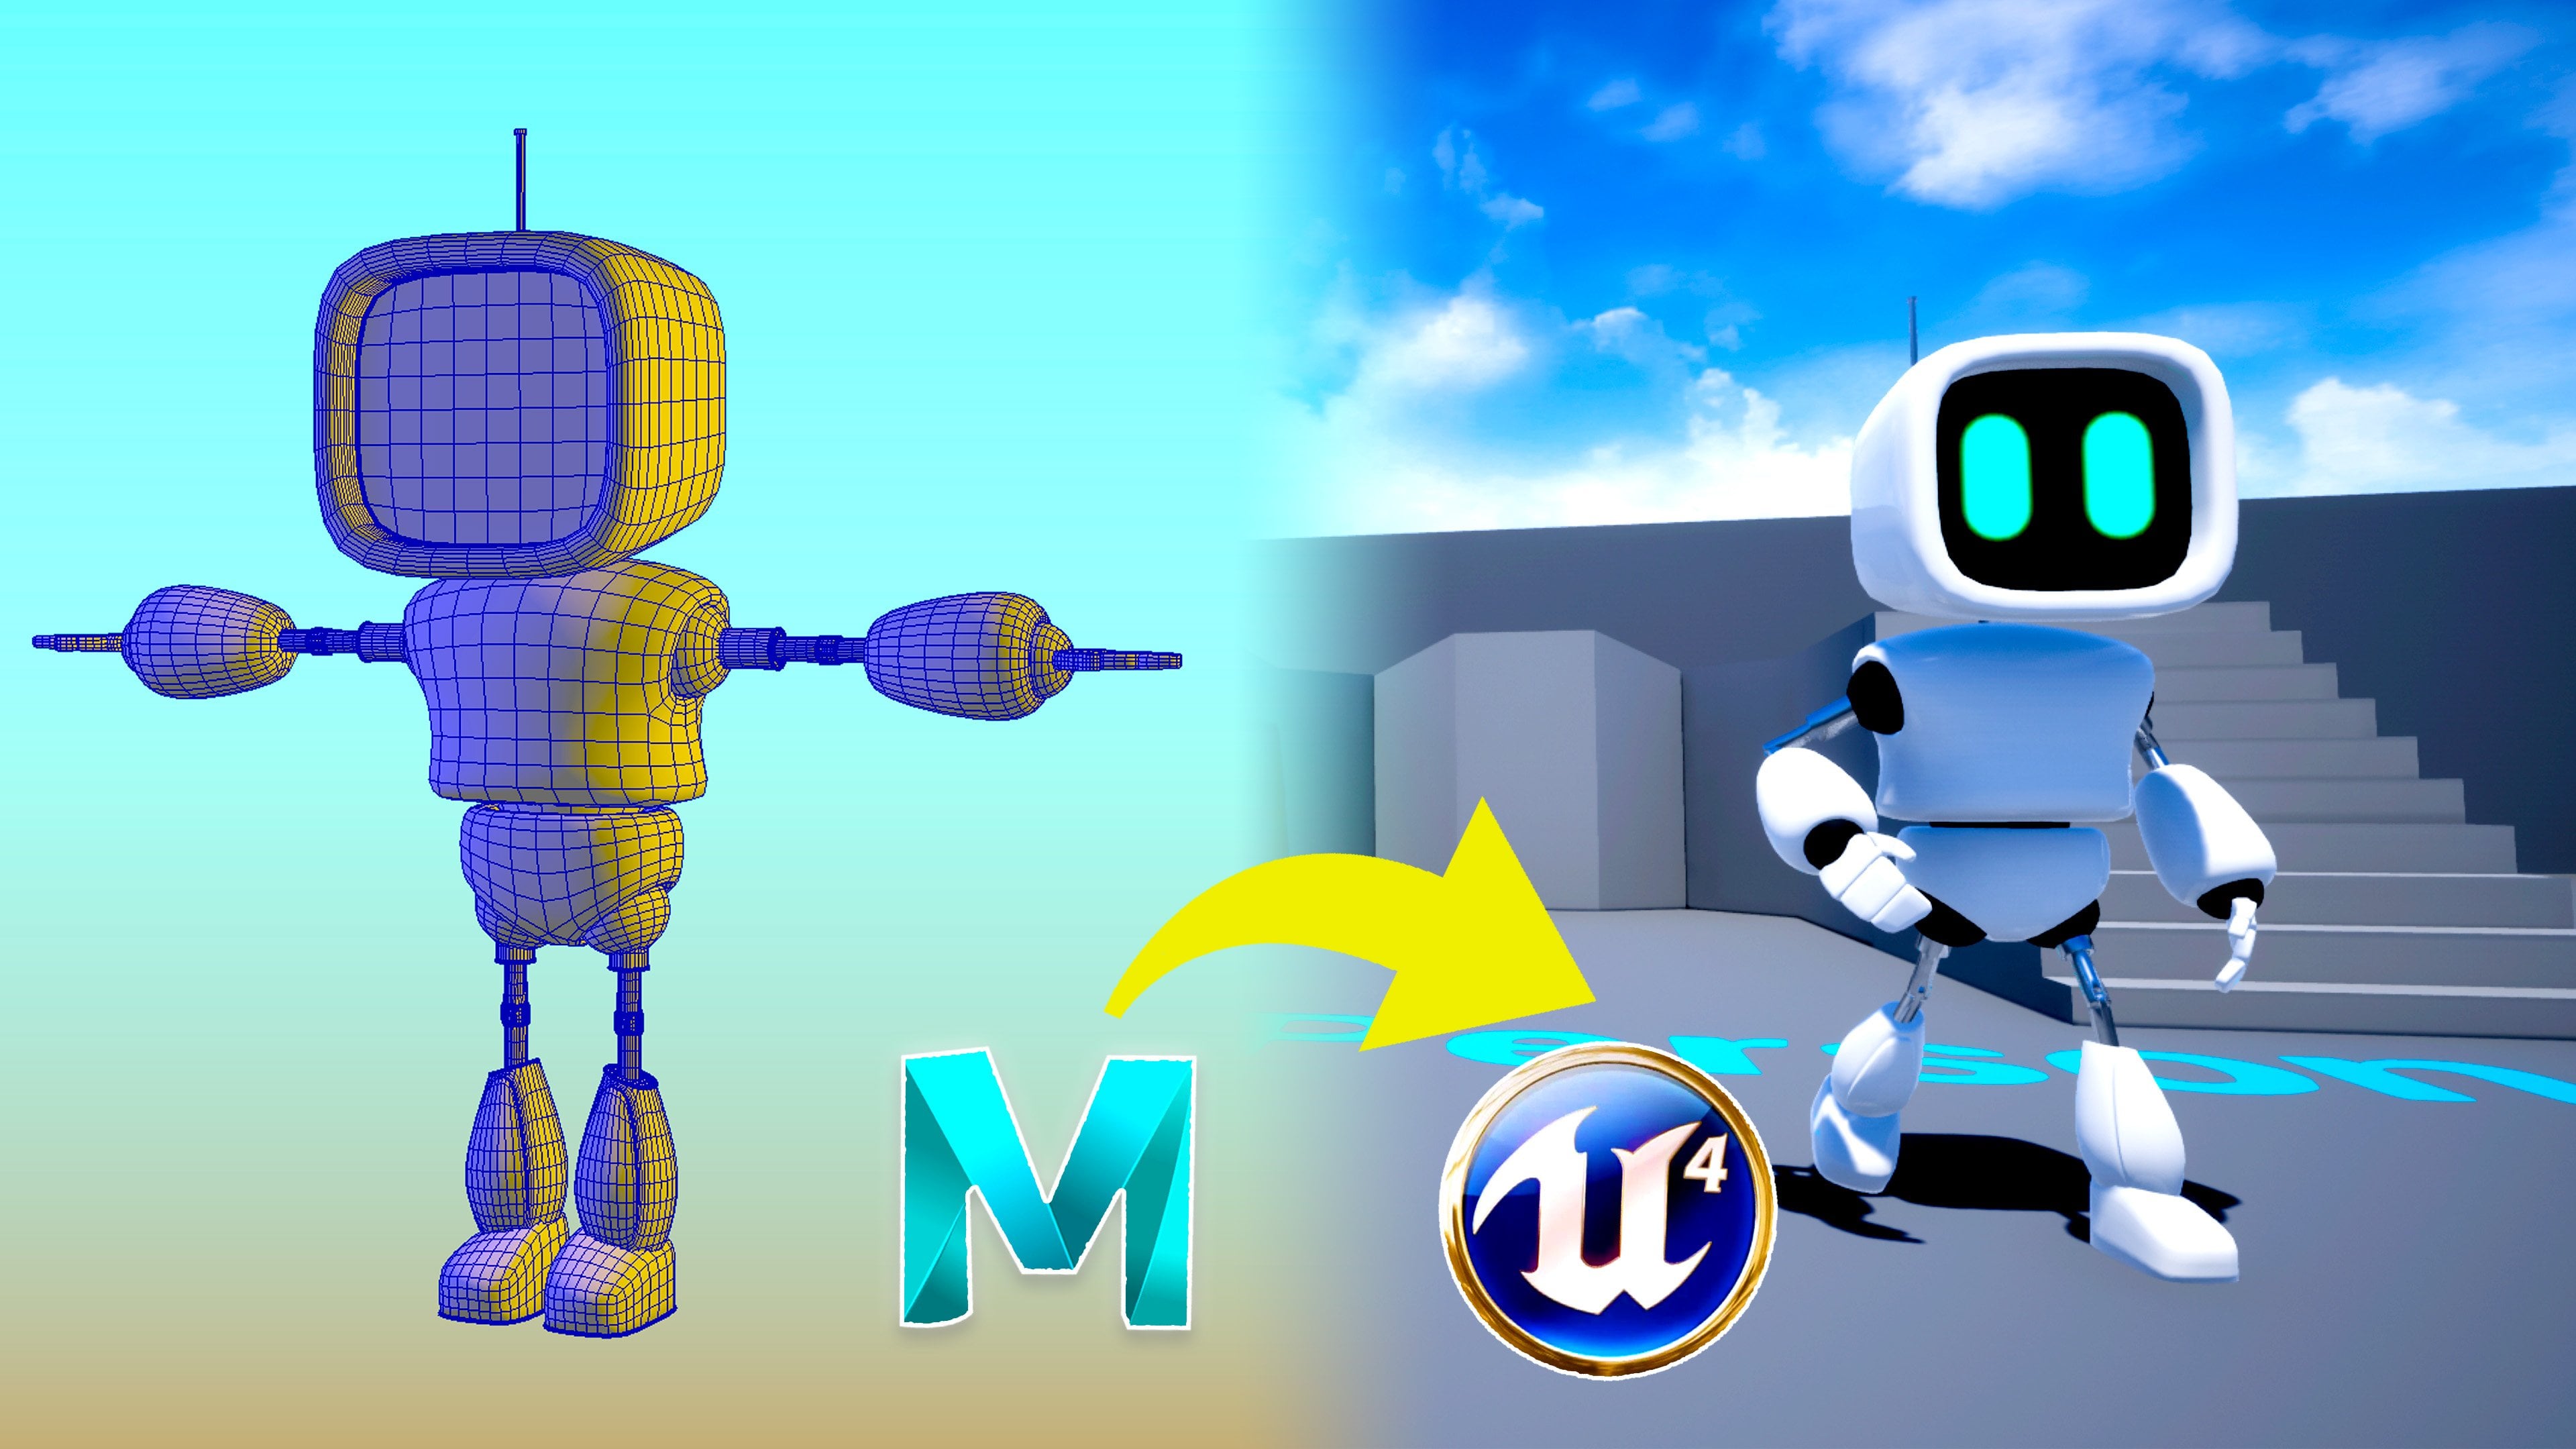
and around 20 minutes. In this quick overview of Maya, you will learn everything
you need to go from this to this, including the
interface navigation, important tools, modelling, printing materials,
lighting, and rendering. Maya is very high-end industry standard
software in the movies, VFX, and game
development sectors. And if you save us about
learning 3D content creation, but I've never used Maya or any other 3D package
for that matter. Then this is the class for you. I have been using my
effort over 15 years and I've been teaching
my two beginners for 12 of those years. I am a qualified teacher and
I put all of my experience with students into the
design of all of my courses. The first time something
that was introduced, I'll hold your hand
through the whole process and thus the same skills or reinforce
further through the exercise, I'll take some of the support
a way to allow you to more independently put your
learning into practice. I also believe that
educational content and doesn't have to
be boring and dry. So hopefully you'll
have a little fun too. You don't need any
of these officers to follow along with this course, although you will
need access to Maya, I've put a link to the
student version of Maya in the course
description if you need it. Thanks for checking out
my course and I look forward to seeing you
in the next step.
2. Create your first shape & learn to move around: Okay, So this is Maya. What you need to know right away is that this is your viewport. You have some common
tools and view presets on the left-hand side, shelf along the top, which contains shortcuts
to commonly used tools. And the channel box to
the right where you can change some of the properties
of your 3D meshes. We'll cover these in more
detail as we move along. Now it's time to create
your first shape. Click on the cube icon from the poly modeling shelf and as if by magic acute appears
at the center of the grid. Let's resize it. On the left of the screen, I'll click on the
scale tool which brings up these manipulators. Click and drag on
these to resize the cube to be about the
same size as the grid. First on the x-axis, and then the same
on the zed axis. Now if you look in
the channel box, you can see the
name of the mesh. Let's just click here
and rename it to base. You can also see the size of the mesh on the
scale x, y, and z. Let's neat and they sought, by setting the size to exactly 24 on the scale x and z are, I'mma leave it at
one on the y-axis. Now I just wanted
to adjust my view a little so we'll cover
movement in Maya. You need a three button
mouse to be able to use my up properly
because 3D movement is handled by
holding the Alt key and by pressing one of
the three mouse buttons, Alt and left button for tumble, Alt and middle button for tracking and Alt and
right button for Dolly. I'll just use a combination of these three camera controls to position my view so that
it looks like this. Make sure you're comfortable
with movement before moving on to the next
part of the exercise.
3. Use bevel & duplicate to create floorboards: Okay, we're off to a good start. Let us say a little more
detail with some floorboards. Let's create another cube. Name it floorboard. And we'll need to move the bass down so we can see the new cube. Click on the base to select it, and then click on the Move tool. You'll see three arrows showing which directions
you can move them. Session, I'm going
to grab the green one to move the bass down below our new cube is a little
difficult to see the new cube. So I'll just click up here
to show the wireframe. And also click here to
hide the grid better. Now let's edit our
floor board, select it, resize it, and then
move it down a little so it's just about
flush with the base. Then move across to the
near edge like this. To make this look a
little less boxy, we're going to bevel the edges with the flow but
still selected. Click on this icon
here to bevel it. A little settings box appears. I don't think we need to change the fraction for this one, but we will add another segment by changing this number to two. Finally, we'll duplicate
the floor board across the whole of the base. Make sure it's selected press Control and
D on the keyboard, you'll see by the naming of the mesh that it has
been duplicated. Use the move tool to
move it across so that it's just about touching
the original floor. But now I'll show you some witchcraft press shift in day to do a
duplicate special. This will create
another duplicate, but also move it based on what we did
with the previous one. Press Shift and
date until you've covered the base in floorboards. One final thing before we
move on, select the base, bevel it and set the segments to two and the fraction to 0.2 to keep the overall
look consistent.
4. Use face selection & extrusion to create the walls: Next up we need to
create our walls. For this will also
need to start with a cube and rename it to walls. Then more resize and move it
to be something like this. And finally, we need to move it over to the far
corner of the room. Now we need to turn this into walls by selecting
some of the faces. To do that, we can open the
modeling toolkit like this, and then click here
for Face Selection. Now we select these two faces
by clicking on this one. And then whilst
holding the Shift key, clicking on the other, I'm going to extend
them by extruding them. To extrude, we click on this
icon here on the shelf. I will see the settings
for the extrusion pop-up. If we try to just pull the new
faces out on the zed axis, it goes a little bit weird. So let's undo that by
pressing control and set. This time we'll turn, Keep Faces Together off and
then pull the faces our data. Now we just wanted
to make the walls a little more interesting
to look at. And to do that, we first need to add a couple of edge loops. To do that, you need
the multicore tool which can be found here. And in order to add
a whole, actually, you need to hold
the Control key and mouseover one of
the vertical edges. Then use left-click
to add the edges. I'll put one here
and one more here. Perfect. I'll just turn off
the multi cut tool by selecting the
arrow tool like this. And now let's finish this
off by selecting all of the faces on the top and
bottom sections like this. Remember to hold
the Shift key to add more phases to
your selection. Once they're selected,
extrude them. I'll press Control
and E This time to extrude and then increase the thickness by clicking on the word thickness here
and dragging to the right. To round out this step, we need to move to edge mode, which is over here in
our modeling toolkit. And I'm going to double-click
on the edges to get the whole edge loop for these
edges running horizontally. And then these ones
on the corners. Remember to hold Shift to
add to your selection. Now with all these
edges selected, I'll press Control and
Beta bevel and then set the fraction to 0.15
and the sections to, to hand, that is looking
pretty fantastic. Wallace.
5. Create the window: To make the walls even
more interesting, we will now add a window. The first thing we
need to do for that is to make a hole in the wall. First, make sure you are
in Face Selection Mode. Then select this face
on the inside of the room and the corresponding face on the outside of the room. Check that you have both
selected and then extrude them. Now changed to the
scale tool and resize the new faces like this. Then move them over to the
side using the Move tool. Once you're happy with
the size and position, hit the Delete key to remove the selected faces
and create the whole. We can now see that
the wall is hollow, so we'll cover that over
with a window frame. For the window frame, we're going to
make another cube. Click the checkbox
tab over here to the right and name the cube frame. I can then move it over to be
within the window opening. I'll then click on the
modeling toolkit tab so I can put it into face lecture motor
resize it so I can line it up with the window
opening more precisely. I'll move each of the
outer faces like this so that they fall just inside
the opening we created. Next, I'll get the front face and pull it out in
front of the wall a little and then do the same
with the face on the back. Now to turn it into a frame, we will select the front and
back faces and delete them. Now we'll put the
remaining phases back into Object Selection Mode, perform an extrusion with
controlling a and then increase the thickness until
we get a nice thick frame. For the finishing touch, we'll go back into
object selection mode. Use control them beta at
a bevel to all the edges, increase the segments
to two and then set the fraction down
to something like 0.3. To add a little more detail, we'll separate the
window into four panes. So let's grab another cube, rename it to separator, move it over to the center of the window opening and just
make it a tiny bit smaller. Now comes the clever bit. Put the new cube into
Face Selection Mode and select the four
outer faces like this. Hit Control and H
perform an extrude, turn, Keep Faces
Together off and then drag out on the z-axis. Make sure you're happy
with the positioning and then bang a bevel on it, a voila, we have ourselves
a sexy looking window.
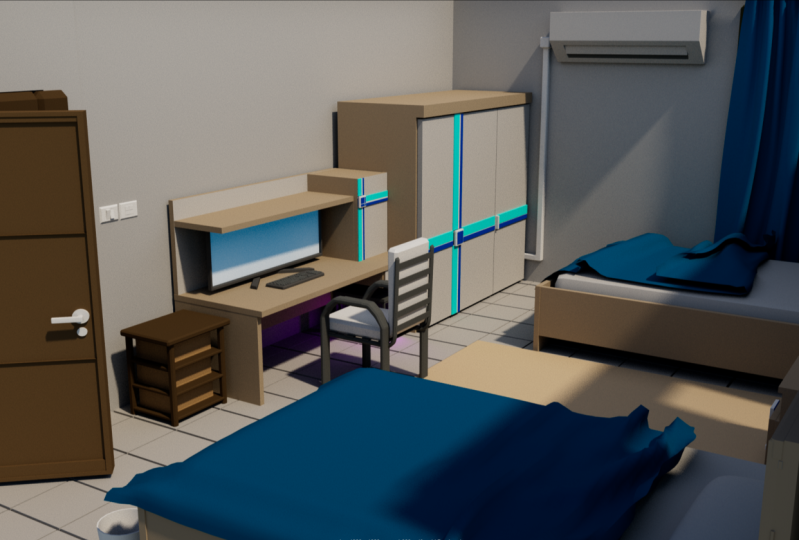
6. Create the bookcase & desk: The room is now complete, but the exposed floorboards and lack of furniture
maker like a drug. Then let's add some furniture, shall we will start
with a bookcase. You know the drill by
now create a cube. Well, wait until we finish
before we rename this one, resize it so you get
a shape like this, bevel it up the segments
to two and then hit Control and D to duplicate
it and then move it up. And then let's make
one more shelf. Now we need the side, so let's take a
shelf, duplicates it, and now I'll introduce
you to the Rotate tool, which is accessed by
clicking this icon here. You can use any of the
circles to rotate the shelf. I recommend using
only one at a time. Otherwise lend it with
a wonky bookshelf. I'll rotate on the z-axis, which is the blue one. And the little top
tip here is to hold J on your keyboard
as you do this, to snap the rotation to 15
degree increments like this. And then I'll just rotate
it by 90 degrees like so. All you need to do then is
move it off to the side, make sure you're happy
with the height and then duplicate it over
to the other side. To finish this off,
we will select all five pieces and then go to Mesh combine to make
it behave as one object. All we need to do now
is name it bookcase, dial and the size and
move it into place. Next, we'll create a desk
in much the same way. First, take a cube, gets it to a good desktop size and then hit it with a bevel. Let's mix things up
for the legs and create them from a shape
that isn't a cube. Make a cylinder. And then you can
make it thinner by scaling it on the x and z-axis at the same
time by clicking and dragging this
green square like so. Once you're happy with
the girth of the leg, get the height right, and then move it into place. Once you've got the
height dialed in, duplicate it and move it
over to the back corner. Now slipped both
legs duplicates. I move over to the other
side to finish it off, select all the pieces, combine them and name it desk, move it into position, and that's the desk complete.
7. Create a painting, monitor & rug: Now we'll add some more
details to the room, starting with a
painting for the wall. Let's make a cube, call it painting and get it into a nice thin rectangular shape. Now go to Face Selection Mode
and slept the front face, extrude it and add an
offset of about 0.2. That gives us the frame. And now we can extrude again and move the face back a little. We'll save the beveling for
now and just put it into objects selection mode
and move it into place. That's the painting
done for now. But we're not really finished
with it because it will make a great starting
point for our monitor. So let's duplicate
the painting and move it out into the open
source, easier to work on. We'll rotate it 90 degrees. Remember to hold J to turn
on rotation snapping and then we'll make it a touch
smaller and a little wider. I'll just move it a little
more out into the open as we will now be working
around the back of the mesh. We now need to go into
Face Selection Mode and select the face
on the back of the monitor using control and AL extrude it and use
the scale tilted, turn the new face
into a little square and move it towards
the bottom like this. Make sure it's not too wide. And with the same face selected, we will extrude again and
pull the face out a little. Next, we need to select
this face here on the underside and extrude
it down by about this much. We just need to do one
more little extrusion going down so we
can make the base. Let's select these
smaller faces we just created on the two sides
and extrude them out a little bit we need
to do now is select these three phases on the front and extrude them out a little. Now you can put it
into Object Mode, give it a cheeky little bevel, and then move it into place. Now it's also a good time to go back and Bevel the painting. One final thing before
we move on to the chair, Let's make a rug as a
cube, call it rock. Make it a rogue shape, and put it in our workplace. To give it a more
interesting shape, we'll go into edge
selection mode. Select these four edges on the corners, and then use bevel. We'll move the segments to
ten and the fraction to 0.9. Now go to Face Selection. Select this big face on the top, extrude it and
increase the offset. This will allow us to add two colors when we have
materials later on. To finish the ROCC, go to edge selection, double-click
on one of these. I just slept the whole
edge loop and bevel it, set the segments to
two and the fraction to wherever you
think looks good. Put it back into objects
selection mode and we're done. I've just realized I forgot
to rename the monitor, so I'll just get that done too.
8. Create the chair: Now that we have a desk, we will create a chair. The trickiest part of
the chat is the base, but I have a cool
trick to make it easy. First, we will need a cylinder. We need to change
the properties of this cylinder in the
channel box by clicking here on the inputs and changing the subdivisions
access to five. Now I need to resize
the cylinder to be about this size and shape. Then in Face Selection Mode, select the faces around
the outside of the shape. Now you can extrude them, make sure Keep Faces Together
is turned off and pull the new faces out on the z-axis at enough
set of about 0.1. And then you can change to the move tool and lower
these faces that little. Now I need to select these
faces on top, extrude them, add enough set, extrude
again, and then move up. Now we can pop this
back into object mode. For the seat, we will take a cube movie top and
scale it into shape. Next we can select this face at the back and extrude
it back a little. Then we can select
this new face on top, extrude that up,
and then move it back a little to make it
look like a backrest. Now we can go back into
objects selection mode and Bevel the two
pieces we have made. The final part is to create a new cylinder, scale it down, rotate it by 90 degrees, and then position and duplicate
it to create the wheels. With that done, you can select
all pieces of the chat, combine them, and then
put the chair in place. Don't forget to rename
it before you move on.
9. Create a keyboard, book & mug: For the last of the modelling, we will create some small
details for the room, beginning with a keyboard
for the computer, will keep this simple
so it can make it quickly beginning
with a new cube, renamed to keyboard, and
then move it over to the desk and resize it into
a good size for keyboard. Now select this edge
on the front and move it down to make the shape
a little more interesting. Now we'll use the
multi-class tool and holding the Control key, we will add an edge loop
over to the far side. Now it needs to move
into Face Selection mode so we can slip the
two top faces, extrude them to and keep faces together off and then add
enough set of about 0.2. Now we'll extrude one more time, increase the thickness
of the tilt, and then add another
small offset. Move back into objects
selection mode or the bevel and make sure you're happy with the position. Nice one. Now will
quickly create a book. Make a new Cuban call it book. Now use the scale tool to
make it look nice and bookie. Then select these three
phases and extrude. We'll add an offset of about 0.06 to make a cover and
then extrude again and set the thickness to
something like minus 0.05 to finish it off with
a puppet back into object mode and then
leveling up real nice. Then stick it over on
the bookcase for later. When nearly done
with the modelling. Now let's just add an
empty milk to the desk, create a new cylinder, go to Face Selection
Mode and then select all of the faces on top. Here's a tip. If you
hold the top Kate, you can click and drag to
select multiple phases like I'm doing here with a top
faces selected extrude, add an offset and then
extrude again and move down. Now go to edge selection mode. Double-click on these edges, making sure to hold shift to get all three edge loops and
then you can bevel them. To finish this off,
we need a handle, go to Create polygon
primitives and choose pipe, move and rotate it so it's
alongside the rest of them look like this is
a little too chunky. So to fix that, make sure
you have the channel box open and then click on poly
pipe one on the inputs. Here are some
additional settings for the shape and we'll
change thickness to 0.3. That's perfect. We just need to
scale the shape so that the thickness
is more consistent. Now move to Face Selection Mode. Select half the
face is like this and then press the Delete
key to remove them. Change back to Object Selection
Mode movements scale it so it looks like a handle and
then hit it with a bevel. The last thing we need to do
is combine the two pieces and then moving skeletal
milk into place on the desk. Not all of the modelling
complete well done.
10. Create and add single materials: With the muddling complaint
is now time to make this look a little less Fifty
Shades of Grey by adding some
colored materials. In order to do this,
the first thing we will need to do is open
the Hypershade, which is where we make
materials in Maya, you can access the
hyper shade by clicking this icon up here. Here's what it looks like. Here's where we are
completely materials live. Here's a list of
materials we can create if I just select slum, but one you can see over here is a preview of the material. And down here you can change
the properties of materials, this behaviors or workspace. And you can also use
this to edit materials. I'm going to add a
viewport by clicking on Window and then viewport. And then you can just
click and drag it to dock it in the hyper shade. I'm going to dock it just here. Then I'll just press F5 on my keyboard to put
it into shaded mode. I'll also hide the grid in this view so it's not in my way. Let's create our
first material then. We'll click Lambert over here to create a new
Lambert material. I will rename it to
light brown over here. Then I'll click on
this gray rectangle here for the color picker, I'll set the color to a
yellowy brown like this. Now we can assign this to
the objects in the scene, which is done by
clicking and dragging using the middle mouse
button like this. You can add the material
to multiple meshes at once by selecting
them and then holding the rights mouse
button on the material and choosing add
Material to Selection. Now let's make another one. Start by clearing the workspace, by clicking this icon. Make a new Lambert, call it dark brown, and then click on
the color picker and choose a shade of
brown that you like, then you can add a new
material to these meshes. Now repeat this process to create a couple more materials. I created a white and a dark gray and assign them
to these meshes. We'll do the other materials in the next step because all of the remaining objects have more than one material
that we need to apply. Once you've gotten
to this stage, you can move on to the
next part of the tutorial.
11. Create and add more than one material: Now that you've
applied materials to some of the
objects in the room, it's time to add some color
to the remaining objects. But this time we wanted
to add to a moment here to the objects
instead of just one, we'll start with the ROCC. And for this we'll begin
with the yellow color. I'll make a new Lambert,
call it yellow, make it yellow, and finally
assign it to the rogue. Now for the second color
will clear the workspace, make another new Lambert. This one will be named read. I will set the color to red. Now we need to put the ROCC
interface selection mode. I'll do this by holding the
right mouse button over the rope mesh and then choosing face from the menu that appears. I can then select the face
in the center and then held the right mouse button down over the red material and choose, Assign Material to Selection. And then you have one object with two different materials. Let's do it one more time to make sure you've got it sorted. Let's do the book
first will clear the workspace and then make
new Lambert name it green. I will make it a
nice green color. Now we'll move the book off the shelf so we can see
all the way around it. And then we need to add
the green material. Now I need to get it into
Face Selection Mode and then select these faces
that represent the pages. It can be a little tricky around the bevels, but
once you're done, you can assign the white
material you should have created for the
MLC to those faces, then you put it
back on the shelf. All that's left to do
now is to make an apply the following materials to the rest of the room,
including the walls. Once you've got
everything called, Dan, you'll be ready to move on and we'll get the
lighting setup.
12. Light and render the scene: Now everything has
a material applied. We need to light
our scene right now with viewing the scene
using default lighting, this is pretty flat and boring, so we'll create our
own sexy lighting. Let's start by closing
the hyper shade and then we can turn off the
wireframe in the view panel. Now, I want you
to press seven on your keyboard to go
into lighting mode and you'll see it all goes black because we don't have
any lights in the scene. Let's create our first live
them from the top menu, go to Arnold lights and
then choose physical sky. This creates a big black
sphere around the scene, but it hasn't really made
things in it easier to see. Unfortunately, this
slide doesn't really help until we start
rendering the scene. So let's get rendering
will go to renderer from the panel menu and change
from viewport to 0 to Arnold, this little window will
appear and then we can click on the red play button to
start the scene rendering. As you can say, the
light now appears, but I want it to look like it's streaming
through the window. So I'll rotate the sky
dome like this. Perfect. Now we have some light
coming through the window. The light seems a little
dark to me though. So I'll open the
attribute editor by clicking on the
tab to the right of the screen where I can change the intensity of
the light to five. I'd also like the shadows
to be a little softer. So I'll just move to
the AI physical sky tab in the attribute editor and
set the sun size to three. If we de-select the sky dome, you'll also see we get a
nice-looking background color. This is a nice start them, but other than the bit of light coming through the window, the rest of the room looks
too dark and gloomy. Let's fix that by
adding another light. Will go back to Arnold lights, but this time we'll
create an area light. I will move it up and rotate it with a single line facing down. So it will be going in
the right direction. And finally our make it bigger
to fill more of the room. It's not really doing much. So I'll go over to the
attribute editor and set the intensity to
something like 300. That's looking better. I just wanted to add one
final touch and that's to make it look like light
is coming from the monitor. To do that we'll make another
area light, rotate it, move it, and scale it
so that it's about the same size and same
position as the screen. Now so I can actually see
what the lattice doing. I'll set the intensity
to 100 and I'll click on the color picker
so I can give the light a slight blue tinge. Just for one final flourish. I'll duplicate this light, rotate it around 180 degrees. So the monitor really
looks nice and bright. It looks nice. That'll do for the lighting. Let's move on to
setting up the camera.
13. Set up the camera for the final render: For the final part of this
quick introduction to Maya, we will create a
new camera and set it up like a 2.5 D view. In order to do that, let's first click on Create, go to cameras and choose camera. Next we'll make it an
orthographic camera, which will give you
that 2.5 the quality I'm looking for in
the attribute editor, I'll scroll down to
orthographic views and then tick the box
for orthographic. Now we want to actually look
through the new camera. So I'll go to Panels orthographic
and choose New Camera. Here's what the camera
can currently see, not exactly what
we're looking for. So I'll make a few more changes. Open the channel box and then set the Rotate y-value to 45, and then set the
Rotate X two minus 20. This is now at the right angle, but for me it's chopping
everything in half. This just means we need
to move the camera back. I'll go to Panels and
then perspective, and then choose purse to
select the original 3D camera. Now I can move our new
camera back so that it's not intersecting the geometry
of the scene anymore. Nothing go back to viewing the scene with a new
orthographic camera. Nothing is being
chopped in half. And the last thing
to do is to position the camera so I can
see everything.
14. Conclusion & Thanks for watching :): That's everything well-done
for making it to the end. If you want to, you can
add some more details like filling the bookshelf or
adding another painting. Or you could even create
some new models of your own. This was only intended to be a quick introduction to Maya. So if you feel like you want a more thorough and detailed
cluster work through, then you can also check out my complete beginners
guide to my class, which is also linked in
the course description. If you enjoyed this
course and found it useful than I would be eternally grateful if you could
leave review of the class is positive
reviews like yours that tell Skillshare that the
cost is I'm creating a God which will make it easier for other
beginners to find them. Thanks so much for taking
my class and I really hope to see you in another
class in the future.
 Shane Whittington, 3D Artist, Educator & Entrepreneur