Transcripts
1. Introduction: Hi everyone. Thank you for
joining my class today. I am Eva, and I am the creator behind
Hannah crochet design. Hannah crochet design is
my crochet jewelry line. For my crochet jewelry, I use a very fine trap. The thickness is
slightly thicker than regular sewing thread and I use 0.5-millimeter crochet hook. I like to incorporate
different shapes of crystals, as well as different sizes
of sequin in my jewelry. Even though you're
using the same crochet pattern for the flower, you can create
totally new design new look by using different
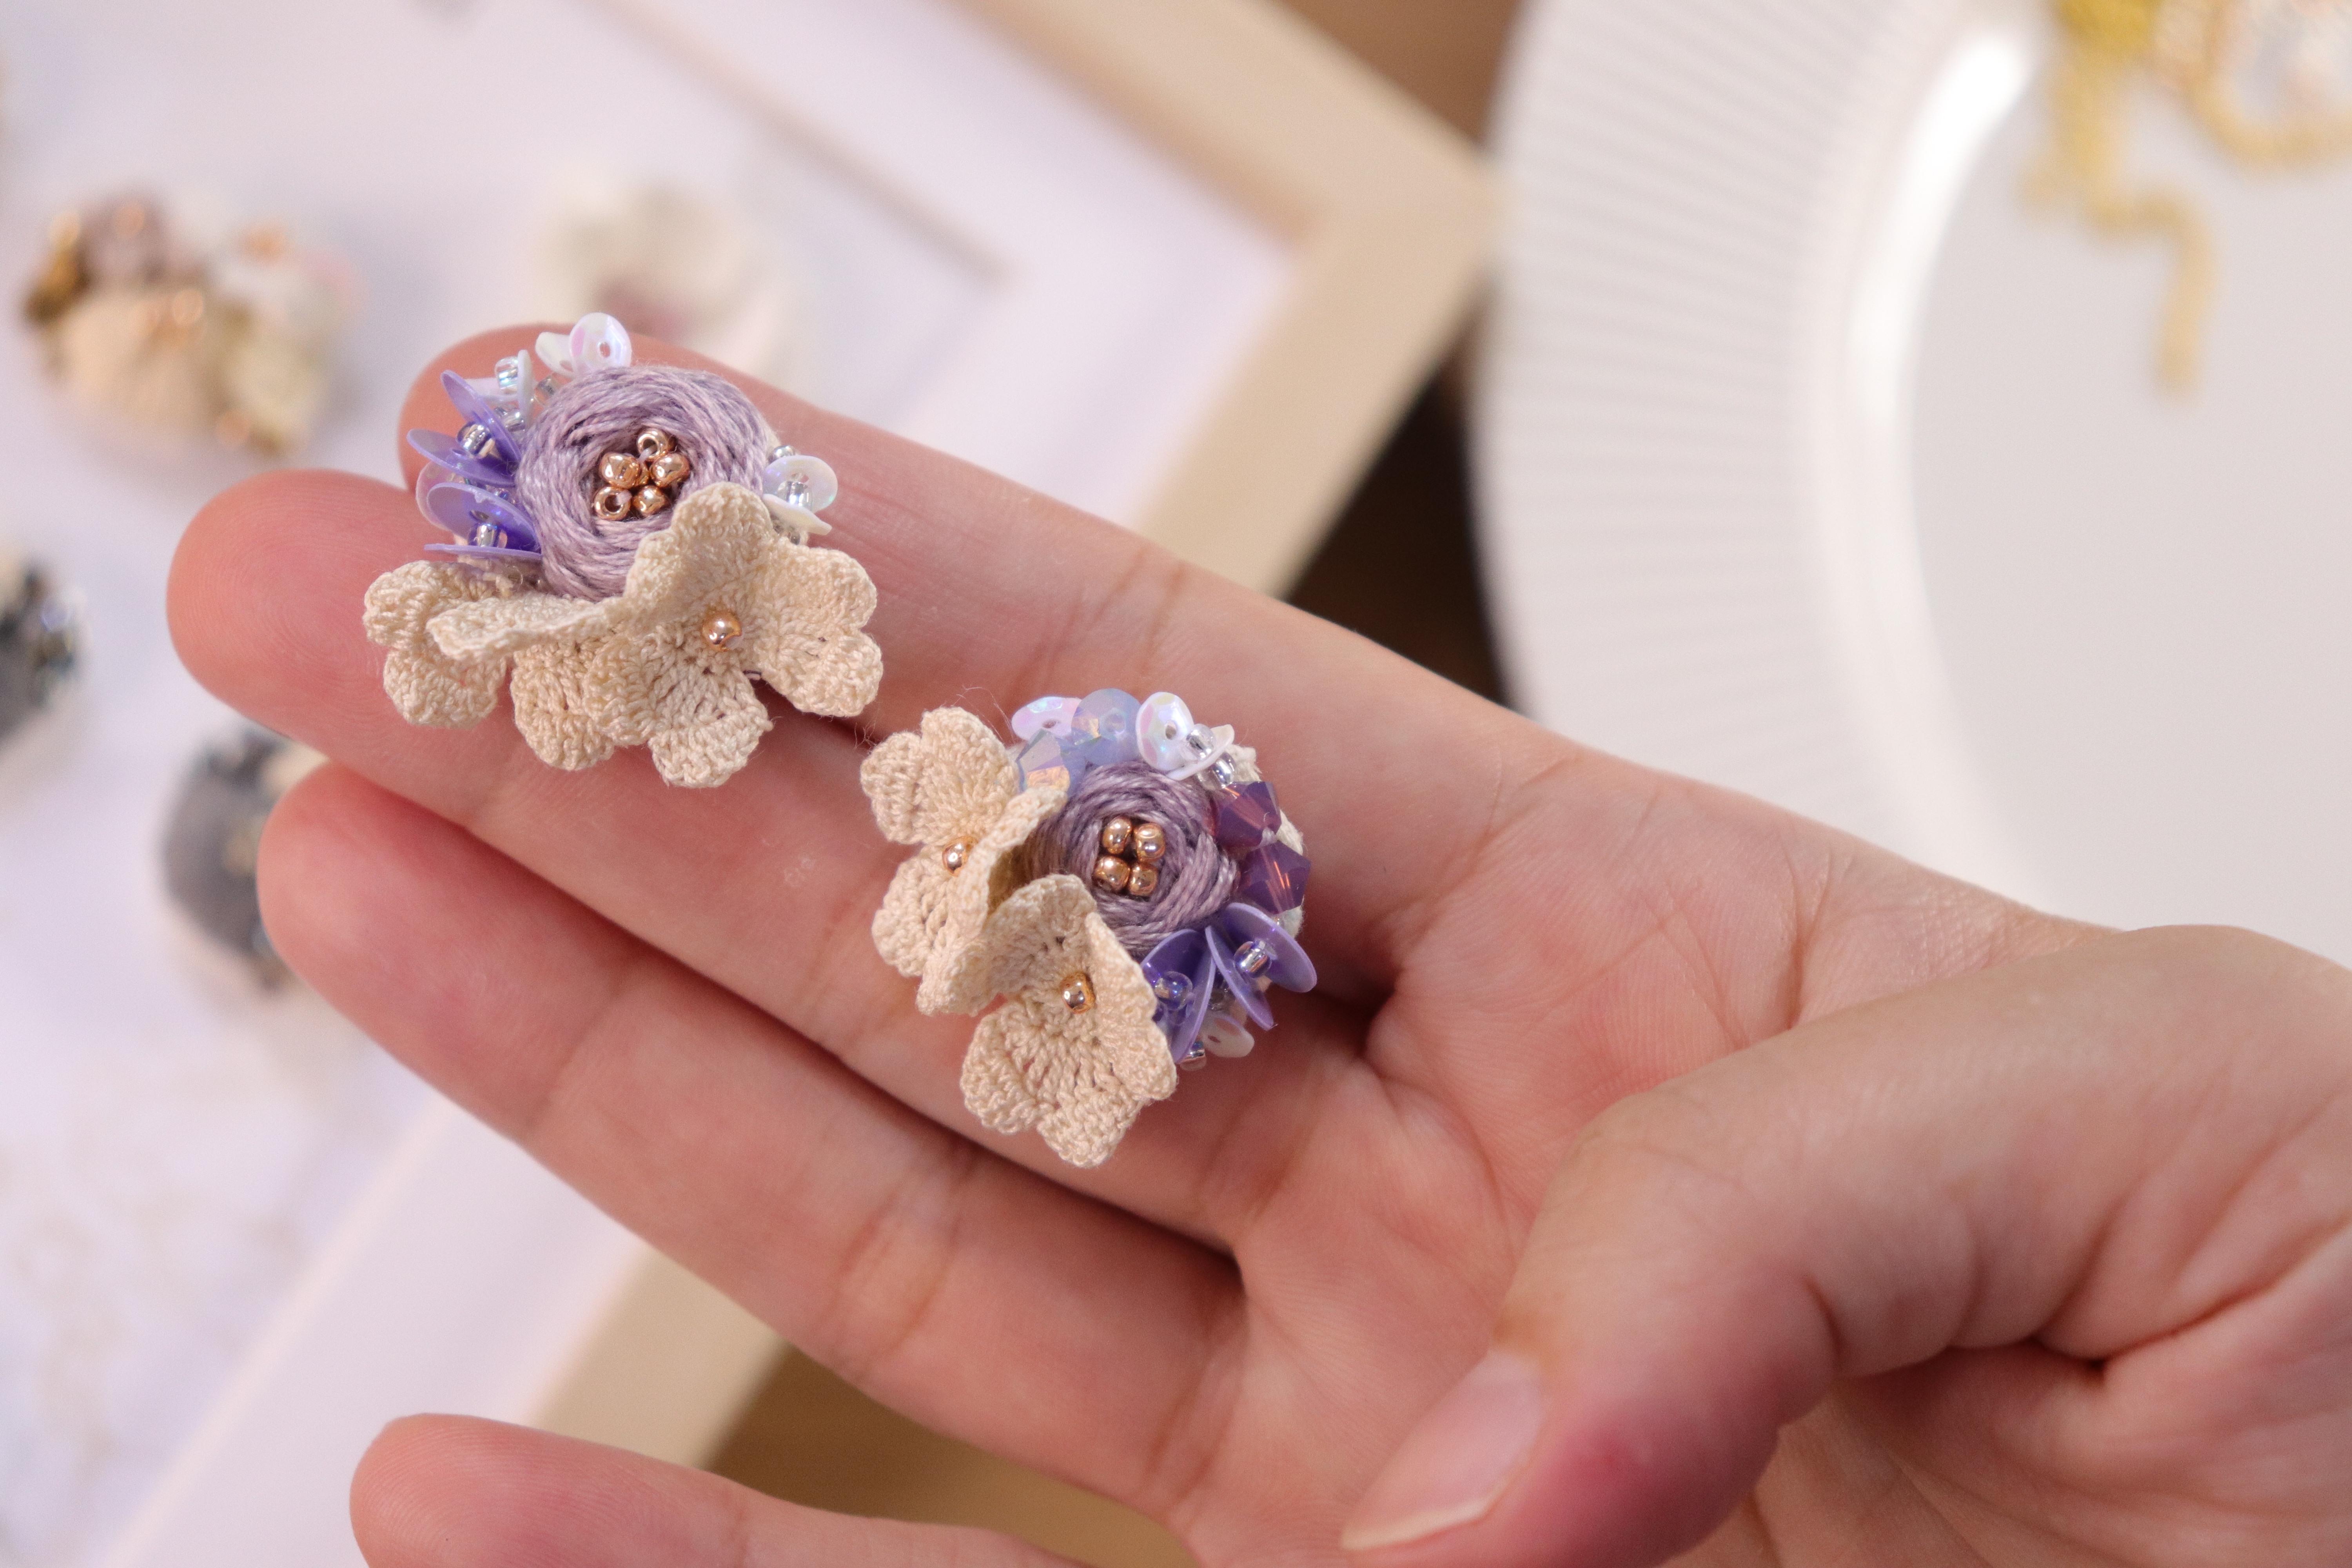
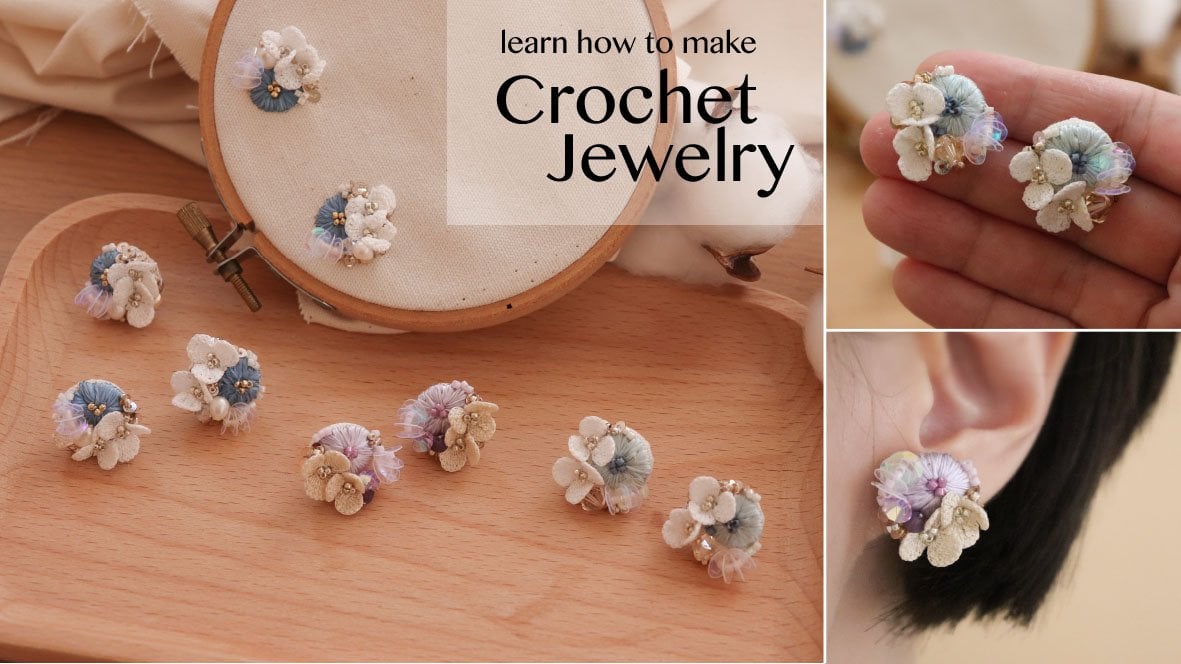
shape of beads or crystal. In this class, I'm going
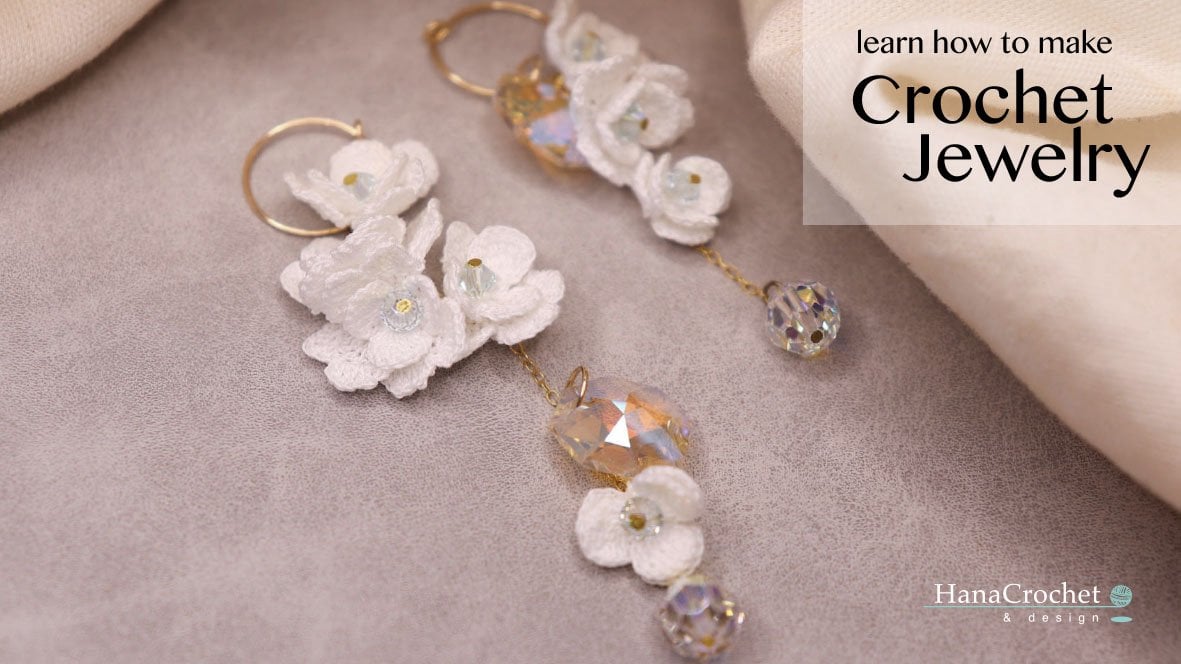
to teach you how to make these crochet
flower earrings. I'm going to share with
you all the tools and materials that
you're going to need to make these crochet earrings, such as the size of the trap, size of the beads, [MUSIC] the type of material that I'm using for my gold chain and also the ear hook and also the size of
crochet thread that I'm using. Then after that,
I will teach you how to crochet a flower. Lastly, I'm going
to share with you how to put up the
earrings together. [MUSIC] If you're interested to make these crochet earrings, go to my next video
to see all the tools and materials that you need to make this earrings. [MUSIC]
2. Lesson 2 how to make basic crochet stitches: Hi everyone. In this
lesson I'm going to teach you how to do some
basic crochet stitches. In this tutorial, I'm
going to use 1.25 millimeter crochet hook and
a skin of embroidery thread, so you can see it
better on screen. We're going to start
with slip knot. To do that, I'm going
to wrap the yarn over my index finger like this. Then grab your hook, insert underneath the
first yarn and then grab the second yarn and pull
it through the first yarn. I'm going to twist. Slowly remove the loop
on your index finger, and tighten it by pulling
the tail of the thread. After this, we are ready to
do our first chain stitch. To do that, I'm going to yarn over and then pull
it through the loop. That's our first chain. Same thing again to
do the second chain, I'm going to yarn over and
then pull it through the loop. That's the second chain. Yarn over and pull
it through the loop, that's the third one. Yarn over, pull it
through the loop. That's how you make
chain stitches. If you're new to micro crochet, you might want to practice making this chain
stitches and they'll all your chain
stitches look even and all of them have same size. Next stitch is a single crochet. To make a single crochet stitch, I'm going to insert my hook in the chain stitch like this. Then I'm going to yarn over and pull it back
through the loop. You have two loops on your hook. I'm going to yarn over again and then pull through two
loops altogether. That's your first
single crochet. I'm going to show you again. I'm going to insert my hook in the next stitch or
in the next chain, and then I'm going to yarn
over and pull it back through. I have two loops on my hook. I'm going to yarn over and then pull through two
loops altogether. That's my second single crochet. Again, I'm going to insert my hook in the next stitch or in the next chain and I'm going to yarn over and pull
it back through. I have two loops on my hook. I'm going to yarn over and pull through two loops together. That's my third single crochet. Again, insert the hook in the next stitch or
in the next chain. I'm going to yarn over
and pull it back through. I have two loops on my hook. I'm going to yarn over and pull through two loops together. That's how to make
a single crochet. I finished my raw. This is how the single
crochet looks like. It's a short stitch
and you won't see a lot of gap in
between your yarn. Next, I'm going to
show you how to crochet a half double
crochet stitches. To do that, I'm
going to start by making the chain stitches. I'm going to flip
my crochet work and we're going to work on this slide.To make half
double crochet stitch, I'm going to yarn over once. Then I'm going to insert the
hook in the first stitch, yarn over and pull
it back through. You have three
loops on your hook. I'm going to yarn over and pull through three loops
all together. That's my first half
double crochet. I'm going to show you again,
I'm going to yarn over once and then I'm going to insert the hook in
the next stitch. Yarn over and pull
it back through. Now we have three
loops on the hook. Then I'm going to
yarn over and pull through three loops
all together. That's the second
half, double crochet. Again, yarn over once, insert the hook in
the next stitch, yarn over, pull it back through. We're going to yarn over, and pull through three
loops all together. I'm going to show
you one more time. We're going to yarn
over once and then insert the hook in
the next stitch, yarn over and pull
it back through. We have three loops on the hook. I'm going to yarn over and pull through three loops altogether. That's how to do a
half double crochet. I finished my half double
crochet stitches role, and this is how it looks like. Compared to the single
crochet stitches below this half double crochet
stitch is slightly polar. Next, I'm going to
show you how to do a double crochet stitch. I'm going to start by making
three chain stitches. To make a double crochet, I'm going to yarn over once, insert the hook in the stitch, and then yarn over and
pull it back through. You have three
loops on your hook. I'm going to yarn over and
pull through two loops. Yarn over again, and
pull through two loops. I'm going to show you again. We're going to yarn over once inside the hole in
the next stitch. Then yarn over, pull
it back through. We have three loops on the hook. I'm going to yarn over and
pull through two loops. Yarn over again, and
pull through two loops. That's the second
double crochet. Yarn over once inside the
hook in the next stitch. Yarn over and pull
it back through. We have three loops on the hook. Next I'm going to yarn over
and pull through two loops. I've finished the double
crochet stitches row. This is how it looks like. It is slightly taller than
the half double crochet. Next, I'm going to
show you how to do a treble crochet stitch. I'm going to start with
four chain stitches. To make a treble crochet, we are going to yarn over twice. Then I'm going to insert
the hook in the stitch, yarn over and pull
it back through. Now you have four
loops on your hook. I'm going to yarn over and
pull through two loops. This one will be the last one, yarn over pull
through two loops, so you're going to
yarn over three times. That's the first treble crochet. This is the second one. Yarn over twice inside the
hook in the next stitch, yarn over and pull
it back through. Now we're going to yarn over, pull through two loops. Yarn over, pull
through two loops, and last one, yarn over,
pull through two loops. That's the second treble
crochet.Yarn over twice inside the hook
in the next stitch. Yarn over and pull
it back through. Now we're going to yarn over, pull through two loops. Yarn over, pull
through two loops, and last one, yarn over, pull through two loops. I'm going to show
you one more time. We're going to yarn over twice inside the hook in
the next stitch. Yarn over and pull
it back through. Now you have four
loops on your hook. I'll bring it closer so
you can see the loops. There are four loops there. Now we're going to yarn over, pull through two
loops, yarn over, pull through two
loops and last one, yarn over pull
through two loops. This is how the treble
crochet stitches looks like. We're going to learn
one last stitch, which is the double
treble crochet. I'm going to start by
making five chain stitches. Then I'm going to
flip my crochet work. To make double treble crochet, I'm going to yarn
over three times. Then I'm going to insert
the hook in the stitch, yarn over and pull
it back through. Now you have five
loops on your hook. We're going to yarn over
and pull through two loops. Yarn over, pull
through two loops. Yarn over, pull
through two loops, and last one, yarn over, pull through two loops. Let's do it again.
We're going to yarn over three times 1,2,3. We're going to insert the
hook in the next stitch. Yarn over and pull
it back through. Yarn over, pull
through two loops. Yarn over, pull
through two loops. Yarn over, pull
through two loops. This is the last one, yarn over pull
through two loops. That's the double
treble crochet stitch. Again, we're going to
yarn over three times. Then insert the hook
in the next stitch. Yarn over, pull it back through. You have five loops
on your hook. Then we're going to yarn over
and pull through two loops. Yarn over, pull
through two loops. Yarn over, pull
through two loops, and last one, yarn over, pull through two loops. I'm going to show
you one more time. We're going to yarn
over three times. Then we're going to insert
the hook in the next stitch. Yarn over, pull it back through. You have five loops
on your hook. I'm going to yarn over,
pull through two loops. Yarn over, pull
through two loops. Yarn over, pull
through two loops, and this one will
be the last one, yarn over pull
through two loops. That's the double
treble crochet stitch. I finished my double
treble crochet stitches, and this is how it looks like. That's all for basic
crochet stitches. These are all the
stitches that I used to make my crochet flower.
3. Lesson 3 Tools and materials: In this lesson,
I'm going to share with you all the tools and materials that you're
going to need to make these crochet earrings. If you purchase my crochet kit all the materials
will be included in the box except for the white glue and
also the crochet hook. Let's start with
a crochet thread. I'm using this crochet
thread Number 80 from DMC it is available
in two colors. This is the white color tread, and this is the ecru. For the embroidery rose I'm
using DMC embroidery thread. I use this purple shape color
the color code is 3042. [MUSIC] To make these crochet earrings, I'm using 0.5 millimeter
crochet hook. My favorite crochet hook
brand is optimal Tulip. You can purchase this
online on Amazon. There are two types of
sequins in the packaging. The first one is the six
millimeter flat sequin in purple shade and the other one is four millimeter cup
sequin in AB white. I used the smallest
sequin to fill in the small gaps in
my earrings design. The auto type of
beads that you're going to get in a crochet kit. The first one is this
round toho beads size 11 in rose gold color. [MUSIC] I sew this beads
in the center part of the embroidery rose as well
as my crotchet flower. The other one is this round
toho beads also in size 11. This is a transparent
beads with a silver lining inside and I use these beads
as a spacer for my sequins. For the back of the
earrings I'm going to cover it with this suede fabric. I have prepared a
pre-cup suede fabric so all you have to do is just a patch the ear posts and glue them onto the
back of the earrings. To glue all the parts together, I'm using this white glue. This is just a regular
handicraft glue. The ear posts is
also included in the crochet kit if you want to purchase for future projects, you can get 14K gold field or sterling silver or get a hypoallergenic material
if you have sensitive skin. You will also need an embroidery
hoop and linen fabric. [MUSIC] You will also need this beading foundation if you purchase my crochet kit, you will get this
pre-cut circle. That's all about the
tools and materials. In the next lesson,
I'm going to show you how to crochet the
flower. [MUSIC]
4. Lesson 4 how to crochet miniature flower: [MUSIC] Hi, everyone.
In this lesson, I'm going to teach you how
to crotchet this flower. [MUSIC] To crotchet that flower, I'm using this 0.5
millimeter crochet hook. I'm using Etimo
Tulip crochet hook. You can purchase
this from Amazon. This is by far the most
comfortable crochet hook I've ever tried because
it has soft grip. For the thread, I'm using this DMC cordonnet special
cotton thread number 80. If you can't find
this brand online, I actually sell this thread together with my crotchet kit. You can purchase that
in my Etsy shop. I will put the link in the
class information below. You can also use DMC dentelles number 80 or DMC
embroidery thread. If you're using DMC
embroidery thread, you have to split the strands. In one skin of
embroidery thread, there are six strands, so you just need
to separate them and just use one strand. This is what I usually do. After I split the
strands one by one, I wind the individual strand
on a bobbin card like this. In this tutorial, I'm
using full strand of embroidery thread and
one millimeter hook, so you can see all the
stitches that are onscreen. We're going to start
with magic circle. To do that, I'm going
to wrap the yarn over my finger and then
grip your hook. Insert your hook
underneath the first yarn, and then the second
yarn, pull it through. I'm going to twist yarn
over and chain one. After this, I'm going to
make one more chain stitch. Then after that,
we're going to make four double crochet
in the magic circle. To do that, I'm going
to yarn over once, insert your hook in
the magic circle, yarn over, and pull
it back through. Then from here, I'm
going to yarn over, pull through two loops, and yarn over, pull
through two loops. This is our first
double crochet, and this is the second
one, yarn over once. I'm going to insert my
hook in the magic circle, and then we're
going to yarn over, pull through two loops, and yarn over, pull
through two loops. This is the third
double crochet, and this is the fourth
double crochet. This is going to be the
end of the first round. Next, I'm going to make
two chain stitches, flip my crochet work, and then we're going to
start with the second row. I'm going to make two double
crochet in the first stitch. To do that, I'm going
to yarn over once, and then insert my hook
in the first stitch. Then I'm going to yarn
over and pull it through. Then yarn over, pull
through two loops, yarn over, pull
through two loops. This is the first
double crochet, and this is the second double
crochet in the same stitch. Then after that,
I'm going to make two treble crochet
in the next stitch. To do that, I'm going
to yarn over twice, then insert the hook
in the second stitch, yarn over, and pull it through. We're going to yarn over,
pull through two loops. Yarn over, pull
through two loops, and last one, yarn over,
pull through two loops. This is the first
treble crochet. This is the second treble
crochet in the same stitch, yarn over twice inside the hook in the same
stitch, and yarn over, pull it through, yarn over, pull through two loops, yarn over, pull
through two loops, and last one, yarn over, pull through two loops. Another two treble crochet
in the next stitch. This is the first
treble crochet, and I'm going to make the
second treble crochet in the same stitch. In the last stitch,
I'm going to make two double crochet
yarn over once. I'm going to insert my
hook in the last stitch. Yarn over and pull it through, yarn over, pull
through two loops, and yarn over, pull
through two loops. This is the first
double crochet, and we're going to make
second double crochet in the same stitch. Yarn over once insert the
hook in the same stitch, yarn over, and pull
it back through. Yarn over, pull
through two loops, and yarn over, pull through two loops. That's the end of the
second row, Chain 1. We're going to continue
to the third row. Flip your crochet work, and we're going to start
with a single crochet in the first stitch. Half double crochet
and a double crochet in the next stitch,
yarn over once. Insert your hook in the
next stitch, yarn over, pull it through, yarn over, and pull through three
loops altogether. That's the half double
crochet stitch. Next, a double crochet in the same stitch, yarn over once. Insert the hook in
the same stitch, yarn over and pull it through. Yarn over, pull
through two loops, and yarn over, pull
through two loops. That's the double crochet. In the next stitch,
I'm going to make two treble crochet stitches. We're going to yarn over
twice inside the hook. In the next stitch, yarn over, pull it through. There are four
loops on your hook. I'm going to yarn over
pull through two loops, yarn over and then pull through two loops
and the last one, yarn over, pull
through two loops. That's the first treble crochet. I'm going to make the
second treble crochet in the same stitch. This is the second
treble crochet. A double crochet in
the next stitch, yarn over once, insert the hook in
the next stitch. Yarn over and pull it through. There are three
loops on your hook, yarn over and pull
through two loops, yarn over and pull
through two loops. I'm going to make
two chains stitches, and we're going to make a slip
stitch in the same stitch. Slip stitch in the next stitch. I'm going to make
two chains stitches, and we're going to
make a double crotchet in the same stitch, yarn over once inside the
hook in the same stitch, yarn over and pull it
back through, yarn over, pull through two loops, and yarn over, pull
through two loops. Two treble crochet stitches
in the next stitch, yarn over twice inside the
hook in the next stitch. Yarn over, pull it through, yarn over, pull through
two loops, yarn over, pull through two loops,
and last one, yarn over, pull through two loops, that's
the first treble crochet. We're going to make the
second treble crochet in the same stitch. A double crochet and a half double crochet
stitches in the next stitch, so I will start with
a double crochet. Then after that, a half double crochet in the same stitch, yarn over once, insert your hook in
the same stitch, yarn over, pull it through, yarn over, pull through
three loops altogether. That's the half double crochet. For the last stitch,
I'm going to make a single crochet in that stitch. From here, we're going to slip stitch in the same stitch. That's the end of the last row. Now we're going to connect this last pitch to the
magic circle below. To do that, I'm going to
make the chain stitches. Make a slip stitch in
the last double crochet that we made in the first row. Make another two chain stitches. To finish the first petal, we're going to make a slip
stitch in the magic circle. That's it. This is how the
first petal looks like. Next, I'm going to crochet
another two petals with the same pattern. This is how small the petal
looks like at this point, if you're using crochet
trap number 80. Now we're going to
do the second petal, which has exactly the same
pattern as the first petal. I will start by making
the chain stitches, and then after that,
I'm going to make for double crochet in
the magic circle. This is my first double crochet, this is the second
double crochet, the third double crochet, and the last double crochet, which is also the end
of the first round. Make the chain stitches. Flip your crochet work, and we're going to start
with the second round. Two double crochet
in the first stitch. Yarn over once, set the
hook in the first stitch, yarn over, pull its through. We're going to yarn over,
pull through two loops, and yarn over pull
through two loops. This is the second double
crochet in the same stitch. In the next stitch
I'm going to make the treble crochet stitches yarn over twice inside the hook. In the next stitch, yarn
over and pull it through, yarn over, pull
through two loops. That's the first treble crochet. This is the second treble
crochet in the same stitch. Yarn over twice inside the
hook in the same stitch. Yarn over pull it through, yarn over pull
through two loops. In the next stitch,
I'm going to make another two treble
crochet yarn over twice. Instead of hook in
the next stitch, yarn over pull through, yarn over pull
through two loops. That's the first treble crochet. We're going to make
another treble crochet in the same stitch. Two double crochet in the
last stitch yarn over once. Insert the hook in
the next stitch, yarn over, and pull
it back through. We're going to yarn over
pull through two loops, and yarn over pull
through two loops. This is the second double
crochet in the same stitch, which is also the end
of the second row. Next, we're going to chain one. Flip your crochet work, and we're going to start
with the third row. A single crochet in
the first stitch, then after that, a half
double crochet and a double crochet stitch
in the next stitch. I will start with a
half-double crochet. This is a double crochet
in the same stitch. Two treble crochet
in the next stitch. We're going to yarn over twice inside the hook
in the next stitch. Yarn over and pull
it back through. Yarn over pull
through two loops. This is the second treble
crochet in the same stitch. A double crochet in the next
stitch, yarn over once. Insert your hook in
the next stitch; yarn over and pull
it back through, yarn over pull
through two loops, and yarn over, pull
through two loops. Then after that, I'm going
to make two chain stitches. Then we're going to make a slip stitch in the same stitch. Make another slip stitch
in the next stitch. Make two chain stitches and a double crochet
in the same stitch, yarn over once inside the
hook in the same stitch, yarn over pull it through. We're going to yarn
over pull through two loops and yarn over
pull through two loops. Two treble crochet
in the next stitch. Yarn over twice instead the
hook in the next stitch, yarn over pull it back through. Yarn over pull
through two loops. We're going to make one
more treble crochet in the same stitch. A double crochet and a half double crochet
stitches in the next stitch, we will start with
a double crochet and after that a half double
crochet in the same stitch. Yarn over once inside the hook, in the same stitch, yarn
over pull it through. We're going to yarn over pull through three loops altogether. We're going to make a single
crochet in the last stitch. Then, a slip stitch
in the same stitch. Then from here,
we're going to do the same thing as we did before. I'm going to chain rule. Then make a slip stitch in the last double crochet that
we made in the first row. Chain two again. We're going to make a slip
stitch in the magic circle. This is how the circle
data looks like. I have a short clip
to show you how the flower looks
like at this point, if you're using crochet
thread number 80. [MUSIC] Next, we're going to continue
to the third petal. Same thing again.
I'm going to start with two chains stitches, and then for double crochet
in the magic circle. [MUSIC] Of the red, I'm going to make
the chain stitches and start with a second round. I will start with two double crochets in the first stitch. This is my first double crochet, and this is the second double
crochet in the same stitch. Since the pattern is exactly the same as the previous petal, I'm going to speed up the video and come back at the
end of this row. [MUSIC] I finished my second row. I'm going to chain one
and flip my crochet work, and start with that row. Make a single crochet
in the first stitch. Again, since the pattern is exactly the same as
the previous petal, I'm going to speed up the video and come back at the
end of this row. [MUSIC] Now we are at the last stitch. I'm going to make a single
crochet in that stitch. [MUSIC] After that, I'm going to slip stitch
in the same stitch. This is the end of this round. Then same thing again
I'm going to change too, then slip stitch in the
last double crochet that we made in the first row. Then chain row, again and slip stitch in
the magic circle. This is how the data looks like. After this, you can
cut the tail of the thread and then
tighten your magic circle. This is how the
flower looks like, if you're using crochet
track number 80. I'm going to tighten
the magic circle by pulling the tail
of the thread. To finish it, I
usually secure it with two knots at the back. For a pair of earrings, you need to prepare
four crochet flowers. This is the size comparison between the flower
with full strand of embroidery thread and the flower with crochet thread number 80. In the next video, I'm
going to share with you how I assembled
the earrings.
5. Lesson 5 how to make rose embroidery: Hi everyone. In this
lesson I'm going to share with you how I make
the embroidery rose and how I attach the crochet flowers
on to the earrings. First, you need to prepare the embroidery hoop and
also the linen fabric. If you purchase my crochet kit, these two items will be
included in the box. Before you start sewing
all the flowers, make sure that the fabric is
securely placed in the hoop. I will also provide the
circle hard fabric, which we're going to use as
our earrings foundation. Next you're going to
place that circle at the back of your hook. I'm just going to make a running stitch around that circle. We just need to make sure that the circle will not move around, while we attach the crochet
flowers and beads later on. All the earrings parts
like the crochet flower, the sequence should be sewn onto these beading foundation. [MUSIC] I'm going to
do the same thing with the other circle. Make sure you give enough
space in between circles, at least about three
centimeters apart. Next, we're going to make
the embroidery rose. I'm using this purple shade
from DMC embroidery thread. This is thread is
also included in the crochet kit and we're
going to use one for skin, so you don't have to separate
this threads one by one. With a pencil, I'm going
to draw a small circle. The circle should be smaller than your earrings foundation. This is going to be the size
of your embroidery rose. After that, I'm going to
draw five equal lines. I'm going to use one full
skin of embroidery thread. I'm using this purple
shape from DMC. The color code is 3042. We will start from the
center of the circle. I'm going to bring my needle up and following the five
lines that we already made, I'm going to make five stitches. [MUSIC] After you're finished with this five stitches, we're going to start weaving
over and under the stitches. I will skip the first stitch
and I'm going to go under the next page and you're going to pull the thread
away from you. Next we're going to
skip the next stitch and we're going to go
underneath this stitch. Then you're going
to pull the thread. We're going to skip this
stitch and we're going to go underneath the next stitch. Next we're going to skip
this stitch and we're going to go underneath
the next one. Then I'm going to
continue to weave until I cover the entire spokes. [MUSIC] This is how my rose
looks like so far. I have covered the
empire spokes, and to finish this, I'm just going to
bring my needle down and I will secure it
with two knots at the back. [MUSIC] After that, I'm
going to sew some seed beads in the center of my
embroidery rose. I'm using the whole
round seed beads, size 11 in rose gold color. Then after that, we're
going to sow the beads one-by-one in the middle
of the embroidery rose. For one rose, I usually
use around 4-5 beads. If your embroidery rose
is full just like mine, as you can see when
I sow the beads, the bead is sing. In this case you might
want to use more beads. Just make sure that when
you wear that earrings, people can see those tiny beads. Next we're going to
sort the sequence. Remember that we have attached the beading foundation
behind the fabric. All the sequence and
the beads should be sewn onto this
beading foundation. Grab your six millimeter
purple sequence. This one is also included in the crochet kit and also take your round the whole beads, size 11, which is also
included in the package. This is a transparent with silver line round
the whole beads. Next I'm going to
bring my needle up close to my embroidery rose. We're going to insert
the TOHO beads and sequence alternately. [MUSIC] This is how the
sequence looks like. You have three beads and two
sequence in between them. Then after that
I'm going to bring my needle down and
pull it tightly. Let's make another set. I'm going to bring my needle up, close to the first
set of sequence. I have prepared my TOHO
beads and sequence. Then I'm going to
bring my needle down close to the first
set of sequence. [MUSIC] I'm going to use
different type of sequence. I'm going to bring
my needle up close to the last set of sequence. This is the sequence
that we're going to use. I'm using four
millimeter AB white. Then we're going to do
the same thing again. I will start with
my beads and then after that I'm going to
insert the sequence. You're going to do
this alternately. Let's make another
set next to it. Then next, prepare
your crochet flowers. I'm going to attach
these two flowers below the embroidery rose. Then we the same round the whole bead size
11 rose gold color. I use one bead and so it in
the center of the flower, I'm going to bring my
needle up close to the first flower and I'm going
to sow the second flower. [MUSIC] I'm going to
bring my needle up at the other side of
embroidery rose. I'm going to fill in that
empty part with another set of four millimeter AB
white sequence. That's it. This is how the earring
looks like so far. Next, I'm going to
make the other one and I'm going to show you how to incorporate some Swarovski
beads in your earrings design. Same step as the first earring. I'm going to start with
my embroidery rose. For the Swarovski beads, I'm just using the same color
tone as my embroidery rose. This is four millimeter
by cone-shaped. You also can use smaller bits
with the same color tone. For my earrings design, I usually pick the main color, which is purple for this design. Then after that, I'm going
to pick my secondary color. It can be blue or red. For the rest of the parts, I'm just going to use
neutral colors such as white or light beige color. It can also be silver or gold. This is how the other side of the earrings
design looks like. I added light blue
Swarovski crystals as my secondary color and for
the rest of the parts, I just used neutral color, such as this light
beige crochet flower. I'm still using the same four millimeter AB white sequence and I also use the same
rose gold the whole beads. In the next lesson,
I'm going to show you how to attach the silver ear pose and how to sow the back part of the
earrings. [MUSIC]
6. Lesson 6 how to attach the earpost and finishing up: In this lesson, I'm
going to show you how to sew the back part
of the earrings. First, we're going to remove
the earrings design from the embroidery hoop and I'm
going to cut out one by one. [MUSIC] I'm going to
cut out the design around seven millimeter from the foundation circle and I'm going to make a small cuts around the circle like this. I'm going to apply glue on that excess fabric and we're
going to fold it inwards. I'm using brush so I can
control the amount of the glue and lightly I apply
the glue around the edges. Slowly I'm going to fold
it inwards with my finger. I hold and press until
the parts stick together. I find that it's easier to glue the excess fabric one by one rather than do
it all at once. I'm just going to
take my time slowly, apply the glue then pull
it inward one at a time. Gently hold and press
with your thumb, make sure it sticks together before you move
to the next part. [MUSIC] This is
how it looks after you glue all the
excess fabric inward. Next, all we have
to do is attach the earposts and cover the
back part of the earrings. I have my suede fabric here. If you purchase my crochet kit, you're going to get a
perfect circle shape. The diameter of the
circle is 1.8 centimeter. Just makes sure that
it is big enough to cover the back part
of your earrings. After that, I'm going
to pick my pencil and mark the center
part of the circle. Grab your earposts and
we're going to poke the earposts in the
center of the circle. I usually apply some glue at the back part of the earposts and I'm going to
apply the glue on the entire surface and I'm going to put this on
the back of the earrings. That's accurate, I'll
sew therein together. That's it. This is how
the earrings looks like. Thank you everyone for
joining my class today. I hope you're having fun making your own
crochet earrings. For more inspiration, you can check out my
YouTube channel, HanaCrochetDesign
and don't forget to follow me on Instagram,
HanaCrochetDesign. See you next time. Bye.
 Hanacrochetdesign Eva Widjaja, hanacrochetdesign