Transcripts
1. Intro: Have you ever wanted
to learn to crochet, but I'm not quite sure where to start? Well, you're
in the right place. I'm Cat Kimball, a crochet
designer and instructor, and in this beginner
friendly class, I'll take you through
everything you need to know to get started
with crochet. No prior experience necessary. We'll start with the
basics like choosing your hook and yarn for
your first project. Then I'll show you how
to make a slip knot, the very first step in crochet. You'll also learn a vital
skill which is how to hold your hook and yarn comfortably so you can crochet with ease. Next, we'll be making
a foundation chain. Think of this as the backbone
of every crochet project. You'll learn how to turn
your work and build rows. And finally, I'll
show you what's called casting off and
weaving in your ends, which is just a crochet term to make sure your work is
finished off nice and neat. By the end of this
class, you'll have made your very own crochet swatch, your very first step into
the world of crochet. The best part about this is
you can build on this skill, and you will soon be making
other things like scarves, coasters, anything
that you would like to make for yourself or maybe
as a gift for someone else, you will be able to do. So if you have your hook ready, join me in this class,
and let's get started.
2. Hooks & Yarn: There is a wide range
of yarn out there, but crochets usually
have a set of hooks ranging 1-10 millimeters. You can buy a set of hooks
really cheaply on Amazon. For simplicity
today, we are using midwight yarn and a
medium sized hook. This is a five millimeter hook, and you'll be able to see
it on your crochet hook, just written in this
little groove here. You can use any
size that you like, make sure that the hook is the size that's written on
the back of your yarn label.
3. Slipknot: First, we need to
make a slip knot. This is what is going
to hold the yarn onto the hook before
we make the chain. So what we're gonna do is lay the yarn on the table like this. This part is called
the working yarn because it's attached
to our skin. And this is the
tail of the yarn. So you want to lay
the tail down first. And then lay the
working yarn over, so you'll form a loop. To make this slip knot, all we want to do is pull the working yarn through
the back of this loop. So we want this
part of the yarn to go through here and up. Now, you could use
your hook for this, but for simplicity, I'm
going to use my fingers. I'm going to pick it up
to show you more easily. So I've got it in my hands here. So I'm going to take this,
put it through the back. And when I get that loop, I've got it with my
thumb and forefinger, so it's not going anywhere. And now I can hold
these ends of my arm, and then you're just gonna pull. And there's your slip knot. Well done. Now you've
got your slip knot. You want to make sure that
it can go onto your hook. So we're going to take our hook and just put it
through the knot. And then you will
realize that you can if you pull on
this working yarn, you can pull it kind of a little bit tighter so it's easily
on your hook, not too tight. Not like that. There you go. Now your yarn is on your hook.
4. Holding Hooks & Yarn: Okay, the way you hold
your yarn and your hook is by far the most
important part. This is the part that might
feel unnatural at first. It's like playing an
instrument or driving a car. It feels weird as if
you'll never get it. But then you reach a
moment where you're like, How do I not get this at first? And it all falls into place. So what you're going
to do is splay your hand out like this as
if you're kind of waving. Then pick up the hook so you're holding
it and your thumb is kind of on the
ridge of your hook. Now you're going to take
the working yarn and lay it across the three middle
fingers of this hand. The other end of
your yarn is gonna hook over the top of
your index finger. So you're holding
this like this? Over those three fingers. And then that is going
to kind of hook over. You want to make sure
that the yarn can always move easily, okay? So it's never going to be in one place as
you're crocheting. It's always going to be moving. So you don't want to
restrict it in any way. Think of it like a river
flowing through your hand. And you can use these two points to stop the yarn and
let it go again. So you can kind of stop here
and it won't go any further, or you can kind of pull
that a bit tighter. But you'll see what I mean next.
5. Making a chain: Okay, now you have your hook and yarn in your hand correctly, you can start to
make your chain. Now, make sure you can kind
of move the yarn like this. It's gonna be going
like this, okay? Make sure it's easily movable. Hold these two fingers together. I'm going to use my third finger on my left hand and just
kind of put it here. This is like my piece of work. So however big your project is, you can kind of pad that
at the back and then hold the front with your thumb and then pull
this finger up a little bit. Just like a little
clapperbard at the movies. Then that'll give you
this lovely tension here. And that is what
you're going to use to make your chain. Okay? So remember, third
finger, thumb, and then you're going to
pop these fingers together and use your finger
for the tension. Now, you can obviously, you need to move the yarn. So when you are ready
to move the yarn, you're going to take these
fingers and leave them apart. When you want to stop
moving the yarn, you can hold them
together, okay? And you can always
readjust at any time. So this is going to
feel really weird. But the next thing
I'm going to do is hold these together. So you've got a secure grip. Hold these two fingers together. And then I'm going to
what's called yarn over, which means I'm going
to take my hook and go underneath like this. And now my yarn is on my hook. Everything else is still. You're going to
pull this piece of yarn through this loop. So the loop that's
already on your hook, the slip knot, you're going
to pull this through. And you can open up your fingers to let your yarn through. Okay? Just pull hook
that through like this. There you go. You've
now chained one. And making a chain is
just repeating that. Okay, so you're just
going to do that again. It's just yarning over and
pulling through. Chain to. Now, as my finger
has moved inwards, you've only got that
little bit left. And if you keep this tight, then it's just going to
create problems, okay? So think of the river, you
need to allow that through. Each stitch, you need to
allow more yarn through. And now I'm holding with my thumb and third
finger against steel, but I've got more
grip on this because now the project is
going into a chain. So I've chained three already. One, two, three. And you can do this for
as long as you like. When you see a crochet pattern, it will say chain maybe ten. Okay. But as you're
going, you're going to see that you will get if you haven't
opened this up properly, then you're gonna get some
resistance from this. Your old friend. You're
gonna get some resistance. So you need to make sure
you allow enough yarn, and this needs to
be able to unwind. So some people use a yarn bowl. I actually just chuck it on the floor and hope for the best. Or I do actually have what's called a wall genie,
which unravels it. It kind of stands
in it and unravels. There's loads of things
out there you can get, but you don't need to
worry about that now. Just make sure you've got
enough for your chain. It's just, like, loose. Okay, so we're picking up again. We're holding our yarn
exactly as we were before. If there's something going
wrong or if it's too tight, just have a check at
your checkpoints. Is your finger far enough away. And these clamped together? If these are clamped together,
it won't be hard to move. Okay, so just make sure they're apart as you're going along. So we're gonna chain a few more. One, two, three, four, five, six, seven, eight, so I'm gonna chain ten, just to show you can chain
however many you want. Okay, so I've made
a chain of ten. Y.
6. Single Crochet: So you have your chain, and
now you're thinking, eh, but how do I make it into
a piece of material? Otherwise you could
just chain forever. The way to do this is to hold your yarn exactly
as you were before. So we're gonna pop
across our three fingers and then hold with our
third finger and thumb. And we're not thinking up here. We're thinking now we're going to go back into the project. And we're going to start with single crochet because that's the most basic stitch there is. And what we're going
to do is single crochet into the chain. We're going to go into the
second chain from the hook. Now, the first chain from
the hook is this one. It has the working yarn in it. Okay, so you're not
going to go into that. You're going into this
second chain from the hook. When I say go into, I'll show you how to do it in a minute. You're gonna hold your
yarn as you were. And if you want to, you can kind of clap these fingers together, hold that up so
it's nice and taut. You can hit your index
finger on that one if you want, so nothing moves. Nothing's moving at
the moment, what you want to do is easily get your hook into this chain here. And you'll see it
will go through. It will go through the middle
of the chain easily, okay? So pop your hook in. Then you want a yarn over again and pull this
working yarn through. So you now have two
loops on your hook. You've got the working yarn, and then you've got the loop that you
just pulled through. Now, what you're going to do is you're going to yarn over again. If you need to readjust
your hand, do. So you have your two loops on your hook and you're
going to yarn over again. And you want to pull
through these two loops. So we're going to do that now. We're going to pull
through those two loops. And when it comes out
at the end, you should have one loop on your hook. You have just made a
single crochet. Oh, done. Fantastic. So now you
have a chain of ten, and you have one single
crochet in that chain. But we don't want to
just leave it there. We want a single crochet
all the way to the end, and this is where you will get better because practice
makes progress. If I could do these
a different color, I would because then
you'll see where the chain is and where
the first row is. It can be a little bit tricky to see, but I'm
going to show you. So the chain is all these
ones you've just done. And then you can see
there's an extra bit here, which is your single
crochet stitch here. And you can see that it's
been worked into this, which was the second
chain from the hook. Now we're going to go on to the third chain from the hook. We're gonna do exactly the
same as what we did here, but we're going to go into here. So pick up my yarn as usual. But go into this third
chain from the hook. So in pull that loop through. You have two loops on your hook, and now you're
just going to yarn over and pull through those two. You've done your two
single crochets now. We're going to do this all
the way along the line. Don't get it too tight, because if you get it too tight, you won't be able to see
where your stitches are. I would say, as a beginner, try and get it as loose
as possible because you will naturally try and
go for the tighter end, and it's not gonna work. So just try and be a bit loose, goosy about it, not too loose, but just if you can,
don't hold it too tight. Just Think of it as, like,
a little I don't know. Be precious with
it a little bit. Don't it too tight
'cause it wants to move. That's our third
single crochet stitch. This is the bit where
you learn, so if you're getting frustrated
now, don't worry. This is a bit that
needs practice. So we're doing more
single crochets, doing exactly the same thing. Is it going through
the next one? So you can kind of see where
the next stitches are. So I have two left here. Because I've chained ten, I have a row of I'm going to have a row of
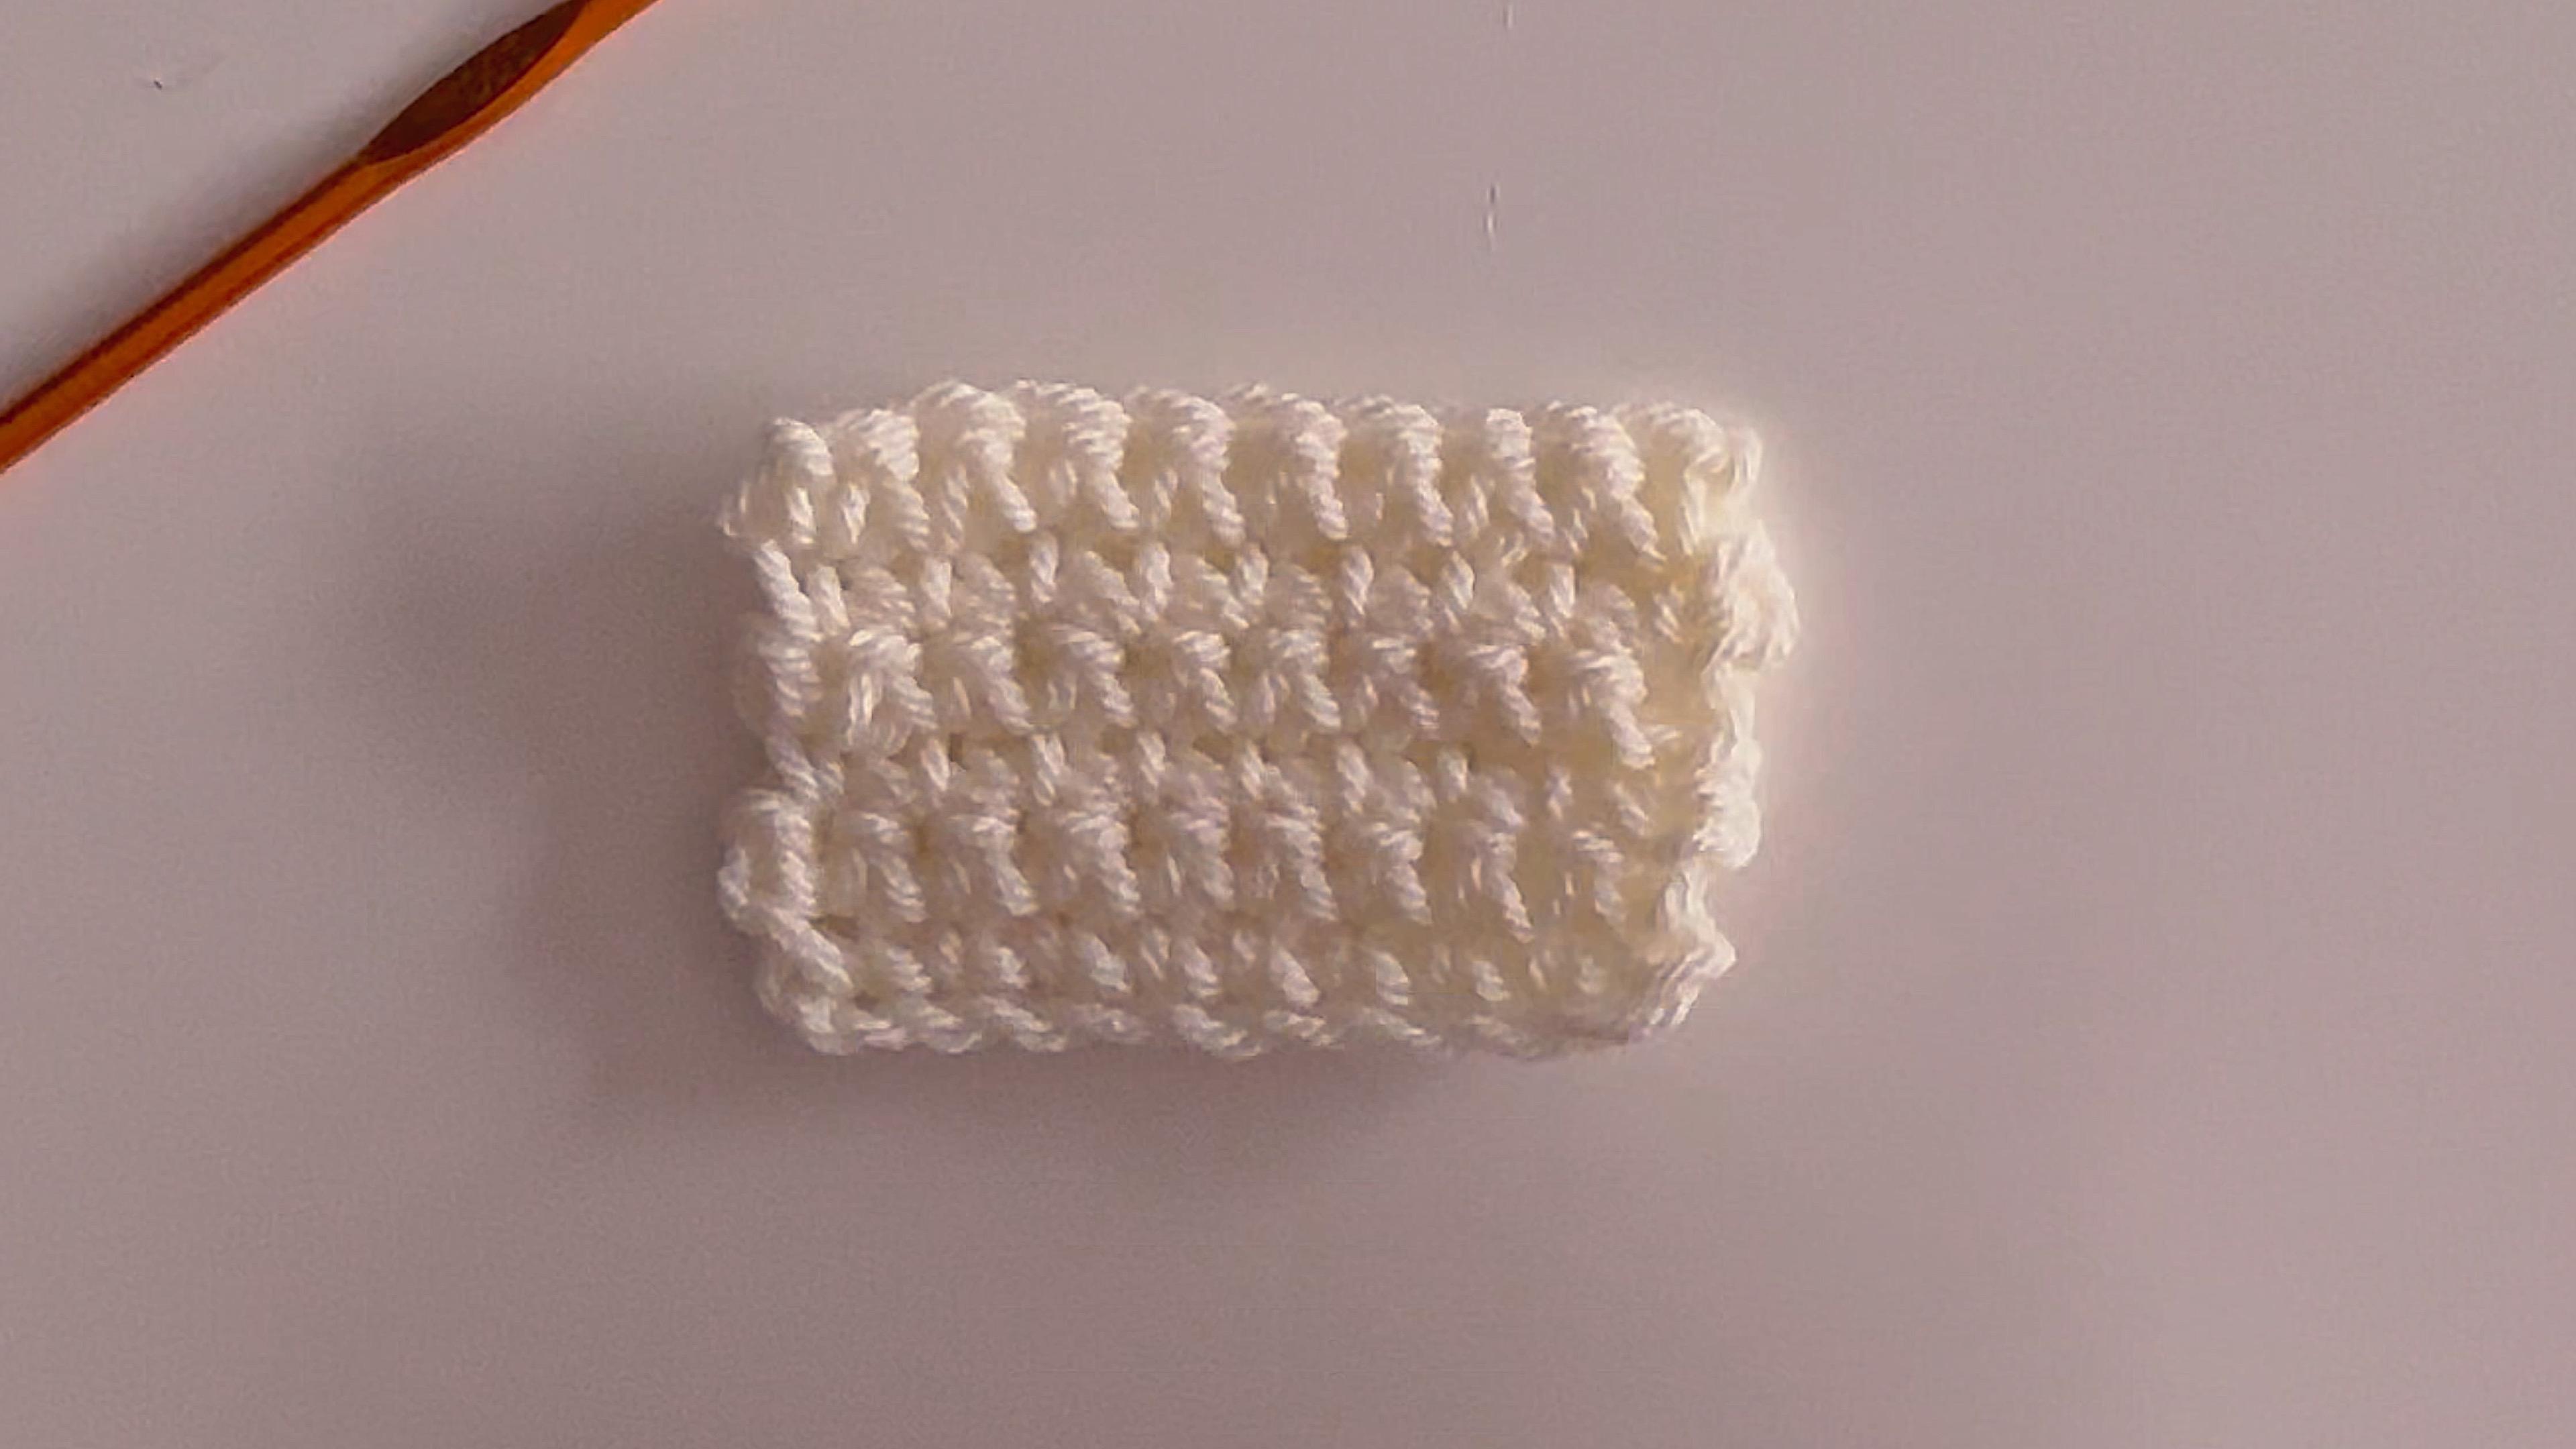
nine single crochet. There we go. So you can check
by counting them. So this is one, two, three, four, five, six,
seven, eight, nine. This bit at the end here,
that's just your slipknot. That's nothing to
put your hook into. You've just crocheted
nine stitches. And now you can see this is kind of working up to be something. You have just crocheted
your first row. A
7. Turning: I so we don't want
to stop there. We are now going to
go on to row two. And before that, we're
going to make a chain. And this is called
a turning chain. And what it does is leave enough room at the
start of this next row. We have to turn this around. So the way we're going
to do that is chain, just as we did at the start, we're going to chain one. So don't worry about going into any stitches or
anything like that. Remember how you chained before, and all it was was taking your working yarn and pulling
it through this loop here. So we're gonna yarn over
and pull through that loop. Well, dare, you've now
made your turning chain. And all there is to do
now is flip this over. If it looks a bit weird, you can just take your hook
out and put it back in again. So now we have kind
of looks like a boat. We've got this
vessel underneath, and that's the bit
kind of in the water. Then we've got the top here. We've got all the men
sitting in the line. Look, it's like a
viking long boat. We've got one, two, three, four, five, six, seven, eight, nine, nine stitches.
Which is correct. And then we've got
our turning chain. So now what we're going to do is hold the yarn how you
would exactly the same, and you're going to hold the work exactly as
you were as well. So your middle finger and
your thumb can hold the boat. Now, you are going to go into the second chain
from the hook again. Alright, so not this one that your working
yarns going into. This one. And the way we do
that is we're going to go. See, you've got a
V on the top here, and the hook is going to
go underneath the V. So I've got to pop my hook into underneath these two loops here. Then I can yarn over, and I'm going to pull my
yarn underneath those two. So I now have two
loops on my hook, and I'm going to yarn over again and pull
through those too. Okay, so you've just made
your first stitch in your second row. You're
going to do that again. You got other stitches here. So the next one,
you go under the V, grab your yarn and pull through. Yarn over and pull through, too. I'm going to do this
all the way to the end. The faster you go, the more
you want the yarn to flow. And if it's not flowing,
you're going to get into trouble quickly. There we go. We have one
stitch left. Can you see it? Just this V here. So we're
going to go under here. And there we have it. You've just done
your second row.
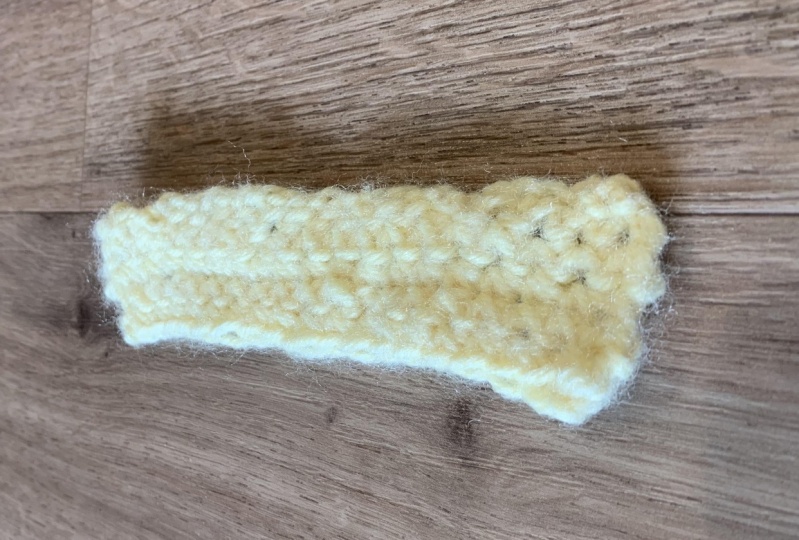
8. Building More Rows: Okay, now, depending
on what you're making, we're going to chain again
chain one at the end, and then completely
turn our work over. We're gonna turn. And then I'm going to go into this
first stitch again here. She's row three, and
we're just going to carry on along this row. And we want to make sure we
always have nine stitches. So you can count
as you go along. We've got one, two,
three, four, five, six, seven, eight, nine. There you go to
throw three done. If it starts to curl, don't worry. It can
curl sometimes. It can mean it's a
little bit too tight, but don't worry
about it. All right. Now we're gonna chain one again. Turn. Go into this
first stitch here. Single crochet again. In one and turn. Then we're gonna go
right into this. Stip chair. You can make this as
long as you want. So really, if you can
crochet a square, you can crochet a rectangle and if you can
crochet a rectangle, you can crochet anything. A lot of things are
rectangle shaped anyway. So you could crochet a coaster or you could crochet
like a dishcloth, or it could be a square
piece of material, you could make a
panel for something. So these would make
a lovely panel for maybe some fingerless gloves or maybe you could make a bow with two
pieces of material. That is what crochet gives you. It gives you the freedom to make whatever you want, really. And once you know
this, single crochet, you can actually make
loads of things, and it all comes down
to this one stitch. So when you're happy
with your thing and you want to finish it off, you're gonna need some scissors.
9. Casting Off & Weaving in Ends: I so when you're
happy with your thing and you have come to the end
of your rope and you want to finish it off, you'll
need some scissors. And you're going to
cut the working yarn. There you go. So you don't need to worry
about that anymore. Now, you're going to take your hook and the chain or the yarn
that's on your hook, you're just gonna pull this out. Like this. And that in itself has
kept it quite secure. Now, depending on the
project you're doing, some people tie
it will not here, or what I like to
do is take my hook and put it kind of through the yarn and just
pull that through. Could be a couple of times, just to make sure
it's nice and secure. And then you can
weave in your ends. So the way I do this, I think this is
probably a bit long. So I'm gonna there's so many
different ways to do this, but you want to make sure
your end is not seen, right? And it's not gonna
come out anywhere. So what I do is just kind
of go through the material, grab that, and then pull it through and do that a few times. Just where it wants to go. Just like that. And when it's at a place
where you're like, Yes, this is never gonna
come out in 1 million years. And you can cut. You can cut it. So I think that's nice.
And we can just cut. You do you could tie
a knot if you want, but we just make it
nice and seamless. Just Okay. Cut that. There we go. And this is obviously
our tail end. So you can do the same
thing, if you want. You can just weave that in. So where am I going to put that? Okay. So take my hook and
kind of put it through here. Weave it through. And then Oh, pull it through again. There you go. And then
just chop it off. There you go. That's
your first piece of material that you
crochet well done. A
10. Outro: Oh, there we have it, guys. Your beginner crochet
course is complete. I really, really hope
that you have been able to crochet yourself
a piece of material, a swatch, if you
will, but it could be turned into something amazing. Just practice,
practice, practice, and you will get somewhere. It can be frustrating. I know it can be
really frustrating, but this is the start of
your crochet journey. You are going to
be fabulous at it. It's addictive, I promise you. And just hopefully you
can take these skills and go forward with them and
crochet anything that you like.
 Cat Kemble, Crochet Educator