Transcripts
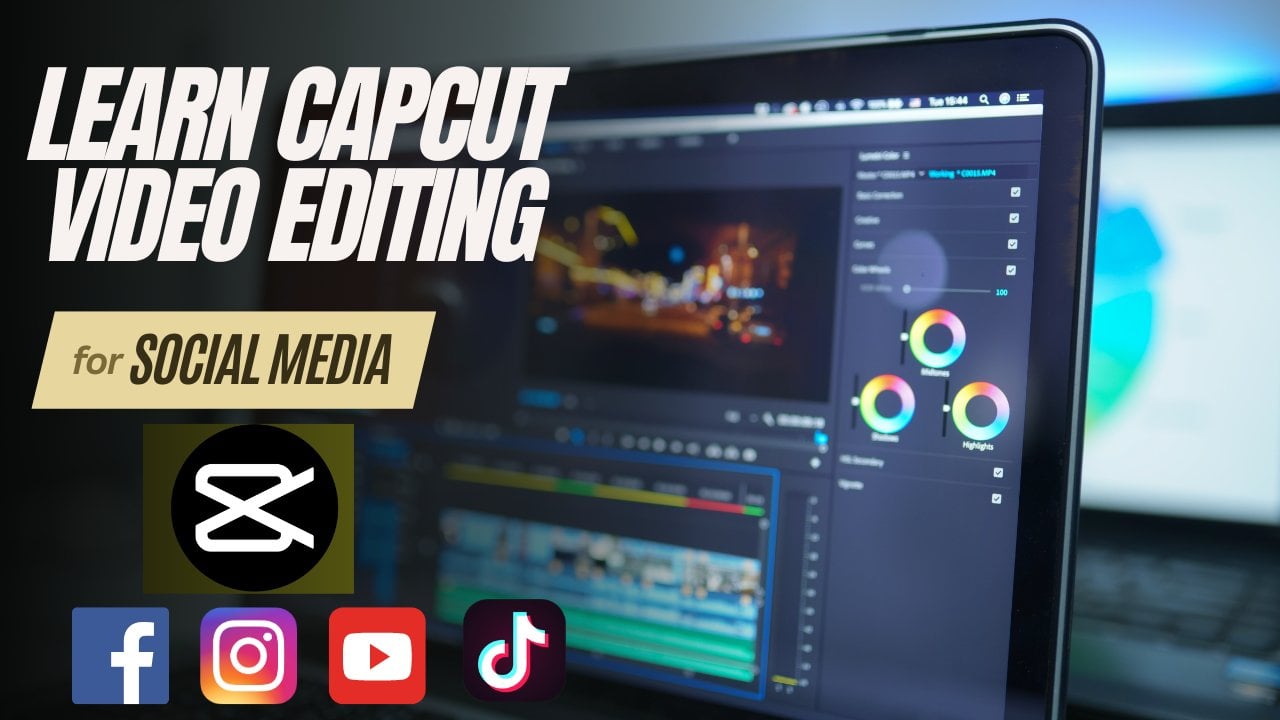
1. Introduction: Hello everyone. Welcome to a class of Canva
for social media, Tutorial for learning, designing skills for your social
media platform. If you're planning to learn
Canva to an advanced level, then you are in the right place because we'll cover the
advanced projects here, there is an advanced
level class. If you have no
previous experience, then you can get some basic
knowledge about Canva. First, let's take a look what
you learn from this class. Create an Instagram
post in Canva, creating an Instagram reel. After that, creating an
Instagram reel cover, make an Instagram story, creating an animated
Instagram post. And after that, we'll
also learn about how to create a profile picture
for your Facebook. How to create a cover picture
for your Facebook account. Creating a Facebook
event cover in Kava, making an animated
Facebook story, making a Facebook post, making a Facebook video, creating Facebook shop logo. And after that, we'll
also learn about how you can create a Tiktok
video in Kva, and also creating
a Youtube banner and how you can actually create Youtube thumbnail. And lastly, I'll be showing you guys
how you will be able to make Youtube short, okay? After completing this
class from here, you will be able to create graphics design tools in Canva branding and also you'll learn about
templates and layouts, exporting and sharing, and also about animation
and effects. This is a project based class. During learning, you will have the class projects,
what you learn. You will be able to
participate in class project, so you can do practice
while you're learning. You'll have supporting
resources in this class, so it will be easier
for you to learn during learning. If you face any issues or if you
have any questions, then feel free to ask me. I'm always there for
you to help you. Let's start learning Kva for social media
designing together.
2. Create an instagram post in canva: Hello everyone and
welcome you all to the first chapter of the Canva
for social media tutorial. Okay, so this is our
chapter number one, and here we'll be learning
how you'll be able to create an Instagram
post in Canva. Okay? So for me I will be making one kind of post
regarding a coffee shop. Okay? So I'll be telling
you guys how to do that. You guys can do it in
any theme basically. Okay, so I chose it
for a coffee shop. You guys can basically
get those elements out, Explore those elements, Explore the shapes and also the
frames at the greens. I'll be showing you a few of it over here while
explaining you guys about how to create an
Instagram post over here. Let's not waste time and
let's get started here. As you guys can see now I'm here in the home
beach of the Canva. So the first thing
what I'm going to do right over here is I am going to take an
Instagram post size. Okay. So if you're not familiar with this particular interface. Okay, so here you do have your account details and this
is basically the home page. In the home page, if you
see right over here. Okay. Here I do have a lot of presets which I can
basically use. Okay. Totally depends on your usage. Only if you want to work
on with the videos, you come here and
go for the videos, and there are different
video presets as well. Suppose if it's a normal
video or a mobile video, here you do have
a Facebook video, Instagram, Real Tito
video, and so on. Okay? Suppose the same way if you want to create a website. Okay? So here you guys can see there are
different presets for educational website or if that's a business website or if
it's a portfolio website. They do have different sizes or different presets
right over here. Okay. So the sizes in most of
it are basically the same, but it doesn't go the
same way with videos. Okay? So the websites are
basically of the same size. But the thing over here is
suppose if I just click onto the educational
website, it will direct, give me different templates
and also different styles regarding the tools which we use in an educational website. Okay. The same way if I go here onto the
presentation here, you guys can see I do
have a lot of sizes. Here you guys can
see the ratio of this presentation is
16 by nine, okay? And the pixels is 1920
into 1080 pixels. And here this one is for the presentation
in a mobile phone. Okay? So it's just
total the opposite. It's 1080 into 1920. Okay, so this one is
a vertical video. The thing, what we
are going to do right over here is I will
just come here and I will just go onto
this particular side and just click here onto
the social media option. Then here under the
social media option here, you guys can see I do have a lot of option
right over here. Only suppose I want to particularly only work with
the Instagram post here. The size over here is
ten into ten pixels. So I can just come here onto the Instagram post option and here onto the
Instagram post option. You guys can see now I do have the size over here is
108 into ten pixels. And I can click right
over here and it will just create me a blank
document here on my page. Okay, so as you guys can see, this is the place where
we will be working. We'll be making
all our projects. Okay, so here we'll be putting onto our images all the designs. We'll be exploring from
the elements option. If you do have elements
which you want to download and upload it here in the
Canva which you want to use, you guys can come here,
go to the uploads option, and from here,
basically you will be able to upload those files. Okay, so for me, for my work, I do have a few of the
images which I have downloaded from website
called the pixels. Okay, so from pixels I do
have downloaded few of it. But what I'll do is
I'll come here and I do have all those files
in my resource file. Okay, So this is the
Canva resource file. Okay, so here you guys
can see I'll be taking this image and I'll
click on Control. And using control, I'll select all of these four
images altogether. And what I'll do is I will just click onto the Open option. Okay, so here once I have
clicked onto the Open option. Here, you guys can see now this images over here
is getting downloaded. Okay, so here you guys can see this one is
getting downloaded. And now if I want to put this particular image
right here onto my screen, what I can do is I can just give this one a click
right over here. And now I want to remove the background of this
particular image. What I only want out of this
image is the Scoffee bins, which I do have over here. And I'll just design the sides using this
coffee bin over here. Okay, so in that case
now I will come here, click this particular photo, go to the Edit Photo option, and under the magic studio I will go and use the BG remover. Okay, so here you guys can
see they're just analyzing this particular image and trying to do the best to
remove the background. Okay, so here you
guys can see now I do have this particular
background right over here. If I want to increase the size, I will be able to increase
the size from here. Quite like this. And I'll just place it right over
here accordingly, So let me just
decrease the size. Okay, so this one
quite looks like this. And the next thing I am
done with the top part. Okay, So the next thing
what I'm going to do, I will come here and
I will be taking on these images and we'll be
putting on here on my frame. Okay? So for that to put up images in a particular place
or into a particular shape, okay, I need to go onto the
elements option from here. Okay? And from the
elements option, what I can do is I can just
drag and go down. Okay? And once I go down here, you guys can see I do have
an option called Frames. Okay? So I can go here onto the Frames option and I'll
click onto this basic shapes. Okay, So I will just click
here on C all option. And here you guys can see, now I do have a lot of
frame sizes and a lot of types right over here from which I will be able to
choose by frames. Okay, so here as
you guys can see, I do have a lot of
it right over here. I will take this only circle
and what I'm going to do is I am going to increase
the size right over here. Okay, so I will just increase
the size quite like this. And what I'm going to do is I am going to go again to
the uploads option. And now to put up this image, basically I will come here, drag and drop it over here. Okay, If you want to
change the positioning of the image and if you
want to decrease the size of the image from here, you guys will be able to
do it quite like this. Let me just place it right
over here in the center. Okay, I will just place it
right here in the center. Now what I'm going to do is I am going to place it
quite like this. Okay? Otherwise, let
me just come here. Let me just place it quite
here on this particular site. Let's just place it
quite over here. Click Enter, and what you
can do is you can just place it quite okay, so just place it accordingly,
right over here. And now I will be able to give the information
about the cafe. Okay, so if you just want
to move it here on top, you will be able to move
it here on top as well here if you want to
give up any lines. Okay? So for that you just need to go to
the border style. And from the border style here, you will be able to
increase the border weight. Okay? And from here, just click onto this
border color option. And from the border
color option, you guys will be able to
choose different colors. Okay? So here you, I do have
a lot of colors from here, just check which color looks good and you
guys will be able to use that particular color
here accordingly. Okay? Here. Once I'm done with
this particular apart, okay, the next thing
what I'm going to do is I will just try
to place it properly. Once I am done placing it, I will just keep this
one on top a little bit. Now the next thing what I'll do is I am going to
write down the text. Okay, come here and go
to the text option here. Under the text option, you guys can see
I already do have a lot of presets right
over here, okay? So if you want to use
this particular presets, you guys will be able to use this particular
presets here as well. Okay, let's come here and if I just want to change the colors, okay, suppose I will
just ungroup this first and select this
one, and delete it. What I'm going to do is I
will just select all of it. And from here, let's
take a dark color. Okay, let's go on
with a dark color. Let's take this color. What I'm going to do is I am
going to write out the name. Okay? I will just
write espresso. Emporium, okay? So I will just write
espresso Emporium. And what I'll do is
I will come here, and now I will just duplicate this layer by clicking on Alt. Okay, so now again, I will come here and I will just write Emporium right over here. And what I'm going to
do is I will come here. If I make it a bit small, I will just make it a bit small. Otherwise, if I do want
to increase the size, I will be increasing the
size from here as well. Okay? And to this place, what I'll do is I will come
here and I'll just decrease the size and place it
accordingly over here. Okay, so now let's
take this one, let's decrease the
size of this box, and let's place it right
underneath this word. Okay? So I will
just place it here, underneath this particular word, which I do have right over here. Okay? And now if I want
to add anything, okay, so in that case now
what I'm going to do is I'm going
to come over here and suppose a 20% discount is going on here onto this
particular restaurant. Okay? So I will be
able to give that one right over here as well. Okay, So now what I'll do is first I will
just give a location. Okay? So for that I will
just go to elements option. And from elements option, I'll just go back again. And now what I'll search is
I will just type location. Okay, So I will just type location and I will
just click on Enter. And here you guys can see Dow. I do have a lot of this graphics for the
location option, okay. So here you guys can see Dow. I do have this location
option right over here. So I'll just select
this one first. Okay. And I will just decrease
the size right over here. And I will come here
and what I'm going to do is I am going to
take my text box. Using my text box, I will just add one text box
right over here. Come to the font size and just type 40 and click on Enter. Now what I'm going to do is I am going to write
this text around. Okay, let me just trite
123 Oliver Street. Okay, I will just
write Oliver Street. I will write California. Okay. I will just
write call Nia. I will just keep this
one quite like this. If I want to decrease
the size, okay, I will be able to decrease
the size from here as well. Let me just place it properly, and let's just select
this particular text. If I want to increase the size, I will just increase
the size from here. And if I do want to decrease it, I will decrease it quite
like this as well. Okay, now let's just increase the size over here and
let's just place it. Okay. After that, what I'm
going to do is I am going to place this one quite
like this, right over here. I'll just try to keep
the alignment, okay. I will just come here
and decrease the size. Now I will just place
it here accordingly. Okay, I just need
to make sure that I keep this one accordingly
right over here. Now I will select this one. What I'll do is I will select
both of these together using shift and I will
just try to align it. Okay. If you want to align
it here in the middle here. Now you guys can see
this one is here, aligned in the middle. I will just go back once I have aligned it
here in the middle. What I can also do is I
can just align it here on top and here I do
have the location. After that, what I'll do is I will go here onto
the aliens option. And instead of location, now I will just give
the phone number. Okay. So now I will come
here and I will just give the phone
number over here. Okay? For that again, what I'll do is I will come here and now I will
just write Ford. Okay, I will just
write Ford here. You do have this
option directly. I will go here onto
the graphics option. Okay, here I do one option. I will select the first
one, decrease the size. What I'll do is I
will just place this one right over here. Okay. I will just align it
here in the center. Now I will just try to
place it accordingly. I will just keep this
one here in the middle. And I will just type
or take a text box. I will just come
here, click on Alt, and I'll just copy this
layer right over here. The same way what I'm
going to do is I am going to write two
phone numbers. Okay, so the first one
I will just put plus. 123-456-7890 And after
that I'll click Enter. And again I will just type
plus 098-765-4321 Okay. I will just put up this
particular number right over here if you want to
place it accordingly. You guys will also
be able to place it quite well as off here. Okay? So I will just place
it quite like this if you want to increase the size. Okay, You guys will be able
to do it from here as well. And lastly, what I'm going to do is I will just come here. Okay? And for that, now I will come to this option, and now I will
search for e mail. Okay, let me search for e mail. Okay. And I will just
click on Enter here. You guys can see I do have
this particular graphics and I will just decrease
the size over here. And I will just place
it here accordingly. Let's come to this position. I will just decrease
the size as well. Let's decrease the size. Let's just place it
here in the middle. And just right click. Click on Alt and drag and drop. Okay, I have just dragged
and drop it over. And now just enter. I will just
write@gmail.com Okay? I will just write
Gmail.com Okay? Now again, what you can
do is you can come here, you can just write
Bc@gmail.com Okay? Gmail.com over here. Now, here I do have
the mail as well. Okay. Once you're done
with this particular part, now the next thing what
you're going to do is you are going to take this same image. Okay, now just click on Alt. And what I can do is I can
just duplicate this layer. Once I have selected
this particular layer, I just want to flip
it. Okay, here. Once I have flipped
this thing down, I will just come down
part right over here. And here in this down part, I am just going to
place it accordingly. Okay. Here. As you guys can see, now I have placed it
accordingly here as well. If I do want to
decrease the size, I can also decrease the size of the one right
over here as well. Okay, here you Now, I do have this Instagram post right over here if you
do want to move it. Okay. In that case, let me select this one
and this one together. And go to the
position option here. I will just position
it here in the middle. And I'll just group
both of this up. Now I will be able to move
these things accordingly. I will just come here and let's just place it right over here. Again, select this one. Click on Shift and select this. Now just group it
up here as well. After grouping it, just
place it right over here. Now this one as well. Click on Shift and
select both of this. And just align it
here in the middle. And group both of this
thing up here as well. And now just place
it here accordingly. Okay, So now I have just
placed this thing up, okay? And here you guys can see this particular page
is almost done. And if you want to
give any other color, suppose I want to give something in this
brown color, okay? So I will just come here, I will just go to the
brown color option. And what I can do is I will go with something
quite light, okay? I will just go with this
light color right over here. And I can just click here
onto this particular option. Okay. So here you guys can see, now this Instagram post
is basically ready here. Now, if I want to add more, okay, more graphics in here, I can add more graphics to it. But before that, let
me just come here, Let me select all
this particular text over here, which I do have. Okay. Let me select
those text around, and let's make it bold. Let's take this, and let's
make it bold as well. Okay, so I will
just make it bold. Let's come here and
let's select this up, and let's also get
these things in bold. Okay, so yeah, the alignment at each and everything
looks quite great. Let's take this graphic. And what I can also
do is if I want to select this one and if I
want to edit the photo, I will be able to edit the
photo from here as well. Okay, so in that case, again, what I'll do is I
will just place it or I will just first
position it accordingly. Okay, So I will just decrease the size of this one
from here as well. Let's just position
it quite right here. Let's just make it
a little bit big. And now what I'm going to do is right click go to
the layer option, and I want to just
send it to back. After that, select the transparency option
and just decrease the transparency
maybe to 30% okay. So I will just put
30% right over here. And this is how it
actually looks right now, so that behind that
particular image, it looks like a water mark. Okay, so you guys will be
able to use it up quite well, and I hope you guys have
understood this particular class on how you will be able to
make some studying designs. Okay, so here if you want to
add any other box around. Okay, so I will just come here, take this particular shape. What I'm going to do is
I am going to come here, select this text box, and now I am going to put
this text box on top. Okay, So I will just come
here and maybe I'll just put this text box here
on top a little bit. Okay, so let's come here, let's select this text box. And let's just increase the size of this one.
Quite like this. Right click, go to layer okay, and send to back. Now after that right click, if you want to change
the color, okay, you guys can come here, go to the color option and
just take up a white color. Okay, here you have
taken a white color. Go to the layer option and
just select send to back. Okay, he also the same way you guys come here,
take this box. Otherwise just create a new box. Go to shape option. From the shape option, select this box right over here. And just decrease or increase
the size accordingly. Let me just place this box
here onto this text as well. Okay. I will just decrease
the text box quite like this. I'll just keep it
right over here. What I can do is I will
just select this box. Go to the shape option, and I'll just make
it a white color. Okay, This one looks better. Come here. If you want to
decrease the transparency, you will be able to do
it from here as well. Okay, let's come here. Let's just keep the
arc to 65, okay? And this one is looking great. Okay, so now the last
thing which you need to do is go to the share option
and go to download. And here you guys can see in what format you want to
download this one, okay? So here you do have a PNG, JP PDF and SVG format. Okay, so you guys
can select this one. So I will just take the
PNG and I will just click onto the download option and it will get downloaded
accordingly. Okay, so here you
guys will be able to do this particular
thing right over here. Okay, And you can just
save it in your system. Okay? So now once it's done, there will appear a page. Okay? So they're asking me in what name do I want
to save this file? So I will just name this
one as the Instagram post. So I will just name this as
Instagram post over here. And let's go to my
resource file. Okay. So I will just go to my
resource file over here. And I will save it accordingly. So I hope you guys have
understood this class on how to make an
Instagram post in Canva. So see you all in
the next chapter. Till then, take care. And goodbye everyone.
3. Creating an instagram reel: Hello everyone, and
welcome you all to another chapter of the Canva
for social media tutorial. So now this is the
chapter number two, and here I'll be creating an Instagram reel in this
particular application. Okay? So I'll be
telling you guys how you'll be able to import
different kind of videos into your panel and how
you will be able to work on with all of
those videos over here. Okay, so we'll be
learning about all of that in detail here in
this particular chapter. So let's not waste time
and let's get started. As you guys can see now I'm here in the home page of
the Canva application. So the first thing over here
what you need to do is, as you're working
with any video, I have already
told you if you're working with any kind of video, in that case, you
guys can come here onto the video panel. From here you guys can see also, I do have a lot
of presets. Okay. From here I will take the
Instagram real option. Here you guys can see I do have the size of 1080
into 1920 pixels. Okay. So I'll just click
it right over here. And basically here you
guys can see now I do have a lot of presets here
onto my left hand side. Okay, so here you guys can see I do have a lot of presets
right over here. Suppose if you want to come here and if you want
to check all of this, okay, you guys can
come here and take out this particular
frame right over here. If you want to
decrease the duration, you guys will be
able to decrease the duration over here as well. Okay, so now let me just
play this thing up. Okay, so here you guys can see I have just played
this thing up over here and now I can just
change the text over here. Okay, so I will come here, I will delete this
particular text. And what I can do is I will just go back to the text option. And basically from here I will be able to take out
different text. Okay? So I will just
click it right over here. And now what I'm going
to do is I am going to ungroup all of
this. Select this one. Delete. Delete this one. Okay, so come here, Delete
this and this as well. Okay, now here I will
write places to explore. What I'll do is I
will also increase the size of the text box here. I will click, and I
will just increase the size of the
textbox here as well. Now I will just position it
quite here in the center. Okay, so here you guys. I am able to position it
quite here in the center. And now the next thing here, let's see how it will
actually look, Okay, so this is how it will actually look at the beginning, okay? And for that, let's
come here and let's try to animate this
thing up, Okay? If you want to
animate this thing, if you want it to
fade in and come, I will just slow down the
speed right over here. If you want it
word by word or do you want it character wise, Let's come here and
let's play it up. Okay, so here you guys can see. Okay, now I will just
keep it quite like this and let's just decrease
the speed over here. So let's bring it
here in the start. And now you guys can see
this is how it will appear. And I will just increase the size of this
one to 5 seconds. Take this play head back again, and let's just
review it over here. What I'm going to do is I am going to go and
find one element. Okay, now I will just
click on Travel. I will just type travel
in my element spanel. And now I will go to Graphics. And I will try to check out
different graphics from here. Okay, whatever graphics
I want to use, I will be able to use
it from here as well. Let's take this one. And what you can
do is you can just place it right
over here as well. If you want to increase
or decrease its size, let's place it quite over here. If you want to
change the border, okay, you guys will be able to change the border of this one. If you want to change the color, you guys will also
be able to change the color from here
as well. Okay? So the A lot of colors which you guys
can basically choose from. If you want to edit this
particular image here, you guys will be able to edit the particular
image over here. Okay, I will come
here, select this one, go to this option now, let's see how it actually looks. Okay, I will just place it
right over here on Enter. Now if I do want to add another. Okay, I can just click
onto the wiggle option. Okay, let's come here. Let's just select
this particular part. Let's move my playhead here
at the beginning only. So I will just click
it right over here. And now what I'm going
to do is I am going to come here and I'm going
to add up a different video. Okay, so in that case now
what I'm going to do is I am going to come over here and I am going to go into
my uploads option. Okay? And from the
uploads option, I will click onto Upload files. Okay, so here under
upload files, you guys can see I do have
a lot of these videos. So what I'll do is I will just use four videos right from here. Let's take this one, this video, this one
and this one here. Okay, so now I will just open
all of these four videos. And now this one is
getting uploaded here on my particular
application called Canva. Okay, so here that thing is
getting downloaded for that. Again, what I'll
do is I will just click on Add up another page. Okay, so once I have added
up this particular page, what I can also do
is if I want to add any kind of transition
in between, I will be able to
add any transition. If I want to add any
page in particular, I will also be able to add some particular place
over here as well. So now here what I'll do
is I will add one more. Okay? So now I do
have four pages right over here on by what. What I'm going to
do is I am going to place all of this
right over here, like this particular video as this what is uploaded
right over here. So what I can do is I
will just come here and I will just place it
quite over here. Right click. Okay. So you guys can just
right click over here. And what you can do is set
video as background, okay? So here you guys can just
say the video as background. And let's just play it up. Okay, so here you guys can see, okay, now this what
is being played. If I do want to move it up, I can also move it
up accordingly. Okay? I can just come here and if I do want to
move this frame up, I will also be able to move this frame up quite over here. Okay? So let's just
set it quite here. Okay? Now what I'm going to do is I am going to only
keep 5 seconds from here. I will just come here, maybe just place it now. I will just decrease the
timing from here as well. Okay, So let me just keep the
timing 5 seconds over here. Now, let's just place it up. What I'll do is for
this 5 seconds, I will just come
here and I will just try to put that frame over here. Okay? Let's just play it up
from here in the beginning. Okay, let's here. Let's just. Okay, if you
want to just make it big. And suppose here what
I want to do is I want to just keep
this particular part. In that case, if I
want to trim it up, I will also be able to
trim it up from here. Okay, Let's just trim it down
from this particular site. Now, let's play this
thing up over here. Okay, let's play it. Okay. And here you
guys can see now I have just played this
thing up again. Come here. Let's play this thing up. Quite like this, Okay? Now, I will just increase
the timing to 5 seconds. And now what I'm
going to do is I am going to write down the text. Okay? So for that I will just
take my text box over here. Okay? And if I do want
to slow down the video. Okay, I can also slow down
the video accordingly. Okay? So I can just click on 0.75 and I can just
click on Enter. Okay, so if you do want
to decrease it here, you guys will be able to
decrease it quite like this. Okay, so let's just play this thing up and let's see
the preview over here. Okay? So here you guys can see the preview of the video
over here as well. Okay, so now I will
select this one. Let's come here at the starting, and let's go here, and let's take a text box. Okay, so I will just take
this particular text box. And now what I'm going to do is I will just
select outside. Let's take this text box. And now I will just increase the text
box quite like this. Okay? So from here I
will just type one, and now I will just
name this one. Wahoo. Okay? So I will just
write O Hawaii. Okay? So I will just write USA. Okay? So I will just
write US over here. And now what I'm going
to do is if I do want to increase the size
of the text box, I will be able to
increase the size of the text box from here as well. Okay? So you can just come
here and you can just place it somewhere
over here. Okay. So you can just place
it quite like this. And if you want to
increase the box, okay, you will be able to increase
the box over here as well. Just delete this part now. I will just keep
it somewhere here in the middle and here
you guys can see. Now I do have this particular
thing right over here. What I want to do is
actually I just want to place it here in the center. Okay, I have just placed
it here in the center. Let's play it again, and let's
see how it actually looks. Okay. What I'll do is I will come here and I will
just animate this one. Okay, here you guys can see, I can just animate this
one, quite like this. Otherwise, I can just
select the drift and I can just increase
the intensity. Otherwise, let's just
decrease it here. Now I will come and I will just take this particular
effect over here. And what I can do is I can
just slow the speed down. Okay, I will just slow
it down quite like this. And let's see the
preview right over here, and this is how it will just
appear here on the screen, which looks quite
professional, okay? As this basic part is done, if I want to add any transition, I can come here and I can just use the dissolve transition. Okay? I will just use the dissolved transition
over here again. Let's go to the uploads
option from here. Let's select this
particular video. And what if you can just place this particular
video right over here? Okay, I will just pause
this video quite like this. I will just right
click over here and I will just said video
as the background. Okay, I will just place this video here as
the background. Let me just decrease
the size as well. Okay, let me just decrease
the size of the video. Let's come here.
Let's just bring it and let's just play
it right from here. Okay, so as you guys can
see now this will just end. And here now I will have
a snow skating video. Okay, and I'll just come
here onto this video again. And what I want to
do is I want to put up more text over here. Okay, so again, I will go
here onto the text box. And from the text box, otherwise what I can
do is I'll select this right click
and copy this one. Bring it over here and
I'll just paste it. But here now I will just
change the color of the text. Okay, so let me just
take a black color. And what I can write is I will
right here, Laredo, Texas. Okay, I will just
write Laredo, Texas. And what I'll do is
I'll just click on Enter and I will just type USA. Okay. So here as
you guys can see, now I do have this
particular option over here. I will just place it. And what I can do is I will
just animate here as well. Okay, let's just put
up a transition here. Okay, so let's put this
transition over here as well. Let's select 5 seconds
duration for this video. Let's just see a
preview over here. And after that, and this will just disappear
quite like this. Okay, this will
disappear like this. Again, I will come here and I will just add,
dissolve transition. And after that, come
here onto this video. And what you can do is you come here and let's go here
onto the upload option. From the uploads option, I will take this
video and what I can do is right click and go
to Set as Background. What I can do, if you
want to decrease it, you guys will also be able
to decrease it from here. Okay, come here and now. I will just come and I will just take this one
right click, click on copy. I will just decrease the size. Okay, so let me just decrease
the size right over here. Let's keep it around 5 seconds. And I will just take my tool and I will
just click on Paste. And what I can do is
I will come here, click on Backspace, and now
I am going to type down. Okay, from here I will just down this place
at Mount Akkagua. Okay, I will over here. Let's select this text box
and let's come here and let's type mount aka. Okay, I will just
type mount akankgua. What I'm going to do
is I am also going to come here and I am
going to change the color. Let's just select a
white color over here. Now here you guys can see I do have a white
color over here. If I want to place it
in a different part, I will be able to place
it quite like this. If I do want to decrease
the size of the text, I will be able to decrease the size of the text
quite here as well. So I will come here
and I'll just click on Enter and I will type Argentina. Okay, I will just write
Argentina over here. What I can do is I
will just increase the size and just place
it quite over here. Okay, so you guys can see, now if you want to give any
spacing between the line, you guys can select this
one and you guys can give a spacing between the
line, quite like this. Okay, Now here also, you guys can see to
edit the video here, you guys will be able to
edit the video as well, but come here and
let's see preview. Okay, so here you guys can see, I do have the preview
right over here. Okay, so let's select this one. And here you guys can see
if you want to use this, you guys will be able to
use it from here as well. Now let's come to this
last option, okay? I'll just select
this one and just right click on to set
as video background. Okay? I can just set this one as the video background
right over here. Okay, I will just
keep the frame quite like this and I will
just decrease the frame. Okay, I will come here
and maybe I will just decrease the frame
quite like this. Okay, let's come here and
let's just play it, okay? And here you guys can see now I do have the frame
right over here. Okay. Here also I'm going
to write using my text. Okay? So come here, take this text copy and what I can do is I will come here
and I'll just paste it up. Okay, I will just come
here and paste it up. And I'll just put
quite over here. Go to the text color and
select the black color option. Now I am going to
give this name. Okay? Now over here I will
type albacarque. Okay? I will type al
Bakerkui over here. And I'll just put up a
place name as New Mexico. Okay, after writing that, I will also animate
this particular layer. Okay, suppose here I need to just decrease the size
of the text as well. Let's just increase
the text box. And let's click on Enter. And here you guys can come to
this particular option and you guys can J USA
over here as well. Okay, Now I will just
increase the text box size. Okay? If you want to
increase the text box size, you guys will be able to
do it quite like this. Suppose if you want
to decrease it, you guys can also place it
quite like this as well. I'll just place it
right over here. Let's come to this corner. Let's place it
over here as well. Okay, I will just
write alba Kirk. Okay, The spelling
is looking good. I will just place it over here. Now, I will also add
some transition here. Okay? I will just select
onto the dissolve option. What I can also do is here, if I just come here and
if I just play it up. Okay, I will just mute this. Okay, I will just mute
this one over here. Okay, now let's see a
preview of this whole video. Okay, here you guys can see this is how it
will appear for the first after it will come
quite like this over here. After that, here
you guys can see, I do have the third video. Here comes the last video. Over here as well. Okay. So now what I'll do over here is I will just
take up a page. Okay? So if I just click here, and if I want to add a page, I can just add a page. And what I can also
do is I can just click on Thank you for
watching that stuff. Okay, so here you guys
can come and here you guys can click
on Thanks and Enter. From here under the
video option here, you guys can click onto
this thank you page. And after that I will
just right click over here and send video
as background here. You guys can come
and you guys will be able to decrease
the size as well. Otherwise just click on cancel. Okay. And what you
can do is right click detached video from
background manually. Also, you guys will be able to place it up over
here if you want. You guys will be able
to place it over here. We're here as well. Okay, come here if you want
to remove the background, you guys will be able to remove the background here as well. Just click here.
Go to Edit Video, and from here you guys can click on the background removal. Okay, here the background
has been totally removed. Okay, I will just delete
this whole thing up here. What you can also do
is you can just select this text and you can just
place it accordingly. Okay, I will just come here and suppose if I want
to place any of this, I can just place any of this. Suppose here, I can
also take any photos. Okay, I will just place it right over here and right click. And here you guys can save
this image as background. If you want to
decrease the size, you guys will be
able to decrease the size from here as well. Okay, so you guys can come here and just select onto
the smart crop. Okay, You guys can also do that if you want to just
adjust the cropping, you guys can just adjust
the cropping as well. Okay, come here and
just right click. Just delete this part again. What you can do is you can
just take this, thank you. Over here, and just place
it quite like this. Take this background, go
to this background color, and just match different color. Okay, let's come here, let's select this
particular color. Let's take this one over here. If you want to put out
any graphics here, you guys can actually put out different graphics
over here as well. Okay, come here and just put
up a graphics over here. Otherwise, just come down here. You guys, just delete this one. Select this. Thank
you. Over here. Let's just increase
the size of this. Let's just place it here on top. Place this one right over here. Okay, let's just increase
the size from all the sides. And what I can do is I can also just keep it
quite like this. And I will just animate
this one accordingly. Okay, I will just
animate this whole page. Okay, here I will just
animate this one as well. Go to animate option. Okay, come here to
the animate option. From here, you guys can also
select the scrapbook one. Okay? Now I will just
add a music to it. Okay, come here if you want
to put any transition. Actually put the
color transition. Okay. I will just put the color transition from
the right hand side. What I'm going to do is now, lastly, I am going
to add an audio. Okay, so come here
and search for any audio down here
here in the audio. What I'll write is
I will just write Adventure and I will
just click on Enter. Okay. After that, here you guys can actually listen
to different music. Okay, let's get some
uprising music. Okay, let's come here. You can just place
this music as well. I will play this, I will just give it
right over here. Will I will just give
a pause over here. Okay, Just take this one. And I will just take
it over here as well. Let's delete this part. Okay, I will just
delete this W now, once I have applied this one, let's see the whole preview. Yeah, that was it. Okay, so I hope you guys have understood how
you will be able to make one nice
Instagram after that. Lastly, you need
to save the file. Go to the Share option. Go to the download from here. Make sure that you choose
the four video option. Now click onto the download, and here you guys can see this file is getting downloaded. So see you all in
the next chapter. Till then, take care. And goodbye everyone.
4. Making an instagram reel cover: Hello everyone and
welcome you all to another chapter of the Twa
for social media tutorial. So now this is the
chapter number three. And here I will be making an
Instagram real cover here. Once you have this particular
Instagram real, okay? After that, you need to
create a cover for itself. Like once they view,
once they come to your Instagram profile and
they go to your real option. Okay? So there you
will be able to see, it's kind of a Youtube
thumbnail type thing. Okay? So we'll be looking at
how you will be able to make an Instagram real cover here
in this particular chapter. So let's not waste time and
let's get started here. As you guys can see, now I'm here in the home page
of the Canva application. Okay. So from here now
what you're going to do is from here the first take unit to go is to the
social media option. Here, if you want to
search for real cover, you won't have anything, okay? So I will just type
in grab real cover. Okay. So here if
I type this here, you guys can see I don't
have any exact size. Okay? So here you guys can see, you guys will also be
able to use this one, which is right over here. Let's just take this
one and here you will have a lot of templates, okay? Here you guys can have
a lot of templates. From here, You can also create a blank layout quite
like this, okay? First what you need
to do is make sure you go to the file option here. You need to make sure that you come here in the
view settings option. From here you add guides. Okay, If you want
to cancel this, you guys cancel this one. Okay, Make sure you do have
your Rulers right over here. Again, let's go to
the file option. From here you guys can see
Show Rulers and guides. Okay? So if you want to
see margins and stuff, you guys can click here. If you want to check the
video playback quality, you guys can also check
it out from here as well. Okay, let me just zoom in
a little bit over here. And the next thing, what
I'm going to do over to this point is I will
just out a little bit. And from here now I
will just put on shape. Okay, so let's take
a shape over here. And after that, what I'm
going to do is I'm going to increase the size of
this particular ship. Quite like this. I will
increase the size of the ship and now I will try
to place it here in between. Okay, so here, once I have placed this one here in between, what I'm going to do now is I am going to put on the ruler. Okay, using ruler, I will
just mark this place down. I'll just put one
ruler over here. And I'll just come
down and I'll just put up a ruler
over here as well. Lastly, I will come here
and I'll just delete it. And here you guys can see. Now I do already have a light
where I will just work. Okay. Now for that, the first thing what I
need to do is I need to come here and I need
to search for frames. Okay, I will just search for
frames over here and here. You guys can see I do have
frames of different sizes. Okay, So let me just decrease the size of the frame
quite like this over here. And if I want to
duplicate the frame, I will be able to duplicate
the frame from here as well. Okay, let's come here. If you want to
decrease the size, you guys can decrease
the size from here. And I'll just decrease it
from this side as well. Okay, let's come here. Click on Alt, and now just drag and drop it somewhere here. Same goes with this one. I will just come
here and I will just drag and drop it quite
over here as well. Okay, here you
guys can see now I do have all of these
four frames over here. So what you're going to do
now is you are going to come here and you're going to put
different kind of images, Okay, So if you guys
remember in last class, I have made one real, okay? So suppose in that
case I will be making one Instagram real cover for a video which is themed as
summer places to visit. Okay, So here I will
just write Summer. Okay, So I will
just write Summer. And I'll just click
right over here. And here you guys can see
I do have a lot of photos. Okay, So from here now
what I'm going to do is I am going to take
one photos over here. Let's just come down. Okay here you guys can see I do have a lot of photos
right over here. Let's take this one up and let's drag and drop
it quite here. Okay? Now, if I want to just
move it up a little bit, I will be able to do
it from here as well. The same goes with this one. I will just place
it quite over here. This is how it looks. Let's come down, okay, let's just move it up. Let's come down somewhere over
here. Let's go down again. Okay, here you do
have a lot of images. I will just delete
this part over here. Drag and drop it here in
this particular place. Okay, I will just
drag it quite here. Lastly, come to this option, come here and just drag it up. Okay, just drag it up. And what you're going to
do is you're going to drag this image and just place
this image accordingly. Okay, What I'll be able to do is I will just place this
image quite like this. Now here you guys can see. Now here, actually I
do have four images. What I'll do is I will just
select all of four images. And now I will come here onto
the border style option. And if I do want to add
any kind of border, I will come here and I will just add the borders accordingly. Okay? And from here again, I will come to the border color. Okay? And I can just give this
border a different color, whatever looks good. Okay? So I will just come
here and maybe give this border this particular
color quite like this. Again, what I'll do is I will go here onto my text option. From the text option, what I'm going to do
is I am going to take this particular textbox and now I am going to
change the color. Okay? So I will change the
color to something this color. Okay? So let's see. Now I will just write
summer time sum. After writing this one, what I'm going to do is I
am going to increase it. And I am going to decrease the size of this letter
from here as well. Okay? Now I will just place
it over here accordingly. Okay? So here as
you guys can see, now I have placed
this accordingly. And what I'm going to do is I will just keep this
one quite like this. And now again, I will come
here to the text box. Okay. And now I will just add
a text box right over here. And I'll just type five. And what I'll do is I
will keep this one and I will just place it
here in one corner. And I will just make it big. Okay. So I will just keep
it quite over here on top. Okay? And once I'm done
after writing five, what I'll do is I
will come here again. I will take another
text box from here I will write, okay. I will just write
places over here. Again, I will come here and I will just place it over here. Okay. I will just place
it quite over here if you want me to
change the text type. I can also change
the text type here. You guys can see I do have a thing right over here if
I want to change the color. Let's go to the
text color option. Let me just
particular color now. Let me just arrange it properly. Five, place it again. I will just click on this one, click on Alt, and I'll
just duplicate this layer. Okay, what I'll do
is I will write here places to visit. I will again increase the size. Okay, I will just come
here, select this one. What I'm going to
do is I am going to increase the text size. Okay. I will come here, if I want to decrease
it a little bit, I will just decrease a
little bit over here. I will just place it
quite like this here. You guys can see five
places to visit. Okay, I'll just keep
it like this here. You guys can see five
places to visit. I will just change this
color to something black. Okay, Let me just
come down and let me just select black
over here. Okay? Five places to visit
during summer. Okay. I will just write
during summer over here. Okay. For that again, I will just take
another text box. What I'm going to do is will. Delete this one and
I will come here. During what I'll do is I will just place
it quite over here. And after that I will just come here and maybe just
increase the spacing. Okay, So I will
just keep this one over here and again I will
just decrease the size. Okay. During, I will just write the during
option over here. And again I will just add another text box and what I'll do is I will
just write summer. Okay? So I will just
write Summer over here. And what I'm going to do is I am going to place
it quite like this. Okay? So if you want
to decrease it, you guys can also decrease it. And now I will just place it quite over
here in the center. And I will just increase the
size of this letter as well. Okay, so I will come here. If you want me to
increase the size, I can increase the
size accordingly. Okay, So I can come here and I place those
things accordingly. I will just place it over here. Let's just place it
here in the middle. And here you guys can
see now I do have this cover ready and if I do
want to make any changes, I will come here and I will just make
changes accordingly. Okay. So let's go on to the
text color option over here. I will on this particular color. Okay. If you do want me to add some spacing
between the letters, I can just add some spacing
between the letters as well. If you want me to
outline this one, I can also outline this
one over here as well. Go to Effects option. And select the Outline
option over here. Okay, I will select
this, go to Animate, and go to the Effect
option, Outline. And lastly, I will also go to the effects
option from here. And I'll just outline this
particular part here as well. Okay, here now I do not need
any more of the rulers. Okay, so what I can do is I
can just select this ruler, and I can just put
it here on top. And the same goes with this particular
ruler here as well. Okay, here, if you want
to view it properly, how it actually looks. So this is how it
will basically looks. Okay, so here you
guys can see if you want to make
any changes, okay? You guys will be able to make
any changes accordingly. Suppose you want to change
the background color, go to the position option, okay, Or just come to the
background color option. And from here, basically
you guys will be able to check which type of color you guys can
actually choose from. Again, for that I will come here and a new color and I will just decrease the intensity of this one to quite an
extent over here. Okay, so this one looks like vintage cover
as you guys can see. If you want to make
any changes and stuff, you guys will also be able to make some changes
accordingly. Let's come here and let's
go to the option from here. Let's select Outline. For outline color, let's
take a white color. Okay, If you want to
take a white color, otherwise let's give this a
black color and for the feel, okay, for the text color, let's take a white color. Quite like this. Okay.
Here, this one better. Okay? So basically
you guys will be able to add some colors
quite like this. Okay? I can come here
and what you can do is you guys can
just take this one. And the last thing
which you need to do, if you want to put
any box, okay, Like any kind of shape
you do want to put, just clear this thing up. Go to the shape option. From the shape option, what
you need to do is you need to just get this box in
the correct size. I will just decrease the size of the box from here as well. Lastly, I will come here. What I can also do is
I will just maintain this particular line over here. Okay? And now I will just decrease the intensity
of the box color. Okay, I will come here and
what I can do is I will just decrease the intensity
of that particular box. And here you guys can
see now I do have a stunning Instagram real
cover over here in my Canva. Lastly, I will go to
the share option. From the share option, I
will go to download and I will just download
this image as a PNG. Okay, so once I am
done I will just click here onto the download
option here as you guys, my Instagrab real cover is getting downloaded and it
also finished downloading. Okay, so what I'll do
is I will just write here as the intra cover. Okay, So I will just name this as the Instagrab real cover. Now I will just come
down and I will just save it here in my resource. Okay, so I will just save
it here in my resource. Al. Yeah, I hope you
guys have understood this class on how to make
an Instagrab real cover. Hope to see you all
in the next chapter. Till then, take care
and goodbye everyone.
5. Make an instagram story: Hello everyone, and
welcome you all to another chapter of the Canva
for social media tutorial. Now we are on
chapter number four. Here I will be making
an Instagram story. Okay, We'll be learning
how you will be able to create an Instagram
story in Canva. Let's not waste time
and let's get started. Now, here as you guys can see, now I'm here in the home page
of the Canva application. So the first thing what you
can do is you can go here, click on to Create Design. And from here you guys can see, I do have a preset
of Instagram story, which I will click and it will create a new page
right over here. Okay. And on my left
hand side here, you guys can see I
do have a lot of this particular presets which I will be able to use as well. Okay, so if you want to put
on some codes at all, Okay, so here you guys can see you do have this particular
things right over here. Suppose you want to create
something regarding fashion. Okay, so if I just type
fashion over here, and let's click on Enter. And here you guys can
see there are a lot of fashion things or like different templates which you will be able to use as well. Okay, so here under templates and here you
will be able to segregate between Bend Fashion
and here if you want to go for any clothing
brand and stuff here, you guys can see
you will have a lot of this particular
options right over here. Okay, So now let's do one
thing right over here, Okay? So now the first
thing what you can do over here is you guys
can come from here. Let's take one text tool. From the text tool, what you can basically do is you
guys can come here, let's take a text box. Okay? After taking the text box, you guys can come here and you guys come and you
guys can type Flash hour. Okay, let's our over here. Okay? And once you
have wrote this down, what you can do is you can
just increase its size. Let's just select all of
it and let's make it bold. Let's get this one in one line. Now what you can do is
you guys can come here, go to the effect option. From the effect option, you guys can go here. And the time line, let's select a black
outline over here. Let's go to color. And let's select white
color over here. Okay, now let's come to
this option right here. What you can also do
is want to go here. In the effects option from here, basically you will be able
to change the thickness. Okay, let me just keep the
thickness at this point. Now what I'm going to do is I am going to just
duplicate this layer. Okay, I will just
duplicate this layer, and I'll just keep
it quite here. I'll just duplicate
this layer here again. Let's come to this point. Let's come here, let's
just place it accordingly. Okay, now I will just
place it quite over here. Let's just come down
and what you can also do is just place
it here accordingly. So I will just place it
somewhere over here again. Okay, I will just
place it over here. And what you can do is come
here, select all of it, and you guys can actually go to the position
option from here. You will also be able to
check this thing out, okay? So if you want to space
even vertically here, you guys can see you
will be able to space even vertically over here, okay? Now I will come
here and what I'll do is I will come onto
this option from here, I will just change
it to 90, okay? So I will just change
190. Let's come here. And what I can also do is if I want to give this thing
up a different color, suppose what I'll do
is I will come here. I have given this 190, Let's come to this position. Let's select the
transparency to 80, okay? And I'll just click on Enter. Let's come to this
point, and let's go to the transparency option. Let's put on 70 over here. Okay, let's come down and let's go to the
transparency option. Let's go for 60. Again, what I'll do
is I will come here from here I will just
go directly to 50. Okay, so I will just
come here with 50. From here again I will type 40. And lastly, over
here what I'm going to do is I am going to type 30. Okay? So I will just go for 30 and I'll just click
onto the Enter option. Okay? Suppose if you do
want to give up any color, okay, so you guys can also
give some color to it. So let's select this one. Go to this text color option, and let's search for
a pink color. Okay? So let's search for this particular color
right over here. And let's take this color, and here you guys can see
how it actually looks, okay? So if you want to
increase the size, you guys will also be able to increase the size
of the letters. Okay? So I will just move
this one here on top. Okay? So now again, I will just come here
and I will just increase the size of this till here. And let's place it and let's
just place it accordingly. Okay? So you guys
take your own time. Okay? So if you just take
time while doing this stuff, it will be easier for you
to figure out how you actually want all of your
letters right over here. Okay? So I will just move this one kind of down over here. And now I will just
move it here as well. Let's place it here, here. And this top one, what I'm
going to do is I am going to increase the size of this
one from both the side. Okay, so now I will
again come here, place it here on top. Let's increase the size
from both the sides. And let's place it here. And let's increase the size
from both the sides as well. Place this one and just
increase the size accordingly. Okay, so this is how it
actually looks right now. And if you do have
any kind of logos. Okay, so here I will
just type on logo. Okay, I will search for
different graphics. In that case, let's take this one and what you can
do is you guys can come here and just place
it over here on top. Okay, after placing this one, what you can do is you can just put on the name
of the company. Okay? In that case, what I'm going to
do now is let's place this one right
over here on top. Okay? If I do want
decrease the size, I can also decrease
the size over here if you want to
increase only the length. Okay. You guys will be able
to do it from here as well. Okay. Otherwise, you guys can this thing here on top for now. Actually, I feel that
I don't need this one. Okay. Again, what I'll do is I will just go
to the text option. Take one text box over here, and what you can
do is you can come here and just write R. Okay? I will just
write R. Now what I'm going to do is I am going to
increase the size over here. I will pick this one and I will just drop it
right over here. Okay, I will just drop this
thing right over here. Let's select all of this. What you can do is you can
just move this one down. Okay, so here you guys can just put it a little
bit down over here. And what you can do now, I have just typed this one. Select this and just
copy this layer. Okay, Now I will just
write V E. Okay? I will just type this
thing up and I will just decrease the size
of the letter as well. Okay. I will just decrease
the size of the letter. Okay. I will just
place it over here. Let's select it with shift. Okay? I will just
place it with shift. Now, let's just come here, Let's select this one. And let's just move
it a little bit. Okay, I just want both of
these here onto the same line. I can just right
here, Rave clothing. Okay, I will just come here, let's just move it
here onto this side. Let's select both of this. And you guys can just move both of these
altogether as well. Okay, now I will just
add another text box. What I'll do is now I will just write after that I will
come here. Let's take this. And I will increase the size. Okay, I will just increase
the size from here. No, I will just
duplicate this layer. I will just write L, O, T, H I, G. Okay. I will just select
all of this and I will just decrease it to 60. Okay? I will just click on 60. Now I will also decrease
or it was in upper case. What I want to do is I want
to make it in lower case. In that case again, what I'll do is I will
take this one and enter. I will just write
L O T H I G. Okay. I will just decrease the
box size. Okay, I will just The box side over here. And now I will just place
it accordingly as well. Okay, So let me just
place it right over here. Okay, so here you guys can
see if you just want to move it up on top a little bit. Okay, You guys can
select this one and just move it up accordingly. So let's select this
one if you want to move it here onto the sides. Okay, so here you
guys can see you will be able to move it
onto the sides as well. Okay, here you guys can
see if you want to put up any different types of font you guys can
see here and here, you do have a lot of fonts available which you
guys can use, okay? So the same way I will
come here and I will just take this particular font. Okay, so let me just take
this one over here, okay? And let's take this letter. And what you can do is
come here back again, and just select the type
you want to choose. Okay. Now I do have this
letter and what I can do is I can just come or bring this
thing down a little bit. Okay. I will just bring this thing down over
here into the same line. After that, what I'm going to do is I'll select this layer. Click on Shift,
Select this layer, this one, and this one. And now go to the
position option. And here you guys can see, now if you want to align
things vertically here, you guys can see now this one
is aligned here vertically, and this one looks better, okay? So here you guys can just
group these things up. Suppose I will select
this one as well, and I'll select both of
these altogether, okay? Now, I can just group this one. Now using shift select this
one and this one as well. Okay, Now I have
just group this one. Select this, and using
shift select this one, you can also use control G
to group those things up. Okay, here you guys can see now I do have
this ref clothing, this logo is
basically done, okay? So you can just place
it somewhere over here if you want to put
up any lines at all. Okay? You guys can search here for lines in the
elements option. Okay, Here you guys can see I do have a lot of lines over here. I will just go here onto the shapes and
I will just select this particular line and I will just bring it right over here. Okay? If you want to
extend the line here, you guys can come and you guys extend the
line accordingly. Okay? You guys come here. What you can also do, you
guys can select this one. Okay? Let's just take this
particular line here. You guys can actually
select the lines. Okay? Let's take this one. If you just want to
make a straight line, you guys will be able to make up a straight line here as well. Select Shift, okay, come here. And what you can also do, you guys can actually increase
the width. Let's take 12. And let's click on Enter here. You guys can see I
will just place here, okay, so I will just
place it quite here. Now, if I do want to increase
it from the sides as well, you will be able to increase
it from the sides as well. Okay, I will just select this
particular layer over here. And I will just delete this one. The next thing what you're
going to do is suppose here I want to put some T shirt. Okay, I will come here and I
will just write for T shirt. Okay, I will just
click on Enter. And here you guys can see I do have different T shirt
options over here. Okay, so I will just
search T shirt and here you guys can see I
do have a lot of T shirts or different
clothings over here. Okay. So here you guys can
see from here basically you guys can basically choose
which one you want to put, okay, or which one
you basically want. And now I'll just select
any model from here. Okay, so let's select this one, and once you have
selected this one, click on Edit Photo and go
to the BG removal option. Okay, So once you have selected
that particular option, you guys just right
click, go to layer. Okay. Uh, just come here, let's just try to select that particular
image over there. For that again, I
will just go to the positions and I will just come here onto the
layer option from layers. As I have selected this one, what I can do is I
can just right click. And from here go to layers. And I will just click here. And I just want to bring
this thing here in front. Okay. I will just increase
the size quite like this. And I will just increase this footage over here as
well as you guys can see. Okay, So this one
looks quite great. And now what you can do
is you can just place it here accordingly and
here you guys can see, I do have this
particular option. And lastly, what I'll do is I
will just take another box. Okay, I'll just take this
particular shape from here. What I'm going to do
is I will just take my selection tool from here. I will just decrease the
size and decrease the size. From here as well, take up one line, and from here select
a white color. Okay, so here I have
selected a white color. Okay? I want to put on some
text here as well. Okay? So for that, go to the text and just click on a, a text box. And from a, a text box here you guys can see I will
just put up a notice. Okay. I will just
write 20% Okay. I will just write 20% discount on all products. I will just write like this. Okay. I will just write 20%
discount on all products. I will just decrease
the box size. Okay. I will try to get
it in one line. Okay. I will just decrease
the box size from here. And now I will just place
it here in between. Okay. I will just try to place
it here in between here. Now you guys can see I do have this wording
side here as well. Okay. Now you guys can see
this one looks quite good. If you want to send it back, you guys can also do that
go to layer option here, you guys can just
send it back as well. Okay, come here if you want
to go to the layer option, go to layer from here, you guys can just select
the send to back option. Okay, here, select Sid, and this one is being
sent to the back as well. Okay, so here if you want
to move it a bit down, you guys will be able to
do that from here as well. Okay. So now this one
looks quite great. Okay. So this is how you will
be able to create some of the studying Instagram story for your Instagram story option. Okay. So this one if you want to do any sales related or any
kind of adding to your story. And lastly, if you want to give any background
color to this one, go to the background
color option. And after that, here
you guys can basically select from a lot of
color options, okay? So you guys come
here and maybe just decrease the intensity of
the color a bit, okay? So here I have
decreased the intensity of the color to a great extent. And now I will just select
this particular box. And this particular box, what I'm going to
do is I am going to add a different
color as well. Okay, so let's take
a light color. And again, what you can do
is just go to add new color, and from here just go
with some faded options. Okay, so come here and
just give this color. And here you guys can basically differentiate between
both the lines. Okay? So I hope you guys
have understood that. The last thing which you
need to do is go to download option and download 18
a PNG format, Okay? So I hope to see you all
in the next chapter. Till then, take care
and goodbye everyone.
6. Creating an animated instagram post: Hello everyone and
welcome you all to another chapter of the Canva
for social media tutorial. So now we are auto chapter
number five and here we'll be creating an animated
Instagram post in Canva. Okay, So I'll be showing you
guys how we'll be able to create an animated
Instagram post over here. So let's not waste time and
let's get started here. As you guys can see, now I'm here in the home page
of the Canva application. So the first thing
you need to go here is the social media option. And under the social
media option here, under Instagram subtopic, you do have an option called
Animated Instagram post. Okay? So I will just
click here and it will create a blank document. Okay, So here as
you guys can see, now I do have a blank
document right over here. Okay? So these are a
few of the templates. If you do want to use those
kind of templates here, you guys will be able
to use it, okay? But for me, I will be trying to create one from
the scratch, okay? So in that case now
what I'm going to do is I am going
to come here and the first thing what I'll
do is I am going to take some of the elements from
this particular option, okay? So I will search
for shapes, okay? So I will just search
for shapes over here. And the first thing
what you'll do is you will come here to
the graphics option. And from graphics option here, you guys can see I do
have a different kind of shaves and glitters
right over here. Okay? If you want to actually put it, you guys can basically put
it here in one corner. So let's just place it here
in this particular corner. Okay? And now again, what you're going to do is you are going to duplicate this one. Okay? So using all, just click right over here, and you have duplicated
this part here as well. Okay? So now I want to flip it. So I will come here onto the flip option and I will
just flip it horizontally, right over here in one
particular corner. And I will just place
it accordingly. Okay, I will just place
it quite over here. Once I have done this
particular part, now I am going to come
here down and there are different shapes and all which you guys can
explore over here. Okay? So different sizes
and different shapes. Okay, so here you guys can see. What I can also do is if I do want to give this
thing a rotation, I can come here and I
can just give this thing a rotation from here as well. Okay, let's just place
it here in one corner. And what you can also do is just make some space for
the text as well, so I will just quite over here. Or let's place each and
everything here in one side. Okay, I will just place this particular thing
here in one side. Now let's come here and if you do want to
decrease the size, you guys can decrease the size and just place it
here accordingly. Okay? Once you're
done now what you can also do is you can just
put up different frames. Okay? In that case, now what I'll do is I will
come here the first thing. Now I am going to take up
this particular shape. And here I will just increase the shape from here
in this top corner. Okay, so I will just place
it somewhere over here. And now again, I am going
to take this text tool and I will just add a text box
right over here. Okay? So in this text box
what I'm going to write is I am going to
write something up. Okay, So I will just
write a social media. Okay, So I'll just write
social media videos. Okay? So I will just
type this thing up, and after that I will also
increase the size of the text. Okay, now if I will just
come up quite like this. Let's select this up,
let's get this thing bold, and now let's change
the font type. Okay, so here you guys can see I do have different font
types right over here. And now I will come
here and maybe I will just place it right
over here as well. Okay, so here you
guys can see now I do have this stop part ready. Okay, so again, now go to
the elements option and cut the shapes and what I'm going to do is now I'm going
to take some grains. Okay, so now I will just come here and I'll
just take greens. Let's search for different
kind of grids over here. Here. Let's go to the
grids option from here. Let's take this particular grid which I do have over here. Okay? I will take this particular grid and I'll just place these
things accordingly. What I can also do is I will just go to the limits option. I will just go back here now. I will just type
on social media. Okay, I will just
type social media. Let's see what all images
do I have over here. I'll just go to
the photos option. From the photos option. Now I will come here and I'll just take this
image right over here. Okay, so I will just drag and
drop this image over here. And lastly, I will come
here the other side. And now I will just place this particular
image here as well. Okay, so now if I just
want to move it up, I can also move this
thing up accordingly. If you want to
decrease the size, you guys will be able to
decrease the size here as well. Okay, so this one's
not fitting that well. Okay, so I'll just
delete only the image. Okay, so again, I will
come here and let's try to take some of the
things right over here. Let's come down again, let's search for
the perfect image, which you'd like to choose. So I will come here
and I will just decrease its size and I will just place
it quite like this. Okay? So here if you
want to come here, if you want to put it up, you guys can basically put these things up quite
like this, okay? So if you want to put up
any border style, okay, you guys will be
able to increase the border style from here. Same goes here as well. Okay? Come here and just change the border
style accordingly. Okay? So now here you
guys can come here and just change the
border style here. As you guys can see, the first page here is
basically done, okay? So I can just animate
all this thing up, okay? So here you guys can see, I will just animate
this thing up. If I do want to slow down
the speed here also, I will come and I will
just take this one. And if I just increase
the intensity, this is how it will look. So I'm doing all
of this manually. Okay? So here you guys can see, let's take this one
right over here. And I will just increase
the intensity from here. And let's take this one, and let's give this one
the same thing over here. I will just decrease
the speed from here. Let's go to the social
media option here. How I want my text to appear. Okay, I'll just click on Rise, and I'll just decrease
the speed after that. Let's come here on
to the last one. Okay, This is how
it should appear. I will also decrease
the speed here as well. Okay, I'll just keep both
of these things over here. Let's select this. This both will also appear
quite like this. If I do want to,
the scaling, okay, here you guys can see
I will just decrease the scaling quite like
this over here, okay? This part is
basically done, okay? Now I will just
take another page. Okay? Here, if you want
to take another page, click on a page. Now what you're going to do is let's give this background
a different color. For that, I'll select
the background, go to background color, maybe take this
particular color. What you're going to do is just take this faded color over here. Otherwise, just go
for some dark, okay? Otherwise, if you want to take some colors quite like this, you guys can come here and always check on with the colors. I'll just take this
articular color over here. The what I'm going to do is I'm going to paste it
over here as well. Okay, I'm just going to take
the same color over here. Okay, now again, what I'll
do is I will come here. I will just take my takes box. I will just take another
takes box over here. Okay, from here I will type the next upcoming video. Okay, I will just
type this thing up. Now what I can also do is after once you've
selected this box, go to the effects option. Go down and select the curve. Okay, I will just
increase the curve. Quite like this here. If you want to increase
the letter spacing, you guys will also be able to increase the letter
spacing accordingly. So I will just come
right over here. And I'll just place it here
somewhere in the center. Okay. So now here
you guys can see, now I do have placed
this thing accordingly. Okay? So what I'll do
now is I will come here and now I will just put
up a thumbnail over here. Okay? So in that case, again, I need to go onto
the uploads option. And let's go to upload files. Okay, from here, let's
see it in large icons. Okay, I will just
select this one. Okay, this is the cover. Okay, I will just
open this up here. Okay, As you guys can see, now I do have opened
this thing up over here, and now I will just place
this thing accordingly. Okay, so let's take this image and let's place it
somewhere over here. Okay, so let's
place it over here. And now let's try to keep this
thing here in the middle. Okay, now here you guys can see this is how it
will actually look. Now, let's try to animate
this part here as well. Okay, So if you want to animate, I will just decrease
the speed, okay? And now again to this image. What I can do is
I will come here. And now I will just this option, Let's select which
one looks good. Okay, this is the flicker. If you want to wiggle this thing up, you
can also do that. I'll just take all of it. This is the stop one. Okay, I can come here and
I can just select this. On Enter, it will quite
look like this. Okay. I will just click this one on. If I do want to add
more things around, I will be able to select
more things around as well. Okay. I will just come
here, place this one. Okay. If you just want to put it in top a little bit,
you guys can do that. Let's place it and just
place it quite over here. And now here you guys can
also give an IG account. Okay? For that what you need to do is you
need to come here, go to the elements option. And from the elements option, you need to take
up a simple box. Okay? So you guys can come here and go for a simple shape. Okay? After that, what you can do is you
can just decrease the, if, let's just decrease the size from here as well.
Let's place it. And what you can
do is you can just give an IG account over here. For that, I will go
to this text option. And from the text option, what I'm going to do now is I am first going
to animate this one. Okay, here you guys
can see I will just select the rise option. Otherwise let's select the wipe. Yeah, I will just decrease
the spreed quite like this. Okay, I will just decrease
the speed ordinance. Just increase in a little bit. Let's increase it quite
like this over here. Okay, Once I'm done animating, I'll go onto the text option. Let's take this key. And now I will just click on a 5684 ABC George. Okay, I will just write
George over here. And as the Swat is
the IG account, I will just come here and I'll just place it quite like this. Okay. Now, I will just
place Instagram ID. Okay. So I'll just write Instagram and I'll
just click on Enter. And here you guys can see I
do have this icons over here. What I'll do is I'll
just skip this swat. I'll just decrease the size. And I will just
place accordingly. Okay, I will just place
this one right over here. Okay, Again, I will just
duplicate this layer. I will just select
this layer first. Click on Alt, and now using Alt, you guys can just
place it accordingly. Okay, I'll just place it
quite well over here. I'll just keep it
quite like this. I'll just select this and this one what I can do is I will go to
the position option. In the position option, I just want to place both
of this here in middle. Okay, now I have just placed both of this
here in the middle. And I have to just
animate both of these, or all these three
things altogether. So I'll just select all
these three things. Go to animate, and now let's
select the stop option. Okay, I will just select the stop option,
quite like this. And it will kind appear like
this here on our screen. Okay, so if you want to
see the full preview, okay, you guys can come here. And here you guys can
see on top there is an icon on my screen
with a play button. You guys can come
here and just see this particular play
button over here. And now you guys can see this is the animated post which I
do have created just now. Okay. If you want to
duplicate any page at all, you guys will be able to duplicate any page
at all as well. Okay? So now I will come
here if you want to go do, you guys can also
go down over here and now let's come down if you
want to put up any audios, you guys will be able to
put up audios as well. Let's listen to this
one over here, okay? This one right over here. Okay, So let's go back
and here you guys. Music What I'm going
to do now is I'm going to put up this
music right over here. I will just delete this. Let's delete this word as well. Now, let's see, this one. Yeah, this one
looks quite great. Now the last thing
is I will come here and I will just save
it into my file. Okay. So just from go to download and make sure you do have the P four video option selected here. You guys can also
check the quality. And here I have selected both the pages and I will
just click on to download. Okay. So it will be
downloaded in form of a video as this one
is an animated post. Yeah, I hope you guys have
understood this class on how you will be able to
create an animation Okay. For your social media as I've shown you
for the Instagram. Okay. This is how
you will be able to create some stunning
designs using your Instagram or
using your Canva to create some Instagram post
which are animated. Okay? You guys can basically
do it in a lot of ways. Okay. I have just showed
you guys the simplest one. Okay? So this is not that bad. Okay? You guys can
basically use this thing, so see you all in
the next chapter. Till then, take care
and goodbye everyone.
7. How to create a profile picture for facebook: Hello everyone, and
welcome you all to another chapter of the Canva
for social media tutorial. So now we are on our
chapter number six. Here I'll be showing
you how to create a profile picture for
your Facebook account. Okay, we'll be learning
how you will be able to actually create a stunning profile picture
for your account. Let's not wet time, and
let's get started here. As you guys can see, now I am here in the home page
of the Canva application. The first thing, what I need
to do over here is you need to go and try to
create a new design. Okay? Otherwise you can
also customize your design. Okay, so for me, I do have the pixels unit
right over here. And let's take 880. Okay, And I'll also take
the height as 880 pixels. Okay, so you guys can
take a different size. No worries. With that,
I'll show you guys the process right over here. Okay? So as you guys can see, now I do have this particular
page right over here. And now I will just give
this one a different color. Okay? So let's come
here and let's check what kind of color do I want
to put for my background. So this particular color
here as the background. And now let's just save it
up right over here, Okay? So once you have done or once you have put
the color over here, let's come to the limits option. And as I don't have
any pictures, okay, So I will just type for
a passport picture. Okay, I will just type for
a passport size picture. Here. You guys can see I do have a lot of pictures over here. Okay. Now what I want to
do is I want to create a profile picture of this
girl right over here. Okay? In that case now
what I'm going to do is as I have
selected this image, I will go to the
edit photo option from the edit photo option. Now I will come here
and I will just select the background remover
option from my magic studio. Okay, I will just
click here onto the background
remover option here. Basically you guys can see this has just changed my
background over here. Okay, once you're done, again, again come here and now
basically from here you guys will be able to check
on different filters. Okay? So you guys can come here and check on different filters. If you want to decrease
the intensity, you guys can basically decrease the intensity here as well. Okay? And now I will
just come down, check out different options. Okay? So I have just put
this one, let's go back. Okay, and afterwards,
let's come down over here and let's go to this option
and let's select a glow. Okay, so here you guys can see. Now for the shadows, I have selected this
particular glow. And what I'm going to
do is I am going to increase the size
right over here. And if you want to
blur this thing down, you guys can actually blur
this thing down as well. Okay? So I will just decrease
the blur amount over here. And you can also
choose the angle. Okay? I'll just choose the angle here if you
want to see the distance. Okay, If you do want
to increase it, you guys can actually do that. Let me just decrease the
blur amount like this. After that, you can also decrease the size
over here as well. Okay? If you want
to come down here, you guys can also check
the intensity here. You guys can also select
different colors as well, okay? If you want to take
this particular color here, you guys can see. Now this one, good. Okay, Now here you guys can see, I do have this particular
image right over here. And what you can also
do is just place it here in the
center after that. If you just want to crop it, you guys can also
crop it accordingly. Okay, here you guys can see
I have just crop this image. If you want to give
any border here, you guys can also give some borders over here,
which I don't want. Okay? I will just again, go to this option. Okay, here. I will just come and
see if you want to put any kind of deotonekayre. You guys can see if you want to change color of the
highlights here, you guys will be able to put some color of the
highlights as well. Okay? Once you have
done this one, otherwise let's select
none over here. And let's go back after that. What you're going
to do is if you want to adjust this image, okay, you guys will be
able to adjust the color. Okay? If you just want
to increase the tint, okay, let me just decrease
the brightness a little bit. Let's just, or increase the contrast and the
highlights a little bit. And let's come down, and let's focus here
on the shadows. I will just decrease the whites and I will just
increase the blacks over here. For vibrance, I will just check the vibrance a little
bit and saturation. And make sure, and try to understand this
particular thing, that whenever we
are trying to work with any of these
things over here, okay? Like if you're working
with any kind of images in any sense, okay, Or once you're doing any
kind of color correction and all there is no
particular or such thing, that you have to do it in
this particular value itself. Okay? So it totally
depends on the image. Okay? What kind of
image we're taking, what kind of camera
we are using. Okay? So you guys need to
do it manually by yourself. Okay? So now if you
want to crop it down, you guys will be able to
crop it down here as well. Suppose now I am just
increasing the size, and now I will just place it right here in the center.
Let's select this. And now if you want
to go and edit it, you guys can come here
and you guys will be able to edit more
of it from here. Okay, here, if you want to give any kind of
an outline here, you guys can give this
outline quite like this. And also you guys will be
able to choose the angle. Okay, so let me
just select angle. If you want to increase
the blur amount, you guys will also be able to increase the blur
amount as well. Okay, here I will just keep the blur amount quite
like this for here. If you want to take
a different color, let's go for black itself. Okay, here you guys can see. Now I do have this one and I have just put this one
here in the middle. The next thing what
I'm going to do is now I am going to
come right over here. Let's place it here
in the exact center. Once I am done doing each
and everything over here, I will just place it here
in the exact center. Now I will go to
the share option. From share I will go to download and I will just download
this particular image. Okay, what I'll do is
I'll come here from here. Now I will just take the
transparent background, otherwise, no problem with that. Okay, I will come here, let's take the
transparent background and I will just download it. Okay, so here you guys can see now this thing is
getting downloaded. And I'll just save
this one as one. Okay, let me come here
onto my resource file. Okay, let's check where
I can act, place it. Okay. So I will come here, I will just go to the
resource file and I will save this
file over there. Okay? So after that, again, what you can do is you can
add up a new page, okay? And this color, I want to
change this color to white. Okay? Once you have
changed this one, you guys can go to
the elements option. And from the elements option, what you can do is you
can search for frames. Okay, So just search for frames
and just click on Enter. And here you guys can see I do have different frames over here. And I will also
increase the size. Okay, so let's come here, let's just increase
the size of the frame. And what you can do now is
you can come here over here. Now you will be able to add that particular image which
you have just downloaded. Go to upload files, Take this one and
just open it up. Okay, so here you guys can see, now here you already
do have an image. So what you can do is
you can come here, drag and drop this
particular image right here. Okay, Now again,
let's go back here. If you want to drag and drop it, you guys will be able to
drag and drop it like this. If you want to increase
the size here, you guys will be able to
do it from here as well. Okay, instead of just
downloading this one, I will come here and I will just delete image and I'll
just keep this frame. What I can also do is I can come here and let's go to
the Share option. Let's download it and let's not have a
transparent background. I will just click on to download and I want to
download only the first page. Okay, I will just click on Done and I will
download this one. Okay, so here it will
just get downloaded. I will just select
as number two. And let's come here and let's
just save it over here. And this one is
being saved as well. Go to upload files now. And what you can do is you can just come here and just open this file here into
your background, okay. So here as you guys can see now I do have this
particular image. What I can do is I can just come here and place this image up. Okay? If I just click
onto the image. Okay? What I can do is if I
do want to increase the size, okay, I will be
able to increase. Size quite like this. Okay? Let's place
this image over here, and now let's see how
this one actually looks. Okay? This one looks
quite amazing. Okay. Here as you guys can see, I do have the shadows
over here as well, to the borders, if you want
to give any border style. Okay, If you want to
increase the border style, in that case, just click on
eight and click Enter here. You do have your
profile picture, which I have just animated, and you can also put different
icons over here. Okay. You can also write
some names and all down you want to use that. Or if you want to do
it quite like that, you guys will be able to
do it from here as well. Okay? This was the simplest way. And suppose if you want
to just put this one, and let's just place
it right over here. If you want to give
some different colors, go to elements, just
clear this down. Go to shape option. From shape option,
take this circle. Okay, I will just take
this particular circle. What I'm going to
do is I am going to increase the size over
here, Right click. What I'm going to do is I will just go to the position option. And from the position option I will just try to
send it to back. Okay, now I will just try to position it here
in the center. Let's come here and let's
take the down layer. And from here, if I want to
put out any different colors, okay, I will also put some different
colors right over here. Let's try to give this
one a dark color, okay? I will just give this thing a dark color, quite like this. And now I will also give this
one a border style, okay? So I will just give this one a border style, quite like this. And this looks quite amazing. Okay. So now you
this particular file and you can just
download this one, okay. Come here and what you need
to do is you need to go to share option from the share. Now go to download. And in this case now you need to have a
transparent background. Okay. Here as you guys can see, now I do have selected the
transparent background. I only want the page number two. Okay? Here I will
just click on Done. Now I will just download this
particular file from here. Okay? Now, let me just
download this particular file, and I will name this
file as profile picture. Okay? So I will just on a profile picture and I will
just save it accordingly. Okay, For that I
will just come down, I will go to my resource
file and save it up. Okay, So this is
how you guys will be able to create some
starting designs. The same way if you
want to come here, instead of this color, you want to use some gradients. Okay? In that case, you guys will be able to work on with the
gradients as well. Okay? If you come here
to this color option, suppose let's go down. You want to take some of
these things right over here. In that case, come
on to this option. Once you've selected the shape, you guys can come here, go to the color option. And from the color
option you guys will be able to select this shape. And from the solid
color option as well, you guys can actually work out. Okay, so here you guys can see if you want to change the color, let's for something
in light, okay? And let's come here
and let's take something in light color
over here as well. So here you guys can see the intensity of the
color has changed. If you want to add a new
color into your gradient, you guys can come
here and just add a new color on your
gradient as well. Okay, so here how you
want your gradient to be. Okay, so here you guys can see. And now I can just save the ones as well with
different frames. Okay, so I will just go
to share, go to download. And I will only download
this particular page, click on download option, and here this one is
getting downloaded. And I will just name this
one as profile picture two. Okay, so I'll just name this
one as profile picture two. I'll go to my resource
file and I'll just save it there accordingly. Okay. So, yeah, I hope you
guys have understood this particular class
on how you will be able to create some studying and professional
looking profile picture for your Facebook account. And you can also use it in
different platforms as well. Okay, so this is the basic way of how to create a
profile picture. So hope to see you all
in the next chapter. Okay, keep on
practicing Canva and all its features which I'm just showing you here in
this particular class. Take care everyone.
Goodbye. See you all in the next chapter.
8. How to create a cover picture for facebook: Hello everyone, and
welcome you all to another chapter of the Canva
for social media tutorial. Now we are on chapter
number seven. Here I will be
showing you how you to create a cover
picture for Facebook. Okay, we'll be learning about that here in this
particular chapter. Okay, let's not waste
time and let's get started here on my screen. As you guys can see now, I'm here in the home page of
the Va application, Okay? So the first thing,
what I'm going to do right over here is I'll be showing you how
to create a cover photo. The first thing you need to
do is take a size, okay? So let's go to my
browser over here, and let's check what is the normal size for a
Facebook cover photo. Okay, so here you guys can see the ideal size for a
Facebook cover photo is 820 pixels wide by 312
pixels tall on desktop, and whereas here you
guys can see it's 640 pixels wide by 360
pixels tall on smartphones. Okay, so here you
guys can see they do have two sizes
right over here. The one I will be showing you is I'll be showing
you guys in this 820 pixels wide and
12312 pixels tall. Okay, so now let's go back to
a Canva application again. So to create a customized size here you guys can
come here, okay? And basically you guys will
be able to put the size, which was 820 into 312, okay? So here you guys can see
eighth 20 by 312 pixels, okay? So I'll just cancel
that particular page. 820 will be the width, and the height is
going to be 312, okay? Once I have created this one, I will just click on
Create New Design. Okay, so here you guys can see, now I do have this
particular page right over here where
I will be working. Okay, Let me just create
another file over here. Okay? So let's ake
this one out as well. Okay, Let's come here and
what I'm going to do is I am going to take this
Facebook cover here. You guys can see here also, you do have the
Facebook cover option. If you want to
take it from here, you guys can also take
it from here as well, But I'm doing it
for the ideal size. Okay. So basically here, what I need to do is you need to first make this page
and put on rulers. Okay, on the sides
and all for that. Now the first thing
what I'm going to do is I'm going to go into
my File option. Okay? And from the file option I will go to View Settings, and I will click on
Show Rulers and Guides. Okay, so once I have put
my Guides and Rulers, I will come here and I will
just place it accordingly. Okay, so let's come here and let's place it quite like this. Let's bring it
over here as well. Okay, so I'll just place
it quite like this. And now I will also
come here and let's check the size
quite here as well. Let's go down. And now again, what I'm going to
do is I am going to place another ruler
quite here as well. Okay, so here you guys can
see I have put another ruler. So after this what
I'm going to do is I'm going to go here
onto my Elements option. Okay, so here from
the Elements option, what I need to do is I need to select a particular background. Okay, so here I have
to do all my works, otherwise I need to put all the things which I do
want to put right over here. Okay, So for that I need
to get a nice background. Okay, So if I want to put a nice background
to my cover photo, so in that case I will
be putting all that. So what I'll do is I will
search from Elements option as a background and I will click on Enter here under the
graphics option here, you guys can see I do have a
lot of it right over here. Okay, So you guys can basically take any of
it from here as well. So now let me just take
one simple one, okay? So let's take this
particular image and what I'm going to do is
I am going to increase the size of the image quite like this and here you
guys can see. Okay? So I will just place my image or the background as you guys
can see, right over here. Okay, If you want to
increase the size. Okay, you guys will
be able to increase the size of the image
from here as well. Okay, so let's take this particular image
right over here. Let's place it
here on the sides. Let's click over here. And now let's place
it here as well. Okay, I'll just take
this ruler again again. I'll just put the ruler
here onto the line. Now I will come here. Let's just go down as well. Okay, I will just place it down here as well. Let's place this. Let's just keep it here on top. Okay, I will just keep this
one here on top as well. Now, let's just select
the guides over here. Okay, I will just place
the ruler over here again. And once this one
is basically done, what you can do is
you can come here, clear this thing out, and now you need to
search for a frame. Okay, so here you guys can
see if I just come down here, I do have the frames and
the grids right over here. Okay? So for that what
I'll do is I will take this particular frame
as you guys can see, it's there already on my screen. And now let me just increase
the size of my frame a little bit as I do want to put an image right over here. And now what I'm going to
do is as I have put on this particular image right over here in this
particular box, okay, I will come here
and I will just type here image here as I have already searched
passport size images. Okay, So here you
guys can see I do have a lot of images
right over here. What I can do is I can
come here and I can just put this particular
image right over here. And suppose if I just
double click over here. Okay, So what I can do is I can just position
the image properly. Otherwise, if I do want to decrease or increase
the image size, I will be able to increase
the image size here as well. Okay, now let's come over
here if you want to expand, you guys will also
be able to do that. Okay, let's come here, let's just delete this image. Okay, let's delete this
particular image right over here. Now, let's just come down again. Okay, and let's search
for other images. Okay, here you guys can see. Let's take this image out over here and it quite like this. Okay, I will just place
it right over here. And I can actually adjust
the placing of the image. Like where do I want to
keep this image okay? I will be able to adjust it. If I want to increase the size, I will be able to increase
the size accordingly. Okay, I will just come here
and I'll just click Okay. Now the next thing
what I'm going to do is I am going to decrease
the frame as well. I will just come over here. Let's just place it
right here in one side. If I want to increase the size, I will just increase the size. And I'll just keep
it here in one side. Okay. So now what I'll do is I will just put out the name. Okay? So I will just give
out his name over here. So for that I do
need my text tool. Okay. So I will just click
on at a text box and now I will name him as Summer. Okay. So I'll just name Saman. So I will just name
Sam Can over here. And what I'm going to do is I am going to increase this one. Take out my text. Okay? And I can
actually play around with what type of fonts
do I want to use? Okay? There are different
kind of fonts here. As you guys can see, I'll just take this
particular phone from here and I will just place
it somewhere over here. Okay, so I need to
make sure that I place all of this here
inside my ruler. Okay, so here you guys
can see Now I will just write all the other
details like I will just write digital marketer
and stuff like that. So I'll just add
another box over here. And now I will
just come here and now I am going to write
those things down. Okay, I'll come here
and I will just write digital market or marketing. What I'll do is same thing. I will come down here, I will just click on Alt and I will just
duplicate this layer. Okay, After that, again, I will just click on Backspace. And now I will write
Graphic design. Okay, Graphic Design. After that, again what I'll
do is I will come here, this layer, Click on At and I will just
duplicate this layer. Okay, I will just
come here as well. Let's delete this
one. Let's come here. Now I will just
select all of it. Click on Back Space, and again I will put UI, UX Design Designing, okay? Once I've written all
these things down, the next thing is I need to place those things
accordingly, okay? I will just come
here and let's just keep the spacing properly, okay? If you want to come here, if you want to increase
or decrease the size, you guys can also do that. I will just lift
all it properly. Okay, I will just try to lift. All right, over here, if you want to align it well, you guys can also do that. Let's come here, Let's
click onto this line now. I will just place it
quite over here as well. Let's place it right here again. Okay, let's just
place it here on top. And after that, let's
come here, let's place, let's come here, and let's
place it here as well. Okay. If you do want to
increase the size of the box, you guys can also increase the
size of the box from here. If you want to put out a ruler, you guys can also put out a ruler from here to
check it properly. Okay, here you guys can see, now I have just put
this quite well. Okay, now the next
thing what I'm going to do is I am going to give the
things up a different color. Okay? I'll just come here. Let's, let's go to the
text color option here. You guys can see I do have
a different text color. I'll just change all
of it except this one. I will just come here on top. Okay, let's go back again. Let me double click here. Let's just select this thing. I will just give this one
a dark black color only. Okay, I'll just come here. And now I am going to select all of this
using shift, okay? Using shift, I have
selected three of this and I will
directly go on to the Effx option from
Effx option here you guys can see I do have
the option for the outline, if I want to put the
thing quite like this, If I want to make it hollow, I can also make it hollow
quite like this as well. And I can actually
manage the thickness. Okay, So I will just manage the thickness of this
one from here as well. Okay, so here as
you guys can see, now I do have this particular
image right over here. So the next thing again what
I'm going to do is I will just place this one here
in the exact center. Okay? So now as I have put
this one here in the center. And what I'm going to
do now is I am going to put up a particular frame again. Okay? I will come here, I will just clear each
and everything out. And now again, I will go down. Okay? And here I will take this particular rectangle frame. Okay? Here, as you guys can see, I have taken this
particular rectangle frame. And what I'm going
to do now is I am going to increase the
size of the frame. Okay? So I will just increase
the size of the frame till here what I'm going
to do is I am going to put up some image. Okay, I will type
a computer. Okay. So I will just type
computer and I'll just click on Enter over here. Okay. So from the images, what I'm going to do is I will go to the photos from here. And from the photos I will be looking onto the photos
which you want to take. So I will just place it
right over here, okay? And now I will come here in the transparency
option and I will just decrease the transparency of the image to quite
an extent, okay? So if I do want to decrease
the size of the frame, okay, I can also
increase the size of the frame from here as well. Okay, so here you guys
can come and just decrease the size of
the frame from here. Let's come here as well. Okay, So you guys
can just decrease the size of the frame from here. And let's select all
of these things. Again, let's try to give
this one different effect. Let's go to the effect option if you want to use the lift here. If you want to use the shadows, you guys will be able
to use the shadows. And here if you just only
want to use the outline, let's search for
the glitch option. Okay, so here you guys can check out all of these
options as well. Okay. Let's come down right over here and here you guys can see, now this is how it
actually looks. Okay, Instead of this one, if you just come
here and if you just place it somewhere here as well, it will also look good. I can come here. And now what I'll do is I will just
select those rulers. And those rulers, I'm going to delete those
rulers from here. Okay, I will just
select those and I can basically delete it from
my keyboard itself. Okay, Now I will
just place it here. Otherwise there is another
way what you can do. Just bring it here and
place it there accordingly at the same place from where
you have taken those things. Okay, I will just come
here and I'll just place it right over here
on top as well. Okay, here you guys can see this is how
it actually looks. And if you want to animate
this a little bit, okay? In that case, you guys can come here or you want to
put some effects. Go to the elements option
again. Go to shapes. Okay, here you guys can see I do have a lot of shapes
right over here. What I can do is I will
just place this one. Okay, let's come here, let's place this box. And what you can do is you can increase the size of the
box here accordingly, and now change the
color of the box. Okay, come here, go to shape. And now just take a white color. Okay? The same way if you do want to increase the
size of the box. Okay, you guys can
also increase the size of the box from
top here as well. You guys can come here
and increase the size. Okay, Now select this box. Click on the Alt option. Okay? Just click on Alt. And what you can do
is you can just drag and drop right over here. Okay? So you guys can drag and drop it
quite here as well. If you do want to
decrease the size, you guys can also decrease
the size here accordingly. Okay, I will just place
it quite like this. Okay, I will just try to take the right
alignment. Select this one. Click on all again and
just copy that layer. Otherwise, just delete
this one for now. Okay, because I did this one. Okay, I will just click
right over here Again, what I'm going to do
is if you just go here onto the position
option, go to the layers. Now here you guys can
actually copy this one here. You guys can paste it
using control V, okay? I will just place
it quite like this and I will just keep the
alignment right, okay. And once the alignment is
right, right click over here, go to layer, and I'll
just send it to back. Okay? Otherwise I will
just go back again. I will not go to the back, I will just send this
one to the back. Okay. I'll just keep this
one right over here. And this particular frame, if I do want to give this
one any border, okay, I'll just come here
and I will just give this one black color border. Okay? So if I just come here, I can just go to this option and I can just
select the black color. And I can just give some black color option
right over here. Okay, so let's just
select that image, which I do have over here. Okay? And now if you want
to edit only the image, you guys can go to
Edit Photo option from here and you guys can just edit the
photos accordingly. Okay, so if you just come here
and let's take this image. If you want to increase
the transparency, you guys will be
able to increase that transparency
from here as well. Okay, so I will also make
this particular letter. Okay, let's take this
letter from here, and let's choose a white color. Okay? I will just give this
one a white color over here. Also, if I want to
put up any other box. Okay, I'll just take
another shape from here. Let's take a shape
right over here. What I'm going to do is I am going to put that
particular shape, okay, I will just increase the size of the shape
quite like this. It decrease in the
size over here. Now what you can do
is select this one. Go to the shape color. From the shape color, you guys can just
take a black color. And what you can
do is you can just place it over here accordingly. Now come here and just
place it here accordingly. Okay, now place it here. And what you can also do
is decrease the size from here top and also decrease the size from
this end as well. Okay, now here you guys can see this one looks quite great. Okay, if you want to put
on any graphics at all. Okay, here I will just
put on some graphics. Okay, so let's just search
for graphics directly. From here. Okay. So here
you guys can see these are the recently
used graphics here. If you want to put up any Youtube icon or
any Facebook icon, you guys will be able to
put that over here as well. Suppose if I just type Youtube. Okay, and if I just click on
Enter here under graphics, you guys can see I do have different icons for this
one right over here. So let's come here and let's
just place it right down. Okay, so you guys can just
place it here down as well. Before that, let me just
group all of this together. I will just group all of this. And now, wherever I
move this thing up, okay, It will be
moved accordingly. I will just place
it here as well. If you want me to
increase the size, you guys can also increase the size over here accordingly. Okay. I will just
increase the size here. Now I can again
put up a text box. Okay. I'll just add a
text box quite like this. And now I will just increase it. I will just decrease
the text box. What I can do is I can just place it over here accordingly. Okay. I will just place
it quite like this. I will decrease the
page size over here. Now what I'm going to write
is supposed BC Channel, okay? I will just write ABC channel. I will just place this
one quite over here. Okay, Let me just decrease
the size of the box. Okay, I will just place
the box quite like this. And let me now place
it exactly over here. Okay? So let me just place
it right over here as well. Again, now what I can
also do is I can come here and now I will just
take another Instagram. Let's search for Instagram. Okay. Let's click on Enter here. You guys can see I do have different logos for
Instagram here as well. Okay, let me just come here. Let me just decrease the size. Let's place it here accordingly. Okay, let's decrease
the size now. I'll just put it here
quite like this. Now, again, I will just
take this textbox, I'll duplicate this layer. What I can do is I can come
here and let's place it. And I will just type
the same thing, okay? Abc channel. And again I
will just take another icon. Okay, so here if I just
come and if I just copy, I will be able to get
it from here as well. Okay, So now again what
I'm going to do is if I just want to add
my Linkedin account. Okay, So I can just
come here and I will just linked in and I'll
just click on Enter. And here you guys
can see I do have the linked logo here as well. Okay, so I will just decrease the size of the logo from here. And now again, I will try
to place it accordingly, so I will just place it
somewhere over here. Take this one duplicate layer. And now what you
can do is you can just place it quite like this. Okay? So I will just
place it and here. This one looks quite amazing. Okay. If you want to
change the background all otherwise if you want to put up any external graphics, you guys can always come
here and you guys can search for external graphics
from here as well. Okay, let's take this one, okay? Now, I will just
decrease the size. What I can do is I can just
place it somewhere over here. If you do want to give
up any rotation here, you guys can actually give
up the rotation accordingly. Suppose, let me just keep
it somewhere over here. Now, using all, duplicate
this layer, select this one. Duplicate the layer. I will just rotate
this one here as well. Okay, let's give this thing a rotation over
here as well. Okay? I will just give this one a
rotation quite like this. This is how it actually looks. Okay. So here you guys can see I have done with
the cover page, so this is how you guys
will be able to make a studying cover page for
your Facebook account here. Also, if you want to put
any kind of frames or Bons, you guys can come here and
just search for Bon, okay? And just click on Enter, okay? And here under Bond, you guys can see you do have different frames and
different ribons or graphics as you guys can see. Okay? So you guys
can actually use all of this from here as well. Okay? So you guys will be able to
use all of this accordingly. Okay? Yeah, I hope you guys have understood this
particular class, okay, on how you will be able to
make some studying designs over here into this particular
application called Canva. Okay, I will just put up
this ribbon right over here. Let's just move it
up quite a bit. Let's just increase the size. And now let's place
it right down here. Okay, so this is how you guys can actually work
on with the ribbon. And suppose if you come here and if you want to
change the color, you guys can also change
the color to this. Okay, so to save this thing up, the last thing what
you need to do is you need to go to
the share option. From the share option, go to
download and make sure that you transport it
in a PNG format. Okay, so here you guys can see they're showing
me that video, audio and animation won't play when exploded as this file. Okay, so I don't want that, I don't want it as a PNG file. And from here, basically I will be able to work
on with the size. Suppose here I can see I do
have 820 into 312, okay? So now I can just click
here on download. Okay. So here they will just download this
particular file. And after that I will
be able to save it here on my system
accordingly. Okay? So I will come here and
now I will just save this file as cover
photo for Facebook. Okay? So I will just click
cover photo for Facebook. And now I will just save it
here in my resource file. Okay, So here you guys
can see I do have this particular
resource file and I'm going to save this
particular file over here. Suppose this same image, you want to take
it in other sizes, so come here, go to share
option, go to downloads. And from here, basically
you will be able to choose all of the
things right over here. Okay? Like what kind of size you want and stuff
you guys will be able to work on with that
right over here as well. Okay. So yeah, I hope you guys
have understood this class. So see you all in
the next chapter. Till then, take care
and goodbye everyone.
9. Creating a facebook event cover in canva: Hello everyone and
welcome you all to another chapter for the Canva
for social media tutorial. So now we are on our
chapter number eight, and here I will be creating a Facebook event cover in Canva. Okay, suppose you do
have an event or you want to welcome people to your
event or to join you guys. In that case, once
you post that thing, how you will be able
to edit that in Canva, I'll be telling you
guys about that, whether it's a music
party or whether it's even any kind of small event into a
restaurant or anywhere, You will be able to create a Facebook event cover in Canva. I'll be showing you guys how, so let's not waste time
and let's get started. So here as you guys can see, now I'm here in the
home page of the Canva. So basically the first
thing what you need to do is you need to get
that particular size, okay, for creating a
particular banner. Manually, you guys can
come here and just customize design over here. Otherwise what you can
do is you guys can directly come here onto
the social media option. And from here you guys can
basically search, okay? So these are few of the popular sizes which
they basically use, okay? And if you want to come
for Facebook here, you guys can see here you do have the Facebook
event cover, okay? And the size is 1920
into 1080 pixels. Okay? So for that I will just
click here to create blank. Okay? And it will just create me a blank page right over here. Okay? So as you guys can see, now I do have this particular
page here in Canva, okay? So basically from here I will be able to do it
kind of like this. But now what I'm going to do is I'll also show you
guys how you will be able to change
the templates, okay? Suppose if I take
a preset template, and let's take this one. And here now I will be able to put on all the effects
which are over here. Okay, suppose I
will just come here and I will just delete
this particular box. And I'll just select
this one also. And I will just
click on to delete. Okay? And what I can do
is I can just increase the size of this
on box over here. Okay, So let me just
increase the size over here. And now what I'm
going to do is I am going to customize
it accordingly. Okay, let's just keep this
one here in one side. This one also, I'll be
keeping it in one side, which we'll use later. Okay, now first let's
start with this box. Okay, here I have just placed this particular thing
here in the exact center. For that, I will just click out. Let's select this one, and let's place it accordingly. Okay, let's place it right
over here in the exact center. The next thing what
I'm going to do is now I will come here and I will
go to the elements option. Okay, From the elements option, I will search for a party. Okay, So I will just
search party and I will just click on
Enter from my keyboard. Okay. Here as you guys can see, now I do have a lot of images regarding parties over
here as you guys can see. Okay? So if I just
come here down here, you guys can see I do have a lot of images right over here, okay? Otherwise instead of party, if I just type a j. Okay? And if I just
click on Enter, and let's search, and let's see what all we do have
right over here. Okay, so now I will just
click here to see all. Okay, so here you guys can see. Now I do have a lot of
images right over here. Okay? So basically
what I can do is if I just come here and let's
take this image from here. And from here now I will
just take this image. And what I'm going to
do is I will go to the edit photo option and I will select the background remover option right over here. Okay, so here you
guys can see now I do have removed the
background here as well. Okay, so what I can
do is I can just come here and I can just
place this accordingly. So I'll just place this sword accordingly right over here. And what I can also do is if I do want to increase the size, I will be able to increase the size from the sides as well. Okay, let's keep this
sad right over here. Let's bring it quite like this. If you want to increase the
size from the sides as well. Okay, You will be able
to do it over here. Okay? So I will just place this particular image
here in the exact center. And what I'm going to do is
I am going to take this one and now I will just type music. Okay, so I will just
type music over here. And what I'm going to do is I am going to place
it accordingly. Let's take this one, and let's
keep this quite over here. Okay? Otherwise let's select this inside box,
which I do have. Okay, so here I have selected. Box. Now I will just
delete this one. Okay? You can just click, Delete from your keyboard. Now here as I do have
this particular J, I will just try to place it
here in the exact center. Now I will just try to
put it quite like this. Let's decrease the
size right over here. And now just place
it here at the top. Okay. Otherwise I can just
change it to Music Fest. Okay, I can just change
it to Music Fest. Now, I will decrease the size of the phone
from here a little bit. Let's take thing again. And now, just place
it right over here. Okay, I have just placed it
right over here as well. Now I do have the gas
over here as well. So the next thing for my event, what I can do is I can
just type join us. Okay. What I do is I will come here and I will
go to the text option. Okay. From the text option here, I do have a lot of presets. Okay? Which I can basically
use right over here. Okay? So here you guys can see I do have a lot of presets. And let me take this
particular preset and let's just quite
down over here. Okay. If I do want to
decrease the size, okay, I will be able to decrease
the size from here as well. So I will just come here. The first thing, as I do
have all of this three, I will just ungroup
all of this first. Okay, so I will just
ungroup this one. Let's select outside. Let's select, delete this one as well. I will just delete it. And what I'm going to do is now I am going to write my thing. Okay, So I will just click here, and I will click on Join Us. And now I will just increase
the size of the box. Okay, And I will just decrease the size of the
letter here as well. Okay, so I will just
click on Join Us. And after that I will
just give the location. Okay, So what I'll do is now I will just take
another type of fonts. Okay? So I will come here
and what I'm going to do is I am going to write those
things accordingly. Okay, so for that again, what I need to do is I need
to take another type of font. And let's search, which
type of font should I take? So let's take this font
right over here and here. Now what I'm going to do is I am going to give
out the location. Again, I will just
ungroup this one. Okay? Now I will just place
this right over here. What I'll do is I will just
write down the location. Let's place my cursor over here. And now join us and I'll just
give the location Mary's. Or I will just write, let's give out a different
location, South Pacific. South Pacific Resort.
Then I'll write, I'll just give out. Okay. Then I'll
just second floor. I will just give second floor. What I'll do is I will
just select this one here. I will just select this here. Now I will just
cut this one out. What I'm going to do is I'm
going to paste this one here in the center or
here at the start. Okay, I will just place my cursor here at
the center control. Now I will come here and I
will just give out as well. Okay, If you want me
to give out of space, I can also give out
a space over here. Okay? So now I will just try to align it
here in the center. Okay, I will select this one and I will go here for
the alignment. And now I have just aligned this thing here in
the exact center. After this, what I'm
going to do is I am going to place it properly. Okay, so now let's
select this word. And now I am going to change
the text color here as well. Okay, so here you guys can
see I do have a lot of option for colors from
which I can choose on. So let's take this color, let's see how it actually looks. Yeah, this one looks nice. Now here I can also
mention the price. Okay, I will just type entry. Let's take this word now. Okay, let's take this
and let's write entry. I will come here, I will
just go back space, I will just write
entry equals to $20 Otherwise, let's say 25. Okay, let's say $25 entry. Now what I'm going to
do now is I'm going to collect this one. I will just Decrease the size over here. What I can also
do is I will just place it right over here. Okay, I will just place
this one right over here. If I want to want this one to be
highlighted in that case, I will go here onto
the lens option. And from the elements option, I will also be able to
use a lot of things. Okay, here onto the graphics. Okay, I can come here and I
can just place this graphics. Let's just decrease the size of the graphics right over here. What I can also do is I can just place this one right here. Okay, so let's just place
it right over here. Or I will just select this particular place and
right click over here. Go to the layer option and
I'll just send it to back. Okay, here you guys can see now I have just send
it to back Again, What I'm going to
do is I will just duplicate this layer
using the Alt. I will select this one. Now after selecting this one, I'll click on Alt. Now I will just duplicate
this layer here as well. And I will try to
align it properly. Okay, I will just try
to align it properly. And here you guys can see, now this one looks better, okay? So here as I wanted to
highlight this one again, I will go to my all option and I'll just delete my
search from here. Okay, So suppose here I will tell that what
all is included. So let me just move this one
a bit here on top, okay? So I will just move
this one a bit on top. And now what I'm going
to do is I am going to place here at top as well. And I will just come here, let's place it in the 225. And let's place white box over here on top For that again, I will select this
particular box. What I'm going to do, I am going to place the box accordingly. Okay. I will come here
and now I will just increase the size of
the box from here. Let's select the text over here. Otherwise, if you want
to select the box, you guys can also do
that from here as well. Okay, I will just
select the box. Let's go to Shape,
and let's try to see how different colors
will look like. Okay, here you guys can see
now the white looks better. Okay? If I do want to change
the spacing or anything, I can just change the spacing
and stuff accordingly. Okay. From here I can also write unlimited drinks and food. Okay. I will come here, take my text tool. From the text tool, what I'm
going to do is I'm going to take this text box
from the text box. I'll just click on this and
I'll just delete this one. And I'll just write
unlimited drinks and food. Okay, I will just give this one. What I can do is I will
just write included. I will just decrease the size of this particular box which
I do have over here. Now, I will just place both
of this here accordingly. Okay, I will just
come here and what I can do is I can just come and I will just increase the size of the box right over here
if I want to make it bold. Okay, I will just select
all of this from here. I will just make it bold, that it's quite visible. Okay, here you guys can
see again over here. Now what I'm going to do is I'm going to take
this particular text, okay, let's see which
text will look good. Otherwise, I can also take
it from the front panel. So I'll just add a text
box right over here. And now I'm going to
write a DJ navabi. Okay, So I will just write
DJ Navabi right over here. And what I'm going
to do is I am going to just place it
right over here. And now I will just place
it here just beside. Okay. So I will just place
it somewhere over here, or maybe here somewhere. Okay. So I will just place
it right here in the middle. Okay. So I can just place it and I can just increase
the size accordingly. Okay. So if I do want to
work with the text type, I can also check on what are the text font type do I have
available right over here? Okay, so here you guys
can see there are a lot of recommended
fonts right over here, and I can just play
with all of those. Let's see which
one looks better. So here you guys can see I have just applied
the future display, so I will just keep this
one right over here. And what I can do
is I can just place it in here, one corner. Okay, so I can just place
it right over here, or I will just mask this image. Okay, so let me come here. And if you want to
mask the image, you guys will be able
to mask it as well. Okay, now let's come to
this particular apart. Let's take a elements box
from the elements box. Let's take this box right over here if you
want to come here. And what you want to
do is you just want to place the box
quite like this. Just decrease the
size over here. Now I want to have
the same color, which I do have
here on the back. I will just go to
the color option. And let's take the color, and let's place it
quite like this. Now what I'm going to do
is I am going to take this one and I'm going to
put it right underneath. Okay, So I will just put
it right underneath. This looks quite good, as you guys can see,
right over here. And now the next thing what
I'm going to do is I'm going to put the date
at the event timing. Okay? So for that
now what I can also do is I can come here
to the text option. Okay? And now I will
just add a text box. And from here let's just type J. Okay? So I will just
type J over here. And now let's just move
it up here in one corner. Okay, Now let's
increase the size. Okay, And what I'm
going to do is I will come here and using Alt, I will take or make
different boxes. Okay, I will just come
here, Let's take this. And now I do have the four
boxes here I will write. And over here I will just write in here I will be writing. Okay? So here I do have
this particular four words. What I'm going to do now
is I'm going to place it here in one side. Okay? I will just place
it right over here. Let's just place it accordingly. Okay, Let's, let's place it, let's take this in over here. I will just place it
here in one side. Let's take this one as well. I will just place it
quite over here as well. Okay, I will just place it now. Again, I will just
take another textbox. I'll just copy this one
only using the Alt. Now I will just
write the T, okay? I will just write 13, 2022. Okay? I will just
write quite like this. I will just decrease
the size over here. And what I'm going to do is I
will place right over here. And I just want you guys to
view it quite like this. Okay? So make sure you choose
the alignment properly. Okay, so here I do have
this alignment over here, and now I am going to write
the tying as well. Okay? So again, using Alt, I will just duplicate
this layer. And now I will just write
the tying here as well. Okay, suppose starts from, I will just write
starts at eight B IST. Okay? So I will just write
starts at 08:00 P.M. ISD. And I'll just increase it a little bit and
what I can do is I can just place it somewhere
over here as well. Okay. So I will just
place it right over here. And if I do want to
give up any line, okay, so I can just give some
lines over here as well. So for that again, what I
need to do is I need to go here on to the
elements option here. Under shapes, you guys can see I do have different lines, okay? So if I just rotate
this thing up, okay, So let's just rotate this thing according
to the 90 degree. I will just take this particular
light right over here. Now let's just place
it accordingly. Okay, I will just decrease the
size of the light as well. If you want a straight line, you guys can basically
use this one. Okay, here as well. You guys can see. Now I will come here, let's just place it right
underneath, over here. Now, I will just duplicate
this layer as well. Okay, I will just
duplicate this line. Now using shift, let's give
this thing a rotation. Now if I just select
this one, okay, If I just thing our rotation, what I'm going to do is I am going to get exact 90 degree. Okay? I will just take this 90 degree line
right over here. Come here and just place
it here in one side. Okay? If I do want
a straight line, if I want to extend the line, I can also extend the line
quite like this. Okay? Here you guys can see now
I do have this exact line and I can just place it
quite over here as well. Okay, now again, I
will come here and I'll just extend this
particular line as well. I will just extend the
line quite over here. And I'll just leave it up. Let's take this text. Box and let's place
it here as well. Okay, so here you guys can see, now this one looks better. Okay, And now if I do want
to add some graphics. Okay, so here you guys can see, I do have a lot of graphics
over here as well. Okay, so here I do have
a lot of graphics. Let's just go to the magic recommendation and
let's check all this out. Okay, so here you guys can see I do have a lot of it
right over here. And what I can do is here, as you guys can see, I do have this graphics
right over here. And I'll just go to colors and I want to make this
one as white color. Okay, So I will just increase
the size of this one. And what I'm going
to do is I am going to place it quite over here. Okay, I will just place it quite like this
here in the center. If you do want to decrease
the size a little bit, you guys can also decrease
the size a little bit. Let's try to put this one
here in the exact center. Now I will just decrease the size from this
end a little bit. I will come here. And now, right go to the layer option. And here you guys can just
send this thing to the back. Okay, here, now I can
also select this layer. Suppose if I want to select it, I can just select
it accordingly, and I will be able to
move it up here as well. Okay, here you guys can see
this one is basically done. Okay. You guys can come
here and take this box. Click on Alt, and now just
duplicate this layer. Lastly, you guys can write
last date of registration. Okay, You can just like
Rst Day of Registration. You guys can actually
increase the size of the box. Now just decrease the
size over here as well. And what you can
do is you can just place it quite over here. Now just click on Alt. Okay? Just click on Alt and duplicate this
box here as well. And just type 12, 2022. Okay. Here you guys can
just place it accordingly. I will just place it
up quite over here. And here you guys can
also see that I do have the last date of registration
over here as well. Okay. If I do want to
put it inside any box, I can also put it here
inside any box as well. Otherwise, I can
just take one of it and I will just come here. Let's select, let's select this particular line which
I do have over here. Otherwise let's select this. Click on copy and now
control V to paste it up. Okay, I have just paste
it up over here as well. Now I will just move it around. Okay, I will just
move it around over here if you want to
increase the line style. Okay, You guys can change the
lines style here as well. Okay? And here you guys can see what type of line do I want? I can also check those
things out as well. Okay? So let me just
give this thing a rotation quite fast. Okay? So let me just give
this rotation of 180. And now I will just place
it over here in the center. And I will just
decrease the line size. Okay, So I will just
decrease it quite over here. And now I will just decrease it here from this side as well. Okay, so here you guys can see, now I do have this lines
right over here. Okay? And this is the poster
for my music Fest. Okay. So here you guys can see all the contents right over
here are quite visible. I have used all of this text. I have just modified this
particular place as well. I have also showed you guys
how you will be able to put on images without
a background, okay. So once this one is done, the last thing which you need to do is you need to come here, go to the share option. And from the share option, you guys can go to downloads. And from here, basically
you guys will be able to download it in a G form. Okay, so you guys will be able to download it from a PNG form, and I will just click download. And this thing is getting
downloaded right over here. Okay. So I hope you guys have understood this
class on how you will be able to make one Facebook
event cover in Canva. Okay? So here I will
just save it up. Okay, I will just save
this one as Facebook. I will just click back space. I'll just write
Facebook event cover. Okay? I will just
write event cover. I'll just save it accordingly. Let's come here to
the next stop option. And I will just save it here to my resource file and
click on Save It. And this one is being saved. Okay, so yeah, I hope
you guys have understood this class on how to
make one over here. So see you all in
the next chapter. Till then, take care. And goodbye everyone.
10. Making an animated facebook story: Hello everyone and
welcome you all to another chapter of the Canva
for social media tutorial. So now we are on our
chapter number nine. And here I'll be making an
animated Facebook story in Va. Okay, I'll be showing you
guys how you will be able to make an animated Facebook story here in this particular chapter. Let's not waste time
and let's get started. So here as you guys can see, now I'm here in the home page
of the Cava application. For that, to make
an animated story, first I need to go here
onto my social media panel. And from here I will choose
the Facebook option. From the Facebook option here if I just scroll or bit down. Okay, So here you guys can see. Now I do have the option
for Facebook story, okay? And the size is 1080
into 1920 pixels. Okay. The first thing, what I'm going to do is
I am going to click here and it will create a blank
page quite like this. Okay? So here as
you guys can see, now I do have this particular
part right over here. And now what I'm going
to do is I am going to take or go onto the
elimates option, Okay? So from the elemates option now I will come here and I
will just type frames. Okay, So I will type frames and I will just click
onto the Enter option. And let me get this
rectangle frame over here. And I will just place
it quite like this. And let's just increase
the frame size. And also I will just increase
it from here as well. Okay, so here I do
have one frame. Now, again, just clear
this out from here. Let's take one shape. Okay? Here. As you guys can see, I do have a shape right
over here as well. Let me place it properly. Let me just get it
here in the same size. Let's just place
it over here and let's come down straight
down, quite like this. If you do want to
change the size, you guys can also do that, okay? You guys can always
resize the frames at all. Okay? Now what I'm going
to do is I am going to put up an image right
over here, okay? So here in this
particular limits bar, let's search for some photos. Otherwise let's go here
to the photos option. And here you guys can see, I do have a lot of photos
right over here. Okay? And let's search for computer. Okay, So let me just search
computer right over here. Let's click on Enter. And here you guys can
see I do have a lot of images of computers
right over here, so I will just check
out which image can I use for my frame over here. Okay, so if you
do want to search some image with more
specification, okay, so you guys can search
here and you guys can type vertical
computer images. Okay, let me just search
it out from here and here. You guys can see, now I do have a lot of images right
over here as well. Okay, so from here
basically there are a lot of images from here. Let's take this image and now I will just delete it first, I will just drag and drop
it here into my frame. Okay, so I will just drag
and drop it right over here. And basically if you
do want to work, okay, you guys can come
here and you guys will be able to place
it accordingly. Okay, so let me just place
it quite like this and here you guys can
see now I do have this particular image
right over here. Okay, So let me just decrease the transparency of the image. Okay, so let me just give
it a 75 transparency. And I'll just click on Enter and this is how it's
going to look, okay? So once you're done with
this part here as well, the next thing what
you're going to do is you are going to work
on with your text. Okay? So come to the
text option and from here a text at a
text box over here. Okay? So here in the text box, what you can do is you can
just write down your text. Okay, I will come
here and I will type or otherwise I will just write new
content over here. And let's just increase
the size quite like this. Let's select all of this again. And now I want to turn
it into all caps. Okay, now I will come
here. Let's select this. What I'm going to
do is I'm going to decrease the size
from here as well. Okay, let's come here, let's make it bold. If you want to try
different text type, you guys can always try for different text
type here as well. Okay, here you guys can see I do have different text
types here as well. Let's just decrease the size. What I'm going to do is
I am going to put out this text right over
here, new content. After that, I will
just duplicate this. What? Okay, so let me just
duplicate this layer. And what I'm going to do is I am going to come here and
I will just write four. And let me just
increase the text size. Okay, So I will just increase the text
size quite from here. What I'm going to do
is I am going to just place it quite here on one side. Okay? So I will just place
it quite here in the center. Okay? So I will just
place it quite like this. Otherwise you guys
can come here, go to the Effx option, and from the Effx
option you guys can actually choose the outline. Okay, you guys can come here and basically choose for
outline as well. Let's select this, let's select the outline from here as well. And let's go with white color. Okay, Here you guys can come and just place
it here accordingly. Okay, I have just placed
this one right over here, and now I am going
to type for UI, Ux. Okay? So now I'll
take this text box, click on Alt, and just copy it right underneath over here. And now I am going to
again select all of this. Click on the backspace
on my caps U, x. Okay, I will just write UI, UX right over here. Now let's select this one up. Now let's increase the
size of the text box. Okay, I will just come here. Let me just decrease the size of the text box from here.
And let's select this. Let's place it
right here as well. Okay, here as you guys can see, I will just place it quite here. And let's try to keep
the alignment fine. Okay, so I will just try to keep the alignment fine over here. And let me just place it
quite over here as well. Okay, so now here
you guys can see, now I do have this particular
thing present over here. Now the next thing
what I'm going to do is if I do want to change
the color and stuff, I will be able to
change the color and stuff from here as well. So let's select of it from here. Let's go to the text color, and let's go for a white color. And after that,
let's go to effects. Okay, in the outline, let's select a black color
outline, quite over here. Okay, once I've selected this
one, let's go to effects. Again, if you want to
increase the thickness, you guys will be
able to increase the thickness from here as well. Okay, here I will select
this one. Go to effects. If you do want to
increase the thickness, you guys will be
able to increase the thickness from here as well. Okay, now let me just decrease the box size from this end. Let me just move out over here. Let me just move this thing up. Otherwise, what you can also
do is you can come here and just decrease the size
of the box accordingly. Okay, I will come here, I will just decrease
the box size. And let me just place it
accordingly over here. Okay, In the same line. And now this one
looks quite better. Okay, Now this part
is basically done. Okay. So here if you
want to create a button. Okay, In that case here, you guys can go to
the elements option. From the elements option, what you can do is
you guys can go to the shapes and
click See All here. As you guys can see. Now I do have a lot of shapes
right over here from here. Let's take this one. Okay, Now I will just
place it right over here. Okay, let me just place it
right over here in the center. Okay, let me just increase
the size of this. Let's just keep it here
in the exact center. Okay? Now again, I will go here to the text
option and a text box, and I will join. Us. Okay, so I will just
right join us over here. And let's increase the size. Okay, let's select both of this. And now just make it bold. And now change the size. Okay, Now come here. And now what you
can do is you can just place this text
here in the center. Okay? So here you guys can
basically place the text. And after that I will
come here again, what I can do is I
can just go back. Only select this text and now just place it here
in the exact center. Okay? Now here you
guys can see this is how you guys will be able to create a page quite like this. Okay, so this is for this particular story
which I have just created. Okay, so if you want to put on more graphics, okay, you guys, any time put on more graphics, let's search if we do
have Edds graphics, which we can't use. Okay, so let's click Enter. And now here you guys
can see I do have a lot of graphics which I can
basically use right over here. And now let's come here
down and here you guys can see there are a lot of graphics which you can basically use. And now here you guys can
just take this one and maybe place it right
over here in one corner. Okay, here you guys can just
place it here in one corner. Otherwise you guys can
just take out an image. Okay, so you guys can just
come here and just check out for an image
regarding this UI UX. Okay, let's take this graphic. And what you can also do
is if I just come here and if I just place it
here in one corner, Let's take this
graphic and let's decrease the size from here. Now let's just place it here
in one side and come here and just place it here
in the center as well. Okay, just place it
here in the center. And increase the
size of the box. I will just place it here
in the center as well. Now, I will just decrease the
size of the box from here. Okay, I will just decrease
the size of the box. Make sure the alignment
is fine here. Again, if I come here
to the elements option. Okay, this one, I have
placed it quite well. Take the shapes, okay, so here now as I
do have this one, let's come here and let's
place it here in the down. Okay? So I will just place
it here and I will try to align it exactly to the line. Okay, so here as
you guys can see, I have aligned it
quite over here. And the same way
I will come down, let's align it here
in the same line. So here I have just
aligned this one. And let's click on Alt. And now let's just bring it here on top a
little bit as well. Okay, so I will just come here. I will just skip this
one right over here. And let's come down and
here also you guys can see now I do have all of the
three boxes right over here. Let's select this box. Go to the color option. From the color option here, you guys can see now I do
have different colors. And here I will just come
on top and I'll just try to take it from the
photo colors itself. Okay? Now I do have all these
colors right over here, and this is how it
will actually look. Okay, So now I'm done designing
this particular page. So the next thing what I
need to do is I need to come here and I need to select
these boxes around. Okay? So here I will
just select all of this. And now I am going to animate
all of this as well, okay? So what you can do
is you can come here and you can just select
this particular box. Go to the animate option, and here you guys can see how all of this
looks like, okay? So here you guys can see, okay, so this is how
it will just appear. And if you just want it to wipe, it will also wipe
in quite like this. Okay, so if you
want it to rotate. Okay, so I will just come here, let's just place it a bit down. Let's select the
whole page around. Okay, I will just select this
whole page right over here. From here, what
I'm going to do is I am going to go to
the animate option. And let's see how it will actually appear on
the screen, okay? So this is the slick one, okay? Here. This is the fun
and corporate chill. This is the chill one. This one is party mode, okay? So these are some combinations. Here are a few of the
basic option, okay? If you want it to come here and just place it
as a scrapbook, you guys can come here and
place it accordingly as well. Let's place the
scrapbook on here. And now I will just
click on Enter. Okay. And here you guys can see the time duration
is 5 seconds. Okay, If I want to increase it or if I
want to decrease it, totally depends up to
me and my animation. Okay, so here as
you guys can see, if you just want
to see a preview, here on this top corner, you guys can see a play button. Okay, you guys can click here onto the play button and this is how it will basically appear
here on your Facebook story. Okay, So now from
here only I will just select onto the
download option. And from the download
option I will just save it as a MP four video. Okay, so I will just save
it as an MP four video. And I do have other
options as well. Pf you want to save
it in SVG PDF format, Okay, But then you won't
have any kind of animation. Let's go to share again. Let's go to downloads. And let's download
this particular video which I had just
created using Canva. Okay, so I will come here, I'll wait for it
to get downloaded, but I hope you guys have
understood this class on how to create one study
Facebook animated story. Okay, so now I will
come here again. I will just click on backspace and I will just name this file as animated Facebook story. Okay, so I will just
write animated Facebook. Facebook. Okay, so I will just write animated
Facebook story. I'll go onto my desktop, and from here I will just save this file here in
my resource file. Okay? So see you all
in the next chapter. Keep on practicing, take
care and goodbye everyone.
11. Making a facebook post: Hello everyone, and
welcome you all to another chapter of Canva
for social media tutorial. Now this is the
chapter number ten. Here I'll be making a
Facebook post in Canva. Okay, I'll be showing you guys how you'll
be able to create a Facebook post in Va. We'll be learning all of that in detail here in this
particular chapter. Let's not waste time and
let's get started here. As you guys can see, now I'm here in the home page
of the Canva application. The first thing what
I need to do is go to the social media
option from here. After coming to the
Facebook option, you guys can come here and
basically you guys can check, you do have the face pla
page right over here. Okay? This is the landscape one. Let's take this and let's try
to design it accordingly. Okay? So this is the
size of a Facebook post. Okay, here I will be
designing accordingly. Okay, let's just put
some agencies over here. Okay, let's just, for a
hiring thing right over here, this is just banner
or something. In that case, what you're
going to do is first I will come here and I will go
onto the elements option. Okay, so from the
elements option, I will search for frames. Okay, so let's search frames, and let's click on Enter. And here you guys can
see now over here I do have a lot of frame
sizes over here. Okay, so let's go
down, let's check out. Okay, so what all frames
we do have over here. The one which I'm
searching for is polygon. Okay, frames. And let's type
polygon over here. Okay, poly gun. And let's click on Enter. Okay, here you guys can see now I do have a polygon
frame right over here. Once I'm done here, what I can do is
I can just place it quite like this,
right over here. Let me just place
it accordingly if I do want to put it
here in the middle. Okay, I will be able to
do it from here as well. Okay, once I'm done, now I am going to
place that image. Okay, now I will
come here and I will just select Group Discussion. And I will just
click on Enter here. You guys can see I
do have a lot of photos of a group
discussion right over here. Okay, from here now I'm
going to take up an image. And I'm going to put that
image right over here. Okay? Now I will just
place up this image. If I want to change the
positioning of the image, I will be able to change the positioning of the
image here as well. Okay, this one looks good. If I do want to move
it up a little bit, I will be able to move it up
a little bit here as well. Now, once I'm done, let's come here and let's
select the border style. Okay? I will just try to
put up a border over here. Okay, Let me just
change the width of the border and let's go for 20. Okay. And I'll just
click on Enter. Now, I do have the stroke
or the border color here. Let's go to the coloring option. Let's come to this yellow color. Let's try to get sub
colors right down here. Okay? Now I do have this particular style
right over here. The next thing what I'm
going to do is I am going to duplicate the layer which
I have right over here. Okay, so I can basically
duplicate the layer. And now what I'm going to
do is I'm going to click on Alt and I'm going to take
another layer out of it. Okay, so here as
you guys can see, I do have another layer. What I'm going to do is
I am going to come here. And now I am going
to detach the image. And I will just delete
the image from here. And now I will select this. And I don't want any border. Okay? So from here I
don't want any border. Now I am going to give this
one a different field color. Okay? Let's see, what
field color can I give? I will go with something red. Okay, something in
dark, red color. Now I am going to
right click over here and go to the layer option. From the layer option, I will try to send it here in the back. Okay, I will try to send this particular thing
here on the back side. Now let's just place
it quite like this. I will just try to bring
it down right over here. Okay? Now I will just
place it quite like this. And again what I'm
going to do is I am going to go to
the elements option. And from the elements option, let me take some other
shapes here as well. Okay, so let's go with
a triangle over here. Okay? So I will just place up this triangle right over here. And what I'm going to
do now is I am going to place this
triangle accordingly. Okay? So let's just place this
triangle right over here. And now right click, okay. Otherwise go to the
position option. And now here you guys can
click on said to back option. Okay? So here now I do have said this particular thing
to the back, okay? And if you want to create
another shapes and stuff, you guys will be able to create some different
shapes here as well. Okay, so let's take
this shape and what you're going
to do is come here, select this one up, and now if you do want to
give this thing our rotation, you guys can come here and give this thing our rotation
quite like this. Okay, come here and let's
just go down a little bit. And if you want to give
this thing our rotation, you guys will be able to give this thing our
rotation here as well. Okay? So now I'll just
come here and I will try to position it
quite fine. Okay? I will just try to position
it fine like this. And I will just try to align
it here with the same line. Okay? I will just
align it here in the same line as you guys
can see right over here. And now let's try to
get another position. Okay, let's take this
one right over here. And now let's try to
place it accordingly. Let me just give this thing
a rotation right over here. Okay, let's just place it. And what you can do
is you can just give this thing a rotation
here as well. Right click and now go to layer option and just
send it to back. Okay, I will just select a
different color over here. Now I can just go to
this color option. Okay, I will just take up a different color
over here as well. Okay, let's select this one. Let's try to get a different
color here as well. I will just go back again. Let's just place
it the way it was. I will just place
it right over here. Otherwise, let's just
change the color. Okay, Now I will come here, let's take a different color. And let's go with the dark color or this particular
light color over here. Okay? I will just place
it white like this. If you do want to give any
borders, in that case, you guys can come here and you guys can actually
give some border styles. Okay. Here, if you want to increase the size
of the borders, you guys can come here
and you guys can give some border styles the same way. Come here and just go
to the border size. Let's take this one from here. Let's go to the border option. Let's give this one a
color here as well. Okay. From here, basically
you guys will be able to choose up from
different colors. Okay, let's come here. Let's go down from here. Let's just increase
the border style. Okay, let's come here, and let's put on ten. And let's click Enter. Now for this one, let's come here and let's give this one a dark color, okay? Otherwise, I will
come here, control z. Go to the border color. Let's take a border
and let's try to give this border
a different color. Okay? Come here and let's give this one a color
quite like this. Come here and give this
value of ten and just enter. Okay. So now, yeah, this part looks quite good. Okay, so now the next thing I am going to work
on with the text. Okay, so here into
the text option, now I will just add
up a text box and now I will just write U, I, U, X designing. Okay, Now I will come
here and I will type UX. Okay? So x over here. And now what I'm
going to do is I'm going to decrease
the size of the box. Let's select this one. And now what I'm
going to do is I am going to increase
the font size 200. And I will just click on Enter. Now what I'm going to
do is I am going to come here and now I am going
to take this whole text. Okay, I will just take this particular text and
I will search for the Best font which I can
use it right over here. Okay, let's search
for different fonts. Let's go to the display option. From the display option here, you guys can see there are a lot of things right over here. Let's go to the Zc display and let's try to see
or explore more of it. Okay, here you guys can see. Let's come here and let's
take the stand headline. Now what I can also do
is I place this one, let's the Toque. Hm. Okay. Here you guys can also see
how it actually looks. What I can do is I can just
place it right over here. And maybe I will just decrease the size of this one
quite like this. Okay, now let's select this one. Let's click on Alt. And let's just bring
it down over here. Now what you're going to do
is you are going to select, okay, I will just write design. After writing design, what I'm going to do is I will come here. Let's just increase the size. Let's decrease it
quite like this. Okay, I will just decrease it
quite like this over here. What I'm going to do now is
I am going to write Agency. Let's take this, click
on at, let's come here. And now I will just
type Agency over here. For that, I want to use
some different text style. Okay? So let's go with
this handwriting option. Okay? And let's just
come down over here, let's see which one
looks good. Okay? So here you guys can see I do have a lot of it
right over here. And now I can just come here and now I will
just type agency. Okay, I will just type agency. Let's select this text up. Okay. Let's try to place
it different text. Okay? Let's see, this one. Okay? And let's try to
check all the ones out. Okay, here. As you guys can see, I can come here, I can
just increase the size. Lastly, I will just decrease
it from here as well. Okay. What I can do is I can
just place it here on top. Okay. If I do have
a different color, I will just go here
onto the text color. I will just take up this
one quite like this. Now, let's select
it right over here. Let's just go here on top. I'll just go here
on top as well. Now, this one looks quite nice. Okay. So what I'm going to do, I am going to write,
we are hiring. Okay? What I'm going to do after that is I am going to
place my text accordingly. Okay. Now I will come here. Let's just take a text
box from here. I will. We are hiring. Okay. We are hiring
right over here. Now, let's just increase
the size of the text. Let's select all of this. Okay, let's all these
things right over here. And go for the caps. And now I will just try to
place it quite here as well. Okay, I will just place it here. And if I do want to
increase the size, I can also increase the
size here accordingly. If you want to make it bold. Okay. You guys can
also make it bold. And if you want to tilt it, you guys can also
tilt it accordingly. Okay? If you want to
come right over here, let's go to the elements
option from here. Let's take one shape. Okay, let's come here. And now let's just increase the size of the box.
So I will come here. I will just decrease the size of the box from here as well. Okay, so I will
just come here and now I will just place
it quite like this. Okay, so let's just place
it here in the center. Let's select this box. And now I will just place it
here in one side as well. Okay? So the last
thing what you can do is you can just give your
contact information. Okay? So here you
guys can come and you guys can just give your
contact information. Okay? Or you guys can also
put out the website. Suppose in that case
what I can also do is I can come here and
let's take a text box. Okay? So I will just
add a text box and I will write U.com Okay? So as you guys can see now I do have this particular
thing right over here, and you guys can also
make this one bold. Okay, I will just
select all of it. And from here I will
just make this one bold. And after that I will just give this thing a rotation
here as well. Okay, so I will just
give this thing a rotation from here. And now I will just try to
align it right over here. And what I can do is I can just place this
thing accordingly. Okay. Now, I will just
try to place this se, here in the exact same line. Okay, let's come here. Let's just increase the
size of the text box. Okay. I will come
here and I will just give this one
a straight line. Let's try to place
it right over here. Okay. Otherwise, I can also
place it here. Down part. Okay. I can just place it here
in the down part as well. Okay. I will just take it
here in the zero degrees. I will just take out a text. Okay. I will just take this particular text
and I'll just select it and I'll just change the
color of this text to white. Okay. Here, if you want to
use different textiles, then I'll just go
back from here. And let me just come down
and from here I can use one. Okay, let's take this text type. And here you guys can
basically come here and you guys can actually
work accordingly. Okay, lastly, what you can also do
is once you're done with this particular
apart right over here, let's just select both of this. Let's group it up.
Okay? I will just group both of this accordingly.
Right over here. What you're going to do now is you are going to come here. Let's go to the elevates option. From the elevates option, let's search for background. Okay, I will just search
for background over here. Let's click on to
the Enter option. Let's see what are
the backgrounds. Do I have right over here? Okay, so let's take
this background. And what you're going
to do is I am going to increase the size of the background quite
like this. Okay? I'll come over here and I
will also increase the size. Okay, I will just increase
the size quite like this. What I'm going to do is I'll
go to their option now. I will just send this
one to the back. Okay, here you guys can see. Now I already do have a
background over here as well, if I want to add some graphics. Okay, in that case I
will come here and I will add sub graphics
over here accordingly. Okay, I'll come here. Over here, I will just place
those graphics accordingly. Let's come here and let's just put the graphics
right here as well. Okay, I will just place the
graphics right over here. And let's just
duplicate a layer. Okay, I will just
go control D. Just select this graphics and
place it right here on top. Okay, come here, select
this, Click on Alt. Now again, I will
just place it here. Okay? And I will just
decrease the size. I will just decrease the size
from here as well. Okay? And I'll just place
it here accordingly. Okay? Now, this one
is basically done. If you want to put on
some borders at all, you guys will be able to put on some borders at all
here as well, okay? Yeah. I hope you
guys have understood this class on how
you will be able to make one Facebook
post in Canva. Now, the last thing
which I'm going to do is go to the share option. Go to downloads
and make sure you download it in a PNG format. Okay, so make sure
you download it in a PNG format and just click onto your download button and it will get downloaded quite easily. Okay, so here you guys can see now this file
got downloaded. And I will just name this
file as Facebook post. Okay, So I will just name
this as Facebook post. And I will just save it
here onto my desktop, here in my resource file. And I'll just save
it right over here. Okay, so see you all
in the next chapter. Keep practicing, take
care. Goodbye everyone.
12. Making a facebook video: Hello everyone and
welcome you all to another chapter of Canva
for social media tutorial. For now, this is the
chapter number 11, and here I will be making
a Facebook video in Canva. Okay, I'll be showing you
guys from scratch how you'll be able to do that here in this particular chapter. So let's not waste time and
let's get started here. As you guys can see now I'm here in the home page of
the Canva application. To create a new design. There are different
ways of how you will be able to create a new
design from here. Okay, so if you click here
on to the Create A Design. And if you type Facebook video, okay, so let me just type
Facebook video right over here. Let's click on Enter. And here you guys can see, now I do have a different Facebook video presets
right over here. Okay. So this is
for shop video ad, this is for news Facebook video. Okay? A lot of it. So from here I can
actually take this one, okay, which is ten
D into 108 pixels. Otherwise what I can
also do is I can just go to the
social media option. And from social media I will just click here
onto the Facebook. Okay? And from the Facebook I
can also come here and take this video preset
right over here. Okay. So now once I do have
this particular page here, you guys can see
this is the page, or this is the place where we'll be working onto our video. I'll show you guys from
the scratch how to do it. Okay, so here you
guys can actually see this is into 108 pixels, like the width is ten pixels and also the height is
ten pixels as well. Okay, so this is one way. Okay, you guys can
come here and you guys can take different
presets from here. And you guys will be able to add all of those
into your video. And I'll be showing you guys by doing it from the
scratch over here. So the first thing
in here what you can do is come here onto
the elements option. Okay, so go here onto the elements option and from the elements option,
search background. Okay, so I'll be putting on a
background here on my page. Right over here under
background here, you guys can see I do have a lot of background
under videos. Okay? So I can also use all of these videos
right over here. Okay? As you guys can see. Okay, so here you
guys can actually get the preview of how that
will basically look. Okay, so here also
you guys can see, I do have this
videos and these are some nice animations which you can also use
onto your video. Otherwise, if I just
come down here also, you guys can see I do have a lot of it right
over here as well. Okay, so for me I will just take some photos or I will take
it from some graphics. Okay, so let's take
this particular photo. And what I can do is I will just increase the size from here. Let's just place it
quite like this. Let's come down, let's
increase the size from here. And let's increase
the size from here, this corner as well. Okay, so now what you're going to do is I am going to come here and now I am going
to write sneaker. Okay, so I will just write sneaker and I will
just click on Enter. So here you guys
can see now I do have different
graphics of sneakers. And also I do have a lot of
photos right here as well. Okay, so I can just come
down and let's see, which one should I
choose from here? Okay, so you guys can
come here and just take up any image from here. So what I'm going
to do is I will just click on this image. And what I'm going
to do now is I will go here onto the
edit photo option. And from the edit photo option, I will go to the magic studio. And from the magic studio I will just click onto the BG remover, which will just remove the
background right over here. Okay, So I will just increase the size of the shoe
quite like this. If I do want to give
this thing R rotation, I will be able to give this thing rotation
from here as well. Okay? So let's just place it
somewhere over here. Okay? And what I can also do
is I can come here, I can just add up a new box. Okay, let me just add up a
new box. Let's come here. Let's take this image,
right click, copy. Come here to this box
and click on control. Okay, What I can do
is I will just bring this one and I will just
copy this one first. Okay, so let me just
copy this one from here. Now, I will just drop
this one over here. Okay, control to drop it. And here I have
dropped this one. As I'm here into
the first video, what I'm going to do is now
I'm going to select this one, and I'm going to delete
this one accordingly. Okay, so now. The first thing what
I'm going to do over here is I am going to come onto this option and I will go here on my text option
right over here. Okay, So here you guys
can see I do have a lot of text option from
which I can choose from. Okay, So these are
different presets. Okay, let me just take this particular preset and
let me just put it over here. Okay, I will just
write new drop. Okay, let me just write
new drop over here. Let's take this box again. Let's just delete this one and I will just write new drop. Now what I'm going to
do is I am going to decrease the size of the
box right over here. Okay, I will just decrease
the size quite over here. And let's increase, or let's just place it here
in the exact center. I will just try to place it
here in the exact center. And here you guys can
see now I have just animated this particular
part here as well. Okay, so if I do want to
footstep animation transition. Okay, I will also put
this one over here. Now let's add another box. And what I can do is I will just put that box here in the middle. Okay? So now from here what I'm going to do is I will just come here the same thing. What I'm going to do is I will just take this whole frame. Okay, so I will just take out
the whole frame from here, control C to copy, come here into this frame
and control V to paste. And also I will
just take this one, and now I will just click on Control and come
here and Control, and it will be
pasted accordingly. Okay, now again, I
will just go here onto my Elements option and I will
just clear out my search. Okay, now what I'm
going to do is I am going to place some shapes. Okay, For that I will just
take this shape box over here. Otherwise, under
graphics as well, I do have the shapes which
it will be quite use for me. Okay, I will just try
to see all from here. Okay, let's take this one. And what you can do is you can just take this right over here. Let me just place
it, Let me just increase the size of the
box quite like this. Okay. I will just
this one right here. What I'll do is I will
just type down something. Okay, let's come here and
let's take this one now. I will second October 19, 199 Okay. I will just write this
one right over here. If I do want to go back, I will come here and
I'll just go back. Let's slick this one. Let's
just click on backspace now. I will just write a second. October 90, 99. Okay, now I will just decrease the size of the box
from here as well. Okay, So let me just decrease
the size of the box. It like this. What I can also do is I will just place this
one right over here. Okay. So let me just increase the size of the box
from this side. And let me just place it
right over here accordingly. Okay. I will just place
it quite over here. I will just place this
text here as well. Okay. I will just place
this text right over here. And I will just
increase the size. And what I can do is I can
just place it right over here. Okay? Now I will just put
this one here on top. Okay? Now what I can also do is I will just go
to my elements option. Let's search for, okay, I will be making ad
for the Y from here. Now what I can also
do is if I just click here to the
graphic option here, you guys can see I
do have a lot of graphics option right
over here as well. Okay, I can basically take any of this
graphics from here. Okay, if you do want to take it, you guys will be able to
take it from here as well. Okay, so now I will
just come here. Let's, let's sick, and
let's click on Enter. Okay, So now here
you guys can see, now I do have this
particular box. Let's go to see all. I'll try to get something, the logo like Nike. Okay. So let's come
and search here. If you don't have, you
guys can also explore it. Okay. Here as I don't
have that before that, what I'll do is I will
just come here onto my uploads option and let me upload that particular
file right over here. Okay, so I will just click
onto the upload files option. From here let's go
to the downloads. Okay, so here you guys can see now I do have this
one right over here. Maybe I will just again go
here onto my downloads option. Will just come here and first I will just
extract that file. Okay, so I will come here and let's just try to extract files. Okay, so I will just try to
extract file from here first. And I'll just click on, okay, and here you guys can see now I do have that particular
logo over here. Okay? So now again what I can do is I will just bring
this file over here. Go to upload files option. Okay? And from here
let's go to downloads. And let's take this logo. And I will just open
this particular file up. Okay, here you guys can see now this file is
actually not supported. Again, what I'll do
is I will come here. Let's go to my browser. Okay, I will just come
here onto my browser over here and I will just
try to type something. Okay, so from here I will just
try to download the logo. To download logos, there
are different websites, but I will just
Nike logo download. Okay, so let's see what all options we do have
right over here. So let's go to this
Victors.com Okay, so here you guys can see
now you will be able to download it
from here as well. Okay, so let's just
come down somewhere over here and as this is free, okay, I can just
download it for free. Okay. So here you guys can see I am able to download
this particular file. Okay. So now it will
just get downloaded. Okay. So now what I can also do is I can just save this file. So I will just save it here into my downloads and I'll
just click on Safe. So let me just go
back, right over here, Let's just thing out and the downloading
is completed as well. Now I will just again
go here onto the file. Let's go to the downloads. Okay, And here you guys can see, now I do have this one right
over here and you guys can extract your files
accordingly here as well. Okay, here I have just
extracted the file. Let's try to see what are the files which are
available here. I do have that file
in JP format as well. No worries with that,
I will come here, I will just go to upload
files option from here. Let me just come here
to the downloads. Let's go to this first one
and let's take this JP out. Okay, so now here you guys
can see now I do have downloaded or I have uploaded this file to be
used here in my document. So let's come here
to the first one. Okay, and what I can do is
I can just take this image, go to Edit Photo, and from here let's click
onto the BG remover. Okay, so it will just help me removing the
background over here. Okay, so now I will
just decrease the size. And what I can do is
I will just place it right over here in
the exact center. Okay, I will just place
it here in the center. And what I can do is I
can just click on Copy, come here, and click on
control V to paste it, okay? And again, come to the
last one over here and click on control V to
paste it here as well. Okay, so here I do have
this particular logo. And what I can also do is
I can come here and let me just place it here on
top a little bit, Okay? And now I will just
take another layer. Okay, So for that again, what you need to do is
if you just click right over here and you can
just duplicate this page. Okay? So if you want
to duplicate the page, you guys can basically duplicate the page
from here as well. Otherwise, I can just
select all of it. So let's just select all of it. Click on control C to copy, add up a new page and click on control V to paste
those things out. Okay, so I want to take
the background as well, so I will just come here, Click on control C, come to this option, and
now click on control V. Okay, so now I will
just right click, go to the layer option, and I will just send both
of these to the back side. Okay, so now from here, so this is the first page, okay? And I want to time this
one for 3 seconds. And I'll just click on Enter. You just need to come here on top to the edit timing option. And the timing will be
edited accordingly. Okay, so come here to this video as well.
Just click here. And let's select the
timing to 3 seconds. And now I will just come here and over here now I
will just time this. For two, and right over here. And lastly, I will just put this timing as 4
seconds over here. Go to this timing option. Click on four and right
over here as well. Okay. Now here also, I want to put on some text, in that case here,
select the text file. Okay? From the text file, what you can do is
you guys can come here and choose your
file accordingly, like which one you
do want to use. Okay, let's come here and let's take any of this from here. Let's go with some
glowing colors. Okay, let's just come here and maybe I will
just take this one. Okay, I will just
select this one. Now I will just click
on to the backspace. Okay, come here and
first ungroup this one. And what you can do is
just click outside, select this one, delete this, and delete this one as well. Okay, come here and select this. Now you guys can delete
this one as well. Come here, and what
you can do is you can just edit up the text now. Okay, I will just
type here 09. Okay. So I will just put on a 09. And if I want to edit
my text here as well, I will be able to edit
my text here as well. Okay? So in that case what
I need to do is you need to go here onto the
Eff option, okay? And for the effect option, if I do want to
put up an outline, I will be able to put on
any outline here as well. Let's take a outline
of the white color. Okay? So I can just take the outline of a
white color here. I can also change the
text color as well. Okay? So let's check which
color looks good. So you guys can
come here and check the colors over
here accordingly. Okay, I'll just take
this particular color. Okay? I'll just take
the basic black. What I can do is I will
just check the positioning. Click on control, come
here and select this box. And I will just delete this one. And I'll just click
on control V to copy and paste in
the same place. Okay, now come here. Otherwise go back. Okay, come here and just
select this layer control. Come here, click on control V to paste it
here in the same place. Let's take this text box. And what you can do, just
decrease the size of the text. And now you can just
place it here in the exact middle or here
in the exact center. Okay, Now here, this
one looks quite great. Okay, if you just want
to see a preview, you guys can come here and also see the preview
here accordingly. Okay, I will just abate
all of these layers. Okay, here you guys can see, I will be able to Adb
all of this properly. Let's give this one
simple adimation. Let's come to this
page from here. What you can do is, if
you want it to come here, if you want it to
move on a slick, let's try those things out. Okay, so here come to
the animate option. From the animate option
here, you guys can see. Now I do have a lot of this
right over here as well. Okay, now I will just
animate only this part. Okay, so if I do want
to animate this one, and this particular box, I will just select with shift. And I'll just animate
both of this, okay? So now I will just
select the rise option. And what I'll do is I will just decrease the speed
of both of this. Okay? So now I will just decrease the speed
of both of this. Now let's come here. And what you can
do is you can just animate the total page, okay? After that, let's check out
which one looks good here. If you want to individually
do all of those as well, you guys will be able
to do it from here. Okay? So here you guys
can see photo zoom, okay? And a lot of things here, okay. You want a fate type of thing, You guys can also get the
fate. Things like this. And lastly, you
guys can come here, select only this text. And what you can do
is you can come here and you guys can this option, otherwise if you
want it to roll, you guys can actually roll
right over here as well, okay? And here also, they do
have a lot of things. If you do want as a typewriter, they will be put on as a
typewriter here as well. Okay, I will just come here and I will just
decrease the speed. Okay, so this is how it
will basically appear. Okay, so now let's see a
preview of this whole video. Okay, so let's come here
and just, let's play it up. Okay, and after that it
will just come like this, and now it will just
reappear here on the screen. And here it basically ends. Okay, So if I do want to put up any transition here in between, I will be able to put some
study transitions, okay? So if you want to select
the dissolve option, okay, So here you guys can see the
dissolve option over here. If you want to just increase it, you guys can increase
it from here as well. If you want to apply
between all pages here. I have just applied
between all pages as well. Now let's just play it up. Okay, And now here you guys can see this one
looks like this. And lastly, here, you do have this one right over
here as well, okay? Now, I will just come here, I will just, uh, move this transition, okay? If you do want to change, you can also put this, okay, come here, go to this
option and last one as well. If you want to put anything, you guys can click on none. Let's try to see the preview. Okay, so this is how it
will appear on the screen. Okay, let's check this one. I will just delete
this top part. I will just ungroup this one. Let's now play it again. Okay, let's come here. Let's just play it up
right over here. Okay? What I can also do is
let's select this one. Suppose I will just
select this whole frame. Okay? So if I just select
the whole frame over here, and you guys can see this one is simple and I just want
it only on Enter. Okay? I just want to use
this one on on Enter. Let's just play it and let's
see how it actually looks. Okay, and this is how
it will just appear. Yeah, this one
looks good as well. Okay, so I'll just come
here onto the third one. I will just go here onto
the fade option also. I just want this thing on enter. Okay, now let's see
the preview again. Okay, so let's come here and let's try to
see a preview here. Now, this one looks better. This is the ad which
I have just created. Okay, The last thing
what you need to do is if you want to add
more graphics and stuff, you will be able to add
more graphics to it. But the thing which you
need to do, basically, is you need to come
here and you need to lock all of these pages out. Okay, if you just
want to lock it up, you can come here and
just come to this option. Let's log this one as well. Come here and just
lock this one. And now you guys can log
this one here as well. Okay, the total duration of
this video, 0.4 seconds. Okay, so now you can
see the preview. But if you want to
make any changes, you won't be able to make
any changes right over here. Now let's play it up and
this is how it will appear. Okay, now again here you
guys can see the shoe, and here this is the
type writing effect. Okay, once you're done here, you guys can go to
the share option. From the share option, go
to downloads from download. Make sure your file type is P
four video and the quality, you guys can actually work on
with the quality over here. But my quality is quite fine for my Facebook video and I will
just click on download. And here you are done with
this particular thing. And so what you also want
to do is you want to come here onto the
Elements option and you want to add
some music as well. Okay, so in that case here
you guys can come onto the Elements option and here you guys can have
your audio file. And here you also do
have different choices. Okay? Do you want an upbeat? Do you want to fun music? Do you want to love
music or piano? Okay, so there are
a lot of options. So let me just take an upbeat
music right over here. And let's just play it out
and listen those things out. So you guys will be able to use all of this right
over here as well. Okay, so now this file
is being downloaded, and I will just name this
one as the Facebook video. Okay, so I will
just name this as the Facebook video over here. Okay, so I'll just name
this one Facebook video. And I want to save it
here in by downloads. And if you want to
add some music. Okay, you guys will
be able to add some music from here as well. Suppose if I just
take this music and what I can do is I
can just select this. And here you guys can see, now I will be able to
increase the five. Okay? So from here I
will just this one. Now here you guys can see, now I do have the music
right over here as well. Let's take this one and I
will just delete this one. Okay, so I will
just click here and I'll just click on
to delete track. Now here I only
do have we track. And last, let's see the preview. So yeah, I hope you guys have
understood this class on how to add your audio on
your video as well, Okay. And also how to create a
stunning Facebook video. Okay, so hope to see you
all in the next chapter. Till then, take care
and goodbye everyone.
13. Creating facebook shop logo: Hello everyone and
welcome you all to another chapter of the Canva
for social media tutorial. So now we are on our
Chapter number 12. And here I'll be
showing you guys by creating Facebook shop logo. Okay, so how you'll be able
to create a logo if you do have an E commerce
store in Facebook. How you'll be able to create
a logo in Canva for that. We'll be learning about all of that here in this
particular chapter. So let's not waste time
and let's get started. So here as you guys can see, now I'm here in the home page
of the Canva application. So the first thing, what I
need to do right over here, is you need to go to your
social media option. And under the Facebook subtopic, you come here and take
the Facebook shops logo. Okay? So you will have a blank document or
500 into 500 pixels. Okay? So basically here only
I will be creating my logos. Okay? So if you want to
have any rulers at all, in that case, you
guys can come here. Go to the File option, and File options, go
to View Settings, and click on Show
Rulers and Guides. Okay, so come here and just put on the guides over
here accordingly. So I'll just put one ruler here and I will just place one
right over here as well. Let's come here and let's just
place it here in one side. And this one also, I
will just place it here in one side as well. Okay, So now here you guys
can see now I do have this particular place where
I will be making my logo. Okay? So for that the first
thing what I need to do is you need to come here and
go to the elements option. From the elements option, what you can do is you
can search for house. Okay? Suppose if I'm making a logo for a
furniture company. So what I'll do
first is I will just come here and I will
just type on furniture. Okay, so I will just
type furniture. And I will click on Enter. And here you guys can
see under graphics, I do have a lot of
graphics right over here, which I can actually use. Okay, so you guys can come here and
check out all of this, and you guys can place
things accordingly. Okay, so if I just take
House over here as well, let's search for House, and let's click Enter, and let's check
out for graphics. Okay, so here also
you guys can see I do have a lot of graphics
right over here as well, from which I can choose from. Let's take this right
over here, okay? And if I do want to
increase the size, I will be able to increase
the size from here as well. Okay, so let's keep this
thing here in one corner. And let's try to place it
here in the exact middle. So I will just place this one
here in the middle itself. I will come here if I do
want to increase the size. Let's just increase the size
quite like this as well. Now I will come here and I
will take this text box. I will just stick here. And I'll just add up a text
box right over here as well. Now if you want to delete it, click onto the delete
option from your keyboard. Okay, I will just
take this text box. Now I am going to fill
this with text over here. Okay? Now I will just
type my things down. Okay, let's Paradise Furniture. Okay, So I will just write
Paradise Furniture over here. Now what I'm going to do is I am going to select
all of this text. Okay? Now let's select all of this text up from here.
Let's select this. Let's come here and let's
just select all of this. And let's make it bold. If you want to increase
the size of the text, you guys will be able to
do it from here as well. Okay? Now, come here. And what you can do
is you can just place it somewhere right
over here accordingly. Okay? So I will just place
this one right over here. And now, again, if you do want to change the
color and stuff, you guys will be able to change the color and stuff as well. So now let's place
it right over here. And I will just place it here in this particular
corner as well. And what you're going to do is now go to the elements option. And from the elements option, what you can do is you
guys can come here and you guys can actually put on
some more graphics. Okay. So if you just come here, you guys can actually
check these things out if you do need any
of it right over here. Okay, So I will just take
this one, let's take this. And what you can also
do is you guys can come here and let's delete
the first one. Let's come here and let's place it right over here as well. Okay, so if you want to
decrease the size, okay, so if I just double click, if I do want to crop it up, okay, I will be able to crop this thing down here as well. Okay, so I will just
place it right over here. If you do want to crop it, you guys will be able to
crop it from here as well. Okay, let's just drop this part, and let's click on Enter. Okay, after that,
you guys can just put this right
over here as well. Okay, I will just try to put
this thing right over here. What I can do is I will just
align this here as well. Okay, Let me just
align it properly. What I can also do is I will
just come here and let me just increase the size
of the text as well. Okay. I will just increase
the size of the text as well. Okay, let's come here now. Let's just place it right
over here accordingly. Okay. I will just place this right over here onto this line. And now I am going to take
another new line as well. Okay, so let me just type line. Okay, And let's
click on Enter here. You guys can see now I do have different lines right
over here as well. Okay, so here you guys can see I do have different
lines over here. Let's take this line. And what you can do is you guys can come here and you guys can just
place this accordingly. Okay? So if I just come here and let's keep this slide
right over here. If you do want to bring it down, you guys will be
able to bring it down from here as well. Okay? So here you guys can
see I do have the logo, and after that, again, I will just clear my search. Okay? And after that I will be taking on some shapes around. Okay? So I will just take
some of the shapes from here. Let's take this one. Okay, so let's come here, let's bring it down
quite over here. Let's place it into
this particular line. Now let's decrease the size. And what you can also
do is you guys can come here and you guys can
increase the size. Let's decrease the
size from here. And I will just give this
shape a different color. Okay, let's check which
color basically looks good. If you want to use some
other colors from here, you guys can also check out different color
options here as well. Okay, here you guys can see, now I do have this color
over here as well. The next thing what
you're going to do is you are going to use
some different text. Let's see what are
the text type, which we can actually
use right over here. Let's select all
of this from here. Let's go to the type
tool option from here. Let's check which one
actually looks good. Okay, this one is
the Carter one. And here you guys can come down and check
those accordingly. But let's come into
this option here also, you do have a lot of
option from which you guys will be
able to choose from. Okay, here you guys
can see these are different types of phones which you will be
able to choose from. Let's just keep this one
right over here and if you do want to place it
on top a little bit, you guys will be able to
place it here on top as well. Okay? Suppose here
I want to take a different color as
the background, okay? I can also do that, but let's try to finish up
this thing first, okay? So now what I'll
do is I will come here and I will just
try to take a frame. Okay, so let's search for frame. Click on Enter, and
here you guys can see I do have frames of
different sizes. Okay, let's take this frame, and what you can do
is you guys can just decrease the size of the frame. And you guys will be able to
put those sizes accordingly. Let's try to maintain the
sides over here, okay? If you do want to decrease it, you guys can come
here and decrease the size quite like this. Okay, Let me just
place it over here. Now, you guys can come down and you guys can also place
those things accordingly. Okay? Now let's just keep
this thing right over here. Also here on the
right hand side, you guys can place it here. Okay? And now let's
just put up an image. Okay? Or you can also give
this a different color. Okay? So you guys can
come here and can give this one different color. Okay? So you guys
can come here if you want to use
subgradient colors, you guys will be able to use subgradient colors here as well. Okay? So you guys can
see this is the letter. If you want to give
this one any stroke, come here onto the stroke
option and you will be able to give some strokes
over here as well. Okay, so here you
guys can also come and if you want to go for
any other border style. So let's come here
and let's take some different color
to the border style. Okay? So I will just come here, I will just go back. Okay? And this one
kind of looks good. Okay? So now what
you can also do is I don't want this particular
line here on this side, Okay? So for that, again, I will just take
another frame, Okay? And what I'm going to
do is I am going to place this frame
quite over here. And now I am going to
decrease the size. And let's, let me
just come here. If you do want to
increase it here, you guys can also increase
the size accordingly. Okay. Now I will just
select this box. And what you can do is
go to the color option, and now select a white color, and this is how your logo
will be looking, okay? So here, this is how
you guys can see if you want to make
any changes, okay? You guys will be able to make some changes accordingly, Okay? Suppose, let's take
different shape, okay? So, if you do want to take
some different shape, okay, you guys can also take some different
shape over here. So now let's come and if
you guys want to just, uh, group all of this thing,
you guys will be able to do it from here as well. Okay, suppose, let's go to the elements option
and let's search what are the different
graphics you will be able to use over here as well. Okay, so here if you just
check out different shapes, you guys can also explore that. Yeah, you will be able to use on two different styles
right over here. Now from here, let's
take this one. And what you can do
is you guys can come here just right click
onto the mouse. Okay? So just right
click, go to layer. And here you guys can just
say thing to the back. Okay, come here and if you want to send this
thing to the back, you guys can also
do that from here. Okay, Let me just move that thing on top a
little bit, okay? You guys can come
here and you guys will be able to move
this thing here on top. If you do want to give
this one different stroke, you guys can come here, go to the stroke option. And here you guys
can see now he also, you guys will be able to give this thing a different
stroke as well. But here if I want to place it in between, I can also do that. For that again, I will
come here and now I will just try to place it
here in the exact center. Okay, For that again, I
will select this one. Let's try to take some
different colors. Okay? So let's check which
color looks good. Okay, So let's take this one and let's just save it
up accordingly. Okay? So here you guys can see, now I do have this
particular logo. If you want to put this logo
inside any box or anything, you guys will also be able to
do that from here as well. Okay, so now suppose if I will just select
all of this layer. Okay, I have just
selected all of this. And what I can do is
I want to just come here and I want to
change those shapes. I will be able to do that. Otherwise I can just come
here onto the effect option. And from the effect option here, you guys can see I can just
change those text box up. Okay? So I can come here and I can just do it
from here as well. Okay? So now, for now, let's see what are the
changes we can do. If I want to give some
border style here as well, I will be able to give on some new border style here in this particular
corner as well. Okay, so this is the basic
style right over here. Okay, so here you guys can
see I have just adjoined this place and now I have just aligned this
one here as well. Okay, so here again, also I want to put
on some graphics. Okay, so let's
search for a tree. Okay, so I will just search for tree right over here
and here you guys can see I do have a lot of tree graphics right
over here as well. So you guys can choose which one you guys want to take
right over here. Okay, so you guys can come
here and let's take this one. And what do you want to do is
you just want to put this. Right over here on top, okay? So you guys can come here that you guys can able to
put this thing up. So in that case,
just right click, go to the layer option. And here you guys can click on send backward,
Right click again. Go to layer, send
backward, okay. So here you guys can see, now I do have send
this particular thing here on the background. The next thing what I'm going to do is go to the
elements option again. And from here take this
particular shape, okay? So now I will just take
this particular shape. And what I'm going
to do is I am going to put up this shape
right over here. And now I am also going
to come quite like this and I am going to change the color of this one to white. Okay, let me just get this one color to white
and go to layer option. Okay, from here what I'll do is I'll just click on
set backward again. I will just go to
the layer option. Okay? I will just
click on set backward. And the same way,
right here again. Okay, I will click over here. Otherwise, let's select
this and go to layer here. I will click on set
backward option again. Go to layer. Set backward
over here as well. Okay? If I do want to put it
somewhere over here, okay? So you guys can actually see that I'm trying to put
this one here accordingly. Okay? In that case now I
will just try to come here. And the best thing, what you can also do is
you can come here and you can just click
on this image here. Go to Edit Image option. Okay, from the edit
image option here, you guys can see I
do have a lot of things which I can
actually work on with. Okay. If you want to change it to some
retro mode and stuff, you guys will be able to
do it from here as well. Okay, so let's try to
put it right over here. Okay? Otherwise I will just try to put
some other effects. Okay, so now let's click
on to the delete option. And let's search for wood. Okay, I'll search for wood and I'll enter right
over here again. I will come here onto
the graphics option. From the graphics option, what I can do is
I can come here, I will just place it right
somewhere down here. Okay, let me just place it
down somewhere over here. Let me just keep this
thing here accordingly. Okay? I'll just place
this one right over here. What I can also do is if
you guys can come here, I will try and I will
just put on some shapes. Okay, go to the
elements option again, take this particular shape, let's just decrease the size. Okay? And let's come here. Let's select this.
Let's go on top. Let's come here. And I will
come down here as well. What I'm going to
do is with Alt, I will just duplicate
this layer here. Now I will just try to
put out this layer. Okay, I will just come here. What I'm going to
do is I am going to just put on some lines
right over here. I will just give this one
white color, okay, here. If you try to see this is how it will basically
look the same way. Come here, okay, Place
this one right over here. Otherwise, you can
just move this one a bit here on top as well, Okay? I will just place
this one here on top. And what I'm going to do
is I am going to come here and I am going to put on
the white color over here. Go to colors, select
the white color. Yeah, this one looks better. Let's move on the
graphics again. I will take another
box quite like this. What I'm going to
do is I am going to place that particular
box here on top. Okay, I will just come here, Let's place it and let's try to place it
here on top again. I will just come here
and I will just try to place this box here
in the top as well. Let's come here, let's just
position it accordingly. Go to the shape color, and from here select the
white color as well. Okay, so here you guys can see I do have selected
the white color. Let's come here and let's
put on no border option. What you can also
do is come here if you want to increase the size, you guys can also increase
the size over here as well. Let's come here, let's just put on the size
quite like this. The last thing what
I'm going to do is I will right click over here. Otherwise I will just
place it over here. Right click. Go to the
layer option. Okay. From the layer option, I will just click on Bring to Forward. Yeah, I will just place it
here in the exact center. Okay, I will just place it
here in the exact center. This is how my logo
will look like. Lastly, what you can
also do is you guys can come here and just
delete all of this. Okay, delete this ruler because I've done working
with all of those. I can just place it back
where it was again. Okay, I'll just place
it right over here. And I'll just place
it here on top again. Now all the icons which I
have here on this page, what I can do is I can just
group all those thing up. Okay, so now I have just
group this thing up, and if I just move it anywhere, I will be able to move
those things accordingly. Okay? So here now I do
have my logo ready. Okay, So the next thing what
I'll do is I will go here onto the share option and from share option go
to the download page. Okay, so here again I will just come and I will just
try to download it. Let's select the
download option. And here you guys can see
the file type is PNG, If you want in a JP format, you guys can also
take in a JP format. And I don't want any
transparent background to it, so I will just click
on download and this particular file will
get downloaded for me. Okay. So I hope you guys have understood how you
will be able to create a logo for your
Facebook account, okay? Like if you do have
any business, okay? How you will be able to do that home to C in
the next chapter. And keep on practicing the Canva for your
designing skill E, and take care everyone.
14. How to create a tiktok video in canva: Hello everyone, and
welcome you all to another chapter of Canva
for social media tutorial. Now we are on chapter number 13. Here I'll be showing
you guys how to create a Tiktok video in Canva. Okay, We'll be learning
how you will be able to create a Tiktok video in Canva. Okay, let's not test time, let's get started here. As you guys can see, now I'm here in the home page of the Canva application from here. The first thing, but I
need to do over here, is I need to go to
create a design. From here, let me search, talk. Okay, so here you guys can see I do have the Tiktok
mode right over here. If I want to create
a Tiktok video, the size is ten AD
into 1920 pixels. Okay. Now from here
what I'm going to do is I am going to click
right over here. And now it will create me
a blank page for my video. Okay, there are
different templates here on the left hand side which
you guys can also use. Okay, for me what I'm going to do is I am going to make
one from the scratch. For that, the first thing
what I need to do is you need to create a video
right over here. Okay, so for that, let me come here onto the
elements option. And from the elements option, I will just search for talking. Okay, So I will just
search talking, and I'll just click on Enter. And here as you guys can see, now I do have different
videos which I can actually use
right over here. Okay, so here you guys can see, now I do have this
particular video. What I can do is I
can just drag and drop this video right over here. Okay, so here you
guys can see I do have my video right over here. And what I can also do is if
I do want to bring it here, if I just want to
position it properly, I will be able to position
it properly as well. Okay, so I will just
position it and I'll just try to keep this here
inside my frame. Okay? And what I'm
going to do now is I am going to click
on the Done option. And here you guys can
see now I do have this particular video right
over here on my screen. Okay, so now I will just
decrease the size of the video. So from here also I
can come and, yeah, 4.5 seconds is fine. Okay, so let's check the
preview of the video from here. Okay, so let's bring it
here at the starting. And now here you guys can see this is the video which
I do have over here. And what I'm going to
do now is I am going to go again to my Elements option. And if I do want to
put on some graphics, okay, I will be able to put
on some graphics as well. Okay, so I will just click
onto this graphic option. Let's go onto the
search option and let's try to see the
graphics from here. Okay, so here you guys can see I do have a lot of options, okay? If I want to search anything
in particular, okay, I will also be able to do
that from here as well. Okay? If I do have anything in
particular in my mind, suppose I want to put a tree, or I want to put any
kind of icon over here. In that case, I will be able to put those things
right here as well. Okay, here you
guys can see here, these are some
hand drawn animals here, some organic rainbows. Okay, so you guys
can come here and check those things out as well. Okay, from here, let
me search for bubbles. Okay, so let me search
for bubbles over here. And let's click Enter. Okay, so here you
guys can see I do have lot of options which
are right over here. What I can do is
I can come here, and from here I can actually
add this particular box. Okay, this icon right over here, let me just increase the size. And what I can do is I will just place it here a bit down. Okay. I will just try to
place it quite over here. And what I can do is I can
just go to my text option. Okay. The text option,
I will come here. I can basically choose
from my presets. Okay. Here I do have a lot of presets and this were the
recently used one. Okay. Which I have just used. Okay. Then from here, what I can do is let's search
for three best restaurants. Okay? So from here what I can
do is I can come here and let's take this
particular text box. Okay, I will just click here
onto the text box option. And here it has
created me a text box. From here, let me
click on Backspace. And now I will just write, okay, three restaurants to visit. Okay, I will just keep
this one quite like this. And what I can also do is I
can just click on Backspace. Okay, so I will just come here. Let's only click three. And what I can do is I can just increase the size of the text. Okay, So I will just write
three again, right over here. And now I will just decrease the size of this one
quite like this. And what I can also do is
I will again come here, Take one textbox, let's
write just three. And I can actually increase
the size right over here. Okay, so I will just come here. Let's take this option. And what I can do
is I can come here. Now, I will just change the font of this
particular letter. Okay, so I will just double
click right over here. And let's see what all fonts do I have
available right over here. Okay, so here you guys can
see there are a lot of fonts. Okay, so here, these are a
few of the uploaded fonts. Okay? You can also use
different textiles, and if you do have any, anything particular in your mind which you
do want to use, you can also use
those accordingly. Okay, so let me take
something in bold. Okay. So here you guys can see, I do have all of these options
right over here from here. Now let's take this
one and let's see how it will basically appear
here on my screen. Okay, so let's come here
here. I do have the three. If I do want to give this
one a different color, I will come here and I
will just try to give this one a different
color. Let's take white. And from here let's go
to the effect option. From the effect option, I will just choose
a black outline. Okay, so I will come
here, select this, and let's take a black
outline over here. And now I will just
place it. Okay, three. And now again I will
just take another box. And from here now I will
type restaurants to visit. Okay. I will just take
this particular text box. And what I can do is
I can just increase the size of the text
box from here as well. Okay. Now here as
you guys can see, if I do want to
increase the size, I can actually increase the
size from here accordingly. Okay, So now I have
selected this box. And what I can do is I can just place those accordingly
right over here. And I will just
select all of it. And from here now, let's try to see which one
can I basically take and which one is quite visible
or which one will look nice. Okay, so I can come here
and I will just increase the size of the text
box here as well. I will come here, Let's
write this thing up now. Let me just take
this text box and I will just place it accordingly. Okay, I will just come here
and I will just increase the size from this end and
from this end here as well. Now let's try to place
it right over here. Let's decrease the
size a little bit. Let's try to decrease
the line spacing. Okay, I will come here
and I will just try to decrease the line spacing here. If I just take
onto the graphics, if I want to give these
graphics a different color, let me come here and
let me just change the white to some red. Okay, let's come here and
let's take this color. And what you can do is this
is how it will actually look. Okay, here you guys can see. Now, I do have three restaurants to visit right over here. Okay, what I can do, I will come here and I will
just animate this layer. Okay, select this one. And select this using Shift
and also the Graphics option. After that, you
guys can directly go on to the animate option. From animate option,
what you can do is you can just check which
one looks better. Okay, If I just take
this span option, I will just decrease
the speed like this. I will just come here. What I can do is I will
just add two more pages. Okay. I will just come here. I have just add
total three pages. Now what I'm going to do, I am going to put up and go to my Elements option
again, clear my search. Okay. I'll just come
here from the videos. I will go from the videos. What I'll search is I will
search for restaurants. Okay. I will just for
restaurants over here. And I will just click Enter. Okay. Let's come here. And I will just die
for restaurant. And I'll just click
right over here. Otherwise, I will search here. You guys can see I do have different restaurants
video right over here. What I can do is I
can come here and I can just check all this out. Okay, I can just
bring this one and I can just place it
right over here. Okay, I will just
place it over here. And what you can
do is right click and set video as background. Okay, In that case, if I do want to move this apart, you guys can also move
this out quite like this. After that, I will
just click onto the Done option and I will just decrease the timing to
4 seconds over here. Let's come to this option. And from here what
you can do is you can just type 44 and click on Enter. Now here I do have this
one for 4 seconds. Now if I just play
this one up, okay, here only this particular part, it will be placed for 4 seconds. Okay? After that, let's
come to this video panel. Okay? From this video panel, what you're going
to do is you guys can come here and you guys can actually take this video and drag and drop
it right over here. Okay? Go to this
playback speed option. And from here let's search
for 4 seconds here as well. Let's come to the last
one right over here. Also, you just can put up a different image or
a different video, and you can just place it, go to the playback time, and from here just type four
and click on Enter, okay? So now I do have all
of these videos, okay? If you want to work
on with the framing, okay, You guys can also
do that from here, okay? As you guys can see, if I just play up this video, it will appear like this. And after that, here,
you guys can see, I do have this video. After that comes this one. And lastly, the last video
which I do have over here, it will come like this. Okay, so what I'm going to do is I will come here
to the first video, and now I will just
use my text box. Okay, so I'll just come here, take my text box. And from here what I'm going
to do is I am going to take this particular text, which I have right over here. Let's take this text box. And what I'm going to
do is I am going to write one restaurant bar. Okay. I will just go back again. I will just take
only the text box. Okay. From here. Now I will just come here and I'll just kick on backspace, one dotage bar restaurant. Then what I can do is I can just place this
thing accordingly. Okay? I'll just try to place
this thing accordingly, and I'll just decrease
the size from here. What I can do is I will just
take this text box now. I will just try to put
it right over here. Okay. If you want to
give up any outline. Okay, you guys can come here, go to the effects option. Okay, you guys can also
give this thing outline. Okay, let's go with some
black outlines onto this one. Again, what I'm going
to do is I am going to increase the tech size. Okay, I'm just going to
increase the tech size. Let's keep this box right here. And now here you guys can see
if I do want as list view, I can also have it as
list view as well. Here, I will just fix
the line spacing. Okay, I do have fix the line
spacing right over here. And what I can do is I can
just keep this here on top if you want to give a box and all
underneath this one, you guys will also be able to do it using the elements option. Now go back here and go
to the shapes option. Once you have taken the shape, what you can do is
can come here on top and now just increase
the size of the box. Now place it here in
the exact middle. And go to the box option. From the box option, what you
can do is you guys can come here and from here you guys just give this
one a black color. Okay? So now what I'm going to do is I'm going to
click on Shift. Take this one and take this box. And now just groom
both of this thing up. And once I select this, both of this thing
will get selected. Just copy this one. By right clicking on your mouse, come to this option,
and what you can also do is you
guys can come here. Click on the Paste
option, right over here. But here what I want to do is I want to change
the positioning. Okay, so the color and each and everything is quite
fine over here. And now I will just come here and I just only want
to change the text. Okay, so I'll come here. Let's go back. Let's write two and I will write Aristocrat. Here, I will just
put Strat Cafe. Okay, so here I am done with
this part here as well, and I will just place
it right underneath. Okay, lastly, what I'm going
to do is I am going to come here and I will just click
on control V. Again, what I can do is
I can just double click onto this particular part. And I will just delete
those accordingly. Okay, I will just write
three after that, what I'm going to
do is I am going to come right over here and I am going to write
the name as Rave Cafe. Okay, I will just write cafe. Okay, so here I do have those three restaurants
right over here. So the next thing
what is left doing is I just want to animate
this one, okay? So if you want it
to fade in here, you guys can see, you guys can actually choose this
particular option. And now I will select this
go to animate option. And from here, if you want it to derise or if you want
it to wipe in here, you guys can use all of this. Otherwise you guys
can come here and also use the type writer effect. Okay? And now for the
type writer effect, what I will do is I will
just decrease the speed. Okay, come here. And again, what you can do
is select this one, okay? This particular box
right over here. Go to the animate option. And from the animate option, make sure that you come down. And here you guys will be able to choose the things around. Now, I will just come here. Let's take this. And what you can do is go to the
animate option. From the animate option, you guys can also choose
the typewriter option. I will just decrease the
speed from here as well. And lastly, come to the
last one right over here. And what you also can do is select this particular textbox. Okay. From here you
guys can come down. And you also, let me just select only this part and I will use the
typewriter effect. And I will just
decrease the speed of the text here as well. Okay, now I have
just selected this. Let's see the preview. Okay, how it actually looks. Okay, if you want to put on some animation over here here, you guys can see. Now I do have this
particular video and here you guys
can see now again, it will come right over here
and it will just disappear. And it will come like
this and it will also disappear from my screen. Okay, let's, let's select this. Go to the typewriter effect. And what you can do
is you can come down and here you guys
can select on both. Okay, now let's see the preview. Let's come right again
at the beginning. Now let's just play
it up and here you guys can see now
it will just go back. Okay, so this is
how you guys can actually make a Tiktok video
for your Tiktok account. If you want to put more graphics
according to your need, you guys will be able to put on more graphics here as well. Okay, so here if you do want to put up any
transition in between, you guys can come here and let's go to the
transition option. And from the transition option, what I can also do is
I can just chop in, okay, so here under
the chop option here, you guys can see I just want
to chop it from this side. And here you guys can
also check the origin. Okay, so here you guys can check the origin
quite like this. Okay? So I will just
select this one. And what I can do is I want
to apply it to all the pages. Okay? So now let's
see it over here. Let's just play
this thing up and here you guys can see now
it will just chop in. And after that, again
here you guys will be able to see that
it has chopped in. Okay, so here you
guys can see I do have the whole video
right over here. Okay. And now if I do
want to add some music, so I will just go for the music. The option from here. Okay, Option. What I can do is I can come here and I can just
check out all the. Let's take this, let's try to listen to that
from here as well. Okay? So I'll just keep
this one right over here. And now I do have this
particular audio. Okay. Now, let's
just play it up. Yeah, he, I remember that. So, yeah, I hope you
guys have understood how you will be able to
make a Tiktok video. Last thing which you need to do is go to your share option. From share option, go to
download and from download, make sure you do have the MP four video option
right over here. And now from here
what I'm going to do is I am going to click onto the download option and it will get downloaded accordingly. Okay, so hope to see you
all in the next class. I hope you guys have understood now how you will be able to make one Tiktok video
for your Tiktok account. So take care everyone
and goodbye.
15. Creating a youtube banner: Hello everyone, and
welcome you all to another chapter of Canva
for social media tutorial. Now we are on our
chapter number 14. Here I will be creating a
Youtube banner in Canva. Okay, we'll be learning about that here in this
particular chapter. Let's not waste time and
let's get started here. As you guys can see, now I'm here in the home page
of the Canva application. So the first thing what you need to do is you need to come here, click on to the Create a Design. From here, what you're going
to do is you are going to type a Youtube banner. Okay? So I will just
type Youtube banner. And here you guys
can see I do already have a lot of recommendation
right over here. Okay? So I will just take
this tube banner size and it will just create be a blank
document right over here. Okay? So to create one. Okay, so as you want your Youtube banner to
be totally visible, in that case, what you need
to do is you need to go here. You need to come here
onto the file option, go to View Settings, and click on Show Rulers
and Guides option. Okay, so here now as
you guys can see, now I already do have
my guides over here. Okay, so here you guys can
see this is the ruler, and here I already
do have my guides. Okay, inside this page for that. Now the first thing
what I'm going to do is I am going to come here, go to the limits option. From the limits option, I will be taking one shape. Okay, let's take this shape out. And now I will just increase
the size of the shape. And let's click on Shift to
make a proportional size. Once I've clicked here, I will go to the
position option. And I want it to position
it here in the center. Okay, so now I have just positioned this thing
here in the center. And what I'm going to
do now is I am going to increase the length
from the sides. Okay, so I'm going to take
the length from the side. And here as well, I
will just increase the length from the
side over here as well. Okay, now go to
the ruler option. Come here and let's
place it just on top. And let's come here. Let's take another ruler, and let's place it here
on top down as well. Okay, and now what you can basically do is you
guys can come here, select this box, and just
click onto the delete option. Okay? So in this particular part only I will be doing
all the designs, okay? So once you put
this image there, it will be visible totally. Okay, so now the first
thing in this case, what you need to do is
you need to go here onto the elements option as I am
already right over here. And let's try to
take few frames. Okay, So I will just come down, let's go down using my mouse, and let's search for frames. Okay, So in frames, what I'm going to do is I
am going to click on CL. Now I am going to take this
frames right over here. Now what I'm also
going to do is I am going to decrease
the size of the frames. If you do want to give any
rotation to your frames, you guys will be able to give some rotation to
your frames as well. If you want to
decrease the size, you will be able to decrease
the size from here. Just click on this one. Click on At now. Just duplicate this
layer over here. Okay, I will just duplicate
this layer again. What I'm going to
do is I am going to overlap right over here. Again, I will select this one. Click on Alt again, I will just try to overlap
over here as well. Okay, so I will just try to
overlap right over here. And next thing what
I'm going to do is first I need to think about
what banner I'm making. Okay, so is it about what my Youtube
channel is all about? Is it about health
and well being, or is it about some
business model, or is it about some tutorials? Okay, so I need to
think that one and I need to just put on all of
this thing accordingly. Okay, so here as
you guys can see, now I do have all these four
things right over here. Let's try to place it. And I will try to keep
this one quite like this. If you want to put
on more image, in that case, click here, click on Alt and just duplicate
your layer accordingly. Okay, I will just keep
this one right over here, and I'll just place
it here in one side. The next thing what
I'm going to do is I will just go back again to my Lments option and
I'm going to take images. Okay. For that first
side to think, what type of images
do I want to choose? Okay? And what type of
banner am I making? Okay, Let me just search
for health and wellness. Okay. I will just search
health and wellness. And I'll just click
on Enter over here. And here you guys
can see I do have a lot of images regarding
health and wellness. Okay, so I can come
here and I can just put any images right
over here accordingly. So I'll just put this
image right over here. Let's take this image, and let's put that in
that particular frame. Let's come back here again. Okay, so let's come
here and let's try to put this image
over here on top. And lastly, what I'm going
to do is I am going to come down and I am going to put up this image
right over there. Okay? So again, what I'll do
is I'll select all of this. And here you guys can see I do have different colors
right here as well. Okay? So I can just
select those colors. Okay? So here you guys can see I can also change
the white color. Okay, So here you
guys can actually take a different
color of frames. So let me come here,
let me just take a different color over
here. Let's go with this. Let's come here, and
let's take this color, and let's come here on top, and let's take this
particular color, okay? So here you guys can see. Okay? If I just zoom in using control and plus
from my keyboard, okay, So I can just zoop in. Otherwise I can come here and I can just select
this one as well. Okay? And now I will go here
onto the limits option. And from the elemates
option now I am going to put on different
graphics right over here. Okay, So for that again, I will come here and what
I want to do is I just want to put this one
here in one side. If you want me to give
any rotation to it, you guys can give some rotation
right over here as well. Let's just place it
here in one corner. Okay, so you guys
can see you guys can come here and actually
check those things out. Okay, I will just give this
one rotation here as well. Now, let's just decrease
the size from here. Let's just give a
rotation as well. Let's just increase
the size from here. Well, okay, I will just place
this one quite over here. I can actually use
these images as well. Let me just give this thing
a rotation quite like this. Let me just decrease the size. And what I can also
do is I can just put up this image
right over here. Okay, I'll just put this
image right over here again. Lastly, I will come here. I will, and what I can
do is I will just place the image quite
here in the center. Quite like this. I will just
try to align it properly. Okay, I will just come here. Let's try to keep this
one here in one side. Now I will just decrease the
transparency of the image. Okay, I will just
come here and maybe I will just give this
transparency of 35. And I will just click
onto the Enter option. I'll also lock it
at the same time. Okay. I would be able to change its positioning
right now. Okay. So as you guys can see, if I do want to put
up any background. Okay, I will just try to search
for background over here. Okay, I will just try to
search for background and I'll just click
on Enter here. I will again try to
search under Graphics. I do have a lot of
it right over here. Let's try to see all this out. Okay, let's take this one. Now, what I'm going
to do is I am going to place this accordingly. Okay? I will just place
this one accordingly. Let's come here and let's
just place it properly. Let's come here, let's try to
place it down. Right click. Go to the layer option and
click on Sent to Back. Okay, so if I do want to change the color of this
graphics, okay, I will come here, go
to the color option, and let's go with
something dark. Okay, so I will just go with
something dark over here. And now again, I will come
here onto my Elements option. Okay, from my Elements option, what I'm going to do is I will come here and I
will search for grins. Okay? So I will search for Grins and I will just click
onto the Er option. And here you guys
can see I do have the grids all over here if
I just want to go back. Otherwise, what I can also
do is I can just place my grid somewhere over here. And I can actually decrease the size of the grid
over here accordingly. Okay, suppose I will
just click on Shift, and the grid size will
be changed accordingly. Go to layer option, and I will just try to
bring it here on front. Okay, so I will just try
to get this here on front. Now let's try to decrease
the size of those. Reads accordingly. And I
will just try to place it right over here
in one corner. Again, what I will do is I
will come here and I will just try to take this size over here. Let's just try to place
it somewhere here. And what I can also do
is I will just place it right over here somewhere. Now I am going to put on
some images regarding that. Okay, for that again,
I will just come here. I don't need this one anymore. I will just put out the rulers, which I had before
Here you guys can see I do have this particular
box right over here. Let's go to elements. Let's go to the search option. And here you guys can
see my previous search. Again, go to see all photos. Okay, now I will just come
down right over here. What I can do is I can
just click onto this one. And now I just want to bring this one here on
the right hand side. I'll just take another image, which I will just put here
on the left hand side. Okay, I will just come here and let's try to put
this one right over here. What I can do is
I will just bring this one inside the frame. Okay? Yeah, this one
looks better again. Here. This text option, what I'm going to do is I am going to come right here again. And now I am going to
type my thing around. I will just come here. And now I will just
add a text box. Okay, I will just
click on Backspace. Keep my caps lock on. So I'll just write Health
and Wellness. Okay? I will just write Health
and Wellness over here. What I'm going to do now is I am going to come
right over here. And now I am going
to select this. Okay, Let me just select
all of this thing out. Let me just bring it over here. What I'm going to do is I am
going to make this one bold. After that, if you want to add any more things
like if you want to add some rotation and
all in that case, you guys can go to the
effect option from here. You guys can actually give
this one a curve, okay? I can also choose the level
of curve I want to give. If I just come right over here, you guys can just come to
this particular place. Just give this, just place
this one accordingly. Okay, I'll just select this one. I will just unlock this. Let's delete this for now. What I do is I can take this one and let's
just duplicate it. What I will do is
I'll just place it right over here.
Go to effects. I would apply anything
right over here. Okay, Now I will just New video every week. Thursday. New video Thursday of each week. Okay, I can just type
this thing down. What I'll do is I
will just decrease the size of the text
quite like this. And now I want to just
place it right over here. Okay. I will just place
it right over here. What I can also do is if I want to give this on a
different font style, okay, I can also give this thing a different font style
right over here as well. Okay, I can just use this one. Okay, let's try to
type new video. Come here and just
type every week. Okay, I can also try this thing out and if I just increase
the size of the box here, you guys can see
I will be able to increase the size of
the box accordingly. Okay? Individually,
what you can do is you guys can just
ungroup this one. Okay? Now, here you will be able to move
all of this manually. Okay, I will just come
here. Let's take this one. If you want to have a
straight line again, go to Effects, and from
here go to non option. And it will be a straight
line right over here. Let's delete this part. And what you can now do is
you can just come here and just decrease the box size. Okay? And just try to
place it right over here. Okay? I will just try to
place it right over here. Now, I will also put this
one here on top as well. Okay. As you guys can see, now I do have this banner ready if you want to
use any graphics. Okay, I will just
try to see what all graphics are available
right over here. Okay, you guys can use those
graphics here as well. Okay, come here, Let's take this graphic
and what you can do is you can just decrease
the size and you can just put it here
in the exact center. Okay, if you want to
position it properly, you guys can also just
position it properly as well. And lastly, what you can do
is you guys can come here and you guys can just put up
your Youtube channel name. Okay? I will come here, go to the text option
at a text box, and from here I will just type at Lt and Wellness. Okay. I will just write
at Health and Wellness, I will also decrease the size
of the text box over here. Okay. I'll just come here. Let's take this text box. And what I can do is I will just place it right over here. Okay? Now, I will just cancel this thing up and
as you guys can see, this one is quite actually done. Okay? I can basically use
this one as a banner. If you want to put
any other shapes, you guys can go to
the elements option. From the elements option, you guys can go to Just
cancel your search from here. And now, again, if I want to take any kind of
shapes and stuff, I can come here and I can just take different kind of
shapes accordingly. Okay, I'll just come here, take this shape from here, and I will just
decrease the size. What I can also do
is I will just come here and if you want
me to crop it as well, I will be able to do
it from here as well. Okay, I will just
come here and I will just put this
particular part again. I will just take another shape, which I will just place it
right over here on this line. Select this line
right over here. Just place it accordingly. And just give this
one white color. Okay? Come here to
the color option and give this one a
white color, okay? This is how your banner
will look like, okay? Yeah. I hope you guys have
understood this class on how you will be able
to use a banner. Okay? I will just come here. I have used this one,
this one in one side. Okay. If I do want
to use another one, what I can do is I will just put something right
over here as well. I will come here, let's
go. Or just come here. And what you can do is I
will just decrease the size. Maybe give this thing
a rotation as well. Okay, I will just give this
thing a rotation as well. And now just decrease
the size over here. Let's place it here
in the center. Okay, Here you guys
can just place it. Otherwise you guys can
just move right or left. Okay. So here you guys can see and if you just
want to go down, you're also using
the down button. You guys can go down as well. Okay. So yeah, I hope you guys have understood how
you will be able to make a Youtube banner
for your Youtube channel. So see you all in the
next chapter, Okay. And before that, what
I'm going to do is I will go to my share
option, go to download. And from here you
guys can basically download it as a PNG file
or in a J pec format, or also in a PDF version, Okay? So I will just choose the PNG
and I'll click on download. See all in the next chapter. Till then take care. And goodbye everyone.
16. Creating a youtube thumbnail: Hello everyone, and
welcome you all to another chapter for the Canva
for social media tutorium. Now we are on our
chapter number 15, and here I will be creating a
Youtube thumbnail in Canva. Okay? So we'll be
learning how to create a nice Youtube thumbnail. Okay? I'll be showing
you guys different ways. What is a thumbnail basically? I'll be telling you guys
about that as well. Okay? So we'll be
learning about all of it here in this
particular chapter, So let's not waste time
and let's get started. So here as you guys can see, now I'm here in the home page
of the camera application. So the first thing
what I need to do is go to create a new design. And from here, basically you can type Youtube thumbnail, okay? So I will just write thumbnail
right over here and here you guys can see now I do have this particular size
for my thumbnail, okay? So what I'm going to do
is I'm going to create a blank page right over here for my thumb lin and here
as you guys can see now I do have a blank
page for my thumbnail. Okay? So if you don't know what thumbnail is,
basically, okay, once you go to Youtube and you try to view any video on that, on top, they do have
an image, okay? Just to show you what
this video is all about, just a small summary
about the video, okay? So in that case, that is basically called the
thumbnail. Okay? So now I'll be showing you
guys how to make one, okay? If you guys want to
see some of it here, you guys can see on
the left hand side of my screen here are
basically different types of thumbnails which
you can actually use on your Youtube videos. Okay? So from here these are
different templates, okay? Some of it are paid and
some of it are free, okay? If you're using the
free version of Canva, then you can get access to all the free thumbnails
right over here. And if you want to
get access to all of it in case if you
continuously work on Canva, maybe for your social media
or maybe for any other usage, then you can actually buy
one Canva pro subscription. Okay, So now I will be showing you guys how you can create one. Okay, So the first thing, what I need to do
right over here is I need to create
a background. Okay? So for that I will come here
to the elements option. And from the elements option, now I will search background. Okay? So I will just search for background right over here. And I will check whichever
background looks good. Okay, so here I do have
different photos as well. I can just get those photos
right over here as well. Okay, so here I do have
this particular photo. And now what I'm going to do is I am going to place
this image accordingly. So let me just
increase the size. Okay, Let me just place
it here in one side, and let me place it
here down as well. Okay? So, here as you
guys can see now, I do have the background done
for my Youtube thumbnail. Okay? So the next
thing what I need to know is what my video is about. Okay? So if I do
have a travel video, okay, So in that case I will put something regarding travel. Okay? So now here what I'm going to do is I
am going to put on some of the things like ten most amazing
facts of 2010. Okay? Ten amazing facts of 2010. So here what I will do is again, I will just clear my search. And from here what I'm
going to do is amazed. I will just type
abased and I will just on enter and here
you guys can see, now I do have all of these
photos right over here. Okay, so from here
now what I can do is I will just take
out this image from here. Okay, so I will just delete one. Now. I am going to
select this image, go to the Edit photo option. Okay, so I'll just
click on Edit Photo, and I will just remove
the background of my image using the
background remover from the magic studio. Okay, so here you guys can see now I do have my background removed and now I will
just place it accordingly. Okay, So as you guys can see, I will just place this one
accordingly right over here. And what I can also
do is I will come here and I will try to
apply different filters. Okay? So here you
guys can see I do have a lot of filters
right over here. Okay, So here also you guys can see I do have different filters, which is just right over here. And before that I will
just click control set. I will just duplicate a layer. Okay, so using this option, I will just come
here and I will just duplicate a layer just
on top of this one. Okay, here I do have this image, and now what I'm
going to do is I'm going to place it just beside. So let's take this one. Okay, so let's go back again. I will just cancel
this page out. Let's just select
this image for now. And now let's go to the
edit photo option, Okay. And after that, go
to the filters. And now just come down and here you guys can see
I do have the bono and what I can do is
I will be able to place it just
underneath this one. Okay? So here you guys can
see I can come here and I can just place these
things accordingly. Okay? So I will just place this
one right over here. And now as you guys can see, this is how it actually looks. Okay? So the next thing what
I will be doing is I will come here and now I will just
create some boxes around. Okay. For that I will come
here onto the shapes option. And from shapes here
you guys can see I do have a lot of shapes
right over here. Okay. So what I can do is I can just take any
shapes from here. Let's take this one. And what you can do is just part and just give
this thing a rotation. Okay, Just give this thing
a rotation from here. Okay, I will just come here. And now I will just duplicate
this layer as well, using my Alt key. Okay, I will just duplicate this particular
layer here as well. If I do want to change
the color of the box. Okay, I will be able to change the color of the box
over here as well. Okay? Now I will just place
right over here accordingly. Now, come and take this one. And what you're going
to do is you are going to duplicate this one, okay, using the Alt. Okay, come here and take
your Alt key preset. And just duplicate this
particular layer here as well. Okay, now you can just decrease the size or the width from here. And using shift, what you
can do is select all of this layer and just change
the color accordingly. Okay, I will just put
on a white color here. Now I am going to work
on with the text. Okay, for that now
what you need to do is go here onto the
text box and here, add a text box and write ten. Okay. I will just write ten. And what I'm going to do is I
am going to select this up. I'm going to select
this text up. Go to my text color
and I'm going to make this one a black color or maybe
a dark blue is also fine. Okay, So I'm just going to
give this one a rotation, okay, according to this one. And now I am going to
increase the size. If I don't want to
change the font, okay, I can also change the
font accordingly. Okay, So I will come here and
now I will just take this. And what I'm going to do is I'm going to make
this in one line. If you do have to
decrease the size, you guys can also decrease
the size accordingly. And now you guys can
actually put this one, just give this thing a rotation. Okay? Just give this one a
rotation right over here. Now you guys can
come here and if you do want to decrease
the size of the box, you guys can actually decrease the size of the box from here. And make sure you choose both of this using shift
click over here. And group both of
this thing up, okay? Now if you do to
increase the size, okay, you guys can come here and
you guys will be able to increase the size
from here as well. Okay, come here and
just increase the size. I will just decrease in
a bit from this corner. Let me just place it properly. Now what I'm going to do is
I am going to ungroup this. After that, select
this one individually. Now decrease the size over here. Okay, let me
decrease a bit more. Now what I'm going to
do is select this one. Using your shift again, select this and try
to align it properly. Okay, once you have
done aligning, again, take another textbox. And from here, this text box, what you can write is
ten amazing, okay? You can just write
amazing over here. And what you can also do is
you can just change the font. Double click over here, select this one, and
just check it out. Which type of font
are you looking for? Okay, I will just take
this one right over here. Also, what I can do is I can
just give this rotation. Now select this one and just
place it here in between a. Make sure to change the
text color as well. Okay, maybe I will go
with something in red. Now let me just increase
the size of this letter. Okay, I will just give this
thing a rotation accordingly. Okay? I will just give this
rotation right over here. And now just select this box. And what you're going to do
is you guys can just increase the size of the box from this corner and as
well as this corner. Okay, so you guys
can come here and just increase the
size accordingly. Let's select this box. Select the behind
box right over here. If you want to increase
the size here on top, you guys can also do that. Let me come here and
let me just align it. Okay? I will just
align it properly. Ten amazing facts, okay? What I can also do is I can come here and maybe select this box. And using Alt, you guys can just duplicate this one down as well. Okay, facts. Now, I will also change
the color of my text. Okay, let's go with
something lighter. Now, again, I will just decrease the size of my box
right over here. And I am going to place it
right here in the middle. Okay, I'm going to place this one right here in
the middle as well. Let's lick that shape, which I have down here. And now let me just
decrease the size. Now what I can do is I can
just add another text box. Now I can just type 2011. What I can do is I can come here and go to this
particular option. From here I will just take the font which
I do want to choose. Okay, let's take
this Gulf display, and now I will just
change the color as well. Go to text color and make
this one as this ash color. Okay? I'll just select
that particular color. And what I can do is I can
just increase the text size. I will just give this one
a rotation here as well. Okay, Now I will just place
this right over here. If you want to check
the alignment here, you guys can also
check the alignment. Okay, here. Once you are done now what you can do is you can
go to the elements option. Okay? From the elements option, just go back a little bit, okay? And from here, what you can do is you can
search for Youtube. Okay? And now you guys
can just click on Enter. And here you guys can see, now you do have a lot of
options right over here. Okay? So what you can do is you guys come right
over here and you can just take this subscribe
button and you can just put it somewhere here. Okay? So you guys
can just put it somewhere over
here on this side. Now what you can also do is you guys can actually
take this one, and now you guys
can also place it accordingly here in
one corner. Okay? So come here and just place
it right here on top as well. Okay? And now you guys can
just place it accordingly. And here you guys can see, now this one looks quite better. Okay? You can also
give some name. Okay? If you do want to give
some name right over here. Okay, You guys can come here and you guys can actually
name those as well. So what I can also do is I
will select this one and also the behind one,
right over here. Okay, So I will just try to
deselect everything now. I will just select this one, also, this I can
right over here. And I will try to group it up. Okay, I will just
select this one now. I will try to place
it right over here. I will try to select it here. Now I will select, and
also the down part. Okay, let's select
this one and this one. Let's try to group it up. Okay, I have just group
this one up as well. If you want me to bring
it down a little bit, I will be able to
bring it down and increase the size
from this site. Okay, so let me just
place it right over here. And here you guys can
see the alignment. Okay, so here what you can also search is you guys can
search for arrows. Okay, so I will just search for arrows and I will
click on Enter. Okay, so here you guys
can see under graphics, I do have a different kind of arrows which I can
basically use, okay? So here you guys can just
give this one a flip, okay? So if you want to
flip it horizontally, you guys can actually flip
it horizontally as well. And now just direct it to this particular
part if you do want to give this thing a rotation. You guys can also give this
one a rotation over here. Okay. Once you're done
with this particular part, you can also put the
Youtube name from here, like your Youtube channel name. In that case, again, go to the text
option, add text box, and what I can do is add the
rate ABC take channel, okay? I will just write
ABC take channel. After that, I will just
come here and I want to make all of this as
bold letters, okay? And now I will come
here and I will take or take the bold option. Okay? So let's try to
get this one from here, and let's make this
one a bit bold. And what I can do is if I do
want to increase the size, I can also increase the
size from here as well. Okay? Otherwise, if I do want to put somewhere above here, I can also do that accordingly. Okay? So I will just
place it right over here. And now I will just place
it here in the middle. And if I do want to increase
the size right now, I can actually do
that from here. Okay. If you want to move
it using your arrow kiss. Okay, Suppose if I will
just select this text. And if I just place
my arrows here, you guys can see now I am
able to move it quite nicely. Okay, so here you guys can
see the alignment is fine, each and everything is okay. And here I will just place it a bit right over here, Okay? Yeah, the alignment looks good, and this is how you
guys can actually create such amazing
thumbnails, okay? And if you want to add
anything more, okay, you guys can also add just
come right over here. And from the graphics
option here, you guys can see there are a
lot of suggestions as well. Okay, But here I
will just type on balloons and I will
just click on Enter. And here you guys can
see I do have a lot of graphics which
I can also use. Okay, so here you guys can come and what you can
do is you guys can just take this graphics and
just place it right here. Okay? And if you do want to increase the size a little bit, okay, you guys can actually increase the size a little bit. And what you can do is you guys can go to the layer option. From the layer option here, you guys can just send
it backward, okay? Go to layer, send to
backward again, right? Go to layer and
send to backward, and this is how it will
actually look, okay? Yeah, I hope you guys have
understood how you will be able to create a
studying thumbnail for your Youtube channel. See you all in the next chapter. Okay. I will just show you how to actually save
this file as well. Go to download. If you
want it in a JP format, I will come here and I'll
save it in a JP format. Here, this is the size, and here you can also see
the quality of the image. Okay, Now I will just
click on to download. Here I do have downloaded my Youtube thumbnail
which I had just created, and here this is being
downloaded as well. Now I am going to name
this one as Youtube. Youtube. I'm going to
save it right over here. Let's go to the desktop. Here is my resource file and here directly in
my resource file. Hope to see you all
in the next chapter. Till then, take care. Goodbye, everyone.
17. Making a youtube short: Hello everyone, and
welcome you all to another chapter of Canva
for social media tutorial. Now we are on our
chapter number 16. Here I'll be showing you guys
by making a Youtube short. Okay, I'll be showing you
guys how you will be able to make a Youtube short
over here in Canva. Let's not waste time and
let's get started here. As you guys can see, now I'm here in the home
page of the Canva from here. The first thing
what I'll do is I will click on Create a Design. From here I will search
for Youtube shorts. Okay? And I will
just click on Enter. And here you guys can see, now I also do have the size. Okay? So from here
now what I'm going to do is as I do have this
video panel right over here, I am going to go here
onto my Elements option. Okay? And from the
Elements option now, I will be searching
on for some videos. Okay? So in that case I will
come down here and here you guys can see I do have
the videos panel option. From here I will just search for surfing and I will just
click on Enter here. You guys can see now I do have different videos of surfing
right over here. Okay. And what I can also do
is I can just select this video and I can
just increase the size. Okay, so now I will just increase the size of
the frame from here. And again, what I'm going
to do is I am going to increase the size of the video from this
side here as well. Okay, now I'm going to place
this thing in the middle. Okay, let's come here and let's try to place it
here in the middle. If you just want
to zoom out here, you guys can basically
zoom out as well. Okay? Now, if you do want
to decrease the size, okay, you guys will be
able to decrease the size from here as well. Let's come to this corridor
again. Let's come here. And what you can
do is you can just place this one right over here. You guys can also
double click any time. Now let's come here
at the beginning. Okay, I will just come
here at the beginning. And here you guys can see
how it will actually look. Okay, let's just zoom in again. Okay? I will just
come here and I will just zoom in t here. What I'm going to do
is now I am going to type things over here. Okay? For that, I will just clear
this thing out and I will just take the text box. And from here now what I can do is I will just take a text box. Okay, here on the text box. What I'm going to do is I am
going to click on Backspace. And now I am going to write, okay, what I'm going to do is now I am going to
increase the size of the font. Okay, I will just increase the size of the font from here. And I will just also
change the text style. Okay, let's try to see what
are the options available, which all we can use
basically from here. Let's go with the Carter one. And here you guys can see I need to just increase the size of my text box and also I need to decrease the size
of my text a bit. Okay. I will come here. And now again, I'll just go back select the text box itself. Okay. I will just
select the text box and maybe move this text
box right over here. Okay. I will just place
it right over here. I will just come here. And what I can do is I will
just decrease the size. Okay, let me just come here. And what I can do is I can
just click on playback. And I can also increase
the timing and stuff. Okay, From here. Let me just decrease
it manually from here. Okay. If I do want to decrease
the time of the video. Okay, here as you guys can see now I will just place
it here at 8 seconds. Okay? Now again, what I'll do is I will add up a new page here. Now I will go onto
the Elements option. Okay, From the elements option, I will just go
back a little bit, and from here I will
search for dessert. Okay? Now. What I can do is I will just come here and
click on Enter. And here you guys can
see I do have many of these desert videos right
over here on my screen. Okay, from here what I can do is I can just select this one. What I can do is
right click over here and set video
as background. Okay, I'll just come here. I will just delete
this one also. I will just set the
playback speed. Okay, I will come
here from here. Now I will just select all double click and click
on eight and Enter. Okay, So now I do have this
video as well for 8 seconds. And I'll select another
one right over here. And what I'm going to
select is Las Vegas. I'll just click on Enter here. In the videos here,
you guys can see I do this video right click and go
to Set Video as Background. And now I do have this
video as the background. I'll come here and I'll also
make this one as 8 seconds. And I'll just click
on right over here. What I can do is now I will just come here and
take this text box. Okay, I will just take this one. I will click on Copy here. I will just come
onto this video. And now I'll click on Control V to copy and come here as well. Control V to copy
over here as well. But here I just need
to change the color. Okay, let me just give this one a white color,
right over here. Okay. Now, let's come
to this one first. What I can do is I
will just write Ab. Okay? So I will just
type that in desert and here you guys can
see now I do have this one here on
my screen, okay. As I do have this thing right
over here and now again, what I'm going to
do is I am going to just place this one
a little bit down. Okay? So the same way I will
come here and I will just try to place this one a
bit down, right over here. Okay? On top of this one, I will just come here and here, I will just type Las Vegas. And I will just make
all of this as okay. I will just click here on upper case here,
You guys can see. Now I do have this
particular thing right over here as well. If I do want to set it on top a little bit,
I can also do that. Let's come here and
what you can do is you can go to the
elements option. From the elements option here, you guys can go to the shapes. Okay, so you guys
can take this shape. Otherwise let's take this
one right over here. Okay, select this.
Just delete this one. What you can do is
you can just place this text box quite properly. Okay, let's come
here and let's place this properly here
on the same line. Let's just decrease
this one as well. Now, let's just increase the
size quite like this. Okay? Now, I will just
place this over here. And I can just give this particular box
a different color. Okay, let's go with
a basic white color. Okay, so you guys can
use this particular box. And I will come here. Let's select the box. And I will just click on control C to copy.
Let's come here. Let's click on control
V. I'll just come here as well and
I'll just click on Control V, right over here. And here, just the vice versa. I will change the box color. Okay, I will just come here. Let's select the
box color as black. And now I am going to
put this here on top. And what I'm going
to do is now I am going to right
click on my mouse. Okay, I'll just right
click on my mouse. Go to the layer option here. I can just click on Send to
back. I'll just come here. I will select this layer, right click, Go to layer
option and Send to back. Okay, here also you
guys can come and you guys will be able to move
this one around as well. Okay? If you just
want to select it, you guys can come here and just put those
things accordingly. Okay? So I'll just place this one right
over here as well. Okay? Yeah, this
one looks great. Okay. Now, if you want to
add any kind of audios, you can come here onto this articular option
right over here. Okay? Here, I will come
to the elements option. From here, I will just directly go down and here
you guys can see I do have different kind
of audios right over here. And I can also search. Okay, and I can just type motivation and I can
just click on Enter. And from here you guys can
just take any of this. Let's check all of this out. So I will just put this
one right over here. Okay, so I'll just double click. And now I'll just pose this one. And let's just select one of it. And let's just delete it
using the delete key. And now I will just extend the
size of this song as well. Okay, so I will
just play this out. Let's see how it
actually looks now. Okay, here I will just
pause this thing up. Okay, Before that, I
can also come here. Suppose I will just
come right over here. I will just select this layer
and also the layer on down. Okay, I will just come here. I will just select both of it. Okay, just select
the outside part. Let's select this and
let's just group it up. Okay, The same way
I will come here. And now I will just select my box over here
and also this one. And I'll also click
on Group, this one. Come here and select this layer. And this layer as well. Okay, let's cut this one
and just select this one. And click on Control. Okay, that is the shortcut key of how you will be
able to group this. Select this, go to animate. And what you can do is you can just animate those accordingly. Okay, here you guys
can see if you want to use the tumble option, you guys can also
do that from here. Otherwise, if you want a drift, okay, you can also
select the from here. Okay, Now let's use the
pan option over here. And I will just decrease the speed and I want you to
come it from the right side. After that, I will just come
here to this video again. From here I will just
select this one. And what I can do is I can just click onto the
breathe option. Okay, I will just decrease
the scale from here. Okay, I will come
to this last video. Okay, from here again, what I'll do is I will
just select both of this. And from here now again, go to the antivate option. And from the antivate option, what I can do is I can
just select the pop. Okay? And I will just
decrease the speed from here. Okay? And I will just
place it right over here. And lastly, I will just add some transition between videos. Okay? So here you guys
can see I will just use dissolve over here and I'll
just come right over here. And here you guys can see I
will just go with the flow. Okay, So I will just
decrease it to one seconds. Okay, lastly, what
I'm going to do is I am going to come right here and if I do have
to change anything, I will just change it, it here as well. Okay, for that, let's go to Elements option and let's
search for Youtube. And let's click Enter here. I will just try to
take the short on. Okay, I will just skip here. And what I can do is I will just try to place it
here in one side. Okay, I will just come here. Let's click this one. And let's click on Control. Come here and click control V. And after that, come
to this video as well. Crow V to place it
right over here. Okay, so now you guys can see this Youtube
short is ready. Okay. So now if you do
want to see a preview, in that case I'll just hold my playhead right over
here and I will just play this kick up here. You guys can see now this will be the
transition right over. So yeah, I hope you guys have understood this class
on how you will be able to make a stunning design. Okay. Of a short, which is a Youtube short. Yeah, now I'll be just
saving up this file. Let's go to the share option. From the share option,
let's click download. And I will just
download this video in before video format. Okay, so here this is
getting downloaded. So I hope you guys have
understood this class, so hope to see you all. Take care and goodbye.
18. Class Project 1 - Designing a profile picture for facebook: Hello guys, so this is the
time for our class project. And now this is
the class project, one where I'll be designing a profile picture for Facebook. Okay, first I'll be
showing you guys the steps of what all
you need to follow. After that, I'll also show you guys in that
chapter as well. Okay? Like in a Cava
design template. Okay, so let's not press time
and let's get started here. As you guys can see, I do have the name
of the class project as designing our profile
picture for Facebook. I also do have a description
and outcome right over here. But for me, I will
directly go onto the steps of what all
you need to follow. Step one, create a new design. Step two, set a background for your image from the
elements option. Okay, after that. Step three is take your image
and put in accordingly. Step four, save the file
and upload it again. Okay, once you take your image, and once you have put that, what you can do is you have to save the file and
upload it again. Step five, place a round frame and place the image inside that. After that, lastly, position it. Well, save the file and upload
it in our project panel. Okay, now let's go to Canva and let's see how that
basically works. As you guys can see, now I'm here in the home page, I will just click
on Creator Design. Otherwise, I will come here, go to social media. And from social media, let's go to Facebook. From Facebook, I will try to come down and check
those things around. Okay, my options over here are loading and
here you guys can see, now I do have for
Facebook, post Facebook, cover Facebook ad, and here you guys can see Facebook
story and stuff. If I just come here again
to the creator, design, just write profile picture. Okay. If I just click on Enter. Okay, let's see here. I do have a size. I will just take this
particular size from here. And what I can do is I will just work on this particular thing. Okay, here you guys can see now I do have this
template right over here. Okay, if I do want to add
options right over here, like if you want to put
some rulers and greens, come here in the view settings, click on rulers and Guides. Okay, now I do this
particular things loading, let's go here onto
the Elements option. And from the Elements option I will search for background. Okay, so I will search
for background over here. And I'll just click on Enter. And after that I will
choose from Graphics. Otherwise, from the photos. Okay, so let's see as all these backgrounds are
loading right over here. Let's go onto the
photos right over here. And what I can also do is
now I will just come here and I will try to take
a photo accordingly. Okay, so now let's take
this photo right over here. And I will just right click
and set image as background. Okay, so now I will just set this one image as
the background. And next thing I will come here, I will just clear my search, and from here I will just
write passport size image. And I will just click on Enter. Okay, so here as
you guys can see, now I will have a few of the
options from the photos. Let's come here, Let's
click on See All Option. Okay, And now here
you guys can see, I do have a lot of
photos which I can use. Let's take this image
right over here. And from here, let's go
to the Edit photo option. And let's go here
to the BG remover. Okay, it will just remove the background for me over here. Okay, Now it might
take some time. You guys just can
wait right over here. Okay. And here it
will just remove the background accordingly
from the image here, you guys can see the background of this image has been removed. If you do want to
increase the size, you guys can actually
increase the size from here. Let's place this
directly in the center. Okay, let's try to
come right over here. If you do want to
decrease the size, you guys can decrease the
size from here as well. Let's go on top a little bit. Okay, let's just move it down. I will just zoom out a
little bit from here. If I do want to decrease
the imate size, I can decrease the
Em size from here. Okay, I will just come here and I will just
try to place it. Here in the middle.
Okay. Now I will just place it right over here. I will just go to
my share option. And from here I will just
download this image. Okay, I will just download
it in a PNG format. Okay. I will just click
on download here. You guys can see I do have this image getting
downloaded here now. I will just add another page. Okay, Before that I will
just save this thing up, I'll just write one and
I'll just click on Enter. After that, I will
just add a new page. Okay, let me just add new
page right over here. Let's come down and let's
go to elements option. And from here you guys
can search for frame. Okay? You guys search for frame over here and click on Enter. And here you will have
different type of frame. Let me take this
rounded frame from here if you want to
increase its size, okay? You guys can come here and increase the size
accordingly, okay? You guys can come here. And if you do want to put
this here in the center, you guys can actually put
this here in the center. Now what I can also do
is I can come here, select this image, and I will just go here in the
edit photo option. Okay, from the
edit photo option, let's just click
right over here. Now I will just select this image and let's
go to Edit Photo. Now here you guys can see I
do have a lot of filters. I'll just click on See
All option from here. Now I will just try
to take one color. Okay, let's try to take
somewhere here. Okay. In that case now I will just click on duplicating this one. Okay, I will just
duplicate right over here. Now I will just place
this image here. Take this one and
go to Edit Photo, And let's choose the Classic. Now what I'll do is I will
just position this one. Okay? I will just position
this one quite like this. And I will just
save my image up. Okay, I will just increase the
size, somewhere over here. And I can just give this type of lines like this from here. If I do want to download it, I can also download
this image from here. Okay, so now I will
just click download. And here I do have all these
files getting downloaded. Okay, now I will save it up. Okay, so now I will
just come here and I'll save it up as two. And I will just click on Save. Now what I'll do is I will
come here in my file manager. And from my file manager, what I can do is I will go
here onto the downloads. From downloads, I do have
this particular zip file, I will just zip or extract
the files from here. Okay, so here now my files
are getting extracted. Here I do have the file and
if I just double click, okay, so here you guys can see I do have my image
right over here. I will just transport
this into Va as well. Okay, now I will just
go to upload option. From uploads option,
go to upload file. Okay, from here let's
come to the downloads. From here, let's go
into the z file. Take this one and open it up. Okay, my file over
here, we'll get opened. Let's click here. I have just uploaded that image. What I can do is I can just drag and drop this
image right over here. Okay? As you guys can see, what I can also do is I can
just position it properly. Okay? If you do want
to position it, well, you guys will be
able to do that from here. Okay, let's try to get
this a bit closer. Okay, let's try to
come down right here. And let's just position
it here in the center. Okay? Now this one
looks good here, you guys can see now I can
just give this one a stroke. Let's come here in
the border style and let's give a border. If you want to increase
the border weight, you guys can do that. Come here in the
border color option. From the border color option, you guys can just save
the color here as well. Let's click on the border color. Okay, Let's take
the brown color. Otherwise, let's take
this light color. Now, I will just save this file. This is the final file as
you guys can see. Okay? I will just only choose
the second page. Okay. Here I will just
only on the second page. And I'll just click on Done. And here I will
just download it. Okay. After that,
you guys just upload that particular file
into our project panel. Hope you guys have understood. See you all in the next chapter. Take care and goodbye.
 Issac Murmu, Graphics Design Expert