Transcripts
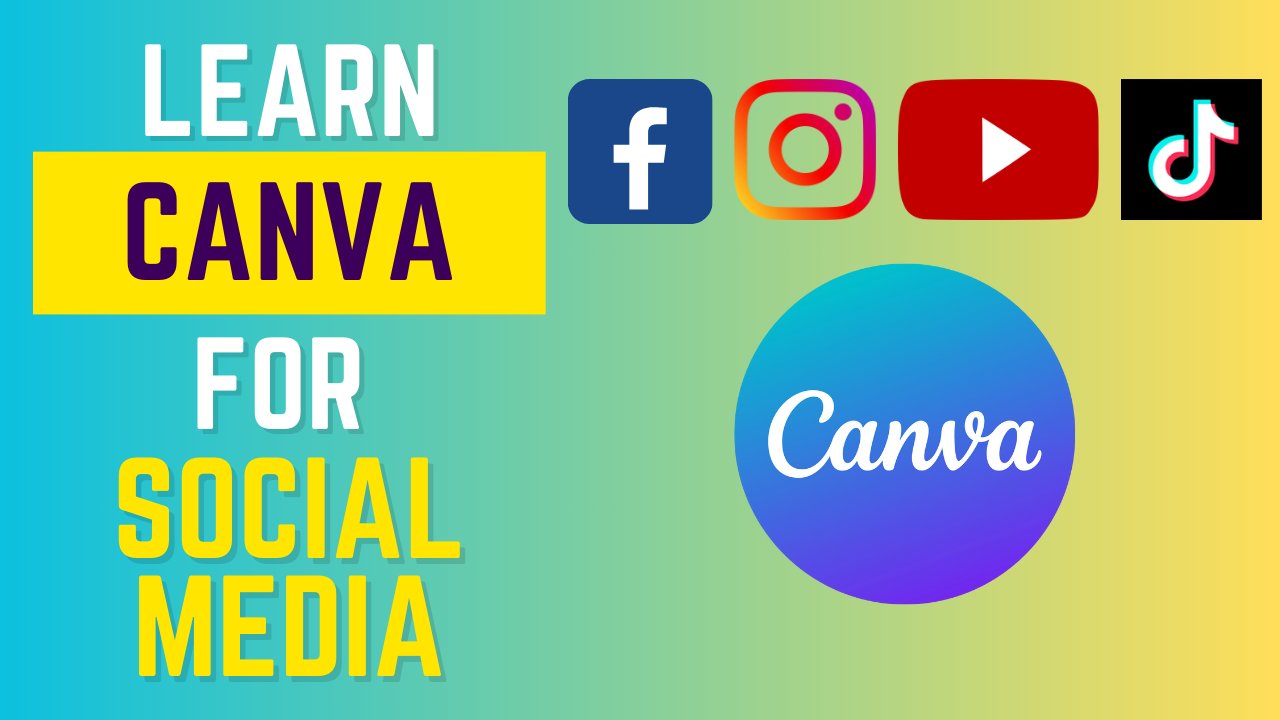
1. Intro of class: Hello everyone.
Welcome to a class of Canva for learning graphic
designing and video editing. If you're planning
to learn graphic designing and video editing
from the beginning, then you are in the right place. Because we'll cover
in this class from the Basic to advanced. This is a beginner level class. If you have no
previous experience, then you can join in this class. Let's take a look at what
you learned from this class. Introduction to Canva. Editor panel in Canva and the side panel and the
Workspace project on making a motivational post and another project on
making a logo in Canva. Tips and tricks to
learn in Canva, creating Instagram
post in Canva, creating a Youtube panel, drip effect and fonts. To use color combinations to
use generating QA in Canva. Shortcut keys to use in Canva, the Canva video editor panel
doing shirt design in Canva. After complete this class, you will be able to do make
stunning design in Canva. You will have great
knowledge about coloring. You'll make your
own color palettes. You will be able to
make logo design, different style templates, create studying
social media posts. This is a project based class. If you are learning you
will have class projects. What you learn, you will be able to practice
in class project, so you can do practice
while you're learning. You will have supporting
resources in this class, so it will be easier for you
to learn during learning. If you face any issue or if you have any question
that feel free to ask me. I'm always there for
you to help you. Let's take Canva Learning, graphic designing, and
video editing together.
2. Introduction to canva: Hello everyone and
welcome you all to the first chapter of our
Canva tutorial here. In this first chapter, I'll be telling you guys what Canva is and I'll start
off with how you can basically download
that application from Web if you want to
use it in Web also, you guys can use it
in any web as well. Okay, suppose if you want to use it in Chrome or you want to use it in Microsoft Edge, you guys can use
from there as well. Okay, I'll be telling you guys that and also explaining to
you guys about the home page and why it is quite
different from any other designing
tool in the market. Okay. Any other
graphic design tool, why it is better
and why we should use basically this canva is quite user
friendly when we try to use any graphic
designing tool. This is quite user
friendly and also you'll able to work on with
those tools quite easily. Okay? And it will give you
such a professional look. And I'll also tell you
guys the difference between Canva Pro and
also the free version. Okay, with our first
chapter in Canva, let's start the journey of graphic design tool Canva and
start to build our design. Quite nice. Become
an advanced user of the Cava application here. As you all can see, I'm
in my Chrome, okay. I'll go to the Search
part download for PC. Okay, I'll click on this
and I will click on Enter. Here you can see I download
Canva Windows from here. Okay, here you guys
can basically see this version is for
Windows Stan after that, okay, Windows Stan is the latest version
which can use this. And after that, if you do have Window Slavin or Windows
12 in that case also you guys can use this particular Canva
set up option. Okay. So here you guys
can see this one. If you also do have
a Mac OS or IOS, or if you're using an Android, in that case, you can click
on these options and it will redirect you to some kind
of similar page there. Okay, so here you can see you can download
it for Mac again. I'll go to the Windows and once you download
four Windows here, you can see you will be
able to download from here. I have already downloaded and I have also set that up as well. For that, I will just close this one or I will
close this first. Okay, Now what I'll do
is I'll go back again. And from here I will
click this again. Here you can see I do have
how it will set up. Okay. Here a set of file
will start installing. Once it's finished, downloading,
installation will begin. And once the device
installation is done, then the app will
launch by itself. From there, you can just get your Canva in your home page. Okay. If you just use your mouse and just drag
it in your toolbar, you guys can get
to Canva anytime. I will just delete
this set up from here. Okay, I will come here again. What I'll do now is
I will go to my app. Okay, I have already opened
my particular app here. As you can see, I do
have my home page here. This is the Canva home page. I'll start with all
these options here. Okay. In the main menu you guys can see here is my account
details and everything. Here is the home page. As you can see,
all of this here, here are different projects
in which I worked. Here, I search it
by different name. Okay? Here I can
search it by category and I can also search by
different dates here. Okay? In the last 30 days, what all work have I done? Okay. I can click this
one and can see, okay. Here you can see the owner or it was been shared with you. You guys can check
those as well. Okay. Here are different
files which I have worked on. Again, I'll go to my home page. Here are different templates which you guys can
get access to. Okay? Here are different type of templates if you do need it
for a presentation purpose. Here you do for presentation if you want it for
your social media or if you're making a video. In that case here, you guys can get different type of options. If you come to videos here, you can see what do
you want to make, basically is a video message, or a mobile video,
or a Youtube video. Okay, here you guys
can actually come down and actually explore all
these particular design in their particular templates. Okay, so you guys can do that. If you come down from here, you guys can see here the brand templates and
creators you follow. You can check all the creators
who you follow, okay? And you can check the
brand templates from here. Okay, so this is the Brand kit. This is a premium version. I'll be explaining to you guys
about this a little later. Okay, Here I do have
the templates and this is the brand I will
explain to you guys after this. Okay? From here you guys can get different type
of apps from here. Okay. Here you guys can see, I do have the Q code one, okay? Here you can use this
particular existing design of this one, okay? I can just click on new design
or use in existing design, I can click on this and I will open the graphic
design from here. Okay? So basically from here
there you guys can see I can do that if I want to create any bar code or anything, okay? So if you want to customize any kind of keyboard designs,
you guys can do that. Here are different
type of tools or apps with which you guys
can do a lot of things. Okay, so here you can actually create
beautiful grid patterns. From here you can
get text to speech, voice over and I
voice generator. Okay, You guys can get
access to that here. It will turn some
text to images. Okay? So this option
you also have here. So these are some AI
features which you can use in Canva, okay? And this is one of
the main thing, okay, and one of the most useful
thing for a graphic designer. Okay, so you're designing
a page here in that case. You want to plan your
daily work in that case. This is one of the best thing that I can show you
guys from here. Suppose I do have
any kind of thing, like I want to deliver
my work to my client. In that case, what I'm going
to do is suppose I need to submit that on 28. Okay. Then from here
I can add a title. Then I can just write graphic, or I'll write motion
graphic delivery if I want to add
any description. Suppose my client name is Max. Okay. I'll write
Max IT Solutions. Okay, I will write like
this that I remember. I do have a reminder I can save. Now on this particular date, I will get a notification
telling that I do have a motion graphic delivery
on this particular date. So you guys can basically
select all of this. Okay? And these are few of
the smart mock ups. Okay? Which you guys can use. If you want to see it in a smartphone, you
guys can see it. If you want to use
it for printing, you guys can see all of this. Okay? So these are few of the packaging of
different products, so you guys can do
all this as well. Okay, so here are a few
of the product images. Okay, so here it will show you guys a few
of the product images. Okay, from here if I choose photos and it will just come here if I want
to upload new images, I can actually upload
my particular works. Okay, from here I can
check all of those. Okay, I can check the
product photos as well. Okay, Once I do the editing or once I work on
this after that. This is the option
of class work here. If I did any kind of
class works, okay, I can get all these
works here, okay? If I need to send this to my
teacher or anyone as such. In that case, I will come here. In this particular
work, I can save that particular work in
my class work that I can check what will
work have I sent to my teacher or my mentor
If I do have any, I can send all this works from here and I can also
check the status. Okay. They can also
rate this one. Is it approved? Do I
need to change this one? Okay. So here you guys can see, okay, you can also tell them that you need review
on this particular work. Then they'll also get
a notification that you are trying to get a
review for your work here. Okay, so this is
the option here. Now let's come to
the branding option. Okay, here, brand kit is a premium tool or in
the pro version only, you'll get suppose if you do
have a particular website. In that website you are a
graphic designer and you want to change the logos
and the text regularly, like on a daily basis, you want to change
something or the other, some of the designs and
such thing as such, okay? In that case, this is one of the good investment
where you can be able to replace logos and images across existing designs
in just a few clicks. And also able to grow
brand with audio assets, controls, and workflows
in one central. From here, you will
be able to find audio brand assets
in only one place. Quickly add your designs and
stay on brand every time. Okay? As you know, that brand is basically changes every time. Okay? It doesn't stay the same what it was before
two years, okay? It has changed a lot with time. You can also change your design and also
stay on board as these have few of the amazing
tools, okay, for designing. I have finished this one. I hope you guys have understood this particular options
which I have here. Okay, now I will go to this one. If I have deleted
any of my work here, you guys can see I have
deleted many of my work. All those deleted files
will be saved here. And if you want to access
those deleted files from here, suppose you want that
deleted file again. In that case you
guys can come here and you can get access
to those deleted files. Okay? If you want
to restore those, you guys can restore
all that as well. Okay? So here you
can see I do have the restore option or if I want to delete
those permanently, I can delete those as well. Okay, I will again go to
my home page from here. And now let's try
to understand here. Okay, so this options, this is the account settings, it will redirect you
to your account. And this one is the
notification bell here. As you can those like if you
have completed any task, it will appear here once you market what all to
doors I have here. I was working with a
few of my colleagues. They send me some works. I do have those notifications. Okay. You can add
so many people at the same time and
work here as well. If you need any kind of
help regarding this app, it's not working properly. In that case, you
can always click on this one and you guys can
reach out to the help center. Here you can see some of
the recommendation for you, like what do people
mostly search? Okay? If you do have
any missing designs, what all you need to do
to just get it back? You will have all
these helpful tips and tricks here, okay? Are these things same here? This is a calm
settings again, okay? Now from here, basically you
can create a new design. And this one is like how I
want to view this one, okay? From here, if you want
to create a new tab, you guys can here, you can actually
change the view. This is the tab and
this is the window. If I want to minimize it, I can minimize if I want. Help help option is
here as well, okay? Here as well as you can see. So I hope you guys have
understood this much, okay? And now here you guys can see, I do have the search bar here. Suppose I want to search any option regarding
sports, okay? Here if I click on sports. And here you can see I do have different sports option here, different templates,
different projects. And here I can get access to
different templates. Okay? So here you can see I do
have option of all of this from where I can get
access to all these templates. Okay? So according
to my keyword, they will see what matches
my requirement and they will send me or me to
view all of these templates. Here you can also
categorize, okay, so here you can categorize
in different categories. After that, if you use filters here you guys can
see the categories, Different styles and
also different theme, different feature,
subject, topic, and also different colors. Suppose you are creating some
work for your client, okay? In that case, they do have a particular color requirement, like they want to make their business card
in sky blue color. In that case, what you can
do is you can click on this and you can apply here. Here. Now you'll have
all these templates here basically about
this color, okay? You will get only these
color templates or designs and you can actually
work on all of those. A here, you guys can see different type of
templates or designs. I will go back again
here in my home page. Okay, here you guys can see I can also customize
my design from here. Okay, If I want to put
any customized design, I can basically put the width and also the
height of my frame. If I want to log that one, I can log that one and I can click on this Create new design. Suppose I 33, and
here I will add 78. At least 40, right? I will give 45 from
here, as you can see. Now if I lock this aspect ratio, I can click and
create new design. Okay, I will just unlock this aspect ratio and I can also create a design from here. If I do have any
existing design, I can upload those
design and also start working with that
particular design as well. Okay, the best thing about Canva is that they categorize
their work quite nicely. That it looks good when you're looking at
the workspace. Okay. Organized. And here you can see, they'll tell you that
if you're making any website or
designing any website, which one you guys
should basically use? If you're using
any kind of video, which one you should use, which kind of designs? Okay? Social media, if
you're doing a presentation, if you're using any document, you're writing any
document to anyone. Here, you'll also have a
logo designing templates. Okay? Here you can
see the sizes. So these are different presets which you'll get here. Okay. Now I will again go to
this web one, Okay? Here in the web one here, if I come to my home page again. Okay, So here you guys will be able to see a few
other options on top. Okay? So here if you want to use this particular design
for presentation here also if you want graphs
and chart in your document, you'll get that if
you're using any kind of photos or videos you
want to edit there. In that case, like are
you a video editor or Youtube video editor from here you can actually choose
your design accordingly. This will give you presets
according to that. Okay. Are you going to print any kind of T shirt
or hoodie from here? Basically, it will give
you the size that you can basically do those
editing, okay? And here, this R of the
marketing things here. Okay, So if you want
to make any kind of flyer or you're making any
kind of poster in that case, you guys can get all
of these things here. Okay? So if you're trying
to make any QA code, in that case, you can click
on this option, okay? And here from the net as well, you guys can browse different
Va templates, okay? So this one is that if you're using this for your
business purpose. So they're telling
you that is it for a content creation or you're
collaborating in a team, Okay, So is it for the
productivity and workflows? Get all this option.
Here you can see resources like
business resources, studies, and for sales. And if you want for
marketing, you'll get here. And here you will
get us that if you want to create and collaborate visually in this
particular classroom. Okay, From here the teacher
can basically work, if you're a student,
you can design your document to boost
your learning, Okay. From here you guys can get that. Free teacher resources, includes tutorials and few of
the webinars, okay? These are for the
educators here. This is LMS integration. From here you will
be able to integrate Canva with your learning
management system here. A few of the case studies if you want to get inspired
future generations with the power of design. You can also do some higher
education here as well. Okay, let's see the
plans and pricing here. There are basically
three things, okay? So the first one is free and
the other one is Pro, okay? The last one is for a team, like if you are a
small organization or a team of few people who are
working together on Canva. In that case, Canva for Teams
is best for you because it will provide you at least with
five people that can work. And this is for
$130 for a year if you're working on
a regular basis on neo graphic designing. This is a very nice
tool which you can use to get a
professional view. If you're using the
Canva free version here will get only the features. You guys can check
those out for me. Right now I'm using the
Canva Pro version here. You can see I do have all
these features, okay? I will have all these
features as well. One B of cloud storage,
I'll get here. Okay, I can actually set this one to two B as well
afterwards if I buy more. Okay. This one was the yearly, and if you want to purchase
it on a monthly basis, here it is 6.4 $9 for a month. For team, it's 12.99 so almost $13 a month if you
are using it for a month, like you are a seasonal user, like you do the graphic
designing for a particular time. In that case, I'll recommend you guys to go with
the monthly deal, but in yearly you are
actually saving up 16% as you guys can
see here as well. Okay, these are the
price differences here in Canva, you
guys can choose. But as my recommendation, first you start working
with the free version. Master all of these features, what you have in Canva. Once you have mastered
all of those, you guys can move
on to Cava Pro. Or if you do have a team which work with
graphic designing, you guys can collab with
them and get the Cava one. Okay, this is that one as well. Here I will go to
the learned option. From learn, you can basically look at different Canva blogs. Here you can see different
tutorials and also courses. Okay, here if you want. For events near you, you guys can click on this. From here you can get
a step to step guide of how to create a logo or a flyer if you want
to make a banner. You guys can see all
of those and get inspired for your designing. Okay, you guys have
understood this part, okay. This icon here is like it
will take you to the app. Okay? As right now, I'm opening it in my windows. Okay, here, this is
the account setting. I have also told
you about this one. I hope you guys have
understood this part as well. Now let's go to my app now, I'll be telling you
the difference between a Canva pro version and also
the Canva free version. Okay, I do have an image here. Okay, I do have this image
as you guys can see, I'll just make it
full screen here. Here you guys can basically
see the difference between Canva free and also
the Canva Pro version. Okay, here in Canva free version you'll get 250,000
free templates, but in Canva Pro you
get 420,000 okay? Well, it is 420,000
free templates, which is almost double
of the free Canva one. Okay. Here you'll get
200 K free photos, but here you will
get 71 million. Okay? Just when you're
designing and you're getting access to 71
million free photos, which you can use
in your design. Such a blessing when you
have this Canva Pro version, if you're working on
graphic designing on a regular basis Here you'll get only 57 K free
graphic elements, but in Canva Pro
4.5 million free graphic elements here you'll get access to 13 K free videos. But in Canva Pro 2.5
million free videos, here you'll get only 1.7 fonts. In Canva Pro version, you'll get three K
free fonts which you can use in Canva Pro. You'll get 25 free audios. In the free version, it's only 75 in case
of animation effects, it's six in the free version
and 14 in Canva version. In Canva free version you'll get only two free folders
where you can work with, but in Canva version you
will get free folders. Like unlimited folders, you'll
get as much as you can. Okay? In free version you'll get only five
GV Cloud storage, but in Canva free one
you'll get 100 GB Cloud, where you can basically put up your work and also save
those for later users. Or if you want to just
safeguard your work, you guys can do in
your cloud storage. Okay, in Canva free
version you'll get only one brand kit which
is the limited version. But here in the pro
version you guys will get unlimited color
palettes and also able to upload fonts and logos
according to your like. I hope you guys have understood
this particular class. On the introduction, I hope
you guys have understood. Okay, again, in
next class we'll be learning if you canva and
if you go to any workspace. Suppose if I want to
go to this workspace, okay, here we'll be learning
about the workspace here. Okay, I have divided
this one in two parts. First, we'll understand
in this stop bar what all options we have and how
you can use that, okay? This things here, okay? How you can basically
start your work. What are these options and how you can add page
and start working. Next, I'll be telling
you guys the options, which I have it on the
left hand side, okay? Or here in the other panels. We'll be learning about all
of this from our next class. Okay, take care
everyone and goodbye. See you all in the
next chapter on Canva.
3. Editor panel in canva: Hello everyone and
welcome you all to another chapter of
the Canva tutorial. So now we are on our
chapter number two. Here I'll be explaining you guys about the editor panel in Canva. Okay, in last place I
have showed you guys about the home page and
what all you guys can do. What are the option
in our home page? What all templates will get? Theme templates between
Canva pro version and also the free version. Okay, I have also
shown you at the last that how our workspace
basically looks. Okay, here we'll be
learning about what all options do I have in
my editor panel. Okay. You can also call it the
workspace or the interface, or the toolbar panel.
It depends on you. Basically here we'll be learned what all
options will get, how to get access
to all the tools, how to use all of those into
our design and many more. Let's not waste time and
let's get started with this particular chapter here as you guys can see in the
home page of Canva. Okay, so from here
basically I have shown you guys how you can
actually create design. So you need to come to this
particular option from here. And what I'm going to do
is I will just customize the size of my design page. Okay, I will take 1,200 in
1,200 and I want it in pixels. Okay? You can also take it in inches or millimeters
or centimeters. Okay? And I'll just
click this one. And the suggested is
it is a link in post. Okay. So this particular size is used for a linked in post. It is showing me
like that and I can also use it in different
other places as well. Okay. So it is not that if
it's showing a linked in post, I do have to post
in linked in only. Okay. You guys can use it in
any other places as well. From here I'll be
creating a new design. So once I click, I'll be redirected to
my editor panel here. You guys can see I do have
my editor panel here. Okay. So as you
guys can see here, I do have the editor panel here. In this particular class, I'll be explaining you guys each and everything
about this panel, that once you start working on this particular panel here, you guys do have idea about each and every
tool available, each and every features
available as well. Okay, now let's come here, let's start with
this frame, okay? The top options, all we have. Then we'll move onto this. And then I'll be
explaining you guys inside this one what
all options do I have. Okay, Let's first start with this file option
right here, okay? If I click on this
file option here, you can see I do have the option if I want
to rename this one. Okay, I will just rename
this one as editor panel. I'll just keep it
like this again. Go to the file option, I just need to click
on, I'll write it. Panel here, you can see this particular file is being saved in
the name of editor. Panel here, you can basically
see the size as well. After that, if you want
to create a new design. Again here you guys can
basically create a new design. Okay, here you guys can see all of these
options from here. Beside that, you guys can
see the size as well. Suppose I want to create
another file here. Okay, If I want to
create another file, it will be created just
beside this panel, which was open from before. But I'll just delete this one because I don't
need it right now. After that comes the
import file option. Okay, if you do have any design, an image, or logo, or any template which
you want import. In that case you
guys, from here, if you just click
on Choose Files, it will redirect you
to your PC computer. And from there you guys can
basically download that file. Okay. After that, the next
option is View Settings. Okay. In View Settings, you guys can see I do
have four options. Okay, what is ruler guides? Basically, rulers and guides that on this particular sites. Okay, on top I'll have my rulers and also I'll
have the guides as well. If I just click on
this one from here, you guys can see I do
have a ruler over here. From here I can
basically see or check the size if I'm making
any kind of design. In that case, if I do
have a requirement that I need to do it in this
particular size, then for that it
is quite helpful. And also to maintain, this is how I can
actually use the grids. Okay, again, if I come here, view settings, I want
to add guides as well. Here you guys can see I do have different type of
guides from here. Also, I can choose how many
columns do I need here? It's selected 612 and now
if I select six here, you can see I do have
six columns here. If I want to divide it
into three to three here, you guys can see now on top, if I want to make any design, it's quite easy for me to understand the proportion, okay? It will just help me to
keep my logo or any kind of design in perfect size and it will help
me to do so. Okay? In that case, if you're familiar with any other type
of green and dye, while doing your design, you guys can come
to this option from here and you guys
can add from here. Suppose you want
columns or 12 columns. In each one, you want
a gap of ten pixels. And after that you
don't want any margin. If you want to add rose as well, you guys can add rose
from here as well. The same one, the gap,
and also the margin. You guys can also
customize your own. Okay, I'll come here again. Go to this View Settings option if you want to see
the margins, okay? You guys can click
on this option here. You guys can see inside
of this particular page, I do have a margin, okay? If I just zoom in here, you guys can see the
margin. Zoom in. You guys can click on control and plus sign
from your keyboard. And to zoom out control and minus sign from
your keyboard. Okay? This is one way of
zooming in and zooming out. I hope you guys have also understood this
part of settings. Okay, here. Now I do have another option. This option is called
the show print bled. Okay? What bled basically is like if you're trying to
print any type of design, you guys will see that
once I click on this here, I do have a particular lining as well here on this
particular corner. Once you choose this one
and once you're trying to print your computer
or the system will automatically understand
that you want to print what all the contents you do have inside that particular box. Okay? So the print will
be perfect in that case. And they'll also have
outer lining, okay? It doesn't go beyond that and it prints perfectly when you're trying to
print in the design. These are a few of the
helpful options when we work. We will understand or
get it in a better way. I'll just turn all
this off again because I don't want all of this
right now, so I will. Of the rulers and
green option as well. Okay, I hope you guys
have understood this one. From here you guys can select
different type of language. Okay, From here you guys can
choose different languages. And it will show you
accordingly after that. From here, if you want
to save anything, suppose I have
selected this frame, or I will come here, I will select a
particular color. I've selected this color here. Again, if I come to
this file option here, I can click on this and that particular
thing will be saved. Okay? Whatever work we can,
it can be saved here. If you want to save this in any particular
folder, in that case, you can click here
and you can create a new folder here and save
that particular item. Here you can see all
your recent works. And if you want to
view all the works, you can view it from here. From here, you can
view all your projects which you have
worked on with here. You can see what all work
has been shared with you, like you are a part of
that particular work, but your client or any other team members have
shared that particular work. You guys can get access
to that one, okay? Now again, if I come to
the file option here, if you want to make a copy
of this particular frame, you can just click
here from here. If you click on
this option here, you can see it made a copy
of this particular panel. Here you can see
the name as well. It is the copy of
my editor panel. This is how you can make a copy. And also right here, there is an option
called Duplicate Page. In that duplicate
page option, also, you guys can click and you can duplicate this
particular page from here. Okay, here you guys can see I do have two pages in the
same panel though, okay? This is the difference
between that if I want to duplicate a page here. Panel only then in that case I can click
on this one, okay? But if I want to
create a copy in another panel or in
another workspace, in that case I can click on this one from our file
and click on Make a Copy. Okay, I'll come here, maybe I will delete
this one, okay? And again, come to
the file option. And from file option if
you want to download, okay, or you can view all
your downloads from here. Okay? Suppose if you want to download this
particular frame, okay, you do have a
particular design and now you want to download. In that case, what
you can do is you can select from this
file type, okay? So here you can,
there is JPG format. If you want your design
to be in a PNG format, you guys can download
the PNG PDF, SVG. If it's a video, you can
select the P four video. Okay? If you're
creating a short cliff, which is a GIF, okay,
You guys can do that. There are different
types here as well. You can select the size, okay? Also as I'm using the
pro version from here, I can also select all
this option if I want my design to be in a
transparent background. In that case I can select this. If I want to compress my
file, I can compress. And whatever setting
I'm putting right now, I can also save that
particular download setting. Once my design is done, I can click on the
download option and it will be downloaded
in my system. Okay, this is that after that, this is also a pro feature. Okay, here you guys
can see from here, basically I can see the version history
from here basically. Okay, this is the
version history like I'm using this
current version. What all work I have done throughout this
particular project, I can view that, okay? If I need to do anything, suppose I need to do anything. In that case, if
I can check that, have I done that or not, it's quite easy to
track down our work. Okay? After that, if I
come to this file option, again, I can view all
the comments, okay? You might be thinking, okay, who all will be commenting
on my particular work? Here comes the twist
where you will be able to share your particular work to your client or
to your mentor. To your teacher, okay? In that case, you can
actually click on this one. Here, you can see there are two options, resolve
and unresolved. Okay? Suppose your client
have messaged you, you have sent them a
particular work link. I'll also show you guys just after some time how
you can send a link. How you can send your work. Okay, In this two option, suppose they have
messaged that, okay? In your particular design, I don't like the color
or the font size, okay? You change the color of the
font and also the font size. In that case, it will
be unresolved thing, but once you have done that particular work
or once you have done or changed the
particular color or that particular font, in that case, you can click on that comment and you can put
it in the resolved section. You won't get confused. What all I have to do, this is quite a
good feature when you're working as or when you're collaborating with
so many other designers. Okay, here is another option where you can find
and replace text. If I do have a text
here in my panel, suppose I'll take this maybe
or apply all four pages. Okay, here you guys can basically see, I
do have this one. Now if I come to
the file option and find and replace text from here, you guys can see I can actually
check the text from here. Okay? So if I write episode one, see here, once I'm
writing episode one here, you can see this particular episode one is getting selected. Okay, I'll just
write episode one. I want to replace this
one with Hello everyone. Here P. This one if I just replace it now
here you can see I have replaced the particular
text with my text from here. But basically you guys can click here and you guys
can also do that. But suppose if I do have the same in so many places
at the same time, okay. In that case, you guys
can just click here. Suppose I do have
a episode one here and I want to change all the episode on which
I do have in my design. And then I can click, replace all all the places where they have
written the episode. One, all those will
be changed. Okay. I hope you guys have
understood this one as well. And I will just delete this. I'll just This one
I've deleted this one. Okay, so this is one use
of that after again, if I come to this one, this is again the help option. If you face any
kind of problem or any issues regarding this
particular application, you guys can always
ask question. You guys can always
reach out to them. If you face any difficulties
while using or while designing or anything related to this particular
designing application. Okay, This is that one. I hope you guys have
understood all this. File option down
from here, okay? Now let's come to the resize
option from here, Okay. Here in the resize option, see I will have different
options from here. Basically from here I can actually customize
the size, okay? You will be able to
do only this one if you do have a pro
version from here. Now I can basically change the width and also
the height from here. Okay, suppose I'll take 1,000 I will just
resize this one. I'll copy size. Okay, here you guys
can see I have resized my particular panel and
now it will be opened in a new window or in
a new workspace here. It might take some time as well. Okay, but see here, the editor panel right now, it's quite different
compared to the other, but here in this panel, you guys can see this
is also being changed. Okay. This is how we can
basically resize from here. This is the editor panel. Here you can see the changes. This is how you guys
can actually resize. This option is the undo option. This is the redo
option from here, Okay, this is the red. You guys can always use
the shortcut keys as well. Okay, you guys
already know what is the shortcut of
redo and undo here. If you have saved
all the changes, okay, it will be
saved in your cloud. Here you guys can basically see all the people who
you have access with, okay, to this
particular project, which I'm doing right now. If I want to add
access to any of them, I can just write their e mail. Suppose if I just write their e mail and I
can just send them this particular e
mail from here that they can be joined in
this particular section. Okay, insights. Okay, insights is basically if you have saved
this particular work and also shared this
particular design to other teammates as well. From here, you guys can check
who all viewed your project and how often did they
actually view your project. You guys can see that as well, okay, if you come to the
engagement, okay, from here. As you can see here also, you guys can see how
many times they have clicked your link
and how many times, like what is the time
duration that they have viewed your profile from here. Basically, you guys can create
a link for your blog post or for your business led you create a link. These
are a few options. Suppose you do have a mentor for yourself, for your design. Okay, You guys can directly click on this sent to teacher, then it will be redirected
to your particular tutor. You can just select a particular
teacher from here, okay? And you can send them
a message from here. You guys can basically do that. It will be saved in your panel. In first class I've showed you, if you send any work or any design to your teacher
where it will be saved. Okay. Next comes
the share option. Okay? If you go to the
share option here, can see if you're add with
any people already or if you are in a group of people or if you have
added any class. In that case you guys can just type their name and they'll appear here and you can actually give them
the access, okay? Or a particular link
will directly go to their PC or to their system that they can access your
design and view it after that, this is a collaboration link. Okay, now if I
come here and if I click on anyone with
the link from here, I can also set, if anyone is able to
enter it with my link, will they be able to edit or will they be able to comment? Or only they can view if you're sending the final
product to your client. In that case, only
view is perfect. But if you want your mentor, then they can also comment. Okay, if you want the
view from your mentor, like how my design
looks, in that case, you can send this or you can actually send a copy to
your client as well, like not the final copy, just to show them if they do have any kind of
issues regarding any kind of color or
any kind of fonts. In that case, you guys can send them this one where
they can add a comment. If you guys need to
change anything, you guys can see that
comment from them and you guys can edit
that particular part. You will use the edit
option when you are collaborating with any other
designers at the same time. Okay, with this
particular thing. They will also be
able to work in Canva once you send them
this particular link. Once they click on this link, they'll just end up in
this particular workspace. From that workspace,
they can also start editing your work, okay? This is how you
can actually work. If you click here, link
will be generated, okay, and you guys can
copy that one here. You can see if you
want to download. Here is the download option. Again, if you want to
directly share it on social media in what
you want to share, if you want to share it in
your Facebook, Instagram, or if you want to use it in your Facebook story or
in a linked in profile, you guys can do that as well. Here are more options, okay, if you want to copy it to your clipboard or if you want to send
it to your phone. If you want to share
Link just to watch, if you want to
create a prototype, you guys can do that in shared. They do have different
options, Okay, if you want to save it directly
to a Google Drive or if you want to open it in
a Microsoft Powerpoint, you guys can also do that, okay? You can also message from
to snap chat from here. Okay? So there are different
options which you guys can come and actually
look for yourself, which are quite useful
and depends on work wise. Okay, So I hope you guys have understood this
particular panel. Okay? So here in this class, I have explained to you
guys about the top panel. In next class, I'll be
telling you guys about this site panel and also all these options which I do have here in my workspace. Okay, till then, take care
and goodbye everyone. Hope to see you all
in the next tutorial.
4. Side panel and workspace options in canva: Hello everyone, and
welcome you all to another chapter on
the Canva tutorial. So now we are on our
chapter number three, and here I'll be
explaining you guys about the side panel and the
workspace options in Canva. Okay, so I'll be explaining
you guys all that in detail. What are the tools which
I have on my side panel? I'll be explaining you
guys all of that in brief. Okay, so we'll be seeing all that here in this
particular class, also in the workspace, how you can actually add a frame or how you can actually
duplicate the same page. I'll be showing you guys
each and everything. Let's not waste
time and let's get started with this
particular chapter here. Here. As you guys
can see, right now, I'm in the workspace or in the place where
I'll be working. Okay, in last class
I'll explain to you guys about all this option
which is available here. Now I'll be explaining
to you guys all the options which I have
here in the left side panel. Also here, this type of
options which I have, how to add a command
and the Canva, and also how to zoom in, Zoom out from this as well. Okay, so let's start with
the design part here. The first option which
I do have, okay, here, actually I do have a particular template
under the design. I do have two things. First one is the template, okay? If I do want to select
any kind of template, which is there already, I can basically just
click on here and you guys can see this
particular thing is selected. Okay, From here,
basically I can select this and I can type the
text whatever I want. If I want to delete
this particular box, I can delete this
particular box. If I want to align
it, I can align it. If I want to replace
the background, I can also replace the
background as well. Okay? So here I will just
go back with these images. I can do all of this, okay? So here, this is all
about templates here. If I want to search
any kind of template, I can search as well
for my Facebook post. Suppose I want to search
for football, okay? So if I sty football from here, and if I click Enter here, you can see the are few
of the templates which is quite similar
to football, okay? This R F of the soccer things which I'm talking about here. You guys can see this Urpy of the templates which
I can use from here. If I'm making anything as such, I can actually change
all this name. I can do all of this from
here, change the text. If I don't want any
kind of animation, I can delete all those as well. Okay, this ph of the
animations which I can just delete from here and can
replace with my one. And after this, if I just
come and delete this one, I want to delete this as well. Right now what I want to do
is I will come back here. And now let's look at
the Styles option. Okay, here I will delete this. If I come to styles here, you guys can see I do have a particular set
of color palettes. Okay, These are a few of the colors which I
have used before. Okay, These are the recently
used color palettes, which I do have here. From here. Suppose I want to take this
color as my background. Okay, here you guys can see I do have this
color selected here. If I want to use this
part palette here, you can see I do
have this color. If I want this color from here, this palette, I can select
this palette as well. Okay, here you guys can see
it changes accordingly. Basically, I can select
all this from here, and I can actually
design my page as well. Okay, From here there is another option which
is quite helpful. Suppose my client send
me some designing to do, but he do have a
color requirement. Okay? He wants his
particular logo or his particular pamphlet
in a particular color. Okay. For that first
what I'm going to do is, so his color is green. I will select the grass green. And now I will
search accordingly. Okay? I will suppose
soccer. Okay? If I search on soccer, and if I click Enter, I don't have anything
from here now. But if I just type sports, if I click here,
you can see these are different templates
which I do have here. Okay? These are a few of the sports template which I can use and which is in a
grass, green color. Okay? It will just help me narrow down my
search and help me. Best one according to my theme and according
to the color, which I want from here. Basically, if I
select this one here, you can see I can again, come here and I can actually change all of
these styles as well, if I want to change the styles. Okay, here you guys can see I do have different
styles here as well. If I want to change
the text from here, I can change the text. If I want to duplicate
this text box, I can duplicate the
text box as well. This is one thing about
templates and styles. Hope you guys have understood. Okay, now let's come to
the elements option. In elements, basically you will be getting all the shapes, different type of
graphics, okay? Ai image generator, this is
quite interesting, okay? Using AI, they'll try to figure out what kind of
image you want, okay? From here, try an example. From here, what I can do is I will come here and
maybe I will write, boy playing soccer
if I type this one. And if I click on Create Image, the AI will basically try to create a image
on my search, okay? Based on the search, the AI will try to create an
image for me, okay? So it might take some time, but here you guys
can basically see, I have wrote here a
boy playing soccer. I have created this
particular things for me here which I
can basically use. Okay? Suppose if
I come here here, you can see I do have
this particular image. Maybe I'll delete this. I will delete this one as well. Now what I can do is I
can actually decrease the size and I can actually put it
anywhere I want to put. Okay, so this is how
you can actually generate image using this AI. Okay, this is quite handy too. And handy option to be used. I'll just go back. I hope you guys have understood
this text to image option. Again. Come to the
elements option here you can get different type
of stickers, stickers. Also you guys can search
different type of stickers, what all you guys want, or you can actually just roll down your mouse
and look here as well. Okay, Come here again. Here are different
photos, different videos, and also different
audio which you can take for your work here. Okay? If you're designing
and you do need any audio, in that case you can
use this audio as well. Different charts,
and these are frames where you can
basically your image. Okay. Suppose if I take
this particular frame and if I just decrease the size of this particular frame here, what I want to do is
I want to actually add any kind of image
in it from here. If I try to upload any kind of images here in this
particular box, in that case I will
be able to do that. Okay? I will come here and I
can send this one backward. We'll be learning about all of this in detail in next class. But here, the usefulness
of this is if I create this one and if I put any image now here in
this particular box, my image won't go outside of this particular
box here, okay? It will be inside this particular box and
it won't spread out. This is one option to
put up your image. I will delete this one for now. Here also, you guys can
put the same thing, but this one is in grid. Okay? And here you
have a different type of or different size of boxes. Okay? Here are a few of the
collection of some graphics. Okay, also you guys will get, you can use all of this
according to your project. Hope you guys have understood
about the elements option as well and how you
guys can use this. Now let's come to
the text option. Once you come to the
text option here, you can see first I do have a few different
things here, Okay? These are few of the
basic text options. Okay, If I click here, I will be able to add a text. Suppose now I want to replace this text
with something else. I will write Canva can Va tutorial. Okay, if I write a tutorial, if I this whole thing, okay, Suppose if I come here. Now if I select
this one from here, now basically I can
increase the size. I can just change
the text color, I can change the
font using this, we can basically change the font and we can
do so many things. Okay. These are few of the
recently used boxes here. Okay, I have seed this box. I'll delete this one. These are recently used
fonts which I have used. If I bring this one here, okay? Now, if I try to take this one, if I bring this, if I want
to change this, Insert. If I write color, okay, L O, U color here, you
can see I do have already said this
particular set of fonts. Okay? This is a few of the easiest way if we
want to save our time. And I can just bring this one somewhere here, wherever
it's necessary. Okay, I can put like
this fonts as well. Okay? There are different
options which you can choose from and actually select this particular
combination of fonts. And after that, you guys can
put up your own text here. Okay, this is for that. I will just delete this
one as well from here. If you want to basically
make your own text box here, you can see once I have click
based on a text box here, I can just type my own text. Okay, text here, you
can see I do have this. If I double click on
this one from here, I can change this and I can
actually increase the size. I can just change font. I can play around with
different fonts here. Okay, we guys can
do that as well. And change the
color accordingly. Okay, suppose I want
this color from here, and I will select this box. I will put this one here
if I just click outside. Now here you can see I do
have my text color now, it looks quite different. Okay, This is the
use of all of this, and here are default textiles. This is the default
textile from here. I hope you guys have understood the option for text as well. Okay, Now if I come here, suppose I have selected
this text from here. There are a few differ if
I come here from here. Once I select this text here, you guys can see I do have
a few of the options here. If you want to underline
this particular text, you guys can do
using that, okay? If I just group both of this and if I
come to this one now, I want to underline
this one as well. You can see I have put the
underline here as well. You guys can actually do this. If you want to
align it, you guys can align it here as well. Okay, here. I want to put this
one in the center. In that case, I will select, I will just go back here. This one looks quite better. I will select this here. If you want to put list, if you want to
increase the spacing. If I want to increase
the letter spacing, if I want to increase the
line spacing from here, I can increase the
line spacing as well. Okay, here you can do
all of this from here. And these are a few of
the advanced option which will be learning
lata from here. Basically, you guys can
animate and you guys can position change the
transparency, okay? If I want to keep the transparency till
this much I can do that. If I want to copy this
particular style, I can copy, if I want to lock this
particular position, I can lock this
particular position. Now using my mouse, I won't be able to change the position of this
one again, here. If I try to unlock
again and again, now I will be able to change
the position from here. Okay, this is the thing
about the text option. Now, if I come to brand, I have already told you
about the Brand Kit. From the Brand kit, basically, you guys can download
your own logos. If you want to see those logos, you guys can check it from here. If you want to add
different phones to your website management
page or the brand template, you guys can do all of this. You guys can actually
update your templates. You guys can choose
different colors and or stack it here. You guys can upload
different type of photos, graphics icons as you're
using it on a regular basis. Then it will be
easy for you to get access to all of those here. You can save it quite nicely. Okay, so this is about
the brand option. Now if you come to
uploads from here, basically you can upload your file and you can
also record yourself. So here are the images
which are being used. These are the video
which I have created or uploaded and there are a few of the audios
which I have uploaded. Okay, so if I come to images, I hope you guys have understood
about the upload options. Okay, so this is basic upload options
from where you can just upload your
file from your PC. Simple as that, okay? If you want to record
yourself, okay, you guys can click on
this one and you guys can start recording
yourself here, okay? Now, if I'm just existing
the studio, I'll come here. Okay? I have just
stopped the recording. I'll just come to this
particular option here. Okay? In this draw option here, you can see I do have a pen
tool and this is the marker, and this is the highlighter. And this one is a eraser. This is the selection tool, this is the color from here. Basically, if I
choose a pen tool. If I make any line
supposed like this. Okay. If I'm writing something
here in my free hand. Okay. I have selected this one. Now I want to erase this one. In that case, what I can do is I can just click on that one, and this one is deleted. I've erased this with my eraser. Now if I click on this one, and here you can see I do
have my highlighter here. Okay, I can highlight
any particular thing again from here
I'll select this, can delete it from here as well. Same goes on with the marker. And basically, suppose I
want to use the pin to, but I don't want blue color. In that case, what I can
do is I can come here, I can choose from all
these colors here. Okay, here you guys can see I can choose
from different colors. Here, I do have the box, I want to write it in pink. I've selected this one, and now here you
can see I'm writing it in pink in this case, suppose I don't want this one, okay, This width is quite small. I want to make it wider. In that case, I will come
here in the settings option. And the setting option, what I can do is I can
increase the width from here, okay, Or the weight, okay. Now if I write anything here, you can see the width of
my pin is so much okay. Then again, come to
the selection two. This and I'll delete
this one as well. This is the selection
tool using which you guys can basically
select anything. This one is the color option and this one is the settings option from where you can
check the width. These are a few of
the default width which you guys can choose. Here is the transparency. Suppose if I write something, how much transparent
will it be, Okay here? If I check the
transparency from here, okay, I will just
click on this much. Now here you can see the transparency have
decreased, okay? Again, select both of, click on this one,
click this one. I hope you guys have understood about the draw option as well. I don't use much of
this option here, okay. Cut freehand, it doesn't
look that great. Instead of that, I use images
and the text option, okay? Now, if I come to
the project here, you will be able to see all your project which
you have created here. You will be able to
see all the designs, all the folders, images,
videos from here. But if you want to
see it in particular, like you want to only
see the designs, you can click here, only the
folders, images or videos. If you want to search
any of your content, if you have saved it
in particular name, if you search that
particular name, you will get access to
your particular project. Okay, so I hope you guys have understood
the project part as well, from where you can
check your own work. Now let's come to
the apps option. If you come here first, let's see the, your apps. Okay? If you don't have any kind of apps as I
don't have any from here. You can come here and you can discover any type
of apps from here. Okay, so here are
a few of the apps which you can download
to use it in Canvas. Suppose you want to
create some kind of grid. In that case, this one is nice, and here if you want
to create any QR code, this one you guys
can use if you want. You guys can basically
click all any of this and you can see
what it basically does. This one add natural sounding
voices to your design. What it does is it brings your canvas designs to life
with mers realistic I voices. Pick from a range of
high quality voices across different languages. Emotion as tonalities. All you need is a script. Okay, so you can actually use a script and actually
put a voice over that. Okay, so they do have a few amazing apps which
you can use from here. So you guys can check
according to your project, you guys can use all of
these apps from here. If you come here from here, you can get different type
of backgrounds if you want to use any background
in your work. I have come here in the background options here
you can see the gradient, background, and some textures. If you want to type
something like adventure, if I click on Enter, I don't have any background
related to adventure, then maybe I will type grass. If I click on Enter here, you can see I do have
different backgrounds in which I do have grass. Here you can see I have actually replaced my background
with the grass. Okay, I can actually change
this one as well here. This is how you guys
can basically work. As this one works
layer on layer, it is quite easy for us
to understand, okay, again, come to this
one and I will just cancel this come here
in the application. From here, you can also check on different type of charts
which you can use, okay? So these are different charts. If I again come to this option, if I want to add this here, I can also stack all
of this here as well. Okay, here as you can
see, this one logos. I can just delete this one. Suppose I'm working with charts and background
at the same time. I'll come from here
and I will just select this one and also
the charts here. You can see in my panel, I do have access to
both of this one. Okay, Suppose I want to
add any type of chart now. Okay, here what I
can do is I can come here and I can just put
this one somewhere here. Okay. Maybe I'll
decrease the size of this and I can put
it anywhere I want. This is one way of doing
this in my donor chart. Here you can see I can
also select the items and I can also put the values
for my item number two. Suppose I will put up
a value of 50. Okay? Everything else is ten. And if I click on Enter here, you guys can see the
item number one is 50% This particular chart has already identified
this data from here. From here, basically it have
created my chart from here. This is quite friendly and
quite easy to use from here. If you want to upload any kind of data where you can
put up your work, you guys can do that as well. But for now, I'll
delete this one. Okay, these are a few of the features which you
guys can use from here. Okay, hope you guys have
understood this part as well. Okay, now let's come
to this options here. One is basically the zoom
out and zoom in option, which you can use
from keyboards. Control plus if you want to zoom in and it's Control minus
if you want to zoom out. If I want to add a page, I can click here if I want to. I can also click here as well. See here, I do have
a blank document. I'll delete this one. Suppose I want to
duplicate this same page only to my same document. For that, what I can do is
I can click Duplicate here, and I have duplicated
this particular layer. This is the same layer which I can duplicate
and start working. Okay? And if I want
to lock this one, and now I won't be
able to do anything. Suppose if I want
to delete this one, it will be quite hard. Okay, so here you can
see this one is locked. So I will just go back. Okay, So it's quite hard as I have locked
only the background here, you can see I've
locked the background. And here you can see I've
locked this as well. Okay. So these are
few of the logs. Okay? And this one can't
be edited right now. Okay? For that, if I
click on this one, if I unlock again, you can see this
one is unlocked. Okay? Only this particular part. If I come here and unlock
this full page again, I will be able to move
around and work accordingly. Okay? If I just increase
the size from here. Here I can create different type of design according to myself. Okay, this is that option. If you have sent this
particular work to any of your client or anyone whom
you have shared the link, I have showed you
guys how you can share the link from here. Basically you guys can actually
message to your teammates or your client can message to you your nor can message
you from here as well. From here. Basically,
if you come and if I want to see check like if I am telling you change
the background, background color, okay? I can also mention from here, if I want to mention
someone I can mention it, then notification will go
into their application. Once they open the Canva file, they can see that
I have mentioned them in one of my comments. They'll understand that I do
have any kind of work for them or I do have any
update regarding the work. Okay, so from here
basically you can add Img, Whatsapp, and also you can add different type of stickers
which you have access to. Okay? If someone have
done an ice work, you can just send this
particular sticker to them. He also, you guys can
mention them as well. Okay, here you guys can
do all of these things. If you guys do have any type of problem while using Canva, you guys can always
check the canvas system. Suppose you forgot how
to import your image. In that case, you can click here and you can type this one. Suppose if you want
to add a box here, you can see are the
recommended options. If you forgot how to
create a text box, you can just come here
and click on this one. Box will be created
for you here. You guys can see once
I've clicked on that one, a Tbox here is done for me. I'll delete this one
again and again. I'll come to this option, hope you guys have
understood here. You can see different
things which I can get assisted with here. If I want this page
to be in a grid view, I can click this one and I can keep on adding pages from here. It totally depends on the
way you like to work. Suppose if you do
have 2030 pages and you want to view all of it at the same time just
for a preview. In that case, you guys can
select this grid view as well. Suppose this particular thing, you want to have
a full view here. You guys can see the
full view from here. Okay, so this is how you
guys can get full view. And with the escape option, you guys can actually go
back to the same page. And here is the help option. Again, from this help option I've already showed
you, this is the same. You guys will be assisted
if you face any crash or if you have missed some file
or document from Canva. You guys can always reach out to the Va Help Center if you want to add any kind of
notes regarding your work. Okay, so this note is
for the page number one. If I want to add page title, I can add any kind
of page title here. If I just write,
I need to change the color of my font here so I can just
click on this one. Then I'll also get, once I
open this particular file, I'll have this note
here that I can see. Okay, in this particular
file I need to change the color of my font, Okay, So this is quite helpful. And once I click on this here, you can see they're
telling me to ungroup as both of the ticks are being joined using
the group option. Okay, So we can do all of this and here are layers option. We'll be learning
everything shortly. Hope to see you all in
the next class where I'll be starting with
basic designing. I'll be designing a
motivational post. I hope to see you all in
the next class and hope you guys have understood
each and everything here. In this particular class, I've understood you guys about the workspace in two
different parts. Hope this was clear and hope to see you all
in the next chapter. Till then take care. And goodbye everyone.
5. Project on making a motivational post: Hello everyone and
welcome you all to another chapter of
the Canva tutorial. So now we are on
chapter number four. Here I'll be showing
you guys a project on how to make a
motivational post here. We'll start on with some basic graphic
designing from here. Okay, we'll start on with that. After that, we will
move on to some usage of the tools here and also we'll do some advanced level
of graphic designing. Okay, here. First I'll be
showing you guys by making a motivational post using their template which are
available in Canva one. I'll be showing you guys from the scratch of how you can create a motivational post here. Okay, let's not waste time and let's get started with this
particular chapter here. Now here as you can see, I'm directly in my workspace
from my workspace. What I'm going to
do is I want to create a design for that. I want to wide board, or I'll just take this
particular panel size from here you can see I do have
this particular setting here. Okay, from here what
I'm going to do is now first I will select this one. Okay? I have selected
this particular template. And what I will
do is I will post or I will change
this text from here. Okay. As I already do have downloaded or have copied a few of
the Tes from here. Here you guys can see
I do have a T here. What I can do is I'll
just copy this one. I'll come here and I will
paste this one here. Okay, here as you can see, I have pasted this one. Maybe I will just bring
this down a little bit here and I will put this
one somewhere here. This template looks good. Okay, for that first I will be selecting
all this text here. Now what I can do is maybe I
want to decrease the size. In that case, I can decrease the size of the font as well. Also, I can come here
and I can actually select what will
be the font type. Okay, suppose if I
select this one, or I want to select this, or if I want to select this one. Okay, I can select from here, basically which I want. I will just take this
text box from here. I will also select
this text box, and I can also put
this one down. I can also decrease the size of this particular
text box from here. If I come here and
you guys can see, I can also decrease this
particular size from here. Suppose I want to use this one. Now what I can do is if I want to bring it somewhere here, I can also bring this
one somewhere here. I will bring this
one in the center. Now again, I can
actually increase the size according
to the way I want. Again, here, I will put
this one in the middle. Yeah, this font size is good. Now I will change the color. If I want to put some red color, okay, I will put
the red color here. And I want to change all. Now here you can see
I do have this one. Now in this case, if I want
to put some author name, I also do have the
author name here. This is a code by Thomas Edison. I will click control
C. Come here, double click this
control V here, you can see I do
have this, okay? If I select this one from here, I will just increase
the font size as I will change or I'll try to
put some thing here. Okay? I will select this font. If I want to underline it, I can also underline this one. Okay? This one. I will just increase the
size a little bit from here. Okay? And this looks good, but I will change
the color as well. Okay? Maybe I will take
somewhat this color. Okay? I will change
this one here. You can see this
particular here now. This one looks quite good. If you want to add any type of sticker or any type of image, or any type of logo, you guys can do
all these as well. Okay, if I come here to
the Elements option here, you guys can see I do
have different type of graphics which I
can basically use. If I come to this one here, suppose I want to see some
of the graphics from here. You guys can see there are
different graphics here. Okay, here, I will
select border. Okay, maybe I want This kind of border here. Okay? I will increase
this border size. I will just increase
this one here as well. I can just put this one inside my box as
well if I want to, but I want to increase the
size of this from here. Okay? If I want to just free from this one,
okay? I can do that. Or if I want it like this, I can do that as well. Suppose I want to use this
here that I can do that here. You guys can see I do
have two frames here, But I will delete this for now. Okay, I'll delete this one. See, I will take this,
delete this one. This quite looks good. Okay. If I want to add any
things like this one here, okay, I can put this
one here as well. If I want to put this
or a different color, I can do that as well. I will delete this from here. Maybe I'll select
this one. Okay? I will select this one. Now I do have this. I can maybe put this
one in one side. Suppose if I want to
put this one here, I can put this one here as well. Now what I can do
is just come here. I can select this one. What I can do is I
can just flip, okay? If I want to flip
it horizontally, I can flip this one
horizontally as well. Here you guys can see I am doing some renovation to
this particular here. Yeah, this looks good. I hope you like this one, okay? This is using the few of the fonts or few of the templates from
Can by itself, okay? But here, if I add
another pitch here, what I'm going to do is I'll be doing this from a scratch, okay? I'll be creating a motivational
coat from the scratch. In that case, what
I can basically do. Okay, so first I need to come here and I need to go
to the design option. Okay. So I'll come to
the design option. From the design option, I will go to the styles. Okay, from the styles option. What I can do is I can select a color after selecting
a particular color. Maybe I want to put
any kind of image okay for image again
to the selection box. Come here and write images or you can directly
select from here. Photos here, you guys can see different type
of photos for that. First, we basically need to see what kind of code
I do have here. Okay, let me see here. It tells you if you want something done right,
do it yourself. We need to understand
basically what theme is this. This is maybe something
like self motivation, okay? We can just type self
motivation here. It totally depends on. Okay, here you can
see right now, I will choose this
particular image. What I can do is I can actually select this
particular image and I will just increase the size that it just fit
the frame, okay? I have this particular image. Now what I can do is I don't want this one to be
highlighted, okay? In that case, I will
come here and I will decrease the transparency
a little bit, okay? I will decrease the
transparency like this, because I want my part
to be highlighted one, I need to use any type of font which is quite highlighted. I do have this one
here right now. Now what I'm going
to do is suppose if I select this here, I will decrease this from here, or I'll do that later. I'll keep this one here. Now I will go to
the text option. Okay, from text. Now what I want to do is I want to edit or I want
to put my text. Okay. Basically for
that I will come here. Here, you can see the
text box I do have, I want to add a text. Okay, here I do
have my quotation. I will just use this
particular coat from here, control C. And I will come and paste this one from
here using control fee. Here I do have this one. Okay, now I will select this. I have selected this whole text. Now if I want to increase
the size of my coat, I will increase the size of
my particular coat from here. As you can see, I
am just gradually increasing the size of my coat. From here what I can
do is I can actually increase the size till the
time I'm not satisfied. Okay. Basically, maybe I will
keep this one in two lines. Okay. For that again,
I will increase it. Okay. Now this size is white. Okay. Again, I'll come here, I'll delete this one. Yeah, this one is okay. Which I like. I will just keep this one somewhere
here in the middle. This, I will just try to keep this one in
the middle itself. I will just put this
one a little down. What I want to do is again here, I want to put some
quotation mark here. Okay? I want to put
quotation on both the sides. But before that I will just
select the font type, okay? And I will select
different things. Okay? Maybe if I'm selecting this, if you want to attract people, then we should use
something in italics, okay? But this one is
also not that bad. In that case, I can
use this font as well. You can basically check
which pont actually looks good with your thing here. This one is also
looking quite nice. But the thing is
that it is quite, really, in that case, I won't be selecting this one. Maybe I will take
something in bold. So I will select this one. And I will also change
the color of my letter. Here, I need to select any
color which is contrast. Okay? Here you can see what are the colors being
used in this document. Here you can see this is
one of the easy and one of the good feature
of Canva here, okay, that it
automatically detects what color is being used here in this
particular document. Okay, I will come here in
the default colors option, or maybe I will select this one, something in dark blue, low. Let's see, this one
doesn't look that great. Or if I just change
the positioning. Okay, you guys can basically experiment with a lot of colors. Okay, that's what I want to say. Maybe I will take a black
color only from here. You can get all the
solid color options. Okay, I will just take a
black color from here. What I want to do is I want to add some quotation
mark from here. Okay? I want to
add some quotation here and some quotation
here as well. That again, I'll come
to this one here. I will click on here. As you can see, once I have
searched quotation here, you can see I do have my
quotation mark here as well. Now if I want to
use this one here, I will just decrease
the size from here. Maybe I will put this one here. I'll keep this one here. Now I will this one.
I will increase this. I will this again from here. Okay? I will select this
particular quotation from here, I will bring this one. And what I can do is I will flip this one horizontally, okay? Or I can flip this
one vertically. I will put this one
somewhere here, okay? So here I have here you guys can see I do have my basic
quotation ready for now. I want to add the
author name as well. In that case, in this
particular space, I'm going to put
the author name. In that case, what I can do, I will come again to this one. Come to the notepad. From here, you can see
the author is Charles. I'll click on Control. After that, I will come here
and I will click on Paste. Okay, here you guys can see the small text box,
which I'll select. I will move this one
right down here. Again, put this one here. Right now I do have this, I have selected this one. Again, select this
particular thing and increase the
size accordingly. Here you guys can
see I am increasing the size of the author. Okay, here I can basically increase the size
gradually from here. What I can do also is I will select this whole
particular text, and I can also check
the text color. Okay, suppose I want to
use something in orange. In that case, I will
select this one here. You can see this one
is in orange also. Maybe I will select
this color, okay? Or the font from here, okay? If I select this one
here, you can see, okay, You guys can basically work around with all of this. Here. Here. This one
looks quite good. Here you can see
the author name. Maybe I will just put the
author name somewhere here. I want to actually increase
the size from the side. Okay, I will come here, maybe I'll put this one here. What I can do is I
can select this. Okay. Now I do have it ready. I can put this one here
somewhere in the middle. It is good. It looks good as well. This is the one which I
made with the template. This is the one which I made all by myself from the scratch. Okay. I can add different
type of things from here. Maybe I'll check
for some graphic. I'll click on. Okay. From here and here you
guys can basically see, I do have different
type of graphics here. Okay. If again I, I was in photos here, I'll go to the graphic option. From graphic option here, you can search different
type of graphics. Okay, suppose if I'm searching
self motivation here, you guys can see I
do have a few of the stickers or few of the graphics which I can
use here in my work. Okay, I can do all of
this from here or I can maybe I want to drop
this one somewhere here. Okay. Suppose if I keep
this one somewhere here, or maybe on one side, I can decrease the
size from here. This is something here, you can put your
logos as well. Okay. These are a few of the things. You can also put a lot things from this
particular option. If I come down here, you guys will be
able to see a lot of stickers and a lot
of things as well. Okay, from here you
guys can do that. If I click on See All Here, you guys will be able to
see all this as well. Okay? There are a variety of things from where
you guys can choose. Here are a few of the
recently used frames. Okay? If I click on okay, here you guys can
see all of this. If I want to add this one here, I will add this one as well. Okay, here I will just change the transparency
of this particular thing. Come here and just
transparency somewhat. This, this transparency is fine. But here I will change
the transparency, okay? Maybe I will put something
around 70% okay? I have decreased 30% from
here. This is one thing. You guys can put it wherever
you basically want. This is also one coat which
you guys can use here. I have used this one as well. Okay? This is a which I
just made from the scratch. This is using the
template, okay? This is quite a simple one, as I do have already a template
I've actually done, okay? So again, if I go back from
the magic recommendations, if I want to add few
of the gradients, I can use different
gradients as well. Okay, Suppose I want to use this kind of
gradient from here. Okay, I'll come somewhere here. I want to add some
gradient here. In this part, I can actually add those
gradient from here. Okay? Here. Now you can see this is how it
basically looks. I can also decrease the
gradient from here. Okay? So this is how
it basically looks. Or in this place I want
to add different kind. Okay? Suppose I want to add
a different color frame. I will come here, maybe I will, I will just come here, put this one here. I will just adjust
the size here. You guys can see
the color, okay? Now, it looks like this, okay? You guys choose which one
you guys like the most, the first one or the second one. This is the simple
project of how you can start on with Canva. Okay? This is quite easy. Anyone can basically use with just a little practice if
I want to add this one. Well, okay here. Okay, hope this class was clear and hope you guys have understood from this
particular class. Hope to see you all in
the next class where I'll be how to make a logo in Canva. Okay, I hope to see you all in the next tutorial before going. You guys can actually save this one or download this one if you go to the share option. And if you click
on download here, you can download it as well. Okay, so maybe I'll
download this one in a JP format and I
want to download all. Okay, I will download both
these pages and I will click here and here you can
see it is getting downloaded. Okay, I'm just downloading
my particular frame here. It's asking me where do
I want to save this one? Okay, I will name this
one as Motivational Post. I will just save it
here in my downloads. I will just save it from here. It will get downloaded
in my downloads option. If I come here right now, if I go here from here I will
just go to my downloads. Okay, so this one I
need to extract first. Okay, I will just extract all. Now, I do have
both of this here. This is the one which
I have created. As you guys can see, this is the Jpeg one and this is the second one
which I have created. Okay, I hope you guys can
create your own as well, and hope to see you all
in my next tutorial. Till then, take care
and goodbye everyone.
6. Project on making a logo in canva: Hello everyone, and
welcome you all to another chapter of
the Canva tutorial. So now we are on
chapter number five. Here I'll be showing
you guys a project on how to make a logo in Canva. Okay? So I'll be designing
a logo from here basically. Okay, so you guys can
make your own design. So I'll be just making
a normal logo to show you guys how you can design
a logo from the scratch. Okay, So we'll be
learning about all of this here in this
particular class, so let's not waste
time and let's get started with this
particular chapter here. Here. As you guys,
I'm already in the home page of the
Canva from here. Basically, I won't be taking any kind of template
or image, okay? But I'll be making
it from the scratch. First up, I'll go to the
create design option. Once you go to the create
design option here, I'll be typing logo. Okay, I'll type logo here. You can see I do have
the size for the logo. I'll be making a normal logo, not any animated logo. In that case, what I will
do is I will click here. The size is 500 into 500 pixels. Okay, here you can
see page here. First up, what I'll be
doing is I'll be making a logo for a tech
company in that case. First I'll come to this box. Now what I want to do is I want to make different
text box from here. Okay, I clicked here with my, this tool right here. Okay, if I come to
this raw option, select this and I will move
this one right around here. We tech limited. Okay, first I will write, so I have written this one here. Or I'll again select this particular text
and I will write now, okay, I will keep this
text box here, here. In this particular text box, I will write R. Okay. I will just select RIS here. I have created this
text box as well. Now I will just decrease the size of this
text box from here, and I will put this text box
and align it here as well. Okay, I have aligned
this one here. Now what I'm going to write is T. I'll take another
text box from here. Okay? Add a text box and
I'll only write, okay. Again, I'll select
this from here. I'll make another text box. I'll repeat the process
till the time it's done. I'll keep this one
just beside this. I will write LTD again.
I'll click here. I will write L. I'll
create another box. I will write D. Okay, now what I can do is I will
just move this box again. Come here in the draw options, select this two here. I have this one. Come here and put this one here. Okay, so here you guys can see I do have different
text box here. Okay? And now you guys
might be thinking, why did I actually
choose like that, like many text boxes
at the same time? Okay, Suppose if I just create a text box
like this from here. Okay, Suppose I'll write BCD. Now I do have this
particular textbox here. Now, here, if I want to change any particular size from here, suppose if I want to
change this one here, you guys can see I just can't
select a particular word and I can't increase or decrease the size of
that particular word. I need to change
the whole set of words or the whole set of text, which I have in one textbox. What I'm going to do is I will
come here and delay this. Now I am almost done here. What I'm going to do is as
I've selected this text box, I will be selecting the logo. The first one maybe I will
select somewhere around 38. All this I will take somewhere around 32 will be fine, I guess. Okay. So what I can do is I will just increase
the size from here. Okay? While making logo, you guys need to work
with all of this. Sometimes it might get a little messy because
while I basically work, I do make it messy. Okay? Here, as you can see, I will just align it here. Now, again, I will put
the first letter here, and I will again change this to. 38. And I'll click
Enter, and again, come here to this
particular box and write 38 to this one, I will do 32. Okay, 32 enter, and I'll come here
again, 32 enter. Okay, here you can see I have basically made that
particular thing here. All I need to do is now
align it here, okay? So what I want to do is I
will start aligning this. Select this particular
text from here, and maybe I want to
align it somewhere here. I'll keep this one here. After that, I will align
this somewhere here. I need to make sure that I
align this all properly. Okay. Now, I will work
with this from here. Okay. So here is the ECH. I do have this now. The LTD. Okay. I have selected this, and now I'll select
this as well from here. Yeah, this looks good. Not quite bad. Now what I can do is I can
select this whole text. I can move this around. Suppose I'll keep this
one somewhere here. I do have this here. Now what I'll do is I'll be selecting a text
for all of this. I've selected this
one from here. Now basically I can check
what type do I want, Okay? Do I want this or do I
want this or this one? You can basically check around. Okay, here. You guys can also
do the same here. Okay? If I take this or
if I click on this one, this looks quite
good. Not that bad. I'll just align it here as well. Here, you guys can see this one. Maybe I will put this one or
align this one accordingly. Okay, here I have aligned
this one accordingly as well. Okay. Here you guys can
see here you guys can see, I'm done with my text here. Okay. I have aligned
it accordingly. Now I will select this one. Maybe bring it somewhere
here in the center, a little bit down. Okay, I have done this one. What I can do is I want
to change the font color. Okay? Maybe I'll come here and I will select this text
color from here. Or I can just double
click here from here. Basically, I can check
what color do I want. Okay. I will go with
somewhat this color. Okay. I like this one.
I will take this. Yeah, I do have this color here. Come here again,
select this one. Also, select this color. Okay? Now, with this, this particular word,
what I'm going to do is I will select
different color for them. Maybe I will check out what color basically
suits all of this. Okay. I'll gray again. This one. Come here
and take this again. Okay. Now, I do have
this one as well here. Okay. The way Tech Limited now I will be
making a logo here. What logo do I want
to make for that? I will come here, all my elements
option from elements. What I'm going to do is I
will search hexagon, okay? Hexagon, okay? Here, I will try to get few of the hexagon here
instead of hexagon. What I can do is I can come
here and I can write analogy. Once I've written technology, you guys can see I do have different graphics which
I can basically use here. Okay, let's see what
all options do I have. Okay? You guys can see, I do have this one here. Let me just check this one, how it basically looks. Okay, Maybe I will keep
this one somewhere here. I will delete this. Okay, I will keep this one
somewhere here, right here. What I'll be adding is
I will add this one. Okay. Here. As you can see, I do have this as well. Okay. I will keep
this somewhere here, here you guys can basically see that I do have my
logo here, okay? I have basically
created my logo. If I just want to do anything, I will keep this logo here. Now basically here I
will be adding a text. Okay. Maybe I will write, again, I'll come to my
text box, add a text box, write services for all. Okay, so I have written
this particular text. Again, select this one. And from here, basically I will select what kind
of font do I want? Okay, maybe from
here I can check. I will take some
regular things only. Okay, so I have selected this, now I will decrease
the size of this one. From here, maybe I will change the color to something in blue. Okay, now with my
move tool here, I will move this
one somewhere here. I'll select this again. The tick color is not
looking that great. Maybe I'll take
something in red. Okay? Yeah, this one
looks quite okay, and this looks quite good here. What I can do basically,
is select this, Maybe I'll select this
whole thing here, I will. Here, somewhere in
the middle here. Okay. Here you can see I am
done here of making my logo. I hope you guys can also
make your own logo. You guys can do
that. If you want to do some changes here as well, you guys will be able
to do that, okay? If you want to change
the transparency here, you can decrease the
transparency from here, but I'll keep it 200 for mine. Okay. Here you can see that
option for animation as well. Okay? But I don't want to do any animation basically
to my, this image. Okay, this looks good to me, It looks good to the eyes. Hope you guys can also make
your own logo using Canva. This is quite easy to make
your logo here in Canva, you can see there
are different types of graphics which you
guys can basically use from Canva and quite useful now if I want to save
this particular logo, then in that case what I can do is I have to click on Share. After that, you guys can come here on the download
option here. You guys can basically
download this in a PNG file. Okay? Here, I can basically
download it in a PNG file. Okay, If I just go back here, suppose if I want to see
what all other options I, okay, so here you can see I can view it only with my link. All this option I
have, okay here, I can actually download this one or directly upload it
to my Google Drive. All these features are also
available right under here. Okay, if I want to
present this one, okay, here, I can also present
this in a full screen. If I click this one here, you can see I do have
my particular logo. Okay? This is how it basically
looks, not bad. Okay. This looks good. Here, I will again come
to the share option. From the share option, you guys actually
download it, okay? If you want it in a PNG form, you guys can basically
get it in a PNG form. Okay? Now I will save this one, I'll click this one here. If I want a transparent
background in that case, I'll click this and I
will just download here. You can see they're asking me
some of the features here. Okay, I will just
save this one as logo logo in Canva. Okay? I will save this one here, and it's being saved. Now if I come to my
file here again, okay, so if I go to my
resource file from here, basically I'll be able to view
this particular logo here. You guys can see I do have
a transparent background, If I want to print this
particular logo in any of my business card or
in any of my templates, I can basically print this in any kind of page
or any document. Okay, hope you guys
have understood this class on how to
create your own logo. You guys can also create
different elements. Okay? I have did
for a tech company, so you guys can also
do for yourself. Okay, Canva is quite easy
and fun to work with. Okay, here you can
see the tech icons. You guys can always work
on this particular place. Okay, You guys can download or if you just want to upload
any kind of shapes. Okay, they're showing
me only the graphic. I want to see. Any
kind of pictures. I can see different
pictures as well. Okay, here are different
pictures here. If I again, come to the apps
option from the app option, if I go to the background here, if I write technology, if I search from here, you guys can see I do
have this one as well. Basically here now
you guys can see I do have a background
for this one as well. Okay? You guys can also work with all of
these things here. If I choose this
one around here, I can actually choose
what color do I want. Okay, So I will just remove
the background for now. I will delete this because
without a background, it looks quite good. Okay, so hope to see you all in the next chapter where
I'll be telling you guys about few of the tips
and tricks when you work in the Canva application to make your work faster and to give you guys some
advanced tips, okay? See you all in the
next chapter on Canva.
7. Tips and tricks to learn in canva: Hello everyone, and
welcome you all to another chapter
of Canva tutorial. So now we are on our
chapter number six. And here I'll be giving you
guys a few of the tips and tricks which you can
learn in Canva, okay? So which are few of the basic things which will
give you some good effects. And a few of the
shortcuts which I'll be telling you how
you can actually work on with that and to give some realistic appearance to your content or your
graphic in Canva. I'll be telling you guys
how to do that here. I'll be explaining
you guys about text effect, image drop shadow, how you can basically drag
and drop directly from the Google Chrome or any
other search engine. And also how you can
create an outline on images and selecting
multiple layers. We'll be learning about all of this here in this
particular class. Let's not waste
time and let's get started with this
particular chapter here. Here you guys can see I'm
directly in my workspace. Okay, from here I'll
come to style and I will select this background
with my text. I will be writing a
particular text from here, I do have this
particular text box one. I'll delete this one, I'll K from here. I will write, welcome you all to the Canva tutorial. Okay, I do have this thing here. Okay, I do have this
particular text now. I will increase the size
gradually from this one. Okay, I will just
increase size from here. Basically, I will
come here again in this draw option and also
align it in the center. Okay? I can also
increase the size. I will keep this one
somewhere in the middle. Okay? Now what I can do is by selecting this
particular thing from here, Suppose I want to basically
change the text from here. Okay? I want to add some effect. Okay, here, I can just
basically select this textbox. And if I come to effects, you guys can see I do have different
type of effects here. Okay, if I want to add
any kind of shadows here, I can add shadows if
I want to use none, click on this one here. You can select all of these options which
are available here. Okay, here you guys can see
the glitch option, the Neon. Okay? First let's look at
this shadow option from here. Okay? Here. Basically, if I
just zoom in a little bit, let me just zoom in here. You guys can see that I
do have a shadow here. Okay? I will just increase
the offset from here. You guys can see in
one direction I want. I can also check that, okay, maybe I'll select the
direction from here. If I want to blur this one
little bit, do the blur. And I can also check the
transparency from here. Okay? This is the option if I want to do add
a shadow, okay, not only that, you guys
can come here and you guys can also select what color
you want your shadow to be. Okay, I'll come here
and it is redirecting me to this document here. Okay? If I want it in red color, I can select this particular
red color from here. Or if I do want it in green, I can select green color here. You guys can check
that I do have this particular
shadow over here. Okay, This is about
the use of shadow. Now if I do come here, if I come to this echo
option again or if I go to the glitch option from here also you can check the opposite. Here you can see it is
giving you a glitch effect. You can check the direction if I'm changing
how it's changing. Okay, I'll keep it
somewhere here. Instead of this color, maybe
I'll click on this one. Okay? Here you can see the
color of the glitch, okay? I can choose between
this or this one. Maybe I'll choose
this one for now. If I want to do any curve here, I can also do the curve, okay? If I want to bring any
changes to the shape, I can do that as well, but I'll select this one only. So here are a few
of the options. If you want this one
to be in a neon color, you guys can do that as well. Okay, From here basically you guys can actually
set the intensity. If you want to
highlight this one, you guys can do that as well. Okay, come here in
the draw option, select this tool and bring
down here in the middle. Okay, so you can also put this neon effect as
well in your text. Okay, so this is one thing which you can use in your work. Once you select this
text option from here, you will get this effect
box from the effect box. You guys will get all
of this option which you can use it
according to yourself. Now the second thing which
we're going to see is how you can actually drop
shadow in an image. Okay? So how you can
basically put that for that. First. I'll go to My Elements. From my elements, what I'll
do is I'll write football. Okay? I'll write football. And I'll click on Enter here. You guys can see I do have different type of graphics here. Okay? I will click to See All. Okay, basically from
here what I'll choose is I'll select this particular
football from here, and I will select this one. I'll bring this one
somewhere here. Okay, here. Basically you guys can see that I do have a football here. But what I'm going to
do is I'll click on this edit image
option from here. And here you guys can see
once I clicked on this, I do have a particular
drop down menu from here. Okay, from here at here, you guys can see,
actually I don't have the drop shadow
option here. Okay? Just because this is not a, this is not an image, this
is basically a graphic. What I'm going to
do is I'll select this one and I will delete this. Okay. Again, come to
the elements option. I will basically go
to the photos here. What I'll do is from here
now I will search football. Okay, Here. I do have that option here. From here. Now I will basically see which one do
I want to select? Suppose I will select
this first one from here. Okay, I have selected this one. I will just drop this one. I will kick this one here. And this one I will delete. Okay. As I do have
this one right now, what I can do is
I will come here, go to the edit photo option. From this edit photo option, I'll go to the Effects option. From effects, I will come here. And now what I will do is I
will select the drop option. As you can see, once I have clicked here in the
drop option here, you can see a drop down
effect here, okay. So basically this effect
you guys can get, Okay, from here under
the shadow option, I can come here
again and I can also check increase or
decrease the size. I can actually select
the blur effect. If I want to change the angle, I can change the angle. Here you guys can see I can basically edit this particular
photo quite easily. Okay? I can check the intensity and everything as
such. Not only photos. If I search any other
things as well, suppose I will
write shoes. Okay. I will select a particular
shoe from here. I will take this red
converse from here. I will decrease the
size of this photo. I will bring this one here. Now I will again go to
the edit photo option. From this option, I will
come to the shadows. Again, I will select
the drop shadow option. Okay, here you guys
can see it is giving a realistic view by giving
a drop shadow here. If you guys can't see, then I'll just zoom
in for you all. Okay, here you guys can see it is giving
a realistic view. Again, if I come to
this option right here, okay, select this, Go
to the edit photo. Now if I come here, if I select none, Okay, here you guys can
see the difference. Okay, I have selected
none from here. Here, if I select the
drop shadow option, I can select how
I want to do it. Okay? I can select the angle, I can select the distance, the intensity, the image. I can do all of these
basically from here. Okay? So this is the use
of the drop shadow here. You can see here, they do have a drop shadow as well here. Okay, now this is how you guys
can basically do this one. Now let's come and
let's see how you can basically drag and drop
directly from Chrome. Basically what we do is
most of the time we will just download the photo into our system and then we'll
bring it in our Canva. Okay, but here you guys
don't have to do that. I'll just zoom out a
little bit from here. Okay, so I'll just
zoom this one out. And now here I'll
be adding an image. Okay, I'll go to my
Chrome from here. As you can see, I have
searched free images by Pixabay that I don't get any kind of copyright
issues. Okay. Pixabay is basically
providing you with different types of
free images here. Okay? Which you can
use in your work to do editing or
for any purposes. These are a few of
the free images. Okay, which you
guys can download. Okay? I will just take
this particular image. Suppose I will take
this image from here. What I can do is I
can track this one in my Canva and I can just paste this one directly
here. Okay, As you. I do have this particular
image from here. Now I will come here, select this one, or I'll just move this one
a little bit from here. I will put this one on top here. You can see I do have the
image right here as well. I can basically zoom this one in and zoom
this one out here. You guys can see that one. If you want to edit this
particular photo from here, you guys can actually edit
the photo from here as well. Okay, maybe I'll select
the glow option from here. Here you guys can basically see, I do have this image
right around here, okay. So this is how you can
actually work on with the images directly from
the Google as well. You don't have to download
it just to practice. Okay? If you're
practicing in Canva, you guys can directly come
here and do that as well. Okay? Now let's see how you can create an
outline on images, Okay? Suppose I will come here in the image option and I'll
go to element option first. And I'll write, man, I'll search okay here. You guys can see I do have
a particular picture here. What I'll do is I'll
just select from here. For me I always double click. That's why I do create two or three images
at the same time. Here you can see I have selected this particular image from here. Now if I go to this edit photo option
now again I will come up here adjustment option and I can do some basic editing
of the image from here. Okay, You guys can see I
can change the sharpness, clarity, the saturation shadows. A few of the things you guys
can do from here as well. Okay? But here if I
want to crop this one, I can also crop
this one as well. Okay. I will select
the auto option. I will just decrease
the size again. Okay, to show you guys
this one I was trying to bring this one. This one. Okay, I do have this come
to this edit photo option. And from here go to the shadows. And again, go to the
outline option here, you guys can see now I do have an outline just
here in my image. Okay. What I can do is I
can select the outline. Okay? How deep I want
my outline to be. Okay? I can select the outline, the blur effect, I
can select from here. Okay? And also the angle. Okay? I can also
select the angle. If I want to use the distance, I can do that here. I do have the intensity as well. Okay? I can actually will
decrease the intensity. And basically you
can also choose the color of this
particular outline here. Okay? Here you guys can see I do have a
particular outline. I want to color
that one as red or maybe something in
this blue color. Okay? Here you can see I do have an outline just
around my image, okay? Maybe if I zoom in, you guys will be able to
see the outline here, okay? It is just differentiating
the main object, okay, or this particular image
from the background, okay? This is how you
guys can do that. If you're making any kind of
banner or anything as such, you guys can actually differentiate or the primary
object from here as well. Okay, so if you do have any
background in any images, suppose I do have
this image right here and I'll delete this one. And I'll keep this
image right here. If I come here and if I go
to the image option here, you can see I do have the
option for background remover. Okay. This is basically given pro thing by
Canva to the pro users. Okay, If you're
using a Canva Pro, then you can basically do that one here you can see
it will take some time. It have identified what is
the main object in the image. According to that it have removed the background from
this particular image. Now I can actually fit this
image wherever I want to put. I can do that as well. This is a good thing by Canva, if you want to use this
particular feature, you guys can also use the
pro version for yourself. Okay? As you guys can see, I do have many layers here. Okay, I'll be telling you guys how you can
select multiple layers. Okay? Now, I will just
put this one here, okay? On top of this one here. Okay? Again, I will put
this one somewhere here. I will put this one
somewhere on the top. Okay. Here you can see I do have all these images
at the same place. Okay. What I can do, I do have multiple
images at the same time. What I need to do
is I just need to click on control
from my keyboard. And here you guys can see it will according to the layers. Okay? The first or on the top, I do have my text layer and I'm clicking on
control and my mouse. And if I just click here, you can see now I do have my image on the
next panel, okay. Now if I click on this one, I do have in this image, and right now I have
here on my whole frame. You can repeat that
same process again and again if you want to select
any particular thing. Suppose from here. Now
it's quite hard for me to choose the image which
is just behind my text. In that case, what
I can do is I will just click on Control, and I will keep on
selecting this one. Okay, I will select
this layer from here. Now I will just move this
layer down from here. In that case, if I want to
select this particular image. Okay, for that, I will again
click on Control here. You can see I do
have that image. And I will bring
this one down again. Come here, click here, and here I do have
this one again. Okay, I can just move
this one like that. I'll just zoom out again, and I'll put all this
here in a sequence. I hope you guys have understood
this class quite well. You guys have
understood what are the tips and tricks
that I shared with you. Hope you guys can use this features in your work while you were working on Canva. Hope to see you all
in the next class where I'll be showing
you guys how you can actually create a project or
a design for Instagram post. Okay, hope to see you
all in the next class. Till then, take care
and goodbye everyone.
8. Creating an instagram post in canva: Hello everyone, and
welcome you all to another chapter on
the Canva tutorial. Okay, so now we are on
our chapter number seven. And here I'll be
showing you how you can create an Instagram
post in Canva. Okay? I'll be telling you
guys how you can make your own design and how
to select the size. Okay? I'll be showing you guys
how you guys can do that. Okay? Different ways
of doing that. Okay? But I'll be showing you guys
from the scratch, okay, that I won't be using any
kind of template from Canva, which they have, but you
guys can use basically. I'll be showing you guys how to get access to all that as well. Okay, So let's not
waste time and let's get started with this
particular chapter here. Here. As you guys can see, I'm in my home page of Canva. Basically what you
guys can do is you guys come to the templates. From the templates, you guys
can come here and you guys can suppose I want
to search coffee. Okay, Here I will be making kind of Instagram post where I'll be promoting a
particular coffee shop. Okay? Or a restaurant business. Okay. For me I will be
creating it for a coffee shop. For that I am
searching coffee here. All templates related coffee, I'll get here right now. Okay, so it might
take some time here, okay, to load, but it
will eventually load. And show me what are the
templates do I have here? Okay, I'll go back from here. Let's try to check
these templates again. Here you guys can
basically see that I do have different
templates over here, Okay? Here are different
templates from where you guys can basically
choose, okay? Here you can see
it's an off page, or you are making one like
this is just a normal image. This one here is just normal coffee shop grand
opening image here, okay? And this are few
of the guidelines, how to make your espresso, Okay? For me I will be making
something like this one, okay? Here, basically you guys can
see that it is 50% of order. Now, I'll be adding an address and I'll
be putting that one. Okay? So I won't be
taking any tables here, but basically I'm just showing you guys that I'll be
making something like this. But here, instead of coffee, if you guys want to make
anything for an restaurant. Okay, So let's see some of the templates for
restaurants as well. Okay? So here you guys
can see this are few of the templates
for a restaurant. Okay? So this is
how you guys can actually make your own as well. Okay, I'll again go back here and as I told you that I'm going to start
it from the scratch. In that case, what I'm
going to do is I'll click on Create Design Here, I will write Instagram post. Okay. Here. Once I click on
Instagram post here, you guys can see I
do have an option. Okay. Do I want it in a portrait chef or I
want it in square? Okay. So basically
Instagram post, if I take it in square, it's 1080 into 1080 pixels. And here if I want to
take it in a portrait, it's 1080 into 13, 50 pixels. Okay? So what I'm going
to do is I'm going to take this portrait mode only now they'll be creating a particular work space for
me where I can start working. Okay, so yes, I do have
my particular thing here. Okay. Now, first thing first what
I'm going to do is I'll come here on the styles option and I'll check what
all color do I need. Okay? Before that, suppose I will come to
the Elements option. From the elements, I will be
going to the Photos option. Okay. I will search
coffee from here. Okay? And I'll click on
Enter from here. Basically, I'll be
selecting one image. Okay. Suppose I want to use. Particular image, this
particular background. For that, what I can do, I will select from here, I will delete this one. Okay, here you guys can
see I do have this. I can basically put this
one from here, okay? This is the one which
I will put here. Again, I will keep
this one here. I do have my background
already here. Okay. Here you guys
can see this will be the background of my design. First, here I have selected. And here you guys
can see there are different others as well. Okay, from here now I
will again go on top. I will go on top. From here I want to
upload some images. Okay, suppose I will come here. If I want to upload any files, I'll click on Upload
files and it will redirect me to my
page here from here. Basically, I do
have a few images. I'll select all of these images. I'll click on Open. Here it is, getting
imported here. Okay, here you guys can see
my image right here ported. Now what I want to do is
I don't want to directly put this particular
image right here. Okay? What I want to do is instead of putting it
directly down here, I'm going to make
some frames here. Okay? You guys basically
know how we can do that. Come to the elements
option, go back. Okay. Directly
from the elements, you guys can search frames. Okay. And click on Enter here. You guys can see I do have frames of different style. Okay? One frame I will
put somewhere here. And the other one,
let's take the size. Okay, let's put one here. Yeah, I do have both
of this frame here. Basically. Come to the
uploads option from here. The first thing I will
be choosing is I'll be dragging and dropping this
particular image here. Here you guys can
see basically I do have this image over here. What I can do is if
I want to actually move this particular
image box here, I can basically move the
image box from here. Okay, This one is that, I will just keep this
one somewhere down here. Now, again, I do have another
image as well where I will be just dragging and
dropping this image here. Okay, Here you can see I do have both of
my image as well. Okay, here I have
this image here. I do have this particular image now I have put my image as well, and I have one properly as well. Okay? If you want to
increase the size from here, you guys can increase the
size from here as well. Okay. If you want to increase
the size of this one, you guys can do that as well. Okay? I do have this. Yeah, this one looks quite fine. Okay. Now what I
will do is again, come back to the
elements option. From the elements option, go back or just clear
this one out from here. Basically you can search ribbon. Okay, If I search
ribbon from here, and I'll click on this and
here you guys can see I do have many graphics
ribbon from here. Maybe I will just
choose this one. And I will keep this
one somewhere here. Okay, I will just increase the size of
my ribbon from here. Okay, I will put this one here. Now what I'm going to do is come here into
the text option. And from here I will
click at a text box. But here in this
particular text box, what I'm going to do is I will keep this one
somewhere here, Okay? In the middle of this one. And I will write Spatial, Spatial offer. Okay, so I'll write
this one from here. And what I'm going to do is
I'll select this whole text. Now, I'll increase the
font size from here, and I'll increase this one. Choose the appropriate
from here. Okay. Check which one
basically looks good. Maybe I'll take the I'll, I'll select different one. Okay. I'll be selecting
which one looks better. Yeah, this one look good. I'll be selecting
color as well. Okay. So basically, if I
choose this color, this color looks
quite good, I guess. Okay? I'll keep
this one in middle. I will select this, and I will decrease the size of
this one from here. Maybe I will keep this
one somewhere on top. And this one in the middle here, you guys can see I do
have this one ready. Now, again, I'll be
creating another text box. Okay. So I'll be just naming
the coffee shop what I can actually name this particular coffee
shop basically, I can see that I do
need more space. In that case, what I'm going to do is I will just decrease the size of all of
this from here. Maybe I'll decrease
it from here as well. Okay, I will keep this
one somewhere here. Now, I will name the
coffee shop from here. I'll just add a textbox. Suppose I have named
my coffee shop as coffee or cafe Coffee. It should be Cafe
Robusta or Cafe Moca. Okay, I will save this
particular name from here. What I'm going to do is I will
change the font from here. I will select this
particular text. Now I will just change size. Maybe I'll keep in 82. From here, I can check which
type of font do want here. Okay, this font looks good. So what I'm going to do is I will bring this one
somewhere here. I will just increase this one. Okay? But here I'll be just
changing the text color. Let's see what suits. Okay. This one looks good. Okay. Now I will be putting
out the By one and get one. Okay. Here I'll be putting
by one and get one for that, I need another text
box and I'll write by. Get one free. Okay. I have posted
this as well. I will just move this
one somewhere here. I'll also put another text
box here, right here. What I'm going to do is
I will again come here. Okay? So I'll bring
this one here, select this particular text box. So I'll write here, offer, Offer. Offer is only available on this month. Okay? So I do have this as well. Okay. So I will
click on this one. Now I will select this
particular text from here, and I will decrease that
text size from here. Okay? So basically I will just move
this one down a little bit. I will change the
color from here. Okay, so here you guys can see what all color
has been used. Maybe if I choose this color, but with a different font, it will look quite good. Okay, let's select
different fonts from here. Okay, so this font
looks quite good. Yeah, this one is ready here. You guys can basically see here. If I want to put any
type of graphics, I will search coffee from here and click on this one here. You can see I will come
to this graphic option. From this graphic option, what I can do is maybe I will
select something from here. Okay, I will keep this one here. I will just decrease or
increase the size from here. Bring this one here, and I will just place
this one somewhere here. Okay? So this is how
it basically looks. And I can also add some
of the coffee bins. Okay. If I want to
from here. Okay. I will just increase the size. I will put it somewhere here. Okay. So this is how
we can basically work? Yeah. I am all done
with my post here. Okay. So here you guys can
do a lot of add your address and so many things for me I
just did to show you guys. Okay. Here in this
particular class, I have shown you how you can make promotional post
for your Instagram. Okay? For your Instagram post. This is about cafe where
I am just promoting them. Yeah. I hope you guys
have understood this one. Okay. I'll just
save this one from the downloads and I will
save this one in Pe format. Okay, I will click on Jp. Here is the particular size
and this one is the quality. I will click download here, you can see I am just saving
this particular word. Okay, now it is
getting downloaded. I'll just click the file where I want it to get downloaded. I want this to get
downloaded here. I will just rename it. I'll name this one
as Instagram post. I will just save this one. Okay, here it is. Being downloaded. Let's see. Okay. Here I do have this one. Okay. This is the one which
I have just created here. You guys can see this, the post which I have just now created hope you guys
have like this one. And understood how you
can actually start on with your Instagram post. Like what are the
different features you guys can do and how you can actually make
business promotional video from the scratch. Okay, This is how you guys
can basically start off. Hope to see you all in the next class where
we'll be learning how you can actually create
Youtube channel art in Canva. Okay? We'll be learning about all that in detail
in next class. Till then, take care. And goodbye everyone.
9. Class Project 1: Creating an instagram post: Hello guys. So this is the time for our class
project number one, where you'll be creating an
Instagram post in Canva. I will show you the step of what all you guys need to
follow and follow that, and you will be able to make an Instagram post in
Canva well and stunning. And I'll be waiting for you
guys to upload your work into our project panel that I can check and get back to you guys. Okay, so let's see what steps
you guys need to follow. Here you guys can
see the name of the class project is
creating an Instagram post. And here you do have
a description of what is the usage of creating
an Instagram post in Canva. Let's see what all steps
we need to follow here. First up, you need to go
to the create file option. From there, you need to search the Instagram post
option and select that. Step number three,
you need to choose your Element option and image
according to your post. Suppose you're making any
kind of marketing post. In that case, you will choose image or elements
according to that. Okay, step number four
is you need to share. Go to the share option
and download your file. And make sure that you
download it in JP format. Okay? After that, the
last step is save that in your system and upload your project into
our project panel. Okay, so the outcome
will be that you like, you'll get a stunning, visually appealing image that is ready to be shared
on your Instagram fit. You can basically upload that. And if you guys need
to change anything, I'll be telling you that
this color match or this style can be improved
or anything as such. So let's see how
we'll start with all of that by by following all the which I have showed here I am in the
home page of Canva. From here I will click
on Create Design. From here I will
search Instagram Post. Okay. In Post. I'll click Enter here. You can see I do have
different options here. I'll choose the 1080 into 13, 50 pixels a page will
appear here. Okay. From here I will name this
one as class Project One. Okay, project one. I'll come here here. I want to basically create page or Instagram
post about what? I want to create
an Instagram post. Basically what I'll do
is I want to create an Instagram post or I will
be just putting on a Okay. Like a motivational
something as such. Okay. I'll create an
Instagram post based on that. For that, what I'll do
is I'll come here first. Go to the Elements option. From my Elements option, what I'll do is I'll
come to Photos. Okay, I will see all from here. I will search Motivation. I'll click on Enter here. You guys can see I
do have a few of the images of motivation, Okay. I'll click on Enter here. You guys can see, I
will select this, I will zoom this one, or I will just bring
this one somewhere here. I'll increase the size. And also from here, this is going to be the
background of my post. Now as I do have this image, what I'll do is I'll select
this particular image here and I will decrease
the transparency from here. I will keep this one here. Now I will come to my text box. From my text box, what I'll do is I will see
text box, I'll delete one. In other one, I will just
write a motivational code. Okay, I'll just basically
write first I'll select this, write nothing is impossible. I'll close this quotation. Now, I will just increase the size of this
particular thing. And also I will increase
the box size from here. Okay, Now what I'll do is from here I will
select this particular text, and I will change the font type. Okay? I will take a
different font from here. Maybe I will be
this one from here. Okay? I'll take this
particular font from here, and I'll change the color
to something as red. Okay? This one. And here you can
see I do have my text here. Now what I can do is come
again to the elements option, go back and after going back, you guys can come here and
go to the graphic option. Okay, From here I will
view the C all, okay, as this one is, I'll search here as Motivation. Okay, I'll again search
Motivation over here. And here you guys can see
I do have many icons here. Okay, As I do have this icons, I can basically put
this icon sub here. Suppose if I want
to put this icon somewhere here on this particular
corner, I can do that. Also, few of the other things I can actually put from here, Suppose I want to put this
particular logo somewhere here or somewhere in the corner. I can do that as well. Okay, this is the Post
which I'm going to do. And you can also add
different type of designs from here. Come down. Okay, maybe I will take
different frames from here. What I can also do is if I
want to put out any image, I can basically
take my frame here. Put that, okay. Suppose I will put my
frame somewhere here. And I can decrease the
size of my frame here. I will put it in one corner. Now what I'm going to do is
I'll come to my photos again. Okay. I will go to
my photos and I'll write as motivation here. You can see I do
have this image. Now what I can do is I can
put this image right up here. I can also increase
the size from here. Maybe I put it somewhere here, just above this one. Okay? This is how you
can basically work on or this one doesn't
look that great for that, I will just delete image. I can come here, I'll
also delete the frame. This one is quite fine. Suppose if I want to add
any other graphics here, you guys can do that, okay? But obviously when you're
doing this particular thing, you guys can obviously
use the framing. Any question if you do
have regarding this one, you guys can always recommend my particular video on how
I made Instagram post. Okay? So I'll be eager to
check out all your work and you guys can basically come
here to the Share option. And from here you can
click on download. And instead PNG, you guys choose the JP format and click
on Download from here. And it will be downloaded
in your system and you guys can upload
it into a project panel. If you guys have understood
this class project, I'll be eager to check out your work. Till then, take care. And goodbye everyone.
10. Creating a youtube banner in canva: Hello everyone, and
welcome you all to another chapter of
Canva Tutorial. So now we are on
chapter number eight, and here we'll be
learning how you can actually create a
Youtube banner in Canva. Okay, so here I'll be
explaining you guys each and every about how you can actually
create a Youtube banner. So if you do have a Youtube
channel or you're creating it for any of your client, you guys can do that using this particular tools
and all these templates. Okay? I'll be showing you guys both ways of
how you can do that. Okay? There are pre
existing templates which are already
there some images. Okay? I'll be
choosing from that. Okay. Also I'll be showing you guys how to make it
from the scratch, okay, by taking some image, uploading that and
after that, making one. Okay. We'll be learning all of this here in this
particular lesson. Let's not waste time and let's get this particular
chapter here. Here. As you guys
can see that I'm in my home page of Canva from here, what I'm going to do
is first I will come here in the great
design options, okay? I will click on this one. And sometimes it might
take some time. Okay. So what I'm going
to do is I will be writing Youtube banner. Once I have written
this tube banner, you guys can see I do have
a particular size here. Okay. Here you guys can
see for Youtube banner, the size is 25, 60 into 14, 40 pixels. Okay? So this is
the standard size, but you can also customize
according to yourself as well. Okay, so I will
click on this one, and now it will just create
a Youtube banner for me. So I'll come here, I will just rename this one as Youtube banner and I'll come
to this particular page. Okay? So here you guys
can see there are different templates which you can use for your
Youtube channel. Okay? So what I'm going to
make is I'm going to make a Youtube banner for
a take, uh, channel. Okay? In that case, what I'm going to do first is I will come to my elements option. From my elements option. Now what I'm going to do is
I will be choosing a shape. Okay? From here maybe I
will write rectangle, okay? I will select this
particular shape. As you can see, I do have a
particular shape here, Okay? I will actually set the
size according to this one. Okay? I will just select this
particular size from here. Now I have selected this. I'll click on this color option. I will select no color here. Okay? So basically I don't
have any color here. Now in this particular box, from here, I will also
check the outline. Okay, I will just put
a normal outline here. This one is basically
a normal outline, which is just helping
me to keep that in mind that I have to work
in this particular panel. This is working as a
ruler or a grid for me. In this particular panel. I'll come here in
this draw option, take my selection tool
and move it around here, somewhere in the center. Okay, I will keep it here
in the perfect center. Okay, so I do have this one. Now the first thing what
I'm going to do is now I will be taking an
image from here. Okay? Now first I
will create a logo. Suppose for that, again, come to the elements
option from here. Right now you guys
can type frames. Okay, I will select frames.
I do have this one. I will select this and I will actually feed this one into
this particular box here. Okay? I will just
zoom Swan and here. Okay. I will delete this here. You guys can see I do have
a frame here as well. Now what I'm going
to do is as I don't have any logo yet, in that case, what I'm going to do is
I'll come here and I'll search logo for Tick. I'll click on Enter here. You guys can see I do have different graphics
from graphics. Basically, I will be
selecting a logo from here. Suppose I want this logo, okay? What I want to do is I want
to this one and I want to put this particular logo somewhere
here or inside this one. Or I will delete this. I'll directly drag and
drop this one here. Or instead of choosing this particular frame,
I will delete this. I'll directly take this
particular logo from here. I will just zoom
this one and I will fit this one inside my box here. You guys can see I do have
this particular box here. Now the next thing
what I'm going to do is I'll again come to
the elements option. From here I will be going to the Photos option from Photos as I'm making
it for a tech company. In that case I'll be
writing okay, Tick. And I'll click on Enter here. You guys can basically see, I do have different
options right above here. What I can do is I can
bring this image here. I will check, or I'll just fill this
particular box from here. I will increase the size. I'll come here. Now
as you guys can see, I do have this
particular image here. I basically selected
this whole frame here. Okay. I will just
maintain this one. This is going to be the
background of my template. Now what I want to do is
once I've selected this, I will come to the
position option. From the position option, what I want to do is I want this background to go backward. Okay? Here you can
see I have sent this one backward,
and I do have this. Now I want this
particular box as well. Okay? Now what I can
do is I will click on this one here. I'll again come
here. Here you guys can see I do have
this particular logo. Once I've selected
this particular logo, if I want to change
color of the logo, I'll come here here, You guys can basically see what all color has been used
in this particular photo. By default it is showing me
that colors do I have here. Okay, Maybe I will select something in red
or something also. I do have many options here. Okay, If I want to edit
this particular image, I can edit this one as well. Okay, I'll click here. Maybe I'll go back here again. I'll click Control here. You guys can see I do have
this particular box as well. From here what I can do is
I'll come to this text option. From here I will be
adding a text box here. Okay. Maybe I will type stick. Okay. I'll write and
I'll write T. Okay. Here as you can see, I have wrote the stick. Now I will actually increase the phone size
basically from here. Here you can see I am
increasing the phone size. From here, I will increase
it as much as I want. From here I will increase. And yeah, this looks good. I will just position this
particular thing here, just beside this one. Okay. Here as you guys can see, I do have this one, now I do have this
thing as well. Okay, So I have
selected this text, and now I want to add
different type of fonts. Okay, Whatever looks good, I will be using that
particular font from here. Okay, I can also
search from here. Basically, maybe I'll take
something in this one. Okay? Here you can see I do
have my stick like this. Or instead of in small letter, I will come and I'll write R. I will take this
one from here. I will increase the
size from here. I have selected
this particular box and I will keep it
somewhere aligned here. Okay, Now I am aligned
to this one as well. If I want to move it, I can move it as well. I'll come here to the
text color option. I will select the
particular text color. Whatever basically looks
good here in my text, I will use that
particular color. Suppose if I am
selecting all of this, I will choose this color. Let's see the preview, how it actually looks. It doesn't look that
great, but again, I'll this one come here and check out with all
these colors from here. If I am taking
something in blue, I'll take this one and I will see that how it looks
when this one is in blue. Okay, here you can see I can change the color
something like this as well. Suppose I will again take. This one. And I will
select only this. I can change the color
from here as well. Okay? I'll take this and
all this other letter. I will take something
in red here. I will take red as well. Okay. Here you guys can see
how it basically looks. Okay, Now I do have
this frame here. Now what I'm going to do is if I want to add any
background to this, I will select this
particular layer and I can also add
a background here. Once I come to the
effect option here, I do have the shadow option or this background option here. You guys can see I do have the background
option right here. As I have selected this, I will come here and I will just align it
to the line as well. Okay, I will select the
background color from here. Okay, I will come again
here into the text option. Okay, go to the effects. And from effect, you guys can
actually change the color. Suppose I want a black color, I can choose the black color, and I can actually change the transparency of
this one as well. Okay, Maybe I just want the transparency to
be something like this. In that case, I will
write this one here. You guys can see I
do have my logo, I do have my text. Okay? Maybe I'll come, I will just select this one. Okay? Maybe I'll take
a white color again, come to this effect option. Okay? I can also change the roundness or I can also
change the spread, okay? Here, I will be able to change the spread as well from here. And also the roundness, okay? I want this one to this round. I will also increase
this one from here. And I will actually decrease the transparency till this much. Okay, Yeah, this much is done. As you can see, this
is just going to be my Youtube banner, okay? But now what I want to do is
I want to change this color. Okay? Again, I will come here and I'll select white
text over all of this. Okay? White text looks good for me because
of the background. Okay. I'll also change
this one to dark black. Okay. I will change
this one to black. Here you can see this is just a very simple
Youtube banner. Now what I can do is I will come here to the elements
option here. Basically, I can
actually put all of my Facebook and all
of these icons. I'll come here and I'll
tie Facebook here. You can see I do have
the Facebook logo, so I'll click Enter
or I'll just go back. Okay, So I want graphics. In graphics, I'll
write Facebook here. You can see I do have
the Facebook icon here. Okay. What I'll do is
I'll just decrease the size of this one and I will put this
one somewhere here. Okay? Now, if I do have
an Instagram account, I will write Instagram here. You can see I do have the
Instagram icon here as well. Okay. Here, as you can see, I do have the Instagram icon. I will put the Instagram
icon somewhere here. If I do have a Twitter account, I will again write Twitter. I'll click on Enter, and here you can see I do have
the Twitter logo as well. Okay, I'll move this one, just decrease the size of
this Twitter logo from here. Again, if I want to add
any kind of thing as well, suppose if I do have website, I can also search
website from here. Okay. I'll write the website
and I'll click on Enter. Let's see what all
option will I get here? Maybe I will just change it. Okay. I will come here again. I will try to see what
all I have option here. Okay. I will bring this one here and I will decrease
the size as well. Here you guys can see I do
this four now the thing, what I'm going to do is
I will here for Youtube. Okay. I'll just search Youtube and I'll
click on Enter here. You guys can see I do have
the Youtube I can here. Okay. I will first add this one. Okay. First I will add
this Share button. I'll also decrease the size of the Share button from here. Now, I will also take the Subscribe button
here with the bell icon. I do have this. I'll put this
one somewhere here as well. I will decrease the size, will keep this one
somewhere here. Now I just want you tube
thing here for this one. I will keep this one on top. I will decrease the size. I will keep this
one somewhere here. Maybe I will decrease
the size here. You guys can see I'm
basically done with my page. What I need to do is I need to come to the
text option from here and I want to add text box. I will bring this one here. Now basically what
I can do is I will just duplicate this
particular layer from here. Okay, here, I will just
duplicate this one again. I will click here. I will duplicate
this layer again. I will duplicate this. I'll just put the address
from where they can basically find me
in wall platform. I will come here in Facebook. T, it's here as I will write T here
in my Twitter handle. It is T LTD. I'll just give our website. It's WW or is Tech. Okay. This is the
website I do have here. Now what I can basically do is I can change the
color from here. Okay? Suppose I want this one to be in a
different format. In that case, I'll
come here first. I will select this one. Now from here, what
I can do is I can basically select the text color. Okay, Come here and maybe
I want this one in red. Yeah, this one I do
have in red right now. Okay. But this doesn't
look that great. When this one is in red, I'll make it a little bold. I will just increase the
size a little bit from here. The same thing here as well. Come here, and I will
click on this color. Okay, Increase the
size from here. Okay, I will increase
the size till this much. Again, take this, I can
actually put the color here. Okay. Come to this option, take the red color. Okay. Actually, I will be able
to align this accordingly. Okay, Here, I will align this. Yeah, this one looks quite fine. Again, come here, Select this whole particular
text from here. Again, change the
size from here, and change the color as well. I'll just repeat this
process from here. I'll select this
whole text from here. Now again, I'll just increase the size and I
will change the color. Suppose I want the red color, come here and click
on this one Here. You guys can see I do have
this one in red color. But if I want to
change the color as this one is not quite visible, first I want something, something to be in bold. Okay, I will choose the Intrust. Same here. I will
come here again. I will choose the
Intrust option. I will come here, I will select Intro Rust. I do have this here, and again, I will come
here, select this one. Just keep in mind
that whenever you're working on this
particular application, make sure that you choose
your phone style and font size from before. Otherwise you guys
might get confused, like the way I'm
getting confused here. Okay, which one to use and
which one to use. Okay. Again, come here, select the whole text and come
to this introrust. Okay, I do have this. I'll keep this one
somewhere here. If I want to increase the
size, I will increase. Okay. I'll just here back. I will increase the
size of this as well. I'll just keep this
one somewhere here. I'll just increase
the size of this one. Okay, Here you guys can see
I am done with my logo here. This is the Youtube banner
which I have created. Okay. You guys can do it
according to yourself, so there are many
preexisting graphics and preexisting styles
which you guys can use while making this one. This is the simplest version
of a Youtube banner which you guys can create and also
save it into your system. Come here, go to
download from PNG. You guys can basically
download this one. Okay? I'll just download
this in a PNG format. I'll click on download here. You can see this particular
thing is getting downloaded. Okay. Once it is
getting downloaded, it will again show you a pop
up bar that in your system. Where do you want to
basically save it? Okay. Here as you can see, I have named this
one as Tube banner. I'll come here down and I will just save this
into my resource file. I'll just save this
into my resource file. And hope you guys have
understood this particular class on how to create a tube banner. Hope to see you all
in the next class where we'll be learning about the dripping
effect in Nava. Okay, we'll be learning about
that in the next class. See you all and take
care and goodbye.
11. Drip effect and fonts to use: Hello everyone and
welcome you all to another chapter of
the Canva tutorial. So now we are on
chapter number nine. And here I'll be explaining to you guys about the
drip effect and what all the phones
that you can use for your template
or for your design. Okay, So I'll be giving
you guys a few of the templates of how and in what condition
you should use. Because as we do
have so many fonts, sometimes we do get
confused which one to use. So I have selected
few of the fonts from Canva and I'll be
telling you guys about that, how you can use
that, and in what scenarios you guys
can use all of those. Basically, you guys can actually
work with those phones. Also, you can check out which
one suits you the best. Okay, but I'm just
giving you overview for what purpose you guys
can use all of this. Okay? Also about the drip effect
I'll be showing you. Let's not waste
time and let's get started with this
particular chapter here. Here. As you guys can see, I'm in the home page from here. Basically what I'll do
is I'll come to Create design from this
create design option. I'll check the
whiteboard option. Inside this one I'll be
showing you guys how you can actually put on different colors or different things from here. Okay? As you can see, I do box here. Now I'll go to the
elements option. From the elements option, what I'll do is
I'll search fruit. Let's see what all
fruit I do have here. Okay, from graphics,
I'll choose here. As you can see, I do
have many of this here. Otherwise I will
come to photos and I'll check different
type of things here. Okay. As I do have
the cherries here, I will bring the
cherries somewhere here. I will delete one. This one I will delete now. I do have only one. In that case I will
just the size. Okay. I don't want to crop, but I just want to decrease
the size of this one. Okay, I'll just move
this one on top here. As you can see, I do have
to cherries here here. If I want to put the
dripping effect, what I can do is I can again come here to the
elements option. From the elements option, I can drip effect. Okay, here as I do have
this drip option here, you guys can see I do have different type of
graphic for that. I will check all of
this from here. Okay? As you can see, I do
have different things here and different
type of rep, effects. Basically what I can do is suppose I want to
use this one, Okay. Here I have selected this. Now I will come here, I'll cancel this one. I can select a color for this. Suppose this one is in red. I can select a red
color here as well. As you can see, I do have all
of this effect down here. Basically what I want
to do is I want to show that this one is dripping. I'll come here, I will
position this one at the back. Come here in the position
option from here, I will send this one backward. Now I will just arrange
this from here. Here you can see I do have
a particular D from here. Basically you guys
can add drip effect. Come to the edit photo option. Suppose if I want to darken the color. Okay, I can do that. If I want to use
the drop shadow, I can use the drop
shadow as well. I will also put some glow here. Okay, here you guys can see I have put the
glow here as well. Again, I'll come to
this option here. Here you can see I do have different effects as well here. If I want to blur
it a little bit, I can check the intensity
of the blur from here. This is how we guys can
basically put drip effect. And also I will edit
this panel as well. Okay, from here. And if I want to
liquefy this one, I can do the
liquification from here. Here, I will open
this liquefy option. And this one is connected here. You guys can see I do have a different type of
drip options down here. Okay, maybe I will
select this flow one. Again, come here from this one. What I can do is I will go
to the Edit photo option. And from Photo option, I will select and I will
do the background remover. I'm using the background
remover from here. Here. Now you guys
can basically see, I have removed the background, well I have added this one here. Suppose I want to add a
different drip effect here. Okay, so if I just
take a banana here, as you can see, I do
have the banana here. And I'll take this
particular graphic and I'll put this one here. And now I will search
for a drop effect. Okay, if I want to take
this Dp effect from here, here, I will take
the drip effect. I will also decrease
the size from here. Now I will also change
the color from here. I will take this color
somewhat to yellow. Okay? As you can see what
all color has been used. Okay? Maybe I will keep
this one somewhere here, or I will just match
this particular color. Or I'll select this one. Zoom this one here, I'll decrease the size here. You guys can see once
I have arranged here, I have put this one here. Okay. I'll delete this one. Maybe come to this option here. Again, go to that photo. I don't want the blur, Okay, I want it like this. Come here to the
drip effect option. Okay, from here again, I will select this color. I can also do some
modification from here. Okay, this drip effect
looks quite realistic. Okay, here you guys can see
I'll just decrease the size. I can also duplicate
this particular layer. Suppose I want to
duplicate this one here. Okay? And also I want to
put on some rotation here. Here you guys can see I am putting on some
rotation as well. In this particular part here, I will just duplicate this
layer as well from here. Here, basically
you guys can check out the drip effect from here. Okay, so you can actually join this one if I
come here again, if I want to put some
drip effect here as well. First I'll delete
this and I will come here and I will decrease
the size of this one, and I want to put some
drip effect here. I'll come here again. I will go to the edit image. I can select the liquefy
option from here. Okay, maybe I'll
choose this one. Once I go to the
color option here, you can see what all color
has been used here, okay? In this particular image, whatever suits the best, I will choose that
particular color from here. Okay? Here, you can
basically get effect, okay? If I just put this one backward, suppose I want to
take this backward, I can check this here. I will send this
one to back here. You can see the drip
effect here as well. I'll copy this one and
I'll put this one. Same here. Here you guys can see also I can just click on Alt
and I can copy this one now. I will just rotate
this one as well. From here I can rotate
as much as I want. I will decrease the size. I will just put the
drip here basically, you guys can actually copy this. Then rotate this one and put
on your drip effect here. Can see again, I will just do this one here and
decrease the size from here. Here you guys can see this is the dripping
effect as well. I hope you guys have understood about the dripping
effect from here. Okay, now we'll be learning what all text font you guys
can basically use. Okay, if I come to
the text option, I do have different
text options here. Okay, font styles, maybe first I will just
write a text here. Okay, we welcome all the Canva tutorial. I have wrote this
particular thing down here, and I'll just increase the size. The font which you guys
can basically see now, this one is the canvas
Sands Canvas Sans, or the Open sans is basically
the default font in Canva. Okay, this one is can be used, this one is the Open sans. Here, you can see
this is basically the default setting
or the default font, and this is quite standard. If I just want to bold this one, I can click on this one here, you can see this is
quite a basic one, okay? This one you guys can
use if you are not doing something fancy or if you're just doing
some official work. In that case, you guys can basically add this
particular font, okay, or use this
particular font. Now let's see what all other
fonts do. I have, okay? The next font which I recommend is like if
you're making any kind of animation or if you're going to do any kind of
cartoon animation. Or if you're making any
kind of graphic in cartoon, you guys can use the
battle scared open font. Okay, This one I also prefer. Okay, so this one
looks quite nice. And here you can also change
the color of your font. Okay, here you guys can see
I have added some color. And this font looks good. If you're trying to use any kind of graphic or making any cartoon or any
kind of animation, you guys can always use
this particular font here. The next font which I'm
going about is like, suppose you want that in Carsif. Or sometimes we
have to put some of our signature or
anything as such. In that case, what kind
of font should I use? Okay, In that case, I'll come here and I will
simply type signature. Okay, from here. And I'll click on Enter here. You guys can see I do
have different fonts. I'll choose this
particular font here. You guys can see this
font looks good. Okay, You guys can use this particular set
of fonts as well. This one is quite
hard to understand, as you can see this is the cars, so if you're putting any kind of signature in any
kind of document, you guys can use
this basic font. Okay, after that, let's another font here if you
want to see any kind of fancy font or
any kind of font which will quite fashionable
or which looks quite good. Okay, for fashion
purposes, In that case, you just need to search
the font name as Liana. Okay, I'll type Liana here. And here you can see I do
have the Liana font here. Okay, so here you guys
can basically see, I will bring this one here
and I will decrease the size. I'll bring this one
somewhere here. This one is quite
fashionable font which you also can
use in your work. Okay, If you're working
on with any kind of fashion page or you're doing graphic designing for
any kind of fashion page. In that case, you guys can use
this kind of font as well. I hope you guys have understood
about the Liana font. Okay. Now I'm going to show you a font which you can use
in your formal work. Okay? I will come here and
I will type lato. Okay? So basically I will type lato. So you can also use this particular font for
any kind of formal use. Okay? So in lato, basically, I do have this
particular font here. And if I want to
make this one bold, this is the lato font. So you can or use this one
for any kind of formal usage. Suppose if you're designing for any company or for any
corporate companies, you guys can use this
if you're writing any documents or if you're
writing your resume. You guys can always check out this particular latto font and you guys can use
it in your work. Okay, so now let's
look at another font which I do have here is
the Libre Vascervel. Okay, so whenever we're
trying to create any logo, this particular font
looks quite good. Inside logos,
basically, you guys can also use this one in
different places as well, but in Logos, this one
looks quite great. Okay, I'll write Libre
and I'll write Basl. Okay, Here as you can see, I have searched
Libra Asker, well, and I will click on Enter here. You can see I do
have my page here. I will apply this one here. This basically looks quite good. You can also use it for
corporate uses, okay? But inside logo, this
one looks quite great sometimes if you want to bend our text and anything as such. In that case also if I want
to put some effect here, you can see in curves and this one looks
quite good. Okay. Here, I can actually decrease the size and everything
as such from here. Okay, I will just
go back again here. I do have two layers. I'll delete all of this. Yeah, I hope you guys have understood this
particular class. I have showed you how
you can actually add Rip and also how you can use different font styles
for different purposes. In next class, we'll learn about how you can basically find different color palettes and also different font combination with those color palettes. I'll be telling you
guys that it will be easy for you guys
to start on with your designing and also do some visually appealing designs. Okay, so hope to see you
all in the next class. Till then, take care. And goodbye everyone.
12. Colour combinations to use: Hello everyone, and
welcome you all to another chapter of
the Canva tutorial. So now we are on
chapter number ten. And here I'll be
telling you guys about the color combinations
which you can use. Okay? So if you're creating a design or any kind of
graphic model color, you can use to
make it look good. Okay. Because most of the time, if the color is not that great, our picture, it won't look nice. Or our graphic, whatever
we're creating also in text, we should understand that what color goes in
with what color. Here, we'll be learning about all of this in this
particular class. Let's not waste time, and let's get started with
this particular chapter here. As you can see right now, I'm here in my home page
or in my workspace. Okay, from here what I'm
going to do is I'll come here to the elements option and I'll be taking few shapes here. Okay, I'll take the shape and
I will also open this one. Maybe I will select
this from here. Okay? Now we'll check about
the color combination. Okay? What color basically
goes with or which one? We'll look into all of that here in this
particular class. For that, let me start
with the red color. I select this one, and I will put this
one a red color here. Okay? I will just select or select this
particular box here. And I will select
the color as red. I've selected this
one on red color. What I'm going to do is if I try to write here with a green, okay, Suppose I do have a grass green or any
kind of green. I will try to do that. I'll again come to my
text here, right here. I will type it with green. Okay. I'll write hello. I'll just increase the text
size from here. Okay. Yeah, this much is fine. Red with black. It goes quite well. As you guys can see, this is basically a
good combination. But here instead of
this, I come here, I change my text to this color. Suppose if I change
my text to green, it doesn't look that great. I don't like it, basically. Okay, if I use any
blue color as well, it also won't look good. If I come here and I select
this blue or I'll come back, I have selected this text. I will select a color from here. I will select the blue color, or the blue color from here. Okay? This combination with
this one looks quite good. Okay. Now let me take
a blue box from here. Okay, I'll come here and I
will take this blue box. Now I want to check the
color combination from here. Basically, I will
select this layer. I'll click on Control here. I want to change
the color as well. Okay, I've selected this. Come to the font text color. Now here if I do
put our red color, okay, suppose I want
to check it in red. This color combination
is not good as well. Okay, From here, if I
also take orange color, it also won't look that great. Okay, With blue, what
all color we can use? Okay, I'm only telling
you guys about text guys. I'll be showing you guys about the graphic after this here. If I do it with yellow, in blue, the yellow
looks quite good. Okay, It looks quite nice. We can use all this color from here and now let's try
to see it in black. Okay? I'll change the
shape color to black. Inside black, the
yellow looks quite good if I use the red as well. Okay, Suppose I will
select a red color here. Okay? Inside black, the
red also looks good. If I come here, if I
choose a violet color, okay, here, magenta, pink. Most of this color
will look good here with this purple cobalt. Okay? But if I choose this
particular set of color, this doesn't go that well. The black color. Okay? So we should refrain this from using. Now, let's see, for
a white box here. Okay, I'll be creating
a white box now. And inside a white box, which color goes
well with this one? Okay, now if I take a red
color here for my phones, the red goes quite well. I will choose here and I
will take a red color. The red one goes quite well
with the white background. Then also, if I use here, you guys can see that
I do have this one. This color combination
goes quite well. Okay. But here, if I
just do the vice versa, in that case that
will also look good, but I do have red background. Okay, suppose I will come here and I will select
a red background here. Okay, I want my text
to be in black. Okay, I'll come here and I want my text color
to be in black. In that case, this text
doesn't look that great. Okay. Here I do have
my text color. Okay. I will select this,
come here, black color. This one doesn't
look that appealing. Okay, here I'll be
showing you guys some of the worst color
combination which you just should not use and
refrain it from using. From here, you guys can
see orange and yellow. This color combination
is not good at all. Here you guys can see this, a few of the palettes which you guys should
refrain yourself from using. Okay, The colors doesn't
go that well altogether. These are few of the
color combinations which doesn't look
good or professional. Okay, so here you guys can see red in the violet or the
purple inside the red. This is also a good combination, and green and yellow also is not a good
combination as well. Okay, here you can see the
neon color combination. Okay, You guys should
refrain yourself from using the particular colors when you're doing any type of
designing in your text. This is for text here, you can look at this
particular thing here. The color combination
here is not good. It doesn't look that great. Okay. There is nothing wrong with the font
or anything as such. The thing is this doesn't go
quite well with the color. Okay? It doesn't look
that professional whenever we're making
any graphic designing. In that case, we need to make sure that my color is on point. That in one look, it looks quite great. Okay? To give out some professional look
to my graphic here, I'll be telling you guys about one website which you
guys can always recommend, which is the color
color gradient. Okay? From here,
basically you guys will be able to see different
color combinations. Okay? If I come to all here, you guys I do have a
website here, okay? I will search the color
gradient from here, I will go to this one here. You guys can see the
combination of colors here. Okay? Here you can see all these colors and
choose this one. And also see how this
basically looks. Okay? This is one app or this is one website where you guys can actually see the
color combination. Does it go well
with any of this? You guys can one and paste
in our Canva and look. Okay, let's see another website which is known as Grapent. Okay, if I search gradient here, you can see I do have this
particular website. Okay? Here you guys can check
out different colors. And also you can get
access to different type of coloring things or color
combinations as well. These are a few of the
color combinations which you guys can check out and
also use it in your work. Okay? But how you're
going to use that, you guys need to
come here or you just need to keep this one here. Once you keep your, you guys can click on
this and you guys can basically copy the color
code and paste it. Come in Canva and
paste that particular in your elements section
or in your color place. Suppose if I come here, If I come here, okay. Right now I will just
paste this one here. You can see I have got
that particular set of color here in my panel. Okay, This is how you guys can get some color combinations. I hope you guys have
understood this part. Now let's try to understand
the different section here. Okay, now I will just Select this one.
And I'll delete. And I will select this layer. And I'll delete
this layer as well. I do have this particular
white page again here. Now what I'll do
is I will come to the element section and I'll take this particular
color wheel. Okay, While we're
making any kind of designing or you're making
any logo or anything as such. In that case, sometimes
you might be confused that what color you
should basically use. Okay? Now, in that case, if you or you want to
use three colors, okay? In that case, what I
basically do is I will select a triangle and I'll
just drop that triangle here. Okay? I will just keep this one and keep
it in white color here. I will just bring my triangle
in the exact center. Okay? I will bring this
one in the exact center. Now here you can see I do
have all my ends here. Okay? What I need
to do is I need to focus on the ends. Okay? Here I do have my
ends in yellow, pink, and the sky blue color. Basically, I can
work or I can take all the three color
or the shades from here and I can
use it in my project. Okay, here are now if I just
rotate this one as well. So if I want to rotate this one, if I just come here somewhere, if I just rotate this, I can rotate this and see, okay. Now for this one, suppose I will come here. Now, this three color
combination will look good if I'm using only three colors
in any of my graphic here, you guys can see. I'll just out, okay, I can use this color shade here. If I'm rotating here, you can see I will just bring this here somewhere
in the middle. This one violet, this orange. And also this light green color will look good if I am making, this is how I can
actually rotate. And if I'm using three colors, I can check the color
combinations from here. Okay? If I'm using four colors
in one particular thing, suppose I'll bring
this one here. I will just delete
this particular layer. Okay? So I will use the layer, and I'll delete this, or I'll delete this one and bring this color palette
here in the middle. Okay, In that case. Now if I want to take
four or five colors, so I'll take this pentagon, and now I can just
put it in the center. Okay? So here you can see
once I put in the center, I need to concentrate on
the edges here, okay? So read this
particular color and this mid blue tone and
this light green also. This particular green will look good if I'm using five colors. This is how you guys can actually understand
which all colors you should use and which all colors
you should not use, okay? So you can basically try
all of this because to create visually
appealing design, the color is quite
important, okay? So make sure of that
and hope you guys have understood this
particular class here. And hope to see you
all in the next class. Till then, take care
and goodbye everyone.
13. Generating QR code in canva: Hello everyone, and
welcome you owe to another chapter of
the Canva tutorial. So now we are on our
chapter number 11, and here I'll be
showing you guys how you can generate
QR code in Canva. Okay, so here if you do have any particular link
through that link, how you will be able to
create a QR code for that. I'll be explaining you guys here in this class in detail, Okay, So let's not waste
time and let's get started with this
particular chapter here. So now as you guys can see, I'm in the workspace, okay, I'm basically
in the home page. And from here now I'll
be creating a design. Okay, I will just come to
customized design and I will take 12001200 pixels, one page. Okay? So here you can see I do have a rectangle
box here. Okay. Here only I'm going to create
my QR code, basically. Before creating a QR code, we do always need a
link without any link. We won't be able to
create any Q for that. To create a QR code. First I will come here
to this template option. Maybe I'll write
Facebook subscription, subscription Q, R. And
I'll click on Enter. Okay, here you guys can
see I do have this page. What I'm going to do
is I'll put this one here at this place. Maybe I'll just add an address. Okay, So I will just add
email address for that. What I'm going to
do is I'll select this whole thing from here. Now I will just write
an E mail address. Suppose it's Albert zero to four@gmail.com Okay? I do have this particular
e mail address here. I will also select
a bright color. Okay? I'll select this, and I will also try to
select a color here. Now here you can
see I do have this. I'll create another box here. I'll just directly put this one. I'll, instead of this one, I'll put a company one like A2023@gmail.com Okay. I will create another
text box from here. I will create a
text box from here. I will write, Reach us in. I'll select this
particular layer now. Okay, I will select this layer. I will also decrease
the size from here. And I'll click here. Join our newsletter. Reach us in Facebook. From here, I'll come again
and I'll type Facebook. I will select from here. Okay, I'll take this
particular icon, and I will just zoom this one. Okay? I will keep this one here. Now in this same place, I want to basically add
my Q R code as well. Okay? Once they click
on the QR code, it will redirect it to my Facebook page or this
particular Facebook page. For that first I will
come here, okay? I will come to this apps option. From this app option, I will just move a
little down here. You can see this is
a QR code option. So basically I will just
open this one from here. If I put any URL, I will come to the Chrome. And from here you can see
this is the company URL. I'll copy this company URL. And I'll come here to my canvas. I'll click here. I'll paste this one if I want
to customize it. Suppose I do want my
background in red, I want my margin
to be like this. And the foreground
or the QR in black, I'll just generate my QR code. It doesn't look that great. Again, I'll come here,
I'll delete this, I'll take this white color, I'll just generate a. So here you guys can see
now I do have a QR code, which I can just place here. If anyone come here
and scan this QR code, they will be redirected
to my page in Facebook. Okay, This is the easiest
way of how you can actually generate a QR code
using a link in Canva. Hope to see you all in the next class where I'll
be telling you guys a few of the shortcuts
which you guys can basically use while using Canva. Okay? Hope to see you
all in the next class. Till then, take care.
Goodbye everyone.
14. Shortcut keys to use in canva: Hello everyone, and
welcome you all to the last chapter of
the Canva tutorial. So now we are on our
chapter number 12. And here I'll be telling
you guys about few of the shortcuts which you
can use in Canva, okay? So shortcuts are
basically used to save your time and to do that
work efficiently, okay, So I'll be telling
you guys about few of the important shortcuts
which you can use in Canva to get out your
output quite easily, okay? So let's not waste
time and let's get started this
particular chapter. So as you can see here, I do have a few
of the keys here. Okay? And I have also showed, I have also wrote like, what all features do we have? Okay? So here you can see the first will start
with a circle. If you want to create a circle, you just need to click on C
from your keyboard, okay? If you want to create a circle, you don't have to click on
control or anything as such. Just click on C from your keyboard and a circle
will be created like this. Okay? Here as you can see, I've created a circle. I'll delete that one. Okay? I will just click on this or I will just keep
this one here in one corner. Okay? Now, if I want to
create any kind of text box, okay, if you want
to write any text, suppose I'm right
there in my elements. But here, if I just come here in this particular frame
and if I click on, on my keyboard, a box will
be created for me here. Okay, So here I do have
a text box as well. Okay, So this is how you can basically create a
text box from here. So I will keep this text
box on top somewhere here. And now if you want to create rectangle or if you want
to create a square, okay, If you just click on
R from your keyboard, you can just click
on R directly, you will get a
squared from here. Okay, here you can see
I do have a square, but here from the square, you guys can actually make a rectangle out of
the square as well. Okay? You just need to
drag this side or you need to just drag this side. Okay? This is how
you can do that. Or you can also change
the width from here. I do have the circle, the text panel, and
also the rectangle. But here now we'll see if you want to create a line like this, then how you can do that. From here, you just need to
select a particular frame. And from that frame
you just need to click L from the keyboard here. As you guys can see, once I have click L from my keyboard, I have a particular
line from here. Basically you can actually
select the length weight. You can also change it here, You guys can see if you want
it like this or like this, you guys can also
this line, okay? If you want your line to
have rounded end points, you guys can select
this one here. You guys can see I do have
rounded end points, okay? I will keep this
one somewhere here. Okay? I hope you guys have
understood this four. These are the most basic and most widely used shortcut keys in Canva. Okay? This is quite easy to remember and quite helpful while we're working
on our design. It basically saves our time. Now we'll move on to a few
of the advanced methods. Okay, Here you can see if
you click on Control Enter, you will have a new
page here, okay? Basically, with your mouse, if you click here on
this particular page, at page option here in
this small icon box here. If you click on this one, you will be able to
create a new page. But here if I come and if I click on Control
plus Enter here, you can see I do have
a duplicate page here. Okay? This is how you guys
can create a new page. Suppose I do have an
animation right around here. Okay, let me take
animation from here. I will take this animation and this animation here as well. I will select this particular
animation right here. Okay? And now I want to just
zoom 100% In that case, what I can do is I
need to click on control plus zero from
my keyboard, okay? So I can see this one properly. And if I do have to do any
kind of designing here, so I can do the designing
from here as well. Okay, And now just to go
back in that case, again, if I want to fit it
to my time line, in that case I will click on
Control plus Alt plus zero. Okay? So I'll click on Control Alt and zero
from my keyboard, again, back to my
same frame size. Okay, And again, if
I want to go back. Control zero. I have zoomed in 100% and if I want
to fit it again, then control plus zero, okay? I hope you guys have
understood this part as well. Now, here, if you want
to create a element, okay, or if you want
to create a group, suppose I do have this
particular logo here. I will take another
logo from here. Suppose I will take a text. Okay? I'll just write, I will just click on Enter here. You can see I do have
this particular text, so I will delete this. Now what I want to do is I
want to rotate this one. Okay, I have rotated
this one now. I will just increase the
size of this as well, or I'll just decrease
the size of this here. I have rotated this one. What I'll do is I'll
keep it somewhere here. Okay. Now suppose this one
is dedicated for this only. I'll come again, select
this one from here. Come to this option here, I'll place it somewhere here. Suppose this is a logo. Now, if I want to change the positioning of
this particular logo, in that case what I can do or
what I basically need to do is I need to move this one separately and I need to
move that one separately. But here if I want to create
both of this group first, what I'll do is I'll click on Shift from my keyboard
with my mouse. I'll select this also. I'll select this one. Okay, both of this
I've selected. Now as you can see, whenever I move around, this one thing or one
particular thing, both of these frames are
being moved together. Okay. Again, if I select this one now again I'll
click on Shift here. You can see I'll be able
to move this one at once. This is another short cut. Okay. Again, if you want any ruler or grid as
I've already told you. Okay, how you can basically
get it from this panel. How to get your ruler and
your grid option from here. If you go to File View
Settings from here, you guys can get this one. Okay? But if I want to do
it in a shortcut method, what I need to do is
I need to click on Shift and R from my keyboard. Here, you guys, I do
have my rulers here. Okay. Now if I want to
duplicate anything from here, suppose I want to duplicate
this particular layer. In that case, what
I'm going to do is I will click on Alt, and with my mouse I'll
just drag this one here. Here you can see I have created
a duplicate of this one. And if I want to create a
duplicate of this as well, I have created a duplicate
of this as well from here. Okay, hope you guys are understanding this
particular class here. Okay, Here you can see I can do Duplicate
Alt and my mouse. Now if you want to zoom in, zoom out for that. What you need to do is you
just need to click on Control. And plus from your keyboard
here you can see it will just gradually zoom
in, okay, frame, okay? By 25% it will just zoom
in each and every time. Or if I click on minus, it will zoom out
each and every time. This is how you can zoom in. Zoom out from your keyboard. From here, basically
you guys can zoom in, zoom out using your
mouse as well. Okay, this were a few of the basic and important
shortcut keys. Here I will end this
total tutorial on Canva. So here we have learned each and every options
which we do have in Canva. I've told you guys how
you can design your own. Okay, so during this tutorial, if you guys face any
issue while learning, you guys can always
reach out to me and I'll always be
there to help you out. Okay, So these were
a few trips and ticks which you guys can
use while using Canva. And I hope you all the best when you create
your own design. And I'll always recommend you
that you keep on practicing on a regular basis while you're
working on any designing. The more you practice,
the more knowledge you'll gain on coloring the designing. Like how to create
a particular shape and all of this stuff. The more you use, the more
knowledge you'll gain. Okay, hope to see you
all in any other class. If I'm coming up with any other tutorial
in the near future, then we'll see you all there
in that particular class. Till then, take care. And goodbye everyone
and see you.
15. The canva video editor: Hello everyone and
welcome you over to the chapter number 30 of the
Va Video editor part one. Okay, so here I'll be telling
you guys how you can use the video editor
option in Va. How we can actually trim
and cut a video. I'll show you about the overview and also
I'll trim it down. I'll also add different
kind of titles, effects and also I'll
add just the audio. I'll try to put some
graphics coloring. Then after that I'll just
export the video editor file. So I'll be showing that in two parts maybe in the
first part I'll be telling till the effects
and after that I'll continue from the audio to okay, I'll be showing
you guys each and everything here in
this both part. So make sure that you
first see the part one, then you can go to the
part two if someone is planning to view
part two from there. So you guys, make sure that you guys join the
part one as well. Okay, let's not waste
time guys and let's get started with the
video editor here. As you guys can see, I'm in my home page
of Canva here. As you can see, I am
in the video page. Okay. Before that,
once we were here, this was basic home page. But from here, if
I go to videos, I will come to the video
interface from where I can actually make
a particular video. Here you guys can see I do have different
options like if I do want to create a mobile video or is it for a Facebook video, then they'll give you the
particular blank size page. Okay. So these are basically the presets and you can
see how much is it for Instagram rail or if
you want to create any Tiktok videos for Youtube videos and all here you can have
different kind of things. Like if you do want to upload the pin interest
video from here, you guys can actually
edit your videos with it. Then it would directly
take you to this. From here you guys can also see the bits,
okay, from here. And one click video. There are different
in new things. Also here you will be getting different
type of templates. Okay? Here are
different templates which you just can't click and actually change the icons or all the typings from there. Okay. You guys can
basically use that. If you guys want to see, I just click on and template here. Here you guys can see, have this in my tab line, basically this is the tab line and this is the play button. Okay, here, now it's loading. It might take some time to load here. I can just pause the video and if I just click on this one, I can just delete
this whole box. Otherwise, if I want to
modify anything from here, suppose I just want
to modify the text. I can just write my
text down from here. Okay. If I just want to
write real lend from here, what I can do is I can select this particular text from here. I can basically change
the font size. Okay? I can also choose
different fonts from here. Okay, here you guys can see I do have different
type of text options. And I can also search
down from here. Okay. All we have learned Okay. Before as well. It will apply this one here. I do have my background color is that I'll just select
the text color as well. Okay, maybe take this
color from here. We can basically do that
and here we guys can edit. Okay, you have my
text till here. Okay, This is if you want to use any kind of previous templates, but I'll also show you how
you can export or import into your Canva application and start working with
those kind of videos. I'll be uploading, maybe I
will just cut this page from here and I'll come here to
just create a blank page. I can just click here. Okay, I will get a blank page
as you guys can see here. Also, I do have different
types of templates, okay? And before that, here I will come and show
you how to upload. Okay, I'll come here, I will click on Upload Files. From here I will select
all that I want. Okay, Suppose I select this one. And I will upload all of
this with this files. Okay, I do have the few videos. Okay, and I'll
upload more files. Suppose I want all of this. I will upload all of this here. Okay, So I uploaded
this one twice. Just this one. And I can just move
this one to trash. Now, I do have this layer. I was just copying
this one here. Again, I'll try to
play our video here. Okay, So I'll try
to play this one. Okay, here using this one. Okay? So as you can see
my video is being played, but I don't have any
audio here with my video. Okay. Here if I want
to put any kind of, or any kind of cut how
I'll able to do that, I'll just kick on this
one here and here. You can see I do have this
particular two on top, so this is the playhead, okay? You guys can call it
as the playhead here. You can adjust this
one and you can take this playhead wherever
you want to put a cut. Otherwise, you can just
view the whole video. And from there you can just find out where you want to cut, what effect you want to put, which will show
later that how we can actually put
all those as well. Okay, now I will come here and
let's try to put up a cut. What I'll do is I'll
come here and here. As you can see, once I do have my mouse on
top of this panel, I'll right click on my mouse. And here you guys can see I do have the option of split page. Okay, so the shortcut key for that one is
from our keyboard. I'll just click on
Split Page here. As you guys can see, this one is now
divided in two parts. Okay? So here you can see this one is divided
it in two parts. Now if I don't want this part, I'll come here again
with my mouse. Click here and click
on Split Page. Now if I want to
delete this one, I'll select this particular, and I'll click on Delete. If I want to add any other page, I can also add different
pages over here. Okay, suppose here in
this particular thing, I do want to add
some nodes here. As you can see, I do
have a notes option. So from here I can click, okay, And I can just get the
node view from here, okay? So if I come to this page, I will be able to see
this particular node. Suppose here I want to actually change the
background music. Okay, In that case I can just write the background or change, sorry, the background music. Okay, so I can
actually save this one now once I come to this
particular thing here, okay? So once I come to this option, I can actually see that I
have created some notes. Okay? I will just
again click here. And now I can also put different cuts
in different places. Okay? As I do have
two cuts here. Okay, I can also add
different videos. Suppose if I want
to add this video, I can also add this video. Okay? But again, I'll
come to this one. This is how I can
add after this. Okay? This is how I
will be able to add. But I will click on
this one and I'll click on Delete Here. I do have a page. I will again take this one. Now I will again
put some cut here. Okay. Here. As you can see, I do have my page here as well. Okay. I can click on this
and I can delete this one. Now I do have only one page. I can actually scale
this one up from here and I can basically
play the video. Okay, if I just want to play
this part, I can actually, this particular
part from here now, I will just trim up this. Okay. I will just try to
trim this one up from here. So I can also trim up or trim down if I don't
want to add anything. Okay, if I come to
this clip here, which is around 39 seconds here, you guys can see I do
have this whole video, okay, so I can basically
scale this one up. Okay, I'll just
delete one frame. So I'll just keep
this frame and I will increase the size from here. I will just keep this one
somewhere here in the middle. Okay? So I do have this
in my particular frame. Now what I want to
do is I want to show you guys different options
right after this, okay? So from here if I want
to have a green view, I can actually have a green
view from here from where I can deselect page and
anything as such. Okay, So if I just go back
or I'll just off this one, I will have this view if I want to see this
in a full screen, I can also view this in a
full screen of how it looks. Okay, so this is
how we can do that. If I come here and
if I close this. Button over here. Okay? I can also come here
and I can trim those down. Suppose I want to trim
this down from here, and I can trim this down
from this end as well. Okay? I can down the parts
and this part as well. Okay? As you guys can see now, this one size is 28.2 seconds. Okay? I have trimmed
that down from 39 seconds to 29 seconds. Okay? And again, you guys can retain back the same
thing from here. Okay? You can also get back the same size which
you had before. Okay? So from this side
also, I can increase. This is how I can actually
get back to the same size. Okay. As you guys can see, if I again, come here. Okay, here you guys can
see if I delete this, I'll delete this one. Okay, here I will
delete this as well, only I'll keep this image. I can also add any comment if I want to
add any kind of comment. Suppose if I want
to change anything, in that case I can also
click on this option here. Okay, here are a few of the options where I can
basically play this video. Okay, from here as this one is called the
canvas, here we are working. But from here I can basically
play that and check out all this work as I put
some cuts again here. Okay, So I will just
keep my mouse here. I'll just play the screen here. And suppose here also, I want to make a
split page here. I do have a split page. Now in that case, if I want to add any kind of, any kind of B roll footage,
I'm going to do that. Okay? First what I'll
do is I'll select any of this video which
I have imported here. Okay. And now I will just take this one and I'll put
this here on the screen. Okay, I'll delete this one and I'll just choose the top frame. This one, I can basically
decrease the size, or I can also
increase the size if I want that to be viewed. Okay, I can also increase the size from here
of this image. Okay, I can do that
one from here. If I want to scale this one up, I can click here as well. Here I have increased this
particular page size. Now here in this I will see the transition from here of
how it will basically look. Okay, So this is how
it will actually look. I won't be able to see this page as my roll footage is
on top of this one. Okay. Here I can actually do so many things if I don't
want to view this one. In other parts, I
can basically hide this particular page which
I have selected right now. Okay. If I want to delete the page here on
top of this one, if I want to add any
kind of transition, I'll be showing you
guys that here. Now, here if you
guys want to, again, go back and also want to
put it in a small size, okay, Inside your, you guys can basically
do that as well. Okay? Come here,
select this page. From here, you guys
can select the frame. Basically, you guys can basically change the
size of this one, okay? This particular frame, you can come here and you can
decrease the size. You can put it
somewhere here, okay? You guys can do that, maybe decrease the
size of this as well. Now you guys can
work out here, okay? Sometimes it might not
look that pretty, okay? You guys need to just
scale it accordingly. For that, need to click
on Control Shift from your keyboard and make sure
to on your smart view. Okay, here you will get an idea of where your frame is starting
and where it's ending. Now both of this video will be played simultaneously
here, if I go back, if I play this one, okay, if here you guys will be able to see the half
screen view here. Okay, here you guys
will be able to see, this is taking some
time to load, okay. It might take some time
as this one is loading, but here you can see
both the frames. Here in my video here, you can create a half an
half video if you do take a long page or a straight page or you
can also rotate this one. Okay? You guys can actually do all of this and come here in this particular options
and write down anything, Okay, We'll see about
text after this, like here if I want to put
any kind of titles, okay? From here, basically I will
go to the text option. From the text option, what I'll do is I
will come here. Suppose I want to add
some text here, okay? Basically, I'll come here
under the text option here, you can see I do have
different combinations of Whatever I can choose from here. Suppose I will select this one. Now I want to bring this
one here in this video. Okay, in this clip, what I can do from here is I can actually
select this one, increase the size of this. I'll delete this layer now, I can actually edit
this particular layer. If I want this one to be darker, I can choose this one in dark. I can also put some
width to it as well. Okay, here as you can see, I can basically change
the text from here. Okay, So now I will just click
the back space from here. Suppose I can select this one. Okay? From here I can take all of this
text down from here. Suppose if I want
to delete all this, I can basically delete. Suppose if I just
delete this layer. I'll delete this layer as well. And I will just put this particular layer and come
to the text option again. From here, again,
select this text. Okay? And you guys can
write your own, Okay? Sometimes bimystically, for me, I do create so many
of these backgrounds, I can basically
put my text, okay, if I just put it Switzerland. Okay, Switzerland. I can also play down
with the text box here. As you can see, I can just
take this one and sum it out. I can also change the spacing. Suppose I have this
one right here. What I can do is I can put this on right down in any side. Okay, This is how you guys can basically put
down your titles. Okay, I this whole
text and I can also add different type
of animations from here. Okay? If I do come to
this effects option here, you can see I do have different options or effects which I can basically use, okay? This are text options, okay? This one, okay, for effects. But what I also want to
do is I want to put some, some effect that it will appear and also it will
go back from here. What I'll do is I will
select this from here. Maybe I will come
till this much here. You can see now I will just
put a cut somewhere here. From here I will just
put a cut for that. I'll again come to
split page here. As I do have both of this page, I don't want my name or this particular thing or this
title to start from here. I'll come here, I will
delete this layer, only in this layer I want to
view this particular thing. Now let's see a preview
of how it actually looks. This is how it will
actually there. After that, this other frame
will start, okay, from here. Basically, I can add
some effects from here. And write down from here, which part do I want This one? I can also adjust
the size From here. I can click on Done. I can also click on
the playback setting. I can actually change the
video split from here. If I just want it
somewhere here, 0.75 I can do that here. You can see if I click on it, Video options, I do have
different things here, okay? If I want to flip this
one, I want to drop. If I want to animate here, you can see I do have
different animations. From here, I will
deselect this layer. And I will try to select only
this layer, only this one. I will choose this layer. Now only this layer
I can also animate. Suppose if I want to put rice, or if I want to put
some thing like this or where I want
to put on the center. Or were also I can adjust the speed of how fast it will come or how slow it will appear. I can adjust the speed here and check all of
these things from here. Okay, maybe this
rise one is fine. I can apply this one here. Okay. Now let's see preview of how this one
basically looks here. You can see the
change with this one. I can also add it to
my role footage as well from here if I want to change this
background color as well. Okay. I can also come here, maybe I will come here and I
will try to select colors. Okay. Here as you can see, background color option, I can basically choose
a different color. As you can see, I have changed the background color
as well. Now I. Move this one and
bring this down to center this frame here. I also do have this animation. Now if I only select this one, now I want to position this one. I do have different
things how I can do that, and I can also do
the overlapping. Okay, now let's see about
the transitions from here. Once I come to this gap here, I can basically add one page. Otherwise I can
add a transition. Okay, here you can see I can
add a page now from here, if I want to put any
kind of stickers, photos, all that I can put here, I don't want this one. What I'll do is I'll just
page from here, okay? Now what I will try
to do basically here is I will put
some transition, okay? I'll come here and I'll click on this at transition
option, okay? Here you can see
the dissolve, okay? Here like that,
between the videos, it will give me some of this
transitions which I can use. From here, I will select
the dissolve one, okay? For this one I'll select the
dissolve one here, okay? I will select the line wipe. Okay? I'll select
the line wipe here. Under that, I also have
in which direction? Okay, Here, I can take
it from the right. Okay. I can also get a preview
of how all that will look. I will put this one here now. Yeah, I'm done with
testing over here. Now I have add the
transition as well. Okay, now let's see the preview of the video of how
it basically looks. Okay, let's come here
and now let's play. I'll just come here
at the beginning. So now let's view this one. Okay, bibystically, I have
just changed the positioning. And here you guys can see
now also it's loading. It might take some time, okay, But I do have this
video underneath which will just show me
after some time. Here you can see this is having some problem in putting
the bure up here, okay. But here, once you
save this video, you will do the particular thing which I do have
here on my screen. Okay, let's come here and also let's see that
transition from here. Okay? So I'll just
play this one here. You can see the transition
basically here. Also, if I want to put any
transition, I can put that. If I put this one, I will just click
on the Out option. And I don't want to put it between all pages and
I will come here. There is another option, like you can actually add all the pages
transition at once. Suppose if you do have any
one transition, in that case, you can actually apply
all of that at once in a splits where you have
put splits in your video. Okay, this is about
this one, okay? I hope you guys have understood about this effects as well. Here I have already
showed you how you can actually rotate this one, okay? You guys can rotate, I can also cancel this, okay? You guys need to rotate that properly if you want to do that. Here are different filters
which you guys can use, okay? Here are a few of the filters which you
can check out from here. Basically, they do have
a lot of options here. Okay. Here, maybe this after
glow is looking great. I'll be selecting this
one for my frame here. Okay? I can actually add
those filters as well. Okay, if you want to animate, I've shown you guys how you
can animate this as well. Okay, the whole frame here. I will just, on this one, I will click here. Now I will try to see preview. This is how it will basically
look here like this. It will be played. Okay. Now I will come here, hope you guys have
understood each and everything what I've explained here in this particular class. See you all in part two of
the video editor in Va. Okay, we'll be learning the
rest here in our next class. Till then take care.
Goodbye everyone.
16. The Canva video editor part-2: Hello everyone and
welcome you all to another chapter of
the Kanvas tutorial. So now I will be
showing you guys the second part of the
Canva video editor. Okay, so in last class I
have explained to you guys, tell the effects of how
you can put some effects. So here I'll be telling you how you can actually
put some audios, do some coloring, do some
graphicing, and also export. And also at the end you
can get some updates. Okay, so I'll be learning
and I'll be also showing you guys at the same time of
how this basically works. Okay, so let's see how
we can actually explore all these options in our
Va video editing here. As you guys can see, I am again in the workspace, Again, the last workspace
which I was using. Okay, again, I will just bring
this one in. The starting. What I can do is
now I can basically select all of these
layers as well at the same time if I do want to. And I can also change the placing of those if I don't use this
button while moving. Okay, I can also do
these things as well. Okay, here, this is the of the video which I had just made using some of
the transitions. Now the next thing is, let's see about the audios. Okay? Now for audios, I need to come here in
the Elements option. From the Elements option, what I can do is I can
just go on this side or come back here
from this option. I will just go on
the right here. You can see just I do
have the audio option. Beside the Shapes option, okay. I will click here and
here you guys can see, I can basically check
this songs out. Okay? So you can see what
kind of music is this? What are the key words
associated to this audio? I can actually play this
one as well from here. Okay, I can just give
me a video on this one. If I want to use this audio, I can basically use this
audio down from here. Okay. It's showing
me till where I do want to use this audio now. Here you can see if I want to trim this down as
well, I can trim this. Or if I just want to start it from the beginning,
I can click here. Okay. Here. As you can see, I do have this
video option here. I can actually extend the
timing of this audio. I can just decrease the
timing of this audio, or I can just put
this part out here. Once I do have my
play head here. If I want to split the audio, suppose I want to
split the audio here. And again, come here also here. I want to split the audio. I can split this audio as well. Now, this particular thing I can come and delete from here. Now I will select this and I
will bring this one T here. Okay, Here, I will put this. Yeah, now this looks fine. Okay. Now I have again
average this one. Now here you can see now
there is no gap in between, but I can always trim this
down or trim this up. Now this video have a
particular audio as well. Let's see other options
of this audio, okay? From here, basically
I can click on this volume option
and I can actually adjust the volume,
okay, from here. As I'm only doing
some work here in this particular section which
I have just cut from here, I can actually apply this to all the tracks and I can actually check the video. Okay, I, that there might be some
problem in saving those out. Okay? Sometimes it
creates problems. It depends on your PC as
well, which you're using. Okay, Here I will come
to the audio again, and let's add audio here. Okay? Or I can also
search from here. If I click on audio, I can click Enter here. I need to come on the sides. And from here I can get
all the audios here. I do have the two audios
at the same time. Okay? Now, if I want to
mute this particular audio, I can also mute this audio from, but if I want to use
the bit sinking option, I can also use that here. You guys will also able to
do so many things, okay? From here you can basically
adjust this particular audio, go to the audio effects, and also you guys can choose
the fade in and fade out. Okay? Here you guys
can do this one, okay? You guys can apply this
particular thing is applied here. You guys can also duplicate
this particular track, or if you want to split audio, you guys can do that bit. Sinking is basically
an AI feature which the Canva have here. Okay. Now here you can. The audios On down, okay. I do have this here down. If I want to hide the page, I can hide this bar here. If I want to view this
one, I can click here. If I want to view any
of this transition, I can view all this
transition as well. Okay? From here I can do that. The next thing, which
we'll see here, is about the color grading. Okay? Once you're done
with all of this, you also have put some animation and also
a few effects here. Okay? The next thing what we'll do is you'll try to color
grade your profile. Okay? Or you color
grade this page. Now I have this particular video here on top here you can see option called the
edit video option. What I'll do is I'll come here. And here you can see I can use different effects which
I've already showed. But here I will come
in the adjust option. From here I can basically
check the color here. Okay, I can basically
change the color down from here, decrease
the brightness. And I can also
increase the contrast. But I'll just increase
the brightness a little bit from here
and change the work, so I wouldn't do
much changes here. Okay. And now I will just
put some shadows over there. And if I want to put some
highlights, I'll do that. The color option, I also do have the vibrant saturation
and also the X process. Okay, here I can change the
vibrans, the saturation. I can change the bed here. I can check all of
this and change this particular setting as I
do have this setting here. Okay, I can apply this. Okay? This one is now applied. And now let's see how
it basically looks. So now let's try to play
this and how looks. And this is the original
video which I just have here. I have here here that I have to audio in
the background, big plate. Basically, if I want to
mute this particular audio, I can actually mute that. Okay? I can basically mute that audio if I want to mute it. And I can also mute
this one as well, okay? I mute this one
directly from here. I can mute this thing. Now if I play, okay, Now, I will just mute this one. I will keep this one here. Now, here you can
hear one voice, okay, or one Music. This is how you can actually
work on with the music. Now, here as I have also
now color graded this one. Okay? Here you can see I did the color grading,
which is this one. Now what I'll be doing is I'll
be putting some graphics. Okay? For that, what I
can do is I will come here and here I want
to put some new pages. Okay, here. I want to add page here. As you can see, I have
put down a page here. Okay? So I do have this
color page in this color, what I'm going to do is now
I'll be adding graphics. Okay, from elements I'll come
and I'll search for Intros. Okay, I will search
Intro from here. Under Intro here, you
guys can see I do have different photos and
also few graphics. Okay, from here I can
basically add all of this. Okay? So here in this
particular suppose, if I want to add this one, I can basically add
this one, okay? I can basically increase
the size of this, select this, and also adjust
the size again, from here. I will keep this one here
in the perfect metal. I can also play this
one somewhat like this. Okay. If I select this here, you guys can check
this is the beach, how I can actually change this? I will just put
this one back now. Again, I will go back now. I'll see. Okay, so it
will play like this. But here I want to zoom
into this particular image. And I can also change
the transition. Or if I want to hide
this particular page, I can also hide
the page as well. Okay, here I can
basically hide here, if I, I can basically
hide this page. Okay, You guys can do that. As I was putting some intro, this is how you
can basically put some kind of intro strop here. We can also put in things, okay, like in the
end we can basically put like so templates. Templates, okay? So I can search here
and I can put here, and here you guys can see I do have different
types of photos, different type of graphics. I can check few of
the templates, Okay, So I can check all of this here. I will go down here, back again, and I will click
on Templates here. I can actually use all of
these graphics from here. Okay? Maybe I can add this
one in some other part. Okay, I can come here and maybe I want to create
a new file here. I have created a new file. I have created this from here. I will select this
and delete this one. I'll select this, and I will delete this
one as well here. I can actually put this, the end thing, okay. I can also adjust
this one from here. I can basically change the color of this
particular I here. And I can put those
colors as well. And I can also adjust
the thing from here. I can also give this one
some animation as well. Okay, If I want this one
to fade in and fade out, I can do this for
the whole thing. This is how you
guys can also put sub graphic in your video. Okay, hope you guys have
understood how you can actually add the end and also
some intros as well. Okay, this is how you can
put some animation here. Now let's see the last thing of how we can actually
export our video. Okay, once we are done, we're happy with the
work which we have. We can basically come
here and actually see preview of how
your video looks like. Now you're satisfied. You have done everything. Now you want to export
this one for that, let's see what we
need to do here. Using that, you
guys will do that. Now let's see Export Come
to Share option and you can click on Download here and you can take the
MP Video option. From here. You can
select the Quality. As I do have a premium
version or the Canva Pro, I can actually use more. Okay, More than this one. I can actually click
here and download. Let's see another
option from here. Okay, Suppose if I do come here, I will select this one and
this particular audio. I will select this audio, I will delete this side as well. I will delete this
audio frame as well. Now as I do have my
audio panel opened here, what I'll do is I
will just put up an audio on top
of my video here. Okay. Here you guys can see I do have my audio just
on top of this one. Now, once I select
this audio here, you can see I do think, okay, So I can click here, and now I can actually
automatically sink down my videos from here. Okay? So here you can see everything
sink to the bed, Okay? I can basically hear
the music from here. Okay. So here you can listen
to the sound and I can also increase the volume
if I want to increase for the video and I can
play this one again, okay? Sometimes it might
take some time, okay, to process
those things out. This is how you can actually export all these
things from here. Or if you want to
save the Canva file, you guys can come
here and you can actually click on
Save from here. Okay? You can click
the Safe option. Come here. Okay, go back now. Okay, I can actually
go back from here. Go to file. From
file safe to folder. I can create any folder and
I can save this file here that if I again log it back to this one, I
can work with that. Okay, here this is the option from where I can actually
see second preview. This one frame, I
can get a preview. Suppose on this one. Now, here I want
to get a preview. Okay, I will just
get that, I guess. Okay, but I have
selected this now. I can also send
it to my teacher. I hope you guys have understood this particular class,
the video editing. I hope you guys can now video
edit in Canva and upload it in your social media or
also use it for yourself. Okay, you guys can now make different
designs using Canva. Next class, we'll learn
how you can actually make some T shirt
design in Cava. See you all in next class still, then take care.
Goodbye, everyone.
17. Doing tshirt design in canva: Hello everyone, and
welcome you all to another chapter of
the Canva tutorial. So now we are on our
Chapter number 15. And here I'll be
showing you guys how to do the issued
design in Canva. So I'll be showing you how
you can actually start with different type of Issus logos. Okay, so how we can do that. And also I'll be showing you guys how we can do
it using the fonts. Okay, so we'll look at both
the ways of how we can actually replace the icons
and put our icons together, put effects and also
different kinds of things into our design. Okay, so we'll see here in
this particular chapter, so let's not waste time
and let's get started. So as you guys can see, I'm here in the home
page of Canva. Okay? From here I will come to this point where I will
go to create a design. Okay, not the custom
size, create a design. From here, what I'll write
is I'll just write T shirt. Okay, One side type on T shirt. I will have the options here. Okay, So here you can see
different type of sizes. I'll click on one of that here. What you guys can
basically do is, as you can see, different
types of templates. Basically, I can bring
those templates out here in my page, okay? Here. As you can see already I have
all these shirt templates. If I want to see all of this, I can actually view all of this. Suppose I do one. This one, I can take this, or here I do one, this one, I can use this one
as well from here. Basically, I can actually change all of the
writings down from here. Okay, all of these things. Suppose I can
actually change that. Suppose instead of
eyeglasses, I will write. What I'll do is I'll just
replace the text from here. Suppose I want to
put here the vibe. Okay, I will just
write here the vibe. Okay, Now what I can
do is I can also select this one and
also edit this as well. Okay, here I can just
make this one like this. Okay. I can create
this one like this, and I can also change all
of these icons from here. Okay, suppose if I just
want to delete this icon, I will select this one, and I'll delete this here again. I will select this one
and I'll click on Delete. Okay? Basically what I'll do here is I will just change here. I will put 2005. Okay? So here I have put
this 2005 and this one, what I'll do is I
will just bring this one little down, okay? I will just try to
move this one down. Or if I want to add any curves, I can basically put
some curves as well. Okay? Here, I will just
put this little down. Okay? Here I have on
the smart swatch, okay? So that I can see is it
aligned or not. Okay? I can also change this
particular thing. Okay, I can here. Okay, so I will select this one. And suppose I have selected
this thing right here, I can basically delete this one. And now I can bring
another image. Okay, here. Now I will go to
the Elements option and I want to put
some graphics here. Okay, So I'll just
write T from here. And I'll click on Enter here. From the graphics,
what I'll do is I will take some images from here. Okay, so as I do have different
kind of images down here, so I can take
anything from here. Okay, so maybe if I want to
create this kind of Deids, I can take all of this. And suppose I will put
this one somewhere here in the Bitwen here. As you can see, I have actually
changed this one as well. Now I can actually move
this one on the top. Okay, I can just move
this one on top. Or if I just bring this,
okay, this animation. I will just right down here. This one I will bring
somewhere here. This is how it should
basically look. Now what I'll do
is, as I do have this layer right now here, okay, I will just position this one and I will
send it to back. Okay, here. Now you guys
will be able that I do have this image just back of this
one. I do have my text. Okay. Now here you guys can see I have actually
made this one. Okay. I can also add
different type of designs. If I again come to
the all graphics, I will just click here. Now here you guys can see I do have this graphics as well. Basically, I can just
decrease the size here. I will delete this one. And this one also,
I will delete. Okay, I'll delete this one. I will only keep this. I'll try to adjust it
in the face. Okay. So here you guys can see, I can just adjust this
with my mouse here. You guys can see, now I have adjusted that particular
space as well. Now if I want to add some
animation to all of this, I can also add some
animation from here. Okay, so here under
effects here, you can see I do have the shadow in all these options here also, you guys will be
able to see that I do have different
things, okay? Which is the direction, the transparency, the
blur effect, okay? I can add all of that if I am clicking on left or if
I do have the echo. I do have all these
things as well. Suppose if I want to change
the background color, I can change the
background color to something white or this color. Then I will be able to
understand the shadow from here. Okay, Again, come to this
particular thing over here. I'll just click this one. Maybe come to this one, okay? And now here you can see
I do have this, okay? So this is how I can actually
write down all of this. Or I was showing you
guys the effects, okay? I'll sel this one. Suppose go to the
effects option here. You can see I do have this particular elements from here and I can add all
these kind of effects. Okay, if I just come here again to the
animation part here, you can see I do have
different animation. Okay. I'll just go for the
page animation here. Here you guys can see. But as this one
is a page design, I don't need to use
all of this animation, but I can just position
all of this and actually do the
setting from here. Okay, I can actually edit the image if I want
to edit image, I can also edit image here. You can see I can
actually slice this one. Or if I want to put
any liquefy option, I can put this liquefying option as well. I'll just put none. This one looks good here. I can just distort and all
of this thing as well. I'll just put the non because
this one looks better. This is one way of how you guys can basically do this
animation from here. Or if I select the
text from here, I can also come here to this
go to effects from here. You guys can actually
change the curve. Okay, here, if I want to carve this one a little
bit more, I can do that. After that, I'll come here, maybe bring this
one somewhere here, select this, keep this
one here in the center. Now, bring this one and
put this one, okay? This is how we can actually
make a compact design. Also, we can put some
other designs as well. Okay? We'll try to look
that as well from here. Okay? If I come to
this circle option and here you guys can see I do
have different circles here. I can just increase this one
the size of this graphity. I can basically fit
this one here, okay? As I have selected this one, and now I will just increase
the size of my graphity. Okay? This is how you guys can actually make a design
for your T shirt. This is how it might look. You guys can do this
one as well, okay? This is one way of how you
can make a T shirt design. Now from here, what I'll do is I will save this image, okay? And make sure that you save
this image in a PNG format. Okay, Here I will save
this in a PNG format, I will just increase the size. Okay? Maybe I will just take somewhere 550 something as such. I'll make sure that I do have a transparent
background for that. I do have my pro, I
can download it and here my PNG file is
getting downloaded. Okay, from here I can
actually copy this one. I have copied this link as well. Suppose later if I want
to use this same thing, then I can come here and
I can save this design. Okay, it's asking me, where do I want to save this? I'll go to the
anvari source file and I will name this one as T shirt design one. Okay, I will click on Save. I have saved this one, and this one is completed. Now let's go and view this. Here. Okay, Here
you guys can see, I do have the T
shirt design, okay? I do have a transparent
background. This is basically
the T shirt design. Now, let's come back here again. Okay, now again, I'm in
my Canva application. I want to add another page. Okay, I'll show you guys a different way of
how to do that. I'll just make this
one as white color. I'll put this one as
white color here. I will make shirt design using the text or the fonts in
my Canva using fonts. I'll be creating
some shirt design. I'll go to the text
and fonts option here. I do have different font
combinations which I can actually use in my
T shirt as well. Okay, I'll be making
a logo from here. Here, I'll be doing
it from the scratch. Okay, I'll go and take the
text option from here. In text option, I also do
have the font combinations. Okay, Here you can see I have different type of
this, of the fonts. Okay, Which I can
basically select. Suppose I want to
take this one, now. I have put this one
somewhere here. Okay, actually I'll just
keep this particular design. I will just move this one on
top and I will delete this. Okay, I will just delete this
particular box from here. Okay, So I will just
delete this one. And I'll click this
one somewhere here. And now as I do have
only this text, what I'll do is
I'll just decrease the size of this
particular text from here. Okay. So I'll just
move this one here. Now what I can do is I can
actually download some image. Okay, For downloading image, I can go to the Elements option, and from here I can
actually search for photos. Okay, So I can search for photos and I can click on Enter. And here you can
see under Photos, I do have different kinds. Okay. So basically here I can select which
kind of photo do I want for my T shirt. Okay. Maybe I'll take this one and I'll just drop this
one somewhere here. I'll keep this one
on top of this. Now it will look like this. This is the T shirt
design which I have made. Again, I'll come to
this text option. I'll also use few
of these things. Okay, here I have
selected this one. I will keep this
one somewhere here. Okay, This top one
I will just delete. Okay. I will select this layer and I will just
delete this whole down. I will just delete this one, or delete this whole frame here, as I do have different
fronts here. Okay, for that what
I'm going to do is I will just select both
of these fonts here. Okay, for that I will come here, select this, and I'll
click on one group. Okay, here. As you can see, now I do have two text. For now, I can change
all this individually. If delete this, I can
delete this one as well. If I want to get this one back, I get this one back as well. Okay, suppose if I want to maintain this size from
here, I can do that. Or if I just want to change
the color of this text here, I can come here to this text
color option from here. Maybe I'll take
black color here. I can also put some rotation. Okay, I can just put
some rotation here. I will select this
now from the sides, I can basically
put some rotation. Or I can actually
come somewhere here and I can put some
rotation here as well. Okay, select this. Select this one
right around here. Now, I will just
put this one here. This one looks good. I will just write
here, Beach, please. Okay. I'll now move this
one again, somewhere down. Okay. I'll just
put this one here. This will maintain. And I'll put this one here. This is one of the design
which I do have created. Now, I have bought this
one in the first page. This is how my
shirt design looks. If I want to do anything here, I can also change the
color from here as well. Okay, here you can see
different type of colors. I can choose some colors
from here as well. Okay, I can choose these colors. And I can put this
one here as well. Maybe if I take a yellow color, I can see this backside
color is yellow here. This one looks quite good. I have used the fonts as well, and also the image here, if I want to put any graffity. Graphics. I can put all
these graphics here as well. Okay, suppose I want to
take this graphics here. Okay, I will put this
graphics somewhere here. I'll select this.
I'll delete this one. I'll keep this one somewhere
here in the middle. Okay. I will align
it properly here. I am done with my
T shirt design. Okay? Which I just
made it from scratch. This is how you guys
can basically create. Now what I'll do is I'll come here and I'll
save this one. Go to download the PNG file, increase the size from here. Now I will take this 5,500 and I will click on Transparent Background.
I will just download. Now you can see this one is
also getting downloaded. Okay, Once it's
getting downloaded, what I'll do is I'll come here. From here, I'll go to
the Design option. From design option, I will
search for T shirt templates. Okay, I will search T
shirt. I will click here. Okay. Here you can see I do have different templates which I can basically use as you
guys already can see. Otherwise, go to the
elements from search shirt. Okay, I will just save this
one here in my resource file. Okay, Here I do have my
Canva resource file. I'll just save a name. I'll name this one
as Beach, please. I'll save this file. Okay, I will just
save this PNG file. I'll click on Safe here. And this one is also
being saved properly. Now I'll write here T shirt. Okay? And I'll click on Enter. Here, you can see
different graphics. Okay, here as you can see, I do have my white shirt. I'll bring this one. Now as I do have this shirt, what I can do is I can actually change the
size of the graphics. Suppose I do have this one here, or let me take another page. I will select this, I'll delete this one. Come here, and I'll add
another page from here. I'll take this shirt. Maybe I'll just increase
the size of the shirt here. Now I'll put that
particular design and show you guys how
this one actually looks. Okay, so again, come
to the uploads option. And from here you
go to upload files. And here you guys will be able
to see your shirt design. Okay, here I do have my T shirt design and I will
open it from here. And now what I can do is here, you can see I can put this
design here in my T shirt. And how my T shirt basically looks with the
particular design here, we can actually
put this one like this or here if I want
to upload another file, which I have just created. Again, I'll go to the
resource file, okay? I'll go to the Canva
resource file from here, and I will try to search
this one as well. For that, add another page, and I'll add another page
from here. Go to Elements. Now I will take a black shirt, and I'll also increase or increase the
length of the shirt. And I'll just put this one
somewhere here in the middle. Now I'll put my design, which I have just created here. Now if I select all of this
and if I click on Control C, that same file, I
can come here and I can click on Control Pasta. I can just pass this one. Now again, I will
just group this one. And I can decrease the
size of all of this. Okay, here I will
just move this one, or I will just select
this particular layers. Okay, here I will just
select this layer. I will just decrease the size. Okay. If I want to decrease
the size of the logos, in that case, I need to
deselect all of that. Only select this logo here. Okay. I select this logo, I will just decrease the size. Maybe from here on I will
just decrease the size. Okay. If I just decrease the, this one and now
delete all of this. Okay, I will just delete
this one as well as well. I will delete. Okay, here I will
delete this one. Delete and also I'll delete. Now bring this
particular design. I'll just group this one first. Okay, I'll group this one. After grouping this one, I do control, I will
paste this one here. Okay, I will past one. Now here you can see I do
have this particular group. This one is in group
and I can basically put this logo here in my image. Okay, I'll just keep
the T shirt size down. I will put this one
somewhere here and I'll put the logo here
in the bit way here. You guys can see how your logo will look
inside a T shirt. And you can actually
save this one, you can actually use it afterwards to show if you
want to make this design, this is what you guys can
send it to your client. Hope you guys have
understood guys, keep on practicing Canva, then you can create some
stunning design using this one. Okay, so here I will
again save this file. Download, and I'll
just compress. I want transparent background or I'll just download
this one as an image. So I will just
download this one as an image instead of PNG. I will make a JP file. Okay, I will download this and this one is also getting
downloaded that, meanwhile I will show you
guys this are the designs. If I want to use it
for any other purpose, I can use it for any
other purpose as well. Okay, so here it will
be downloaded here. It's asking me where do
I want to save this? So I want to save this
in this file only, but as the name of T shirt. Okay, I'll click on T Shirt. I will save it. Okay, Come
here to this file again and go back and I will
extract this file from here. I'll just extract the
file after extracting. Here you can see I
do have my T shirt designs as well as a JP
format and also this one, so you guys have understood
and keep on practicing. Guys that you can
master this one. Take care and goodbye everyone.
18. Class Project 2: Designing a Logo: Hello everyone. Now this is the time for
our class project. So now we're on our class
project number two. And here you guys need to
design a logo in Kanva. I've showed you guys the steps, what all you need to follow, so let's not waste time
and let's see what all steps you need to follow
to create a logo in Canva. Here you guys can see, I do have my steps here. The name of the class project is designing a logo in Canva. You guys can also see the description and
also check the outcome. I'll directly go to my step. The step number one is go
to create new file option. After that, go and search logo on the panel and select that
particular frame. In step number three, edit your text and graphing accordingly what a
graphic you're using, Select those properly and also
the text select properly. After that, go to
the shared option. Download it in a
PNG format, okay? Make sure that you
download it in a PNG format and you choose the transparent
background, okay? After that, save
the PNG file into your system and upload
it in our project panel. Okay, I hope you guys will
follow all these steps. Now I'll show you
guys how to start on making a logo in Canva. Here you guys can see I'm
at the home page of Canva. From here I'll click
on Create a Design. From here I will
be searching logo. Once I search logo here, you will see I do have a 500, 500 pixel size page. I'll select on this one here, basically I'll be creating
my particular logo. First up, what I'll
do is I'll come to this text option and now
I will create a text box. Okay, so here in this text box, suppose I want to
create a logo for Cafe. Okay, I will write here Cafe Reggie Monda. Okay, I'll write Cafe Regiment. I'll select this
particular text from here. I will change the
text font from here. Okay, basically I'll be
choosing something quite nice. I'll search here and I'll
take the Liberal Baskerville. This one is basically
used to write, make any logo from here. Now I will select
this and I will increase the size a
little bit from here. Okay, I have selected this one, now I will change
the color as well. Maybe I will take
the color from here. Now what I can do is I'll
go to the Elements option. From my Elements option, what I'll write is Cafe. I'll click on Enter. Now here you can see I do have different
type of graphic here. What I'll do, I'll come here, maybe I will just drop down this particular logo from here. Maybe I will just put this
one in one side here. You guys, I do have
this one and I will just put this
one in one side here. I do have a logo. Okay. Which I have just created. I will also do some
modification here. Okay. Maybe I will
put on a coffee. Okay, I will just decrease
the size from here. I will put this coffee
somewhere here. Okay, I think it
looks quite good. Now what I'll do is I'll
also add some design here. In this case, what I
is I'll come here, I'll delete this one. Now let's search something else. Okay, here if I
want to add a line, I can add a line as well. I'll bring this line somewhere
here underneath this one. I will extend the line here. Rotate this one. Okay.
I will rotate this. Now, this one is straight. I'll put it somewhere here. What I can do is I can
also change the, the line. This one is fine. I will
choose a different color. What I'll do is I'll come here from here, I'll select this. Come to the light
color option Here you guys can see what all
color has been used here. This one looks quite good. Or if I want to put
up a different color, I can do that as well. Okay? I can basically put this color. This also doesn't look that bad. Okay, I will come here and I will just round this
options from here. Okay. This one better. Also, I will add some of
the other things from here. Okay, Again, I will come
here in my elements, okay, And I will view
all these things here. Okay, I'll come here and again
I'll search for a ribbon. Okay, I'll search for
ribbon from here. And here you guys can see I do have different
type of ribbons here. Maybe I will select
this particular ribbon. I will decrease the
size of this one. I will put it somewhere here or somewhere here is fine, but I will just replace
it with this one. I won't delete it, but I will just replace the
positioning from here. Okay. Here. As you can see, I do have this logo here. I am done with my logo. Now what you guys need to do is once you are
done with the logo, you guys come to your option
from your share option, you guys click on download. Okay, You click on
download and make sure to choose the transfer in background and select
the PNG format. From here, click on download, and here it will be
downloaded in your system. I hope you all will
send your work into our project panel and I'll be eager to take down your work. See you all in any
other tutorial. Till then, take care.
And goodbye everyone.
 Issac Murmu, Graphics Design Expert