Transcripts
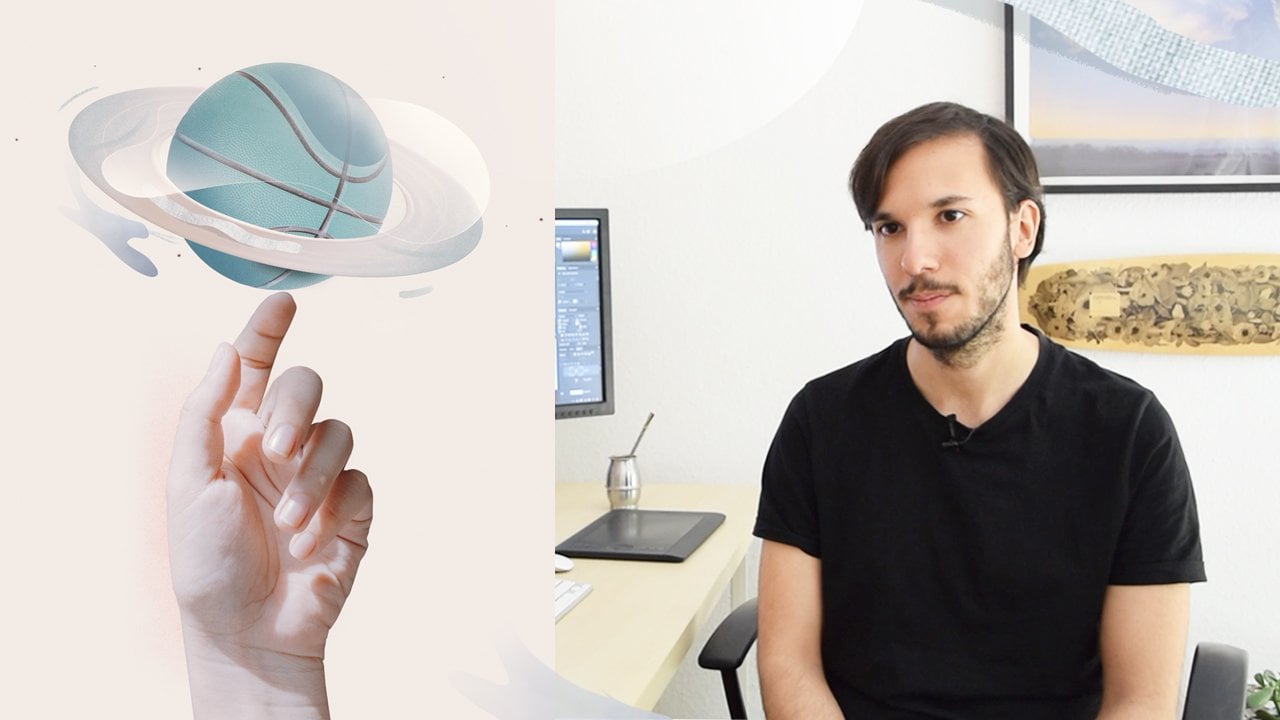
1. Intro: In this class we're going to learn how to make a beautiful math using digital collide. This class will be centered in novelty panicle style. We're going to use some leaves, flowers to generate this month. In future classes, we're going to use other kinds of images to be able to accomplish different styles like this ones. But for now let's stick to the photonic calls. My name is Marcus what Alice, I'm a graphic designer and illustrator. I've been very lucky to work with different brands and different projects using digital collage. This class is for anyone with interests in illustrating with Photoshop. As long as you have the basics, I think you will be able to follow this class. So if you're used to using layers, the brush tool, and we have used Photoshop or a couple of times I think you're good to go. You will find that we will be using the pen tool a lot. So if you're not very used to it, don't worry, I have also added the already cut images so you don't lose that much time. So if you're ready, let's start.
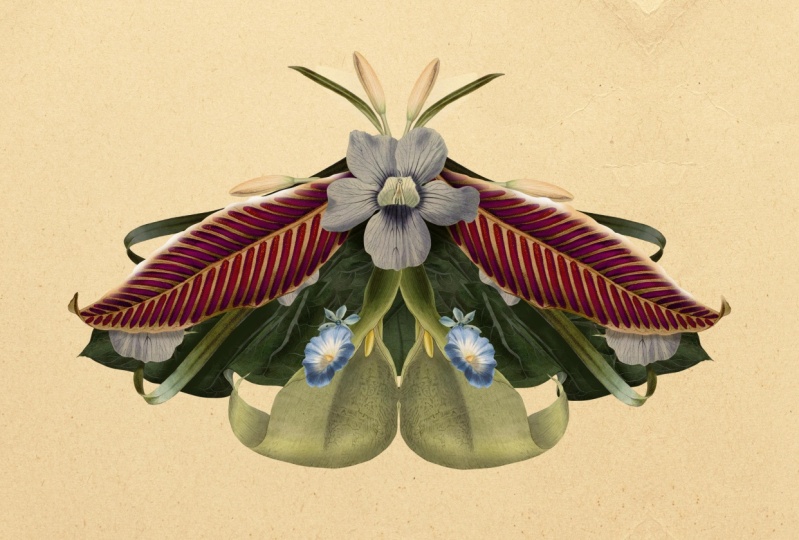
2. Class Project : For the class project and we're going to work with an animal. In this case, I've chosen a moth and because I really like it symmetry and it makes it easier to duplicate the work from one wing to the other. But you can choose any other animal and that you want. We're going to work with an folder S base. So it gives us the basic shape, one quick tip. It's to look for images that are somehow flat. So if you have an animal, it will be easier if it's a 100% frontal or a 100% on the side. So for example, this image, it's going to be easier to work with than this one because we will have to represent the perspective and it makes it way harder. So for now, let's stick to the flat image. You will find in the resources of this class the files that I will be using. So you can follow along, but feel free to use any other image that you want. Have in mind that you can upload your work to the project gallery even if it's not finished or even if I don't know, you have some questions or you will need some feedback and then you can go ahead and upload it in the middle of the process.
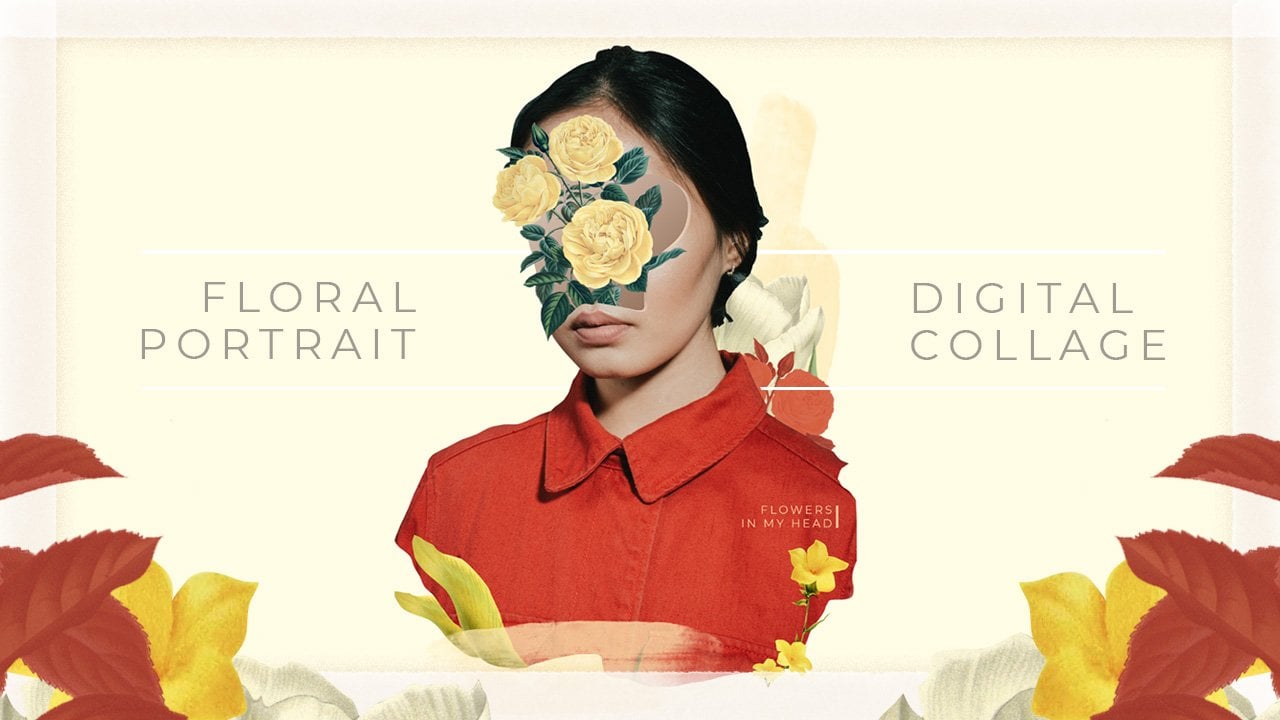
3. References: If you have taken any of my previous classes, you'll know that I usually start with references. In this case, I use Pinterest to gather images that I've worked as a reference for what I want to do specifically for that, the keywords that are used wherever botanical clash, clash with flowers, butterfly illustrations, fashion clash, whatever that comes up to your mind when, when looking for this kind of style. References work as a frame that give me a wrong or right approach. My goal is to find out what are the elements that build this style. For that, I'm going to ask myself questions like, how are the backgrounds? Are they full of images? Are the tryst of plain color or a texture, maybe. How are the images? Are the photos, Illustrations, 3D elements? How our images related to each other? Do they touch each other? Are they separated? They look like they're floating. Are they based on an imaginary ground? How is the color pallet? And apart from these, tried to find patterns even if they don't fit in these questions. Maybe you see that the usually cover faces or that all images are floating. Whatever is to help us the code, the style will work. Now. All this information's help us build the frame in which we're going to work. Of course, I can make my own choices and get out of the frame. But for practicing, both are technical skills in our illustration skills, I'll try to stick to the frame. Let's try to answer this questions now. How are the backgrounds? If we take a quick look, we'll see that there are two main options. At least from this references that I gathered. It is either a black background or black plain background or soft color. A lot of paper texture, if we see here, here, here. So I have these two options open. Either I use a plain dark color or maybe your soft colour with some paper or something That reminds me a little bit of an old paper texture. Now, how are the images? There are photos, but most of them, they are using this kind of old vintage book illustrations. So outtakes, a mix of both of them. We could use either photos or illustrations or paintings. For example, these, you have to take a second look to understand if it's an illustration or a photo. So we could use both of them. How are they related to each other? If we take a quick look, we see that most of the images connect somehow. They're all touching and connecting to each other. So that's one thing. And the other one is they use symmetry quite a bit. If we divide this image in the middle, we'll see that we have the same on one side and on the other side to here to here to, here to. And we can also see that some things go in the front, something's going the back. Like here, this leaf, it's on the front and this one is on the back. These are resources that we can use when we're making our own collage. And how is the color palette? Well, we have already talked a little bit about the dark backgrounds and the light backgrounds. But apart from that, I think there's a lot of greens, of course, because of the botanic goals, but also some yellows and reds. We can find that, yeah, the most predominant colors screened, but then we have a lot of yellowish and reddish tones. So if we have that in mind, it's going to be easier for us to make a collage. Now we could place, for example, in this Pinterest board, and it will look like a part of the whole group.
4. Searching for images: Thank you for making collage. It's finding images for this class. If you want to follow along with the same images that I'm using, I have left in the resources che, pegs with moths and jetpacks with photonic calls that you can go ahead and download. They are all free to use. And I'm going to show you now, I get the images from, I'm going to show you these three sites that I like. And I think they're going to work pretty well for this project. If you haven't already taken one of my other classes, probably you already know this. So you can go ahead and skip this part. But if not, I will show you this three sites. That first one, son's plush, it's becoming more and more popular. The nice thing that it has now is that there are galleries where it's not just photos, but there's also illustrations from different museums. It's becoming bigger and bigger and therefore, we're gonna get more results. So for example, I'm going to look for months in any image that we want from here, we can click on the heart. And if you have an accountable survey done in your favorites and you can make collections. Or you can also come straight here to this download button. And it downloads directly without the need of making an account. You can see the photo here a little bit bigger so you can scroll around there many, many very nice images. As I said before, it's always better when we find an image that it's flat to say it's somehow, for example, this image, it's going to be a little bit more difficult to work with because it has this perspective. Then this one, for example, it's a 100% on the side. Or for example, this one will be easier than this one or this one. So I would recommend that you get an image that it's flat so I can see the whole shape from the front, from the side, but nod like a 45-degree angle. So this is an splash, produce straightforward. The other side I wanted to show you it's Pixabay here you also have free to use images. We're gonna get a little bit different results. You also have here illustrations, videos. So I'm going to filter here for photos. And here we have a lot. I think you can download a couple without registering, but if you download many in the same day, it will ask you to make an account. So have that in mind. The quality of the images is really good. Picks up a license. So you put Free Download and you have here the sizes. So you can go ahead and download it. And The other website that I really like using its Flickr, Flickr, it's a little bit forgotten, but it does have some really interesting images from really all media, only illustrations like this vintage retro style. And I'll seriously recommend you make yourself an account. Why? Because you can start following people, groups, galleries. And what this will do is that you will always get first the results from the people you follow. So for example here I'm gonna go and type moth and see that I have the results from the people I follow and from everyone's photos. So as I have been following some interesting galleries, you see the difference of the kind of images. This looks like homemade photo and these are all illustrations. If I go to BU all, I'm going to have all this lonely results. I'm going to leave you some of these galleries as a link so you can go ahead and start following them right away. So your results are a little bit more similar to mine. And what do we also have here? It's the license kind. So right now have any license and we have several algo for these two commercial use and modification is allowed or no known copyright restrictions. So we make sure that we can use this images and we'll see that our results will be less. But still, we can find really nice images like this one. Once you like it, you can go here to this button and always try to download the original size because that's going to be the biggest size. And yeah, you can go ahead and start working with this one as you see here. If we take here, we have that it's public domain and range. And that this photo is in one album and in $1. So we can go ahead and open this. And T other images from the same gallery so that we'll have a similar style. And like this, you can lose hours and hours. These three are the three sites that I find more useful for this project, but have in mind that there are many, many websites that nowadays offer free images. So feel free to look for images, whatever you want. You don't need to stick to this 31 tip that I would like to give you is always trying to download all the images that you think that you are going to use before you start working. It doesn't matter if you're not a 100% sure that you are going to use it, you just can go ahead and download it because you're working in Photoshop. And you say, Oh, I will need something else. You go to your browser, you start browsing, you go to Pinterest, you go here and there, and at the end you'll lose focus and you get out of the zone from making your collage. I would advise you, just download everything you think you are going to need and work with that. And of course, you can go ahead and look for, I don't know, some piece that you need, but you're not going to be coming and going from your browser to Photoshop browser Photoshop, because that will make you lose focus.
5. Selection Tools: So let's talk a little bit about selection tools. They are very important when we make digital clash because they are our scissors somehow. So these are the tools that I use the most. And there's not one tool that will make everything. So we need to find the one that it's more efficient for the work that we're trying to do. We go from the easiest one to the one that has the steepest learning curve. So let's start with the last photo. I left this file for you to download, so you can go ahead and download it and follow this part with me. And we have this image here and I wanted to show you how I use the lasso tool. For this lasso tool is this tool that we have here or the l is basically you click and hold your click, and then you go ahead and make a selection. Now, what's the problem with this is that it depends on how much precision you have with your mouse or with your graphic tablet. And the problem is that once you let go, it closes the shape, then you cannot modify it. But I use it for quick sketching when I'm not sure if how will actually want this image on my collage. I can choose come make quick selection. Copied, and pasted whatever I need to. And that took me three seconds to. It's not precise, but it helps for sketching and need also helps a lot when I'm trying to get parts of these. For example, this texture. And I really like working with parts of textures that build other elements. So for example, here I can choose, take some kind of leaf and you sit him, Michael Ash will see that I will do exactly this later on in the course. So that's one thing that I like to do, or the other feature that this has is that let's say I want to graph this. And then I said, oh, I wanted to grab this two. Then what I can do is to press Shift and hold it. And now people making my selection. So these will add some parts actually, when you press shift, you can see a little icon there that will tell me that as long as I'm holding Shift and I'm selecting something, it will be added to my previous selection. And exactly the same happens when you press and hold Alt or option. I can also get rid of part of mine selection. And this applies not only to the pen tool but to some other, to the pencil, sorry to the lasso tool, but to some other tools in Photoshop. We also have different kinds of Lasso Tools. The polygon L1, this similar thing. You just press and now you'll get this line. Whatever you press, you'll get a point. And once you get closer to the end. See this little circle coming up. And you can close the shape again. If you press shift, you will add. And if you press alt and hold it or option, your subtract. Now, you'll find that sometimes you have a selection like this and you want to do something else. And it's quite messy because then some lines appear, becomes a must. Always make sure that if you don't want this, you can press common D or go to select the select. By doing that, you will make sure the now there's nothing selected and you can move on. So basically lasso tool for making quick selections or to use it as a shape itself for you. When do I use the magic wand? It's very handy when we have images. They have a lot of contrasts between, for example, here the background and the object itself. Let me show you how that works. So I double-click on my smart objects so it opens in a new window. And what I'm going to do now is to go to this tool, the magic wand tool. If you don't see by default, you just click and hold and your selected from there. If not, you can press a w and you will be able to see it. We said we have a very contrasty background from the object itself. It's very separated. You can see the edges really clear what I'm going to do or how I usually use it. It's instead of selecting my object, I select the background. So I'm going to make, choose one click on the back and see, now we have a selection around this object. And if we pay attention, look what happens with the flower. As you see the difference after colors between the flour and the background, it's way lower here and here. So photoshop said, OK, I guess this is the background to, I'm going to select it. So we need to refine our, our set action. I'm going to go ahead and press common D or select the Select. And I'm going to select again the magic one. But here we have tolerance level. What I am going to do is to tell Photoshop OK, take EDC, Just get me whatever it's more similar to the background. Not so much. So I'm going to put, let's try with 20. And again, I'm going to just click on the back and see there now. It got it better. Like now the lines are yeah, it's not getting the flowers. That's good. And what we have to do now is to start adding this little white holes that we have here. So in order to do that as we saw with the Lasso Tool, and we're going to press shift and hold it. Now we have a plus sign there on our selection tool. I'm going to click here, click here, click here, here, here. Sometimes I click a couple of times when it didn't select it all. So just to add a little bit more to that selection. So I am looking for all the white spots weren't selected. There. Nothing. We have them all. But now, what do we have? It's the background, not the object itself. So I'm going to go to Select Inverse. And now yes, I'm going to zoom out. Go back to my move tool. Now we have a good selection. I can copy it, edit, copy and edit paste. And we have a new layer with the proper selection of our element. Now, have in mind this is for objects are well contrasted from the background. For example, here. I wouldn't use that tool because we have some things going on. First of all, it's a little bit blurry the edge. So Photoshop will have unlimited travel. They are trying to guess what's what. And we have some other objects and then I will need to refine, in this case, images like this. Our probably tried to do it more manually because I would lose a lot of time with this. This was only to show you how would you use the lasso tool. Now, there's a really fun tool. This select subject, we will start again, like with the magic one, but it's a little bit different. And this one are using situations when they have a lot of details. That would be a little bit problematic for the magic wand and a little bit problematic to try to do it manually because it would take so much time. So I'm going to click on this layer with my move tool so I get it selected. And I'm going to double-click on layer one. Going to get closer and see all these little edges. This will be hard to select. But fortunately, Photoshop has come up with the latest version, psych, and I think it started in 2019 or 1018. We started getting this tool. And in order to select it, I'm going to go to the magic wand again or press a w. I'm going to select my layer. And see that up here. It says select subject. So Photoshop would try to guess, okay, what's the subject? And in this photo, it's this math. And try to guess a selection. Now, we see that it's not perfect. But the good thing is that we can refine this. So right next to select subject, we have selected mask. And now we have a world of options here and here I'm going to show you the ones that I use the most. And to get closer here. And now we will see that all these edges are a little bit rough. I'm going to go to the second brush that we have here, not the first one, the second one. And I'm going to start painting as it is here. Look what happens. Photoshop is trying to analyze all this dark parts are right at the edge. And it's doing something with it. It's helping me with my selection. Now, if you don't see this part like IC, then read n. Your subject. Check it out here says View and masked areas. So you have many ways of visualizing this this window. But what I used this overlay and indicates mask areas. If you have a differently, you can go ahead and change it. So I will keep on just painting on the edge and let Photoshop do the work. So it's softening, it's taken away all those black parts. Not gonna do it with the whole moth. Just so I don't make you lose time. But this is especially useful, for example, when you have a model and you have some travelled to cut their hair. Photoshop will really help you with this. And there are many ways to refine it that you can play around. But look at the difference between this part and this part. Now, we can also smooth the feather it make it a little bit more or less contrasty. The selection shift the edge inside or outside. That's really good. Ten, what we can also do is we have a manual way of selecting things. So for example, here we have this anthem like this. I don't know what is this part of the body of the math that wasn't selected? And I can also go over it and Photoshop will think, okay, there's probably something I should have selected there, but I don't have. But if you see, when we get closer, there are still many red parts. These red parts are not going to be selected. So if we want to do it manually, what we can do is to go to the third brush that we have here on the left. And this works like any brush. Now I can paint with it, but if I right-click, I can change some of its settings. And for now what I'm going to do is to make it a little bit smaller. So now I can freely paint here and refine my selection. Going to chose what this part, so we don't lose time. But you get the idea. I'm going to finish painting this. Again in Photoshop, Shift and Alt or Option make different things. If I press Alt, I have this minus sign there. So I can return some things to read. You see out here there are some things that will be selected that I do not want. Okay. I'll paint here a little bit. And now, once I'm done with my whole selection, I'm going to go here, output two, and I'm going to choose New Layer with layer mass. So this will, this will make a duplicate of my layer and it's going to use a Layer Mask. And as we see, we have our original layer and a new layer with a layer mask. This what it's basically telling me, it's everything that it's white. You see? So the math, I see it here. And everything that it's black, I do not see which is what we have here. So. If you see we refine these area and now we can see it properly and look at the difference between the area that we have painted and the one that we didn't paint. So we have all this messy edge and on this one we don't. What I usually do is I go down here, make a new layer. And now just to see the difference, I'm going to choose some random color. And I'm going to press common and delete or common and backspace just to feel the layer on the back with the background color. Look what we have here. Now we see the difference of the selections. Now, this takes a couple of steps, but the quality of your selections becomes really good. And you can actually get things selected like hair or this, yeah, this little details that it will be so hard with other tools. Once we're done with the smart objects that we are opening it here from the previous PSD, I just press common S or file save. And the changes that you have done in this file will be applied on this file. And the last tool, let's go to the pen tool. This one is sloughed by Selma, hated by others. It has a really steep learning curve. But it's so accurate that if you end up using it often and you actually get good at it, it's going to be probably your favorite. So I'm going to double-click on my smart object there on the layer. It will be opened here. And what I'm going to do is to press the letter p for the Pen tool, or just come here to this icon. And I'm going to make sure that app here it says path, because we can also make shapes with this, but in this case, I just need to make a path to make a selection. Now, first of all, why would I use depends all on this image and not on the others. Well, the thing is that if I tried to use an automated tool here, it's going to probably think that these two leaves are 2s1. So although the background it's, it's very contrasty. Photoshop will not understand that this is one side of the leaf and this is another one. So I do need to make it manually also because it has some really nice curvy shapes. So that means that will be quite easy with the pen tool. And yeah, that's pretty much it. So I'm going to double-click on it. And there are some things that you need to have in mind here. So the first one is that you will always start with just 1. So I'm going to press the P, I'm going to make 1. And that's fine. And now I'm going to click and hold. I'm not going to let go. And when you hold, you can move around and see there now we have this line with two little arms to say it somehow. These arms are the ones dictating the position and the direction of our path. So I'm going to make another point. And again I'm going to pull another point and pull another point and another point. And so you'll find that this is going to start moving to random directions when you start. But it is key to remember, click, hold and drag. Click, hold and drag. And if you messed it up, For example, if you came over here, you say, okay, how do I go back? You can either use common Z or edit, Undo, or you can press common or control right here in the middle of the two arms. And drag that point to where it should be. And from now on you can continue this same thing you can do if you mess up and you do this and you want to come back, you can always press common and move this guy. Or you can press common and move these ones. So in this case I'll probably try to take it down. I'll press common and hold and move this little arms. So this arms will always be showing in which direction I am going to be making my selection end. If you see these arms, they never touch with the previous ones. This one's, They don't touch this ones because once they start touching, you're going to have a problem. So again, we click, hold and drag. And if we mess up, we can always press comment and click and move it back to its position and then less common and hold it and work on its curve. Now, with this tool, you can always go back and you can even delete this points, but these are just the basics. Let's just keep on going around our shape. With time, you will find that you will understand where the points go to make less points and to make your life easier. But for now we're just click holding and dragging. Going to, for example, they're a mess it up so bad that I am going to press common Z. Cuz I want a smaller curve here. Now keep on going. Keep on going. I use the space bar to move myself around the canvas. So press the bar and a click and drag with this little hand that you'll see on your screen. And if you realize I'm really, really close, you can see here 307%. So I'm really, really close to my object. That's one mistake. I tend to see that people tried to get selections by being way too far away. And then it makes it even harder. So it's always better to. Get close and always a couple of pixels inside your shape. For example, here, I have the zoom to selected. I'm going to go back to the Pen tool. Click on my last point, and now keep on going. If I don't click on my last point, then I will start another path and we don't want that. So yes, this tool is a little bit frustrating in the beginning. But after a while you'll find that it's such a precise tool. And actually it's, it's fun to use because for some seconds, your mind get some rest of the composition you are making or the classroom making or whatever is that you are making. And you have a repetitive action to do that. Put your minds, your mind squared relaxing. I find it quite relaxing. So I will keep on going and moving with the Spacewar. And for example here. If I made this point, I can also press common and move it always in the direction. I wouldn't do it to this side. I will place it on the direction of my next point. That's basically what this little arms are doing. So once you're done, you will see that you have a blue line all over your shape. And there are many ways of making a selection of this. I'm going to right-click and press makes election. We're going to hit OK. And now we have the marching ends. So once I have my selection, I'm going to press comment c, common V to copy and paste it or simply edit, copy, edit paste. What we can also do once we have our selection to come here to this little icon, press it once. And now instead of making a copy paste, we have a mask. And the mask is showing us everything that it's white. We see, which is the leaf and everything that it's black, we do not see which is the background and the other leaf wise these helpful, well, because you'll notice that if I click on any of these two thumbnails, I can work separately on them. So if I click on the mask and now I grab a branch, you will see that by default it's white and black. So what I can do is to just paint and I will have my image still there. Because what we're doing is just hiding or showing. I'm going to press Command Z to go back. And I will show you with black. What we're doing is to hide. So now you see that there's a little brush stroke in there that is telling me, OK, half of your leaf you're not seeing. Okay, so these are the selection tools that are used, the most lasso tool for quick selections and forests, selections of textures or things that I want to illustrate with a shape. Magic one, our for images that are very contrasted from their background and very sharp edges. I used select subjects for very hard selections, for example, hair or this little fine details. And a let Photoshop do the automatic selection of the background and the element itself. And the pen toys for very accurate selections where the automatic tools, they cannot get it or they take too long to refine those automatic selections. And I can do it on my own with AP curvy elements in. I can have a path that I can modify and take my time to do it. So these are the basics in this class. We're going to use mostly the Pen tool. Because of the nature of the elements that we have, we are going to be needing this tool the most. But in the other classes of this math series that I'm doing, you will find that will be mixing more the selection tools.
6. Building the base: For this class, we're going to use one math as a base for we're going to construct our collage. So if you want, you can go ahead and download the resources that I've uploaded for you. And let's go ahead and open the folder. And here I've left some of them. I'm going to choose the first one. And I'm going to directly drag and drop it on the Photoshop icon. If you're using a PC, then what you can do is to right click open with or you can just go to Photoshop and go to File Open and open it from there. So we have our math here. And right now what we're going to do is to make a file new. So we prepare our canvas. This size will depend on basically what we're going to do with it. For going to print it, we're going to need a bigger size. If we're going to choose for the screen, we're going to need a smaller size. For now, I'm going to set it in centimeters. So I'm going to go for 30 per 30 centimeters. And as I'm thinking then maybe someday I'm going to print it and we're going to put this at 300th. And I'm not going to change RGB color. I'm going to leave it like that. Although RGB, it's meant for colors that you see on your screen in CMYK are for printing. But for now, as we're not sure, I'm going to work on this because we have many more options. So once I have said this up, I'm going to go to create. And here we have our white canvas. What we need to do now is to bring the image to this canvas when I'm going to deal with my selection tool here, the first one or the B. I'm going to click hold and I will not let go. I'll keep on holding kPa, holding until I'm on my canvas. Now, it's when a let go of my click. So I'll do it once again. Click, hold, hold, hold, go to the other tab and drop it here. So now we have this image here, and as you will see, I have this little points and this frame around the image. That means that I can transform this image. I can scale it and rotate it right from here. Why does this happen? Because I have clicked here out to Select Layer and show Transform controls. This is for me very useful because every time I click on an image, I know exactly what the image I'm clicking. And also because it allows me to quickly modify it, because I have the show Transform controls activated. So in this case, what I'm going to do is to rotate it because I want the image to be centered in the cameras. And by holding out, I'm going to scale it down. I hold out. So the scaling has its center right here. If I Wouldn't, it will scale, but it will go from this point. And depending also on which version of Photoshop you have, It has changed since 2019. But you will see there now. You don't need the alt to proportionally scale it. Maybe if you have an older version of Photoshop, you will have to press Alt to make it proportional n for it not to be like this. Okay? So, and to press Alt and scale it, rotate it a little bit. And once I'm happy with my rotation, I'm going to press Enter. As you see I have here some rulers with the numbers. What I can do if you don't see them is to go to View rollers. And now I'm going to click and hold and dry. So I can take a guide outfit and look what happens when I go to centre. It snaps there. And I'm going to take another one from the upper rule ruler and put it on the center. I do this. So now with the arrows, I can move my mouth and leave it quiet centered. Now we have the math right in the middle. We can start building on it. What I'm going to do is to go to my layer panels. Maybe you have a differently. And I'm going to take the opacity down because I only need this as a base. So we have its shape and we know what's going on, but we don't need to fully see it so we can concentrate on the botanical. So we're going to put on top of it. Now that we have it in the center, I'm going to go to file, save us, and I'm going to save my PSD file. So I have here botanical style, and let's save it as a Photoshop file. And there we go. Now we're ready to start with their selection tools and get our botanic calls.
7. Adding botanicals: Okay, time to start with a clash. I'm going to open my PSD file that I saved earlier. The first thing that I'm going to do is to try to get rid of this background. Only because it kind of bothers me. I'm going to drag and drop this Guides. Now that I know that it's quite centred, going to put the capacity up. And again, I'm going to use the pen tool to try to quickly get rid of the background. As we said before, the first we click and from now on I click and hold and they start pulling on this arms that you see. So just follow the outside. I don't really care because I'm going to build on top of this. So if this selection is not perfect, that's also fine. I just need it as a base. So I'm going to go around. I use the space bar to move around the canvas. So every time I want to move, I press the bar. Click, try, move. Okay. So once I have it, I make right-click, makes selection. Okay? And now I can either delete the background or I can simply come here and make a mask. So if I want to add anything or modify something, and then I still have. So I'm going to double-click on the name layer and I'm going to put math. Okay, so now it's time to start building up our collage. I am going to use the mouth as the base. And the first thing to have in mind or how I prefer to do it is always tried to build a base first. So the bigger elements or the viewer planter leaves or whatever it is that we're using. I put them first and then I start building on top of it with some small details or medium size shapes or objects. So I'm going to go here to my folder where I've left the jpegs. And as you see when we have different images, I'm going to try to look for the beak shapes then I know that I would like to use. So for example, this one here, it's a surface that I think it could work also because it has some kind of wing shape if we rotate it to the right. So I'm going to try this one and drop it on the Photoshop. I can if you notice, I didn't drop it in Photoshop like this, but I dropped it on the icon and let go there. Why? Because I want to have it in a different tab. So you can also right-click open with both if you are in PC or a Mac, or simply go to File Open. Here right now, as these two objects, let's say the flower and leaf are in the same. Group together somehow won't be able to use any automatic tool to separate it. So I'm going to go with the pen tool all around here, going to get closer. I used the bar to move around. So I have this little hand. So I will use the pen tool. I will make sure first that up here it says path and not shape. Because right now we are trying to get this out of here now to make a new shape. So again, p to get the pen tool and I'm going to go around the shape. If you noticed. Don't really care if it stopped precise because this will probably be covered by many other things. And again, always try to go a couple of pixel scene sign shows to avoid getting one really ugly. Pixel align around your selection. This process takes some time, but sometimes it's the most accurate way because if I would try to do this with an automatic tool, I'll probably spend so much time fixing it and correcting it. That wouldn't be worth it. So when you calculate the amount of time, maybe it's one minute or two minutes to cut something, but once you have it, you have it, then you don't have any trouble that you are seeing some things that went wrong. So go into that a little bit closer again. And right now I'm going to grab some parts of it because and once I have it, I have many ways as we saw, I will right click and make selection. Feather radius. And this time I'm going to leave it to 0. And I'm going to edit copy, go to my clash and edit paste. I go to the Move tool or the B and I started to see I kind of like this border here. So for now I'm going to just press Enter and drop it there. Okay. Now I've seen this. We can still grab this one. Let's see. Now that we have it open. I have my selection here, but I don't want it anymore. So I'm going to press common D, which is select, the Select. And now I'm going to grab this other part, C to get close. And it's again the same process. Click, hold and drag, click, hold and drag. And if you ever have a problem with one of these little arms going too far or in another direction that you don't need like this. And let's say I want to go straight up. I press Alt and click there in the middle so I can come back. Bad in this. Moment I'm going to, I'm going here, going to zoom out a little bit. I press common one to fit the image in my screen instead of zooming out sometimes. So for example, I press common one here. And sorry not to fit the image on the screen to have a 100% view, to have a full image, to have the full image in my screen and press command 0, and that will fit it there. But common one just shows me a 100%. So the real size of the image. I'm going to keep on going. And you have to kind of guess here. You see a lot of details, but you also need to have in mind that we're so close. So all this little fluctuations on the shape, probably they won't be visible ones. We sum out. So sometimes it's not worse to be so detailed when yeah, when it's going to either recovered or the shape is so so be that it's not actually visible depending on what you want to deal with it. If I would be to print this, then probably maybe would try to get some more information because yeah. I'll need more information to be seen and more resolution. Once I'm done, right-click makes election. Okay. Wait, my layer selected, I will press come and see. And common V. So I think this shape could kind of fit on this part of the, of the math. I'm going to just quickly place it there. Edit, transform, flip horizontal. And as I said, I'm just dropping the beak shapes. I'm going to close this one, common W dot save. And I'm going to bring this one now. And in closer and again, the same process as one leaf is on top of the other. If I would try to select this automatically. See, I'm having half of this but not this part, not this part. I'm going to choose go with the pen tool. So once I'm here, right-click makes election 0 common C, V. This is quite big. Lets you see now we have one part covered. And if you notice, I'm dropping everything on one side. I can play around with this now. But the reason why is because after we build one side, we're going to duplicate and move everything to the other side. So then there's no need to make everything twice. Of course, then we're going to move some things around. But for now, just building a base on one side, it's more useful.
8. Adding botanicals Part II: Before this turns into a mass, I'm going to try to start organizing the elements where I think they could work. So for example, this one at the moment, it's way to being, actually, I believe that if this is smaller, kind of, these edges look a little bit like wings. So I'm going to maybe even a little bit more. There we go. This one is also prolly tubing. To take it down and see all these foldings that botanic calls have. We can use in our advantage. Little bit smaller. Because also these things, let me put some things behind an on the front, which I have a lot of fun doing. Okay. Maybe this one also regard to take it a little bit smaller. Now there's some movement there, probably this one we're going to put on top. So I just drag the layers here. Tau, I really like this. I don't know what it is, but we're going to solve it. Sometimes when you have details like this, it's not worth solving them right now because maybe afterwards we're going to either cover it, move it, or something, it's going to fall right into place. So I am going to leave it like that for now. And let's go ahead and look for some smaller details. Now we can add to this. Going to go to my capex for tannin calls. I'm going to choose another image. Maybe first I wanted to cover this part, this middle part on to do some, something about it. And I've seen that these flower can actually work as a middle piece. So I'm going to drag it and drop it in Photoshop or right click open with Photoshop. And again, with our beloved Pen tool, I'm going to start selecting this shape. Well, I'm going to right-click makes election. Okay. To copy it and I'm going to paste it. Again. Probably this is to be going to press Alt and drive. And I think that I could work, we can modify this a little bit later. Now we see that we have an extra part here. We can quickly get rid of it because I don't think I'm going to use this in the future. So I'm going to grab any selection tool. For example, here, the lasso tool with our layer selected, I'm going to choose. Make a quick selection and hit delete. So now it's behind there because I know B using this here. So that's fine. Now we have this a little bit better organized. So that's fine. I'm going to start adding other elements just to add some more details to the wings. And for example, I find this leaf more interesting than this one because it has this little turning here. I'm going to drag and drop it in Photoshop or right-click and open with Photoshop. And I'm going to select it. And now right-click makes election. Okay, I'll comment Z, copy and paste it here. And now the fun part for me is to try to see how this relates to the other. Like, oh, this looks like it's going to be behind this other shape. So maybe what I can do is to go to edit, transform, flip horizontal. So now I can fake it as it's going to go in here. Maybe. So I'm going to leave it there. That's fine. What else? Let's try to find something for this part. Let's find some other thin strokes. For example, this one. I'd take a look at this and it reminds me of this shape. But it's very useful. Another way of making your selection instead of Right-click makes election. But you can do is to press Enter when you have your path in blue. And I'm going to paste it here and make it smaller. And one thing that I usually enjoy to do is instead of using a shape like this, a random image, I like to make my own Shapes. I'm going to grab the lasso tool and you see that we have the shape. I can quickly come here. Make a similar shape, copied, pasted. Maybe this one is too small and then do it again. And this kind of things give it a little bit more fun illustration style, I would say, because you're actually yeah, using textures or you're using your own hand to make the shape of that, of that element. Don't worry, we're gonna leave it like this. We are going to modify it in the next lesson.
9. Adding botanicals Part III: And I'm back to my platonic calls. And I really like this one. I think it could be acute detail somewhere. So I am going to again trap it in Photoshop. I don't need the whole thing, so I'm going to grab it from here. Common enter and command, or control C, control V. And if I know that I would like to use it in different sizes, what I usually do it to either convert this into a Smart Object or just simply duplicate it by holding out and dragging. I'm going to get a new shape. So I hold Alt, click, hold and let go click. And this one, for example, I can make it smaller. And this one will stay outta that a bigger size. Okay? So we'll see how that works out. So right now we have quite a couple of things. Let's add one or two more, and we're done with the elements are going to use. I saw this one and I also liked it. So I think I have the image over here. If I want to get rid of this selection, I'm going to press common D or select the Select or Control D. And I'm going to grab this one here when there's some, so many little details, what I usually do is to click a lot. If you're using a graphic tablet, that will make it easier for you. Because you can have a little bit more clicks and details. But otherwise, you can do it with your mouse. Just be sure that the points are very close to the other. Otherwise you'll end up having like this rough edges. Same thing here. Take it to the top. Try to put it some more. I think it would work. And let's leave it there and see if there's anything else that we can call it from here. This lays out a really nice I'm going to get this. Copy, paste it. We have been using Photoshop for some minutes. So I'm going to go to File Save just to be sure that if my computer crashes, I still have this. And on the next lesson, we're going to put this all together and add some details.
10. Completing the Moth: So let's start putting things in the final order and try to make it look nice. So I'm going to try to fill up this space is the in-betweens with some other elements and try to accommodate them so they make some sense. We will have to edit some of these images. For example, this one here. I would like this to reach until now here. So what I'm going to do, I have several options here to try to make this work. Let's try with what I think would be the easiest one. I'm going to duplicate this layer. So I'm going to select it, press Alt, hold it, and drag. Ok. So try to put this on top of the other one. You can check it out with your capacity if that fits. And now I'm going to grab any selection tool and delete this part that it's like an extra. And let's see how these two match. Okay? So now I see that I have a little bit extra here and I can see this cut. The way I would solve it is to grab the eraser, the base one, the soft round, make the hardness to 0 and make the size bigger. So I have a very soft edge. So now I can clean up this part and see that they're kind of merging together. Okay? And for these two, I can select the two by holding shift. So I'm going to click on layer file, press Shift, and click on layer five copy. And I'm going to merge these two layers. So now they're just one. I'll move it over here so we take a look at it. And now like before, but instead of selecting with the pen tool, I'm going to make a selection where I want my live to see that I am selecting the part that I want to delete. So I'm going to press now common enter or right-click. Make selection. Okay, see I have the, the part I wanted it and now simply hit delete. Let's see how this looks. It's one piece now, that's one way of doing it. I could also have clone that. But for extending things when they're this simple, that's the easiest way for me. So now I'm going to go to select and deselect. So I don't have that anymore. Come back to my move tool. And now I have a four leaf that I can hide under all this, maybe not this one. There we go. Cool. So right now we have this be coal going on here. I'm going to show you a little trick. Grabbed the selection tool. I'm going to select the missing part. So if I would want all this to be the same as here. And with my layer selected, remember to have your layer selected, I'm going to go to Edit, Fill. And I'm going to make sure that it says content aware, if you have a very old version of Photoshop could be that you don't have this option. If you have this ES6 version, CCR5, or previous, I think you don't have this. And now I'm told Photoshop, OK. And Photoshop is going to try to come up with something similar to this four here. If you see it, it's not perfect. But we can also select this parts again, edit, fill. And you see that Photoshop, thanks again. And tries to come up with a, with a better content aware solution. And you can do this as many times as you want to keep on working on them or the other option that you have. And the reason why I don't care so much here, it's because there's going to be more stuff on there, is to clone some parts of here. We have this tool that it's the clone stamp tool. I'm going to press Alt and click on this little i. So I just see that layer. If I press Alt and click again lc all the layers. But just to show you how this tool works, I'm going to press Alt and click on the little i. So you'll have some kind of what looks like a brush that you can by pressing alt, tell Photoshop we're going to get the information from. So I'm going to select one of these green areas, not this lighter areas, but the green ones. By pressing alt and making choose one click, you will think, okay, nothing happened, but it did happen. So all click from where I want to take the information from. And now I'm going to start painting. So what photoshop is doing is taking the information from that little cross r we have there and duplicating it wherever I'm telling you to do so. So now, I know this is not perfect, but we can refine it. We can make our brush smaller. And again, press Alt and click. And now we find this Alton click. Now refine this. Just make sure to make different starting points, elections. I'm pressing all thing clicking several times so I get information from different places because otherwise you will start seeing these patterns like here we have this here and this here, and this here. So I can try to hide those. And if I press Alt and click on the litter, I am going to make all the other layers show. It's, I'm going to craft some more information from here. And that's, that's pretty okay for now. Oppress common 0 will control 0 and IC. I make my Canvas fit my screen. Okay, so let's start trying to move things around a little bit, accommodate them so they fit. I really like when things kind of fit with each other. To turn this round, it gets smaller because the resolution of tau one is not so good. Maybe put it there. And what you can also do is to use the same shapes that we have here. For example, I really like this part, this kind of banes. I don't know what it has here. So I can also, for example, select the layer grabbed my lasso tool, take a part of it, copy it, edit, copy, and then paste it. And now I have some little parts to duplicate or to live somewhere else. I'm going to drop it. They're going to hide the moth to see how it's going. Okay? And I'm going to accommodate this here. What if we make it smaller? Going to move this around? For example, if I want this shape to fit right on my math, I'm going to move this away so you see it followed like this shaped to fit in there. But I can do is to select my shape, go to edit, transform, warp. And now I'm going to have this box that I can click and pool, and it's going to modify my image. So somehow I have a little bit more freedom to the shape of that image. I can adjust it and then bring this thing is back here and here. Okay, so let's see what else we can do. I really like this one. So I'm going to duplicate it. I'll press. I will hold out and drag it. And now I'm going to go to edit, transform and Floppy Bird a call because I would like to put it here, make it a little bit smaller, so it's a little bit different. And everything that it's smaller and darter. Would look like it's behind. And everything that has a little bit more flight and it's bigger would look like it's on the front. So for example, if this one I want to make it look like it's behind, I'm going to make it smaller like I did try to put it behind the other stuff. I'm going to use the non-destructive way of making it. So I'm going to select my layer, This one. I'm going to come here to this little Ying Yang somehow and I'm going to go to exposure. So if you see now we have a new layer on top of our previous layer. And the first thing that I'm going to do and this you should remember is to click here. Just so this properties affect the layer below if you see it here now I have this little arrow telling me, OK, this will only work with the layer below. And now I'm going to take the exposure a little bit down. We can keep on adding elements. This has no end. Somehow. I'm going to do the same here. Grab my lasso tool and copy this part, and take it somewhere in between. Or maybe here. Let's see. I kind of like how this darker part looks. Maybe are going to put it here. Yes, I like that better. Cool. So let's say we came to a point where we like this part. Now, remember that we're building everything on the right side. Whether we're going to do is to duplicate everything we have here and take it to this side. So in order to do that, we need to make sure that we select all the layers that we have that belong to this part and take them and select them. So I'm going to recognize that the math is down here. So I'm going to go from the first one on top of the mouth to the last one. And before clicking on the last one, I'm going to hold shift. So I have them all. Now what I'm going to do is to right-click duplicate layers. Ok. So now we have all of them on top, so we don't really see them. But now we can go to edit, transform and flip horizontal and we are going to get a mess. Okay, that's fine. We haven't clicked away, we haven't touched the keyword. So now what we're going to do is to press Shift and the arrows. So we move this exactly there. I press shift, you can do it just with the arrows, but I press shift because it goes a little bit faster. So I'll come back. And there we have it. Now, the challenge will be to accommodate this. But that's fine. Why did I do it through the Layers panel and noxious directly from here selecting them like this. Because once you have made adjustment layers, this is called adjustments there. Then if you did like this selecting with the move tool, then you want catch your adjustment layers. And then some things are going to look different than others. So the first thing I'm going to delete this one in the center. And I'm going to select this one and put it on top. Lb They easier way to do that. Let's hide our moth. And ok, we have something that starts to resemble a moth. Maybe I would look for a way to fill up this place here in the middle. And we can do that either by going to any of our green stuff here and bringing up something that has the color that we want. Or we can clone or duplicate. Let's try to bring some part of this. I'm going to grab any selection tool and get a part of this. We want to edit, copy. Go to my first layer just selected. So when I paste it, paste on top of tau1. And now with my arrows again, we're going to take this down. Now, I can get rid of this guy by clicking and dragging it out fast. And now I can work a little bit with what I have. I can start selecting things at in details. And of course, a moth would never be exactly like nature is symmetrical. But the beauty of nature is also that some things are not always exactly the same. So to add a little bit of realism, I'm going to move a couple of things around. Because even when we don't see it, it makes our brain thinks a little bit more. And I kinda like that to get smaller too. And if you see we have here a little hole. So what we can do is to duplicate this one. There we go. And on the next lesson we're going to add the final details.
11. Adding details: So let's add some details. So we make this our image. I'm going to start by changing a little bit the color of this leaf. And for that again, I'm going to make an adjustment layer. Click on this little Yin Yang and I'm going to go to hue saturation. First of all, I'm going to remember that this only applies to a layer below. So I'm going to click it there. And now I'm going to move the slider until I find the color that I like. Going to this kind of reddish autumn thing. Really like we can take down there. I kind of like this. And now we have another one on the other side. So what we can do is to find this Adjustment Layer, find this other layer. So I'm going to get this Adjustment Layer, press alt. And the same as with layers. I am going to holding out, drag it and drop it. And that's going to make a duplicate of my Adjustment layer. And again, I'm going to tell this one, Hey, apply only to a layer below. So here I have it. I have it in both sides. And what I really enjoy this kind of collages that there are so many small layers and so many things on top of the other that we can add some shadows. So we generate this volume in-between things. So for example, what I will do here is I have this layer that is underneath this one. So if I want to add some shadows, I'm going to create a new layer on top and paint with a brush. So I'm going to make a new layer by clicking on this little plus icon here. If you see we have one layer on top of the other. And I'm going to tell this layer, ok, chest, apply on the layer below. The same as we did with the adjustment layers, but this k between layers. In order to do that, I'm going to press Alt and click right in between these two layers. See what happens. I get this white square with an arrow. I'm holding Alt at this moment and I'm going to click right there. And if you see now this layer has this arrowed, tell me anything that you do here. It's going to only be applied on this layer. So now I can grab a brush. I can make it a little bit bigger. And I'm going to again put the harness to Sierra. Okay. I'm going to get closer here. And what I tend to do is to pick a color, like a dark color from my layer. So for example here. And now I'm going to soften the paint. And you see that even if I paint here, you see nothing because there's no information of my layer there. It's only painting on my layer. So I'm painting right underneath, making this a little bit bigger. So it looks like it's a little bit farther away than this part. And okay, the shadow looks very fake. So now what I'm going to do is to go here to my blending Modes and choose multiplier. So see that now this layer, it's a little bit transparent. I can also fine tune it with a capacity. That should be fine. So again, here for example, I can do the same or even here, that there's this whole area that it's underneath a flower. I can do the same. Actually right here. What I would do is to choose Find the flower here, go one layer below, make a new layer. Thicker, dark green, make my brush a little bit bigger. And now I campaigned and put it on multiplier. In this case, I didn't apply to choose the layer below as we learned because I wanted to apply on many layers. So I do not need that. Go into a little bit farther. And to see the result by C, it's now taken some more volume. We're going to do same here, make a new layer. Press Alt. Grabbed my brush and pick a color by using alt. Make my approach smaller. And simply paint. The nice thing about making the shadows again, instead, they are a little bit different and they also make this be a little bit less computer made a more realistic somehow in this unreal world. So I'm going to make a new layer on this, on top of this one, the back one. Press alt, click in-between. Press my brush. I'm gonna make it bigger. And I'm going to pick a color with alt and painter underneath. Photo multiplier so it see what's going on. If that's too much, I can go to my eraser and take some things back and do the same on this side, New Layer, press alt in between. If you see, you will see here that I always go back to B. It's like a reflex that I have. I always get back to the Move tool. I'm going to press the brush and paint on this side. If that was a little bit too much, crap my eraser. And erase some of the things. Make it a little bit bigger so it's softer. Okay, cool. So let's say we're happy with that. I'm going to add some more details. But instead of shadows, let's add some lights. And we're going to use exactly the same process. For example, I'm going to come to this layer. In this case we have an adjustment layer on top. So what I'm going to do is to make a layer on top of the Adjustment Layer and press Alt and in between the layers. So it's, it's part of the same chain crop. I brush and grab a light color, in this case white or it can be these yellowish and c. Now I can paint and see how we have some lighter. I'm going to pick this white here, so it separates from the one below. And now we have some subtle, but still some lighter. I'm going to do the same on this side. Make a new layer, press Alt in-between, grabbed my brush, it on this side, and go back to see how it looks. Even a little bit more. Cool. I'm going to go into my move tool or v again. And we can do this as much as we want. We'll probably add some more. I should have added a little bit more shadows here. We're going to do that quickly. Make a new layer. Apply on the, on the bottom layer. Press Alt to grab a color, make my brush bigger. That's better. And go there. See how this is on top of this one. I think one thing that would look very nice would be to try to make this leaf in-between these two. In order to do that, what I am going to do is to grab this leaf, make a mask. Remember how we did it before. We're going to get this white square there. Now I'm going to grab my brush and by default it's in black. And to make it smaller. And this time I'm gonna make it harder so the edge is not so blurry. And I'm going to paint painter. So it looks like it's right on the edge. Let's see how that looks from far away. Okay. For it to come closer. Now, I'm going to do the same thing with the shadows. I'm going to. And to make a new layer, press Altoid applies, chose to this layer. Grab my brush with holding Alt and clicking and going to get a dark green. And now I'm going to paint with the star grain. Remember that we made the hardness a little bit higher, going to take it back down to 0 so it's softer and make my brush a little bit bigger. So the shadow, it's a little bit more realistic. And I'm going to put a multiplier, takes the capacity down. So it looks a little bit like it's going underneath it.
12. Making a background: Okay, so it's time to add a background to our cash for that, I'm going to head again to an Splash.com. And I'm going to look for all paper. Let's see what that gives us. Let's see if this one works. I'm going to download this image. Thank you, Dan Christiane for their rich. I have it in my downloads. I'm going to drag and drop it on Photoshop. And now I'm going to drag and drop it on my clash. Going to press common S or file save, just in case it's good to Savior project. And I'm going to put it on the ground. But I don't really like as it has so much of this harsh shadows. And we have this really soft ones. I think that's what it is not matching. What I can do is to make it a little bit bigger. Say if this went for E, now start to like and again, we can use the same tools we used before to clone some parts. I'm going to get closer to here. I'm going to grab my clone stamp tool, make it bigger. And I'm going to press Alt and click to have a sample. And I'm going to paint, so we get rid of this one. Going to do it again. And to do it again on this side. Kind of like that border bean in there. I've appended line to the right here and say, yeah, this looks here. And I think that's quite fine. Now, what it don't really enjoy is that it's very orange. I would like this to be a little bit closer to this kind of color. So it looks like a real base for this math. So what I'm going to do is to graph here my layer, go to the adjustments layers. And now we have to think, I wanted to be a lighter and I wanted to be a little bit more yellowish. So again, we can use the hue saturation because we have the lightness and we have the hue. So we can turn this into something a little bit more yellowish. And we can make it a little bit lighter. I think that looks way better than before, but it's also apt to personal taste. Okay, cool. So we have our, our background now. Maybe what I will need to do now is to either make this lighter or darker. So it goes a little bit farther from the background. What I really enjoyed trying, sometimes it's clicking on my layer and going through the blending modes to see if there's one that actually looks better. This one, I really like how it looks. So I don't have to make any adjustment layer on top or anything like that. I just go through them. Oh, black looks good too. I think the Linear Burn is the one I like the most. So I'm going to put it Linear Burn, and I'm going to select the one on the other side, put it on Linear Burn to. Now that I see and I don't like so much. Maybe I can put the opacity a little bit. Towns, it's not so orange. Yes. The capacity a little bit down. Cool. We have it. Now there are many other things that we can do with this. One little trick that I used to do. That it's similar to using a 3D lab, but it's not, is to make one shape on top of everything. So I'm going to make one big shape on top of Michael Ash. I just make sure that here it says shape. Now path going to double-click on it to select like a yellowish color or any color you want. And right now, okay, I covered everything, but the same thing that we just done with blending modes I can do now with this. And why would I do this just to make everything look a little bit more on the same page. See that now everything has this yellowish tone to it that we can make a little bit more subtle. We don't need to do it like this. But I think it looks nice. It can add, for example, a multiplier output it choose. I get 5%. And the difference, it's very low. Let's see a little bit. Harder. Difference is very, very small, but everything looks a little bit on the same page, spread in like 20. Okay, cool. I think we're done with this collage. And we're going to export it.
13. Exporting: So usually if you want to post this straight onto Instagram, let's say what I would do is to go to File New, make here, the Instagram sizes. So for example, 1080 per 1080 at 72 dpi, because that's for the screen to hit Create. I'm going to grab my Marquee Tool, select everything, and go to Edit, Copy Merged. Why copy merchant not copy, because I want this to copy all the layers, not just a layer that it selected here. So I'm going to go to Copy merged, edit, paste. And you will see that this is huge. So I click on my layer and now I make it smaller and a press Enter, make it smaller and I press Enter. I do this in several stages. Just for Photoshop to know what's important and what's not. And there we have it now I can go to File, Save As, and save it as a JPEG. Let's put Instagram post going to save it. Now. If I would like to make a story, for example, I'll go to File New. I would put 1080 per 19-21 And I'll do it on 72. And now I will do the same. I will paste it. I would make it smaller. Let's say if you want to have it there in the middle, we have a problem. Why? Because we have this edges and there are many ways to do this. I'm going to show you the I wouldn't say the easiest one, but the one that would look probably better. So what I'm going to do is to hide my background. And I'm going to hide the last layer we put with this, with this color because this is changing everything. So I'm going to do the same Marquee Tool, select everything, Copy, Merged, edit, paste. So now I only have the math. Let's say we'd like it like that. And now I would only take the background without the moth. So as we learned, if we're press Alt and click on the little i, I can choose, Show the layers I want to show. So for example, only this layer, I press Alt and click on the I. And now I'm going to copy merged, edit, paste. And why am I doing this? Because now I have my background on a bigger size, which is the same background as before. And now I have my model. And if I want, I can come here and take my rectangle. I'll copy and paste it. And now I have the same call ash, but divided the background, the mouth, and the color. That's I believe better than having the square here with the white sides and having to duplicate or invent this part. I know it's a little bit more complicated, but it gives you a little bit more freedom. And the bag texture, it's the proper texture.
14. Final comments: Okay, so we got to the end of the class. I really appreciate you made it this far. Remember that this is just one of the math that we will be making. So I know it has been a lot of Pentaho today, but in the next classes, you're going to have some other tools to play with with your selections. So yeah, I hope you enjoyed it. Feel free to upload your progress, to send it to me if you want some feedback. And yeah, I really appreciate it and hope to see you in the next class. Thank you.
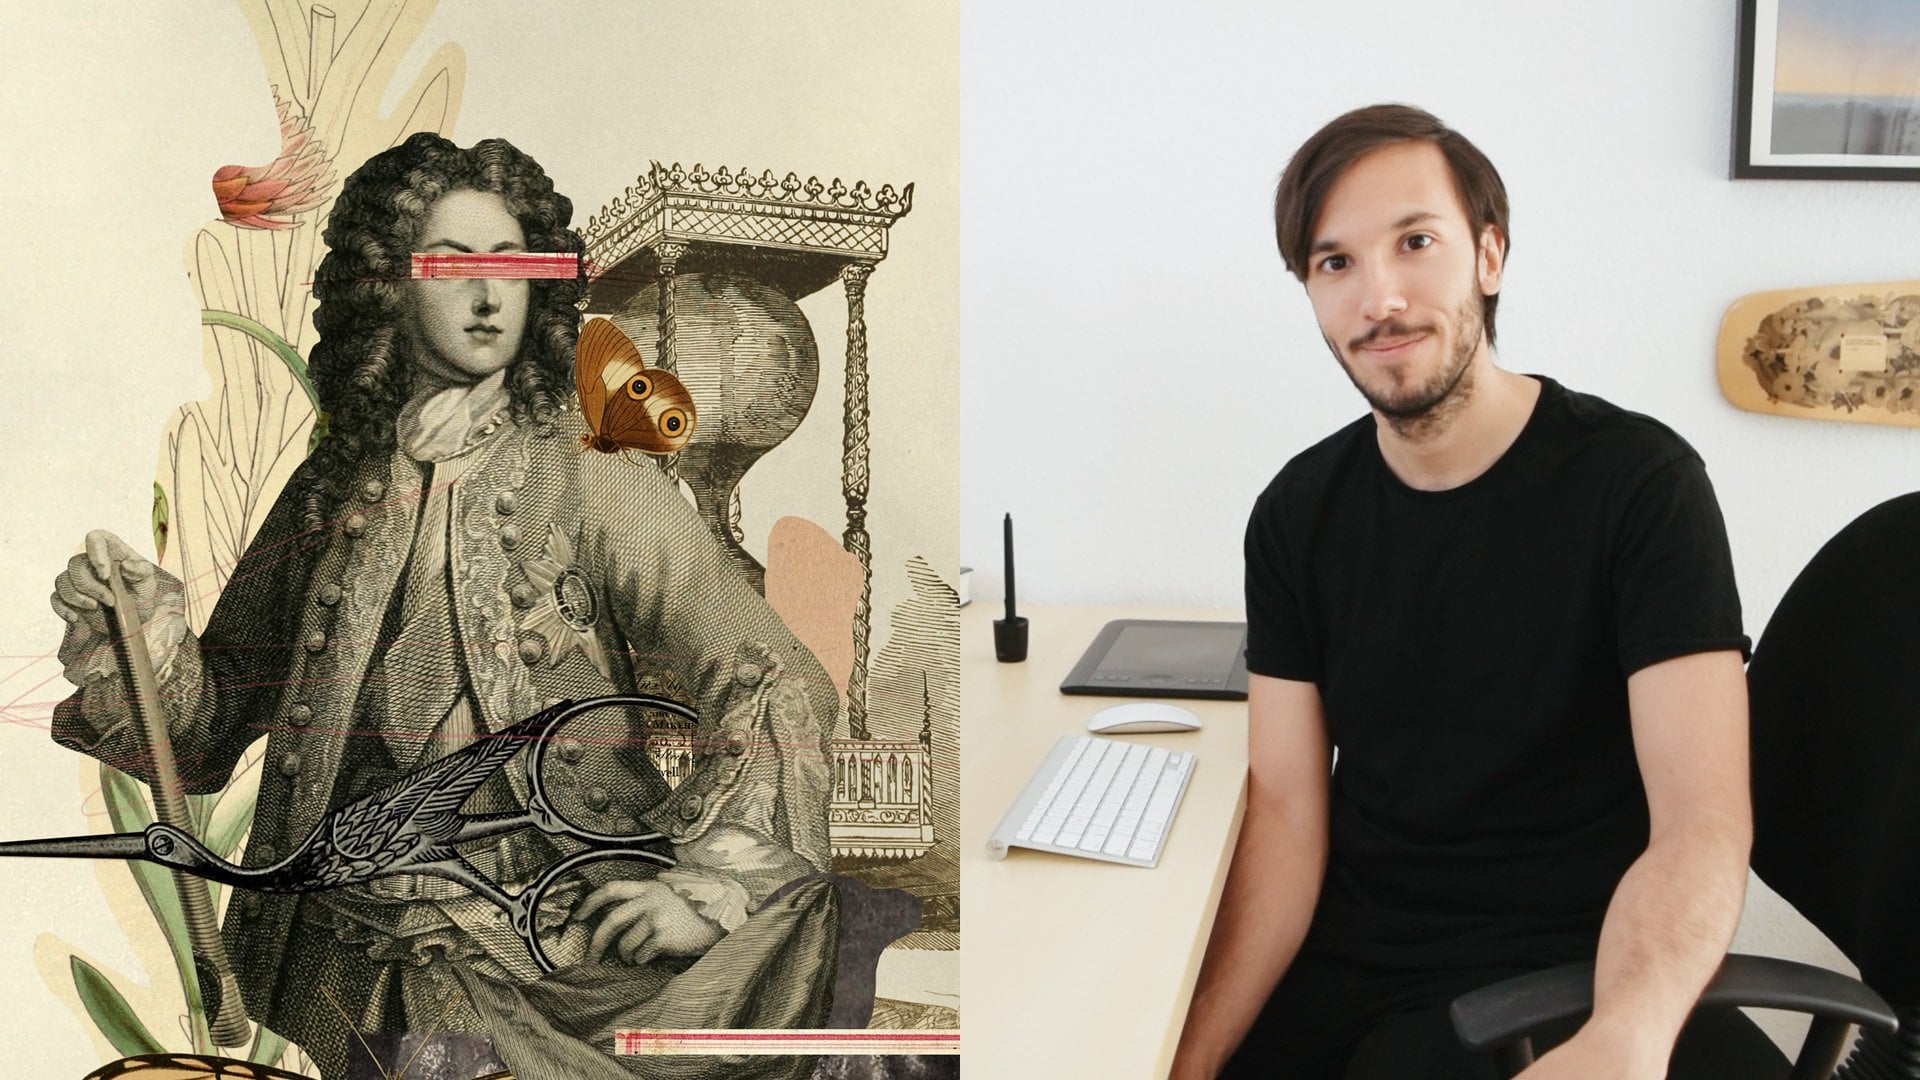
 Marcos Morales, Graphic designer, Digital collage lover