Transcripts
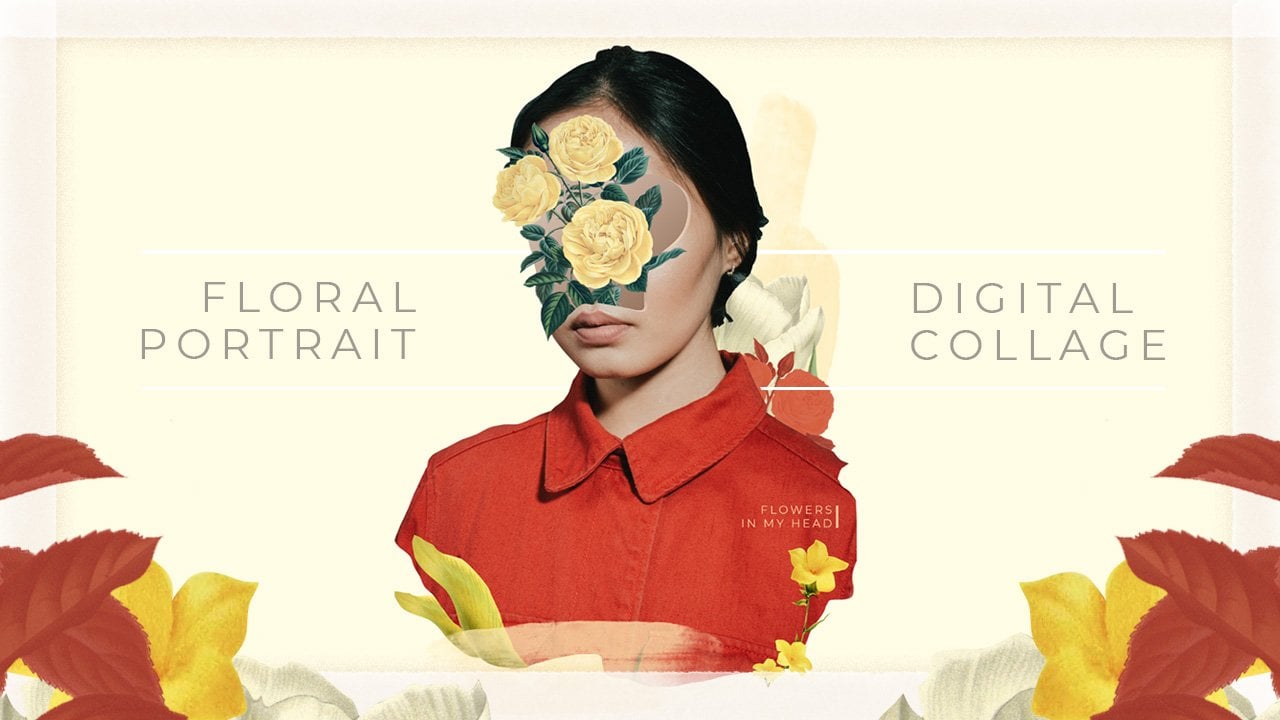
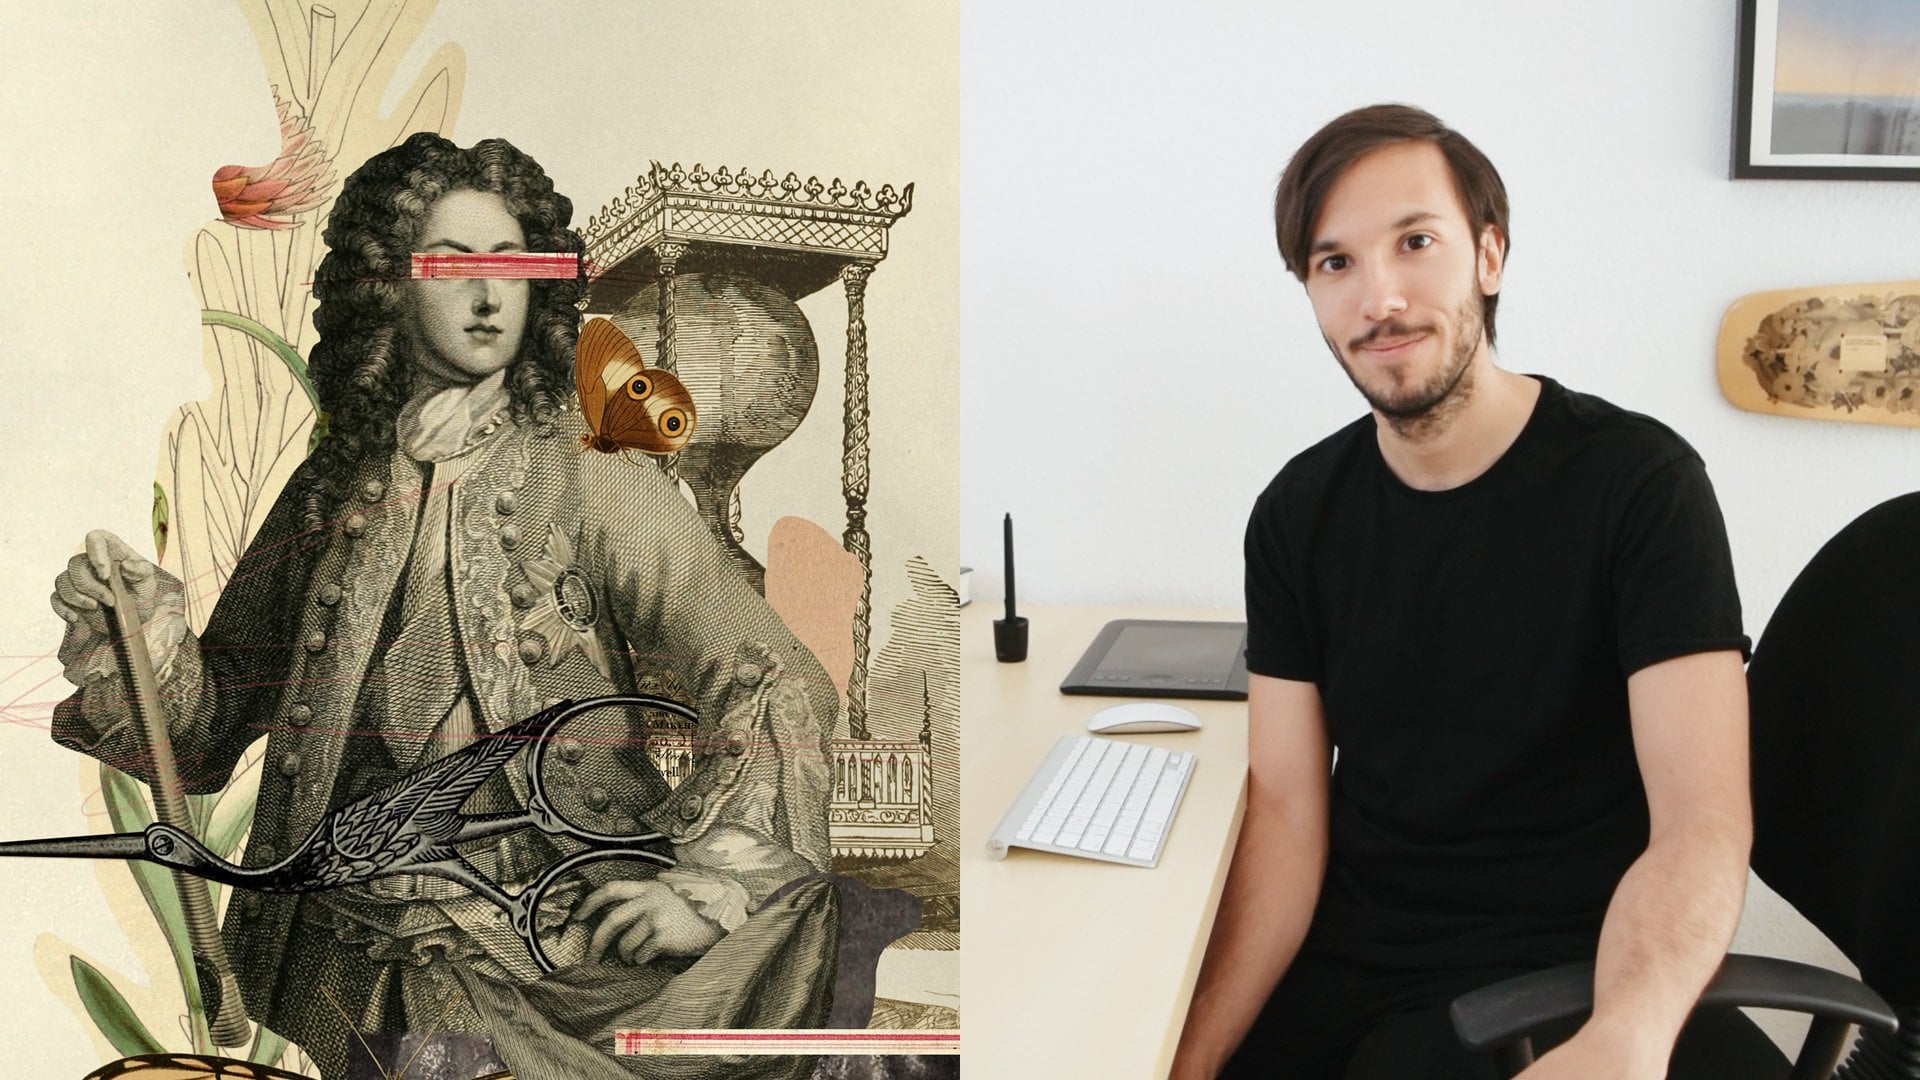
1. Introduction: Have you ever sat next to someone and watch them work and think, Oh, that's how you do it. Okay, this class is all about that. It is not centering the Kalash itself. I will be making one, of course, but it's about practicing, making photo shop your friend and learning ways off solving problems that can be quite useful. These classes for intermediate, for the shop users, as I will be skipping some off the very basic concepts anyway, Don't worry. If you're a beginner, I will provide you with the files that I will use so you can follow along. I will be showing you with shortcuts. I use my favorite photo shop tools and some workflow tips while going through the process of making a digital Kalash. I am Marcus Monetise, a graphic designer and illustrator, and I've been very likely to work in many different projects for brands, agencies and, for myself, does my reward uses digital collages, its base. I have always felt the need to somehow changed and own the images from different media. My spending, quite a few hours a day sitting in front of Photoshopped, have adopted a way of working and I believe that I can give you some tips on how you use it . As I said, this class it's about practicing, will review tips that will help you go from the first election to the moment of saving the file and making it a smallest possible. So if you're ready, let's start.
2. Class project: we have to option for this class project. One of them is to follow along and make your own collapse, raising the images from the suit file that you can find in the class resources. And the second option is that you make a collapse. Using the tips that I will show you here, there might be some that you already know. So feel free to choose in practice with the ones that you don't use yet you can upload your projects and they don't need to be finished. Remember, this is just the practice class. By uploading your process, I can help you with feedback or clearing some doubts that might come while trying to incorporate these tools to your workflow.
3. First show transform controls: Hi. Thank you for taking the class. This first tool we're going to see. It's very basic, but it's really helpful when you're making Kalash because you're modifying moving things around all the time. And this is the move, tour and the motor. I use it like this with auto Select and Children's form controls. Why do I do this? Well, because when you click on a layer, you immediately get this bounding box with a transform control so I can quickly scale, rotate, do whatever I want moving around, and I don't have to press comment T to go and get this free transform controls will go to edit free transform and also because it helps me identify with which layer I'm working with . So, for example, here have to overlaying layers that are one on top of the other, and this will happen to you all the time. When you make clash, we have things that are higher up or lower down in your layers. So you might just click here thinking that you're going to grab this branch. But in reality you're driving this stain. So of course, now it's very obvious because we only have two layers, and we know which layers they are, and you can identify them. But once you have, ah, background, the matches a little bit the color of this layer, or you have some other things going around where you have been working with many men in the airs for a long time, you will no longer remember that this small Grady in goes on top of this layer. So for you to identify it fast, you see that these makes a box with a bounding edges off the layer so you'll easily recognize that this might go for this layer. And this more rectangular and on vertical bounding box might be for the brunch, so you can quickly identify them by having all just, like layer and show transform controls activated.
4. Content-aware textures: Okay, so let's start making our composition. We're going to make a very simple kalash in order to explain the concepts and the tips and tricks that I want to share with you. So we're going to go to create you, and we're going to make an A four file. You can find it on the print, and here we have your presets, a four arch, be. It's perfect. So I've also left the resources that we're going to use at the resources tab. So if you want, you can go ahead and download them and do everything as I do, and we work together. So this step that I'm going to share with you, it's when I find the texture, for example, like this one that I really like. I'll drop in on photo shop, and now I'm going to drag and drop it on my campus, and I let go when I'm right on top of the cameras, not anywhere else. And let's I have this structure that I really like, but I don't want to stretch it because we're going to lose quality. So what I tend to do in this case if I really like it as it is, I'm going to get the Marquis to with my layers elected, and I'm going to select all the parts where the texture doesn't reach with more. There, the more here on the more here and now I'm going to go to edit feel, and now I make sure that it's as content aware I'm going to press. OK, so what photo shop is doing now is trying to see how to feel out the rest off the page, and it's quite good. But if we need to this this doesn't always work this way so perfectly. So if you need to do it again, you can simply go ahead, select the parts you want to change and do it again. But what I do when I have, for example, little details like Dishman said, I would like to get rid off. It's I used the spot healing to, and if you check up here, it says content aware, too. So what I'm going to do, I'm going to get a brush harness quite soft and now I'm going to just paint on those details that I want to get rid of and see what happens. It's using the same content of where engine to change these kind of things. So see, there are some little points here and there. Always make sure you're looking at it at 100%. That's common one. And if I would like to get rid of all this little things, I actually do like them because makes it more realistic. For example, this one is too big, so I'm going to get rid of it. So that's how I get a texture without stretching and without losing quality. And now we have a base for us to start working, so I'm going to just save it, and we move on to the next one.
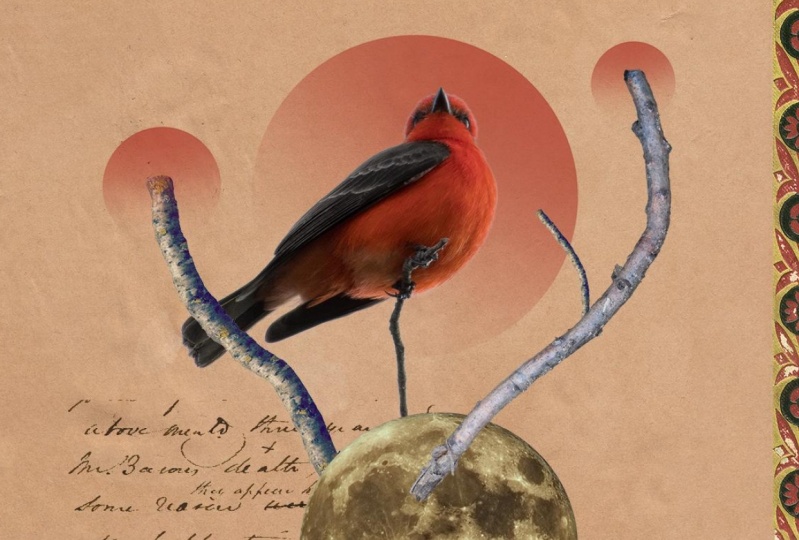
5. Selecting subjects: So here we are. We can start adding off checks to our Kalash. These images that I've downloaded most of them are from unspool rush. If you want to know where I get images from, I have other classes where explain exactly were and how to get them. Right now, I just wanted to share this one's with you because this class, it's more to be about this little tips on to try to go fast. But if you want, you can go ahead and check it out. After this class were, get the images I share links and everything. So don't worry about this right now. We're going to get this image from a really nice bird that I found in unspool Ash going to drag and drop it in photo shop. And right now I have many ways off selecting this bird. I'm going to try to find the easiest, fastest and more useful way because I could definitely do it with a pencil. I could definitely try to hit it with the Magic Oneto, but there's a really nice tool that I'm using a lot lately that it's with our much of Wandell selected looking up here and see. It's a select subject. So finish up now recognizes where are subject is and makes a marching on selection. But if you see it's not perfect, like there are many things that were left outside. And if we go ahead, copy and paste this guy, it's not going to look very good because, you know, it still has some details. So if I go back to my match of one tool you remember, we have clicked here. Select subject. Now what I'm going to do is to go to select and mask. Could be that you don't see this reddish pinkish background. You can change it over here to go to the overlay mode or trust. Press the F until you find that. So what we're going to do to have this second tool selected. And look what happens when I start painting on these areas than haven't bean selected. See how now it reacts very softly to those details it's going to for the shop. It's going to think for you. Okay, this is this should be selected and this shouldn't be selected. We can try to see how it works there. See, It still keeps some off the feathers, but it has removed the white background. Of course, it's not 100% perfect, but its way better than having these this super strong selection that we didn't want. So, for example, here I'm going to refine this little bit. And now for the showbiz understanding. Okay, this guy wants the branch hopes, so it starts to give the original color to the branch. That means that that's going to be selected and everything that it's in red. It's not going to be so we can keep on painting if you have Walkom, that's why easier so you can also make your brush bigger. But for now, these will work because we're probably going to get rid of this lower part of the brunch. And once I'm happy with my selection, we have here a lot of parameters to touch. But for now this works and I'm going to go to Al, put two new layer with a layer mask, so if you see now, we have the same layer repeated here and with the mask so we can keep on working on it afterwards. So what I'm going to do as always, I came back to my move to I'm going to drag and drop it here, See what happened now these parts I can still work on them, but its way softer the difference between the birds and the background. What? I'm going to do what I usually do. So, for example, here I have the mask. If you're not from in there with mask everything that you see here and black, it's what we're not seeing and everything that it's in white we are seeing. So it's about covering and showing. So what I'm going to do, suppress all or option and click on the mask. So right now I only see the black parts and the white parents so I can easily go to my brush. I'll make it smaller and I can paint with white to recover this areas. I'll press all door option again and see Now it's coming back off course it has some white there. I'm going to go back. So this election Photoshopped did was better than what I thought I could do s so I can go ahead and refined this This mattress I want, for example, my pain would like here and then to start hiding this just like this leader. Soft white parts around this, but it's not fully necessary. But just to give you an example of what we can do here, for example. Yeah, this is quite good. We're going to leave it like that. And right now you have seen that we have made a very I wouldn't say hard, but a very detailed selection in a very few steps. So I'm going to show it again. Just so you remember, it would come to the magic one select subject. Select a mask. And now we paint the areas that were left outside. And once we have it out, put two new layer with a layer mask and there we have it. So let's move on to the next one.
6. Easy selections: another file that you will find its this photo of the moon. I'm going to drag and drop it in photo shop. And when it comes to circle our objects, there's one trick that I find it super useful because if I would have to select is with the pen tool or with other tools, it will take some time, and it gets more difficult than an actual ease. So what I'm going to do is to drive a guide from the left and from the top. If you don't have your guides here, it's coming our or view, um, rollers so you can get your guides from the brothers. And right now I'm going to go to my elliptical marquee tool, and I'm going to come a couple of pixels inside. Were this two guides meet, and right now I'm going to make this election. If this will be a perfect circle, our probably press shift, as I'm doing right now to get a proportional perfect circle. But right now it's moon. It's not. I don't really need it, and what I usually try to do is to make a selection that it's a little bit smaller, so I don't grab any off the black pixels. It doesn't matter if you leave some pixels outside, so I'm going to you and it Copy on edit paste. So right now, we have made a selection off the moon, a circular object in a couple of seconds and, yeah, let's move onto the next one.
7. Shaping images freely: another tool that I absolutely love using its the puppet warp tool. So I have added this to PNG branches. They are already separated from their background and I'm going to drag this one photo shop and I'm going to drag it again to my Kalash. Remember, this is a very simple thing we're doing. It's just to show you which tools I usually used and what tips I can give you. So I made it a little bit smaller. And why? Because I have my show transformed selected so I could directly make it smaller. And I'm going to place it where I think I want this to be. And with my layers selected, I'm going to go to edit Puppet Warp. These works as if you would mean something to a wall and then move it. So I'm going to start adding Peens one on top here, another one here and maybe another one here. So look what happens now when they drive from them, click and drag. Right now, I can freely modify this branch however I want and I can keep on adding paeans to make it as I want once I'm done. Oh press, Enter and look what happened. We went from a straight French to um Yeah, Kurt brunch. And I can do this as many times as I want, so I'm going to bring it again to make it even smaller. I'm going Teoh room and again Edit puppet warp to click Here, here and now I'm going to add another point. Move it from here. And this works beautifully with natural objects were they don't have a specific shape off course. If I grab this bird or if I grab the moon and I do this, it's going to look very weird because we're not used to it. But also, we can extend the modify images however we want with this. So for branches for yeah, clouds for whatever it is that doesn't have in a specific shape. We can do this as much as we want, and probably it's going to look very good. So I'm going to keep on doing this until I'm happy with some kind of composition. And yeah, we can try to make them join. That looks a little bit weird, but well, Woolsey, I'm going to keep on adding some of these branches probably wanted to make. Yeah, let's make some kind of stairs to the moon. So I'm going to make this smaller. And what I find very funny is to try to generate objects from other objects. So, for example, these to, um, branches can easily become some stairs. So I will duplicate this common chain. I'm going to turn it around. And right now, I would just grab the lasso tool inches, cut it to make a couple of stairs my holding shift. I'm going to grab all the slayers, and then we go, we have some stairs, and if I want a press common and down here, I can modify them to. So this is just some random things that are coming across one making this collection. But yeah, I have in mind that you can modify stretch and the store images in a very fun way with the popular warp tool. And let's move on to the next one
8. Get more brushes: but I'm going to show you now. It's not a drake or a shark cut. It's more of a tip. I've been giving workshops, and I've noticed that many people don't use the brushes that Photoshopped gives you by default. If you're paying your photo shop or you're a double subscription, you'll have access to a lot of brushes. And if you're using a tablet, uh, like a walk home or any other brand, these precious react really nicely and they're really well made, so they're really worth downloading. So I'm going to go and click on my brush to our right, click anywhere on my campus and open this little panel. Here I'll go and click to get more brushes, and these will immediately open this website were you have a lot off packs to download. You have cross Hatcher's, I don't know. Watercolors dry, medium and only have to do is to click on download. I have already downloaded them, and you'll get this file. Did you just need to double click? And now, when you rightly with your brush selected the last folder, you're going to get its the one off the process you just unloaded and then anything about this precious is assay mentioned. I'll make a new layer is that they react. They have pressure, sensitivity, and you have a lot of options and a lot of things to play with. So, for example, I have organized my brushes in a folder. I have them brushes selected for style. These are the brushes that I use the most and the ones that I like the most. So I took the time to download so many of these packs and to check which ones I like the best. And I made a small folder, and I put them there so I don't have to go through all of them. Um, every time I want to find the brush. So I have here, like, 20 brushes that are the ones that I used most. And if you see, they react really nicely, I compress harder and going to mark harder or softer. You have water cars. You have so many. This is so much fun to play with. And you also have rubbers. You have, um I don't know. Yeah, yeah, it's munchers. You have everything. So I would advise you to go ahead, download as many packs issue can and spend the day playing around and checking whatever brushes you like the most to play around.
9. Say no to eraser: for the next thing that I want to show you were going to use these filed texture number two going to drop it in photo shop and now my composition. And here we're going to learn how to give natural edges to objects when we select them when we raise them. So, for example, we have here this image that has this very dark edge that I would like to get rid off, and there are many, many ways to do this. One of them will be to come to the Marquis to interest, select it and deleted or econ dude with the razor. But one thing that I I usually use it's making a mask to make sure that you're working on your mask and I grab a brush. And also like the brush maybe off one of thes that we have interest. Don't load it. That has some kind of edge to it. So, for example, grab this one, see how the borders are and what I'm going to do is to come closer and by holding shift, I'm going to paint with black on my mask, so I just pass it once there it goes. So see what happened here. Okay, this was a little bit bad, so I'm going to pay the interest. You see it now, we have a niche that it's not a straight anymore as this one, but it has some kind of personality. It looks a little bit like paper and make things a little bit more realistic. Right now we're watching at this at 200% or more. Eso, this looks very close. But when we see it from far away see that now it looks a little bit more realistic. This is a small detail, but I think it looks really good when you're working with things are you don't want them to look very digital. You want them to look more natural or riel. I try to give these to the borders off my selections. Oh, are my objects choose to make them all feel a little bit more handmade? We could have also you used the eraser and let's get a hardy razor. I'll go to my layer, choose to see the difference. So this is a straight line and this is the line with a mask. And not only that, by using the mask off course now I deleted the image itself, but I can always disable it and have my information there to redo it, to do differently, to hide some other parts. So I recommend this way getting used to using mask instead of the eraser or dilating things .
10. Easy selections part 2: So now we're going to learn how to use shapes in our advantage. Maybe you already know this, but to begin with I'm going to organize this a little bit because layers start to stock and , yeah, this is becoming a mess. So I'm going to select the stairs and I have the options here. I can either merge them or I can link them and make a new folder. That's what I usually do when I want to be really organized. I'm going to select them right click link layers and then, by holding shift, I'm going to click on, create a new group. So now I have here stairs. Now, if I want to move them, they're all together because they're linked someone to close this. Another thing that I usually use, um, is to lock the background. So now I can select things and I don't get the background there. Everything moves every time. So, as I mentioned before, I am not. This is not a riel Kalash composition. I'm just working around my way to show you the tools that I want to show. And I'm going to grab this guy, and I put it higher and I'm going to take the moon in this. I don't know what's going to come from this, but yeah, going to do it. So OK, let's say we're happy with that. I'm putting everything together there and now what I do to not have to select again things or to use the shapes off things to make new layers. What I do is I press common and I click on the layer not on the name but on this square that we have here. So right now I have the marching ends going around this shape Exactly the shape off the layer. So the same I could have done with with the brand shoes or with the birth of whatever. So I'm going to press common and click there, common in click, and I have it. So now I'm going to make a new layer and what I usually use this four is to colorize some parts off the objects. Eso I'm going to grab my brush big. Maybe this red or anything that it's here, my composition. So everything starts to look in the same world like as if they were in the same word. Sorry, and I'm going to grab a brush. For example, this grain brush I really liked going to paint a little bit around this shape. You compress common D to de select or just grab any other selection to on Click Outside. And as you see now, I have a new layer with this shape off the moment, so I can either leave it there. For now. I can play with the blending modes. I could do whatever I want. So let's say it like that. We're going to leave it like that. This is very useful also for giving shapes some kind of shadows or, for example, here when I have this branch going on top of this one, what I would do is to make a small shadow here that I could do in many, many ways, but what I usually do. Scientists select the layer that I'm going to apply the shadow, too. Press common click making you layer. I'll pick a color dark color from here, going to get my brush way smaller, and now I can paint. So now I'm generating this dark part exactly on the shape off my image. I can do this in many other ways to. I can also come to my layer and press this one. And now if I pain it will Onley paint and sign my layer. Or I can make a new layer on top paying my shadow impress old and applied this shadow trust to this layer there many, many ways. Um, video. It's up to you and your workflow. This is how usually do it to colorize parts Also, because I can take them away and maybe do something with them. Maybe it could make this bigger, um, play around with shapes, but this is completely up to you and just wanted to show you a couple of ways where you can use the shapes off your images in your advantage.
11. Using Smart objects: in this lesson, I would like to talk a little bit about smart objects. Smart objects preserved an images source content with all the original characteristics enabling you to perform nondestructive editing to the layer. What this means is that I can turn this image, the bird or the moon or whatever into a smart object. And then I can modify them in its original form. So, for example, I will right click convert to Smart Object, and you'll find that now if I want to paint on it, if I want to make a selection and in the lead, for example, I'm not going to be able to do it. So I'm going to double click on it and look what happens. We have a new top open, and now I can perform any modification to this file and save it, and it's going to be modified on my original. So not in the origin the kalash that I'm doing. Sorry. Um, so I have a new layer here. I can paint, and I'm going to press common s to save it. And now the modification is here. I cannot modify it from here, but I can always double click and come back and keep on working. So when do I used the smart objects? I use them in two different occasions. One. It's when I'm going to perform a modification that I'm not sure about, so and that could really affect the image itself. So, for example, if I would like to make this moon really, really small on a keyboard and say, I'm going to put it here and then it could Working for half an hour, I save my file and I'm like, No, I want to go back to it. If this was in the smart object, my image will probably pixel ate a lot. So let's let's take a look at that. So I'm going to rest arises Layer to have it on its original state going to make it really , really small. I want to move this away, and now I'm going to make it the same size again. So see that now the image is all blurry and it doesn't have the same quality. That's because we lost a lot of information when we made it smaller and it was a raster layer. So let's see what happens when we have a vector smart object. Abductor is smart objects are rightly cumber too smart object. And now I'm going to make it small. And now I'm going to make it big again. So see that this time it didn't blur itself. Didn't pixel ate? That's because we still have all this information here. So that's 11 way I would use it. And the second way it's when I want to start applying filters to this that I might modifying the future because I'm not sure about how I want them to look or because they depend on some other objects that I will also be applying effects, too. So, for example, let's use thes branches. I'm going to take this one to the back. Um, because not there. Sorry, I'm going to put it. Yeah, like all the way to back So I can work Freeny and I'm going Teoh, make another one here. Place it here making really small. So let's say I want to blur this branch is because I want them to look like as if they are in the background. So if I go at filter Blur, Gaussian blur the same situation, I'm going to blur this I'm going to keep on working. And if I want to come back to being sharp, I won't be able to. Because eventually I'm going to run out off steps to go back, and I won't be able to keep on modifying it. So what I'm going to do is I will first turn it into a smart object. And now I'm going to apply the filter. This could be a blur. Noise distorted. Whatever is that you want to apply to your image. So now will apply this Goshen Blur. Look what happened here. Now we have the Goshen blur that I can see or hide. And I also have a smart fielder mask. This means, like any other masked reacts to black and white black heights, white shows. So I can also grab any brush. I'm gonna grab a big soft brush, and I can hide the effect on certain parts. This is now making much sense here with what we're doing. But you get what I mean. So for example, I'm going to live this Tacitus. If I would have something here that I want to apply some noise or I don't know, let's play with a blur again. So I would like this to pretend that it's coming from here from my point of few, some kind of weird way there and to move this away So it makes more sense. So I can now turn this into a smart object. I can apply a blur. I'll make it really obvious. So the larger would be as thesis closer to me, and I'm focusing on this part. These will be blurry, and this might not be that blurry. So I'm going to go to my smart filter giver, get a very big soft brush, and I'm going to start making this. Still, it's blurry. But this part it's not. And we can check if that works or not. Sorry and yeah, and I can always come back to this, make it better, say, like, No, this should be more or less blurry. I can do this all over again, And if I double click, I still have my blower options here. I didn't lose any quality, and I can use a mask. So this will be a very good example off using photo shopping and nondestructive way and which also gives us even more possibilities because we have a mask that we can modify and the parts were. These effect applies or not. This is a little bit complicated to get used to, but once you do, you work in a way more freeway inside father shop because you can always come back. Decisions are not to stay forever. You can always modify them, and it gives you a way more freedom to try and explore different ways of doing things. Let's move to the next lesson.
12. Getting rid of backgrounds in a second: the next thing that I want to share with you. It's quite simple and basic, but it can save you a lot of time. So we have this file cold letter that J. Peg I'm going to drop it in photo shop, and now I'm going to drop it on top of Michael Ash. So if I would want just the text without the background here, there are many ways to do it. But one very simple way, at least for me, is to double click on it and check that in the first panel that we have a blending options says blend. If Gray and here we can move this threshold and look what happens. This will be very rough so we can make it a little bit more detail. By holding cult or option, we can add a 2nd 1 See that now we can go really soft on our selection. I'll go farther, and to finish with this, I'll put the layer multiply. So now I've lost the background and I only kept the dark parts off this. If there's something that I need to adjust, maybe here there's one very little small line, but I'm going to do is to make a mask. And again, as we have done before, I grab a brush and interest paint with black, the parts that I can see that maybe we don't need. So that was very simple again. Double click land. If and you move this, this can not only be applied to topography on a piece of paper, but to any object that has a very contrast e background.
13. Rotating canvas as a paper: I came up with this trick when I first got my welcome and there was a little bit difficult to control it. So I found out that using the letter R, we were going to get this tool that it's to rotate the campus. This doesn't mean that we're rotating the campus itself. It's mostly the view of our campus. So we're seeing it, for example, now horizontally. This is not going to change the configuration of her compass just the way we're seeing it. So I'm going to put it back in position by holding shift. It's going to lock there in 90 degrees. Let's say I would want to go all around this bird. I will always try to go in an upward direction. So let's see. I'm going to make a new layer and I'm going to grab my brush and now opposition the cameras in the way that it will make it easier for me. So as my range of motion goes in, an easier way upwards in this direction I'm going to do is to put this on the upper position and start drawing. And once I have to go down, I pressed. The are again. I turn, and so I go upwards and again here, So okay, it's not the most technical or the most beautiful way of doing it. But it makes my life way easier when I have to go around figures or where I have to draw something that it's very, it has to be very controlled. So that's one off the ways that I do it. And the other one is again. I'm making you layer again the brush we can play with the smoothing smoothing. What it will do is to add a small delay toe what you're painting. So, for example, now if I paint this, the brushstrokes comes directly with my with the brush tip. But if I add, let's add a lot of smoothing, see what happens. We'll have a delay there, and this will allow us to go in a more slow way, and we're going to be able to go in the more control way. So that's the other trick for you to make smoother lines or to be able to control your walk . I'm a little bit more, at least when you begin
14. Make versions, save yourself: this might seem like a very basic adviser dip, but it's really helpful when you're sketching or when you're about to make a really big change on your composition or in the way that things look so I would usually go. Once I'm about to make this change, I'll go shift common S and I will make a new version. You can name it however you want opened one A here and now I can feel free to start moving things around, scaling the modifying them in whatever way I want. That's one way of doing it the second way. And this depends on how strong your computer is, how much memory you have and how much your computer can deal with it. We can use our boards. So first, what we're going to do is to unlock any layers that we have locked this background. I don't care because it's always the back of a well on looking anyway. And I'm going to go to Layer new Art board. You will see here this dialogue and okay, so now, as you see here, it's us, our board one. What we can do is to just duplicate this, so I'm going to right, click on it and duplicate artwork. And now we have the same elements just in a different art board. So we have all the layers here as if they were to separate PSD files, but we have them in the same top to say it somehow. So now I can have these two versions and even compared to see. OK, this looks better here or no, it looks better here. This is really, really useful for either working with versions off the same off the same file or when you need to do a serious. For example, if Hero have another kind of bird, I could actually see them all together, and I can repeat this as many times as I want, but have in mind that it's like working with three PS these at the same time or four. Or however how many you want to work with. So this might make your computer go a little bit slower, but it's really, really helpful for playing around with different versions without feeling bad about it. I'm scared off destroying it, Um, which is one thing that you modify and everything goes in the wrong direction and you can never come back. So yeah, if you make versions, it's way better. This is one small example off how I do it when I find some images that I really like and I'm still not sure what I'm going to do with them, but a lot of compositions come into my mind. So I just start cutting things with the lasso tool, making them really fast and putting them together. I don't care how they're going to look, if you see, the selections are really rough. But I just come up with several compositions really fast, and then I decided, Okay, what I'm going to work with, um, these versions are really helpful for this because they give you a little bit off the speed off working by hand so you can make something in one paper and moving around, continue and continue and continue
15. Shortcuts: this lesson is about circuits, and I really sure cuts are quite important. Why? Because when we use analog tools, we don't really think OK, now I'm going to grab a pen. I'm going to grab a brush and put it on top off the cameras, which is to it. And what shortcuts due in an hour in a digital media is that gets you closer to this experience of trust, doing things without actually going for them. Once you incorporate them in your workflow and ones you are comfortable with using them, they can make things go away faster. I will try note for you. With this I have selected the ones that I use the most. You find these J peg in the resources and yeah, I'll go through them really fast. So you take a look at what I use. So the 1st 1 is to be the move to and thes allows me to make quick selections like to select objects. So no matter what other tool, I'm using a brush or under no, on the spot healing to whatever other to Lyman. I always tried to go back with my index finger to the move to so I can keep on selecting things and moving them around. So V. It's for a motel. The 2nd 1 is the brush. It's quite straightforward. The e it's for the razor. L is for the last two and the last two. It's a very simple to, but it can make you go away faster than others. Election to also, for example, when im sketching, I tried to use the lasso tool that it's the L, and depending on which one you have used previously, you might have this one or any of the other times off last sauce the same with the marquee tool. It's very, very useful. Um, you just can make quick selections. You also depends on what you have use. Before you might have the elliptical or rectangular and you have the others. Then you have the pencil. And here it's very important to have in mind that depending on what you have selected here , it's going to do two very different things, either path or shape. So I have it here in past, so this will help me to make a selection afterwards, Um, but it can be that if you have selected a shape, you will have ah, field shape. So there are two very different things. Then the eyedropper, especially when I'm using the brush to or yeah, it's It's mostly for the brush toe. I can come here and select the color. And now start painting with that color again the I to select another tone and keep on painting. Commonplace enter turns path to marching ants. So, for example, I came to my mental the p I made a selection up. See what happened. I had it on Ah shape. So I'm going to come. Having s a path military one this very rough selection breast common enter. And now I have the marching ends. So from no one they can either copy and paste depending on the layer that I have or again Chief to come and see that will copy merged. And now I can based it. And look at what happens now. I have Ah, I have copied all the layers. No, just the one that it's elected. But all of them come and ask just to save yourself. If your computer crashes all the time coming s common delete. It's apply background color. So let's I have this layer, and I want to fly a color than then I'm going to put a multiply or any other blending mode and contrast. Press common delete and it's going to feel with this color the background one. So, no, I can do whatever I want with this layer common avenues to close to have. So now it's going to ask me if I want to save. I'm going to cancel. But this is really useful when you have, like, 13 images that you have. Just download it on and you drop them in for the shop because you're working on your kalash . Okay, you can quickly go common w coming that were coming w two. Close them coming. Need to de select. So let's say I have made a selection that I want to get rid off Common D and I can do it again, or I can simply click outside the campus like adjusted, actually, outside the selection interested campus. I can click here and it's going to be gone. Come in zero and common one. These are very useful because sometimes we're working super close to our peace, and we loose the sense off. What's the rial size. So, for example, now we're seeing it that 79%. If I press common one, this is going to show me the rial, Um, size off the things. They're real details. If a press come and see where it's going to feed it in the screen, this is good to have Ah, overall look of what you're doing. And this is also good because sometimes you're working in this distance, you forget about it, and you think that this is a little bit pixelated. But in reality, if you press coming one, you'll see that the image is just fine. The same happens when you work from too far away. And you think that the details are final when you actually take a look at them really close . You see, the, uh, this is a little bit this line. It's not so good or it speaks a later or I have to improve that selection. This one takes some time to get used to control an altar option up and down changes the harness and left and right changes the size. So I'm going to show you here. Let's go up here and making your layer going to grab a brush with a B and our press comin out and click and go up and down and see what happens now if I go up, my brush gets softer so I'm going to be able to do this. I bet if I press comin out and now I click and drag down, it gets harder and I'm going to be able to do this and no free press comin out and hold it and go to the left. I'm going to make my brush smaller. And if I go to the right, I'm going to make my brush bigger. Have in mind that I'm pressing comin out and I'm clicking, um, on my mouse Now I'm not letting go to be able to do this. So comin out now I click and dry click and trying. And once I'm happy, I let go off the commands, Ault or Option and Tribe will duplicate a layer. So, as always, I come back to my move to and let's say I want to duplicate this and just press alter option and see what happens. Now. I have, like a little ghost following my pointer. I'm going to click hold and drive. And now I have a copy of this layer out and or option price plus this scroll it's going to sell in or out. There are many ways to so mean if you're using a track pad, miles or you can also come here. But this is the one I use the most common Sorry, all interruption and ah, scroll off your mouth. And then the other one that is all the time. Is the space far and just clicking to move around. So when I pressed, I'm pressing. As you see, this keeps on going. I have this little hand that I can go around my peace without something in or out. This is not that handy, but M interest. It's just showing the shortcuts that I use. Okay, so I hope, um, these are helpful for you. They're really, really helpful for me, and I use them all the time. You can also of course, go ahead and select them from here. But I wanted to show you this ones that are my favorites
16. Improving the collage: Okay, so we went through. Ah, quite a couple of tips. Now it's time to try to make this look a little bit better. Anyway, as I mentioned before, this class is meant to show you some things. Not really about the Kalash itself. So I'm going to just apply a couple off actions to this just to make it look a little bit better and not to leave it like this. So, yeah, I'm going to try to start to organize objects. And as I said before, always with my index finger on the fee, Um, just to to try things around in this case as we're just practicing, not going to make all the other art boards or not too many versions unless I'm going to make something really crazy. Um, So right now, yeah, I'm going to try to start making things work a little bit together. So what I'm doing now is making a selection with Marty, too. And as this layer has a mask, I'm going to trust, press the be with black and paint inside of it just to get rid off a little bit of what's there. And I think I'm going to try. Yeah, to make this all a little bit more organized. So I have all these layers that are composed the stairs, as I don't need them separately. I'm going to convert them to a smart object. And I'm going to turn this realm. That's to say, this is Trist to play around a little bit, um, compress Come and zero to see it from side. So I'm going to take this out. This could be a little smaller, so let's try to see if we can make as if the moon it's sitting on the tree, Okay. And let's make some stairs to the to the moon. Like if this was a tree house with a Morningside, does it makes anything? Ah, there's some text there. Somehow we got this layer here. I'm going to let it. And this has smart doctor. Okay? And to leave this but to say what? Uh, it's not looking that Well, maybe I'm going to make this little bit less. They're ghosts. Looks in that it is better. So I'm just moving things around for now. For example, I don't like this. And as we have ah, layer mask here, I'm going to trust, get a brush and controlled, click and drag to the left. Just so can come close here to clean it up a little bit and the same with this. I believe you. I'm going to get rid of this. What I could do now is to make a mask through this one, and I'll make my my brush soft. Why? Because I want these two to blend a little bit. So if this will be hard, it will look a little bit weird. I mean, it doesn't look that good now, but the it blends a little bit better. A bit too much it goes, and there are 1000 things I can do here. It could put shadows to this again. Put another shadow between two. These two objects. But as we're playing, this guy will be. We'll go behind that and maybe I can duplicate this by holding out and trying in it. Let's make this. Let's try something when a press coming j to duplicate this or right click on the layer and duplicate layer. So now I have this to I'm going to merge them just so they become one. Let's put this on top of this French. Which one is it? This one. So we're going to make, like, some touches of color here and there. If there were some fruits or something of the tree lived it abstract. That's fine. So now that we have everything a little bit more organized starts to look a little bit better, right? Um, it's a matter off putting things in the correct place. This is trust for playing, for example. Now what I could do is I could save this and now save another version of this so I can put Kalash to and I could keep them working with this and I'll say, OK, this color will come here now. This was right here, but maybe this could go on the back so I can keep on playing and experimenting on Leave it as it waas you had a water more. If I would want this to be with more realistic, I could blur this too thing she looks better. It's smaller. And maybe what we could do is, as I said before, I used to Marquis, too. You can grab a little bit of this texture and I can either go to these layer and copied from there. But if I'm lazy and I want to do it fast as I know that this texture, it's just fine. Nothing comes in in the way. Compressed shift. Come and see to copy. Merge. So I copy from up here till down here and now I come and V and I paste it. And maybe we could make this a little bit darker. Cell go to image adjustments and exposure and gonna take this poster down so it looks a little bit like another piece of paper. And as we saw before, this looks to to rough comparing to this one. So what I'm going to do is just make a new mask going to press. You see, I've just pressed the very first because I go out from the tool. This is a tick that I have because I learned it that way. But, um, it's not necessary. So I pressed the first, but I could have simply pressed be for them for the brush and now is like a selective brush that has some tincture in its borders. And I'm going Teoh paint by holding shift and see that now it feels a little bit more like a paper, and I'm going to right here. I don't know will come to my crib, So yeah, so I can grab the sticks. Now if I press all, it's going to shrink to the middle. Otherwise, if I don't press, all that's going to go from this anchor point to this one. So I press all day and drinks in the middle, and I'm going to live here somehow. I'll change the color, too. Yeah, pick that as it's not that important. So now welcome to my crave. It's like describe that this place from the bird and that could be like I could be happy or not With this Kalash, it's quite simple. I just wanted to look a little bit more organized and, yeah, if I would want I could keep on going and textures adding more elements, but it just wanted to do a little bit off something so it doesn't look so so we're not done . So let's go to the last Tipton
17. Reduce file size: this step. It's quite helpful when you don't have too much space on your computer or you need to send something over. We transfer or upload something to Google. Drive Dropbox. These helps you make the file way smaller. Right now we're we have ah, Furley small size. It's 75 megabytes. That's fine, but we can make this almost 2/2 off its weight, so I'm going to show you how I would do it. I will press, alter option and make a copy of this, and I'm going to call it example. I'll open it in photo shop and once let's say we're sure that this is going to be our finished Kalash. We're not going toe. Modify it too much anymore. We need to send that it's done. So now what I can do is to start rust arising applying the effects Russia rising the smart object. I can try to simplify this this mattress possible in order for us to have less weight. So, for example, a typography I can right click and rest Arise it. I have this layer mask and I can apply it. So right now I cannot modify the mask anymore. The same here. Oh, apply. And I'll apply on this one to thes one. For example. As we see here, it's ah, smart object. So I can also rust. Arise it, Um here we have another smart object. I can rest. Arise it too. We have a mass years. I will apply the layer mask the same with the bird. And this one It's also smart objects. I will rest. Arise it and I will merge these two layers because the background we don't need it. Um so chicken it. No, we have all rosters light years and the last little trick is to hide all these layers. So of course you're not going to get a preview. You won't see what's inside that PSD. If you press the bar on a Mac, for example Hero, close it. So now we have a fire that looks empty, but in reality, we have all the layers inside, right? You can still modify it, not ask much is before, but you can still modify it. Um, so we sent that the first fire with 75 megabytes. Let's check this one to see right now. Have a fine that it's 34 from eight megabytes. It's very noticeable. The the weight drop off course. Uh, with this weight, it's not that important. But when you need to upload, maybe once you goodbye, then you're in a deadline, and it doesn't go up so fast, and you need to do it. This is a good technique to reduce your file sizes.
18. Final thoughts and goodbye: The biggest difference between making digital illustrations to drawing in a piece of paper is that we have been dealing with PanAm paper since were kids. It's normal to not feel so free in a digital medium. That's why I believe that practicing just for fun. It's a very important part of digital illustration and digital art. I hope you enjoy this class. You can go ahead and check out my other classes if you want. And if you have doubts, questions or you just want to say hi, you can find me in social media. Or you can also join my private Facebook group where I sure information that I find valuable for digital illustration mostly related to clash techniques. You find the links in the class description, and I hope to see your projects. Thank you again for taking the class and Susan
 Marcos Morales, Graphic designer, Digital collage lover