Transcripts
1. Welcome To The Course: How do I become a 3D artist? Where do I start learning? What sorts of tools or techniques would I need to learn? How can I be successful as an artist? These are all common questions that can be answered in a single course. This one, I guys, my name is Joe Bailey from Bailey Design and I am the chimps up bought this remastered of our original course on how to learn blender or at creating 3D assets. We created this course with the goal of teaching students everything they would need to know about up 3D. Blender is an open source application that is used for a variety of tasks, but is primarily centered around things like 3D modeling, sculpting, and animation. It's open source, which means it's completely free to download and start using even for commercial projects. So who is this course aimed towards? Well, whether you are an experience, queues up the general hobbyist or an absolute newbie. This is the perfect course to learn how to use Blender for a date. Why? Because we cover all of the tips, tricks, tools, techniques, and workflows related to using Blender in just about any capacity. So what are the requirements to take this course? Any modern day computer will work just fine when running blender and you should have no problems following along with this course. As you begin to get used to blend to itself and begin with your own projects, you will find that having a better graphics card or having to memory will allow you to create more complex scenes for your own projects. But as for the course itself, you should be fine. Regardless. At this time, blender is not supported for mobile devices such as tablets and funds, or certain tablets such as the Windows Surface tablets will be able to run blender because they have traditional versions of Windows install. When it comes to operating systems, blender works on Windows, Linux, or Mac operating systems. In this course, we start from the very beginning, opening up, land up for the first time and getting comfortable with how the interface works. Then we explore freely space, learning how to navigate in three-dimensions on it to the screen. After that, we move on to object manipulation. This is how objects generally work in Blender, their relationship to other objects and the world around them. Then we really get going by learning about all of the various editing tools available in Blender, such as extrusions and pebbles to create, shape and form our 3D models. With these tools, we can begin to create limitless number of 3D objects. There are too many topics to cover in this one video. There's some of the other topics we will be focusing on include the following modifiers. Sculpting, topology, materials, texturing, rigging, animation, and more. The goal of this course is a very simple one. It is to teach you as the student, everything you could possibly need to know about how to use Blender. And we do this by creating new objects and scenes, as you learned at the many different tool sets in this course. Not only will you finish this course with an incredible portfolio of knowledge, but you will also have an even more remarkable portfolio of assets and savings that you will have created to get you started. So ladies and gentlemen, The time has come. See both learn and master the world of Glenda and free day.
2. The Class Project: Before we begin, I'd like to turn your attention to the class project on Skillshare. All courses will have a class projects for use completes. In this course. In particular, our class project is to effectively create as many objects in Blender as we can. Practice, makes perfect. So for your class projects, I'd like you to get started straight away. As soon as you learn how to open up and safe project files in Blender, I wouldn't need to start creating objects as we continue to go through the course. Every time you create a new object, I want you to post either a render of your 3D scene or a screenshot of the Blender interface each time you create a new project. Let's your fellow students know exactly where you are in the course and the main skill that you learned in order to achieve the ability to create that specific object. The more objects that you create, the more you are going to be learning as you continue to use Blender.
3. Course Updates: Hi guys Joe here. And I wanted to just give you a quick update on the carbon situation with regards to this class. At the moment, we are we mastering all of our old content. This class has been around for several years now. It's going great success and has built up a large base of students. What we're doing right now is we are updating the class for the latest versions of Blender. This way you'll be able to learn about the current version of Blender and house. You use all of the different tools and techniques. That being said, we are not simply going to be deleting the old content. In fact, we're going to be keeping all of the old contents for the foreseeable future, especially while we continue to add new videos to this class. At some points in this course, you're going to find a lecture titled as transition video. This is going to be the point where we transition for the latest version of Blender to the older contents. Again, it should be noted that all of the older content will be maintained and a lot of the stuff that you can learn there will be able to be mirrored over to the newer versions of Blender. We are also keeping the older content in for those who prefer to use Blender version 2.78 or 2.79, as there are a lot of people out there who actually prefer the older versions of Blender. So let's move on to the next video.
4. Set Up Blender Section: Hi guys. In this section of the course, we're going to be focusing on setting up a blend up for the first time. This means we're going to be demonstrating how to download Blender, how to open up, blend up 41st time, the structure of the interface, and how you can begin to manipulate the various workspaces and editor types to control the interface and create a set-up design for your purposes. This means we are going to be looking at how we can control which panels display, which editors. We're going to be looking at how we can resize individual panels, how to add and decreased number of panels, change the color scheme and more all of that coming up in this section of the course.
5. Downloading Blender: If you don't have blend up already installed, then the first thing that we need to do is download blender. Now there are several different methods for downloading the blender software. The most fundamental, which is to go to www.blender.org. On the main page, you will see a blue button that allows you to download the latest stable release of Blender at the time of recording. That version, blend up to 0.9 to in order to download, click on the blue button. And it will take you to the download page. You will then see another big blue button, which will allow you to download blender to 0.92. Below that, you can define which of the operating systems you are currently using. For example, at the moment, I'm using Windows, so I'm going to keep it on the Windows option. When I'm ready to download, just click on the button. And it will take us to the thanks Paige. And then begin downloading Blender. If you want to download and experimental version of Blender that has additional tolls, then you can do so from the same download page. I'm just going to go back to the download page. And then I'm going to scroll down. At the bottom, you'll see a red button labeled download Blender experimental. Note that it is not recommended to use experimental versions of Blender for production purposes because they are just that little bit more likely to crash. Click on the red button, and it will take you to the buildup page for the latest versions of Blender. Commonly, we have a candidate version of 2.8 free and the Alpha version of 2.9 free. Eventually this will become a beta version of 2.93 and an alpha version of free 0 will be visible here as well. You can choose which of these versions you want, and you can also choose the operating system that you are using. You can also download experimental branches that focus on specific sets of tools. We come down here to where it says experimental branches. We can left-click to go to the branch site. As you can see, there are many different versions of Blender to choose from here. Some, for example, focus on a geometry notes. Others focus on things like tracking for proportional editing or the Crypto Map workflow in the compositor. It's generally recommended to use an Alpha or Beta version from the previous page anyway. And it will have many of what you will find in these branches. It's also a tiny bit more stable to select an Alpha or Beta version. These do have a tendency to clash as they are generally 40 use of testing out new tools. And as a result of that are more likely to crash. Then we have the ability to download previous releases of Blender. If we were to click on the option labeled as blend up to 0.7, it takes us to the previous versions page. We can access all the previous versions of Blender from here. So if we left-click on this all previous versions, we get an index of all the versions of Blender from 1 all the way up to the current version. You can click on any of these links to begin downloading that version of Blender. So for example, if you were a fan or Blender version 2.79 and didn't want to use 2.80 or newer than you could just click on the link for Blender version 2.79 to download.
6. The Splash Screen: With Blender installed, it's now time to open up the software on our computer. Locate where you have stored your blender software. So I have created a shortcut on my desktop. Double left-click to open. It should only take a few seconds for blend out. So open up, you should then see something like this. So we have the blender interface, but in the center we have what is known as the splash screen. This is the welcome screen that will allow you to access some of your most recent files, as well as opening up some more older files and accessing blenders template system. So let's just cover exactly what we can see in this splash screen. The top half is an image that has been rendered using the software by a specific 3D artist. We can see the name of the artist in the bottom corner, and we can see the common version in the top corner. The bottom half, we have a series of links that allow us to access blender in different ways. So starting with this selection here, these are what are known as templates. Blender has a variety of different templates depending on what your primary use of Blender is going to be. If you're using blend out 40 purposes of traditional 3D modelling, then you will want to use the general templates. If you're looking to create two-dimensional animations, There's an option for that. We also have options for sculpting, VFX and video editing. To the side of that you will have the recent files. So from here you can access the five most recent files that you have saved in Blender. Note that the file extension for any blender file is dot blend. You won't be seeing these options here because these are the projects that I have been using in recent days. So your list will most likely appear MC, but I should begin to save your projects. The most recent ones are going to appear he in the splash screen. In the bottom corner, we have two options, Open and recover last session. Open will open up the file browser and allow you to locate your older Doppler and files, select them and then open them from blenders file view. You'll notice that it looks different to your traditional file directory when using Windows, Linux, or Mac. And this file few is the same regardless of the operating system that you use. I'm just going to click Cancel. And when I do that, you will see that the splash screen has closed. If you want to get the splash screen back into view, just come up to the blender icon in the top corner. Left-click and select splash screen. Now the option below, the open option allows you to recover the previous session. So blender walk hash your sessions. And if you forget to save a project, then you can restore that previous save by using the cover last session. You can see with this tooltip that Blender creates a file known as Quit dot blend. And this is what allows you to access the previously unsaved work. Notes that this will not work if you close down your machine in-between your blender sessions. It will also not work on files that were not at least saved once. So you need to at least save a project. And then if you were to do some work, but forget to save it again and then close, you could come back and choose this recover last session option to bring back your unsaved work. Finally, we have a couple of external links. The release notes is a very useful link that will take you to the official notes for the current version of Blender. If I left-click, it's going to take us to the release notes for Blender version 2.92. We can also access older versions from here. Blender is fantastic when it comes to this sort of thing. Letting the users know exactly what has been included in the latest version of Blender. So as I scroll down, everything that you see here is new in a blender version 2.92. And as you can see, there's a lot of good stuff. So I advise just clicking on the link and just having a look at some of the new features that are present in this version of Blender. Because every time there is a new version, there are a lot of changes to be made. For now. Let's just go back to Blender itself. The last option is the development fund. Blender is an open source software. So it requires the development funds to help to fund the people who are responsible for making blend up better every single day. What you need to do once you are ready to come away from the splash screen is to either choose your template, choose your recent file, will open an older file. You can also just left-click away from the splash screen to close. That's what we're going to do right now. So left-click and we close the splash screen. All we're left with is Blender itself. So let's take a look around and see what is what in the world of Blender.
7. An Overview Of The Structure: In this video, we're going to provide a quick overview as to the general structure of the Blender interface we have already touched upon at the template system. So we go back to our splash screen. We can choose from a variety of templates. For example, if I wanted to choose the Phi of x template, it would ask me, but for all not I wanted to save the changes to my current projects. I do not. So I'm going to go down save and blend that looks very different. What I'm going to do now is I'm just going to go back to the splash screen and select General. So each of these templates is going to set blender up in different ways. And the why these templates actually creates the structure 40 Blender interface is that they use what are known as workspaces. A workspace is a specificly structured layout of various different tools that you can use for different purposes. So for example, we have a variety of workspaces up here. These are the workspace tabs. And each of these will have its own set of tools. Commonly, we're using the layout workspace. But if we wanted to focus on scripting, we can go to the scripting workspace. Now you can see that the appearance is very different, but all of the tools here are positioned so that you aren't able to begin scripting using Python script for your purposes of 3D modelling in blender. Again, each of these workspaces has its own unique purpose. But that doesn't mean that these workspaces cannot be edited. Each workspace is constructed form a series of panels. The layout workspace, for example, has four panels. Each of these panels contains an editor type. The editor type is the specific set of tools that we use for that specific purpose. The largest panel here stores our 3D viewport. And this is where we can begin creating individual objects and even entire scenes in 3D space. So to summarize, blender can use a variety of different templates. Each template has its own selection of workspaces. And a workspace has a variety of differently sized and positioned panels. And each panel has its own editor type, which is what stores all of the tools necessary for a specific purpose. Over the course of the next few lectures, we're going to be going into a little bit more detail as to how we can control this interface and begin editing some of our panels, editors, and workspaces.
8. The Purpose Of The Workspace: Let's take a closer look at the workspace is used in Blender. In each of the templates that we have, we can use a variety of different workspaces. In the general template. For example, we have all of the workspaces that you see up here. Now, not only do we have these workspaces, but they are positioned in a very specific order to follow a specific workflow. In the general template, we're focused on 3D modelling. So layout, for example, is setup for scene creation. Modelling is used primarily for the creation of the 3D objects themselves. In terms of their basic detail. For greater detail, we can use the sculpting workspace on those same objects. To prepare an object for material and texture application, we need to create what are known as UV maps. So we have the UV Editing Workspace. A UV map is effectively just a 2D representation of a 3D objects surface area. The texture paint workspace allows us to actually paint textures onto our three-dimensional models using IVR, the UV map created on the 3D object itself. Shading is used for the application of materials. The difference between a material under texture is that a texture is effectively a pattern. And the material is the way an object's surface responds to when it is hit by light. We then have the animation workspace, which focuses on creating animations with the 3D objects in our scene. When everything is set up at this point. We then go to the windowing workspace where we can render I have a single images of our scenes and objects or entire animations. After the render, we can edit our results using the compositing workspace. Think of this as blenders version of Adobe Photoshop or Premier Pro, where we're able to edit our videos, animations, or images after they have been rendered. And then finally we have scripting. So scripting is for those who want to use programming as a means of creating their Freudian models and scenes. It can also be used for other purposes as well, such as automating certain tasks. As you can see, all of these workspaces have their own specific purposes. And they are able to achieve this because of the panels and edited types that make up each of these workspaces.
9. Editor Types And Panels: Let's move down the hierarchy form workspaces, two panels and editor types. In each workspace, we have a series of panels. And the loud workspace, for example, we have four panels here. Each panel contains a single editor type. Notes that you can have multiple panels that have the same edit type. For example, we could have multiple panels in our layout workspace that show the 3D view port. However, you cannot have more than one editor type in a single panel. A panel is effectively an area in the blender interface that is used to store an editor. And the editor is what houses a specific sets of tools that allow you to complete a specific task. So looking at the layout workspace in particular, we have four of these editor types. The largest is the 3D viewports. This is where we can navigate our three-dimensional scene, select and manipulate the different objects in our three-dimensional scene. In the top corner, we have our outline, a panel. This allows us to organize our scene and becomes very useful as we create more objects. We are able to select, reorganize, and we name our objects using the outliner panel, amongst other things as well. Directly below that, we have the Properties panel. The properties panel is a one-stop shop of many of the additional tools in blender that were not stored in alpha editor types. From here, we can do things like manipulate the specific values of our objects. We can create what are known as modifiers. For example, if I just very quickly add a subdivision surface modifier, you can see the immediate impact that it has on our selected objects. From here we can also apply objects constraints, particle physics. Look at our objects, mesh data, and even applied materials and textures from the Properties panel. There's a lot that you can do here. So throughout the course, we're going to be spending a lot of time in the properties panel, as well as the likes of the 3D view port and outliner. The final panel here is the timeline, which is the small panel at the bottom of our layouts workspace. This is where we can perform a basic animation functions such as playing and pausing our animations as we create them. If we go on to another workspace, you can see that the structure is slightly different. Here in the modelling workspace, for example, we have our 3D viewports outline a panel and Properties panel, but no timeline. Also, the 3D viewport and looks a tiny bit different. And this is because in the modelling workspace, we have a different mode for the selected object. So here we have it set to edit mode for our cube. In the layout workspace, it's set to objects mode. A little bit later on in the course, you're going to be finding out the main differences between the different modes for our objects. But this type of change holds true throughout the different workspaces. So these sculpting workspace, for example, is very similar to the modelling one. The key difference though, is that we are in sculpt mode for the selected object. So we have an entirely different set of tools that we can use. And as we go through each workspace, we start to get more or less panels. So in the UV Editing Workspace, we have our properties and our honor panels, as well as the 3D viewport. But we also have a new panel or new edit type known as the UV editor, which allows us to map a two-dimensional representation of our 3D objects. Each of these, as we have stated several times now, has its own purpose and as a result of this, has its own set of panels and editor types. In the animation workspace, you can see that we have the 3D viewports in two different panels. They look quite different because in this version of the 3D view port, where actually fueling our scene through our camera, which is this objects here. As you continue to experiment with Blender, you're going to be able to familiarize yourself with all of these different panels and edit types. Now, let's just take things one step at a time and look at how we can't manipulate the interface itself.
10. Changing The Editor Types: Over the course of the next few videos, we're going to focus on how we can change our interface in various ways. Blend this interface is highly interchangeable. Each of the existing workspaces can be edited as you see fit. We can rename these workspaces and we can completely restructured them from top to bottom. We're going to start with the ability to change the editor used in a specific panel. For example, let's say if we didn't want to use our 3D view port. If you go to the top corner of any panel, you will see that we have a drop-down option. The icon for that drop-down is dependent on the active editor type in that panel. So in the case of the 3D view port, the icon here looks like a grid and a bowl. If we look in the properties panel, that same option appears as two bars. But if we click on this drop-down menu will get the same menu, which shows all of the different edits, a types that we can choose. There are so many that they need to be divided up into four categories. General, animation, scripting and data. For example, let's say I wanted to use blend up for video sequencing or video editing. I can change from the booty viewports to the video sequencer. So left-click, and this changes my panel form. The 3D viewports to the video sequencer. Let's do something similar at 40. Outline a panel, come to the top corner option, open it up and we get the same choices here. I could go with say, the image editor. And it becomes an image editor in this panel. Can do the same with the properties panel. So we can change this to something like preferences. And it changes that panel to the preferences editor. Any, and all of our panels can have their editor types change whenever we want. The only part of blender that remains the same throughout is the Header Menu, which is located at the top of the interface. This is the location where we can find all of the different workspaces, as well as the more traditional file and edit menus. For now, I'm just going to reset these bats what they were before. So I'm going to go back to properties. Go back to the outliner here, and then come back to the 3D viewport. This is just one way in which we can begin to change what Kevin's Workspace.
11. Resizing Panels: Not only are we able to change the edits are used in a specific panel, but we can also resize a panel both vertically and horizontally. Now, all of our panels will always have foresights. And our panels must always make up the total shape and size of the interface as a whole. In order to manipulate the sizing of our panels. Simply hover your mouse cursor over an intersecting line between two different panels. For example, if we have the 3D view port and the timeline underneath and position the mouse cursor about here. You can see the mouse cursor changes. If we click and drag up or down, we can change the size of both of these panels. As I just mentioned, because the overall size of planned out needs to remain the same. Whenever we make one panel larger, the opposite panel has to become smaller as a result. So we can't just make one bigger and then have all of the others the same size. We can do the same with a vertical line. So we take this line here, click and drag. You can see we make our outliner and porpoises larger while the 3D view port and the timeline becomes smaller. Now you will notice here that as we manipulate this line, we are in fact resizing all four of our panels. And that's because when the intersecting points combine and we get a single line, it becomes a single intersection. So in the case of this line here, the only two panels connected to it are the 3D view port and the timeline. So only these two are affected. But with this bird's cool line, we actually have four panels connected to it. So we are able to manipulate your sizing of all four of these panels.
12. Snapping And Joining Panels: There are other things that we can do as well with regards to changing up our workspaces. If you hover over an intersection and right-click, instead of left-click, you bring up the area options menu. From here, we have our vertical split. Horizontal split, the ability to join areas, and the ability to swap areas. Let's start from the bottom and work our way up. So with the swap areas option, we can swap over the editor types used into specific panels. Let's say if I wanted to change the positioning of the outliner and properties panels. So I wanted to switch them over. I can right-click on the intersections, bring up the area Options menu, and select Swap areas. As you can see, the sizing of the panels from mines design, but the edit types being used as being reversed. We can do the same down here. We have the timeline and 3D viewports just while I click Swap area. And it swaps the editor type that's being used. Alternatively, we also have the ability to join areas together. For example, if we were to join our outliner and our properties panel together, which one do you think would survive? Because we can't have both of them in the same panel. Only one editor can exist in one panel. Joining the areas is going to do exactly that. It's going to take two panels and merge them into one. If we go join areas, you can see we end up with a highlighted our 0. So if I prove position my cursor in my outline, a panel, you can see the highlighted our OH, points up towards the center of the outliner. This means that if I was to left-click, the outliner panel would be deleted and the properties panel would take over the space left behind. The reverse would be true if I move my mouse cursor in towards the Properties panel. You can see we have the highlighted arrow here in a different direction. In this case, it would be the outliner panel that would survive. So let's say if I didn't want the outline panel, I can just position my cursor in the outliner and left-click. This deletes the outline panel. And we are left purely with the properties panel going across the entire height of the interface.
13. Vertical And Horizontal Splitting: If we were to take a look at some of our other workspaces, we would see that we have a different number of panels each time. So with the texture pane workspace, for example, we have 1234 panels. But with the scripting workspace, we have 123456 panels with compositing 1234. So the number seems to vary with each one. With rendering, we hope 123 panels. In order to add more panels to our setup. Hover over an intersection and right-click to bring up your area options menu. We have the option to go with either a vertical split or a horizontal split. Let's go with a vertical split and see what happens. So left-click and you should see a thin white line appear in the panel where your mouse cursor is positioned. In this case, I've got a thin line in my 3D viewport. If I move my cursor over to another panel, the white line is positioned in that panel. Instead. If I left-click in a specific panel, it's going to divide the editor into two versions of the same editor for two separate panels, but they take up the same area for our workspace. So in this case, we've divided up a single 3D viewport into two 3D viewports. From here, we can change one of these editors. So for example, I can change this to the UV editor. I could also change this to something else if I wanted to. For example, a text editor, we can do the same thing horizontally. So just right-click on an intersection and choose the horizontal split. Then we get a horizontal line wherever we position our mouse cursor. For example, I'm going to position this here and left-click. This creates two versions of the properties editor. We're going to take the top version and we're going to change it back to our outliner. Now I want to do is I want to get my 3D viewport back. I'm going to start by joining these together. If you'll remember. We do that by right-clicking, going join areas. And we can decide which area we want to become the primary editor. In this case, it doesn't matter too much. So we'll just left-click. Come up to our editor type menu and select free DVI ports. Drag this down and we're pretty much left with what we had at the start.
14. Creating A New Workspace: In this video, we're going to be demonstrating how you can create a new workspace altogether without having to make any changes to the existing workspaces that we have. So there are a couple of ways of doing this. One method is to take your selected workspace. In this case, the layout workspace. And like click on the workspace tab, you have a variety of options here. The one that we want is the first one, which will allow us to duplicate the existing workspace. Left-click. And we end up with a workspace labeled as layout dot 000 001. From here, if we double left-click on the name, we will be able to rename this new workspace, hit backspace and call it what you want. For example, I'm going to rename it as practice. From here. We can then begin making any changes that we want to, our practice workspace without affecting any of the others. If you want to reposition a workspace, you can do so from the same workspace menu. White click on the workspace itself. And you will have the opportunity to reorder to either the front of the list or to the back of the list. So we want to move this to the front. We can left click here, and it moves our practice workspace to the front of the key. If we reorder to the back, then we can position it behind all of the other workspaces in this tab list. Now this is a pure workflow preference. It's entirely up to you how you want to reorder your workspaces. But they should all be visible and available at the click of a button regardless of where they are in this order. Finally, just for fun and a bit of practice, Let's make changes to our practice workspace. Well, I'm going to do is I'm just going to divides my 3D view ports using a vertical splits and also a couple of horizontal splits. Now one thing I want to demonstrate is that as I have created these two horizontal splits here, either side of this intersection, you can see that because they're not attached to each other, we can't manipulate them independently. However, if I was to take one of these intersections, position it about here so that we create a single line and then lease, then come back and attempts to manipulate it again. You can see we have infanticide joined these two intersections into one. So that's a little something to keep in mind. And if we bring this line up here to match the line between the Properties panel and the outliner. Release. Come back and then grab. You can see we have joined all three of these together. So what I'm going to do now is I'm just going to show you a little bit of navigation in the 3D view port. Here, we just have our traditional view. But what I can do is I can use 2D views for the other free panels. If you look up here in the top corner, you will see that we have this axis with C, x, and y. So I can go C to go into my top view for my freely objects. I can go y, which will take me to either the back or front views. You simply click multiple times just to get the few that you want. And then x will take us to our IVR out right or left views for our objects. So here I have four different editors, each with the, each with the 3D viewports. And I'm able to view my objects from different perspectives by manipulating this navigation axis. But more importantly, we've been able to create a new workspace without having to edit any of our existing ones.
15. Adding More Workspaces: So we have spent a little bit of time with our workspaces and how we can manipulate them. You may have noticed that we have this plus option at the end of our workspace tab list. This is another way in which we can add a workspace. From here, we have the add workspace menu. And this will allow us to add some existing workspaces or duplicate that which is selected. So this is the exact same thing as going to a specific workspace. Right-clicking to bring up this menu and selecting Duplicate. The other options, however, our workspaces that already exist and they're based on the templates that blending uses. For example, say if I wanted to bring in our video editing workspace into our general template, I can do so just by clicking here. This adds the video editing workspace to the end of our queue. If I want to say a masking workspace form VFX, I can just come here, left-click and it adds the masking workspace. Alternatively, if you want to delete a workspace, formed a list just like click and select, delete. This doesn't delete the workspace itself permanently. It just removes it from the list. So we can right-click again deletes. But if we want to bring them back, we can do so very easily just by coming to this same menu at the end.
16. Creating A New Template: So at this point, we know how to change our panels. We know how to manipulate our workspaces. But what if you wanted to create a new template? Well, unfortunately, creating a new template is not possible in a blender itself. However, it is possible in your file directory. So what we're going to do is we're just going to come out and blend out for a brief moment and head over to our file directory and find the blender file. So here I am in my Windows file browser. I'm in my program files, which is where your blend aversion should be installed to. And you should be looking for a folder named blender or Blender foundation. So we're going to double left-click to open this up and then choose the version required. So here I'm going to choose version 2.9 to then open up the folder, which is 2.92, double left-click, and then select scripts. So if I'm going too fast, you're finding a folder known as blender Foundation. Open this up, select the appropriate version of Blender, blender version 2.9 to then select the appropriate file, which again is going to be 2.9 to come down to where it says scripts, double left-click. Then go to the folder that is titled startup. Open this up. Go into your template system. And here you will have the folders for your templates. So what we can do is we can take any of these templates, for example, the sculpting template. We can right-click to open it up. And we can duplicate this. So we can go copy, right-click and paste. You may need an administrative support to do this. So I'm going to allow it and it's going to give us a copy of the sculpting workspace. Then if we open it up, we can see we have the startup file and older. We're just going to rename this by right-clicking to bring up the menu, go into where it says Rename. And let's just rename this as practice templates and then press Enter. So the question is, has this works? And can we now access this new template in Blender? Let's find out. So here we are back in Blender. What we're going to do is we're going to go File New. And if we have a look at our list of templates, you can see that the practice template is now visible in our list. So we left-click. I'm not going to worry about saving from Y1. So I'm going to click Don't Save. And it gives us our new template. Now this is based entirely on the sculpting template. But what we can do here is we can begin to make some changes so we can add whatever we need. So we could add perhaps a modelling workspace. We audited a front, maybe have ourselves a rendering work-space at the back. And then we've got a simple setup where we create a 3D model with the base detail. Then sculpt it with the sculpting workspace. Are a material with the shading workspace and then render.
17. Accessing The Blender Preferences: As you can see here, we have gone back to the original setup for Blender. And I've just done that by going to File New and selecting and general form here we're going to be taking a look at the preferences. Now the preferences is an editor type, but it's also more than that. So in order to access this as an editor, we just do it the same way as we would any other editor by going to the top corner, opening up the menu and finding the appropriate editor type, in this case, preferences. However, whenever you use preferences, you will only ever be he on a temporary basis to change one or two settings. So there's not really much point in its being a part of our active workspace. Instead, we're going to go back to the 3D viewport and then go to the Edit menu at the top of the interface. Come dance where it says preferences and left-click. This opens up a blenders preferences in a separate window. We have a variety of different tabs to choose from here. Each allows us to change how blender works in different ways. The interface tab, for example, can allow us to make changes to how the interface behaves on our screen. A couple of examples. We have the resolution scale, which allows us to adjust the sizing of many of the different elements of the Blender interface. And this can go from a value as high as two to a value as low as 0.5. Now I'm pretty sure that you cannot see anything on my screen with a value of 0.5. So I'm just going to set this to a value of 1.3. Perhaps let's go a bit higher than that. Let's go 1.35. And that should be a good enough value so that we can see exactly what's going on in our interface. It actually does look a little bit smaller than what it was before. So maybe I should go even higher than that. Let's see if we can find one that looks more suitable. Let's go with a resolution scale of 1.5. I think that looks like a good value. And then there are other things that we can change as well. So for example, we could adjust the line width, which is basically the space in between our different panels. We can change it formed a fault which is effectively the medium setting. And we could go and make it thinner, which gives us a tiny bit more space in each of our editors. Or we could go the other way and create more of a space between them. This is a particularly useful auction if you find it difficult to position your cursor over these intersections as it will make things just a little bit easier. Each of these different tabs is used for different things. Themes. Allows us to adjust the color scheme of the interface. Viewport manipulates some of the properties of the 3D viewport itself, such as the ability to display the current name of the objects, the current view, and the collection. We can create different lighting setups for our viewport here. We can also change the way certain functions edit our scenes. So for example, when we create new option objects, we can determine whether or not we want to go form objects mode for that object or if we want to start in edit mode by clicking on this option here. We can manipulate properties with regards to our animation. And if these look really complicated, why now? Don't worry, we're not going to be spending any more time than what we need to hear. Add ons is a very, very useful one. Blend up being open source has a variety of different add-ons form different developers that contribute to making blend up better. These can be developers associated with the blender Foundation itself, or they could also be independent developers. Each of these various add-ons, we'll add various functions to Blender. Some of them are highly recommended and will normally be enabled by default. For example, the import FBX formats. Others may need to be added after the fact. For example, if you want to create a library for your materials, then you can left-click to enable this material library add-on. Whenever you've made changes in the blender preferences, all you need to do is just close the preferences. Because if we come down to this option here, this save and load menu, you can see we have the autosave Preferences option ticked. If it's not ticked, make sure it's ticked because it's very useful to have that on. Otherwise, you can just go to where it says Save Preferences and click to save any changes that you've made. Of course, we have other options beyond this. So we have the input option, which changes certain functions relating to the emulation of the keyboard, how the mouse works, or how blender response to using a graphics tablet. We also have the navigation tab, which can allow us to make changes as to how we orbit 3D space. The key map section, very useful because blender is very hotkey intensive. A whole key is effectively a keyboard shortcut. So as a quick example, if I hold down shift and press in a 3D view ports, it brings up an Add menu, which will allow us to add a variety of different objects and object types. You can find all of the different K-maps associated with Blender in this list here. But be warned, there are a lot of keyboard shortcuts in blender. You won't need to learn them all. But the more you learn, especially with the workflow that you want to use, the quicker you will be able to create your objects and scenes. Below that we have things like the system tab. So this allows us to tell blender how we want to use the computer to do things like rendering or set the specific memory limits for our undo features. We can define how we want to save our blend files. So we can define, for example, how many versions of a project we want to be able to store and whether or not we want to auto save our work at specific intervals. This works in conjunction with our recover last session option that we looked at in our splash screen located here. And then below that we have the file paths. So we have different files that we may want to import into Blender at various times. If we want to locate a specific directory of textures, we can define that here. We can also bring in forms from a specific location, scripts, sounds, and even assign a temporary file, which would be useful for when we are rendering things like animations. Then below that, you will have the experimental branch, which will just allow you to do some called debugging stuff. That's, believe it or not, very brief overview as to what we can do with the blend of preferences. I know I'm whites have Yammer dawn a little bit there. But there is so much that you can change in the blender preferences editor. So experiment with a few other things, but not too many. If you ever find that you have plots blend up to a stage where you no longer recognize it. You can always come to this option here and select Load fat-free preferences. And it will reset everything back to what it was originally.
18. Changing The Colour Theme: In this video, we're going to be taking a look at one of the subsections for our blender preferences, we're going to be looking at how we can create themes. So we're going to go back to our preferences panel and then come to where it says themes. This is going to allow us to make changes to blenders color scheme. So at the top here we have the label for presets. If we open this up, we get a variety of different options to choose from. If I was to select blended dark, for example, nothing happens. The reason why is because that's actually the FIM that's already been selected. But if I go blend a light, you can see the color scheme changes almost immediately. This is great. If you don't really like the default look of blender, you can choose form any of these options. For example, if you're coming over from Meyer, then you can use the Maya option to have a similar color scheme, especially in the 3D viewports. And you can choose which of these looks best on your device. So for example, print friendly does not look good on my screen at all, but it may look good on yours. I would normally keep it sets a blended dark or deep gray. I think deep way is a great thing to use by default. We also have excess psi, whites, modo and minimal dark. In addition to this, we can also customize our own color scheme. There are many different elements that we can change with Blender. So let's take a look at a few of them. Let's go into our user interface. And as soon as we open that up, we can see just how many elements there are. Uh, we can change. For example, let's change the text. Currently it's set to this sorts of grayish color. But if we left-click on this text color, we bring up what is known as the color wheel. And from here, we can change the color of this specific element. So if I want it to be wet, I can make the text wet. Now notice it doesn't make all of the text elements where this is specific to the text that we find in our search bars here. So these elements here are having their colors altered. We can easily change this to any color we want. When it comes to creating your own theme. The best advice I can give you is to just experiment for a while, because there are so many different options and it will take some time before you can get an understanding of which options relate to which elements of the Blender interface. Let's take a look at another example. Let's take a look at the radio buttons. So this time if we manipulate the text value, you can see this relates to these buttons here and these radio buttons up top. The foodie viewports header bar. We can also adjust other parts of our radio button. So for example, you can see here that we have the color 4D inner and selected values. So say we have our Themes tab selected. Let's change this color. Let's make it green. And now whichever tab gets selected appears going. But all of the other tabs, we might want to change this to another color as well. So we might want to make these pure white or pure black. Or maybe a color like a pink or purple. There are so many different things that we can do here. In fact, with the radio buttons, we can even adjust the roundness, the shape of the buttons themselves. So if I set this all the way up to one, we create more of a curve for our radio buttons. If I said it all the way to 0, they're basically just rectangles and squares. Once you are happy with the changes you have made, you can save those changes as a new presets. To do this, and just click on the plus button next to the femur preset. I'm going to click on the plus button and give it a new name. So let's just name this as test. And click. Ok. Give that a few seconds. And then what you'll find is the blended dark theme changes to the test fame. What we can now do is we can now go back to the blender dark theme. And you can see it reverts back to normal. So to changes that we made, there were not made to deep blend dark theme. That can be a little bit confusing. When it comes to creating color theme presets. You make the changes first and then you add those changes to a new feet. Theme of presets in other scenarios or in other programs. This sort of thing might be the other way round where you create the preset first, then you make the changes and save those changes. Before moving on to the next video, I have a mini challenge for you. I want you to spend 10 to 15 minutes going through some of these options and try to create your own color theme in a blender. Feel free to use the color theme that you create throughout the rest of the course. Remember, all this does, is change the colors of the specific elements. In most cases, it's not going to affect your ability to go through the course. There will be a couple of changes that you could make that might affect how you go through this course. For example, you could potentially manipulate the lines positioned in the viewport or the color of selected objects. I would advise if you are going to make changes to define, to make changes to things like the header bars and text elements. In particular. That way, you won't be confused when we're talking about things like the different axes. And you end up with different colors to make. So complete that mini challenge. And then I will see you in the next video.
19. Basics Of Selection: At long last, ladies and gentlemen, we arrive to the 3D view port itself, where we're going to begin playing about with the objects in our scene. Before we get started. What I'm going to do is I'm going to just enable something known as Screencast keys. So you'll see I've just added an additional panel here. This is the side panel business. This side panel will have these various tabs going along the side. Each of these houses its own set of tools. You should only see the first free item tall and view. The next two that you see on my screen freely prints and Screencast keys are associated with add-ons that had been used to improve blend dysfunctionality. I'm going to use the screencast keys, add on here by left clicking, and then going to set origin and position it in my free DVI ports. This way, whenever I press on any of my mouse buttons on the keyboard, you will be able to see exactly which button has been pressed. You obviously won't have this enabled. But this is purely for the benefit of you guys being able to see exactly what I'm doing. Now, let's move on to the objects themselves. Let's start with the basics. So selecting objects in the 3D viewports simply requires that you hover your mouse over that object and press the left mouse button. The selected objects will appear with a yellow highlights going around the outline. If we left-click on this objects here, which is the camera objects, you can see it gets that same yellow or orange outline. This first object up here is the light. So this applies the lighting to our scene. And you can see as we left-click on each one, a new objects becomes selected. You can also select multiple objects at the same time. If you hold down the Shift key on your keyboard and then left-click on a novel objects. That object becomes selected. It has the same orange, yellow outline that it did before. But now the previously selected object, lava than being unselected, which was the case before when we were just left clicking. This object now appears with a different color on his outline. So this is a much deeper orange. This basically means that we have two objects that are selected, but only one of them can be the active objects. In this case, the camera, because it was the last object that we selected. If we hold down Shift and left-click on the loss object, this becomes the active object. The other two are selected objects. There are important differences between the two. The active object and the selected objects. As we continue to learn about new tools, for example, pivot points, you're going to learn how important it is to define what the active object is going to be. Not only can we select our objects in the 3D view port, we can also select them from the outliner panel as well. If we left-click away from any of our objects, we effectively be select all free. If we come over to our outline a panel, we can select the objects by left clicking. So I can left-click on the camera object to select it. I can left-click on y cube object or my lights objects. I can also hold down the Shift key and select my objects in my outline, a panel. However, the order of which is the active selection is reversed in this case. So in the 3D view port, the last object that was selected becomes the active objects. However, in the outliner, it is the first object that remains the active object. So we select the lines and it's active. If we shift select the cube, it's added to the selection, but the light is still the active object. If we add the camera, Same thing, It's attitude is selection, but he's not the active objects.
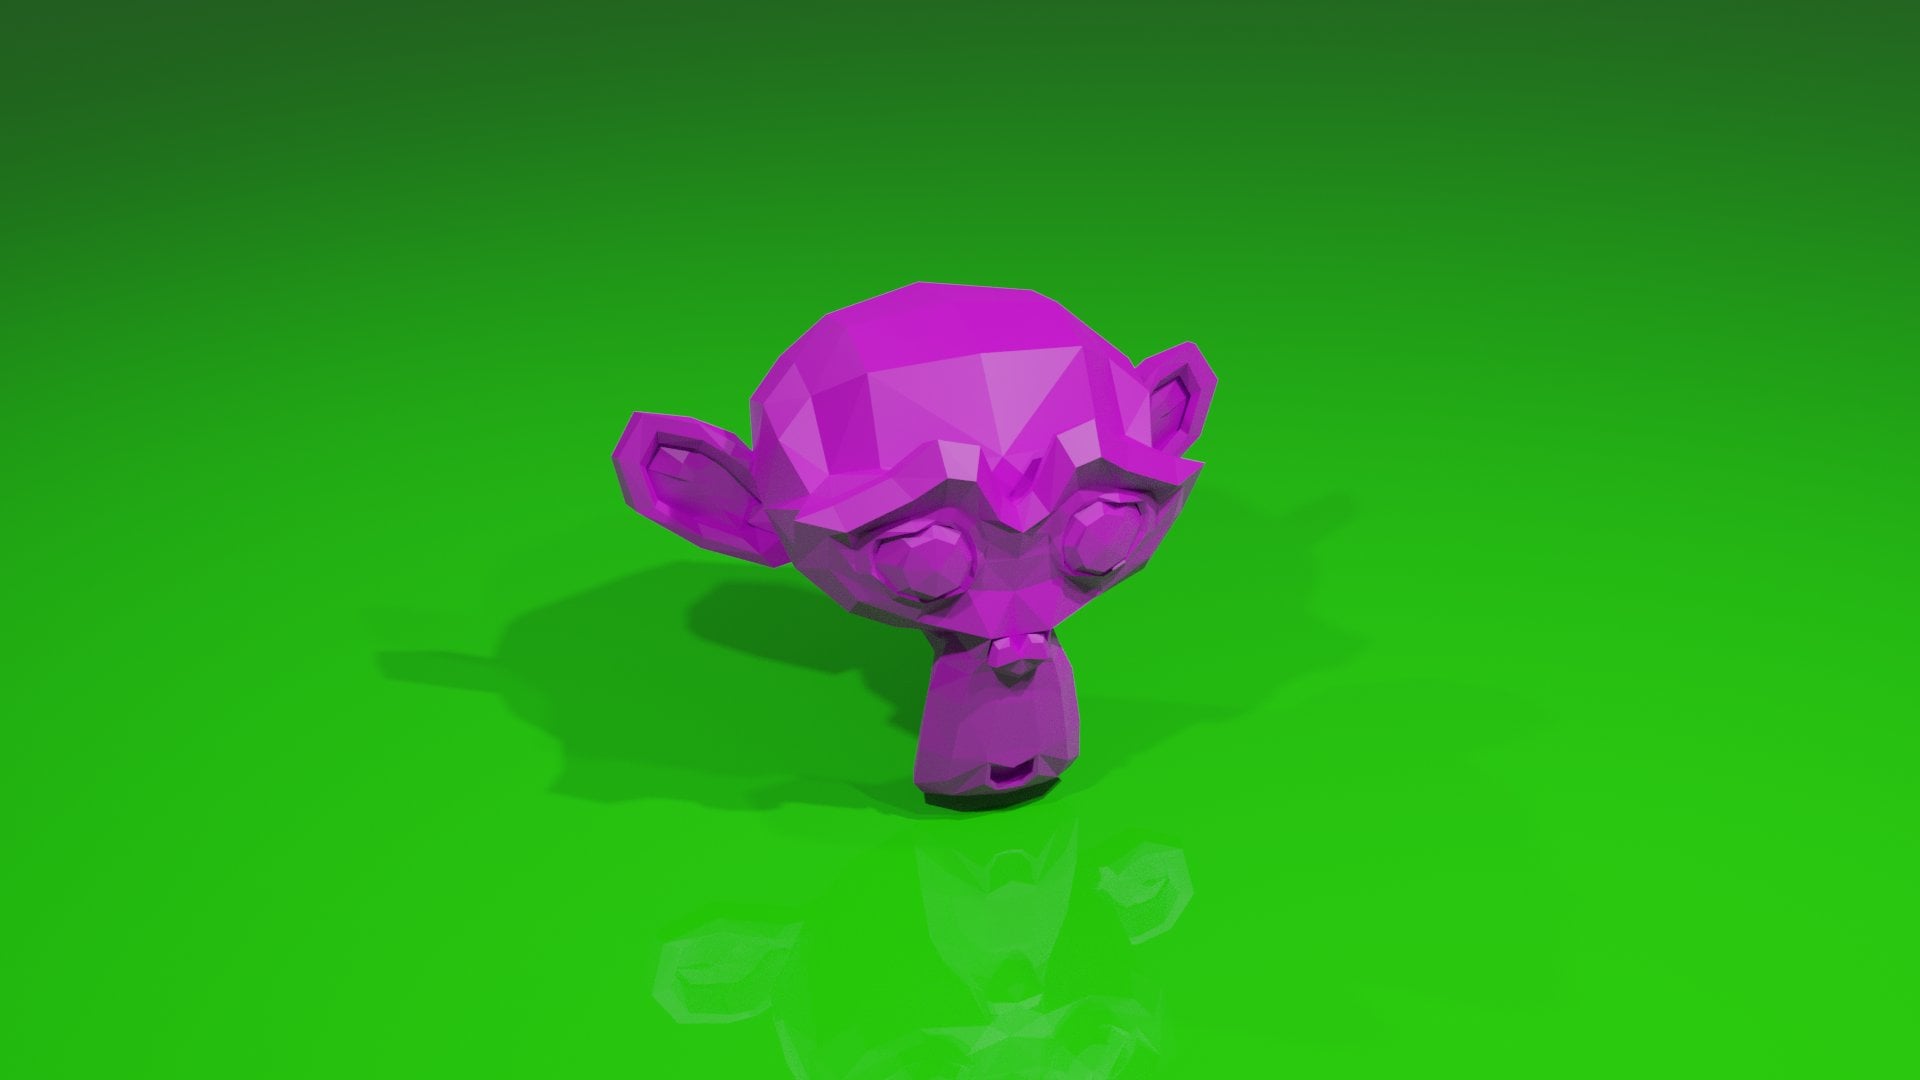
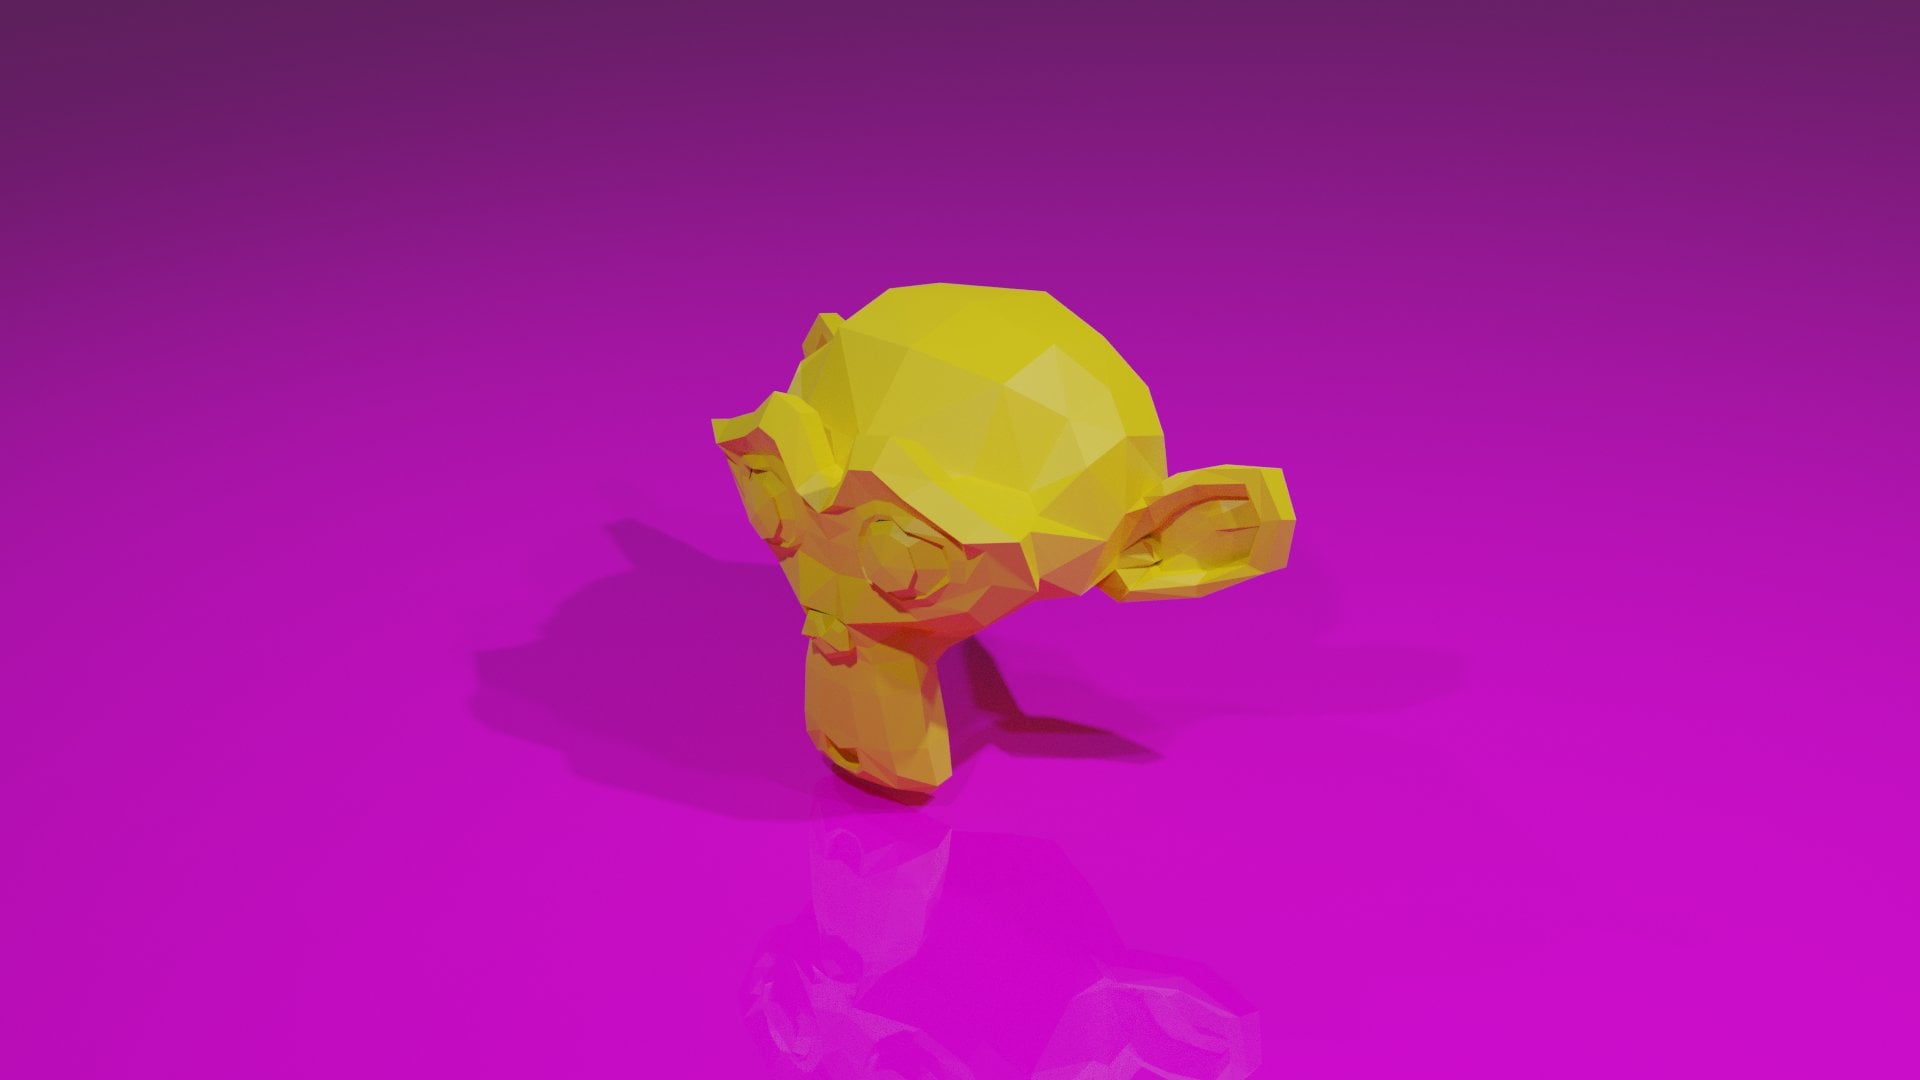
20. Deleting And Adding Objects: In this video, we're going to be taking a look at how we can both delete and add objects into our 3D view ports. So starting off with deleting, make sure the object that you want to delete is selected. Then you can press the delete key or the X key on your keyboard. If I press X, it brings up a prompt, making sure that I want to delete my objects. I'm going to click Delete. And now the light objects has been deleted. Both form the 3D view port as well as the outline up panel. You can also delete an object in the outliner panel itself. Select it, press X to delete. The only difference is you don't get any prompts to make sure that you want to delete it. If we use the hotkey known as control and z, we can undo previous functions. So say if you accidentally delete Situ objects, you can easily bring them back by holding down Control and pressing Z. This will undo your previous function, which in our case was the deleting of the camera objects. If we press control C, again, we end up with the D selection of our camera object, because selection is what is known as a step. It is a function that we have used. And if we press control C, again, we bring back our lights objects. If we press Control Z one more time, we deselect because if you remember, we selected which was a single action, then we deleted. Then we selected then deleted. We can delete multiple objects at the same time by using the Shift key and left clicking to select them. All, select all free this time, hit X, and then select Delete. And this time, all three of our selected objects have been deleted. I'm going to hit control and C once again to undo that action. And this time I'm just going to select the cube and delete it. Now I want to add in a new object to my scene. To add a new object, you can do so form one of two methods. The first method is to come up to this Add menu at the top of the free DVI ports and left-click. You can see we have a variety of different object types to choose four. Alternatively, you can use the hotkey, which is Shift, and a note on using the Shift and Control keys. If you use them to use a hotkey for a specific function, remember to hold down the Shift key and then just press the secondary key. So hold down Shift and press a. If you just press Shift, then press I, you end up doing something completely different because we need to hold down the Shift, which is the primary key, and then press a to bring up the Add menu. This is the same menu that you will see up here. And she will notice again that this looks slightly difference what you would see. And that's because of certain add-ons there have been enabled. But you should be able to see in the mesh option F we think form plane down to monkey. So let's add this monkey object. This looks like it could be fun. Left-click. And we add ourselves and new objects. This is blend is mascots and her name is Suzanne. You can see the name of the newly added object again, he in the outline, a panel.
21. Naming The Objects: There are several areas within Blender from which we are able to change the name of a specific objects. Good naming conventions will be very important when creating larger scenes, and also when creating a library of 3D assets. The most common method of changing the name of an object is to go to the outline, a panel, double left-click on the name of the object, and then type in what name you wish to give it. So I'm going to change Susanna to Sarah. Press Enter, and that changes the name of the objects. This doesn't only changed the name in the outliner, but also everywhere else in Blender. If we look in the 3D view port itself, we have some metadata here. And one of the things we can see is the name of the currently selected objects, which is Sarah. If we left-click on the camera, this change is to camera. And if we change the lights, it changes to lights. In the properties panel. We can also see the name of the current object here. This is only true if you are in the Object Properties tab, which is this orange looking square. So if you're in another tab, you won't see this. Make sure to select this tab here so that you can see the name of the currently selected objects. You can also rename your objects here as well. So left-click and rename this time, let's go with something like Sam. This changes the name of the object in all of the aforementioned locations.
22. Fundamentals Section: Hi guys Joe, here. Congratulations on completing the previous section. And it's now time we started to focus on the fundamentals of a 3D application. In other words, we're going to be learning how to select and manipulate objects in 3D space, how to navigate in 3D space and more. So we're going to be taking a look at the 3D view port in particular, which is where most uses of Blender, we'll be spending the majority of their time. So it's important that we begin to learn how to 3D view port works and how we can't manipulate objects in free space.
23. Navigating Buttons: In addition to using the middle mouse button, we also have some other onscreen buttons that we can use to navigate around our free space. The first option here is the ability to zoom. So with this button, if you left-click on the zoom button and then move up, you can zoom in on your objects, move down to zoom out. And we're able to do that without having to use the control or middle mouse buttons. The option directly below allows us to move our view, which is panning. So again, if we click and drag in any direction, we can move our view left, right, up or down. Again, the controls for this tall are inverted. So if you move your mouse up, the view will go down and so on. The other two buttons underneath our new. Instead of focusing, orbiting panning and zooming. This next option allows us to snap the view to our camera's position. If we left-click on this camera view button, you can see that we get this border that focuses around our object and anything outside of the border is grayed out. What you're looking at right here is the view of the camera. If you were to render this scene. So if you wanted to create an image of this 3D scene, the image would be everything that you see inside of the camera border. Anything outside of the border would not be rendered. Just as a quick demonstration, let's very quickly render Sam. Go to the render option up here and open it up. Then select Render Image. Give it a second. And you can see that Sam has been rendered using the camera view. Notes that you do not need to have this view in the 3D view port in order for the render to work. This tool is purely used to preview what you are going to see when you eventually decide to render your scene. In order to come out of this view. If you were to left-click on the Toggle camera view button again, it takes you straight back to the view you were in before. The final option here changes. The view from perspective to offer graphic. Will go in a little bit more detail about the difference between the two later on. But perspective and orthographic basically change the type of view in 3D space. With perspective, the objects will get smaller as it gets further away from the view. And we'll get larger as it gets closer. But this behavior does not exist if we go into orthographic view will demonstrate this when we move on to being able to move our objects in 3D space. Above these buttons, we have the interactive access, which allows us to orbit our view. If we hover our cursor inside this circle, you will see it gets highlighted. If we click and drag using the left mouse button, we can orbit our view. The same as using the middle mouse button in the free DVI port itself.
24. Navigating In 3D Space: In this video, we're going to be focusing on how we can navigate in 3D space. Navigating in three-dimensions is a little bit trickier on a desktop screen than at navigating in two-dimensions. The easiest way of navigating is to orbit around a selected object or a point of reference. If we were to press down on the middle mouse button and move our mouse around, you can see we are able to orbit around our monkey objects, which we have named as Sam. We can use the middle mouse to orbits, but we can also use it in different ways. For example, we can use the scroll wheel to zoom in and out of our objects or our points of reference. If I scroll up on my scroll wheel, we zoom in. If I scroll down on my scroll wheel, we zoom out. We can also use the Shift and Control keys for navigation. If I hold down the Control key, then hold down the middle mouse button and move my mouse up. You can see we zoom, but assuming is slightly different. This is what is referred to as a dolly zoom. Compared to the previous method where we use the scroll wheel, it looks a lot smoother because with the scroll wheel, we are assuming in increments every time we scroll up on the scroll wheel or scroll down to zoom out. The third method of navigation is to pan of you. If we hold down the Shift key and the middle mouse button and then move our mouse. We pan of you left, right, up and down. Notes that when we pan of you, the controls are inverted. So if you move down with your mouse, the view is going to move up. If you move up on your mouse, the view is going to position down. When you do this, the points of reference will change. So panning the view is going to impact the ability to orbits and x2. If we attempt to orbit after we have panned of you, you can see we are no longer orbiting around our central objects. If we attempt to zoom in on our objects by scrolling, you can see we end up scrolled into a different points in the 3D space. If you want to correct this. And you want to focus on either at the center of your scene, which is where the green and red lines intersect on a specific object, such as our Sam objects. You can do so by going to the frame menu and choosing frame selected. So this is going to focus the view. Whichever object is selected. We can also frame 0. And that will sensitive use so that we can see all of the objects in our scene. If I press on frame, all, the view changes slightly. And when we orbit, where effectively orbiting around a point of reference created using the location of all of our objects. If we were to go frame selected, it zooms in on the selected object. And now we can orbit around that objects and also zoom in and out of that object as well.
25. Saving Our Work And Creating Our Directories: In this video, I'm going to be showing you how to save a blender file and also how to set up your directory that you will be using to store all of your blender projects formed this course. We have here a very basic setup. We haven't made any changes, but we're going to save it anyway. I'm going to go to the File menu up here. And I'm going to click on Save As. Then I'm going to go to my desktop. You can go wherever you want. And I'm going to create a new folder. Make sure that the folder is easily accessible. So make sure it's in a easy-to-reach location, which is why I have chosen the desktop. And I'm going to rename this as blender practice. I'm then going to open up this folder and I'm going to create a series of sub-folders. So the first one I'm going to create is the mini challenge folder. So throughout the course, we're going to be doing a variety of many challenges at the end of certain lectures to test the skills that we have developed in those videos. You can then save your mini challenge projects in this folder. We're also going to do some other types of challenges as well. So we're going to do single lecture challenges, which we can store here. And we can also create a folder for larger projects as well if we wish. We're also going to create one more folder for now. And this is going to be our resource folder. So this can be where you store any things like textures or UV maps or anything that could help you with any of the other projects. You will store in this folder right here. Now that we have these set up, I'm just going to create one more folder just for this specific file. I'm just going to name it as test. Then we're going to open this up. There's nothing inside, and we're going to rename this as first. Save and press Enter. As soon as you press enter, it will add the dot blend file extension Dan here, such as name, wherever you want to name your file, and then press Enter to add the file extension. Then when you're ready, click Save As. And it's as simple as that. You will know you have saved your file in the top corner of the Blender interface, because now blend up, we will have the location of your currently open projects as well as its nine. If you want to open a file, file, go to File, and then Open recent. And then you should see your more recent files located here. You can also press Open and then locate your files in the file view. This is how we can both save and load our projects in Blender.
26. 2D Views: In this video, we're going to be taking a look at two-dimensional views in Blender. Starting with our interactive axis, which we can already use to orbit around our scene. You will notice that we have a series of buttons here. Three of them have letters, and three of them do not. But they are also positioned in pairs. So we have to the ALU, to d'etat green and two that are red. These represent the frequencies of 3D space x, y. And see. If I decide to click on this see option here. It snaps our view to talk orthographic, so we get a bird's-eye view of our scene. If I click on this option here, it actually takes us to the back orthographic view. If I click on this X option, it takes us to the wind speed. Basically, the blue options allow us to go top and bottom. If I click on this blue button here, it takes us to the bottom orthographic view. If I press the Z, it goes to the top. If I press the Y, it goes to the back. And if I press Y again, it will go to the fun. So we can use these buttons in order to snap to various 2D views. Alternatively, we can also go to the View menu in the 3D view ports and come down to where it says the reports. And we can choose the same options, top, bottom, front, back, left, and right. So I could choose top view from here. I could also perhaps choose the left for you. You will noticed in this list that we also have these grayed out hotkeys. So whenever a specific tool has an associated hockey or keyboard shortcuts, it will appear to the side here with our frame selected option that hockey is numpad 0. For our 2D views, we use the number part and also the control key to access these views. So if I press 1 on the number pad, it goes into the font orthographic view. If I press F3, we go right. And if I press seven, we go top. We can reverse any of these with the number nine key on our number pad. So say if I wanted to go to my back orthographic view, I can press one to go into the front orthographic view, and then nine or my number pad to go into my back view. In addition to this, if we press F5 on our number pad, it switches between perspective and orthographic. So to recap, one on your number pad is the front view. Free is Rights. Seven is top. Knowing each were burst the previous few. And five is perspective and orthographic. So being able to switch in between them. The question then is, what do the even numbers do on our number pad? Well, if I press too, you can see that we are orbiting around our view, but in a very specific rotation. If I press eight multiple times, we go the opposite direction. So you can combine your even numbers to orbit around your view using a method of snapping. This is a good way of trying to get a very specific angle on your scene and or objects.
27. The Side Panel: When you normally open up Blender, you will be greeted with this exact layouts. We are in the layout workspace with our 3D view port, outliner, properties and timeline editors. In the 3D view port, we will have our 3D scene along with some additional menus at the top, and also the tall shelf to the side here. Now the tool shelf can be made hidden from view by pressing the t key on your keyboard. This gives us a little bit more room to work with in the 3D view port and is used for doughs who do not access to tools form the top shelf. In Blender, most tools can be accessed in a variety of different ways. For example, the move toward here can also be accessed by using the G key on our keyboard. So we can select an object, hit G, and then move our objects. So even though the tool shelf is very useful, it's not always required for every user's workflow. Alternatively, there is another hidden panel in the 3D view port. This is the side panel. If you take a look in the top corner, you will see that there is a small arrow next to our interactive axis. If we left-click on this small arrow, we bring into view our side panel. If you want to close the side panel, you can do so by pressing the Enter key on your keyboard. So press N to close the side panel. And you can also press M to open it up again. In the side panel itself, we have a series of tabs that we can select. Each tab has a separate sets of tools and values. You will probably see the items have the tool tab and a few tab. This fourth tab here, screencast keys you won't see as this is a part of an add-on that is used to allow me to display any different key buttons that I press. But each of these is valuable in its own. Why the values in the Item tab, for example, relates to the transforms of the selected object. So here we can manipulate the location, rotation, scale, and the mentions of our cube objects. The tab directly underneath this is the tall tab. Now this can relate to whichever active tool you are using. For example, we have the tools in our tool shelf, and currently we have the select box tall, active. We can change some of the preset values for the active tool here. So we can, for example, change the mode for creating a new selection to extending our existing selection using the box tool. If I change this to the move tool, you will see the options here change based on the top that is selected. Billowed out. We have additional options that allow us to affect objects in our scene in various ways. For example, we can have it so that our transforms only affect the origin points of our selected objects. As a quick example, I'll left click here and then hit G to move my objects. But this time instead of moving the mesh, we are moving this little yellow dots, which is the objects origin of the cube. I'm going to right-click to undo that operation. And then we have the few tab. Now the few tab relates to the 3D cursor and the 3D view port itself. So from here, we can adjust things like the focal length. This is not related to the camera objects, the actual view in our 3D view ports, we can adjust eclipse start and end values. This is for creating large or really small scenes where the default values will give us potentially a little bit of clipping. So if I zoom out a lot, you will eventually see that the object disappears. If I zoom out too much. To correct this, I would need to increase the end value. And you can see it come back into view as I increase that end value. We also have a load of other options, such as the ability to use local cameras. Define an area on our 3D view port to act as our render region. This is a way of improving performance. We can also look our view to the 3D cursor and even lock the camera to the current view. So for example, if we look the camera to become view, nothing happens. But if I press 0 to go into my camera view, that's 0 on the number pad and then begins to move around my viewport. You can see the camera goes along with it. I could then turn this option off, come out. And you can see that our camera has changed its location. We have a variety of other options here as well, such as the ability to manipulate the 3D cursor, collections, annotations, and more. So there is a lot that can be done in the side panel. Also note that there are going to be a lot of add-ons that are stored in the side panel itself. The screencast keys is an example of one such add on. This is a place where we can store additional functionality for our objects and scenes in Blender.
28. 3D Cursor: In this video, we're going to be turning our attention to the 3D cursor. The 3D cursor is a very important tool in Blender. It allows us to do all sorts of different things. The most primary of which is the ability to add new objects at a specific location. The 3D cursor is identified as a white and red circle. You can just about see it here at the center of my scene, inside of our Sam objects. Using the 3D cursor, we can add new objects. Of course, if we were to add a new object now, it will just take up the same space that Sam is. In order to move our 3D cursor, we can activate the cursor at all. Located here. What you see at the side of the 3D view port on a series of options located in the top shelf. So this tool shelf has a variety of different options that allow us to manipulate our objects. If we select our cursor at all. And then left-click anywhere in our scene. We end up moving our 3D cursor to that specific position. We can click and drag. And the 3D cursor will follow the mouse cursor wherever it goes. When moving our 3D cursor, we can look at movement to a specific axis. So as I move my cursor with my left mouse button, I can press X, for example, to lock the movement to the x-axis alone. I can press 1 to lock it to the y axis and z to look at the z-axis. If you take a look at the very, very bottom of the Blender interface, you will actually see that whenever we are actively using a tall, we will get a series of keyboard shortcuts that allow us to alter the functionality of the tool while we are using it. So as I move around, you can see we have the x, y, and z options at the bottom. You can also see what it means to confirm or cancel the position. So to cancel is to use the white mouse button. So we test that now hit the white mouse button. And we have canceled the change in location for our 3D cursor. Not only can you change the behavior of a tall while using it, you can also change the behavior before you use it. If we take a look at the header bar for our 3D viewports. You can see that we have several options that the light to our 3D cursor at all. If we change to this top option, which is the select box option, you can see the options here change depending on which of the tours are selected. So with the 3D cursor, we have this option for surface projection. What this means is if I just left-click on the top of Sam's head. And we assume an orbit have you. You can see that the 3D cursor is just sat nicely on the top face here. Or Sam. If I left-click on the E, you can see it's basically sat on the surface of the E. If we turn this option off and left-click and then orbits, you can see that the 3D cursor now ends up inside of Sam instead. In most cases it's recommended to have this option switched on. Then we have the orientation. So we open up this menu. We have a variety of different orientations that we can choose. For example, we have the view orientation. So if I left-click here, you can see we have these four black lines that go out from the center of the 3D cursor. Because of the orientation. They're going up, down, left and right. But if we change this orientation to something like geometry, and then left-click, you can see that the direction of these lines changes. And actually by changing it to geometry, the 3D cursor now matches its direction based on the face that it now sits on. So this face points out in this direction, like so. And with this orientation option, our 3D cursor will be positioned in the same manner. We can also choose to go with the none option. And as you can see, that basically doesn't change the rotation of the 3D cursor no matter where we move it two. And then we have the transform option, which has these lines 40 3D cursor, moving along the three axes, x, y, and z. For the most part, there are a few occasions where you want to change your orientation. But for now, let's just go back to our view orientation. And that just keeps it so that wherever, wherever we left-click, the rotation of our 3D cursor is based on our current view. If we change the view, you can see how the cursor has been rotated. Now in addition to these tools, there is in fact, another means of being able to move our 3D cursor. And this is a method that you may find yourself using quite a bit. If you go to the side panel and go to where it says view, you'll get some of these piu options. One of the options is to change the location and from rotation of the 3D cursor. This is going to be a prelude to being able to manipulate the transforms or 3D objects. So at the moment we have the values body location on the x, y, and z axis, as well as the rotational values as well. If I wanted to get my 3D cursor back to the center of my scene. All I would need to do is make sure that the location values, we're all set to 0. Now you can just click and drag on these values to select them all. And then type in 0 and press Enter that positions to 3D cursor back at the center of our scene. Let's also fixed the rotation, set all of these back to 0 and press Enter. So now our fluid cursor is back to its original position, which we have been able to achieve by manipulating these values in the side panel. Finally, let's use the 3D cursor to actually add an object to our scene. We're going to manipulate the location of the cursor on the x axis to about here. You can see that we are using a specific dimension here. So we're using metric meters. And now what we can do is we can hold down shift and I go to Mesh and add a new objects. So let's add a torus objects, for example, left-click. And it adds the object at the location of the 3D cursor.
29. The Operator Panel: In this video, we're going to be taking a look at the opera rose up panel, which appears in the bottom corner of the 3D view port off that the use of specific functions, what we're going to do is we're going to add another mesh objects to our scene. I'm going to change the active tool in our tool shelf from cursor to the select box option. We don't need the cursor at all to be selected if we're going to be manipulating the curse up form. Hi. I'm going to click and drag to move the 3D cursor. What I can do here is I can snap the cursor increments of a singular meters by holding down the Control key. If I do that and move my cursor, you can see in this side panel that we are moving our 3D cursor on the x-axis by increments of single meters. I'm going to position the cursor here and minus 4 meters on the x axis. Then release. Next, I'm going to rotate by a value of 45 degrees on the y-axis. If I click and drag, you can see that we are rotating by 0.1 degrees each time. If we hold down the Control key, we can increment by 10 degrees each time. If we hold down Shift and Control, then we can rotate in increments of single degrees. This is what I want. So by using Shift and Control, I can rotate by single degrees until I reach 45. Then release. Next we're going to add another mesh object, hit Shift, and I go mesh and select tours. So we're going to add a second tourists. When we do that, get this operator panel that appears in the bottom corner. If we left-click open this up, you can see we have a variety of options to play with. The options that you find in the operator panel are dependent on the function itself. So with the art tours option, we have the ability to manipulate the location and quotation after the object has been created. So we can click and drag to move on the x, y, and z axes. We can also rotate on each of these axes as well. Above that, we have these segments and radius options. If I press the period key on one number part, I can snap to my selected objects. These segment options would allow us to increase or decrease the amount of detail 40 added objects. If we increase the major segments value, you can see by the lines that are visible on our tours objects that more detail is being created. If I reduce this value, it reduces the amount of detail and eventually changes the shape. We can do something similar with the minor segments which actually focus on these vertical lines that you see. By the way, the lines that you can see on your objects are referred to as edges. More on geometry and different types of geometry. When we move into edit mode. By manipulating these two values, we can manipulate how much detail our tours object is going to have on its creation. We also have the radius options, which is effectively the scale of our tours objects. So we can manipulate the major radius like so. And we can also manipulate the minor radius, which is the general thickness of the torus. There are a few other options here, but the other one we're going to look at is this a line option? So currently it's sets world, but we can also set it to the view and the 3D cursor. When we set it to the world, the object is going to have its free axes, x, y, and z, pointing in the same directions. That's the global axes are. If we were to change this view or change the alignment from world to view. You can see that we're tourists. Objects is basically pointing straight at the screen. If we change this to our curse of you, the rotation of our edit objects will now match the rotation of our 3D cursor. If I was to manipulate the value of the 3D cursor on the y-axis. So let's go to something like minus 20 degrees. Nothing happens with our tours objects. However, if we change to a view, so let's go with aligning to View and then go back to 3D cursor. You can see the rotation again matches whatever value we have here. For the 3D curses rotation. The operator panel will only exist body most recently used tool. The tools that are exempt from this are the navigations halls, the ability to orbits, pan, and zoom. However, if you were to use another tool, such as selecting a different objects, the operator panel would disappear. So we select the SAM objects. Here. We select the object, but the operator panel.
30. Transforms And Changing The Location: Over the course of the next few videos, we're going to be focusing on object transforms. Transforms are a specific set of properties that allow us to determine the positioning of a 3D object in the 3D space. The free main transforms are the object's location, rotation, and scale. In this video, our focus is going to be on the location and how we can change the location. I selected objects. You can see that we have gone back to our default setup for this lecture. To go back to a default setup, just go to the File menu, select New, and then select the general templates. We're going to select the cube objects first of all. And then we're going to come over to the side panel where we can actually see the values for the location, rotation, and scale of our selected objects on the x, y, and c axes. With the cube object, the x, y and z location are all set to 0. However, if we were to select another objects, such as the camera, you can see that we have different location values as well as some different rotation values as well. This is because blender uses a coordinate system based on the three axes, x, y, and c. Currently, using this coordinate system, we can see that the cube is located at the very center of our 3D world. The camera, on the other hand, is located approximately seven meters on the x-axis, minus seven meters on the wire, and about five meters on the z-axis. If we take a look at our lights objects, again, you can see that we have different location and rotational values. Let's move on to actually manipulating the location of a selected object. There are numerous ways in which we can manipulate the transforms of our selection. The first method is to use the Move tool that is located in the top shelf. To activate the move tool, come over to the tool shelf and click on this icon here. This will activate the Move tool. If we go back to our cube, you can see that some lines and squares have appeared. This is our freebie gizmo. Its shape changes based on the tall that is being used. The gizmo allows us to manipulate specific transforms of our 3D model. The arrows allow us to manipulate the location in the specific axes. For example, if I want to move my cube on the x-axis, I simply click on the red arrow and drag. That allows me to move my objects on the x axis. If I release the left mouse button, it would confirm this change in location. So if I release the left mouse button, the cube is now been moved to an x location value of 4.5. If I want to undo my previous action, I can hold down Control and press Save. I can also move on the y-axis by positioning my cursor over this green out, clicking and dragging. And if I want to cancel this change, I can do so by pressing the white mouse button as I'm moving the cube. Finally, I can manipulate on the z-axis as well. You will also notice that we have free colored squares and these relates to the planes. So we have the x, y, and z planes. And what these allow us to do is they allow us to move an object on any two of the three axes. So with the arrows, we could only move on one axis. But with the planes we can move on two axes. For example, if we click on the red square, which is 4 dx plane, we can move our cube on both the Z and Y axes. If I was to click on this green square here, then we would be able to move on the x and z axis. And if I was to move using the SI pipeline, which is the blue square, it would allow us to change the location on the x and y axis.
31. Other Ways To Change The Location: In addition to using the Move tool from the tool shelf, there are several other methods for manipulating the location of an object. We can also use hotkeys to move our objects around our scene. The hotkey associated with changing the location is the G key. So if you press G on your keyboard, you will notice that gizmo disappears and the highlights surrounding the selected objects becomes white. If you move your cursor, We'll begin to move your cube in three-dimensions. The ability to move the cube is partly dependent on whatever view you are in. So for example, if we went into a two-dimensional view, say different orthographic view, and then hit the G key to grab. You will notice that we are only able to change the location on the x and c axis. Alternatively, if I press F3 to go into light orthographic view and press G and move. You can see that we are not able to move on the x-axis this time. In addition to this, we can also lock this on the free axes. So if we hit G first to move, then X on our keyboard, we can lock B location to the x axis. We can switch between the free axes. So if we press Y, we can then switch over to the y-axis. And if we press C, we can switch over to the z-axis. Note that all of these hotkeys are located down at the very bottom of our Blender interface. As we're using the Move tool, we can use any of these additional hotkeys to change the behavior of the Move tool. If we use shift and then x, for example, we can lock the location to the x plane, which allows us to move on only the c and y axes. Shift why locks to the y plane? And Shift C locks to the z plane. If we go back to moving on the x-axis and then hold down shift as we move our 3D model, you can see that the change in location is not as responsive. This is one way of getting more control over the change of location on a specific axis. If you only want to move an object ever so slightly, then you can use the Shift Key to do so. Alternatively, you can also hold down the Control key to enable snapping. By holding down the control key here, we are able to move in increments of single meters each time. If we want even more control, we can combine shift and control together. So as we move our objects, hold down Shift and Control. Then move in increments of 0.1 meters each time. I'm just going to hit the light mouse button to bring us out of the Move tool. You will also notice with the move tool that we have this white circle. We haven't covered this yet, but this basically allows us to click with the left mouse button and then move our cube around in all three directions. I'm just going to right-click to cancel with that change of location. Now, not only can we use the move tool located here as well as DG hotkey? We can also change the values directly in our side panel. We can make these changes simply by clicking and dragging on a specific access, allowing us to change the location on that access. We can also click and drag down to select multiple axes and manipulate them at the same time. So if I click and drag all free and then begin to manipulate, we can see that we are able to change the location on all three axes simultaneously. And you can see this effect in the 3D viewports. Alternatively, we can also use numerical values. If we left-click in the bar that has the x-axis, we can type in whatever value we want. For example, safe. I want to position my cube on four meters on the x-axis, two on the y and one on the Z. I can press four, then two, then one. And very quickly gets my cube in the exact location that I want. Additionally, while manipulating these values, you can also use the Shift and Control keys. So I could use the control key here to manipulate in increments of single meters. I can use the Shift key to manipulate in what is effectively millimeters. And then I can use shift and control at the same time to manipulate in increments of 10 centimeters each time. Vital way. You can also use numerical values when combined with other tools like the hotkey. So for example, if I hit x0 and x to lock to the x-axis, I can even type in a new numerical value while using this tool. So I can type in five and then press Enter. So move it by 5 meters across the x axis. Note that this will move it from its current position. So now we have an x value of 7.1 meters. I'm just going to avert these all back to 0. The final place where we can manipulate the location values of r cube is actually in the properties panel. If you go to the Object tab in the Properties panel, you will get the same values that you can see he in the side panel or the 3D viewports. And you can manipulate them in exactly the same way. You can click and drag to slide. You can also use the Shift and Control keys to snap in increments. And you can even type in your numerical values directly. These are the different ways in which you can manipulate the location of your objects in blender. Before we go on to the next video, I'm going to issue a mini challenge. What I want you to do is I want you to try and create a basic castle shape by stacking cubes on top of one another. So if I could just get you started, we're going to take our first cube and we're going to position it on the x-axis to a value of, let's say five meters. Let's move it up by a value of one meter. Now the default cube is set to a size of two meters by two meters by two meters. We can see this in the dimensions he selects. Use that to our advantage. I'm going to hit shift and I go mesh and add a key. I'm then going to position this on top of this key. So this cube here is set to 500 one. So I'm going to want this to be two meters above this cube here based on its size. So with this new cube selected, we're going to set the x value of five. And when I do that, you can see there's a bit of overlapping going on and we want to avoid that. We're going to keep the white is 0 and we're going to set the z value to free. And that should rest our block on top of the other key we want you to do is I want you to try and create a very basic set of castle walls. So a tower in each corner of the castle, and then some cubes going across to act as the walls. So again, let's just add a couple more. Just to make it an easy example. We're going to set this to one. We're also going to set this to a value of about three. Then let's add another, set this to one. And also set this to one. And you can probably see where this is going. So just create a shape. It doesn't even have to be a castle. Just create any shape you can by using cubes as building blocks, positioning them on top of each other or next to each other to create the shape that you desire by using the location tours. Complete that little mini challenge, and then move on to the next video.
32. The Rotation Transform: In this video, we're going to be moving on to the second of our free transforms. We're going to be learning about rotation. So the first method or being able to rotate our selected object is to use the rotate tool in the tool shelf. The rotate tool is located here underneath the Move tool. So you'll notice we have a selection here for our transforms, move, rotate, scale, and transform. So far we've covered the move tool. So let's now use the Rotate tool. You can see that our gizmo returns, but it looks very different to what it did before. We have, first of all, a white circle going all the way around. And we also have some curved lines. We have a red line, a green line, and a blue line. You will also see that as you position your cursor in towards the center of this circle, that we get that little bit of a blinking effect. And this is because a different tool is being highlighted. You might not quite see on your screen. But this is what is known as trackball rotation. So let's go through each of these. If we want to rotate based on our view in the 3D view port, we simply hover over the white circle. Then we left-click and drag in any direction. And that allows us to rotate based on our view of the 3D view port. If we were to change our view and use the same tool, the rotation behaves accordingly, so it changes based on our view in the viewports. Alternatively, if we position our mouse inside of this circle, click and drag. This is what is known as trackball rotation. So you see how the cursor changes as we click and drag our cube. It also changes the behavior of the rotation. Basically, with this method, you ignore the view in the 3D view port. And this allows you to rotate freely in all three directions, x, y, and z. I'm going to hit the white mouse button to cancel that operation. The free curved lines all represents the free axes. So if you want to rotate an object on only the x axis, just hover your cursor over the red curve, click and drag in either direction, up or down. This would allow you to rotate only on the x axis. If we select the green curve, we can rotate on the y-axis. And finally, if we rotate on the blue curve, we rotate on the z-axis. Because of the natural properties or flotation, there is no such thing as an x, y, or z plane. You can't really rotate on two axes at the same time. It's either one axis or free.
33. Other Ways Of Changing the Rotation: Let's now take a look at some of the other methods of manipulating our rotational values. Let's take a look at using the hotkey. Now, whenever you use the hockey or manipulate the values in the side panel, you don't need to have the rotate tool active in the top shelf. So we're just going to switch this to the select box tool so that we no longer get the gizmo on our objects. Then I'm going to press R on my keyboard to activate the rotate tool. And this allows us to rotate in three dimensions based on our view in the viewport. If I wanted to rotate using the trackball method, I can do so by pressing R a second time. So plus R2 times in a row. In order to enable trackball rotation, which again ignores the view that we have in the viewports. If I want to rotate on a specific axis, I can press R, then I can press X, Y. All see to lock to a specific axis. You will see at the bottom of the Blender interface that we also have the ability to rotate on the planes by using the Shift key. But this isn't exactly the case. As we said in a previous lecture, we don't necessarily have planes for rotation. What will happen if you press shift and x, for example, is that you will rotate on the x-axis, which is the same behavior as just pressing the X key. The same applies if we go Shift Y to lock to the y plane, which is the same as the y axis. And again, for shift and z, which locks to the z axis. You can also use the Shift and Control keys for your rotation as well. So if we look to the z-axis and then hold down the Shift key as we rotate. Not much happens at the moment, but if I press Shift again, you can see that we end up rotating on the c-axis by increments of 0.1 degrees. So we get more control over our rotation. If I was to hold down the control key as I rotate, then we are able to rotate in increments of five degrees on the z axis. And if I was to combine these two buttons, so Shift and Control, I would be able to rotate by increments of single degrees around a single axis. So again, shift control. And the two combine will give us more control over manipulating our transforms. In addition to this, we can also manipulate our values. Once again, in the side panel, it's exactly the sign. As with the location, we can either click and drag a single value. Click and drag multiple values. We can even use the Shift and Control keys to snap and control our values better. And we can also type in the values that we want. For example, 45 degrees on the x-axis. We can do the exact same thing in our properties panel. If we go to the Object tab, we can't manipulate these values in exactly the same way as we can the side panel of the 3D view ports. So these are the different ways in which we are able to manipulate the rotation transform of our selected objects in blender. Before we move on to the next video, we have our next mini challenge for you. So for this mini challenge, I want you to add a Suzanne objects. I also want you to add a cube object. I want you to position the cube on top of the plane. And this bill, I'll just show you just to get started. So you can, for example, hit G, then z, and then you could perhaps use a numerical value. So one for example. And left-click, and that will position your cube on top of the blender grid. Then I want you to add a Susanna in monkey objects. And I want you to have it so that Suzanne is sitting naturally on top of the cube. And I want you to do that by manipulating both which transform value as well as its rotation value. So experimental see which of the three axes would be most suitable. And then just position Suzanne on top of your cube. Complete that mini challenge. And then I will see you in the next video.
34. The Scale Transform: In this video, we're going to be focusing on the third of our free transforms. We're going to be learning about the different methods of scaling out 3D objects. The first method is to use the scale tool that is located in our tool shelf. Be scaled told is located here. So left-click to activate the scale tool. You can see that if we compare this to the move tool, the two are very similar. The key differences are the fact that with the scale tool, we have this white circle that surrounds it, which is not too dissimilar to the Rotate tool. And also instead of our rows, we get queues at the end of our code, colored lines. If we were to click and drag on the white circle, we would be able to scale on all three axes at the same time. If we were to click and drag on any of these cubes. For example, this red cube allows us to scale on the x axis. This green cube here allows the scale on the y-axis. And the blue cube allows us to scale on the z-axis. Then we have these free colored squares. These allow us to scale on the respective planes. So the red square represents the x plane, the green square represents the y plane, and the blue square represents the z plane. The behavior of these squares is pretty much what you would expect having already used these squares with regards to the Move tool. If we were to select the blue square, for example, then we can scale on the x and y axes, but not the z-axis.
35. Other Ways To Change The Scale: Let's now take a look at a few of the other methods of manipulating the scale. So the hotkey for scaling is the S key on your keyboard. I'm just going to go back to my select box tool to get rid of the gizmo and then press S on my keyboard to activate the scale tool. Now this is a bit of tried and tested here. All of the hotkeys are the same as with the previous two transforms. If you want to confirm, you press the left mouse button to confirm your change of scale and you can hit Control and Z to undo that action if you wish. If you want to cancel while scaling, you press the white mouse button. This is the same as with the move and the Rotate tools. If you want to lock to a specific axis, you can use the X, Y, or Z keys to lock to an axis. Alternatively, if you want to lock 2 applying, you can use Shift X, Shift Y. And finally Shift C. You can also, if you wish, lock based on your shift and control keys for more control over your actual scaling. So if you hold down the Control key, for example, you can scale in increments and you can scale it in smaller increments by holding down Shift and Control at the same time. You can also just use the Shift Key Vault better influence over your scaling. Another thing that we can do with all of our transforms is press the C key to clear any constraints. If I press C, my keyboard, then it just allows me to scale on all three axes again. So I can look through a specific access with x. And I can also clear this lock by pressing C. I'm going to now press the white mouse button to counsel that operation. And let's now take a look at the side panel. Now in the side panel, we will see that we have the scale values, but we also have the dimension values. So what's the difference between each of these? Well, the dimensions represents the actual size of the object. So whereas the location value is the positioning and the rotation value is how it is rotated. The dimension value actually relates to the size of the object itself. The scale value above it is the size of the objects relative to its original size. This is why we see the value of one on the x, y, and z axis for scale. Whereas the rotation values and location values are set to 0 by default. Let's add another object to clarify. If I hit Shift and I go mesh and add a monkey or objects. Then I'm just going to grab it on the x-axis and just move it out. You can see that the dimensions are difference compared to the cube. However, the scale values are still set to one because the scale values relate to the object compared to its original size. In order to delete an object, we're going to hit the delete key just to delete Suzanne and select our cube once more. Changing the scale will change the dimension values. If we manipulate the scale on the x-axis to a value of something like 0.5. You can see that we have harmed the scale on the x-axis. And as a result, half the value of the dimension as well. If we doubled on the wire, we double the dimension value on the y-axis. And we can also do the same on the z-axis as well. Notice that all of the other things that we demonstrated with the other two transforms are applicable here as well. We can type in mathematical values if we wish, we can click and drag a single value or multiple values the same as before. We can use Shift and Control to snap in increments and even combine the two together. And we can do all of these things down here in the object tab as well. So we can manipulate the individual transforms, use numerical values, et cetera. So we're going to finish now with a mini challenge. For this mini challenge, I want you to create the following. I want you to add various cubes to your scene. And I want you to stack these cubes on top of each other to create a tower of some sorts. But I want each of these cubes to be located. We positioned obviously because you've got to create a tower. And I also want them all to have a slightly different scale. Now think about the order that you would do this. I would recommend scaling your objects as soon as you create them. So for example, we have our first cube objects here. Let's just move it up to it's on the plane itself. So make sure it's on the blender grids. And then we're going to add another cube objects. And I'm just going to first full-scale this on the z-axis. And then on the y. Then I'm going to reposition it. So let's move it until it's just on top of our first cube and it doesn't have to be exactly on top. And then let's manipulate the rotation, perhaps on the z-axis. So all I want you to do is just create a random tower of cubes that have been scaled, rotated, and positioned to different values. You can use any methods that we have learned in order to achieve this, complete this little challenge. And then I will see you in the next video.
36. The Scale Cage Tool: Certain tools in Blender have different variations and we can access these variations form the tall shelf. The scale tool is one example of a tall that has a variance of its current form. So in order to access this variation, we need to go to the top shelf and locate these specific tool. With the scale tool, you can see that there's a little arrow in the bottom corner. The same is true for the select box tool, the annotate tool, and the Add Cube tool, which we haven't looked at yet. If we click and hold on the left mouse button, we can bring up a secondary menu. This would allow us to switch between the Scale tool and scale cage tall. So again, come to the appropriate Hall, which in this case is the scale tool. Click and hold on the left mouse button to bring up the menu and then come down highlights, scale, cage, and release. You can see we end up with a load of these white cubes surrounding our cube objects. This is the scale cage tall. The way disco cage tool works is that it uses the max dimension values of the objects, then positions points in the appropriate locations. Each of these points represents either a single axis, two axes, or free axes depending on its position. If, for example, we click on one of the little cubes that are located at the center of a specific face. Say this top face here. Click and drag. And then we can see we are able to scale on the z-axis. Now you can see the cursor and you can see that we have a dotted line. And that dotted line actually heads towards the bottom of the cube. Even though we selected the top. The reason why is because each of these little white dots that you see is paired with another. So this white dot at the top is paired with the one at the bottom. These two allow us to scale on the z axis. So click and drag to scale on the z-axis. But we use the white dot that is located at the bottom of the cube as our anchor points. So one of the dots is used to scale and the other is used to anchor the other side of the objects. This is different to traditional scaling. If we just use the blue cube here to scale on the z-axis, it scales up in both directions, up and down in order to increase the size. But with the scale cage, we only go up in a single direction. The bottom part of the cube remains exactly where it is because it is anchored based on this point here. We can also do the same on the x-axis by clicking on this white dot here, and on the y-axis as well. Now, if you were to select one of the white dots located on one of the cubes edges. You would be able to scale on a specific plane. So for example, with this white dot you see here on this edge, if we click and drag, we're able to scale on the x plane. If we select this one, then we are able to scale on the wire plane. Instead. If we want to be able to scale on all three axes, we just need to select one of the white cubes positioned in the corners of our key. So if we select this one here, we're going to be able to click and drag in all three dimensions, x, y, and c, using the paired white dot in the bottom corner as the anchor points for the scaling. So that we can better understand the scale cage towards behavior. Let's actually swap out with a slightly more complicated looking objects. Let's bring in our Suzanne objects. I'm going to hit X to delete, hit Shift a mesh and bringing the monkey objects. Now we still have the scale cage tool active. And you can see that the scale cage itself is still a cube. Remember that it is based on the max dimensions of these selected objects. So the longest dimension is the x axis here. So the cube is longest on this axis, as we can see in d dimensions here, the behavior is exactly the same. We can scale on 12 or three axes depending on which of the points we choose. Each of these points is paired with another, which acts as the anchor for the scaling itself. This is how we can use this scale page tall on different objects.
37. Add Object Tool Part One: In this video, we're going to be demonstrating the ad object tall. The add objects hold can be found in the tool shelf, while in objects mode, it's the last icon that you see down here. If you hover over this icon, it will bring up the tooltip labeled as Add Cube. If you left-click and hold down, you can see that you have several other options. So we have cube, cone, cylinder, UV sphere, and Ico sphere. But what is the difference between using list Hall and the traditional way of adding a new object. Well, let's start by just deleting our default cube. And as we know, if we go shift and I, we can add a variety of different objects and we have more options here than we do with this ad object tall. However, if we were to add any of these objects, for example, a UV sphere, it adds that object as a base shapes. So it's got a fixed size that we can edit after the fact by using the operator panel located down here. But the ad object tool works a little bit differently. So we just deletes our UV sphere and then go back to this add object tall, left-click and hold. Then go to add a UV sphere. You will see that a highlight appears around the cursor when it is inside the 3D viewports. If I click and drag, you can see that we are able to create a two-dimensional circular shape. If I release the left mouse button, what it then does is it allows me to adjust the height of this shape. Then I can left-click to create my UV sphere, and I've created it for a custom size. Now let me just go over that one more time. So I'm going to hit Control and Z. Then I'm going to left-click and hold down the left mouse button. I'm going to move my mouse cursor to create the shape of my UV sphere, but in two-dimensions. So in this case, on the x and y, if I want to give it depth on the z-axis, why can release the left mouse button and move my mouse cursor up or down to create the shape. You will see that there is a cube or a bounding box that surrounds the UV sphere. And this is what is used to determine the spheres size. So if I bring it up to here and left-click, we get our UV sphere, but it's slightly elongated because I have dragged it up. Quantity distance on the z-axis. This of course works with any of these other options for the AD objects all. So for the Add Cube option, we can click and drag to create a square. Then release the left mouse button and bring it up to create our key. We can also use the services of other objects to create more objects. So for example, I position my mouse cursor on top of the cube, click and drag, release and create the size of the cube. And I can do so on any of the sides of the existing objects. This will allow us to very quickly add multiple shapes of various sizes to our scene. Right now, we have a limited selection of primitive objects that we can use as the base. But you can see just how quickly we are able to add these objects to our scene to increase its complexity.
38. The Add Object Tool Part Two: Much like any tool, we can edit how these tours will behave before we use them by coming up to the header menu of the 3D view port. So for example, with the UV sphere tall, we can use multiple properties here. For example, we can define the depth wherever we want to use the surface, the cursor plane or the cursor for you. We can change the orientation. We can snap I of us who, the actual geometry of objects, which is what we were doing here to create the selection of cubes and cones. Or we could even change our segments and Ling's specific to our UV sphere. And there's also this one more hidden menu that allows us to locked whose specific axes provide a base height, et cetera. We're not going to go into too much depth about what each of these two straight away. But let's just manipulate a couple of them. So let's manipulate these segments and Ling's values. So let's reduce the amount of segments to eight and the amount of wings to four. Just as an example. Then we're going to find somewhere to add our UV sphere. Click and drag, bring it up and left click. This adds a UV sphere. We're pure segments and fewer wings. Now I'm just going to reset my scene very quickly. And that means deleting all of the objects that we have created. There are several ways in which we can do this. We haven't looked at the box selections hold Azure. But what I'm going to do is I'm going to show you how you can select multiple objects in the outliner. So we're going to select this cone objects. And then I'm going to come down to the cylinder objects, so I don't want to delete the lights. I'm going to hold down the Shift key and left-click. So this allows me to select all of the objects in between. And I'm also going to hold down control and click on the sphere and Sphere one. Then I'm going to come into my viewports and hit Delete to delete all of those objects. And that's just one way in which you can select multiple objects and have control over which of the objects that you select so that you can't manipulate them or delete them. I'm now going to change back to my cube objects. And if we take a look at the tooltip, you can see that we can use the Control Alt and Shift keys to change the behavior of this toll. So starting with the Shift key, if we click and drag and then hold down the Shift key. You can see why able to maintain the aspect ratio. So the cube will have the same length and width as long as we hold down the Shift key. Then if we release the left mouse button and still hold the Shift key, it will also keep the height the same value as well. We can position it above or below the plane. But if I left-click. You will see that we have the scale values, all sets of one which is expected, but the dimension values are all the same as each other. I'm going to hit Control Z to undo that. If we were to just use the Shift key for the length and width. And then release both the Shift and left mouse buttons, but release the left mouse button first, and then release the Shift key. We can then create the height freely, even though we have matched the length and width to each other using the Shift. So I'm going to show you that again. Click and drag to define it the length and width. Use the Shift key to lock the aspect ratio. Then release the left mouse button. Then release the Shift key to define your height value. Left-click to confirm. And this time the x and y are the same, but the z is different. I'm going to go back and this time let's try it, the Control key. So click and drag once again to create the shape of the cube and then hold down the Control key. This will allow us to enable snapping for the creation of our cube. So I can position to about here and release the left mouse button. Then bring it up to define the heights. We're still holding down the Control key. So let's go to about here and left-click. And here you can see that we have synaptic dimensions to single meters. So nine on the x, nine on the wire, and free on the Z. Now let's see what happens if we add our cube using the Alt key. When we normally click and drag, we have our starting points and then we define the length and width from the starting points. However, if I was to use the alt key, the behavior changes. So if I click and drag, then press Alt, then the position where we started form becomes the center of the plane that we are creating. Lava than it being the corner, as shown traditionally, by holding down the Alt key, that location becomes the center. So we can't create the length and width using it as the sensor points. Then release the left mouse button. And if we hold down the Alt key, it remains the center point of our creative objects. So if I left-click to create the objects, you can see it's positioning here. These are the different methods of being able to manipulate adding objects into your 3D viewports by using the add objects Hall. Use Shift Alt uncontrolled to change the way in which your objects are added. By the way, you can also combine these. So if we click and drag, hold the Shift key to lock the aspect ratio and also hold down the Control key. We can do both at the same time. Lock the aspect ratio for both the length and width, and also enables snapping as well. So then we release the left mouse button. Hold down shift if we want or hold down control if we want to define the shape of our objects. As a quick mini challenge. To finish off this video, I want you to create a building of sorts by using the primitive objects created with the add objects hold. It can be any object that you want or any building that you want. And you can add as many of these objects as you wish to add detail. For example, maybe I could just delete this. Add a cylinder. Use the alt key and Shift key to create the shape. And then size, like so. Then I might want to, for example, create some columns. So I might create one, he create one, he create one here, et cetera. And I might want to creates perhaps and Alina of some kind. Whatever you wanna do is entirely up to you. But make sure you spend at least five to ten minutes just practicing using this tool. That's the main purpose of this challenge. Just have five to 10 minutes practicing with a tall and see what you can come up with. Do that now. And then I will see you in the next video.
39. The Measure Tool: In this video, we're going to be taking a look at the final toll of our fruity tall shelf. And that is going to be the measure tool. The measure tool is, as you would guess, use to define the length in-between certain parts of an object or the length between objects themselves. To activate the measure tool, come over, click on this icon right here. Next, we're going to provide a few examples as to what's the measure tool that can do. If we hover our cursor over the measure tool itself. Eventually you'll get a tool tip that displays all the different things that you can do. Well, I'm going to do is I'm going to press 7 on my number part to go into talk orthographic view and just zoom in a little bit. Then with the measure tool active, we're going to click and drag. And you can see this white line that appears. So using this white line, we can position our measure tool anywhere we want. Now, using this method by itself isn't perfectly accurate, but you can get a good enough representation. So here from point-to-point, it measures at about 2-zero 76 meters. But that's based on where I've positioned it and is not strictly related to the length of our cube itself. To the liter measurement. Press X on your keyboard. Now let's take a look at some of the things that we can do to improve this. So as you can see here in the tooltips, we can use Control and Shift the change to behavior. So let's start with control. If we hold down the Control key without even clicking, you can see that a circle has appeared. Wherever our mouse cursor is positioned. So it's snapping to the edge of our key. What I can do here is I can left-click and drag while holding down the control key. And then we position over here. You can see it snaps into place at the other end. So if I release both the Control key and the left mouse button, you can see we have the measurement of two meters, which we know is correct because we have the dimension values set here. What we can do with this if we press X to the leads, is we can measure up, form different points. So for example, if I hold down control, click, drag and position over here. Release. And we're able to calculate the distance between the top corner of the cube and the bottom corner, which here it looks like it's about 3.46 meters. Again, let's press X to delete that. If we were to use the Shift key, however, rather than measuring form point-to-point, we would instead be able to measure the total distance between faces. When using the Shift key, we need to begin creating the measurement first. So click and drag, and then hold down the Shift key. It then snaps into place depending on the angle. So because my cursor is positioned on this front face here, it's measuring the distance between the front face, which the cursor is resting on and the opposite. If I was to move my cursor up to the top face of the cube. You can see that the line snaps form horizontal to vertical. So now it's measuring the distance between the top and bottom faces. If I position my cursor on this side, you can see it's able to readjust and position itself so that we can measure the distance between the two side faces. If you position it's in the corners, then you may begin to get slightly different behavior. So if we move it about here, you can see the actual measurement begins to alter just a bit. Now, not only can we measure a straight line, but we can also measure an angle as well. In order to do this, we must first of all create the measurement. So I'm going to hold down control position. Click, drag to the bottom here, and release. Then on the white line itself, I'm going to click and drag. And you can see this creates an angle. So what I may want to do is I may want to position it over here. So if I hold down control to enable snapping and release. You can see that by measuring the angle between these three points, we end up with a value of 45 degrees. If I take this point by left clicking on it, I can reposition it. So I could reposition it down here, for example, for another 45 degrees. Well, I could position it in the opposite corner here. And that gives us an angle of 35 degrees.
40. Annotations: In this video, we're going to be looking at the annotate tool to create annotations in our free the viewports. The annotate tool is useful for those who want to take notes while they are creating their scenes and models. The annotates all can be found in the tool shelf located. He. If we left-click and hold it, open up the sub-menu, we can see that we have four different types of annotations. For now, let's just use the traditional annotate tool. So with this selected, you can see that the cursor changes to a pen. If I left-click and drag, you can see that we are able to create a line. And as I move my cursor around, you can see we're able to create shapes. This is a form of annotation. Now if I was to orbit my view by pressing down on the middle mouse button and orbiting my view. You can see that the annotation has been constructed based on our view in the 3D view port. So if I draw a circle about here, apologize for the bad circle because I'm using the mouse. At the moment, the annotation looks flat to the screen. But if we orbit our view, you can see that that is based on our view in a 3D viewports. If you want to delete anything you have created using the annotate tool, then one of the easiest methods is to switch to the annotate eraser. Now if I just left-click and drag, you can see we're able to delete the lines that we created earlier. I can also increase the radius or my eraser up here. So I can click and drag to increase the size of my eraser. Left-click and drag in the viewport. And that makes it easier to get rid of my annotation. We also have the annotate lines, or this allows us to click and drag and create a straight line in any direction that we wish. So I can create my line, he create another one below, one here, and one here. And now I can start playing a game or noughts and crosses if I wanted to. The last of the four options is the annotates polygon tool. When we use this, we can left-click to create our first and then create our second by moving to a separate location and left clicking again. Then we can click a third time down here. And you can see we're able to create lines just by clicking on the left mouse button. So that behavior here is different because instead of clicking and dragging with the annotate polygon told, you are creating a singular points and then creating multiple points after that to construct a shape. I'm just going to get rid of what we've created here using my trusty eraser. And you can see with our lines that we created that the behavior changes depending on the type of annotation used. So with the annotate lines hall, if we want to erase an entire line, or we have to do is simply hover over one of the pointe shoes to construct it. And it will delete that point, but the other point will still remain. So that's something you've got to be careful with. So make sure to go over and deletes everything that you need to delete with the annotate arrays at all. Finally, let's take a look at some of the options up here. First of all, we can change the color of our annotations if we wish. At the moment it's set to a light blue. But if we click on this light blue bar, we can bring up our color wheel, and this will allow us to use any color that we wish. So say we wanted to use an orange color for our annotations. Just switch it to orange and then begin creating your annotation. Then by, by side we have this note menu. So we open this up. This actually brings up a layer system for our annotations. We can create different layers for the annotations. For example, we can take this notes layer HI, and we can hide it from view. So if I click on this Hide button, we hide at the annotation. We can also create another layer by clicking on this button here. And we'll move the commonly selected layer with this button here. So if I left-click on the plus button, we create a new layer known as Node.js 000 001. We can rename these by just double left clicking. And we can also adjust the thickness value for this specific layer. So for this layer, we can increase the file you to as high as 10 pixels. And then if we begin to create our annotations, you can see that the line appears much thicker. So these are the different tools that you can use to begin creating annotations. And annotations are useful for just keeping track of what you're doing in your 3D workspace.
41. An Overview Of Object Types: As you continue to use Blender, you will find yourself using different types of objects. In our default setup, we already have three different types of objects in our scene. These are the mesh objects, which is to keep the camera object and the light objects. There are many other object types besides these. When you hit Shift and I, to go to your Azure menu, you will find many of these different object types. So the first one on the list is the mesh object. This is the one that you're going to be using the most to create the large majority of your 3D models. The ones directly below it, the curved surface and metal ball options are also used to create free dimensional objects. However, they are constructed completely differently compared to mesh objects. So each of these basically represents a different workflow. You may not see all of the options on your screen that I do on mine because of the inclusion of add-ons. But in general, each of these object types can be used to create objects in different ways. In general, dough, you will be spending most of your time creating with mesh objects. And then sometimes you may even be using curved objects for certain object types. Surface and metal objects are used less commonly. Below that, we also have a variety of other object types used for different purposes. For example, if you want to add text into the scene, you can do so here. The Grease Pencil object type is used to begin creating 2D animations in your viewports. We can add what's known as MTS, for example, so that we can change the behavior of our existing objects in various ways. For example, we could use the empty object to define it, the transforms of a mesh objects. We can also bring in images with the image type, bring in light sources in addition to the one we currently have additional cameras, speakers for sound, force fields, for effects, and even collection into instances. So as you can see here, we have for a variety of different types of objects that we can bring in to our 3D viewports. As you continue to learn about Blender, you're going to be using more and more of these as we go along. For now though, we're going to be focused mainly on mesh objects, as these are the objects that you're going to be spending the large majority of your time using.
42. Comparing Transforms In Object Mode And Edit Mode: In this video, we're going to be doing a comparison of using the transform tools in object mode compared to edit spout. Well, I'm going to do is I'm just going to go and create a new file. So I'm going to go File new general left-click. And I don't want to say this. So I'm then going to open up my side panel and ensure my screen cast keys are enabled. Okay, at this point, we already know how blender behaves when we attempt to manipulate an object in object mode. If we hit G, we can move our object around our 3D scene. You can see in real-time the changes being made. 2d location values on the x, y, and z axes. We can look to x, y, or z specifically. And we can also change between location, rotation, and scale. Now let's go into edit mode and perform the same actions. So hit the Tab key to go into edit mode. Two things that you will notice. First of all, the cube looks very different. The corners look a lot more pointy. We've got almost like these small spheres coming out of them, as well as the change in the highlighted color. And the side panel looks a lot smaller as well. Whereas before we had the values for the location, rotation, scale, and dimensions, we're now left with the median values, the type of axes. So global versus local. Also some other options as well. So let's see what happens to our objects if we attempt to use our grab, rotate and scale tools? Let's start with the grab top. So if I hit G, It seems that all these normal, we're able to reposition our cube wherever we want. In the 3D view port, you can see the changes that are being made in real time. But this median value is not the same as the location value. Let's say I lock it to the y-axis, hold down control to enable snapping and position it five meters on the y axis. Then left-click to confirm. Do you notice anything that's different compared to before? Well, if you take a look in the center of our grid, you can see we have this small yellow dots. This is our objects origin. Let's take a look at what the values will read as if we go into object mode. So hit tab. And for some reason the location, rotation, and scale of the objects have all remained the sign, even though we're pretty sure we just changed the location just now. So what's the deal here? Well, this goes back to our previous video, looking at the different types of data. In objects mode, we manipulate the objects data, its main location, rotation and scale values. And these values are based on the origin point of the object in edit mode. However, if we go back into edit mode, when we manipulates the location, rotation, and scale, we aren't manipulating those properties based on the geometry that we have selected. Because we've selected all of the geometry of our cube, we're able to move it, rotate it, and scale it as we would in objects mode. However, these changes are not related to these values here because they were late to different data types. This is very important when learning to use slightly more advanced tools such as pivot points. And the reason why is because if we make changes in edit mode, compare the two objects mode, then we actually begin to change the behavior of our objects. When we do go back into object mode. If we attempts to move this object, the behavior remains the same. But the origin point that you see here will always be outside of the cube. The values that you see in the side panel relate to the objects of a gene and not its geometry. In this case, it's not the cube itself that these location values relate to, but the origin point of the cube object. Rotating however, is where it gets really interesting. If we hit the R key to rotate, you can see that the behavior of the rotation is very different to what it was before. We are now rotating around this singular points. If we hit the S key to scale, we can scale the size of the cube as before. But this time, because of the changes that we made in edit mode, as we make our cube bigger, it actually pushes the cube out away from the center of the scene. And as we make it smaller, it brings in towards the center. I'm going to delete the cube and just create a new one. And that's just review this. So the normal behavior allows us to grab, rotate, and scale with this origin point in the center. However, if we go into edit mode and move our geometry away from this origin points, say on the y-axis, we can effectively change the way in which our objects will rotate and scales. If we hit, are, we effectively orbits around this point. And if we hit S, we both increase our size or decrease it, as well as bring the geometry close up towards our objects origin.
43. Data Types: In this video, we're going to be introducing data types. And data types are different to object types. If we recalled an object type that can be found if we go Shift a to add a new object. So mesh curved surface that all different object types, a datatype is something slightly different. Our mesh objects, for example, actually has three different datatypes. And they all talk to each other with regards to how that object should be constructed. In our 3D view. The most basic of these data types is the object data. The object data relates to the object's relationship to the 3D view port. It's transforms, its location, rotation, and scale. We can manipulate our objects data in objects mode. Then we have the mesh data, which is associated with mesh objects. The mesh data allows us to make changes to the actual geometry of our mesh objects. And this is what we have when we go into edit mode. By the way, if you want a quick method of switching between objects mode and edit mode, you can press the Tab key on your keyboard. The Tab key is located next to the Q key. So if I press Tab, I go back to object mode. And if I press Tab again, we go into edit mode. The third type of data associated with our objects is the material data. The material data assigns the materials and textures to a model. It tells Blender how the surfaces of the model are going to react when hit by sources of light. We already know how to access edit mode in the 3D viewports. But if we want to access our mesh data, what we can do is we can left-click on the green icon next to the key. So if I left-click on the green icon, it changes the active tab in the Properties panel to the object data properties. Now don't let this confuse you. This is when we're talking about mesh objects. This is our mesh data. And up here we have our Object Properties tab, but this is actually the objects main data associates into its short forms. And then this relates to the geometry itself. So there's a very important distinction to make in between the two of these. In addition to this, if we open up the hierarchy for our cube objects, you can see the mesh data is actually located within the object. And within our mesh data, we have. We're material data. So if we select the material data here by clicking on this red icon, it takes us to the material tab in our Properties panel. So if we press on the yellow icon, it takes us to the object tab. If we press the green icon, we go to our Data tab. And if we press on this red icon, we go to our material tab. These are three different types of data that are all used to construct the look of our model. One more thing before we finish is that you can actually change what's mesh is being used with an objects. You can do the same with the material, but we'll come back to material was a little bit later on. So for example, if I create a second cube and just reposition it over here, you can see that the shape of two cubes is different. Now the name of each cube is different as well. So do you wish know is key? And the cube that has just been created is labeled as Cube 001. So they're given different names because no two objects can have the same name, must be different. The same applies to the mesh data. So the mesh data must be different as well when created. However, what we can do is we can take the mesh data here so we can browse our meshes and we can select another mesh. Keep in mind, I've got cube, got CO 001 active. If I select cube here, all of a sudden it looks exactly like the original cube, but we haven't done any editing to it. And this is an example of where the object data is different to the mesh data. The object is still cubed, 0, 0, 0, 1. But the mesh data that has been associated or assigned to this object is the same as the dates are used here. Now because of this, if I was to make changes to either of these models, those changes would be replicated on the other model as well because they're both using the same mesh data. I hope that makes sense. But to clarify in case it doesn't, we've been, we're looking at the three main types of data associated with a mesh object. Its objects data, which relates to the transforms of the object. So for example, we can go back into object mode and we can manipulate the transforms. And you can see when we do this that even though they share the same, that mesh data, they're not being moved at the same time. They're not being rotated at the same time or scale because the object data is still different.
44. Moving The Object Origin: Since we touched on the subject in the previous video, Let's continue talking about the objects are virgin and why it is important to understand how the object Origen works. The objects origin is the point of reference for your object. It creates the relationship between the object itself and the freebie space that surrounds it. The values that you see in the side panel are possible because of the object origin. Objects origin itself can be identified as a small yellow dots. It can be positioned anywhere as we saw in the previous lecture. You can have your geometry I have at surrounding your objects origin, or have the objects origin positioned outside of your geometry altogether. And this will change the behavior of certain tools, such as the rotation and scale. It's a little bit harder to identify at the origin of our camera object. We would need to select it in order to do this. So we can see the objects or gene is located here. Therefore, if we rotate the camera, you can see it rotates based on this origin point, which doesn't really move. We can also scale it from this position as well. The lights object is a little bit different. We can grab as normal, but adjusting the rotation and scale values doesn't appear to do anything in our 3D view port at this points. But more on that later on. Now back to the object O gene itself. For the key objects, we already know how to move the geometry away from our origin. But how can we move origin without moving the geometry? We can do this by going to the Options menu in the top corner, in the very top corner of the 3D view ports. We can open this up and shoes to affect only the origins locations or parents. Now let's focus on origins of this point. Left-click to enable. And you'll see gizmo appears around the object origin. So we get the x, y, and c axes. If I press a G on my keyboard, we can move the objects origin, but the geometry remains in place. I can also rotate my objects origin if I wish, and scale it as well. And the visual markers for the x, y, and z axes are exactly as I just said. There are visual markers which represent the change in location, rotation, and scale that he objects origin. So this is an easy way of moving your objects origin without having to move your geometry. And as we move it away from our geometry, this will change the behavior when we eventually rotate and scale. But make sure before you do this, to turn off this origins option, you can see there's a shortcut for this control and the period key. So we hold down Control and press the period key. You can see the gizmo disappears from the objects or login. If we grab, the behavior is relatively normal regardless of where the object O gene is compared to the cube geometry. But if we rotate, you can see that the orbit is much greater than what it was before, as is the scaling. Now what if you wanted to snap your objects or your gene back to your geometry or vice versa. Well, there is a way to do this. If we go to the objects menu up here and opening up, the second option down is the ability to set the origin. From here, we can set the origins of various locations. For example, I can set the origin to the location of the 3D cursor if I wish. So if I left-click, it snaps the origin, but the location of the 3D cursor, which is in the center of the blender grid. Alternatively, I can set the origin to the geometry. So for example, I could left-click on origins of geometry. And it will reposition my objects origin back into the center of my cube. This will of course, make changes to the location values because of the positioning of the geometry. Alternatively, I could also snap the geometry to the origin. So if I position the origin to 3D cursor, which is located in the center of the blender grid. Then go and set the geometry to the origin. I can't reset the positioning of my cube objects to wherever it was before.
45. The Various Interaction Modes: Different object types have different modes. These modes are used to access different tools in 3D viewport. Let's take the mesh objects for example. So we select the cube. We aren't currently in what is known as object mode. All of the different types of objects have an object mode. And this relates to the object, the free, the space that surrounds it. So in object mode, we can't manipulate its transforms. For example, its location, rotation, and scale in relationship to the surrounding space. If we come up to the top corner of our 3D viewports, you will see that we have the name of the company selected mode. If we left-click, you will see that we have a variety of other modes to choose from. Edit mode, for example, will allow us to begin at changing the actual shape and form of our selected mesh objects. We can do this by manipulating the geometry used to construct the object. So as a quick example, I can use the extrude tool. Go to face selects using this button here. Select the top face, and then click and drag. Now, I might have done that a bit quickly, but it's just as an example at this point where we have begun it to reshape our cube by adding more geometry, allowing us to create a brand new shape. And this is just one example of what we can do when we change our selected mode. So we go back up here, we can see we have other options as well. So in sculpt mode, we can use a variety of sculpting brushes to begin adding detail to our existing geometry. And below that, we also have modes for vertex painting, white painting, and texture painting. Now texture painting, you could probably predicts what that's for. It would allow us to paint textures and patterns onto our model in 3D space. Vertex and white painting though, might be a bit confusing as beginners. But don't worry, we'll reach these eventually and we will go into detail how we can use these in certain scenarios. Now, even though we have access to these modes for our mesh objects, the same is not true when we change to a different type. So who I select my light objects, for example, and go up to where it says objects mode. You can see we only have one option, objects mode. We can't edit this in any way. We can't sculpt this object in any way. So we're only left with the mode that allows us to manipulate the selected objects transforms. The same is going to be true for our camera objects. Because of the type of objects being used, it only has one mode objects mind. As you continue to use different types of objects, you will find that some of them have more modes available than others. The mesh objects hype is great in this aspect because it has so many different modes for so many different use cases.
46. Using Transforms With Geometry: When working with individual pieces of geometry, the transforms will behave differently depending on the type of geometry selected. So first of all, let's take a look at a vertex. If we select a single vertex, we will be able to reposition that vertex in 3D space and we can position it anywhere we want to. However, because it is a single coordinates, we cannot rotate a vertex, nor can we scaled it. So we are restricted with regards to our transforms when it comes to vertices. And each has a little bit more flexibility. So with an edge selected, we can lab and we position. We can also rotate. So we can rotate using the center of the edge. And you can see that the two vertices that connect the edge rotate around this points. Depending on our view in the viewport or the axes that we have selected. We can also to a degree, scale a single edge. But the only thing that we can scale here is the distance between the vertices that creates the edge itself. Beyond that, a face has slightly more flexibility when it comes to transforms. Again, we can reposition the face with the G key. We can rotate it from the center of the face in any direction or access to we define. And we can also scale it from the center of the face as well. So there's a little bit more flexibility when it comes to manipulating a singular face using the grab, rotate and scale tools compared to the edges. And there's a bit more flexibility for edges compared to vertices just based on how these geometry or types of geometry are constructed.
47. Cube Objects Challenge: So this is going to be a challenge video where I'm going to assign you a challenge and you're going to attempts to complete that challenge as best you can. For the challenge of this video, I want you to create free separate cubes, including the one that we already have. And I want you to be able to edit the geometry to create three separate shapes. They can be any shapes that you want, but I want you to try and make it reminiscent of a real-world object. So I'll give you an example. Could you make a cube look more like a pyramid? So I'm going to allow you now to just pause the video and create free objects just by manipulating the transforms of your selected geometry. 3, 2, 1. Pause and go. Okay, Well, I'm now going to complete the challenge myself just so that you guys can see how I would go about it. We're going to start with our first cube objects. We're going to hit Tab to go into edit mode. And let's first of all start with that pyramid shape. So I'm going to take my top face by going to Face Select and select it with the left mouse button. Then if I zoom in, I can easily change the shape by hitting the S key to scale my select the geometry. Notice that when you do this, the influence does not only occur with the selected face, but also any faces that are connected to it. So if I scale down to create my pyramid shaped to about here, we get the pyramid shape pretty much. And we can also see how scaling this top face affects all of the side faces of our cube. But there's not impact any faces that are not directly connected to the top one. Before we move on, let's just rename because it's important to get into the habit of naming our objects. Let's name this as pyramid. And actually I think this is a bit too tall for a pyramid. So I'm going to now hit the G key to grab my top face, lock it to the z-axis, and bring it down to about here. So that's the first object Done. Now I'm going to hit G, then C, move it up onto the plane here, and then just move it across on the x-axis. Let's move on to the second shape, fixed shift I mesh. Keep. I'm going to make this into a simple Periscope shape. Again, let's go into edit mode. Let's first of all take our top face, grab it, and move it up on the z-axis. And then I'm all I'm gonna do is select this face. He hit G, then z. And let's move down. And let's use the Control key to snap to increments. Let's move it down to something like that. And let's also just move it in Woods on the x-axis to about here. Left-click. And it looks a bit long on the y-axis. So let's edit that as well. Select this face, keep CI. Then why? Then Control? Snap it to about here. To create our next shape. I'm just going to rename this as Periscope and press Enter. Then we're going to take our objects, hit G, Then x, and move it across. Now note that when we constructed this object, the objects aubergine ended up in a interesting place. So we're just going to fix that very quickly. Go to Object, Set or virgin. And then we're going to go geometry to origin. And that repositions the geometry with the origin at the center. Now let's create one more shape using our cube. Again, hit Shift a mesh and playing and hit Tab to go into edit mode. This final object is going to be a witch. So I'm going to go to edge select, and select this edge here. Then I'm going to hit G, then z, so that I can move it down on the z-axis. Hold down Shift and Control to enable snapping. And just bring it down to about. He. Then left click to confirm. I want to increase the length of my wedge. So I'm just going to take this back face, hit G, then y, then control. And bring it out a couple of meters to about here. To create my wedge shape. Then go to my outliner. We name as which. And as you can see, it's as easy as that to begin creating custom shapes just by using the basic cube object and the ability to grab, rotate, and scale your geometry. Now in my examples, I didn't use the Rotate tool to rotate my geometry. And the main reason why is that with the cube, we have a very low triangle count. Triangles are basically what make up all of the faces that you see. So even if your face has four sides, if you were to export it into a game engine, each four-sided face would be split into smaller triangles. With regards to our cube or objects, we have so few of these faces that it would have been very difficult to create a usable object by rotating. But grabbing and scale. Absolutely fine for this challenge. So congratulations if you were able to create your free objects using the cube as a base. And I will see you in the next video.
48. Edit Mode For Multiple Objects: Whenever you want to begin editing objects, you must first ensure that they are selected and then change their mode. For example, with our key objects, we go up to the mode in the top corner of the viewport, left-click and change to edit mode. This gives us the ability to manipulate our mesh data while we are in edit mode. So we can grab geometry, we can rotate it, we can scale it, et cetera. However, we can also select multiple objects at the same time and go into edit mode for each of those simultaneously. To do this, we must first of all make sure that we have multiple mesh objects. Remember that the lights and cameras objects only have an object's mode. So this isn't going to work for them. But if I hit Shift and I and add a second cube, open up my operator panel at the bottom or the 3D viewports, and just move it along the x-axis so that we can see we have two cubes. Then I'm going to select both of them. For this, it doesn't matter which is the selected objects, the one with the orange outline and which is the active object, which is the one that has the yellow outline. That doesn't matter here. With them both selected. If we go into edit mode, we can go into edit mode for both of the objects at the same time. This is going to allow us to manipulate both of the objects as we see fit. So I can grab this and bring it up on the z-axis. And then maybe I can select this face and scale it to create a sort of pyramid shape. And I'm able to do that. I'm able to edit two objects at the same time in edit mode without having to press the Tab key, selecting a new object, and then hitting Tab again to go back into edit mode.
49. Using Local View To Edit Objects: Here we have an example of multiple objects in our scene. Let's say we wanted to edit the shape of our cube objects. Can you see problems here already? With regards to the structure of the scene? We have multiple objects, one of which is a cylinder that is really close to the cube objects. Now we could just move the objects around to create more space for When we were to go into edit mode and begin editing. However, there's a much simpler solution. If you want to edit a single object in a scene, select that object, then go to View. You will notice there's an option for local view and you can toggle the local view. He. You can also use the hotkey, which is the number part forward slash. So we decided to toggle the local view of the selected objects. We immediately zoom in on the key. If we zoom back out again, you will notice that all of the other objects have disappeared. They have been technically hidden from view. But it is actually a case of just using a different type of view altogether. So this is local view. And this is where we can focus on a single object at a time, regardless of how many objects there are in our scene. So now I can easily grab, rotates, scale, and manipulate the geometry of a single selected object without having to worry about any of the other objects in my scene. When I'm done editing my object, why can it come back to the view menu, local view and toggle Local view? Or I can use the number pad forward slash key to go back to my original view. So there are two types of view that we're using here. Global view and local view. Most of the time, we use global view, which displays all of the objects in our scene. But for when we are editing a single object, we can use local view instead. And that way, we won't have to worry about selecting objects that we don't want to select, or about them getting in the way of our actual edits. In the same way as being able to select multiple objects for edit mode. We can also select multiple objects that go into local view. For example, let's say if I wanted to just edit the cube and the plane object, I can select both these objects, and it doesn't matter which of these is the active object, as long as they're both selected, then press the hockey, the number pad forward slash. And it takes us into the local view for D2 selected objects. So now we can't select one of them and go into edit mode and begin editing. And we can even select both of them if we want. And hits have to go into edit mode, an edit both at the same time. If we want to remove an object from our local view, we can do so in object mode by selecting that objects, come into view, go into local view and selecting the option remove form local view. We can also press the MK to do this as well. So if I press M, it gives us a command prompts, making sure that we wants to remove this from our local view. Left-click to confirm. And all we're left with is our key objects. Again, if we want to go back into global view, just hit the number pad of forward slash to do so.
50. Duplicating An Object: In this video, we're going to be creating a duplicates of an existing objects. So for example, we have a simple cube objects. If we want to create a duplicate of this cube objects, we already know that we can just press Shift and I go mesh and select cube. Then we can just move this on an axis and we've got a second key. But this isn't duplicating. This is just adding in another primitive objects. What if you had something other than a primitive object? So for example, if we go into edit mode for our cubed, Let's just increase the size on the z-axis by hitting g density and just dragging up. Now this is no longer the default shape of our cube. If we hit Shift a mesh and cube and just bring across on the x-axis. You can see that they no longer look the same. We have the basic cube and we have the 12 we edited. So what we want to do here is we want to duplicate this mesh as it is. To do this, we can go to the objects menu with the cube selected. And then come down here to where it says duplicate objects. You'll notice there are two types of duplication. For now we're focused on duplicate objects. You can see the hockey for this is Shift and D. So I'm going to use the hockey hold down Shift and press D. As soon as I press the d key, you will see that the outline now appears white instead of yellow. If I was to move my object around my scene with my mouse cursor, you can see that we have actually created a duplicate of the existing key object. So I'm going to hold down Shift and z to look into the z plane. And I'm going to just position It's about, and let's just put it here. We can also duplicate multiple objects at the same time. So I can go Shift, left-click shift and the shift and z. So it looks at a zip line and position these duplicates about here. And now I've got a series of tall buildings that I can begin to create a city scene form. You will notice in the outliner panel that we now have four cube objects. The original cube, cubed got 000 001, qplot series 002, and cubelets series GO free. Every time we attempt to create a duplicate, it's going to add a numerical extension on the end of the existing name. So the more of these we add, the higher this number is going to go. If you remember our videos on object data and metadata, you will wonder whether or not these have the same mesh data. The answer to that is no, they all have their own mesh data when duplicated in this way. So the cube object has the object data of cube, cubed plus 001 actually has, in my case, the cubed root 0, 0 for mesh data, et cetera. So we can actually use different mesh data here. And that means being able to go into edit mode and editing them independently from each other. So we can select each of these and manipulate them in different ways.
51. Linked Duplicates : As mentioned in the previous video, there are two forms of duplication. The first form was the standard form of duplication, which is known as the appended duplicates. The second form of duplication is the linked duplicates. So that's demonstrates a linked duplicates and how it compares to an appended one. I'm going to select these three objects and delete them. Then we're going to select our original cube. And I'm just going to hit shift and D to create a traditional appended duplicates. Look, it's at a y-axis. Hold down control for snapping and just position about heat. Then I'm going to select the original cube. Once again. If I go to the objects panel here, we can go down and we can see that we have an option labeled as duplicates linked. The hotkey for this is Alt and d. So if I hold down Alt and press D, once again, the objects outline appears once. But if we move, we can see we've created a duplicated objects. If I hit Y and control, I can lock to the y axis in increments and position about here. So now in our scene, we have the original object, we have the upended duplicates, and we have the links duplicates. Now the first thing you will notice in the outliner panel is that they still all have different names. You cannot have two of the same object in your scene. So regardless of the form of duplication that we choose, the object that is created will become a new objects. While I'm going to do is I'm just going to very quickly rename these. So the original key is original. The second key is appended. And the third cube is the links. So let's take a look at the differences between these. The original cube has the cube mesh data. If we go back to where we have the appended duplicates and open this up. You will see that it has different mesh data cube dot 000 seven. If we open up our linked mesh, however, you will see that's the title of the mesh data is just cube, which is the exact same as the original. But what does this mean? Well, if we select the original object and hit the Tab key to go into edit mode, you will notice that we have also gone into edit mode for the lnx cube as well. Not only that, but the same geometry has been selected. If I select this font face here on my original cube, it selects the same face on the links duplicates. Through link duplication, you can edit multiple objects at the same time. Of course, this means that they will always have the same shape. Like so. Alternatively, if you create an appended duplicates, it will have its own unique mesh data. This means that when you go into edit mode for the upended duplicates, you will find that it is completely separate from the original object, as well as the links one. So we can edit this one all by itself, regardless of which form of duplication you use, one thing that will cross over will be the material. So if we open up the mesh data here for the upended duplicate, we will see that we have a material data block here labeled as material. If we open up our cube for our links objects, we get the same material. And then again than he. So if we go to the materials tab of very quickly for our objects, so we're on our upended duplicate commonly. And left-click, you will see we have the details 40 currently assigned material. It's named as such material. And this material is in fact used on all free of our objects regardless of whether they were linked or appended. This should cover all of the need to know stuff for the differences between using upended duplicates and lint duplicate as well.
52. Introducing Materials: Since we touched upon materials in our previous video on duplicates, let's go into a little bit more detail with what materials are. To keep things simple. I'm just going to create a new file. And with our basic default cube, we will already have a material assigned to this object's. Just go to the materials tab in the Properties panel to view the details relating to our material. If you need to expand your view, don't forget, you can always do this by hovering over an intersection, clicking and dragging to increase the amount of area taken up by a specific editor. So here we have the basic material with her husband assigned to our cube objects, and it is named as material. There are a lot of properties below relating to this material that we can edit, such as the base color, metallic values, specularity, roughness, transmission to make it glass, or even emission values to make it emit its own source of lights. So there's a lot here already that we can do with our material. The material, however, is only automatically assigned to the default key. It can be transitioned over to other objects that are duplicated form the original cube, as we saw in the previous lecture. However, if I was to delete my cube objects and replace it with say, a monkey objects. You will see that the material tab in the Properties panel is now empty. There is no material associated with my new object, even if it is just one of the base objects located in our Add menu. To add a new object, click on the New button that you'll see here. This will give us a material named material but 000 001. Can you tell why it's being given the name of thought 000 001? The reason why is the materials are separate data out from the objects. Now, even though we have deleted our cube object, the original material still exists in our projects. So when we create a new material, it's given a different name. To rename this to something more accurate, we can left-click and then name it whatever material we want. So for example, let's say we were to create a red material and click Enter. This changes the name to read, but it doesn't change any of the other parameters. If we want to change the base color, we can do so by clicking on this white bar located next to the base color. Left-click. And this brings up what is known as a color wheel. This would allow us to choose any color that we want for our selected objects. For example, I can bring this little white dots in the color wheel down to read. And it will change the base color to red here. And you will also be able to see that HE, you can also bring up a preview men knew to see the effects of the material on one of the primitive shapes. So here we have it displayed on a UV Sphere. As an example. We can also have it displayed on a simple keyboard object. So we can get a good idea of what our material would look like on certain types of objects. However, the spot changing the color of our material, nothing has changed in the 3D view ports. And that's because we are currently in what is known as solid period. When working in the 3D view port, there are different few times. These are different from the interaction modes located here. These modes are associated with the selected objects, but the views are associated with the 3D view port itself and they are located up here in the opposite corner. So we have currently selected sada solid view, which only displays the geometry of the object. We can also choose y fine to only show the wireframe or the edges of our objects allowing us to see straight through it. We can also go with our material preview, which displays our materials. And now we can see the red color of our current material. And also rendered view, which will allow us to breathe you how our objects will look if we decide to render an image or an animation. So we go back to our material preview. We can change our base color and you can see it changes on our Suzanne objects in real time.
53. Assigning Multiple Materials To An Object: In this video, we're going to be demonstrating how we can assign multiple materials to the same object. Currently, for our Suzanne objects, we only have a single red material assigned. The first thing we need to do if we want to add a new material to this object, is to add a material data slot somewhere where we can store our next material. To create this material slot, click on the plus button located up here. This is currently an empty slot that we can store material was in. You can browse existing materials by clicking on this browse option here. And you will see that we have two options. We have the material that was created with the default cube and the red material that we originally created for Suzanne. Let's just create a new material by clicking on the New button. This gives us material. Got COO, CFO one. We can rename this to something else. Blue, for example, to represent the color blue. You'll notice that the preview is independent of the material. So here we have the sphere displaying the current material. We can change this once again to any of the various previews that we want. Let's change the base color from white to a nice blue. Now we have an issue here where we have two materials located here, but only one of them is being displayed on the object. Once you create multiple materials, you will need to assign them to the individual faces of your objects. This means selecting the object and pressing Tab to go into edit mode. In our example, we want to assign the blue material to the eyes. Now, for Suzanne, the eyes are islands that are independent from the main mesh. If you don't remember, what islands are, we touched upon them when we use the joining tall in a previous video to join two mesh objects together. And each of those meshes became an island or a part of the overall objects. To select an Islands, hit the L key on your keyboard. So here we've selected one of the eyes. If I hit G, we can move it out of the head of Suzanne. I'm just going to hit the white mouse button to undo that action and press L to also select the second are. In edit mode. You will notice free new buttons, assign, select, and deselect located in the properties panel. Select allows us to select all of the geometry that has the current material assigned to It's, the select is the opposite. So it will deselect all the vertices and faces that have the assigned material. But of course at this point, the blue material is not assigned it to anything. So we're going to click on the Assign button. As soon as we do this, the color of the eyes changes from red to blue. What we can now do if we left-click away to be selects everything is we can begin selecting our geometry based on the assigned materials. So if I want to select all my mesh that has the red material applied, I can select the red material and then choose the Select option. This selects all of the geometry associated to that material. I can click the Select, deselect that. And I can also do the same with my blue material as well. So these are the basics of how you can assign multiple materials to your objects in Blender. Note that each individual face on your object can have its own material, but no individual face can have more than one material. So for example, if I was to select a single phase here, this one face can only ever have one material, but we can always choose which material we want to assign to that specific face.
54. Assigning Materials To Multiple Objects: Not only can you assign multiple materials to a single object, you can also do the reverse. You can assign multiple objects the same material. So for example, let's create another object. So this time, let's create a torus objects. And that's just scale it up so that it surrounds Suzanne. And let's give it a material. But instead of giving it a new material, can we give it an existing one? Well, we can do this by simply coming to this browse menu here. If we left-click to open this menu, you can see we have free materials associated with our current file, blue material and read. I can select any of these and it will add that material to the tours objects. The most important thing to note here is that the material is separate from the mesh data, the object data. That means that if you change the material you, of any given object, for example, the base color of this red material. Not only would it change the base color on the selected tours, but it will also change the red color on our Susannah object as well. Because in this case, they are both using the exact same material. If you want to use one material as the base for another and effectively create a duplicate of it. You can click on this option here to create a new material based on the properties of the existing one. So let's say if I wanted to make a faded red color for the tours, I can click here. And that makes it red dot 001. It's now a unique material. And I can go to my base color and just bring this white spots up towards the sensor just a bit, just fading the red color on my tours object. And now you can see that even though we have faded the red on the tours, it has not affected Suzanne because you Sam is still using the original red material. Whereas our tours object is using red dot 001.
55. Joining Objects: In this video, we're going to be demonstrating how you can make multiple objects in your scene become a singular object through a process known as joining. In order to do this, we must first of all ensure we have two objects in our scene that we can join together. At the moment I have my cube object and I'm going to add a second mesh to my scene. So shift and I mash. And let's select an IPO sphere. Then let's bring up the operator panel located in the bottom corner and just move it along the y axis. At this point we have two separate mesh objects, the cube object and the ecosphere. You can see these objects are independent from each other in the outliner panel as well. If we want to join these two objects into one, we need to ensure that both objects are selected. With the Ico sphere selected, I'm going to hold Shift and left-click to then select the key object. Now, the highlights of the two objects are different. One appears yellow and one appears dark orange. The other one is the active object. And this is important for the process of joining objects together. What's going to happen when we joined the two objects is that the non-active object will become a part of the active mesh. So when we join the two objects, we're going to effectively deletes the ecosphere as an object. And the mesh data associated with the Ico sphere is going to join the cube. To do this, go to the objects menu located here. Then come down to where it says Join. Now you can see that there is a hotkey associated with this tool. The hotkey is Control and J, so I'm going to be using the hotkey, but you can left-click here as well to use the join tool. So hold down Control and then press J to join the two objects together. You will see several things have changed. First of all, the highlight that surrounds the ecosphere has become a yellow. Second, the objects origin for the IPO sphere has disappeared. And third, the ecosphere object has now disappeared in the outliner panel. If we open up the cube, you can see that we still only have the cube mesh data. And if we open that up, we get the material which is basically the same as it was before. What's happened now is that the mesh date up from the IPO sphere has been added to the cube data. Here. If we hit the Tab key to go into edit mode, you can see that we've gone into edit mode for both meshes because they are now part of the exact same objects. When you have an object that has different meshes within it. These are referred to sometimes as islands. You can select an entire island, for example, by pressing the L key. If you have a bit of geometry selected on an island, you can also press Control and L to select all of the geometry associated with the selection. This is useful for creating more complicated objects that requires the construction of separate parts. But not only are we able to join it to objects together, we're also able to join even more objects into one. I'm just going to hit Control and Z numerous times until we get back to where we were before. So we have the cube and the oncosphere back as their own individual objects. Then I'm going to hit shift and I and add a monkey objects and move it along the y-axis. I'm going to add a novel object. So let's add a tourists and move it along the x. And then I'm going to add one more objects, a cone, and move it along the x in the negative direction. So now I have multiple objects in my scene, and they are all separate objects. No matter how many of these objects I create, I can always join at the mesh data into a single object. For example, I can shift and select each of these and then hit Control J to join. But always keep in mind which of the objects is the active objects? So in this example, which object is going to survive? The answer is the tourists objects. And you can tell that by the fact that it has the yellow highlights, which is different to the others. This is the active object and the axis object is what is maintained when joining. So if I hit Control and J, all of the other objects will become a part of our tours mesh. If we hit the G key to grab, we can grab all of these objects at the same time. If I hit R to rotate, you can see that they orbit around the origin point of the original tours. The same applies to the scale. So all of these different objects here, they're now part of the tours and are using the same origin points for the location, rotation, and scale.
56. Transition To Old Content: Hi guys, It's Joe here, and this is the transition video. So what this means is that we have now completed all of the available content for the latest versions of Blender. And we are now moving to the older contents of the course. Now, what does that mean for you as the students? Well, a lot of the stuff that we can learn in the older contents cannot be successfully applied to the newer versions of Blender. The core functionality of Blender doesn't change, but new tools are added, new workflows are created. And there is also a slightly different look between Blender version 2.92.7, which is the older content. Notes that we will be keeping this content for those of you who have already been moving through the older version of this course and wish to continue to do so. We are also going to be keeping this content for those of you who prefer to use blend up version 2.7 over 2.9 and beyond.
57. Welcome: hi, guys, and welcome to learn Blender Freedy Learning to use blender by creating over 50 models. My name's Joe Bailey, and I'm going to be your instructor for the scores. So what's this course all about? Well, this is all about learning how to become a free T artist on learning how to use Blend. Afridi blend Afridi is open source software that you can use for provide ity of different applications and goals. For example, you could learn to create video game characters. You could learn to create environments for animations. You could learn to create animations themselves. You can do just about anything that's definitively creative. By using blender, you can do even two D modeling. To an extent you can do free D modeling, rigging, animation, the creation of realistic materials and textures in your scenes, creating realistic scenes. The possibilities with blender are endless. You can even use blender if you're interested in working into the field or free D modeling three D printing or architecture, so the possibilities are absolutely endless. With blender on, this course is dedicated, showing you all you need to know in how to use blender so that you can move into any field with confidence. Today
58. The Blender Course: hi, guys, and thank you for enrolling in this course on Learning Blender Freedy on being able to create over 50 models. So this video she's going to give you a brief introduction into how this course is going to be structured so this course is going to be divided up into a series of different sections on each section is going to be dedicated to one sub topic within Blender. The first topic is going to be on the blender interface. Another gauge course will be focused on the very, very basics. That's just how to use blender and how to navigate in the Freedy world because it works a little bit differently to using two D applications such as gimp on Adobe Photo Shop. It's not a two d world that you're working, and it's not a piece of digital paper. It's an actual world, so you have to learn how to move around that Freedy world or nor two D screen on. Don't worry, it's a lot easier than what he sounds, so we'll be doing that in the first section. Then I will be moving on to blenders. Key foundation on that is the ability to create Freedy models. Three D modeling is a crucial skill set to learn for anyone who's interested in digital entertainment. With the exception of the music industry, of course, would then again, if you're looking at creating animations for songs and music. Then again, this is a place to pick up the skill sets needed to create those models and creators animations. So for blender modeling ease key on, they are always looking to upgrade ability to model all different shapes and sizes. So whatever you want to create, it's entirely up to you. This section is gonna give you the skill set to do just that, that this section is going to be in a way split between two different subsections. It's going to be split by the base tools with things like extrusion ins to subdivide told different tools that you can use on the fly in Blend Up creates subtle changes, and then we're going to be looking at modifies, modifies our shortcuts. They create major changes to our models in the press of a button. After that wouldn't introduce materials and textures. This is where we'll also introduce blenders, render engine system so blender has different rendering engines each with their own specific skill. Sets were going to be looking at the two key ones, which heart blend Orender and cycles render and how we can apply materials and textures in each of these two rendering engines. Then we're gonna move on to reeking. So rigging is the process off Creating skeletons for more complicated models so that we can , in turn creates more complicated animations. For example, if you have a human model, then you can't create animation off a human walking unless that human model has the necessary rig that it continues to move all of the different geometry, that sort of different faces and a little bits that make up the human model in order to perform the animation. So we'll be learning about the process of rigging in that section. Then I will be moving on to the next section, which is, of course, animation. So that's gonna be where we are actually going to learn to use all of the different tools to create animations. Oh, practically any length and any quality that we desire, what you have done, that we would have pretty much done all off the different sub topics that you would need to know in order to use blender adequately. So I will finish the course with an end of course projects. This end, of course project will give you the opportunity to take all of the skills that you've learned in the previous sections together to create your own model. Now, in this end, of course project I will be creating a robot called blender bolts, but you don't have to follow me in the end of section course. You can just create your own main model Now. That said, the title said, Create 50 models. So where do I create 50 models? So basically, at the end of some of our sections, we end up with some challenges, some special challenges where, based on our knowledge, you have learned you will be encouraged to go away. Aunt to learn how to create these models. Well, you'll know how to create the models, but it will be a matter of you actually going out and creating models yourself if you get stuck on any of these models that you feel that you really want to create. But you're just stuck on one thing, maybe it just doesn't look right. Maybe you're creating, say a spoon and you can't get it to be round enough. You can get the edges to be round enough. Always have. Look into discussions, post your problem, and then someone shores help you. I'm sure to help you as much as I can. So all of that will be coming up in this learned Blender course, where we'll be creating over 50 models, including our end of course project See there.
59. How the course is structered: hi, guys. So this course is going to be divided up into six sections. The first section is what were now which is the intro section. Distrust goes over the housekeeping rules off what you would do on any course in you to me . So we're gonna go through section assets in this lecture, how the courses structured what you're going to gain from this course etcetera. In section two, we're going to be looking at navigation. Now, you may think oldest is gonna be a short section is gonna show me just how to basically click and select. Blend is a lot more than that. It's a free D development software, So free D models being developed in blender. Therefore, the navigation system is a little bit more complex than what it would be if he was using paints to do some drawings on your Microsoft laptop, for example. So there's a lot to go through navigation and a load of different ways in which you can select the select objects a whole time of different what we call blender panels, which you can go to inform to do different things. So you've got blender panels for modeling blender panels for you. The mapping for animations, for creating textures of materials. The least is goes on and on and on. Then in section free, we go onto the modeling phase. Now, this is where we will begin to actually creates models in blender, and we're gonna learn how to do that. We're going to look at things like different most. So we've got things like object mode where we can select objects as a whole. We could edit mode where we can select a part of an object, and we can edit it. We also have modifiers which are extensions off tools that we can use for modeling. We're gonna learn what the's modifies do, so we're gonna be able to solidify objects. We're gonna be able to create a raise, which is basically duplicating objects. We're gonna learn how to add and delete parts of an object. If I could tell you everything that we were going to do in this course in this one lecture , we'd probably go over the 20 minute mark easily or modeling and not along. There's so much that we can do that. Then in section four, we've got textures short 14 textures and materials in this section, you're going to learn how to take the models you've created, and you're gonna be able to apply textures to de materials to them. And I'm not just talking about colors. I'm going to show you something called the Node editor, which is going to be your go to place for creating real life like material textures. You can create things like the metal used on cooking pans, for example, or ceramic bowls. Actually, creating ceramic objects is very easy in blender. So too, is making objects out of glass. You can make glass materials very easily on. We're going to learn how to do these sort things in section four in section five, we're gonna move on to something called rigging. Now, you may not have heard of written before, but basically wreaking comes before animation, specifically a more detailed object that has a lot of geometry. So, for example, if you would create a human being and you wanted it to move an animate like a human being, you would have to begin rigging your model. Rigging is basically to some of lies, creating a skeleton when armature on this amateur is used to control how your model moves. Once you've done that, we're gonna move on to animation animation that fairly straightforward. You're going to learn how to create video animations using objects were gonna start by looking at animating something called Mr Cube. So we're going to animate a cube, objects very basic animations on. Then we're going to do a little bit more advanced stuff in animations such as actually being able to create a human animation. So Section five and six in particular will link together because in Section five, you're going to actually create a human rig. And then in Section six, you're going to animate that week. Very exciting. So that is what you can expect form this course. It's a very brief outline, but there are several hours of content in this course several hours on modelling alone, I would say, because there was so much to learn in the modeling aspects. The course is also structured, so we give you a series of challenges. For example, by the end of the modeling phase alone, you should have created a minimum off 20 different objects before even considering moving onto textures. By the end of this course, you should have completed at least 50 different models. A lot of this will be homework, but a lot off the knowledge necessary to create all of these objects will be covered in this course. Make a note that this does not cover every single solitary bits about blender. It is a comprehensive course for beginners, so this will take you through a with the most important stuff. So the most commonly used modifiers have been selected. They will be included in the modeling course, a deep primary ways of texture, ring rigging, animations. All of these will be covered in detail, but I'm not going to go to over the top after all. This course is primarily for those of you who are entering blender or free D animation or free D modeling for the first time, or you have entered three D modeling but don't know too much about it. But there we go, guys. That's how the course is going to run. Andi, I hope to see you inside
60. How to install blender: Okay, so the first thing we need to do is we need to see how we can install our blender software . There are two ways in which we can install blender. The first way is by out the blend up website On the second way is fire steam. So we're going to show you how to download form the blender website first. So as we go into the Internet, I'm going to open a new tab on, and 1st 1 is gonna go Google and I'm gonna type in a blender. Now when you come down, you'll have a web site called www dot blender dots. Walk Going to click porn that's on it takes you to blenders Main website. Now, what that blender has at the moment for its website is a very nice layout. Give shored latest news on different things going on in blender how you can get involved. Development projects, etcetera. The most important part of this is this button here. This is your download button and it tells you the current version that blender is using. So at the moment it's 2.76 b. Once you click on that, it will take you to blend up dot or slash downloads, and this is where you download blender you can download. It's for I of our Windows Mark or Lennox, or even as a free BSD on. Did you have a different versions off blended that you can install in general for most Monday computers you want to download for a 64 bit? I don't think too many people will use 32 bit Windows computers now because that's mainly Vista on older versions of Windows seven. Um, a lot of us do still use Windows seven, but will use 64 bit on What you'll need to do is you just go to install. I don't worry about sip for Windows because we've got the installed a direct Andi click. So I'm form. I'm from England, so I would actually choose the Netherlands one. That's what I did. Or you could choose the USA version. It really doesn't matter which package you pick. They're all the same. Full mark. You would need to download the zip file first and then unlocked thesis fire sit file soy in your settings. So I'm not gonna click this because I've already downloaded blender, so I don't want a dime a blender for a second time. But that's how just clicking on any of these buttons were automatically start your installer and you'll go through the blender installation process, which is pretty much the same as any other software installation that you would have ever done. Okay, so thesis on way off downloading blender is formed steam. Now I'm gonna come out off internet, and I'm just going to find my desktop. So if you've got steam installed, then you can use steam to Dinallo Bender. So I'm going to click on steam, and I'm just going to enter my password. Just get a second to load up, Okay? So to find steam, we obviously have to go to store Andi. Then we're gonna go to the search bar, and we're gonna type in Glenda and we'll see Blender comes up at the top. Click now for me. Blend is already in my steam library because this is how I originally downloaded it. But this is where you can in store, blend up by esteem and it's absolutely free. Both VR the blender website on via steams system. You can download blend are for absolutely nothing why I've never had to pay a penny for anything related to blend out. That's one of the advantages of it being a community website. So those are two ways in which you can download blender. Once you've downloaded blender, we can get started with the tools that we need to complete the course and become blender artists. Thanks, guys, and I hope to see you in the next lecture.
61. Operating systems: Now, before we get into too much about Blender itself, I just need to close. Clarify some think PC clinics and Max. What's the difference? Within Blender itself? There is none. I just want to point out straight away, even in terms of loading and saving files, exporting and importing. We use blenders interface. We use blenders, own internal operating system for doing all those things. It's only when you are working with things outside of blender that obviously you would use your own operating system for. But I just need to clarify it that this is only when you're accessing files outside of Tennessee or not actually working on your blender project itself. But pretty much everything within Blender is identical from importing to exporting Teoh saving and loading to creating models that texting them. It's all the same because it all uses blenders own internal operating system, which is identical on PC clinics on Max. Very important that we just get that out of the way just to ease your mind thinking all. Maybe I've got the long type of computer for this. You don't as long as you have a Windows PC, Linux or Mark. It works exactly the same on all free. Thanks, guys. See you in the next lecture.
62. What do you need for blender: Hi, guys. Welcome to the wonderful world off Blender. Now the first thing we need to go over is what we need to complete this course. Or why advised that we have the first thing that we need. Most importantly, is a PC. Now, at the moment, Blender is not compatible for use on things like tablets or phones. I think we can use it on the Microsoft surface butts. I'm not sure because I don't have the marks off service at this point, however very, very strong recommendation that we use Blender on a PC. Now that PC can never be Windows. It can either be linen or it can either be a Macintosh device. Sawdust, emotion, Putin thing. The other two that you'll need on them or recommendations is a four size keyboard on a free button mouse. Now, the reason why we need a four size keyboard and a lot of us will not have this because we'll have notebooks will have, like chromebooks, a small mini appalls etcetera, and they won't have the number parts. The reason why I recommend having a four sized keyboard, even if that means buying an external keyboard and attaching it for us, be to your notebook is the number. Part plays an important role in how we conf you. Our projects in blender, basically the number part. Each number allows us to change our camera angle so that it becomes two dimensional on when we get the lectures regarding this, you're going to see exactly why it's so useful to use. However, I should stress that there are ways around no having a number parts. There are ways in which we can emulate this number part elsewhere, so it's no crucial to get a keyboard that has the number part, but it is recommended. The third and last thing that you'll really need in terms of hardware is a free button mouse now, like the number parts, blender has a way off emulating a free button mouse so that you can use it with your smaller notebook or chromebook. However, I strongly strongly strongly recommend that you get a free button mouse because that's scroll wheel in the center of the free button mouse. That you can see in this picture here is an example. This plays a very important role in a very crucial role in being able to navigate Blender on navigation is very important in Blender because it's Afridi Morning software on a two D screen. So you're Billy. Eat and navigate Your Freedy world actually is influenced largely by what you can do with that wheel mouse. Now, as I said before, yes, we can emulate the wheel mouse using blender. However, as you'll find out when we do that in a future lecture, it is very cumbersome, very awkward. My top recommendation is for you to have a PC, which you will have if you take in this course most probably a full size keyboard with the number parts, although we can work around up pretty well. And finally a free button mouse, preferably wireless, for greater maneuverability. But between the two. If you were stuck for money and you're wondering all shrike a keyboard, it's four size or free button mouse. 10 times out of 10 get the free button mouth. Trust me, it will make life so much easier. Okay, guys, that smile introduction is to what you need for blender. Make sure that you have, at the minimum the PC, which you should do on the mouse. If you don't, that's fine don't worry, will look into how we can get around not having a free button mouse. We can emulate it, as I keep saying, and I got stress. Yes, we can emulate it, so you don't absolutely, absolutely, absolutely need to. It's not as if Blender won't work without it, but it's just that you will find blend up more challenging without a actual free button mouse. So those are my recommendations, guys on day, I hope to see you in the next lecture.
63. First time in blender: Okay, guys. So in this lecture, we're going to open up, blend up for the very first time, we're going to be looking at the splash screen, the user interface on the default layout. So let's look into blender. So I've got a Windows 10 device, so I just press the windows key. I've got my wind, my blender I corn here and I'm just going to click. You can also opening up fire your desktop if you set the option in the installation process . So this is blender that the first thing I'm gonna look at is this box that's appeared in the center. This is our splash screen on this appears every time you open up a blender and your splash screen has a Siri's off. Immediate details. We have first of all, the version that you are coming using. So at the moment I'm using blend up 2.76 Not for those of you who have noticed in previous lectures. The current version available is 2.76 beat. Now The reason why I haven't downloaded or up dated to 2.76 b is the I've had a look have the fixes and updates in 2.76 B that there wasn't enough to really Woman's taking the time to upgrade its pretty much identical, especially for what we're doing in this course. So 2.7 sixes while be using if you don only 2.76 b. Obviously, that's absolutely fine. It won't make any difference whatsoever. We also have the date off installation off the current version. So I installed Blend up 2.76 on the 11th off October 2015 at 6 55 Fingers American time because I don't think I was up at that time a day. So I think that's American time There. Every single version off Blender has its own splash image. Now even 2.76 B has a different image to 2.76 So that's another way off finding out what you're blend. Our version is Ah, never Wife Unit is this image is normally the same as the image that you see on the home screen. So if you downloaded 2.76 b, you should actually have this image here that's in the background. All you might have this image, which is the current one. But that's because this one is representative Oplan a 2.76 so it's still 2.76 But there's just 2.76 unless 2.76 B. But as I said before, there's very little difference at this point. So going down, we have what we call interaction, and we have free modes. We have Blender Freedia Smacks, which is another Freedy software on Mile, which is a very famous Freedy software kind of the daddy of all fruity somewhere, if you will. This is used by many, um, Games development companies around the world use my many animation companies use my as well . The reason why I recommend blend up above mile is because blender is almost and I've used all with them blend that is very, very nearly as good as my. There are a couple of things about mile that I prefer. But the big reason why I recommend Blender is because this is free on these two cost hundreds, if not thousands of pounds, depending on what version you get on, that's pounds sterling. If you're looking at dollars, that or any other currency or the euro or anything like that, then the price is going to look even more astronomical. It really is, um, remarkable how these could be so expensive. And yet blender is completely free, which I find absolutely fantastic. Next, we have the links thes take you. Most of them take you to different parts off the blender website. We have the python reference pie Phone is thesaurus code. So it's the programming language that was used to create blender. We have a link to the blend a website. We have a link toothy manual credits on the donations page. I've had a look through them by obviously, unless you wanted to have a look at what was on the blender website, which is where most of you probably would have downloaded a blender from in the first place . Then you won't use the links. Really. What you will use, though, is the recent file. This shows you your five most recent projects and allows you to open these files straight form to get ghost. You don't have to go file open and find your projects. If it's one of the previous five projects that you've done, then you can open it up from here, you can also recover the last session that she used. So that's the excuse Me. So that's thes splash screen. I'm gonna click away from the splash screen on will have a look at our user interface. So if we go back to our slide thes interface and default layout basically the same thing for this some This is our default allow. We have our free de Vieux port, which is where we will make our creations. We have our info bar traditionally at the top. This is where we can render images and animations. We can change our render engine so different render engines perform differently. We can look at the stats off the count. Selected objects on. We can save load on change, our user preferences. In addition, we have the outline er, which tells us what is in our scenes of what is in our Freedy view ports. And we have the properties panel which allows us to perform things like modifications, apply textures, particle systems. We do all that fire Arthuis Properties panel. The last thing we have at the bottom here is the timeline. This is often used for things like animations, so that was an introduction to blenders interface. In future elections, we're going to look in more detail about how to construct our interface and how to use it. We're also going to be looking at how we can navigate in blender. Thanks, guys on. I hope to see you in the next lecture.
64. Other resources: hi guys. So this lecture is more of a resource lecture just to let you know or other things that you conduce with blender. So blender is a very powerful tool. You can do so many things with it. Free D Modeling to D Modeling animation Rigging, Texture ring But blender doesn't just work on its own. It's so much more effective as part of a set you'll need Certain Resource is such as Where can you get textures from places that are dedicated for two D design places that dedicated four games design? Remember blender conduce So many different things, but the one thing specializes in is free D modeling. So or I have. It's just the couple suggestions off what you can get, what other pieces of software you can get to further expand your skill set beyond blender, the first thing that I recommend is going to a website called CG Textures. This is a fantastic website. If you want to find a place where you can download a good texture, a good quarter, it's extra for absolutely nothing, so you don't have to create hand paint. It's extra yourself. You don't have to download it for £2.3 pounds, £4 wherever all the textures from CGE textures are free with the free account Andi, all you need is, as I just mentioned, all units do is create an account with them, and you gets I think it's 15 downloads per day, I believe, which is fantastic. So I definitely recommend guns, a C G with CD textures and just checking that out next you'll need. Or I'd recommend A to D design software that, yes, you can design things in two dimensions in Blender. But it's not a familiar way off doing things. My top I've got to hear. But I've got free recommendations. Gimp is a stand alone two D design platform. It is absolutely fantastic because you're you can work in layers. It's absolutely free. Absolutely fantastic. I would definitely recommend gimp second to D design software recommended that there be photo shop. This is probably the strongest to D design software that you can get, but you are required a subscription fee. So this one costs a little bit on. The last one is not here. But I found the auto. I did this power point. The last one is called creature. That's K R I. T. A. You search for a creator creator is basically blenders, two dimensional sister. So I think that I'm not certain, but they're very similar in how they are produced, and I think they are made by thes same community. So I think creature would probably work best with Blender itself because I think that's what it was designed to do off the free. I would probably recommend Creator, I think creatures, probably the easiest toe work with blender or freedom, allow layers. Any one of the free is a really good choice, so you have gimp, adobe, photo shop or creature. But just remember that while gimp and creature are absolutely free, Adobe Photoshopped requires a subscription, and I think it's something like £6 a month. Finally, your want. If you're interested in game development, you'll want a game engine. Now I'll say now that blender itself has a game engine, but Blender is a free D modeling software, so the game engine is not the Centrepoint off blender. Therefore, it doesn't receive perhaps as much attention as it would deserve. I would recommend using a more powerful game engine. I would recommend unity. First and foremost, that is the most versatile K mentioned that you can make that is the my top choice. And plus, the free version has absolutely everything you could ever want. My second choice would be unreal engine. Unreal Engine is a little bit more geared towards fighters and shooters and first person things. But at the same time, you know it's still a fantastic game. Mention my number one recommendation is Unity. My number two recommendation is on riel engine now. There are actually quite a few more resource resource is that I could throw at you, but let's not overcomplicate things too much. Basically what I recommend to enhance your skill, she said. You've got your Freedy modeling software in Blender. I would advise making account with SETI textures to have a source for your textures. I would recommends creator for your two D design software on unity for your game creation software. Of course, this is all entirely up to you. If you're not interested in any of this, that's absolutely fine, and we can just continue with the course in Blender. This is, after all, a blend, of course. Thanks, guys hope to see you in the next lecture
65. How to change the theme: in this let shop. We're going to look at how we can change the theme in Blender. We're going to introduce the user Preferences section. Andi, I'm going to show you how you can change blenders. Color scheme to suit you. So let's log in to Blender. Obviously, when we come up to blend up every time we open blender up, we get the splash screen to get with the splash screen. Just click away from the splash screen. Now, if he wants to change the look off your blender layouts, there are many things you can do in this lecture. We're gonna look at how we can change the color scheme. To do that, we have to go to file and then scroll down about how whites, where it says user preferences. We're going to click on user preferences and she will come up with a box. Now, if you're doing this for the first time, you will be on the interface box we have. We're gonna call it subsection, so we have seven subsections along the top. We have interface editing, input, Adams fame's file and system. The one we want is the Fame section so wanted to click on that on. You'll know you're on the fame section because the themes button will be the only blue button. Now we're in the theme section. We can begin to make changes to how art layouts looks in terms of its color. We can either do this manually as we have a whole variety of options that we can change. Oh, we can choose a preset. Let's start with the presets. Let's see what happens when we change the process. So if I click the drop down menu, I have a Siri's off presets that I can choose. I'm gonna go through each of them just to show you what they all look like. Back to black gives us a full black backgrounds blended 24 X money does the opposite a lesion, flat e lights, glove hexagon, our fame science lab, which is my personal favor. Soft image. Andi. Open to ambience. If you don't like any of them, or if you don't like what you create, you could always go to this button down here, which says Reset to default thing and click. What you can also do is if you want to have full control of your buttons. You can do this manually, So I will give you an example. If we scrolled on here, what can we change? I'm looking for something to change. This is all to do with the user interface itself. So I'm gonna go to menu So we'll see what happens when I changed the inner color for menus . So I'm gonna click on, and I'm going to make this brighter on. I think we'll go for a nice bright green on. It works in real time. So as you can see, all menu buttons have been made green. I'm gonna change this to yellow. Andi, see what happens when I change it to yellow. So keep it more on the buttons and we can see they've changed. Cut off instantly. Now, if I was to change the outline, let's see what that does, which is focusing on the menu buttons for now. So if I was, I'm gonna make this blighter and I'm gonna make it stand out. So I'm gonna make a noise pink. Difficult to spot on my computer on this video. But if you look on yours, you'll see that your outline of all your menu buttons is now a purposely pink color. We're gonna make that quite right. You should be able to see that bit more clearly. The item color, which is currently blue if I've changed at that, influences the drop down arrows. So on every menu button it changes the color of the drop down hours. And finally, in a selected If we make that noise and green, nothing seems to have happened. But watch what happens when I click on one of these buttons. Let's click on this button here, which we can see is yellow and now it's turn green. I'll go to obvious object mode. Button has turned green, You see, guys, so I'm just gonna bring that back up. The same concept applies for all of these. So I'm going to press the reset to default theme button. Andi, just to let you know that we have a syriza others here. But I don't want you to worry about thes right now because we haven't even introduced things like the no data to in text editor. So we're only going to focus on the user interface for Anna. But it is now time for your first challenge off the course for your first challenge, I want you to see if you can create your own fame, experiment with the pre made themes to see if you like the look at one of them or you can make one entirely from scratch. I don't want you to save your theme. I'll show you how to do it out in another lecture. But the reason why I don't want you to save your theme for now is because throughout this course, I'm going to be using the default theme on. I think it would be a lot easier for you guys if as much of what I was doing was on your screen as well. Okay, guys, I hope to see you in the next lecture.
66. Pre made layouts: it in this electric guys, I'm going to introduce you to allow the pre made louts in blender. We're gonna look at what these layouts are the primary way in which we can access our layouts on what each layout is used for. So let's log in to blender. So at the moment, as we know, we are using the defaults loud with five panels. We have our info bar outline up properties Freedy, Vieux Port on time line. But not everything we do requires these panels in facts we might require to do different things. How can we change our default layout to suit what we need to do? Well, if we come up to our info bar, we will find the word default just next to default. We have a menu button which says, Choose screen layout if we click once. We now have a Siri's off different pre made layouts, so I'm just going to quickly go over he with you. What? Each is mainly four. First of all, we already know a default allow, so when we come to it, we are going to skip it. Freedy view. Few full. We click. What's happened here is that our five panels have become a two panel system, so we have our info bar at the top. On the rest of the page is our Freedy few ports, but it is in our rendered states. So in other words, we can only see our objects. We cannot see anything else of up down at the main objects which in this case, is a cube. Next we have animation. This layout is used for when we want to begin animating our objects, we have the info bar at the top. We have the Freedy Vieux port. We have a smaller Freedy Vieux port. But if you can see here, the difference is that our cube is in what we called wire fame mode. Beloved, we have the outline er and then below that we have the properties. We have our timeline as before, but we also have what we call a dope sheet on on F curve, which we can use to manipulate our animated scenes. So, to sum of eyes for this we use the timeline to insert key frames which are moments in time where we animate the object hold our animation works is determined by these graphs here. Next we have compositing. This is used. Bought the purpose off UV mapping. In other words, this is where you will apply textures, materials on backgrounds to your object checks. We have the good area here, which is called the Node Editor. If we come down to its drop, we have, it's a node editor. This panel, he's our you, the image editor. We have our Freedy few port. However, our Pridie Vieux Port is in a camera perspective mode. So we're looking at the free de Vieux Port through the lens. Off our camera, we have our info bar at the top, as always, Andi to decide we have the time line at the bottom on the properties panel, going up down close to the bottom. Next, we have game logic. This is where if you want to do war advanced stuff in terms of creating games, this is where we can create games in blender. Is it possible to create a really good game using blender Absolutely days. No doubt you can create very good games and actually very high quality games using blenders . Game in Jing on the game logic layout. The screen comprises off our info bar are free de Vieux port, Our out liner. This empty square here is our text editor. We have our properties panel in this corner on The rest of it is made up off our logic editor. This is where a lot of game mechanics come in. So, to some wires, what we've got so far we've got Freedy few full that's bought looking at rendered objects. Animation is for when you're trying to animate scenes. Compositing is when you're applying textures and materials. Game logic is when you're trying to create the game motion tracking In this one, we have our Freedy View Ports, our movie clip editor. We don't have just one. We have two days. We have our movie clip edited down here. So actually, we have free of these. Very interesting. We have our time line at the bottom Onda. We have our properties panel the movie trick in the movie tracking so movie tricking a motion tracking basically involves importing a movie on animation into blender on it creates animations based on movements in that movie. Hence motion tracking scripting. This is where we have things like our text editor. Our python console which is where all the coding is based off of our free de vieux port. Seen Andi, our properties panel. This is pretty self explanatory. This is where you'll create different different scripts. So this is for programmers who perhaps once take a different approach to modeling or perhaps once get involved in the game logic side. This is also a place where you can create gains based on scripts you ve editing. This is where we unmapped are objects to prepare them for textures and materials. So this is a very important process. When we're pasting a material onto Afridi object, we want to make sure it pastes correctly. UV mapping allows us to do that. Finally, we have video editing which takes our animation are created animation. Andi allows us to do all different effects to it. Here we have the graph Editor, the video sequence editor Andi, the video sequence editor here But in animation mode. So, guys, that is your introduction to all the pre made louts. Have a look at each of them. Perhaps try a couple of things, see the sort of stuff that they can do. Most of these bodies, half of them will be applying in this specific course animation compositing default on U V editing will probably be the ones that we will go over our attention to most as we go through the course. Thanks, guys. Andi, I hope to see you in the next lecture.
67. Changing layout part one: in this lecture, we begin a free part are in how we can change our layout in Blender. What I mean by this is, even though we've got all those pre made louts, we can still create our own. That suits us. So in this lecture, I'm going to teach you how you can change the size off your panels. And I'm going to also teach you how to delete panels and create new ones. So let's log in to Blender, so the first thing we're going to look at is re sizing panels. Every panel can be resized to do that. The first thing I'm going to do is I want to make our timeline bigger. I think it's too small. Let's make it bigger. The way we can do that is very simple. We go to the point where the time line meets the Freedy View ports, which is this line here. Once you find it, your mouse cursor will change its shape. Then you ought to click and then drag. And as you can see dragging up and down to make my timeline bigger release and I've got a bigger timeline. The concept applies for any panel at any edge that connects to enough a panel stuff. I wanted to make these two wider I can grab either he or he click and drag. Now you may have noticed that when I click he and drug the outline er also increases in size at the same rate. The reason why is when the two lines meet, they become connected in that direction. So we have one line that influences both panels. Let's try making our outs liner bigger, click on drug, and we now have a bigger outline with smaller properties. What happens if we join lines together? So what if we join the line that connects the Freedy View ports of the timeline on? We join that in line with this one, which connects the outline er, 22 properties. Let's see what happens. We're gonna drag this one, we're gonna drag it done, and then we're going to make sure it can necks. Yet what happens now is not I've released. These are connected in both ways. So let's try increasing the fruity Vieux port, making it wider. Make sure we grab. And as we can see now, all four are increasing. But that was the same before. Now what? We grab this line and move it up and down. We can see that because the connection has been made. We can move not just the timeline, but also the properties panel. And we can do that any way we want. Don't forget that the info bar known as info can also be moved up and down. However, there is not much point to this, as even when we move it down. There is nothing above, so we'll move that back up. So that's how we change the sizing off our panels. But what if we wanted to delete panels to do that's we would have to click, but instead, this time we have to once click instead off. Let's click. So we white click on the line. We get two options. We get spit area and join area to delete panels. We have to click on join area, so I'm going to left click, and now I get a shade with an hour because more mouse cursor is in de timeline panel, it affects the timeline panel. So if I was to left click again, the timeline panel will disappear. If I hover my mouse cursor up to the free de Vieux port. We see the opposite. Now occurs, we have an arrow going up on the Freedy few port is shaded. I want to get rid of my timeline. So I'm gonna hover my mouse cursor over the timeline on I'm going to left click. And now the timeline has gone in addition, maybe I want to get rid off my properties panel. I don't want my properties panel, so I'm gonna come to the line. What? Lick, Join area, Hover over properties and left Click And there we go. Now, how do we add panels? We know how to change the sizing of panels. Now we know how to delete panels. How do we add panels? Well, to do that, every single panel has in one of its corners one of thes you'll see just a few lines coming out diagonally out of each panel. If we click on these on, we drag in either direction. We walk straight away, create a duplicate off that panel. So what I'm gonna do is I'm going to click and drag down. And as you can see, we have a free de vieux port duplicates were to freely view ports I could make Morgan Tudo . If I click and drag sideways, we can see we can manipulate it this way and again down here. So now I have four Freedy view ports. I could do the same with any panel so I can click here and create a second. Okay, guys, I hope you've taken or that onboard experiment as you will. And I hope to see you in part to off how we can change our layout in blender.
68. Changing layout part two: in this lecture, we're going to look at how we can change our panel content. So in a previous lecture, we looked at how we can change the sizing off our panels, how we could delete panels on how we could add panels in Part two. We're going to be changing these panels, so let's go in to Blender now. In my last lecture at this, where we finished up, we had six different panels. Now I want to make each of these different, so I'm going to keep this first panel as it is. The second panel at the other end will also remain as it is, but I want to change one to free on four. Let's see what options we have to change our panel. We go down toothy drop down menu in the corner or that panel. We click and we get a Siri's off options. We have python console file, browser info, user preferences out liner properties, logic editor, node editor, text editor, movie clip editor, video sequence Edit Are you be image editor, an Ally editor, dope sheet graph Editor Timeline and Freedy View. So we got a lot I'm gonna pick out for the purposes of this lecture, the ones that will probably end up using the most. So I'm gonna select node editor and no one got a noted itself. I'm going to select my file browser. So I've now got a file browser up where I can save and load work. I'm going to change this one to I you the image editor. Well, I can unmapped objects on. I'm gonna turn this one into my properties on. As you can see, I now have my own custom, Louds. So by now, we should know how to change the color theme off our blender interface. We should be able to deletes on ads. Panels changed a sizing of panels. And now we can change our panel content. We can even change the content off the info panel. Of course, once you've done that, you won't have those crucial options where you can go to file and render things so you have to come elsewhere, or even the same place. Andi recommendation. Always make sure that you've got your info panel, which we can see. It's now here. Thanks, guys. I hope to see you in the next lecture.
69. Changing layout part three: in this lecture, guys, we are going to be creating our own layout, using all the skills that we've attained so far, Andi. Then we're going to learn how you can save your layouts for future use in your project. So let's log in to blender. So by now, what do we know how to do? We know how to change the color fame in Blender. We know how to resize any and all panels. We know how to delete panels, how to add panels on how to change panel content. So what we're going to do is we are going to create our own pre made layout. So as we remember from previous lectures, if we come up to the Info Bar and click on this choose screen layout icon, we have a series of pre made Laos. Now we can add today's boy changing our layout and then saving that lie out. The way we do this, he's we have whatever pre made allow were on on. What we have to do is we have to press this plus button to add a new screen. Once I do that, it becomes default point Ciroc 01 Now I can rename this. So I'm gonna call this Joe's layout. Okay? So excuse me. So we've got our new layout name. Now we can start editing our layout, so I'm just going to do a couple of simple things. I'm going to extend the size of these two panels on. I'm gonna change my properties panel into I A I'm gonna bring up user preferences. So got my user preferences here. I'm gonna make my timeline a bit bigger as well. So I've got my new layout. So if I look down here again, I'll see that I have my layout for reference so I can go to default Animation Aiken dual the sames before. But now I've got one more. I've got Joe's layout as well. However, I can also delete active screens with the X button if I don't like it. So I compress X on It takes me to de whatever layout was either above or below it. So I think it's above. So it's taken me to the game logic screen. I'm gonna go back to dif ona So now you know how to ads on and deletes your layouts. Now bear in mind, you can also deletes the pre made ones as well. Now make sure that you don't do that. Well, it doesn't matter too much. As long as you don't save your preferences, I'm gonna show you why. That's the case. So I'm gonna create money. One Joe layouts. I'm just gonna do something very simple. Just might that Bega. Now, as you can see, we've got Joe layout amongst all the other pre made layouts. Yes. What happens when we open a new file? We want a day faux again on its disappeared. So basically, the way to keep anything we do is to create our new layouts. So you guys struggling a bit with my voice today on, we're going to create our layout as we just make a violin layout. I'm gonna bring this one up on change that to the UV image editor. Now, to keep this, I have to go file on. I have to save use up references, safe start up. While that's the one I want now, in a future lecture, we're gonna be going over exactly what this does. But basically, if you want to keep your layout, you have to go file and press save startup file. And in the next election, we're gonna show that in more detail. But once Now, I've got a challenge for you guys. So you're now going to create your own layout using all the skills that we've learned in the previous lectures. I want you to do the following things. I want you to change the number panels, change your panel content, change the size of the panels on change the color theme. Then I would like you to try and take a screenshot off your new layout on Post It in. The discussions. Do that guy's post in the discussions on I hope to See you in the next lecture.
70. Saving the start up file: in this lecture, guys, we're going to be looking at saving I start up file Andi loading things back to factory settings. So we're gonna look at how you want blender to look when you open a new project aunt, how we can revert it back to the default settings. So let's log in to blender. So from the last lecture, I've got my pre made Joe layout. Now, what I'm going to do now is I'm going to save this layout by saving my startup filed. To do that, I'm gonna go to file. I'm going to save startup file. I'm going to click. Okay. Also, you've got a hot key in the cave here which says control you and click. So now I've saved my startup file. What I'm going to do now is I'm just gonna change this to will go game logic. Ah, now I've done something key that I perhaps shouldn't have done. Can you see what it is? I've gotten rich off the default layout to buy a mistake. Let's see what happens when I open up my phoner. New reload startup file. Andi, it's No, I'm gonna make that more obvious. I'm gonna go to game Logic file New reload startup file And now whenever I open up Blender , I get my layout. But what if I don't want that? What if I want to get my default layout back again? Well, the best way to do that is to go file on Go one below safe Start file to load factory settings this war. Load that default, boil on, alert the user preferences. So I'm going to click load factory settings, and I now have my default file on what you may have noticed. Guys is a lot off my screen. The text is a lot smaller. That's because in the user, preferences for this course are altered the sizing of all the text. So that's how we save our startup file. So when we saved the star file, we get whatever layout we produced, so it does several things. The first thing it does when we say the startup while is it saves all off your user preferences so all of your user preferences get saved. In addition, it also saves all off the layouts that you have created. So as you can see, Joe's layout is now gone. It also saves any scenes or any layouts that you deleted. So we got rid off the default layout last time on. As a result, when we saved our startup file that the fault did not return with it. In addition, we could justus a tip if you created a new layout. So I'm going to go movie clip editor. I'm going to at a new screen and cool that show layout. Now I believe that I have made a mistake here. If I go to default, he felt remains the same cause default was edited before I changed the layout. That is a tip. If you do that, guys, and then you go file save startup file. Your default file is going to be exactly the same as your pre made layout. So what you have to do there is make sure so I'm gonna go file new on what's happened here . It's gone back again. Why has it done that confusing? I know, but this is where you got to be careful when you're saving start up files. Even when you load factory settings in a project that does not stick in all that to get things back to factory settings, and for it to stay that way you have to go file load factory settings and then you have to go file again and save startup foil because the default the factory settings must be saved again as the new startup file. So I'm gonna save startup foil. I'll change that to scripting file new reload start file. And now I've got my return. Default, lout. So, guys, I'm going to summarize all the points of this lecture. So we go back to our power point. We've looked at how we can change blender to look when we open a new projects and two week river back to default settings. So to some of boys, you can create new layouts by pressing the plus button and then starting in the nine, remember that when you want to create a new layout in order to keep your default pre made layouts, you must change the name first. That has to be the first thing that you do next. Then you can customize your layouts. Then when you're happy with it, you can go to file and save startup file. But if you still want to keep it on the default screen when you open up a new blend of projects, then make sure that when you save your startup file you were on the defaults lay out because that is also saved. So when you save the startup file, the startup file becomes any pre made layout that she were on when you saved it. So, for example, if I goto animation and I was to save the startup file here, then every time I open up blender it would open up with my animation layout, not my default layout. So once you've made it, once you've made your layouts. If you want to keep it as simple as possible, go back to default file Safe startup file place. Okay, I'm gonna change over. I'm gonna go file New reload Startup file. I've got my default screen. And now if I come to the drop down, I've got my pre made layout as well. Okay, Thanks, guys. I know that's a lot to take in, but just to some of our allies, obviously, to save a startup file, you go safe start file. To get the factory settings back, you have to load factory settings and den save your factory things as the new star file. Thanks, guys. I hope to see you in the next lecture.
71. The mouse emulator: okay, In this lecture, we're going to look at how we can enable the mouse simulator in blender. This is for those of you who have bean unable to acquire your own free button mouths. So we're going to look at how we can emulate that using our keyboard. So let's go into a blender. In order for us to emulate a mouse on our keyboard, we have to perform the following. We have to first go to file and then user preferences. Once we're born user preferences, we want to go to the input subsection and click. Now, if we look down this side, we will see straight away that we have mouse options. The common one all have selected is continuous crab, but we don't need to worry about that at the moment. The one we want to worry about is the one just above it emulates free button mouse. If we highlight it, we it says we can emulate the middle mouse using Ault left mouse Button and does not work with the left mouse Select option. But don't worry about the bit in brackets for now. So old left mouse click. So I'm going to click and then I'm going to save users settings. I'm then going to close my user preferences. Andi, if I press bolts Andi left click, I can now move around my screen using the keyboard. So the best way to do this is why I'm using cults by pressing down on I'm right handed. So I'm using the middle finger off my left hand to hold down the old button. The index finger on my right hand is holding down the left click button on the touchpad. Andi, my middle finger on my right hand is being used to move my few around Freedy few port. As you can see now, while this is for me the easiest way to use the mouse emulator, you might find different finger combinations to be easy off better. But none of them come anywhere close to just having your free button mouse. Which, by the way, I've just started using Andi. It does mess up a bit if you've got free D if you've got free button mouths and you enabled the mouse simulator So just to recap to enable or disable your Mel simulator, you go to file user preferences and then you go to the input subsection on under mouse, you'll click emulates free button mouths, which will allow you to move around your free the screen. I'm not going to disable this because it is no longer required for meats. And so I have a free button mouths on. I'm going to save use up preferences or say views of settings and clothes. Okay, thanks, guys. That's how we emulate the free button mouse on the touch pads on. In the next lecture, we will be doing the number pounds, so we will be learning how to emulate the number parts. Thanks, guys. Hope to see you in the next lecture.
72. Numpad emulator: Okay, guys, this lecture is four does of you who do not have a number parts on your keyboard. So this lecture is gonna teach you how blender can emulate your number, pat. So let's log in to blender on In order to emulates your number, Pat, you must go to file, use our preferences, go to the input subsection Andi In the last lecture, we looked at mouse. If we go a little bit further down, we'll see. Emulate Numb pat. Now for me, that's currently ticks for you. That might not be ticked. If you need to emulate the num parts, tick the box. If we read the description, it says main one to Ciro Keys. That's the wonder zero keys that formed the line above your keyboards letters. And these keys act as the number Part K's, which, as it states, is useful for laptops. More specifically, laptops without the number parts. So things like notebooks ultrabooks, chromebooks, etcetera. And there you go. That is how you emulate your numb part. Make sure that once you've ticked the box, say views of settings and close use up preferences. Thanks, guys. I hope to see you in the next lecture.
73. Navigating blender: in this lecture, we're going to be looking at how we can navigate in Blender. We're going to learn how to navigate the free D blender world on our two D screens. So it's not like to D software such as gimp or Dobie Photo Shop, where we can navigate wherever we want and know exactly where we are. Instead of using a two dimensional axis, we are using a free dimensional axes on in the three D View ports. We need to know exactly how that works. So we're gonna learn that in the upcoming lectures were also going to introduce you to the properties panel on what the properties panel was used for, as well as the outline panel or with that is coming up in the next Siri's off lectures.
74. The 3D viewport: in this lecture, we are going to be looking at the free de Vieux port itself. This is gonna be the home of all of your hard work. This is going to be way. You create your scenes and your objects. We're gonna look at what you start with when you open up your free de vieux port for a new project. We're going to be looking at how you can navigate your free de Vieux port on ways in which you can change your display methods over that is coming up in the next Siri's off lectures . Best of luck, guys. Hope you learn as much as you want to learn. See you in the next lectures.
75. Saving and loading: in this lecture, we're going to see how we can save on load our projects. So I'm also going to show you a special strategy you can use when modelling projects. So let's have a look in a blender. Okay, So I want to save my work. But 1st 1 guys do is I'm just gonna scale this a little bit just so we can get something that's a little bit different. So scale of rotate. And now I want to save to do that. It's very much like any other program we go to file. And then we have two options, save and savers. We also have a saved copy, which we will go over in a minute. Sudden. First of all, we want save as because save basically saved to cover blender file. But this is not a saved file, so we need to go save as first. Then we'll see that we have a Siris of different When I have a Siris of different projects that I've done yours will be empty ons. You may have to create your own folders, So if you open up, you may end up going to your documents slash blender on within that you may have to create different parts of your project. So I've created Modeling Folder. For example, any projects that you make in blender is saved as a dot blend file. You can see that all of these are dots blend. So if I simply type in test and come out, it automatically does the doc blend part. Once you've given it a name you can save as a blender file, and it's now saved and you can see it stayed because the location off your project, it should now be visible at the top of your screen. Now we can also save with save so we can press that button just to savers any files that have already been saved before two over white, the previous save. We can open our files one of two ways we can either click open, which will give us our fullest off files. So I'm going to give you another file just for example. So if one is going to my house project double click to open it up and there we go, it's opened up Morehouse projects. If I wanted to go back, I could go to open again or I could go to open recent, which gives me all of my recent projects in chronological order, which means that test stop blend is second on that list. I can click on go straight back to my test blend. So if I was depressed, save copy now, press save copy. This is similar to save us. So even though it says saved copy if I save it is test stop blend. It will overwrite it. So if we do that very quickly and go to save us, we can see that all it's done really is overridden it. A good strategy to do is each time you save a project isn't not to overwrite your previous save. What I mean by this is say, if you had made a mistake at one point and you had to go back and find that mistake, something wasn't quite right. Something didn't quite work out. You could just do control and said to keep going back until we found a mistake. But what if What if you couldn't find it that way? What if you tried? You'd have a look back. You Preston do so many times. But you just couldn't find out what was wrong. A better strategy to do would be to create multiple saves off the same project. So this is my first save. So Save has been to file. Next, I might say Scale up a bit more, I could go file, save us and we name it Test 001 and Savers Blender file. And now, if Sigh I wasn't happy with this and I wanted to go back to an original form. I could just open that up in blender so I don't have to go all the way back. So that's just a little tip for saving and loading. Therefore, you on that will do for this lecture. So that is how we can save unload our work in blender.
76. Screen movement: in this lecture, we're going to be looking at how we can move around our screen. So we're gonna look at how to move around our free D screen using the middle mouse button and also how to assume in and out with the's scroll wheel. Just a note. The scroll wheel is the middle mouse button. Or now what free button mouths on. And in this lecture, you're going to see just how valuable where is to have a free button mouse. So let's look into blender. So if we want to move around our free de vieux port, we have to do so by clicking down on our scroll button. So the scroll wheel on your mouse is also your third button. So you're gonna press that down until you hear a click, and then you can move your mouse around with your finger on the button, and you can now move around your Freedy few ports, very handy, told in addition to Zoom is a lot simpler, we simply scroll up, assume in and slow down to assume out. So to recap, we pressed down on the middle mouse button to allow us to navigate our Freedy few ports Onda we scroll up to assume in and down to assume out on That's it guys want. It's just practice that get used to that. In the next lecture, I'm going to show you how we do these things using the mouse emulator for those of you who do not have a mouse. So if you don't have a free button mouse, make sure you watch the next lecture for how to do this. Thanks, guys. And I hope to see you in the next lecture.
77. Panning the view: in this lecture at were guys be looking at how we can pan the view in the Freedy view. Ports were going to be the shift onda control slash command Keys to pound. What I mean by that is, if you're using a Mac, you'll be used in command. If you're using a Windows PC, you'll be using control. This will give us a greater control off our scene on. We'll also look at the main difference between panning on standard navigation. Once we've done that, I'm going to give you your first challenge off the course. So let's log in to Blender. So we already know that by pressing down on the middle mouse button, we can move around our Freedy Vieux port. We also know that we can assume in by moving up on the scroll wheel and soon out by scrolling down on the zoom will just the tip if you try to do both, so press down on the on the wheel and dense scroll up or down, it's will not work. OK, guys, So when you're assuming in, do not press down on your three button mouse, just scroll up and down as you normally would now to pond of you, we have to perform something slightly different. We're using the same controls, but we're going to ads to the buttons used. So the first thing I'm gonna do is I'm gonna go and press the shift button on my keyboard. Now, when I press down on my third mouse button, I am panning the view. So my view is no longer rotating around my cube objects. I can move my few to the left to the rights up and down on the's. Controls are in verse. That means that if I press shift middle mouse button and move my mouse cursor up, the view goes down. If I move my mouse cursor in a downwards direction, the few rises. If I move my mouth's to the left, the view moves to the right, and if I move my mouth to the rights, the view will move to the left. So the main difference between standard navigation on panning is that in standard navigation, we pressed down on the middle mouse button to rotate around our Freedy world, but panning where we put the shift command in, hold down the shift key and then press the middle mouse button allows us to move, but we are still BUE ing from the same rotated angle. Okay, guys. So that's the main difference between the two. What about control and command when I'm company using a Windows PC? But this will work exactly the same using the command key on a Mac. So I want you to press control or command whichever one you have. Plus it done on. I want you to press down on your middle mouse button, unmoved up. What you'll find is that it is a Nuffer form off, assuming so you consume with the combination off the control slash command on middle mouse button and then moving your mouse backwards and forwards. So there's two ways to zoom. You can scroll up and down on the middle on the scroll will, or you compress down on the scroll wheel button with the control key. Or come on key and move your mouse up to zoom in on down to zoom out. What you can do here is if you have multiple objects in your scene, you can pan your view with the shift key to place your desired objects in the center. and then you can begin to rotate around your objects. This is slightly challenging and does take some getting used to. So what I'm doing is I'm rotating. But as I pan of you, I can pan it around my camera as well as you can see so I can move it round to the back of the camera. So I have a challenge for you guys. Now on. I want you to try and pan of you so that you can navigate around the Cube, then the camera. Don't worry about the lamp. The reason why I don't want you to worry about the lamb is because number how far you assume out or in in blender. The lamp will remain the same size on the screen, so it's very difficult to judge that. But for example, with the Cube, I can scroll in and then I can move and rotate around my cube. We've standard navigation out. Then scroll out with the control key and I'll find more camera objects. And now I can try and seem around that you won't be able to pan around it completely because blend dot doesn't quite allow you to do that. with the camera order lamp. But that's just an idea of what you conduce. So give that a challenge. The main part of that challenge would be simply to be able to pan on and standards navigate your cube. That's the main thing that I want you to be able to do. Okay, guys, give that a go on. Then I'll see you in the next lecture.
78. Selecting different objects: in this lecture, we're going to learn how we can select different objects in our Freedy view ports as well as being able to select the objects in our outline a panel. So we're going to look at to ways in which we can select the objects in our current seen. So let's go into a blender. So first of all, we need to know what are the objects in our scene? Onda, We start with free separate objects. We have our default object, which is our cube in the center. We have the start up here. This is our lamp or light source. And finally we have our cama. This triangle shaped item is our camera. Now, how do we know if an object is selected? Well, an object will be selective if it is highlighted in yellow around the outside. So we can see if I assume in that our cube is highlighted in yellow of Andy. Outside this, as well as anything else that is color coordinated can be changed in the options off your custom themes. So if you decided to go with a different theme, then you might actually end up with a different color But if you are using the default, which is what I recommend you use for the purposes off this course, then your object should be highlighted in yellow. So as I assume out, selecting objects now, this is where blender is different to any other software that I'm aware off normally to select. Some think you would have to click on the left mouths button. However, that is not the case. In Blender, we click on the left mouse button and try to click our lamp. We can see that it's not selected because our cube is still highlighted yellow If we tried a cama, same thing. All that happens is this. Weeds red and yellow circle just hope is over where we clicked, but it hasn't selected are comma because our cube is still selected. In order to select an object in your scene, you must hover over it. Andi, Right click. And now that I've liked clicks, we can see that the cube is no longer highlighted in yellow, but the lamp is, and if we do the same with four comma, we can see that our camera becomes a more pure yellow compared to what the black it was a moment ago to indicate that it has bean selected on. Why? Why clicking? You can select any visible objects in your scene. Now, how do we go about this process in the outline, a panel will to do this. First of all, I'm going to make the outline a panel, which is this box. He I'm gonna make it fairly big. So I'm going to drag this across to about here and then I'm going to drag down so we can see everything so in or out Liner, We have our scene by pressing this minus button. Weaken close on. Open up the list. We don't need to worry about one when delays. For now, we don't need to worry about world. What? We want to be concerned about our thes free. These are our objects in our scene. We have all camera, our cube and our lamb in the outline er we comptel, that's an object is selected when the icon is inside, a yellow circle on the name of the object is funded in a white sponte, whereas the non selected items are highlighted in a black font. So we can see our lamp is selected here and it is also selected in the outline er, to select our objects we have to click on the objects icon in the outlawing are so fire left Click! This time our cube is selected. Now this is an important point. The whites click rule to select things only applies to the free de Vieux Port panel. It doesn't not apply to any other panel in a blender. These are all left click so to access file to render to change our scenes for a while that we use left click as we would in any other software. It is only in the Freedy view ports that you use the right mouse click to select an object or to select what you need. Select. So we've got our camera A cube on our lamp. So there we go, guys. Now we know how to select our objects both in the free D View ports and the outlaw Nick panel. Thanks, guys. On our hope to see you in the next lecture
79. The blender grid: in this lecture where guys go over the blender grid system used in blenders interface. We're gonna look at what? It's four. We're gonna introduce the free axes in Blender on. We're going to introduce blend up units. So let's log into blender. So the blend agreed is the grids that we can see here. Most of the squares are colored in a grey scheiding. So this is our blend. Agreed. If we see him out that blender grids doesn't increase in the number of squares, it remains in the exact same number of squares number I would assume in or out. So if we count, we've got 12345678 times to. So it's a 16 by 16 grids. This is our blend, agreed on. Its primary focus is to act as the center off our blend the universe, So this would always be the center points. No matter we go up down outs, in rights or left. The blend agreed will always represent the center in a default project. It also represents where any created meshes will appear, so the blender grid is basically a reference guides to use when creating your projects. another thing that blend dot references. Using the grid is the axes. We have a red line gonna cross the blender grids and a green line. The X axes is distinguished in red in blender, so this red line tells us what direction the X axes is. The green line is the Y axes, so we have red for X on green four. However, blender is a free D modeling tall not to day. So what about the said or Z axes? Well, that is not visible on our breath blender grids because the blend agreed itself is in two dimensions, the grid is not free. D weaken go under Onda above it. It is not free d like our cube so we can see the half. The cube is above the grid on half of the cube is below so very simple thing. But they're important to notes that the blend agreed operates in two dimensions. However, even though it is visible in two directions, blend the units which are what the blend agreed Represents are not. Blender units are the measurements used by blender. It is blenders, version off meters, kilometers, centimeters, etcetera to know what direction these that axes is going in. There are two things that we can no. Firstly, the set axes is the one axes that cannot be seen on the blend agreed. So does their axes. Must be going up and down because that is the direction that the blender group does not move in. In addition, if you have an object, you will see free lines coming out of that object. You have a red line or red arrow to signify the X axes, a green line or green arrow to signify the Y axes on a blue line. Or are bo to signify visit axis. And you can see when I pressed on there that a blue line appears. That is ours, Ed access. So those are free axes on that is all blend. Agreed. Each square represents one square blender units. So if I Khobar over just above my objects each of thes squares represents a blender unit. This is blenders. Default measurement off distance. So if I was to move my cube over one square to the left, I would be moving it. One blender unit to the left. Okay, guys. So that's the blend. Agreed. Thanks for watching guys on. I hope to see you in the next lecture.
80. Using the numpad: in this lecture, I'm going to introduce to you the number part on your keyboard on exactly what it's used for. We're going to be looking at the difference between perspective on orphan graphic fuse. We're going to create a two D workspace in L Freedy World by using the number part to view our objects from its top bottom, front, back and side views. Now let's see how we can do this in Blender, so I'm gonna go into Blender now. The first thing that you need to know is what few you're currently in. I am currently in what is known as user perspective mode. I can tell that I'm in user perspective mode because it will say so in the top corner. So it says user purse, which is short for perspective. There are a couple of ways in which I can change between perspective on golf. A graphic the first way that I can change between the two is by going to view at the bottom here. Andi coming up to where it says few pursed, dash off a graphic click, and now you'll see that your screen will have changed slightly. Now we are in user or photographic modes. To get back to perspective, we can do the exact same thing. And there we go. The second way in which we can go into off a graphic mode from perspective is by pressing the number five on our number parts, not the numbers above your letters on the keyboard unless you've enabled that is your number pads but the number pad to the side of your keyboard past where the enter button is . So I'm gonna press number five. Andi, I'm in off a graphic mode. Press five again and I'm in perspective modes. So there were two ways of doing that. But what is perspective on what is over graphic? Well, I'm gonna show you now the main difference between the two in perspective. If I moved this cube back along the X axis, I'm moving it further away from the viewpoint. So what's gonna happen is the cube should get smaller, select troy, click and move back on. As you can see the fervor back, it goes a smaller it gets. Now I'm going to I'm going to undo that by pressing control and said or command and said, If you're using a Mac, and now I'm going to perform the same task in or photographic mode. So I'm going to press five to bring up off a graphic modes on. Now I'm just going to pan it around so it looks a little bit like it did before. I'm going to do the same thing again. Grab and move away, but you'll notice moving off screen and jets. It looks like it's exactly the same size. So that's the main difference between perspective on off a graphic modes in perspective modes. You can change how you're cube or your object looks, depending on where you drag it in your scene. However, if you're in awful graphic mode than your selected object will remain the same size no matter where you move it to along its axes. However, if you assume in and out of your scene the effects if we go to perspective ah, pretty much to sign. Okay, guys, So I'm gonna move that back in, see him out pretty much the same, but go to off graphic mood modes. The same thing occurs, so in terms of assuming there is no difference. The key difference is when you are actually moving the object itself. So in off a graphic mode, the size does not change. But in perspective, the size does okay, so that's on pretty in depth. Introduction to blenders. Perspective on off a graphic modes. Now we're going to learn how we can view our objects in two dimensions. So whenever you have use of perspective or user or for graphic, then it means you are fueling your objects form on angle. This angle means that you are fueling your objects in free dimensions. So regardless of whether it's in perspective off a graphic mode, if it's used the perspective or user or for graphic, it is being viewed in two dimensions. However, there are different perspectives and different over graphics. Let's take a look at them, form the view button. First we have left, writes back front, bottom top on camera. We're not gonna worry about camera. For now, we're gonna focus on the others. So if I press the top button, we can now see that we are viewing our objects in top perspective on In this view, we can sell. It is a two dimensional view because we have only two visible arrows coming out of our objects. We have the war axes on the X axes, but there is no button or no arrow for the zed axes. We can also tell that this is in two axes by looking down in the bottom corner, which tells us which axes are visible in which compass direction. So we have war and X. But no said Next we have bottom view which fused our objects from underneath. As we can see once again, our axes in the corner has changed on the name is changed. At the top we have front view which now views the zit on the X axes we have the But if you which fused the object from the back right view which is said and why and finally the left few, which is also said and why. So those are our different viewpoints on DWI conduce the same whether we're in perspective or photographic. So gun for who? Those again on offer graphic. We can see that we can do the same thing. Okay. In addition, we can instantly move out off thes two d few points by simply roads hating our few ports by pressing down on the middle mouse button on moving on assumes we do that. Our few port changes to use are off a graphic or use of perspective, depending on which one you're currently using. In addition to changing it in the viewpoint, we can also use the number pad, so one is front free. These rights seven is top Andi nine. Ease reverse off your action or what that means is that if I went to one for a front view and I wanted to get to the back Orthodox view, I would press nine to go to the back if I wanted. If I went to the right few by pressing free but I wanted to go to the left of you, I would press nine to go to the left. We can also see which keys they are by coming to the view point point, which will tell us what's keys to use and we can see we can also use the control key or the command key if you're using a Mac to do the same. So if I wanted to few the bottom off my mesh, I can go control on one that is in fact, the back. I believe it's control 17 Yet there we go. And I can also change, of course, between perspective and alpha graphic just by pressing five. Okay, guys, That is how we can create a two D workspace in the Freedy world off blender. That's guys hope to see you in that the next lecture.
81. Navigating in walk mode: in this lecture, I'm going to teach you how to navigate your blender. Seen in walk mode. We're gonna learn how we can use the walked all for precise movement in our view ports on. We're also gonna introduce the hot ski, which is shift f. So let's see how this works in a blender. So I'm going to start a new file. Andi, if we go to file on user preferences were going to make sure that our walk mode is active. So we're going to scroll down in the input sections and make sure you're in the input subsection. And if we go down, will have an option that says few navigation. Now we have two types off navigation for this. We have walk and fly. Now I'm commonly selected on flight, so I'm going to click to select Walk. We don't need to worry about any of these for the moment. We just need to worry about the facts that we have selected Walk. We're going to save you. Two settings uncover out. So at the moment, you can see more mouse cursor. Yes, fantastic. So I'm going to activate walk mode now by pressing shift and f on all of a sudden my mouse cursor has gone on. Has bean replaced by what you can see as four black lines thes represent mites, hard hitting cursor. This targeting curse that is used to point me in the direction that I wish to move in. So if I am, it's at just above the cube and I press w on my keyboard. You'll find that your camera is moving towards that point and it will continue to do so forever. If you press s, it will move backwards or assume out De moves it to the right. So we're panning the view on I moves the targeting curse up to the left. So it's basically another way off panning the view In blender, we can also combine to a D. So, for example, we can combine w for moving forward on D for moving to the rights. Alternatively, you could do I S S D as long as they don't contradict with each other. So, for example, for press w and N s, then they cancel each other out. But that is walk moat in blender. And this is another good way off being able to move around more complex scenes with a greater level off precision. So, for example, I can mais my mouse over my objects press w to assume in on, say, if I wanted to view that part of the object that I can't see at the moment what have to do , decide after move more targeting cursor over around an area where I think I'd be able to see it. And then I can press w stop, move my mouse cursor around. And now I can see the part of the cube that I want to face. Okay, If I want to view the top off the cube, I'll move my targeting cursor above it. Press w Stop and move my mouse. Curse it down. And there is the top off my cube. Fantastic. So there's a lot of power in the water little once you get used to it. So give that a go, guys, practice that practice. Moving with that. Try moving around your object if he can give yourself a little challenges, you know? Okay. I want of you this face or this corner. Okay? I want to view the front of the camera. Little things like that just get usedto walk mode because it's a very powerful tool for navigation, especially once you start adding more and more objects to your scene. Thanks guys on. I hope to see you in the next lecture.
82. Navigating in fly mode: Okay. So having looked at navigating in walk mode in the previous lecture, we're now going to look at navigating in fly modes and how the flight all can be used for precision movement in the view port. We're gonna look at how we can switch between walking Floyd, and we're going to introduce the hot keys of shift F Onda ought f. So let's talk in two Blender. So in order for us to first switch from walk mode to fly mode, we have to go to file user preferences. Andi come down to where it says a few navigation on. We're going to switch to fly modes suck Once we've selected fly mode, Wigan's Go to save user settings, click and clothes. Now I'm going to enter fly mode by pressing shift on F in walk mode. I had a targeting curse up with four hours, one for the North Direction for West, East and South. In fly mode, I keep my mouse cursor, but instead off the targeting cursor, I now have a little box. If you do this on your screen, you might be able to see a little box with the corners visible as long as my mouse cursor remains in that box. Nothing happens. However, if I was to move, my mouth's slightly above where the boxes like, So my few starts to pan upwards. If I move my mouse cursor just below the box. If we just there we go, we can see it panning down. We can finish that by simply moving our mouse cursor into the target inbox on. We can do the same going rights and left very important to note that the further away your mouse cursor is from the box, the faster your view will pan. So if I move it quite a way to the right, you can see it speed up more and more as we get further away from the box. And as you can see, it's not just spinning around. If I move even further away, it's even quicker and quicker and quicker. So that's how we use the box. So wherever we move our mouse cursor, we can pan off of you too much, very hard. It'll we can use this in conjunction with the W. I s and the case, so I'm gonna press it. W once and now you may notice that the camera is gradually moving to ward my cube. I can change the direction of this by simply moving. Why? Mouse cursor. So I'm now look going towards the lamp, move to the right and it's a really great way of getting control. If you want to move faster, you compressed up with you again. The more times you press w the faster it moves forwards and by believing what mouse Custer to decide. As you can see, I can rotate my camera view, all of on a cube. Let's try and get a better view that so I'm gonna come to the corner off my blender grids. I'm gonna push s to stop impound my view around. Okay, so I've caught my key there. I'm not gonna move along. The blend agreed. So I'm gonna press w and when press it again to make you go a bit faster. So I'm moving along my blender grids and I want to turn light. It's just like a video game. Guys, look in CR box there. Let's come back up. Whenever I want to turn, I simply move my mouse cursor to the rights on dive turned with the blend agreed. So Fly mode is basically walk mode with even more depth or position. It does take a lot of practice to get it to work the way you want, but it can become absolutely fantastic when you're making scenes for animations on games. So that was the introduction to fly mode. I want you guys to practice that practice for I mode, practice walk mode as much as you can really get used to these tours because they're really , really powerful. Thanks, guys. Andi, In the next lecture, I'm gonna be showing you what's Colt F does. So stay tuned for that. Andi, I hope to see you in the next election.
83. Object mode: So while we're modeling in blend up, there are two blender modes that we're going to be using. These are objects mode, Andi at its mode. So this lecture is going to be ferry brief. It's just going to go over what objects Modi's on the sort of things that you can do in object mode. So let's have a quick look in a blender, so to make it easy, it's going to start new file. Okay, so when you open up your blender file for the first time, you will always start in objects mode, and you can tell that you're in objects mode by coming down to the Info bar on having a look at this drop down box. Which company says objects mode? If we click on the box, we can see that we have six options. We have object mode and it's mode sculpt mode, Vertex paint. Wait paint Andi texture paints. Now, for now, we're not gonna worry about any of thes. We will be discussing edit mode in the next lecture, but for now let's focus on objects mode. Objects mode is the mode where you can select different objects in your scene so I can switch between my cube, my lamp on my cama by pressing whites. Click. This is also the mode in which you can alter on objects, location, rotation and scale. Location is where your objects is in the scene, so object mode is where you can move and change the location off your objects. You can also rotate your entire object to any angle that you wish, and you can also scale your object so you can reach size your objects in objects mode. We're gonna be learning how to perform each of these, and there are so many ways to do them that you can really pick and choose. What star will you want to make One of the great things that I like about blender ease the facts that you can literally create your own style for modeling because there are so many ways to do just about anything. There are so many different ways to scale. There's so many different ways to rotate so many different ways to change the positioning off your objects on. We're gonna be going through pretty much all of them in the upcoming lectures. So stay tuned guys in the next lecture were guides introduced what edit mode is all about. And then we're actually gonna begin practicing what objects and edit mode can actually do. These guys hope to see you in the next lecture.
84. Edit mode: So we've had a look at what we've spoken about, what objects motives. So I'm going to introduce you to edit mode and why we use it. So edit mode is basically where you can bolt up the shape off your mesh. This is where the modeling is actually done. The modeling is not done in objects mode. The purpose of object mode used to play with the fundamentals off your shape. So where it is in your seen, what direction it's facing and how big it is, But in object mode, we can't change the actual shape. We can turn our Q into a ball. We can't make a dice our of it. We can't joy join and create really complicated measures like Busses or cars or human beings. We do all that in edits mode. At its mode is where we create under elite parts of an object Onda. We re modify that's objects, so that's the main difference. The main difference is in objects mode. You focus on the core aspects off location, rotation and scale on edit mode is all about the finer details. A couple more differences between the two, first of all, in edit Mose. You can only edit, and you can only select parts off the mesh or objects that was selected. So I'll give you a quick example with that in Blender. So I'm gonna go into edit mode now by going to object mode, press and press on edit mode. You'll see that the highlights off more cube has changed. We can now see the lines more clearly, and we can also see the points are highlighted. This means that we need can now select parts off our objects instead of the whole thing. However, we cannot select any other object. While we are editing our selected objects. In order to select our camera, we have to go to objects mode again to select notes. That's edit mode only applies to mesh. She's our keep. Roxanne, for example, is a mesh. A mesh is something that can be edited. Our lamp and our camera are not mesh objects. Therefore, when we come downs where it says objects mode, all we have for the camera is the objects mode option. We don't have any other options. We only get these options with mesh objects like our Cube. So that was all introduction to edit mode. Now, in our next lecture, we're going to begin looking at what we can do in object mode on at its mode on. We're going to pave the way for the rial funds. It begins. So all the modeling is going to take place Pretty soon, guys, Thanks for me. Much hope to see you in the next lecture.
85. Objects and meshes: so question. How do we know if an object is a mesh on what is a mesh? So let's find out, shall we? We're going to go into a blender. So we touched upon this in the previous lecture. When talking about at its mode, a mish is on object that you can as simple as possible. Edits so you can change the appearance off that object to be on its size and rotation. All objects, whether they are a mesh or not, a mesh can be altered in terms of their size and rotation. For example, I can roads hates this camera in the same way that I can rotate this cube. However, we cannot edit objects that are not meshes on the best way to tell if a objects is not a mish is quite simple. If you select the object and go downs where it says Eddie objects mode and press, if it does not have the edit mode option, then it is not a mish. So this comma is not a mish. The same applies for lamp. We select and we can see All we have is objects mode. That means the only thing that we can do to the comma under lamp is to change where they are in our blend the universe. We can't change how they look. We can do that. However, with our cube objects, Our cue is a mesh because we can edit it. Another way to tell if an object is a mesh is to look in your outside liner. So we're gonna make the outline a bigger so a mesh has a specific icon attached to it. It is this triangular icon next to keep this triangle icon means that the object is a mesh Next to the cama, we have a camera icon which signifies that it is a camera object, not a mesh object. And obviously with the lamp we have a lamp icon next to it which signifies that it is a light source. Objects not a mesh objects. So there you go. You now know how to tell what objects in your seen on Messi's on what objects are not. Thanks guys hope to see you in the next lecture
86. What is the mesh made of: so we can I know how we can tell if something is a mesh on how something is not a mish but what is a mesh made off. So we're gonna look at faces, edges and for Toussie's. So first thing we're gonna do is we've got our cube selected on. We're going to go into edits modes. When you enter edit mode, you will start off in for Tex Select mode. A vertex or 30 C is a coordinate in blender space In terms of your mesh that coordinates would be any off the points. So in this cube, any corner points is a vertex. So Vertex Select allows us to select these versus ease. Next, we have the age select mode And in order to change our selection mode, we have to come down to thes free icons here. So the shaded icon is Vertex. Select the next icon he's age select on. Then we have faced select. So I'm gonna go onto age select. And now I can select edges instead of courtesies. On edge. By definition, is 2 30 sees joined together by a line. That line is Theis age, so to verte sees equal one edge. Finally, we have faced select mode. So when we go into face, let mode we get little dots on every face, a week pan around. We can see that there were thoughts on every single face off our cube, and we can now select that entire face. A face is any flat surface that is formed by a minimum or free more edges. In the case of our cube, each of our faces is made up off four edges or 4 30 sees. So there you have it. Now you know what for theses edges on faces off. I know it sounds really basic at this point, but trust me, it's gonna undo that. It's very important that you know the difference between a free and also especially important, how you know, to select the different selection tools in a blender. Okay, guys, thanks a lot on I hope to see you in the next lecture.
87. Maximising panels: in this lecture. I'm going to show you how we can maximize our panels in blender, so we're going to learn how we can make a single blender panel appeared full screen by using the hockey control Andi up power. So let's stories in a blender. So you may get times where you want to see just one panel on its not particularly time saving to just start moving panels around. Sometimes it's better if you could just make the panel you want full size at the click of a button. To do that is very simple. First thing you need to make sure is that for the panel where you want to make four size your mouse curse, that should be inside the boundaries off that panel. You can then press control or command on a Mac on the up AL O on your keyboard, which should be located directly underneath your enter. Key on this will make your selective panel go full screen. For example, control up Onda. We now have a full screen panel. The only exception, of course, is that the info bar at the top remains so. Blender has been quite clever there. It knows how important that top panel weighs, so it's decided to keep it there for us to go back. Its very simple. The same hockey's required so control on up to go back to your regular view, and this applies with any panel that you have. So, for example, the outline a panel hover my mouse cursor over the panel. Control up and there we go, control up to go back on. We can do this for all. Panel was so controlled up on his our properties looks very different in full screen. This is a great way of just having a look up. What sort? Things are available. So here we get a really good idea off the sort things that we can use. Timeline is well, it works with any panel question. Does it work with the info bar at the top? Well, let's find out. Control up. Yes, it does. But when we expand this particular panel, what we get above it are lines off code which are not really necessary to us. So there we go. That is how you can maximize a single blender panel
88. The 3D cursor: okay in this lecture, I'm just going to teach you how we can use the Freedy cursor on what it's for. So let's go into blender. So the Freedy cursor is the red Andi white circle marked by a targeting curse that this is your Freedy cursor on. Basically, what this is used for is for centuries selected objects on being able to insert new objects into your scene. So if you wanted to add a new objects, you're saying you would add it to wherever the Freedy cursor is placed. So, for example, if I go at Mesh Cube, we see the Cube has been added where the Freedy cursor was. Now what? We have to be careful what is in Afridi view. Our cursor will change on a LFA three axes. Even though I'm not moving my few poor, we can see that it's well, actually, we can't see, but we can tell that it's actually not in the same place at any one time, not in terms just only of what we can see, but also in terms of the axes. So as you can see he from this angle, it looks like it's just above the keep. If I look on Pan don, we can actually see that the select button is underneath. If I select here, it's done above, still above, so we never know. It's very difficult to tell exactly where we have selected our cursor. So the best way to note this and how to put the cursor in the white Place is to lock one of the axes by fueling our blender into face in two dimensions on. We already know how to do that. So let's press one on on number parts to know, view, form our front perspective on we can see that we've got now apply Mu Cube in front on the second Cube that we added, we can see in the background now to tell exactly where our Freedy cursor is. We're going to bring up something new. We're going to bring up the Scene Properties panel to do that, to come to this corner and click where you see the plus sign and now you have your scene properties. If we scrolled on, we get the Freedy curse. That subsection on this tells us the location on the X War and said axes off our Freedy cursor now, at the moment we're in front perspective mode. That means that our curse actually only moved direction on the Zed's on X axes. So I want you as I move my Freedy curse around in different places. Keep an eye on the's free values. So I'm moving my cursor clicking or time left clicking on. You will notice that the X value changes with each click, as does the said, but with Y remains the same. That's because, in front perspective mode, we are only working in the set on X axes, which is a very hard, he told. If I was to say do a top perspective, you we are now working in the war and X axes. So if you're focusing your attention on these free values again, you will notice that it is thes ed valued this time. That does not change. Finally, if you were to move out of one of these two D views back into a user perspective mode and you began to left click in different places, you would now see that all free values change. So that's the introduction to the Freedy cursor on a couple of things that you need to watch out for its primary function is to be positioned where you can add new objects into your scene. Thank you guys. Hope to see you in the next lecture.
89. Resetting the 3D cursor: in this lecture, we're going to be looking at the free ways in which you can reset your Freedy cursor. We're gonna look at how you can resend to your cursor in the middle of your projects using the scene properties that type your coordinates on and using free hot keys. We're going to use N to bring up our seen properties. We're going to use shift, see two sent up cursor on shift s to relocate cursor or geometry. So let's begin to blender. So I'm gonna start my new file on. First thing I'm gonna do is I'm going to uncensored up my Freedy curses. So I'm just gonna click up here the first way we can restore this back to 000 which is the center off our blend. The universe is to do this manually, and we need to do that by pressing the N key to bring up the scene property. So press in and you now have the scene properties. Now, if we scroll down, we confined our Freedy cursor subsection to avert this back to zero or we need to ease left click drag downs that awfully are selected release and then just hype zero. Andi, enter. And there we go. Our Freedy cursor is now selected back at the centre off the blender universe. The second way of doing this is boy doing sent up cursor to do this. We Chris Chef shift, apologies shift. And then yes. Oh, not long. One shift and see. And there we go. What happens with the shift and see function is that it centers are cursor into the middle off our view port. But it also centers our camera view so that we can see a lot of the objects. The final way is by using shift and s. And this is the relocate curse. It'll So I'm going to place my cursor over here, and I'm gonna put a shift on s now I've got a series of options. The one we want to send to our cursor. He's curse up to center, or we can go curse to selected because our Cuba has not been moved yet. The cube is the selected objects, but I'm gonna go Curse of the center, click on the curse, as we can see, is back on 00 You see about I'm gonna do that one more time shift in s this time I'm gonna use curse up to selected press, and it's back to 000 Those two are the same because the cube, which is the selected object, was made by default. That's the coordinates. Ciro zero Syria on There we go, guys. We know no how to manually restore our Freedy cursor back to the center. We know how to use the shift. See toe to bring the cursor back automatically on the shift s soul for a more in depth way off Relocating our cursor. The big difference between shifts see, and shift s is shift See will always being art Freedy cursor back to the center off the blender universe whereas shift s will allow us different options in where we can place the Freedy cursor, not just in the center. Thanks, guys. Hope to see you in the next lecture.
90. Primitive meshes: So in blender we have what we call primitive meshes. We're gonna learn in this lecture what the's primitive measures are, how we can create them are introducing the new hot key, which is shift on a So let's log in to blender. So a primitive mesh is basically a pre made mesh objects ready to use it in blender. A prime example of this is your default cube When you open a new blender project when you open a new blender projects every time you do so you will start with the scene where you have the blender grids, the lamp, the camera on the keep. This cube is the primitive mesh off choice for when you start a new project. However, this is not the only mesh that you can select. If you come down to the info, bar the bottom off the free de vieux port and you click on add. The first Met mesh option will be mesh, and now you have a Siri's off primitive objects. Now note that I have a couple of add ons installed in blend up, so anything from single effort down you probably won't see because thes are all Adams the primitive measures that we're looking at are going down for Monkey down here, up to plane. So I'm not gonna take you through what each of these looks like. So first of all is I need to just move my cube out with way that will do so that sake we know walk you by now. Now a short cut to creating primitive measures and summoning them to the blender interface . He's shift on I once you do that, you didn't instantly get the add mesh option, and you can now choose your meshes. So the 1st 1 we have is a plane. This is a two d plane that is basically one face of the cube on this sort thing. This is great for when you're constructing things like walls, roofs, windows, any flat square objects. It's perfect as well for creating the flooring. For your seen as well, that's what it's most commonly used for. Next we have. If I go shift again under mesh, we have the key. We've already done that. Next is circle. Now the circle is actually a two D shape and we can tell it's basically we can tell this is actually a two deep primitive shape because if we look around, it has no face. It's just the circle, so we can see straight food. A center. This is used for creating things like wheels or anything. Cough a spherical shape. Next, we're gonna go shift. I again, we have a UV spear. Ah, you ve sphere, I'm gonna assume in he's a perfect ball, made up off two shapes, So most of it is made up off square shapes of four sided shapes. But if you reach the top, you will see that there actually made off triangles which come together to form the poll points. And this is used for creating things like sports balls and anything. Cough that client of shape next one we have is an Aiko sphere, and I close feel like you ve sphere is used to create spectacle shapes. However, the key difference here is that I co sphere Onley uses triangles to construct the spear. So even at the polls, we can see that it's all triangles all the way around now, while the spear itself will never be as smooth as a UV sphere, the advantage often Aiko Sphere, is that when you're applying textures and materials. They apply it better to aiko spheres than they do you ve spheres. Because the object itself is actually more uniform. So most of the time, it will be a choice of two. We go, you ve sphere, will you go like, Oh, sphere, it's up to you. Next we have the Sedona. I'm just gonna brush foodies now cylinder out once again used for creating things such as we always etcetera anything that spherical but needs sharp edges. The cylinder will be your best bet. Then we have the cone on. And finally we have the tours. The choice is a doughnut shaped. The cone is obviously a cone shape which you can use. Teoh, use your imagination. You can create things like hats with the cone hoops with the Turo stone nuts already made view there. So these are your primitive objects. You have a whole selection off basic objects that you can use to create your mesh creations . Andi, let's see what we've for gotten to. There were two more. If we go shift again, we have the great on the monkey. Now the grid. I don't want you to worry about because the greed is basically the plane that is subdivided . That means that the grid is made up off small squares to make the plane. The monkey, however, is Suzanne. So let's introduce you too, Suzanne the monkey on She's currently right in the middle of the toys at the moment, so I'm just going to track her above on. This is Suzanne. Now, Suzanne isn't what I would call a primitive object because it's actually a very complex objects compared to the rest. But she is the mascot off blender on. It's the perfect tall to use if you're experimenting, experimenting with things like textures, materials, etcetera because you can really see how these textures work with a human would face. Okay, I said, Those are your primitive objects. Thanks, guys. On day, I hope to see you in the next lecture
91. Origin: in this collection that we're going to be learning about origins. We're going to learn how to change the origin off our objects and why we may want to do this. We're going to introduce the hot key, which is shift control, bolt and see to bring up our origin options. So let's log in to blender. I'm going to begin, boy, creating a new file looking at that load up. OK, so there are two ways that weaken set origins the first way. And perhaps the simple way in this case is that just go over to the toolbar and click the drop down menu offsets origin. When we do that, we come across four options. We have geometry to origin, origin to geometry origin. It's Freedy cursor on origin to center of mass. Now, for our default object. When we open up blender, all four thes values are the same. Therefore, on that or what we pick, nothing will happen. So I'm gonna show you by purposely manipulating where the Freedy cursor goes and where the origin goes, how this works. So the first thing I'm gonna do is I'm gonna click my Freedy cursor up here so I got my Freedy cursor here. Now I'm going to move my origin point to the Freedy cursor. When I do that, you will notice exactly what the origin point is. So, watching carefully set origin, I'm gonna go origin to Freedy cursor. Click. And you will have noticed that the gizmo with the free card lines coming out of it has moved from the center off our cube to our Freedy cursor on. We can still use it to move our cube in the same way. It's just that the origin has now been moved. So that is how we can move the origin towards three D cursor. I'll do it one more time. So I've clicked my Freedy cursor over here. My objects in the centre, My gizmo, My origin is over here. So I'm gonna go sit over gin origin to Freedy Cursor and there we go. Now, I'm gonna take this a step further. I'm going to place my Freedy cursor over here. So now I have three separate points of interest. I have my Freedy cursor, my origin on my cube. What I want to do is I want to get my cube over to the Freedy cursor without touching the key battle. So I'm not gonna do anything to accuse this is all gonna bay in set origin. So the first thing I'm gonna do is I'm gonna go set origin. I'm gonna go origin to Freedy Cursor. So that's that one done. I've got my origin where my Freedy cursory is Step two set origin and I'm going to select geometry toe origin until we go. My cube is now where I placed my Freedy cursor Because it's followed the path off the origin. I could do the reverse effect. So I'm gonna go control and see to undo my last action on say, if I wanted my origin it to go back to my que But I didn't want to move the Cube. I just wanted to get the origin back to the Cube. In that case, I would go set origin. I would go origin to geometry. Click. And there we go. It does not move the Freedy cursor. It's simply moves the origin back to the Cube. The final one we have is origin to center off mass. Now, to do this, you don't have to follow makers you want done thes steps as yet. But what I'm going to do is I'm going to change my cube slightly by going into edit mode. I'm going to act a little bit of geometry to this side, Remember? Obviously you haven't been to what's depreciate, so don't worry when scaled out. Okay, So what I want to do now is I'm just gonna do one more thing. Actually, I'm just going to grab this and scale up there. We got fantastic. So if I go back to tap, the origin remains in the same place. What I'm gonna do now is I'm going to set my origin to the center off mass off my object. So I'm gonna go set origin, origin it to center mass click, and you can see that my origin has now moved. It hasn't moved outside off my object. But what it has done is it has moved to the points where mass is evenly distributed from. So as we can see, there's a lot off extra geometry of our que in this corner here. If we look for my top view, we can see that we've got a lot here. So our origin has moved up slightly and of course, it is moved out quite significantly because we've got a lot of this new geometry. If we go so origin to geometry again, it sets the origin it to the center. Point off the objects, Not the point where mass is evenly distributed, but where the shape is at its center. So this is the very center off our object Now instead, off If you see where my mouse is hovering over here, this is where the origin was before. Now it's been moved over here. This is the very center off our objects in terms off its geometry. So there you go A few tips. You you want to use this genuinely when moving objects about it plays a very important part when you're rotating and scaling your objects where the origin is because normally when you rotate and scale and I'm gonna be showing you examples of this in future videos, when you rotate in scale things, they can be dependent on where your origin is set. It is scaled dependent on your origin. Thanks, guys. Hope you learn something from that on. I hope to see you in the next lecture.
92. Grabbing and moving objects: in this lecture, we're going to be looking at grabbing and moving. Objects were going to learn how to grab an object and move it around our scene. We can use the hot key off G to grab. We're gonna use the escape key to escape in action. And we're gonna use the scene properties panel to place our objects at a specific point. Then I'm going to give you a challenge. So let's log in to blender. I'm gonna create my new file. So the 1st 1 we're gonna do is we're gonna learn the different ways in which we can grab our objects the first way in which you can grab an object ease by going over to the tour's bar. Andi clicking on the button that says translate, assume issue. Press the button. You can now move your cuba around with your mouse cursor. This is not an ideal form to do this, obviously, because your mouse cursor remains equal distance away from the cube on. It can be a bit disorientated if you wish to cancel something while performing the action press escape to cancel. So I'll repeat that click this button to translate or move on. If you're not happy with it, press escape before you press anything else to cancel the next way off. Moving objects is simply by clicking it. So I will right? Click the object. Hold down on Di can now move my objects around the scene once again to cancel it. I'm gonna press escape. I'm gonna do that again. I'm gonna click. Move around on before I Let's go off the mouse button. I'm going to press the escape key to cancel reaction. The next way to grab our objects is to use the G key. So our press G and I'm automatically in it translate mode, which means that I can move my cube to whatever place I deem necessary. So those are freeways off selecting your object. We can also go to the selectable for more in depth options. But we're not gonna worry about these for now. So to recap so far, we have the translate button in a tours bar. The escape caked cancel. We have the once click on hold to move Our cube once again escaped. Cancel on. Finally, we have the geeky to help move. Now we only press the G key on it locks us in that glad action UN escaped to cancel. So those are free ways in which you can grab your objects and begin moving around the scene . Another way to do this is to use numbers in that the scene properties panel. So the first thing we're gonna do now is we're going to open up seen properties by pressing in on our keyboard, pressing in to bring up our properties. We're gonna worry about the first free values in the location section. So we have a value for X for Y and said, using the's values, we can place our cube wherever we want. So for example, say if I wanted to two plus one to on seven and then our cube matches the coordinates that we tight this is a much more accurate methods off censoring our objects where we want it. In fact, it is the most accurate method because this is the way in which we can move to precise coordinates. We can also select two or free at the same time and move left and right to increase the values at the same rights. We can also select objects at the same time and type in the number value. Mind you, if you'd used this method, all number values will be the same. So if I type in zero on Enter, our Cube is back at the coordinates. Ciro 00 Okay, I think it's now time for a challenge. For your challenge. I want you to place your cube at the following coordinates. I want X to be a coroner off four blender units. Why two equals 4.5 on Said to equal 2.25 Once you've done that, I want you to screenshots your challenge on post in discussions to see how you got on do that, guys. And then I hope to see you in the next lecture.
93. 3D Gizmo and axis: in this lecture, we're going to be looking at the Freedy gizmo ons the axes. So we're gonna learn hearty used of Kismayo. Celeste Going to blender, not Afridi. Gizmo is put is the origin point. Basically, we learned in a previous lecture that this triple arrow objects with a yellow dot in the center. Our this is our origin points well, more specifically, the origin point is the yellow dot in the center that show origin point the free lines coming out of it. These are your Freedy gizmos, and these help you to move, rotate and scale your objects. In this lecture, we're gonna learn how they can be used to move your objects. So we have free arrows. We have a green arrow. This represents the war axes. We have a red arrow. This represents the X axes on. Finally, we have a blue arrow which represents the said axes. Very simply, we can use thes arrows to move our objects along. That's axes. So if I wanted to move my cube along, the Y axes are simply left. Click on the arrow and move. I can do the same with the Red Arrow to move it along the X axis on the blue Al Oh, to move it up and down Bizet access. And there we go. Simple. Was that guys using the's free of owes. You can move your cube toe wherever you want. Don't forget, though. You can also use the properties panel, the Tools Properties panel to more specifically sent to your objects in a specific place. So I've got a rough idea now. Thanks that the gizmos where I want to put it now I can refine it. Some 4.1 minus pi point free on and 5.9, I'm going to refine it so that it's four minus 56 So I'm gonna go full minus five and finally six until we go. I've got it in a very specific place, and I think that's a good looking place to start making my seen Fantastic. Now, then it's challenge time. From what you've just learned, I want you to create on additional two more objects in addition to our cube. So you have free in total, and I want you to position all of your objects on the screen using the gizmo. Once you've moved them across certain places, I don't want you to use the properties panel to sent up your objects. So basically, what I mean by that is if I go back into blender making sure that your free values are whole numbers, or at least to one decimal point do that now, guys. And I hope to see you in the next lecture.
94. The snapping tool: in this lecture, I'm going to introduce you to the snapping toll we're gonna use snap to be able to move our cube around with more precise control than we have in the past. Once we've learned how to snap, I'm gonna give you a challenge. So as we go into blender, I'm going to start my new file. So in blender, we have what we call snapping. This is where we can snap objects or parts of objects are over to the blender grids or to other objects altogether. For now, we're gonna worry about using the snapping tool for precise movement. That is the point of this lecture. So in order to activate the snapping tool, I must come down to the info bar and you will see an icon that looks like a magnet. If you hover over it, it will stay snap, drawing transform by transform. We mean moving around. If you can see up in a toolbar. The subsection in which translate is under is called transform. So snapped your and transform is what we want. We can also see that we have a short cut to activating this, which is shift on tap. But we're not gonna worry about that at the moment. We're going to go click. So now we've activate its snapping. Now watch what happens when I press tree to grab my object in attempt to move it around. Swipe fresh G Only the up and we see as a movie around its snapping in what we call increments, which is very useful to have if he wants to play sure objects in specific spots. So I'm going to left click to confirm. I can also do this with the gizmos, so I'll click on the X axis gizmo. It moves mark you backwards and forwards in increments, you may know, is that it is using the increments off the blender. Great. So filling up the squares each time we can do that on all three axes. So this is a free dimensional toll moving across the X y and said planes, if we looked down, we have a series of options when on the snap elements off increments, which is what we will now it snaps in increments to the blend. Agreed. So this is the mild we want when we are moving our whole objects, the options above we will go through in future. Lectures on these allow us to snap two faces edges on for Toussie's, but for now, it's challenge time. So I want you to move your cube to the following coordinates. X two white. One said six on I want you to do this using this natural. There are two ways in which we can reference this. When we grab, I move our Cuba along a certain axes. We will see a number were placed the entire info bar. So I'm going to move in the X axes now. And I want you to spot the number in the corner because I caught. I won't be able to move their mouths over here. So click and you should see in the corner that it is the colon Ciro, 0.0 bracket 000 global. Now, as I move across, I can see that the value changes with each increment. So this is one way that I can learn exactly where I'm placing my objects. The second way, which is a way you may have already guessed, is by pressing n un bringing up the scene properties panel. So once again, I can crab on Each time I move, so does Theo. X value. So using those points of reference, I now want you to complete the challenge. Remember, the cube must be placed in X coordinate to why quarter net one and said, Coordinate six. Good luck guys on. I hope to see you in the next lecture.
95. Changing the Gizmo: in this lecture, we're going to be looking at changing the gizmo on going to introduce Shoot to how to rotate using your gizmo and also how to scale using your gizmo. Once we've learned them, we're going to move on to a challenge. So let's go in to Blender. So we've got our cube here, and we've got our gizmo with the free hours coming out of it. If we look down to the info Paul, we can see that we have a gizmo icon known as the free D. Manipulates up widgets bite by clicking on the widget itself. Weaken fact turnout gizmo on and off. This is particularly useful when you are in edits modes, and you don't wish for your gizmo to be in the way because in at its mode there's no point in having it. It's also useful when if you want to select objects from certain angles, then you may find the gizmo gets in the way. This is a very useful tool of ensuring that doesn't happen next to the free. Next to the gizmo, there are several I corns. The next free order ones were interested in the currently selected icon is the translate or corn at the moment are gizmo is set to translate mode. This means that we can use our gizmo to translate to move our objects. Bear in mind that from the previous lecture I've still got my snapping tool applied. So I'm gonna turn that off now. What we're gonna do is we're going to change our gizmo from translate mode to rotation mode And we're gonna do that by clicking this button here. So we click Onda. We now have our rotation which it we can see. The appearance has changed quite a lot. However, the principles remain the same. You click on the appropriate color to move your objects in the appropriate axes. So if I click on the blue circular line I'm now rotating my objects along the said access by clicking the green line I can rotate along the y axes on by clicking the red line I can rotate along the X axes Finally, what I'm gonna do Just to make this simpler years I'm going to turn all my rotations back to zero just so we can see what happens in the next phase quite quickly. So we now know hard to change that. A rotating gizmo. We're not going to move to the next one. This is going to be the scaling gizmo, so I'm gonna click. So the appearance off the scaling gizmo is very similar to the translate gizmo, the only differences instead of elbows. We have squares at the end of our lines, but again, the concept remains the same. Click on a college line to scale on their axes, so click on the blue to scale on said, Click on the green to scale on the war and click on the X to scale on the said. Okay, so now we know how to move. Vote eight and scale objects using our gizmo. Fantastic. Now it's challenge time. Using your key smoke, I want you to take a basic cube on. I want you to move it along the war axis, rotate it along the X axis and then scale a long beset access. Just so you have a bit of practice at using the gizmo in a different ways on different axes . Once you've done that, post the screen short in discussions on, I will see you in the next lecture
96. Axis forms: in this lecture, we're gonna look at the two main axes forms global on local. There are multiple axes types in blender, but for now we will introduce them to you. But focus only on the global and local options will then set a challenge based on a thes axes. Sudden, as we go into blender, we're going to start with a new project. Now there are two main forms of axes global on local. Up to now, we've been working in the global axes to know what form of accedes we've been working in. We simply go down to the top down option next to the gizmo icons and we can see that the transformation orientation is global. When our viant a shin is in global. This means that the axes are based on the axes off the blender world. So our blend the world has said in the uptown direction why is left and right and X is forwards and backwards. That is the case for blend up global. However, there are multiple different axes forms. If we click on this button, we will see we have global local normal gimble on a few for now. Don't worry about these three. We're going to focus on global and local because these are the two that you'll be using 90% of the time. So as we know, everything we do is based on the Globe waxes. So if we grab the Zed's our we're moving up and down in the global axes. However, let's see what happens if we go to the local access. So we switched into local. Now, as we can see, nothing seems to have changed If we grab the hours, nothing seems to have changed in terms off being able to move our objects. So how can we tell? What difference does it really make? Well, I'm gonna first of all, go back into Global Global is based on the axes off the blend. The world local is based on the axes off the objects. It just so happens that when you insert any objects into a scene, it's local. Axes will normally be identical to the global axes. To see the true difference, we must rotate our object. So what I'm going to do now is I'm just going to randomly rotate my objects by going over to the gizmo for rotating on I'm just going to move it a little bit along the X a little bit longer. War a little, A little bit along, is it? And now I'm gonna go back to my translate gizmo so we can see that the gizmo axes has not changed. We're still in global on. The axes are still positioned the same moving up, moving across unmoving forwards and backwards. They're all the same. Watch what happens when I go into local axes. Instantly. We can see that the origin on the global, which it has bean altered, it has been tilted. If we pan around, we can see exactly why Blender takes and objects on the signs angles to faces. What it's done here with our base cube is it has assigned this face here that my mouse is hovering over as the top off the keep. So this face has been automatically assigned as the top off the cube. Therefore, Zet access will always point towards this face. So I'm gonna rotate again. Mix it about quite a bit now. So can you guess which one it is on now? We're gonna go back in and we concede that this is the top face. This is the same faces before, exactly the same face. And now if we grab the arrow, we are moving them along the local axes, so we translate along the local axes instead of the global ones. The same effect applies for scaling in terms of rotation. It doesn't really matter a great deal. Whether you're in the global axes order local axes. It does change, however, where each position is, but that obviously takes a little bit of getting used to. What I really want you to focus on is how it effects translating aunt scaling. So this is currently in the global axes of gonna press one so that we can see it from a front view. And I'm gonna press five such front off a graphic watch what happens when I rotate this So it when I scale this rotated cube along the global axes we can see. It's quite strange, isn't it? It's not like it was before. It seems to be almost. It's almost a Ziff. It's scaling a more uniform. Same applies for the X. Let's see what happens now If we go local, he's as we can see. It's a lot stronger in terms off how it scales a particular axes, same with the wow axes and, of course, with the X axes. So there we go. Those are axes, forms. Those of the two fundamental axes forms off global on a local. Watch this lecture a couple of times. Guys work around it. See if you can really get to grips with global local axes because it can make such difference when you are modeling scenes and you want to sky when a certain white just by changing your axes, you can completely change how you rotate, how you move in, how you scale an object and it can be a very powerful tool. Finally, we have a challenge for you. I want you to create a cubes to basically create a new project. I wanted to rotate the objects. Then I want you to move it along the zed global axes. Then I wanted to create a second cube, but move along, the said local axes. This challenge is just so you can get mawr off a feel on how global and local axes work. Obviously, you can go beyond this challenge. You can do it with the X and more axes. You can do it with scaling and rotating. It's entirely up to you. Once you've done this bit, though, make sure you've done this challenge specifically because it's a very simple form off getting to grips with your axes and your axes forms. Thanks, guys. On day, I hope to see you in the next lecture.
97. Hotkeys for grab, rotate and scale: in this lecture, we're going to be looking at the main hot keys that are used in objects mode. Thes are the hot skis for grabbing, rotating and scaling. The hot key G is used to grab the hot key. S is used to scale The hot ski are is used to rotate hot keys X y, and said are used to lock to an axes on hot keys, shift X Y and said are used to lock to alternate axes. After that, I'm going to give you a challenge. So let's have a look at how these hot keys work in a blender. So the first hockey is to grab an object. So by pressing the letter G, we enter grab mode and now we can move our object around our scene. I'm gonna press escaped, cancel. Next. We have rotates to rotate objects we have to press the hot key are so press are to enter rotate mode and we can now rotate our objects escape to come out. Thirdly, we have the s key, which is the hockey to scale. So pressing s Andi pulling my mouse cursor away for my cube increases the size pulling it towards my keep decreases the size escape to cancel to those of the free basic hot keys. But now let's look hat moving, rotating and scaling to specific axes. We can do this by locking to a specific axes by using the relevant letter on the keyboards . However, we must activate the type of action first so we cannot press X, y or zed before pressing g s or heart. We must press the action first before locking to the scale. For example, if I want scale along the said Axis, I would have to press s to enter scale mode and then said to lock it to Desert Axis. And now I can, by moving away, increased the size on, he said. Access on by moving closer, decrease the size on the set access. The same applies with any other combination. Why compressed g to grab, and then why? So that it only moves along the wire, Axes said. No matter where I move my mouse, my object is fixed to moving along the wire axes for a better idea of what this looks like . Let's open the scene properties panel by pressing end. Once again, I'm going to grow up my objects, lock it to the war axes. And now I can move it across the war axis without any change in the X or said values, and the same applies for all axes. Finally, we have the shift key to use in this concept by pressing shift before pressing an axes button. We look not that button, but the other two. I'll show you what this means. So if I wanted to scale on the X and y, but not the said I would press s toe enter scale mode and then I would go shift said you should now see that the green Andi red lines are in fact the ones that are highlighted. Now when I scale my cube, the values off X and Y increase by the value of said does not. This is because I have locked it. Two thes ed access only instead of locking the set access itself, it is locked up. The said access is now the one which is not manipulated. So to sum of eyes, we have g the grab are the rotates Yes, the scale ex war and said to look our axes to a single point So Grab said, and we can only move in a set. Access another example. Rotate O X to rotate along the X axis scale one to scale along the Y axis. In addition, we can perform the opposites locking command by pressing shift. So if I wanted to move my cube without lifting it above all below my plane, I would press G to enter movement and then shift said to lock it to the X and Y. And now I can move my cube around the blend, agreed without it lifting above or below the grids until we go. So it's challenge time. Guys, finish challenge. I want you to create a UV sphere. I want you to grab, scale and rotate your sphere using the hot keys. So experiment with this as much as possible. Get used to using the's hockey's, especially locking them toe axes. There aren't too many people who used the shift X Y Z function, so if you can really master that, you really do have a step ahead. So remember, G s and R are the basic hot keys for object mode X, Y and Z to lock to an axis shift X y and Zed to lock to Olten access. Thanks, guys. Andi, I hope to see you in the next lecture.
98. Using the lock tool: in this lecture, we're going to be learning about the locked all We're gonna be able to use the lock high corn to prevent altering on objects by accident. We're going to use the scene properties to grab, rotate and scale objects by using numbers. And then I'm gonna give you a challenge based on this. So let's go into blender. And as I start my new project, first thing I'm gonna do is open up my scene properties by pressing n so as we know we can from here increased things such a scale and location under you in our rotation, all the objects. However, we can use this panel to help stop moving in a way that we don't want to. So, for example, say if I did not want to move my objects along the X axes, which is the reds axes. When we go up to our tools, we can see there are lock icons next to the number values. If we click on one of these icons such as the X, we will look that axes. So what has now happened is that I have locked the position off my cube on the X axes so I'm gonna push G. And no, I'm going to move. But as you can see, I can't move it on the X axis. The only moves on the said on Dwyer access. I can do that with his many off them as possible, and you'll notice that when I lock on access, the dismal for that axis disappears. So by taking away or free he there is no gizmo visible on the Cube because awfully a lot. I cannot grab my key at all. It can end to grab mode, but I can't move. It's anywhere. This could be very useful if you're looking to move objects in Afridi space. But along two D planes, the same concept also applies to rotation and scaling. By pressing this'll lock for the Y axis. When I press scale, it only scales along the X and said access. A very useful told. Indeed, we can also use this panel to help type in coordinates or values that we want. So, for example, I may say in terms of location, I may look my one access on our select the more and typing too, despite the fact that the value for war is to on the value for X is too. We can see that it has not moved along the X axis. That's actually quite interesting. We tried again. See, it's remained same M. Why is it done that? Well, let's undo a couple of steps. So we're going to look our axes. We're then gonna change the values. Let's change its of five and see what happens. All free values have changed. So basically, what we learn from this is that the locking feature does not apply when you manually enter your value. So this does not count if you actually enter the value itself. This is used drawing free edits. Basically, when you grab, you're mesh your object on attempt to move it. As you can see here, the Y value is locked. The same applies for rotation and scale, so we know how to use the lock icon to prevent altering and objects accidentally on. We can use the scene properties to grab, rotate in scale objects by using numbers. Your challenge now is to grab, rotate and scale your object with at least one axes locked each time. I will give you an example, so I will do this in a new project so that you can see clearly press the end key. For example. I can lock it on on the X axis for awfully. That way I'll grab and it won't move. The X axis rotates without moving along the X axis and scale without moving along the X axis. Simple wise. Perform that challenge now guys on. I'll see you in the next lecture.
99. Renaming our objects: in this lecture, we're going to learn how we can rename our objects were going to give them better names so that we can identify them. So let's log in to blender. We're going to We don't need to start a new course this time, actually, because we can just use what we have. So what I'm going to do is I'm going to move my cube to decide I'm going to unlock all the x axes and then I'm gonna create two more cubes. One here, a plane for here on a cube for here. I'm just going to scale this cube up, so save these were different objects. Say, if I wanted this to be a house, I wanted this to be a call this to be a human. Andi this to be a dog. So we need to name them that ever two ways in which we can name our objects. The first way inthe e seen properties panel is if we scroll down, we get to a sub section that says item. Now we can see that we've company Selective plane. If we select this cube, it's given the name Cuba 0.2 This Cube is Cube Point CEO Seo by one on this cube is simply keeps that this was our original. So blender already gives us a way of distinguishing which object is which, but it's always better to give their their accurate names as soon as possible. So I believe we said this one was gonna be a house. So we're gonna name House on. The item is now called House the second place where we can see the name off our objects. And also where we can change them is the outline a panel. So I'm going to increase the size of the outline A panel, and as we can see, all of our objects in are saying all in the outline. A panel we have keep cr 01 keep Syria zero to We now have our house mish lamp play. So by right clicking on the nine week in Tokyo, don and choose the rename operation. And we're just gonna call this don't just for argument's psych. We said cube 001 was going to be a car, so we know that two car ons cube rename as a human. No, we'll just do that again because my computer just froze on me there for a sec. Okay, so we've got our items. So we have our human a dog I'll call and our house. So now, even though they're all very primitive on they're all very basic, we can now distinguish them by the names in the outline. Er so that's how you rename the objects, guys. Thanks a lot, Guys. Hope you've enjoyed the course so far. Andi, I hope to see you in the next lecture.
100. 3D display: in this lecture, we're going to be looking at the free D display. I'm gonna introduce to you the different displays that you can make in the free de Vieux port on what each display is used for. The displays that we're gonna be looking at our wire frame, texture materials and render. So let's have a look at these in blender. So to change our Freedy view, ports toe one of thes display modes. We have to come down to the drop down icon with the White Bowl in it. If we hover over it, we see the highlights says method to display shade objects in the Freedy View code on solid . So currently we are in solid mode. Solid mode off the Freedy few ports allows us to few our objects as solid, non textural ized forms. So basically, always see is the geometry off the object itself. You cannot see any textures, all materials in this solid view. So it will, unless you tell blender. Otherwise, it would always be a grayish color. So how do we change our Freedy display where we click on his drop down box and we have a Siris of options? The 1st 1 bounding box. We're not gonna worry about for now because you will very rarely use that we have our solid option. And we also have a wire frame, texture, material unr ended. If I click on wife, I'm my object is now viewed as a wire frame. This means that in this mode we can look at the geometry off our objects without any off. The face is getting in the way, so basically a why frame o does is it takes out the faces. This isn't permanent. This is just a display setting. If we go back to solid view, we get our what faces back. So that's why frame next, we have texture, texture displays, as it says, a texture on top off our objects. So it displays the objects as a solid but also includes any textures that you have applied's material is similar. Material allows you to place any materials on your solid objects and display them. The difference between texture on materials and they normally work together is texture applies how an object looks so. For example, you can have a wood texture on your objects. Soy material is how your objects responds the things like light. So different materials. Different material effects involved different ways in which light bounces off off the object. So, basically, to summarize texture is how your object looks. Material is used for behavior. Two light sources. So how light reflects off for the objects? Finally, we have rendered. If we press rendered, then what blended does is it previews on image off our objects in the blender scene. We can still navigate in blender, but this is a preview mode. So the only thing we can do at this point is to look around our objects just to see how the lights effects each of the faces. If we go into edit mode from here, we conceded very little changes. So we can't edit, are objects or can weigh. We cannot actually effects are objects, but it's extremely difficult to do so in rendered mode. You're much better off doing it in solid modes. So there we have it, guys we have. Why fine solid texture, material and rendered. Thanks guys on I will see you in the next lecture
101. Modelling: in the upcoming sections, Off lectures were going to be looking at the modeling a process in Blender. We're going to be creating new objects using modifies for the first time. We're going to be working with objects and at its mode, and we're also going to learn how to save, unload our creations. All of that is coming in the next Siri's off lectures.
102. Selecting geometry: So we're going to start this section by basically reviewing some of the fundamentals that we've already learned. We're going to be reminding ourselves how to select for Toussie's edges and faces. We're gonna look at how we can select each of these and change what selection methods you use. We're gonna look at the difference between grabbing, rotating, on scaling with each off these selection methods ons are going to be using the hot key, which is the tab button off. The woods were going to be giving you a couple off challenges. So let's go into blender. So first thing we need to do is we need to go into edits modes we do that by five are coming down to the drop down menu on pressing edit mode. Oh, we compress the tab que The tab key is used to move between edit mode on objects modes. We have free different selection methods. We can select courtesies with this box here. This box allows us to select our eh Geez, on this box allows us to select our faces notes that you can apply it multi multiple selection methods at the same time. At the moment, I have faced select selected but say if I wanted to select for Toussie's as well by press holding down shift and then click, I now have to selection methods available. I can select my face or I can select my for to see. I can also do this with all free, so I will activate edge Select on Now I can select, eh? Geez, 30 sees on faces. So what's next? Well, let's have a look at how grubbing, rotating and skating works. Andi. It's best to try and remember this in a specific order. Faces can be grabbed, they can be rotated and they can be scaled. Eh? Geez can be grabbed, can be rotated but can only scale on a toothy access for Toussie's can't be grasped, cannot be rotated and cannot be scaled. Let's see what I mean by this so I have this face selected and I'm going to press G. I could move it about No problems escape. How about EJ selects. So I select an edge. Grab. No problem. I can grab on Manipulate that edge. Let's have a look at for Toussie's grab over to see pressured G to grab, and I can manipulate the virtuous e two if IQ so in terms of clapping, we can grab all free without much difficulty. Now let's move on to rotation. Starting with the face. I will select a face and press are we can see that we can wrote. Hate the face To make it easier. We can rotate along an axis. So there's that axis for excited Pope. What about our edges? Or select image? Lo tight and we can see that Aldo slightly restricted. We can rotate our edges, rotate along the Z axis. We can see that this is indeed possible. Scaling. However, let's try scaling. Pressing s very interesting. We can scale our edges. However, we can only scale on edge by its length because an edge is a two D part of your free Demisch. So any age can be scaled in size. However, it can only be scaled in its length. Finally, let's move on to Verte sees will grab, avert Asi Onda. We can see that we can move it. No problems. Now let's see our rotation. We can't rotate it. Let's try scale. We can't scale it. The reason why is because you can only low take in scale things that are made up off different coordinates. For example, this edge. If we look in a scene for parties, if we select an age, we can see it has transform options. It has transformed coordinates for Texas also have transformed coordinates. However, the big difference here is that the Vertex coordinates are locked to that coordinate. So unless you grab and move your age so if you gravel move your birth asi you can change the coordinate, however, because on it, because sorry, I'm getting a mixed up because of Vertex is a single coordinator. You can't rotate it, nor can you scale it to the best way to remember this. Ease faces. You can grab, rotate and scale edges. You can grab, rotate and scale, but there are restrictions courtesies. You congrats, but you cannot rotate and you cannot scale. Now it's time for a challenge. So let's have a look at now what challenges I want you to experiment with moving for Toussie's edges and faces. So I want you to just getting used to what you can do what you can't do, etcetera. We're then gonna create a periscope. Now for this change because it's your first modeling challenge. We're creating a fairy basic periscope. So I'm very quickly going toe. Do one for you, son. Back into Benda. I'm going to now make a periscope. Now, the first thing I'm gonna do is I'm gonna increase the length off my cube by grabbing this face, and I'm gonna pull up on a said access this pause my entire mesh up. So it's another way of scaling. I think it needs to be a little bit thicker on the war axis. So I'm going to grab this space and I'm gonna grab it on the war on. I'm just going to make it a little bit thicker. That will do. Finally, I'm going to create my periscope shape by grabbing this same face on the said axis on moving up. So grab and move up on there's my periscope. Actually, I think it would be better if I made it. Finner. So let's make this Finnessey how it looks. This is all part of the editing process. You'll do something you think. Does that look great? Does it not? And you'll make changes. This is how freely modeling generally works. But there we go. I think that will do for my periscope shape. I know it looks very simple, guys. And it is very simple. Just a couple about impressions, but that use very basic periscope. Oh, I want you to do now, guys, is to create your periscope. You can use the same method of ideas. You can use the scaling methods to scale the whole objects. If you prefer Robert in just dragging faces individually. Either way works fantastically well on experiments about with it guys. So complete those two challenges. Post your periscopes in the discussions on day. I hope to see you in the next lecture.
103. Undoing mistakes: in this lecture, we're going to be learning how we can undo our mistakes. We're gonna be learning how to use the undue Tall where we can increase the number of undoes that we can make. Using the Alz Key to undo rotation grabbing and scaling on applying location, rotation and scaling before finishing the lecture with a challenge. So let's go in to Blender. So say, if I wanted to do something so say if I went into edit modes when it's a face select, grab a face on guy, start playing with it. So I'm moving about a bit. Say, if I looked at that and I thought that doesn't look too good on. I wanted to start with my cube again. Do I need to delete my new cube and creates one from the primitive meshes? No, I don't have to. I can just undo my previous steps to do that. We used a hot key combination control on a windows or commands on a Mac and said, So I'm using a window. So while press control and said on it goes back and undoes one step, Control, one said again, again and again. And there we go. It's gone back to its default shape in order to save memory on your computer blend. It limits the number of times that you can undo, but it does give you the option to change this limit. To do this, go to file, go down to use up preferences and click. And under the editing subsection you will have on undue section. The facts up that we're worried about at the moment is the steps factor. The number that you should be seeing at the moment is 32. I believe that is the default. You can change this to any value you want between zero on 256 steps. The more memory or ram that your computer has, the higher I would advise you to increase your number as a general guide. If you have, say, a computer with two gigabytes of ram, why recommends going up to 64 If it has four gigabytes of RAM, I recommend 128 steps at most on if it has eight gigabytes of ram or more, I advise 256. My computer has eight gigabytes of RAM, so I can use 256. In most cases, it doesn't affect too much. But if you have a computer that doesn't have a lot of Ram Atoll and you decide to maximize the number of steps in Blender, you will actually find that your computer will become slow and sluggish. So just bear that in mind. I'm not going to say my use settings on exit user preferences Now. I'm gonna go into objects mode now. There are different things that we can undo, so we can specifically undo location, rotation on scale using the old key. For example, say, if I wanted safe, I scaled my cube to be a little bit bigger, but I wasn't happy with it, and I wanted to start again in terms of skating. To avert it back to its original scale, I would press out on my keyboard and s the grabbing. It's the same grub on moved to a new position to move it to the old position. I press bolt on G. Note that your cube or your mesh has a fixed applied position. That means that no matter how many times I grab on, move my object. When I heard press bolt and G. It would always go back to the default position, as I've just done there. The same applies with flotation unschooling. So what are these applied factors? If we go back to our PowerPoint slide, we can see that we can apply it location, rotation and scaling. So what does it mean by that? Well, if we go back into blender and open up the scene Properties panel, we can see that we have value. So we have serious 00 seriously received. 111 These are all applied values. If we scale our object, for example, we can see the our free values increase. By applying our location, rotation or scale, we revert thes values back to the default one or these values back to the default of Ciro without changing the Cube. So what we want now is for the Cube to be this size as default. To do that, I will go to objects apply on. I can choose one of several options I could choose, apply location, apply rotation, apply scale, or apply it rotation and scale. Since scale was the only thing changed, I'm going to just apply scale and there we go even dough. Our cube has not. Bean reverted back to its original size. Our scale has now been reverted to one. That is because we've applied the new size as the default scale. Let me show you how that works with location on rotation. So crab move over here and we can see that we have several wild values. But we want this to be the center point for this objects. So we're going to use the hot key now, which is controlled, and I This brings up the quick bar for applying location, rotation and scale, and we're going to click on location on there. We can see that all of our values have moved. Now, bear in mind that when you do this for location, your origin and your Freedy cursor remain in the center. So if you do this, bear in mind that you'll need to set the origin back to geometry like so finally, we have rotation so we can rotate objects to any value we want, and then we compress control and I on apply rotation. Of course, this also works if you rotate, locates or scale along specific axes. Note, however, that this does not work in edits mode. We cannot apply it positions to specific faces. Low bases edges on for Toussie's. This application off location, rotation and scale only affects the object as a whole. So it's challenge time. I want you very simply to go into your user preferences. Onda. Change the number of undoes You can make any value you want and save user preferences. Do that now, guys, and I will see you in the next lecture.
104. Snapping in edit mode: in this lecture, we're going to be snapping in edits modes. We're going to learn the power off the snapping tall in edits mode we're going to be snapping an emerging parts often object together on. Then we're going to be joining multiple objects together using this soul. We're then gonna provide a couple off challenges selects moving to blender. So I have a pre mates set up. However, I'm going to start this one blank. So the first thing we're gonna do is we're gonna learn about the snapping tall in edit mode . We already know that in object mode, we can apply to snapping tool by pressing this button. And then when we grab our object, our objects will move in increments on the pullup lander grids. These are in increments off one blending unit per time. However, we can use snapping as a more powerful tool in edits mode. So let's go into edit modes. What I'm going to do now is I'm going to snap for Toussie's together. So I am going to First of all, change the snap element which is done here from increments to Vertex. I'm then going to select my Vertex grab it hovered it over the Vertex I wanted to snap to and left. Click. Next, I will do the same with this Vertex. So grab over, over and click. And now we have snapped our 30 sees together. I'm gonna undo the steps and I'm gonna show you how it's done using H snapping. So I'm gonna press control said twice, three times and then I'm going to go into edge Select mode, Select voyage Make sure that my snap elements is also edge. Glad voyage, Andi, Snap it to this search. Now make sure that when you do this you still snap to one of the corner Vertex. Otherwise it can slide along, so make sure it's in the corner. Vertex confirm with left click One day you go. This works very well with Vertex. Snap on edge snap. However, when snapping parts of a single object together, it's not plausible to do this with the face snap elements because in theory, every face is part of the Freedy object. On each face is a different angle to the one next to it. Cities can become quite tricky, so we're not gonna worry about facing up elements for the moments. What we're going to do now is we're going to move on to how we can snap to other objects. So I'm going to go into objects mode and I'm just going to go into increments, snap and move more cube along the y axis. Next, I'm gonna press a to make sure that nothing is selected and I'm gonna create a second mesh . I'm gonna press shift and I mesh Keep. I'm just gonna bring more cube up. Said that it is in line with my thirst keep. And now I'm gonna go back into edit mode. I'm going to go into for ticks. Snap elements on Vertex Select. I'm going to select this Vertex on by grabbing this for Tex aunt hovering over the Vertex. I want it to snap to I can confirm with left click on The two objects have now joined together at that coordinate. I can do the same with this Vertex Grab, Hold a user and snap. I can also do this using my age. Select selects on edge. Make sure that both the edge increments on the edge select are switched on. Grab my h, Andi link. It's with this one And there we go. Now, in this case, when we're combining two objects together, we can also do the same using face snapping. This will be a little bit more challenging, so I'm going to undo those previous steps. I'm going to go into object mode because I think we need to increase the different different distance slightly to make this a little bit easier. Get it through Temer angle and I'm gonna change snap element to face on the select Aulas. I go back into edit mode to face Select my face grab and I want to harbor it over a verdict . So you always wanna over over a Vertex, ideally so it can snap onto the face connected to that Vertex click. And there we got. Now that's it. We hope we hope for a win that's slightly off there, so we undo that. Let's see, we can do that again. Now this is why I recommend using the snap element for Vertex selecting edge Select Robert Dan Face Select because it's a lot more tricky this way. So I'm going to grow up over over my objects, Troy and get it so that it reaches theme corner point on and confirm on. I think that's perfect. Excellent. So even if you're in face snapping or edge snapping, you steal, warns toe, hover over the verte sees that are related to that age or to that face, because that's the easiest way to get an accurate snap. So I now have a challenge for you. In fact, I have two challenges for you. I want you to using the snapped all in edit mode. I want you to create a ramp so create a ramp like a skateboard ramp. If you If you're not sure what one looks like, look up on Google. I'll have a few pictures inthe e section assets for you just so you can never look very simple things creates. Give that a go. Then, once you done that challenge, I want you to create a custom objects by joining other measures together. It doesn't have to be anything specific, but I want you to create several primitive measures and I want you to use this snapping tall in edit mode to join Thes meshes together in whatever way you like and come up with your own crazy custom objects. Post those objects in the discussions guys on I will see you in the next lecture
105. Advanced selecxtion: in this lecture, we're going to be looking at advanced selection tools. We're gonna be learning how to do free things. We're gonna first of all, learn how to make our objects trans loose, translucent four selection. We're going to learn how to use the circle selectable on the box. Select all with the hot keys. See on be so let's go in to blender. Now, A cube isn't the ideal object to use for this lecture because it doesn't really have enough for Toussie's. So I'm going to delete my keep by pressing X ons left, click, and then I'm going to create an object with more for disease. So I'm gonna choose a UV sphere. Let's scaled up just a little bit and seem in there we go. Now we're gonna move in to edit modes to de select everything. I'm gonna press the hot key A so that nothing is selected. The first thing I'm gonna do is I'm going to make my objects translucent. Four selection. To do that, I come down to where the select ALS are for Vertex. Select edge Select on face Select on the next icon over is limits selection too visible let this button is comely turned on its a limiter and it's on by default. So we're actually gonna turn this off on you may have noticed in the video. If you're following along on your blender projects, then you will have noticed it too, that we can now see objects in the background. If we're in a Vertex elect, we can actually select objects towards the back off arm ish. So I'll select this Vertex on. If I pan around my view, you will see that I have selected a ver to see on the opposite side of my sphere. They do that one more time. As you can see, having translucent or having the limits are off basically means that you have to be just that little bit more careful in what you select. You've got to make sure that what you select is correct. But it does greatly enhance the number off courtesies that you can select from any given a few points. What I'm going to do now is I'm going to turn this on again. I'm gonna show you Circle Select on box Select to enter Circle selects We simply press the Seiki and we now have a circle hovering over our cursor by holding down the left click on the mouse button, we can begin selecting. Any verte sees that we want to confirm this. We white flick to exit Circle select. So there we go. We can now select with Circle Select. The other way to do this is to go to select all on press circle, Select And now we can select that sees again. We can do the same with edges and faces to cease elects for Toussie's edges and faces while in the search selects mode, we press down on our scroll mouse on a wheel. So by pressing down on the scroll, mouse hobbling over, you can see that's we thesis elects. Ah, wow, for to seize any Vergis E that ends up being in our circle. Is he selected? And then we can confirm. Here's where it gets a little bit more interesting. I'm going to see select everything, So I'm gonna prissy on de select everything. There are two things I want to show you now. First of all, we can increase and decrease the size of our selection circle by scrolling up on our mouse . We can decrease the size of our selection circle for more precise selection. If we want to select multiple Berta sees edges or faces quickly, we can scroll down to increase the size off our circle as much as we want. So we'll make it this big and then we can select all of these Verte sees at the same time very, very useful tool. It's also hardy that we can encompass an entire objects on just one click. And there we go. Every think that we can see is selected. However, if we pan arounds what was not visible could not be selected. So what I'm gonna do not be so I'm gonna press see on I'm going to press the middle mouse button to de select everything make my circle select back to a standard size on Come out of it now we still have a few for Toussie's selected. So what I'm just gonna do is I'm just gonna press by on that is the selected everything. Now I'm going to make my object translucent by turning off the limiter. Now if I enter circle select, make it small again, I can now select not only 30 sees in the front but also 30 sees in the back so we can pan around. We can see that 30 sees all around the shape have been selected. So that's the circle Select pressing A to undo that now for box Select There were two ways we can do this. We can either go to select on border select all we compress bay When we press b, we get to grid lines to activate box Select. We have to create a box by pressing and holding left Click then scrolling to create our box like you would with a text box in words And then once we're happy with selection release so show you But be Andi once again be hold on left click Scroll over the verte sees you want so that they enter the box on day release The same rule applies in terms of translation objects. If the object is not translucent, then okay box select one more time Any objects any ver disease that were not visible at the time of the box Select will not be selected to take a waiver to seize edges and faces in box Select we press b then hold down the third mouse button make our box on release. And there we go. So that is how we used the circle on box. Select ALS. And that is also how we can make our object translucent for better selection. Thanks, guys. Hope you learned a lot from that lecture on. I will see you in the next one.
106. Render an object: in this lecture, we're going to be looking at how we can render our objects in blender. I'm gonna teach you how to perform a quick render. I'm going to introduce you to sampling on how we change between our CPU on GPU surrendering . So let's have a look at rendering in blender. So I've started this lecture with a default You the sphere. As we know from a previous lecture, we can look at how our you the sphere, will be rendered by going into the rendered view ports we can see here how it's would be rendered with the light's hitting thes faces but not hitting that thes. Let's add a little bit more to our scene to get a good idea of how rendering works. So the first thing I'm gonna do is I'm gonna adds a plane and I'm going to scale this plane , so I'm gonna press s and I'm going to scale it by eight times its original size. So I'm gonna press eight Andi, enter. I'm going to make sure my plane is not selected on. I'm going to create two more objects I'm gonna create on ICoast fear. And I'm just gonna move this one around. He Andi finally will have a What can we have? I think we'll have a cube. We'll go back to our good friend, Mr Keep So shift. I mesh, keep And I think, how have my keys up here bit scaled down. So we have a look at shading now we can see for the first time that because we have a plane because we have a surface, we now have shadows. Now the keeps shadow is invisible because the one the playing isn't big enough to the Cube is too high and free because the UV sphere is probably covering up the shadow If it was there. But we can see that we have shadows on. We have lighting effects. Fantastic. This is a rendered few ports. This is a preview. So let's do a proper Orender to do a proper render. We have to come to the properties panel for the first time, and I'm going to just make the properties panel big us. You can see it better on the first thing we see is the render subsection. We have free options. We have render animation on audio. Let's render So let's press render to render are active scene. This creates a picture of our seen. However, it seems to have cut a lot of it out To go back to our Freedy view, we simply come to the icon and click on Freedy View. Not a reason why is that in pew Port shading? We can see our seen rendered fruit What we can see But when we render an image that image is taken by our cama So we can only see when we render an image What? The camera sees the solution We're gonna bring out camera back on up If we have a look from behind we can see it now needs to be rotated it So I'm gonna press far I said and rotates Let's have a look now render that's a little better Let's try and bring it backwards a little bit more So we're gonna bring this back a little more Bring up a little more Rendah Andi, I think that will do so. There we go. So we've now got a rendered image Depending on how many Virtus ease we have in our image, This rendered can take anywhere from one second to unlimited amount of time, and when I say unlimited, I mean unlimited. If you have a lot, a lot of pixels in a lot of quality in your image in a lot of for Toussie's, then it would take your computer a very long time to render the image on a much longer time if you were doing animations. So this is the one thing that you're going to need more than anything else. When in the aspects of Freedy modeling, you're going to need a better patients because rendering can sometimes take even longer than the actual modelling process. In this case, because I created primitive meshes on my total number of purchases, for my scene is 536 which is not a lot at all. Then the rendering was very, very quick. However, there are ways in which we can reduce the amount of time it takes to render on increase the amount of time it takes to render This is found under sampling. However, To do this, we have to change our render engine. What surrender engine you ask Well, in blender, we have several different types of render engines, good for different things, Blenda Vendor which is what we're currently in now is the default. Now, most of the time, when you want to render really hide these health images and animations, you don't want to use blender render you want to use cycles. Render so we're gonna go into cycles. Render. We will be going more in detail about thes render engines in future lectures. But for now, let's just focus on rendering in cycles. Render. We have the option to change the device that we render with so we can choose between the CPU on the GPU. The CPU is the process, er that you're computer uses. So, for example, Mayan uses an Intel I seven processor. So by default the process was used to render the image. You can change that, however, to your GPU, which is your graphics card. So for me, I haven't a video GTX 9 60 m graphics card on my laptop. Depending on the type of image that you create on the type of graphics, card and processes that you have the's times may very 1 may be more effective down the other, but we're going to cover that as well in a future lecture. But that's how you can change between the two. What I want to show you was this section. This is the sampling section on Dhere. We can increase or decrease the number of samples that we render with. Now note that we can change this anywhere from one to anything. So far, I put in, for example, one million offing. That's one million. We can rent out one million samples. But remember, the more times you sample your image, the longer it's gonna take to render the same for animations. So why would you put in more samples? Well, the reason why is very simple. The more quality on the moor 30 sees that are in your image, the more samples that she will need to create a quality looking image. So for me, because I have very little quality of my image, I don't need that many samples. But just as an i d 10 samples, let's see how long this takes. So I'm going to go render on. We can see up here that it has taken 1.65 seconds to Linda, my image ons. There we go. Now you'll know is that the lying is a little bit different. That's one of the aspects of changing your render. Engine lights is different in cycles. Run dots of blend Orender. Now let's see what happens if I increase might render to 150 samples. I'm gonna go back to Fruity View because I first thing is a good habit and fresh render. We're just going to let that render up. No, don't worry about the quality, because actually, in this case to court, you won't be that different since the courtesies involved are very small in number. However, the computer is trying to create a higher quality image with the samples and as a result, it has taken 21 seconds to render this. Now, if you've got a really high detailed image, 21 seconds will be very, very, very, very fast. We are talking 10 15 20 minutes on our higher these hold image. So just bear that in mind. But there we have it, guys. That is how we can render objects and scenes in a blender
107. Using the spacebar: in this lecture, we're going to learn about the use of the space bar. The space bar is your go to hockey to performing many tasks in Blender, so let's see how this works. So say, if I wanted to add something to my scene, I could use the space bar to give me suggestions on what to add. So I'll press the space bar type in the word at, and I have a Siris of options. So let's add a camera. Atacama. Bring it out of our cube and there we go. We have a second camera. Let's try something else. Let's go Space bar. Now make a note that your space bar remembers the last being that you tight so back space. Let's go, sadly wants to to delete something so dearly. So we have a series of things that we can delete. Let's go delete and it deletes the selected item. So the comma that we created has now been deleted. There are a whole variety off things that you can do just by using the space ball straight away. We have a Siri's off examples, which we can do just by clicking the button. So let's have a look. A challenge. I want you to click your cursor away from the center, so left click away from the center of the grid and I want you to use the space bar and twice in snap cursor to center. And using that, I want you to bring your cursor back to the center. Do that now, guys on. I will see you in the next lecture.
108. Duplicating objects: in this lecture, we're gonna learn how to duplicates objects. You're going to learn how to duplicate your mesh. To create a double. You're gonna create links, doubles on upended doubles. We're also gonna use the hockey shift and day before finishing with a challenge. So in order to duplicates are objects. There are several ways in which we can do this The first way we're going to go over to D tours, bar and press on the duplicate button underneath. Edits If you can't find it, you will have a Siris of subsections to the side and make sure you are on the tools panel so duplicate and then drag your mouse cursor over to position your duplicated cube ons. Left, click. So there we go. We have one, too. Keeps the second way is duplicate links, so we'll press duplicate links. Andi, Confirm. Fantastic. So this is our original cube. This is our duplicate on this is our linked dubica. Note that we could also create a link. Stupid Kurtz form the original as well. If we look in the outline, er, we can see that these are free separate objects. But let's see what happens when we begin editing thes objects, and this is where we're gonna find out the difference between duplicates on linked duplicates. So I'm gonna press top to go into edit modes. So I have my original cube, and I have it's duplicates. If I grab of Earthsea on, move it about, we can see that nothing happens to the other cubes. Very simple. Okay, what happens when I edit this cube? So I'm going to go back into object mode, select my second cube, go into edit mode, and straight away we can see that the first duplicate has bean selected as well as the A Pentti linked duplicates. So if I grab this vertex and grab, those two cubes are moving around at the same time. Very interesting. So, basically to summarize what's happening here is when you create a regular do pick urtz. Those two cubes will act independently of each other. However, if you create a linked duplicates, then one you make changes to the original. The duplicates will also change. We're gonna come out to that and let's see if the same occurs with the links duplicates. So select the limp Dubica Chris Tab and we can see the same applies. So these two objects or go they are different objects in the outline. Er, when we're in edit mode, they remain the same in terms of we can edit them simultaneously. However, one thing to note, you can only edit or select parts off the object that has been selected. I can't come over to this keep and select any verte sees, because it wasn't my originally selected object, not something that matters too much since they're being edited together. However, in Objects mode say, If I wanted to scale one of these objects and rotates the other, let's see what happens. I'm going to scale now. The first duplicate so s to scale and scale up. This time, nothing seems to have happened to our upended duplicates. Let's try rotating the duplicates, but our to rotate and rotate around. Nothing seems to have changed in terms off links duplicates. It's important to note that only the editing off the object itself he's done at the same time seen transformations, so location, rotation and scale remain completely independent of each objects, so I can move this objects wherever I can rotate by, can scale it, and it will have no impact on the other. However, if I go back to edit modes and grab, we can see it's still hides the same effects of fort. Both objects, even dough one has been rotated on one has been scaled. Weaken still, edit those same points. So to summarize, we have two ways off do pickers. The first way is a regular do picker in which once that do, because made the two are completely separate in every way. They are two completely different objects. One was born of the other, so it has the same shape, the same properties. But it is now completely independent once you have confirmed it. The second why is linked duplicates Lynn Stupid cuts, when in Edits mode are edited simultaneously, so they will always maintain the shape off the original. You can only edit the objects that was selected in object mode, but this part doesn't matter, since both are being edited in the same way at the same time. In objects mode, however, thes two objects are independent of each other, so best way to remember that the duplicates they are completely independent. The duplicate links they are independent in objects mode but stay are connected in edits modes before we finish. There are in fact, a couple of other ways off. Duplicating the first way is shift D, which is your hockey to duplicate. This is a regular duplicates. The second why is out day to create on a linked duplicates we go into edit mode. We will see 12 free Thies to a linked This one is not okay Guys, if we look in our options here as well, we will see we have the ad Dubica option as a another way off adding duplicates. So now it's challenge time. I want you to create a double on, then just size off the duplicate. I also want you to try and take this challenge fervor and I want you to create free doubles . Forman Objects said this is your chance. Create free double. Too much object. I want you to make sure that they are all links doubles and I want you to move all free in two separate parts. Then you're going to move one, rotate another and scale deferred. Give that a go, guys. Andi, I will see you in the next lecture.
109. Smooth and flat shading: in blender, we have two forms of shading for objects. We have smooth shading on flat shading. We can make our mesh appear more defined without making the object any more complex. By using smooth shading, We're also going to discuss when to use smooth shading. So let's how, See how this works in Blender. So the best thing to do right now would be to use a more detailed objects, so well, I'm gonna use Suzanne the monkey. So I'm gonna delete my cube and I'm going to shift I mish monkey. And there, Suzanne. Currently, we are in flats mode, flat mode or flat shading is the default shading in solid few points for blender. And this allows us to see all of our shapes away the angles along the edges. Every single face is shaded differently to those next to it so that it can be visible. However, if we were creating objects, then surely we would think that we wouldn't want to see faces on the final design. We wouldn't want to see all these edges, all these courtesies. We wanted to look really smooth, really nice, as if it was an actual organic objects which arm Monkey is so to do that, we go to the Tools Bar and go down to where it says shading. We have two options, smooth and flat. Let's press on smooth and straight. Why you can see the appearance off. The object is very different now. I should note that nothing has happened to the faces. None of the faces have been moved. None of nothing's been deleted. Nothing's been added. The only thing that's changed he's blender has altered the appearance off our monkey so that lights reflects at the same rates on a long faces. This way it makes it seem a lot smoother. A lot more defines, but we haven't added anything to it. So I'm gonna go to flat again. So we call these faces up here. We see what makes up our what mesh. So we have over 530 sees on 500 faces. Even when I go into smooth shading, despite the fact that it looks more defines, we still have the name the same amount of for to seize on the same amount or faces. Smooth shading is best used towards the end off the modeling phase of your project. So once you've done with the modeling and you're about to move up to two textures and materials, that would be the best time for smooth shading. However, you might want to use smooth shading, drawing the modeling phase just to get an idea of what your final design would look like. For example, you may be making a metallic objects that is quite circular in nature, but this circular objects might require several hard edges you would want to see in smooth shading how it looks so that you can find where those sharp edges would bay. So guys, that is smooth shading and also it's flat shading. Use them wisely. Very powerful tool for preparing your model four textures and materials on for helping you determine where extra geometry should be placed to make your mesh look as good as it convey . Thanks, guys. See you next time
110. Edge loops: in this lecture, we're going to be learning how to use the loop cut and slight all to actually arm a tree with EJ Lopes. We're going to learn how to increase and decrease the number of cuts on looking at smoothness and fall off factors. So let's see how this all works in blender. So we're going to start with a default cube on. We're gonna movinto edit mode By pressing the tab key. We're gonna make sure that nothing is selected by pressing a. And there are two ways in which we normally use the loop cut and slide. So the thirst is fire. The tools bar to the side, scrolling down toe where it says add and selecting Luke cut and slide. Once we've clicks once, if we hover over our objects, we can see that our Luke cuts appears in a purple highlights before clicking anything. If we scroll up on a scroll wheel, we can increase the number of cuts and we could do this as high as we once was. High as we need. For example, this may be a little bit too much. I think there's 48 cuts there a moment a little bit too much. In most cases, we can also reduce the number of cuts by scrolling down on the scroll wheel. One left click will change our Luke cuts to a yellow highlights, which means it has now been added. However, it is not being confirmed to a specific point. That means that after a single left click, we can still move our cuts up and down its edge loop two ways of confirming if we want click. Then we confirmed the cut, and it will end up in the very center off the cube. If we left click, we confirmed the cut wherever it lies at the point of confirmation. So, for example, say fire drug, the loop cuts up here. But why white click it finalizes in the center of our cube. I'm going to undo that we controls it. The second way in which we can edits are measured by adding lube cuts is by pressing control and all. Once we've done that, we can hover over on the same thing happens this time I'm gonna left click once ha va my A loop cuts upwards and left click again and now we have a loop cut much higher up on our keep. So let's look at smoothness and fall off. If we look below the tall walls bar, we will see a properties menu. This properties menu appears whenever we perform an action. This properties menu relates specifically to that action in this menu. But a loop cut and slight. All we can increase on decrease the number off cuss. We can also increase the smoothness factor. Currently, it has a smoothness factor off zero. It can go as high as high as four, in this case and as low as minus four. This basically scales that Luke cut in or out, depending on the factor. Let's give a better example of this, so I'm gonna press controls it to the elite. Our Luke cuts. Now I'm gonna add in not one but five Luke cuts. I'm gonna press control and are hover over and scroll up until I have five leap cuts. I'm going to left click on Den White. Click. I've got my number of cuts set at 55 Or do me if I increase the smoothness, we can see it greatly increases the size off our cube, almost making it quite circular or curvy in shape and vice versa. The more cuts we have, the greater an impact the smoothness has. We also have fall off full off alters the effects that smoothness has on our mesh. So we come. We have the inverse square option if I turn this up, too. 0.5, let's see how this effects the fall off. So we have certain options. We have six in total. Linear creates a straight path to dissenter, so it's no longer curved. It's a straight line for this, for to see to this one shop keeps the middle Luke cut at a point, but the age curves in woods up towards the top. This is our sharp effect. We've already done inverse square. This is the fairly constant curve. Lieut. Basically makes a curve, but it keeps each edge as straight as possible. During this curvy we pan around, we can see that the edges are relatively quite straight. Going down spear makes the loop cuts as very call was possible. But we can see at the top on at the bottom that the first and last loop cuts come out a lot further than the ones down the middle. Finally, we have smooth fall off, which basically creates a graph like line in which we swerved up to form a bump in the middle and swerved back down. These are just a few examples of how smoothness and factor can effect a very simple objects . So that is the Luke cut and slight. Oh, play about with that a bit. Make sure you get used to it. Try using the loop. Can slight or with different primitive objects. See how they work with different objects. Thanks, guys. Hope to see you in the next lecture.
111. Joining objects: in this lecture, we're going to be learning how we conjoined objects together. We're going to be able to join two or more meshes to form a single object. These measures become parts of a single structure and can be edited together. We go also going to look at how we can separate meshes into separate objects on We're gonna look at what we may do this. So let's look into blender. So what we're going to do is I currently have a scene set out where I have my central cylinder and I have two cubes to join two items together to join two meshes together. You must click on one, then click on the one you wanted to join too. So in my case, the cylinder on you will notice that the first selected objects is no longer a yellow highlight, but reddish pinkish highlights. This means to objects have been selected to join these two together. We're gonna prove press control on the letter J Control and J. And now we can see that both objects are highlighted on Now they come under a single If we come away and come back again, they come under a single object cylinder. So these two are two different parts or the same object. So where's the Cube gone here? Well, if we press the plus button next to sit under, we can see that we have both available. So now both of these are part off the cylinder mesh. What this does mean, however, is that we can edit thes two objects in the same edit mode so we don't have to come out or that it mode into object mode and select a different objects. We can just do it straight form edit mode. The second wave, joining an object together, eased to select the first object selects the objects you want to attach it to. So once again it's gonna be the cylinder and then come over to the tour's bar and press join. And now, all free off. All free meshes are parts of a single object. Once again, if we press tab to go into edit mode, then we can clearly see that we can edit any of our free objects on. We can still edit them independently of one another, so we could still create a car out of this. A bus out of this Create cube on a limousine. Our office. Keep the cylinder soy on weaken dual that in wanted it mode without any influence on each other. It does become influenced, though in objects mode, because they're in the same object bracket of cylinder. When you manipulate one you manipulate. Also, we pressured G and all have been grabbed. We process on a lot, are scaled. It all behaves as a single object in this in part, two off this joining on separating tutorial. We're going to learn how we can separate these objects. So we've learned in this lecture how to join them in the next lecture. We're going to learn how to separate them. Oh, see you then, guys.
112. Extrude tool: in this lecture, we're going to be learning about geeks. True soul in Blender We're gonna use the extrude tall to be able to create new geometry, form existing geometry. We're gonna be using the hot ski e to extrude while in at its mode. And then we're going to give you a few challenges. So let's go into blender. So let's have a look at what the extrusion talk can do for us. First thing we need to do is we're gonna go into edit mode by pressing the tab key. Then I'm gonna go into face select mode, since face Elect is ideally what you want to be on when you're extruding, you can extrude verte sees and you can extrude edges. But for now, let's do faces because it's amore visible Demonstration or we have to do to extrude is selector face, so I'm selecting a top one here. Andi, we'll press what are two things we can do. We can either go to the tour's bar and we have several extrude options. We have extrude individual extrude legion on an extrude drop down box, which gives us extra options may be the same options, so let's have a look at what the stars. First of all, we will do extrude individual so press the extrude individual button and now we can move up or down a long visit. Access now, even dough. It looks to desert access straight away. If we press said it said, then we can unlock it and create all sorts of different shapes. We can always lock it back to desert access and left click to release now because we've extruded that face we now have. If we look an additional four birth sees an additional four edges on an additional 12 free four faces to our objects or without coming from one extrusion. Let's see if extrude region does anything different in the case of a cube, So we're gonna press extrude region so it doesn't seem to be doing anything, at least not to an individual. But we can always confirm, and that is enough for extrusion. We're not gonna worry too much about a difference between extrude region and extrude individual. For now, that's more of an advanced concepts. For now, we're just gonna worry about extrusion is itself this time I'm gonna take this face on. I'm gonna extrude with e e hockey. So I will press e and drag Note that we can also use the snapping tall for when we extrude . So, for example, if I extrude this face with a and bring it up, what I can do now is I can activate snapping snap to the techs, select if ice and then pressing e to extrude hover over the Vertex. I wanted to snap to and click and there we go. So that's the extrusion tall. Now we have a special challenge for your challenge. I want you to create a human using the extra tool you're going to use edge, loops, toe geometry and make the body mawr round IDs. So if you remember in a previous lecture where we used edge loops, we used to smoothness fact up to create more circular cubes. I also want you to use the flight all to navigate around your objects while you're editing and once you've finished. So I'm going to start you off with this one just to get you started. So we're going to go back into blender. I'm going to start a new project. The first thing I'm gonna do is I'm gonna bring my cube up and I'm going to scale it up slightly. So I'm gonna press s 1.5. This is gonna be my head. I want my humans be nice and big. Gonna bring that up so it's a little bit bigger. So, for example, if I wanted to create a neck, I could go into edit modes, Grab face, select, grab the bottom face and just extruded little bit down. And there's more neck extrude again. It's a create my top of my chest cities. Um, I said I select this face extrude one 0.5. I don't have the star of my left shoulder. Select this face e 1.5 start of my right shoulder and then I can continue going on in this manner so extrude free, probably to better So that's the top of my chest. That's my neck. This one is the main part of my chest. Let's extrude again 1.5 extrude again 1.5 and then you can begin extrude free. Grab this face extrude free and you can keep going like that. As you can see, we've got a heads, we've got a neck. We've got the top of the chests which links to the shoulders. We've got to start the arms. We've got the chest. Don't forget that you can add edge loops. So, for example, control are I'm gonna make a few edge loops for more heads, and then I'm going to increase to smoothness. So I have a little bit more off a head shape. I can change my fall off so that it looks a little bit better. I would. Sy spear is probably the best one. And then you could almost create, like, a Minecraft style character using the extrusion. So? So I'm going to leave it there. But I'm gonna leave you guys to usual imagination to create your own humans using the extrusion on the loop cuttings, Lyttle. Good luck, guys. I'm going to finish the video on the PowerPoint slide so you can just pause it to have a look at the challenges. Watch the video a couple of times on. Once you feel calm, confident, using the extrusion tall. I will see you in the next lecture.
113. Merging and removing doubles: in this lecture, I'm going to show you how to merge your birth sees together and how we can remove doubles. So doubles are basically unwanted. Verte sees that are in the same coordinates you can actually have multiple verte sees in the same coordinates. Andi, the problem with this is it creates extra geometry that is just completely unnecessary and can in fact have a negative impact in future parts of your projects where you're trying to add more detail or you're trying to add textures and materials. So we're gonna look at different ways that we can merge or emergencies thirties together as well as removing any unwanted doubles that we can't see. I'm going to introduce to hockey's W toe open the specials menu on ult em to open the merge menu. So what I'm gonna do now is log in to Blender so we start with a default cube. Now, to do this, I'm gonna go into edit mode. He selects everything with I and I'm going to add on edge loop with the lute cut and slide soul. So I'm gonna press control and are to make a loop cuts. I'm going to left click once, and I'm gonna bring this loop cut over close to the edge. De slept with a consuming. Okay, so we have two for two. Sees that all relatively close together. What if we decided we wanted to join these courtesies? We can do that by clicking on one vergis e pressing shift and selecting the near Biver to see and then pressing the hot ski boat on em. Now we have a Siri's off merge options. We can merge at first at last at center, at cursor on a collapse. For now, we're not gonna worry about the collapse option. We're going to focus on the 1st 4 The reason why is because in this course I'm going I teach you what you need to know. On a collapse isn't something that is used anywhere near as much as the 1st 4 merge options . So I will teach you D's fourth or now. So at first means if we bring that back up that the two Vergis ease will merge at the first selected verte sees, coordinate at last means that they will merge and join at the 2nd 30 sees coordinator, a center in the centre between them on at Curse that they will merge. Where the Freedy Curse Aries sit Destroy at first. So I'm gonna come out the select everything. The edge, the very corner That's gonna be our verse First. Vertex apologies shift and click The inside Vertex is our second or our last Selective Vertex. We're gonna press old m at first and we can see that the two have merged together. I'm going to undo this for a sec on I want you to keep an eye on the top info bar. Currently we have two Their cease selected out 12 when we merged these together with old him. At first it becomes one out of 11. So these further sees have joined together to create a zing single Vertex. If we was to merge at last old M At last, we can see that the very core of Earthsea has bean dragged back to the second corner. I am to make this a little bit more visible. Now I'm going to select the inside edge loop and I'm going to bring it back. So it's a little bit more visible thes space. So next we have at centre select the to out M at center on the first courtesy on the last 30 both coming towards each other. So both move to create a new Vertex. The last one, which would be very interesting to do, is both. Make sure both is selected. Vote em. That's cursor. These bring this option brings both for theses together at the Freedy cursor. So this is really going to change our cube now left click, and we can see it's made a dramatic impacts on our cube. But this again shows the power off the Freedy cursor So it could be really, really helpful when merging things together if you know how to use it Control and said the second point we have is the remove doubles option. So to remove doubles, I'm going to actually bring this closer again on then I'm going to be select everything and select everything so everything needs to be selected in order to remove doubles toe work. I'm gonna press W to bring up this specials menu, and I'm gonna come down to where it says removed. Double was notice. We also have the merge option here. When I press removed. Doubles it says removed, sear over theses That's because there were no over theses that won't talk to each other. However, we can change this down here where we can change the merged distance. So I'm going to increase the merge distance gradually or on straight away. Once I get to about one point C zero point zero to that's the one. So once I get to 0.2 we know is that the Verte sees have merged. Go back to 01 we say removed. Zero c wrote to removed four So 1234 have been merged. If I undo that's action Andi, increase the gap between these loops again. I'm going to select everything, bring up a specials menu removed doubles and now will have to increase emerge distance Significantly more. Andi, There we go. And actually, because this loop was closer to the back end of our cube, it's merged with that side. So there we go. That is how we can remove doubles. So now we know has removed doubles on. We know how to merge courtesies. I will see you in the next lecture
114. Normals in blender: in this lecture, we're going to be looking at normals in Blender. We're gonna learn what normals are. Why incorrect normals can mean trouble on how we can identify and correct normals before I'm going to give you a little Cube base challenge. So let's go into blender. So for this to toil, I have a pre made cube set up that has been divided or subdivided into a Siri's off smaller square faces. Now, in blender, we use blender for variety of things. We use them for animations, game assets, all sort of things. We use it for test models ever dynamics. You can use it for just about anything. One of the things that blender is most commonly used for is importing or exporting models into game engines such as unity and Unreal engine, so that they can be used in those games. However, sometimes you might export a model, and then you might find that when you imported into, say, unity that not all the model is visible. Certain bits and pieces may be missing. If you find this, then the most likely cause of this is that you have a normal is issue in your blender that design. Basically, every face, every single face in blender has an inside and an outside. The idea is that all faces should be visible from the outside because the outside off the face is the part of the face where light reflects off it. So every time a face is constructed, that face is given two sides, just like an a four piece of paper. However, one side of the A four piece is glossy for an example, so that glossy side is used so you can reflects light off of it. The other side of that paper is just regular paper on it absorbs the light so you can't see any change in the paper. The same concept applies here. We have the Grassi part off the face on the outside. Andi like Yoda. No, not very exciting part of the face on the inside. If you have a situation where the normals are incorrect on the normals that should be on the inside are facing outside. Then you will have the situation where no light will reflect. Offer them on day will be invisible in your game engines so toe identify what a normal is and to identify any incorrect Normal. It's actually very simple, and you can put probably spot them already. Basically, a face will be a lighter shade if it's correct on a darker shade. If it's incorrect, that's basically the beer. One end, all of normals. So this one's corrects, CORRECTS, corrects, corrects correct. Incorrect because we can see it's clearly a much darker blue, a shade. So that is very easy to identify in normals, especially if the normal faces are quite large on your object. So how do we correct them? Well, the first thing we can do, just seeing if it's along here but it's not, is we can select our entire objects by pressing. I I asked you that a couple of times. Andi, you can correct this by pressing control or command on your mark on the letter n. And this instantly makes all normals consist with each other. So it consists with the outside off the measures. So every Boesch face is now correct. As we can see, we can also use this to turn our faces inside. So now that I've ticked the box, the entire mash is full of outside inside normals now, no, entirely sure, in my personal opinion, why you would want that. But that option is there any way. So I'm going to revert them back to normal with control on end on. The next thing I'm going to do is just show you a couple of other places where you can revert normals. So if we go to the specials menu, we can flip normals off anything selected. So I've just clicked flip normal flip normals on. We can see that the color off the face that was selected has been changed. Will select that again. Press W flip normals. And there we got. So that's an introduction to normals. Very important that we know how to solve the normals issue because you don't want to be importing your models into your blender games or worse, selling your models to games developers on for them to find out that they can't see parts of your creation because the normals were inside out. So let's make sure we've got that right, guys. So I've got a challenge. Now. I want you to open up the Cube asset in the assets, fold up off this module, and I want you to correct the normals on the Cube assets. Do that, guys, and I will see you in the next lecture
115. Subdivide: in this lecture, I'm going to teach you how to subdivide your mesh. We're going to be adding geometry fast so that we can create more detailed meshes very quickly. We're gonna go over. Why should avoid over using this tool on? We're also going to introduce smoothness and fractal selects. Log in to blender. So we've got our base cube here in order to subdivide Are Cube. What we're going to do is we're going to press tab to go into edit mode, press the double u k to bring up the specials menu on the 1st 2 options we have are subdivide and subdivide smooth. If we click left, click on subdivide, each face has now been divided into four separate faces. Note that this shape the key remains exactly the same. We just have more geometry in our subdivide menu in this corner here we can change certain factors such as the number of cuts, with each cuts increasing the number old vices note that this does so with cuts squared. So basically, if you say one number of cuts, it's actually two by two. So it's four. Two cuts is a free by free free cuts is a four by four and so on. You also have the smoothness option. The smoothness option goes from the values of 0 to 1. Zero means that the faces are purely flat. The more we move it up, the more spherical our shape becomes until we reach one point. Cirillo, which is about was close to a ball as we could make this object. If we were to increase the number of cuts, we can make our object more and more spherical. We should avoid over using the number of cuts because the more cuts we include into our objects, the more virtuous ease we will have now. Although this is great for modeling, it's not so great for our laptop. All our computer, the more courtesies we have, the more edges and faces that we have, the more restrained it's gonna put on. Our system meant memory. So we have to be careful not to overdo this. Otherwise, we could risk slow slowing our computer down and perhaps even causing our computer to crash . So we need to be wary of that. The final thing we're going to look at is the fractal. I'm gonna turn the number off the smoothness factor down zero Fractal is an ever increasing value where the more we increased the fractal value, the more walt our mesh becomes. So all factor basically does is it slightly alters the coordinates off most a lover. Toussie's causing more, more wacky geometry as we increase the fractal factor. So there we go. That is the subject vital. Now for a challenge. I want you to create a cube and I want you to transform it into a ball using the subdivide toe. I didn't want you as a bonus to the challenge. Scale your ball and apply the scale. Good luck, guys, and I will see you in the next lecture.
116. Deleting geometry: in this lecture, we're going to be looking at deleting on dissolving in at its mode. We're gonna look at what's the differences between the leading parts for mesh on dissolving parts of a mesh? We're going to use this as a means off, being able to make our objects better with less, and then I'm going to give you a challenge. So let's log in to Blender. So what we're gonna do is we're going to enter edit mode with Tab Key on. I'm going to subdivide my mesh quite a bit. So I'm gonna press w on click subdivide, and I'm gonna go with five cuts. Okay, so first of all, let's look at deleting as we may have known by now, if we go into objects mode and press the X key, we have the option off the leading our selected objects. However, in edit modes, we can delete parts off the object. So, for example, off selected one vertex. If I press the X key, I will have a delete menu and it will tell me what I want to delete. So we have the leading versus ease at his face is only edges and faces only faces dissolving options limited, dissolve, etcetera. For this lecture, we're going to focus on going from for Toussie's Down to the Soul Faces thes They're the ones we're gonna focus on. So let's start with deleting. Avert asi the late Onda We now have a hole in Amish. The reason why this has happened is edges need Verte sees to have form faces need versus ease tohave form. So by deleting that courtesy, we also deleted all off the edges and faces that were connected to that verte. See, I'm going to press control and said Now to undo on we'll see this effect in edge select mode So we're selecting age for sex. Delete edge and we can see that's the edge has been deleted. Therefore, the two faces that were connected have also being deleted. However, the two vergis ease If we look in Vertex, select the tuber disease that made that edge ost the order. So make a note of that. So when you delete on edge, it does not delete the verte sees that connected that edge just the edge itself and therefore it only deletes edges and face is connected to them. Control and said a few times just to bring our cube back. And next we have faced select. So selector face, make sure you right click not left because I just did on We're going to press X delete faces and there we go. So this time, because we delete the faces, it did not delete any edges or third disease because they are higher up in the blender hierarchy. So you have for Toussie's at the talk, which they are. The king edges next, then faces. So we've got rid of our face. However, there are different ways that we can work with this so controls it. I'm gonna press X again, but this time I'm going to select the elite edges. Now, what's happened is that instead the leading the face itself, it's deleted all of the edges that made up that face. And as a result, the elites all off the face is connected to those edges, controls it to undo. Finally, if we go X delete verte sees I'm gonna wait Sick paused the video in a sec on d. C. How many off the surrounding faces you think will disappear when I delete courtesies? Okay, here we got gonna press X the league for Disease. And that entire nine by nine square has gone because that one face it's for Toussie's connected with all of those other faces. So we created a very large window just by deleting a single face. Control said to bring that back. Now, if we look at other options, we can see only edges and faces deleted. So, in this example, if we select one and really only edges and faces, we can see that no overseas have been the lead. But this is very similar to what we had before. So how would this be different? Well, let's have a look. In order to see the difference here, we'd have to press control said on, we'd have to select at least two. So we've got to selected now. If we put X on delete only faces can you know is what's happened, right. By only deleting the faces, we've actually we going to edge select modes. The face, the edge Sorry that joins them is still there. So only the edges have now disappeared. A lover to seize and all the edges have remained. If we undo that, a couple of times. If we now select, let's say we're going to select these four Onda. We delete only edges and faces. Let's see what happens. So we've deleted the edges on the faces, but some of the edges have remained. This is because some of the verte sees have remained intact. If we go to Vertex Select, we can see that in fact no, just some. But all courtesies have remained intact. Even the birth asi in the very centre which is no longer connected to anything because those but those edges and faces were deleted. Even this Vertex has remained because we chose the option to only elite edges and faces. So every single vertex that made those edges and faces that were selected, every single one of them is still intact. So that completes the section on. If we do enough undoes, we'll get it back. There we go. You do have to do undo a couple of quite a few times. That completes deception on deleting parts of Amish. Let's move on now to dissolving. Now, in order to see the effects of these old, we have to select multiple parts of our mesh. So I'm gonna press to see key I might select bigger on that will do nicely. So what I'm gonna do now is I'm gonna press X and I have free options. Here I have these old but verte sees Dissolve edges on dissolve faces. Let's see what effect each of these has. If we slept his old faces, we get a single face. So they all being dissolved on a single face, has bean created in its place. This is particularly effective on flat surfaces. It's not as effective on curved surfaces and services with many ankles on them. If we undo that, is there any difference in this tsunami? Oh, with these old being edges or verte sees. Let's have a look So X dissolved edges. Yes, there is. Let's go back, is sick. So control and said What's happened is that a lot off the edges are dissolve, which means the edges created by the faces around our selected area have also dissolved to form uneven, larger face. But this face is a little bit different in terms off its shape. So we're gonna show you again X dissolve edges, so even want the ones at the top, which were also connected, fired. I was. Edges have also being dissolved. Finally, we have dissolved Virg disease, which almost does the same thing. But we can see slight changes in the corners and changes down here. So as you can see, different options off dissolving and the leading conduce very different things. So it's challenge time. I want you to create a bowl by selecting on deleting edges over UV sphere. So you're gonna create a UV sphere on. Then I want you to create a bowl out of it. Credit as nice a polish you can use to use thier scale tall try and make a couple of its extrusion is try and make the bold look fancy. But the main goal with this challenge is to be able to delete deletes in at its mode. That's basically it. Deleting edges in edit mode. That is the name of the challenge. Okay, guys, good luck with that on. I will see you in the next lecture
117. Joining objects: In the last lecture, we learned how we conjoined separate objects together to form a single object. But maybe if you've got a very complex objects, you might want to work on one part of the objects independently from the rest. So in this election, we're gonna just show you how to separate one part of your object form the rest of it. So let's go into blender on the process is actually quite simple. We have to go into edit mode to do this. So pressing tab on, we're going to be introducing two new hockey's to perform this separation. The first thing we're gonna do is we're gonna make sure everything is the selected By pressing I we're then gonna hover over the part of the objects that we want to separate on . We're going to press the L K, which will just select that part off our object. So pressing the Elke L stands four linked. So whatever you hover over, it selects that age face or Burt Asi and anything else that is directly connected. So basically the entire cube is connected to that one, Berta, see, But it's not connected as we can see the blender space between to this cylinder or the other kids, which is why only the Cube here has been selected. When we've pressed out next to separate this selected object, we're gonna press the letter p so pressing the letter P once brings up the separate menu. We have free options, weaken, separate by selection, separate by material and separate by loose parts. Now, because we don't have any materials attached at this point, we can't separate boy material, but we can separate by selection, and we can separate by loose parts. So we're going to choose for this lecture. We're going to choose selection. So against left click on what's happened is we're still in edit mode. Four are cylinder on. We're still in edit mode for this cube, but we're no longer in edit mode for the Cube that we had separated. Instead, it has a red highlight around it. This means that it is selected, but we are currently editing the original select, or which is the cylinder on Ditz Cube. If we look in the outline, er, we can see that this is the case. Currently select. Suitable editing is the cylinder. However, our selected cube has been made a new mesh called cylinder 0.1 If we go into object mode and select, we now have it selected it We Cresta Tap K, we can now edit it. So it is now completely independence both in edit mode and in objects modes. The only thing you need to make no old is when you select on separate part of an object. The origin off that object remains as it was when it was connected to divest of the original object. As you can see in this case here, when we drag, we have an origin that is outside off our mesh. Now, we don't want that. It's not particularly good practice. So we're gonna solve that issue by going to set origin origin. So geometry on the problem is solved. So that's how you separate you objects, guys. Good luck. Hope to see you in the next lecture.
118. Parenting and child objects: in this lecture, we're gonna be learning about parenting and child objects. This is a wave joining meshes while keeping them as separate objects. When a parent is manipulated, so is the child. When a child is manipulated, the parent is not. Let's see what this looks like in blender. So first thing we need to do is create second object. So we're gonna come cross and we're going to create. We're gonna create to keep so we're gonna make one. Andi, we're gonna bring this one over on. We're gonna create a second just so we can see more clearly what's going on. So what we're going to do here is we're going to make this object, this cube, the larger cube, the parents object, and we're gonna make these two objects Children off this parent object. So we're going to select this cube first shift. Right Click the second you shift, right, click the large a cube on. Then we're gonna press control on DPI. This gives us the set parent to option. We're gonna choose the 1st 1 which is objects on the left click. We've done that now and we can see that these two objects are no longer in our scene, but we press the plus button. We can see that they have joined with this cube. They have become Children off this cube. How this works if we select just Big Cube in objects mode and we manipulate it so we press G the two Children cubes are linked to it. We can just see that there's a dotted line that links the objects together. The same applies for rotation and scale. If we grab the child objects, we can see that we can manipulate this shoulder object on its own. However, when we grab the parent objects, the Children are manipulated along with it. Also, if we go into edit modes despite the facts that these two are Children off the larger objects, they cannot be manipulated to these off still free separate objects in blender. But two are just Children off the one. This means that in objects mode, whenever we manipulates, the parents of the Children are also manipulated. But in all other circumstances, whatever we do to the payment or the Children does not affect the other, so we can grab a Verdecia manipulated, but obviously unlike linked duplicates, it does not do anything to our Children. Cubes. So there we go to some of eyes. We have parents and Children. I'm going to show you this one more time to see the process again. I'm going to reduce the size of this. Keep and move over, create a second keep would used to size and move over. Create 1/3. I just want to check something yet create 1/3 cube. And there we go. So gonna move this one a closer in. So we select to smaller cubes first on Deep Parent Cube. Last, we create the parent child relationship by pressing control on DPI and selecting objects. Now, whenever we grab, rotates or scale the Parent cube, the same applies to the Children. Andi, There we go, guys. That is how we parent and child objects. But there's one more thing. How do we separate Children from their parents? Well, if we go blood back into blender, we can do this by selecting our child objects or selecting out short object he on. And if we grabs the objects here on move And so if we drag it out, we drafted out, it's no longer apparent. Let me do that again with this objects. So we're going to click, dragged to the outside and release. And now they are no longer parents or they are no longer Children, I should say off the large. Keep. Thanks, guys. Hope to see you in the next lecture.
119. The pivot point: in blender. Anything that is an object can be scaled, all rotated. But in order to scale or rotate something, we need a reference points. This is our pivot points, where we can scale from all rotate form. We can change this pivot point to alter how we scale and low Tate our meshes. So let's have a look at the pivot point and it's uses in blender. So we have our Default Cube aunt to know what our pivot point is. We have to come down to the info bar at the bottom to this icon here. Comely, it says Pivot sent up for rotating slash scaling median points. If we click, we have five options for this lecture lecture. We're going to focus on the median points, individual origins and Freedy cursor. Currently, our objects pivot point is the median point. This is the center off the objects. So no matter what the shape of the object is, it will have a medium points a center point where from that point, all of the mass of the object he's describing distributed equally for a cube. This is very simple, with his dead center in the middle of the Cube Because no matter where you go from the center, it is the same distance, the same sort of geometry, forming a medium points. We can rotate around this median points and we can scale in towards on out towards this median point. But let's see what happens when we change this to Freedy cursor. So we're not going to change the pivot point to the Freedy cursor Now, if we rotate now, nothing appears to have happened If we scale now seems to be the sign. But of course, as we know, the Freedy cursor is by default in the same place as the gizmo as the origin as the pivot point. So we need to move the Freedy curse of dis ease effects. So by move the Freedy cursor over here and now, why roads heights? So I'm gonna press far. We can see it rotates, and it actually moves our object around that pretty cursor. This is particularly useful when creating things like animations where you're creating things like jumping animations, a very powerful tool. The same applies to the scaling effect. By tracking out, we move our cube away from the pivot went while increasing its size. By dragging in towards the pivot point, we can see that we are decreasing in size. So we can already see that there's a profound difference just by changing the pivot point from the median points to the Freedy cursor. But what about individual origins? Well, less he had this works in all that for us to make use of individual origins, we actually need toe have more than one objects for more than one part of a mesh selected. So let's do this now. We're going to first of all, sets our origin back to the way it was. So we currently have our origin, he which is also our gizmo, and we're going to send it back to out geometry, which we have done. But we need to send our pivot point back to the medium point. There we go. We're also gonna press shift on s on going off really cursor back. So what I'm gonna do now is I'm going to create a second cube and there we go. So if we select both objects, we can rotate thes objects. Notice how that with two objects, the median point is the center point in terms of the distance between the two, so we can now pivots around that point. This may be good. If you wanted to create, say, your own solar system. You can make the sun your pivot points and wrote Hate Aled the planets around your son if we have a look at scaling, the same applies as earlier when we were using Afridi Cursor. But how do we get changed it so that these are rotated and scaled on their own, not connected to each other? The way we do that is by going to individual origins. Once we click, that's it, we say loads height. We now find a. Both of our cubes are rotating as if we were just rotating a single cube. If we process the scale, even in scaling, it appears to be normal. It's just that were you doing to at the same time, so again, some very powerful tools there for us to use. So, guys, that was the pivot points. I'm sure you would've gotten plenty off thoughts about a sort of things that you can do just by changing your pivot point. It can make such a big difference to certain projects as I said some great examples would be creating your own solar system. That would be a fantastic project to do if you're going to practice using the pivot point. So thanks a lot, guys. On I will see you in the next lecture.
120. Hiding our objects: sometimes when we have too many objects in our scene, our scene can become congested and it can become difficult to edit certain objects. We're working on a single mesh hiding. The others can free up your screen to make editing easier. This does not delete the objects. It just makes them invisible. We're gonna look at how we can both hired Onda unhygienic objects Select slogan to blender . So, in order to hide a selected objects, all we have to do is press the hey h g and straight away the object disappears. Notes in the outline er that's the Cube is still in the outline. Er we still have a cube. We just can't see. It's at the moment to bring our cube back. All we have to do is press cult and hate each and that brings any hidden objects back into view. We can do this with multiple objects so we can select the cube. The lamp on the camera 12 free press. Hey h! And all three are now hidden by pressing out Hey, age We can bring them all back. So there we go. Go guys. That is how we can hide Onda unhygienic our objects in blender
121. Removing the blender grid: in this lecture, I'm going to show you how you can remove the blend. Agreed. Sometimes if you're working with a very big object the blender grid market in a way, in the same way that the Freedy gizmo could also get in your way when you're editing larger objects. So let's have a look at how we can get rid of the blend. Agreed. Not the liters such Just make it invisible like we would make an object invisible. So we're gonna go into blender on to keep this lecture nice and short. I've kept it very, um, advanced. So what you're seeing right now is a scaled up version off Suzanne the monkey that has bean you the maps. But I want to be able to look at to my monkey without the blend. Agrees. Getting in the way. So several ways of Gouda. I could just simply drag it up. But then I need to change my navigation. Or I could simply get rid off the blender grid to do. That's all I have to do is open up the scene properties, which is this panel here. So you can do that by pressing the N key on. If you cut start at the top and you scroll down to where it says the splay, you may need to click to bring it up, you'll have a series of options. These allow you to display certain things. So, for example, the world background we can see the shadings just turns lightly. There. We can see outlined selection relationship lines, but the one we're interested in is grid floor. Now this one is interesting as well, because we have different options such as lines scale on subdivisions. If we press the Z axis, nothing appears to have happened. We pressed the war again. Nothing appears to have happened. Or has it? Something has happened. Our If we assume in, we've still got our X axis line. But we no longer have our Y axis line, which should be coming out of here. If we click on the white, we can see it now coming out it. We click on a zed, we can't see anything, but that's because our grid is still in two dimensions. We can actually increase the number off lines in our blender grid. So if I increased that to 32 our blended greed becomes much larger so we can increase and decrease the size of the blender grid. Very highly toll. Let's try 64. And as we can see, much bigger on this is actually starting to look a lot more like it would in unity in unity , our grid system, which looks quite similar to this. But it is actually very large. It starts in a very large scale. Where's blenders? Greed starts very small on. We can continue to increase that. So which, while 128 even biggest still and so on and so on we can. Increased scale was, well, this is the distance between the grid lines. So by increasing this value, we're increasing the sizing off A with the little cubes. This, as a result, is another wire increasing the size off the blender grids. But what we want to do now is making invisible all we have to do. It's untech this box and there we go. The blender grid is now completely invisible. The axis lines are still visible on. If you want to turn those off, you simply click on X and y. If I click on the gizmo total at the bottom here. We've gotten rid of that as well. So now all we have in our scene are our objects. But of course, if we need to, we can always bring them back. The final thing going to make a no off is subdivisions, so we can increase in decrease the number of subdivisions. The more times you subdivide. Basically, the more times you said about these squares here, so you make different. If we have a look form user orthodox, we'll assume out. And assuming if we increase the subdivisions, we can actually say see fades quite a bit now, probably because of the sheer size. It won't do too much at this point, but we can see that it does tend to happen effects of every small effect on our blender grids, but not one week should be too concerned about. So the main thing to take away from this lecture is if you want to get rid of your blender grid just until this box on ticket tipping it back. Thanks, guys. And I will see you in the next lecture. Where will continue on you ve editing
122. Scene layers: in this lecture, we're going to be looking at scene layers. The blending universe is a universe that has different dimensions or layers. We're gonna learn how we can switch between these layers. We've also gonna learn how we can move objects to other layers and how to make multiple layers visible on den guns. Give you a challenge. So let's lock in to blender. So we have multiple scenes in our project, the way we can navigate between these scenes. We have two methods. The first method is when we come down to the info bar. We have this Siri's off dots, so we have $10 here on $10 here. Each of these represents a liar. If that layer possesses a circular dots inside of it, such as this first layer, then it means that there are objects in that layer. If we click on another lie, a box blender takes us to that layer. So now that we're in layer to there is at the moment and nothing in latitude, there's no camera, no lamp, no cube. But we can do. We can add these things in blender so we can go shift. I well at all keep shift. I well at all. Camera putting that one over actually shift. I will add our lamp and there we go. We've got a second scene which is gonna rotate that one because I'm no happy with it facing that direction. Excellent. There we go. So that's our seen on layer to, but we can go back to layer one, and you know it's no to both. Eli one and two have thoughts. We can go back to lie a one which brings us to our original scene. The second way that we can move between layers are the number keys above your keyboard. So if you've got a Quartey keyboard, for example, you'll have the number one and two above the cue. That line off buttons. That line of number buttons is what we used to move the layers unless you have emulated the number pad, in which case those numbers will be used for camera views instead. But if you have not emulated a number part and she would press to, you would go straight to layer to free 456789 and take. So there we go. That's how we can move between layers. But how do we move our objects to other lies? Well, to do this, we simply right click to select the object, press the letter M on the keyboard, and we get a pop up menu that says moved to layer on Weaken Select, which led to move them. So I'm gonna move my cube to lay off five, and now it's disappeared. But if we have a look at layer five, there's all que So there we go. That's how we can move objects, toe other lies. Finally, how can we make multiple layers visible? So I'm gonna go to lay, too, And I'm just gonna move my keep to decide on God's go to lie a one to make multiple layers visible is very simple. We simply shift on click other layers so that more than one layer becomes visible. So I'm gonna hover over layout to shift left click on. We now have left layers one to have combined form a single liar, at least in terms of what we can see. So there we go. That is your introduction to layers, that we can't go into a lot more depth in future. In the scene tab. This is dedicated to laze. And this is in fact, another way in which we can go to any lower we want. But we'll go over this another time. For now, I have a challenge for you. I want you to create objects and place them in four separate layers. Create as many objects issue want, even create more than four layers if you want. But I didn't want you to make a lot of those layers visible like I did at the end. Do that, guys. And I will see you in the next lecture.
123. Introduction to modifiers: in the next Siris of lectures were going to be looking at modifiers. Modifies are very useful tools that at a whole range off factors that we can add into our creations weaken do things such as deform, salute, solidify arrays, devils, billions. We're gonna be looking at all of these in the upcoming lectures, and we're going to see how we can use our modifiers toa alta our creations.
124. The mirror modifier: in this lecture, we're going to be looking at our first modifier. We're going to start with the member mortar fire. We can use the mirror mortar fire for objects that have a least one line of symmetry so that we can have our workload. We've also got a look at how clipping effects Woomera mortify before giving you a couple of challenges. So let's go in to blender. So the first thing I'm going to do is I'm going to create a line off symmetry in my cube. Now, obviously there is a line of symmetry, but we need to tell blend that where that line of symmetry is. So what we're going to do is we're going to go into edit mode on we're going to press control and are on. We're going to make a loop, cuts there's only cuts. Next thing we're gonna do is we're kinds press seven for a top perspective. You de select everything we are den going. We're then going to make sure our selection is not limited to visible. So now we can see are in toy a mish on a lot of its 30 sees. We're now gonna press B to bring up box Yvette, select this half off for two C So 1234 We're going to press X on delete 30 sees. So what we've done is we've deleted half of our keep. Now what we're going to do is we're going to recreate this half of our cube by dragging out the properties panel on This is where we guys introduce the modifier tap, which is this tall icon here. Note that the mortar fire tap is empty because we currently have no modifies. Adam WaterFire. We must click on add modifier on. We have all of the's modifies to choose from. What we want is the mirror modifier. So we're going to left click Andi. Nothing's happened so far in the reason why is because we have to make sure the axes are correct. If we pan around, we can see that nothing has happened. But if we take our war axis, we can see that we now have our Ball cube. We don't need the X axis in this case, so we now have a mila. Now, one thing to note about using the mirror modifier is it's it's best to avoid applying your modifier until the last possible moment because you want to be able to edit it. What will happen, ese? Once you apply that mortar fire, then your entire mesh will be available for edits. Now, that's that sounds okay, but the whole point of having the mover modifies actually so that you can edit two sides of an object at the same time. For example, I'm going to select this for to see and I'm gonna drag it up. Watch what happens to the myriad half off my cube said Drag up and we can see that's the opposites. Vertex has also been manipulated in the same way. The same applies to just about anything. If I insert a couple of loop cuts and then scale out those lead cuts, we can see that it impacts the Mewes site as well. However we know is that as we scale in a whole appears in our mesh. If we scale too far out, we end up. Why just confirmed that for a second with geometry crossing over each other and we don't want that in order to avoid this, we have to enable the clipping option which clips at the center off the mirror. So I'm gonna press control and said, I'm going to chick clipping and now I'm going to scale again. If we scale in, we can see that it is nice and tight scaling out almost say, now we have one problem here as we scale out, the clipping doesn't seem to be working, so we need to make sure that that is working. So we're going to undo. The reason why it's not working is actually very simple, even though we have clipping engaged as we clip smaller, we have it nice and tight. But as it comes out, it seems to almost disconnect from the clip on. The reason why that happens is very simple. We can't scale out with the clipping. Always applied. Blend up doesn't really allow this very well, because you if you if you're clips and it's preventing you from skating, then you can't scale. So scaling takes priority, so just bear that in mind. It's sometimes better anyway to make sure that you're you've scaled, rotated and move draw objects before applying any modifiers. So that's my number one tip. Before you employ any modifies, make sure you're objects, location rotation and scale are what you want them to pay. So that's the mirror mortar fire, guys. Now we're going to We're happy with that. We're going to press, apply. Uh, here's another thing. Modifies cannot be applied in edits mode this because they're still being used. So we have to go into object mode by pressing the tab key and then click Apply. Now, when we go into the edit modes, our entire mesh is available for edits. This time, However, if we click on this Vertex, it's opposite. Vertex is not moving in the same way. In fact, it's not moving at all. So the mirror mortify only really effects both sides of a mesh before the modifier is actually applied. So I've now got a challenge for you. I want you to create a custom Objects with the mirror mortar fire. Create 45 Used the primitive measures. If you have to take each primitive mesh, create a line of symmetry using the lute. Cut in slight. All delete 1/2 of your measure. Make sure you don't delete percent oppose percent appoints, and then I want you to apply a mirror modifier and then customize your object while using the mirror mortar fire. And then I want you to apply it. Once you're confident enough with that, I want you to step it up a gear. Quite literally. I want you to try and create a very basic car model. It doesn't have to look brilliant at all. But use things like moving your courtesies about extrusion ins, scaling rotation, all the things you've learned so far trying to use them. Used joining methods to try and joined create wheels and joined them to your mesh before using that mirror modifier. Okay, guys, do that now. Postal with your creations in the discussion so that we can all say, Andi, I will see you in the next lecture.
125. Subdivision surface: in this lecture, we're going to be looking at the subdivision surface modifier. We're gonna be able to use its create smooth geometry. We're gonna be looking at the difference between the modifier on the subdivide tool. We're gonna go over again. Why? You should avoid over using subdivision surface on. We're going to look at how we can prevent unwanted curves and then we're gonna give you a challenge. So let's go in to blender. So we already know that by pressing, it's hard to go into edit mode and then press in the W K to bring up the specials menu. We can select the subdivide toll on this Consob. Divide our cube up as many times as we want without changing the actual shape. However, there's a second alternatives to subdivision. We can use a mortar fire, So let's bring out our for Pity's panel. Go to the modifiers tab Adam Mortar fire. On this time, we're gonna click subdivision surface Now watch what happens when I click subdivision surface. Very interesting. So what's happened here is we got the basic shape and we can actually select the cubes geometry as it was before, So it's still got the same geometry shape. However, Interestingly enough, the object itself looks very different. It looks a lot more circular with a lot more edges in a lot more Verte sees. The strange thing here is that if we look up here at the top, we can see that we still have eight vergis ease as we would with a normal cube. So basically, the subdivision surface mortar fire increases the smoothness and geometry or or official geometry off our mesh with how, actually changing the mesh structure itself. We can increase the number off subdivisions that we can perform so I can increase their to free for And you know, is that this is actually a much quicker way off creating a bowl out of a cube and we can go up to six in terms of the subdivision surface mortar fire, mainly because we have a look. We can see that that is a lot off geometry, and that is an extremely smooth ball that we've created for our cube. If we go back to one, so we've got a subdivision surface modifier. But what if we don't want it to be like this? What we don't want it to be like a bull. What if we just want to make some curved edges out too far, Cube? Well, the white dude are is by just using the loop cut and slight All So I'm going to de select press control are over over left, click on a soon as I left click. I haven't confirmed it yet, but straightaway the shape off our objects has changed significantly. So I could drug this up and we can just see how this changes our objects. So say, if I wanted to bring it up to the top on, then once more to the bottom and as we pan around we can see we have a very interesting object. We can do the same on multiple planes of subdivision and in fact, we could even we create our entire cube by adding more subdivisions here If I can create the smooth cube that I have been looking for once I'm happy with what I'm seeing. I can click apply Oh, once again, don't forget you cannot be in edit mode. Press taps go into objects mode. Click, apply And we have our mesh. We have our keep. We've much more curvy edges. If we go into edit mode, we can actually see now that that service has been applied on. DSO has the geometry, so in much the same way as the mortar fire doesn't actually take full effect until you applied it. The same applies for the modifier off subdivision surface. We can edit the modify and how it works in this panel here, and once we apply, that's when the geometry is added. So that's the subdivision surface mortify. It's actually very different in terms of how it could be used to the subdivide toll. So now let's make a challenge. Our this. I want you to subdivide your custom objects or car. So, for example, if you create Eudes your blocky car, which I'm sure many of you would have done using things like exclusions, etcetera, this is a great opportunity for you to add more natural, more curved edges to your car's structure for any parts of your objects where you want to shop in your edges, don't forget you can use Luke cuts to do so. Thanks, guys. Post your creations into discussions on I will see you in the next lecture
126. Solidify: in this lecture, we're going to be looking at the solidify mortar fire. We're going to be using the solidifying mortar fire to give our what measures more substance to them. So let's go into blender. So the best way to do this for me is I'm going to delete my cube and I'm going to install a sitting duck. Next, I'm going to change my cap fuel type from end, gone to nothing. What this will do is it will delete the faces on both ends off the cylinder, so I'll change from N Gone to nothing. So now we can see the inside of our cylinder. Next, I'm going to go into edit mode, make sure everything is not selected so that I can see more clearly. And then I'm going to add might solidify mortar fire. So click where it says solidify. It should be just above your subdivision surface on what solidified does is it basically adds fitness. Tual your faces. So no matter what models you create in blender, they will always have a default minimum thickness, so that only have the smallest amount possible to be considered a face. You think the solidify mortified we can add fitness toe objects. Say, if you were creating a brick wall so you created the brick wall. You modeled it. You text it materials and everything, but it was still a flat surface. Shorty. You'd want to make it thicker wood to solidify conduce that here we have the fitness value . By increasing the fitness value, you can see we can increase the fitness off our faces. How thick we can make our faces is almost limitless. So I've got a van. What 0.15 will do me nicely on. We can see that that's a very thick object to use. It's ideal to use solidify after you have completed the modifying stage. So this is one of the last modifiers that you should use before moving on to textures. The reason why is very simple. The more fitness you add to an object, the more challenging it could be to see accurately how you're manipulating your objects. Ideally, you want your objects to be as close to flat as possible. So that's the solidify. It'll very useful. Very powerful. Right now we have a challenge. I want you to apply, solidify to any objects that you have created in the past. So your car, your skateboard ramps, anything your Pyrrhus cope. I wanted to apply some FitLinxx thickness to all with these objects. Once you've done that, I want you to create a pastor ball. If you don't know what one looks like. Have a look on Google and I want you to use the solidify modifier to give it some thickness . Do that. Guys on. I'll see you in the next lecture.
127. Boolean : Our next modifier is the 1,000,000,000 modifier. The 1,000,000,000 modifier is a very creative way or being able to create unique shapes by using our existing objects has tolls to cut into each other. We're gonna be looking at the free forms off. Julian thes are difference intersect on union before we give a challenge. So let's log in to blender. So we've got our cube here on. In order to use the bullion modifier, we're gonna need at least two objects, so I'm going to drag my cue to decide on I'm going to create a UV sphere. Next, we have the bullion modified to come into effect. So what we have to do, first of all, is I think the Hubie Sphere is a little bit big for my liking. I'm gonna scale it down slightly. There we go. And I'm gonna bring more cube, and I'm going to intersect with my you ve sphere so we can see that the UV sphere half of it is now covered by the Cube. Now, these are still two separate objects, which means if we ever had this in our seen, it would cause a lot of problems. When, when doing. However, our plan here is to use the bullion modifier so that we can connect these objects in a certain way. So let's do this. I'm going to drag open. Why? Properties panel and go to modifies. Don't forget we have to go into edit mode to do this Now before you do select the cube modifier because this is the shape that will be applying it to To start with. I'm going to edit mode. He select your object with I on at the bullion mortar fire, we commonly have 1,000,000,000 as a red tap. That means that it doesn't know how to use the mortar for her as yet. Therefore, we need to give it an object to use for the Boolean operation. This object is going to be our sphere. So now we've selected a sphere and we have our free options under operation. We have intersect Union on difference To get a clearer idea of how this is going to look, I'm going to change my Freedy display to wire frame. So we company have our you the sphere inside How our cube we have intersect Union on difference. We won't see the effects of these until we've applied the mortar fire. So let's do it. Let's see what happens when we apply Intersect for our 1,000,000,000. Apply on once again. I've made the mistake. I do do this on purpose every time, guys, because it's very, very, very important point that you don't get into this habit. Always, always make sure that you apply your modifiers in objects mode. It's quite strange because you've always really got being edit mo to create the modifies and to actually get to start working. But you have to be able to make sure that you can switch in and out on the fly. So we're gonna press tab Oh, and straight away we can see something's happened. The cubes disappeared, but selected he's this half off the UV sphere or is it selected? Let's have a look if I drag, it seems that we now have a white tint to our mesh, and as I drag it, it seems that we can change what is what and what is black. That's because I'm not manipulating the sphere at all. The sphere is staying exactly as it is. What I'm doing here is I'm moving the cube, the only difference is you're looking at what's left off the Cube after the Intersect. So what happens if I apply this? I'm going to click, apply, and then I'm going to drag this away, and then I'm gonna go into solid view and we can see that I've actually got half of the UV sphere. So when intersecting the 1,000,000,000 what has happened is that blender has deleted everything that was outside off the UV sphere when I applied at the mortar fire. So let's go back. If you on, let's change this value to union. Now that we've changed it to union, our mortar fire has brought back our cube. Let's go back into a wire frame and we can see this time that's the inside off. Our UV sphere is unsolicited, but we seem tohave the outside selected as well as the Cube. But once again, it's important to note that D U V Spear is no actually being selected. If we move across, we can see the UV sphere here, and he okay, so let's see what happens if we apply the union 1,000,000,000. So going to press apply, we're going to drag it a why and we're going to go into solid view and there we go. We've still got our UV sphere as it was, but now we have a very interesting cube with 1/2 of a UV sphere coming out of it. Very, very powerful tool. So we've got one more to show you on. That is the difference. 1,000,000,000. So let's see what happens when we apply the difference. 1,000,000,000. Let's have a look in wire. Fine. We can see this time that the inside is selected, but we can see to Cube. We're going to click, apply. And we're going to drag our cube away and go into solid view this time by using the bullion mortar fire we have actually cuts a shape in the form of are you the spear into this face off our cube? So that's free. Very powerful ways off using the bullion mortar fire. Now for a challenge, I want you to create a light bulb and I want you at some point to use the bullion modifier . Do disguise post your creation in the discussions on. I will see you in the next lecture
128. Array modifier: over the next free lectures were going to be going over the array modifier. We're gonna be using the array modifier to create a Siri's off duplicates using the blender world as a reference point. There are three types of offset. When using theory modifier on each lecture is going to cover one off each offset. We're going to be looking at relative constant on objects offset. So but this lecture we're going to start with relative offset. So let's have a look at this in Blender. So unlike most of our modifies, you don't need to be in edit mode to make the most off theory modifier. This is an object mode based model for what I mean by that guys is most modifiers affect the overall the geometry over your objects. For example, sub deficient surfaced. Will crew will make your geometry much more in depth when in at its modes, changing its shape theory. Modifier is an object based modifier. This means that we don't need to be in edit mode to have any specific impacts on our modifier. So let's have a look at what this looks like. I'm going to open up the properties panel click on the modifies tab, I'm going to click add modifier and she will find array at the top off the generate section . So one click on the first thing we notice a soon as we click, is that our cube seems tohave doubled in size, but it hasn't doubled in size. All that's happened is that blender has now created a duplicate off the original Cube. But it has been placed right next to our original cube. So let's look at what we can do with relative offset. First of all, we've obviously got our a ploy. Andi, copy buttons. We have fixed count, which we're not gonna worry about the count value if we increase its this increases the number off a raise so it increases the number of duplicates that you make. We'll go back down to two. So this doesn't really look like the duplicates districts. Looks like one rectangular objects. In order to separate these two, I'm gonna have to increase one of my relative offset values. Now, at the moments we got X Y and said X is a value of one, why is a value of zero Said is a value of zero So let's see what happens if we transform the X value to To on. We can see straightaway. That's our cubes have now separated. So what? We mean very important point what we mean by relative offset. Well, let's see what happens if we increased this number by 2.5. Very interesting. We're gonna look at this form the top down view. So I wanted to keep in oil on the blender grids. So that's commonly 2.5. We've got 12 free. Let's go for free. They're interesting. We've now got 1234 will go to free 0.5. Now we've got 12 free for five. So basically, relative offsets uses the world the blender world to calculates the distance between the two blender objects. Let's see in more detail how this works. So if we go into the scene properties panel, what I'm going to do now is I'm going to increase the values off my scale. Values toe 1.5. Some guns increased them. Well, actually, we'll make it easy. That will make it to now the values. If we assume out it, it's no longer in straight units. We can see, that's a lot more than five by comparison. So what we're going to do is we've got it at two. We're going to apply this scale, so we're going to go to objects a ploy scale. So currently we have at 3.5, let's set this back to one on Samos before it now links back with our original cube. Let's now turn this up to two. Very interesting. So the way that this basically works is that if we have a look at this from top down view a little bit difficult to see there. So I'm gonna narrow the angle on and we can just about see, I'm just gonna get spilled. Better view. We can see that the width off the cube is one to free four blender units. The gap between them is also 12 free four blender units, and that says to so basically, what this means is that when we have an officer value of two, the value on the distance between the two cubes is Theo equivalent to a four cubes. You can fit entire third cube in between these two cubes. That's how we calculate the offset. That means that if I increase to 2.5, let's see what happens. 2.5, which increases by a number to So we can't. 123456 It increases by another two blending units because these to blend the units make up half off the width off the original. So that means we got to free. We should go a fervor to blend the units, which we can just about see, Obviously the blender grid stops there. But we can just about see it up. Of course, we also have the wire values, underserved values. So if I turn this back to zero on increased this value to to we can see the array now takes effect along the war access. We can also do this along the zed access. There we go. Don't forget we can also input from minus values so we can go minus two twos. Position dear. I in the opposite formats in addition to this week and also set values to to mawr than one off the axes. So I can position this app to and I can position the X axis at one. And there we go a week pan out once we're happy with that, we can increase our count. So I don't recommend you increasing the count until we were happy with the distance between the 1st 2 So we can increase that free for five soon out on Duthie, offset values will be the same for each off thes cubes. So the value is related to the previous cube, not just the original. So some of our eyes this cubes positioning is determined by thes values. 12 free on the original cube. The next cube is positioning is determined by these free values again. But this cube is the original position. Form the offset. So there you go. That was the relative offsets in the array modifier. Thanks, guys. Hope to see you in the next lecture for Constance Offset.
129. Bevel modifier: in this lecture, we're going to be taking a look at the bevel mortar fire. The bevel modifier is a modifier that we can use to smooth edges on our objects. That creates more lifelike materials, and we do this by adding geometry in a curb format. We'll be looking at how we can use this bevel toe in and it's mode and introducing the hot key for the bevel modifier, which is Control Bay. So let's go in to Blender. So we've got our cube and we're going to go into edit mode now for the purposes. Off this lecture, I'm going to select the top four edges only. So I'm going to dig, selects everything, and then I'm going to go into edge, select and press cult, right Click or control. Oh, what I think. There we go. So next we have the devil modifier. So there are two ways that we can do this. We can use the bevel tool, which uses the hot key control on bay. Once you press control and be, if you drag away, you can see that's the edge, splits into two and creates an angle. The more we drag away the greater the distance between the two under. More varied are shape becomes. If we scroll up on the scroll wheel each time we do so adds another loot cuts. The more Luke cuts we include the smoother our bevel. So as we can see, we have quite a number off cuts here, so it's very, very smooth. Let's reduce this. That would do on click to confirm and there we go. We have a very interesting Shaffner. Next we have. If I first Control said to go back, we have the bevel modifier so we can go to modifies top. Add mortar fire on bevel. This works slightly differently. This works in a similar way to two subdivision surface, so the bevel modifier actually alters the entire mesh, whereas the bevel tool will only modify your selected parts off the mesh so we can be select these edges. Now, as we can see, the mortar fire works quite well. By increasing the width value, we can increase the distance between splits edges, creating a variety of shapes by increasing segments. We ads lead cuts in those in those meshes. So by adding more segments, we add more loot cuts, making much more round, much more defined corners. And there we go. That's the bevel tall on the bevel mortar fire both of these Beverly objects, but both can be used in completely different ways. So there we go. There's the bevel mortar fire and I will see you in the next lecture.
130. Modelling challenge: to end the section off modeling. I have a very special challenge, or Siris of challenges. I want you to try and create everything you see on this screen. I wanted to create a drink. Can a fork, a spoon, a knife, a bowl, a plate, a glass, a wine glass bottle smartphone on a TV I want you do before moving on to the next section to try and create as many of these items as possible. This is a great way to take everything that you've learned from the modeling section and to apply it into a Siri's off different real world objects. I have specifically selected objects that won't require too much time. Most of these you could probably do in Nome or Dan 20 minutes. Probably the ones you spend the most time on would be the fork on spoon. But apart from that, a lot of them are great modelling projects for you to just get into modeling in your own time. So do as many of these as you want. I recommend that the more you do the better because each of them is different. So modeling a fork is completely different to modeling a wine glass, for example. On if you've done over them and you want to do even mawr, find some other objects. Maybe model your remote, maybe model a plug socket. I know it sounds. What? Plug socket? Really? But you know, simple designs that you can find in your house. Maybe you could design a door with a door knob or a window or even your house. You can try and design a model. Your house. There are so many different things you can do. So give that a go, guys. Andi, I will see you in the next section.
131. Textures and materials: welcome guys to textures and materials. In this section, we will learn about applying textures to give our creations more feel on more substance. We will also begin rendering our creations on looking at the basics off camera and lighting . We're also going to be looking at render engines because of this. So we're going to be looking at two engines in particular. We're gonna be looking at blend Orender and cycles render.
132. Materials in blender render: index. Let shot. We're going to be looking at materials in the blend up, rendered in engine. We're going to be looking at STI typical things that you can do using blend Orender and why this simplistic form off blender is better for exporting models to other programs such as unity. So let's have a look at the blender render engine. So when we open up our new seen, we have to make sure that this icon up top says blend up. Render if it says either blend a game or cycles render, then you're in the wrong engine and you need to make sure that you click blend Orender, however like so shouldn't be a problem. Currently, we are not in solid shading. In case you may have noticed that the shading off our cube is a little bit different to normal. I'm currently in material shading, so we go back to solid. We can see the shading is different. So now we're gonna go to material shading on. I'm going to go to the materials tap in the properties on. We now have this tap toe work with so first things we're gonna go through these four subsections in this lecture preview shows us a preview off the coloration off our objects. We can change what primitive form this is so I can have my cube there. Suzanne, off it. We've even got a hair preview here on a search lie with world backgrounds Were gonna choose cube because obviously that's what we're working with. Next one down is diffuse. Now, if you don't know what the word diffuse means, it is basically a form off coloration where the color is constant across an entire surface . So basically, what happens with a diffuse color is light will hit it, and it will scatter evenly across the entire surface. So, for example, I'm gonna change the diffused color by left clicking on the on the white bar on onion. Select a nice green color on. We can see that we have now given our objects a green material. If we look at each face, we can see that the color is fairly consistent across that entire face. Obviously, the more light reflects on that face. The more color we will see notes that in blend Orender. If the light source hits the face, then we get a nice constant color. But if it doesn't hit the face, then the entire face is going to be black like these here next we have speculum. This is basically more of a glossy type Carla to choose. So if we defer this one back to White Onda we click speculum and we're gonna go for will go for the same color so we can see the difference Unconfirmed. Nothing's happening. The reason why is because we have a look. Something is happening, but it's a little bit different. So speculum doesn't really change the color off the object itself. What it does is it gives the light akala when it bounces off the object. So she consumes. I hold for over we get the light source hitting the top of the face on a nice green reflection appears on the face. We can combine these two together so I can click the future I'm gonna go for Ah, they're really lights like green bluish color. And as we can see now we can see a little bit more clearly that is, we hover over. We get this speculate green That just shines when hit by the light source, which is up here Finally, we have the shading section. This shading section helps us to determine how much light our object can emit from itself. So if we move this above zero, we can see now that ALOF the faces have lit up quite dramatically. This is because the object is now admitting a light. We have ambient values on translucence values, but we don't need to worry about these for now. So turned that down to zero and we get our classic shading again. We also have several ways in which we can view our objects. So we have surface view. Why have you which shows how we could see it in WiFi mode volume, which is quite a grainy effect ons halo which basically creates, as we can see there a Siri's off coordinates where the verte sees were. So there you go, guys days your introduction to lend Orender play about with it little bit. See what kinds of colors and shadings you can create with different objects. The reason why this is perhaps better than cycles Engine to export your models in two things like unity is because unity, war perhaps have their own systems in place where you can apply materials on. Sometimes you can have issues when applying complex materials from cycles on, important them into unity. You cannot problems. These problems don't exist with blend Orender. So, ideally, if you're creating something to import into some into a game software like unity, then you can use Blend Orender to use basic color options to create a templates material for your objects so that you can have a look at how these objects actually look when they've got materials supplied to them. And then you could import safely into unity where you can touch upon the designs. So there we go, guys, that's materials in blender render.
133. UV mapping: in discs lecture. We're going to look at the process off you. The mapping with three D objects applying materials can be a little bit more challenging than simply importing and loading a texture. When we imported texture, we transfer it onto that material. When those materials are replied, however, you may find some abnormalities. You might find that some of the textures maybe stretched across a specific surface, and it won't be as even as she would have liked. UV mapping Help solve these issues by dividing your objects into faces in a two D layout. It's whipped this two D layout that you can apply your textures to whatever way you want. On additional benefit of UV mapping is the map. Condemn be exported to two D software, such as gimp to create the textures. So let's have a look at how we can UV map our objects. So as we go into blender, the best way to show this would be to bring up the correct pre made lout. So I'm going to choose screen layout and I'm gonna choose you the editing. So in the UV editing screen, I've got my Freedy view, and I've also got my you the map in older to unwrap our cube. The first thing we need to do is going to object mode and ensure that everything is selected, which it is because it's all highlighted. Next, we're going to use the hot ski you to bring up the unwrap menu. So I'm going to press you. And now I have a series of options. Unwrap Smart TV project like map. We've also got ones down here, such as Q projection Sitting Down Sphere Project from View, which projection au the image onto our map based on what we're looking at, Onda form Bounds is well, for now. Let's focus on unwrapped and see what that does. So it appears to have given us a object of sorts. Let's click one, and we can see that what it's done is it's applied all of our faces, one on top of another. This is fine if we're going to install a uniforms style texture to our cube. But maybe we don't want that. Maybe we want to apply specific parts specific colors to specific parts of our cube. Well, I'm gonna press controls it several times to undo the UV unwrap I'm gonna push you again. And now I'm gonna try cube projection. Let's see what happens when we press cube projection. Very interesting. So now we have not one but free visible cubes. It would grab one. We can see that these are mixed in terms of where they're placed, but we concede we have a little bit more death. Let's on Duda again on We'll try this time or press you then smart UV projects. Now we get a Siri's off options so we'll click. OK, just for Knox. It's an example on now this is interesting. Now we can see that we've got all six of our faces in different parts off our you the grit , This is much better. This is what we want. Now we can apply textures to each face individually. What we can do here is we can go to U V s and we can go to export you the layout. If we press export UV layout, we can export it as just about anything. So we've only got free options at the moment. But we got PNG in captured a postscript. Andi scalable vector graphics all with these have their advantages. But PNG is by far the best, because with a PNG lay out, you can do perhaps the widest range of tasks. So we're going to call this Test Cube. You see, Andi exports and there we go. So now we've exported this UV lout as on image, and now I'm gonna do is I'm gonna open up to the software so you don't support this spirit . But I'm gonna open up gimp, which I do suggest you download because it's completely free. Just wait in a minute for that to load up. I noticed that it may take well, when Sometimes it does. Sometimes it doesn't. But whatever objects you used, there's always a hole for right of ways that you could unwrap it. And it's just experimenting to find which unwrap is best for what you want to do, Deletes and why Gibbs Taking so long is probably because it's updating, and I haven't actually used it for quite a while at this point. But there we go. So we called our gimp software up. I'm going to maximize the program and then I'm going to file Onda. We don't have if we know if we look across, we don't have any import options, but then we don't really need to weaken. Just open our file. The better way to do this, actually, when you're importing UV layouts is instead of just opening, you should open as liars. This gives you the opportunity to edits different parts of the mesh one on top of another to create more detailed textures. So I'm going to left click open his lies on gonna go documents blender on to go. Look is another tip for you. Make sure you know where you're saving, so I'm gonna have to go back to documents on. Actually, here is Test Cube UV. So I didn't have to go into blender right here. So there we go. We can see in the pre you open. And there we go. There's our UV layout ready to be edited. So now we can use gimp to create our own custom texture for our cube, and then we'll export it back to blender. So there we go. Guys. That's the basics off. You ve editing in the next lecture. I'm gonna show you very quickly how we can exports our UV image back into blend out Once we've played around with it a little bit on. See how it works. So in a bonus to this course, you also get a little bit of a gimp. Tutorial was well as blender. Those guys hope to see you in the next lecture.
134. Smart UV project: in this lecture, we're going to be looking at smart UV projection. This is the automatic version off UV unwrapping. Basically, how smart you the projects work is that they can create invisible scenes to try and unwrap your objects as best as blender possibly can. So instead of you manually marking seems you can simply select your entire objects on you can select Smart TV Project on it will create seems in places that it seems feasible to create a decent UV map. So let's have a look at a couple of examples of smart UV projection in a blender. So we're going to go into our UV editing mode on. We're going to do a few of the primitive machines just to see what happens. What's the main difference? So I'm going to start with the cubes. I'm gonna go tap into edit mode. Everything selected you. I'm lap. So as we know by now, when we unwrapped a cube, we have all six faces unwrapped, but they are a with same size, and they're away on top of each other. Now, if we go smart, you ve projects we get a Siri's or free separate options. We have angle limits on and margin and area white. I'm going to Thurston former Show You What happens when each of these are normal, So I'm going to click OK on. Fantastic. So we can now see that we have all six faces equally distributed across the UV map, and that's very good. So we can even select islands. But there's a thing here because these free are connected based on where the seams are, we can't see the seams on our mesh because we didn't create the seams. Blend are automatically created. The scenes on, it seems, have created seems along. These free faces, too, allow for decent separation. But as a result of this thes re faces are not connected. So I'm going to undo that. Make sure we own do that numerous times Now I'm going to try getting smart TV projects, but the one I want us to focus on is the island margin. Let's have a look at what happens if we increase the island margin to to, so I only goes up to one so we can go anywhere between zero and one. So let's see what happens at one. So that's very interesting So now allow off our faces have bean disconnected because we've told Blender that when it projects how you the map, that each island must have a certain amount of space between it on any other islands. So now, as a result of that blender has had to remark the seems so that every single face is disconnected. This is brilliant because now we can select islands we can move thumb about. We can resize them, however much we want etcetera. Let's have a look at a couple more examples off smart UV projection, and we're just gonna worry about the primitive mess she's for now. So I'm gonna go into object mode to smooth out to the side. Doesn't really mind. We don't need to delay it. Let's try a UV sphere, so let's unwrap the shoe the sphere. Once again, we can see very, very interesting how it's covered the entire you the mop. But we really can't tell what's what. We have absolutely no idea. This is a very poor unwrap, so let's do about one. Let's smart UV project. So let's press you smart TV project. I'm going to bring this back down to CEO. So we're gonna show CEO and one just Just so you know, for this lecture, we're not really gonna worry about angle limits or area waits. At least not for now, because order today use forward and no very necessary for creating what we want. So okay, so we now have a Siri's off islands six. Fantastic. No, let's troy and see what happens if we increase the distance between them. So Control said you smart UV project increased to one. Okay, so basically, in the case of the UV sphere, the shape off the maps is putting much exactly the same, but they're just smaller so that we created more space between them. In this scenario, that's not really ideal, Actually, To be honest, it would be better to smart UV project in this scenario because they're all still disconnected so you can grab one and move about. No worries on they take up pretty much the whole off this UV map on. Ideally, that's what you want. You want your project to be organized to be able to select any part for projects you want. But you also wanted to fill up your UV map and we're gonna learn that about why that is when we go into creating checkerboard textures. So let's now try one more. We're going to see what happens when we do Suzanne the Monkey. So let's have a look at Suzanne the monkey and let's see how blend up unwraps Suzanne. So we're gonna go into edit mode. You on lap. That's no, that's not horrible. We've got the eyes here on. We've got the head here, but it still looks quite messy in certain places, So it's not the worst one I've ever seen, but we can make that better. So they go, you smart UV project. Okay, so ah, much more complex objects such as Suzanne results in a lot. Mawr seems being created, and when I say a lot, I mean a lot. So we now have on absolute ton off islands that we can work with on this may look a bit daunting, but don't forget that you can always sink selection so that you can know exactly what face represents, what part of your object. So it's not not too bad. The only problem in this scenario would be the facts that if you were to export it to say, gimp, you would have to come back a lot to your blender screen. Just a double check. No, what's face is what parts off the objects. Because that's an awful lot to remember my memory. So I've done a lot of clicks hunger through a lot of Monday's. Now on, we completely much tell what we're gonna do next. Andi, just a little bit of a problem. There we go. So if you do just just a little hints here If you do sink your two views together, remember that you have to a NSYNC it before you can get rid off your UV map just is a little bit of advice there. So finally, we're gonna go, you smart TV project up that 21 on basically weakens here. What's gonna happen here? Can't wait. Basically, what we expect to happen is for it to unwrap in the same way just as our you VE sphere did . But a lot off the islands are gonna be a lot smaller. So press OK on. They are a lot smaller, a lot, lot smaller. We have to see me in a lot here. Now This looks so this looks very good, actually, because it looks like we can really focus on specifics specific faces without whining about any others. The only problem here is that because thes are also small, the texture for every single one of these is gonna be tremendously stretched. It weep. Click on stretch on, which is going to select all of these. We can see common in it. There's a lot different shades of blue in quite a lot of them stay. We got light blue here, light blue here, light blue here. It's actually not as bad as I expected it to be. That's because they're split up into so many different islands that stretching occurs across multiple faces in a very small space. The fortunate thing about this in Io is yes. These islands are accompanying a very, very small space, but none of the islands have too many faces in them, so it's not too bad. But there we go, guys, that is the arts or smart evey projection in a blender
135. Project from view: in this lecture where guys be looking at you, the mapping using the project form view tools. This is a form of UV mapping that takes what is viewed in the greedy few ports on unwraps it as it appears to the user. So basically, it creates. It takes what you're looking at in the free de Vieux port on it Basically maps it in the exact same way is your viewing it on the two D UV map? So let's have a look at this in Blender. So we're gonna go into our UV editing tool on. We're going to go into edit mode. You for unwrap. We're going to select projects home. Pew, Bounds. Now I'm gonna come out for a sec, have a look at what direction I'm facing my cue in So we got the corners coming out. Watch what happens when I select projects from view. So basically it looks pretty much exactly the same or diverted. Sees seem to be in the white places, it seems to a completely UV Matt as a cube. Now, this can be useful if you're trying to select flat faces, but in order to do that, you should really be in a two dimensional view in your free de vieux port. This is where projects from few really comes in. So before I do that, I'm just going to show you a couple more different angles. So you could yet from view, we can see that on one more time from this angle. No, we got before we move on, we also have project from Butte Bounds. This is basically the same thing. However, the key difference here is that project from view bounds will actually attempt to fill up your entire UV map. So left click projects from View bounds, and it attempts to fill up the internal while UV map. This is perhaps more ideal if you go into a two D view in your two dif in your free de Vieux port. So, for example, if I press one to enter a front perspective on Quest, you project from view on. We can see that's a little bit better now, so we've got it in basically two dimensions. Let's see what happens if we limit this to visible and draw again. You project from view, so it still seems to have done the same. So it will literally take what it sees on. It will map it onto your onto your UV mark. Now, a tip here for projecting form view is that normally this is a result off you wanting to select and unwraps particular face is not necessarily the whole mish. So in this example, I'm just going to select one face on. Then I'm going to hear one to make shorts flat. You unless and there we go. So we've unwrapped a single face by its perfectly unwrapped Let's Do another example. So let's go into edit mode on Let's press the W key on subbed. Avoid this face on. We can see that it also does this in real time on our UV map because our faces already Bean edited and has already been unwrapped so we can move the lounge. But it has no effect on our UV map. That's excellent. So there we go, guys, that is projecting form few. The best times to use project from view or projects from huge bounds will be when you want to just select a single part of the object full a more uniform level off you the mapping. So if you don't want any stretching on that particular face. You can select that face. Make sure that you're if you pour is in two dimensions not free. And then you can project from view, and it will project it as it is. So there won't be any stretching. There won't be any act normal for to seize abnormal angles, etcetera. So there we go. There is how we can project from view in UV mapping.
136. Marking Seams: in this lecture, we're going to be looking at the process off marking. Seems this is a way off. Manually customizing our UV objects by inserting seems into it. The more complex and object is, the more likely it is that you may require. Seems we can create seems to use as markers to determine where on our object it divides into its to deform. So let's create some seeing seems for our basic objects. If we go into a blender like the first thing I'm going to do is I'm going to go to more default loud, and I'm going to select you The editing. So now I've got my two required panels. I'm gonna press the end key here because we don't need the grease pencil, and I'm going to press the T key here because we don't need the toolbar. Next one gun stoop is I don't need the faces at this point, so I'm going to get rid of the faces by changing my few port shading to wire frame. So now I'm in WiFi mode so I can see only the Verte season edges. Now, next one guns do is I'm going to press top to go into edit modes on Let's see what it looks like for the normal unwraps Everything selected I'm gonna press you andan rap. So basically what happens here is that our objects unwraps but we have every single face one on top of another. Now that's no good. We warn one face to be different from another. So I'm gonna press control said to undo that And now I'm going to press by to de select everything. So now we're going to create a better you be map by creating seems to do that we need to know which seems we are selecting. So we needs going to edge selects mode on If you're following along, try and do exactly a so I do it So you want to try and create? Seems a long edges where you can literally split your object So I'll give you an example off slipped one to free and then 45 so that the seen comes up 678 So we've got that entire scene going throughout our cube with a lengthy selected I'm now gonna press control on E on . The option we want is Mark seem so we're going to left click that press A to de select everything, and now we can see that some of the edges are highlighted in a dark red color. This indicates that these edges are seems so. Let's try unwrapping our cube again. Select everything with I remember. It's very important that you select your entire object in all the foot to be completely on that push you on our keyboard and select unwrap ons. Would you believe it? Now we have a much, much better UV map because we have all six off our cubes, all six of our faces evenly distributed across our you the map. Fantastic. So that's one example. Now, let's try a slightly more complex example. Let's try it with a cylinder. So I'm going to press pay to come out on. I'm gonna go into object mode, and we're just gonna move this cube to decides we don't need it now. Next, I'm gonna create my cylinder. Don't forget we're still in WiFi mode, and I'm gonna press tab to go into object mode. Now let's see what this looks like without marking. Seems first of all press you on a nap. So traditionally, your UV unwrap. If you have no seams, will attempt to do two things at the same time. It will attempt to get everything inside the UV map, which is what it should try and do. But it also attempt to use the whole off the UV map on what often happens, such as with the Cuban with the cylinder is you get bases late, blowing on top of one another on a lot of time. You might not want that. So controls there to go back this time. We want to mark our seem boy, first of all day, selecting everything progressing. I We want this top face. If we go into sorted few. We think this top faces should be on its own, as this face should also be on. It's time on a with ease. Faces will want to sort of roll outs across our UV map, so I'm going to do this by pressing cult on click. So we've got one face selected shift, old click, but a second face on. We just need to select one off these edges. Select. Select this one. Next, I'm going to press control a unmarked sing a toothy, selects everything and we can now see that we have our scenes. If we go into wire frame mode now, let's select everything on press you and on lap. And there we go. Absolutely perfect. So now we've got our two circular faces on. We've got every face that makes up the connection part of the cylinder, which has been lined up very nicely very evenly across our UV map. So there we go, guys. That is how we can use seems. And Mark seems to create better you the maps.
137. Hotkeys for UV mapping: in this collection, I'm gonna teach you to fantastic hot keys that you can use to make you be mapping so much easier. The 1st 1 is going to allow us to scale our islands so that they can all fit evenly within the UV map. So what will happen is you'll select all of your islands on. Then you'll use the hot key control A or command I on a Mac on what they're there will do is it will average out the scales of each of your islands so that you get an even size between them so that they can all fit in. Once you've scaled it, you're going to be able to rearrange your islands to fit into your UV map without any overlapping this that requires scaling First justice of precaution to avoid the overlap. The hockey, for this is control or command pay. So let's have a look at this in blender. So at the moment I've got two objects. I've got a cylinder on the cube on. We can see that it's all fitting in. Not too bad at the moment in our UV map, but obviously we can see that there's quite a bit of overlapping going on. We can actually, we can't tell if I move this over. Parts of the cylinder are overlapping with parts off the cube on. If we don't want that, well, we can manually drag things out, drag things across scale, win an ounce. You know, we can do all these things, but we can go the quick routes. So what I'm gonna do is I'm going to press a a couple of times to make sure everything is selected. Now we're gonna make sure that everything is scaled correctly by pressing control on I ons you may have noticed on your screen. Not short for resolution was high enough, but a lot off my islands have bean slightly resized so that they are suitable to be placed inside off my do you theme up. Now what I'm going to do is I'm going to resize it again, and we fit it into my UV map by pressing control on DPI and watch what happens. So now they've bean scaled down again. However, they've all been scaled down by an equal amount and now we can see that we've been able to fit all off our islands within our you the map without any overlapping whatsoever. This is a fantastic tool on if you're wondering why it hasn't filled up the entire UV map world. The reason why is because when we scaled all of our islands, we scout them said that they would be scale to the same size as each other, just as you would scale an entire object in object mode. All of the faces here have been scaled to the same proportional size, which is war. It doesn't completely cover our you the map. If blender did increase the size off one slightly, then every other face would also increase in size on. As a result, we would go over the UV map. So that's why what you see now is what Blender has done. But we can do this with many faces as we can create. So let's create one more objects. Let's creates a cone on. Let's also unwrapped this or gonna do smart you the project. OK, so we can see that's projected, and that's projected very nicely, actually, for the calm. But we're going to select everything here on once again, we conceded, because we've added a new object. We've now got overlapping again. So we're gonna need salt with again. So make sure everything is selected control. And I two we saw is everything. Control and pay to fit everything in our youth team up on notice, we can still click on an island and move it about word of who we want. So there you go. Good guys. Now you know how to resize and refit your islands in your UV maps.
138. UV Map islands: in this lecture, we're going to learn about selecting islands on the UV map. Water islands will Basically, when you on a map unwrapping objects, you can divide it up into islands. These are a Siri's off faces that have been unwrapped. Based on where you have marked your seems, we're gonna learn how we can select these islands. Ondas, apartness. We're also gonna learn about the stretch feature. So let's have a look at this in blender. So to get a good idea of this, I'm going to use Suzanne the monkey. So I'm gonna delete my keep with excelente on. I'm going to create more and Monkey Suzanne. So I'm gonna go shift and I mesh a monkey. Now I'm gonna make Suzanne a bit big us. I'm gonna press scale too and enter next. I'm going to go to UV editing and we can actually assume out a little bit here. Next thing I want to do is I'm going to mark the seams for my objects, so I'm gonna go into edit mode. I'm gonna make sure that this is toggled two invisible, as in this scenario, it's automatically sets it to visible when we have UV editing up, so I'm going to select it to invisible on. I'm going to de select everything with I. Now we want to make sure that our seems link up, so we're going to find a starting point. So we're going to start by selecting edge. Select much easier to do in a Gillette on. We're gonna do this while holding down the shift key. So hold on shift Select. So we've got these two. Now, let's start creating our scene. So shift out and just continue to go shift. Cult, We're gonna go around the face off. Suzanne did one of the bottom here. We're just gonna go away arounds and I was home. I'm doing this. There'll be more for tickle approach because you don't want to miss out any. Seems if you do, you end up with a completely different unwrap to what you were looking for. Even if you miss out just the one, it can have a very dramatic effect on how your object is unwrapped. So, for example, if I missed out this one, then yes, we can up unwrapped the face on the heads so that their apart on screen butts because there's no scene here. They would still be connected at this point on. We don't want that. So we're gonna make sure that that's also selected. We're gonna press control a and mark scene, but I two on select Everything on, and that looks perfect. Next, we're going to select everything by pressing I. Then we're gonna talk you and we're going to select Unwrap So Subin in Fantastic. So we've got what looks like the eyes, the face on the head. Fantastic. Now we could have Mark seems for the ears as well, Butts. That's not entirely necessary at this point. Sudden. How do we select islands on what our islands? Well, basically each of these is an island. So we come and we have 12 free four islands to select individual islands and moved about, we have to come down to the info bar on. We have four selection icons. We have X Elect, which allows us to know excellent soy Vertex select, which allows us to select a manipulate our for Toussie's edge Select face select, etcetera. The last one, however, is island select. Once we've click this weaken click what? Click much you want click on. It will select that entire islands so that you can grab on, Move it about like so you can always scale and rotational objects how you want center silence and how we can select them. What we're gonna finish with is by showing you the stretch feel. So I'm gonna take the stretch box and we'll see that everything has turned. What? Most of it is turned blue, some of its green etcetera. Basically, this gives us an idea off. How old it's Hoekstra will be applied to the faces. Andi to some of eyes, basically the dark heart shade off blue, the better your texture on the more detailed protection will be applied to that face. So we can see if we go into face elects. That's these. Ah, very good in terms of texture ring Very good indeed. However, these faces are much lighter. So the texture where should be quite stretched if we assume in towards these are the ease. So this is the ease area, which is why it's all mangled up, consuming fervor. We're getting a lot of greens here now. Some of them are very dark blue, which means some of them will actually be a field in very nicely. However, they kind of take that and what's around them. The faces around them are tremendously stretched. Basically, if you look at your UV map and you see with the stretch feel that you have any of these green faces, you basically want to try and avoid that that so it's good common practice. We're not gonna do it now, but it's good common practice to try and re you the map, your object, and to try and sort these out and you want to try. Your main goal will be to try and make your objects as a uniformly blue as you can because theme or navy blue faces you have, the more the object is going to be textured correctly. So there we go, guys, Thanks on, See you next time.
139. Selecting parts from the UV map: in this lecture, we're going to learn how we can sink the UV and Freedy layouts to select parts of Amish. We're going to learn how to be able to select part of an object in both panels so that we can see what's what and plan how we can texture our model. So let's go now to do this in Brenda. I currently have my cylinder selected form the previous lecture. Now the problem we have is that we can select and you've all mesh parts here. But then the UV map disappears in its entirety. Even we select multiple parts of our mish. Nothing reappears. If we press I a couple of times, then we get the whole mesh back. But it's only with everything selected that we confused the mesh we can, however, as long as everything is selected here, select individual parts of our mesh in the UV map without it having any impact over here. But the reason why this might not be ideal is that we can't determine exactly what for to see is in what parts off the mesh. So say, if I wanted to make this the top on this, the bottom of our cylinder, Andi. I wanted to make this cylinder into a Coke can That would require perhaps a slightly different form of texture ring. How would I know which these two faces is the top on which these two faces is the bottom? Well, to do that, we're gonna have to sink selection, and that is a very simple process. All we have to do is click on this button here next to the bounding box corn which says, keep UV and edit mode mesh selection in sync. One left click. And now everything appears to have been re selected. But watch what happens now When I select over sex or on edge, we can see that this is selected our you. The map has remained on. If we assume in, we can see which edge has been selected on. We can select, move around. I will mish and we can see that each of these edges is being selected. We can do the same process for faces so we can see now that this one is our top face, which means that this one is our bottom face on Dweik and select any of thes faces as well as well as for to see so we can select any ever to see that we want Make a note in the U. The editor, when it comes to Verte, sees that if 1/3 seed joins more than one face together, which it normally will if it joins more than two faces together, that 30 seat might be duplicated when unwrapped. But this is not really a problem, as the main focus when unwrapping movies is to make sure A with the faces are correctly formatted. So there we go, guys. That's how we can sink selection when you the editing.
140. Select tools when UV mapping: in this lecture, we're going to learn how we can use the selection tools. When you ve mapping, we can actually use the same selection methods for Are you the maps that we use in Freedy mode? We can still believe it or not. Grab, rotate and scale in the U the maps. So we're going to learn all this on, then I'm going to give you free challenges. Celeste, log into blender. So once again, I've got my cylinder mesh up on former previous lecture. We know that we can now sink the selection on both sides. However, maybe I want to mix things up a bit. Maybe I want to perhaps scale these out to make these a bit bigger. So let's select this face and we're gonna grab this face here. On what? As we can see, we can move it anywhere we want. We can even move it off screen. A really useful strategy is to actually move everything off screen off your UV map so that you can really range. It's to your specifications, so I can also use advanced selection tools. So I don't want to separate these because there will together, which is good. So I'm going to use the box. Select. Also, I'm gonna press B to select all grab and playoff. So I know this is my bottom. I know this is my top. So maybe I want to rotated this Maybe I think all maybe rotating this will give it a better space. So if I use box select, I can press are to rotate and I can rotate by, say, 90 or c wasn't See what done there. Make sure that's things you don't want selected are not selected. Don't forget Box Select ignores the fact that you've already selected something So it will add to that. So press a toothy select Beazer ends a box Select select objects or series of objects Auto rotate 90 degrees and enter. Now we can clap and we can position it wherever we want. So positioning up here Very nice. I can grab the top. I know a place about he grab the bottom place Iran his maybe a little bit higher now for these two. I want to make thes bigger but I don't want them to be different sizes because if these are different sizes on the uvm up then the way text room will be applied will be slightly off. So I'm gonna select over them with shift right click. I'm gonna go scale, pivot point individual origins s scale and click. And there we go. So we've got a lot more space used to there. Ideally, you do actually want to try and use up of much of the u the greed as possible because the more off the UV grid on object takes up, the more detailed the textract for that part of the objects can be. So there we go. That's how we can use selection tools in you. The mapping Your challenge now is your guns creates a battery. A water bottle on a cola can on with each of these objects I want you to, mark seems and you the unwrapped them once you've unwraps them. If you're happy with your unwrap, I want you to do what we've just done in this lecture. Grab parts of your mesh, rearrange it to suit you. Don't forget that if you're not happy with the way you have a natural object, you can always press control or command said to undo the UV unwrap. Thanks, guys. And I will see you in the next lecture.
141. Checkerboard UV mapping: in this lecture, we're going to be looking at checkerboard UV mapping in UV map in. We have a way of seeing how textures can be applied before we actually apply them. By using the checkerboard, we can see how faces are stretched so that we can then edits our layouts before exporting our objects. So in blender, I have more achieved, and I have more You the map. What we're going to do is we're going to look to apply a image texture that will be a checkerboard. So to do that, we're going to first of all, unwrap our objects. So we're gonna go press tab you Andi, I'm going to press smart. You be under up. I'm just gonna make very small island margins. Okay? Ons we assume in that looks about perfect. Excellent. Next I'm going to go tones where it says new, which says create a new image. I'm going to name of my new image. You the bleeds. The expiry is very important. Go to generated type. Click and select u The grids click OK on. We can actually see now if we see him out that we have a checkerboard. If we put eight selects everything that we can now see our faces. So instead of the UV map being blank, it is now a checkerboard. This will allow us to see on a three D view port how that section twos are stretched and applied. Your basic aim is to make sure that the checkup boards along the squares are of a square shaped instead of rectangular. That's basically what you're trying to accomplish that will demonstrate that there is no real stretching now to make this visible. Even if we go into texture or material, we can't see the checkerboard. To do that, we're going to have to go into the node. Editor notes that I'm currently using the cycles render engine on. We're going to click use nodes and we've got er material here. So what we're going to do now is I'm gonna go into texture of you on going to ads, texture, even texture. We're gonna assume in I'm gonna click here on this browse image to be linked option and I'm going to select you ve grid and note straightaway. We've now got our checkerboard on our keep, which is gonna link that so it could be wended that way. And there we go. We now have a checkerboard now because all the facts that we're using a cube with equal length sides, the checkerboard pattern shows that it is currently perfect. That means that if we apply it textures onto this cube, each face will be applied very, very well. They won't be any stretching involved. So there we go. That is how we can apply checkerboard patterns to our images. In the upcoming lectures, we will learn how we can use the checkerboard to men's images in terms off being such as stitching. So where we have seams and edges, we can see that these two faces the cubes Don't line up. We're gonna learn in the upcoming lectures how we can line up these cubes banks, guys, and I will see you in the next lecture.
142. Unwrapping multiple objects: Okay. Question. Can I unwrap more than one object at the same time? Well, you can technically unwrap more than one mesh at the same time, But you have to join objects together temporarily so that they appear on the UV map. So I'm just gonna show you the process of doing this. So mapping more than one object on a single UV map, We have a couple of requirements here that we need. So we need at least two objects. So we're going to move this cube, decide on then we're going to create a cylinder. Next, we're going to go into you ve editing. We're gonna unwrap each of these differently to start with. So we're gonna go tap you, and then we're gonna go with smart UV project, and we can see it's all unwraps nicely. Next, we're going to unwrap our cube, so it's gonna move this over, she and go tap you smart UV project to give a little bit of oil and margin. Okay, so we've unwrapped them separately, but then we have to go in between them so we can't put them on the same UV map for exporting. So what? We simply have to do is just join them together. So click on a sit in the first next click on the Cube control Jay to join. Now, if we go into edit mode, we can see that we have both our cube on our cylinder new the months out in the next lecture, we're gonna show you how we can reorganize this so that we can have a look faces from both objects on the UV map without any overlapping.
143. The stitching tool: in this lecture, I'm going to introduce the stitching tall. The stitch tall allows us to select two islands onto UV map on stitch them together. This stitching effects will help avoid abnormalities along the edges off our objects. So let's have a look at stitching in blender. So I have ah, pre made lesson here just so we can get right into what we're looking at. So what we have is a cube or box without its face because of what it will just be simpler to see without a face at the top on. We've got a checkerboard pattern. Now the thing is that we see around some of the edges of the checkerboard pattern is we look it. If we go into edge, select and select the edge, we can see that the edges are not lined up perfectly on this shows us that there will be problems in terms of how the texture is applied at the seams. So we're gonna use stitching to solve these issues. So we have enough our example here where the checkerboards don't line up, but all very well. So there will be issues when d texture is applied. We moved to another area. We can see yet another example where the, uh the checkerboard is not applied correctly. Therefore, the textures will not be applied to solve this issue and to make our texture run seamlessly across edges. We're gonna use this stitched hole now to use stitched, or we can go to you these and we can go to stitch or we compress the wiki. Make sure that you have the appropriate part off the mesh selected. So we assume in we can see that we have the sex selected. Now it appears as two edges on our UV map because it is the same age but for two different islands. So what we're going to do now is we're going to press the wiki. So I pressed. Afeaki wants on. We can see. We assume in that we have a green highlight applied. This green highlight shows us where our island will move to once we press the enter key so that it can be shifted to the correct position for a good stitching effect. So I'm going to not worry about these options down here at the bottom. For now, we don't need to worry about those glaciers press enter and see what happens. So two things have happened. One on each panel. The first thing that happens is that the to selected edges on here have joined up to become one. Now, we can still select these faces, and we could still actually select and move thes faces. They haven't merged together. They've just stitched together something press escape to cancel on as a result of this stitching. If we look over here, we can see the checkerboard flows perfectly around our edge so we can see away from top to bottom that flows perfectly around our ridge. That means that when we apply our texture, we're not gonna have any problems with this saying so There we go. That's stitching in the UV editing panel in blender.
144. Welcome to the node editor: in this lecture, I'm going to introduce you to the node editor. This is gonna be the place where you can create your materials your way. The note at its heart gives you so much more depth than the materials panel that we covered in the previous lecture on is a great way for getting measures to work with your scenes and rejoicing. Make a note. That's this. At the moment, as far as I'm aware, can only be used with this cycles render engine and we're going. That's the first thing we're gonna realize why that's the case. So let's go in to Blender. So I've got my new project started. I'm currently in Blend Orender. I'm gonna first of all go into the Properties panel where we have our materials that we looked her in the last lecture. We can edit all of these options here. However, we want to be able to use a node system and I'm going to show you the node system. Now we're gonna drag this out, make sure we do it correctly. There we go on. I'm going to transform this panel into the node at its heart, which should be just below logical guitar and just above text editor left. Click on. We don't need this bitch. We're gonna drag it along on. This is our space that we can use to create nodes. However, if I go to the add button and try to add any nodes, we will see that we cannot as yet. That's because we need to enable dysfunction in Blender. Unfortunately, in Blender ender, we can't do this because we don't have the option. In order to get the option to use nodes, we have to go to the cycles render engine. So we're going to click that now on a straight way. We can see that the materials panel over here is a lot less congested. We can open this up if we go to custom properties. We can add properties. We have our preview panel which, as we can see, looks a little bit different to what it did before. A little bit more detailed, actually done in blend Orender. We have surface now. This time in surface or we have is the abuse color, so we can select a diffuse color off the material on. That's it. So if we do that now, very quickly go into material. Click the fuse color chooser, reds And there we go. I'm just gonna turn that back toe. What? Just keep things simple. So what we have to do is we have to click use nodes. One left click on some things appeared on our no date. It's a screen. Let's assume in. So now we can use notes on. Whenever you start using nodes, you'll get two boxes. The 1st 1 I want you to know is the material output. This is by far and away the most important piece of the node. Editor. The reason why is this is your output button for your materials without an output, Anything that you do before that number, if you have one node or 1000 nodes where you're trying to get the perfect material, If you do not have a material output, then that's material will not be applied to your object. It will not. Okay, guys, some make sure that you always have your material. Alpert and you have free options. Surface volume on displacement. For now, all we're gonna worry about is making sure that it is attached to the surface node. The 2nd 1 is our defuse Shader. So now we have our shader in the form off a box. So we have our own box where we can select color Onda roughness. So roughness basically means the more you increase the roughness, the mawr land demised lights will bounce off your objects. Doesn't make too much difference, though at this point to the diffuse Shader on its own. So there's our introduction to the node editor in the next couple of lectures were going to be going over. Other knows that we can use to help create better objects. Thanks, guys. And I will see you in the next lecture.
145. Diffuse Shader: So in the last couple of lectures, we've had a look at the defuse shader. This is your standard shader. Nearly every material that you make should have the few shader at some point because it gives you your standard color. It gives the base color for your object with the diff you showed that you can create more no kind of textures that scatter light evenly on did the Pew Shader is particularly effective in Blenda render it centers around the thief. You Shader does blend Orender so really great when you're using thief, you shade er's to import things and export them into things like unity. So but this lecture all I'm going to do is give you a challenge. I want you to create free cubes and I want you to give each a different material or different color using the defuse Shader. That's all you have to do, guys who this just get used to applying shavers. I want you to use the cycles engine for this. You can't mix and match with this. So if you correctly single project, everything has to be used under a single when the engine. So I would recommend using cycles Render, however, you can use blend Orender getting used to blend a vendor if you want. It really doesn't matter for this challenge. In particular, it does not matter which engine you use. I would just use the cycles engine because it would get used to adding nodes for each Objects do that. Now guys on, I will see you in the next lecture.
146. Rigging: welcome guys to the rigging section off the course rigging is the creation off artificial skeletons or armatures, which are used to dictate how our objects can move in animations. It is a much faster way than recreating our mission edit mode. So instead of just recreating the same mesh in different poses over and over again, you can just use weeks or armatures to hold tight the way your mesh looks. In certain scenes, we're going to be looking at bones, which obviously make up. Our skeletons were going to be looking at weight painting. Now, a quick overview or weight painting is that it's basically a way off, increasing or decreasing the amount off influence each bone highs on a movement. Finally, we have bone constraints, which basically imagine your elbow. In real life, you can bend your arm straight that you can't up bend in the opposite direction. So basically bone constraints are where you prevent your mesh from making any unnatural movements we're going to be learning all without. In the upcoming series of lectures
147. The human rig: So in order for us to do this section of the course, we're going to need a base Rick model. So we're gonna need a model that is pre made for us to use so that we can look at the rigging process on. I've actually decided to create a human bore Distrigas. That's the most likely type of skeleton that you're gonna be creating in your games. You're gonna want to create human rigs above all else. Now creating humans. Maybe a little bit beyond the scope off some of you who are taking the course. You may not feel confident enough to create a four human. Therefore, I have included my human based model inthe E section assets folder for this section so you can download my human who you're going to me in a minute on. You can use him for the next section of the course. Also, it would be a good idea for all of you to download human because then you can get a really good look at how a human rig how a human mesh is made in Benda because you can always go into edit mode and have a look. See where all the faces and averted seas are and you can gather. Okay, this ghost here, this goes here. Okay. It spits at this point, etcetera, etcetera. But without further ado, this here is Mr Human. So we can pan around now. We has no toes or no fingers. Arteries more he doesn't use because we don't need them. For this course of the reason. Once again, why I haven't gone through the process off modeling. This character is very simple because it's, ah slightly advanced for this course on. We will be creating organic measures in my next course, which he's becoming an advanced blend up modeler and you'll be able to hear more details about that course at the end of this one. Once you've downloaded it, you can play with it as you like. Feel free to. I've just being playing about with the different color settings. So I'm coming to using blender renda picks. I only need a single color. I actually found this peachy, Carter, to be quite human like very nice. So this is what I'm going to be using for this section. Please download human as well from the section assets as you'll be able to follow along much more clearly with this as you wig, however, that doesn't mean to say you can't create your own human. If you really want to buy all means. Download human, have a look at, see how he's made and then try and constructs your own human. It's really good practice, a really great idea. So do that. Do whatever you want with human, but make sure that you have something ready for this next section off the course, because you will need a slightly more complex modeled in a cube for us to be able to leak up the objects. See you soon.
148. Bones: So in the upcoming series of lectures, we're gonna focus now on bones, so bones form parts off our skeleton. The skeleton is actually not called a skeleton. In blender, it is called an armature on. Basically, thes bones acts in a very similar manner to how they would in a regular human skeleton. In real life, they give our models a structure from which to move on. So basically, the key difference between bones in real life and bones in blender is actually bones work more like your joints, more like tendons in blender. Where is in real life you have the bones, which provide your body shape on. Do you also have joints that connect the bones together in blender? We're going to see that we have thes joints together, but of course, we don't need bones to create the mesh itself. That's the one difference is that you don't need bones to constructs measures, as you will already know. If you did, then that would have been the first thing we would have done would have been learning how to create bones, but basically bones. Their main function is to create a skeleton, not for the mesh itself butts for you to be used as a reference guide for what parts off the objects can be moved when conducting animations. So in this lecture, we're gonna focus on adding a bone. So So we're going to do. And then in the next lecture, we're going to name our barn. So let's add a bone in blender to do this is very simple, uncommonly in edit mode at the moment, which I shouldn't be. I should press tab to come in to object mode, ongoing press shift and eight ad on you'll see a section called Armature on in this section . We have one option single bomb we're going to left. Click Andi. There we go. We, assuming this is our bone, So I'm gonna drag this bone out so we can get there. Look it on. I'm going to scale up Despina. So this is the default layout off a bone. We have a top sort of like a prison or pyramid shape, and then a bottom thes spherical parts. These are our joints. This is technically classed as the top off your bone. This is technically classed as the bottom on. We can use this to create more bones and to connect to our bone to these are joints on. This is our bone. So what I'd like you guys do not ease. Create a bone. You don't have to do anything else other than just create the bone. See if you can create your free. Maybe even positioned them on different parts off human if you want. Get that ago. Now, guys. And I will see you in the next lecture.
149. Bones two: in this lecture, we're going to see how we can give our bones names. So let's go into blender. So we've got our large bone from the previous lecture in all that to give this a unique name as we will be required to give all of our bones names, we need to go to the bunt up, which becomes visible along with E data on bone constraint Tabs on Dwight going to kick on bone on. We can see here that it says bones so we can get that name. So if I was to give this say spoiling and so and there we go, this is very important. This is probably more important than giving your objects themselves names, because blend up needs to have a Siris of names for each bone. So that's you can refer to them when you connect them to certain parts of your mesh. So, for example, if you have a spine bone, you're going to need to use that as a reference. But when you connect your spine bone to the spine off human. But there you go. That's how we name our bones in blender
150. Making bones visible through our mesh: in this lecture, we're going to look at how we can make our bones visible through our meshes. So a lot of the time you want to actually put your bones inside of your mesh so that it's really easy to use the bones to control it. But that can lead to us placing bones inside of a solid objects, which makes the bone invisible. We're going to learn how we can keep our bones visible even while they are inside or they mesh. So let's look into blender. So the first thing we're gonna do here ease. I deleted my previous bones, so I'm going to create a new bone with shift I all mature single boat as reminder we're gonna go to Bone and I'm going to name this bone spine and enter next. I'm going to along the set access raise it up into the body. Now it's now inside off our human. That means we cannot see it now. There are several ways we could make this visible book sample. We could just go to our few ball shading and go to wire frame, and that makes it quite visible. But this might not be what we want, we might want to see. It's as a fall object. So also, if you know, is the bone itself is in WiFi mode, which may or may not suit you for what you're doing. So what we need to do is we need to go into solid few on Go to D Data Data Properties panel , which is our armature panel on. And if we go down to where it says display, we have an option here called X ray. If we left like X ray, you can now see that our bone is visible through our mesh, so it's ideal toe. Have this on all times. There are very few situations where you would rather have this switched off. Bear in mind that bones our behave in the same way in terms of rendering as light sources and cameras do so basically, no matter how many bones you create, whether you created inside or outside of your mesh, your bones will not appear in rendered images or animations because they are not classed as mesh objects
151. Animation: in the last section of this course, guys, we're going to be looking at animation. Animation is basically a Siri's off moving pictures created to form a cartoon or film. In Brenda, we use animation, and we create animation using things such as our timeline, our graph editor. We use things like keynotes framing. We're gonna be learning all these things in the next series of lectures. So we're going to learn, firstly, how to animate. And secondly, we're going to learn how we can use our weeks that we created in the last section of the course to create more detailed animations and come the end of this section, we're going to create a one off project where we're going to model, texture rig and animates a single object. So we're going to create a robot at the end off this section, we're gonna mortal it. We're gonna texture and materials. We're gonna rig it up, and then we're going to animate it. So everything that we've learned in the course will come together at the end. See, there
152. The first animation: in this lecture, we're gains. Create our very first animation with Mr Keep. We're going to just move basic Cuban. We're gonna create an animation without cube. We're going to refuse to frames, and we only needs work on the first and last frames. Then we're going to give you a couple of challenges. So let's log in to blender. So the first thing I'm going to do for this is I'm going to bring up my timeline if I can. Yet there we go. Now, this timeline show will show us any friends that we have. So we checked the number bar at the bottom here. These are your frame numbers. So we're currently this Green line means that we're company on frame zero. So what we're going to do is we're going to creates an animation. Now I think the way I want to do this is I'm going to press one for a front perspective and in five to go to fund orthodox. What I'm going to do is I'm going to drag my cube, but to about he I'm now going to save my key. Fine. Now there are a couple of ways we can do this? What we're going to do in this lecture is we're going to press this button, so we're gonna do automatic key frame insertion for objects and bones. So we're going to click. Just move this over about a bit. Andi, what's happened? There is We've now saved a key flame. The next thing we do is we have to choose another frame in the timeline. So I'm going to tap this value here, and I'm gonna type in 60 Aanenson. Now. The green bar has moved to frame 60. But where we were before, we've got a smaller yellow bar. This represents a key from now. What I'm going to do is I'm going to move the cube along the X axis to he And as soon as I release it will insert the key Fine. Now to have a look at our animation. Because, believe or not, that's all you need to do to create an animation. In truth, these were going to press this button here to go back on. We're going to press play so soon as I press play. There's our animation. So we've got a mute moving cube, so basically all we really done is by changing two frames on, creating two key flames. We have created an animation. The reason why is because blender is very clever. It takes your first and last animations that you inserted on. It fills the gaps. So, for example, because this is the location for key frame zero on and this is the location for key frame 30. So it for 60 soy, then blender has works. How a wealthy other frames in between. So it knows where the cube should be at frame 30 for example. So there we go. Those are first animation. Now I have a couple of challenges. I want you to now create an animation where the cube jumps from one point to another. So the animation we just did saw it slide along the X axis. A little bit of a hint for you. Move your cube along the X on, said access. So does my tip. There. I want you to create enough apart where the cube travels to its original position. So it's a little bit weird. How off said that basically what I mean is, you do your first animation and then after you've done that, you're to insert another key frame later on where your cube will travel back. Toothy original position. So actually, with this one, I'm just gonna show you very quickly what I mean by that. So in blender, basically your create you'll animation form 0 to 60 will do it 0 to 60 for now, where your cube will jump for one space on jump to the next space by frame 60. Then I want you to go to say frying 120 where you're going to using what we've learned so far. You're gonna tap 1 20 with all toe keying on, and you're just gonna slide your cube back to where your original position was. That's what we have to do guys on. And finally, I want you to. Once you've done that creates a second sliding cube that travels in the opposite direction . So what you can do is, for example, you can have one key starting this position on flame zero, and you can create another cube that starts over here in this position. And you can have this cube jump while at the same time, the cube that you install here slides back. So give that a go guys on. I will see you in the next lecture
153. Insert keyframe menu: in this lecture, we're going to be looking at how we can insert key frames manually. By using the key frame menu, we can manually insert key frames for changes to location, rotation and scale. And we can do this by using the hot ski. I say, Let's do this in Blender. So what I'm going to do is I'm gonna create a two dimensional view, so it's easier to see. So I'm going to press one and then five. I'm gonna bring my timeline up and just bring my cube back. We can insert key flames just by pressing the I key. Once we've done that, we have a Siri's off different options that we can choose. For now, we're not gonna worry about anything below rotation and scale. So anything that says Fish War Delta before it, we're not gonna worry about them for now. So I'm going to start by inserting my key frame for location, and now I've got a key flame. Next, I'm going to go to crime 30 on. What I'm going to do is I'm going to move my keep forwards on, move it up, and now I'm going to insert Mikey fame again. So I compress high insert key for a menu and select rotation. We can also do this for more than one so we can do this four rotation as well. So now I'm gonna go to frame 60. I'll see Mao a bit, move it towards the center, end up, and I'm also going to rotate and I'm gonna rotate along the war axis. That would do. And then I'm going to press boy on because I've changed both location and rotation. I should select this option, which is Look, look what's so select on the insert Monix key. Fine. Next they'll go to flame 90. So I want skin all move forward. I found a bit and oh, rotate on This time I think I'll scale will. It will be as well. And then I'm going to insert key frame. And since I've done all free, I would have to choose the location, rotation scale option. And there's another key flame. So one more key frame to choose 120 on. We're going to 1st 4 gonna roads hate it just so it makes pretty much a full circle, drag it down on a cross and scaling up just that little bit more. But so I location, rotation scale. And there we go. So if we now go back by pressing this button to go back to the start, let's have a look at, uh, process. So can see that we've got our animation. We'll see that one more time so it comes up. Then it starts to rotate at 60 and scales towards the end. So there we go. That's the That's the very basic born with the process that we use for inserting key frames . Takes a little bit of getting used to, but it's a very simple process. So if we look, what I want you to do now is your guns. Do this yourselves. So you're gonna create a cube animation that changes the location, rotation and scale off the object over 120 flames. As a bonus, I wanted to create a close up rotating animation, often objects previously made such as a fork. So folks sample if you've made a fork or any piece of cutlery object. I want you to insert key frames that we rely on just rotating so that you can creating animation where aled, the object does is rotated itself. Do does on through those animations. Now, guys on I will see you in the next lecture.
154. Playback buttons: So in this lecture, we're just going to go over the plate, but playback buttons in time lines just to see how they work on. Then I'm just going to give you a challenge. So this is gonna be a very quick lecture. So if we're going to blend up, we've got the animation seen that I created for my last lecture on Basically, we've got our playback buttons down here. We have the play button which will play our animation. Notice how once it reaches the end off 250 frames, which is our set limits, it goes back to the start. We can press this key to jump to the first frame off the animation on. We compress this key to jump to the final frame off the animation we can play. Obviously, using the play button on it transforms into a pause button so that we can stop whenever we can press the back button to play the animation in reverse. In addition, we have key frame jumps. Thes aren't fast Fords. The's a key frame jumps. So by pressing this one, for example, we jump to the next registered key frame so we can go forward to each key. Fine. And using this button, we can go back. Simple wiseguys. Also, as a bonus note, you can tell what's key. Find your on by looking at this value here. Thanks, guys. On. We have another challenge for you. So the challenge this time If you haven't done this already, I would like you to model a car or any vehicle on. Then I would like you to create an animation with your vehicle. It doesn't have to be brilliant, so it doesn't have to be like hold wheels are actually moving. You don't have to do that at this point. You can if you want to. If you feel confident enough, but just doing animation where the car is actually moving across the blender. Grids do that, guys. And I will see you next time.
155. The dope sheet: in this lecture, I'm going to introduce to you the boat sheets. The dope sheet tracks what animations are inserted at what frames. It allows us to move key flames from one fine to another manually, we can also copy and paste key flames across an animation using the dope sheet. So let's look at the hope she in blender to bring up the dope sheet. The ideal method would be to go to the animation output. So we're gonna select animation for our default louts, and we can see that we have our dope sheet up in the corner now because we have no animations. The Dope Sheets summary is currently empty, so let's create some animations to see what this looks like. I'm going to begin by bringing my cube backwards, and I'm going to press I on insert location, rotation and scale. The reason why I'm inserting all free is because if I just locked rotation or if I just locks location, for example on, then I changed a rotation later on and apply rotation din. Then the rotation would in fact be automatically applied to the first key frame as well on . That's not something that you would want. So it's better to look all free to start with. Just a good habit, as we can see now that we've inserted the key fine, we now have a few extras. The objects is now visible in our dope sheet. Because we have our first animation. We have an action associated with the object on. We have a detail off the actions that have been applied, so in this case, we've applied a location, rotation and scale. We have a few extra options here, so we have the ability to modify fear the F curve, which we're not going to do just yet. We have channels and we have key frame locks, so we're gonna leave all with these as default. For the moment on, Let's add another couple. So before you start moving about your cube, remember to change your frame first. That's the first thing you should do when you start. Creating your next key frame should always be on that key frame when you start editing, so I'm gonna go to Key Frame 30. Next, I'm going to bring my cube on, lost across the wire on across the X on. I'm going to rotate it along. This said by the 30 degrees next, I'm gonna press and I'm going to insert key frame for location, rotation and scale. And we can now see that we have two key flames. It looks on a dope. She is if they're right next to each other. But that's because we actually assumed quite far out in terms of what we can see in terms of frames so we can assume in by scrolling down on the scroll wheel and then just scrolling down actually increases the value. Scrolling up decreases the value. In other words, it assumes in and we can just see that bit more spaces appearing now. So let's see him in a little bit more. And there we go. We've got quite a nice space. Now we're gonna go on to flame 60 on. I'm just gonna move it forward on back across roads hate again along the zed by 30 degrees . So it's a quite consistent animation. Andi always remember to insert the key Fine. Ongoing. Do one more. So I'm going to seem out a bit. I'm gonna go to Key Flame 90 and, uh, I'm just going to bring this and rotate one more time. 30 degrees and enter on insert key. Fine. And there we go. We've got four key frames here, so let's go back to the beginning on player animation so we can see rotating. And there we go. So that's our animation. Used the dope sheet. Weaken. Begin editing this animation by right clicking on a single key frame. We can highlight that key frame in yellow. Everything else turns Want to indicate that it is not selected. Now we can click and drag this key fine across all of our other frames and released where we want Andi. Make sure we left Click. Now let's have a look at our animation so we see a sharp jolt there because the two key frames are so close together, that is just one example with the power of dope sheets. A great hall for manipulating how your key well, how your objects, whatever it may be, can move in its animation. It's a great way of being able to speed up certain parts of your animation or slow down other parts. So one more thing is the ability to copy and paste key framed across an animation so let's have a look at that. So we're gonna take this, Keefe, We're gonna take the Starkey Fine on. We're going to go to Key. And we can I have a copy or paste? We see we have shortcut keys as well to control sea and control the let's left click to copy the key. Fine. Andi. If we moved to number 120 we're gonna go to Key and Paste Key Flame. And there we go. So let's see how this now looks. Play on drugs back. There we go. Fantastic. So there we go. There's the dope sheets. Play around with it. See if you can do more complex animations with different objects. Maybe you could get a ball start rolling across or bouncing on a surface. A couple of good ideas for you there. Andi. I will see you in the next lecture.
156. The F-curve: in this lecture, I'm going to introduce you to T F Curve. The F curve is used to manipulate animations in real time and can be used to alter your location, rotation and scale on the fly. So let's look at this in vendor. I'm using the animation that we created in the last lecture when we had a look at the dope sheets. Now that we've had a look at the dope sheet, I'm gonna bring this panel here upwards. This is the F curve, and this is where we can make different alterations to our animations. So as we can see, with the exception off the dope sheets summary tab, we have the exact same as we did inthe e dope sheet. We have the key, but the objects we have the action for the object on details of the action. We can select any of thes black dots by right clicking each dots when clicked, turns yellow and has free site two circles. Either side, these circles can be moved and altered to change the shape off our graph. So I'm gonna trust escape there. I'm gonna go back to the first scene. So this is what our animation currently looks like and there we go. Now let's see what happens if we change some of these values. So I'm gonna grab this value and I'm going to drag it along here and we can actually see that it's making changes. Moving up and down is scaling our objects. We can also say, See if you look at the timeline that we are moving up and down the frames as we move from left to right. So up and down this the scale of objects left and right is to move across the frames and click. Now let's have a look at our scene, see if it's any different, so not much has changed there. Let's see if we can change that. Let's Troy scaling it up. So let's bring this up on. We can see now that the graft takes a very shot steep curve. So let's have a look at this. Will first apply animation on. There we go. It begin scaling up. Fantastic. Let's have a look at what can happen when we click on this green section here. So we're gonna play the animation. Very interesting. Let's have a look. What happens if we change you. So let's see what happens if we drag this down. So that seems to have moved a lot quicker this time so we can actually see that the green has affected how fast our animation moves. So this must have something to do with our location. Let's have a look at this by moving our animation across. Very interesting. Do we see how it's changes on the fly? So the animation is continuing, but we can continue to change the values in real time. So let's bring up here, see how it works. So it's definitely impacting our location, isn't it? Cause so let's release that and let the animation play for a bit on will pause that. So let finally, let's have a look at the red line how this is impacted. So we've got it selected here, which is roughly, I think this is seen 90. So frame nineties currently selected on. We're gonna apply. See what happens. And there we go fairly straightforward. That's what was happening before. Now let's move this up quite a lot. Let's see how much that changes so again, location is key there. On the main change, there is that it has moved much further along the X axis than it did before. Finally, we're going to see what happens when we manipulate these two, which is so we've seen the animation before. Let's see what happens. If we extend on drag, these widgets will drag this one and will dry this one. So let's see what happens now. Very sharp so we can see it's a bit sharper. Let's have a look here. So we've got our blue line. Let's manipulate this curve. So now we can see that we can actually start multiple scales so we can use this to scale it up and then down again based on the shape off our curve. In that case, what would happen if I assumed out and I got seemed quite a bit? Actually, what would happen if we doing this one in and pulling this one across so nice and slow? And there's all animation, so the F curve is very powerful, so there's a whole load of things that we can do here in terms off manipulating scale, rotation, speed of location, etcetera. A good idea right now would be for you guys to just try and play around with this yourselves. It can be a bit fidgety at times, but it's very good to get used to this software. So right now I'm just playing about seeing what animations consumed may. So as I moved this bar here, the animation has turned out to be a lot slower. So there you go. That's how the F curve works. Andi. In top in time with the dope sheet. You can really make great alterations to you animations now, so you're not limited by just the simple basics. And it does doesn't just give you automatically an animation. You can manually edit shoe animations to how you see fit using the dope sheet on the F curve. So thanks to look for that guy's on. I will see you in the next lecture.
157. Bone display options: so we have an option known as bone display. We've already accessed this by creating our bones. We have X ray so we can now view our bones crew Al meshes. However, we can change how these bones actually look that this could be useful depending on the type of object that you're creating. Maybe you're creating a very thin object with the reef in parts on this may require you to use y style bones because they can act on and look mawr like the object that you're creating them with. So we're gonna have a look at these different bespoke blade types and we have five types of bone. We have Octa usual stick be bone envelope on Dwyer. So let's very quickly go over each of these. So we currently have, if assuming and I'm gonna get rid off the gizmo we currently have on Octa, he drool bone. This is a very good starting point for us because we know that the Aqsa Heatwole bone is made up off a pyramid where the long points makes up the top Andi wide point makes up the bottom. If we move on to stick. Stick is a really good one, because the bone basically becomes a line with two points, this again is useful. This is particularly useful if you want to create a load off bones so you can create a load of bones in time. Network of bones for large objects on. Do you think maybe the doctor huge role option is to fit? Maybe it will get in the way. Mabel. Maybe you won't be able to see quite what you want to see when looking for ways to alter your rig so sticks really handy. If you want to create loads of bones on, Do you want to create load of extensions out those bones and be able to see what you're doing? One downside to using sticks, though, is because they're so bin. It may be difficult to locate the one you want when editing. Next, we have being bone. Now, as we can see, this displays bones as boxes on shows things like subdivisions be split lines, etcetera. So basically what it does here is it does no make our bone into a mesh, but it does give it a measure like shape, so it now looks like a cube. So one advantage of this ease. In this form, the bones are very big. They're very blocky. We can see exactly where each bonus. The downside of this type is that we cannot tell what is the top or what is the bottom on. That could be important when we're trying to maneuver our weeks to create animations. Next we have envelope. Now envelope is very similar to opt a huge role. We have a joint at the top Onda joint at the bottom, with the bottom part being a lots wired up on the top. This is basically the same as knocks a huge role. I think the only main difference with this one is it's more visual that you can see that the joint at the bottom of the bone is clearly bigger than the joint at the top. Finally, we have wire, which basically is pretty much the same as a stick. Former If we look around in terms of a single bone, it's the same as a stick. Former. The key difference between the two years that he stick former if we assume in, does have little dots at the top, and bottom two indicates that this is the top. This is the bottom. The wire, third Asian stars notes. But again, it can be used for the same advantages. Really. Overall it it's display. It really doesn't make any difference to the mesh Atal or how the rig will be set up. This is purely a personal preference thing. So whatever displayed hype you considered out to be the most comfortable is a display type that you will use now for the set up off the rig that we're going to do for human. We're gonna stick to Octa. He'd roll, at least for the start, just so everybody can get used to it. This is basically that default choice. Full hour leaks.
158. Extruding bones: in a blender we create all weeks through bones on to create our arm itches. We need to have many bones, you know, armature that are connected. The best way to do this is fire exclusion. By extruding out of the joints off our bones, we can ensure that they are connected as to bones will be connected by the same joint. Let's have a look at this in blender. So we've got our what singular bone. If we want to extrude form this, can you guess what we have to do? Correct. If you guessed it it mode, that's exactly what we need to do. So now that we're in edit mode, will, actually no, it's that just top it is lit up. So this top joint is lit up. That means that we can extrude form this point. So what I'm gonna do is I'm gonna press free to go to a side view, Onda. We don't need to worry about the arms. It's no actually going to get in the way. We're gonna first e to extrude and we're gonna bring out another bone bringing it up. Andi, there we go. So assuming we can see that this joint is still the top part off this bone. But it's now the bottom part of this bone, and we can do this as many times as we want. So why extrude again? One One more for the neck and one more for the head. And there we go. We've got a nice where we've got a spine of sorts. This will need some edit things, is a little bit wonky, But there we go. We can see there as well, so make sure that I'm just gonna grab thes and just move them about it. Make sure that when you are creating an extruding bones that they're in the white place that you want them to be in and also make sure that there relatively suitable. So, for example, this one won't be very goods. If I just leave it like that because the bonus Killian angle on, we create these rigged animations because our bones are in the codex positioning. So I'm gonna undo them on what I'm just gonna do Nice. I'm gonna press free. I'm going first be to extrude on up. Now What I'm gonna do is we're going to object mode. I'm gonna grab thes, and I'm just gonna move them back because being despoiling our fingers. But if there at the back next, I'm gonna go back into edit mode, make sure that I mean a to d if you because the problem with last time was I went out with my two d view on my bones went everywhere. I'm going to keep the straight by locking the monster axes, so I'm gonna press. He then said E. Then said E then said, And there we go. It's a good idea to keep your armature astray as possible to begin with and then grab individual parts and move them around to suit your needs. As you can see in the same way that a mesh will move non selected parts, so will bones. So there we go. That is how we can create armatures fruit extrusion
159. Arms and legs: in this electric guys, we're going to create bones for our arms on D R legs. More specifically, we're actually going to use the singular terms. It's gonna be an arm under leg. The reason why is because we're actually going to end up mirroring our week. So because a human has parallel what has a right arm and right leg, a left arm and left leg, then we only need to create 1/2 and then we can mirror it to the other. So for this lecture, we're just gonna create 1/2 off our human mesh knows that The reason why I'm doing this to reason why I'm doing this lecture in particular is to show you that your entire wig does not have to connect to each other. No, Every bone has to be connected to every other bone. In a single network, you can have different networks in your home mature. So I'm going to show you what that looks like by creating the arm and leg bones. So I'm gonna go into blender. So at the moment we've got how, uh, Spines, who got the bomb? The spine, the middle, the top and shoulders. We've got the neck on. We've got the head. Now I'm gonna make sure I mean a front orthodox view. I'm going to click out here, so I'm gonna position my Freedy cursor here. So this is another point where the Freedy curse becomes very valuable because you can use the Freedy cursor to mark where you're going to start a week off, bones. So now I'm gonna plus shift I on what that has done because I am in edits mode by pressing shift day, it is automatically created a bone. Why has it done this automatically? Well, because if we were in objects mode and we were to add a bone, adding a bone would be our only option anyway. So instead of just taking us to the menu where we just click at bone, it just at it for us, the top of the bonus selected. So we're gonna pressure G to grab, and we're gonna move it down here to roughly where our elbow would bay next. We're going across the to extrude on and bring that we'll keep it fairly basic. So do one here on one here. There we go. Next, I'm going to do it for the legs, Some going to position while Faridi cursor. And then I'm gonna press shift and I grap bring it Dance where the knees exclude to where the ankle ways. Now I'm gonna press free on. Do you know it's that they're our position. This isn't really a problem. Because, as I said in a previous lecture, your bones will not be visible. However, you may want them to be in line. So I'm gonna press l he to select these bones here. However, I got to make sure that these a run selected. I can see actually that the bottom of that is un selected. So if I was the fresh G, yeah, it would bring it back. OK, so press a toothy, select every think, then l to select the arm bones, make sure that you're in a two dimensional perspective. I'm gonna plus G I believe we're along the war access. I'm just gonna move it. There we go, just in line with our arm itself. And now I'm going to do the same with our leg bones, some guns. Just grab war on. Just bring it back. Now I'm going to select this bottom joints on. I'm gonna do one more extrusion for the foot. We go into front front, few with one excellent seem out of it. That looks good. If we spin arounds, that looks fantastic. So there you go. That is the standard way in which we would create a human leak. Mesh, or at least 1/2 of it soon will mirror mortify this onto the other side so you don't need to create a full on skeleton like a a real body skeleton. You just need enough bones to do the animations that you want. So you don't really need any connection shoulder bones. If you were doing something like really ridiculously high Polly, like a really high end game or really high and animation, and you felt that you wanted to use as much over a week as you possibly could, then obviously, yes, you would create more bones along the spine and you create shoulder bones to connect, possibly formed the neck to the top of the arm on likewise for the hip area. But there you go. That's how we traditionally create arms and legs. At least the human weeks in a blender
160. Naming bones: in this lecture, we're going to be creating our I K bones. These are bones that are used to control the movement off our weeks. They are our quince off manipulation and are normally located outside the mesh. Basically, the I k bones that we're going to be creating are going to be created. We, with the objects off being connected to the elbow, the name on the wrist and ankle. So those joints that I've just mentioned, we're going to create RK bones four does joints on. This is how we're going to create a week that can move based on those joints. After that, I'm going to give you a challenge. So let's create our RK bones in blender. What we need to do to create these bones is we need to go into our side orthodox view. So we're gonna press free on. The first thing we're gonna do is we're gonna create to be wrist and ankle. That's create a wrist and ankle. We're going to first of all, select, assume in. We can see that the joints at the end, he's selected, and we're just going to extrude this out. Look it along the war axis, and that would do nicely. Now we're gonna come down to this joints. If we assume in said this joint is selected on, we're gonna do the same e y to extrude out. Now, I'm gonna make that one a little bit smaller. Now, what we actually want is the like. A bones should be disconnected. So we're going to select these two RK bones and we're going to clear them, form their parents. So we're going to press boat pate on. We're just going to say clear, parent. Now, if we grab these two, we can move them about. Excellent. I'm going to what clicked to cancel that next, I'm going to create a knee bone. Andi on elbow bone. Now, these are actually the pivot points for how our elbow and how our knee bends. Therefore, they have to be quite a way away from the body. This means that we're not going to extrude these bones out. We're just gonna create them on their own. So I sent out my Freedy cursor to where I would like the should be slightly higher, I reckon. Slotted. Yeah. There we go. This is where I'm gonna want to my knee joint to be based off, so I'm just gonna hit shift. I fantastic. There's on E bone. Now I'm going to come up, he and I'm gonna press shift I And there we have our elbow. So we go into front view, we're going to make sure that these are unequipped position. I actually think that the ni itself is really good. That's a really good starting point for us to work with. I think we could make it a little bit bigger. Doesn't really matter too much, but just to make it more visible, the elbow bone, we do have to move those. So we're gonna grab X and just move that in line with the elbow. I think that will do nicely. So what you see now is basically what you need to create a human wig. So we have our spine, the center of our body, and we have a series of bones there. We have arms, legs, and we also have our cake control bones. Four hour wist ni and ankle Andi elbow In the animation section, you're going to be learning how we can use Thies to actually animate our human wig. But For now, they're just a couple more things that we need to do. One of those things your guns do now. If we click on where it says names under the display, we can see that's a lot off. Our bones have been given names. If we pan around, we can see that every bone has its own name now because we called our thirst bone spine. Every bone after that's been extruded out of it has been given the name spine 0.0 and then the number. If we didn't give it a name, then it's simply called bone 0.1 bone. So I think the first bone not connected to the spine was this one. Because it's just called by. What I want you guys to do now is I want you to name a love your bones. So I want you to name a lover spine, chest, neck heads, elbow, etcetera. OK, guys, so do that now and I will see you in the next lecture.
161. Deforming Bones: Now, before we move on with anything else, I need to cover deforming bones. This is a very important lecture. The reason why is because every bone has a box in which ifs ticks. And here's the deform function. This basically what this does is it gives our bones wait once we connect them to our mesh. So if we tick the box that says the form, then when we move that objects about, then it's going to manipulate or deform the mesh. So basically, this is useful. This is basically for the skeleton part of your armature, so any bones are inside of your meshed up. Make up your mess. She's skeleton. We want their deformed boxes to be ticked. However, we don't want I K bones to be de formers because they are the pivot points. So there are skeletons can move around if we tick the deformed box for a Nike a bone and manipulate it, then we will find that our mesh deforms in a way that is very much unnatural on very much not what we want. So or we're going to do in this lecture is untech the boxes for the forming bones 40 K bones. So let's do this in blender. So as I head on form the previous lecture, you should have completed the challenge where you have we named most, if not all off your bodies. Now, one thing that you probably wouldn't have done. But if you did, I'll give you extra credit is for anything on your left hand side. So any bones attached to the arms or the legs I have named them and then I've put dots. L now I advise you do this to on the reason why is because when we mirror all of these bones over to the right hand side, Blender is going to be very clever, and it's going to name the myriad bones appropriately. So, for example, when I Miller my upper arm dot l, over to the right hand side, it will be renamed by default to upper arm dots are the rights. So that's why I have named them dots L. You don't have to do that, but I would recommend that you do waken see a box that says the form and it's currently ticked. Every single bone that you creates will have this box ticked because by this by default. Blender believes that when you create a bone, it is for the purpose off the forming a mesh, which, which is correct in assuming. So if you have any bones inside of your mesh. So, for example, your upper arm your spine, your head You want this to be ticks, Andi, near enough All the time. Every bone is gonna be ticked by default for us. The ones that we want to untech Arthuis Wrist, ankle, knee on elbows. Let's do that now. So we'll click on the wrist now, actually, haven't renamed this one. This just called dot c 001 So I'm gonna rename this as as wrist. Sorry for that. I'm not sure what happened there with my computer, so list not l on now. I'm going to just pick off. I'm going to do the same. Some kinds of green renamed. This is ankle dots. L click to make sure deform is off, do the same with elbow and do the same with me. So for us, only four bones will have the deform option as off. And there you go. Once you have mirrored this, hopefully blend up will understand that The myriad version should also have their deforms off. So once we never say the elbow left, then the right elbow we'll have the deformed button off. But I would recommend checking that when we get to that point. So that's how we can tick on UnTech, the deform option for our bones. Very, very important that we are aware of. This guy's Thanks, Andi, I will see you next time.
162. Attaching control bones: now there are actually several different ways in which you can week or connect bones together. We're going to be looking at the first way in which we can attach I k control bones to singular bones that are part of the mesh. We're going to attach our ankle bone to our foot bone as we know the ankle bone is one of our like a bones. We're going to use the ankle bone as the single bone that is going to allow us to move that part of the body on. We're going to do this by making this ankle bone a parent off the football. So basically, this method is used when you want to attach your like a bone to a single bone in your mesh . So let's do this now. So we're going to press free on the number pad to go to our white Orthodox view. We're gonna assume in said, that we can see our foot bone on our ankle bowed. Now we're going to have to make the ankle bone apparent off the foot. Bone sets do that. We have our foot bone connected, and then we're going to shift click on our ankle bone. Now, before you do this, I want you to make sure you click downs where it says Edit mode on and you go to pose mode because impose mode. This is where we literally creates the different poses for our animations. So, as you can see, we've now got a blue highlight. So now we know that we can connect these two. So make sure both for selected Made shorty Ankle Bone is the second to be selected. You're then going to press control or command Onda pay on. And now what's happened here? You've got set parent, too, but none that we really want. So what we actually want for now is we want to go back into edit mode, Click shift, click Control P again, and now we can create Keep Offset. So try not to get confused that you have different options between edit mode and pose mode . Pose mode is where you're going to actually make the most of this connection, so it's going to connect these two so that you can move your ankle bone on, move your foot bone At the same time, however, you have to connect them in edits mode So we're going to do that now. We're gonna press control. P on the option you want is not connected because we don't want to directly connect him. We want to keep offset so it keeps the values. So we click. And now what we do is if we would just select this bone on rotate so press par, we can see nothing happens. Although if you look closely, you can see Adoptive Line is attached to the joint. This shows that we know it's connected, but it doesn't appear to be doing anything to our bone. If what, what clips come out of that and go into pose mode. Now if I do it all, place all and we can see that as I moved the ankle bone. The foot bone is also being moved. So to sum of eyes, we connect our control bone to a singular bone by going into edit modes, making sure that the mesh bonus selected first on the control bone second control pay on. Then you'll get the option, which says keep offset. Obviously I don't have that option anymore because it's already connected. There you go,
163. Bone constraint: So we've had a look at attaching our I K control bones to singular mesh bones. Now let's look at bone constraints. So we're going to use a method called inverse Kinnah Matics to connect our wrist bone to our arm. Andi, the way we're guns do this is gonna be quite different to just creating a parents. So let's have a look and see how we do this in a blender. So the first thing we're gonna do is we're going to go into pose mode, so this does not require us to be in edit mode. It requires us to be imposed mode. We're then gonna select our wrist bone first so we can see selected Andi. It's gonna be selected first. So where is the ankle bone was the last to be selected, so it became the parent. It's actually in the case with the wrist bone. It's gonna be the first on we're just going to select the next one. So the lover arm, which is connected to it, is gonna be the second to be selected for the moment, we're not going to select the upper arm bone. We don't need to at this point What we going to do now, though, is so the hockey we're gonna use is gonna be shift control and see. And now we have a new menu. This is the ad constraints menu on. We have so many different options we can choose on. Each of these has their own way off being able to week things together. What we're interested in today, though, is inverse Kinnah Matics. This utter constraints the active bone with the target. So we're going to left Click Onda. We can now see that our upper bone has now been given a yellow shading. This year, a shading employs that we now have a bone corn strength. So we've now got bone constraint on our upper arm. But we're not done yet. Our next step is to go into a new properties panel called Bone Constraints. And here we have a series of options. What we're going to do is we have something here called chain length. By increasing or decreasing this chain length, we increased the number off bones that are affected by the I K bone. So as we can see, we've got one here on. We've got another here. So we've got two bones. So we're going to increase the chain length to to Now I'm going to click on my bone. I'm going to grab it. If I put away, we can see that it is influencing if I put it towards excellence. And now we've got the makings off our arm. If I just assume around just a little bits, you can see from a couple of different angles very world at the moment. But yes, we do have progress. Now we can help manoeuvre our arm thanks to our wrist bone. So that is how you can use an like a bone and used the inverse killer Matics feature to connect to multiple bones soda. It can influence a part of your mesh. Now, just one last thing. Obviously, we've got no bone constraints here. The reason why is because the bone constrain isn't for our Iike a bone. In this case, our bone constraint is four. The bone that the I K bone is connected to. So our upper arm and we can see that we have our bone constraint
164. Pole Target: so our next step in creating our fantastic human wig is to assign poll targets. These poll targets are used to create pivot points for our joints. We can use poll targets as a means of creating a more natural moving league. And we can use our unattached RK bones as the poor polls. So in this lecture, I'm going to show you how we can use the elbow bone to create a poll target. So let's log into blender. So where we were in our last lecture, we've got our inverse kid Kinnah Matics up, which is fantastic on we've company got a elbow bone here ready to be used. So we're going to select Ah, bone that has a bone constraint on. We're going to give it a poll target. Now, when you give your bona poll target, the pole affected is actually at the bottom off your bone. So in this case, it's literally gonna be the elbow. This is the point. If I go into edit mode to selected specifically, this is the point that is going to be affected by the pole target. So let's go back into post mode on Select our bone on we're going to give it a poll target on. We have to click on armature. You probably we'll have the word Bob is well, but nor that you want, Armchair. Now you can select a bone on. I want you to just type in elbow are just talk e l I can see elbowed or l click. And now that should be our poll for bone constraints. If I click on our elbow bone, I assume out slightly on if we press g, we can see that it's now influencing our bone so we can move this about we can grab and we can move. This about was, well, fantastic. So this is our poll talk so it can be used to rotate our two connected bones. But when they are straight and unaffected by our original RK bone, which is our wrist bone, then all the poll target will do. Really? We move it around is rotate the arm once, however, we contract our elbow. So at the moment, our elbow is fully extended. This is why the poll target doesn't really do anything apart from rotate the bones. But once we moved this in and contract our elbow then if we select our poll target, then we can start to move it about. So now, by using two bones, we can create difference ways, different motions in which we can use our, um fantastic. So there we go, guys. That's how we can assign poll targets to our bones. Now, I have a challenge for you. This challenge is gonna undo the movement so I can get it back to being nice and stripe is going to take what? There we go. So your challenge is going to bay off, actually undone it too far. There we go. Your challenge is going to be your going to form the exact same process for our ankle and knee. So I want you to ignore this foot bone and you're going to connect this ankle bone with this leg using inverse Kinnah Matics. Exactly the same method. I shoot deeds as we did for the arm. And then using that same method, you're going to connect this bone with the bone constraint on attach this poll target. Do that now, guys on I will see you in the next lecture
165. Pole Angle: in this lecture, we're going to be looking at how we can change the poll angle for Pol targets. When we assign a poll target, we may find that our joints move at an awkward angle. Andi, I don't want to move the way that we want them to this because when the selected bone was originally created, it was rotated at that angle. So when we assigned a poll target to it, the poll targets was assigned with that rotation in mind to solve this issue is very simple . We must change the poll angle value found in the bone Constraints tab, and we can change this angle value until we get the value that we are looking for. So let's look at this process in a blender. So I've saved from where I was last time. At the end of the last lecture, I gave you guys the challenge or repeating this process for the leg. So we're going to do that now. So we're going to click one shift click and then we're gonna go shift control and see click inverse killer Matics. We're going to select armature and our bone is gonna be knee dots. L set the chain length to to all the same as before. Now, this is where things get a little bit interesting. If we now click on our knee joint and we move it. As with the elbow joint, all we're doing is rotating our to leg bones, so not much happening there. But let's start by pressing free to go into a two dimensional view, and I'm gonna press G to bring that up now. You might have seen this when you did your challenge if you start playing around with it, and you might have noticed that the angle in which tits rotating or bending is completely unnatural for human leg. So we need to solve this issue. We can do that by clicking on the appropriate bone. That's the bone. With bone constraints on, we're going to change this value here. This is our poll angle, so it's commonly set to Ciro degrees and weaken. Turn us up or down, and, as you can see, the more we do. So either way, the more our Ni Benz. Now I know for facts because this happens quite often when I create rigs with knees. That's the value I want is minus 90 on If I press one, we can see that's perfect. If you've been following along with my lectures, then minus 90 is probably the value that you want as well. But if no, just keep experimenting until you find the angle where the knee comes out straight like this. So now I can move up and down and it looks much more like a real leg movement. Fantastic. And there you go, guys. That's how you can set your poll angles for your poll targets.
166. Mirror the rig: Okay, so now it's time for us to mirror our week now for the mirroring process. We can't use the mirror mortar fire as our bones are not meshes. So it's not gonna work. We need to perform a different process. What we need to do is we're going to select the bones that we want to mirror. So basically, we're going to select all of our like a bones, arm, bones and our leg bones. We're not going to select the head, neck or spine bones. We're then gonna create a pivot point using the Freedy cursor, and we're going to duplicate our bones, then flipped them over to the other side of our mesh, using the pivot points. So let's see if we can do this. So for this process, the first thing I need to do is press one on my number parts so that I have face on view. Next, I'm going to make sure everything is thes selected by pressing I on. Then I'm going to press see to end such circle select mode. I'm gonna thick hold down and select all of the bones that I want and they are all selected . Fantastic. Now if you haven't done this well, I want you to do next is you're gonna position your Freedy cursor in the center, and you're gonna do so by pressing Shift s and snap curse at the center you condemn in I ever go to the Pivot point bar on select Treaty cursor, or you can tap the full stop key on your keyboard. So the full stocky if I was to move the three D if I was to change this soy so changed its two medium point, which is the standard. And then I pressed full stop on a keyboard. It would change the pivot points to the Freedy cursor. Once you've done that, you're going to press shift day to do precut on. Then you're going to push scale. Thanks. Minus one. Ah, do we know what we done wrong here? I'm going to double check. Sometimes this can happen. So first of all, it's grab. So we've only got one day, so we haven't duplicated, so I'm gonna go shift the again wise and it will not worked. Is have you noticed you are correct if you said you're in the wrong modes. So this is another example where it's very important to be in the right mode. You can't stoop like eight things in opposed mode. You have to be in edit modes. So now that we are in edit mode, we're going to try against you gonna press shift and day on next. We're going to press s for scale because we're scaling across the end of Freedy Cursor, gonna press X to lock it to the X axis, and then we're gonna press minus one and enter. And there we go. We have mirrored all of our bones from one side to the other. So to do that, I'm just gonna go back a couple yet, so make sure in order to do this if you're following along, that's your arm bones. Make sure all the bones you want are selected. Then make sure that your Freedy cursor is in the center off the blender grids. Then press full stop to pivot around the Freedy cursor. Shifty to duplicate. Make sure you're in edit mode. Press the escape for scale extra look to the X axis and minus one, then answer. And there you go. Now we have a full human rig to work with next stop. We're going to apply this rig to our human. Thanks, guys. On. I'll see you next time.
167. Applying the rig to our mesh: that's time has finally begun to finally come. We're going to deploy our rig to Al Mish now. We have a full week set. We conform the employ a week to do this, we're going to select the mesh first, then the rig second on. We're going to set the wig as the parent by using control P, we want to set this with automatic weights. The automatic weight system basically gives are something to work with when we move into waiting. Now, we're not gonna cover waiting in this course. We're going to cover it slightly in animations, but its not part or our reading sections. So all we're going to do for now is to make sure that we have set it with automatic weights . So let's apply our rig. So we've got a full rig. Happy days as I know it. Earlier on in this section, we don't need for the spines be connected to the arms, etcetera. That's not necessary. So this is a perfect human weak. If I do say so myself on now, we're going to link the mesh with the rig. So we're going to go into object mode. Select the mesh first shift and select the A choice. It cold, the league's second. We're gonna go control P. And now we've got a series of options. We're going to select armature deform with automatic weights, Click and there we go on. We can see. Actually, that's changes have already been made to our mesh. This is because the automatic weights have already taken effect. It doesn't look brilliant now, but it just shows it's working, which is really good. And you can always edit this in the future in white paints. So there we go. The last thing I'm going to show you is I'm just going to show you what weight paint looks like. So we come up, we have to select the mesh itself. We can go to white paint on there. We can see that we have a mesh now. In this case, there's something that I would have to work on because that's a very uneven mesh. In fact, that might be war that's being caused, but it's not something we need to worry about. For now, All we need to worry about is the fact that we now have a mesh with a wig, so I hope you guys have enjoyed the section with Bigfoot human weak on. I hope to see you in the animation section where we'll be learning about animation and will be finishing the animation, sir section by making one or two very basic human animations. So we'll be looking at weight painting in a little bit detail, not too much, and then will create an animation without human. I hope to see you there, guys.
168. Assets: so I'm going to very quickly show you where you confined your section assets basically in new to me, as instructors, we can give you assets that you can download to help you with the course or help you with what you'll do after the course. So I'm just going to show you where you can download these. So if we go into one of my selected lectures, so this lecture is changing your feet and bend up, which you will soon see in the course, we have a Siris of icons in the top corner. The coven iconic displays all of your lectures on in blue shows. What let you your company on There are circles next to each lecture. If the circle is what it means that you have not watched that lecture yet if you have 1/2 moon. So if you have half green, half white circle, then it means that you have watched a part off that let shot, but you have not watched the whole lecture. If the lecture is full green in circle, then it means that you have completed that lecture, which means you watched it as a whole. Every lecture can have its own downloadable content. So the lectures are where you download a content from not just the course dashboard, which you can go back to any time up here. You have to go to the lectures themselves. So this second tab, which company has nothing in it? But it says there are no available downloads Board this lecture. If a lecture has downloadable content form, it's that downloadable content will be displayed here. Simply left, click. The wording, which will appear if it's downloadable on it will do so automatically notes that certain downloads are optional in this course, and certain downloads are very much advised. For example, due to the nature of this being primarily a beginner's course, although anyone can take it, I'm not going to be creating our human, which we're gonna use for human reek in the course itself. So the reason why that is is because that is a more, um, or advanced level than what's I. I'm aware that many of us will be at once we reached that stage so a human mesh will be available for download in the appropriate lecture, and then, from there you can do whatever you like that human would mesh. But the idea that human mesh is to help set up a wig form that mish. There are other downloadable content. So, for example, in the UV textures and material section, I will have downloadable content, which shows example objects where detailed materials have bean created. These are merely is an idea to give you a days of how you can set out different material objects. But there we go. This is where you get your section assets for.
169. Discussion and feedback: So what If you'd like to give feedback on particular Lesh lectures or if you want to discuss with other members off the UDA me community and myself who are taking the course, whatever a couple of places, you can do this. So if we go to the U to me website So we're back on our example lecture. The first place, which I would recommend, is on the lecture itself, in which you might have, um, an issue or question that you want to bring up about that lecture. If you go to the speech bubble work on, you will see it says, start a new discussion. So here you can type in the title on You could say in that title, I would advise you to write, perhaps what the question is or what the a summary of what you are about to study in the box below. So I'm just going like, title a theme on If I've got a question law, for example, can oy create my theme manually? Just just an example, Andi. Then I can press post not going to at this point, but well pressed post on, then that will appear down. He Andi people will be able to apply to that post. I will be able to reply to that post on Did you can post a many things if you want here. So if you've got questions, just place him here on, someone will get back to you. Ideally may. Maybe someone else in the community can help you. We also have a few word Microsoft Word style options. So we have bold italic. You can create ordered lists on order lists. You can do links on insert images. This is particularly useful. Basically, if you're having an issue and you're not sure what's going on, you can. In certain images, you could take a screen shot off. What you're doing on. You can post that screenshot here on to the community and myself. We can have a look to see what the problem is, or you could do so and you could post what you've done in the discussions as part of the course itself. So there were quite a few times where I might ask you to complete a challenge on then posted in the discussions. So you post it here in that specific lecture using insert image of course, make sure you know how to make a snapshot off your laptop or your desktop first on, then save it to some way you know where you've stored it, and then you can insert her image on people can have a look at what you've done. Thesis place is if we go to the course dashboard, then we have at the moment. Since the courses company not live, we have show unanswered discussions, but we have different kinds of discussions, so we have a box here. It says that discussion on Dhere you just click at discussion on you can similar to the lectures themselves. You can type in the title and then go into more detail about the query that you have. So this one is for more general purposes. It will also display any discussions from individual lectures, so this is like a global discussion page. But if you have any questions about a specific lecture, what a content of a specific lecture trying used the lectures discussion page, person foremost. We also have announcements tap, which I will display announcements form on a student's tap that's purely for May. So all you really need to worry ease in that part, how you can insert discussions. So there we got
170. Changing the number of frames: One thing we need to always be aware of off when we're about to create animations is how many frames we have set our total animation to beat. We can edit this in the timeline on this is a useful thing to be able to do as if you have too many frames in your animation, Then the amount of time that it's gonna take to render your animation is gonna be astronomical, I've said before in previous lectures, even on real high end computers, it can take a very long time for your computer to successfully created animation, especially if you've got it up high quality due to the number of samples. So when planning an animation, you need to make sure that you know exactly how long you want that animation to be on. Then adjust the frame of the number of flames based on your frame right sudden. In the case of blender, we currently have as defaults 250. Now it allows us to see all 250 frames within. Timeline on those frames are noticeable because they're all of a lighter gray color. Now we can select any of those crimes we can also select frames outside off our animation bar, so our animation bar companies friends 1 to 250. However, what we put in these crimes, we will not rend up when we do the animation. The reason why this is so important to know is because you can just creates a 30 minute movie on expect sure computer to be able to render it all. It's just too long for 99% of computers. So the way to go about it is to actually create small animations based on your scenes, which a lot of the time can only be a few seconds long before going to a different camera angle for a different scene on you wind up that scene. So, whereas we think are 90 minutes is 90 minutes of pure animation. It's actually hundreds and hundreds off different animated scenes that are created separately from each other. But that doesn't mean we can't increase or decrease how big thes scenes are to do that. We simply changed this end value so we can change that from 250. We can make it really short, So 10 frames, of course, you won't goes for anything in that. But you can see there that thief flames have been done. We could go 1000 frames. We could go 10,000 frames. We could go as high as we want. But as a word of advice, keep your animations short and sweet, because the longer you animation is, the longer it's gonna take to render on. I've said this before and I'll say it again. It Conseco a seriously long time to under animations. So there we go. That's how we can change how long our animations are.
171. Zooming in the timeline: a useful tall in the timeline is the ability to assume we consume in our timeline to give us a clear view off a longer animation or allow us to easily select single frames on. To do this, we have to use the scroll wheel sort of spell that completely wrong on our mouse to accomplish this. So if we look at our timeline in Blender, I'm gonna go back to my norm or 250 fines on by default. Our timeline allows us to a few of these rains. But what if I increase? We can change this to 500 and enter. So now what? And when we can see that our clip goes beyond the skulks, the scope of our visible timeline. So all we need to do is soon out life scrolling down on our school wheel. And now we can see that we have our timeline fully in place from frame 0 to 500. We can also grab the bar below it, which is actually also a scroll bar in itself to move backwards and forwards in our frames . In addition to scrolling out if we scrolled in, we could scroll in as far as we wanted, opportune, singular fame's said. Now I've scrolled in enough so that I can go Sergeant four 35 36 at the click of a button and, of course, by cancel ECT, which former one he. But even once I do that, it does not all toe locate to that frame, so I'd have to assume out again. Make sure that the selected frame is roughly in the center on begin scrolling in and then I can work on that section of frames.
172. Human animations - raise arms: Okay, let's begin making a few animations for our human. The first one's gonna be very simple. We're going to raise our arms on, then lower arms. So let's do this in blender. So if you want to start, the same is May I've actually got free panels. So in addition to my Freedy Vieux port on my timeline, I've also got the job sheet underneath. What we're gonna do is we're gonna assume in Andi we're gonna have a look. So this is our starting position. But what we're gonna do is we're gonna start lower, so I'm going to select. This is like a bone I'm gonna grab. I don't get a Pulling it down about here will do nicely. Don't worry about what happens to the shoulders for now. If you like in spring, the our little bit more. Just make sure that it's extended on will do the same on this side. That will do nicely on what we do is when working with an amateur, we make sure everything is selected imposed mode on. I'm gonna make sure that the correct key flame is selected, so I'm gonna select frame one on what's happened here. so making. Once you're on the appropriate key frame, make sure everything is selected. Press I and then we're going to insert location, rotation scale next week, er choose our end Fine. Which I'm gonna say is gonna be faulty. It's not necessarily going to be the end frame for animation, but it's gonna be where we want our arms to stop rising. So we're going to select the okay, bones again. We're gonna push g to pulling them up. I want to keep them extended on. I think I want to move this forward, and I want to do the same for this side. Don't worry. If the I r K bone becomes detached from the Army Jewish. All that shows is that's your arm should be straight. And so there we go. That looks pretty good. Make sure everything is selected Very important. Point make sure everything is selected. Press I on insert location, rotation scale. Now let's play our animation. But before we do that, we're just going to set the animation to 60 frames in length so that we don't get too much meaningless friends on. If we press play, we've got ourselves an animation as I said before, looks word at the shoulders. That's mainly because Theo Bos airbending so don't want me too much about that. But we are now going to get rid off the bending elbows. So to do that is very simple, because blender automatically inserts what it thinks should be created in each frame. In between your start and finish, we simply give it another reference point. So if we paused the animation, bring it back to the start and then go to flame 20 this is what we can see at the moment. So at the moment, elbows being been in Woods. Let's solve this issue because we don't want this. We're gonna straight in this hour. Make sure it's nice and shray on both sides on roughly level. I'd say the left arm's a little bit too high up. There we go. Make sure everything is selected on then press boy location, rotation scale. And now, if we look little bit bending, but not too much. If we want to get rid of that bending at the start, obviously we can see off the frame. 20. There's no bending whatsoever, but if we want to get rid of that bending at the start, we can go to flying. 10. Andi Repeat the process, not just goingto weight paint mode, so make sure that you avoid that. If possible, I need to go back into pose mode. There we go, sir. Let's more like a week on. Just make sure that they're stretched out nicely. So now I can select everything again one more time. Insert location, rotation scale. And there we go astray on my is fantastic. Of course, you can always view this without the Wasn't one was saying without the amateur visible. Just press page to hide Olt age to bring it back. But with hates to hide, we can still play our animation. Okay, so that's how we can create an animation where we raise our arms for the basic animation. What I want guys for you to do now is you have a challenge. So before we go into that challenge, just make a note that when we hide what's being animated, even though the animation still applies to Amish, we can actually see that's the frames. The key flames have disappeared on both the timeline on the job sheet, so make a note that you can't edit does while the armature is invisible. So let's make that visible again on your challenge Now is I want you to extend the total length to 90 frames per second on using frame 40 as to stop when I want you to create the reverse effect for the remainder off the animation. So from 0 to 4 way, we raised arms on form 40 to 80 as a little hint away should stop you. Should Lee lover your arms back to roughly their original position. Do that now, guys, and I will see you in the next lecture.
173. Human animation - wave: So let's create our next animation for our human. We're going to get him to waive now. Obviously, we don't have any proper hands toe wave with, but we're just gonna waive arm. So this is gonna be another arm animation. Let's have a look at how we can do this. Apologies. There. There we go. OK, so you call our previous animation on At the end of the last animation, I challenged you to finish this animation. So let's just have a quick look at where we were raises the arms. Excellent. So if we click on an animation on hit delete, we can delete key flames. So what I'm gonna do is I'm gonna delete all these key flames on one more. Andi. Sometimes if you're not careful, what it will do is it will actually rest your rig where your last key flame was deleted, which is what's happened here. Now, this is useful for me. Actually, I'm gonna keep this right arm up. But what I'm gonna do is I'm gonna go to frame one. Andi, I'm gonna grab this like a bone. I'm gonna go up. I'm just gonna pulling more like a bone. Don he now, I'm just going to grab this elbow bone and just move it a little bit. Move this to the side. Make sure what the correct one grout. Just move that in on. The reason why I'm doing this is just to make it a little bit more of a natural look. So we've got Oh, I'm down here. We've got our waving arm up here on. We're going to select everything on We're going to press, boy, insert location, rotation scale Now where we need to perform a waving motion. So it's not just raising alarms once we're gonna do this several times. So we need to figure out at what frames we perform the top and bottom of the animation because we're gonna do this several times. So at the moment in Blender, we're going about 24 frames per second. So I'm looking at possibly Let's Troy doing it in a 12. So I'm gonna select frame 12 and I'm going to grab and make sure it's extended on. We're just gonna go like this. Really? I saw we're really gonna day, so gonna bring it down here slightly. Select everything. Well. Location, rotation scale on and not too bad. So next what we're going to do is we're going to select it. We just bring this. Well, I'm trying to do at the moment is I'm gonna try and bring the dope sheet up, and then I'm gonna bring a time line up a little bit. So the next step is we're going to duplicates the first key. Fine. We've shift D and then we want to move that to 24. There we go on if we go back to the beginning. Excellent. So we got the first part of our waiting motion. We want to do that. Uh, another time or two. So we're going to that This We're gonna shift the again and we're gonna move this one up to 48 on. Then we're going to grab this key Fine. Which is our second key from a key from 12 shift day. Move that up to 30. Teoh, I believe. No, it's gonna be 30 six. So we assume in a little bit here, we can see how it's developing. Let's see from the beginning what we've got so far. Excellent. And we can see him repeating because that animation repeats as soon as it reaches the end. Excellent. So there we go. We've got a waving human. Fantastic. Obviously, this is a fairly simple animation, but this is the first time where you look to Pete's motions repeatedly so you could continue this motion again so I could stop on. I'm going to extend this to you, Shall we say 90 and then a gun press shift e to 60. And that's one too far. So I'm gonna push g to grab that key frame and move it back of Fine. Then I'm going to select this one on Move it. So it's hits 72. There we go. If you're finding it difficult for the long guys, don't forget to use the u to me controls. You can always go backwards to have a look at what's going on, but basically what we've got here is we've got two key flames. One a key flame 11 a key frame 12 on Then each of these two key flames are duplicated roughly 23 to 24 flames down the line. So frames 1 24 48 on 72 will all be the exact same key. Fine Likewise, the key flames at flames 12 36 on 60 will be all the same. Key finds. So let's go back and have a look excellent on. We can always shorten this down to Sigh 73. Let's add an extra frame after it on. If we play from here, then we can see it's near continuous if you walk. If we wanted it to be completely continuous, could we go one less to 72? Let's see what that does, making sure that it's going in the right direction. Excellent. So we've got a pretty much a continuous wave. There we go.
174. Human animation - bow: Okay, so we're going to move on to a slightly more difficult animation. Now, we're going to get our human to perform a traditional bow movements, Aziz in bowel movement as a new bow to someone. So it's a little bit more difficult, cause now we're gonna be using gonna be bending knees. We're gonna be talking our head forwards, etcetera. So we're gonna be using more the body now. Now, the way we're bats do it is based on what we have learned so far. There are better ways to do it. We can use weight painting to make this more effective. But for now, I'm just going to show you how we can do it with the knowledge that we come be possess. So let's do this in Blender at the moment I've got my human in its wave animation form. Although I have now deleted the wave animation. So if you're at this point, please make sure that you do the same to do that, just come into the dope sheet, press A. It will select a love your key flames and then press X to delete them. Now we're gonna start with ah wah bow movement and the first thing I wanted to do is make sure the arms who in the quick position. So for a traditional bow, we actually need them to be pretty much how they were at the start. They need to be pretty level coming out here. In addition, what we're gonna do is I'm gonna go to key frame, make sure it's quit one key flame one on going to ringy, Stan, because we need to have a Starkey Fine on. I quite like that Actually has quite traditional stance slightly too far out knees ever. So elbows ever so slightly bent. That's a pretty good one, I think just brewing the arms in slightly. Okay, so that's gonna be our starting point. So let's insert the key frame location, rotation in scale. Make sure we're looking at eight directly on. We're now going to start with our final frame, which is gonna be frame 40 for this. I'd say 40 frames the bow laughing. That's about why a little over a second so slept the 1st 1 on. We're gonna grab and scratch. We're then gonna use the elbow like a bone, and we're gonna grab that. And if we moved down, we can see that the arm moves up and down. We want the forearm to be facing towards the ground. So we need the like a bone low in this case. So there's a good point. So now the elbow it week Grab this. When are we pointing upwards? Excellent. Let's do the same for the other side. So let's bring this out. Make sure it's nice and straight. And then we'll bring this like a bone down. He so that the arm bends downwards. If our human had hands, the palms of the hands would not be facing towards the floor because the elbows, if we can go out, this one are pushing upwards. So we've got our arm. Stan, let's do our head now. So if you ever make mistakes with ease because this is a slightly more complicated animation, always save. So I'm gonna go save us. I'm gonna dio human vice, and I'm going to do what should I call this? I'm gonna call this both one. So now I've saved at the point where the hands are ready. Now I'm going to rotate this head bone. So that's the head goes down don't worry about any distortion at the moment. We won't need to worry about that for these lectures. Let's now rotate. They stand slightly. Glad we're just one by one. We're just rotating thes done now because we don't have any weight painting apart applied. You'll see something really strange has happened with our shoulders. But don't worry about that. Will solve this problem in a second. We're fun. Just gonna rotate this down, and we're just gonna grab it to bring it down, rotate a little bit more. Now what you'll know it's with the bottom off the spine is that this actually doesn't rotate itself. So it's a little bit more difficult now because I'm not entirely happy with that shape. I'm just gonna grab this bottom bone and move it for just a little bit. Now, I'm just gonna rotates a little bit more each time. Andi, I think that will do. Now, what we're gonna do is we're gonna grab all of these on which is gonna grow up on. Just bring him down. See, we can get them in a decent enough position. I think that might be a little too high. We can see we've got issues on this side. So a lot of this one should get more complex stuff. Guys is gonna be quiet. Ah, complex on. Obviously, it doesn't look very good at the moment because we're not using white pain in tools. Once we learn weight painting tools and future courses or feed a couple new cheap when I even add some weight weight painting to toy was in this course. Then we'll start to really be able to create weeks without this sort of effect happening. But we're not worried about the four motions too much. We're just worried about animations, So that will do. For now, I think the one thing if I press one is I think the head is tilting slightly, so I'm just going to tilt it just a little bit. And that looks good. I'm not gonna press save as I'm gonna push to. So this is the second stage done on the last thing. We're gonna do these legs so I can assume out on we're gonna have the left leg back. So we're going to grab this, said that it comes back and then we're gonna rotate lap. Okay, That looks pretty good. We're not gonna move this one, Ford. So let's rotates. I grew up. Onda rotates back. So what we're gonna do now is we're just going to select the No, select the top one, just grab it, just move forward just slightly. So I think that will do If I press, you know, coming to front view. Let's have a look at it. It's not perfect. It's nowhere near perfect, to be honest, but we don't really need it to be. So let's press. I insert location, rotation scale. Now let's have a look to see how this works. Okay, so it's not too bad performing a so and I actually think that's quite good. So from there you can do what you like. Go in between frames one and four way. If there's something in your animation that you don't like, you can just adjust it. But old Twinkie flames in between. Perhaps you could get his head till lower etcetera, but there we go. So if we press hates just to hide our bones and there's our human performing about
175. Challenge: okay, I now have a challenge for you. Now that you've learned how to use the blender render engine, I want you to create a Siri's off new models. The list below is a series of different models that I would challenge you to create. And then I want you to texture these models using blend Orender So we have a battery. A house. Don't be too daunted about doing a house. You're just doing the outside a ladder. Hammer nail a storage shelf so shell where you put books, DVDs, etcetera. Andi, A plug on plug socket. Most of these will be fairly simple for you to model. The only one that will really be challenging will be the plug in the plug and plug socket, because plugs tends how quiet few different curves. But once you've done that, once you've modeled save modeled your battery begin applying textures to different parts of the battery, using the blend up when the engine. Now, this is a completely optional challenge, as all challenges are, but I advise you to do this. Not only will it give you a great, even greater sense off model ings, you'll have more experience modeling different objects, but also you'll begin to get used to using Blend Orender. One theory that I have myself when I've been learning Blender is that if you just learn how to model one object and then texture one object, then you really only know how to create that object. So this challenge helps you create a series of different shapes and sizes with different textures, so that you can really develop your skills both remodeling andan touch texture in.
176. End of course project: Okay, guys. So we've near enough. Reached the end of the course now. So now we have a project just to finish things up. We're going to model a robot's. Now you can create. I'm giving you obviously free rein. Use any of the tools that you've learned in this course model. You'll robots in any way that she wants. Once you've modeled your robot, I want you to add textures and materials. You can use the blender render engine, but I'm going to be using the cycle was engine because it's much better for materials on, then guns. We're then gonna we get up, we're going to create two animations without wig, and then we're going to render an image, and then we're going to render an animation. Now, in the next couple off videos, I'm going to be shown you how I I'm gonna make this robot and I'm going to go through a lengthy steps. But if you want to, you connive are Wait till you seen what I've done and then try to copy or try to take notes on, then model you'll open afterwards. You could model it with me so I could model and you can model at the same time. Or you could create your robot before and then just use my videos as a reference. Once you've created it, it's entirely up to you guys. There's no restrictions. You create any robot that you want. See you in the next lectures.
177. Human animation: So the last animation we're gonna do is we're going to perform a standing jump. So let's do it. So from the previous lecture, we've got our bow. Now we're gonna do a standing jump now. I don't think his head needs to be tilted. So we're going to sort these out. We can put them up quite, Streit. And now we can grew up a le slide Bones on brewing thes up. I mean, that looks excellent. Now we press one. As you can see, it's slightly tilted, so we need to make sure that's not the case. Now it's tilting slightly the other way. There we go. Excellent. Now what we're going to do here is which is gonna grab this bone, bring it alongside on what we need to do now He's weaken roads, height. We're almost in a very good position, actually. What I want to do is I want to grab these two bones on. If we grab, let's see what happens. That's where we did. So we grab those two bones, we can move it down. But then, of course, we also need to grab a with the bones above. So if we press see, we complain diesel down at the same time by pressing G on. That looks fantastic. Be careful with the front, but that it's looking pretty good so far on we're going to grab the to RK bones on. We're just going to grow up to put him down on the first standing jump when we bend our legs, we normally putting our hands in. So I'm going to go up one at a time on bring it in and we also putting our arms behind us. So let's bring these two back behind us. Obviously, as you can sell by the fact that I'm not instructing too much, this is the sort of thing that does require quite a bit of concentration just to make sure you get it right. But that's looking who assume in That's looking very, very good. Now, this isn't gonna be the start of our animation to start off. Our animation is gonna be normal standing motion. But this is the starting point off the jump, So this is gonna bay 30 flames in for May. I'm gonna do this. First he frames in. I'm gonna tilt this head slightly forward on what's gonna happen is we're gonna make a jumping motion into the air, and then he's gonna come back down. So we're gonna select everything with I. That's a very good position, actually. If I say so myself, working to apply location, rotation scale there on now what we're gonna do, ease. We're going to reached the point where he's made the jump, which is gonna be in frame 60. So first things first, we're going to glad I'm feeling these up. The arms go nice and high into the air. Doesn't really matter how it how it goes at this point Get the body to be nice and straight at this point Once we're in the air, we want our body to be nice and straight so I'm gonna just rotate that up. Next, I'm going to press the Seiki, grab a with ease up to the fires on. We're gonna grab them and bring them up, get it to its about strike. And then we may know ISS that it we move particularly with this foot. We move it too far forward as a bit of the formation. But don't worry too much about the formation. As I said, we don't need to worry about that at this point. But let's make these nice and strike Andi. Now, just gonna move these up just sewed our arms become more natural again so that a twist in the air so that they go back to normal, I just know, is that this one's too far forward. So this will happen many times in your animation projects. The entire body there for me at that stop seems to be too far forward. So we're gonna press, see, grew up everything. And we're gonna just load states that there we go. And now we're gonna grab absolutely everything. We're gonna groove, move this up. And now we've got a little bit of a problem, and we don't know why. This foot seems to be very, very sticky. Doesn't seem to wanna move it all. So let's go into object mode. Aan den. If we go into weight paint mode for our objects, let's have a look. That doesn't really seem to be anything wrong there, which is a bit weird, slightly glitchy. So let's go back. We can see the problem here with the D formation. Not really entirely sure why that's happening on one side and not the other. But if we go back into pose mode on we grew up the mesh. That's very strange. If you're finding this issue to we're not really gonna worry too much about this point. It's gonna rotate that on. That makes it worse. So the fact is, if ice, if I stood here trying to figure this issue out, we'd be here forever. So we're just gonna leave it like that. So we're going to select everything we're gonna hit by insert location, rotation scale, and it's almost a standing jump. Obviously, it's not quite the jump because we've left it there due to the issues with that foot. But this is basically the animation that we want. Last thing we're gonna do is we're gonna go to seeing one, and we're just gonna before get him to be standing up straight. So rotate her up, bring these in on. We're going to press, see, select, grab to bring them up. It grabs, bring this back and then are to rotate. It's all a very it's a very what's the word I'm looking for here, guys. Meticulous process animations and rigging because you want to make sure that everything's correct. One. Make sure everything's right and there's a lot of focus that's involved. So what I'm gonna do here, because that's what is really starting to bug May. I don't know if it's bugging you guys on your projects, but we're just going to select everything. He and glove and just move it, move it down a bit. Trying to get that foot. Kreutz. Very awkward, isn't it? Okay, so let's see how that works. Let's play the automation. Okay, so I'm gonna leave it there, but we can obviously see that we've got problems with this rifle which now causes problems with the right knee. Which kind of jars forward now. You wouldn't want that in a clear cut animation. So as a challenge, I'm going to leave that to you to try and figure out what you can do. This is your first external challenges. Well, don't forget, it's not just on you to me where you can find blender courses. You can also do this on YouTube as well. There are plenty of rigging tutorials with regards to rigging and white painting. So my challenge for you is to try and figure out what the issues are on to try and solve them on. If you can do that, post your animations in discussions and it will be fantastic for us all to see. Thanks, guys. See you in the next lecture.
178. Blender bot intro: to finish our course. We're gonna finish by creating a full project. Were guns create blender bolts? This is gonna be your own personal robot assistant in blender, so we're going to model texture Rig on animates a robot completely from scratch in a blender. A few guidelines, if you will. I am going to be creating a humanoid based robot. But this is the end of course projects. So you guys have absolutely free reign to do this any way you want to create any shape, any model that she want to, you can use any textures you like. You can animate it any way you want to. It's entirely up to you If you feel confident enough to do that. If you would rather just brought him along with my own projects, then feel free to do so. I'm gonna be using select modifies to model my blender robots. So I'm gonna be using things like exclusions the Boolean WaterFire connecting primitive objects together. So basically, my robots actually going to be quite simpleton creates something that we can so that everybody can do it with confidence. If you feel that my creation is too simple, then you can obviously go one step Verba on and make changes to your blender bots to make it as good as you can possibly make it. So good luck, guys.
179. Blender bot - modelling: So let's begin with the morning stage for blender bots. Now, just to give you an idea, this is going to actually be kept quite simple. Andi, this is not rehearsed A tall. So I'm doing this completely from scratch to there's no voice over. I am going to be doing this live as I show you it just to give you a really good idea off the sort things that you have to think about when actually modeling a creation. The reason why I'm doing it this way is because if I simply rehearsed it, then I just go through, did it flawlessly. Andi expect you guys to copy it. All in that detail on the reason why I don't really like that is because I'd rather you guys get a sense off, actually, what goes on when you're actually modeling the things live. So I will probably make a couple of mistakes, which is a good thing, because if I make mistakes, I'd like you to point out what those mistakes are. Andi, follow along as much as you want. You don't have to copy me for this. Used the methods that you find best on. Remember that you can use all different kinds of modifies. You can use the mirror modifier, solidify a 1,000,000,000 etcetera. It's entirely up to you how you do this project. But if you want to follow along with May, you're more than welcome to do so. So let's get to it. So I've got a simple cube to start with. I'm going to go into fun Orthodox mode. I got my cube now because I'm keeping it fairly simple. This cube is gonna be my body, so I'm going to scale this first of all by two in all directions on now. Scale said by 1.6 on Enter. I think I should scale it a little bit more on the X axis, so I'm gonna press stale X 1.2 Andi, I think that will do there. I think it's a little bit wide, so I'm going to reduce the scaling on the Y axis. So I'm gonna press X. So it s this girl. Why? And I'm gonna close 0.9. Let's go 0.85 necessarily. Look rounds on, actually having that still too wide for my liking. I'm gonna go 0.75 actually scale on I gotta be careful. When I do this, I'm gonna bring up the scene properties, because if I did scale 0.75 now, it would be scaled based on. Well, I've now got. So instead, I'm going to go scale boy 0.9 again. And I think that will do next. I'm gonna go into edit mode, so I'm gonna give it some of geometry on. I'm going to do league cuts. I said I can create. Actually, no, I'm not gonna do it that way. I've decided that I'm going to install a couple of cylinders. I'm gonna connect them to my cube using the bullion modifier. I'm going to do it that way. So I'm going to place I going to objects mode on. I'm going to create a cylinder. I'm gonna low tight sit and, uh, along the y axis. So I believe 90 degrees. Excellent. I want this to be quite fin. I'm gonna push scale on, then X. Just bring it down to we'll go 0.7 because it's tips over is coming on. The said access. So I'm gonna go 0.7 Drew rocket in. And now I'm going to use the bully and mortar fire. So I'm gonna select this. First I'm gonna go into at it mode on, and I'm going to add a mortar fire. 1,000,000,000 goes to object. Cylinder on. Let's have Look, what happens if I press said so before I select this one. So which one would you go for? Different union or into sex? Oh, would go union. So we apply modifiers can't be applied in any mode, so we have to go into object mode on a ploy on. Now, if we come into push said, grab this and bring it. Why? And there we got we've got on addition to our mesh in the form over cylinder that's now connected. Fantastic. Next, we're going to attract this way. We're not gonna use it over this part because what I'm gonna do is I'm going to create 1/2 of my objects hunger to create an arm on the leg, and then I'm gonna use the mirror mortar fire. I'm going to She won't do the head as well. No, because I'm gonna do what I'm gonna do is I'm gonna do a head which is a smaller cube. Were you be spheres is always and I'm gonna do Let 1 10 of a top with the little ball on because I'm going to do that antenna. I don't want to use the mortar fire for my head. So that's gonna come after I've used to mean a mortar fire. For now, I'm going to continue working on the arms. So what I'm gonna do now is I am going to creates another keep on and this is going to be my shoulder. Now it's a little bit big for shoulder. I'm gonna press scale X 0.8 drug over and in scale Shift X because I don't want it to increase in the X axis, I'm gonna press 1.1 just so it covers the until our cylinder. Andi Excellence. Now I'm gonna use the bullion mortar fire again with the cube. I'm going to use difference. So union on into sect. But I think we're going to go with difference. We go with difference. Oh, poor apologies for that. Just hearing that telling me my internets gone that doesn't maverick some recording. So we've got different union which will connect together if we go apply and glad now I've actually done this the wrong way round. So I'm gonna press control said so. Basically the problem wife just made for myself on this is a good thing about doing it live because you can see that even like I have been using blender for years. And I still make mistakes on the problem is I've used a mortar fire on my new key. But I should have used the mortar fire on my original object. So I'm gonna take this mortar fire away, select my main cube objects on. I'm going to use the bully and mortar fire on it. I'm going to select the New Cube. It's common into sex, which is what has disappeared. We want union unions, the billions heart that we want. Now I'm going to fly. Glad. And there we go. Now, this method off doing things does obviously create extra geometry. But we could always delete this geometry, or we could choose it later so we could always recycle it. Next stop. We're going to now use this cylinder again, so I'm going to create a smaller version of this cylinder. I'm gonna do that by rotating war minus 90 to bring it back up to the way it was when it was first created. I'm gonna make this considerably smaller along the Y slash X axis sunken press scale. Shipp said point to Let's go point free on. And now I'm going to bring that up. Excellent. So now we've got ourselves a top part of our arm. So I'm gonna create sin under here. I'm going to create a UV sphere to act as our elbow joints. And then I'm gonna create another cylinder, and then I'm going to create a hand off source. So we've got the sinner. Andi, we're going to just scaled out on the said by 1.1. I'm gonna drag it down slightly just so the topic is sticking in. If we look at this, form the bottom, we can start to just level this up, make sure that's a level nice and central. Excellent. Now what I'm going to do is you guessed it. Boolean mortar fire. So now I'm going to use the bully in again wave cylinder, a ploy. I grew up drug. Quite. There we go. And now we can actually see that we have one singular object that's actually already quite complex. Next I'm going to use a U V sphere, so he selects everything. I'm gonna use a UV sphere on four hour UV sphere. We want a first of all, make sure that it's pretty much central. That looks pretty good, and we're going to scale that. Allow axes by point free points for yes, that looks pretty good. Excellent. Now we seem in here we can get a better view on. It's quite weird. It's no quartz perfect and how it's doing our can see what? There we go. That's much better. If we assume in, we can actually use the geometry and the shading to line them up very nicely. So that's looking pretty good. Gonna bring it down as much as I can. There we go. Excellent. So what's next, guys? Yet you guessed it bullion. WaterFire. So there's so many different ways in which I could create this robot. But the bullion waterfire is an excellent methods or creating simple designs very, very quickly on very, very easily. So at the moment I haven't used any extruding whatsoever. I haven't really altered any of my shapes in edit mode. I've just used the bully and mortar fire so far, which is really, really helpful. So now I'm going to do it again. Union with sphere. Okay, I'm gonna keep applying each time. Excellent. Next. I'm gonna grab this one, brewing it down, assuming in just to make sure everything's lined up on it looks like it's already lined up . That's fantastic. Let's bring this down too much as it will go. Let's bring up a little bit. So I can imagine that when we move our arm about, we don't warn the top of the cylinder it's come out on. Actually, I might. As a result, that's all joined together. What I'll do is a result is I'm going to going to face, select and select. The's loops are gonna scale him, she said. I'm going to scale these out on a reason warm doing. That is because I don't want it's to be doing much poking out. So I don't want when I do an animation, I don't want the top of this to be poking out. So now I can. If I go into object, Modi completeness up Sabit on. I'm actually gonna scale this one down ever so slightly so I'm gonna do scale I'm gonna do , Shit said. Because I'm happy with it along the set access 0.97 Let's try it again because that seemed to increase. That was weird. We'll try Scale, Shift said. We go 0.94 That will do. That would do nicely. So let's have a look now. Push goods. Boolean Union cylinder. Don't forget to apply X if you don't apply one work. Excellent. Like that's looking really good. Stay tuned for Part two, where we're going to create the arm on begin making the leg.
180. Blender bot modelling two: Okay, So I'm gonna make a basic hand, and I'm gonna use the basic block model. So for the rest, I'm gonna use a cube, and then I'm gonna have cylinders coming out of the cube as a means off creating a hand. So let's grab our cube up here on. We're gonna place it down here, and we're gonna road site along the Y axis by 90 degrees will drag it up. Let's have a look. Okay. So I don't want my hand to be that much wider than the cylinder arm. So let's start experimenting. It's along this axis, so I'm gonna do scale. Why? 0.5 can go a little bit lower for free. Let's try this one point for you. That's superb. In terms off length along the x axis, we're gonna need a scale this down again. So scale X. I'm gonna go point right. Mm. Let's go 0.6 five. Make sure that's a little bit more central. Make it central's. We can. Okay. And now I think we're gonna on long this set access. It's gotta be a lot smaller, so I'm gonna go Scale said point fleet. Excellent. Okay, Very good. Now then it's time for us to first of all, we're gonna use the modified A Boolean mortar fire to connect to the keep. And there we go with night Golts the start of our cube. Now the first thing I'm gonna do is I'm gonna create. We want four fingers coming out and then we want a farm. Now the thumb has to be smaller, but at an angle. Or does it? Well, because this is isn't a major project. For now, I'm going to leave the farm out. So for my project, I'm not going to include a farm because we're not going to be doing any major animations with our balls side. We're gonna be doing animations, of course, but it's not gonna be a major one is going to require the use for fun. So now I'm going to Yeah, that's OK. Now I would go into edit mode and insert loop cuts and make sure the white object selected The issue here is that's It's going to be slightly difficult to create Lou cuts here, so let's have a look. See if we can apply loop cuts first and foremost and control are obviously we've got two options free options. Okay, so this point, I'm actually going to do this for extruding. So I'm gonna grab and I'm gonna move. It's up to he I'm gonna add a second. Lieut. Cuts down here. Not too far below it. I don't want the thing is to be that big. Now, get ads. Luke cuts. So I'm gonna do once you I want to make sure I got four fingers. So this count. So it's 1234 1234 one to free four. There we go on like that. So I'm going to grab 1234 I'm going to press one. I'm going to press E to extrude. We see amount. Very good. Next I'm going to instead of extruding again. Yes, I will eat food again. Some gun excludes. One more down. Is it on these cubes? He it 1234 They're gonna be the joint parts and I'm going to exclude one more time. Andi, there we go. So we've now got the basic model for our hands. So we've got the bottom of the fingers. It's operative fingers on the small cubes are going to be our knuckles where we can bend the robots fingers. What time also gains do now is Do we want these to be more circular at the bottom? Such you. I mean, the best way to do that would be to absolute cuts very close to the bottom and then grab the bottom faces and then merge the points so that you'd have pointy but more natural looking fingers. But we assume out, I think that will do for our robots hand for now. Let's have a looking objects mode yet that's looking fine. Okay, so next up, we've got our legs suck 40 legs. We're going to I need to make sure that they can move. So what I'm gonna do is I'm going to use Thievy sphere for this on. I'm actually going to create too large joints. That's come out off the bottom off the cube, part of the robot. Sargon. Press scale. Free on that looks a little bit too big a scale 0.95 on. I think that looks fine. We'll bring that down and what do is open it and what I'll do actually is a little bit of life thinking. Edit mode, press the press this key to total visibility. He select everything. Pressey. I'm just gonna select the chopped part. See? Don't need select these on. What I'm gonna do is I'm gonna bring these. Apply this and then when I grab more cylinder can bring it up. And I can keep mode most of the cylinder outside of the Cube this way. What we can do, You can bring that over. There we go. The reason why I've done this just to let you know is because as a UV sphere, I wanted to connect naturally to the bottom off the Cube, so I don't want it to be bending into far. In addition, I want there to be more surface area with the's UV joints so that when we're moving our lakes, the top off the legs don't come out of the U. B Spear. So not I've done that. We're going to bullying it, bullion it with this fear. Andi, just double checking to see. Everything's okay yet. That looks fine on. We're gonna hit the ploy and we're pulling this one out. Okay, so now we've gots it's a big joint, and it needs to be big for my robot because we want to be able to move the legs. What? You're gonna come next? So I'm gonna crap this cylinder on. I'm not going to increase the sizing of the cylinder, but I'm gonna put push it quite a way in and scale said to. So if we press one and see MT, we can drag it down just a bit. Excellent. Now, because I've already edited this sphere four hour knee joints where guns have to use a number. You ve sphere, we can either use a UV sphere or we can use a cube, but to keep with the rhythm off the arm, I'm going to use a UV sphere. So I'm going to create my ubi sphere. Bring it down, assuming so that we can line it's up nicely thing that looks pretty good. And now we're gonna skay or point free two small 20.4. Still too small 0.5 nature when it's obviously have to be pretty big and we can line this up. And now we're going to scale this along the x and y axis 1.2 to give a Beverly Why aan den , we're going to excellent. So that looks much better. I'm gonna take this one. These two are still unattached, by the way. So I'm gonna duplicate the top leg. I'm gonna bring it down to here on that. Looks a lot better. You may this side that we want to perhaps make this sphere small arms started to think that it's a bit too big, but it looks reasonable enough so far. Okay, so last lead, we've got the foot's now. I don't want my foot to be complexes all. I don't think it's gonna need to be that complex. I'm going to create a cube slash ramp style foot. So I'm going to create more cube and bring it down here. We're gonna make sure it's leveled up on this legs pretty much gonna be the ankle. So we've got to bring it back quite far. That looks pretty. Goods centralize its okay, Then we're gonna do scale. Said points four. Yeah. Looks OK. Before we're gonna go into edit mode and we're gonna add a loop, cuts about he within gonna grab this stoppage on. We're gonna turn on snapping and snapping edges. So going to snap to this age and there we go So we've got ourselves a nice foot. Okay, Now we're just gonna join these free parts to a mesh. Now we're using the bullion methods we could join one at a time, or what we could do is Weaken Select all four days. The Cube is last, so it's going to be known as cube 0.2 And then we're gonna press control. J t join select our main objects at the 1,000,000,000 mortar fire union with cube 0.2 a ploy. And then we can grab this robotic part on. There we go. So if we move these away so we can get a really good view, you're gonna move them off screen. We can see that we now have the makings off our robots. Fantastic. Now, a couple of things that you may do, you may increase the size he which you can do in edit mode. No problem doing that whatsoever. I might do that myself. Something the arms a little bit small compared to the leg. Nor that it will not too much. But there are a few things that we might edit in the next episode. But for now, I'm going to leave it there. And I will see you in the next episode where we're going to use the member modifier to create the other half off our robot body.
181. Blender bot modelling three: Okay, so let's make a couple of adjust adjustments with our Bobo body before we used to mirror mortar fire. So I've had a cool grand and I'm satisfied with my knee. I'm satisfied with my foot. I'm satisfied with my hand, But I think my arm is too long on. I think this joint, I'm gonna call it the hip joint as it would be in a human. Just know, in this shape, I'm gonna make this smaller, so I'm gonna go into edit mode. This is the first thing I'm gonna dio. Now, make a note that the way I've done it is because I used a lot these brilliant modifies individually to join them up. If we use l to select, all of this gets selected. But these we don't because they were alone. Original pieces when? Before they were joined into one. But that's no problem. Well, candy, select everything on. I'm gonna press one to go into a single view. I'm gonna turn off my snap. It's all because I don't need it. Turn order or turn off visibility. Press the sea key. I'm going to increase that size. I'm going to select a lot of this. I think that looks good. Now we're going to press scale, as you can see, because of the bullying mortar fire that's actually forcing our bottom of our cubes go down . Likewise, it can force upwards. While this is a decent effect, it can cause geometry problems if we're not careful. So what I'm gonna do is I'm going to press scale. She said, I'm gonna recuse that. And now I'm gonna do is I'm going to try and flatten this slightly. So I'm going to press the a key to the select everything one to bring it back into, uh, two d mode. I'm gonna press the Seiki gonna make it smaller this time. And I'm only going to select thes so that looks good. I'm gonna drool rag. Just drag this up. There we go. Now that drugs the bottom outwards. So I'm going to go into face, select Cressy, select all these faces. I'm going to scale them on the zero axis and then yet you'll get a little bit drawn from inside, but then worry too much about that on. That looks pretty good. Maybe just scale on the Xerox and just make it a little bit smaller, Ethan. That excellent. And that's Finner. That will do me. I don't want it to be too thin, because I want there to be plenty of room within this this space so that our before I can move about next. We wanted to. Basically, we wanted to increase the length of the on. So we're going to do that's point. Adding lube cuts on did in grabbing everything underneath the Luke Luke cut on dragging it downwards. So I'm gonna create No, I just know it's an issue here. That face is very strange. Actually, I'm not sure why that is. What I'm gonna do is I'm gonna press a to select her moving again, and then I'm going to impress double you remove doubles removed. 15 for disease hasn't actually sold that issue. I'm not sure if that's going to be much of an issue. We shall see. Normally, this is not the sort of thing you would want because it shows that that face is considerably dis proportionate to the others. Doesn't appear to be in terms of its shape, but she never knows so well. Keeping my eye on that. Make a note with that for later on. Now we're going to create a loop cut, and actually it has caused ourselves a problem. So the problem that it's caused, we turn this off is we can't do Luke cuts at this point now. And it's very strange. Is the why it's doing that? Very strange indeed. But in that case, it's still not a problem for us, not for this project on. Do you want to know why? Because we don't necessarily need the loo cut itself. So it would just make things a little easier. But what we're gonna do now, very simply is we're gonna go into edge, select a single view on I'm just looking. And I'm just thinking that the bullion mortar fire hasn't done that brilliantly. It's all I think that's what's causing the issues up here. But no worries. We can go into two d view press the c k. I'm gonna make that noise and big Don't forget some my kids total of his ability there. So we're gonna de select everything again. Press see? And then we don't want thes selected. So we're gonna first see again make it smaller on middle mouse. Click Now we're gonna grow up the Sava. I would just contribute on not too much. Because then we're going to de select everything Siegen drag down just a bit on. And if we have a look because we can see certain issues appearing with our geometry nha on . This might actually be part the cause of the problem that we've got with our arm. So what I'm gonna do to solve this issue is I'm gonna first control Chris out, and that selects a lot of those extroverted sees. So I'm not really sure why they're there. That piece foi the problems with this type of editing, huh? OK, un select, actually, yes. To select in that one Taiwan un select him, then it can get a bit visually in this case. So what I'm gonna do is I'm gonna turn this off. Un slaps everything in, try one more time, so colts select. I don't want that to be selected on its not selected on the other side. I'm going to press X dissolve edges. Much better, much, much better. That will do me nicely yet that would do mean honestly. Okay, so there we go. Now it's time to use the mortar fire. So first thing you can do is gonna create a loop, cuts he on the issue of the bottom that we've got, actually ease the fact that this part he won't allow us to create a for loop cut. So controls Ed to undo that on the solution here. Makeshift solution. Gonna grab this face and we're gonna drug it back until it's Central. Let's have a look at it from overview assuming. Okay, so next let's add the mortar fire. So we're gonna use the mirror mortar fire. Excellent. We're going to enable clipping double checking to make sure that the pieces are connected. We can increase the merge limit just to make sure that it's definitely emerging. Andi, now we can apply, of course. Colombian in edit mode. A ploy and it mode. Fantastic. So now we've got a global. We have two arms on two legs, starting to take a bit of shape. Now, isn't it starting to look pretty half decent? Andi, In the next EFS episode, we're going to be creating the head on Antenna four. Our model
182. Blender bot modelling four: Okay, I'm now going to create the head on until so I'm gonna go into or jet mode front or for dogs Place might Freedy cursor roughly where I wanted shift. I mesh and keep free to have a look. Where is a bit too far back? That's a good enough space for me. If I assume in there for you, I'm going to scale along the war axis point full just the next slightly. And then scale said 0.7, pulling its in. That looks good. Now I'm gonna use the bully and mortar fire on my label on a ploy. Drag this one away, and now it's time to create the head itself. So now we've got the neck. Now we're gonna create the heads. So a gun pressed be and like, like, scale shit said today doesn't move on set access yet to and enter. Now I'm just gonna grab thes arrow and just drag it up a little bit. So we got a nice chin a little bit higher. Excellent. Plus once goings front, Orthodox e to extrude on. I think that's a decent enough size. E took screwed again. Not too much on a scale very good. Okay, so now we're going to going to save our work so that we don't lose anything on what? Guns create our on Senna. So to do that, we're going to go into object mode, plant off, really cursed above shift I cylinder. And now I'm just gonna go scale shit said 0.1 and so on. That's still too big for me. Scale. Schiff said 0.5. Good scale. Said 0.5. Excellent. Now I'm gonna line this up. It's in the middle. Andi, that looks pretty good. Next, I'm going to join these foods together. I'm not going to use the bully in this time. So what? Click shift Click Control. Actually, we got my shorts the other way round, so we know it's the robot control J. Terrific. Next, we got one more thing, and that is our and 10 of the reason why I want an antenna for my robot is because I'm going to do a light animation where the antenna is blinking. So positional cursor we're just gonna create is gonna be nice and easy. Credit. UV sphere scale it down two point free in size point, big 2.0.0.2. That's perfect. drag it down, matching up Andi. If we assume in just to get a better view, I'd say that's pretty much a level where that is. So now I'm going to select Select Control J. And there we go. So now I've got the base model for my blender balls.
183. Blender bot modelling five: Okay, we're going to next for the face. We're going to creates a mouth. We're gonna create a voice box, mouth. So we're just going to create a cube. I am a guns just extruded out and extruded inwards to create a voice box on in the same way . I'm gonna have the antenna and the eyes light up. I'm also going to have the mouth or the voice box light up in animations where our blender pot will be talking. So I'm going to now are several ways I can do this now. I could subdivide this face and I'd be able to bring out my envelope. My voice box Quite well. However, that will cause problems with texturizing fervent on a line. So my best bet is to continue with the theme off, creating primitive objects to begin with. So I'm gonna go into object mode. Andi, I make easy Oh, it's hatch my Freedy cursor to blend boy itself so that this time, when I creates my objects, it creates with it under the scale point before long, Black Sea's the stars. Next, I'm gonna bring this force box in woods because it's too far out. I'm gonna do scale X to ente, and we're just going to level with the eyes. Not too worried about leveling it with the answer. No, it's not a perfect project. Just gonna showing level up as much as we can. That looks like it's slightly ever so slightly ever so slightly seeming in. It does look like it could go grab X. Just compress the one of the directional, please to move across Once there we go. That will do May. Okay. Next edit mode on the subject. Select the fun face only press I to inset the face and then e to extradite. We're just gonna extrude it back into the mouth just slightly on. There we go. That's gonna be our voice box.
184. Blender bot materials and textures: Now we're going to move on to the next part of our projects. We're going to We want to Giving blender bought some materials as this is a simple project . I was plans used blend arranged bender engine as it says here for simple textures. However, I have decided that for animation purposes, I'm now gonna use the cycles surrender so you can use the blender vendor he want. But I want to use the cycles render because I want to create something that's a little bit more realistic. You're free to use whatever form off blender you wish. But the one thing light advise is when you're creating textures, be all robots, try and include at least free different textures for your model. Free is a really good number for this project so that you can really create a simple but beautiful model.
185. Blender bot materials one: stone. Our first step is to create the blender interface that we require to apply our materials. Now, you can do this one of two ways you could have far used the compositing few port, which looks pretty decent or you create your own. I'm gonna create my own because I'm not going to use you the unwrapping for this project. So I'm simply gonna apply colors and materials from within blender so I won't need the UBI map. So I'm gonna go back to my default on. I'm going to press an anti to get rid of the side panels. I'm going to bring up the time line on. I'm going to change the time and I on to my node editor. Now, I'm just gonna going out the properties panel on. I'm going to move on to the material tub and click new. But before I do that, I have to make sure that I'm in the right engine for what I want to do. Because as soon as we start manipulating things in one blender engine, then if we change later warned, it can have some negative effects. This is particularly noticeable if you're going from cycles render to blend Orender. It's not as bad when you go from blend of end up two cycles render. But nonetheless, we're gonna change our cycles. Render right now, Now on guns, click new to add a new material. Andi, I want free, different materials on my robot. So what I'm gonna do is I'm gonna come over to this plus sign he I'm gonna keep plus once and click No, Plus again click New Next, I'm going to name each of these materials so I know exactly what I are. Double, click or highlight where you could just name it here a little easier on the 1st 1 is gonna be called skin, so that's going to create the metal skin. The 2nd 1 is going to be rubber tubing. So we're gonna have like, a rubber tubing, dark rubber style for the joints, his shoulders in the arms. And then finally, we're going to name this one nights eyes because But this one will be using emission shade er's as part of it. So as part of our animation will get our eyes to light up. So there's all free base ones on. What we're gonna do is currently, our mouth is disconnected Form Amish. We haven't connected that yet, so we're gonna do so now. We're going to select the mouth Shit. Select blend Herbal Control and J. Now, a extra material has been created for us because we've joined that material from the voice box on. We're just gonna name this voice box because it's also going to create a light up effect when blender but speaks in an animation. We're just gonna move that down, and we're going to arrange them correctly. So we've got skin first lubber, light eyes, voice box. Make sure use notice applied to all of them. And there we go. So we got our four textures that we're going to be creating four blender bolts on. Now, we've got our layout so we can begin
186. Blender bot materials two: so let's begin. So we're going to assume in so we can see our notes. I'm gonna track this up a little bit on. We're also gonna go into material few bore shading. Now I want a metal like effect for this. So the way I have decided to do that is I'm going to First of all, I want to add a little bit of gloss to it. So I'm gonna add a glossy shader on. I'm gonna add a mix shader so we can mix the two together like so excellent they don't worry about what it's applied to at this point. Now I'm going to its hatch glossy shader on at the moment, it's only doing the voice box, but that's no problem. We can a sign our modifies later on. Next. We are going to we have a look. We're gonna drag this to the side. Andi, we're going to focus a bit more of the abuse of sites. We're going to go 0.12 on. We're gonna give the diffuse color grayish color next on gains at a another mix shader. And then I'm bones at a new shader which she's on and it's a tropic shader on this creates they metal like effect. So we're going to touch that. Andi, that would looks very good. We're now going to place this point free start with. We're gonna see how that looks. Next week is going to edit mode. Make sure we assign it. So we're gonna sign this skin to everything just to start with. So everything's now selected. Click a sign and there we go. Now we're gonna want to set up our scene so we can see how this looks in what scene itself . So we're gonna need to come out of edit mode. Grab our lamp on. We're gonna change the lamp type two, son, We're also gonna use nodes for this on there. It is just Harding out of you. I'm going to increase the strength to five. And now I'm going to position my lamp nice and high bit wide and rotate. It's there we go. Now let's have a look. See what this looks like in rendered mode. Okay, So if we have a look, we can see quite nicely at the top of the base. How the Anisotropy shader affects how light balances office. So it gives it a slightly metal effect. I would like a slightly more metallic effect. So what I'm going to do is I'm going to select my robot again on and I'm going to increase the shader to 0.6. I think that looks very, very good. So we've got the original shade of which is a combination off, diffuse and glossy, and that will just give it a these in color decent gloss. In addition to the anisotropy effects, the glass is probably more important. So I'm going to increase that 2.24 and there we go. I think that looks a bit better. Okay, so step one is done. So we've now applied a skin to our entire robots. In the upcoming lectures. We're going to select specific parts off our robots so that we can give it more texture
187. Blender bot materials three: Okay, so next step, we're going to create toothy lover effects. Now, we first will have to click on rubber so that the accesses Thena node add it up for the my brother material. Next, we're going to go back into material mode, hit, tapped, go into edit mode and press play to the select everything. Now we need to select everything that we want to become a part off our lover material. So we're gonna choose the shoulders, the arms on the fingertips. We're also going to do the top and bottom legs. The knee joints on the fire joints, as we call them, will remain the skin color as Wilbur fates. The lists will also remain in that skin color as well as the knuckles. So let's get down to business. I'm gonna start boy pressing the taco limits visibility press the Seiki. I want to bring the stand quite long on. Must make sure we're very, very careful with what we've selected because now I have selected these two unintentionally . So I'm gonna make sure that it's correct in the best way to do that in two D view. So I just pressed one on my keyboard Let's see. Okay, Andi, that looks correct. Next to duty of 1/2 seem l a bit. That's looking very good so far. Always make sure we do this in single view. Now I'm going to reduce the size off my circle. I'm just gonna come across here generally and he of his will. We have a look around. That looks excellent. Next stop. We've got our finger and fingertips on. If we look around, that all looks fantastic. Let's continue now and finish up with the legs. We can increase the size of this now. Kind of cross on back on, and excellent. Now that's all selected. I'm gonna select rubber on. We can create our rubber effect. So to do that, we're going to create We're gonna get rid off this diffuse make sure that only the diffuse boxes selected. You don't want to get rid of the material output shift. I shader ongoing First chick fil be shader because that's the main one that we want on a ploy it I'm going to employ a Noyce dark color. No, not completely black, but black ish on. Let's have a look at hardest is viewed in rendered mode okay? Not as yet, because the materials haven't been assigned. Let's click a sign. Okay, that looks pretty good. But I'd like to give them a bit of gloss said, Now I'm going to add a glossy shader and we're gonna keep the gloss grayish because we don't want it to be two warrants. We're gonna keep it grayish gonna add a mix shader on connect on the factor at the moment is pretty central, so we need to change that. Just looking around might be one or two fingers ago. Touch up. But for now, let's move the shader down to about point free free. Maybe a little bit loaded on that. Let's go point to. And I think that will to thin out. So last thing I'm gonna do these guys going to solid few. Andi just pining around, seeming in, making sure that's everything we wanted selected has been selected. I didn't know it's a couple in rendered few that weren't selected. Andi, a sign. Okay, so at this point, we now have two materials. Are skin and rubber applied to blender bots
188. Blender bot materials four: okay, our next. That is to do the eyes now, because this is gonna be an animation where the eyes light up in the animation itself. We're going to be creating a material as it will be in the first frame. So even though we're going to have read allies in a better antenna, it's gonna be a very, very dark Reds material that we want. Because thes number values can be changed, we can insert key frames in them on that way, we're going to creates the animation later one where we can insert key frames at different points, depending on the strength of the emission that we want. So let's create our shader for light eyes. So we're gonna click on night eyes. Andi, we're going to assign it to the materials that we want to assign it to. Gonna put a toothy, selects everything. And they were gonna press l a couple of times to select the parts that we once we've got our antenna at the top, we've got our to wise now. The voice box is gonna be a light, yellowish color when animates, so we don't need to worry about that for now. So What we need to do right now is we're gonna give you a diffuse color, which is gonna be very dark. Next, we are going to add our mission. Shader. So I'm gonna go to Shada on a mission. I'm gonna change this color to wet. No, the way we want is we want to add a mix Shader on. Let's have a look at this in Wondered view So nothing has happened yet. What? Because we haven't assigned its as yet. So let's do that. Now we're going to click a sign back into rendered view. Okay, so we call us Light issue here with this I onda I know exactly why that's the case, because yet I fall was much. If we go into edit mode, we have the original I created. That's in the way. So now we go to rendered view again. Excellent on that Looks pretty good on this is the value that we're going to change in our animation. So we're gonna leave that very low at less than 0.1, and we're going to reduce the emission strength at the moment 2.5 and we seem out there We go
189. Blender bot materials five: Okay, so all we've got left now is our voice box. Now we're going to keep the voice box pretty much identical to the eyes. The only difference is gonna be the color off the emission, which we're going to have a very bright yellow whites color for our voice box. Now, the problem is that normally you would think it would be really good if we could copy all of this onto the voice box. Node editor. Unfortunately for our style, that's not the case. So we're gonna have to do it manually. But we can always use the eyes as the reference point. So we've got our Defu shader on. If we keep panning between them, we can see it's currently a dark defuse color. I'm going to I'm not gonna have a dark. I'm going to have it. Darkie showed lights up, but not too dark because we wanted to light up nice and brought on. That's also the wrong one. So voice box meat done about four weeks. Send that looks good. Turnover. It's material view so we can get a good idea when it view. Probably better, actually. So we haven't assigned it is yet Let's do that now by pressing a to the states everything. And then l'd so like this part. It's a voice box on a sign now in rendered few. That looks pretty good. I'm gonna make it a little bit darker. Much better. Andi. Now we're going to add a mix. Shader. We're going to add our E mission Shader, and now we're going to make the factors equal. So currently, that's very, very bright. If we have a look at the right size, weaken seats just under, So basically it's 0.1, and that's 0.5. So we're going to go 0.5 on day 2.1, and that'll do nicely. And now what we can do is for the animation we can and play around with these factors to insert key frame so that our eyes and our voice box light up in the animation. So there we go. That's the texture part done for our blender bots.
190. Blender bot rigging: Okay, so it is now time to move on to the rigging stage off our projects. So we're going to wreak blender bots now, in terms of my animations, I'm gonna perform one animation with the light up eyes and voice box on I'm gonna purport form a second animation with e bendable itself. So the first animation won't require any rigging, But the second animation will so a couple of tips if you bean following along, then continue to follow along even if you follow the long dough. My model? Exactly. You don't have to use exactly the same week. You could probably end up using a simple wig or more complex rig whatever you want. In fact, I reckon it will be good practice to create your own wig with different sets off bones. To be used as my robot is a human would structure. I will be using a human style rig, much as I did in the rigging section for our blender human. But if you've created your own model, then it's going to be an opportunity for youth. Creates a new kind of rig based on the shape of your model. But remember, very important point the week that you create must resemble your model. If there's too much of a difference in terms of its natural shape, then you're gonna find it very difficult to week your animations for your robots. But with all that said, let's get down to the rigging stage or blender bots.
191. Blender bot rigging one: Okay, So what we're going to need to do now is we're going to need to set up our blended into face Ford of rigging process. Now, to do this, I'm going to drag this up so lightly and drag out the properties because we're gonna want to see the pop properties in full view on. I'm also going to get rid off this node panel. So, in a white click join area on left click Onda, we go. Excellent. Now we don't need to be in rendered mode in practice. Advisable that were not so we're gonna go solid on. What I'm gonna do now is I'm gonna press tab and I'm going to just move a lot of these two other layers. I would delete them, but way probably won't need them in the future. But just in case, just to be sure, I'm just going to press em. I'm gonna move all of the's onto layer to select an object, press him and click the second mile. Next, I'm going to grab our human drug him up on now I'm going to scale them down. So before I do the rigging, I'm going to scale down blender but because he's too big, that makes I'm gonna create seen using the blender Quid on. I'm gonna want my blender. What? To be smaller. So I'm going to reduce the size of blender. But before I begin the thinking process just to be on the safe side. So I'm gonna press s point for E. And if we assuming so every bit of Leonard, but would have been scaled in the same way. That means all that. The mentions will still be the same. Excellent. Just track him down to a thick and that will do. No, I sleep. Just have a quick panel lined. Excellent. So next I want to go into object mode, which I'm in right now. I want to make sure that I mean solid few on I'm pretty much ready to start wreaking. So four blend herbal. I'm going to use a human style wig. I'm not going to use just It's just a certain idea. I'm not going to use to bones for the chest area because it's no a flexible warier. It's just going to be the one bone. But most of the rest is gonna bay fairly similar in terms of its structure to the human rig that we created
192. Blender bot rigging two: Okay, then let's begin with the rigging process for our blender bolts. Now, the way we're gonna do this is I'm gonna have a single bone to make the main body. Andi, I'm also going to have my bones for my arms and my legs. The connects are between the upper arm bone on the lower arm bone is going to be the joint for the elbow in which I'm going to be using on our cable on if we look to the side. Obviously, we've got our fingers as well now, because off the nature off our wrist, we are going to create a list bone of sorts as a control bone. But we're not going to be doing anything in terms of moving the fingers at this point. Some let's begin by creating our first bones, we're gonna press shift. I on. We're going to go down to arm a sharp single bone. So the issue I've got at the moment he's this bone isn't central, which isn't good enough. So I need to delete it because it will be just easier to delete it and re sent up my Freedy cursor. So gonna press shift s curse of the center. Now I'm gonna press shift. I armature single bone and bring it up. Now I'm gonna go to the armature tab on. I'm gonna turn on X ray. Now. Now we can see our bone because this is a very straight object, our blender. But we're not going to move the bone from this point. However, I am going to move it up, Scalea on the axis and move it down. So it's a little bit big. Scale said that will do nicely. Okay, so that's the first bit done. Next, we are going to do something about the nick and heads now, because our neck is a square shape, we are not going to be able to do much in terms of moving the neck itself. So all we're going to do is we're gonna do a single extrusion coming out off our body bone . So going to go into and it moat one e for extrude said, coming up. There we go. Very nice. We're gonna bring this one up to the top off the blender. Bart's body on. There we go. So now we've got the center part off our blended bolts
193. Blender bot rigging three: Oh, I want next step is to do the arms. So we're going to just do one arm and they were gonna maybe over once with on the arm on the leg. So we're going to place off Freedy cursor here, which is good enough, plus one shift I And there we go, because we're still in edit mode. We now creates an additional bone. We're going to grab the top of this bone and just move it down to about here, and that's looking good. We're gonna move that backwards, but we've got to make sure that everything is now selected for this bone. So we're gonna press l and playing it backwards. Her hands were going to make sure that this bone is as central as we can possibly make it. Next. I'm gonna press a to exclude, and I'm gonna exclude along the said access so that it doesn't rotate too much. We don't want any unnecessary rotation, Andi, that we'll do So the reason why we're not having any bones, he ese, because we're gonna move this up on down on. We could have a bone here to have it act as a rotator. So it's up to you Whether or not you want to do that, he best way to do that would be to actually make this the center point on extrude out this way on. If you press X, you can do so along the X axis. Now, looking at that, if we assume in, that doesn't actually look too bad. So what I'm gonna do is I'm gonna keep it as is for now. But this may change in the future. So you may change drawing your animations. You may decide the rigs not exactly working out when you might delete or add additional parts, because it's not gonna work brilliantly straight away. It's, ah, process off foil and error. But for now, that will to With this additional bone, we can get these shoulder joint to rotate whenever the arm moves up or down.
194. Blender bot rigging four: Okay, Now let's do the legs. So we're going to assume out a bit and come in. We're gonna do this Left leg. We're gonna press shift I to create another bone. We're gonna grow up that bone and place it down here. We're now going to inverted so that the top one is facing down and we're going to destroy it. Into what leg? So we look around to make sure that's in the leg centralizing a little bit more. Excellent. Now we're just gonna grab the top it and just bring it down to where the joint ease. We're going to extrude one more now because we're not going to be really bending the feet as much as we would a human. There's not gonna be an ANC angled joint, so we're not actually gonna have Well, we might have a Nike a bone as an ankle, but that would just be to help leg itself. We wouldn't be using it on to create an additional bone here, so we won't be using additional bone here because we won't need to. But we will be using the like a bone to help lift up and make foot like movements with our legs. So at this point, it's very simple. Rig, because I blend upon isn't gonna move in any complex way. But at this point, you should now have the body, the heads, the arms on the leg. Next, we're going to use the mirror mortify.
195. Blender bot rigging five: Okay, so next that we need to create our RK bones. So we need to make sure our if you port is correctly created. So we're in the front orthodox view by pressing one. Now we're gonna position are Freedy cursor roughly where we want our Ike A bomb to bay. We're gonna press free and then we're gonna make sure that it's seen as close to the corrects place as we can make it. That looks excellent. Now I'm gonna press shift. I drag it down in size and excellent. We now have on, like, a bone ready to be applied as in NYC, a bone four hour mesh. While we're on this bone, we're gonna go to bone properties and we're going to untech thief form Next. Next, we're going to do the same process with our knee bone. So we're going to send off reedy cursor where the knees pressed free and then just place Afridi Curse are along the war access that looks very goods shift. I I would use the size doesn't need to be too big. In fact, the size really doesn't matter too much for the I K bones. Drag it out and There we go. So now we've got the I. K. Bones. The last thing we're going to do is we're going to extrude out on ankle bone. So click the bottom point off this lower leg bone press e to extrude y it's go along the X axis I lend you strike out, Andi, There we go. So now we've created are like a bones. Next, we actually have to tell blender that thes are like a bone. So before we do that, let's just make sure that, awfully these the deform is switched off.
196. Blender bot rigging six: Our next step will be to name our bones. Now, if we remember form the rigging section, we only have to name as long as we name our bones correctly on this side. When we flip them over, we can make sure that they're named quickly on the opposite side as well. So we're gonna name these bones. We're going to click on each bone and go toothy bones hat and we're gonna give it a name. So we've got head Will have body who have older dots. L on We'll keep the theme it. Make sure you always keep the theme throughout. ALOF the left bones. So, um dot capital L because that's what we use for the shoulder. Lo uh um dots l And just keep going with this process with each bone. So you call elbow. Don't tell Click. We've got up a leg. Don't know. Lower leg, Don't l ankle don't know. And finally we have ni, don't tell on one more thing I'm gonna do is at first I thought maybe we probably don't need to have a wrist bone here because of what we want to do with our animations or what we're gonna want to dio. But you know what? There's no harm in avenue there anyway. If it doesn't help, we can always get rid of it. So I'm gonna press e to extrude out this bone on. We're going to make sure that we name this bone correctly. So we're gonna put call this wist dot hell, and now we're just going to separate these two bones. Click, click on. We're just going to separate them and to do dots. We're going to select both the objects. We're going to use the hot key cult on P, and we're going to clear parents, and now we can grab them and move them bats. Fantastic. So now we've separated the backbones for the wrist on ankle on. We given all of our bones names
197. Blender bot rigging seven: So now we need to connect our arm to our response. So we're going to go into pose mode, select the wishbone first. Shit senate, the up the upper arm bone. Just double checking that. I just realized I haven't named all with the bones. I'm just gonna do that now. So in ago level, um dot L, um, shoulder adults. L Now we can join these two together. So select Sethi like a boat first, then the lower arm bone shift control. See and select. Inverse Kinnah Matics. Now we grabbed this one. We can't move the about. Very nice. So now that we've done that, let's do the same down here. We're going to select you like a bone and then the leg Bone shift control, See in verse. Kinnah, Matics on. There we go. One step closer to our global league
198. Blender bot rigging eight: Okay, so testing what we have so far, I'm gonna press free to go into the side of you. And we're just gonna grab this like a pawn and grab it and move it up on town. So we turned around. So if that was to be connected yet, that would be pretty good. Now, because this is a robot, We would have to be quite careful in terms off moving the bones too much to decide because we are. If you want to keep this very straight now, even dough, I'm going to apply the poll targets. They're not really going to be used that much because of how straight we want our arms to bay and our legs in terms of our legs. This poll target will probably be more important because of the shape blender bots. We're not going to be moving to the elbow to the sides too much. So let's move this back into place on May down. That looks pretty good. Next, I'm going to select this bone which is thebe own, in which the bone constrained has been applied to We're going to increase the chain link to free because we've got 12 free in chain length. So 12 free. And then if we grab this, that actually works exactly the way I wanted to, because I don't want this top bone to be moving next. I'm gonna go back to it, and I'm going to create the poll target, which is going to be as part of my own Machar elbowed or l excellent. So because it straight at the moment, if I grab my poll target and move it about, it just rotates. And actually that's pretty much perfect. That's the sore thing that I would want it to do. That was the sort of animation I'd be looking for. If we bend this in which we're now finding difficult because of the poll. Talk it. It's bending in, but it's bending to awards our poll target. That means that we have to change the poll angle and I think 180 will do the trick. Excellent, much better. So now we can move that up and down. Now, in this case, we can move the poll target around, but we've got to make sure that we're careful when we do that because we don't want thes shoulder joint to be moving too far, so gonna have to keep that in mind when we're saying apart animations. So now that we've done that, it's time to move on to our legs. So we're going to select this bone, give it a chain length of two because it's one on, too, and then give it a poll target. Armature. Bone need oil? Well, just test that on very interesting there a moment. So I got you free and glad that up. Now that's interesting, boys. And that working well, let's have a look. So we select that because it was working before. Let's try free. Still not working. It's connected, but it's not working. Let's see war. That's the case. So we grew up that, and we can see here that it's working in a moment, although we do have to be careful. The chain length is two, so that's correct. But there's currently no poll targets, so this is where the issue occurs. So if we go all mature, then need dots L. And we grab it and we can see very clearly that's we have issues. So if I grew up and wrote a piece so if I crap moved its let's see what happens. Grab this. And for whatever reason, we can't seem to bend our knee anymore. So this is, Ah, very troublesome. However, there are several solutions that we can use for this. I'll just send to that. So currently, this is all correct. What if we change the poll angle to, say, 90 degrees? Let's see what that does. Still nothing. So we'll try a couple different variations for poll angle. I will try 180. I see it that does anything on. It doesn't seem to be doing anything at all, which is very interesting. So the issue currently that we have is when we apply it the knee as the poll target. It doesn't seem to want to bend at all, so let's do a little bit off testing. Let's take this or way. Take the pole target away. Chain length is still too grab and move that for now. We can see that it bends. It bends. No problem. If we lock it to you, say the war axes, it keeps it straight. If we look into the desert access, it doesn't make any impact at all. so if we grab, it's well in a fun Orthodox, we can see that it's moving from side to side. So the solution here that I'm gonna use is I'm going to not use this poll target for now. We'll keep it, but we won't use it for thou. Andi. I'm going to. If we look around, we grab. That doesn't move forwards. No, it does not. So I'm going to grab these two. I'm gonna rotate them by and 90 degrees. If we glove them now, we can see. Not much has changed. So let's send it up. And this is what rigging is all about. This is basically trial and error again and again. So if we think about potential solutions, let's try decreasing the changeling toe one. I feel if twice Ciro And if we grab it from here, that already is looking better, which is very interesting. But we bend it too far with Ben's away. If we were to lock it to in axes, we can see that it does bend away. But it does work this time, which is excellent. So that's progress now, at the moment, what we got is if I send to this and grab it along desert, Move it up. Okay, so we can see that we have the same issue that we did before in terms of the angle. So in this case, the poll target would be really useful. But if we try again this time, we got Changeling people to see alot and grab it, and we can see that we keep getting this problem. So the solution that we're going to take now I think based on everything that we've got these to, quite simply, take away the poll target. And for now, we can see it can move about now. It's just gonna have to be a bit of manual. So the poll targets and normally there is a great reference points for where the knee bends to. But in this case, since we're having difficulties with the rig, the best solution would be to just not worry about using the pole targets. It does make things a little bit more complex on. Perhaps you don't have this problem it all. Sometimes you can do something and you'll get problem off the problem trying to perform the action on. Then you'll do the exact same matching the next day and blend on, and it worked. Fine. So that's not gonna be a problem. We can work with that. I'm just going to send to the arm now. Okay, So now we can mirror what we've got over to the other side.
199. Blender bot rigging nine: Okay, It's time to finish up our rig structure. So we're going to go into edit mode. We're going to press the Ceasar select button and select elite arm bones and older leg bones. Press free to make sure that there will selected bus ones. Come back next. We're going to send her our Freedy curse up by President Shifting s curse. It's a center. We're gonna press the full stop button on our keyboard to change our pivot point to the Freedy cursor. Then we're gonna press shift D to duplicate s to scale along the X axis minus one and answer. It's a simple is that so? Now we have if we go into pose mode and operate herbal wig
200. Blender bot rigging ten: okay, We want to make shorter. Our naming conventions are correct. So what we're going to do now is we're just gonna make sure that a lot of duplicated bones have the correct names. So currently we've got, say, the lower arm. But Button is currently selected, but it's called lower arm dot l 0.0.1 Even though it's on the right hand side to change that, we're going to go impress the pose button on. We're gonna press flip names, and now we can see that the naming convention has changed. Two dots are, and we can see that with each bone that we select.
201. Blender bot animation: So now we move on to the final part off our projects, we're going to create an animation. By this point, we have modeled our robots. We have texted it on. We have given it a week to animate with. Now I'm gonna be performing two different animations. My first animation is going to be a visual animation off my robots and tenor. Writing up on my second animation is going to be a simple moving gesture. For you know, if you've been falling along, feel free to create your own animations with your blender bots, especially if you have modeled a completely different blend of what's what I have. That's absolutely fine. This will give you a couple of ideas off how you can animate blend about. Once you've done that, you're going to render an image off your robots. Now, what I'm gonna do is that's the first thing I'm gonna do is I'm going to render my image first because obviously an image is a single frame, so we don't really need to worry about animations too much. What you can do is render an image off your robot in its original position. Aan den render a second image off your robots in its animated position, so you can almost create portfolio here or different images off your blend about doing different things on then the final thing we're going to do in our project is we're going to render our animation for our robots, so let's do it.
202. Blender bot animation one: Okay, so now what we need to do is we need to set up a scene because we're going to render an image. So what we're going to do here, ease. We're going to go into object mode, select our robots, make sure everything is selected. What we're going to do here, actually is which is going to move these two hour to another plane. So we're going to press em on. Move here on it, we check on we can see that our entire rig is all the second layer, which is good, cause we don't need it for support the moment. So now we call blend abouts. We've got it at a good size on. Now. I'm just going to create a scene. So I'm going to start by creating a plane underneath blender bots. We assume in we can see that the plane needs to be the Retz Lee just underneath that looks perfect. There we go. So that's a perfect start. Plane, or perhaps just a tiny bit too high. Lab said. And then down on the down key on the keyboard just once and enter. So you want to get a port to the point where the bottom off the feet just become invisible . Food applying on that looks excellent. Now I'm going to scale that playing boy 10 on. Got to be careful because we currently have the pivot 0.22 Freedy cursor, which means that the plane moves as well as scales. So we need to change that back to median points. And now we can scale 10. Excellent. Now our camera is facing informed this angle on, we're just gonna bring that up and away. Now, What I want to do is I want to get the camera right first and foremost. So to do that, I'm gonna press Ciro on my number. Pad on that takes me into camera view. So whatever you see within this box that's highlighted in orange, this is the image that will be rendered. Anything outside off that box will not be rendered in your image or your animation. So I'm going to just Peschke to grab my camera, move it about that's pretty central on the plus chicken and just change that just a little bit more Now I think I'm going to move that backwards on up slightly and backwards on up slightly because said a little bit too close. Chris here again, we can see it's moved. So let's sort this out on that. Looks better. I think it needs to go to a little bit closer, actually. So gotta be careful, actually, because I think I just hidden camera. Yes, I have. And then she pushed g incentive. That just a bit. That looks good. There we go on, and I'm just gonna rotate the camera just to the side of it, just to give us a funky, funky look. Okay, now, where? Copycat Without. Because now our actual screen has ended up on its side. So just got Be careful with that. It's no problem. For now, we plus one. There we go. Fantastic. So if you ever find yourself in a corporal, um, where you adjusted the camera on, then, as you pan around your Pridie universe, it's still at that angle that you've adjusted it to just press one of the number pad buttons to go into a two dimensional view on that instantly solves the problem. Now I'm going to select the plane. It's that eats going to edit mode. So pressed taps going to edit mode naughty going to edge select. I'm going to select this edge. I'm gonna press be to Extrude said along is their access up to there will do nicely and then we're gonna do the same here. I'm going to turn on snapping because I wanted to snap to this call, not said it at the exact same size we're gonna do for tech snapping. And I'm gonna plus e said on then over over and click. Now if I pressed taps come out of that it mode, we've got our seen very basic room scene. I'm gonna turn snapping off. We don't need that anymore. And I'm gonna press Ciro. Excellent. So now we've got a better scene to work with. Let's have a look at this in a view. Few port shading. So text shot first of all, materials, as we can see. So now we can get a good idea off our blender bolts and how it looks. Let's see how it looks in rendered view on. It's just taking a minute to load up. Okay, that's interesting. Now, because off the lighting effects and because off our planes scene, which has been given a default color, we currently have a pretty grave scene, and it doesn't really bring out the best in our blender bolts, so we need to sort out the color of the scene. So to do that, I'm gonna come into sorted few again on I'm going to First of all, go into my node editor for my lamp, and I'm just going to reduce that strength down to 3.45 because I think it's a little bit too strong at the moment. If we go back into rendered view. The lighting looks really good on blender bots unhappy with that, but it's far too strong on the walls. So now we're going to sort out the material for the walls. So I'm gonna go into materials. We're going to click new material for our wool on. We're going to give it a We'll give it a reddish back ground. If we zoom in, we can see that's looking quite a bit better now, So we press Sierra to zoom in on. I think I'm just gonna dark the but drop just so that there's a little bit more emphasis on our lender bolts on, and I think that will do for our basic scene. So the final thing we're gonna do is we're going to render this image. This is what we're going to be rendering this image here. So we're gonna go into the render tap ons for May. I'm going to switch this the gpu compute because I have a really powerful tpu to use. I'm gonna keep the resolution settings as they are, and I'm gonna keep the file format as it is, but I need to select an output. So I'm gonna select this button here on. I'm gonna go into documents. Blender. This is all for May. So you're gonna obviously have something different ons. I'm going to go reference material for this, and I'm going to accept it. So now I've got a place where this image while is going to be stored to, and it's gonna be stored as a PNG. Finally, I'm gonna go to sampling. I'm gonna increase the number of final render stand. Paul's 10 is a very low, So armed guns increased this to 500 on dancer. So now that's increase of 500 samples, which is still quite low for an image. So actually, I'm gonna go 700 just a little bit higher. And now I'm going to go to file Rendah. Or I could come up here and press render, so I'm gonna press, render, and then it's going to begin. The process of rendering more vaccine click on what you're looking at now is blend up trying to render our scene. Now, this will take a fair while. So to save time, I'm going to just fast forward to the end result. Okay, So when are coming towards the end, it's taken me over free minutes to rent this on. I should stress that 700 is a reasonable image. Sample size on This is a very powerful laptop on. This has still taken me free minutes and 16 seconds to render as we can see up here in this flying here. But there we go, guys. So that is my rendered image. Feel free to post your rendered images in the discussions. Andi, I will see you in the next lecture where we will begin creating the appropriate blender interface that we need to perform our animations
203. Blender bot animation two: Okay, so let's create the blender interface that will you require. Now, you can either choose the pre made animation or you can create your own. What I'm gonna do is I'm gonna take the animation, and I'm going to just adjust it slightly. So we currently have our come a perspective. Here we have our seen here. I don't really think the scene is gonna be necessary. I will use it at this point. So what I'm going to do ease make this smaller? However, what I'm going to do is well, is I'm gonna go into my second scene. Andi, I'm going to select my weak, and I'm gonna move it back over to my original, which you cordis layer so completely forgot what it was called them layer. So for May, as I look around here, obviously I want these to be visible for now, so we're gonna keep them invisible. But I don't want the backdrop to be visible, So I'm just going to select the backdrop just for now. Andi, I'm going to find where it's called Plane on. I'm gonna click this. I assume it's like left click this side. The backdrop becomes invisible so we don't have to worry about it anymore. Also, if I turn around because obviously we've got the light source that might be getting in the way, I'm gonna select the light source and I'm also going to hide it. And just by clicking this, I we can hide and unharmed whenever we want. So panning around, we can now see how, uh, week ready to be animated. The final thing I'm going to do is I'm now going to not close it necessarily. But I am going to shrink that very small and I'm going to bring thes across because they don't need to take up much of the room. I'm going to increase the size of the timeline. I'm going to increase the size of the F curve, said that it reaches about half way. Andi for me, that's my preferred set up. So I've got my outline, a panel, but it's taken up a very small space so that I can always drag it out when I need to. I've got more Freedy Vieux port so that we can create our animations. We've got our timeline and then we've got the dope sheet and F curves so that we can edit the animations that we create
204. Blender bot animation three: Okay, so the first animation I'm going to do is I'm going to light up the eyes, the antenna on the voice box. So to do this, we're not going to need the f curve for this. So we're going to come over here to the drop down box, Click on we're going to select node editor. We're then going to maximize the size on. The first thing we're gonna do is we're going to just hide the rig because we don't need the rig for this animation. So we're gonna press, hate to hide. Select our Blenda bots, Onda. We're gonna come over to the materials tab and select light eyes. First of all, now, I'm just gonna assume in here just so you can get a better view. And I'm just gonna drag this out and drag this down. Hopefully now you can get a better view with this lecture in particular because we've got so many panels. I advise watching this in 10. 80 p not 7 20 p. So we have to values that were concerned where we have the factor value on we have the emission value. Now, however, these we can use to change our animation throughout. What I'm going to do is I'm going to increase the strength factor 2.9, and then we're going to use the factor value for the animation. So the strength of the emission is gonna be constant. But the factor value will be what changes to see how this effects blender. But we need to beauteous in rendered shading. So currently, at the moment, I think the antenna on the eyes are to read. It needs to be almost off, so we're going to love that down, too. 0.5 that looks about rights. Now we're going to insert a key fine so we can insert key frames on any new medical values within blender just by pressing I as we have our mouse cursor over the value. So I'm going to press I onda. We can now see that's the factor Box has become a yellow color. This signifies that this is given a key frame. That's the currently selected frame, which is frame one. We can also see in the dope sheet that we have a animation key flame set in four hour Shada no is, well dough that even though we have a key frame installed. It doesn't not appear with the light eyes a factor. So if we, for example, created an animation where we changed, say the heads rotation, we would still see a yellow diamond. However, because this has nothing to do with location, rotation or scale, we don't see the yellow diamond point to signify that on. This means that it could be a little bit more difficult to duplicates thes, kind off key frames to other frames. So what we're going to do is we're going to select our end frame, which is going to be framed 80 on. We can see that the color off the mix shader for the factor has now turned green. If a value has been given a green background such this factor, Thank then it means that there has bean, a key frame inserted into this factor at some point in the animation, but not at the currently selected frame. So I'm going to repeat that. If you see if you insert a key frame and you're on the frame where the key frame was inserted, it's going to appear yellow. Once you've inserted a key fine. Any other frying that you select that value will be given a green background to signify that a key frame has bean inserted for this value, but not at the current frightened. So now we're going to select frame 80. We're gonna hover over on. We're just gonna press i again. And now we've got a second key flame at frame 80. Now, what we can do is we can select a middle, finds a frame faulty on. We're going to increase the factor. So going to increase the factor, I think 0.8 looks good enough for May. So 0.805 That's good enough for May Weaken. See, to even know the value has changed. The background is still if a green color, we're going to press I and there we go. So now we have freaky frames. I'm going to change the end key flame to 90. So our animation will be 90 seconds long. I'm gonna go back to the start on Let's see how it looks up on down. Very good
205. Blender bot animation four: Okay, Next, we're going to do the same thing that we've just done with the eyes and antenna, but this time with the voice box. So we're going to select the voice box material over here, left click, and we can see our know that it's a has changed. Now I'm just gonna give my emission color a more yellowy color. There we go. That's perfect. I'm going to increase the strength 2.75 So there's a little bit more of a yellow tint. Now I'm gonna decrease this factor. 2.5 point 06 on. I'm going to press I to insert the key. Fine. Now we can see that key frame has bean inserted for voice box on. If we click down on this icon here for lies or voice box, we can see that we have shade up no tree. This means that instead of its appearing up here where it says light, I So instead of it appearing with the material itself, as it would for location, rotation scale, we have a further drop down box to select on. We can see that it has no tree animations. We can go even further to have a look at certain options that we can do. But we're not gonna worry about those for now. So also make sure that you got the correct key frame inserted when you insert your key flames. So make shorter. It's the white frame. We're gonna do the same thing for frame 80 Chris. Oi! And now when we go to frame faulty, I'm going to inject increase the factor. But it's not gonna be increased as much as the antenna or the eyes. So I'm going to increase this two points for roughly. I think point fours goods, and I'm gonna press by and there we go. So now if we go back to the beginning and play our key Fine. Excellent. So we've now got light up eyes light up, antenna on light up voice box. Great.
206. Blender bot animation five: now. One problem that's I may have is or you may have, is maybe you've done your animation, but you're not happy with that animation. There are two things that you can do on. This is in terms off. How far slower animations performing. So my problem is that it's taking too long to light up and then them back down again. So I conniver moved the key flames closer to each other, or I can increase the frame rates. I think I'm gonna increase the frame rate for this one just to show you how it's done. So I've come to the camera settings. Andi under dimensions. We have things such as the resolution on Duthie Frame land, it says, which is basically how long that the flame runs for on just below the frame land. We have frame rates. It's by the fourth set 24 but we have a Siris of options going all the way up to 60. Now make a note that the higher your frame light of the more frames per second, the longer it would take to do a specifically timed animation. So, for example, a animation where you're running at 35 per second. We'll lend up much faster than a animation that lasts for one minute but is also 55 per second because basically simple, bitter maths. If you're gonna do a one minute animation for further frames per second, you are looking at 60 seconds. That's 180 as 1800 frames that have to be rendered for your animation. Sounds a lot. If you would go 50 frames a 2nd 50 times 60 is free 1000 frames. So just by changing the frame rate from 30 to 6 30 to 50 sorry, you've added an additional 1200 frames that she or computer will have to render in a single minute. That's a big increase. So for a lot of what you'll do, you'll probably want to stick to no more than 30. But for the purposes off this to toil, I'm gonna make an exception, and I'm going to click on 50. This way you can have an idea off how quickly the time line will move, so we're gonna press play and we can see the Green bar does move quite quickly now. And as does the animation in fact, that's about perfect. I think if I increase that to 60 it would be too fast. So I think that's perfect
207. Blender bot animation six: Okay, Now I'm going to bring back my scene so that we can prepare our scene for an animation render. So what I'm going to do is I'm going to drag down this bar here so we can see everything on . I'm just going to click on the's values Notice that I had the lamp invisible on that was just so we could see the eyes more clearly. The effects that the eyes would have more clearly said, That's our current scene. Now, I'm gonna go very quickly. I'm just gonna go into sorted few. I'm just gonna select that I'm gonna go into edit mode because I believe that shift they should be higher up. There we go. Now, if I press sealer, we can see that our scene is a bit too far away for more cama. So I'm gonna go into object mode to select my camera, plus one on. I'm going to just grab that and just move that closer to my camera CEO. Just grab it from a Seacon. Grab it while you're looking. This is a really good why actually off maneuvering your camera around if you go pressed zero on the number part and you're looking crew your camera and then pressured G. It's a much easier way off moving your comer into position, so that's looking good. I'm just going to move that away slightly. See you again. Andi, I think that this animation actually, I'm not going to show my whole blender bolts. So in this scenario, I'm going to soon in, so I'm going to come out with this. Be very careful. I'm going to zoom quite a way in, and then I'm gonna grab the camera, move it down. I'm just gonna make my armature invisible again because we don't need that on. That looks quite good. Now, if we have a look at that food rendered view, okay? And if we just play this animation now, if you play an animation food or rendered, um, shading so the rendered few poor you'll get the problem where it's constantly trying to sample up eso. It's not really an ideal method for look, seeing how your animation is gonna look. A better idea would be to create an animation Andi playing animation with very few samples just to see how it looks that way. So our next step now, now that everything's visible is we're going to select a key frame something sticky, frame 30 where it's lighting up on. I'm just gonna lend you an image off its lighting up. So I'm going to go to glad to increase this size. Go to sampling too many samples for May. I'm gonna go 300 and now I'm going to come up here on Brenda. My image on. I'm just going to fastball with this so that you can see the end result.
208. Blender bot animation seven: so we've rendered an image. Now it's time to render an animation. Now, before we do that, we're actually not going to choose a movie format. If you was gonna choose a movie formats in blend up. The most common one is G. Fiore are not MPEG. Oh, do, Chief, you're is the one where you can edit the most off that you've done your creation. However, we're gonna use the PNG file formats on the reason being is because if, for any reason your bending process stops joining your during your time when you're rendering, then if you choose a movie format, then allow the time that you had spent letting your computer render your animation a law that would be lost and you'd have to start all over again. Now, that can be really annoying If you're like 55 minutes through a one hour process of rendering you animation and then you've lost everything and you have to do that entire hour of rendering all over again by selecting an image file format, what you do is you create your frame in a Siri's off images so you're samples are done image by image, frame by frame Robert down the whole lot on it saves it in this way as well. So if, for example, this length animation is 90 seconds long. If, for example, I got to the 65th flame on, for whatever reason, say, for example, my laptop lost its battery life. Then when I come back to it, I will find that the 1st 64 frames were already have bean completed on. All I have to do is we end up former flame 65 to 90. So that's what I advise you doing. You can absolutely converts PNG files together into a single movie file on. We're going to be doing that with our moving animation. But for now, we're just gonna be creating animation purely using PNG. So I'm going to reduce the samples quite significantly because I I know for a fact that, you know, 300 samples takes well to do a single image in the case, off rendering animation. That's gonna be an awful lot. You're talking 300 samples times in 90 and that's a very short animation. So you just got be worried that so I'm just gonna change this down to 60 and no That's not a lot at all per sample, but with the frame rate that will be going out, which is 50 frames per second, it should look pretty decent. So now I'm gonna come up here and I'm going to make sure that my output is correct. And what I'm gonna do here is under reference materials. I'm gonna come out of this by pressing this button up here and know that that's not Let me do that. If I go to no documents, splendor on guns, go animation, we're gonna create a new folder I'm gonna do Blender Bolt one on. The reason why we're creating a folder is because that way, once we open up that fold out, this is gonna be the reference point. All of our P and G files will go into here. So if we didn't create this folder, we'd find that all a PNG files would be saved here where there's other stuff already. So it might get bit confusing if you do it that way. So it's best to create a unique folder specific to the animation that you're about to render. Now that we've done that, we're gonna click ups except and we're gonna go animation. Click now, this is going to take a long time to render, So I'm going to pause the video and fast forward so that you can see the end result.
209. Blender bot animation eight: okay, We're not gonna move on to our second animation, which is going to be actually moving parts off our lender bots. Now, I'm not actually going to get rid off the previous animation. I'm going to keep the animation of the light ups. As is the reason why is because they'll have absolutely no effects on the animation that we're about to do in terms of its movement. So you can get rid of them if you wish. To do so, we have to do is make sure that they are selected and impress the X key to delete. But I'm not guns do that. What? You should do that ease. If you were falling along with my animation in a previous tutorial, she would have hidden your bones. So too unhygienic bones or any other objects that you have hidden, You press. Hold on. Hey, h So he would have hidden your bones, Which is why start now, press Colten h to bring them back. Now I'm gonna do is I'm thing to keep the backdrop because that's fine. But I'm going to hide the camera and hide the lamp just because it's a little bit cluttered at the moment. Also, make sure that you have the f curve up on running below the dope sheet, just in case you want to perform some specific animation variations. So if you want to edit to animation once you've applied locational rotation and scale, this is the place to do it. The first thing we're gonna do here is just drawing up our bones to Amish because we haven't done that yet. So what we're going to do is we're going to select the mesh first shift right click to select the bones control and pay and sit parent to automatic waits, a much armature to form with automatic weitz. And now it's all part off the mesh weaken. Select it separately in object mode, but they are not connected.
210. Blender bot animation nine: Okay, so I'm very quickly just gonna show you a very important part off what we're going to be doing in the upcoming tutorial. And that's going to be using weight paints now. Too few how different bones affect different parts of your mesh. You must first go into pose mode, which you will, which I am company. And now select a single bone. Not all the bones, just a single barn. So it could be any more any bone. Then you're going to select the mesh itself which will take you into object mode. And then you're gonna press the hockey control and tab. What this does is it goes into waits paint mode for that previously selected bun. And now we can see how our bone how are selected bone effects, our blender bolts. So as a rough guide, the more dark blue an area is the less influence the selected bone has on that part Off blender bots like waas, the if it's turns to a greenish color, it has a low level of influence. But it does have influence yellow first, slightly more influence on Then the redder and area gets the more influence the bone has. If we select other bones, we can see that each bone has a different color coding, depending on where it is. Okay, guys. So now we're going to paint our blender bots, so that's we can't. And I made him it correctly.
211. Blender bot animation nine: Okay, so we're looking at weight pain at the moment. Andi, we're having Look, it how our mesh is being affected on. We can instantly see that the arms are being bent unnaturally. Now there were several things you can do in this sin. Avea You can my, uh, go to specific bones Experiment with which bones are causing that effects on change their weights or you can simply do is you can go to each bone and simply subtract all of the weight paints 20 So that's the wait so are completely taken away and you have a blank canvas toe work with in terms of what's bone supply? Water weight. This is a longer part way by I recommend it for beginners because then once you have a blank canvas to work with, you can form their own. I know exactly where you stand with your bones and how much weight you deployed to each of them. If weight is dis proportionate to the mesh. So if that means that certain bones carry more weight than other bones when they shouldn't , then you will get effects like this, which happens with the shoulders. So this is common when you set the parents who don't mesh, Andi will normally have to sort this out. My method is going to be simply to select the bones on in the arms on. Then we're just going to deletes the or Giusti waits to zero for these arms. So I'm going to go into post mode and I'll start selecting the arms. Andi, if we have a look. Okay, so now I'm gonna do is I'm gonna car come down to where he says brush. I'm gonna choose a blending mode and I'm gonna make sure sub tract is selected so I won't select. Subtract now before I hope that the left click Andi keeping left click down. As I rub across with my mouse, we can see that the lights of getting blew up on We can definitely get a reaction with our mesh. Don't worry if it goes too much over the place with only worry about too much on the reason why company the mesh is now deformed. So basically, because thes bones now have weights, that's why we get the deformation. So as we hover over as we can see, it becomes normal quite quickly. So this bone isn't too bad. We can see not too much variation of the mesh which is going to we averted, though, just to be on the safe side. There we go. And now we're going to perform the same on this side. So going to subtract weight. Ameche. Andi, There we go. So now hold that. These bones can't. You have no wait. We're gonna keep it like that for now, because the first animation, the first part, the animation that we're going to do is just the top half of our blender, but to turn sideways without the feet moving, as I robot would do or could do so. One of our major creating a robot instead of a human for this project was the facts that we could create robotic movements which are very simple compared to organic ones. If we select our middle Bo now, our body bone, we can see the influence that it has or lack of influence. So what we want here actually ease for this have complete and total influence over the top half of our body. So when we rotate this, the others will be rotated as well. If we have a look commonly. If we press our to rotate, we can see it rotates the body. But because there's no weight on the arms, there is no influence there. It just looks weed. So let's go to brush blending mode. But and who assume in we can start adding to our waits for center bone. So that's one side, it would seem out of it. Make sure the head gets done and you have a bomb. If we hang around, make sure it's on both sides, which it is on. I also want to make sure that very little is on these legs, so as little as possible on the legs. So I'm gonna go to to brush blending modes, attracts. It's going to take away from the legs as much as we can if we come to the front and have a look again, can have a little bit of reduced influence at the bottom. But we've got to make sure that we still have a degree of influence, even if it does overlap slightly. - Okay , now that I see this is a very touch and go process, and now I've got a sub tract again, and I just got foreign the rights there. That would do. Okay, so now if I come to the front, select that bone on rotate along the Z axis. That looks pretty good. It might be looking a bit weird. Reviewed it form below. But we're not going to be doing that for animation, so we don't need to worry. And he's not gonna rotate too far. There we go. OK, next we're gonna add weight to the arms again so that we can perform an arm animation.
212. Selecting The Different Types Of Geometry Redo: In this video, we're going to be going back into edit mode, where we're going to be learning about the free different types of geometry. So with the cube objects selected, press the Tab key to go into edit mode. Geometry is made up of free types. These are vertices, edges, and faces, and there is a hierarchy here. So a vertex is a singular coordinate in 3D space. To create a fruity objects, you will need multiple vertices positioned around your 3D area. In order to connect these vertices together, we've acquired the second type of geometry, an edge. An edge is the connection or the line in between two vertices. Finally, we have faces. A face is a closed loop or free or more edges. In the case of our cube, our faces all have at least four edges used to construct each of our faces. Note that a face cannot exist without a certain number of edges, at least free. And an edge cannot exist without at least two vertices. In fact, all edges will have two vertices. And if it has more vertices than that, then you're dividing it up into more edges. When it comes to selecting geometry, we can change the selection method up here. These icons next to the Edit Mode option allow us to switch between vertex select, Edge Select and face selects. So we've vertex select selected. We can left-click on any of the vertices and select that vertex. If we choose edge select, we can select any edge that we want. And if we go Face Select, we can choose any face. Now, the grab, rotate and scale tools.
 Joe Baily