Transcripts
1. Introduction: everyone and welcome to my premiere Pro course. I've spent hundreds of hours over the last five years perfecting my concise yet detailed tutorial format. My unique style of teaching has even been promoted by it will be on Twitter and this course you'll find over 125 shore. But detailed lessons these lessons will help you master the basics, learn some more advanced techniques, and I'll even show you how to make more than 60 of the most popular effects. My goal for this course is to not only get you comfortable working in Premiere Pro but get you making professional videos. I also plan to update this course over the years to keep up with any changes in Premiere Pro that affect my current content. All right, thanks for watching this little intro video, and I hope we'll see you in my course.
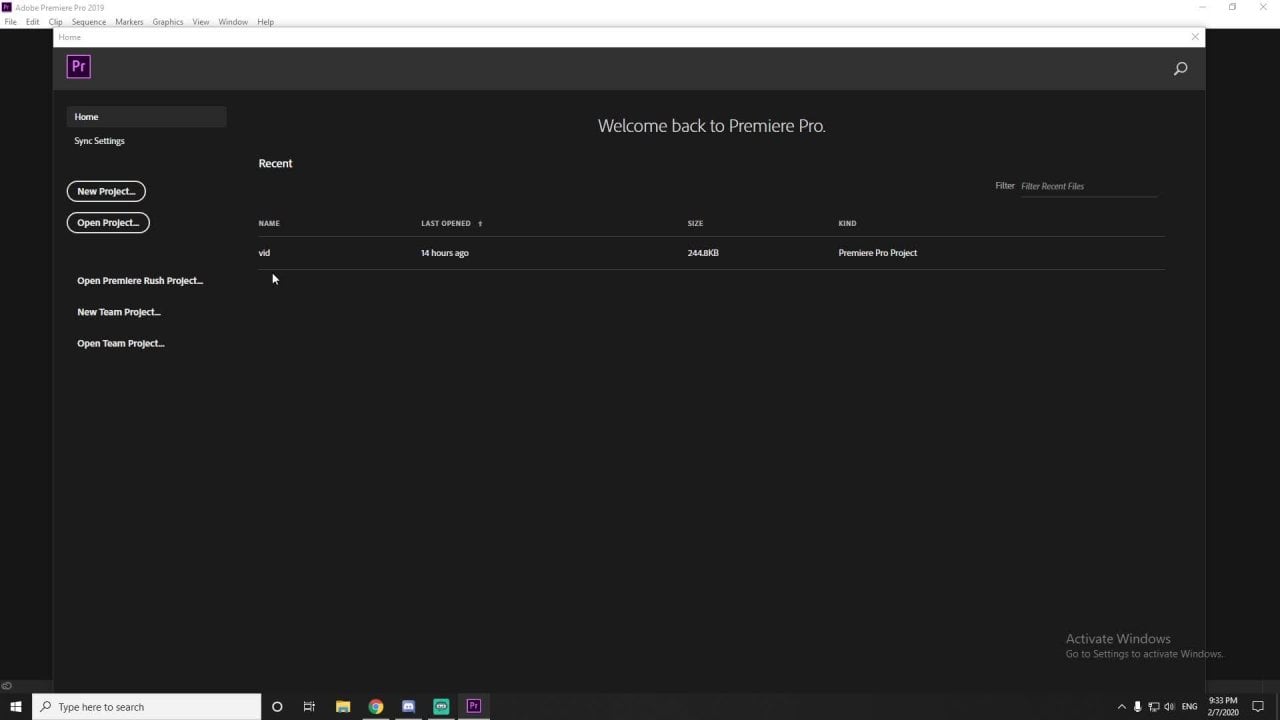
2. Creating a New Project in Premiere Pro: Okay. The first time you opened up Premiere Pro, you're going to be greeted by this papo to create our first project. Let's click this new project button now in the new project, pop up, give your project a name, and then choose a location to save your project by clicking the browse button. I'm just going to save my project in this first location that comes up. We'll be sure to select the location on your computer. You'd like to save your project. Okay. Now, the good news is, we don't need to change anything else in here. These default settings will work fine for 99% of you. So let's just hit okay to create her first new project. All right, that's all for this lesson. And the next one will be learning how to import media
3. How to Import Media: Let's start this lesson off by making sure that we have the same layout by going up to window workspaces. Reset to save layout. Okay, now down in the bottom left corner, you'll see a project panel. The easiest way to import media in your project is by double clicking inside the project panel, where it says import media to start. You can also use the control I keyboard shortcut on Windows or command I on Mac now in the import Papa, Navigate Teoh and select the media you'd like to import. This could be a video image or audio. Once you have your media selected click open to import into the project panel's been, you can also import multiple files at once within the import. Pop up in here. Simply hold down the control key on Windows or command key on Mac while selecting all the files who like the import and then click the open button. Okay, and they're added three more files into my media. Been notice how premier color close your files based on their types, which makes them easier to find. Video files will be blue and purple audio will be green and images will be pink to view any of your imported files. Simply DoubleClick. One of them in the project, been it to view it above. In the source panel, you can either hit the play bun or press the space bar to playback and pause your media. Okay, And that's all for this lesson, and the next one will start organizing our media on the timeline to make something creative .
4. How to Add Media To the Timeline: to start this lesson off. I just imported an image. A couple of video clips in an audio clip into my project. Been Let's start by dragging a video clip from the project. Been under the timeline. Whenever you drag a video clip onto a new timeline, it's going to create a new sequence named after your video clip. For now, just think of the sequence as the container that holds your timelines. Information. Your sequence will be represented as a green clip in the project panel. So if you ever accidentally close your sequence on the timeline, you can easily recover it by double clicking the sequence. Over here, the sequences settings will automatically be set to the resolution and frame array of the first video you add to a new timeline. So if I dragged the 7 20 p video under my timeline after my first video, it's not going to fit into my frame right, because my first video already set my sequence to 10 80 p. But don't worry. You can easily risk ill your video to fit in the frame by right clicking the offending clip on the timeline and selecting scale to frame size No. If you want to add background audio to your video, you simply drag audio clip under any one of these audio tracks below your video clip on the timeline. You can change when your audio starts playing with your video by dragging the audio clip under your video it to reposition it to a later part. I'm sure you've noticed how there are multiple audio tracks and video tracks on the timeline. With the extra video attracts, you can do things like Dragon Image over an existing video clip toe Overlay it or you could even overlay a video on top of another video. The extra audio tracks allow you to add background music or even additional voice over that can be dubbed over the music. We'll learn more about using multiple tracks in the future, but for the next lesson will be discussing how to navigate our timeline.
5. Navigating the Timeline: to begin this lesson. I just added a video clip to my timeline. Playing back your video clip this simple. You can either hit the play button in the program window or press the space bar on your keyboard. Deposit video, clip the stop button or press the space bar again. The length of each clip on your timeline and the corresponding time above a represents its duration. You could navigate quickly through your video by dragging the play head at the top of your timeline to scrub through it. Or you can click at any point on the time of roller to move the play head to that position . It's important to remember that wherever your play head is on, the timeline is what's going to show up in the program window. So if I were to overlay an image over my video clip, my image is only going to show up in the program window. When my play head is over, My image clip on the timeline. Okay, now, to move through your clip frame by frame, use these right and left Baden's next to the play button in the program window. You can also use the left and right arrow keys on your keyboard to move the play head frame by frame. Another very important part of this timeline is using this bottom scroll. Barda Zoom zooming allows you to Seymour less of your timeline. For precise editing. To zoom, simply drag either circular end of the bottom scroll bar to zoom in and out and even faster way to zoom. Your timeline is by holding down the all can windows or option key on Mac while scrolling with your mouse wheel. Additionally, dragging the middle of the scroll bar will allow you to navigate a different parts of you zoomed in timeline. All right. Now let's drag another video clip onto the timeline and attach it to the end of the first clip. Your clips should stand together effortlessly. If you have this magnet toggle turn on which you pretty much always should. My new video clip has some audio attached that I don't want, so I'm just going to Tuggle on this m next to my audio track to mute it. In addition, you can hide your video clips by using the I toggle next to each track, although for this lesson I want to see my video when you have multiple clips on your timeline, you can easily move between cuts by pressing the up and down arrow keys on your keyboard. The home key on your keyboard will take you to the beginning of your timeline, while the N key will take you to the timelines end. Another little shortcut that's useful is holding down the shift key on your keyboard while pressing the space bar to play back your timeline from the beginning. OK, and that's all for this lesson and the next one I'll cover cutting and trimming clips on the timeline.
6. How to Set Custom Keyboard Shortcuts: all right to get started. I just added some footage to my timeline, and for an example, I'm going to use the Control K keyboard shortcut to make a cut at the plate. Heads position. Okay, there it made the cut. But let's say you want to change the control K shortcut to something else to change of the shortcut. Let's go up, Teoh at it. Keyboard shortcuts. Now in the pop up, you'll see a keyboard with all the default keyboard shortcuts. We want to change one of the defaults, though, so let's go over to the search box and type control K inside. So there is all we want is going to be this Add Edit command, which basically cuts are clip the easiest way to change our shortcut. It's a drag the ad at a command under the key you'd like to change. Okay and all my ex key has been assigned to the Add Edit Command. If you want to do control X instead, you'd hold down the control key while dragging ad at it under the X Key. You probably won't want to set both short cuts to the same thing like I did, but Since this is just a demonstration, I'll click OK to confirm the change. Now, back on the timeline, I could just have the X key on my keyboard to make a car at the play. That position and I could also use Control Act, since I set that, too. Alright. Next, let's re open the shortcuts pop up by using the controlled K keyboard shortcut in the Papa noticed that since we changed one of the keys, the keyboard layout preset changed a custom before it was on the adobe premiere. Pro default custom can work okay in a pinch. But whenever you change shortcuts, it's a good practice to create a new preset so you don't lose your changes. So to save my preset, I'm just going to click the same as button. Then I'll give my preset a name and hit OK, all right. And there's my new sample preset that I can select whenever I want to use my custom shortcuts. Another useful thing with this keyboard is the ability to select a key to see what shortcuts it already has. So, for example, if I select the Tiki, it tells me that pressing T by itself will select the type tool pressing Control T. It will give me a new text layer and so on. If you like to delete a shortcut, click the axe next to it to get rid of it. For example, all delete this extra ad tech shortcuts since it's redundant. And if you ever change something you didn't mean to an accident. There's this helpful on Do Bond and that undoes your most recent change, All right, and that's it for this lesson. Thanks for watching, and I'll see you in the next one.
7. Basic Trimming and Cutting on the Timeline: to start this lesson. We're going to trim the beginning and end of a clip on the timeline. So let's begin by making sure you're using the selection tool on the toolbar now. To trim the beginning of a clip, moved the play head where you'd like your clip to start, then hover over the very beginning of your clip so that your curse, their changes to a bracket, drag your clip to the play heads position to make the trim. And I'm just going to drag my clip back to the start of my timeline so that playback starts and my trim position trimming the end of your clip works basically the same way. This time. Position your play head to where you want your clip to end, then dragged the end of your clip to play heads position. Okay, next, let's say you want to cut something out of the middle of your clip. To do that, let's begin by moving the play head to the start of the part you want to cut out, Then select the razor tool over in the toolbar or Presa sea key on your keyboard to select it and use it to make a car at the plate heads position. Next, move the play head to the end of the part. You want to cut out and make a cut at that position. Now simply recent like the selection tool and select the clip. You just cut out, hitting the delete key on your keyboard to get rid of your selected clip. And I'm just going to select the empty space between my clips and hit the delete key to rejoin my clips together. Keep in mind that you can make cuts without placing the play of first, and you can also trim without the play head. But you really want to use. The play had most of the time because it helps with being precise when making your edits okay, and those are the trimming basics. In the next lesson, I'll be covering some super useful techniques and shortcuts for making your cuts
8. Advanced Trimming on the Timeline: to begin this lesson. I have a video clip on my timeline that I cut into three pieces, and I'd like to delete this middle section, just selecting my middle clip and pressing the delete key. It leaves this gap that I also have to delete to bring my clips back together. Fortunately, a Premiere pro comes with a function called a Ripple daily, which allows you to shift two clips together while deleting to ripple Italy. Simply select your clip on the timeline and then hold down the shift key while pressing the lead. Okay, and they're deleted my middle clip while shifting my clips together automatically. Additionally, you can shift clips automatically while trimming at a cut. To do this position, the play head to where you want to trim your clip to. Then, while holding down the control key, hover over the end of your clips of your cursor, changes to a yellow bracket and drag it to the play heads position. Okay, and they're my clip stayed together after the trim. If you're not a fan of holding down the control key, you can also trim by using the Ripple Edit tool. With this tool, you can trim at any cut, an eclipse will automatically shift together. Premier Pro also lets you skip using the razor tool all together to make cuts. If you desire, simply position the play head to where you'd like to make a cut and then select the clip you'd like to cut. Use the control K keyboard trunk cut to make a car at the plate. Heads position. Keep in mind that if you don't select your clip before you cut and you're using multiple tracks, Premiere Pro will also cut any track that's titled on. So using Control K with this audio track will cut both my video and audio clip. Simply toggle off any tracks you don't want to cut before using the shortcut. Now, when I make another cut with control K, it'll Onley caught on my video track. Since it's the only track that's toggled on. Okay, and that's it for this lesson. Thanks for watching and see you in the next one
9. How to Trim in the Source Panel: to start this lesson off. I'm just going to double click one my video clips in the project. Bento, open it up in the source panel Before we begin, you may be wondering why you'd want to edit your clips in the source panel and not just do everything on the timeline, while in particular long videos could take a long time that import into the timeline when you might only be using a small part of them. In addition, editing long clips on the timeline can be a hassle, especially if you're trying to edit around other clips. So in the source panel, position the play head to where you want your trim clip to start, Then click this mark in button to set a starting point for your trim. Next, let's move the play head to where you want your clip to end conflict The mark out button to set unending point now simply dragged the video from the source panel on your timeline toe . Add on Lee the clip that you marked in and out. Okay, it's that simple, and that's all for this lesson. See you in the next one
10. How to Trim and Cut FASTER: All right, let's begin by going up Teoh Edit Keyboard Shortcuts If your keyboard layout preset is set to the Adobe premiere Pro Default, your Q and W, he should already be set to ripple, trimming your clips to the play heads position. This is a really useful because you can position the play head to where you like to trim off the end of a clip and press a w key to trim its end to that position. Or you can move the play head to the beginning of a clip and press a cuchi to trim the start of the clip. To that position, though, the game changing part of the shortcuts is when you have two clips right next to each other so I can trim off the end of this clip while shifting my trailing clip forward. This avoids any dragging or repositioning of clips. Okay, now let's go back over to the keyboard shortcuts to change a few things to make editing even faster in the search box. Tight delete for the clear command. I'm going to click to the right of the delete shortcut toe. Add another shortcut. Now let's press the Z, he and R keyboard to set the key to delete. Now we can delete without moving a right hand off the mouse. You might get a warning down here that it's already in use by the zoom tool. But if you're like me and don't use that tool, just ignore the message. Otherwise said it to another key on your left hand. Now let's click next to Ripple the lead. To add another shortcut, hold down the shift key and Z key on your keyboard to set it to shift Z. Finally, let's type add edit into the search box. The Add Edit Command lets you make a cut at the plate Heads position. Click next to control Kato. Add a new shortcut for it, then press E X key on your keyboard to set it to the X key. Now I can make cuts without moving my hand off the mouse or even using the razor tool. All right, Once you're done assigning shortcuts, click OK to save your changes. You should now be able to delete clips simply by pressing the Z key. You can ripple delete clips by holding down shift Anzi, and you're able to make cuts at the plate heads position simply by pressing acts. Remember that it makes a cup based on what tracks you have selected over here. So if I d select my audio track, it's only going to cut my video track our A and that's it for this tutorial. Thinks they're watching in. See You next, son.
11. Overlaying Media + Positioning and Resizing Basics in the Project Panel: to start the lesson. I imported a video I'd like to use as my background, an image that I liked overlay on that background as well as a video I liked overlay. Before we do anything, I'm going to turn off. This left most a one toggle for my bottom selected video because doing so will allow me to drag my video onto the timeline without bringing along its audio. Okay, now let's begin by drinking the video you'd like to use as a background under the V one track on your timeline. Then we'll drag the video we liked overlay under the track above it. Be sure to position your overlay video clip to where you want it to playback on your timeline, and I'm also going to drag the end of my overload clip to shorten its duration. Okay, now, when I play head reaches my overlay video, we'll see it in the program panel, though will want to reduce its size so that we can see our video underneath it. Jury size it. First. Make sure that your overlay video clip is selected on the timeline and then double click your over late image in the program panel. Okay, My DoubleClick worked because I can see my over light videos Anchor Point, but I'm not seeing sizing handles yet because my over laid video doesn't fit into my frame . So if you're working with two different resolutions and this happens to you, just right, click your overlay video clip on the timeline. And so let's scale the frame size all right. Now that we can see the sizing handles, let's drag any of them to resize the video to reposition the overlay video in the frame. Just drag anywhere inside it. Okay, now that we have a nice looking over Lake video, let's move on to overlaying our image. Less drag are overlaid image from the project panel under the track above the overlay video clip on the timeline. Stacking them like this allows us to see all of our over laid media at once. Now, with our image selected on the timeline, let's double click it in the program panel to reposition and resize it in the same way we did with our video. If you ever accidentally click on your background video in the frame, you'll have to re select your image clip on the timeline before double clicking in the program panel again. Finally, if you want to rotate your image, just hover over one of the anchor points and then slowly move your cursor away from the point until it changes into a curved arrow. Then simply click and drag from the curses position to rotate your image. Okay, and that's all for this lesson and the next one. I'll teach you how to more precisely overlay media by using the Effect Controls panel.
12. Using Effect Controls to Precisely Rotate, Position, and Resize Media: to get started, I added a background video to my timeline as well as this video of arose over laid on top of it. While I'm using an overlay video for this lesson, keep in mind that using in the image will work exactly the same way. Okay, let's begin by selecting are overlaid video clip on the timeline and then going up here to effect controls under motion. You'll see properties for position, scale and irritation. First, let's change our overload media scale by dragging its corresponding value to the left or right notice. How are scaling? It keeps the original aspect ratio by default. You can also changes a scale manually by clicking to select its value and then typing in your desired scale. But let's say you want to stretch your media and aren't overly concerned with keeping its original aspect ratio. To do this and check the uniforms scale check box under the scales value. Now you're free to change the scales within high independently of each other. Keep in mind that if you stretch your media too much, you'll lose some quality. All right. Next, let's change our media's position, dragging the positions first value allows you to reposition your media from left to right on the X axis while dragging the position. Second value repositioned your media up and down on the Y axis. Additionally, you can click either of the X and Y values to change the position manually if you're trying to be super precise. Lastly, let's change the media's a rotation by driving the rotations value. And, of course, you can click the rotations value and enter in a number to be more precise. Okay, And that's all for this lesson to remember that while I used a video for this example using effect controls like this will work the same for images as well.
13. What are Adjustment Layers and Why They're Useful!: okay to start this lesson, let's say you have four different clips on your timeline that you want to add the same effect to It's okay if you don't know how to add effects. Yet this is a good thing to know before you start using them. So I'm going to add in effect by going over to the effects panel, and I'll drag my blur effect onto each clip manually. Men, to make adjustments to my Blair, a fact I'll select my clip and go up to effect controls to increase its blur. But I want to blur all my clips, so I'd have to select each clip. I added my effect, Teoh and repeat this process of going up to effect controls and increasing the blur as you can see this content to be time consuming, especially if you have your footage already cut up into a 1,000,000 pieces from editing it and things get even more complicated. If I wanted to add my blur effect only the first half of my first clip as well as the others, then I'd have to make another cut and then my effect to that new cut out peas in no time your timeline will get really messy, and your project will take 10 times longer to complete. But luckily, all these issues can be solved with adjustment layers. So I'm going to do adding my blur effect all my clips now to add an adjustment layer. I'm going to go back to the project panel. Then, all right, click in the project panel, hover over a new item and select adjustment layer. The default setting should match your timelines, so just hit. OK, now I'll drag my new adjustment layer from the project. Been under the track above the clips. I like to add my blur effect to Then I'll drag my adjustment layer. Zenda changes duration to cover all the clips I want to add my blur effect, too. And of course, you can drag your adjustment layer to reposition over the clips you want. Now, whatever effect I add to this adjustment layer is going to also add the effect any clips underneath it. So, for example, I'll have my blur fact to the adjustment layer. Then, with my adjustment layer selected, I'll go up to effect controls and in here all increase the blurriness of the effect on the adjustment layer. Okay, and I want to scrub their this. You can see that anything underneath my adjustment layer is blurred out. Notice how I can run my adjustment layer through the middle of a clip, and my blur effect will only start once the play head gets the adjustment layer. No need for adding my effect to a bunch of different cut out clips. I did it all with a single adjustment layer. With this adjustment layer, I can add multiple effects to it. Or it could change or delete my effects without having to go in and add a each clip. The great thing about Adjustment Layer is is that Premiere Pro lets you do a bunch of different things with them, like add animation and even color grade, all on the single layer. One less thing to keep in mind is that if you have multiple clips underneath your adjustment layer, it will affect all of them. So, yeah, adjustment layers are pretty big deal. If you want to save time and keep your work space clean. Okay, and that's it for this Lawson and the next one will talk about using adjustment layers. This change of the scale and position of your clips
14. How to Change Position and Scale using Adjustment Layers!: to get started. I just added a video track with an adjustment layer on top of it to my timeline. Let's begin by heading over to the effects panel type transform into the search box, then dragged the effect onto the adjustment layer. Go up to affect controls for the adjustment layer and scroll down to the transform effect. Now, you're able to change a scale position or whatever else you'd like with this effect. Okay, that's all for this video. Thanks for watching and see you next time.
15. How to Add Colored Backgrounds: Let's start by going over to the project panel. Collect the new item button. Select color Man. The default settings worked Fine. So just hit. Okay. Now, just use a color picker tool to select the color of your choice. Hit. Okay, once you're finished, you can name your color, Matt, if you want, But I'm just going to leave mine as it is now. Just drag it under your timeline added to your project and finally to change your color, Mestre Reddish. And you can just drag the edges of the clip. OK? And that's it for this tutorial. Thanks for watching and see you next time.
16. The 3 Ways To Change Audio Volume!: to begin. I just edit a video to my timeline that has some audio the first way to change the volume. It's a right click your audio clip on the timeline and select audio gain in the pop up. We're just going to be concerned with these top two options. Set gain and adjust gain. You can think of gain is just another way of saying volume, starting with SEC gain. Let's elect its blue value and change it to a negative number to decrease our audios game. To increase the gain. Enter a positive number instead. But start with small numbers so you don't blow your ear drums out. Set gain differentiates itself from a just gained by setting your tracks volume to exactly the number you put in there. On the other hand, adjust gain works quite differently. Changing the adjust gains value will add that number. Tow whatever your set gains value currently is so putting a to in here we'll send my current volumes gained. Five. Since I just sent the game to three or putting a negative foreign adjust gain will set my volume to negative one. I think it just gain is more useful because you probably won't like your first volume change, and it's easier to add on to what your gain is already set. Teoh. Okay, The next way to change your volume is to select your audio clip on the timeline and go over to effect controls. Under volume, you'll see a level setting, which controls the volume. First, let's tuggle off the blue stopwatch because we won't be key framing. Now. Simply drag the levels value to the left or right to adjust the volume. And, of course, you can click the levels value and type in the number manually. If you want a specific volume, the final way to change your volume in Premiere Pro is to extend your audio track until you see this line going through the middle of it. Now, simply drag the line downwards to decrease the volume or dragon upwards to increase the volume. Okay, and that's all for this tutorial. Thinks they're watching and see you next time
17. How to Delete Audio & Separate Audio from Video: all right to get started. I just added a video clip to my timeline that has some audio I like to delete. Now. I can't delete the audio simply by selecting the audio clip on the timeline and hitting the delete key because it will also delete my video instead. What you can do is hold down the all key on Windows or option key on Mac and select your audio clip. Now the only my audio selected. I can hit the delete key to get rid of it. Another way to delete your audio is by right clicking your video clip and selecting on link . Now you can select your audio and video clip independently and delete your audio clip easily. Okay, and that's it for this tutorial. Thinks they're watching and see you next time.
18. How to Mute Audio: to get started. I just have a few clips here that I added to my timeline. Now, for this tutorial, I just want to meet my middle clips audio without actually deleting it. So to do that, I'm just going to select the clip and go up to effect controls under audio effects. Change the volumes level to negative 1000. This will get converted to negative infinity, which will essentially mute the clip. OK, and I want to play this back. My audio will get muted when it hits the middle clip. All right, that's it for this tutorial. Thinks they're watching in See you next time.
19. Mute Multiple Audio Clips at Once!: to get started. I have four different audio clips on my timeline, and I'd like to just the volume for them all at once. To do this, I'm going to click and drag on my timeline to select all of my audio clips. Then right, click them and select audio gain. Click the zero next to adjust gained by now. If you want to lower the volume, enter a negative value. If you want. Increase the volume into a positive one. Okay, and all my audio clips have a lower volume. Well, let's say you only want to just the volume of certain clips like the 1st 3rd and 4th 1 To do this, hold down the shift key while selecting the desired clips you'd like to change the volume for then, just right click one of the selected clips and goto audio gain. Now just adjust again by entering a positive or negative value like before. All right, And now I adjusted the gain on Lee for my selected clips. OK, that's it for this tutorial. Thinks they're watching and see you next time
20. How to Record Audio Voice-overs: all right to get started. I just added some video footage to my timeline that I'd like to record over before we began . Make sure you have an empty audio track to use for your recording. If you need an extra one just right, click on any of your audio attracts and select add track. All right, And there it inserted an extra audio track. Okay, now, to record audio, you'll need this little microphone next to the track you'd like to record on. So if you're missing it, just right, click your audio track and select customize in. The Papa simply dragged the microphone onto your audio track. Next, let's position the play head where we want to start recording. Okay, now let's click the microphone to start a recording. You'll see a countdown timer in the program window, and then premier will start recording from your microphone to stop your recording. Either click the microphone Boughton again, or simply press the space bar on your keyboard. Okay, and their premier created a new audio clip with my recording. If your microphone isn't recording for some reason, right, click the audio track and click voiceover record settings in here set the source, and the input to your microphone would should fix any problems. Another useful thing you can do is turn off the recording pre roll. If you don't like the countdown, you can also click the blue number and change it if you want a different duration for the pre roll. Okay, and now when I record again, I have a two second pre roll instead of a three second. All right, that's it for this lesson. Things they're watching and see in the next one.
21. How to Reverb Out Audio: to get started. I just did a quick audio sample of me talking that I like to add some reverb two to my timeline. I'm going to give this audio some reverb. I'm going to begin by making a cut of the point where I want the reverb to start ringing out for you. This will probably be right before your last be. If you're doing music, then right? Click that cut out and clip and select nest. Double click the nested sequence. Open it up. Drive your original audio file you imported. Blow it in the nested sequence. Make sure that the bottom audio clip is selected and go up to effect controls under volume . Change a level to negative 1000 which will translate to negative infinity and completely mute your bottom track. All right, now, dragging the end of the muted clip toe however long you want your river for the top clip to ring out for. Okay, we're done messing around inside the nested sequence. So let's go back to the original composition during the end of your nested clip to extend it with the silence audio we just created Now go over to the effects tab type of reverb into the search box. Drag one of the reverb effects under the Necid clip. I'm just going to use surround reverb, then go up to effect controls for your next clip, click the presets bought in next year. Reverb effect selected preset of your liking. I'm just going to use from the front, okay? And I want to play this back. My audio will river about. I'm going to give this audio some reverb. All right, that's it for this tutorial. Thanks for watching and see you next time.
22. How to Fade Video In and Out: to get started. I just added a video clip to my timeline that I'd like to fade in and out. Let's begin by going over to the effects tab in here. Open up the video transitions folder and then open up the dissolved holder. Then select the film, dissolve effect and drag it to the very star of your video clip to fade it in to fade out. Your clip instead simply dragged the film dissolve effect to the very end of your clip. Okay, and now when I play this back, my video fades in, and when it reaches the end, it fades out to change the speed of your fade. Simply hover your cursor over the end of the transition and drag it to adjust its duration . And I'll just do the same thing to extend my fate out. All right, and now my fates happen more gradually. That's really it for this tutorial, but I'm going to explain why don't use other dissolves like additive dissolve. So instead of the film dissolve, I'll just drag this additive dissolved to the start of my clip and extend its duration. When I play this back, you'll notice that extending restoration didn't slow down my dissolve. It just made the first part of my video black. So that's why I stick with the film. Dissolve over additive, dissolve unless you want the extra black space. All right, and that's it for this tutorial. Thinks they're watching in See you next time.
23. How to Fade Video Clips Together (Between Clips): to get started. I just had it two clips of my timeline that I'd like to fit together. Let's begin by positioning our time marker at the cut between our clips and dragging the ends of this bar down. Here it is. Zoom into it. Now let's go over to the effects panel type crosses all of into the search box. Drive across is a perfect under the cup between your clips. Now, if it 6 to 1 side like mine and doesn't go to the middle, that's fine. Just select the transition and go over to effect controls. Change the alignment to center at Kat and there we have a fade between our two clips. Okay, this looks good, but if you want to change the duration of the crosses, all just dragged the edge of the transition. All right. And that's it for this tutorial. Thinks they're watching and see you next time
24. How to Fade Text In and Out: okay. To get started, position the play head over the part of the video on the timeline. You want your text to fade in it, then select the type tool and click anywhere inside the preview panel to type your text. All right, now that you've added some text, you should see a pink text clip on your timeline. If you want to change your text aeration, simply drag the end of that text clip. Next. Let's add a fate by going over to the effects panel and type dissolve into the search box. Under video transitions. You should see a few different dissolves. Drag film, dissolve under the very beginning of your text clip to fade it in. All right, And I want to play this back. My tax fades in. You can also use crosses all but I think film dissolve looks more cinematic on video to change the phase duration simply dragged the end of your dissolved transition on your clip . If you want to fade your text back out, drag film. Dissolve from the effects panel under the end of your text clip. Okay, now my clip fades in and out, but I'm going to undo adding the dissolves and show you an even easier rate of fade using default transitions. Back in the effects panel, right click film, dissolve and click set selected as default transition. Now select your text clip on the timeline and use the control de keyboard shortcut. Adequate film. Dissolve transition to your text. And, of course, if you just want to fade in and not paid out, you just select the fade out transition and hit the delete key on your keyboard. Okay, and that's it for this tutorial. Thinks they're watching, and I'll see you in the next one.
25. How to Fade Audio / Music in and Out: to get started. I just added some video clips to my timeline along with the music track below. Okay, let's begin by going over to the FX panel, open up the audio transitions folder and then open up the cross fate folder. Now, if you want your audio fit in or out linearly at a steady pace, the transition you want to use this constant gain dragged this transition to the very beginning of your audio clip to fade it in. When you hover over the right spot, the clip will turn pink, letting you know that you can drop the transition there. Okay, And now when I play this back, I have a simple Faden thief. Fader Music out just wrecked the constant gain transition to the very end of your music clip. Instead, to increase or decrease the duration of your fate dragged the ends of the spar down here to zoom into it on your timeline. Then with the selection tool dragged the transitions end to adjust its duration. Okay, that works great, but I'm going to do this and show you another way over in the effects panel drug The exponential fade to either the beginning or end of your audio clip. With this transition, your musical fade exponentially, meaning that at the beginning of the effect it will fade in only a little bit and towards the end, the fatal ramp up. You can also apply this transition at the end of the clip and a consideration by zooming in and dragging the end of the transition like before. So adding fades is really simple and premier. It just depends on whether you want to study, fade with constant gain or fade that starts out slow in a ramps up like the exponential fade all right, and that's it for this tutorial things they're watching and see you next time.
26. How to Change Default Video Transition: to get started. I have some clips that I'm going to add My default transition to by moving my time head between the two clips and using the control de keyboard shortcut by default I have across is all. I want a different transition as my default. So I'm gonna undo that head over to the effects panel and open up video transitions. Find when you like, then right, click it and select sets selected as default transition. Now, when I use the control de keyboard truck that between my two clips, it applies my new push transition as a default. This looks OK, but it like my transition to go a little faster to trained your transitions default duration, Go to edit preferences. Timeline in here, I'm just going to lower the video transition default duration to 15 frames. Okay. And now when I read my default transition, it will be much faster. All right? And that's it for this tutorial. Thinks they're watching in See you next time
27. How to Copy Transitions to Multiple Clips: to get started. I just added some clips to my timeline, along with a dipped away transition that I would like to copy to the rest of my clips. Let's begin by selecting the transition and using the control, See keyboard shortcut to copy it. Then click and hold on the third tool down to bring up multiple options. Select the rolling at it tool. Now, while holding down the shift, he click on all of the cuts. You'd like to add the transition to use the Control V keyboard shortcut to pace your transitions to all your selected cuts. All right, and there we have our transition copied to multiple clips. Okay, that's it for this video. Thinks they're watching and see you next time.
28. How Add Text: to get started. I just added a video clip that I like to use is my background to my timeline toe at our text. Let's begin by selecting the type tool on the side of our timeline, then click anywhere in the video preview and start typing toe ad. Your text premier will automatically create this pain clip for your tax above your video clip. On the timeline. You can drag the clip center to change where your tax shows up in your video. You can also drag the edge of the text clipped to adjust its duration. Now to change your text properties like it's fun, hover over your texts and dragged from the beginning or end of your text to select all of it. You can also just click your text with the type tool and uses the control a keyboard shortcut to select it all. Once it selected go over to effect controls Under attacks, you can do things like change the fine and its size. You can use these buttons to turn your text bold or italic under appearance. You can change the color of your text by clicking the color box next to Phil and selecting your desired color to give your Texas stroke, check the check box next to it and change the stroke color. If your desire to increase your strokes with, just drag this number to the right, you can also easily give you text of background or a shadow by checking their boxes and adjusting a few settings under transform. You can drag these position values to change where your Texas located in the frame, although I preferred to just use the selection tool and move it in the frame. One other thing you might want to do under transform is decreased the text capacity to make it more transparent. Okay, and that's it for this tutorial. Thinks they're watching and see you next time.
29. Adding Rolling End Credits: Let's begin by clicking on the graphics tab up top. Select the type tool and click in the frame to type out your credits already have a live, so I'm just going to pace it in in the essential graphics panel. Click on your texts under edit to select the entire block of tax. Now I'm able to make some adjustments. First I'm going to center, align my taxed. Then I'm going to click this horizontal center button to move my tax to the middle of the frame. You can also change the fine and do some other stuff in here, but I'm satisfied, so let's move on. Click directly under your text in the essential graphics panel to de select it. Click the role check box to enable the rolling credits feature. Okay, and now we have our rolling credits to speed up or slow down. The role just dragged the end of your clip on the timeline to change its duration. All right, this looks a little better, and if you don't want the credit sister offscreen or end off screen, you can just uncheck these boxes. The pre roll and Postrel settings are therefore, if you want to pause before or after you start rolling the credits, the ease in and ease out settings will just add a little speed up or slow down effect as accredits enter or leave the frame. All right. And that's all I have for this tutorial. Thanks for watching and see you next time.
30. Subtitling Videos: all right to get started. I just said it a video clip to my timeline, along with an audio clip. Let's begin by going up to file new captions in the pop abs. First, drop down. The first option will be four standard definition close captions, which allows the user to turn them on and off. Below that, there's an option for close captions for high definition. But I'm going to select open captions because I want my captions permanently burned into my video for social media. Now let's drug the captions from our project panel under the track above your video clip on the timeline, and I'm just going to drag my caption clips and so that its duration matches my videos duration. All right, so each individual caption you add will be represented by this black bar. On the caption clip. You can double click that black bar to open up the captions panel in here. The first thing you're going to want to do is tell your caption in this box where it prompts you to Now that you have your tax, there's a bunch of settings to play around with, like changing the font size of your text. You may want to drag the edge of this panel so that you can see all of the settings. Another useful thing you can do is change the captions opacity by clicking the square and dragging the percentage value. Additionally, any of these small grid squares will allow you to change the position of your caption in the frame. You can also change your captions position more precisely by dragging these X and y values . Next, I'm going to adjust the duration of my caption so it lines up with the first section of my audio. You can do this by dragging the ends of the black caption bar on the clip. You can also change when the caption plays back by dragging the middle of the black bar. Okay, this looks good. So let's add our next caption by clicking this plus bun in the captions panel, then will just drag the middle of my caption to reposition it. Anil Dragons ends to match the duration of my next bit of audio. Now, back in the captions panel, I'll just type some text for my next caption. As you can see, my second caption will keep the formatting of my first caption, which is really useful. Okay, and the finish captioning. You just keep adding captions and lining them up to the parts of the clip you want. Once you're finished adding captions and goto export your video under the captain's tab, you'll see export options, which will let you burn your captions into your video, create a sidecar file or simply not include them. All right, that's it for this tutorial. Thinks they're watching and see you next time.
31. Placing Text Behind Objects!: in this video, I'm going to show you how to put text behind objects in Premiere to get started. I just added a video clip with the text clip above. Out on my timeline. Let's begin by selecting your text clip and going up to effect controls. Position your time had at the start of your club under rapacity. Click on the pen tool. Click somewhere around the edge of your object to create your first point. Then continue clicking around it to trace it. When you get to the last point, make sure you connected to the first point or the effect won't work. Check the inverted check box. Supply the mass to the object. Okay, this looks good, but unfortunately, when our object moves, the mess doesn't move with it. So we need to add animation. Position the time ahead of the start of your clip, where you made your trace. Click on the stopwatch. Toggle next to mass path to create your first key friend of the time. Head to the end of your clip. Select the mask in effect control so that you can see it. Click and drag to move your trace Master, where the object is you can also use the handles to reposition your points. Okay, this looks better, but it's still not quite matching up. So I'm going to adjust the trace of a few more points to fix it up. This effect works best for simple objects. If you have complicated movements, you're going to have to create a key frame for nearly every frame of animation. All right. And there you have it. Thanks for watching and see you next time.
32. How to Add Animated Lower-Thirds Text: to get started. I just added a video clip to my timeline that I'd like to add a lower thirds name bar to Let's begin by going over to the graphics tab over in the essential graphics panel. Make sure you're in the browse tab and select my templates in the search box Type thirds and press enter. Knowing the results. You'll see a bunch of animated lower thirds titles that you can drag onto your timeline. If you want to overlay the lower thirds title on your video, just driving under the track above your video to edit the text, simply select the text tool and click on the text to edit it. Sometimes there will be this little yellow T in the corner of the templates, letting you know that you don't have the required fund to give the fine. Just right. Click the temple and select sink missing funds. Okay, and now I can add the template to my timeline. Next, I'm going to delete these lower through templates to show you another way to add them in the essential graphics panel, make sure you're in the browse tab and select Adobe stock in here. You'll find even more free, lower thirds templates, but from the Internet, type thirds in the search box and press enter, then check the free option. Now simply drag your desire temple above your video clip on the timeline. Some of these will take a little while to loads and so they can have fancy animations. Also, keep in mind that despite these being templates, you concil adjuster duration by dragging the clips end with the selection tool. Okay, and that's it for this tutorial. Things they're watching and see you next time.
33. How to Add Text Templates: all right to get started. I just added a video to my timeline, along with some texts on the track above. Now the way I used to save time with text animation was by going over to the effects panel and dragging a preset under my text clip. This works okay, but there's actually a much faster way to do it. If you're just going to use the same text you always do. Once you have your text slip on your timeline with your desired animation, right, click it and select export as motion graphics template. Name your temple how you like and hit OK, and I'm just going to delete the text clip on my timeline because I'm going to replace it with my new template. Now let's go over to the graphic stabbed. Open up the essential graphics panel under browse, Select my templates, dragged the template you just created above your video on the timeline. Now when I play this back, I have my safe texts animation just by dragging on my template. No need Dad text and then drag on a preset. Even though it's a template, I can still edit it to suit the video I created. So if I want my Texas stay on the screen longer before popping out, I can just drag my key frames in effect controls. Or if I want to edit my tax to, say four times speed instead of two, I can do that. And what's nice about this is a None of your changes will affect the original template. Okay, and that's it for this tutorial. I thought I'd share this because this tip was super life changing for me. Thanks for watching and see you next time.
34. Animating Text Color Change: to get started. I just added a single text clip to my timeline that I'd like to animate changing colors. Let's begin by holding down the old key on your keyboard and drinking the text slip to the side to make a copy of it. Then make sure to text clips are right next to each other. Now select your second text clip and go over to effect controls. Open up the text properties, then change the film color to the color of your choice. Okay, now I have to text clips of different colors. Next, let's go over to the effects panel and type cross dissolve into the search box. Drag the crosses, all transition to the cup between your two clips on the timeline. All right, and now when I play this back, my text and mates from white to red and that's it for this tutorial. Things they're watching in See you next time
35. The 3 Ways to Change Speed: all right to begin, I added some footage to my timeline that I'd like to change the speed of the first way to change speed is by right clicking the clip. You'd like to change the speed of and selecting speed slash duration. For the speed, enter a number larger than 100 to speed up your video. For example, entering 300% will increase my video to three times its original speed, or you can enter a number less than 100 to slow it down. Entering, 50% will play back your clip at half speed. You can also click and drag the blue speed value to change the speed in a less precise way . Keep in mind that changing the speed will affect your clips duration. So if you have any trailing clips, be sure to check ripple at it to prevent unwanted gaps. Okay, I know my video is playing back faster the next way. The change a clip speed is by clicking and holding on the third tool down and selecting the rate stretch tool using the rate stretch Tool just tried the end of any clip to change its speed. Unfortunately, as of the 2020 version. There's no way to shift your trailing clips when speeding things up, so you'll have to manually reconnect them. Likewise, it won't allow you to slow down the front clip when they're next to each other due to the lack of the ripple feature. Well, unless you mix base for slowing down your clip first, all right, and for the last way to change the speed, let's drag the top of the track we're using to expand it until we can see this line going through it. Then right click your clip and go to show clip key frames. Time remapping speed Now simply dragged the line in the middle of your clip up or down to increase or decrease that speed like their H stretch tool. You can't ripple at it using this method, but it will be useful in the next tutorial when we learn how to speed ramp. Okay, and that's all for this lesson. Things we're watching and see you next time
36. How to Speed Ramp Your Videos: all right to start this lesson, I added a video clip to my timeline. Let's begin by expanding our video track so that we can see this line going through it. Next list. Right. Click the FX square in the top left corner of your clip, then hover over a time remapping and select speed. Now, while holding down the control key on your keyboard, click on the line where you'd like your speed around to start. This will create a speed marker at that point, then dragged the line after the marker up or down to set the final speed. You want a ramp to eventually reach. I'm going to drag mine up to increase my clip speed. Okay, now, my clip speeds up when it reaches the marker, but it doesn't instantly and not gradually with a ramp. So to create our ramp, let's drag the second half of our marker to the right. Keep in mind that how far you drag the marker is going to control how quickly your speed change ramps up. All right now, my clipper ramps up over time until it reaches the second half of the marker to smooth out the ramp. select one of the halves of your marker to see this point with handles. If you're speeding up footage like me drunk the top handle to the right to create a curve, which will smooth out your speed ramp. Okay, and they're my speed a ramp. It's more smooth. Keep in mind that you can change the final speed, even after creating a rant by dragging the line after the second half of the marker. Now, to bring your clip back to regular speed, we're going to create a second marker while holding down the control key. Click on the line where you like to start slowing things down. Then, after the marker dragged the line down to set it back to a lower speed up 100% to make the speed rammed down, simply drag the second half of the marker to the right. Finally, I'll just move out my second rant by driving its top handle to the left. All right now, when I play this bag, my clip speeds up, stay, sped up for a bit and then slows down to regular speed. One popular effect is to speed up and slow down your clip. All at once by moving all your mockery is close together, then dragged the last part of the line further down toe. Add slow motion instead of just bring in your clip back to normal speed. Remember that if you're using slow motion with lower frame rates, you'll need to add optical flow to your slowdown clips to smooth things out. So right click your clip, go to time interpolation and select optical flow. Then, with your clip selected, go up to sequence surrender selection. We're just runner in the selection because optical flow can be hard on your computer's hardware, and we wanted to play back smoothly in the preview. Okay, and there I have this nice looking sped up and then slow down speed ramp, in fact, and that's all for this lesson. Thanks for watching and see you next time.
37. How to Create a Time Lapse from Video: to get started. I just added a video clip to my timeline that I'd like to add my time lapse effect to. All right, let's begin by going over to the effects panel and type time into the search box, then dragged the posterized time effect onto your video clip. Okay, now make sure your clip is selected on your timeline and go up to effect controls. Under posterized Time changed the frame ray anywhere from 1 to 1.5, depending on how choppy you want your time lapse toe. Look. Now, when I play this back, it's almost as if my footage has been converted into a bunch of still images. Next, let's right. Click our video clip and select speed slash duration. Then in here increased the speed. I'm going to set mind in 2000%. Increasing the speed this much can make it hard for your computer to run your time lapse. So if you have this problem, just select your clip, go up to sequins and select render selection. One's Premiere Pro is finished, rendering your selection. Play it back this year. Nice looking. Time lapse, all right, and that's it for this tutorial. Thinks they're watching and see you in the next one
38. How to Freeze Frame: all right, so there's three different ways to freeze the frame in Premiere Pro. The first way, which I think is the most useful, begins by positioning the time worker on the timeline where you want to freeze your frame right, click your clip and select insert frame hold segment. This will answer a two second frame. Hold at the time markers position to make your frame hold longer shorter. Hold down the control key on your keyboard. If you're using windows or the command key on Mac while positioning your cruiser at the end of the frame, hold clip. The cursor should turn into yellow bracket with a narrow drag it to extend her. Decrease its duration, and the trailing clips will automatically shift with the frame hold. This is called a ripple editing. Now you can extend the duration without ripple editing by just moving your trailing clips before dragging. The frame holds end, but I think control dragging the end will save you a lot of time. All right, I'm going to do my frame. Hold and show you the second way to freeze a frame. Position your time worker to where you want to freeze the frame, right. Click your clip and select add frame. Hold. This will make a cut and freeze the rest of your clip so you really only want to use this method. If you are finished with clip and just want a freezes end. Okay. And I'm going to do this and show you the third way, which is creating an image out of a still shot position. The Time Margarita, where you want to freeze the frame under the video preview, Click this little camera button to export the frame, given the name if you want, and so let the image format. You like to save it as and make sure you check the import in the project check box, then just dragged the still image from the project panel to the track above your clip on the timeline on the time markers position. Now, if you want your clip to keep playing normally after the frame hold, you're going to want to make a cut. The time workers position where the still image starts. Then just drive your cut clip to the end of your image, okay, and now it freezes my frame before it continues to play back normally all right, and those are all three ways to freeze the frame. And Premier Pro. Thanks for watching and see you next time.
39. How to Reverse Clip: to get started. I just added a video clip to my timeline that I'd like to reverse. Let's begin by right clicking our clip on the timeline and selecting speed slash duration in the papo. Click the reverse speed check box and hit. OK, all right. And now when I play this back, my clip is reversed. Keep in mind that you can also select your clip on the timeline and use the control our keyboard shortcut to quickly open up the speed slash duration. Pop up all right, and that's it for this tutorial. Thinks they're watching and see you next time.
40. How to Insert Frame Hold on Clip: all right. If you got into this situation where you have clips above or below your video, you'd like to do a frame. Hold on. And when you're right, click your video and select insert frame hold, segment it into its a frame hold, but also split your other clips in half, which isn't desired. So in the past, I just drag my clips back together and leave them cut up, which is kind of a messy way of handling it. I'm going to show you a better way to insert frame hold, so I'm going to do that next to the tracks you'd like to avoid splitting with the frame. Hold, click the toggle lock track button toe, lock them from being edited. Now when I right click my clip and select insert frame hold segment, my friend Hold will get created without splitting or affecting my other tracks. And when you're ready to edit your other tracks again, just click the toggle lock track button again to unlock them. Okay, and that's it for this tutorial. Thanks for watching and see you next time
41. How to Crop Video: all right to get started. I just added a video clip to my timeline that I'd like to crap. Let's begin by right. Clicking our sequence in the project panel and going to sequence settings in here changed the frame size to your liking. I'm going to set mind to 10 80 by 10 80 which will create a square aspect ratio for social media. Okay, and they're my frame size has changed and my resolution will be set to it when I export. Now let's go over to the effects tab and type auto reframe into the search box. Dragged the auto reframe effect on your clip, and it will automatically keep your subject in the frame with the help of key frames created by I. But let's say you have a few clips on your timeline and you want to auto frame the whole sequence. To do this simply right. Click your sequence in the project panel and select auto reframe sequence. Change the aspect ratio to what you'd like. I'm going to keep my net square and click create All right now. This will create a new sequence with all auto for in clips to demonstrate how to crap manually. Instead, I'm going to get rid of these extra clips and the auto from effect. But keep the edited sequences frame size now. Either use the move tool to reposition the part of the video you'd like to crap in the frame or change the clips. Position in effect, controls. This works fine, but there's an even easier way to manually crap a single clip. To do that, I'm going to do all this and go back to my clip. With its original resolution, make sure the timeline panel is selected and used the Control M keyboard shortcut to open up the export window in the upper left corner. Go over to the source tab, then click the crop tool just below it. Drag the handles to prop your video to your liking. Hover over the crop video to see its resolution, which you'll need in a moment under basic video settings and check with and height and click this link. Toggle to turn off the scale. The aspect ratio change the width and height to the resolution you got from hovering over your crop video. Now when you export this, the output will be cropped as you see in the preview with your entered resolution. The final way to crop is if you want to do a video and video type effect for this, I'll crop this top clip on my timeline in this bottom club. All right, let's go over to the effects panel and type crop into the search box drug, the crop of fact under your top clip. Now make sure your top video clip is selected and go over to effect controls. Under Crop dragged the left to right top and bottom values crop out the part of the video you want now look to position and direct the positions values to change where the crop video is in the frame. All right, and those are a few of the best ways across. Video in Premiere Pro. Thanks for watching and See You next, son.
42. How to Loop Video: all right to get started. I just added a video clip to my timeline that I like toe loop. Let's begin by making a cot in the middle of our video to cut it in half, then dragged the top half above it under the next track. Now drive your lower clip so that it's beginning is overlapping with the top clips End. Next, let's go over to the effects panel and type cross into the search box, dragged the crosses all transition under the end of your top clip, and I'm just going to drag the transitions end so that it starts when my clips first overlap. Okay, and there I have my transition at the cut. Now you can drag to select both clips and then, while holding down the Altar Hander keyboard, simply dragged them to make a copy to attach to the end of the first loop. The great thing about this technique is that because I cut its want my clips at the beginning, this cut will be smooth despite looking like a hard cut. With this, you can continue copying and pasting the loop until you're satisfied with its length. If I were to do this a simple way by duplicating my clip. Putting across is all between it and then making copies. You would have cuts without the transition, so you'd have to continue adding the crosses all every time you pasted in new loops. All right. And that's it for this tutorial things they're watching. And I hope you found this useful.
43. How to Export Video for Youtube: all right, so I have a project here that I just finished up and I want to export. To do that, let's go to file export media. You can also just use the control M keyboard shortcut to open up the export settings on Windows and command em on Mac under export settings. Make sure your format is set to H 0.264 And for the preset, just use one of these YouTube preset settings based on your sequences resolution. I'm working with 12 80 by 7 20 resolution, so I'm going to select the YouTube 7 20 preset. If you're not sure what your sequence resolution is, just look under summary at the source where you'll see it under the video tab. Believe the with high frame rate, field order aspect and TV standard alone. But make sure you check the render at maximum depth setting. The encoding settings are also find the way they are. Just make sure the profile is set too high and level is at 4.2. However, if you're footages HDR, make sure you set the profile the high 10 and check rack 2020 color primaries. Then check high dynamic range, but I'm just going to switch my profile back to high. Since this isn't HDR footage for the better, it's having changed the better, including two VB are to pass. Increase a target but Ray and maximum bit rate to 32. This will help make sure that YouTube doesn't compress your video too much. Finally, check use maximum or under quality. Okay, and those are all my settings to save this as a preset click, the first spot next to preset and give it a name. Now you can click the preset drop down and select your preset. Whenever you want to export a video to YouTube to finish up and save your video to your computer, just click export. Okay, and that's it for this tutorial. Thinks they're watching and see you next time.
44. Best Presets for Exporting MP4 and Bit-rate Settings: all right. I just ended a club. I like the export to my timeline, and I'm going to use the control M keyboard shortcut to open up the export settings in here . My preset is usually set to match source high bit rate. Now that sounds like high quality. But if you scroll down to the bit rates having, you will see that my target bit rate is only set to 10 and my maximum is set to 12 out of a total of 50. This would probably be fine if you're working with 10 80 p footage at 30 frames per second or lower, though I find that if I'm working with higher frame rate footage or high resolutions, this doesn't always do the job. So if that's the case, I'd recommend changing the pretty set to adaptive Highbury, which will give you a custom bigger it based on the resolution in frame ray of your video. As you can see, this basically tripled my but Rae and the size of my video because I'm using 60 FPs footage now. While adaptive high bit rate usually gives me the absolute best quality, I'm not to fund of how it tripled my file size as well. I find adaptive medium berry to be a good middle ground that gives me good image quality, along with a slightly lower file size. Of course, you can treat the bury it settings manually and put it above 30 for every video and you'll probably refined. But I find the adapted presets to work really well, all right, and that's it for this tutorial things they're watching and see you next time.
45. How to Export One Individual Clip on Timeline: Recently I was making a video, and I edited in the short worst sound that I think to reuse in other projects. So to export a single clip, let's start by selecting the clip on the timeline, then go up to sequence and select make sub sequence. Okay, now over and the project been. My new sub sequence has been created under my main sequence, so let's double click it to open it up on the timeline. Then every scroll over to the side, you'll see that it created this new sub sequence with just my audio clip. Now I can export the single clip like any other project by using the Control Am keyboard shortcut. If you're working with audiophiles like me, be sure to change the format to MP three. Finally, I'll just click export the export, my woof sound that I can easily reuse in my other projects. Keep in mind that you can export single video clips. Teoh. I just use audio for my example. Okay, and that's it for this tutorial. Thinks they're watching in See you next time
46. How to Save a Frame as an Image for Thumbnail (Export Frame): to get started. I just added a video clip to my timeline. Now let's begin by dragging the time worker on the timeline to the frame that you like to save as an image. You can also use the left and right arrow keys on your keyboard for more precise frame by frame control. Once you have the frame you'd like to save, click this little camera bond under the video preview to export the frame. You can also use the control shifty keyboard shortcut in the pop of name your image if you like. You can also change the format, but I'm OK with J. Peg, so I'll just leave that. Select the browse button to change the location on your computer. You'd like to save your image to, and lastly, you can check important project. If you want a copy of your image saved into your premiere Pro project now, just had okay to export and save your frame. Okay, And there I have my frame imported into my project as an image, and you confined your image on your computer and dragging into Photoshopped to edit it as a thumbnail, if you like. All right, and that's it for this tutorial. Thanks for watching and see you next time
47. How to Make Images Move with Animation: in this tutorial, I'm going to cover simple movement animation to get started. I just added an image above my background video on the timeline. Let's begin by dragging the image on the timeline to where you wanted to first come on screen drug. It sends to adjust inspiration if you like. Then make sure your images selected on the timeline and go over to effect controls in here . Position the time it to where you want your image to start moving. I'm just going to move mine to the very starts about my image animates as soon as it appears on my video. Then direct the positions left and right values to move your image to where you want it to . First show up on the screen. Click the timer bun next to position to create your first key frame, which would represent the starting point for your animation. Next position the time it where you want your image to be done, moving by. Then change the position. Did I use to where you want your image to move to you? By that time, this will automatically create a second key frame, which represents your image. Moving from the first key frame to this point. All right now we have a very simple movement animation. If you want to create additional movements, like moving this area to some other point after the first, you just position the time I do where you want the next animation toe end and then change the positions values to create 1/3 key frame. Not my image moves to the second key frames location and then to the third's. But let's say you want the image to pause in between the second and third key frames animation, and then move again. After the pause, I'm going to delete this third key frame, and instead click a little circle between these two arrows. Next position. This will create an additional key frame at the time his location, which represents the current position of your image. This means that, however big this gap is between key frames two and three is how long your image will stay. Put the second key frames location. Now I'm going to move the time that after the third key for him, and reposition my image again toe automatically create 1/4 key frame. Now, when I play this back my image will move to the second key frames. Location pause at the gap between key frames two and three and then continue after three to the forest location. All right, this works great. But in my opinion, the movement looks kind of stiff. Just without your animation click and drag to select the key frames you'd like to smooth. I'm just going to select all of them, right. Click one of them and hover over temporal interpolation. Select one of these options to smooth out your animation. I'm just going to select auto busier, but you can experiment with the other options and change them at any time. Okay, now my animation looks much smoother, and that's it for this tutorial. Thinks they're watching in See you next time.
48. Animating Your Text!: in this video, I'm going to show you how to create a smooth and professional text animation in Premiere Pro to get started. I just added a video clip to my timeline along with some text on the track above it. All right, let's begin by selecting the text clip on the timeline and going over to effect controls in here. Expand the text settings by clicking this arrow. Move the time. Marker it where you want to start your animation on your text clip. I'm just going to move it to the beginning of mine, then dragged the positions value to move your text to where you want me animation to start from. I'm going to move mine. Just off screen on the left side clicked the stopwatch. Next opposition to create a starting key frame. Next move the time worker to where you want your texts Animation to finish moving by. Men change in the position to where you want your text to move to. This will automatically create a second key for him at the time Markers Location. OK, this works fine, but I also want my textile leave the frame after a set amount of time to do that. I'm going to position my time, Margarito, where I want my text to start leaving the frame. Then click the diamond between these two arrows secrete a key frame for the current position. Next move your time market where you want your tax to finish moving. Then change the position where you wanted to move to, which will automatically create 1/4 key frame. Okay, and there I have a simple text animation, but there's a lot we can do to make this look more professional. Dragged a selector to Middle Cay frames, right click one of them, hover over a temporal interpolation and select continuous busier. Now, doing this will make things a little smoother, but let's make it look even better. Click this arrow next position to expand its settings. Make sure you're to Middle Cay frames I've still selected, so you can see there Blue handles under your second key frame dragged the left circular handled down into the left to create a ramp like this. Then under your third key frame, dragging to write handle down into the right to crew Durant for the ending part of the animation. Okay, and now, when I play this back, my text moves in and out smoothly, with some acceleration from my ramps. This looks good, but to make a text look even better, let's add some blue to it by going over to the effects panel type directional blur in the search box, then dragged the effect on your text clip on the timeline. Make sure your text slip is selected on the timeline and go back up to effect controls. If you're moving your text horizontally, like me under directional blur changed the direction to 90 degrees. If you're moving up vertically, a zero degrees works fine. Now move the time marker so that it's over your first key frame for a position. You can just use these little arrows by position to move the time worker from key from two key frame if you find that easier, and I'm just going to minimize the source text stuff so that I can see my directional blur and position key frames at the same time. Now clicked the stopwatch next of blurred length to create a starting key frame. Increase Leibler length. I'm going to some kind of 30 year, so my text starts off blurry. Now let's move the time worker to where your position second key frame is. Change the blurred links back to zero, which will automatically create a second key frame. So you're Texas and blurry by the time it stops moving. And I'm also going to blur my text as it moves out of the frame by moving the Time Margarito, my positions. Third key frame, the next a blur link. Click this little diamond between the two arrows to create a key frame for the bluest current value. And finally, I'll move. The timer grew to my positions fourth key frame and change the blur linked to 30 to create 1/4 key frame, which will make my text blurry as it moves off screen. Okay, this blur looks decent, but a look even better if we ramp the Blur animation in the same way we did with the position to do that, I'm going to drag this like my middle two key frames for Blur Ling's, then right, click one of them and select continuous, busier Click the arrow next bluewings to see its handles and lines. Now drug your second key frames left handle down into the left to credit slopes similar to the one you did for a position. Keep in mind, I'm dragging the handles for this top line, not the bottom one. Then select your third key frame and drag the red handle down into the right. So that is similar to the position slope on the other side. Okay. And that's all there is to it. When I play this back, I have a smooth looking text animation with Blur in Premiere Pro. Thanks for watching and see you next time.
49. Making a Smooth Image Slide Animation: to get started. I just added a background with you to my timeline, along with an image on the track above. Let's begin by selecting our image in going over to effect controls. Position the time worker to where you want your image to start coming in from off screen. I'm just going to put mine at the start of my clip, then dragged the positions first or second value until your image is off screen, where you want it to come in. Click the stopwatch next to position to create a starting key frame. Move the time margarita, where you want your image to come back on screen. Drag that same positions value again until your images back on screen toe automatically create a second key frame. Okay, now, when I play this back, my image slides in from off screen, but it isn't very smooth to smooth things out. Drag dislike both your key frames, in effect, controls right. Click one of them and hover over temporal interpolation. You can play around with any of these settings, but I find that ease in and ease out tend to look the best. And now when I play this back again. It looks a lot smoother, all right. And that's it for this tutorial. Thinks they're watching and see you next time.
50. How to Draw Shapes and Lines: to get started. I just added a video clip to my timeline. Let's begin by going over to the graphics panel. The out of shape. Click and hold on the pen tool to select either the rectangle or eclipse. Then just drag where you want your shape. This will create a new graphics clip for your shape on the timeline. To make your shape on Phil Justin, check the fill over in the essential graphics panel, then check stroke. You can increase the size of the stroke by dragging the number next to it to change the color of your filler stroke. Just select the color box next to it. Now all this works great if you prefer. You can do this in the editing tab. Just be sure to click anywhere on the timeline decent like the graphic so that when you draw new shape, it will create a new graphics clip for it and the changes properties. You can just go over to the effect controls panel. Okay, and that's it for this tutorial. Things they're watching in See you next time
51. Text Tracking: to get started. I just added a video clip to my timeline, along with some text that I would like to track over this woman. Make sure your text clips duration is long enough to cover what you want to track in your video. Okay, let's begin by using the text tool to select our text in the video preview, move the cursor to the end of your tax and press the enter key on your keyboard. Then type of next on the next line, which will use to help center a text over the subject. Now drag to select all of your text in the preview and go over to effect controls. Open up your text settings. Click the center line button to center your text. Next, move the time worker to the start of you text clip. Now use the selection tool to center the acts on the object you'd like to track. I'm going to position my axe over her face under text. In effect, controls scroll down to the position property clicked the stopwatch next to position to create a starting key frame, Then move the time marker to the end of your text clip in the video preview. Move your ex back over your subject, which will create an ending key frame for the tracking animation. Okay. Now move the time worker halfway between all your key frames and recent or the X of your subject to create a middle key frame. Then keep moving the time worker halfway between all your key frames and re center in the X over your subject to create additional key frames until your Texas accurately tracking your subject. It looks like it's already tracked Find between the first and second key frame. So I'm going to move it halfway between my middle and last key friend. Now, I'll just re center the X over my subject to create an additional key frame. Well, moving the text halfway between key frames works well as a finishing touch. I recommend scrubbing three a video and repositioning the X over any spots Where moves off your subject. Okay. Once you're finished, keep framing. Use the text tool to delete the X from your video. Okay? And I want to play this back. I have smooth text tracking in Premiere Pro thinks they're watching and see you next time
52. How to Zoom In and Out of Video with Animation: to get started. I just added some footage to my timeline. And since I have some cuts, I like to zoom in with an adjustment layer. All right, let's begin by going over to the project panel and right clicking anywhere in the empty space, Go to new item adjustment layer, then drug your adjustment. Lay around in the timeline above where you want to zoom into your clips, and I'm just going to drag the end of my adjustment layer to increase its duration. Next, let's go over to the effects panel and type transform into the search box under the story, dragged the transform of fact onto your adjustment layer. Then make sure your adjustment layer is selected and go up to effect controls. In effect, controls scroll down to the transform of fact. You just added Position the time margarita, where you want to start your zoom in the adjustment layer. I'm just going to put mine right at the start, clicked the stopwatch, toggle next to scale to create a certain key frame, and I'm also going to click the stopwatch next opposition to create a starting key frame for my position. Move the time Margarita where you want your clip to be zoomed and by increase the scale to your liking to create a second key frame bench into the position value so that you clip it zoomed in where you want it to be. This will also create a second key frame for your position. Okay, And now my club zooms in using my adjustment layer to make you zoom. Go fasters lower drug to select your second key frame for position and scale, drag them further away from your first key frames to make the zoom go slower. Dragged them closer to your first key frames to make the zoom go faster. Now, if you want, you zoom to be smoother dragged to select all your key frames, right, click one of them and hover over a temporal interpolation select season. Or he's out. Okay, that looks smoother, not Azuma. All you have to do is position the time margarita, where you want to start zooming your footage back out. Click the little circle between the two arrows next to position to create a key frame at the current position, then click the little circle next to scale to create a key frame at the current scale. Move the time marker to where you want your clip to be zoomed out by. Dragged us like your first key frame for position and scale. Then right click one of the selected key frames and select copy. Finally, right. Click anywhere in the empty space and select pace to pace the key frames at the time. Workers location. Okay. And now when I play this back, my clip zooms in and then zooms out. Thanks for watching and see you next, son.
53. Zooming with Jump Cuts!: to get started. I just added a clip to my timeline that I would like to zoom into by using a jump cut. Let's begin by positioning the time margarita where you want to do men with your jump cut, Then use the razor tool to make it caught of the time workers position. Move the time market where you want your zoom jump cut toe end. Make a cut at that position using the selection tool. So let the middle part of your clip between the cuts you just made and go over to effect controls. And it's also a good idea to move your time worker over the middle of your clip so that you can see it as you edit it. In effect, controls increase the scale of the clip to your desired amount, and you also might want to adjust the position so that you zoom is centered where you'd like it. Okay, and now when I play this back, I have a nice looking zoom jump cut in Premiere Pro. Thanks for watching in See you next time
54. The Magnification Effect: to get started. I just added a video clip to my timeline with the swan that elected Zoom in on while leaving the rest of the video alone. The best way to do this is by going over to the effects panel type. Magnify into the search box, drag the magnifying effect onto your clip on the timeline, make sure your clip is selected and go over to magnify in effect, controls. Under magnify. You consent the shape to either a circle or a square. I'm going to stick with the circle to change the center position of your shape. You can either click the center setting and drag around its anchor point in the video preview. Or you could just drag the centers values in effect controls to change it manually. The magnification is heading is going to affect how much it zoomed in. I'm going to increase this to 200. The size setting will affect how bigger shapers and you can also increase the feathers heading. If you don't want your zoomed in shape, toe have sharp edges. Okay, The magnifying effect works great, but I'm going to do this and show you the other way to do it. Go back over to the effects panel and type transform into the search box under the store. Dragged the transform effect on your video clip. On the timeline. Make sure your video clip is selected and then scroll down to the second transform effect in effect, controls. Under transform, click the circular square to create a mask around the object you'd like to zoom in on. And you can just drag the masks handles to adjust its size or dragged the center of the mask to adjust its position. Now, simply increase the scale to zoom into the part of your video covered by your mask. Lastly, you can also increase the masks feather if you don't want the sharp edges of the masks shape. Okay, and that's all there is to it. Thanks for watching and see you next time.
55. How to Zoom with Motion Blur: all right to get started. I just added a video clip to my timeline that I'd like to zoom into. Let's begin by going over to the effects panel and then type transform into the search box under the store, dragged the transform effect onto your video clip, then make sure your video clip is selected on the timeline and go up to effect controls in here under the transformer. Fact. First, let's uncheck use composition shutter angle to make our motion Blair work, then increase the shutter angle all the way up to 360. So you get the largest amount of motion blur. Okay, now let's position or play head where we want resume to start under the transform effect clicked the stopwatch next to scale to create a starting key frame. And if you want to zoom in on something off center, clicked the stopwatch next to position to create a starting key frame for that as well. Okay, now that we have are two starting key frames, let's move the play head where we want her footage to be finished zooming and by notice how I want my zoom to end right after my first key frame. This way my zoom is fast, which will in turn make my motion blur. Stand out more. Now let's increase the scale to your desired zoom amount to create a second key frame for scale. I recommend increasing it to at least 300% to get a really obvious motion blur. And I'll also change my positions value to zoom in on something I want. Okay. And now when I play this back, I have a nice looking zoom effect with motion Blur to make my zoom look even smoother. I'm just going to drag to select all my key frames. Then right click one of them hover over a temporal interpolation and select season. All right, now, my zoom looks smoother and more professional. If you want to zoom your clip back out with motion blur, just position the play head where you want to start zooming back out. Click the little circles next to scale in position to create key frame, so premiering knows when to start zooming out. Then move the plate head to where you want to be finished, zooming out by finally click this little curvy arrow next to position and scale the curvy a robot and just creates key frames that reset your video back to its original position and scale. Okay, And now when I play this bag, my clip zooms in for a bit and then zooms back out when it hits my second set of key friends. All right, that's offered this tutorial things they're watching and see you next time.
56. How to Blur Entire Video: in this video, I'm going to show you how to blur the background in Premiere Pro. To begin, I just have a background clip that I'd like to blur. Let's start by going over to the effects panel type Gaussian blur into the search box dragged the effect on the clip you'd like to blur. Make sure your clip is selected and then go up to effect controls. Position the time it to where you want your blur to start. Under Gaussian Blur clicked the stopwatch next to the blurriness property to create a starting key frame. Its value should be set to zero. Then, with the time had a little bit forward, increase the blurriness value to your liking. To create your second key frame, be sure to check therapy edge pixels so that there isn't a black border around the clip. All right, and now when we play this back, we have a nice looking blur effect to go from your blur back to a clear video. Move the time they do where you want that to happen. Next to the blurriness property, click the circle button between the two arrows to create 1/3 key frame, then move the time at a little past. Its current location change the blurriness value 20 to create unending key frame. And now the video goes from blurry. Back to clear. Okay, that's it for this video. Thanks for watching and see you next time.
57. Blurring Part of Video: to get started. I just added a video to my timeline with a mega man logo that I'd like to Blair out. Let's begin by going over to the effects panel and typing Gaussian blur into the search box . Drag the effect on your video clip on the timeline, make sure your clip is selected and then go up to effect controls under Gaussian Blur. Click either the square, the circle, depending on what shape you want. Your blurred area to be. This will create a new mask. Drag the center of the masks so that is positioned over the object You like to blur, then drag the handles so that the mask fits snugly around your object. Now back over. In effect, controls increased. The blurriness, your liking. Okay, this works great, but I don't really like how square my blur looks to fix that. Just increase the masks feather. This looks much better. But let's say you want to blur a moving object like this enemy here. Keep things simple. I'm just going to delete and Riyadh my Gaussian blur effect to my video. Now my enemy here is circular. So I'm going to use a circular mass this time under Gaussian Blur, reposition and resize the mass so that it fits tightly around your moving object. The next a mask path. Click the play button to track your object and create key frames for the animation. Once it's finished, just increase the blurriness in mass feather properties to your liking. Okay? And I want to play this back. My moving object has been blurred. All right? And that's it for this tutorial. Thanks for watching in. See you next time.
58. Automatic Tracking for Blurring: to get started. I just had it a video clip to my timeline worriedly to automatically track and blew my subjects phase. Now I'm going to go over to the effects panel and add Gaussian Blur to my clip. But keep in mind that automatic motion tracking will work the same for all effects that allow it over. In effect, controls. Make sure your time markers position where you want to start masking and then school down to the effect you added. Underneath, they click on one of these masking shapes. I'm wearing a face, so I'll just use the circle. Position your mask over your subject and use a handle so fitted properly. Then click the play button next to mask path to automatically track your subject. Okay, now that I have my mask following my subject, I'm just going to increase the blur amount to blur the mask. Now, this looks quite good, but if you need to make manual adjustments, just stop the video were needed and move the mask around a little to adjust it. I'm also going increase my mass feather a little bit, so my mask looks less rigid. One less thing to keep in mind is that if you decent, like the mask at any point and want to make adjustments later on, just to re select it here to show it in the playback window, all right, and that's it for this tutorial thinks they're watching in See you next time.
59. How to do Split-Screen Effect: to get started. I just added to video clips to my timeline, and I have them stacked on top of each other. Let's begin by selecting our top clip on the timeline and going over to effect controls in here. Dragged the positions first value to move your top flip over to the right side. Okay, and there I have a simple split screen effects, but my subjects aren't really centered in the frames. To fix that, let's go over to the effects panel and type crop into the search box. Drag the crop effect under your top video clip. In effect, controls under crop changed the left or right values to crop out the part of the video you want, then dragged the positions first value to reposition your video in the frame to change what's in the frame in your other clips. Select your bottom video clip on the timeline, then go over to effect controls and change its position. Okay, and there have a nice looking split screen effect. If you want to add a line between your split screen, select the pen tool from the toolbar. Click at the very top of where your videos air split and then click of the very bottom to form a line. Now, in effect, controls under your shape. Make sure you have both Phil and Stroke checked and set to the same color for your line. You can change the strokes value to adjust the thickness of your line. And finally, I'll just use the selection tool to drag the end of my timelines graphics so that my line matches my video clips. Durations. Okay, and that's it for this tutorial. Thinks they're watching and see you next time.
60. The Sliding Split-Screen Effect!: in this video, I'm going to show you how to create a sliding split screen effect. It started. I just added a background video to my timeline and imported two clips for the split screen effect. Let's begin by dragging the first clip for a split screen under the track above the background video. Make sure its position to where you want the effect to start. Then, during the second video for you split screen under the track above the one you just added. Next, go over to the effects panel and type crop in the search box, dragged the effect on both of the clips you want to use for the split screen, select your top split screen clip and then go up to effect controls. Scroll down to where the crop effect is change the left and right values so that together they equal 50%. This way, the clip will fill up half the screen. I'm going to use 25% for both left and right. But these numbers will probably be different for you based on what you want a crop. Just be sure that added, together the equal 50. Once you're finished up to the position value under motion and dragged the positions first value to the laugh to move the clip until it's barely touching the edge of the frame. All right, we're done with this clip for now. So go back down to the timeline and click the I toggle to hide it so that we can fully see the other clip. Select your other split screen clip and go up to effect controls. Once again, scroll down to the crop effect and changes left and right values to get the crop that you like. While making sure that the two together equal 50%. When you finish with adjustments, go up to position and dragons first value over to the right, so that is barely touching the right edge of the screen. Then re click the I toggle so that we can see both of the split screen clips again. All right, now that we have our clips in place, let's add the animation. Let's start with the right clip, since we already have it open In effect, controls position the time ed to the start of the cliff. Click the stopwatch toggle next position to create a starting key frame drug. The position second by you. It's why value until the clip is just slightly off the bottom of the screen. Press the right arrow on your keyboard 15 times. Move the time, had 15 frames forward, then direct the positions. Why value into the clip is fully back on the screen, creating the second key frame. Okay, this looks good. Now let's do the same thing with our other clip, but moving in the opposite direction. Select your other split screen clip on the timeline and go up to effect controls. Position the time ahead of the start of the clip clicked the stopwatch title. Next to position to create a certain key frame. Drag the positions. Why value until the clip is slightly off screen, but at the top this time, press the right arrow key on your keyboard 15 times. Move the time had forward 15 frames, then dragged the positions. Why value until the clip is fully visible again in the frame. This will create your second key frame, all right, And now when I play this back, we have a nice looking, sliding split screen effect for a final touch. I'm just going to smooth out the animation a bit. To do this, click and drag dislike both of your key frames, right? Click them and go to temporal interpolation season events like your other split screen clip and go up to a fact controls and do the same thing by dragging Dislike both of your key frames, right clicking one of them and going to temporal interpolation season. And now when I play this bag, it looks smoother and more professional. All right, and that's it for this video. Thanks for watching and see you next time.
61. How to Color Grade!: to get started. I just added a couple of video clips to my timeline that I'd like to make look better with color grading. Let's begin by selecting our first clip and going over to the color panel appear. If you don't see it, just go to Window Lou Metric color in the loo metric color panel opened up. The basic correction section in basic correction will mostly be playing around with these tones. The first thing you might want to change is the exposure which controls how dark or light your video is minus plenty bright. So I'm going to leave the setting alone. My video does look kind of flat, though, so let's increase its contrast. The contrast is a scale of difference between black and white. Then I'm going to decrease the highlights, which will tone down the brightness of the brightest parts of my clip. I like how this makes my leaves calories pot more. Next, I'm going to decrease the shadows that darken up the darkest parts of my video. Since I like my dark foliage and water to stand out more and also decrease my blacks to make my water even darker. Since I really like it. Start, look to really live in your video up, you can increase the saturation a bit. I think this Saturday look brings out the colors in the shop, but it comes. Sounded preference and the shot up here. I'll make my temperature more orange since it's a fall day and I want a warmer look. Okay, and there's my original video and next to my new one, which looks much more lively. All right, Next up, I have the city landscape that looks kind of flat. First of all, I'm going to decrease the exposure since I think this scene is a little too bread. No, let's increase the contrast to bring out some color that this video is sorely missing. Next will decrease the highlights, since I think the brightest parts of this video are a bit too bright and also decrease the shadows to make the darkest parts of my video darker. I still think my whites are a tad too bright. It's all lower. Those a bit then will decrease my blacksmith God buildings, black windows a little darker. It also might not hurt to all my saturation, a tiny amount to make my Browns and blues pop a little more. And since this looks like a dreary day, I'm going to make my temperature cooler. Okay, Side by side. I really think this new video has more life to it, All right? And that's how I call a great videos. I hope this guy I'd give you some insight as to what the different tones do and how to use them. Thanks for watching and see you next time.
62. Adding Filters: to get started. I just added a video clip to my timeline that I'd like to add a filter to. Let's begin by going over to the effects panel in here, you'll see a Loom Entry Presets folder, so go ahead and open that up. Now there's five broad categories for filters. I'm going to start with the cinematic ones. When you select each filter, you'll get a little preview that's highlighted and gray on the side to see how it looks on your foot is just click and drag the filter on your clip on the timeline. If you don't like how it looks, just use the Control Z keyboard shortcut ton. Do adding it. Then just drag a new filter on your clip to experiment with different looks. And, of course, you should try out the other categories, like monochrome for black and white. The speed looks. Filters are also good. One to try to get some pretty unique looks. Okay, and that's it for this tutorial. Things they're watching in See you next time
63. How to Make Video Black and White: to get started. I just added a video clip to my timeline that I'd like to make black Hawaii. Let's begin by going over to the effects panel. Type white into the search box under image control. Dragged the black and white effect on your video clip on the timeline. Okay, and now I have a simple black and white video. This works great, but let's say you want a black and white effect that has a little more contrast or a slightly different look. I'm going to Justin do adding this black and white effect. Now go back over to the effects panel and type monochrome into the search box. Under monochrome, you should see a bunch of different presets for a black and white effect. Select them individually to see a preview of how each will look once you find one you like dragon under your video on the timeline. All right, and I have a different black and white effect with more contrast. OK, that's it for this tutorial. Things we're watching in See you next time
64. How to Color Tint Video: to get started. I just added a video clip to my timeline that I like to change the color off. Let's begin by creating a new adjustment layer by right clicking on the project panel and going to new item adjustment layer. Then drag your adjustment layer above your video clip on the timeline. Next, go over to the effects panel and type tent into the search box. Drugged the tint effect under your adjustment layer. On the timeline, make sure your adjustment layer is selected and then go out to effect controls. If you only want to change your video to a single color, changing the map way too will usually look the best. Reduce the amount it if you want a more subtle effect. If you want a different, lighter looking effect, change the map way to backed away and change Matt Black to to a different color to create a multicolor blended 10. Just change both colors. Now this looks good, but the reason I added the adjustment layer earlier is because it allows you to change. The opacity is blend mode for your tent. This way you can create interesting blended color effects. If that's what you're going for. Finally. If you want to animate your tent in and out, start by moving the time head to where you want to begin showing your tent clicked the stopwatch next to amount to 10. To create a starting key frame. Change the amount to 10 to 0, then move the time ed to where you want. Your tend to be fully shown by increase the 10 to the amount of your choice. You create a second key frame. Then move the time it to where you want your tent to be removed by and change the amount of 10 back to zero to create 1/3 key frame. Okay, and now my tent goes in and out, all right, and that's it for this tutorial. Things they're watching and see you next time.
65. White Balance Correction: to get started. I just added a clip to my timeline where the whites look pinkish in off to fix us. Let's begin by selecting our clip and going over to the color tab under white balance, Click the WB Select area dropper tool. Then click the white area you'd like to fix. Okay, right away. This looks a lot better if it still looks a little off just recent like the dropper tool and select the area you'd like to correct. All right, that looks much better. And that's it for this tutorial. Thinks they're watching in See you next time.
66. How to Use Green Screen Footage: to get started. I just added a video to my timeline that I'd like to overlay the screen stock footage on top of Let's begin by dragging the green screen footage from the project panel under the track above our video on the timeline. Then go over to the effects panel. Type ultra into the search box dragged the ultra key effect under your green screen video clip. On the timeline. Make sure your green screen video selected on the timeline and go over it to effect controls under ultra Key, Click the Dropper and next to key color, click anywhere in the green space of your video preview to get rid of the green. Okay, and when I play this back, my green tune footages over, laid nicely on my video. That's it for this tutorial. Thinks they're watching in See You Next time
67. How to Add Diffused Highlights: in this tutorial, I'm going to show you how to add diffused highlights. Two clips to get started. I just added a clip to my timeline that I'd like to add diffuse highlights to let's begin by holding down the all key on your keyboard and dragging the clip under the track above to duplicate it. Max. Let's head over to the effects panel and type Blue Mickey into the search box. Dragged Lewicki effect on your top club over. In effect, controls. The threshold should already be set to 100% but if it isn't, increase it to 100. Then go back over to the effects panel and type camera blur into the search box. Dragged the effect on your bottom clip, which will create this nice looking diffused highlights effect in effect, controls under camera blur. You can change the blur amount based on how strong you want the effect to be. Okay, and that's it for this tutorial. Thanks for watching and see you next time
68. How to Render Timeline Clips for Smooth Playback: okay to get started. I have this last video clip on my timeline with some trippy effects that aren't playing back properly. Hence the Sarette Bar. To fix this, you can render an individual clipped by selecting on the timeline and pressing the enter key on your keyboard. Okay, And now when I play this back, it works like a charm. If the enter key doesn't work for whatever reason, you can also select your clip and go up to sequence render selection. And I'm just going to cancel this because I already showed you the final result. But let's say you want to run your all your clips on the timeline at once. To do that, simply go back up to sequence and select. Render in to out. Then once this is finished, all your clips will play back smoothly and have the green bar over them. All right, And that's it for this quick tutorial. Thinks they're watching and see you next time
69. How to Duplicate Clips: to get started. I just added a video clip of a cat and a magnifying glass image to my timeline to duplicate and make a copy of any clip on your timeline. Just hold down the all key on your keyboard while clicking and dragging the clip. You can do this as many times as you want, and it works for any type of media. You can even drag, disliked a bunch of clips of once and then hold down the all key while dragging your selection to make copies of the entire selected group. Okay, and that's it for this video. Thanks for watching and see you next time.
70. How to insert Clips in Front of Others: to get started. I just headed to clips in my timeline so that I have some footage to work with. Let's begin by heading over to the project panel. Now, to insert a clip at the start of your timeline, hold down the control key while dragging your clip to the very start of the timeline. All right, that works. But I'm going to undo this to show you how to insert a clip in between two clips to do this , hold down the control key and drag you clip directly after the clip. You want the new clip in front of Okay. And that's all I have for this tutorial. Thanks for watching and see you next time.
71. How to Replace Clips on the Timeline (swap them out): do be, and I added a couple clips of my timeline so that I have some footage to replace. All right, let's start by going over to the project panel while holding down the all key dragged the footage you'd like to use onto the timeline clip you'd like to replace. Now you'll notice that while this work to premier dinner adjusted duration of our clip to fit the one we replaced it with, since our original clip was longer than a replacement clip, we get some black video on the end represented by some diagonal lines on the clip. Unfortunately, there's no way to avoid this when you're inserting your new clip, so you'll have to do a quick manual adjustment. Simply hold down the control key and position your cruiser at the end of your clip. Your cruiser should turn into a yellow bracket. Click and drag the end of your clip to adjust situation. So better ends right before the diagonal lines. Now, if you're old, clip is shorter than the new clip your inserting. You'll have to extend your clips duration in the other direction to see all your footage. Okay, and that's all I have for this video. Thanks for watching and see you next time
72. How to Join Clips Together on the Timeline: to get started. I just added some clips to my timeline that I'd like to join together. There's a few different ways to do this, but let's start with one. You'll probably use the most nesting. Alright, begin by dragging on the timeline to select the clips you like to join. You can also do this by holding down the shift key and selecting each clip individually. Once you have your clip selected, right, click one of your selected clips and select nest name your nested sequence if you'd like and hit OK, all right, and they're enjoying my two clips together in one nested clip. Now you can add effects or whatever you want to the nested clip, and it'll be applied to both of the clips you join together, and you can change the effects properties as normal by selecting the clip and going over to effect controls. If you ever want to see the clips individually, just double click your nested sequence to open up a new tab on the timeline that shows its contents. You can even apply affects each clip individually within the nested sequence. If you want to go that route, think of nesting as a container that's just holding your clips inside of it, and you can either apply changes to the whole container or open it up and apply changes to each piece inside it. Once you're done messing around in the nested sequence, just click your timeline tab to go back to it. The next way to join clips is to select the clips you'd like to combine like before, right click one of them and select make sub sequence. This works exactly the same as nesting, but leaves your original clips on the timeline alone and instead creates a new sub sequence over in the project panel that contains your combined clips. Just dragged the subsequent on of the timeline, and it will behave the same as in nested sequence like before. You can double click it to see the two clips that were combined inside the container. Okay, this works fine, but let's say you don't want to actually create a container and instead just want a group clips together so that you can move them around more easily on the timeline. To do this select eclipse, you'd like to group right click one of them and select group Now, when I select one of my group clips, it will select anything that it's grouped with, and when I move them, they move together. The downside of this, though, is if I apply an effect to my group clips, select a clip and go to effect controls. It won't let me change the effects properties because it's still treating them as two different clips. All right, and those are the ways to join clips together in Premiere Pro. Thanks for watching and see you next time.
73. How to Rejoin Two Clips Without Nesting: All right. So let's say you have a clip on your timeline and use the razor tool to make a cut later on . You might decide that you don't want this cut, but you don't really wanna have to Messi either. If you didn't change either clips duration of the cut, you can simply select the selection tool than right. Click the cut and select joint through edits. Okay, that worked great. But keep in mind that this won't work if you change the clips duration near the cut by trimming it or changing its speed since I trim my first clip at the cut, joined through. Edits is great out now because it can't reconnect. My trim clip, despite this limitation, is pretty flexible and that it'll let you rejoin your clips with effects on them or volume changes. It'll just supply whatever effect you have to the rejoined clip. OK, and that's it for this tutorial. Things they're watching and see you next time
74. How to Merge Audio Clips Together: to get started. I just have a bunch of cut out audio clips on my timeline, along with a pretty sizable gap in between the last two, not emergencies all together, and create a single audio track. I'm going to click and drag on my timeline to select them all. Then I'm going to right click them in Select Nest. Finally, to convert my nested sequence back into a single audio track. I'm going to right click it and select Render in a replace. All right. Now emerged all my cutout clips together into one audio track. Okay, that's it for this tutorial. Things they're watching and see you next time.
75. How to Move Multiple Clips Together on Timeline: the most straightforward way to move multiple clips around in your timeline issues attract select forward tool with the tool selected. Click on the first clip. You want to move, and all the following clips will be selected now. Just dragged the clips to where you want to move them. Another way to move multiple clips together is by simply using the selection tool and dragging in the empty space on your timeline to select your desired clips, not just dragged them to move them around. This works great, but let's say you only one move the second and last clip to do this. Hold down the shift key while clicking on each clip. You like to move now. Just dragged them to move your selected clips. All right, and that's it for this tutorial. Things they're watching in See you next time
76. How to Loop Clips During Timeline Playback: to get started. I just added a couple clips to my timeline that I like the loop during my previous playback . Begin by clicking this little ad bond under the video preview dragged the loop playback button under the toolbar. Under the video preview, Click it to turn looping on Now, whenever my time had gets to the end of the last clip on my timeline, the video. A loop in a replay. But let's say you only want a loop part of your clips to do this position. Your time I do where you want to start the loop. Click the mark in Baden under the preview. Then with the time it to where you want to end the loop, click the mark out button, all right, and I want to play this bag. My clip will loop on my selection. You can also move clips around when this is happening, if you want to experiment with adding something to the end of it. And finally, once you're done with your in and out points right, click up here and select clear in and out. Okay, that's it for this tutorial. Thinks they're watching it and see you next time
77. How to Rewind Clips during Timeline Playback: to begin. I just added a video to my timeline to demonstrate how to rewind video while editing. All right, let's start by positioning the time and where we want to start your whining from now. Just presage a key on your keyboard. One store wind the video. Press it again to speed up their winding. This trick also works in the source panel. If you prefer to add it that way. Okay, and that's offered this video. Thanks for watching and see you next time.
78. How to Speed up Clips during Timeline Playback: to begin. I just said it a video clip to my timeline to work with. Click anywhere inside the timeline panel or program panel. Now all you have to do to speed up the video is presi elke twice to speed up your video even faster. Continue pressing the L Key. You can also slow the video down by pressing the J Key to bring your video back to regular speed. Just pause it by using the space bar and then press it again to resume playback. Normally, keep in mind that you can also speed up the video and the source preview pain by using the same keys. Okay, and that's it for this tutorial. Things they're watching and see you next time.
79. How to Add Cinematic Title Text: in this video, I'm going to teach you how to create cinematic titles in Premiere Pro to get started. I'm just going to right click in my project panel and then go to New Item Black Video. Then I'll drag the black video on my timeline and extend it to round seven seconds. If you can't see the individual seconds like me dragged this part down here to zoom into your timeline. Next, click the text tool and type out your desire text, and I'm just going to drag the text clips duration so that it matches my black video. Make sure Texas selected and go over to effect controls in here. I'm using the Latell phone, which is available for free on the Adobe Fonts site. I'm also going to set my font size to 90 then change the tracking setting to 300 to create some spacing between your letters. The center of the tax. Go over to the graphic stab up here, select data and then click these two alignment buns the century text horizontally and vertically. Position your time marker at the start of your text clip and go back up to effect controls in effect controls. Open up the opacity settings. Change the opacity 20 To create a starting key frame, move your time marker to the two second mark and change the opacity to 100. To create a second key frame. Move the time worker to the four second mark and click the circle decreed a key frame at the time. Workers current position. Move the time worker to the six second mark and change the opacity 20 to create 1/4 key frame. Okay, in our text fades in and out, but let's make it look smoother. Drag to select all your key frames and then right click one of them in select auto busy air . Okay, now that looks smoother and more professional. Next, let's go up to the motion settings. Reposition the time worker and the start of your text clip clicked the stopwatch. Next to scale. To create a starting key frame, move the time worker to your last key frames position and increase it to 1 10 Now a text looks like it's growing slightly for one final touch, I'm going to go down to the effects panel and search for Gaussian Blur, drag Gaussian blur on your text layer. Make sure you text layer is selected and then go back up to effect controls. Position your time marker of the start of your text clip. Under Gaussian Blur clicked the stopwatch next of blurriness and change the blurriness to 50 to create a certain key frame. Move the time marker to the two second mark and change of the blurriness back to zero. Then move the time marker to the four second mark and click this little circle next blurriness to create another key frame at zero blurriness. Move the time worker to the six second mark and change the blurriness back to 50. Okay, and now when I play this back, I have nice looking cinematic text that blurs in and now in Premiere Pro Thanks for watching and seeing extent.
80. Simple Text Reveal: in this video, I'm going to show you how to create an easy text reveal effect to get started. I just added some text. My timeline. Let's begin by using the selection tool to move or attacks a little below where we want it to be revealed. Once it's in place, go over to the effects panel type crop into the search box, dragging the crop effect on your text track on the timeline up in effect, controls for your tax scroll down to the crop effect you just added. Increase the bottoms value so that the crop is barely hiding your text. Next, click the drop down arrow. Next it transform under your tax position. Your time it to where you want the text revealed to start at clicked the stopwatch next to position to create a starting key frame. Move the time head to where you want the text to be revealed by then, decrease the position. Why value until you can see your text. This will create an ending key frame for the animation. Okay, and there we have our text reveal effect. If you wanted to look a little smoother, click and drag to selector to key frames. Right. Click one of them and go to temporal interpolation. Ease in. All right. And there you have it. Thanks for watching and see you next time.
81. Advanced Text Reveal with a Line: in this video, I'm going to show you how to do a text reveal effect in Premiere. All right to begin, let's add a solid color background by right clicking in the project panel and going to new item color. Matt. So let the color of your choice and hit OK, drag the color map from your project. Been onto your timeline. Now let's hypertext select the type, tool and type of attacks in the program panel. Next, we need to add our line. Go to file new Legacy title or use the Control T keyboard shortcut and the title designer. Select the line tool while holding down the shift key. Click and drag to create a straight line above your tags. Make sure that your line is longer than you're taxed. It's also a smart idea to increase the lines with because it will make the next steps easier once you're satisfied with your line dragon so that it's touching the top of your text. Okay, we're done in here so close out of the title designer drag the title you just created under the track above your tax on the timeline. Now let's go over to the effects panel and type crop into the search box. Drug. The effect on your text clip up in effect, controls for the text clips scroll down to the crop effect. Increase the bottoms value so that the crop runs right up to your line. Completely covering the text clicked the stopwatch bun to create a starting key frame. Move the time had where you want the texture. Reveal animation end. Select the crop effect so that you can see the crops bounds during the crops. Bottom Handle to reveal the text creating your second key frame. Okay, now that we ever text being revealed, we just need to animate our line to sync up with the crops. Animation. Click the bottom properties Left Arrow to move the time ed to the crops. First key frame. Select your title on the timeline. In effect, controls for the title clicked the stopwatch toggle next to position to create the starting key frame. Re select your text clip on the timeline and scroll down to the crop effect. Click the bottom properties right Aero. To move the time head to your second key frame selector title again. Now in effect, controls our time had disposition exactly where the crop ends, which is where we want our lined end To decrease the positions. Why value until your line is just under the tax? All right, now what? I play this back, we have a nice looking text reveal effect. Keep in mind that you can do this. Reveal from the bottom to the top or from the sides and said You just need to change which direction you're animating your crop in. Okay. And that's all for this video. Thanks for watching and see you next time.
82. Adding Motion Blur to Text: in this video, I'm going to show you how to add motion. Blur two images and text to get started. I just added some text to my timeline. Let's begin by heading over to the effects panel type, transform into the search box and then drag you onto your text or image up in effect control. Scroll down to the transform effect. Now, I'm just going to create a simple rotation animation using the transform effect. I just added to my tax. It's super important that you create your animation using the transform effect and not by using the motion or text transform properties or the effect won't work. Once you're finished adding your animation and check the use compositions, shutter angle check box that increase the shutter angles value to your liking to create the motion blur. All right. And now we have a really easy motion. Blurred. Okay, that's it for this video. Thanks for watching and see you next time
83. Blurred to Focused Text Effect: in this video, I'm going to show you how to do it. Blurred to focus Text effect in premiere to again I just added a video with some text to my timeline. All right, let's start by heading over to the effects panel in typing Gaussian blur into the search box, dragging the effect onto your tax layer. Now go up to effect controls for the taxslayer in here. We're going to start by adjusting the text capacity so that our text fades in. Move the time head to the start of the club. Make sure the opacity stop. Audubon is turned on, and then chin geo passes value 20 to create a starting key frame, dragged the time, had a little past his current position and change the opacity to 100 to create the ending key frame. Okay, now that we have our fate, lets out the Blur scroll down to the Gaussian Blur effect that you added earlier. Move the time head to the start of your clip, changes the blurriness to 100 clicked. The stopwatch struggled to create your starting key frame. Since you want to text to come out of the blur and into focus. Right? When it's finished rating in, we're going to want the time. Head of the location of our opacity is ending key frame. Go up to the opacity property and click the right arrow next to the blue key frame bun to move the time and to the capacity second key frame. Now, when we scroll back down to the blurriness property, the time had his position in the right place change. The blurriness is value 20 to create your ending key frame. All right. And now when I play this back, we have a nice texts blurred to focus. A fact in premiere. Okay, that's all for me. Thanks for watching and see you next time.
84. Stretching Text Effect: in this video, I'm going to show you how to do this text stretching effect to get started. I just headed a background video to my timeline. Let's begin by selecting the type tool and adding some texts of the video. Then select the move tool dragged a little circle, which represents the anchor point to the lowest point of your taxed. So for me it will be right under the G. This is where we want the stretching animation to start from now over. In effect, controls scroll down to the transform properties for your taxed. Uncheck the uniforms scale check box position the time it at the start of your tax clip, Then change the vertical scale to zero. Click the stopwatch toggle next vertical scale to create your first key frame. Press the right arrow key on your keyboard 12 times. Move the time head forward. 12 frames. Change the vertical scale toe 1 20 to create your second key frame. Press the right arrow key. Another five times moved The time had forward five frames. Change of the vertical scale to 95 to create 1/3 key frame. Press the right arrow key. Five more times moved the time had forward five more frames. Change the vertical scale to 100. You create your last key frame. All right. And now when I play this back, we have a nice looking stretching text effect in premiere. Okay, that's all for now. Thanks for watching and see you next time.
85. Flickering Text Effect: to get started. I just added a background video along with some text in my timeline that I'd like to make flicker. Let's begin by selecting our text and going over to effect controls. Position the time and where you want your text to start flickering. I'm just going to position mind at the start of my clip, Click the little circle next to opacity to create a certain key frame. Press the right arrow key on your keyboard. Wants to move the time it forward. One frame. Change the opacity 20 To create a second key frame. Press the right arrow key on your keyboard to move the time. Moved forward Another frame. Change the opacity to 100 to create 1/3 key frame. Press right arrow key again and change the capacity to zero to create 1/4. He frame okay, and I want to play this bag. My text flickers twice now to easily make it flicker more times drag to select all four of your key frames, right, click them and select copy. Position the time at at your last key frame and press the right arrow key on a keyboard to move the time had forward one frame, then right? Click and select paste Okay, in our text flickers more times. Keep positioning in the time that one frame ahead of your last key for him. And copying and pasting your key frames until your text flickers long enough for you. All right? And that's it for this tutorial. Thanks for watching and see you next time.
86. Text Pop Effect: in this tutorial, I'm going to show you how to make text pop in and out in Premiere Pro to get started. I just added some text in my timeline on the track above some background footage. Let's begin by selecting the text clip on the timeline and going over to effect controls in here. Make sure time marker is positioned at the start of your text clip, then go over to where your Texas in effect controls and open up its settings. Scroll down to the transform, sending for your text and change of the scale to zero. Then click the stopwatch next to scale. To create a starting key frame, press the right arrow key on your keyboard five times to move the time worker forward five frames Change of scale to 1 25 to create a second key frame. Press right arrow key on your keyboard for more times, move the time worker forward four frames. Change of scale to 95 to create 1/3 key frame. Now press right arrow key on your keyboard. Three more times. Move the time worker forward three frames. Genius scaled back to 100 to create 1/4 key frame. Okay, and now when I play this back, my text pops in tow. Pop it out. Move the time record where you want your text to pop out. Click the little circle between the two arrows to greet a key frame. For the scales. Current value. Press the right arrow key on your keyboard three times to move the time worker forward. Three frames. Change the scale to 95 To create a six key frame. Press the right arrow key on your keyboard four more times. Some of the time worker forward four frames Changes scale to 1 25 to create 1/7 key frame. Finally, press the right arrow key on your keyboard. Five more times. Move the time worker forward five frames Changes skills. Zero to create an eighth and final key frame. Okay, and I want to play this bag. My text pops in and then pops back out when it hits my second set of key frames. Now this looks pretty good, but let's with the animation a bit by dragging dislike their 1st 3 key frames, right click one of the selected key frames in select busier, then dragged this life your last three key frames break like one of them and select busy air. Notice how I left the fourth and fifth key from alone Because I want the text remains still and not a man occur between my texts popping in and out. Okay, And now when I play this back, my text smoothly pops in and out. One thing you might notice is your text popping in from the corner and not the center. To fix this, go down here and select your selection tool and then select your text. You should see a little circle and one of the corners representing the anchor point, which controls where your text pops in from. If you don't see the anchor point, go back over to effect controls. And make sure your Texas selected now simply dragged the anger point to the center of your text. All right, and all my text pops in and out nicely from the center, and that's it for this tutorial. Thinks they're watching in See you next time
87. Flashing Colors Text Effect: in this video, I'm going to teach you how to create a flashing color text effect like this. The first thing I'm going to do is right. Click in my project panel and go to new Item Black Video. Keep in mind that you can do this effect over regular video to next. Drug your video onto your timeline. I also have an audio clip here that I'm going to add as well. Select the type tool in type your text on your video. Make sure your Texas selected and then go into effect. Controls. Change the text. Fill color to something other than black or white. I'm going to use red. It's important that you do this or the effect won't work. Next. Let's head over to the effects panel. Tight color balance into the search box. Drag the effect called color balance HLS on your track. Make sure it's the one with the HLS next to it. Go back up to effect controls for your text clip and scroll down to your color balance effect. Position the time head to the start of your clip, then click the timer next to the Hugh property to create the first key frame. Move the time head to the end of your clip, and then increase that you toe automatically create your second key frame. The more you increase your cue, the faster the flashing colors will be. And now when I play this back, we have a nice looking, flashing color effect in premiere. Well, I did this with text for this video. Keep in mind that this effect work for anything with a color. Okay? And that's all for now. Thanks for watching and see you next time.
88. Growing Text Effect: in this video, I'm going to show you how to animate text like you see in this chilies commercial to begin . I just added a collar background to my timeline as well as some taxed. Let's start by selecting her text layer on the timeline and heading up to effect controls. Position the time it at the start of your text clip. Use a type tool to select your tax and then change the text size to 100 then put through spaces between each letter. Using the type tool, click the stopwatch toggle next to source text to create a starting key frame. Since my sequences at 60 frames for second, I'm going to press my right arrow key twice to move. The time had two frames to the right. If you're sequences at 30 FPs, just move the time had one frame to the right. Select your text with the type tool and increase the font size to 1 50 Delete one space between each character so that there's two spaces between them. Making these changes will create a second key frame. Select your tax in effect controls and press the right arrow key twice. Move the time head forward another two frames again. If you're working with the 30 FPs sequins, just move forward one frame. Select your tax and increase the font size at 300 using the type tool, get rid of all the spaces between your letters. Doing this will create your final key frame. Now, when I play this back, we have the animation that you see in the commercial. Keep in mind that you don't have to use my exact value to do this. What's important is that you understand the process of adding and removing spaces and changing the size of the text. Okay, that's all for now. Thanks for watching and see you next time.
89. Zoom Text Effect: in this video, I'm going to show you how to create the zoom text effect to get started. I just added a color my background to my timeline and added some text under the track above . Let's begin by selecting our text slip and going over to effect controls. Position the time marker at the start of your text clip increases scales I use so that it's super zoomed into your text. I'm going to set mind to 500 then click the stopwatch next to scale to create a starting key frame. Move the time Margarita, where you want your text to be zoomed and by changes scaled back to 100 toe automatically create your second key frame. Okay, and now when I play this back of a nice and simple looking zoom text effect to make it look smoother, click and drag to select both your key frames. Then right, click them and selectees out. One last thing you can do to make it look even better is go over to the effects panel and type directional blur in the search box, dragged that effect on your text clip on the timeline, then in effect, controls position the time worker to the beginning of your text clip. Change the blur ling so that your text looks slightly blurred. I'm going to set mind to 15 clicked the stopwatch. Next job Lurling To create a starting key frame, Go up to scale and click this little arrow to position the time marker at your scale. Second key frame. Go back down to blur length and change it to zero to create a second key frame. No warbler will end exactly when I resume does all right. And now when I play this back, we have a nice looking zoom text effect and that's it for this tutorial. Thinks they're watching in See you next time.
90. Wiggle Text Effect: for initial set up. I just added a title in a video to my timeline. All right To begin, let's head over to the effects pain type, turbulent, displace into the search box, then dragged the effect onto your title clip. Next, make sure your title is selected and then go to the effect controls. Now the first option you might want to tinker with is the displacement. This changes the style of your wiggle. The other options air cool, but I'm just going to stick with the turbulent. Next up is the amount of distortion we want. I'm going to lower mind to around 30 for more subtle wiggle. I'm also going to lower the size to about 30 because we want the size of our wiggling waves to be small. All right, now we have all of our basic properties we need set up, so let's add the actual animation to do this, position your time, head to the start of your clip, then click the stopwatch next to offset turbulence. To create a key frame, dread your time, head to the end of your clip and then increase both of these values based on how quickly you want your wiggle to go, which will automatically create your second key frame for these two values. A good rule of thumb is to have your first value to be double your second value. All right, now, when I play this back, we have a nice looking wiggle effect, and there you have it. I hope you found this tutorial useful.
91. Glitching Text Effect: to get started. I just added some text to my timeline. Let's begin by holding down the old Kian dragging our text ought to duplicate it. Now let's go over to the effects panel and search for wave warp in the search box drug. The effect on your top text clip over. In effect, controls go down to the wave or perfect. You just added. Change the wave type two square. Increase the wave height to around 50. Then increase the wave with 2 100 change of direction to zero so that a glitches horizontally. After that decrease a wave speed to negative. 10. Make sure the time head is at the start of your text clips and press the right arrow key on your keyboard three times to move the time it forward. Three frames now put the top clip at the time Heads physician Move the time had forward for more frames and make another cut. Delete the clip that you just cut out, then during the bottom clip so that it isn't overlapping with the first part of your top clip. OK, now we have a horizontal glitch and then a slight pause. All right, let's select the next part of our top clip and change the wave orbs direction to 90 you so that it glitches vertically. Then position the time it where we left off on our top clip. Move the time it forward three frames and make a cut. Move the time it forward for more frames and make another car. Delete the clip you just cut out. Then make a couple cuts down here it to delete where your clips are overlapping on the bottom. After that, make another call where two big clips overlap, then dragged to select the to end clips and delete them. Now dragged to select all your cut out clubs while holding down the old, he dragged them to create duplicates. All right, And now when we play this back or text glitches, one last thing you can do to enhance you blitz effect and make it feel more random is to select some of your glitch in clips and change their scale. Okay. And that's it for this tutorial. Thanks for watching and see you next time
92. Futuristic Text Effect: to get started. I just added some text above a video clip on my timeline. Let's begin by positioning the time made to the start of your text clip on the timeline that hold down the shift key on your keyboard while pressing the right arrow key three times to move. The time had forward 15 frames. Make it caught at the time heads position. Next, let's go over to the effects panel and tight mosaic into the search box. Drag the effect under the first part of your cut out text clip, then make sure that text clip is selected and go over to effect controls. Position the time it at the start of the text clip, then clicked the stopwatch titles. Next, a horizontal block and vertical block to create starting key frames. Now move the time met to the end of your club. Change the horizontal blocks, vertical and horizontal values to 1 25 Okay, this looks good, but let's at an argie re split effect by going to the effects panel and searching for chromatic aberration. Drink the VR chromatic aberrations effect on your pixelated text clip, then go up to effect controls for that clip and under rapacity change the blend mode to screen to get rid of that black background. Okay. And now when I play this back, I have a nice looking future. It's sick text effect. All right, that's it for this tutorial. Thanks for watching and see you next time.
93. Video Inside Text Effect: to get started. I just added a video to my timeline. Let's begin by using the text tool that add some text or video, and I'm just going to increase its scale a bit in effect controls. Now let's go over to the effects panel type track matte into the search box, then drug your track. McKee effect on your video clip on the timeline, not the text clip. Make sure your video clip that selected on the timeline and go up to effect controls a new track. Matte key. It changed the mat to the video track. Your text layer is on. In my case. It's right above on video, too. Okay? And they reckon see my video through my texts and that's it for this tutorial. Things they're watching in See you next time.
94. Split Text Effect: in this video, I'm going to show you how to make a split text animation effect in Premiere. To begin, I just edited video track with the text layer to my timeline. Let's begin by duplicating the text layer. To do this. Hold on the all key and drag the text layer all bunch of the track above, then, with the duplicate off the original so that you can see both of them changes the fill color of your duplicate so that we can tell them apart. Next, let's add a line tour project by going to file New Legacy title or by using the Control T keyboard shortcut and the title designer. Select the line tool while holding down the shift key. Click and drag to draw a straight line through the middle of the original text layer. Make your line even on both sides and longer than your tax, so that you have room for the animation. It's also a good idea to increase your line with because a thicker line will make the next steps easier before we continue. Make sure your line is exactly in the middle of your tax, so move it if you need to. Once you're finished, close out of the title designer. Drag your new title from the project. Been above the two text tracks on the timeline. Select the text with line through and head over to effect controls under the text setting. Click on the rectangle to create a mask for the text. Drag the masks handles so that you can only see the bottom half of the tax under the line. Once it looks like the selector duplicated text layer, reposition it so that is completely overlapping your other title. Then go to effect controls and click the rectangle under the text setting to create a mask for the top half. Drag the handles so that you can only see the top half of you duplicated text above the line. All right, now already died. The animation. Make sure your duplicated text layer selected and then go to effect Controls Position. The time had to where you want the animation to start. Click the stopwatch next to position to create your starting key frame. Move the time had to where you on the animation to end an increase of position. Properties first value to create the ending key frame then click the left arrow to move the time head to the first key frame so that the time heads position is set up for the next animation. Now select your bottom text layer on the timeline. In effect, controls clicked the stopwatch next to position to create a starting key frame. Move the time and you were the top half's animation ends. Decrease the position properties first value to create your ending key frame. And now when I play this back, we have a cool looking split text animation effect, all right, and that's all for now. Thanks for watching and see you next time.
95. Highlighting Social Media Comments with Animation!: in this video, I'm going to show you how to make highlighted comments or any other popped out tax look clean and professional to begin. I added a video clip to my timeline, along with an image of my comment to the V theory track. We're going to be sandwiching an adjustment layer between the video clip and our comments and make sure you have an empty track here. So the first thing we need to do is quickly blur footage before displaying the comment. Right, click in the project panel and go to new item adjustment layer dragging a little past the start of your footage. Now head over to the effects panel and type Gaussian blur into the search box. Drag the effect on your adjustment layer up in effect, controls for the adjustment layer. Make sure the time had his position at the start of the clip. Then click on the stopwatch next to the blurriness property to create a starting key frame . Move the time had a tad to the right and then increase the blurriness to 100 to create your ending key frame. Also, be sure to check for P edge pixels to get rid of the blackboard around the blur. Okay, now that we have our blue transition in place, let's move on to the comment. Reposition your comment to start right after the footage is completely blurred. Then head over to the effects panel type drop shadow into the search box, then drag you onto your comment on the timeline back up, in effect, controls. We're going to adjust a few properties for a comments. Drop shadow. These adjustments might be slightly different for you, but here's how I did. Mine said the capacity to around 85% to dark in the shadow change the distance to 12 and lastly, I'm going to set the softness of 17. All right, this is looking pretty good. But for a finishing touch, let's give this a little more life by very slowly zooming into our comment. To do this, let's head over to the project panel, drag another adjustment layer under the track above your comment. You can just use the one that's already in the project. Been from before a justice duration so that it matches the length of your comment, then go to the effects panel and type transform into the search box drug. The effects on terry adjustment layer up in affection. Trolls for the new adjustment layer and navigate to the transform of fact. You just added position. The time had, at the start of the adjustment layer, clicked the stopwatch toggle next to scale to create a certain key frame, dragged the time head to the end of the adjustment layer and increase its scale a small amount to create the ending key frame. We want the zoom to be super slow and gradual so that it gives our video a slightly animated for your rather than a jarring zoom. Okay, and now when I play this back, we have a nice looking highlighted comment in Premiere. Alright, guys, that's all for now. Thanks for watching and see you next time.
96. Making an Animated Call-Out Box: in this video, I'm going to show you how to make an animated call a box and premier, do you get started? I just added a background video to my timeline, So I have something to put my call out box and top of Let's begin by positioning the time made you where you want the Kahlo box to start showing. Make sure you don't have any clip selected by clicking anywhere in the empty space on your timeline. Then go up to graphics. New layer rectangle dragged the rectangle over to the corner of your screen and use one of the corner handles to increase its size over in effect controls. For a new rectangle. Scroll down until you see the shapes appearance properties. I'm going to add a shadow to give it a little more style drug, the distance slider so that you can see it better and make sure the rest of your shadows values are roughly the same as mine. Click the color picker box next a shadow and select a white color. Okay, this looks pretty nice. Let's move on, and that's and text. Click anywhere in the empty area on your timeline to de select directing holographic, then select the type tool. Click somewhere outside your rectangle in the video preview to create a new text graphic. Now just type the text you want for your column box. Once you finish typing, use the selection tool to drag it on top of your graphic click and drag a new timeline just like both your rectangle and your text graphic. Right click them and select Nest. Now that they're nested, we can animate both of them together is one object. Select your nested sequence and go up to effect controls. Click on the motion property so that you can see the anchor point in the preview. Drag it over to the upper left corner of your graphic. This way, Premier knows that we want to start our animation from this point, making it look like a rectangle graphic. It's slowly expanding from this corner. Now make sure your time and his position at the start of the sequins click on the stopwatch , toggle next to scale to create a starting key frame, Then change the skills value to zero. Move the time it a little bit forward and change the scales value to 100 to create a second key frame. Okay, this animation looks good, but you're probably going to want to animate a going off screen to move the time ed to where you want to call a box to go off screen. Click on the hollow circle between the two key frame arrows to create 1/3 key frame. Move the time had a little further down changes. Scales value 20 to create an ending key frame. All right, and now when I play this back, the color box animates offscreen. For a final touch, let's move out the animation. A little click and drag. Dislike your 1st 2 key frames, right click one of them and selectees out, then dragged to select your last year. He frames right, click one of them and selectees in. And now when I play this back, it looks smoother. All right, that's it for this video. Thanks for watching and see you next time
97. The Color Isolation Effect (Black and white with color): to get started. I just added a clip to my timeline that I'd like to make black and white except these Berries. Let's begin by going over to the effects panel and typing. Leave color into the search box, dragged the leave color effect on your clip on the timeline, make sure you clip it selected and then go up to effect controls. Under leave color. Change the amount of the color to 100%. Then click the dropper next to color. To leave. Using the dropper, select the color in your video preview you'd like to isolate. Try to pick a mid tone of your color that's not too bright or too dark of a shade. Now, if you doesn't look very good like mine, the first thing you can try to change the match color setting to using Hugh. Okay, this worked really well for me, but if you're still having problems separating your color to try to lower the tolerance until you get your color isolated, okay, and that's it for this tutorial. Thinks they're watching in See you next time
98. RGB Split Effect: in this video, I'm going to show you how to do this. RGB split Effect in Premiere Pro To get started I just added a video to my timeline that I'd like to add my effect to Let's begin by going over to the effects panel and typing RGB into the search box. Drive the color balance RGB effect on your clip on the timeline. Then make sure your clip it's selected and go over to effect controls. Under rapacity. Change the blend mode to screen now while holding on the all key on your keyboard. Drive your clip up under the track above to make a duplicate, then did the same thing to make one more duplicate for the track above. Next, make sure your middle clip is selected while holding down the old key. Press the right arrow key on your keyboard twice to move the clip forward to frames, offsetting it. Then select your top clip and hold down the all key while pressing the right arrow key four times to move it forward for frames, position your time it at the start of your top clip and cut off the beginning of your bottom two clips at the time heads position. Then select the cut out parts and hold down the shift key on your keyboard while pressing delete to get rid of them. And I'm also going to come and get rid of the end parts of my top clips that are hanging out All right now that are clips are even at the start in and select your bottom clip. In effect, controls under color balance RGB changes of the green and red values to zero. Then select your middle clip and change the red and blue values to zero. And lastly, select your top clip and changed the green and blue values to zero. Okay, And now when I play this back, I have a cool looking RGB split effect. All right, that's it for this tutorial. Thinks they're watching and see you next time
99. Trippy Color Effect: to get started. I just added a couple clips in my timeline member like to mess with the colors in. Let's begin by going over to the effects panel and typing inver into the search box, then dragged the effect on your desired clips. Make sure your clip with the effect of selected and go over to effect controls under Invert , changed the channel to either in face prominence or quad richer prominence. I think Watcher looks great for this shot because it turns all the foliage purple for my second clip. I'm going to change the channel to in face prominence to make the people what kind of alien and blue like I've seen before in music videos. I also like how the quarter to channel looks on this clip, giving these women yellow lips and hair okay, and that's it for this simple color effect. Things we're watching in See you next time
100. Flashing Color Video Effect: to get started. I just added a video clip to my timeline. Had the flashing color effect to Let's begin by going over to the effects panel type, color balance and of the search box drug, the one with the HLS onto your club. Make sure your clip is selected and then go up to effect controls. Position the time it at the start of your club, go down to the color balance effect and clicked the stopwatch next to Hugh to create a starting key frame. Move the time into where you want the flushing color effect end. Click and drag the hue value to the right to increase its value. This will automatically create your second key frame. All right, and there we have our flashing color effect. If you want the flashing colors to go faster, start by using one of the arrows on the Hugh property to reposition the time ed on the second key frame, not just increasing Hughes value for your second key frame. To speed up the flashing colors, you can also slow down the flashing colors by simply decreasing the value for your second key friend. Okay, and that's all for this video things we're watching and see you next time
101. Image Pop Effect: in this video, I'm going to show you how to make an easy animated pop up of fact to begin. I just added a video clip in an image to my timeline. Let's start by selecting our image on the timeline and going up to effect controls. Position the time it at the start of your image, then changes skills value to zero. Click the stopwatch toggle next to scale to create a starting key frame. Press the right arrow key, a new keyboard five times. Moved the time had five frames to the right, then change of scale to 1 20 to create the second key frame. Bresil right Arrow key three times moved the time. Had another three frames to the right. Changes the value to 95 to create your third key frame. Press the right arrow key three more times and change of scale value to 100 to create the last key frame. And now when I play this back, we have a nice looking pop effect. If you want to make it a little smoother, click and drag to select all of your key frames and then right click one of them. Select continuous busy air. All right. I think that looks a little better. Keep in mind that you can play around with the amount of space between key frames to speed up or slow down the effect. The main thing you want to take away here is how I made the animation by increasing the scale, decreasing it and then slightly increasing it again to give it a bounce. Now, if you want to pop your text back in, you would just do the same key framed animation, but in reverse, move the time head to where you want to pop back in your text, Click the little circle between the two key from arrows to create a key frame for the current scale press the right arrow key three times moved the time had three frames to the right change of skills value to 95. Press the right arrow key another three times and changes scale to 1 20 Press the right arrow key three more times and then change of scale to zero. And now we have our text popping in and then back out. All right, that's all for this video. Thanks for watching and see you next time.
102. Screen Pump Effect: to get started. I just added a video clip to my timeline that I'd like to add a screen pump effect to Let's begin by positioning the play head. Do where you want to start the screen pump effect, then make sure your clip it's selected on the timeline and go up to effect controls. Clicked the stopwatch next to position and scaled to create a starting key frame. Then press the right arrow key on your keyboard three times to move the play head forward three frames. Change positions first value to 8 20 and change position. Second value to 4 40 toe automatically create a second key frame for a position, then increase the scale toe 1 20 to create a second key frame for scale. Press the right arrow key on your keyboard three times. Move the play head forward another three frames. Click the reset parameter button for position and scale to create third key frames at your clips. Original position and scale. Okay, and now when I play this back of a nice looking screen phone to speed up the screen poem, just like the first and third set of key frames closer to the middle set. Finally, if you want to do a double screen pumps, start by copying the 1st 2 sets of key frames. Then position the play head at the first set of key frames. Press the left arrow key on your keyboard six times to move the play, had six frames back, then paste the 1st 2 sets of key frames at that position. Ari and there. I have a double screen poem, and that's it for this tutorial. Thinks they're watching in See you next time.
103. Video Stutter Effect: to get started. I just edited video clip to my timeline that I like to make stutter at a certain point. Start by positioning the time worker to where you want to start a your video. Then make a cot at the time markets position. Press right arrow key on your keyboard to times some of the time worker forward to frames that make another caught at the time Mercury's position. And I'm just going to move the rest of this footage out of the way while holding down the all key drug you cut out Clip to make a duplicate and place it right after your clip, then dragged us like both clips and hold on the all key while driving to duplicate both of them. Keep making duplicates of all your cut out clips until your video. Studdard's for your desire. Duration. Okay, and now when I play this back of a nice looking stutter effect, all right, and that's it for this tutorial. Thanks for watching and see you next time
104. Kaleidoscope Effect: to start things off. I just added a video clip in an audio track to my timeline. Begin by selecting your clip and going up to effect controls under motion changed the scale to 50. Back on the timeline. We need to make three more copies of our clip. To do this, hold down the bulky and drag you clip onto the track above it to make a copy. Repeat doing this until you have a total of four clips. Don't worry. If you can't see all your clips right away, they're just stacked on top of each other. Next, go to the FX panel and type Flip in the search box, drag the horizontal flip effect on your top. Most clip, then dragged the vertical flip under the next clip down. Drag both horizontal flip and vertical. Flip onto your next clip and just leave the bottom most clipped the way it is without any effect. All right now, to arrange or clips, double click your video to select your top clip, then drag it into the bottom left corner. If you're having trouble lining things up, remember that you can use the arrow keys to move them. A little at a time. Move your next flip into the top right corner for the next one. Move into the upper left corner and put your last clip in the bottom right corner. Now, when I play this back, we have a nice looking kaleidoscope effect in Premiere. Okay, that's it for this video. Thanks for watching and see you next time.
105. VHS / Old Film Effect: in this video, I'm going to show you how to create this old film effect in Premiere Pro to get started. I just edited the new clip to my timeline that I'd like to add my effect to Let's begin by right clicking in the project panel and selecting new item adjustment layer, dragging the adjustment layer above your video so that you have to empty tracks between it and your video. Now let's go over into the effects panel type wave or into the search box and drag the effect onto the adjustment layer, then search for a noise and dragged that effect on your adjustment layer. Next, search for Gaussian blur and drag on your adjustment layer. Finally search for Crop and dragged that effect on your adjustment layer as well. Now that we have our effects, make sure your adjustment layer is selected on your timeline and go up to effect controls. Go down the wave warp and change the way of type two square. Change the wave with to 700. Change the direction to zero, then changed the wave speed 2.1 and lastly, changed the pinning toe all edges. Okay, now we have a glitchy looking line that runs up our video. Now let's go down to noise and affection trolls and change the amount of noise to 40% to make our video look grainy, then go down to the Gaussian Blur effect and changes the blurriness to five, which will make our video look less HD and, for the crop of fact, change the left and right properties to 10% so that that has a non HD aspect ratio. Okay, this is looking good, But to make this look even cooler, let's add an RGB offset effect to our video. To do this, hold on the all key on your keyboard while driving your video under the track above it on the timeline to duplicate it, then make one more duplicate for the track above. Now that we have three copies of our video, let's go over to the effects panel. Type RGB into the search box. Drag the color balance RGB effect on the each one of your three videos, then select your bottom video and go up to effect controls. Under color balance changes the blue value to 100. Change the green and red values to zero we're done with this clip. So select the next one up on the timeline. In effect, controls change. The opacity is blend mode to screen. Then set the greens value to 100 changer. Red and blue values to zero. Finally select your top video. Under your adjustment layer change. The opacity is mode to screen. In effect, controls under the color balance effect set the red value to 100. Change the green and blue values to zero. Then go to scale for this clip and increase it to 102 to offset your top video creating this cool looking RGB effect. All right. And then we have our old film effect in premiere. Okay, that's it for this tutorial. Thanks for watching and see you next time.
106. The Vintage Effect: to start things off. I just added a clip to my timeline that I would like to add my vintage affect to let's begin by heading over to the effects panel type elementary color into the search box, then dragged the effect onto your clip. Now go up to effect controls where you should see the low metric color effect. Expand basic correction before we start adjusting properties in here. Try to keep in mind that you don't need to worry about my exact value, since your footage might mean different adjustments. Instead, pay attention to the properties I change and the direction of changing them in. Okay, so the first thing I'm going to do is increase the temperature of my footage to about 50 to give it a warmer look. Then I'm going to change the exposure to negative 0.5 to make it a tab darker. Next, increase the contrast. I'm setting mine to 40. You also want to increase the highlights. I'm going to set this to 40 as well, Then lower your shadows. I'll put mine at negative 80 and let's also lower the saturation to give it more of a washed out look. 75 looks about right to me. Next, expand the creative section. Increase the faded film property to your liking. All set mind to 65. All right. And now, as you can see, we have a nice looking vintage effect in Premier. Okay, that's all for me. Thanks for watching and see you next time.
107. The Glow Effect: to get started. I just ended a video clip to my timeline that I like to add my glow effect to Let's begin by holding down the all key on your keyboard and dragging your clip up under the track above to create a duplicate. If you're using a Mac, hold down the option key while driving instead. And I'm just going to click the I toggle on next to the bottom clip to hide it for now so you can see what we're about to change. Now let's go over to the effects panel and type Lewicki in the search box during the Lewicki effect under your top clip. Make sure your top lip is selected on your timeline and go over to effect controls. Under Lewicki change, the cut off to around 65% were using the loo Mickey to tell Premier that this building is the thing we want to glow. Then under opacity, change the blend mode to pin light. Okay, now you can turn back on the I toggle for your bottom track. Next, let's go back over to the effects panel and search for Gaussian Blur drug. The Gaussian Blur Effect onto your top clip on the timeline, then, in effect, controls under Gaussian Blur increase the blurriness your liking to get a nice looking glow effect. I also recommend checking Rippey edge pixels so that your glow continues to the edge of the frame for a different look. You can change the blur dimensions to vertical or horizontal to get more of a glowy street . He look all right. This glow looks good, but if you're looking for a different kind of glow, you can experiment with different blend modes under opacity. The linear Dodge ad will create more of an intense look. You can lower the opacity to decrease its intensity, but it kind of like how it looks at 100 1 Last thing you might want to do is at a color tint to your glow. To do this, go over to the effects panel and type HLS in the search box. Drag the color balance HLS effect under your top clip. Now, under color balance and affecting trolls, you can play around with adjusting the hue, lightness and saturation to get your desired look. Okay, I really like how this looks now, and that's it for this tutorial. Things we're watching in See you next time
108. The Strobe Effect: to get started. I just added a clip to my timeline that I'd like to add my flashing lights effect to let's begin by right clicking on the project panel and going to new item adjustment layer. Then position your time and where you want the flashing effect to start drug your adjustment layer under the timeline of the time heads position. Now, position the time it to where you want the flashing lights to end during the end of the adjustment layer to extend it to the time has physician next go over to the effects panel type strobe into the search box, dragging a strobe light effect. I'm your adjustment layer. Make sure your adjustment layer is selected and then go up to effect controls under strobe light. I'm going to start by changing my stroke color to black that I'm going to set the stroke duration 2.7 and I'll start. Maestro period, 2.15 You can experiment with these two values, but I found these best for getting quick flashes. Okay, and now when I play this back of a nice looking flashing color effect, if you want to use different colors like white. Just change the strobe color. Solid colors like this don't look super great, though. So I recommend increasing the blend with original setting to get an opaque color. Okay, now it looks a lot better. All right. And that's it for this tutorial. Thanks for watching and see you next time.
109. Pulsing Street Lights Effect: Let's start by right clicking in our project panel and going to new item adjustment. Layer dragger layer above your video clip and then drag its edge so that it matches the length of your clip. Now let's go to the effects panel and search for Gaussian Blur in the search box. Drag the effects onto your adjustment layer. Make sure your adjustment layer is selected and then go up to affect controls. Increase the blurriness property to 100. We don't really want this blackboard and you see here, so I'm going to check or P edge pixels. Next, Expand the opacity property. Change the blending mode, toe linear dodge. Now we need to add some key frames to create our pulsing light effect. Make sure that the stopwatch is selected and then change the opacity to 0% to create the first key frame. Move the time, had a little bit over and then change it to 100. Now just copy and paste these two key frames over the length of your clip. To do this drag to select all of your key frames, then hold down the all key while dragging them Ari. And when I play this back. We have a nice looking, pulsing light effect. Thanks for watching. And I hope you found this useful.
110. The Light Streaks Effect: in this video, I'm going to show you how to create a light streaks effect in Premiere To get started. I just edited video clip to my timeline that I'd like to add my effect to Let's begin by folding on the old key and drugging the video clip onto the track of book to create a duplicate. All right, now, let's head over to the effects tab Bad. Some effects to our top clip in here, I have a custom been with the four effects you're going to need directional blur, Lewicki elementary color and tend. You can just use a search bar appear to find them, then drag each one over to your top clip on the timeline. Once you added all the effects, make sure your top clip is selected and go over to effect. Controls under rapacity tend to the blend mode to screen mentions of Lurling to around 100 to get some light streets. I'm also going to change the direction to 45 so that my streaks go diagonally. Exchange loom, accuse threshold to around 40% so that your streets are more pronounced, then open up basic correction under Demetri Color and increase the whites toe 1 50 So the light stand out more. All right, this looks pretty good, but let's get a color to the 10. To make it look a little trippy. Click the color picker box next to map white to not select the color. You like to change your light streaks too. This looks good, but if you want your streets toe look even brighter Just hold on the all key while driving your top clip up to create another duplicate. All right? And that's all for this tutorial. Things they're watching and see you next time.
111. The Flicker Effect: to start things off. I added some music and a video clip to my timeline. The first thing you want to do is drag the image you like to flicker onto your timeline. Next, drink the size of the image clip to reduce its size to about the length of a single frame. Now I'm going to position mind to write about where the drums come in. Pull down the all key while clicking and dragging your image to make copies of it. I'm putting about a frames worth of space in between each copy. Once you have a few images, you can speed up the copying process by highlighting all of your images and copying, pacing them right next to each other. Make sure you only have the track you're currently editing, selected or will paste your copied images on the wrong track. Notice how I'm positioning the time marker right where I want to pace my copies to make my frame timings accurate. Once you're finished hip playing to see your new flicker effect in action, that's all there is to it. You now know how to create a flicker effect in Premiere
112. The Flip Flicker Effect: to start things off. I just added video clip to my timeline with the separate audio track. All right, let's begin by holding down the bulky and dragging your video clip onto the track above it to make a duplicate. Now let's head over to the effects panel type. Transform into the search box, drag the effect onto the V one tracks video clip, then go up to the effect controls for that clip under transform unchecked uniforms scale, then change the scale with two negative 100 to flip the video. All right, now we just need to make some cuts on her V two tracks. Footage to shore flip footage, every other frame. Move the time head to where you want the flicker effect to start. I'm going to move. Mind where the drum start. Use the bar on the bottom to zoom into your footage. Now use a razor tool to make a car at the time. Heads position. Press the right arrow key wants to move forward one frame. Then make another cut. Keep doing this for however long you want the effect toe last. If you want to use a short cut to speed things up de select all the active tracks except the one you're editing the to. Now you can use the control cake keyboard shortcut to make cuts instead of having to use the razor tool every frame. Once you're finished making cuts, delete every other frame that you cut out. Okay. And now when I play this back, we have a cool looking flip flicker of fact in premiere. All right, that's it for now. Thanks for watching and see you next time.
113. The Creepy Negative Film Effect: in this video, I'm going to show you how to add this creepy looking negative effect in Premiere Pro to get started. I just added a video clip to my timeline that I'd like to add my negative effect to let's begin by going over to the effects panel type inver into the search box under Tranel dragged the invert effect on your video clip. So right away this will give you a cool looking effect. But let's say you want to make it black and white like you see in a lot of music videos to do this, go back over to the effects panel and tight monochrome into the search box. Dr. One of the money from presets under the clip. I think monochrome punch looks great for this effect. All right. And there you have it. A nice looking negative effect in Premier. Thanks for watching it. And see you next time
114. The Wave Effect: in this video, I'm going to show you how to do the wave effect in Premiere Pro to get started, I added a video clip to my timeline that has a flashing color effect on it. If you like this color effect and would like it for your own videos at the end of this tutorial, they'll be a link to a video on how to do it. But anyway, for a wave effect, let's begin by going over to the effects panel type wave orb into the search box. Drag the effect under your clip, make sure your clip is selected and then go up to effect controls under wave or I'm just going to leave the wave type set to sign. Now for the rest of these settings, I'm going to give you the ones that I have for the intro, but you're welcomed Experiment to find what works best for you. First, I'm going to increase the wave height to 80. Then I'm going to set the wave with two for 50. The 90 degree direction works fine since I want my wave going from side to side. However, I am going to decrease the wave speed 2.7 to slow it down a tad, said the pinning toe all edges to get rid of the black around the outside of the video. And now when I play this back, we have a really nice looking way of a fact, all right, And that's it for this tutorial. Thanks for watching and see you next time.
115. Fade Video From Color to Black & White and Back Again!: to get started. I just added a video clip to my timeline that I liked the fade from color to black and way . Let's begin by right clicking in the project panel and going to new item adjustment layer Ben. Direct your adjustment layer above your video clip on the timeline and position it to where you want to start your fade. You can also dragged the adjustment layers and change its duration for how long you want your clip to remain black and white. Next, let's go over to the effects panel and type loo metric color into the search box. Drug the elementary color effect under your adjustment layer. Now make sure your adjustment layer is selected on the timeline and go over it to effect controls in here. Start by positioning the play head at the start of your clip. Then open up the creative section under Lou Metric Color. Click the stopwatch Nixa saturation to create a starting key frame. Then move the plate head to where you want your clip to be faded to black and white By change the saturation 20 to automatically create a second key frame. Okay, now, when I play this bag. My clip fades from color to black and way to change the speed that your clip fades. Just dragged the second key frame closer or further from your 1st 1 Now to fade, you clip back to color. Move the play head to where you want to start fading it back, Then click this circle between the two arrows to create 1/3 key frame. For the saturation is current value. Move the play head to the end of your adjustment layer clip. Increase the saturation to 100 to create 1/4 key frame. Okay, and now when I play this back, my clip fade from black and white. Back to color. All right, and that's it for this tutorial. Thinks they're watching and see you next time.
116. The Bounce Effect: in this video, I'm going to show you guys how to make stuff bounce in premiere to begin. I just added a background video along with the graphic that I like to make bounce to my timeline. Let's begin by going over to the effects panel and typing transform into the search box, dragged the effect onto your image or taxed. Now you can animate without the transform effect, but if you want motion blur, it's a requirement. Next, let's head up to effect controls and scroll down to the transform effect we just added in here. We're going to be adding a bunch of key frames for the position property my sequences at 30 frames for a second. So keep in mind that if you're sequences at 60 FPs, you're going to want to double all my spacings between the key frames to match the speed of my animation, you also should make note of a Y value that you want your graphic to bounce off of during the animation. I'm just going to use the center default, which is 5 40 All right, let's begin. Move the time head to where you want to start the bouncing animation increase of positions . Why value until you can't see your graphic? Click the stopwatch toggle next to position to create a starting key frame. Press the right arrow key nine times moved the time had nine frames to the right. If you're working with 60 FPs footage, moving 18 frames here, change with Y value to where you want the animation to bounce off of to create the second key frame. In my case, it will be 5 40 now. We just want the animation to rest here for a frame presser, right where he wants to move the time had one frame to the right. Click the circle between the two errors to create a key frame for the current position. Press the right arrow key 13 times to move the time had 13 frames to the right. Okay, so the Y value here should be a bouncing off points value plus half of the bouncing off points value. So if you're following along, enter 8 10 This will put a graphic at half the distance between the starting point and the bouncing off point. Press the right arrow key to move the time ed forward one frame, then click the circle between the two errors to create a key frame for the current position . Press the right arrow key 12 more times to move the time head forward. Another 12 frames. Change of positions value to your bouncing off points value to create another key frame again, if you just want it center like mine, that will be 5 40 Press array Rookie five times Moved the time head forward. Another five frames here enter the value for the bouncing off points value plus 1/8 of the bouncing off points value. So if you're following my example, enter six away. Press. Right Arrow Key wants. Move the time it forward one frame. Click the circle between the arrows to create a key frame for the current position. Press Herrera. He's seven more times and change of position back to the bouncing off points value, which is 5 40 for this example. Press the right Arrow key three times moved the time that forward three friends change of value to the bouncing off points value plus 15. So for me that be 5 55 Press the right arrow key two more times and change of position back to 5 40 Okay, now we have the basic layout for our animation, but it looks kind of stiff where the graphic bounces off the bottom to fix us, dragged a select the fourth and fifth key frames. Right. Click one of them and go to temporal interpolation, continuous busy air. And I'm going to do the same thing with the seventh and eighth key frames where it bounces off the bottom again. Okay, this looks really good for a final touch. Let's add motion. Blur to the effect by UN checking use composition, shutter angle and changing the shutter angle to 200. And there we have a smooth looking bounce effect. All right, that's it for now. Thanks for watching and see you next time.
117. Glitch Transition: in this video, I'm going to show you guys how to do an easy glitch transition to be in. I just added to video clips to my timeline that I would like to add a glitch transition to . Let's start by heading over to the project panel and right clicking inside. Go to new item adjustment layer right click on your adjustment layer and select speed slash duration. Transistor aeration only last for eight frames and hit OK, now dr your adjustment layer onto the timeline so that it centered exactly at the cut. If you're having a hard time Santa Maria, you can hold down the all key with the adjustment layer selected, and then use the arrow keys to move it frame by frame. Once it's in place, head over to the effects panel type wave warp into the search box thunder. I get under your adjustment layer on the timeline. Now let's go up to effect controls and change some of the wave orbs properties. First, let's change the wave Type two noise to give it a distorted effect that increase the wave height to 900 set the wave with to 2000. After that, I'm going to change the direction toe 180 so that the effect looks like it's going sideways to speed up. Our effect increased the wave speed to five. And the last thing we need to do in here is changed the pinning to all edges so that we don't get any black video pulled in from outside the frame. Okay, this looks pretty good, but for a final touch, I'm going to increase the saturation of my glitch. Make sure you have your adjustment layer selected and go up to the color tab in here. Simply turned the vibrance and saturation adjustments all the way up. All right, now, when we play this back, we have a cool yet really easy glitch transition. Okay, that's it for this video. Thanks for watching and see you next time.
118. Whip Pan Transition: in this video, I'm going to show you how to create an easy whip pan transition in Premiere Pro to get started. I just added two clips in my timeline that I'd like to add my transition between Let's begin by right clicking inside the project panel and going to new item Adjustment layer. Then right click the adjustment layer and select speed slash duration. I'm working with 24 FBS footage, so I'm going to set mine eight frames. If you're working with 60 FPs footed, set it to around 20. Then position your adjustment layer directly above and in the middle of the cut. It helps zoom into your timeline and with your adjustment layer selected, hold down the all key on your keyboard while using the arrow keys to position it exactly in the middle of the cut. Then go over to the effects panel and tight push in the search box. Drag the push effect between you two clips, then select the transition and go up to effect controls. Change the duration to match your adjustment layer, so I'm just going to put eight frames. Also, if you have a hard time placing your post transition between your clips, Change the alignment here it a center at cut. Now, to add our blur, go back down to the effects panel and type directional blur into the search box. Drag that effect under your adjustment layer, then in effect, controls for your adjustment layer. It changed the direction to 90 degrees and increase the blur linked to 100. Okay, and now when I play this back, I have a nice looking whip Pan transition, all right? And that's it for this tutorial. Thinks they're watching in See you next time.
119. Luma Fade Transition: in this video, I'm going to show you how to do a fast and easy loom. If aid in Premiere Pro to get started, I just added two clips in my timeline. The first clip is an overhead shot of trees, and my second clip is a guy that I'd like to fade into the trees for this effect. It helps if you're subject. That you like to fade in is darker than the background. Okay, let's begin by position. The clip you like to fade in on top of your first clip, then go over to the effects panel. Type radiant into the search box, dragged the Grady int wipe effect on your top clip, Then make sure your top lip is selected and go over to effect controls. Position the time marker at the start of your top clip under Grady in White changed the transition completion to 100%. Then click the stopwatch next to transition completion to create a start in key frame. Move the time marker to where you want your loom. If aid completed by change, the transition completions 0% to create unending key frame lastly, and make sure you check this invert Grady in check box. Okay? And now when I play this back of a nice looking loom if Aidan Premier Thanks there watching in. See you next time.
120. White Flash Transition: in this video, I'm going to show you how to create a white flash transition in Premiere. To begin, I added two clips of my timeline that I would like to add a white flash transition between start by right clicking on the project panel and going to new item color. Matt in the color picker. Pop up. Click in the bottom left to select a white color. Make sure the color Matt, you just added to the project Panelist selected. Use the control Our keyboard shortcut to change the duration of the color mad. I'm going to set mine the last for eight frames, but you can make your is longer. If you want your flash to be slower, drag your color Matt Clip above your to video clips on the timeline. Try to land it up so that the middle of the color Matt clip is above the car. Now make sure your color Matt Clipped is selected and then go up to effect controls. Position the time it at the start of the clip. Make sure the stopwatch in front of the opacity properties turned on it should be blue. Then change. The opacity is valued zero to create a certain key frame. Move the time into the middle of your color. Matt. Clip. Change the opacity to 100 to create your second key frame. Move the time Head to the end of your color, Matt. Clip. Change the opacity 20 to create your ending key frame. Okay. And now we have a white flash transition. All right, that's it for now. Thanks for watching and see you next time.
121. Diagonal Wipe Transition: to get started. I just had it two clips to my timeline that I'd like to add a diagonal white transition to Let's begin by going over to the effects tab type wipe into the search box, scroll down under video transitions until you see the regular white transition vendor I get between your two clips on the timeline. If you get this pop up, just click. OK? All right. Now that we have our wife, let's turn into a diagonal one selector White transition on the timeline go over to effect controls in here. You should see a bunch of little arrows around a rectangle. Click the top left corner. Aero Data. Diana, Wipe That goes from the top. Left the bottom right. Okay. And now when I play this bag, we have a nice looking Diagana. Wipe. If you want your dying wife to move in a different direction, just click on one of the other three corner arrows. All right? And that's it for this tutorial. Thanks for watching and see you next time.
122. Fading Wipe Transition: in this video, I'm going to show you guys how to create this diagonal fade transition to begin. I just have two clips here that I'd like to put my transition between. Let's start by heading over to the effects panel. Go to video transitions, wipe and then scroll down to the regular wipe affect. Drag it between your two clips. If it doesn't fit like mine, that's all right. We'll fix that. Next. Select the transition you just added and go up to effect controls changes speed the last for one second and also switch the alignment to center at Kat. Then click the top left corner arrow so that our wipe is diagonal. Back down on the timeline. We need to duplicate our first clip to do this. Hold down the all key while drinking the first clip up under the track above. Cut the clip at the start of the transition, then delete the footage before the cut. Now you have a couple choices here on how to extend your clip based on your footage. If, like me, you ready made a cut at the end of your footage, you can just extend your duplicated clip to match the length of the transition. Otherwise, if you have nothing to extend right, click your duplicated clip and go to speed slash duration. Change the speed to 50% and hit OK. Next, select your duplicated clip and go over to effect controls. Position the time had at the start of the duplicated clip, the capacity stopwatch toggle should already be on by default. But if it's not, make sure it's turned on. Click the circle between the two arrows to create asserting key frame. Move the time it to the end of the duplicated clip and change the opacity. Zero to create the ending key frame. And now when I play this back, we have a diagonal faded white transition. All right, that's it for now. Thanks for watching and see you next time.
123. Zoom In Transition: to get started. I just added to glimpse my timeline that I'd like to add a zoom transition between Let's begin by going over to the effects panel type. Zoom in the search box. Drag the cross zoom effect between your two clips on the timeline. If you're having a hard time placing the transition between the clips, just select the transition on the timeline and go up to effect controls. Change the alignment to center at cut. Okay, now I have a pretty good looking zoom transition. I think this looks decent, but I think it would look less pixelated with a blur. The at our blur. Let's first go over to the project panel, right click inside and go to new item adjustment layer the default settings match my sequins. So I'm just going to hit okay now dragged the adjustment layer above your cross. Zoom on the timeline and dragons, and so the restoration matches your costume. Gonna go back to the effects panel and type Gaussian blur in the search box. Drag the Gaussian Blur effect on your adjustment layer. Now select the adjustment layer on your timeline and go up to effect controls in here position. The time worker doesn't start of your adjustment layer clip. Under Gaussian Blur clicked the stopwatch next blurriness to create asserting key frame. Move the time worker to the middle of your clip, where it looks pixelated and change the blurriness to 100 to create a second key frame. Finally moved the time worker to the end of your clip and change the blurriness back to zero to create a final key frame. Okay, and now when I play this back of a nice looking zoom transition with blur, all right, and that's it for this tutorial. Things they're watching and see you next time.
124. Blur Transition: to get things started. I just added two clips in my timeline that I would like to add a blur transition between. Let's begin by heading over to the effects panel. Tight, fast blur into the search box, drag fast, blur out onto your first clip, then drag Fassler in onto your second clip. All right, now, when I play this back, we have a quick, blurry transition. This looks pretty good, but I don't like this black silhouette around the video to fix this, select your first clip and go to affect controls under the fast blur effect Checker P Edge pixels. Then select your second clip and checker P Edge pixels there as well. All right, and that's it for now. Thanks for watching and see you next time.
125. Twirl Transition / Stretching Spin Transition: in this video, I'm going to show you how to create a stretching spin transition to get things started. I just added two clips that I would like to add my transition between. Okay, now let's begin. By going over to the effects panel, type iris round into the search box, drag the transition between your two clips. If it doesn't sick in the middle, like mine, that's all right. We'll fix that next, select your transition and then go up to effect controls. Change the duration to last for 35 frames, then change the alignment to center at cut. All right, now that we have the start of our transition, we're ready to add the stretching spend effect, go over to the effects panel and type twirl into the search box, drag the effect onto your first clip, then go up to effect controls for that clip and scroll down to the trial effect. All right, The first thing we're going to do in here is set up the twirls animation by using the angle , property position, the time it at the start of the transition. Then president left Arrow key eight times moved the time had eight frames back. Click the stopwatch, toggle next to angle to create a certain key frame. Move the time head to the end of the transition and change the angle to for 25 to create the ending key frame. And I'm also going to increase the twirl radius to 35. Okay, this is getting closer to what we want, but unfortunately, we're getting some black pulled in from our twirled. To fix this, we're just going to zoom into the frame a little. Click the left arrow next to the angle property to position the time it at the start of the animation. Then click the stopwatch toggle next to scale to create a starting key frame for the zoom. Use the right arrow next to the angle property to position the time had at the end of the transition, that increases scale 2 to 50 to create the ending key frame. And now when I play this back, we have a cool looking, stretching spin transition. Okay, that's all for me. Thanks for watching and see you next time
126. Spin Transition: to get things started. I just have to a video clips here that I would like to add a spin transition between Let's begin by right clicking in the project panel and going to new item adjustment layer, dragging the adjustment layer onto your timeline. Right. Click the adjustment layer and go to speed slash duration. Change the duration so that allows for 16 frames. Now position the adjustment layer so that the middle of it is right above the cut if you're having trouble placing it in the exact spot position the time had at the cut. Impressive left Arrow key eight times, then dragged the clip to the time his position next head over to the FX panel and tight transform into the search box dragged the transform effect onto your adjustment layer. This effect is going to allow us to rotate and scale the to bottom clips by using our adjustment layer. This way, we can easily reuse this adjustment layer multiple times or even create a preset for it. Now make sure your adjustment layer is selected and then go up to the Effect controls panel Scroll down to the transform effect. First, we're going to increase the scale so that when we rotate our video, we won't see any black bars. Move the time head to the start of the clip, then click the timer bun next to the scale property to create the first key frame again. Make sure you are changing these properties under the transformer. Fact and not the motion area or the effect won't work. Now move the time head to the middle of your adjustment layer and change the scale to 300 to create your second key frame, Then move the time head to the end of the clip and change the scale to 100 to create the last key frame. Okay, now that we have a resume taking care over going to adjust the transform effects, rotation, property position the time had at the start of your clip, click the timer bond next to the rotation property to create the first key frame. Press the right arrow key three times to move the time had three frames to the right. Change the rotation value to about five degrees. Create the second key frame. This value might be slightly different for you, but the thing you need to keep in mind is that you don't want any black video showing around the edges. Next, move the time head to the middle of your clip and change the rotation. Do 180 degrees to create you third key frame, then position the time head of the end of the clip and change the value to 360 to create your fourth key frame. Press the left arrow key three times and then changed the rotation to about 354 to create the final key frame for the rotation. And now, when I play this back, we have a spinning transition to make it look a little nicer. Let's add a blur effect to it. Go to the effects panel, then type directional blur in the search box drug onto your adjustment layer. Go up to effect controls and scroll down to the directional blur effect. Move the time head to the start of the clip. Click the timer bond next to the blur length property to create the first key friend. Press the right arrow key three times, moved the time head three frames to the right, then change. So the blur length. 20 to create the second key frame position. The time had at the end of the clip and changed the blurred Ling zero to create another key frame. Finally, a press the left arrow key three times and changed the blurt linked to 20 to create the last key frame. And now I want to play this bag. We have a cool looking spin transition effect, Ari, and that's all for now. Thanks for watching and see you next time.
127. Crop Transition: in this video, I'm going to show you how to do the crop transition effect to start things off. I just added a short video clip to my timeline. Let's begin by heading over to the effects panel tight barn doors in the search box, dragging the transition under the start of your clip. I also want to show you how to do this at the end of a clips to drag the transition onto the end of your clippers. Well, as you can see, this transition is already pretty close to what we want, but the crap should be going from the bottom and top. To do this, select your starting transition and go up to effect controls. In here, you should see a little orientation preview with arrows on all sides. Click the bottom or top arrow so that the crop starts vertically back on my timeline. I'm also going to drag the end of my transition to make its duration last a little longer. Now, when I play this back, we have a nice looking opening crop transition. Next, select your ending transition and go up to effect controls. Click the top or bottom orientation airs again to set the transition vertically. When I play this bag, the crop is happening from the middle, though, which isn't what we want here to fix us. Make sure your transition is selected and go back up to effect controls. Click the check box next to the reverse property. I'm also going to quickly increase the duration of my effect. And now when I play this back, the crop transition closes. How he wanted to you. Okay, that's it for now. Thanks for watching and see you next time.
128. Bright Flash Transition: in this video, I'm going to show you how to create the school flash effect to get started. I just added two clips of my timeline that I'd like to add my flash effect between Let's begin by right clicking inside the Project panel and going Teoh a new item adjustment layer . Then right, click your adjustment layer in the project panel and go to speed slash duration. I'm going to delete the default five seconds and change the last two zeros to 15 so that my adjustment layer last for 15 frames. If you want a faster or slower flash, you could make it last for a few frames, more or less. Then drive your adjustment layer onto the track above your clips and center above the cut. If you're having a hard time centering it above the cot, position your time marker at the CAU and use this bar down here To zoom into the timeline, select your adjustment layer and then, while holding down the all can your keyboard presser writer left arrow keys to nudge the clip so that it centered over the cut. If you're using a Mac, hold down the option key while using the arrow keys. Once your adjustment layer is centered over the cot, go over to the effects panel type brightness into the search box. Dragged the brightness and contrast effect under your adjustment layer. Make sure your adjustment Larry selected and go over to effect controls. Position the time marker at the start of your adjustment layer clip clicked the stopwatch next to both brightness and contrast. To create starting key frames. Move the time marker to the middle of the adjustment layer. Increase the brain is in contrast to 100 to create two more key frames in the middle of your adjustment layer, then position new time marker at the end of your adjustment layer clip change. The brain is in contrast, back to zero to create ending key frames. Okay, and now when I play this back of a nice looking flash effect in Premiere Pro, Thanks for watching in See you next time
129. Phone Call Effect: to get started. I just added an audio clip to my timeline that I like to make sound like a phone call. Hey, how are you? How's it going? Let's begin by going over to the effects panel and typing high pass into the search box dragged the effect on your audio on the timeline, make sure your audio selected and go over to effect controls under high pass change The cut off anywhere from 400 to 1000. Based on what sounds best for your clip, I'm going to set mine to 700. Okay. And now when I play this back, my audio sounds like I'm on the phone. Hey, how are you? How's it going? All right. And that's it for this tutorial. Thinks they're watching in. See you next time.
130. Underwater Sound Effect: to start things off. I added a video with some music. Now the first thing we want to do is make a cut where we want the underwater effect to start. So, like the cut tool. Then drive your play head to where you want the effects. Start. I'm going to set mind to where he's underwater. Now cut your audio track next, head over to the effects pain type low pass into the search box. Drag the effect on your audio track you cut out. Now, when I play this back, we have a nice sounding underwater sound effect. If you want to increase the intensity of the underwater sound, select your audio track with the effect go to effect controls and in the low pass effects settings. Lower the cut off. All right, and there you have it. I hope you found this tutorial useful.
131. Deep Voice Effect: to get started. I just added an audio clip to my timeline that I'd like to make deeper. This voice clip will be deeper. Let's begin by going over to the effects panel type. Pitch into the search box dragged the pitch shifter effect that isn't obsolete onto your audio clip. Then make sure your audio clip is selected and go up to effect controls. Under pitch shifter. Click the edit by next to custom set up lower the amount of semi tones by dragging the slider to the left. You also want to make sure high precision is selected and use appropriate default settings is checked. Then just close out of the window and playback your audio. This voice clip will be deeper I and that's it for this tutorial. Things they're watching in See you next time.
132. Muffled Audio Effect: to get started. I just added a clip with some audio that I want to sound distant and muffled like it's coming from the inside of the car. Let's begin by going over to the effects panel and typing Equaliser into the search box dragged the Parametric equaliser effect onto your audio clip. Then make sure your audio selected and go up to effect controls under Parametric Equaliser , click Edit in the pop up, Change the preset to generic low pass, then dragged this point over here down into the left to create a distant, muffled sound. You can experiment with moving around this point to get the muffle sound you like. All right, that's it for this tutorial. Thinks they're watching and see you next time.
133. Distorted Audio Effect: do you have started? I just added some on you to my time on that. I like to distort. Let's begin by making a cut in your audio where you want the distortion effect to start. And I'm going to make another call where I want the distortion to end. Okay, so the easiest way to add distortion to your audio is to just use a preset. To do that, I'm going to go over to the effects tab and open up the audio effects folder. Scroll down until you see the distortion effect drag onto the audio clip. You cut out, make sure your cut out clippings selected and head over to effect controls. Next, a distortion. You shouldn't see this little circular arrow. Click it and select one of the presets. Just experiment around and find one that you like. All right, this works fine, but I'm going to show you how to Adam or custom distortion effect with base, if that's what you're looking for. First I'm going to just delete this distortion effect. And we had the effect of my clip so that we can start from a fresh slate back up in affection. Trolls under the distortion of fact. Next to custom set up, click at it. Drag the middle of the positive line all the way up to this corner and drag the negative one all the way down to this corner. Now, just close out of this and go back down to the effects tab. Tight base into the search box, dragged the effect on your audio clip, then type trouble into the search box. Drug the trouble effect on your audio clip. Back up. In effect, controls under base increase the boost of 24 then go into the trouble effect and increase its boost to 24. Okay. And I want to play this back. I have a cool sounding, distorted bass boost effect. All right. And that's it for this tutorial. Thanks for watching and see you next time.
 Brandon Lemke