Transcripts
1. Adobe Premiere Pro CC Trailer: Hey, this is a trailer for my course on Adobe Premiere CC essential strategies. My name is Bill and I had been filmmaking for over 30 years and I've taught thousands of students across the world. But this course is so much more than just watching him pressing buttons. This is about giving you the knowledge in a way that you can understand and the tools you need to get you up and running. So you can take that video footage you have on your phone or your laptop and make amazing video stories with it. I want you to be able to create videos that people, when they see them go what, given a walk away with all the knowledge and fundamentals, you need to gather the materials and video, edit and manipulate your videos into amazing video stories. All the real-world techniques that you need to make amazing videos all in one single course. I really am so excited to guide you on this journey. So if you're ready to get inspired, then put down your distractions like social media and YouTube just for a short time. And I promise you take this time for yourself. You will learn the techniques that will make your videos stand out from the crowd. You'll also have the confidence and skills to go from strength to strength as a video editor. So if this sounds appealing to you, and I look forward to seeing you in the first lesson.
2. Getting assets : First of all, let me thank you for choosing this course. I'm sure you're gonna learn a lot and have a lot of fun along the way. In this chapter, we're going to look at getting assets. So what assets? That video clips, pictures and music and sound effects. So you can put over your video or pictures to create a movie. If you don't have any of your own assets, don't worry. We've included sample footage down in the projects area, somewhere in the description of this course. And you can download that and follow along. Also. We can show you sites where you can go get stock footage and pictures and videos so you can download and practice a free. Remember the more that you practice, like anything, the better you'll get. Especially with things like Adobe Premiere. It takes a lot of practice and skill to get familiar with it and get better and better. And the only way to do this is to continue repeating the process. With all this said. Let's get into Premiere now and start this journey together. So if you don't have any Asset, so videos and pictures and things to practice with. We will provide some that you can follow along during the course. However, it's really great, as we said, to be able to go and get more free assets. So a really good website for that is Paxos.com. For a thing to note here. And they have lots of things like videos and pictures and stuff like this. You should read that license. Their licenses is pretty simple. Photos and videos on pixels are free to use. Attribution is not required, but giving credit to the photographer or Peck cells is not necessary but always appreciated. Meaning attribution means if you have a YouTube channel or something. For example, if you see something on a free stock site that you download, clip or music or something. If it's attribution is required, they'll tell you that you have to give credit in a link, in the description or somewhere on your site, back to the person that gave that footage. So you can modify the photos and videos and Paxos be creates banana them as you like. So it's really, really good. What's not allowed? Identifiable people may not appear in bad light or in a way that is offensive. Don't sell unaltered copies of the photo or video. Eeg is a poster print on physical products without modifying it first. And don't simply doesn't imply endorsement on your product by people or brands on the imagery and don't redistribute to other stock footage sites, for example. So, you know, don't take advantage. And you can upload if you're a photographer or something or a videographer, or you can upload your own stuff and get ammonia. So it's very simple to do this. It's great for practice and if we go back to home, we can go look for look for I don't know if he had drone shots and something that I love. So these are you can see these are photographs. If you're looking for something in particular over a city, for example, you can tells you what it is. The set its free tiers. You can look at the information, tells you who the photographer was. It tells you the size, the resolution of the picture, the software he used to Jarrett, and the aspect ratio. So it's free to use and no attribution is required. So this is a license. That means you don't have to even give this guy recommendation if he used his picture. And this is what he's put up here to do. And then just to download, all you have to do is go up to the top. And the free download. This has an Assad downloading on wherever your download area is. On Windows is normally just under downloads. And that's where that is downloaded two. It says here you can say thanks to Thomas. So you can follow him on Instagram. You can donate on PayPal If you want to give them a dollar or something if he were using this for some other projects, have you just practice in? I think it's okay. And then if you need it to give attribution which you don't, but you can copy this link and it will be a link back to here. So this guy will get sort of credit and acknowledgement for upload him his picture. So that if we go back to the home site, we want to look for some videos. For example. You go to videos. And this is still looking for drone shots. Maybe I won something like people into people. And he has video clips. And if you just hover over them, they'll show you a little footage sample of them. And it's the same thing. They have lots and lots of whatever you need for your project. It's actually you can get stuff here that will, will work. So he has one on someone rolling out some dough. You can open it up. You can look at the information on it again. So you can see this is 4K ultra HD 3840 by 2160. That's 3840 pixels this way by 2160. This way tells you what the aspect ratio is. 16 to 09:00 AM. It's 50 frames per second. That's what it was filmed. And so you have this information and then you can play it and you can see if that's what the type of footage you were looking for. And then you just do the same thing. We can then just download, starts to download. And also is a link to click back here to the person that uploaded event. In this case. And that's the way you can explore this and get lots and lots of stuff. There's MAN group is lots and lots of footage and lots and lots of photos that you can pick. The big red, they're great for your projects and great for practicing. Whatever you need to practice along with the course or beyond the course, we just want to get some you don't have any footage of your own. Maybe you're not a videographer or photographer. This is a great site. One of these, a few other sites too like this, just explore, search for them. And it gives you lots of great footage to be able to practice. So here, then if we go down to my dynodes area, wherever it is on your particular computer. You can open up the picture that we just downloaded. We can look at the other one that we downloaded here. And the last one is that video, which I believe is this. And they're on your computer ready to use. So coming up, we need you've downloaded some video footage if whether it's a project files or we've supplied or you're getting some of your own. At this point, it's really important to organize everything. In the beginning, you'll be tempted just to frank footage into a folder, put it on your desktop. And as you get more and more for age and more and more stuff, you have to be organized from the start. This is a really important tip and I would really suggest you follow this along with this. So looking in Premier, I'm going to show you where you can organize some stuff now. So if we go to the computer, there is a folder here that will supply for you cold ZZ temp. We do that just because it's easier to find. And what you're gonna do is right-click on this and say copy, and then control V to make another copy of it because you don't want to spoil the original one. This one here, we're going to rename that, just right-click on it or just click on it slowly. And when I call it my project, for example, whatever, whatever your project is a young working on. Okay. So inside of here then you'll see that it's laid out with folders called Audio, Copy footage, graphics, project files, and renders. So audio is we're gonna put all your sound effects and music and anything like that, like narration or whatever you're doing. And then copy is if you make a script and you follow a script when you're talking to video and a token head thing like this, and you talk into a camera. Yeah, some people use teleprompter as other people use no pans, whatever you wanna do. So whatever way it works for you, that's somewhere you can put the copy. Or even like if you download some music that you purchase, you can put your license and there in such a way that keeps everything organized. The next thing we'll have is all of our footage over video clips are in here. Any graphics pictures, things like that? Project files, any premier files when he met the Premiere project file, this is a great place to keep it. And then the final renders, so you'll find a line put of the video and it keeps it really organized. And as you make more and more projects and videos, this is a great little structure. The keep it under. It isn't my idea actually. It's another guy and you can look him up. Its Geico Daniel Scott. So looking inside of here now under my project you can see that this is where you'll put your stuff down. So in audio, there's some sound clips in here or music. In footage is some videos that were downloaded. And then under graphics you bought some other pictures in here. And then this way a project file would go and your final video, there's nothing in here right now. And also under my copy, I would have a text document or something in there that if I resume my narration, I would keep that in there. Whatever you want to. It's just for documents basically. Alright, and this is a really good idea to keep everything organized as you make your video, moving through the process.
3. Opening premiere : In this section,
we're going to open up Premiere for the first time. What are all the settings mean and how to set up your projects. Now that we have some, some assets or videos and
pictures put together, Let's open up Adobe
Premiere Pro. If this is your first time
opening Adobe Premiere, you won't have any recent
files that he had. But if you've been
in here before or open up another
primary project, this is where you can
click on to actually go and reopen it. For us. We're going to click
on New Project. You can then put a
title name in here. So we're gonna say practice
movie, for example. And then here you're
going to select the location where you are
go into stole your video. You want to choose a dry
that has a lot of space. What we're gonna
do is put it in. We have a folder
made practicals, which is what we copied videos into in the
previous chapter. I'm going to select
that as my folder. This is where it's going to go. So my location is deep
practicals in my case, my project is called
practice movie. And as far as the rest of this, you don't really have
to change anything. As far as Scratch Disks go. I always say this
is same as project. Just make sure you
have enough space on the hard drive
that you go into. Try not to put it onto
a separate USB drive. Try to try to put it on the
fastest drives you have, like an SSD drive for example. This is rendering. If you have RAM on
your graphics card, you want to select that. You can select playback
on suffer only, and that will just slow
things down quite a bit if you have a
good graphics card. So Adobe Premiere video editing is actually very memory hungry. What you want to do if you
have a great graphics card, choose that, then
we're going to say, okay, that is the beginning of our first new project that we're going to start
creating a movie in. If you have the newer version of Adobe Premiere Pro
from April in 2022, version 23 and above. Now when it first opens up, you might get this screen here. Frame i o is just a way that if we're in a logical operation, that your clients can
actually integrate on your videos and they can draw on the video
and leave messages. But from a 99% of us, we're never going to use this. Now if you've landed
on this screen, notice it's on home. And there's nothing down here. If you've had a previous
projects that you've had, open a playing around. You can see them
here, for example, if he didn't have anything, it's a very first time. You will see nothing here. The other thing
you might land on, it might be on the Learn area. This is just Adobe's
area for you to take some tutorials and look at different things like hands-on tutorials up here if
you're interested in that. If we go back to home, this is where we are. And we're going to go
up to New Project. And click on that. You'll see that we've
landed on sample media. This is a sample media
here from Adobe. Up at the top you have a
couple of little tabs here, import, edit and export. Grayed out at the moment because we haven't creating anything. And down here, for example, if you had other media on different parts
of your computer. So this is an external drive. This would show me, if I
click on this, for example, I GO TO, this will bring up the different media
on my external drive. Now we're gonna get
into all of this as we move forward into the course. But right now we're just
going to concentrate on a project name. Here. We're going to just
call it whatever test. For now. You can call it
whatever you need to. This is a location that
it's going to go to. Make sure you have enough room on your hard drive for this. And you also want this
in an area that is on your computer not trying to
work off or external drives. If you do try to work out
for an external drive, it has to be a very
fast SSD drive. But I would recommend
you copy the files over to your main competitor, a workstation or laptop. Because premise very
intensive, resource hungry. And if you try to work out for external drives directly,
normally you're, unless you have a
really fast processor, it'll struggle and you'll see choppy playback and
things like this. We're gonna go through that. I had to import media
into where we need it. Next, we need to choose
a location where we want to store our project. We're going to choose location. My case, I'm gonna do it here under D and I'm going
to right-click, I mean windows, you can do the
same sort of thing in Mac. I'm gonna create a new
folder and I'm gonna call it test for the inch. For example. That's created. I'll select that. So now that's the folder
that my project called test. We'll go into d tests footage. I'll simply come down
to the right down here and select Create. Now here we can
see on a D drive, we made a folder
called test footage. There's a project called test. Let me create it. Just be careful around here. So I was showing
you that I was in the Samsung drive and
it shows a media. You can look at your media, you can import it. So for example, if I had
this and this was checked, for example, it goes
that blue color. And then I did create. Now when it opens up the file, it's going to copy or import that file that
we selected here, which is right here, would put it automatically
for you in there. Just be aware of that, just in case you do that by
accident, then this comes up. What do you think? How did I get these files in here right now which we haven't
covered yet. So just be aware of that. So if you didn't select them, I'm going to just
delete that it was somebody come up
and look like this. And now we have these
tabs where it says import takes us back
to where we were. We can select media,
edit or export. Now these active, I'm going to go through these as we
go through the course. But this would be, well, it would turn up
in the Edit tab. And we're going to go
through this next.
4. Workspaces: In this chapter, we're
gonna take a look at the workspaces or panels
as they're known. When you first open Premiere, they're pretty intimidating. You'll click on a button for sure that will move them around. And you try to figure
out how to get them back to the way it used to look. Don't worry about all this. We're going to take you
through each panel. You can customize it,
move them around, and if you make a mistake, Put them back to
where they were. Let's get into this. Welcome to the interface or panels
as they call them. And Adobe yours might look a little bit
different than this, depending on the
version that you have. No problem. They all work the same. You'll see up here
there's a learning time, assembly, editing. If we don't need this,
this is learning. We can get some tutorials. You can, these
little three lines, you can click on them
and say close panel. You can see that all
these little panels that we'll be using, we'll be working with editing. We can change these panels to our layout however we want them. In editing. If you don't
see that you can go to Window workspace and
then you can just choose editing right here. Now the other thing we
can do is if you click in a panel and then you
move your cursor over until it turns
into this double line. You can drag the panel
to whatever size. If you click on another panel, you can move this up or down so they can be
manipulated around. You do something by double-clicking and
then this happens. We don't freak out. You can just
double-click on this again and it'll go
back to where it was. And you can change these layouts that whatever suits your needs. Now, if you change it, let's say you did
what I just did then if I double-click
on this for example, and it does this in the
middle of your edits him. It's quite scary initially and
you don't know what to do. What you can do is
change them right back to default BY
go into Window, Workspaces, reset
to save layout, and then everything will
go back to default. One other thing to let you know is that if you
click on the top here, you can't move the
panels around. However, if you want
to change these. So now this will be down here. And then you could
take this one up here and move it down here. If you do this by accident, I pretty much work
in the default. I go back to Windows
Workspaces and reset to saved, and everything goes
back to normal. So no need to be too scared, get to panic, buy it. Always go back to
where you were. That's enough about
panels right now. The next session we're
going to start imposing some media into this area here. This little all make more sense. In the newer version
of Adobe Premiere, when you were in Workspaces, you'll end up here. The older version you had all
the windows across the top. They've now gone. So we have import,
edit and export. So if we hit Import, we go back to where
we were and we can choose any one of the
files that we want to bring into the edit
area that you can move these windows
around just by hovering over any lines. You'll see this double arrow. And you can make
this window bigger, or you can make
this window bigger. Just customize it
however you want. If you get lost, which you will, for example, you can drag this and
put this down over here. Then you'll be freaking out because it looks very different. You don't know what
to do. Just go up to Window Workspace. We're in editing, it
tells us that's what we're in because that's
got that little dot there. And go back to reset
to save layout. And let me go back
to the default. So a lot of times I'll
bring this window over here to make
it bigger for me. Because this is the preview
known as the program window. Now if you wanted to change your workspace so you wanted to go to coloring, for example. You can't go to Window Workspace and then just choose
color for example. And that will change the
workspace right here. But if we go back and we
wanted to change that back to editing, we can do that. You'll also notice
this little box over here now on the new system. We're going to click on this
and we can do it right here, change it to color, for example. Then that takes us to the color panel where
we have lumetri color. And this is essential
graphics which pops up here. But now we have the color
panel for whom were coloring. If we want to go and see all the tabs that we
have open are chosen. We can do Show workspace
tabs to click on this. And you can see here
that you can drag these open and you can go
to learning assembly, editing, color,
audio, for example. You can use this and this is what you're
probably end up doing, is having this little bar
up here to go between the different workspaces
that you wanted to go to, such as audio and
then back to editing. And 90% of the time you're
going to spending in editing. As I said, you can actually
drag this to minimize space, pull it out big,
and also edit this. So if you click on
this Workspace button, you can come then
to edit workspace. Here what you're going
to do is you have all the workspaces in
your menu up here. And then see it
says Do not show. So if you don't
want some of them, you just click on them
and drag them down. And they won't show
in the workspace. And if you say okay, the ones that you've
taken below won't show up in the acetyl scroll bar up here and there'll be hidden. They're still there. They're just shown they're
just hidden below. So if you wanted to go to
the bingo to the manually, but again, you could go back if you want
to see them again. He would just drag them up into this area and then
there'll be up here. If we pull this further forward, there'll be wherever
you need them. One last thing here to show you is if you're in
window and we want to work on essential graphics, for example, that's going to open up the essential
graphics panel here. And that's where we can add titles and MOG are at
some things like this, whatever you have,
you assist them. You can also get
Adobe Stock media. A lot of this has paid for. Some of it comes with
your subscription. Then this is where you
can edit stuff like this, but we'll get into
that later on. If you don't want that there, you can just click
on these three lines and do Close Panel. And then we can always
bring that back up again by doing Window. Essential Graphics are
essential same for example, this will bring up the
essential same files, do some edits and we will be looking at this
stuff later on. Let's move on and figure
out how we can put some media into the
workspaces next.
5. Importing media: In this section, we're
going to import your media, your videos, your
pictures, your sound. It's really important to
organize it inside of premiere. Just like we did
outside the Premiere. If you just dump a bunch
of files in there and then your project gets bigger
and bigger all the time. Well, pretty soon it'll be uncontrollable
would become but some, and you won't be
able to find things. And if you've gotta go
back to it later on, then it's really
difficult to do that. So it's important that we organize the files within
the project manager, just like we did when he was in your file explorer or your Mac. So that's what we're
going to go through now. And trust me, you want
to do this if you don't start off in this little
mode of learning, when you get bigger,
bigger projects and falls, it'll get lot harder. Take good notes at this one. All right, let's get into it. Alright, so let's get
some media into here. So this is the project panel. This practice movie is what we made in the
very beginning. Now we got to get some
medium inside of here. There's a bunch of
ways to do this, but if you just
double-click in here, it will take you to
your media is stored. So again, we had a video here which
you could choose the images individually
and pull them in. Or you can play in a folder
by doing import folder, I have some of the videos
and pictures that I want all in this folder
called Old here. Give us a sample. So I'm going to select all. What you can actually
do here is if you just select all of these by
doing Shift on a PC, you can just do OK. And it's going to now import
them all into here. If you want to look at
this a little bit bigger, we can go to assembly
and they're all in here. This gives the window, it's the same thing
switching between the two, It's just different view. Then this gives us an idea
of what we're looking at. Now a lot of people will say no. You can separate this out between your video
and your audio. For example, you can see here this is it tells you
everything about this. Yeah, this icon here is
it tells you what it is. If you just hover over it. It's a video clip. It's 23.976 versus 24
frames per second. And it looks like it
is 28 seconds long. This one is video, which is the purple one, and it's got an audio track, this little green track here. If we look down here, this is just an
audio track and it tells me that he could see where there's a
purple and a green. It's got audio and video. If it's just got the purple, that's just video only. And if you hover over it,
it'll tell you that as well. If you want to organize these two leaves actually
at the top here, a JPEG save pictures
has a different icon. Again, if you want to
separate these out, if you have lots of them, you can create a folder
also called a pin. You can click on this and
then say video is one thing. Then what you could
do is take all of your video tracks just by
doing them individually here, you can just do Control or Command and
take all of your video. And then just drag them into the video folder and then see
that actually this is open. You can just click on this little arrow and
I tidy it up here. And then we can
make another folder called, for example sound. Then here you would just
drag your sound or music up into that folder or
being as they call them. Your last ones here. We just have a picture one if you want to make another one, where a lot of
people actually do, they'll just create
bins and we'll drag this one up here as
well inside of here. So that just sort of
separate somebody. So if you wanted to get video, you do this and you
can pull them over. If you want to get the sound
following me, come to this. If you want to get a
picture, You can do this. You just separates it all, makes it neat and tidy. Will go into, just go over
to the editing tab again. And you can see it's
the same thing here. If I look at the video tab, when I click on this
little down arrow, he's all my video clips. Then we can make this a little bit
bigger if we wanted to. Looked at before like this. If you also look down here, this is showing you a list view, but you can look at an
icon view year as well. Double-click on this, then you have an icon view of the video. And actually if you just
go on these videos, do you don't even
have to click trained hover over left to right. It'll scrub through
your video clips. You can see maybe this
section you're looking for. I personally like to
work in the ListView. And neither we made a couple
of folders in here or bins. You can see all you've
got to do is click on this up arrow on
the folder or bin. It'll get you back to your different bins
that you've made. So at the video, sound, again, clicking on each one will
give you the assets here. Don't forget this guy up here. It will always take you up a diameter inside of
one of these guys. And you have to change
views, whatever reason. However you want to work. You can always go back up level. Go back to your list view. Here. The new interface. So
I just want to show you how you can import media. There's multiple
ways to do this, but the new interfaces
is a little bit different if you're
used to the oldest system. Again, we've got a
project name called test. We have a project location
called test practice. Now the next thing
we wanted to do, what we can do in here is if you select Copy media like
this, for example. This is actually
going to open up. The window is Media Encoder. I particularly don't want that right now, so I want that off. Then this one is a new bin. I wanted to have a
band called footage. For example. Sequence one can just be test. Sequence, whatever you
want to put it in here. So just pre-populates
it for you. Now. The tricky bit is this. So I know that I want
to go find my media. So I want to go to the D drive. Then I want to go
down to this folder. Double-click on that and you'll see what happens straight away is down here that this all turns blue because
I've double-clicked it. And it's counting up. It's actually
selecting everything in every single folder. That's not what I want. So right-click it and say clear all because the only folder that I want is in
practice files. This evening. If
I click it once, it selects everything is
15 items in this folder. So I'll double-click it. And I'm going to again
clear all the video. If I look inside here, you can see everything
is selected. It seems to always do that.
I'm going to clear all. The only thing I want is this
one video to be imported. Now, if I wanted more, for example, I could go ahead and select something
else restaurant. As true. As you select them. He can't a little timeline
being made across here. I'm going to clear all
one more time here. I'm just sort of
do the ocean drone and restaurant for now. The two which gives it
gives you a thumbnail. I'm a select Create. It says this project already exists because I've
been playing around. I can say yes, I want to, I want to replace it. Then what it's gonna do is
create that project for me. So again, I want to
go into editing. Over here, I add the
audio mixer selected. So I want to go to
maybe Effects Controls. Just because this is
the way I would work. Here's my two clips. Are we pre-selected? Here's my footage
folder, the bin. And it's selected the ocean
drone and the restaurant. And the sequence called test sequence is
already created for us. Now another way that we
could have done this, let's go down here. Click on this guy, this is a new bin. We're going to make
this cold picks. I'll make another
one called audio. This is the way I
would normally work. I can always go back to import. We can select more
things to move over. I'm gonna stay and add it. And then what I could do, it just literally navigate
on my computer to things I want to move in, select them, and just drag them into my footage area,
just like that. Then all my pictures and video that I just
chose are in here. So if I drag them into the
timeline, for example, where we want them, then other things I can do is if we choose in the practice
files here and the PECS. But select all of these. Just drag them down
into the pics folder. Now, put them on the timeline. The timeline sequence. There's lots of ways you can
drag and drop things in. You can just use the end port media interface
here to do the same thing.
6. Sequence settings: In this chapter, we're going to talk about a sequence. The sequences are nothing more than timelines. We can place your video clips, pictures, and sang along the timeline to create your finished movie. You'll probably have different clips of different sizes. Maybe 24 frames per second, 60 frames per second, along with different resolutions such as four, K, ten, ADP or AK. So we're going to look at organized all these. So the output of your movie is exactly what you want for the outside world, whether it be Youtube, Facebook, Instagram, or what have you. So let's get into this one. So before we can create a movie, we have to create a timeline sequence. So what's a sequence? So first thing we have to look at is pulling over some of these video files here so that they can create a set of different videos or pictures, music on a ration in this title timeline. And this will create a movie first. And we're going to do though is sorta what type of video we have. So double-click on this practice movie. This opens this screen a lot bigger. And we can see here that these were not all shot on the same camera. There's shop by different people. And basically the camera settings are all different. We have 60 frames per second here, 24 frames, 23.97625. You, the thing that we have over here is a video information. The resolution, we have 3840 by 2160, which is 4K video. Time to seven hundred twenty nine hundred or 1920 by 1080, which is HT. So the first thing we want to try to do is sorted some of this information here. So I don't really care whether media starts. If you click on this and just drag it further down, we can get the way. So I like the frames per second here. I don't care where the media ends shares information we don't need right now. And we saw we have frame rate, we have media duration, demanded time. Let's grab this video info and bring it down here. So now we have these three columns here that make more information for us a lot easier to find. So double-click on this project panel again and it'll go back down here. So now we can see very easily if in our video Ben, we have a bunch of videos. We can see this when it's 4K, This one is h t. And this is how we're going to make a sequence. A sequence is going to be made up of the frame rate and the resolution of what we want for our final movie. So we, For me, I always pack the 4K version. So what we're going to do, we also have another video here, this drone rock 4K is actually higher than this normal 4K forage. So I'm gonna right-click on there and say new sequence from film clip. So here we go. It actually places that video over into here. And this is a preview window in the program window which called. So when we drag this slider across it, the video moves in the project wearing the other program window. So okay, this is what it's going to preview, what the video is as we make this sequence up. And you can see here that it changed from the name of the video that we pulled him was called ten Joan rock four K. This has ten. Rock for k is the sequence now. And it's actually here. So this is the video that we chose. And this is the sequence is little icon here that you see is actually if you highlight over it, it says sequence. Now, the problem is that it's a great resolution. We want 24 frames per second, which is 23.976. I know this is a bit confusing, but just go with it for now. It's 28 seconds long. And this is the video resolution. So I want to change that to match true 4K. So we'll click in this window here, will go to sequence sequence settings. We can see here on the custom, it's 23.976 frames per second, which is what we want. But we don't want the original frame size. So what we can do is type in these new numbers, which is 3840 by 2160 and its ratio of 16. Tonight we're going to say everything else is okay. We're gonna say okay. And it's going to give you some information here. So now sequence setting is what we want it thirty eight, forty two, twenty one, sixty. This is the sequence again here. I want to change the name because it's taken on the name of the video that we pulled in here. And you can see that up here as well. So what you can do is just click on this icon it again slowly. And that's changed that to practice movie or anything you want to click Enter. And then you can see it's changed up here. This is our sequence now, and the sequence is called practice movie. So now we've created a sequence ready for us to start building our video. And the output will be 4K video.
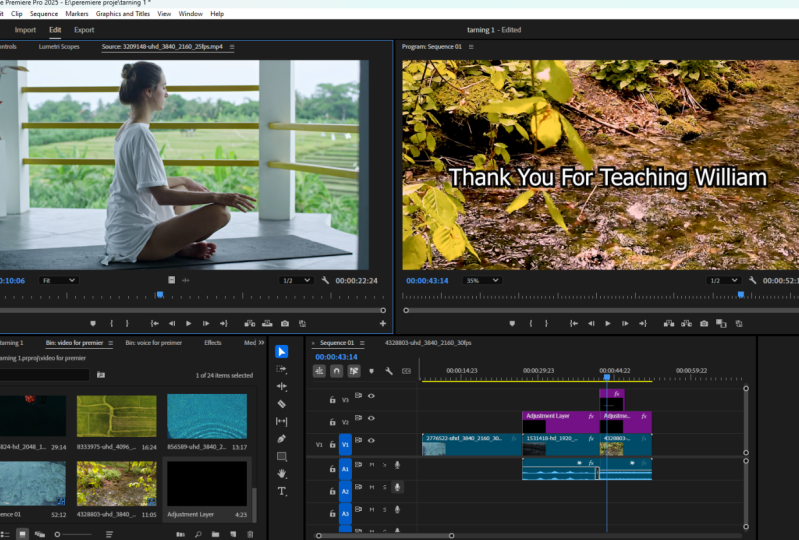
7. Editing : In this section, it's the editing section. It's a reason why you're here, right? So we will manipulate your video, showing you how to use some of the tools to be able to cut, move, move in just the video, moving just the audio, and manipulate the video to start building that timeline for your finished product. So let's get into this. So we're gonna start editing now, you're moving. So the top half of the timeline window is for video. The bottom half is for audio. That's what these a channel, a, a2, a3, V1, V2, V3. So you can just left-click on, uh, on your video and you can move it along the timeline. So video goes above here and audio goes down here. You can use this playhead to scrub through or just use a space bar. And it will scrub through. And you can watch the preview of the video. In the top. Press the spacebar again to stop it. And you can do the same thing up here for the start and stop video head. Well, I'm going to most people will just have you come into the video section, bring in all the video clips and then start doing it. Well, I'm going to show you a way that might make sense to you if you're a beginner. And we'll put these things in step-by-step. So let's just click down here on I can view. Double-click on this folder or bin. And then you have these these thumbnails that you can scrub through. So I will, I'm thinking I want to use this one next. So what you can do is just double-click on this and it opens in the Source panel. Now the Source panel just gives you a bigger area too. Scrub through where you want to stop and start this video clip. If you want to completely there, or you want it just a little bit. So I'm gonna start right at the beginning. And then I'm going to stop it around. Let's say here. And what you can do is this is your mock out point. Now here if you look closely, it says video and audio. You would just grab this and you can pull this down into this area here. You drag this on the video. So we have a video here now. But one thing you'll see, or notice as I scrubbed through this, the picture resolution isn't the same as when it's over here. And you can just click on here and you can scrub through your system here. So what does that mean? It means that this one was a 4K image and that's what we made our sequence with. This guy over here, is a lower resolution. So if we go back over here and we just hit on the ListView, and we will check at this woman walking on the beach here. We can actually, we can just scroll along with this and take a look at our information as well that we had before. So you can see here that Woman walking on beaches 1920 by 1080 versus the drone rock is 4K. That's why they look different. Sheet oxidize walking on the beach. So how did we fix them? So it's quite simple. You will just right-click on this and you set the frame size. And now they both are the same size as 4K. The other thing that's going on with this thing is it says that it has audio and it has video. But I can tell when we scrub through this, press the space bar or what have you. There's no audio because it would be coming up here on this on this bar indicator. He and I can't hear anything. So we're going to get rid of that audio just by you can do this and see on link if it was linked together. In this case it's not. We're just going to highlight the audio pod and click Delete on my keyboard. And that gets rid of this, has no audio in this anyway, even though it had some wacky setting, whoever uploaded that. Ok, So that's at two clips. So how do we move these sands? You can move things together by left clicking down, highlight and everything, and this dragon it together and it will move together. It doesn't matter how many clips you have here. So if we wanna go backwards, there we go and leave a little space here for right now. The other thing you can do here, this little rubber band thing is actually a zoom in and out key. So you can zoom in, for example, and then move this back and forth to scroll along here. But another simpler method is as long as you're in this window here, this, this timeline window, you can use your plus keys on your keyboard and your minus keys to just zoom in and out a lot quicker when this is highlighted. So let's pull it in another clip of something here. Let's take these people on a moped double-click again. So in this case, I want to see where I wanted to start. Maybe I wanted to start here. That's the endpoint and that's also you can do on your keyboard for n. And then you can just drag it along to where you want it to stop. And you can do mock out or out on your keyboard. This guy here, it shows there is no audio, has nothing to drag it. There was you could drag the video by clicking on this icon or the audio only on this icon. So in this case, we're going to drag this, bring it down to the timeline. And we're zoomed out a little bit here, right? So we can just do a rubber bands here to zoom in. And then you can move along here. And now we can see by clicking in here we have these guys. So this ducks all okay. So the next thing we wanna do is show you some of these, these tools here in this two panel. And the tool we're going to use, the selection tool, which is v on your keyboard, and the razor blade, which is a cut tool, which is C on your keyboard. And you can scrub through here just like this. And let's say we want that this dot right here is two ways of doing this. You can click on this and you can just cut that. And then you can use the selection tool and highlight the part that you want to delete and just press Delete on the keyboard. I'm going to do Control Z or Command Z to just show you again. The other way you can do this is if you're on the selection tool, you can see as I come near to that, it turns into this little red arrow. You can just do this and drag it. And it's the same as doing the cut command. Like so. I know you don't really cut the video because if you want to replace it or go back, you can just expand it again. So it keeps it in there. Three Clever. So let's say we want to start it here, for example. So we can do that. And then we want to go around here and just get this guy to stop right there. I could use C on my keyboard, a Brit which brings up the Cut tool, and then do that. And then I can use my rubber band to see where I am. And then I can just use the selection tool and press Delete on the keyboard. And now what I could do is just highlight this next video and drag it over until it snaps into place here. So now we've got these two bits of video. And this one is a bit long. So what I'm gonna do is cut that down. So again, select CMA keyboard, cut that down, and then use via my keyboard to highlight this. Use the Delete key. And inside of here. Now, instead of dragging this like we did, I, you can right-click in here and do ripple, Delete, and it will automatically bring this up here for you. So now if I hit the space bar, we have our open-end beach scene. And then it will go into the next video with a, just a straight cut. So that's enough. Let's say we wanted here. I want to stop that there and just trim it up to there. Now use him my rubber band tool again. I can right-click here. I can drag this again, as long as I'm in the selection tool up here, I can just drag that and move it down to the snaps in place. Or again, I can just right-click and rippled delete. So now we have a three little clip CIA all glued together. So it's Beach, fact. The lady walking on the beach. And the guy he's on the motorbike or the moped. Okay, so now we're using the, the supplied clips or ones of your own. Just make an another project, call it whatever you want to in this particular case is so-called practice movie. I can check what settings. This is where I go into sequence and sequence settings. I can see that the frame is 3840 by 2160. So that is 4K. That can be changed by going up here and custom and then type it in. They wanted it 19201080. You would do that by just changing that here. And again, you know, just something that you can do. Just check that again. But I actually wanted 3840 by 2160, which is 4K. And when I hit Enter, it closed up. But before I hit that, I want to show you that always make sure this is in square pixel. And this area then here says 1920 by 1080. This means this program window here. So just say OK. So we know this is a 4K sequence. Grab some files of your own. And I want to see that. I wanted to try to get like a 1920 clip here. So if I drag this onto the video here, it's going to tell me that this cut doesn't match the settings. So when this pops up, it's talking about the sequence settings. We just set it for 4K. So if you want to keep the 4K settings, it's not going to affect the clip. It's going to say yes, keep the sequence or timeline and 4K, if not, I dragged in a clip which is 1920 by 1080. It's going to change the sequence, not the video clip, to 1920 by 1080. So I'm gonna say keep it. And now you can see that the clip art I dragged in here, it looks like this because it's 1080. And as we remember from our resolution stuff, there's four. There's you can get four of these in 14K clip as far as our resolution. So what do we do again? So right-click and you're gonna go set the frame size. So now it's at the right frame size. This just happens to be a fly through in-between some trees. So just drag that and drag another, another clip on here, whatever you want. People on a moped for example. And that's fine. So now we have these two. I can zoom in a little bit with this guy just by moving this hit my spacebar And then it's the people dragon through. Now, this didn't need change and because the resolution was fine. Okay. I want to get back to like we did before here. So what I want you to do is. Practice cutting this up where you want to add some other movies, anya, and do some cuts. So we're gonna get into transitions and stuff later. So let's say we wanted to just see where this is coming in. And I wanted to start here, for example. Now, remember there's two ways of doing this. You can cut it just by bringing this up, clicking on it, are doing commands, just the C key on your keyboard. Or you can click on this guy and just drag it to where you want this. And then you can move these together by highlight that in both. And during that late you'll notice too and you move this around. I click it off it, just click on one. It will sort of snap to where that is, doesn't go past it unless you force it sort of snaps and you get it near to the area. The reason why it's doing that is because this snap in timelines on this little magnet by click that off, it's white. And I can zoom in here just by doing plus, if I'm in this blue area here, du plus on the keyboard. And then what you'll see with this snap into off, you can move this around, but I can also move it just a little bit by little bit. It doesn't just snap to the end of the previous clip over here. And that's because this is off. This is handy when you're trying to fine tune a clip and butted up against another one, for example. So let's move that all the way back to where it was turned this on. And now when I drag this towards it, it will snap to the edge, just like so. The other thing that you can practice too, while you're in here is remember, now I don't know what this is. It says DJI 0114 and there were in the ListView. But now remember what we can do is we can go into the icon view. We're gonna go on videos, go back to the ICOM view. And now I can see that this is this one. And if I scrub through, I can see what it is. So I want you to do this type of thing and then I want you to double-click on it to bring it up into the source area here. And then playlist. So you can see here that the monkey goes out of frame and then comes back in frame. So there we go. There's there's that I would like it to finish there. So I'm as either do 0-4 out or I can click on mock out. And it highlights that area. I don't want all that background noise, just people talk and so I'm just gonna grab if I grab this and drag it down, it's an a bring both things then the audio underneath and the movie. I just want, so do Control Z to get rid of that or Command Z. I just want, and I'm going to zoom this out a little bit so I can see what I'm doing. I am going to just drag the video portion then. Alright, so now we're on this video clip. There's some things that we can edit while we're in here. So if I press play, I come to here. Now the monkey's going out of frame here. So I can use this step back, frame-by-frame. Just keep clicking on it until it's about here. And then I can use my C, C0 and do cut. And then I can press play again. And I want to pick up where the monkeys backend frame over here. For example, a little bit further right there. So now I can use the SI, you know, the Cut tool, eraser tool again, like in cut this here, that I can use the V key or I can click on the selection tool. Click on that, press Delete, and then right-click and press ripple delete. And now that will look like this where the monkeys coming into frame and we pick up back over there. And instead of having all that stuff on the video, on the original video, where the monkey is out of frame for such a long time. Okay, and we were coming up in the next sections, we're going to talk about putting transitions. And so you can do things like write at that little, that little frame area here, right-click and do apply default transition. And now what we'll do is come in here and sort of fade in, and then the monkey will come out the other side. My computer is just buffering because they have so many things that right now. But just like that makes it smooth and we're gonna get into those transitions coming up. One other little chip here. As you can see that all these clips are in on the same line, v1 and some blue here. So you can drag the little playhead, you want it. But one quick tip is, if you're clicked in this box here, and these are on the same line, you can just use your up arrow key and it'll take you to the cuts. She'd go back very quickly. And same thing with pressing the down key. It'll take you along here. So now what happens later on again, this is all coming up, so don't worry. I know it's a little bit overwhelming, but just for you to practice, you can't mess anything up. The clips on damage your source clips are never damaged. That never change if you cut them or delete them and hear nothing changes to the original clips. These are just when this opens up and looks for those clips and just makes a copy inside of here. It doesn't affect the original ones. So if you have other clips here on another time lines like this, and then you do that same thing where you go back, you'll see that it's sorted and then down again with a down arrow. It skips setup of one. So the reason it does that, if you look over here, is only that V1 video one is on. If you'd like v2, and then do that. It'll then stop even at the B2 video as well as the v1. So it's just a quick way for you to get back to to where you want to be. All right, so enough for editing right now. Just practice a little bit. Bring in some other clips and just practice during cuts and moving. Don't be afraid to move the things around here and mix them in like you want them just by dragging them, et cetera, and like this. And then see, see how your playhead moves and what it's doing. Just get used to that. And we'll get more in the next section.
8. Resizing media : So in this chapter, it's really likely that most of the eclipse you've got, unless you shot them all yourself on the same camera. We've different sizes. Some OB in 4K, somewhere between ten ADP. And their aspect ratios will also be different. What do we mean by that? Well, economical aspect ratio of 16 by nine. Or someone shot something on their phone. For Instagram, for example, you could have 39 by 16. So that means it'll either be horizontal, 16 by nine, or the box will be flipped like vertical phone, Nairobi nine by 16. And a bunch of other things, whether the shoulder and go pros or the type or cameras and phones. So the goal of this chapter is to look at all the different clips. So you God, And we've supplied you with a bunch of different ones here. And we want them to be a certain size and aspect ratio for output our final video. So we're gonna show you how to manipulate all of the videos so that they will all match in your timeline. So that when you put your final video, it's exactly what you want, whether it be ten ADP or 4K, 8K, whatever you need. So let's get into this. So OK, so there's something else going on with this first video here. If we look at this here and we look at the resolution, this is an oddball one, like normally sequences set to 4K, which is 3840 by 2160. But you'll see that this actual resolution, 4096 by 2160. So whoever they they did this with a GoPro or some other Kimball system. Again, because you didn't use the same camera, that these are different settings on different people's cameras and what have you. So we would click on this right-click and say scale to frame size. But what I see now is look at these black bars, come up here and here and here. So what does that mean? How can we fix that? So if we clicked on here, were in the editing panel, we're just gonna go to affects control. And then while we're clicked on here, you can see this scale and position. We can literally just highlight over this and we'll see that little pointer will move the scaling number in an ad. So we can make this smaller or bigger. We can make this up and down. This is how you load effect then is special effects on user with text or video or titles or anything. If you don't remember numbers that were sad, you just click on this to reset the parameter and go back to square one. So to get rid of these black bars here, or we're going to do is zoom in just a little bit. Just like so. And then we're good. And I can click black on here and we're back. So that now matches these other ones that we see on here. So let's take this a little bit further. So for example here, let's say you dragged all of these media in here into your project folder here. So we have drone rock over here. We have a woman walking on the beach and couples swimming, bla bla bla. These are all different resolutions. We have a picture here which is 2832 by 3665. It's not unusual for pictures to be totally large size. Then what we've done here is we have mileage, drag this drone rock over into this and it's created this drone rock sequence here. And this sequence setting then will be 4096 by 2160. Then we have another video clip of, if I double-click on this, this woman walks on the beach, which is 1920 by 1080. And then we have another video clip of people jumping into the water, which is 1280 by 720. Again, totally different people, different cameras, different resolution. So we have some samples in here. So we dragged in us, in our example, we drag this first video here, this speech scene. And it's called ten drone rock for k. And it may, when we drag that onto here and made this sequence setting. So now what we want the output to be 4K. So first things first, we want it to be 4K, which is 3840 by 2160. If we look at our sequence setting by looking here, we can see if we hover over its 4096 by 2160, it's the same resolution as the first video we dragged over. So we want to change that. So I'm gonna go as sequence, sequence settings. And you can see here that it's 23.976 frames per second. A check on the frames per second also of the video clip, which is what we want for cinematic video. It's 24 frames per second. And you don't know me type in 24, you put in 23.976. And then our frame sizes here are actually want to change this from this to normal 4K, which is 3840 by 2160. And then we just say, OK, And this is changes the Preview file format or the frame size required all the previous files to be deleted. Okay. We're gonna say yes. Ok. Now we can see that our drone Brock sequence here is now 3840 by 2160 kids. This is what we want to output. So let me go through each one of these clips. We can see that they're all different sizes. So each one of these video clips. Different. They were filmed differently. This is 1920, the woman walking on the beach and then the people on the water, and then our photograph. So the way that we can to each one of these is this looks fine here. But if we right-click on this free, zoom in a little bit. So make sure in this box here to the plus arrow. And then you can right-click on this and say set the frame size. That will set this to the 4K resolution that we want. Now, like in the previous section, we have these little bands here because of this drains setting that was, this was film then probably it was obviously a drone. So now we're in here and we click on this clip. Let's go up to this source area. And we will do affects controls. And I were on this guy. I just click on this once and these will come up. So I mentioned he used the scale slider just to move this. You can see, just like the other video we were doing, just move that to unpack the size we want. Okay, so now this is our first video. It's now in 4K setting, and we resize that for that. Let's go to the next clip here. The next clip is this lady walk along the beach. Again, right-click, set the frame size and automatically. Now she has set up here. And you can tweak these things up here if you want to be can see it goes up to a 100% because it was 1920 by 1080. The 3840 years is going to increase the zoom or the scale by chu 100%. Okay, that's good. Now we're on this one, is these people jumping into the water. So if we click on couple with this one was in 1280 by 720. So again, right-click, set the frame size. And we had this little pillow box here on the side. You can see the black bar here, but not on this side. Again, click on this. And then we can just drag these guys wherever we want this. So we're going to do this if we can't get rid of them like here, we're just gonna do a little bit of a zoom just to get rid of that. And then they're gone. And then our last one over here frees him over is our picture. And the picture, again, you're going to, you're going to click on this and there. Set the frame size. The set the frame size if you like this, look, you know, because it's a photograph. It's up to you, but we will zoom this around, rescale it. Now pictures are always much bigger and you're not going to be able to get this job at the whole picture in. You're going to have to just have it like this with these big black vertical bars here. And this isn't a fact that some people do for photographs. But we're going to zoom in as much as we can here to fill the screen. And then we're going to go up and then maybe to get this guy looking over the city just like that. So now we have all of our video all in 4K resolution. And when we explored this out, they're all going to be in the right frame size. And that's it for this one.
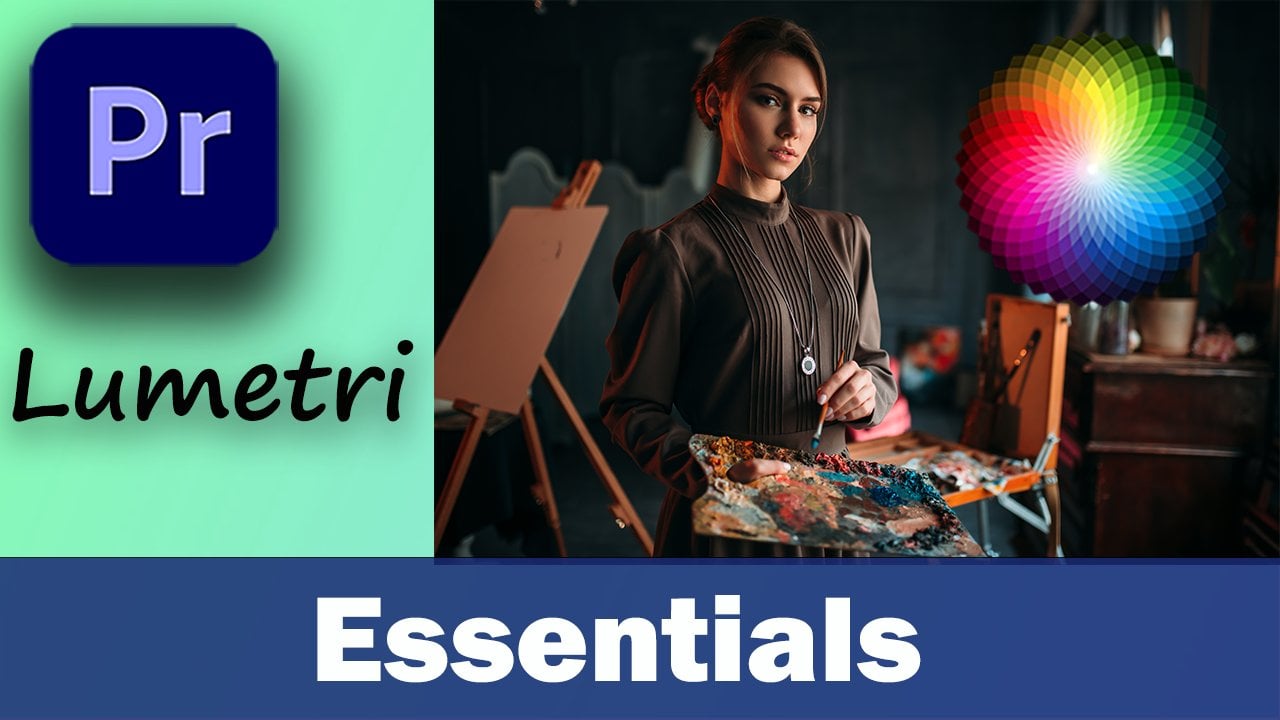
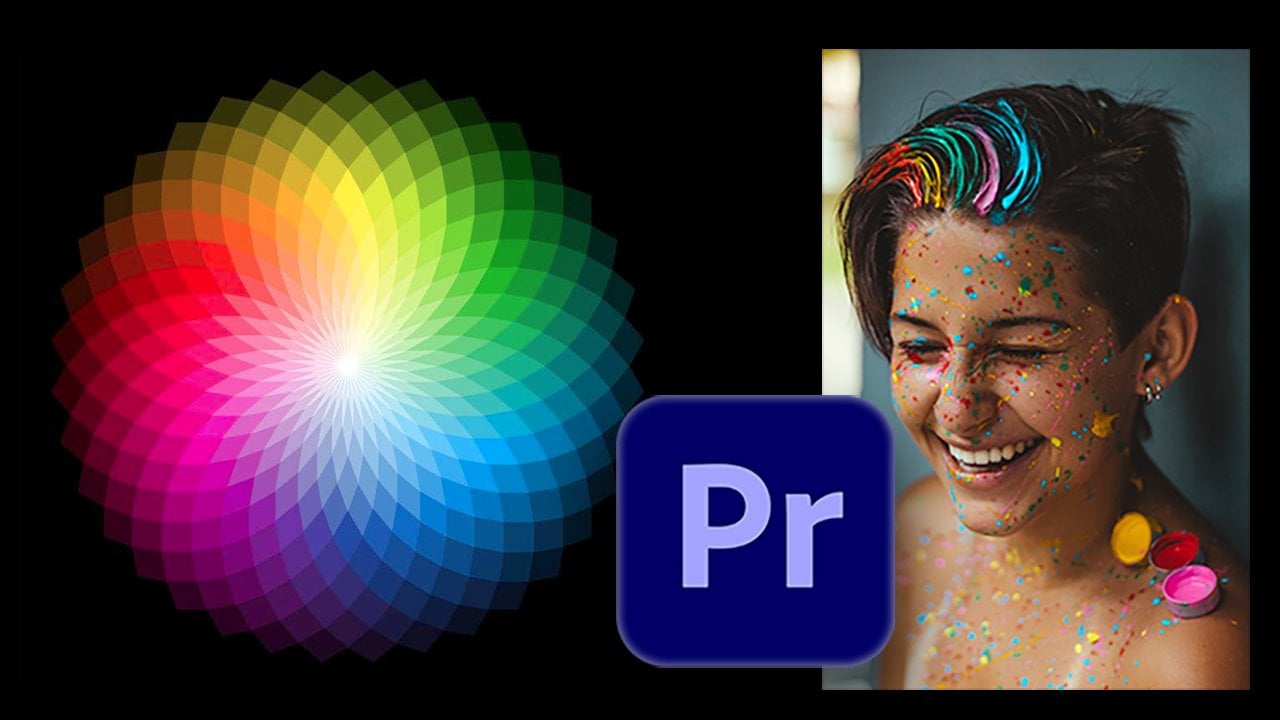
9. Color correction & Grading: In this chapter, we're going to talk about color correction and color grading. So what's the difference? Well, color correction is changed in things like your exposures too high or too low, or your column balances off. And color grading is where you can change the contrast of the look of the video. You can take different lots literature lookup tables, for example, and overlay them onto your video so that it will give you certain looks more like that orange untill look that they use a lot on YouTube over the past couple of years and things like this. So we're gonna get into all these little things now. We're gonna take a little look at Scopes. Color grading, and color correction is a vast subject on its own. Somewhere you just going to touch the base x and this course. Alright, so let's get into the next thing we can look at that I do is I build it all night, do the color correction as I go. Well, people will have you click on this and make a, an adjustment layer here. Say OK. And then this says adjustment layer over here. And they'll put that on the next video slider in one above it. If they've got more video in this area and you can drag this alone. And then what they'll do is able to make the color correction into on this adjustment layer. So this is imagine like a film over the top of all of these clips and the adjustment colors will then be applied to all of them without doing individual ones. So we're not gonna do that right now if I just press Delete on that and I'm gonna get rid of it, edit my bin as well. Because each one of these bits of film were filled with different cameras, with different light settings, different apertures. And we want to tweak them a little bit individually. So we're going to do is color grade, and color correct these individually. So how do we do that? So the first thing to do is go to the top. If you don't have color at the top, you've got a window workspaces and choose color. And I choose the color panel here. Now, be careful when you choose this. Make sure you can see this defaults to the blue around this one or this one. So I mean, I'm adjusting their color based on this guy. So click on the one that your video clip in the program panel and you clicked on it down here. And now what we can do is we can, you can see there's an auto button. This is where over here we're in a luminary color, rim, basic correction. If it comes up with anything else like creative or curves or whatever, come back to basic. And then what you can do, first of all, is you can just try, make sure you've clicked on this one, say auto. And it will try to order correct to what it thinks exposure should be contrast. Highlights and blacks from whites. If you don't like that, you can just click on Reset and it resets. So also if you do auto and then you click on this little checkbox, Show tricks on, on unhealthy effects. You can see the difference. So we do reset on that. The other thing is you have a white balance corrector here. So you can click on something that's white in the picture. And then what you can do is you can, again, make sure you're in the right area. We can make this cooler. For example, Walmart. They can go crazy, right? You can make your break green are wary. The idea here is to make it natural. So basically if you mess up in here, just double-click and they go back to 0, ok, and you can also reset this. So again, make sure you're always in this panel. One thing you can do, it's a bit advanced here, but we can do window and we can check on geometry scopes. And these scopes. Then look at the color signatures. And now there's a whole science behind this and people just make their living doing color correction. However, one thing you can do, which this helps with is you're looking at this. You can use the exposure appear to go 255 appears pure white and zeros pure black. So this is looking at all the, the signature information in this video clip over here. So click on this again and what we're gonna do is move that up with a suit with the exposure because this is really white here. And then the next thing you can do is move the blacks up and down as well. So what you can do is try to bring them down towards 0, but don't make them pass 0. So we're just trying to make it look roughly there. Then when you're done with that, you can forget about that panel right there. Now to close this panel, Daniel C, it's opened up here. We can just click on these three lines and say close panel, and that goes away. And you're affects panels back or your source panel where we were right here. Okay. Now we what you can do then, you can play around with again, making sure you're on the right, right video clip on the right panel it's looking at you can play with saturation to make it really die. This is all down to your personal taste or black and white. So again, double-click and makes it a 100%. The idea is to make it natural without going crazy and you can play around with contrast that a little bit. And then the highlights so you can see what the highlights two. So if I do that, you can see the, the waves of washed-out. So if I move that back down, you can see you start see in more detail in the waves itself and maybe bring the contrast Dan a little bit. Again, it's all personal taste and same with shadows. So if I do this, all the shadow is really light. If I bring him back down a little bit to go really dark so I can double-click them making back in the center. And then the whites are blown out, oversee their faded here. So again, you're just trying to play with this so it looks natural to you. And then we can just play this again to see what that looks like. Ok, so if you're happy with that, what we're gonna do is move on to the next one. So for this one, same thing makes sure you clicked on that, on that video source. And during that window, try auto, you can see it just went a little bit brighter. I might want to bring that down a little bit. You don't always have to use a scope, so I just showed you that. And it's just what it looks like to you if you wanted a bit warmer here, because it's a sunset, you can actually make it a bit warmer by dragging this guy. This is like opposites of each other. This is warmer, this goes Kula. So whatever you feel like to me, it looks like a sunset, so just some a drag dot like that. And on the last one, this talks a little bit washed out. And in the beginning part of the video here, again, you know, this guy has a white shirt on. Maybe you can click on that. That gives you what it thinks is a white balance. You can click on auto. You can see it went a little bit, a little bit brighter with colors compared to what it is on and off. Very subtle. And again, you can play around with it. A little bit of saturation may be. And you can just see what you think like the exposure. Touch on that a little bit of contrast. And again, click this button on and off here just to see the difference. So again, don't go crazy. That's what you wanna do, but you want to do this for each clip. You just sort of color correcting. All right, so that's it for color correct data is a lot more.
10. Using B roll & transitions: So in this chapter we're going to talk about payroll and transitions. So first of all, what is be wrong? So B-roll is nothing more than imagine me. This is what's known as a talking head video. So it's like an interview, you're talking to the camera. But if it's just someone like this going on and on, it becomes monotonous. So to fill in the gaps and make it more interesting, you'll put in other parts of videos. They'll fade in. These videos at fade in and out also have transitions on them. And that transition is nothing more than maybe you've failed between one clip to another, where you'll have a straight cut between two clips. And you can give a lot more stuff with fancy zooms and spin effects and all these things that you can buy news. My advice would be in the beginning. Get used to the basics. Learn to use them because they're the most professional looking. And then a lot of people will buy these packages where there's 200 video transitions with spins and bounces. And then it just becomes crazy. It sort of doesn't look professional and people go overboard with it. So a little bit goes a long way. So in this chapter we're going to learn about putting some B-roll over a role. So ava would be the main video like this when MY token on it. And it'll fade in two other video known as b wrongs. Alright, so let's get into, okay, so we've got our three clips in, and then we want to look at what they call B-roll. So B-roll basically is if you have lights, they call it a talking head video. It's stuff that gets faded shoe. So you have someone talking on camera and they fade into what jump to some other clip. So just to show that a fact, because we're only using one, we're still using just video one channel. We can use 23 and more. So we can, what we can do here is look at something here with if we're looking at this guy drone on the rock, I go, well look at this guy. So what we can do is drag this guy over here and have it may be there, for example. So if we go here now, this is actually a picture of an hour late or forest or something like that. So we can do this. Let's see what that would look curd. So maybe here we would cut into their syllabi. So right now we need to do a few things are there, so let's use our keyboard or rubber bands to just go on in and zoom in a little bit. And again, several loco we got here. So this will be this and not for much longer. Don't you have very long here. Again, we can do c and cut that one right there then do v to get rid of that, to lead. Okay, so now if we play this back here, first things first, that is just too small, so we're gonna click on that. Again. We have that same issue. You could use this here. And we go to the editing panel, which is easier for us to work in. And what we'll do here is we can click on this video. We could go to effects control and we could manually move this up, whatever wherever we wanted. But say we wanted to put that as a video and move it somewhere up in the corner. I don't know, it's there we go. You can even use the tool here, double-click on it and they move it where you want to. Sort of easier. So that would be a way where you could have a video and video, for example. Or let's say we want to, we want to go into that video here. Again, what we could do is click right click on this and do scaled a frame size. So now, because we move this by the way, just now, what we gotta do is go back over here and then make sure we're clicked on that and this to reset, reset. So now wouldn't be the same size. So now for that little bit of video was just fade into this other thing here. And then what we can do is if you right-click for transitions are coming into, we're gonna right-click on this and say apply default transition. And then this is going to show it to you in a cross dissolve as they call it. It's going to fade into this and then it's going to harshly jump back out. So we need this to be a little bit longer. Maybe. We just drag that and the cross dissolve here. You can actually see, you can actually go to the end and drag it down. So it's a little bit faster. And let's see what that looks like. So now you fade into that. And then again, you can crossfade back by, come to the end. Right click, apply default transition. Highlight over it, just make it a bit less of a transition time. Just gonna fade in for this B-roll as they call it. And then back. And again, he would colorize this the same way we just did in the previous chapter. So that's what it would look like. And then maybe for whatever reason, whatever clip you want to put in there. Okay, so let's use our keyboard by the minus button, and let's go back out to here. So now we're looking at some sort of transitions right now. This is called a cut transition, should go straight to the other one. But maybe you wanted to do like this is a crossfade in my cross fade out and then a cut again down here. So let's say you want to change some of these things. So what we can do in here is we, so we're going to click on this and go to the facts. And here are a lot of effects. So you can see there's lots of things you can do and this is a totally different area, but we can go to video transitions. And then you can see what you could do here with immersive video or dissolve. So what you can do is drag one of these onto, let's say we're gonna do like dip to black, will pick that one in a second. But let's zoom in here a little bit. So we'll do plus and our keyboard. And then what we'll do is just move this around so you go back to where we want to be. There. We go right about here. Okay? So right about here. And we're going to then just drag this video transmission dip to black. Right on to this thing right here. They can see it actually landed on this part of the video. So if we click on this one, we can actually see this is how you can control the effects. And I can just drag this up here to its half over the end of this other clip right here. Before it goes on to the second types of we take a look at that now. It looks like this. So it's sort of a classic one right there, but there's a lot more that you can do. If you don't like that one. You can just click on it, press delete, and then we can do film dissolve for example. Maybe go. Same thing. You can click on this one and then you can move this up here. Let's see what this one looks like. So you can get, you get the idea. So you can have your, your transitions between Eclipse. And there's a lot more of this other stuff up here, this 3D motion, iris and page P, L and wipes and zooms. So zoom if we do that one, if you delete this, click on zoom, make into crosses zoom. Let's see. Oh yeah, handed on there. Click on that one. And he can. But trying to go as bringing this guy back where we want it to be. Let's click on this one and then just do across a zoom. So let's have a look what that one looks like. And this, uh, do a little zoom in to the next one. So there's a lot built into premia. You could do a lot with it. So I'm going to stick to the crosscut. Nice and simple are actually what we can do. Let's make it a little bit better than that. Let's go to video transitions and then do the one we had earlier, which was tip to black. There we go. And I'll put that on there. And I can click on that. Move this a little bit over two both. And we have our debt to Black video that goes into the next one and then goes through the trees, dissolve zygote. And then we have a cut to the last one. So that is how we would use some transitions, a lot more to it, but I want to go crazy with transitions. You can go, you can have so many transitions and affects that it just gets, it loses the story of the video. Keep it simple. Use a couple of basic ones. It's much better. So, alright, so now we've added some transitions. We've added a B-roll piece of video and we'd use the Select tool and the Cut tool to have videos. It'll sequence coming together that he, as we go through it all. And we've done some color correction. The next thing we're gonna do in the next section is added some titles.
11. Creating Titles: In this section we're gonna talk about entitles. Why do add them? How to create them? Now to manipulate them, we're going to show you how to add a motion graphic template known as how to install them and utilize them. We're also going to give you some practical examples in the next couple of sections coming up where you can make some cinematic titles and some animated titles that will enhance your video to another level. Alright, so let's get into this one. Okay, so the next thing we're gonna do is add some titles here, at least at the beginning. I'm going to show you in a fact that is sort of a tidal effect as well. If you are on your timeline here and you want to go back to like the first frame. So you can just keep doing this until it goes black. And then you click on this 12 steps forward. One frame I want to capture that frame is the Z opening of video. And I'm going to use this guy here says Export, Export frame. If you don't see this here, you can click on this plus button and then you can go get it and add it to your, to your layout here. The other thing I want to do is close this up in the effects tab that we're in. So click on these to Chevron, so arrows and just go back to Project, practice movie, and then we're back to where we were. We were. So I'm on this this area here. I now want to take a picture of it. It's going to ask me if it wants to keep a copy of this, where it should store it as a jpeg. And it's an ally was to give it a name. So I'm recall it from picture. Anything that makes sense to you. And it's going to import it into the project. And then it's going to put it in a path here as well. So to say, OK, an ad that picture, if I double-click on it, is right here. So I'm going to drag that into keep everything tied here, drag it into my pictures bin. And then I'm going to drag this onto my video timeline right here. And this is a picture. And it's the very first clip of this. And you can see it's about three or four seconds long here. So as I move this timeline, you see this guy Kang thing. And another way you can do things here as you can right-click on this and say speed and duration. And you can actually change this duration or speed of a, of a, of a video or what have you. So if you click on this, you can just change this to, let's say five seconds. And if you want that to be exactly five seconds, you make 0. Say okay. And then now I'm, what I'm gonna do here is just right-click on there, do ripple, delete. And now this guy isn't to start off with a still picture and then start out video at that same frame. Okay, now let's make this a little bit more fancier. Skip this sort of a blue background with the title of the top of it. So what we're gonna do here is look for effects were on this guy here. We're gonna go over here to effects. And then I don't know where the bluer effect is NEA. So I can, I think it's called corrosion blur. Sociologists are typing it, it finds anything with that name. So I can just drag this on top of here. And if you say nothing really changes the UNO. So let's close this up here. The facts, we're going to click on this two arrows. Come back to the practice movie. And just like the tidy up as I go along, this is the source picture. So if we click on this guy now over here, for this guy, we're going to click on effects. We have this audio clip mixer open. I don't want that with a hose up panel. This is what I'm looking for. This is the effect so that we, the Gaussian blur and I can see it's actually down here at the bottom. Wherever you add it, it's always at the bottom. You can see blurriness is here. And you can just start making this blurrier like this. So it's a slight blur as such there. So we can make it 0%, we can make it sort of a go, a 100% or so, right? So that's the way that works. So we have sort of a blurry background. So if we look at that, when that runs into here, it's an undo this, okay? The next thing we want to do is I'm going to go to the very front because I want it to start open with the do apply default transition. So when it starts off, it's black and then it fades into the blurriness. And then we can even make another transition here just by doing a play default transition and then drag the timeline back. Let's see what that looks like. So fades into like a blurred version of that and then starts to move. So not too bad. This is all whatever you want. Maybe this doesn't have to be as blurry. We can make it. But clicked the wrong one. So I checked opacity there without looking. So again, if you mess up, you just do reset parameter goes back. I'm looking at this one goes from blur. And I'll make it not quite as blurry, maybe 70% or something, just to see what that looks any better. And then we will to that and it'll fade into the existing one. Okay. Okay, so we're happy with that. And then I wanted to just sort of zoom in a little bit just to get where we are. Now want to put a text effect on here was some text. So you click on this toolbar, then he and just click on the Type tool and just click in here once and sat tight type insert saying my new video. Okay. Now what you wanna do is we want to change this, make it bigger or what have you. The best thing to do is. Click on the selection tool. Don't click on the S because it affects like circular rotation or something. You can just highlight this here and make it bigger. You can just grab it and move it around the screen wherever you want. Like so you can see the timeline then deviate is here. So we're going to just drag that back a little bit because this can go into the other video. So if we just look at that right now, that's a sort of pop on the screen. Okay? On the other thing you could do is when you click on this here, you'll notice that if you're in the effects panel, you see this is my new video and the effects panel, if you were in something else, for example, or editing, again, normally, just while you're on this, click on effects. And then you can see what we have up here is the text. My new video. Click on this down arrow here. And then you can pick the font that you pad if you want it to be bolder or something, or any other type of thing, you can make it really big. And then you can move it around. And what have you. You can make it in the center. You can just like you're using different editors or you can just click on it, it as long as you're in this selection tool, click on that, just drag it to where you want it. So maybe like here. And there's other effects to ten years removed down here. You can see a give it a background box I think. And what have you. So to that and then stroke. And the fill. So fell means fill up the tax itself. I think the stroke would look at that. Let's do a different color for the stroke. Actually, I wanted just double-click on that. Say it's a stroke is black and it makes like a background on the back of it, like a highlighter, you know, make it stand out or whatever. And they go, there's lots of things you can do. There's lots of other effects. You can give it again, but just keep it sort of simple. There we go. It's just a simple one. And what we can do now is, you know, it'd be nice if that was sort of fade in and out as well as just sort of fade him with it or something. So you can do the same thing, apply default transition, make it much smaller. And let's see what that looks like noun. So if we do that or you can make that actually longer. That was a little bit to Crick. And then you would do that. It comes in and then goes back out. That's saying that's the best, you know, text to use. Or like you said, if you don't like it, you can come back. It's totally up to you what you use. And I can come down here to take distro cough. So it doesn't have that. And you can change the. The font again, maybe not extra bold, just something simple like this. And then again, you're in that mode. You can move it around and you can change the colors of it and what have you is have you just double click on that? It can be yellow or whatever color you want. Here. Say okay, Kazakhstan, Kyrgyzstan there. So you can just do a Control Z and no go back or Command Z if you're on a Mac, okay. And you had to put a text in and give it an effect like a fade in and fade out or something to fade in by default again. And then we can take another look at that. Say, my new video fades back out and then you video starts. So before we go, I just wanted to give you guys a tip on when I used to watch all these YouTubers and these big guys, you know, with all these fantastic tidal affects and intro isn't all this other stuff. And I was like these guys must be geniuses at making all this stuff. And then you have figured out later on they're using this stuff is a website called embargo elements. And Video Hive is a lot of them. And basically you can actually see these packages that'll give you like 70 lower thirds maps and subscribe things and design packages and what have you and you can actually go in and buy these things for Premiere Pro. So like neon light titles and what have you. So this is a way they have packages for things like this. You know, I mean, so if we look at this one for example, this is one where if you play that little video, it shows you what this package will do for you. And then all these things that we see popping up on the screen, for example, you're not making these by scratch, you're actually just download and embeddedness. It'll plug-in that allows you to do all these little. In this case is it'll titles like this on the backend. So if you're doing it for YouTube or Instagram or what have you, this saves you. Davidson's available is of time. So as a template you, you can download and put into, look for. It's for premia for example. And then like here's another one for lower thirds. For, for Adobe Premiere, be careful because a lot of them are for After Effects. But did they go, it's like making titles like we were just doing that symbol one. All these are built in. So it's a lot easier. You just can edit them. However, be careful though, because some of them are actually, it's a great website, were not affiliated, NOT being sponsored by these people. But all. Sometimes you download these, these, these little packages and it's like, man, that makes no sense whatsoever to try to get it going. So just look at the reviews and play random as you get more experience, this will definitely help you out. So what does it look like in real life? If we wanted to put a title over this, for example, we gotta graphics and your download circle Margaret files and there's a video that had to install. These is pretty simple. And then you'll have them in your local folder. So you can select all, for example, and he has all the different ones that you can just drag and drop them onto the, onto the timeline and they go home. It's as simple as just drag that in. And let's, let's make that more in here on this other video, which is easy to see. There you go. It's just like this. So the way you do that then it's once you're on here, you would just go to add it. And then you can just actually changed the name of my video, for example, is the one video tax file. Look at that on here. I want to maybe change this so we can see it better. They go. So my video is the piece down here right now. And again, if we click on this guy, you can change stuff in here. So say it's a my video is whatever. During Great. Whatever you guys want to say in here doesn't make any sense to me right now, but basically you can change it in here, look as well. So these are all the effects and changes that you can do. So again, all of this stuff here has, like, for example, it says doing grade up here and then you can actually change the scale of it. You see if you go too much, it can cut off each one of them is different. And then my video down here, we can make that a little bit bigger. You can change the tax and what have you. And you can work your way down. You can change the colors and the size and what have you. So with the different lines and what have you here. So we can do position and scale. You can move it around wherever you want it to be and you can scale it up and down. So again, then if we preview that, for example, you can see that it basically does this for you. Now, if you owe video gets choppy Like This was just showing it's because you're trying to run it at full speed. You need a really powerful computer for premia. So what you can do to help that is go down to like a quarter or an eighth. So we've got a quarter. You'll see that this gets blurry. But it should help you just to preview the thing. Yeah, I mean, but when he bet on there when you really exported out, it's gonna look crisp. So that's just to show you that that's how these guys do that stuff. Just some extra information for you.
12. Music and sound design: In this chapter, we're
going to talk about adding music and sound
effects, sound design. Audio is 50% of the
viewing pleasure. You can get away
with Paul video. If it goes in and out
of focus a little bit, a little bit fuzzy. Okay, away with is
that your audio is really just watch the video. It's half of the
viewing pleasure. So make sure you do your best to get as good as
audio as you can. So the other thing
I will enhance your video is sound design. Not just having someone talking or some music
over the background. But what about ocean sounds? If you're looking at
the ocean of birds, if you're in a jungle or
a forest or a park, wind. All these little sound effects make a build a story
for you finished video. Let's take a look at all this. Let's get into it. Just
to give you an example. Here is a little movie
that I've made up. There is no music
in this at all. It's just using
free stock footage, video and some sound effects. Take a look and see
what can be done. It. In this next section,
we're gonna talk about sound design and music. The graphics tab we want
to go over to Edit. And again, we need to get some music and some
other effects here. So I am going to go to
my son panel over here. I'm just going to click
on this one that says moped and birds because I already have this
ocean effect one here. I'm gonna drop it into
my sound effects. It's folder or bend. So now we have three. We have some background music, some birds and trees
and a moped send. In our example. I'm gonna look around
here for where I thought the birds in
the trees would work. I believe it's in sort
of this jungle area. Isn't very long, but let me have this mopeds going to
write right here. I'm just going to drag
this bird's music sand. I'm gonna put it
on this A1 line. This is our already
and now you can make this look bigger or
smaller just by clicking, hovering over the line here and just clicking on
it and drag down. Then we're able to raise the volume up and
down of your audio. This by clicking on this line. Going up or down. We got some burden noises here. And then I'm just going to put them in this little section around TEA. Just suddenly. Let's just click on that
and delete that for now. I just wanted to
get a little bit of that so I can
double-click on this, which we have up
here. And I can just Play where I want this in an 8 that I can just see
by this sort of waveform. This is roughly where
the senza we go here. You can see the same
thing over here. For me. I'm going to try to
capture between here. So click on this endpoint, then capture the 8. Then just click on the sound
icon here and drag it down to where I want it rent here. This is from before. We'll just get rid of that. If we play that over. It plays into the
moped silent as well. Let's go and then
put on our mopeds. And I also want that
mopeds side here too. So I'm gonna close this
up a little bit for now. Then I'm going to drag
this mopeds sound over here online, A2 now. And just two. Then it's
just background sounds. They call it say
at sound effects. Now we're going to have, we can have the birds
actually be a little bit. Even while she's on the
beach, maybe there you go. We can just do that
and drag it out more. And then we'll have
this moped same when the moped pot is coming up. So if we go here, then that's all we
have for there. So we can zoom in a little bit
and take your razor blade. Just cut that off. Take your selection
tool, cut that away. Now, these are pretty abrupt. I want them to be a lot quieter. So what do we do here? Again? Move to where
we want to work. Now. We can fade this in actually
really quickly here. And fade this in here, afraid to say it just by right-click and
do apply default. And you'll see here that it creates a fade even
though it's an audio. If we listen to that, We're actually I don't
want to listen right now. I can hear both things, so I don't want to hear this. I just want to hit this
fade on this birds. If you go to M over
again and click on that, that will meet this sound, but play this one. I'm gonna get rid of that
because I don't like it, but doing clear, there's nothing really here
but the sign of it. So I'm going to drag that
back in a little bit. Small birds sends over here. See you that that's cool. She got your bird sound. And then we wanted to just get rid of that mopeds
saying a little bit more because it's
just ramping up. If we change over and listen
to that versus this one. So the bird sense and listen
to the moped signs going by, started from the beginning. Let's listen to that.
Now. The other way of doing that to another way of fade and stuff in and out. We just go over here. Click on this guy. I'm going to expand it then
so I can see it a lot better. And I'm in it while I'm on here, I'm gonna go to effects. Over here, I'm clicking
on this audio. Here's a decibel level. So as I click inside of here, again, like I said, you can actually drop the
sound of the moped just by dragging this little slider
up and down with your mouse. There. We listened to that. They go into a lot quieter. Another way if you want
things to fade in and out by using a keyframe, for example, this is
another subject altogether, but what we can do is when you
rip up inside the effects, whenever you have these
little stopwatches on, that means he affects can
be on it makes a keyframe. You just saw it, made it here. Wherever I clicked on that, I can drag this
along this timeline. Do another keyframe, you just click on
this little button. Again. That will stay constant from this keyframe
to this keyframe. And when I get to the end, I wanted to sort of
control what it does. I can click another one. And you'll see I made
another point here. So what do you got
to do is click on that point and
then drag it down. So now this will play, play, play and fade out. We can do like this. There we go. If that makes
sense, I'm more time. Again, this is why you
can use some key frames. Can be quite complicated, but just showing
you that you can affect not just video
but audio as well with, with even sound effects. And what have you. What we've done currently right now is we have put some bird songs
over the beach time. Then a little bit over the moped when the capital on the moped. Got it muted. But
let's take that back. It's quite loud. I can tell already
before we even put the music on the background. You can drop that down
just a little bit. He just wanted you don't want the 70 effects to
be overpowering. You want them to be
in the background. That's the first place. The next thing we got
to do then is we've got to put the background sound. And I guess in the
ambient ocean sounds, which will cover the entire section that we're
building here. Okay, so first things
first, let's close up. These are just drag
them up a little bit so they're smaller in size. We can see the other
channel down here. By the way, these little
bands down here allow you to move up and down within the
video audi of sections. It says for the video section, this is for audio. So the next thing we're gonna do now is we're going to drag this ambient ocean effect and drop it onto
a timeline here. Scenario, if we
just use a keys on the keyboard for zooming out, we can just drag this guy
right to the beginning. Then if we listen to that and we can zoom in just a touch. If we go right to the beginning, we'll have some ocean
ambient sounds. The ocean sound, obviously
it's very loud right now. Again, you can condense at the bottom here
and drag it down. Then you could just
drag this down here. Let's see what that
sounds like compared to the birds and the moped. That's the sentence
you bad at all. Another way of doing
this, by the way, you could right-click on
this and say Audio Gain. You can actually adjust the
game by whatever you want. For example, five decibels. And then you'll see that
the whole thing peaks up, makes it louder.
If we played it. Again, just do Control Z to drop it back
down where it was. And the simplest way is to
drag this lineup or ****, it. It's normally halfway
on a stereo clip. So we'll leave it where it
was using Tax Cut tool. Right now. We can just cut it off. Use our selection tool. Click on this guy, press Delete. Now when you're ready
to export your media, just make sure that
this little timeline by here is not over here somewhere. It's at the end of the
eclipse right here. We'll talk about that
in the next section. So everything looks good. We've got some titles. We have some ambient
background music or sound. Then we have some other
sound effects as well. We have some birds to moped signs when you can
put whatever you want, then you just build up
these sound effects. It just makes it
more interesting. It's layers and layers,
a different sign. Where do you get
your sons? So I'm actually there's all sorts of paid subscriptions
and also free. You can search the Internet. But for one thing, if you actually have
a YouTube channel and you go to your, your create section here, then here is the audio library. And you can see
here by using this already a library
agree with YouTube. These are actually free to
use for YouTube videos. And you can pick a genre by clicking on things
like this or a mood. Then it will, can play in them. Then you can actually
download it like this. You can all sorts of things. You could do that. You can go to a place
like Epidemic Sound. It psych, I can't
remember how much amongst like $10.15 dollars. But you have all sorts
of sound effects and other stuff and we're not sponsored by them or anything. Again, there's another
one called that list. Again, a paid subscription. And then you can
download sound effects. So I think all
sorts of music for your videos, lots of ways to go. Make sure you're not using any copyrighted music
and stuff like that. Unless you've paid for it. Again, if you are
looking for free video, make sure it's copyright-free,
a royalty-free. Make sure you read licenses
and always stay home. That's enough for a sound
design for right now. Next thing we're gonna be
doing is exposing your video. A new thing in the newer
version of Premiere from version 22.3 and above. This, as you said, we only
be available in audition, but now it's in Premiere
is a thing called Remix. In this example, we
have some video, it's about a minute long, and you can see that sand
track is much longer. So normally what you'd have
to do is use the cut key. And then you would just, you don't have to take something out here and then try to
match this up somehow. Manually do it. But now there's a way
to do this in Premier. So we need the essential
sound panel open. And if you don't see it up here, just go to Window and the
four essential signed. Click on that, that'll
turn up over here, would go into click
on the music. We're going to tell
it that it's music. Then we're going to do, we're gonna do duration. Click on here, click on remix. It's an a look and analyze this. And then all we're gonna do
is drag this down to what we want to get and I
want it to be about, let's say one minute. Let's go from there. Then you can see it
automatically will change the duration of the clip. And you can see these
little wiggly lines here. This is what
premiere has done to automatically remastered
the clip itself. Now here you can see
where it says Customize. You can expand that. You can see the segments here that it shows
these are these lines. So primary had decided when to cut the song to make it match. And you can take those segments, you can make them less, you'd have more duplication and less of them
or more of them. And that will depend on what the song is and
what the harmonics. You can play around with
that if you don't like what preemie that automatically. Same with variations. This is adjusting what permeated with the
harmonics and what it decided to cut up the song-like
so you can play radio, some other customization here. If we play through
this now you can see, let's expand this a little bit
so we can see these lines. You can see it didn't
quite a good job. Son was flawless
going through this. So let's really, it's
a great little tool. As I said, it only used to be available in Adobe Audition. Exactly the same thing. But now you can do it
right here in Premier. And it can shorten
the song few so you don't have to manually
cut it up and try to match tempo is and
stuff like that. Great update on the new version.
13. Title practice 1 cinematic: Okay, so we're going to make a cinematic title is your first effort here on a black background. So if you're in a brand new project, we want to make a sequence. So we can go down to New Item create sequence. And we're just going to go up to settings custom 3840 by 2160 is for 4K. It's a ratio of 16 to nine of you were doing ten ABP 1920 by 1080. Like so. And that will give you also 16 to nine. So I'm gonna go to 4K, which is 3840 by 2160. Okay? Make sure this is set to square pixel. And you're in 24 frames per second, 30 frames per second, whichever you want. 24 frames per second is a cinematic look for your video. So I'm going to say o k, you can give it a names. I'm going to put mine cinematic title. For example. Say okay, so now what we've got is we made this sequence here. This will give us his Blackberry we want to create. And we have a sequence in our project folder here. All I'm gonna do now is go down to here and select the Type tool. Click once, click it once in here. I'm going to make cap locks on. And I'm an approach. I can't spell makerspace. One thing to note here is that if you're still in the text tool and you click anywhere on the see this red area now comes up, that's another text tool. So to controls the for that, you wanna change over once you type your text in to this selection tool so that you can click on this. Now there's a few ways to manipulate this. You can go to the effects panel and this will give you some larger highlight that's zoom into this by taking the rubber band all the way down. And this defaults to about 4.5 seconds, which is fine. I click on here. We can do affects controls. And then you can see as the cinematic title. And I ask them some ways to manipulate this right here. However, you get used to use in the window. Essential graphics, essential graphics area is actually what's used a lot and has more control. It's very similar to this and you can use either one. But a lot of the effectual do later on you will use the essential graphics. So again, we see the same thing. Go to edit. In here. We can use these but with this selected here, with the selection tool, like we said, this one, you can use these boxes to center the text in the area here. I want to change the font to, you can scroll down, but I know there's a thing called plateau, which is quite cinematic. And I'm going to do not so bold. Actually, I don't like the Bold, so I'm gonna change that to light. And I'm also gonna spread this out a little bit here by doing this VA. And I'm changed at the 300. And it sort of spreads out the distance between the, the letters also centered up, back up again. And you can also use this here just to make this bigger like so. I can use the selection tool to do the same thing. Again, alike to center things up as I'm going. So that looks a little bit better for a nice, clean look in cinematic look. Okay, so we have a title. I'm going to make this lengthier by clicking on this insane speed and duration. And I'm gonna set this for six seconds. Six seconds make i 0. And so now we have the CIA. The next thing we have to do now is with this selected, I'm gonna go up to facts control. And we want to animate this a little bit over this duration as this moves in and out, we want it to fade in and out. So what we're gonna do is use some keyframes. So I can just go up to him and infects controls. I can click on this arrow to clean it up here. And I'm looking for opacity. Okay? So right when the playhead is right at the beginning, like here, we're going to click on the opacity stopwatch. That creates a keyframe here. I'm going to set the opacity to 0. That means it won't, you won't be able to see it. And then I'm going to move the play head. So this is up. At two seconds. And now I'm gonna move the play head thirds at two seconds from here. I'm going to click on this. It will add a keyframe. So it makes us keyframe. And I may change your possibly up to 100. I'm gonna move along again to four seconds. And just add a keyframe here. So it's going to be 0, one hundred, one hundred. And then when I get to the end of this, I can drag it. And, or you can also use the down arrow and it'll take you to the end. And then we're going to hit another key frame like that, and we're going to make it 0. So if we go all the way back and see what that does, so fades in and fades, I'm OK. So one thing you can do is highlight all of the key frames. And then just do. These. Actually do is I was actually there we go. That what that's gonna do is as it goes into each one, if we do this, we can see it can be highway ramps between different key frames. So it should make it smoother. Just like that. Don't worry about it too much. What they're actually doing is this is later on, it's a little bit more advanced stuff. Okay, so now what we can do is just make this a little bit more fancier. Causal effects control. Then here. And they project powder or facts that start happening garage, garage Ambler, drop down to the type itself and you'll notice that this popped up here and the effects control. And it's actually right here. So what we're gonna do now is make sure we're at the beginning of the sequence and we're going to do blurriness. Click on stopwatch when a type in 15, 50%. And then we're gonna move on to the Go down here we did opacity. It'll just go to the next section which is two seconds. And then I'm going to make this 0 shuttle make another keyframe and they match up with this, go to the next one, and leave that at 0. Again. Hit that, which will make another keyframe in line with this one. And if we go to the last one, it will be again at 50%. So these keyframes all match up. So now what we've created is it'll be blurry in the begin end. As it fades in. It's clean. It's clean and blood gets fades out and gets blurry again, such as schedule another dimension to it. Let's do one more thing. So if we just use the up buffer collectiveness parks, Dionaea, a sequence title box and just go up arrow and go right back to the beginning. And then basically we're going to now click on the scale. So right here, you know, being a 100%. And if we come back down to here, click on the down arrow, where at the very end, go back to click on the title again. We're signed scale and maybe do a 110. So it's an upgrade, a keyframe where we'll start off with a 100% and slowly zoom in just a little bit. So if we go all the way back now and take a look at that. So it's just zooming in by 10% and fades out again. So another thing we can do is add another subline to their CIA. So instead of doing all that work again, we click on our title, hold the Alt key down, drag it up, and then let go of your Mirsky. You'll have the same thing on the upper layer. Go to your window, make sure essential graphics is turned on over here. And then we're collect on the top one. So we want to change what this says. So I'm gonna say coming soon, for example. And then I can manipulate this down position to wherever I wanted. Let's go below here. And I'm going to actually change this because it's all caps locks. So I'm gonna take that off and say coming soon. Become my wherever you want to Began may get centered. Drag it down. So to make sure you're in the selection tool here. And then you can just drag this a little bit, make it a little bit smaller. So and I'm joined the center it and keep it in that wrong button, but that's fine. We can move this down to wherever we wanted here. So now if we go here, Let's see what we've got. We have them both coming in together and doing the same thing. So we have all those effects that we did initially, but we don't have to remake them. So the other thing we can do is if we just take this upper one which says coming soon, we can drag it over a little bit. So now it will be, it'll come in at different timings are free. Play that back. This one we'll fade in, fade out. And actually I'll move that a little bit more. Just so it looks like this. Then you get the idea here. So finally, just to top it all off, we go back. I have some friends, some sound that will add onto the top of it. So I'll just drag some sound effects that are found on the internet here or on YouTube. You can get them in multiple places as search around for Warsh sends and see what that looks like. So one last thing. So one last thing is you don't have to have it on a black background. This is a nice opening effect for sedimenting opening to a video. Where you can do, you can also just highlight both, drag them up, and then drag in a video clip that you might have. For example, if this was your video clip here. And then that would do the same thing over a video clip. But again, having that dramatic by background to make it just makes it more dynamic, in my opinion. They go, that's example, one. Simple but effective way to use titles.
14. Title practice 2 Mask effect: Okay, for this first effect, we're going to use a mask to create a text animation. So the first thing to do is to why you're in graphics. You can select the text button, click once and type the text. And from here, if you change the the selection tool, you can just make this the size you want. If you use the alignment tools over here, you can center it in the frame and also change the color I'm on. Leave my white and then select your font by here. I'm going to leave it as railway light. We can then go up to the pen tool here, if you hold down on the little arrow, must like the Rectangle tool and just draw a line underneath here. You can then use the horizontal button here to align it to exactly where he wanted. And this moves at the center. We're going to move it just a little bit down below the text. And I selected a red line. So if we just click on that again, you can see that you can change the color here to whatever you want. If you want it to be yellow or what have you, it will be whatever you want. Now you can see that it made the shape called shape or tomb. We're going to just click on this slowly and change this to line so we know what it is when we go over to the effects controls. Okay, and I've gone over to the effects control. You can see there's a shape called Line that we labeled over a year. Now we're gonna go over here and it comes down to this rectangle tool. And you can see it makes a mask sooner. We're just going to reshape this so it fills a line area that we want. Just like that to make it a bit more square if you want. Really doesn't matter. Now drag your timeline to where you want the light to appear in the animation. So about right here. And then just click the stopwatch umax path right here is sets the keyframe right here. And then what we're gonna do then is go back to our using the up arrow, the beginning of the clip. Now to see the mask again, click on the mask right here. And then over here you can simply drag this over here so it won't be sane. And you can see up here it made another keyframe. So if we just press the play button now, you'll see that the line will be revealed from left to right. So next we're going to animate this. Welcome to my stuff to come out of the line. So go here and collapse the shape line. You just give yourself more information and go to the text. Welcome to my stuff. Click on this little arrow. And then if we have the same sort of information. We're going to select the rectangle again here. And this time we're going to select the masker again. But this time we want the bottom here to be in the middle of this yellow line. So if you just double-click on this panel, it'll bring it up here. And then what we're gonna do here is just when I'd be in the middle of that yellow line. Like so. Just intersecting it. Yes. So you need more accuracy. You can zoom in, for example, to get it even better here. So that's to that. And that looks pretty good. And then just double-click on this again to bring it back down to where you were going to fit. The other thing you wanna do is for the mask feather. Here we just wanted to type in 0. So the next thing we wanna do is see where we want this text to be revealed from. So if we just click on this text here, you'll get rid of the mask itself or CNN. You click on this again to bring it up. So I'll just click on this. We're going to come down to the, to the line here to the playhead and see when the yellow line gets revealed. So when it gets revealed, i'm gonna hold it right band. That's when the tech should be real. Next thing we wanna do is scroll down and click on the position stopwatch here. So this is the point where it's fully revealed. If we move the play head here, the line will stop. And if you look up here, we're not quite at that point. And we made a point here. A couple of I press Second further for the line to be its final position. And we're going to come back a little bit to where line just finishes. And that's where the tech should start coming out. So this point, this is where we want the text not to be here. So we're gonna go to the position and just move this below the line. And you won't see it right there. And you can see it makes another keyframe. So if we just use the up arrow to go to the beginning of the animation press Play line is revealed and then Welcome to my stuff pops up. You can then if you wanna go down to where your two timeframes are on position. You can make this a little bit smoother by just highlighting over both of them, right-clicking and saying temporal interpolation. You can do is in this shouldn't make it a little bit smoother between the movements. Okay, for the outro, we're just gonna go in the opposite direction, so we're still in the position. We can move the play head for however long we want that text to stay on the screen. Let's say here, we're going to then hit another key frame here. So that's where it's going to reveal itself. If so, if we go back using this little toggle previous keyframe, It's gone. It will appear that it stays on the screen to this point. And then move the play head than that point to when you want the text to disappear. And then we're just going to move this again to make it disappear. From this point. Go up and minimize the area here. For the walk into my stuff. Click on the Shape Line, and then you're going to hit the mass path again. In the starting position. You wanted this data, which will be this position when the, when the text is gone. I'm here to keyframe here. And then you can hit the mask itself, move a little bit further forward, and then just use this guy to move the text out the way. And now if we play that back, let's see what that looks like. You have a nice little graphic animation that brings on your tax, makes it a little bit more interesting. Using a mask.
15. Title practice 3 MOGRTS: Alright, so we're looking at a MOG herbs which motion graphic templates they're actually titles and animations that get animated. People make them in After Effects and they look like this. Now, you can download them from YouTube or somewhere. Or you can purchase them from other places like Video Hive or elements for example. And then you'll see here then Kemeny, a zip file. And in this particular case is a help file and shows you how to use them. And then also some fonts that have certain fonts that were years in making them. And this particular case it's neon social media. So there's one, some Facebook. And you can see they all have a mogul extension. So what I've done is I've taken the ones for you to Fannie, I've copied them and I put them on through a separate drive. So I have them on here. This is the three that we're going to install. I have to change the name of this just because it's something that I need to to find easier. So I don't know I could, let's call it my stuff just for this particular example. And if I get any other mode shirts that I want, I can actually just load them in here and add them to this folder. And we're a member in Crimea. And right away you are, if you're an editing or graphics. If the essential graphics don't come up on the right-hand side here I've got a window, essential graphics. And then this will load here now. And a lot of tutorials you'll find that if you want to load a single maneuvered file, it asks you to click on this. Go to wherever this is and you can choose one mode at a time. I particularly don't like this at all. Because if you have some of these boulders might have 15 things in them. So I'm not going to load one at a time. And also for whatever reason I don't get along with that. So I like to use folders. So the simplest way to do this is to click on inessential graphics has these three lines. The Manoj manage additional folders and then just to add. And then go down to your folder. All my stuff, say select folder, say OK. And now. If we sad looking for our folders, we click on local. And we have the folder right here called my stuff. Click on that. And there's your three mobile phones. And it's as simple as that. When you search in, you can see if you went the local folder. These are all the different local folders supply and click on just the folder Kolmogorov. These are all these type of Margaret's or templates. If I click on this, click on my stuff again, these ones will be removed from there. If I select all and I have everything. In my particular case, I have a lot. So if I just double click on my essential graphics, you can see here that I have a lot of overt false, but you can, I purchased over the way and some are free from YouTube, I guess side nine. To get out of this, just double-click on this again and it will minimize this guy right here. So again, if we're trying to find the ones we've just loaded, I want to go into my stuff and just utilizes here. As I said, if he sets a new tube, for example, some people have given away 20 animation titles, free text mode births and things like this. And there'll be a link somewhere where they can download some free ones. I've got free and purchased ones. So by the way, this for PC users is the path that you will find all your MO vert folders and the different logins that are loaded n three. And I'll put this up on the screen for you for Mac and PC. So how do we use these? So I'm back in editing. I've made a sequence, and I am going to go to a graphic. We have, there we go. We can look down here and see my stuff. I can simply drag one of these onto the timeline. I will say keep exist in settings. I made this for k. These are not. So it will keep the setting for the sequence. It takes a second to load it. Now in our case two. And it tells us that this uses fonts that are not currently available. And you can get them from Adobe. And say, I'm resolvable. So it will be, use a default font, which I don't really care about. And I move this over here. I'm going to zoom in a little bit here. Now if I play this, if I go back to editing, that's easier to see. I'm going to the works praises reset to save land. And then press play. We see that this is your logo and some animation. Sam, Follow me and looks like it's for you to in this case. Ok. So one thing I can do here is to set the frame size that'll make it bigger. I'll set it to the 4K signs. So if you want that to come up on the screen, whether it's over a video or what have you. It doesn't matter when you're on here. We go back to graphics. And now you can see with this selected when the essential graphics, you can see the text up here. How are you added? This says, says follow me. So we'll say your name. You can change the text or whatever you want. And it gives you the font, the size. You can make it bigger or smaller. And then your YouTube channel name, say you type in here. Whatever it is, you know, just put it in nothing for now, but some way that would be. So YouTube channel name. And again, you can have some control over this here. Exactly like that. And we can move things up and down. And again, the global scale, if you want to make that so big in the picture, we wanna make it 50% of that. And then you can move this guy, enact. And why, for example, you can see at some point it might disappear. All right, so let's say that's here. Let's go back to edit ten, for example now. And then this is what it will look like on the screen, whether it's over a black screen or over someone talk and whatever heavier. And again, it looks a bit blurry there because my resolution has set the quarter or the fall. Let's see. We can run this Avalon within is running. And again, when you render it out, it'll be crystal clear. So that is how we would use a motor. And each one of them is slightly different. Began you gotta graphics. Make sure the essential graphics as I can. So when you're on it, there's all sorts of things here. You can change. The line color. Could be, I don't know, whatever color you want, the yellow. So now you can see it's a yellow color. So there's lots of options to change stuff. The text colors, the icon color, what have you, right? So that's how we use a motor. Again. Just search YouTube was somewhere, get some free ones, go to Video Hive or invite o elements and purchase some. Just search the Internet. And play around with them and then install it. So that saves you having to do all that work to animate something. So if we look over here and we go back to browse, and I have a lot of different ones and all sorts of ones here that you can use. And there's lots of like lower thirds or simple one thing. For example, like this. Try this one then. Again. Here we go. I'm going to actually set this to frame size and see what we have to add it. I gotta just cuz it's easier to see for me. And that's a nice title intro and moves in and out again. And again. If you click on it, called a graphic and an essential graphics, this has a lot more things to edit. So master properties. We go here, click on this and it gives you like scale Text1. So it says here topography templates. And you could put two, for example. And then how you can change the type of font. And then text position. Wherever it's had a big a playwright I'm really saying is. And then you've got text tail, which is unique design this guy here, for example. And now we take a look at that. And now we'll read this comes on the screen. So, you know, saves a lot of work, gives you a nice fancy graphical titles coming in. All right, so one last thing here is, let's say you want to clean up this thing. He got a graphics. If you don't see graphics, you can always go to Window and then go to the graphics window and the workspaces graphics, for example, see here, well in review is essential graphics. Again, you want to clean this all up. You can click on the three lines, go to Manage additional folders. And my stuff that you really don't want that ego just trying to clean it up. You can just remove it like that and say, okay, they might have to reset Adobe Premiere just to refresh it all. But we'll see if you go back to here now. And it's already gone. So my my stuff is been removed. Okay. I hope you enjoyed it and play around with it. There's lots, as you can see, yo can build up a whole library of this stuff. So enjoy.
16. Export Movie: Okay, so wet that point now where you've edited your video, you've made all your adjustments and transitions and effects. It's time now to explore the video to whatever
platform you want, whether that be YouTube, just be a self, Facebook, Instagram, what have you? But in this section
we're going to take you through the export settings
to get your movie out. And then you can put it on
whatever platform you want. So let's finish up this video. Okay, So now we're ready
to movies all made. Now we're ready to
export it and build it. So a couple of things here. We see it. A little panel here is not
all the way along to the end. Just drag it over to the end, again, to the end where
your video stops. Bring your cursor all the
way over to the front-end. And do I on your keyboard for n, you're going to see this hill
in point becomes visible. Go to the end. You want it to stop
and it will snap to the end of the video and
select O on your keyboard. Then that's the area that
it's going to export. Then I always save, it'll auto save anyway, you might say this coming
up on the videos and then do File Export Media. We have some things
to set up here. You just need to change the name and
location wherever you want. I uploaded video to go choose your location where
you want to save this. The next thing we have here, you always want H.264. There's a bunch of
other settings here, but H.264 is actually
may not have heard this, but it's an MP4 video, which is a standard, and that's what you want to do. We can see here our
output's going to be 3840 by 2160 at 24
frames per second. And that's what we want to export the video and the audio. You can also use this slider there and here
if you wanted to just export part of the
video, for example. But we actually want
to export all of it. So we're making sure that it's, it's dragged here all
the way to the end. Case, 25.02 seconds. Then you have some
dropdowns here, which you can choose
many preset format. If you're not exporting to
YouTube or online somewhere, recommend that you
use these ones and say high-quality
settings depending on what your frame rate
and resolution was. I was was full
case that we would use this one, for example. But if you did 1080 P or
720 or 480, what have you? You can see there's
a lot of preset ones for Facebook and what have you. If you are going online, I recommend that you
use the YouTube ones. Down at the bottom. We
can see there is he a YouTube or Vimeo onesies
ones work fine too. We would choose YouTube
for KL term HD, because that's what we set. And then it sets all the things
for you. It's quite easy. One thing I would
check on is using maximum render depth here. And then you just press Export. And your final video is made. With that, that's about done. I hope you've
enjoyed this course, this crash course for beginners. And even if you have
been doing some, some video in video editing or you've been self-taught on
YouTube or what have you. Hopefully you've learned
something as well. Because we can all
learn from each other. Enjoying it, play around. And I can't wait to hear
about your video creations. All right, So now you've
finished edits in your movie and it's
time to render it out on the new software
from April 2022 onwards, they've changed the
user interface. Whereas before it
looked like this. And you basically have your
options along horizontally. Now we have the top three
little tabs up here. So we're in edit, we
just go to Export. And the interface
now looks like this. So along the top over here, it's on media file, which is this we're
looking at now this page. They can. Send you fall out directly
to YouTube or Vimeo, Twitter, Facebook or FTP. It, I wouldn't really do this. I always say my meteorite to my computer and then
upload it later. But if you liked this type
of thing, it's available. So for example, if
you choose YouTube, you can fill in everything, the YouTube channel
name, your playlists, your title description, everything you'd
fill in any YouTube, even a custom thumbnail. And then basically
upload it directly from Crimea up to
your YouTube channel. However, like I said,
I'm not gonna do this, but the options, I feel
like this type of thing. I'm just going to
switch that off and you'll notice that
it's grayed out here. Just means you have to
click on media file again to bring back the
menu that we were in. So here we have the name of the file that you
want to export, the location you're
going to export it in the preset resolution. Do you remember in
the old software ever give you a whole
bunch of presets? Now you can click on some
here and then you can add more presets by just
choosing from the list. And you can favorite
their favorite demo, just pick one and select Okay, and they'll end up in
your drop-down list here. Then, for example, I'm
going to do like YouTube. For example here for k, my format resolution, you have a bunch of
different options. I have 264 here. Then you'll notice down
here that it gives you your estimated file size, your video information, and
your audio information. Videos size, frame rate, all the information as before. If you wanted to change
that just like before, except that it's in a vertical format versus
horizontal or over here, like it wasn't the old one. You can come on down and
you can select more. For example, he's your render
at maximum depth, depth. And if I drag this down here, I can see my target bit rate. If this was too large, I could change this
down here, for example, to bring my size down, but it won't juice if we reduce this, reduces the quality. You want to just make sure
what you're choosing. Some of the ways I've used this as I upload this
class, for example. And some of the
sites that I upload to have a limit on the
size of the video. Sometimes if I choose
the maximum quality, it's too large for the site. So this allows me
to get as much of the qualities like can
without going over a target, depending on the sides. Then once you're done, you'll just come down here to Export and you're finished
video will be exported.
17. Instagram settings: There are a lot of
social media sites now. And the growing
larger and larger, we currently have
Instagram stories there. 15 seconds disappear
after 24 hours. You have Instagram Reels, which have 15306090 seconds, and they don't disappear. Instagram Reels or Instagram's
answered the TikTok, and then there's TikTok. They can have up to ten
minutes currently a video. Most of these are created on your phone with a phone
app or third party app. Normally, they recommended
aspect ratio is nine by 16. So 1080 by 1920. So why would you create any
of these with Premier Pro? Why not just do
it on your phone? Well, if you're on multiple platforms like
YouTube as well as Instagram, TikTok, and other social sites. Sometimes it makes
more sense that you can create the
shoot a video and then you can use
the same footage and repurpose it or not
all these other sites, instead of shooting a
vertical video and then a horizontal video
at the same thing. Plus I find it
easier to edit and create on a desktop
rather than a phone. For example, YouTube and
Vimeo or in 69 format, whereas Instagram and TikTok, or in a vertical format, you can also manipulate
special effects on a desktop much easier,
in my opinion, if you shoot Instagram
or TikTok only, I suggest you shoot
in vertical footage. Yes, you can watch
horizontal footage by rotating your phone. But the majority of people
that are on Instagram, for example, once I'm quick, vertical swiping
entertainment, and they won't turn their phone
unless it's something they're really,
really interested in. Recording vertically makes life easier when trying to cram a horizontal 16 by nine video into a nine by 16
vertical space. So you have to decide
what's important to view from the
footage you shoot. Recently met a
combined IGTV and feed videos into one format
called Instagram video. You can now upload Instagram
videos up to 60 minutes, but only the first
60 seconds will be displayed on your
Instagram feed. After this, the viewer
gets an option to keep watching this option
of Ms up a new player. With some new options. The video can be rotated
for a horizontal view. They don't have to wait
for the 60 seconds to end. If you tap the screen, you can get to this
new player sooner. If your video is 60
seconds or less, you can unload it in
three different formats. The first is a one-to-one ratio, that's 1080 by
antennae pixel format. The second is for
the five ratio, or ten AD by 1350 or 69 ratio, which is 1920 by 1080. This format could also be re-used on YouTube or
Vimeo for example. There's also a maximum file size also that you have to stick to. Let's move over to Premiere
now to set this up from the New Item tab,
select New Sequence. Go to the Settings tab
and select Custom. Time-based should
be the frame rate or the footage you shop. If you don t know this, you can check it here
in the Project panel. Next, change the aspect ratio. Let's do 1080 by 1350. Here we can see that's
a four to five ratio. You can leave everything else
as default and press. Okay. Now you can drag
your video footage or was it the timeline? If you get this warning, is telling you that
the video clip does not match the sequence
settings that you just said. But we want that sequence
to stay the same. So choose keep
existing settings. Now using the effects panel, scale and move the video to
fill up the entire frame. This is where if you had
shot the video vertically, this one make this a lot easier. Repeat this for all the clips
that you want to include. My project is one minute
long, 60 seconds. At the top left of the
screen, select Export. And the format select
H dot 264 Kodak. This is a very common codec
and it creates an MP4 video. Click on the arrow by the
video and select Match Source. Then click the More button, scroll down to the
target bit rate slider. Notice as I slide it, I see the estimated file size
change on the lower right. Some guidelines here. A 15-second video should not
be bigger than 15 megabytes. Generally, 50 megabyte video should be about five to
eight megabytes per second. Don't be tempted to crank up
the megabytes per second. Thinking you'll get better
quality as Instagram is algorithms or compress
it a lot to make it fit, I might actually result
in poor quality video. Check the folder that you want your video to be exporting. This is in the upper
left under location. Now click on the Export
button on the bottom right. And you're finished video, we'll be ready to be
transferred to your phone. It might have noticed
in the export tab, there are some
toggles where you can upload directly to
YouTube or Vimeo, Facebook, twitter and more. However, there isn't one
for Instagram or TikTok. I prefer not using
any of these anyway. I upload via my own YouTube
channel, for example. That's it. And
that's how you can shoot one format of video, a multi-purpose it across different social media platforms.
I hope you enjoyed it. And I'll see you
in the next video.
 William Buckley