Transcripts
1. Introduction: Hi, I'm Jessie Mahon. I'm a painter in Illustrator and we're here in my apartment in beautiful, sunny Los Angeles, California. I've been drawing and painting for almost my entire life. I'm largely self-taught and I've always operated from this place of just really wanting to make things and create things. I never really put much thought into whether I was qualified to make art or whether I had the proper credentials to be an artist. I absolutely wholeheartedly believe that art is for everybody and everybody can make art. I've worked on a variety of projects, working on a lot of different contexts, showing my work in group shows, designing and installing large-scale murals, and painting and writing for online and print publications and magazines. I am really excited to be teaching this class. Today we're going to be talking about mistakes and how to move through feelings of perfectionism to enjoy the process of making art. If you have ever felt anxious or overwhelmed when you look at a blank piece of drawing paper or if you're a person like me who sometimes rips pages out of your sketchbook because you don't think they quite look good enough or they're not perfect, this class is for you. I think there's such beauty in work that's flawed. When what you make is an honest reflection of how you see the world, there's really no need to worry about style or mistakes or flaws. The whole beauty of making art is that it doesn't have to be serious or sacred or perfect. It can be whatever you want it to be. This class is suitable for everyone, no matter who you are, no matter your skill level or profession, whether you've been making art for 40 years or today is the first time you're picking up a paintbrush ever. I'm so happy you're here and I can't wait to make some art with you. Together, we are going to gather inspiration, make a few quick rough sketches, refine those sketches, and then transfer them onto a work surface. Finally, end with making an original piece of artwork that is truly and fully you.
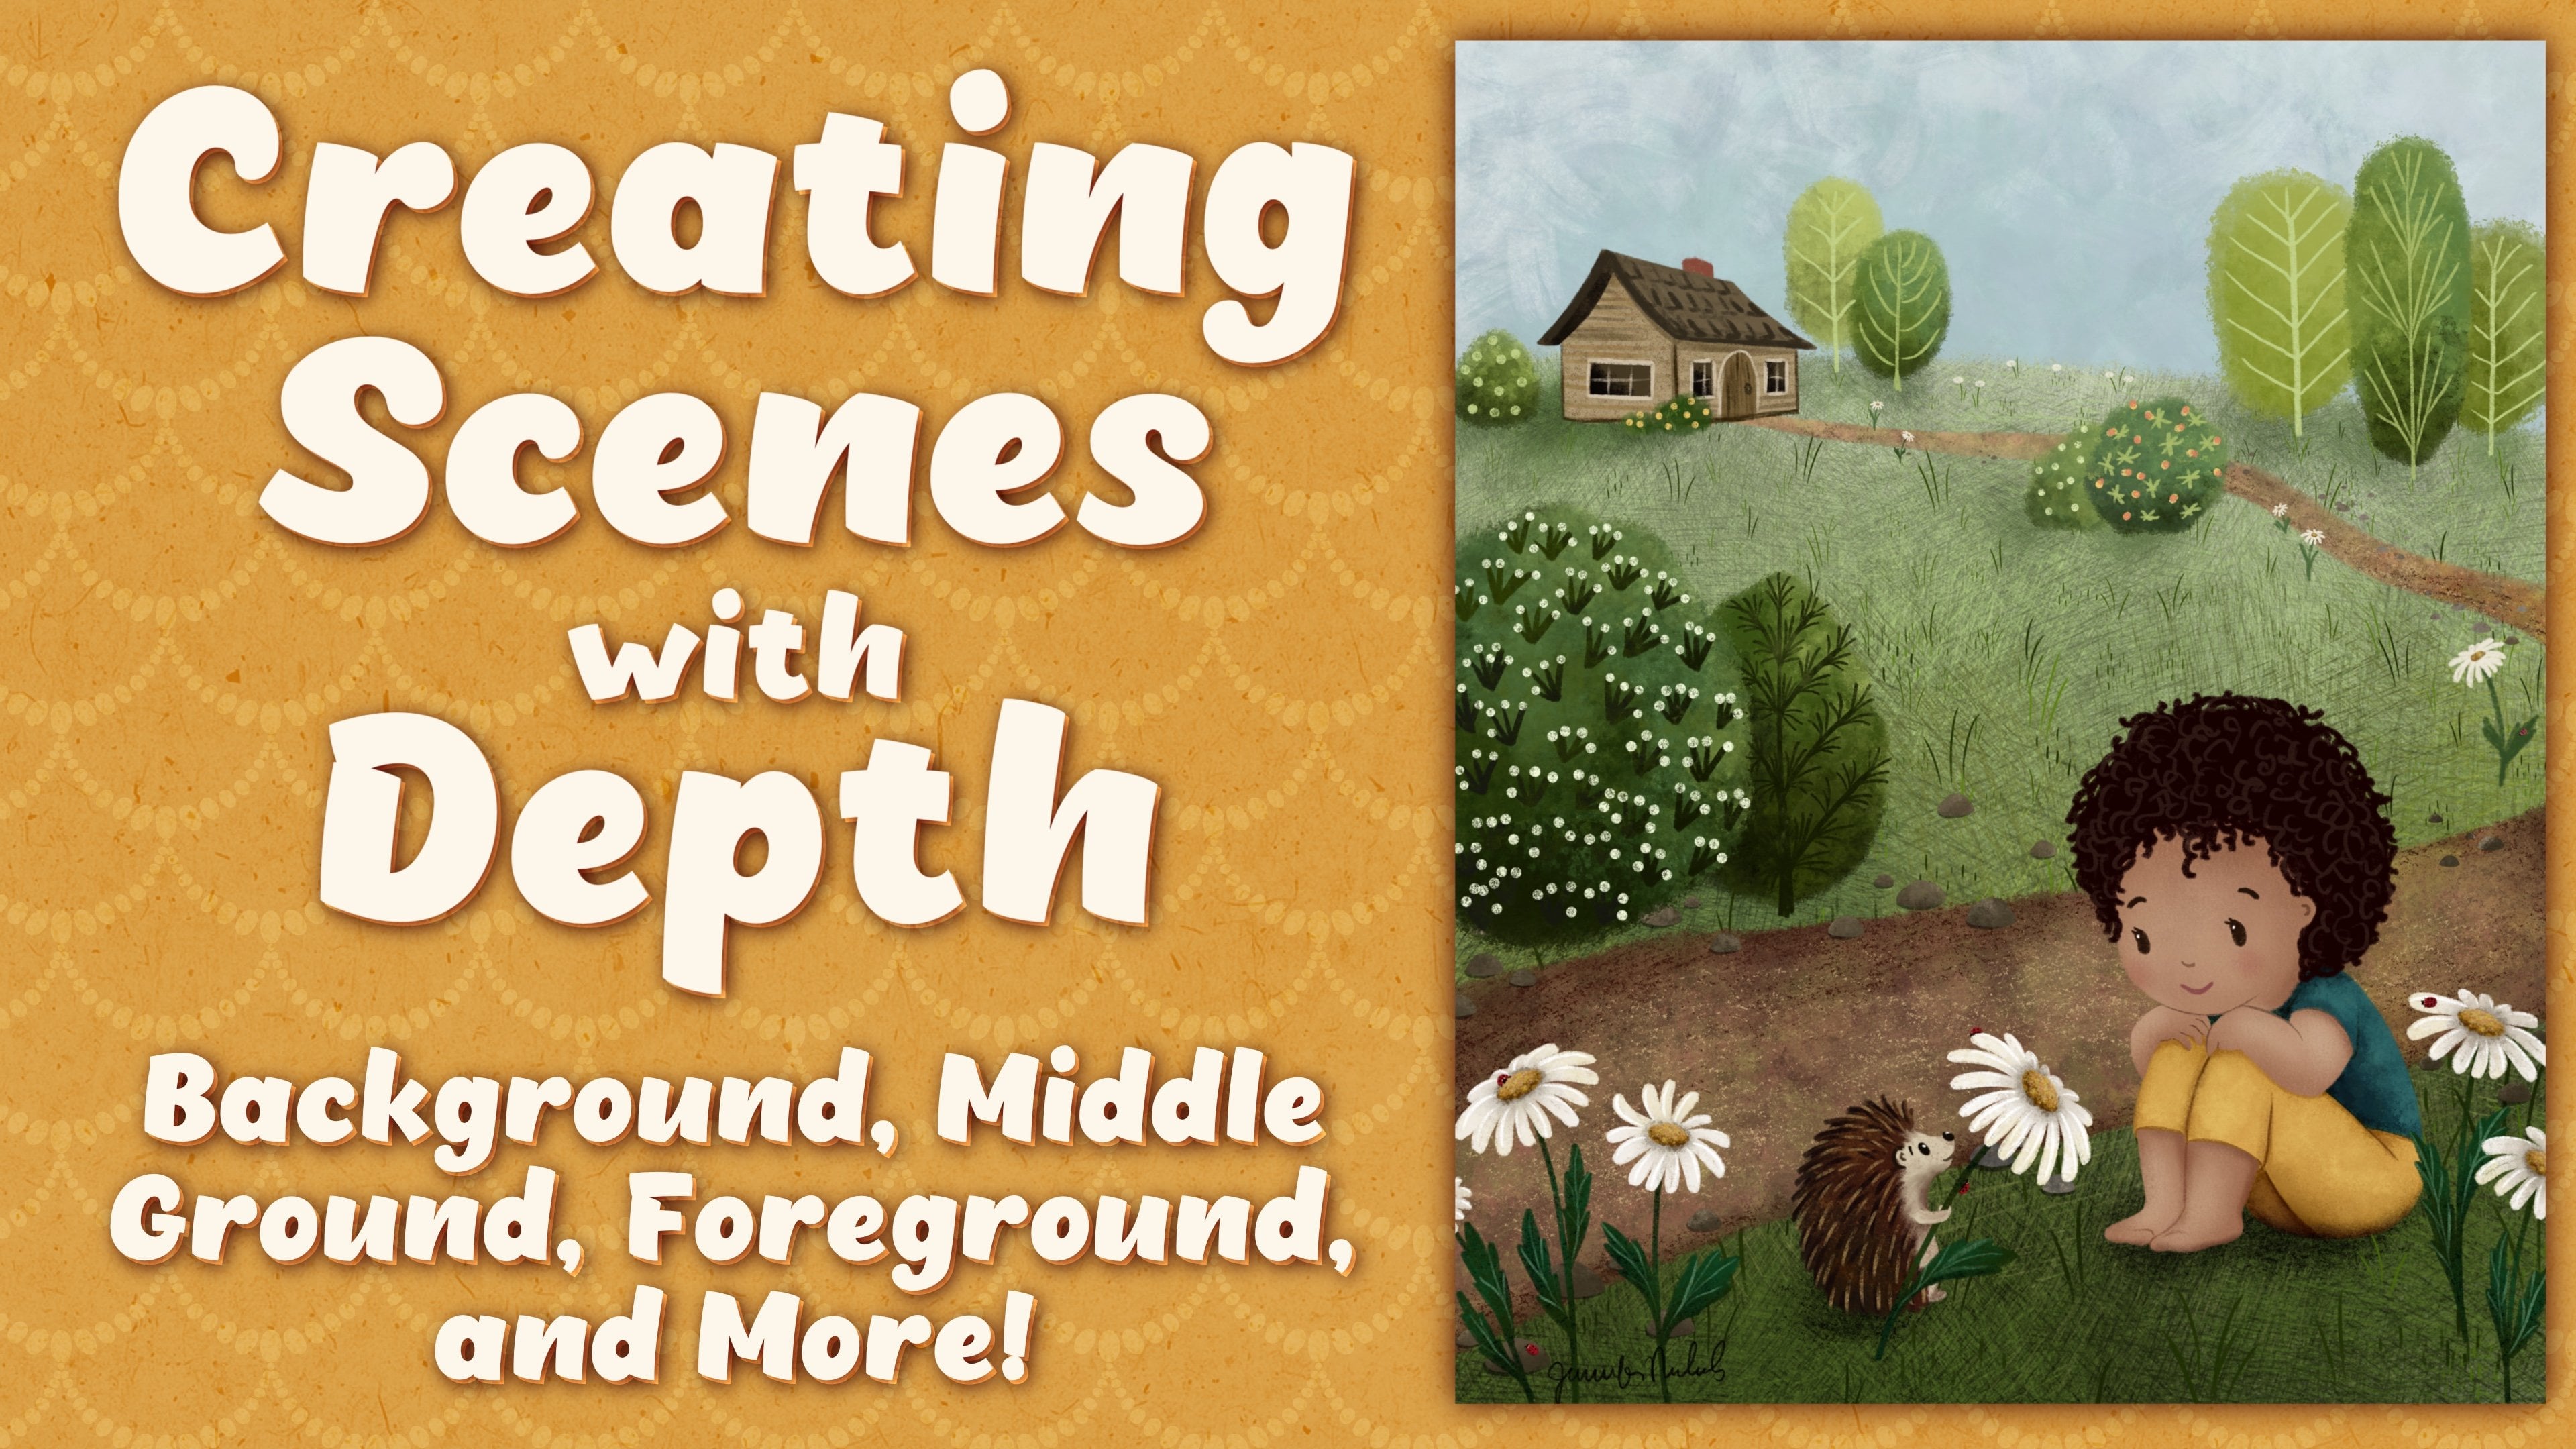
2. Project Introduction: The project for today's class is pretty straight forward. We are going to make an original piece of artwork and we're going to do it all on bracing any mistakes we make along the way. I'll guide you step-by-step through my own process of making art, talking through all my decisions and helping you make your own. I chose this project because feelings of perfectionism or wanting my art to be perfect popup a lot for me, both in my daily art practice and even, and especially on big jobs that I work on from onset of time. Perfectionism isn't really something I can get over, it's something I have to move through and I actually think that's an important distinction because we as a society are taught from a very young age to compare ourselves to each other. Conquering this inclination to be or make something perfect isn't exactly possible for me. My perfectionist brain won't let me do it, so it's just something I have to work on a little bit every day and is largely the reason why I wanted to teach this class. The first thing we're going to do together is gather inspiration. Gathering inspiration is an important step for anybody who feels overwhelmed or intimidated by making art or who has never made art for themselves before. We'll talk about methods and tips on how to gather inspiration, what we can use for inspiration, and how to draw from that inspiration. Next, we're going to make a couple of rough sketches. This is where you can really just experiment and get all of your ideas down onto the page, all of your thoughts, dreams, desires, anything. We'll make two or three of these and use one of them to start building our piece. Once we've chosen one of our rough sketches, we will have another chance to go over it and refine it. I call this refining our sketch. It's a really important step for me because it just takes a little bit of the pressure off when I'm rough sketching, knowing that I'm going to have another opportunity to go back through, clean things up, add or subtract elements that I maybe didn't get to while rough sketching and it also helps me while I'm developing my work later on. After we refine our sketch, I'm going to teach you a really cool trick to cleanly transfer your sketch onto a work surface. Work surface is anything you want your final art to be on. You can use art paper, watercolor paper, printer paper, cardboard, canvas if you're feeling really fancy, we'll transfer that and we'll use materials that you probably already have around your house; ballpoint, pen, pencil, tape, and paper. Finally, we are going to make some art together. The fear of messing up can hinder people from even trying to make something in the first place, and this is totally normal, my brain does this to me all the time. For example, some of the things my brain tells me when I'm trying to make art is, I don't know if these colors are right or I'll be on Instagram and looking at somebody else's work and think like, their art is so much better than mine, or when I'm working, I'll make some weird line and think the whole thing is ruined. Truth is, there is no right, there is no wrong, there is no better, there is no worse, it's art. Before we start, take a few deep breaths, just let go of any expectations or pressure or self judgment. Just enjoy this process. Allow yourself to enjoy it and be kind to yourself, and please if you feel so moved, share your projects in the project gallery. I would really love to see what you're making. Go ahead and grab a pencil and paper and I'll see you in the next lesson.
3. Gathering Inspiration: Every artist has a different process. A really big part of the process for me is having the discipline to write down my ideas when they come to me or take photos of things that are really inspiring or that spark something in me. Because if you're anything like me and you think you're going to remember it later, odds are you probably won't. It's a good idea to have a notebook or even a note on your phone to write down ideas in and sometimes I'll write them in my phone and then transfer them to this notebook. It's just a good idea to have documentation of your ideas. I go on a lot of walks and hikes in Los Angeles because nature is really present in my work and I'll just take twice as long to go on a hike because I'm stopping to take photos of plants or trees or flowers. But it's really important to do this because when the time comes to make art, you already have this entire documentation of inspiring images or words or phrases that you can work from and it really helps kick-start your artwork. It could be anything. Anything can be inspiration. It could be a photo from a really awesome vacation. It could be a children's book or an art and photography book. It could literally be a piece of fruit if that lights you up, do that. It could be a scrap piece of wallpaper. It could literally be what you see outside your window. It could be the weather, it could be little figurines that you have inside your house, anything, a piece of clothing. You actually might surprise yourself with what inspires you when you think outside the box a little bit. As long as it ignites something in you, that's what's important. Today, for my piece, I'm using three pieces of inspiration that I gathered from around my house. I'm using this shirt, it's a really beautiful leopard print shirt that I actually don't wear very often, I don't know why. I really like this because, maybe not so much the color, but I really like the way the pattern is really organic and unpredictable and simple. Yeah. I'm going to use this shirt and I'm also going to use, I printed out this photo of these swans. You can see my printer is also working on moving through perfectionism. I really love swans. I've been obsessed with them for the last several years. I like them because historically they're just like this symbol of romance and love and beauty and in reality they're just mean. I just think that's really interesting. I also love the shape. I actually don't really love painting animals that much, but I relax once. Then my third piece of inspiration, my fiancé and I have this very modest record collection that I love very much and I'm going to use just this side of the record. I love the way these lines are juxtaposed with these big jagged shapes. Again, colors maybe not. I don't want to copy this because I don't know whose work this is, but not mine. Yeah. These are my three pieces of inspiration. Go ahead and surround yourself with a few items that sparks something in you that you want to explore in your own artwork. Don't overthink it too much. Don't put too much pressure on yourself. Just grab a few things and go ahead and meet me in the next lesson.
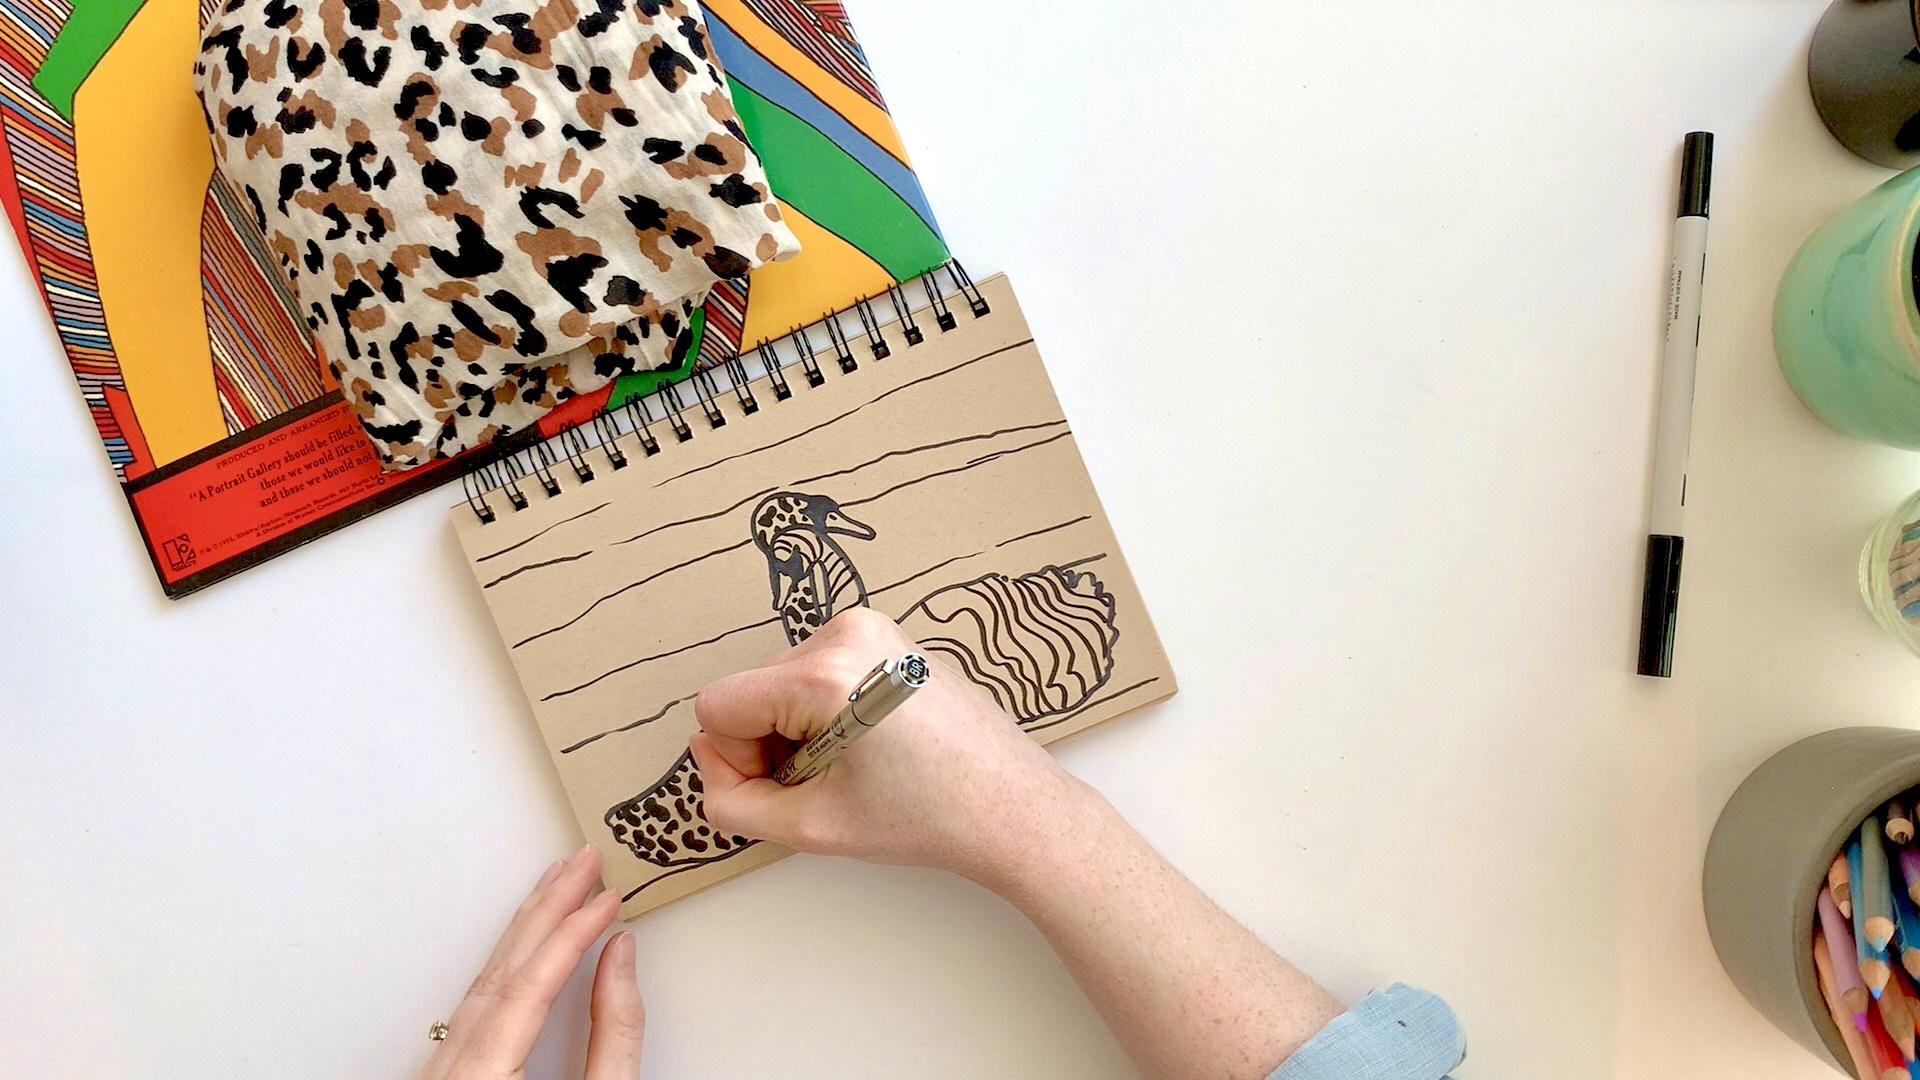
4. Rough Sketching: I'm going to start off this lesson by showing you some of my own rough sketches that I would normally never share in public. I made a lot of these sporadically throughout the last year and some of them are questionable, but that's okay, it's part of the process. For example, this person probably took me all of a minute to draw and I actually used this sketch for a painting that I did last year, and it ended up being one of my favorite paintings that I made. In this whole sketchbook is just experimentation. The perfectionist part of me often wants to rip out pages of my sketchbook if they are half-finished or half-realized. But I actually think it's a really good practice to keep everything in your sketchbook, creating an archive for you to look back and reflect on because you really never know how you're going to feel about your artwork later on. Often, I really like to make my rough sketches or draw my rough sketches with marker. It just takes a little bit of the pressure off for me because it's permanent. When I use pencil, I'm really tempted to erase parts and refine it and make it a little bit more presentable and with marker, I can't. I also really love using small sketchbooks or a smaller work surface because one is less intimidating, two, it is just a little bit easier to fill up the page and I can think about composition just a little bit more working on a smaller surface, that's just helpful for me. If you don't have a sketchbook, regular printer paper is great. I am going to first use my photo of the swans, and I'm just using these IVs alcohol markers by Tombow, they're great, they have a skinny end on this side and then a thick end on this side, so I'm going to use a skinny side. Sometimes that where you start is just to make a mark on the page, just like literally a random mark, and then there it's done, you've started. Let's start with the beak. I love these markers because I think they're just beautiful and because there's like I felt tip like it just makes everything look like really organic and beautiful and almost like you tried really hard but you really didn't, let do the neck. That's a thick neck, but we're going to go with it. We just want to get in basic shapes right right. Well, you just maybe not people, but you want yourself to know that this is a swan. Now we're going to move on to the other swan. Do we think these ones are friends or more than friends? Think I heard somewhere that swans mate for life and eagles. Maybe it's a bird thing and penguins. So if you have the details, please let a girl now. That's two swans, we're doing pretty well. So I'm going to put this aside and move on to my other sources of inspiration. Pool and then, third piece of inspiration, this shirt that I don't wear enough, let this be a reminder that I should wear a shirt more. We just want to use this as inspiration for just the story that's going on in this drawing. So for this other swan, I'm going to use this shirt. A big upside to just doing this intuitively and leaning into the mistakes that we make is it looks that way, it looks intuitive, it looks that someone didn't overwork it, didn't keep working when maybe they should have stopped. Then again, artists objective, everyone's going to view art differently, it's just a personal preference of mine. I'd really encourage you not to spend more than four or five minutes on each sketch. This is just a really quick way of getting our ideas down on the page, we really don't want to labor over it and once you have two sketches that you really like, meet me in the next lesson where I will teach you how to refine our sketch.
5. Refining Our Sketch: Now that you have your two sketches, pick the one that looks the most interesting to you, and we're going to clean it up a little bit. You may be asking yourself, why are we refining our sketches? The answer is, you really don't have to. This is just something that I like to do when I'm developing work because when I'm rough sketching, which in my opinion is the hardest part, so congratulations, we've gone through the hardest part. It's helpful for me to know that there's going to be another chance to revise any messy parts or things that I might want to like refine a little bit. It just takes some of that pressure off and helps me later on when I'm developing my work. There are a couple of different ways we can refine our sketch. A really simple way is you can take your sketch and tape it to a window and put a fresh piece of paper on top, tape it down and the light is going to make it really easy to see your sketch and you can trace your sketch directly on top of that fresh piece of paper. Another way is if you have a tablet, you can import your sketch, take a photo, import your sketch into a drawing app and refine it that way. I have an iPad and an Apple pencil, so I'm going to take a photo of my sketch and import it into Procreate and refine it that way. I do want to mention this definitely is not a Procreate class. There are many instructors on Skillshare that can teach you a lot more about Procreate than I can. You have the photo. I'm going to adjust the size and bring it to the perimeter of my canvas. Now I'm going to open my layers and click on this little N and adjust the opacity of the sketch. This is just going to make it a lot easier when we're refining our sketch to see the lines that we're making. I'll bring it about to 20 percent opacity. Make a new layer by clicking this plus sign. I have a whole list of favorite tools that I use in Procreate for sketching. I really like the HB pencil and I like using just a medium gray color. Now we're going to refine our sketch. The goal here is to make really clean lines. The reason for that is in the next lesson, we are going to be tracing over these lines with a ballpoint pen to transfer our sketch onto our work surface, so in this step, this is the only part of the lesson that I'm going to tell you to be precise, because it's just going to make our lives a lot easier later on. Listen, if you love your rough sketch, if it's like perfect and you don't want to do this extra step, that's fine too. I just want to teach you guys what I do when I'm making art because I think I found something that breaks it down into easier steps and works for me. Another reason why I like to do this is because like right here, the neck was a little thick in my rough sketch and I think I'm just going to thin it out just a little bit. Slight alterations, but worth it for me. The refined sketch, as you can see, is not very sketchy. It's reminiscent of a coloring book, like really clear lines. If you're using paper on a window and refining your sketch that way, it's the same thing. You're just trying to make really clear, smooth lines. I like to aim for a medium amount of detail. We don't want to be here all day, cleaning up where the marker bled a little bit, just making it a little bit more clear for myself, a little bit more representational of what I think these swans want to look like, making the composition just a little bit fuller, a little bit more balanced. You can add things and you can be playful, even though this step is a little bit more precise than anything you will do in this class, feel free to experiment, feel free to add, subtract, do what it feels good. It's just art. It's just drawing. Great. I'm happy with that. Now to remove your rough sketch layer, so just as an example, we went from this to this, which I think is really cool. I'm actually going to move this up a little bit, like the whole thing, just to center it a little bit. That's also a great perk of breaking up your sketching into two steps. You can place things differently, you can adjust sizing, you can adjust composition, and I just really enjoy that part of my process. Once we have our refined sketch, if you use the window tracing method and you don't have a printer, you're all done. You have your refined sketch. If you've used a tablet, go ahead and tap the layers symbol. Tap the N symbol on that layer and lower the opacity by about 50 percent. The reason why we want to do this is because it'll make our lives a lot easier in the next lesson when we are transferring our sketch onto a work surface. Once you do that, go ahead and print and meet me in the next lesson.
6. Transferring Our Sketch: Now that we have our cleaned-up sketch, I am going to teach you a technique that I think is magic. We're going to take our sketch, flip it over. Take some graphite. I use these graphite bars. You can absolutely use just a regular pencil, it just takes a little bit longer, and I'm impatient. You're just going to rub it all over the back of your sketch. Don't go wild. You don't want too much graphite just enough to cover the general area. I even like to evenly disperse it a little bit more so I'll take my fingers, and just rub over the entire thing, so there's less loose graphite around. You may even want to shake off some of the excess after you do this. It looks like that. Once you wash your hands, take the refined sketch that we just rubbed graphite all over and put graphite side down on your work surface and place it where you want your sketch to transfer. Just lightly place it. You don't want the graphite on the back of the paper to rub off on the work surface too much. But if it does, it's okay. Then we're going to take a piece of tape and tape the refined sketch onto your work surface. This just make sure the sketch doesn't move when you're transferring your sketch, and you can even fold up a corner of this paper to check on your sketch as you're transferring. Take a ballpoint pen. It can be any color, it can be black. It actually might be really helpful if it was red or blue, because then you could very much see where you've already gone over your sketch. All you're going to do is trace your line drawing using a little bit of pressure. The pressure from the ballpoint pen is going to transfer the graphite on the back of the printer paper to your work surface, and it's only going to transfer where you're pressing. Once you have a little bit traced with your pen, use that corner that you folded up and check to make sure it's transferring. Great. Really you just want to do that for the entire sketch, and if your graphite isn't transferring super well, experiment with a little bit more pressure. You can also flip your refined sketch over and add more graphite. If there's enough graphite, and you're using even a moderate amount of pressure it'll transfer. I'm sure it's also making sense why we decided to learn on a medium amount of detail, because this is a little bit time-consuming. I'll say this over and over and over again, this doesn't need to be perfect. I am not hitting all of my lines with intense accuracy. With a light hand. Go ahead and transfer your entire sketch onto your work surface using the method I just showed you. Remember, don't use too much pressure and add more graphite if you need to, and then meet me in the next lesson where we're going to really get creative.
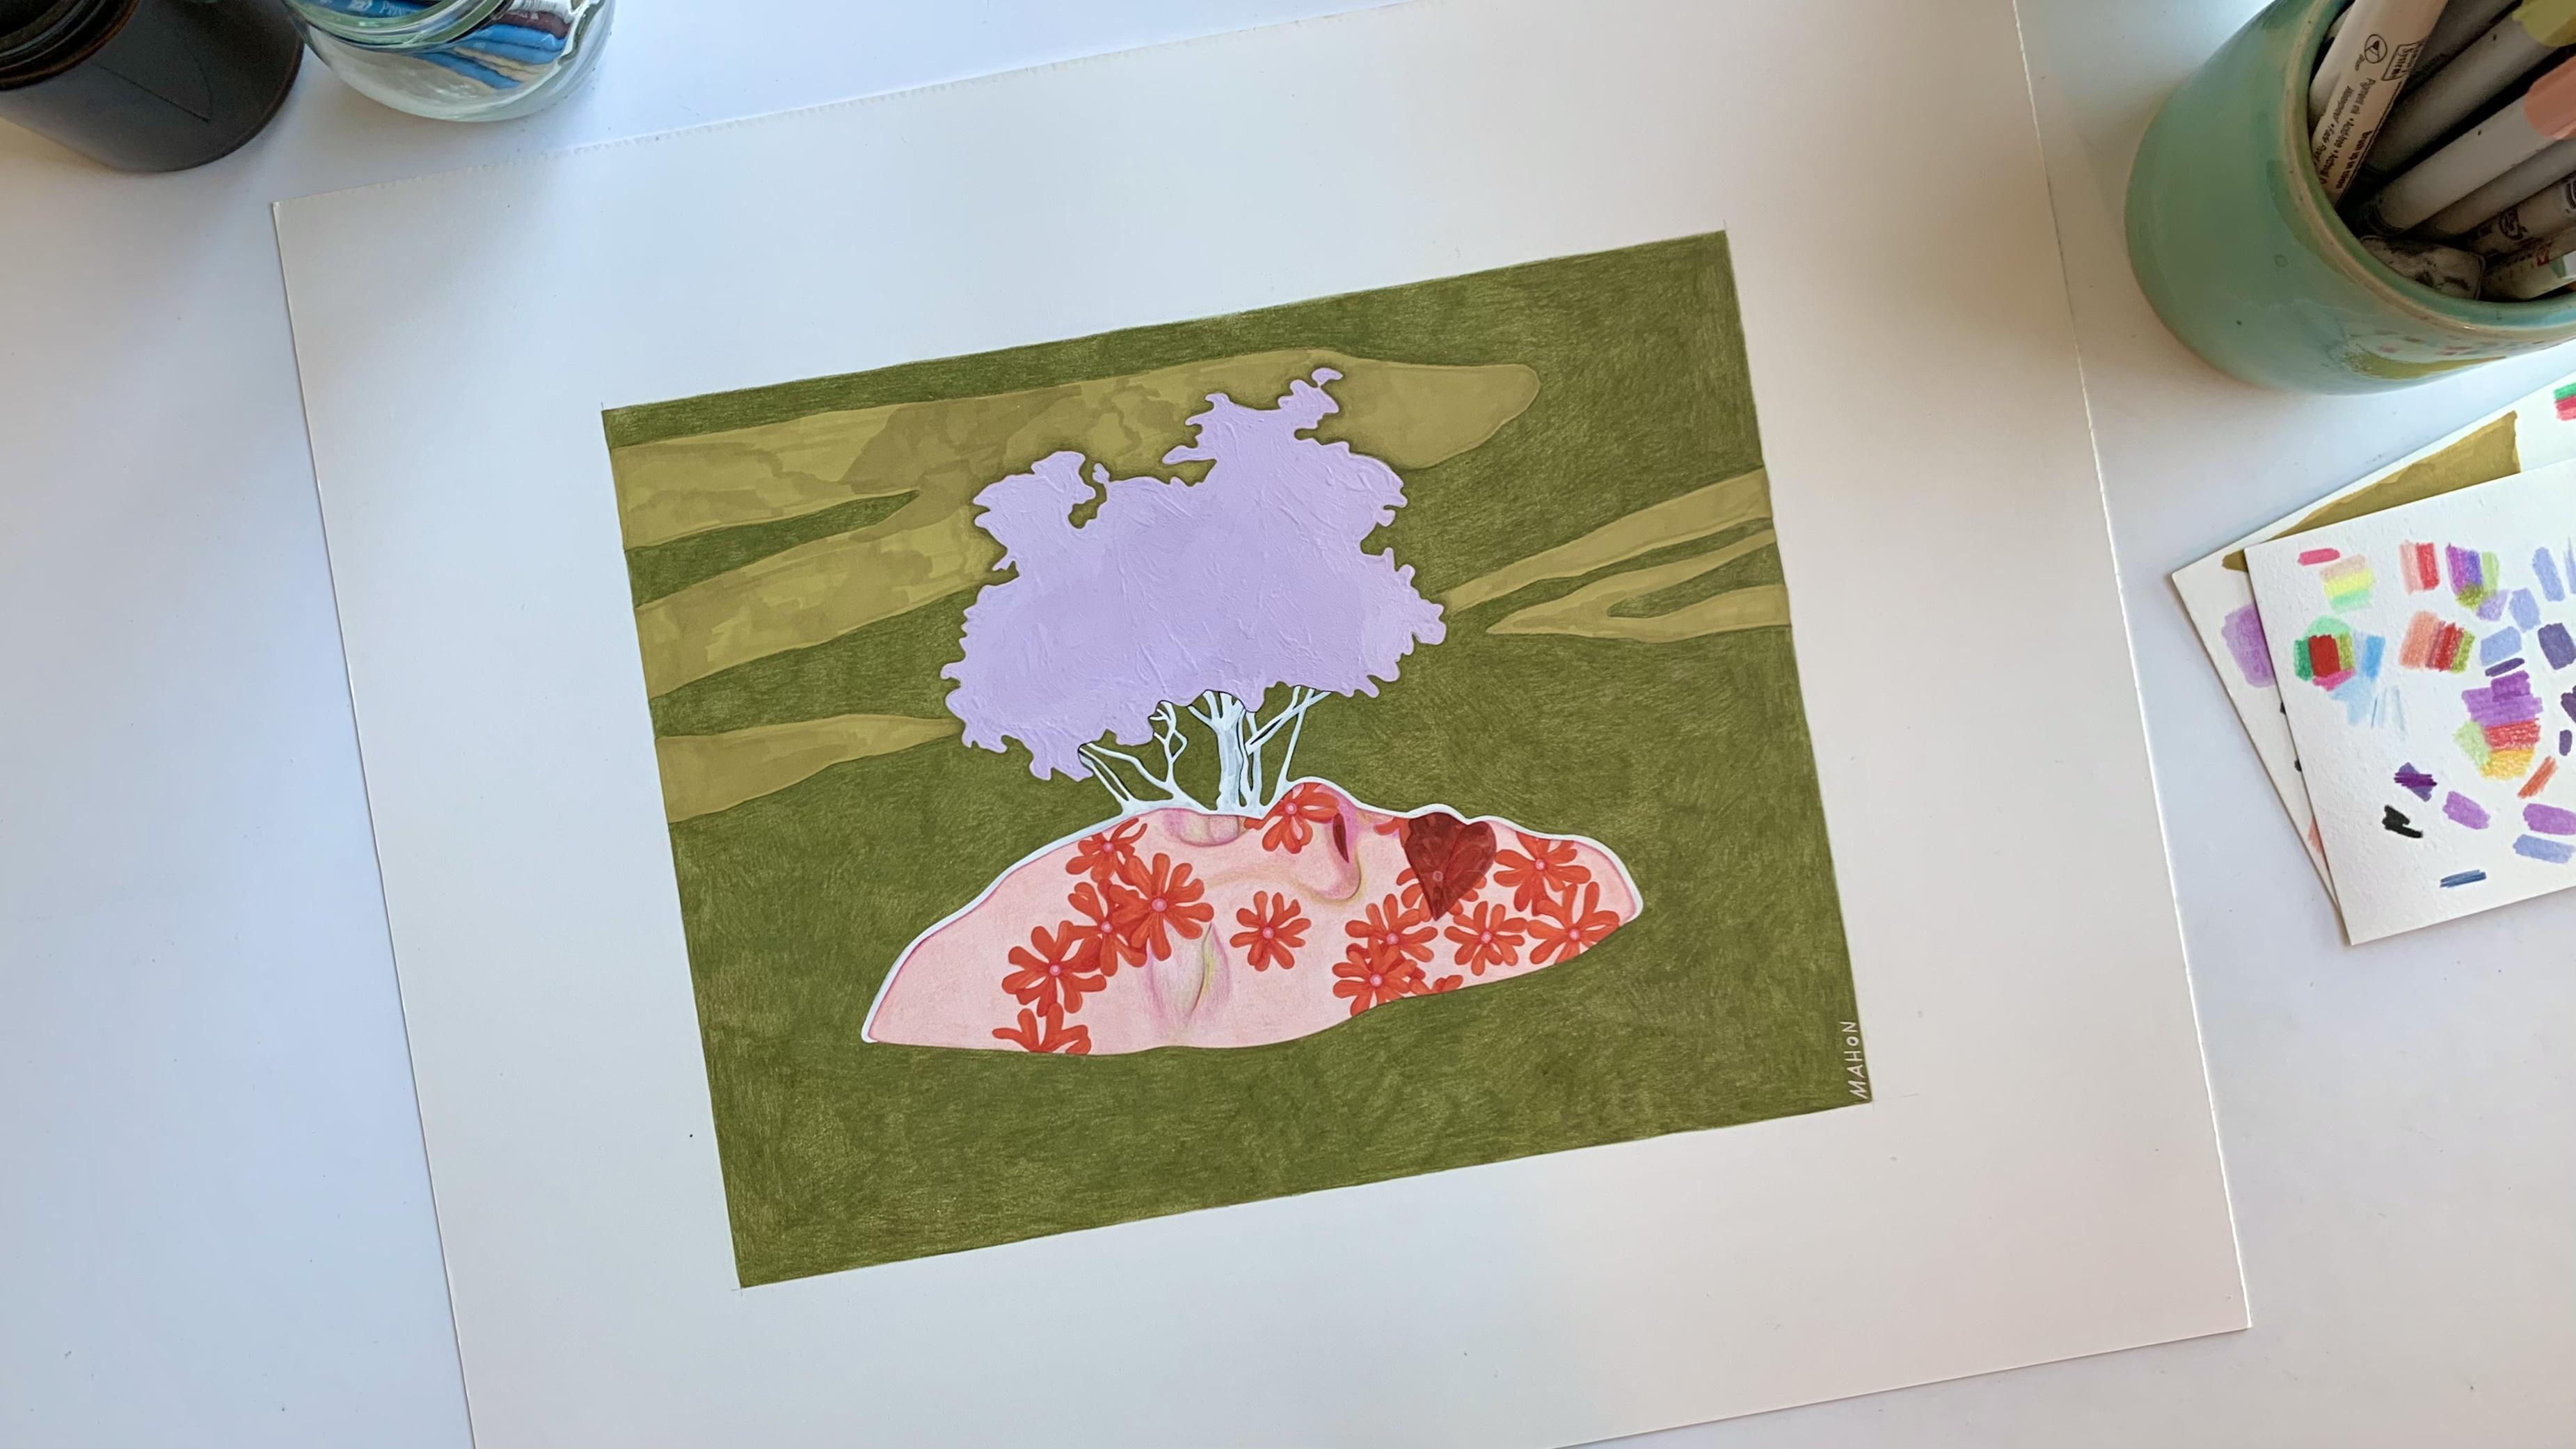
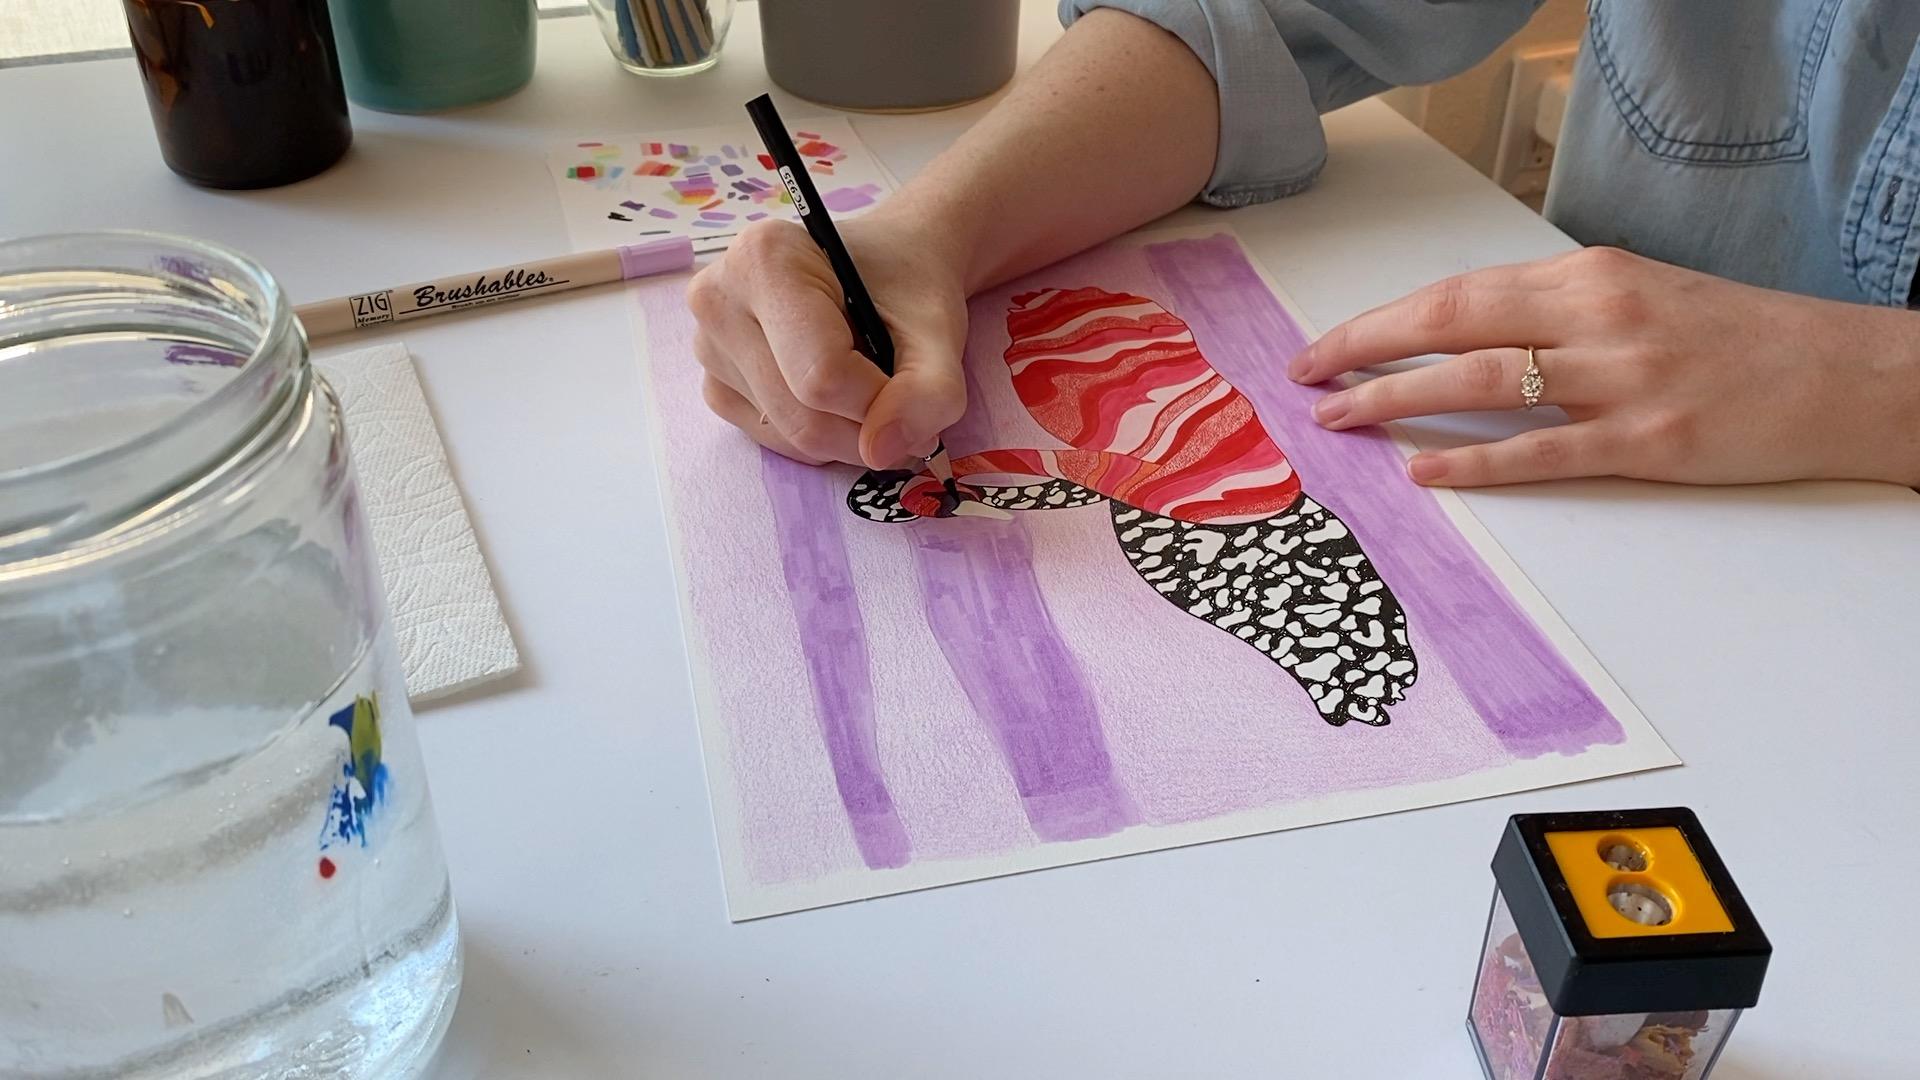
7. Developing Our Work: This is the part of making art that I get really excited about because basically the hard part is over, now we just get to have fun and try stuff. If you're watching this and thinking, what is she talking about? I'm so overwhelmed. That's okay. I would say if you're overwhelmed, just pick 2-3 colors that you like that make you feel happy and start there. Or if that's too overwhelming, just choose a tool like a marker or a colored pencil that's like really forgiving and really easy to use and start that way. I love mixing mediums. I've loved mixed media art since high school and mixed media art is just when you use more than one tool. It could be paint and marker or marker and color pencil. I think it just creates this amazing opportunity for different textures and layers and depth that I don't personally achieve when I'm just using one medium. The first decision we want to make is where to start. There is an old rule that advises anybody making art to start background or foreground, or when you're working with color, lightest colors to darkest colors. I actually follow these rules pretty often. Sometimes I break them, but just remember that obviously nothing I say here is set in stone. If you feel moved to start your artwork in the upper left corner because that feels good to you then do that. Let's start. Not really worrying too much about how precise I'm being, I'm just trying to get color down. Now that we have the background colors blocked in, I'm going to move on to this foreground. Swansea, I'm breaking the rules I'm actually working, background to foreground, but not foreground to background, it doesn't matter. I think I want this swan to be red and pink. That's really pretty. I'm going to do one color at a time. First I'll do marker and then I'll move on to color pencil and then, I'll add in anything. I actually might do paint at some point. It's just all about playing. So much of our self judgment stems from what we think our art should look like. Also, something that comes up for me is sometimes when I'm working, my painting or my piece will have like an ugly stage, sometimes because it's unfinished, I'll think it looks bad and I won't want to finish it. So if this is you right now, if you're working on something and you don't feel great about it, just keep working on it because you actually may surprise yourself with your choices later on and how much you like it. Just really focus on enjoying the act of making. Listen to some good music and grab a cup of coffee and keep going. I don't want this one to look like a candy cane. But if it does, that's fine. Now we're going to move on to the other swan. I like when my pieces have a little bit of contrast in them, and I'm going to try and keep this spirit of that shirt that we used. Something that's really helpful for me when I'm making art, is remembering that making art is a practice. It really helps me if I frame it that way because then I'm always working on getting better instead of being the best because that doesn't exist. If that helps you let go of self-criticism, self-doubt, especially if you're making art for the time, it's a really helpful way to look at the process of art-making. Because then you can sit down every day and just tell yourself, I'm going to practice today, and you'll get better no matter what. If you sit down and practice, the more you practice, it's inevitable that you're going to get better. I switch to gouache. This is the the adding depth thing I was talking about. I really love mixing marker and gouache and colored pencil because I just think it looks really interesting. We just want the idea of water. I don't really want to make it too detailed because we have a lot of details on the swans already. I'm just going to make, I think, a couple more marks, but I actually think it's done. That's like that feeling. It's like, well, I could add more, but I don't need to and I actually think less is more, at least for me. I think we're done. We have a painting. I like this painting a lot. There are some things I don't like about it and I think that's normal. But for a painting that I finished in just a short period of time, I think it's great and I can see many flaws on it, but that's also okay. The whole point of this lesson is that when we release ourselves from the pressure to be perfect or make something perfect, it just opens up so much room for so many possibilities, and the entire point is that we started and finished. The point isn't in the doing, it's in the making and hope you like what you made, and if you don't, that's okay. But I hope you sit down tomorrow and make something else because that's more than enough.
8. Final Thoughts: My greatest hope, no matter who you are, whether you've been practicing art for 30 years or today is the first day you've ever picked up a paint brush or a marker or a pencil, is that you're able to be kind to yourself. Most of all, in the future I hope that the fear of messing up doesn't hinder you from expressing yourself. The world needs artists. Think about how much art we consume on a daily basis; books, TV, movies, architecture, design, the art you hanging your home cookbooks. What kind of world that we live in if each and every one of these artists decided not to make things because they were afraid of messing up? Thank you so much for being with me today. I hope you had fun. Please share your projects to the project gallery. I would love to see what you're making and celebrate it. Just keep making things for the joy of making them.
 Jessie Mahon, Artist + Illustrator (she/her)