Transcripts
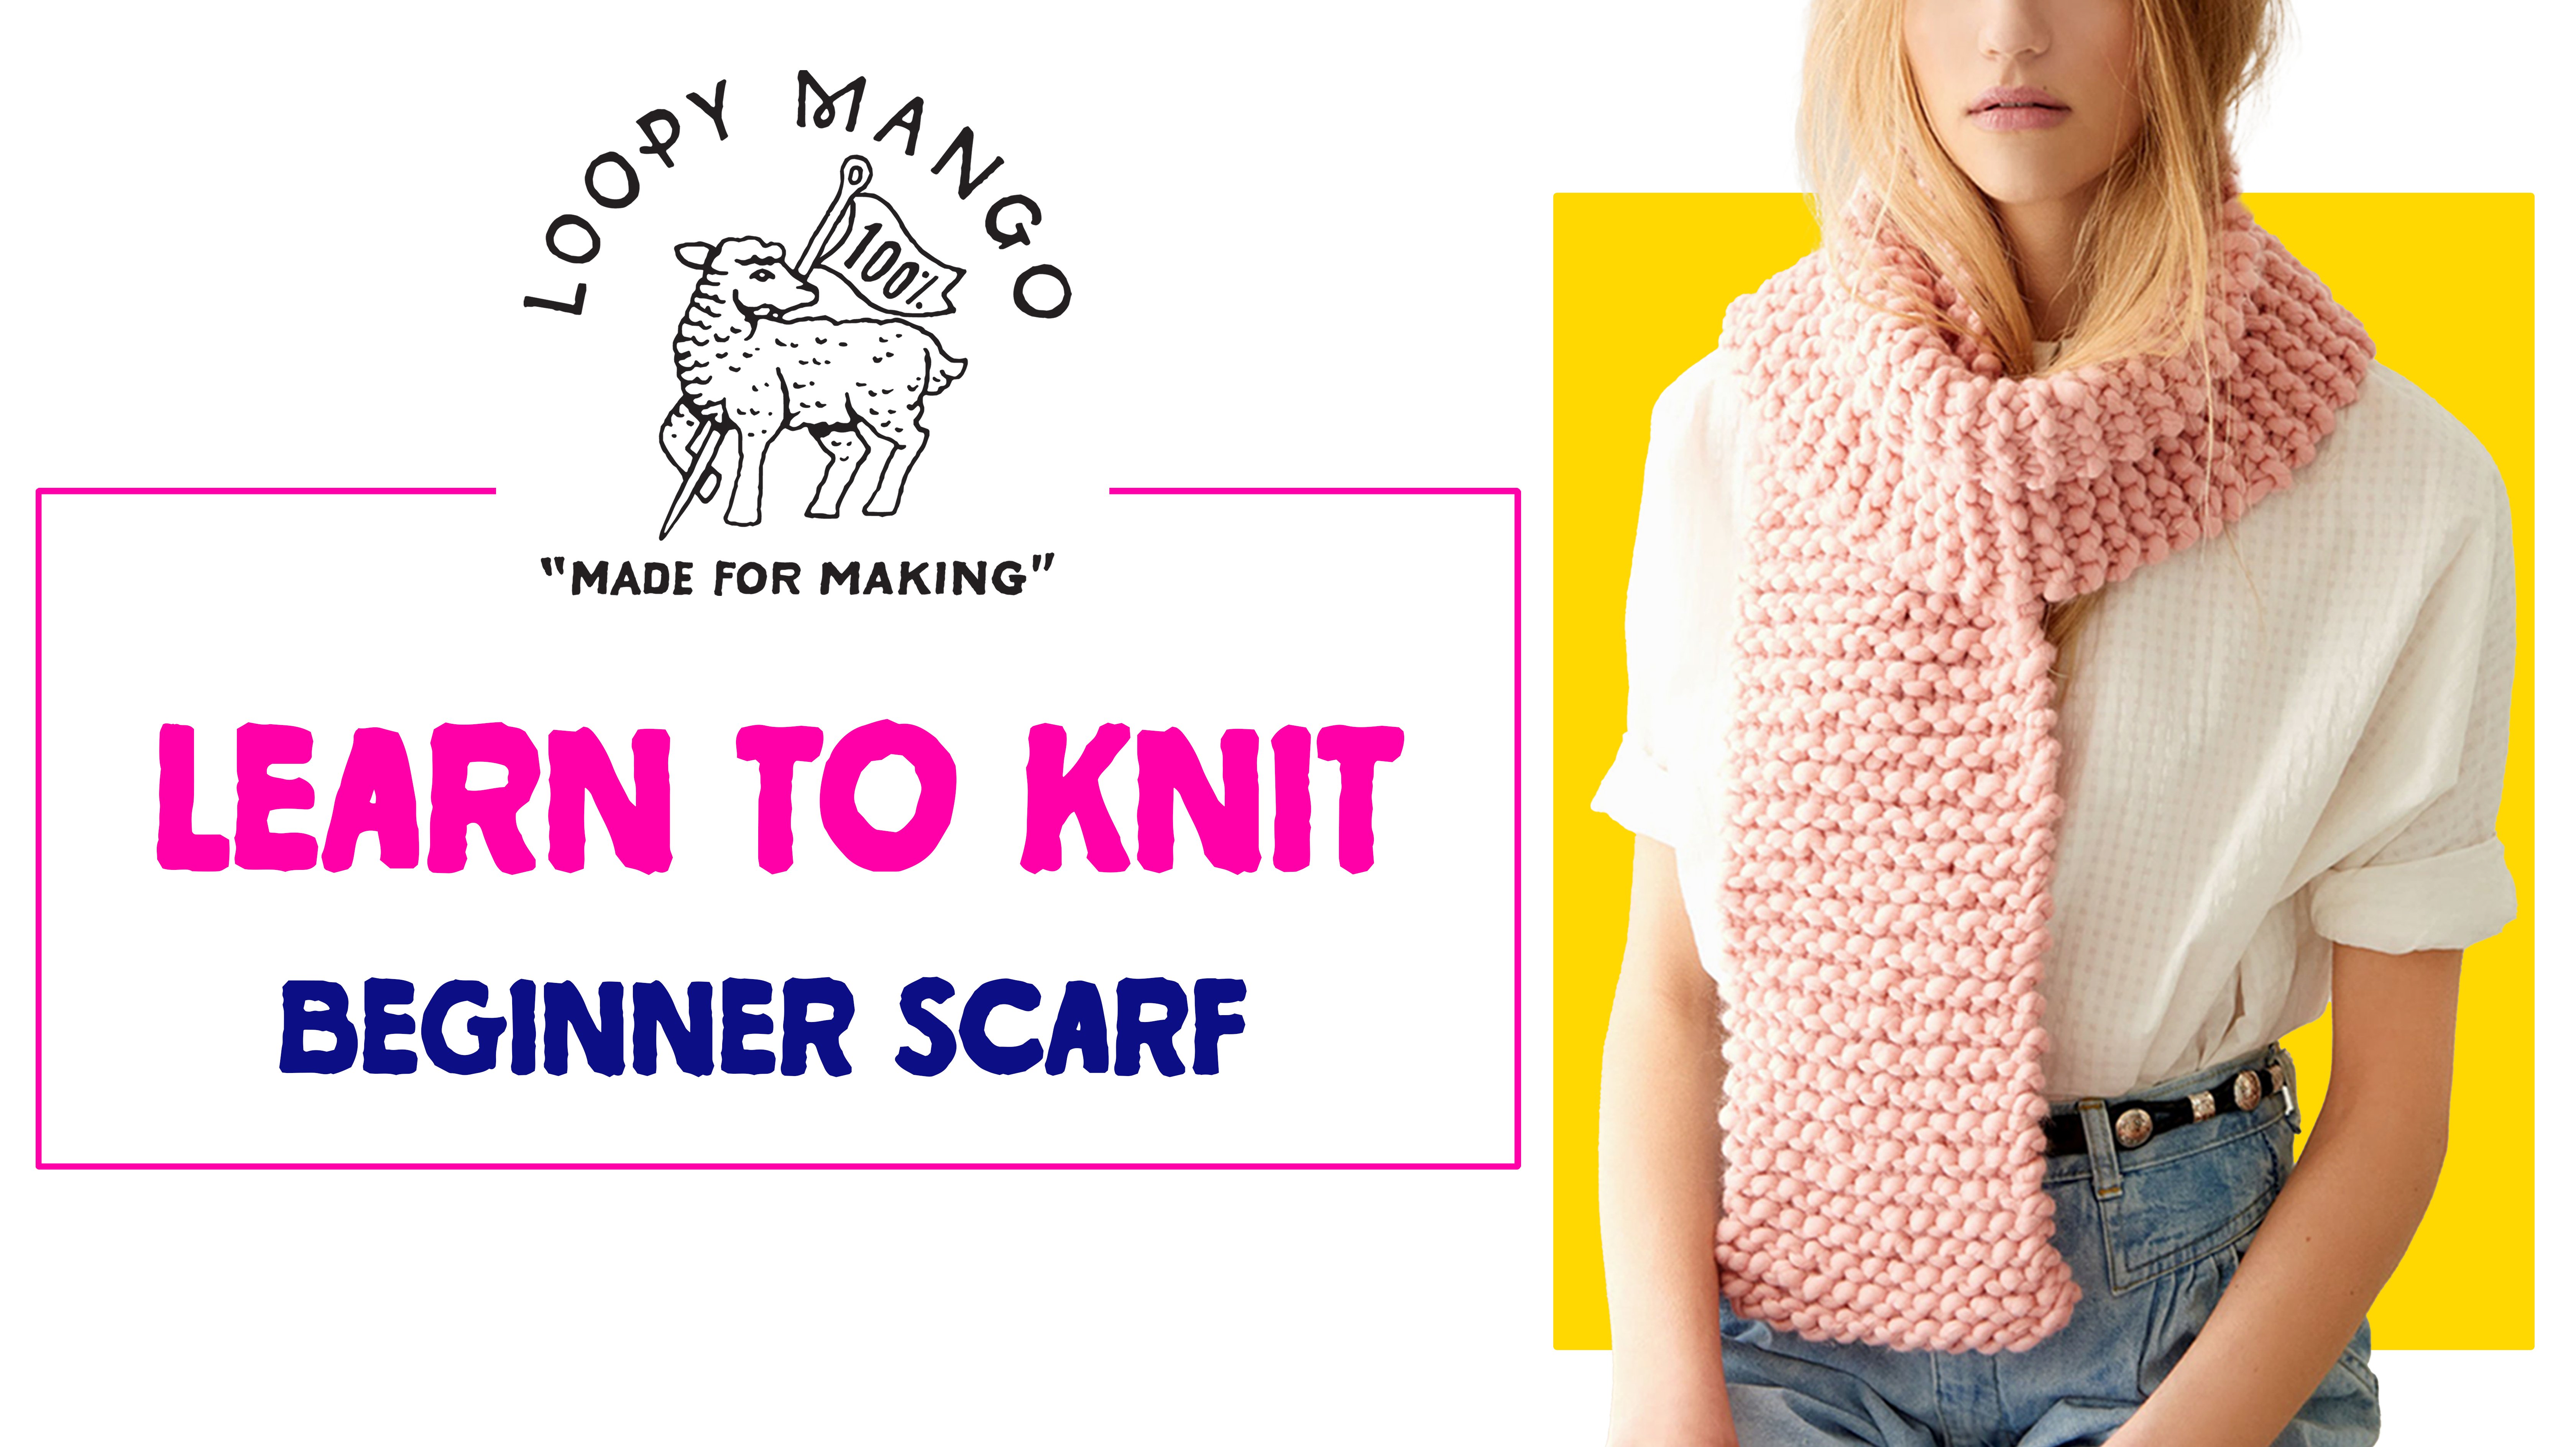
1. Knit For Begin Lesson 1 Intro: Hello, my name is Sandra Clark. I'm a maker and teacher and welcome to Knitting for beginners. I think teaching knitting and textile arts for over 20 years. I teach online and in art galleries, schools and museums. In this class, you'll learn how to cast on stitches, knit a Garter stitch, and how to bind off and finish your project. I teach knitting skills and projects so that you can learn something new and have a beautiful and functional object. By the end of the class. In this class we're making three projects. I did go cup Cozy, a cup cozy for home, and a teapot Cozy. The materials needed for this class are once gain of numbers six, super bulky yarn, eight millimeter knitting needles there also called us number 11. And they can be straight or circular. A darkening needle, scissors and burn option. You can have a buttons or jewelry or beads and a sewing needle and thread. There are several benefits. Knitting, develop motor skills and muscle memory. Increased focus, improved math skills, build self-esteem, cams, and relieve stress. Exercises your creative muscle, and balances, your right and left brain. Studies have shown that hands and getting along with other forms of needlework provide several significant health benefits. These studies have found that the rhythmic and repetitive action of hand knitting can help prevent and manage stress, pain, and depression, which in turn strengthens the body's immune system. Needing creates a relaxation response in the body, which can decrease blood pressure, heart rate, and help prevent illness and have a calming effect. Pain specialists have also found that hand knitting changes the brain's chemistry, resulting in an increase of the feel-good hormones like serotonin and dopamine and a decrease in the stress hormones. Have you heard of hookah who got is a quality, coziness and comfort, a feeling of contentment or well-being. The Danish people call who got this cozy bumpiness. And that's what I want to bring into this class. Who got is the goal of this class? I look forward to teaching this class. 20-20 has been a difficult year. We all need extra comfort and calm. And knitting is the perfect cozy activity to create warm and well-being.
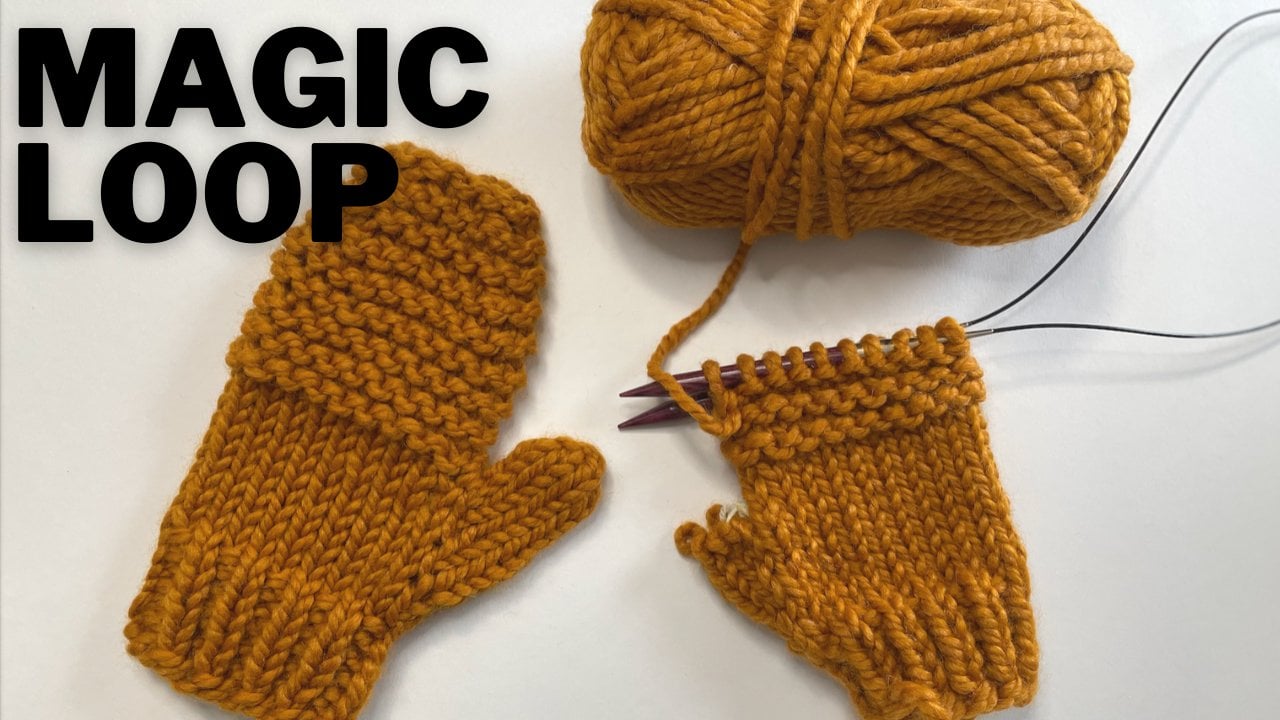
2. Lesson 2: General Knitting Materials: Hello and welcome back. I wanted to talk about some of the general materials that beginners we'll be using as they learn to knit. The first thing that you'll need for two things are knitting needles and yarn. So let's talk about some knitting needles. They come in all shapes and sizes that we've got. These big giant needles, tech, I think these are 25 millimeter needles and their US 50. So you'll usually see tho, those two numbers. And they just tell you the size of the needles. So that's 25 millimeters. That's the size of the needles. But also us size 50. That's just an indicator of this specific needle. So those are for giant projects and you can really do some fun things with big ones. And then you can go all the way down to some really tiny needles. These are only two millimeters. So this is for like really thin yarn. This is some nice thin yarn and a project that will fit along these needles. There's also smaller needles that you can get. These are ten millimeters us size 50. I got these at a charity shop and it's really fun to go into charity shops and see what they have. And these are 5.5 millimeter needles. These are great for children's most needles that you will find, our straight needles like this, and these are seven millimeter needles. So this is more for a bulkier weight. And then there's, you know, some really cute needles. And then I want to talk about double pointed needles. So these are called double pointed needles. And what these are generally used for is if you're knitting in the round, but your circular needle is too big. So if you're knitting socks and it's really small at the toe of the sock. Then you would knit. You would take three or four needles like that. And you can make a circle like that and then knit with your fourth or your fifth needle. I like double pointed needles for really tiny projects. I'd like needles that will fit in my hand. So I started, like most people do start with straight needles and these are really long straight needles. I actually, when I was a child, I started with the double pointed needles for my little hands and then I went up to the straight needles. So that was was my progression there. And then I got into circular needles. Now, I love circular needles for everything now, even if I'm doing straight knitting, So that's just a flat piece of knitting. I like circular needles. They just fit in my hands nicely. And if I'm going to lose something, I'm only lose in one. Spell. And then I don't know the size of these and they're not written anywhere. So you can get to anywhere that sells knitting stuff. You can get these little measurement things and these will tell you the size of the needle. So all you do is you just pop it through and where it's nice and where it can go right through. If it doesn't go right through, that is not the Saudis tried to size up. And this goes through nicely. So I know that this is eight millimeters. So I know that. And so these are these are metal needles. Consult their metal needles. Those are fine, little or heavier. Let's see. These are middle. Note, these are plastic. I love plastic needles. Plastic needles are very light. They're probably my favorite needle. I can just go really quickly with them. And the metal needles that just a little heavier my hand, but you might like that if that's the type of meeting that you like to do. Now there's bamboo needles and bamboo needles are really great to use if the yarn that you're knitting with is kind of slippy Arnot slips off everything, then these needles will be quite helpful. The bamboo needles. Now these particular bamboo needles, when I first got them, it was very easy to tell the size. They have the size printed on them, an ink. But then as time goes by, I can hardly read them. So this has eight millimeters on a side, could still see that. So eight millimeters, if I wanted to make sure, I can just use my handy dandy. And here are these, are, these are force I can to, you'll be able to tell, you know, sometimes when you can just by looking at them, these are fives I can tell. So I do like circular needles here. This would be a great needle to use this as a really big needles. This is probably not. Well, it's yeah, it's a 12.5. So that's good. 12.5 meters. This is good if you're using bulky yarn and you're making a big bulky comfy sweater and you're just knitting in the round. Or even you can get a lot of stitches on here rather than if you get a lot of searches on these. But you're pushing your work to the end where this you can just get, you can get a couple of 100 stitches on this, which is a great, big, bulky, great sweater. So that's needle. And then there's, I also, I showed you this measuring tool. It's also good to have either a sewing measuring tape around and just a couple of things to measure. So stats that I also like having some crochet hooks, especially small crochet hooks because what they're good for is instead of darkening like I've got these cute little darling needles that you can when you're weaving in the ends you can so in DNS or you can just crochet them in. And this will act like a knitting needle. Scissors. You always need scissors for your project. And I just showed you darling needles. Those are good things to have. And then there's the yard. When I was growing up and I first starts in it 50 years ago. Pretty much everything was Walt. You couldn't get acrylics. I think sometimes if you're pretty lucky, you can get some silk and things like that. But most of the time it was wool that you, that you got or even a blend of wool. Nowadays you can get all sorts. And the debate on whether synthetic is better than wool is you can you can take both sides on it. Yes, synthetic fibers, like acrylic. It's not natural fibers. You can get a mixture. I'm a blend you can get, you know, half will have acrylic or have nylon and things like that, like synthetics. But the thing is like if you're just using Wolf So it's processed, it's like a protein-based wall. So protein-based means animal and animal based. So that's sheep, goat, like Gora, Gora, rabbit. I guess silk isn't there, their animals, that type of thing, that, that's wool. You can also do plant-based. So that would be flax makes linen or cotton. And I have some coffee here, I want to talk about that. So those are natural, but it takes a lot of natural resources to process animal fibers. There's a lot of water use to, and just a lot of natural resources that are being used up to make a protein-based or plant-based wool and natural wool. Now, acrylic is synthetic. It's basically very similar to plastics. And we all know that plastics aren't good for the earth either. So you can debate which one that you'd rather use. I like a little bit of everything. Beginners, I always recommend acrylic because acrylic yarn comes in all sorts of sizes and colors. And a lot of it is very soft, but there's a lot of it too, that that's basically feels terrible and it looks terrible. But there are a lot of beautiful acrylics or acrylic yarn has come a long, long way. This is one of my favorite acrylic yarns. It's made in candidates, made in Ontario, so, and I'm in Ontario, so the price is excellent for me because it doesn't have to go far. So that's another thing is is there's not a lot of travel done in this who from my home to this is made is about 60 or 70 kilometers type of thing. So it's not very far at all. So it doesn't have to come far. So that's good. And other good thing about this particular brand. I not affiliated with this brand. I just love it. So this is the Berne Act. Softy chunky are. Now. So there's this type of Bjarne that we've got, and then here is a blend. So this is acrylic and mohair. This is very pretty. I made a really nice shop out of this using very small meals and that was beautiful. And then I wanted to talk about cotton. Cotton. Again for naps because it's close to where I live and the cotton is not stretchy at all, but it's washes pretty well. And it's great for children's projects. So bibs or little little blankets, things like that because you can just throw it in the wash, its cotton, it's natural. And this is 100% cotton. And it's very, it's not a, you get, it's very well pressed. So anywhere that you go. So Cotton is very good to. Now when you're a beginner. And a lot of things that I hear from, there were one of the biggest things is, okay, I'm really sick of just knitting squares or rectangles. I'm going back and forth and back and forth. And there's only so many scarves or blankets that I want to make. So for something a little different, you can use a multicolored yarn. So there's gradient yarns. So that is basically the same type of color for it starts from darker than goes into a medium dark, then a medium, the medium light and light. And sometimes it just fades into white and it repeats itself and it's beautiful. So if you're just making a lot of squares and rectangles at the beginning. Don't worry about it. You can use some really nice different ingredient yarn or this type of thing. Oh, this is washable wool. This is great. Where is what is this made of? Seventy-five percent wall and twenty-five percent nylon. So that's kinda nice out makes a nice sachs, that'd be warm socks. So that is a nice alternative for a design factor, is instead of using just one color or just, you know, you're doing a few rows and then change color a few rows. You can use these natural or unnatural, not natural. Indie died, or even you can get them from large companies and they're just beautiful that and just, you can combine these two. I have a pattern where I use this type of yarn and then I also use a solid color and I do these wave thing with the multicolored yarn. So that's something that you can do as well. Okay, so I've got the needles and scissors and rulers and crochet hooks and darkening needles here, we've talked a little bit about yarn. A couple of other things that I'd like to talk about is, it's always nice to keep a little jar of embellishments, especially for like sweaters or shawls, or even had bands, hats at anything that you're going to make to where you can keep your everybody's got a few buttons that it's really pretty button and I don't know what to do with it. Well, don't throw it out, just keep it because you'll be able to use it to embellish your knit where. So there's inhibitors, a bunch of just lost earring. I lost one earrings, so I kept the other one. And it's very pretty. Or broken costume jewelry from Nana, things like that. And you can keep these things and you can use them. I'll show you an example. I made this. This is one of the beginner projects that we're doing. And I put buttons on it, and this is just goes over the cup. And because a cup has a handle, you can just tie it, just tie it off. Or you can put buttons or an earring or just use your imagination on what you can do there. So that's just the materials that you can use as a beginner. And I'm going to tell you in the next lesson, the items that we're going to use for the three beginner projects. See you in the next lesson.
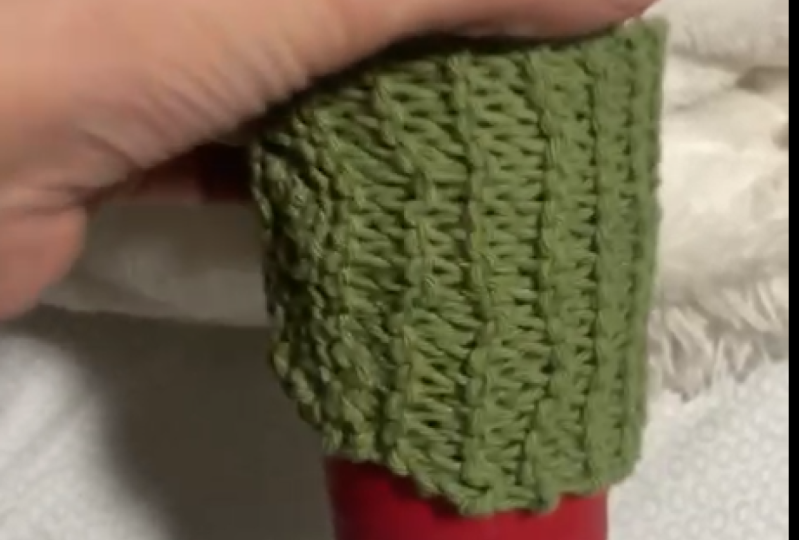
3. Lesson 3: The Projects: Hello and welcome to Meeting for beginners. We are making three projects. It's really nice to learn to knit, but it's also very pleasurable to when you're finished knitting. You have an item of a project that you had completed. Instead of just, you know, some squares and rectangles, which squares and rectangles are good too. There's a lot of things you can do and I'm going to teach you that. But it's nice at, for your very first project to end up with something really practical. Things that you can make as a gift. You can make a lot of these. It's not expensive and it's fun, it's fun to do. And you can get it done easily in just a couple of hours if you, if you want. So what we're going to be making is a target, goal cup cozy or a cup sleep. It fits a lot of different cups. I have a couple of different here. This'll be a little loose for this one. I'm actually drinking this right now. It's my team. It's so cute. Looks a little sweater for your cup. So will be making that. We'll be making at home, cut cozy. So this will fit almost any cop. And how this is constructed is exactly like how we got to go cut cozy. You can either just tie the ends together for the top and the bottom that goes around the handle of a couple. Or you can do what I did and I just sewed on some buttons. So that, that's a fun thing to dig and put on buttons or beads or anything and old earring that broke. You can put that on there. It's a really nice thing to, to keep Zobel subtle. The little broken pieces of jewelry and beads and just things that you find that they have meaning for you and you really like them, but you don't know how you're gonna use them. Things like this is perfect because you can make a really nice cozy. And then we are going to make a teapot cozy. And this is one of my favorite teapots. I think it holds eight or ten cups of tea. And it is super easy. So we have it at the bottom, is also, are committed to part two. So that acts as a triplet and can easily fill it. You can keep the you can keep the cosy on. You put teabags in or your loosely TD. We go and there you go. Is it a port super easy to come off and come on? And it's easy to, to wash. This is basically, it's just a large rectangle and you need it this way back and forth. But we're going to be using it this way. So this is what I was saying earlier in the previous video, that we do make a lot of squares and rectangles when we first start knitting. But use it differently. We can, instead of going back and forth, we can turn it quarter turn, and it gives it a whole new look. I love this look. It's a ribbed look. And you can create this type of look with knitting, knitting Perl. But this way we're just doing a knit stitch. We're, the verb that we're doing is knit or knitting. But the name of the stitches called the Garter stitch. And what makes these type of projects so fun to do is you can use just a darling needle and you can get these guys anywhere there, just pennies. They come in plastic, they come straight, become with a kind of a little bit of a band on the end, they come in metal as long the only thing that you're really concerned about is that it's comfortable to use and the eye is large enough to thread through the yarn that you'll be using. So that right here are the three projects that we will be making for our knitting for beginners class. In the next lesson, I'm going to tell you about the materials that we'll be using for that class.
4. Lesson 4: Materials for 3 Projects: Welcome back. The materials that we'll be using for this class to make these three items will be one scaling. So that's all we need. Once gain will make all three projects plus you'll have some yarn leftover to make more cut causes a few like so I'm using Burnett, I like to call it burning. Burning a soft chunky yarn. And it is very chunky and it's a great yarn to use for coffee projects like this. And even though I really like the whole being in the moment that present, you know, slow Minnie. We just want to focus on what we're doing. The reality is we really do want to see something to show for it at the end of it. So by using this bulkier type of yarn when you're first beginning to learn to net. And the large needles that they recommend go with this. You will see a, a quicker process in the slow knitting and that will make sense to you. So you're slow knitting, you're being very deliberate. You're watching every stitch. But because it's bulky yarn, the project knits up very quick. So on the label. On the yarn label, all yarn labels will have the type of size of the yarn. So this is super bulky and it's six, super bulky six. And the recommended, and I say that they just say recommend it. You don't always need to use what they recommend. The recommended needle size is the eight millimeter size. So that's that us 118 millimeters. And you can use the straight needles any size because we're not making a lot of stitches for these two projects. We are making 30 stitches. For this, you will still be able to get 30 stitches on a longer straight yarn. But with one of these, I just like to use this. This isn't, these circular needles are not necessary for this class. It's just my preference and you'll develop your preference as well. It took me years to like these needles. I didn't like circular Niels. I didn't knit in the round. I rather knit flat pieces. And then with a crochet hook or adorning needle, or speaking, that's when you cut it. You cut your work. But it's something that you'll learn at that for a lot of fair owl projects and knitting in the round. And it's okay to do that because it makes sense to do so. So we've got the yarn, the nice bulky yarn that we're going to use. We are going to use the recommended needles, eight the eight millimeter needles. Now, when I say it's not necessary to use what they recommend because you're going to develop the type of knitting that you do. So you might nit exactly using like what they say because like here what they'll say is like a four-inch by four-inch, which is ten centimeters by ten centimeters square. If you use this size needle. It tells you that you will need to do 11 stitches by 14 rows. Will make 11 stitches by 14 rows will make a four-by-four square or a ten by ten centimeters. That's if you use the eight millimeters. I'm a looser knitr. I quite loose. So if I knit 14 rows and put 11 stitches, cast on 11 stitches, my piece will be larger than a four-by-four square. Sometimes, especially when you first are first learning to knit, people can very tight. So if you put 11, cast on 11 stitches, 14 rows, if you, you can be very tight. You won't be making a four-by-four square. You'll be making maybe a 3.5 by 33 quarter square or even smaller than that. So what I recommend is that you knit your way, knit what's comfortable for you? If I always stuck by being a loose knitr, stuck by what they said, what they recommend it. My fitted where would be too big. So what I do if I'm going to make something that I'm going to wear, I will either use the a smaller needle. So I might use a six millimeter or seven millimeter needle to get like fan following a pattern to get the sizing. Or I might just use a thinner yarn or a thicker yarn. I think it's a lot of fun to experiment. And so it's a lot of fun to like, just tell everybody that you know that you're learning to net. And people come out of all sorts of places. And we'll give you some nitty supplies and yarn and things like that. You can use charity shop yarn when you're just learning to practice. You can, a lot of people don't want to do this and I do it all the time. Knit something and you're not sure what you're gonna do with it. So it goes off to the side, but then you, That's a perfect yarn for something else. And I just unravel it and reuse the yarn again for something else. You will get to know your knitting style. So for this, we are going to use the recommended needle size for this type of yarn to make these three things. But you might say, you might find that urinating is tighter, too tight, or too loose, or it could be just right. You can unravel it and then do different map and start again. So that's the wall. These are the needles we will be doing. You always have a little pair of scissors hanging around. I'm going to use my darling needle to sew up these things. I'm going to have a measuring tape because I am going to make a swatch to see if I'm a loose knitter or a Titan editor. I'll show you that in the next lesson. And then for this at home cup cosy, I do have some buttons that I might be using. That's all the supplies that you need while you've got the teapot and the cup out, why don't you make yourself a cup of tea? And come back and join me in the next lesson, where we are going to learn to cast on. And then we're going to knit the Garter stitch and bind off and make these projects.
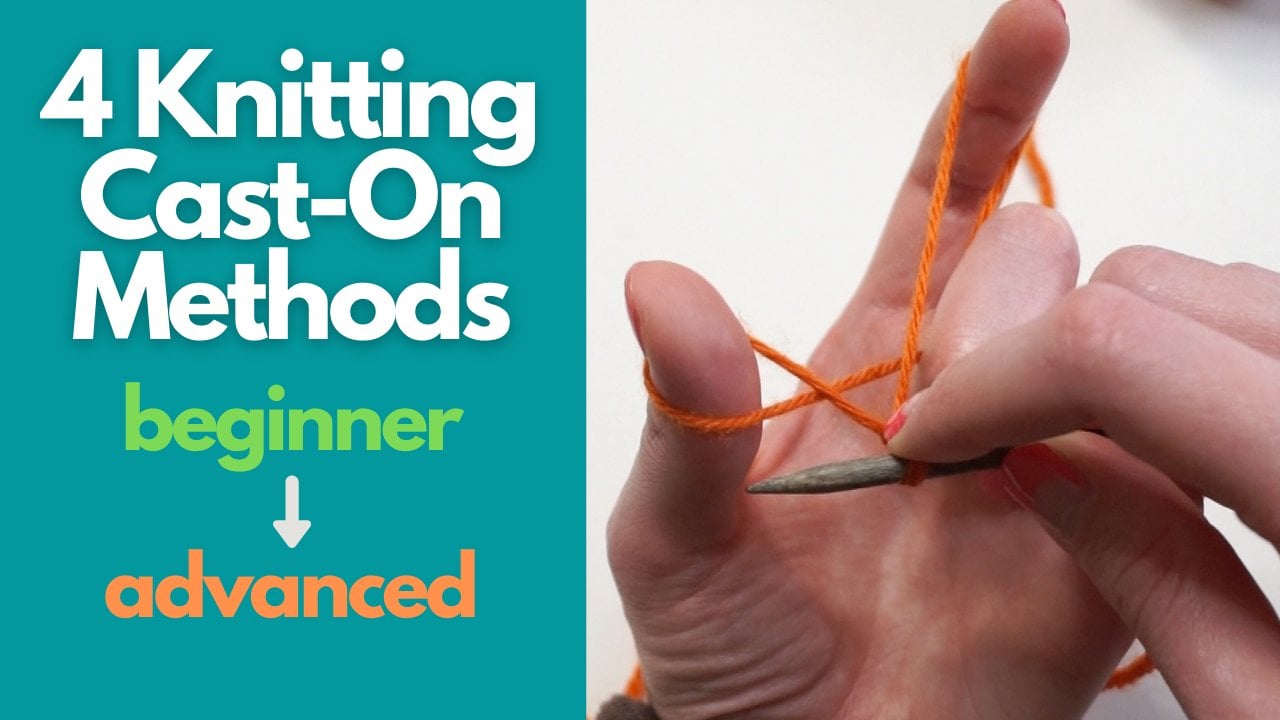
5. Lesson 5: Swatching and Casting On. To-Go Cup Sleeve: Welcome back. Before we start knitting our cup cozy, The first one I wanted to show you about swot Ching. And what's watching is, is where I see how I knit. So here, as I said previously, using the recommended needles for this yarn to knit a four-by-four square. I have to knit 11 or cast on 11 stitches and knit 14 rows. And that should be a four by four or ten by ten square. So what I did is I just knit this up and you'll learn how to do this. Because when we, it's the same thing, the same type of action that we're going to be doing to knit our cut posies and our teapot cozy. So I CAS or casts on actually a bunch of stitches here. And how I'm going to show you how to count the stitches. So as you see there, if there's these bridges, they go up and down and up and down. So what I do for every for every up-down, That is one cast on type of thing. So how many I cast on? I'm just going to start with this one. You can start anywhere you want on the edge. I'll start here and I'm gonna go one and then do the next one that looks like it. So this goes this way. So I'm gonna do this way as well. 1234567891011. So this is 11. Now, if I did, I let this arrest. So if I did it the way they said I'm going right to the edge of that stitch. So when I cast on and knit 11 stitches, My work is 4.5 inches, so I am quite loops quite a loose knitter. And here, instead of ten centimeters on my 113 quarter centimeters. So I do knit quite loose. I like the way that I knit. I don't want to change the way that I knit. And that's like you, you as well as if you find out like for instance say, okay, I'm a loose knitter and, and, but I want to knit tighter. If I knit tighter, what's going to eventually happen is somewhere in the middle of my project. I'll go back to knitting the way that I usually MIT loops. That's just our nature. And if you're a tight knitter and you want to try and looser knitting. I get again sometime in the middle of the project, you're going to go back to what's comfortable to you and knit that way and you're going to have a tight project. A lot of times when you're making a scarf or even a hat because you can get away with some sizing on that. You can't work cozy, things like that. You can get away with looser or tighter knitting. Or instead of changing the way unit, changed the tools that you use. So you can use a larger or a smaller needle size for the project. And that really has more to do with when you're making knitted knitted wear type of thing. So sweaters or dresses are coats of things like that. So let's see 14 rows. So here is my cast on. So let's see, that's my cast on. So this would be my first knitted row. So 14 rows is supposed to give me four inches. One, or this is one. And then in the middle there, that would be the second one. So if I just count by twos the raised areas, I will get that. So I'll do 2468101214. So right here is 14. Let me just secure that. So let's see. 14 is right here. I'm not. And here it is. 14, isn't it? So here I actually, this is supposed to be ten centimeters and its eight centimeters. And see that again, 2468101214. Yep. So that so I actually am tight. I'm loose with my casting on and stitches going this way. But I am a little tighter when I make my roles when I progress. So that's interesting to know when I want to look at a pattern and use their suggestions. But if I know the way that I can knit, then I can adjust it for me. But for beginners, that's just good information to know at the beginning. But when you're first starting out and you knit just squares or rectangles to make blankets or scarves or things like that. It's less necessary to size, but it's always a good practice to figure out how to make a swatch. So you can make your swatch, you know, just do 11 by 14. I like making it a little bigger because my projects are always going to be a little bigger than 42 or four inches, four centimeters. So that's watching. So now we are going to get into casting on. We're finally going to learn to knit. Okay? So you've got your ball or your, your scheme. This is called the scan of yarn. Just the way that it's put together is called a scheme. To sometimes on the labels, they'll tell you where to pull from the center. You can if you want your I'll take the label off here. You can, if you want here, I can tell there's a line there. And here it just this part. This is the outer part and it was just sitting inside. So I can just if I wanted to knit from this from the outside. But it's nice and much more clean if unit from the inside. So we want to find where the end of the yarn is in the middle of this whole scheme. So what you can do, you can look there's a larger side and then there's the smaller side there. So somewhere in the center, there is the other end of the yarn and I want to pull that, that's the center pull. Sometimes on the labels they'll have a little arrow to tell you which end is. Will be easier to find the center pole because no matter what, and you go in, you'll eventually find it type of thing. But what I liked to do is go into the larger section. And I got my fingers as deep as I can. Sometimes with indie makers, they'll find it for you and put a little, like a little tape on it so you just pull from the center. So here I'm just I'm not looking for it with my fingers. I'm just going to grab a little bit of yarn from the center. And I'm going to pull, and there'll be a bunch that comes up there like that. And then in here I will find the other end. And all we do is just, we'll be needing that up. And it'll go fast. And then eventually what we do is just keep pulling from the center. So it's nice, clean yarn that we will be using. Okay, let's find this end. Okay, I have the n, So this is from the inside. This part, I'm going to call my working yarn. So this is the yarn that I will be adding to the project to make more stitches. I'm just gonna put that somewhere near me. And this little bit, I'm going to call this the tail. A lot of times I know, I'm going to promise you that you'll do it. You'll grab the tail by accident and start knitting with that. And then you just have to unravel, carefully, unravel. So just undoing what you just did so that you know you're working with the working yarn. Okay? This is the easiest cast on to do. I'm not even going to make a slipknot. Sometimes people will make a slipknot and start back from start from slipknot at your very first stitch. I don't do that. And I'll show you why. The, there's a few ways of casting on. This particular way creates a lot of loose yarn for that very first cast on row and the very first knit row. And by, if I did a slipknot here, it'll end up with a great big hole in my project. I'm right handed. So I'm going to put my needle in my left hand. This one needle dot and going to be casting on with this is called the left needle because it's in my left hand. When I'm finished and I switch, then the other needle would be called the left-hand that needle and the right hand at IDO. So we are going to be. Switching, going back and forth. And it will make sense, I promise you. So I'm going to take very comfortably, doesn't matter if it's circular needle or a straight needle. It's just gonna rest on the fingers of my left hand. And then I'm going to take the tail. And it doesn't matter how much. 234 inches. And with my left thumb, I'm going to just push down nice and gentle so that the working yarn doesn't move yet. And I'm just going to hold that the yarn to my left hand with my thumb. My hands are really loose. And now I'm gonna make my very first cast on stitch. I'm going to take the working yarn, okay, and it's going to easily move through my hands. I'm gonna take the working yarn and just lay it across. My right fingers palm is up. And then I'm going to point my thumb towards me. And then what I'm gonna do is create a cast on stitch, working yarn on my thumb. And then I'm going to let my left needle take it off my thumb. So watch first, listen to my words and then you work. I'll do it again. And then we'll do it together. It's one you just want to listen to my words and watch before you start on your own. I'm gonna take my right thumb pointed to my body. And then I'm going to wrap the working yarn around my thumb by going under the yarn over the art and the artist is easily sliding. You can see that under my hand. And then under. And then I'm going to look at my thumb. I'm going to look at my right thumb and I see that there's two lines of yarn. And now I'm going to put my palm up. And there's two lines of yarn. And now my palm is up, uh, got the working yarn laying across my poem. And this is our very first stitch. I'm still gently holding the tail with my left thumb and the left needle in my left hand. And with the tip, I'm going to just lift that up. And it removed my right hand gently. I've removed my right hand. I'm going to take the working yarn and pull. And there it is. That's my very first stitch. And the other way of doing it, as I said, is to make this into a slipknot. But the nature of this cast on is it creates a lot of that extra yarn at the beginning. And by not making that a naught, I can easily just take up the slack at the very end. But it's just wrapped around here. It's not a not. So I have to be careful not to undo it. But even if I do undo it, I can just cast them again. So I'm gonna do that again. I'm going to cast on ten stitches. There's one. Working yarn is across my right palm. My right thumb is going to point to me. Go under the working yarn, over, under I see two lines of yarn. I'm going to just turn over my palms facing up. Here's my work in my left hand over here. This is my working yarn. And I'm going to lift that stitch off my thumb. So lifts off and now I'm going to just carefully removed my right hand. And as I'm removing my right hand, I'm going to take the working yarn and pull that slack. So I have two identical stitches Now. Now we want to make sure again that the stitches are able to just move freely along the knitting needle. We don't want it to, to type. So here I go again. I'm just going to make sure that I'm holding my tail nice and gentle. And I'm going to take the working yarn right here in my right hand. My thumb is going to point at me. I'm going to scoop below and over the low. And then I'm looking at two strips of yarn. I'm just going to move my left needle down. So it's one stripe again when you're looking at it. And then I'm going to turn it over and I'm going to scoop that up and pull to tighten it up. That's my third cast on. I'm going to speak and move a little faster now. Comfortably holding the left needle and the yarn and the tale. I'm going to put my right palm. So it's got the working yarn. My thumb is pointing towards me. I'm going to go down and up and down and up. I C2. I turn over, i C one. I scoop that up, move my right hand down to pull on that. Slack a little bit. There's four again now this time, because that's on there. I can now I don't need to hold the tail. I can just gently hold the left needle and allow the stitches to move. Another cast on stitch. I'm going to lay across the working yarn down and up, down and up. So that was a little faster. Turn it over, Skype it up. There we go. There's five. Let me do that again. Working yarn down and up, down and up. I C2, I turn over IC one, and I scoop that up. So I have 246. Scoop down, go up, scooped down, go up. There we go. And scoop it off to four, 6-7. And it's low working yarn. Down and up, down and up. I C2. I turn over I C1, I scoop it up. My right hand, poles 2468, and only do two more. Scoop around and around and up and lifted up nine around, around and ten. And this is what ten cast on stitches looks like. And this is the easiest cast onto do. Ok. Now I'm going to do it again, and I'm gonna do it quicker. So you can always pause the video and go back. So I just took all that off. So now you can do this one with me if you like. Okay, I'm just going to hold the yarn, the tail with my left. And I'm just gonna go around and around and on. And that's how it's gonna look around. And you see you can slow this down. And this works when you're casting on 200 stitches for a sweater. And then I can count. Let's see what if I got I've got 246891 more. Okay. And that's it. That's how you will do that. See, it's nice and quick. I'd like to show it slow. But I also like to show it quick because sometimes if you learned something too slow, it's actually not, you're not gonna retain it as too slow makes, does not make sense. So that is casting on. And in the next lesson, we're going to get together and we are going to learn to knit that Garter stitch.
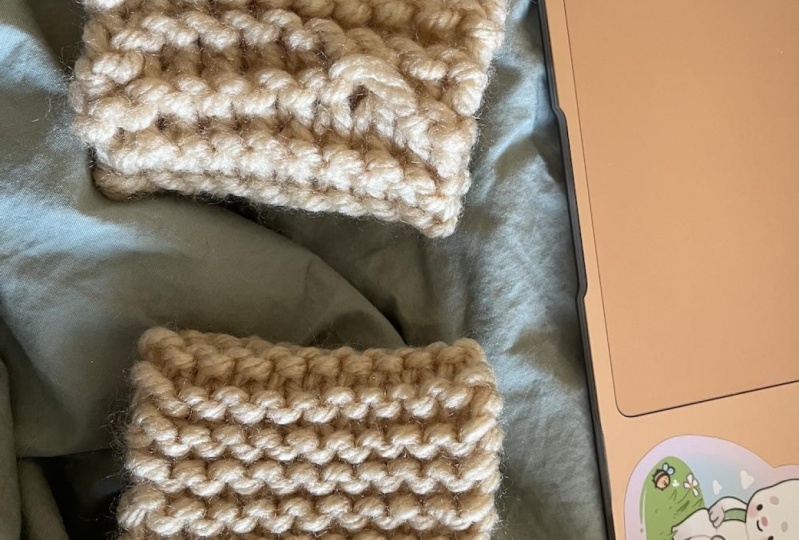
6. Lesson 6: Knit The Garter Stitch • To-Go Cup Cozy • Bind Off: Welcome back. Okay. This is what you've been waiting for. You. You've got the cast on, you've casted on ten stitches. And that will make an example. So here this is just cast on ten stitches as what we did here. I'll show you at the beginning of it. Yes, so that together yet. So I cast on and now we are going to knit the Garter stitch. So we're going to do the same action, going one way and then turning the work over the other way, one way and the other way. And by doing that, you get this beautiful. I think it's very contemporary looking darter stitch, so that's what the Gartner stitch looks like. But the verb that we do, what we're doing is Knitting. Now you've heard of knitting and curling, and this is knitting. Perlin is almost the opposite of knitting. So what we would do in that case is to knit one side and Pearl The other. One side, pearl the other. And then we get that stock and act looking stitch. So almost like that, that's almost those little v's. It would just be all of that rather than these smiley face frowny face bumps. Okay. I love this. I love this stitch. It's just it's comfy. So versatile. You can make anything with it or this is cozy. Okay. So to make this, I made so I cast on and then I made 24681012141618202224262830. Thirty two, thirty four, thirty six, thirty eight. And then I sewed it together. I DO find that this is a little loops. So instead of 38, I'm going to knit 34. Now, what that might do is that my stretch out my work a little. And that looks really cool too. So you might like to see these ridged looks, that ribbed type look, but you don't like it. You can knit more like 38. Or if you knit some unit, say 40, it'll be loose. I'll probably fall off the cup, but it'll be very tight together. So it's knitting the Garter stitch, but you can get several different looks. And it's super-easy. It's a lot of fun. Okay, let's do it. Cast on ten stitches. Now this first row on this particular cast on is going to create a lot of excess yarn. And you'll see what I mean when, when I get started. That's only for the first row. The rest of the rows, you'll be just knitting the way you act today. So how I'm going to do this? What I want to do, essentially here's my left knitting needle, and that's called my left knitting needle only because it's in my left hand. This is my right knitting needle only because it's in my right hand. And that's why I call it that. When I move it over to this hand, then it's going to be called the left knitting needle. I'm right handed, so I've got my cast on stitches in my left hand, left needle. What I'm doing is I'm adding yarn to each of these stitches. So I'm gonna make a loop and put that in this loop. Then I'm not going to need this loop anymore. Pop that off. And the new loop is going to be in my right hand. That's all I'm doing. I'm just making a loop using sticks to put another loop in here. And to move the new loop with added yarn into my right hand. And when I've done all of this, my, when I've done all of these ten stitches, my left needle will be empty. If stitches on my right needle will be full of stitches plus the new yarn, the new loops that I put through the old loops. And then I take that work, put that in my left hand and started to get, let's do this. Okay. So remember you can pause and go back. So here is, we're going to call this as the, the top. This is the top stitch of the stitch. This is the bottom of the stitch. This is the front of the left needle. This is the back of the left needle. So let's take the right needle, put it at the bottom of the stitch. And we're going to poke at right needle in. So we've got both needles are in that front stitch. We're going to work the tension. We got the working yarn in our right hand. And that's going to help with our tension. What I mean by that is if you're not, if you're not caring about what's going on with our right needle, you're going to have a great make stitch. So I'm going to pull a little tighter, but not too tight. And I'm just going to have the working needle in my middle finger, ring finger and Pinky, and my thumb and my index finger going to do some moving now. So I have both needles in that stitch. I don't want it that big. And I'm gonna take my right needle and it's crisscrossing. And it's in the back of the left needle. I'm going to do that again. My right needle is at the bottom of the stitch. I want to poke it through so it sits in the stitch Just like the left needle. My right needles behind my left needle. Both needles are in this ditch. My right hand is controlling the tension of the working yarn. So nice crisscrossed. So what I wanna do now, my left hand is holding the left needle and the right needle just gently, loose, nice and loose. So what I wanna do now is add some yarn so that it goes through this stitch. And I can pull it through to the front and that my right needle has a new stitch on it. I'm going to do this. And once you can watch, then I'll undo it. And then you could do it with me. So I'm gonna take my working yarn and I want to add new yarn. And to do that, whenever we knit the Garter stitch, the yarn is in the back. I'm going to swing that new yarn. So that's still in the back, but it's over towards the left. And I'm going to put it right between the right and left needles. So it's lying across the top of the stitch. My right needle is very gently. The tip of it is going to help bring this new yarn through the old stitch in to the front. And then I'm going to pop it off. So this is what I'm going to do anything to show this twice. Okay. So I'm going to bring my right needle. It's touching the left needle. C, It's going into the front now. And when it went into the front, it brought that new yarn with it. And there it is. Now a lot of times people will go ok, oh, I did it. Yea. Now I'll go the next one goal. We gotta get rid of that old one. So you can with your finger or you could just gently guide it over and there you go. So that's your very first stitch. So I'm gonna do that again, okay? And you see this is what I mean about some extra yarn. Okay, so I'm going to do that again. Okay, so I can just take that out and unravel that because I'm just going to I had my tenth stitch back. Okay. Now let's do our first row. Nice and comfy. And I'm going to bring my right needle to the bottom of that first stitch. I'm going to poke the right needle through that same stitch where the right needles behind the left needle. I need to add some yarn. So I'm gonna take my working yarn. It's always at the back when I'm knitting. And I'm just going to move my right arm over to the left. And I'm going to bring the yarn up and over. So that this new yarn with the help from the right needle is going to the right. Neil's going to take that yarn and guide it through the stitch into the front of the left needle. Okay, let's do this. Our right hand is holding tension. Not too tight. And here goes my right needle. It's going to come to the front. There it is. And it's bringing that new. Yarns you, that's, that's the new yarn. So now I've got that new stitches going to come on. And I'm just going to pop off that left stitch either with my finger or with the right. And there you go. We're gonna do that again. And let's just go to the next stitch in line. So I poked, I went to the bottom of the stitch, poked through so the boat that the old stitch or the stitch on the left has both needles in. The right needle is behind in the back of the left needle. Let's add some yarn. I'm just going to bring it from the left over to the right. So that's just adding yarn. See you, that's going to be a new hoop. And then I'm going to hold the tension not too tight. And I'm going to let the tip of my right needle stay in contact with the left needle. And by doing that, I'm going to take that brand new yarn that i just moved over and bring it to the front and there it is. And then I'm just gonna slip off that stitch. And there you can see there's a bit of a a not there. Let's do that again. And go a little faster this time. So we've seen how slow doing it slow. Now fast. I'm gonna take my right needle to the bottom of the stitch on the left, poke it through, add some yarn c. Now I, instead of doing this great big action like this, I'm just going to add some yarn going from the left bottom over. And now with my right needle ongoing to just bring that new stitch to the front and pop it off and see there's all that extra stuff. Don't worry about that. Okay. And it can get pretty long too, so don't worry about that. For this very first row. I'm going to go to the bottom of the stitch, poke through, add some yarn, and bring that new yarn to the front and scoop it off. Okay? Also be carefully. You can see here, this is a three strand piece of yarn. They just unraveled as I was casting on. We want to make sure that those three stay together. Okay, and for this particular yarn, it's three strands, but sometimes there's all three plies. Sometimes it's one flight to apply more than that. So I want to make sure that that just unraveled because like I said, because of the capstone, add some yarn for bringing it to the front and pop it off. Okay. Poke it through at some yarn, bring it to the front off. Now I'm pulling this so that I get these nice even stitches. Okay. It's just that that first casting on. Here we go see and I'm pulling the first casting on the first row. And then once you get that going, Pulled that a little bit. And this is why I'm going to show you this is why I don't do a slipknot. Now that this is just circling that that's if I let go of the tail, I lost that stitch. So I want to be very careful. So I'm going to go in. And then what I can do is pull on the tail and that'll create that stitch. But I'll be able to fix my tension, go around, pull it through and here. Because if I made that a not like a slipknot, that's what the work is going to look like. This great big hole, and we don't want that. So we just pull up and there is the cast on and the first row. And you need a governor's. Okay, let's do two more rows together. And then you can go on and we'll meet together again at the end. Once you're ready to do the last couple of rows and then will bind off. And so this together. Ok, so here now this is nice and loose. Everything looks even. And this is a time if you don't like what you've done, unravel it and start again. That's fine. Now here, because we've got that first row and good foundation. Everything's going to be much easier to do. Now you can see here my three plies are together now. So now there's really no mistake on where I need to put my needle. And that's because when I put on when I put on my stitches, casts on my stitches, what had happened is this was unraveling. So you could see this is the end. So it's like, oh, where do I put the needle? Well, this is replies. You just group them together just like I showed you on the very first row. Okay? So here I'm going to, so when I did my first row, and now this is my second row, so I'm going to again take my right needle. So here when I end it, everything was in my right hand. Now. It's in my left. I'm just moving it over. Putting the work where I need to work is in my left hand. Don't worry about the tail. Let's make it go to the way. I'm going to take my right needle at the bottom of the stitch, poke it through, so it goes to the back. My right needle is behind my left needle. I'm going to take my working yarn. I'm going to wrap it around to my right needle, like from the bottom, left, up and over. Now it's on the right. The working yarn and new stitches right between the left and the right stitch, or they're left on the right needle. I want that right needle to now help guide that new stitch seat. There's that new stitch is right there and just book it through and then slip off that other stitch. And now we're building it up again. Let's do this again. From the bottom of the stitch, poke through at some yarn, bring it to the front, pop it off. The right needle to the bottom of the stitch, poke through the back. Both needles are sharing the stitch, adding some brand new yarn. So it's just sitting there in the back. We're going to bring the yarn to the left, up, bend over, and now it's on the right. And it's right between both needles, the right needle. You can use your fingers if you like, can push through, grabbing that new yarn, not too tight. You can even give it a little tuck. You want c, You can, you have all that control of how tight or loose this work is going to be and pop off the old stitch. There. You can see that's building up. Let's do that again. Bottom of the stitch, poke through the rate is by in the back at some new yarn. That new yarn, we're going to put the right needle, take that new yard to the front and top it off again around. Pump it up, clicking the needles. Here's the last one. And you're done. So that's row number to cast on and row number two. So now we built up that next row by moving the, adding some yarn to all the stitches are on the left. Now are things on the right. Now just switch. Take the right needle, put it in my left hand. And there we go. Now it's now it's my left needle. Okay. Now here's a little tip as well. Say you're, you're knitting along and near your knitting along and you go and you put something down eagle, but the Catalan and you come back and you go. Was that two or three rows, or seven or eight rows when the working yarn is in your left hand and the tail is on the left. You are working an odd number rows. So I did a cast on the capstone. I knit one, then I knit two. Now the work isn't my left hand, the tail is in my left hand. So I know that I'm on, I'm just about to start an odd number rho, which is three. So I'm gonna do this again. I push my, my work to the top. And now I'm going to start again. Everything's nice and loose. Poke through. So this row, I'm just going to show you that repetitive action. And this is where the meditation comes from. Now here I want to. Push up again, have things to the top of my tips of my needles. This is my third row. I pull on the tail. So that's my third row. And now I'm gonna take all that work in my right hand, put it in my left hand. So now that becomes needle. I have a lesson that shows common mistakes, but I'm going to show one to you right now. So here I want to have my working yarn when I'm doing this stitch is always in the back. Now what happens if I have it in the front? And you can see how okay, this is how I want to enter the stitch. But look what happens. If I say, oh, I gotta put it in the back and I go like this, I just added a stitch. Now if you wanna do, do that on purpose by increasing work on increasing for a garment that you're making that spine. But this will end up with 11 citizen set of ten. So you want to make sure that when you start, you've got your Tintin stitches, 246810. So be careful of that, that you don't add a stitch. That is, that is a thing that we do in knitting when we want to increase. But we don't want that. So we want to make sure that when we pull down My by I like to pull down and that I'm seeing all my bumps. If I go like this, I don't see that bump. So I know that I've added a stitch, so I'll make sure. And then sandra said, it's gotta be at the back. We don't go over. We go under and that's where it's at the back. Okay, I'll go over that again in another lesson. Ok, so I know I did that. I know that that was row number three. And how I know I'm going on to row number four is my tail is not on my left, so now I have an even number. So I just move my work to the front. I'm gonna do another meditative row so you can slow it down. And this is a fun thing to do once you get this and your hands get that muscle memory. So meditative. And I'm going to push my workup towards the front again. We go not to just pull on the corners. So that's what it looks like. This way. It's in my right hand. Now I need to add some more stitches, so I put in my left hand. And here, how do I know that I'm on five because the tail is on the left, so I know I'm going on to an odd number. And a lot of times, especially when you're beginning you go, well, how do I count my ropes? And just like I said before, as we know, we had a cast on row. So there's our cast on row. And then we did one too. So there's one. And then two, nice and bumpy. Three. Array three was okay. So here we go. Cast on. One towards the tail, two away from the tail, three towards the tail. And four is the bumpy. We always count the row that we have on here. So I know that that's for complete rows. And if I have a 20 rows alls, I would probably do it. Just count that the bumpy parts and I go to four and then from there, so let's do another road together. And then we'll continue on. So I'm putting it through, adding some yarn. There is so much you can do with this stitch. You can make a ton of squares and make a blanket or a scar. Can make a great big rectangle and make a hat. Cowles, myths. Maybe go, that's it. And that's row number five because I did it towards the tail. Putting it again in my left hand, see how easy that would be to just make that an extra stitch. So I don't want to go over this way. I want to go under to bring it back so that I know I've got my rich, rich, rich, rich, rich. Okay, so there's five ropes. Now, as I was saying before, this was 38 rows, but I found it to be a little loose. So ongoing to knit. Or the topic that I'm going to knit. And then this retains its shape, so it'll go back to its shape. That's just acrylic gets what it does. It's easier to watch as well. So I'm going to knit 30 or 32 rows and you do the same, knit 30 rows. And then we'll come back together and we will knit the rest of the rows. I'm going to knit. This was 38, I think I'll hit 34. And then we will bind off. And so everything together. Welcome back. Okay, I've knit the come on 30 rows. So I am going to look at this fabric because we're making fabric is I cast on here. And then I knit my first row. Looks like the v's there and I know it's the first row. Because I knit towards the tail as an odd number. And then this first ridge of bumps, this very first ridge of bumps here after the cast on is my second row. So I can count these by saying 2468101214161820. Twenty two, twenty four, twenty six, twenty eight. Ok. Now 29 would have been this row. And I know that because this is my tail. So row number 30 is what I have right here on my needle. So that'll be row 30. And I know that because I'll be moving away from the tail. Now we have an opportunity here. Here I have the end of my working yarn. So there's all sorts of fancy ways to add on new yarn. I think knots or charming. And that's just kind of the way that I am. So you can, you know, there's all sorts of fun, fancy ways of doing this. But what I like to do it is to make it secure. That's my thing. So what I like to do is have both ends together and simply just tie a knot. And by doing this, it's very secure. It's the smallest naught you can get. So I'm going to pull everything, all, all of the ends. And this is the smallest and most secure, not that you can make. You can just, if you want it to weave in these ends. But when I'm connecting, I just comes close to the naught as I can. If there's a problem and it comes like that phrase or something afterwards, I could just get that fabric, kinda that, that fabric. It's like a bit of a glue and you can put it on to to make it more secure. But I have never had a problem. I am really pulling that. I've never had a problem with these type of naughts and with bulky yarn, it really does disappear. Okay, so I'm going to continue and I want it 34, move everything out of the way. So here we go from just this tail. So I don't want to add that extra stitch by going over. I'm going to bring my working yarn to the back by going under. So I know that I retained my ten statistic. Okay, so I've got my work, my working yarn is in my right hand. Gotten a couple of fingers holding it. It's easily can work through my left needles, got my stitches. I'm going to add some new yarn. And this is row 30. Your comes the not. Ok. And that's fine. Just going to be very loose with that. Not I'm just going to make They're around there's 30. If I added all my new stitches, it's all in my right hand. It over to my left. I'm going to do 31 and I know I'm going towards the tail. So I know this is 31. Nice and meditative. And I'm saving here off the grid. Doesn't mean they don't have power. We do at power, we have solar power. That's what's lighting everything. Let's do another one. This is 32 and I'll count to make sure. Okay. Okay. So that'll be an even number. Complete it. I know that because the tails on my right, so I have my cast on stitch. Let me see. You can't see very well. I've got my cast on row one. Row two is the bumpy stops. That's 2468101214161820. Twenty two twenty four, twenty six, twenty eight thirty and what's on? There's 32. So I'm going to actually at this point what we can do is I can start, I can put my cup on there and I can pull pull that together. And I can see what it will look like. So that's 32. So it is it's really got those ridges bending. It's holding that cup that cuts not going anywhere. But I do think I want 34. I do think I want it a little closer. And one of those even number rose a little closer. I do have to account for that binding off is going to add another row and sewing it together might add another row to it. That's okay. I may just keep going. So I'm going to do 33. Okay. You see how quick that goes and you will be quick soon. I'm not going over, I'm going on in HDR. And I'm also going to show you what happens if you draw a stitch so that and going over, going under that, adding a stitch. And another common mistake for every single knitr doesn't matter if you're beginning intermediate or an expert. You dropped stitches and they're actually pretty easy too. Get back on there. If you don't want to add them. If you don't want to correct it, then you just call it an embellishment and add b. Ok, so let's do our 34th row. Okay, adding yarn. Here we go. And that's it. There's 34. That's so nice. So you can see you can add more, add more stitches, add more rows. So you can make all sorts of things with, with doing just this guard your script is such a pretty stitch. Okay, now we're going to bind off, bind off or cast off. So we don't want to be taking off the we don't want to take off the work and go, oh, we're done. Because if you do that, you're gonna pull all your stitches out. So let me just pop that back in again. I'm right handed, so I'm just being super careful. Because if you just pop it off like that, it's been a unravel and all that wonderful work that you did unraveling, it's fine if that's what you're meant exists what you want to do. Okay. We're just going to be taking off stitches by securing them to the top. And how we do that is we're going to start by knitting two stitches onto the right, one to just knit regular. Okay, that's it. And now we're going to take the stitch that's behind and jumping over the first stitch and slide it off and that's going to secure that top. So let's do this. I'm going to with my left needle. Grab that stitch, that's behind. Well, that's fun. Grab that stitch and bring it over the first stitch. And then you have one stitch left on the right side. And that is secure. That's not going anywhere. We're gonna do that again. So we already have one stitch on the right side and we need to. So we're going to just knit irregular stitch so that we have two on the right. And then bring the back stitch carefully over the front stitch. And there it's nicely secured. Let's do that again. Moving my left work to the top of the needle. I'm gonna do just a regular knit, two stitches on the right needle and then take the back stitch. Jumping over the first stitch. See you that there's the first stitch. And carefully slide off that stitch and got that really pretty breed and top that chain stitch at the top. Okay, let's do that again. Knit so that we have two. And then take the back stitch over the front stitch. And we've secured in place again to stitches on the right just by irregular knit stitch. Take the back, jumping over the front, let that left go so that you have one stitch. Again, regular knit stitch so that we have two stitches on the right. If you want it, you can use a crochet hook if you like, or even a needle C, you just pop that, make sure that you don't lose that front stitch, just pop it over there like that. That's another way of doing it. Or a crochet. Like I said, a crochet hook is fun because it does look like the chain stitch. So I've got to their pop back over the top. It's such a pretty edge. Knit again. Oops. And take the back over the top. And we're always watching that tension as well because if you pull it too tight, then that top is going to be tight. We want it to have a bit of an elasticity to it. And then there's our very last one. So now we have just two stitches left and we're just taking that back stitch, jumping over the front. Let it go. You take everything out. I just have one hoop left. Snippet. That's it. And what the end? You can just put it through the hole and pull. So there you go. And that is a complete it that you can do all sorts of things with. But what we're gonna do with it in the next lesson is So it together so that we have a beautiful cup cozy or risks warmers or boot top earners or make it longer and you can have a nice headband, cover your ears with a, a cow all there's so many things you can do with this. Okay, I'll see you in the next lesson. We're going to sew it together.
7. Lesson 7: Sewing the To-Go Cup Cozy: Okay, time to make a to go cup cozy. So here we have our finished measured item. I'd thought to kind of longish tails and that's good. I want those long tails because I'm going to use just the darkening needle to sew it together. And I'm just going to instinctively decide where I want my stitches to go. And what I mean by that is a lot of times when we learn something new, we really want to go buy the book type of thing and where do we take the stitches up? Well, this is, we're gonna do it by instinct, just by where it looks good. So I'm going to use the longest tail that I have this way. I'm not adding any more yarn onto it. And then I will at the end, just weave in the rest of this and I'll show you that in a sec. So we're going to see the boat because of this stitch is it's the same on both sides. That's fine. Just going to see which side I like better. Just they're they're probably both exactly the same, so it doesn't matter. We're gonna take the longest tail that we have. And I know if I saw it in, I'm going to have plenty of room there. So here I'm just going to thread the needle. Just leave enough of the tail out that it's not going to just follow the needle. That's fine. We're just going to use one part there. So I'm going to bring this together and see where I want to sell it. So I want the seem to be as invisible as possible. Actually, I'm going to turn this around. There we go. So with my right hand. So I I'm looking here and I see that if I SO instinctive, remember if I start sewing, say here and here, that will, that will just probably be invisible if I just go back and forth. Sometimes if if you wanted to be prominent, go underneath. Because by going underneath the stitch, stitch and kinda dynamic at the top, we'll be more visible. And you can, so it where if you're, if you're a salary, you know how you saw the wrong sides together, you could do that as well. I like to see what I'm doing. You can make this into a little jacket. How cute with that be little jacket there and put a little bow tie or whatever. Okay, so here I want these to kind of disappear. So I'm just going to instinctively go into this first bump. So what I'm gonna do is what's most important here is the consistency. So you don't have to like here and then here and then here and then here of that type of thing. So I'm going to keep sewing through these top. Bumps. So I'm going to start right there and just pull it through. Ok. And now here I want this kind of disappear into the back. So I'm going to go into the next top part of the bump and I'm pulling through. I just want to see how does that look. Now, if I go over, I'm going to just see all these stitches and I don't want to see the stitches so much. So I'm gonna go under so I'm going to go, let me just see if I can lift this up and show you. So I've got that nice and tight and I'm gonna do all of these, but I'm gonna go under, instead of going up here, I'm going to go under. And then I'm going to do this one here. Where do I want it to go? Okay. So I'm going to do this next one member as long as I'm consistent, it'll look fine here. And I'm using the whole stitch like the whole stitch. You couldn't go in between the applies if you like. And again, I'm going to go under here and pull and then under here and pull. Bones. Take peek. Oh yeah, that's fine. Z it's, it's actually creating a really nice scene. And it's almost invisible. And I'm going to go under here, pull gentle under and pull. And it was there. So I go under here and pull. That's looking good. So it's just an insight I can I could have done it any place, but I just wanted to make sure that I'm doing the same consistency, the same bumps, the seams, stitches. There's that one. This washes up really nice and you'll get coffee honestly, you'll want to throw it in the wash. If use wall like a 100% wool and it's not deemed as super wash and you get super wash wall. What will resonate worlds with super wash wool? What happens is with wall, it's got like the little hairs that kind of come off of the the yarn and super wash wool kinda just a chemical treatment that takes that hair stuff off. So if you washed it, it won't felt as much. It might still felt a little bit. But if you do not have super wash wool. And you throw something in the wash that's that's like a natural fiber. You'll probably get it to felt. And sometimes that's really pretty too. Okay. Okay. So I'm right at the end. It looks really good. I like that, looks really good. So now what I'm gonna do is just again, instinct. I'm just going to finish off. And then I'm going to turn it inside out. Remember if you're, if you do so. And then I'm going to weave in the ends. And all weaving in the ends is, remember I'm on my wrong side. And here I can go right between the plies if I like and just kinda go almost any almost anywhere you want. Your this is the wrong side, so it doesn't matter. You're not gonna see this. And I'm just securing. I do like to go in between the plies when I just weave in the ends like this and just make a straight line, or that's how I do it. So there it is. And I'm going to do the same with the the other side is I'm going to just thread my needle and darkening needle. These dirty needles are amazing when you want to do little projects like this, you can do something, you can knit in the round, but you're not going to get this type of fabric in the round. So I'm just going to put a stitch in the top or the bottom of that just so that it looks a little bit more consistent. And then what I like to do, like I said, I think knots are very terming as I'm weaving in the ends and I am bringing this other bit. Oh, look at that seat. This various I was probably really loose there. And this isn't this isn't a stitch that dropped or anything. It's just really a loose stitch. So while I'm weaving in the ends, I can actually just go right between the eyes. This is, It's going to disappear and it just visually, you won't see that hole because it's going to be filled in with this stitches. So it's not a whole whole Olga, it's just the loose thing and that will probably in the wash Disco, you won't be able to see it at all once it's been washed. Okay. So I'm bringing both of my my tails, my ends as close as I can get together. Remember this is the wrong side. And then I'm just going to make a regular Not now not pulling too tight. If I pulled too tight, I might what real it maybe make things like to donkey and tight kind of things. And I've made that not that charming, not you're not wearing this, so it's not a big deal having knots. And there we go. And now right side in this one, but just a tiny bit smaller than the other one or like it. Look at that and there we go. So that was ten cast ons and 34 rows and a bind off. That's pretty nice. And there you go. And that is your cut cozy. Congratulations, you made your first knit item, or you come back to practice some new knit items are learned something new. So the next lessons will be the At Home cut cozy and the teapot. We won't stop or start at the very beginning because you already learned how to cast on. What we will be doing is binding off together and then sowing the projects together to get three nice projects. So you see that didn't take long at all. All right, see you in the next lesson.
8. Lesson 8: Home Cup Cozy: Okay, we're ready to finish our projects. So here we have. The second project is the cup cozy for home. So what I'm gonna do here, I just that was my button. My button. You don't need buttons. I'm gonna show you how to do it without buttons. So I measured my where's my measuring tape here? So I just measured my cop. And then I decided, I decided that what do I want it really stretchy or do I want it really tight? And I measured my cop. I know what my like by tension is like by math, tight-knit or not. And then I just knit the same thing, the nice long strip. Let see. Yep, that's good. I just knit my my rectangle just like I did with my ego cut cozy. And I've got the amount of rows that I want to. Now here's the tip, here's the good tip as I want, I always like to use my tails when I know that I have a project that I'm going to be using the tail to tie up things or to weave in. I don't like to add, instead of having tiny little tail and putting an extra nod in, that's not necessary. I do like my nots, but it is not necessary then is unnecessary. So I know that what I'm gonna do is up here, I'm going to tie the, use this bit to tie the cut cozy together. So I want to have, I want to end up with my working area or I'm going to cut that off. I want that to be on the bottom so that I can you I can use one at the top and one at the bottom. So when I come to the point where I've just finished and odd number rho because I know it's odd number because I'm knitting. I knit towards the, the tale that I started with. Now I'm going to cast off so that I have a tail on the opposite side. So a cast off. I'm going to knit, knit and then take the back over the front. I've only got one left now I knit. Take the back over the front. Very careful. Now let's have, oh no, they all fell off. What do I'm gonna do? Just really careful, really carefully, put it back on. So and that came right out, I can tell. So I'm going to have to knit that again. Air we go and then pull that off. And then by binding off or casting off this way, I have my tail and the opposite corner kinda put or they call that key corner. And then I can either weave in the ends and put on a bead or Or some broken costume jewelry that I want to keep. I guess I should disclaimer, don't lead children alone with things like that because they might swallow. But I'm done. Ok. So now I'm going to cut off enough that I can work with. And when you've got that very last hoop, it doesn't matter what side you just thread through and pull. So it's stretchy there and stretch you there. Let's get the cup. You can have a bigger cut thinness, that's fine. Okay. So you can look and see what side you like best. They're both the same stitch, but you can decide what's and what you want. So here is I want to connect there and connect to there. So I can do that by, like I said, like sewing on something or I can just so in the ends. Okay, Now here, there is a not. So I'm going to make this the inside. So you can use crochet needle, that's good enough. You can just cook things in and Tyson knots or darkening needle. So here I can do you can make so many different sizes of these. And then I'm just going to, again, we're instinct. This bump right here, that stitch there. I think I'm going to go through there and you don't need too many of them. And then I'm going to go in again. And you can tie a knot. So I'm going to go inside out. So this is my wrong side. And so I've got my wrong side here. Now we're just going to go between the ply. So remember this is a three ply yarn. I'm just going to go between the plies and ongoing away from the edge so that when I do tie up a naught, it's not very. Oops. It seemed that, okay, so when I target the knot, you can't see it's on the wrong side. So I'm going to let that just hang there. And now I'm going to take the other end and just thread that on. And same thing. And again here if you like, if you find that there's a hole that you can't live with like that. That's not a drop stitcher anything. That's just just how it how it ended up type of thing. You can cover it by doing a just sewing where it's but that's because this is the wrong side. You'd be so like this and you turn it over, it disappears. But I can live with stuff like that for a cup cozy. Instinctively, we are going to just pop in wherever we think it needs to go. This is the wrong side, so this is fine. And then I'm just going to secure it again by coming back on it. And then again, we don't need, don't need too many because it just gets really bulky and all if that's what you're going for and that's fine. And here. And then I'm going to weave in the ends far from the edge. I'm just coming through the plies. We're doing this instinctively. Remember that because I find what happens is you'll read a pattern and it'll say, OK, do this and then sew together and you're thinking, well what do I so do I so bumped served or I so just DO I saw with thread or so with what I've got. So here, now I've come right to the I'm pulling it so I know that it's not too it's not going to be too tight. And I'm just going to it's far from my opening so you're not gonna see the knot. And when I do my first couple of knots, they're very loose. And then I could start pulling a little tighter. Here, pull a little tighter. You can even continue to weave in and stuff like that, but I'm just going to do that. Cut off the ends, turn it right side out. And there you go. And then this'll go over. I can just pop my cup in. Here we go. And that's nice. Uhc is a nice cup of tea or hot chocolate and you won't burn your fingers. Isn't that cute? I really love this. Can you imagine it and do all sorts of different colors and things like that and be really nice. And then like add embellishments, going, add all sorts of things, make it, make it all your own. Okay. Last projects coming up.
9. Lesson 9: Tea Pot Cozy: Welcome back. Here's our last project. It is a teapot cozy and you can make you can make these anyway. You like, I like this one because it's got that kind of tribute built-in to the bottom. And the only thing I did here was a, a nice rectangle. I find that I made this a little bit like it's, it's kinda big. So when I made this example, I'm actually making it a lot smaller. So the construction of this, let me just pull it apart. Here we go. The construction of this is just I knit back and forth, back and forth. But then I turned it this way. So it's got that I loved this rebuke. Oh, nice, calm people and make a copy blanket under this that's gorgeous. Okay. So what I did is I measured, I know how, I know what my tension is. And so I wanted it to be it was kinda big before. And I think I did 32. This was 32. So this one I thought I'm going to make it 30. So let's see, do I have 30? Let's take a look where I'm going to have to add some more yarn. Okay, so let's take a look at what we've got here. So there's my cast on my capstone right there. And then row one goes towards the tail. And this first bump is two. So I've got 2468101214161820. Twenty two, twenty four, twenty six, twenty eight. And so I know that I'm going to so I know that's 20 aches. I counted it. It's already on the needle. And I know that 29 this will be 29 because I'll be going to the towards the tail that I started with. All right, I've got my yarn. I have a ton left that ball among. I still have some of my balls. So again, I'm going to add, I'm going to show you a different a different way of of doing that, of just tying it together. Okay. So I'm going to make a very loose, not okay, very loose naught. Then i'm going to thread my working yarn into not just my thumb. Ok. And I'm going to pull on the not there. And now with my working yarn, I'm going to make a knot. I don't love this one. And then I pull it together so that both knots come together. See, I still think this is a little looser. Yes, yes. To me, that's just two loops. And in snip off the ends. Nice and close to the not. And there's that Fabric stuff. You can use it for light. And here, there we go. Okay. There it is. As ongoing anyway. Okay. So I I'm on 20 or we go or am I where am I? Yeah, that was 29. So now I'm going to finish up and do 30. And then I'm going to bind off, poll my needle, push my work up towards the top and hopefully it doesn't fall off. And we're going to do the last row together. Nice and cozy, repetitive and meditative, nice and calm. And I just went right over that, not that's fine. And I pulled out my work on the right, push up my work on the left. Here we go. So I've got all those stitches, those new stitches there all bunching up all my writes. I'm just gonna pull them down. Push up on the left, pull down on the rate. And an almost done. It's getting chilly here this morning. It was, it's sunny, it's beautiful. But it was like 11 degrees Celsius silhouettes. What's that? Fahrenheit 1111 is 22 plus 32. So that's like 50 something. Here we go. I'm Danny. Now I'm going to bind it off. And so it together. So it's knit. Knit, slip the second one over the first one and pull off. And I'm using tension or retention is one of those things that you will learn the more you do it. And if you find you're, you're doing something and you're tensions all over the place. You're really loose or you're really tight. The more you practice, the better your attention is going to get. I love this, I love that. I think that is so pretty. And there we go. It's really fun to just go to a yarn store or anywhere that you can wet when we can and when it's safe to do so and just browse and because it is overwhelming on what yarn to use, and that's why I love acrylic yarn at the beginning. And then you can start looking at all sorts of different yarns. And especially like once you get to where you might want to start supporting some like indie diaries and you're makers in spinners and things like that. And the yarn is, can, the, it's definitely more pricey. Most acrylic yarns, and that's just because of all the beautiful creative art that goes into it. And it's very beautiful yarn. And just with a skin of yarn, you can make these three things again with some wool. Beautiful different colors. You can strike it could do, let's say an inch of one color of this and then change colors. Here we go, almost done. And say I'm keeping my consistency or not too tight. It's nice and stretchy. Eventually we'll do some lessons where we'll add stitches and do short rows and also, and then cables will Perl will do it will have another class where after this becomes really comfy, we'll do a class where you're going to learn to Pearl and Nitin pearl. Almost done. This is very similar to the At Home cut cosy. I love tea, I love my coffee in the morning and the rest of the day it's all about t. There we go. Last one, my last one on there. I want enough of a tail to weave in. And there we go. And then take up my needle. And then that last 2p, I'm just going to take that end and pop through. Here we go. So here we've got some nice tails. And the only thing we're going to do now I'm going to just take my plot. Where's my, my pot? And I can lift it up this way and lift it up that way. And again, you can use something to embellish to put it together. Oh, I much prefer this size to the other size. Okay. So I've already showed you how to use a dirty needle. I think dirty needles are like the best thing to help with embellishments and stuff. So I'm just taking the ends, putting them together. And now just with a crochet hook. Again, instinctively I'm going to come to the corner and then pull through. This is a small hook. Here we go. Just pull through and then we can weave in the ends. Let me take office again. I'm gonna go with mine, my wrong side. And I'm going to just instinctively pull some yarn through. Just like how we weave in the ends. You can just poke through some of the stitches. And again, I just I'm poking through the plies so that it doesn't show on the right side and then come up as far as I can and then I'll just bring this through. This is a tie hook. Here, we go, right through. And then I could tie a knot. Do that again, K, and then bring it through. And then somewhere. Just figure out where you're going to end up and you can tie a knot or do like a slip stitch. And very carefully or watching the tension I'm pulling there and then I can just clip off what I don't need. Same thing with the other end. But let's see. I'm going to go just right to the end, instinctively, pull it through. And then really, you can just like once you've got that sat through, you can just pull that nice and tight. You can cut that if you like, or add embellishments. Now I'm just doing this, like just really close there because I know that I'm going I'm going to want to put now I'm going to put it inside out my right side. And then when you have it like this, you put your tea pot in and pull it over. Nice and stretchy. Whoops. Broke. That's because I didn't tie it really well. Arie, go pull that up. I didn't tie it well because I want it. I'm going to be sowing something onto this. So there we go. Just pulled out there. And there you go. There is your teapot cozy. And you can embellish it anyway, you like. Here you go.
10. Lesson 10: Common Mistakes: Welcome back. For you. Now we're gonna talk about the three most common mistakes that beginners do. Or really any knitters, you don't have to be beginner to do this mistake. So the first one I showed you earlier is adding a stitch. So that's where you, instead of bringing your network to the back when you first start, you add a stitch and then you knit that. And then what will eventually happen, happen is you'll start to have your Nick work come into a v Because you keep adding stitches. So to not do that is you make sure that when you're knitting, That's even if you're, you're knitting one-sided Perlin, the other knitting ones I pulling the other. If you're knitting like especially like the gardeners stitch, when you're on your knit side, you make sure that your yarn is in the back and that you've gone to the back from the bottom, both bee's back to the bottom, not over the top because you'll do that. Okay? Now this is the dreaded one that everybody hates and everybody's still does. Okay. So I'm getting along and getting along up. Oh, a stitch falls off and I didn't notice it and I'm reading along and I knitting along. And then if I keep me finish this, if I keep doing this and now I've come to the end of my rho. So now I don't have ten, I've got nine. Woo, what happens? So then I look and I'm going to just examine what I've done. And I see that I've dropped a stitch. I don't know whole. So either I can unravel my work and try and figure out how to go back. Or what I'm gonna do is I'm going to get a little crochet needle. Okay. And I'm going to go down to where that stitch dropped. So there it is. There's that dropped stitch. And I'm going to pull that out and I'm gonna make sure that I haven't separated my plies. Okay. And now very carefully, what I'm gonna do is I want this to come up here. I want to bring this up here. So I'm going to go into the stitch on the top, that stitch on the top of it. And I'm going to pull the new stitch through or that old stitch. So there it is. So I'm getting it closer to the top. Okay, so now what I'm gonna do is go into the back and I'm going to pull at stitch up again. So I'm just I'm pulling it through the work. So here it is. There's that stitch. So I'm going to very carefully start to knit, knit again. And I'm going to pick up that stitch as I come along. So I am just bringing the stitch up through the top by using a crochet needle. So here I am, I'm gonna just knit. I got that needle, that that stitch right there, 123456, woo her cubs and holding it with my thumb. Seven. Okay. Now I've got it. Yeah. But here oh, there it is. Again, it needs to come through that stitches. Well, so I'm going to go in through the stitch and bearing number eight up, trying not to break the air. We go there it is. So that's all I've done is I've just basically changed, stitched it on the way up. I'm going to put it onto the left needle. And now I'm going to admit it onto the right needle, 8910. So I've dropped the stitch and instead of going all the way back to go get it, I just used the knitting needle or the crochet hook just to bring it up through the top until I get I want it and I still have all my nice little bumps. It looks the same. It's very pretty. So that's mistake number two. Mistake number three, I've talked about a lot. And that is your tension. And that instead of trying to adjust to you as your knitting style, you'll just adjust the tools that you use so the size of the knitting, the size of the needles, and the size of the wool. So those are the three major issues that beginner knitters go through.
11. Lesson 11: Conclusion: Thank you very much for coming to class. I wanted to create this classes so that people who are new to knitting or haven't knit in a really long time, can spend some quality time with themselves. Something doing something that's slow and joyful and creative and not that expensive and just fun, just that repetitive clicking of the needles and that meditative feeling that you get when you are doing it over and over and over and watching the progress of the item that you're making, the item that you're knitting. So again, I want to say, thank you very much and I hope we can meet again and do some more knitting together. I'm Sandra clark. Thank you so much for coming to class. Look at you can make it the rectangles. I've got my hat. Everything you learn from this lesson you can do. I've got my cow wall livable. My glasses are steaming up. Small scarp. But instead of with one scheme, my one scheme scarf. Who doesn't like a pair of fingers plus mittens. Yup, you can make these two. Thanks everybody. Ethical keeps us all know. One more thing. You can make a ton of squares. I'm just starting this. And then with crochet hook or darkening needle, you can sew them together and just keep going and going and going and have giant blanket. So chilly here I am going to be knitting quickly tonight. Thanks everyone again. Bye.
 Sandra Clarke, artist • educator • maker • craftivist