Transcripts
1. Welcome!: Hi. Let me ask you a question. You ever get a catalog or
a magazine in the mail, and the pictures
are so beautiful, and the paper is so amazing. And you sit on the couch and you flip through it for 5 minutes, and then you slowly
take that walk of doom to the recycling bin and
drop it in regretfully. What could have been what should have been?
What might have been? You think about saving
it, but only for a split second because
it's just not practical. And what are you gonna
do with it anyway? I'll tell you what
you're gonna do it. Going to put it into your
own junk journal and draw collage or paint all over it to your
heart's content. A junk journal is
a homemade book. You can make with whatever two dimensional materials
you have lying around the house or stuff
that you've saved from recycling or kept
from daily life, like a really cool
wrapping paper from your niece's birthday or cool
packaging that you like. Your finished junk
journal can be used for drawing,
painting, collage. It can be used as a photo
album as a personal diary, as a personal art journal. You can keep it to
hold travel mementos. There's really no wrong
way to use a junk journal. They're very inspiring, they're very
creatively motivating. They're just a
beautiful tool for everyday creative reflection
and creative motivation. My name is Cathy. I
am an avid recycler, a creativity enthusiast, and I'm an artist who identifies
as non crafty. Aren't all artists crafty? I can't cut a straight line and I can't punch
a perfect hole. But I don't let it stop me
from crafting my head off. I don't think that should
stop anybody else either. Perfect is boring anyway. There's magic in mistakes, and trust me, I've got a lot of them, there'll
be a lot of magic. Together, let's make some
magically imperfect, craftastically, amazing
junk journals together. In this class, I'll
walk you through the process of creating
an easy to make, but bold in character junk
journal from beginning to end. So what do you say?
Let's do this.
2. Stashtastic Class Project: Welcome to your project. We are here at the
stash tastic Project. We're going to start to build our stash for our junk journal. Part of my why for my junk journal is I love
to draw on stuff and all different textures and tensions
of paper and finishes. I like to fill my journal with different things that
are fun to draw on. And yeah, sometimes I
use it for other things, sometimes I glue things
on or I tape things on, but I really like to have surfaces that I can
draw on that are fun to draw on with different
types of crayons and markers. So that's really like
my thought process. You'll see that reflected
in the choices that I have here for this book
for your class project. I would like to see what you're going to choose for yours. I also am interested to find out what you plan to use your drill for if you even have a plan, and it's totally
fine if you don't. But the thought is just to think about what is inspiring you to make it in
the first place, even if you end up using it for something
completely different. What's inspiring you to make it? What kind of activity are
you planning to use it for? Show me a few things that
you're going to put in it. I want to save some of
your stash for your both. I would love to see
your drunk journal after it's done. But
for the project. Really? I'm only asking to see a few of your pieces of
paper. I can't wait to see
3. Cutting & Hole Punching Tools: Here are some of the
things we'll be using for cutting and punching holes. So for cutting, we
have some options. The first one is a paper cutter. This is your garden
variety paper cutter. Any paper cutter
like this will do. If you don't have a paper
cutter, you could use scissors, or you can use an
exacto knife with a ruler and use the ruler
to help you cut straight. If you're going to be
using an exacto knife, you will need something like this self healing mat,
you can cut into this. It won't harm any
of your surfaces. When you cut on this mat, the little cuts fade
away and they don't arm the surface or make it hard for you to do
repeat cutting. I will be using my paper cutter. I cannot cut a straight
line, as you know already. If you have one of these, please join me in using it today. If you don't you
want to try one. You could even go to
your local copy store, and usually they have one
that everybody can use. So they're great.
For hole punching, we have a few options. We have the garden
variety hole punch, which is just the type
of a hole punch you could probably find this
at a grocery store. I think most homes
probably have these. These are other types
of hole punches, but they're just a little
more high powered. This has two types of holes. Can do a thin or thick hole will cut through all
kinds of things. I think this would even cut
through an aluminum can. These are great to have too, and these are really useful
just around the house. This is a Cinch as you can see, it is a hole puncher
for homemade notebooks. It will hole punch
up to 12 holes. It will also punch through about ten pieces
of copy paper. Is an all. Anything sharp
like this will do. If you don't have a
heavy duty hole puncher, then this is going to be
good to burrow a hole into any pages or
your cover that are too dense to hole punch. When using an or a similar tool, please take care
and use it cutting that underneath to
protect your surface. Here's a recap of everything
we went over in this video, and next step, we're going
to do binding tools.
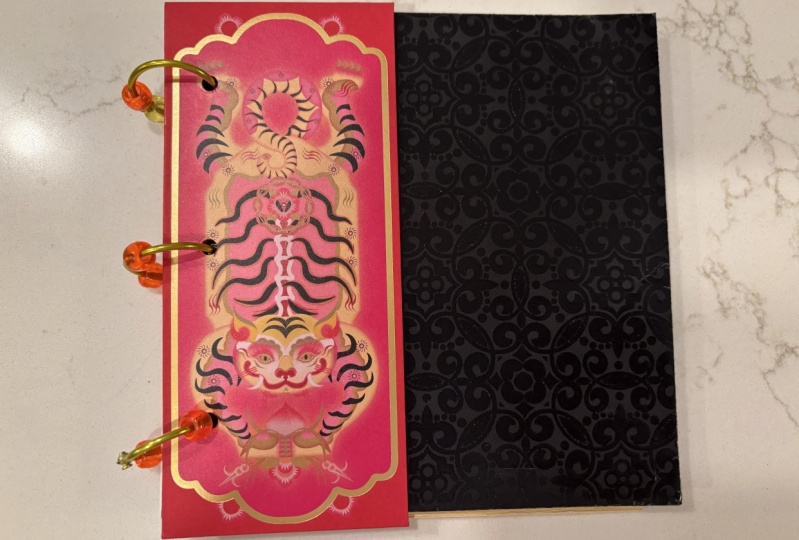
4. Binding Tools: To binds today,
we're going to be using loose leaf paper rings. These are easy to find. You can get them online. They sell them in
office supply stores, sometimes even hardware
stores have them. They lock strongly. And they unlock, you
can change out pages in your journal and you can rearrange things in your
journal anytime you want to. They make it really easy
to make your own books. We'll also be using ribbon. It's not only decorative
and attractive way to decorate the binding
of your journal, but also it has a
practical use as well. I'll share that with
you when we get there. Last but not least, we have
a piece of random styrofoam. If you have something like this lying around and
you've been thinking, What am I ever going to use
this for? Now's your champ. We're going to use this to
hold some of our materials. And you're going to need
to be able to cut holes in it and use it for binding. Next up, I have a
little stasperation, show and tell for
you. Stay tuned.
5. Stashpiration Show & Tell: Before we start making
our journal today, I wanted to share with
you some sta spiration. You can really put almost
anything in your junk journal. Even though we're not
going to be doing actual collaging in the
artwork part today, it's these ideas
and thoughts about what can go in and go hand in hand with that
type of thinking. I just wanted to share with
you some of the things that I collect to put
in my junk journal or to collage with
and to create artwork with inside of my journal
after it's already made. Is some vintage wrapping
paper I purchased through a second hand store where they had a whole bunch of
vintage wrapping papers. It was very cool, and I
collected a few of them. This is stuff that was in a package that I
got, and it's flat. It has these cool bubbles in it, and it's really cool texture, and I think this would work
really well in a book. And even if I didn't
use it to draw on, I could use it for
printmaking inside the book. So this is cool for that. Don't discount anything. This is just a random
magazine page. And obviously, magazines are like they need no introduction
with this type of journal. Here's from one of my
pairs of eyeglasses, and I got them from C, and
I love the design of this. And I also really like the
texture of this paper. It's really nice to draw. Plus, there's a
cute little pocket. So that can go in my journal. Here's the aforementioned
wrapping paper sample that I collected from my niece's birthday
party last year, and look at how pretty it is. I just didn't want to see it get thrown in the trash when it
can go into my junk journal. I have a whole roll of it, practically. Isn't it beautiful? Look at that. Oh, my gosh. I'm so excited already.
So that's a find. This is a postcard
that I designed. I had it all written
out to send, and then it never made it into the envelope that I was
going to send it in. And I've just been
sitting looking at it, like, What am I
gonna do with this? So I think I'm going to put
this in my junk journal, too. I can always collage
on this page or draw all over it again. Or I can keep it like this. Here's a piece of waxy paper that came in Are
you ready for this? Came in my tea. A
celestial seasonings, sleepy timeliner of a box. I just love the
texture of this stuff. It's heavish, but it's light enough that it's like
it's really like a page. It's not even as heavy as, like, a card stock, but the
texture is great. It's waxy, but it's got
like some tension to it. It's got, like, a tooth to it. I'll be able to draw
on it with something. I don't know whether
that's gonna be crayons or wax pastels or my paint pens, but I will be able to draw
on this with something, and I think it will take glue, and I just um the
texture of this. This will be fun to use. And it was such a fun find. Always look on your tea boxes, 'cause there's some cool
surprises in there. This is one of my
favorite chocolates. And every time we finish a bar of this
chocolate, the rap ba. Because I know it's going to be good in one of my journals, where I know I'll
find some use for it, some collage used or something. You know those
drawer liner papers you can buy that are
sticky on one side? I have a roll of chalkboard
paper like that, and this was the, um, when you peel it off, and this is the part
you throw away. I say that because one
side is slippery ish, and the other side is not. It feels like there's
tension when you rub it. So I know I'll be able to
draw on one side of this, but I also like grids. So this has a grid on it. I just thought it
was a cool type of paper that I was not used to. Can't buy stuff like
this in the store. You really like this paper. You can't go and buy your
notebook of it in a store, but you can fill
a notebook filled with all these weird kind
of paper that you find. So it's fun. Needs
no introduction. A cereal box. Food boxes is something that
actually got me into making my own notebooks. Let me see if I
can find the ones that inspired me originally. Can't believe I found
this, but I did. I think I bought
this 15 years ago. I found it on Etsy. It was the first time I'd
ever seen notebook for sale, where the cover was made
from recycled boxes, and I was so inspired. So I bought a few of them,
and this is one of them. I forget who the seller was. I'm sure this is not even in
my purchase history anymore. Thank you, Etsy seller. That is, I guess, part of my inspiration
for doing these things. I really like the
cereal bowl and I thought that that
would be really cool in my junk journal. It would be fun to draw
and to decorate this bowl. I just thought that
would be cute. Good addition. This seems
like a weird edition, but now that you know that
I like different textures, I got this in the mail. I think I'm going
to use the page in my junk journal because I
think it would be fun to draw. It's got a little bit of, like, a printed feel to it. So I think it will probably
take some sort of inkwell. Here's a bag from my
local coffee shop, and you'll see they
have their little logo printed right on there. It's cute, and I thought that it would be
cute in my journal. You know what, you get
packages in the mail, and they're full of
this craft paper, this light craft paper
that's just sort of smushed in the box so
things don't move around. Every time I get
that, I fold it up. And I save it because I know I'm going
to use it for something. Sometimes I end up putting it all over my desk
when I'm painting, and sometimes I make
things out of it. It's really fun to draw on, and sometimes I wrap
presents with it, but I also want to use
it in my junk channel. You could just have some
regular craft paper, and this is really
good for that. Once you start collecting this
stuff from your packages, you'll start noticing things. Like, sometimes they're scored, so they are easy to
rip apart into pages. And then sometimes
they're not scored. And then sometimes
there's, like, a slightly different
shade of craft paper. And then sometimes they're like a slightly different
texture to the paper. So that's really cool, too. I hope this show
intel helps spark your idea bank for things you can include in
your junk journal. It's funny how each piece can represent a memory, a feeling, an idea and really fire up curiosity and creative
inspiration like nothing else.
6. Interior Page Prep: Hey, welcome to
interior Page Prep. This is a section
where we're going to decide on our final
filling for our book, the size and the
orientation of your book. Plan your interior pages. This is where the Y comes in really handy to know what you plan to use the
book for that can drive what types of papers
you put in the interior. Let's go through
papers I'm putting in my book, my interior filling. H two stacks of stash here. I don't know how much of this I'm going to be able to fit into my I have it and I'm going
to cut it down to size, so we'll see how it works out. This is the size that I
have chosen for my book. It's six by eight
and horizontal. The reason I chose this size is because most of the things
that I wanted to fit into my book fit best in that horizontal six by
eight lock of size. There are a few primary images
that I wanted to put in. One of them is the
cover of the book, which I'm going to use
this Brand flakes box for. That fit perfectly. This is the pile of the stash that I showed you
in my show intel video. And then this is a
pile of stuff that I collected this morning
that I also want to add because I
felt like I didn't know if this was going
to be quite enough, and I wanted to give
it a little bit more. So we don't need to go
through this stuff, but I did want to go
through some of this stuff. I'm putting just an envelope in because envelopes are fun, and they're like, a little
additional pockets. In your journal. Then
I went through some of my flat files and I found some really beautiful
painted backgrounds. I don't mind if some
of the pages are not the exact six by eight size. Six by six is just fine with me. Anything that stokes my
inspiration, my imagination, my creativity because
I'm primarily planning this book out for drawing works for me and
this works great. Look at how beautiful those
two pages look together. I don't know that
they'll end up together, but they sure look
pretty right here. Have a couple of pages
of just copy paper that were testers for a coloring
book that I published. These pages I used underneath pages that I was
doing marker artwork on, so you can see the ghost
image and it's really pretty. I thought I would
put them in my book since what else am I going to use these for and I could
build on top of that. Accidental copy that I made
onto this blue card stock. I thought that would
be a fun element. This was a page from
last year's calendar. It's such a pretty calendar. I want to put some things will be wonderful
and some things will be terrible
and into my book. Since this is my size, I'll use this as my sizer. I see that it will
fit really nicely. I will cut it like that. This has been sitting
in my flat file. These are liquid inks and they're so vibrant
and beautiful. I thought it would be
really fun to draw on. Plus, this paper is really nice. This watercolor paper. I'm going to do a couple
of pages here like that. And then for this one, I'll do whatever I can
fit, like that. We'll see. And this I bought
for a shooting background. It just didn't work
out for pictures, but it'll work out
really good in my book. And blue seems to be
a running theme here. And then I have
some painted pages with black gesso over purple. Random painted black pages
because I like to prepare them for paint pens or for
other types of painting. I don't know if these are
going to make it in or not, but these are more painted se, I have this notebook that
I got a long time ago. I got it for like $1.
It's really pretty. It's got some beautiful
colors in it. So I might put some blue and maybe some green in
my book from here. I might even use some of the used pages because then I can, you know, draw on
top of those and add more layers to them. Sometimes you have things that
just sit on your shelf and you don't know what to do with them so you
don't do anything. But what's the point
of that, right? So, finally, you
kind of have to, uh hop off the ledge and throw caution to the wind
and use things like that. I think these would
be really pretty. Some of this will be
really pretty in the book. I'll do that. Cover I can use maybe at some point
too for another book. Then for the back cover, I have this really cool
folder that I got at Staples. A long time ago, and look
at how pretty it is. Let's start cutting. If you're using a paper
cutter like I am, please be careful
of the blade part. Always close the blade
when you're done with your slicing and
when you're cleaning up or you need it to be
open for some reason, stay aware of where your
fingers are in relation to the for the
paper orientation, I made a little bit of a
mistake in the beginning and I forgot that I was
doing landscape at first. Luckily, I didn't lose any
major parts of the Bges. I was planning for
that orientation. Just a good reminder to
try and remind yourself in the beginning to remember what the orientation you're
working with is. I hope you enjoy this part of the process as much as I do. It's really fun to have ideas in your head that you
want to do loosely. Then when you start
cutting your papers, fun to see where you're
going to switch gears and different ideas that come up to change up your book. H fun. Here's a recap of what we
just did in interior prep. Next up, we're going to organize our papers
for hole punching. We're going to punch our holes, and we're going to
get ready to bind.
7. Planning To Punch: Are you ready to
start this process? I'm so excited. In this video, we're going to organize
our interior pages into piles based on weight of the paper and size and orientation of the page that
we're going to be punching. We're going to be
using a landscape. We're going to
organize our pages as they're going to be punched. They're going to sit in the book the way that
we want them to. After that, we're going to
choose a whole pattern, and then we're going to prepare
our pages for punching. Let's do this. We'll be making three horizontal
piles for lightweight, medium or the most medium that I have in my pile
and heavy weight. And then vertically,
I'm going to make two piles of actual size. And then if there's a size that's different
than the actual size, it will go in the same
bucket of weight, but it's going to go
vertically in another pile. This is kind of our control. I'm going to leave
it up here. So I always have it to refer to. So a couple of things
I want to mention. This is going to be our
back of the journal. So I flipped it because
all these pages are going to be front facing
except for this one. This one is going
to be back facing. I want to have the finished edge on the outside of the book. So this is the part
that's going to be bound. Also, there are all different
types of materials in these piles like this
Styrofoamish stuff. And then this is well. This is the chalkboard paper. This was really hard to cut
with my gelatin paper cutter. So I know this material is plasticy and difficult
to cut holes in. I want to be careful.
I think it's going to potentially
give me some trouble. So these are just little
things to look out for. These, you know,
could also give me some trouble I'm not sure
if they will or not. There are some bits that have a little bit of
stickiness to them, and I did have some issues
when I was trimming them. The sticky part stuck
to my paper trimmer, and so I had to go in
and fidget with that. Be aware that different
types of papers can be challenging
to hole punch. And that's where
having alternate tools ready can be really handy. Now I'm going to try and get my pages aligned to the
side that I'm going to put the holes on so
that we can create our whole punch pattern for everything and get
ready to do it. For my binding, because
my book is 6 " high, I chose a three hole binding, 1.5 " apart, and 1.5 " from the edge of the top
and bottom of the book. This is what my whole punch pattern is going to look like. I made these holes with
my cinch offscreen. I don't want my holes
that close to the edge. My cinch does not allow me to change this space,
this space here. So I'm going to manually
punch another hole right beside each of these to give myself a
little bit of margin there. I'm just using the ruler
to make sure that I do things in a way that's
actually even and straight. I I am challenged in that way. I have three holes now. They're evenly spaced
to where I want them, giving me more
space on this side. Really what I'm looking at is the one that's the
closest in there. We're now ready
to start punching our holes and
binding our journal, meet me in the next video and we're going to
start doing it. In this video, we
organized our pages, created our hole pattern, and now we're ready to punch. Next up, punching and
binding. Let's go.
8. Punching & Binding: Let's begin the process. We're going to actually bind
and punch at the same time. Punch and bind at the same time. I am alignment challenge, and maybe you are, too. I don't have that
inherent balance gene. I'm always sort of asymmetrical. Even though these are
almost foolproof binding, I do want to make
sure that things are smoothly gliding on my rings, so I can make sure that
everything is aligned as I go. If my book is going
to be a little askew. As long as it glides,
I don't care. It's going to be
beautiful books. Let's start, punch and
bind at the same time. Using my template, I will
cut my styrofoam making three slits where I plan
to insert my rings. This really helps those
rings stay steady. The rings don't look slippery,
but they really are, so this makes it much
easier and quicker process. I'm having pretty good luck
with my whole punch today. I'm going to continue to use
it to bind my entire book, but I did want to show
you how you could use an all if you
prefer this method. This is just a sharp pointy tool that you can poke holes
in your pages with. And, you know,
really, there's a lot of different things you
could use for this. You could use one of those handheld manual
hole punch tools that they use for leather goods. Sometimes you can even
use a ballpoint pen. There's a lot of different
things that are possible to punch a hole with if you would like, and
this is one of them. Just kind of poke a hole
through where I want a hole. This is good to do on the
self healing cutting mat, so nobody gets hurt
and there week out. So you could also
hook a hole with an or sometimes you can even do it with a
pencil if you want to. There's really no end to
ways you can get your holes. I'm just going over these
with my whole punch. I'm still making it
imperfect because this guy, even on my template, my template is not even, it's further in than
the rest of them, so I have to even that
out, that and that's okay. On my piece of foam, I have my ring open in
these slits I made, and then the back of my
book is going to be here, and then the front of it is going to be on the
opposite side. I'm just going to start moving my pages from one side to the other because I
started backwards, which I do tend to work backwards sometimes
on different things, and this is no different. But that's okay because this book I know
I keep saying it, but I love these
rings because you can just move stuff around. They're very forgiving. If you feel like you made a mistake, you can just correct
it and move on. No need to get in your
own way like this, see? I want to get in
my own way about that. Just make a bigger haul. I'm a biggie. So
that's what I'm doing. And as long as you
make a bigger hole, then you shouldn't have any
resistance with the rings. So if you are like me and
you cut holes off base, you can just make a little
bit of a bigger hole, and it should work
out just fine. There we go. Cool. Awesome. Cannot wait to paint in this
thing and to draw in it's going to
be so inspiring. Okay, I did a bunch
of this off camera because it's very repetitive and I don't want to bore you. But I'm going to cut the little weird
pieces now in my book, and I wanted to take you
along for the journey. So let's do it. I think maybe I'll do
like that or like that. So let's do like that. I'm enjoying the
wonkiness of my book because it's actually
very appropriate. You can tell I made it because it's off center,
and that's okay. It's all good, and I love it. A little harder to punch a hole through this kind of paper. This is like a
sturdy craft paper. Kind of like a
cardboard, really. Let's see. Okay, I can see the hole now, so I'm going to take my template off and
just move forward here. There we go. Let's
see if we can. Looks great. I'm actually also really enjoying
doing sort of the double hole thing because I like to have a
little bit of extra. I think I might invest in a hole punch that
makes bigger holes because I like that bigger hole. I'm going to do
this in there, too. Remember, you can just move this stuff around
however you like. I'm going to do a couple
holes for this one. Because if I did one hole, it would just be
uncomfortable in there. I'm going to just do two holes. Even though this is flipped upside down, it's
going to be okay. Not super picky. Make it work like Tim Gunn says. There we go. Alright. And I'm going to do a litt bit of a
bigger hole for these two. Okay. Now I have a big cleanup job with
whistle and dots everywhere. I think they might need
to make a little bit of a larger hole on the top, just a little wider,
so I don't have any Any strange
movement going on. There we go. Oh, yeah, let's do this one now. Hold up the template
to just make sure. Let me see if I can Avis. Alright. We're gonna poke it
with a pencil, and there. We'll just make another
hole. There we go. Excellent. Let's
do the three holes for the envelope.
'Cause they'll fit. Et's see if I still
off. That's okay. We're gonna give it a shot and
see if it works. It works. I do think one of the holes has a little
bit too deep that one. And then let's just double. Let's do some double. So yeah. Okay. That'll work. That'll work. That'll
work. Works for me. And now I have a
cute little pocket. Excellent. All that's left to do
is shut the rings. In this video, we
punched out our pages. We bound our journal, and we had so much fun doing it. Next up, ribbon rings. I can't wait to
share this little
9. Ribbon Rings: And I want to show you a
little trick that we do with ribbons that's
going to make it easy to change out your pages. Here's the trick. You
see where this opens. Where the ring opens, we want that part to
be inside of the book. The little joint on the ring, we want that to be on
the outside of the book. One thing I like to do is to put ribbon where the joint is. That does two things. It will keep the joint
from going inside of the page portion of the book and it will keep the opening
portion inside the book. The ribbon was going to act as a little stopper on
either side of the joint. It's going to keep the joint from rotating inside the book so that whenever you
want to change out your pages or add more pages, you're always going to have
easy access without fussing. I have a few different
varieties of ribbon. You can use whatever
ribbons you like, as long as they will not securely, then
you're good to go. I have a method that I use, but it's by no means Any
official way to do it? It's really whatever
works for you. Whatever does the function
that you want it to do. Hey, the function is to keep the joint outside and
where the papers are. I put one ribbon here,
one ribbon here, and one ribbon in the middle, and then I tie them together, and I'm going to show
you that right now. I got my ribbons. They're about
I don't know, three, 4 ". We don't need to measure,
but here I am measuring. One, two, three, four. Actually, these are about 5 ". I have three per ring. It's very simple and it doesn't require really any
special knotting skills, just that you can make
a knot, basically. Make a knot on the left side of the joint and make one side of the ribbon
longer than the other. We're going to do
this. For each, feel free to make it
as strong as you like, as tight as you
like, I should say. Then we're going to do the
same thing on the right. And then we're going to
take our last three, and we're going to
put it on the joint. Actually, the ribbon
I picked is a little too skinny to go on
the joint, but that's okay. Now we'll just take
the long tail from the right side ribbon and tie it with one of
the tails of the ribbon in the center and
do a double knot on that and then take the long
tail from the ribbon on the left side of your
joint and tie it to the other tail of the center and do a
double knot on that. Walla that's my method. Super simple. No
fancy knots required. And it works really good
to keep the joint out of your way so you can easily
access that when you want. You can make more knots
if you want to, as well. I'm gonna probably
do something with this'll knot it again here. Get crazy. Okay. And they also look really cute. And there we have it. Now I can add more to my
book if I would like to. My Ring's open in the center. I can add as many
more pages as I want or remove pages
or do whatever I want. And there's plenty of room, so my pages aren't
going to get stuck, and there's always something inspiring in here to draw on. I'm so excited and I can't
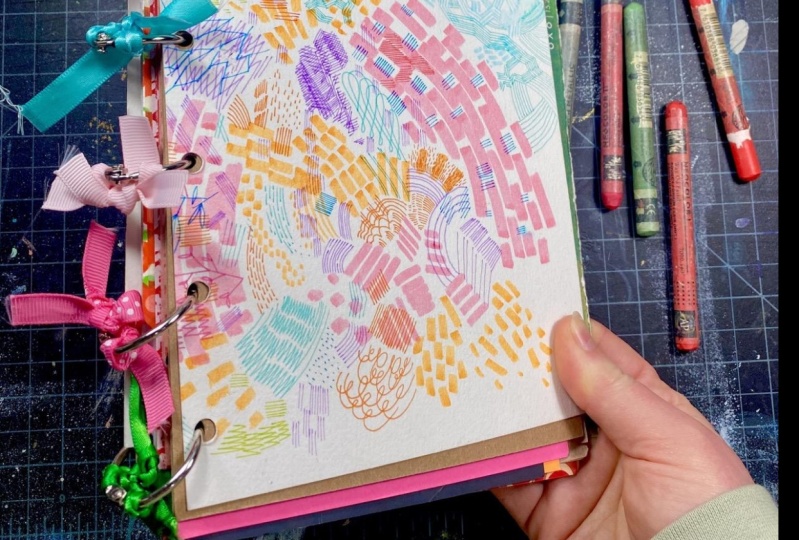
wait to start using my book. Want to see what I'm
doing in my journal. Join me for the wrap up video. I'll show you how I'm
doing in my journal, and I'd love to hear about
how you're doing in your.
10. Extra, Extra: Tool Thoughts: There are many different
methods to bind your journal. Today we're going to
be using this one, but I would be remiss if I didn't mention there's 1 million different other ways to do it. Some people bind groups of paper together and
then sew them all into already existing book
cover or create a new one. This is a long arm stapler. You can make your
own different kinds of journals with this. So not the same as
we're doing today. You have your larger
pieces of paper and you staple the center of them
and make a book that way. I also just want to mention how creatively inspiring
it is to have stuff like this around because you sometimes think of
things to do with them that you wouldn't normally think sort of idea
generators as well. I wanted to show
you these things, not just because it's cool to
know about different tools, but also not to encourage over consumption at all because I believe
in using what you have. If you decide to do more, then you can try different
things later on. I just wanted to
talk a little bit about how creatively
inspiring it is to have tools like
this around because sometimes if they're
in your studio and around you and you are into creating
different things, they can unconsciously
inspire you to try new things and to
do different things with. Sometimes having these things, they're not just
taking up space. They're in the background and they're working
their magic on you. Then one day you turn
around and you're like, I'm going to use that,
I'm going to make this and it's a cool moment. Then you can explore a whole new world with a whole new tool and all
the different things you
11. Junkjournalspiration & Final Thoughts: Hey, I've already started
on my junk journal. I started designing the cover, and I'm having such a
blast with my pink pens. I hope you do, too,
and I can't wait to see all of your creations. I really hope this
class helps inspire you to see what
packaging and papers that you come across in
your daily life can be a conduit to a
feeling or a memory. Simply just something
that sparks your creativity and
your imagination. If it's something that you
even think for a blip. Gee, I wish I could save this, save it for your
next junk journal or add it to a junk journal
that you currently have. I also hope that this class has motivated you to try
something crafty, even if you don't feel
like a crafty person. Hey, I'm not a crafty person. But I love to craft. You can be crafty and
creative and find so much joy in the act
of making and being creative just for the
sake of creativity and enjoy making mistakes because there's
magic and mistakes. Make so many mistakes, and I love them all
because I either learn something or something
really cool happens. They teach you something about your creative process and about the way that you operate
in a creative zone. And most of the time they end up looking pretty good anyway. Please hit me up in the
discussion thread and ask me any questions you like
and follow me on YouTube, Instagram, Facebook,
all the places. Thanks so much for
taking this class. I hope you'll look into some
of my other classes too. I've so enjoyed
this time with you. Keep creating and remember there's magic in
mistakes. Bye bye.
 Kathy Weller, Artist + Hand-letterer | Etsy + P.O.D.