Transcripts
1. Introduction: Hello, and welcome, everyone. My name is Joan This Shortcard. I am Full Stack Web Developer
and online instructor. I am thrilled to
have you join me in this brand new journey into the pure Javascript
animation where creativity meets the code and simple script bring
your web pages to life. In this course, we are diving
into multiple hands on animation projects using
nothing but vanilla JavaScript. No library, no shortcut, just pure Javascript power. We will begin with stunning
visual effects like growing text animation and
colorful animated heading. Then we will explore interactive experience
like paradox scrolling and scroll tier animation to make your website
truly dynamic. We will also build fun
and engaging UI elements like animated eyes that follow
your Kazar clipath base, transition, and multiple
interactive menu styles, including circular
menus, toggle action and the popular nine
dot toggle menu. But that's not all. We will bring the
wave to life with ambient animation
like Blinking Star, night Mot Road Animation, even wavy text effect. That will captivate
your visitor. Each project is crafted to not only enhance your web
animation skills, but also to strengthen your core understanding
of JavaScript, from dom manipulation
to event handling, from timing function
to CSS integration. By the end of this course, you will have a
powerful portfolio of Java Script
animation effect and a solid foundation to building interactive and visually
engaging web element using JavaScript. You are ready to
turn study code into living breathing animation.
Let's get started.
2. JavaScript text animation with glowing effect part 1: Hello, everyone, once again, I'm back with a new project
related JavaScript animation. In this particular lesson, we are going to build this
beautiful hovering effect. You can see when we hover over this text, these effects happen. As you can notice, the text
shine to left to right. Also you can notice all
letters had different colors. When I hover it away, this
light effect fade away. We will create this
effect using DML, CSS, and little
bit of JavaScript. Let's start create how
we can build this one. As you can see, side by side, I open my Wizard studio code
aer and my browser using b server extension
and I already create an TML document name indexdt TM. With that, I already create the styled CSS file and I link this file
with this document. Then I also create
script doot Js file. For now, our style CSS file and script and Script DJs file is completely empty. At first, inside the body tag, I'm going to take a
H two tag, H two. Inside this H two tag, Amuotype JavaScript,
animation, this one, and then I'm going
to set this file. After I set this file,
this is how it's oblige. Next, I'm going to assign
a class to the H two tag, so to type class, and our class name is text. And I'm going to set this file. Is this file, now let's jump
into the style or CSS file. First, I'm going to use a
universal selector, star. Then inside the
ali versus first, I'm going to define margin,
margin and padding. Margin, I'm going to say margin zero for
all of the direction. Then I'm going to say padding. Padding also zero. Then I'm going to
define box sizing. Box sizing, I'm going
to make it border box. Then I'm going to define the
font family, font, family, and I'm going to
use Aerial font, area I'm going to set this file. After set this file, this
is how it look like. Next, I'm going to
target the body tag. Body, then the calissF property, I'm going to use display. This play, I'm going
to make it flakes. Then justify content center. Also align item center. The next property I'm going
to use minimum height, minimum height, and here I'm going to
define minimum height, 100 v Vote height. Then I'm going to define
background color. Background color, and here I'm going to
use background color, Has tag 222, it's
a dark gray color. If I set this file, this
is how it looked like. Next, I'm going to target the H two tag, the heading to tag, H two inside the calyces, first, I'm going to define
the position position, I'm going to make it relative. Then I'm going to define the
font size font, font size, and I'm going to make
it three M value EM and next I'm going to next, I'm going to transform these
takes into uppercase to type text, transform uppercase. After that, I'm going to
add little letter spacing. For that, I'm going to
type later spacing, and I'm going to
use 0.05 EM value. Next, I'm going to
use cursor property, cursor, and I'm going
to make curs default. After that, I'm going to
define font to eight. I'm going to type font to eight and I want to use minimum fondwd so
I'm going to use 500 and I'm going
to set this file. After set this file, this
is how it looked like. If I increase the
fondd little bit, if I make it 700, let's see how it looked like, I think 700 is good for it. Now let's go to the JavaScript
file. Now what to do. At first, we need to
separate all the text from these words and we need
to put it in a span tag. Every character of this word, we need to put it in a span tag. So later J, we need to
act it in a span tag. And the same way, we
need to wrap it A in a span tag, then, then a, then, then C. This is
how we are going to wrap every character of
this text into a span tag. After that, we are going
to style this character, and we are going to do
that using JavaScript. At first, I'm going to select the H two element and I'm going to store it in a variable. First I'm going to
define a variable AET Late and our variable n is text. Text equival to here I'm
going to use a dom method called document Quis lector. Ciector then inside
the rounds is here, I'm going to target
the class name. Here I'm going to
target the class name, our class name is dot text, and semiroun in this line. Basically, here I
target this H two tag, this H two element using its class name with the
help of Javascript Dom. Now we need to wrap each of
the letter in a span tag. So here, I'm going to define another variable ALT and
our variable name is spans. Spans equal to text, taught in our text, in our text method. Now, what basically
in a text do? Basically, it's going to extract the text
from this variable. If I print this
variable in my console, let me show you some
type console dot log, console dot log
inside the Run Brass, I'm going to pass the
variable name spans. After set this file, if
I show you my Console in my browser Ispatle Console. Here you can see the text,
JavaScript animation. You extract the text
using inner text method. Now we need to retrieve
each of the character, otherwise later
individual because we need to grab it
inside a span tag, and we can easily do that
using speed function. Here I type dot
split. This method. Then inside the round
dresses and inside the roundress I want to split the text by every character. That's why I use this
regular expression. Basically, here we
pass an empty string, and it's a written array. Who going to store every
sp character in it. If I set this file, as you can see, it's
written and array. Which store every
character separately, JavaScript animation. It is a regular
expression technique, and if I pass a space, then it's going to store only array two array item,
JavaScript and animation. Let me show you. A provides space if I set this
file, as you can see, this time it's
stored in this array total two index,
JavaScript and animation. We're going to spit
this text using empty string, not by space. So we set this file, we are back to the
previous position. These are all array elements. Now I want to run a
loop over this Ay. For that, you are going
to use map method. After split function,
I'm going to type dot map Mthood here, we need to pass
value and the index. For the value as a
first parameter, I'm going to save the letter.
I'm going to pass letter. Then I'm going to pass, then I'm going to
pass I I for index. Basically this
method looks through the array and
creates a new array. Remember, here I represent
the index number. If we pass zero, then it's
going to represent J. If we pass one, if we pass one index, it's
going to represent A. If we pass two, it's
going to represent. This is how it works. Next
inside this map method, I want to call a function. I want to create
a function let me show you here I'm going to use arrow function equal to arrow
sign inside the alia says, I'm going to return. Return, and here I'm going
to use template literal. Here I'm going to use backticks. Inside this backticks, I
want to return a span tag. I want to return
a span tag, span. Inside the span tag, I'm going to use dollar sign
and inside the carvers here, I'm going to pass the
letter, these variables. This variable. I copy the letter variable and I'm
going to paste it here. So we set this file,
as you can see, this map method loop through every character and here we put every character
inside this span tag. Here you can see every
span tag hold a character. And now we need to convert this array into a
normal estimle. We need to inject it
in our TML document. For that, we are going
to use Join method. So utter around races here
I'm going to use dot join. Join method. I going to join all the separated array vdus
now if I set this file, you can see the
different result. Now you can see in my console, it's a single text. It's not an array anymore. Basically, it's a string, and we need to put this string
inside the TML document. Basically, we need to put
it inside the heading tag. For that, as you can see, we already target the
heading tag using its class name and we store
it in a variable called text. Here I'm going to type text, dot text dot inner ML and equal to her to provide the variable
name called spans. Now, if I set this file and
back to the elements section, now you can see inside
the tag HT element, we have multiple span tag
for each of the character. So here we successfully put every character in a span tag
with the help of JaScript. But there is a problem. It provide comma between
all the characters. We need to resolve this problem. If I show you my console, here you can see the comma. For that, inside
my joint function, I'm going to join it
with empty stream, and then I'm going to
set this file again. After set this file, as you can see it resolves the problem.
3. JavaScript text animation with glowing effect part 2: Now let's jump into the
style CSS file again. Then I'm going to
select this pen tag which is inside the H two tag, H two space pen. Then I said the clivussF property, I'm going
to use colored. Colored, and I want
to use this color, Hastag 555, this light gray color, and
I'm going to set this file. After I set this
file, as you can see, it changed the color. It changed all the
character colors at once. Also, I'm going to add
little transition on it, transition and hound at 0.25 seconds, this
amount of time. Then below it, when
I hover over this, H two tag, H two, colon hover, then I want to carry the
span spans the calis again, I'm going to use color property. Color and I'm going to use
this Hashtag 00 FF two A, this colour code, this
light green color. I'm going to set this
file set this file, if I hover my cle on it, you can see the result,
how it's just the color. Then order to give
shining effect, I'm going to use text shadow. Type text shadow, this one. Here I use this drop shadow dow and I'm
going to set this file. After set this file,
at this drop shadow, if I hover over this link, you can see this
beautiful lighting effect because of this shadow. And then I'm going to add detail transition delay
in our span text. For that, we need to go and jump into the scripted Js file, and here inside the span tag, I'm going to use style tag. It's a inline styling method, equal to inside
the double quotes, I'm going to use the
property called transition. Transition delay. Transition delay,
then I'm going to add double quotation N
quotation and inside it, here I'm going to
use again here, again, I'm going to
use dollar sign. Then inside the CarlssF I'm going to pass the
index number, which is I. Then I'm going to multiply
index number with 14 and I'm going
to set this five. After I set this file,
this is how it look like. Oops also need to
define the unit. Here in pass me second MH. I'm going to set this
file. After set this file, if I hover my cars on this text, here you can see the
beautiful transition effect because of this
transition delay. For this transition delay, here we use index value. With index, we multiply with 40. Every time for the first index, it's going to
multiply with zero. Then it's going to multiply with one. Then it's
going to multiply. For, it's going to
multiply with two. F A, it's going to multiply
with, three times 40. So it's going to return different is result.
Mi second result. Because of this delay, it's created this
beautiful transition. You can notice our letters
shine one after another. Next, we are going to
change the color of each letter using
CSS filter property. If the same way inside
the double codes, I'm going to add another
property called filter, filter, colon and I'm going to use Huotd Value Hu the
rotate. You rotate. Inside the rounds, inside then I'm going
to use dollar sign. Then inside the civses
then inside the caris, I'm going to pass, index, multiply with 30, 30 degree. Outside the Cl versus
Amil type, unit the EG. After I set this file, if I hover my cursor on this element, you can see different result. You can see this
beautiful colorful text. As you can see, each of the character represent
different color. It made with different color. This is how we can create this beautiful Java strip
text animation effect. Thanks for watching this video, stay tuned for our next project. I hope you enjoy this project.
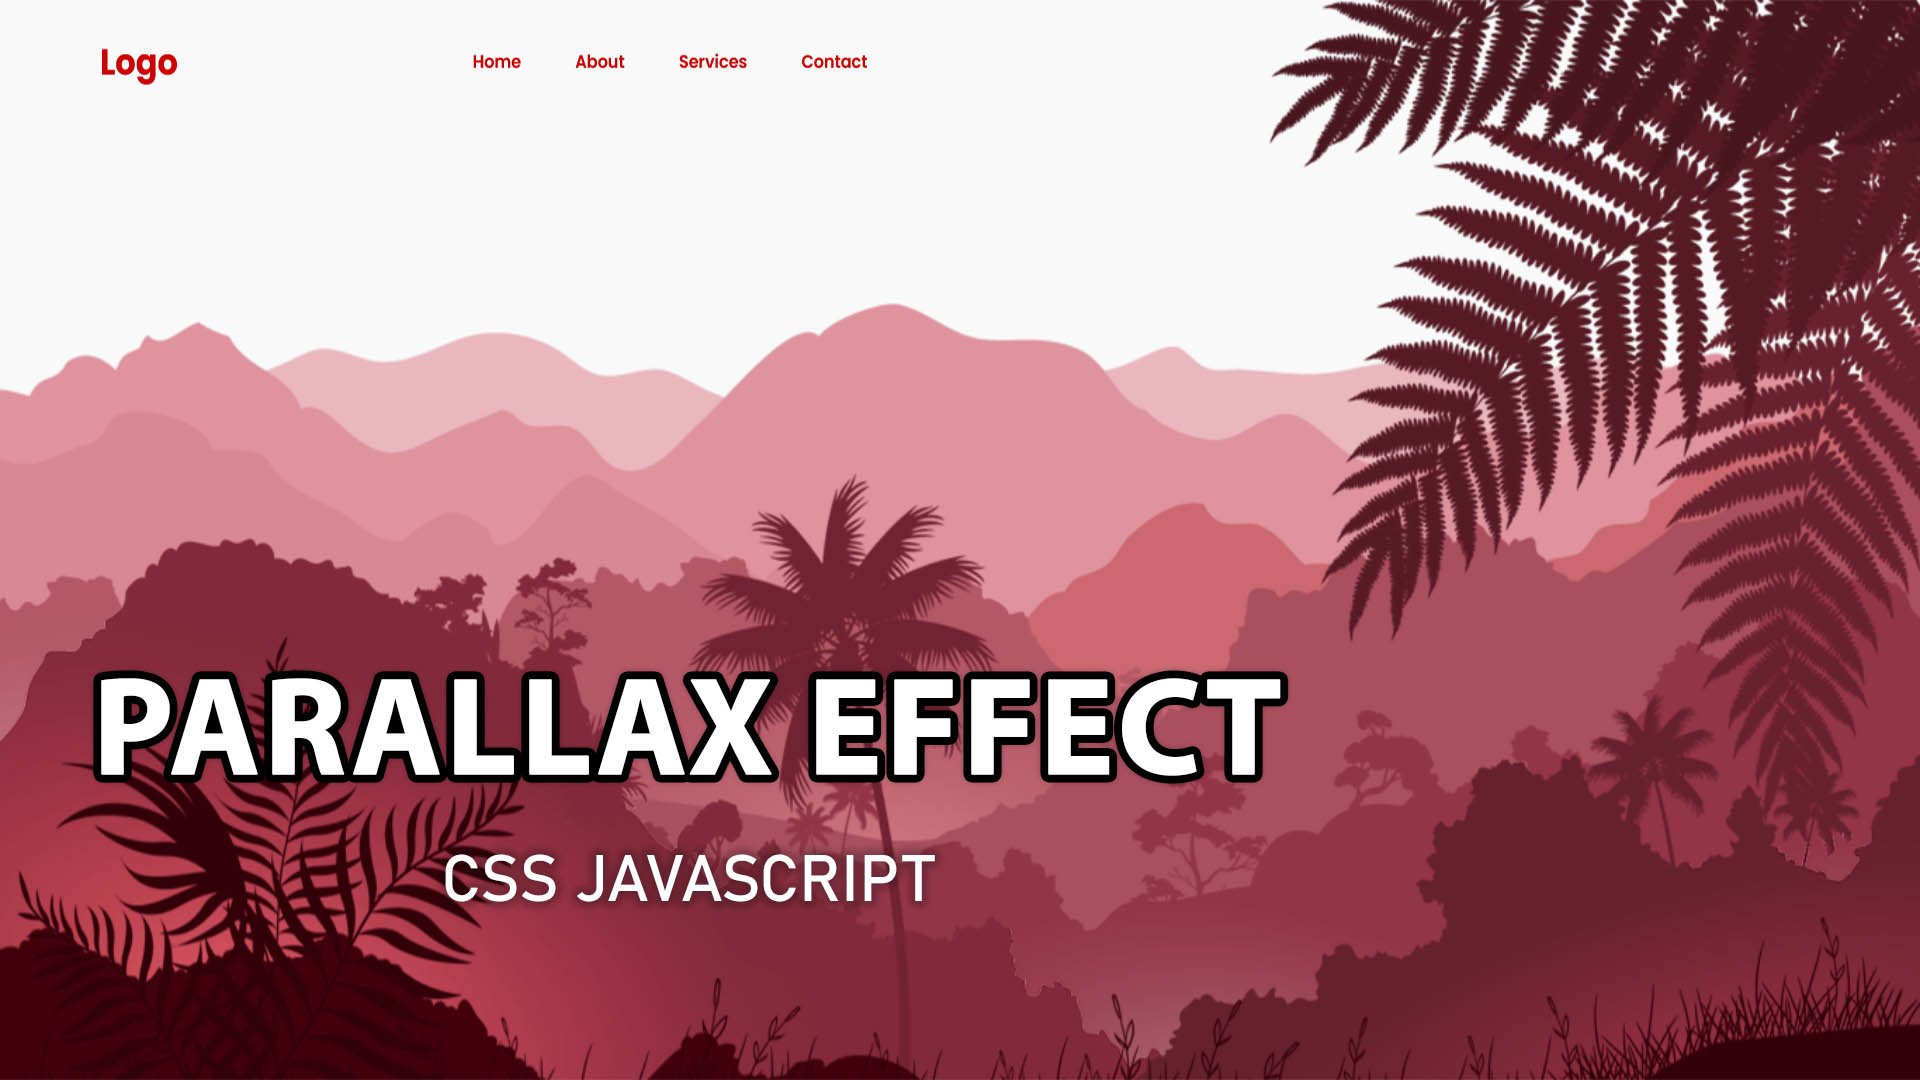
4. Website parallax Effect Part 1: Today, I'm going to build this beautiful Paralex
animation effect. As you can see, when I
scrolled on my page, it moved the mountains and
the leaves from the sea. So let's see how we can create this beautiful Parlex
animation effect with the help of
JavaScript CSS and HTML. So finally, I am in my
vis studio code editor. As you can see, I already
create index dot tMLFle, style dot css file and
scrip dot JS five. Also you can see in my
current working directory, we have a folder called
images inside this folder, we have all the images
such as hell Image, Hill two, L four, Hill five, leaf, and plant. Also, the coconut
tree, this one. These are all PNG images, and I'm going to use
all these images to create this paralytic effect. So let's to the index dot five. At first, inside the body tag, I'm going to take another
tag called headed headtag. Then inside this
head attack, first, I'm going to take a
heading to tag H two, and here I'm going to type Logo. Also, I'm going to assign
a class to the H two tag, some type class, and also
our class name is logo. Then inside this head attack, here, I'm going to
take a nap tag, navigation tag nerve and I'm going to add a
class to this nap tag, class, and I'm going
to type navigation. Then inside this nap tag here, I'm going to take anchor tag A. Then I'm going to add our
first anchor element, our neighbor element home. Then I duplicate this section and I'm going to name it about. Also, I'm going to
duplicate this section and this time I'm going to name it services at last, I'm going to add contact. I'm going to set this
file. After set this file, if I back to my browser, let me show you this
is how it looked like. Now we have the logo
and the navigation bar. Now, let's jump into the CSS file and style
the body section. I am in my CSS file. At first, inside
my style CSS file, I'm going to import a font. I'm going to import Google
font, which is pop ins. I'm going to use this
one. After that, here, I'm going to select the
universal selector, start. Then inside the clrass here, I'm going to add some sty. First, I'm going to add margin. Margin, and I'm going to
set margin by default, I'm going to set margin zero. Then I'm going to use padding. Padding, by default, I'm
going to say padding zero. After that, I'm going
to use box sizing. Box. Sizing, box
sizing border box. Then I'm going to use
font family property, font family, and here, I'm going to use Poppins
P O double PINs, Poppins, this one, and apacoma here and I'm going ultrapas the family,
which is sensoric. San si, this one, and I'm going to set this file. After set this file, if
I back to my browser, now you can see it remove the default padding
margin from it, also it changed the font, default font to pop ins font. Now, let's back to the
Visal studio code. Then after that, inside
the style CSS file, I'm going to select
the body tag, body. Then inside the calices first property, I'm
going to use background. Background, and I'm
going to set this color. HatagFF nine, if nines
a light gray color. Then I'm going to
say minimum height. Man height, minimum height, I'm going to say it
100 viewport height. Then I'm going to
target the header tag, this one, this header section. So I'm copy the tag name header, and here I'm going
to type header. Then inside the calibraces. And first I'm going to define
the position position, and I want to make it absolute. After that, from the top, I want to place it zero
and from the left, also, I'm going to
place it zero position. Then I'm going to define width. I'm going to define with 100%. I'm going to use 100%
width of this screen size. Then I'm going to
define padding. Padding from top and bottom, I'm going to use 30 pixel
and for left and right, I'm going to use 100 pixel. Next, I'm going to
use this property, display flex and justify
content, justify content. I'm going to use flex start, flex start and align
IAM, align, IAM center. Also I'm going to set the Za
index and I'm going to say Za index 100, I'm
going to set this one. Here we use flick
Start because I want the logo and the navigation
war left side of our screen. That's why we use flix
Start and to make sure the header will be visible no
matter what element we add. I say Z index 100. Now after set this file, if I back to my browser, let me show you this
is how it look like. Now you can notice we have
padding from top side, 30 pixel and from the bottom
30 pixel and from the late, here we have padding 100 pixel also from the right,
hundred pixel. Next, I'm going to
style this logo, so I'm going to
target this logo. Now I'm going to
target the logo. I'm going to type dot LOGO logo. Then inside the
colss Here, first, I'm going to define the
font size font size, and I'm going to make it to EM. After that, I'm going
to define color. Color and here I'm going to use this red
variant color code, this one, and I'm going
to set this file. Also, we need to define
some margin at the right, some type, margin, right, herd pass 270 pixel
because I need gap between the logo and the neb elements. I
preset this file. If I back to my browser, this is how it look like. Now let's target the
navigation menu. Let's back to the
code and first, I'm going to use its
class name navigation, so I copy the class name
and back to stylo css file. So type, dot, navigation
and inside this navigation, I want to target all the anchor
text inside the calices. Inside the colors is the first property I'm going
to use text decoration, text decoration, and I'm
going to make it none. I don't want any
text decoration. I want to remove the underline. Then we need to
define the color. Color here, I'm going to use
the exact the same color, this one, which we use
for the logo, dark red. Then I'm going to
define padding. Padding from top and bottom, I'm going to use
six pixel padding and from left and right, I'm going to use
15 pixel padding. After that, I'm going to define border radius, border radius. Border radius, I'm
going to make 20 pixel. Also, I'm going to
add little margin. I'm going to type margin. From top and bottom, I'm going to assign Margin
zero and from left and right, I'm going to assign
Marin ten pixel. After that, I'm going to
add little font to it, font weight, here I'm going
to assign font to it 600. I want little boulder font, and at last, I'm going to
add little transition on it, transition, and
here I'm going to add transition
duration 0.5 second. I'm going to set
this file. After set this file if I back
to my browser, let me show you this
is how it looked like. Now I want to add
Hi it when I hover my cursor on the anchor emits. I want to change the font color and the background color
when I hover on it. So let it back to the
code, and this time, I'm going to create a Huber
selectod using Ancag A Huber. Then inside the clirass here, first, I'm going to change
the background, background. I'm going to make
background this color. And our font. For the font, I'm going to type color
and I'm going to make it white. I'm going to satisfy. After satisfy if I back
to my browser and Huber my cars are on
these neb elements, you can see the result. This is how it look like when
I Hoberm cars are on it. It said background color
red and font color white. Now let's work on the images that we use to create
the parallax effect. Let's jump into the studio code. As you can see in my
current working character, we have the folder name images. First, I'm going to jump
into the index dot H file. Then a header section, I'm going to create a section. I'm going to use a
section tag section, and here, I'm going
to assign a class, and our class name is parallax. Then inside this section tag, first, I'm going
to take a image. I G. And here, I'm going to pass
the image source. Inside the double
codes, I'm going to type the folder name images, and from this images
folder, first, I'm going to add this
image, hill dot PNG. Then I'm going to assign
an ID ID is a Hill one, and I'm going to
duplicate this section. One by one, I add
all the hill images. And at the same way, I add
three leap and plant images. And I'm going to set this file. So we have to tall eight
images, five hill image, one tree image, one leaf image, and last one is plant image. So to set this file, if I back to my browser and you can see this is
our first hill image. This is our second hill
image, this is third one, this is fourth one, this is
fifth one, this is the tree. This is the leaf, and this is the and this one is for plants. We need to put all
the images together. But before, also I'm
going to add another tag, which is H two for the text. Here I'm going to
type H two and inside this h2d I'm going to
type paralyxParalyx, if. Then I'm going to assign
ID to this H two tag, ID, I'm going to make it text, and I'm going to set this file. Now, let's jump into
the tile your CSS file and target the parallax D. Here, I'm going to target
the parallex D dot, paralx and inside this, then inside the calibraces. The first property, I'm
going to use position. Position, I'm going
to make it relative. Then I'm going to use
display property. Display, I'm going to use flix. After that, I'm going to justify content center and align item
align items also center. Then I'm going to assign height, height and here I'm going
to use height 100 VH. After set this file. If I back to my browser, you can see it put all the
images next to each other. Now let's get to the
studio code again. Next, I'm going to hide
the overflow area. Overflow, it's a hidden. After that, to order to give
the exact shape we want, we need to select the images which is inside
the parallax deep. Here I'm going to type
dot parallax, image ING, then inside the Carlss here, I'm going to pass position, position, first, I'm
going to type absolute. Then I'm going to add top value, top, and I'm going to pass zero. Next, I'm going
to use bed value. As I'm going to pass zero. After that, I'm going
to defy wet with, and here I'm going
to set 100% weed. Then I'm going to define
the pointer event. Pointer events, here, I'm
going to use Nun Valu. None. I'm going
to set this file. After set this file, if
I back to my browser, this is how our
images looks like. Together, they form this
beautiful background. Reason this is happening
because image, all of the image are designed
only for this purpose. Their resolution is same. This is one view split
into multiple images. This is it for this tutorial. At the next part
of this tutorial, we are going to complete
this animation. Thanks for watching this video, stay tuned for our next part.
5. Website parallax Effect part 2: Hello, it's nice
to see you back. This is the second
part of this tutorial. As you can see in
our previous part, we arrange all the images at right place and create
this dautiful view. This is one view that split
in a multiple images. Now, let's work
on the H two tag. I'll jump into the visual
studio code editor, and if I show you my
index estimated file, here you can see the
two tag, two ID text. I'm going to use
its ID name text, and let's jump into
this style CSS file. Here at first, I'm
going to target, I'm going to target the
text using its ID name. So inside the ibas here first, I'm going to define
the position, some type position,
I'm going to make it absolute position absolute. After that, I'm going to define
the font size font size, and here I'm going to
say font size five EM. Then I'm going to define
the color, the text color, color and I'm going to
use the white color, Has tag if if A. After that, I'm going to
use little text shadow. But before I use
this text shadow, let's back to the browser. Suppose this file if
I back to my browser, this is how it look
like Perlix effect. Now, let's add
little take shadow to give it little depth. Let's back to the Studo code
and Hem type text shadow. Take shadow, and I'm
going to use this shadow, and I'm going to satisfle to satisfy if I
back to my browser, this is how it looked like. Now it provides little
death in this text. Now, let's add the
content section. Let's jump into the
Studio code and jump into the index dot
estimate file. Then after this section, here, here, I'm going
to add a new section, Section, then inside
this section, but before I'm going
to add a class, and I'm going to
name it content. Then inside this section tag, first, I'm going to take
a H two tag, H two. Then inside this H two tag, hemo type, paralex
scrolling website. Then I'm going to
take a paragraph tag. Inside this paragraph tag, I'm going to take some
dummy text for scrolling. I need content to scroll. Type m I'm going to
add nearly 750 word, and I'm going to set this file. After set this file, let's
back to the browser, and this is how it looks like. Now, we need to style
this content section. So let's add some study. I'm going to jump into
the studio coordinator and I'm going to open
style or CSS five. I'm going to start the styling. At first, I'm going to see
the content section using its class name dot content. There inside the class, first, I'm going to define the
position and position, I'm going to make it relative. After that, I'm going to define background
color, background, and for this background, I'm going to use the same exact
same red color, this one. Copy the color code and
I'm going to put it here. After that, I'm going to add some padding from
all of the direction, padding 100 pixel from
all of the directions. Then after satisfy if
I back to my browser, this is how it looked like. I think this red color
is very vibrating, so I'm going to try to
match with this color. Let's change the color code and this time I'm going
to use this color. Something match with
this background and back to my browser again. Now, it is quite match with
this background color. And then we need to
change the text. We need to arrange the text. At first, I'm going to
target this heading tag, so Hemo type dot content
H two, heading to tag. After that, inside the col ressF I'm going to
define the font size, font size, I'm going to
use three EM font size. Then I'm going to
define colored. Color and hemotype color white. Hastag if if if. Then I'm going to define
margin, margin at bottom. Margin bottom, I'm going
to pass ten pixel. And I'm going to
satisfy satisfy, if I back to my browser,
this is how it look like. After that, we need to
style this content section. For that, again,
I'm going to jump into the CSS file and this time, I'm going to target the
content dot content, and I want to target
the paragraph. Then inside the colorss first, I'm going to define the
font size, font size, I'm going to use font
size one EM after that, I'm going to define
the color of the text, color, Hen to set it, white, has tag,
has tag, if if if. At at last, I want to use
little lighter phone so I'm tri font, weight 300. I'm going to set
this file. After set this one if I back
to my browser. Now this is how it looked like. Now it's look better and we have enough content to scroll. So we successfully
complete our styling part, and now we need to work
on the paralxeffect. For that, we need to jump
into the JavaScript file. Let's jump into the JavaScript
file, script dot js. At first, we need to
target those elements. I want to say those images, I want to move when I
scroll down my page. For that, I'm going
to declare a variable late and our first variable
name is text, THT. First, I want to target the
text using its ID name text equal to document that
get element by ID. Here I'm going to
pass the ID name. Then inside the round
resses I'm going to pass the ID name text and
semicon in this line. Then then at the same way, I'm going to target Hill four, Hill five and Hill one. Also, I'm going to
target the leaf. I'm going to copy
its ID name leaf and back to script JS file. I'm going to duplicate
this line and this time, I'm going to target
leaf and I stored it in this leaf variable and I
pass the ID name leaf. Then I'm going to
target Hill one, Hill four and Hill five. So from here, I'm going
to target Hill one. Copy its ID name and that to the Scribb Js file and I duplicate this line
total two time. This time, I'm going
to target Hill one. Then I'm going to target
Hill four, hell four, and also I'm going to
change the ID name Hill four and at last, I'm going to target
Hill five, H five. It's not leaf five,
it's a Hill five, so I copy hell not leaf and
replace leaf with Hill. So I successfully
target those elements which I want to move when
I scroll down my page, such as this text, the first hill and the fourth hill and the
fifth hill, also the leaf. I don't want to select
this coconut tree and this and these plants. I don't want to select them. I want to move only
the background hill. I want to see the first hill, the fourth hill and
the fifth hill, also the leaf and the text. That's why I select all of them and store it in a variable
in different variables. These are the elements
that I want to animate. Now let's work on the effect. So type, Window, dot,
and even listener. Then inside the rounder says, first, I want to scroll. If I scroll, then I want to
run a call that function. Here I'm to use arrow function. Then inside the crass, it's basically
mean whatever code we write inside this
called function, when I scroll it, it's
going to run this code. Inside this function,
I will create a new variable late and
our variable is well. T value equal to henotype and I want to
extract the value of scroll Y, Su type window, and here we need to
extract the value of scrollY type window,
dot, scroll, Y, and sub end this line because we need only
Y xs scrolling, not Xs strolling to execute
the parallax effect. Basically, it's going to
excess the vertical distance. Now let's work on the elements, which I want to change. Now to get the value, at first I want to change the text position when
I scroll down my page. I want to add a little margin. I want to add margin
at top of this text, so it's going to move downward. For that, we are going to use style method,
let me show you how. So hero type, first, I'm going to type
the variable name. Which stored this
text, W is text, text, dot, style, dot, I want to add margin top value. Margin, top. Then equal to margin toque, then I'm going to
assign a value. Equal to here, I'm
going to pass. Basically, I'm going to
use template literals. I'm going to use back ticks. Then inside the back ticks, I'm going to use dollar sign, then inside the Carlss, then inside the crass, first, I'm going to
provide the value, the value we get from this
scroll, some type value, and I'm going to multiti it multiply and I want
to multiply with 2.5. Every time when I
scroll down my page, it's going to change the
value and it's going to multiply with 2.5 pixel, then provide the
unit PX. That's it. After set this file, if
I back to my browser, and try to scroll
down this page, here you can see the result. Whenever I scroll
down this page, as you can see, this text
add a new margin at top. At the same way, we
are going to move other elements at left
side and right side. Let me show you how. Let's
get to the studio code, and this time I'm going
to duplicate this line, and I'm going to target
the leaf Leaf style, and this time, I want to
move this leaf from the top. Hemo type style dot, top. Above that, here I
want to multiply with -1.5 minus 115 pixel. Here, I want to provide
negative value. So when I scroll down my page, it's going to provide
the negative value, dynamic negative value
to this top property. At the same way, I'm going to do this line, and this time, I want to move this leaf
element at lip side, PT and here, I'm
going to pass value, I am going to pass
the positive value. I'm going to set this
file. After set this file, let's back to the browser. But before I'm going to add something cools, it's necessary. Otherwise, it can throw error. So back to the browser, if I scroll on my page, here you can see, you
can notice the leaf. Whenever I scroll down my page, it provide little
move away effect. As you can notice, it move
away from this seam because here we use minus top value
and positive left value. That's why it move
upside and left side. At the same way, we need
to handle the hill five, hill four and Hill one.
Let me show you how. I'm going to duplicate
this line and this time, I'm going to target Hill five. I want to move this
hill five element left side and to provide
the same way too. It's going to move it lip site. Then I duplicate this line, and this time I'm going
to target Hill four, and I want to move this hill
four at opposite direction. So here I'm going
to use negative do, negative lift do at last, we have another
element which is hill five and I want to move
this element top side. It is the background hill. That's why I want
to move it top. So I'm going to
pass top property, top and here, I'm going
to change the value. I'm going to use only one pixel. Every time, according to the dynamic value, it
multiply with one. Oops, our background
hill is not hill five, it's a hill one, not five. It is the main dground hell. So after satisfy, if I back to the browser again and
scroll this page, now you can notice this
beautiful parallax effect. I hope now it's clear for
you how we can create it. Thanks for watching this video. Stay tuned for our next project.
6. Animated Eyes Follow Mouse Cursor: Hello guys. Nice
to see you back. Once again, I'm back with a new project related
Javascript animation. Today in this project,
we are going to create this beautiful
animated eyes. As you can see when I Huber my cars are on
this body element, this body tag, it follow
the cars are pointed. If I move the cars upside, it follow the upside if
I move the cars at p, it follow the lap side, also from the down and
also from the right. If I uber my color on
the face of this Imoge, you can see it changed
the facial reaction. Also it follow the mouse cursor. So today in this project, we are going to create this
beautiful animated eyes, which is going to follow
our mouse cursor. So let's see how
we can create it. Let's jump in the visor
Studio code editor. As you can see, side by side, I open my visual
studio code iter and my browser using
lip server extension, and I already create a TML
document named index dot TML. I already link this
TML document with the CSS file, style dot CSS. At first, inside the body tag, I'm going to create
a De Dev class and our class name is phase. At first, I want to
create the phase. Then inside this deep tag, I'm going to create
another D D class. In this section, we are going
to create Is of our pace. Then inside this section, we are going to create two Is DV Class I. I'm going
to duplicate this line. So we successfully
done our estable part. First, we create
a tag for phase. Then inside this past tag, we create a block for Is, and then we take to another
deep tag for two Is. Now, let's jump into
the style section. At first, I'm going to take
a universal selector star. Inside the alorss at first, I'm going to use
margin property. Margin zero. And then I'm going to use
padding property padding zero and box sizing border box. Next, I'm going to
starle the body tag, body inside the Caliss display flex, Justify
content center. I use flex container to align our face
center of this page. Next, I'm going to use
align item property. Align items center.
Minimum height, mean height. Hundred VH. I want to use whole webpage. That's why I use 100 VH. And our last property
is background. Background. For
background color, I'm going to use RGV
Value RGV for red, I'm going to use eight. And for green, I'm
going to use 84 value. And for blue, I'm
going to use 139. If I set this file, you can
see the background color. For this project, I'm going to use dark blue background color. And now I want to
style the pace part. So I want to style dot, face inside the Cali
recess, at first, I'm going to use
position property, position relative, and our next property
is Width, 300 pixel. Also I want to say height, height, 300 pixel also. Our next property is background. Background. And once again, I'm going to use RGV value. RGV for red Value, I'm going to use 255. For green value, I'm
going to use 198. And for blue value,
I'm going to use 54. If I set this file, you can see the square
box on your screen. And now we need to convert this square shape
into a round shape. For that, I'm going to use
border radius property. Border radius 50%. If I set this file, you
can see the result. And also, I'm going to
use display property. Display flex. Justify content center. Also I'm going to use Align
item property center. Hey, if you are not familiar
with CSS Flexbox and greed, you can check out my
responsive CSS course. So we successfully
shape our face. Now we need to put
mouth in this phase. For that, I'm going to create dot Pasol colon, before
selector, before. Then insert the cariss
as you already know, first, we need to take
a blank property, and our property
name is contained. Contained blank, then our
next property is position. Position absolute. And then I'm going to say
it height and width, Width, 150 pixel, height, 70 pixel. And now I'm going to
take background color. Background chocolate. If I set this file,
you can see a rectangular shape
middle of this face. And now we need to move
this phase little bit down. For that, I'm going
to use top value. Top 180 pixel. If I set this file, you
can see the result. Here you can see our mouth
look like a square box, and to create a
perfect mouth shape, we need to use border
radius property. At first, I want to set a
border radius in this corner. For that, I'm going to use
border bottom lift radius. Border bottom lift radius, and I'm going to use 70 pixel. If I set this file, you
can see the result. Then I'm going to duplicate this line and replace left with. If I set this file, here you can see it create
a smile shape, and now I want to change the mouth motion when I
open my cursor on it. For that, we need to create another selector.
Let me show you. Dot, face, colon
hover, Colon before. Inside the calices, I'm going to re use this
value and property. I'm going to copy
the property and Value. And paste it here. Now, one by one, I'm going
to replace these values. First, I'm going to change
top value 210 pixel. If I set this file and Ober my cars are on it, you
can see the difference. It's change the
position of mouth, and next, I'm going to
change this boer radius. Bottom bottom lip radius zero. Also, bottle bottom
right radius zero. If I set this file and
Ober my cursor on it, you can see the difference, but there is no transition
in this transformation. For that, we need to use
transition property. So here, I'm going
to type transition. Transition 0.5 second. If I set this file and
over my cars are on it, you can see the
transition effect. It takes 0.5 seconds to
complete the transformation. So we successfully complete
our mouth section. Let's jump into the I section. As you can see, inside the
I container, we have to I. So let's create the
Is of this pace. At first, I'm going to
style I section dot Is then inside the livers
is position relative, and I want to position
it top -40 pixel. I'm going to use display
property, display flex. Using this property and values, we successfully move our
I section in that place, not the middle of this phase. And then we need to create the I. I'm going to select Is class. Also, I'm going to
select I class. Then inside the calibrassO
first property is position. Position relative. And also I'm going to
say height and width for this I Width, e ty pixel, heightetipixl. After width and
height, I'm going to say background
color. Background. Why? If I set this file,
you can see the result. Basically, side by side, it creates two square box with a typical Width and height. And then I'm going to use this play property,
display block. Next, I'm going to use
border radius property. Border radius, 50%. If I set this file, you
can see the difference. Here you can see side by side, it creates two eyeballs, but there is no gap
between two eyeballs. So for that, I'm going to
use margin Bobbet Margin, zero and 15 pixel. If I set this file, you
can see the difference. Overall, this margin value provide 30 pixel space
between these two eyes, and now we need to create
the eyeballs for this eyes. At first, I'm going to copy this line. And I'm
going to paste it here. With I, I'm going to
use before selector, Cl and colon before. Then insert the
Cardiorss as you know, first, we need to
create a blank content. Contain blank. Our next property is position. Position absolute. And also, we need to place it. I'm going to use
top value, top 50%. Let 25 pixel and
for our eyeballs, I'm going to set with 40 pixel. Also height 40 pixel. Next, I'm going to use diground
color for our eyeball, background, and I'm
going to use RGV value. Argv, for green, I'm
going to pass 42. Then for red, I'm going
to pass 42 once again. Also for blue, I'm
going to pass 42. Set this file, you
can see the result. As you can see, it creates
two dark gray square box, but we need to make
it round shape. So I'm going to use border
radius Border radius 50%. If I set this file, you
can see the result. Here you can see our eyes
look down in that angle, but I want to change
the eyes looking angle, something in that position. For that, I'm going to use
transform property, transform, translate -50% for XX
is also -50% for Y xs. If I set this file, you
can see the result. Now it's loop in that angle. If I ber my curar in this emotive phase, you
can see the reaction. But the eiceball do not
follow the curar position. For that, we need
to use JavaScript. So we successfully
complete our styling part. In the next part of this video, we are going to work
with JavaScript. So thanks for
watching this video. Stay tuned for the next part.
7. Animated Eyes Follow Mouse Cursor adding javascript: Hello, guys, good
to see you back. This is the second
part of this tutorial, and at that section, we are
going to start JavaScript. So inside the body tag, here, I'm going to
type script tag. Script. And inside
the script tag here, at first, I'm going to select the whole body
using Qi selector. So to type document
dot Qui selector. Selected method. Then
inside the round dresses, I want to select the body. So inside the single code,
I'm type BO BY body. And then I want to run an evet. So to run an event, we need to use add
event listener method, some type dot at event listener. And inside the round dresses, here, I want to run
mouse move Evet. Inside the single code,
I'm type mouse move. Then after comma, here, I'm going to call a function and our function
name is eyeball. I eyeball and semicon to N line. Now, we need to create
this eval function. But the question is, what
I just basically do? Basically, here we
said mouse move event in whole page. I want
to say the body. It's mean, whenever I move my Karsar inside this body tag, it going to return
carsR exact location, such as XXs YXs, top position, right
position, et cetera. And every time if we move the
mouse inside the body tag, it's going to call this
function, this eyeball function. Now we need to
create the function. Here, I'm going to declare the function name function Ker
using function Q function, and our function
name is eyeball. As you can see, it
already suggests me because I call this function, so type I ball. Function and our function
name is eyeball. This function going to
handle the I movement logic. Then inside the cariors then inside the carliras
I'm going to declare a variable where and
our variable n is I EYE I equal to here, I'm going to type
document dot is elector. Then inside the round verses,
inside the single course, I'm going to target, these two
Is Som type is class name. I'm going to target
it using its class then song type dot EYE, and semicroon two in this line. Basically, it's going to
select those element who have class I and as you can see, and as you can see, we have to two deep element with class I. This line basically select
all elements with class I and return in
nodes like an array, we store the array
in I variable. Now we need to run a loop. We need to run a loop through
each of the I element. So here, I'm going to
run for each loop. I dot for each for each. Then inside the roundress again, I'm going to call a function. Function and inside the round
reress I'm going to pass I here we run a loop
for each of the Is. Next, inside the calices, we need to calculate the center position of the I element. In terms of XXs and YXs, XX stands for horizontal and YX stands for vertical
coordinates on the screen. So here, I'm going to
declare a variable. First, I'm going to
declare a Tlate X. This is for Xxsvdu Xs
position of I equal to heterotype inside the
round ress motype I dot, and I'm going to
use a method call get bounding client react. Type get bounding client react. Then I want to extract the
lift dot lit with that, I want to concatenate with
inside the round verses, I dot client width, client width, divided by, and I want to divide it by two. Now the quotien is
what that mean? Let me explain to you
what does that mean? What I basically do here. As I told you, here, we are going to calculate the center position of I element. First, we extract the X xs. Here we declare a
variable called X and inside the round
brass, at first, here we extract I dot, gate bounding client
react, dot lit. Now the question
is, what basically this method gate bounding
client react do? It is give you the position
and the size of the element, related to the viewport. I want to say the
browser window. It's written object like this, 100 top position 200 with 50, height, 50, et cetera. Here we extract,
basically here we extract the late edge of an I
element, this edge. Then we continate
with I dot client width divided by two.
Now, what does that mean? It client width returns the
inner width of the element. This method return the inner
width of this element. Suppose if the I
is 50 pixels wide, then it going to
return client with 50. Then I divide this 50
pixel width by two. I going to return 25. I mean it going to give you the horizontal center position. Hap up I width, give you the horizontal
center position of this I, this point. If you contatenate
both the values, lept H and the half width, it's going to return
the horizontal center of the IT line. At the same way, we need to
extract the vertical center. I duplicate this
section this time, I want to change the variable,
I'm going to make it Y. It is for YXs for
vertical direction. And instead of using lab value, I'm going to use top value, top and and now we have the top value and half
of the width and it's going to return the
vertical center of the I. The main conclusion
is X and the Y together give you the client x and client to I
of the I element. And these two coordinates
are used to calculate the angle from the
I to the mouse, so we can rotate the I
in the carret direction. So now we have the center
position of this I. Next, we need to calculate. We need to calculate the angle between the mouse and the I. For that, we need
to use math method. So here, I'm going to
declare a variable LET late and our variable is
radian because we are going to extract
the radiant value. Radian equal to heart. He I'm going to use a
method called math dot, and amotyp at an two. Then inside the rounderses
amotpevent pageY position. Event, page Y, Y position, minus YXs and comma. At the same way, we need
to extract the X xs. Event, dot, page x, page x minus Xs. Now let me explain this line. What we basically do here. As I told you, this line
calculate the angle between the center of the
I and the mouse pointer. Now the question is,
what is math atan two? It is an inviel
JavaScript function. It's written the angle between the positive Xs and the point, such as XY, and it returned
the angle in radiant value. It's help to find the direction from one point to another, handling all adin correctly. In this case, we are
finding the angle from the center of the I
to the mouse pointer. So this is our mouse pointer and this is the center of the I. So we need to extract
the angle, this angle. And here we did a elemistic. First, we need to
work on the X xs vdu. Then we need to
work on the YX d y. Here, we need to pass
this two parameter. Now, what does that mean? What is event pH minus X? It's mean how far the mouse is from the I horizontal at
horizontal direction, and this one is represent how far the mouse
is from the I vertical. It's going to represent
vertical direction. Basically, this one return Delta X value and this
one return Delta Y value. I know it sounds very technical, but this calculation
give us the result. Now the question is
why we calculate this? We use the angle to rotate the I so it points
toward the mouse cursor. Now we need to convert
this radiant value into degree value
because in our style, we need to apply degree
value, not the radiant. Here, I'm going to declare
another variable AET late and our variable name is root T.
Late root means rotation. Inside the rounds, first, I'm going to pass the radian. Radian multiply with
inside the rounds, 180 divided by math dot Pi. Dot Pi. Then I'm going to close the round brass and here I'm going to type, I want to multiply with, I want to multiply
with minus one. Then I'm going to
close the round brass. Then outside then outside
the round process, I'm going to add plus I'm
going to conggnate with 270 and semicon
to end this line. This line convert the angle
from radiant to degree value. After that, it
adjusts the rotation to make the I point
correctly at the moms. Basically, here
we use a formula. Degree equal to radiance, multiply with 180 by Pi. So this is what we do here. After that, we multiply
with minus one. Multiply the angle by minus
one to flip the direction. Here we flip the direction. This is needed because the
screen coordinate system is sweeped vertically compared to the standard mathematical
coordinates store. Without this, the I could
rotate in the wrong direction, and then we add to 70, add to 70 degree to align the starting point of
rotation with the top. Now the question
is why we use 270? Why we use this vedo? We can use anything, but why? Because in CSS, zero
degree is facing right, 90 degree is facing down, 180 degree is facing lift, and 270 degree is facing. It will ensure that
the I directions start from the top
and rotate correctly. First, we convert the
radiance in degree. Then we flip the direction
using multiply minus one. Then we flip the direction
for cark visual rotation. At at last, we align
the rotation with the default facing up of the I. I know it sounds
very technical. Now we have the I
rotation value. If you want to print this
value in your console, you can, but I'm not
going to print it here. Next, I'm going to apply
this rotation value to our I element using style
method. Let me show you how. Here our type variable I, dot, style, dot, and I want to
apply transform property. Transform, equal
to here, I'm type. Inside the double codes,
I'm going to pass a string. Inside the double code, I'm going to type
rotate, rotate. Then inside the
round grass, again, I'm going to use double codes and inside the double
cos I'm to type space, concatenate with here I'm
going to pass degree value. EG and semicoront in this line. And I'm going to set this file. Now I press set this file. If I hober my cursor
on this body section, now you can see it
follow the cursor, the eyeballs follow
the cursor pointer. So this is how we can achieve animated eyes follow mouse
cursor if it this animation. So I hope now it's
clear for you, thanks for watching this
video SaduneFw next project.
8. Colorful text animation: Hello, guys, good
to see you back. Once again, I'm back with a new JavaScript
animation project. And in this tutorial, we're
going to create a beautiful, really cool text color effect with CSS animation
and Javascript. Here you can notice the color of the letters change randomly, and it's blinking also randomly. We will generate a random
animation duration. Also animation delay
to create this effect. So let's jump into the results stdio code editor and
see how we can do that. As you can see, side by side, I open my Visual
Studio code editor and my browser using
if server extension, and I already created
an HTML document named index dot HTML. Then at first, inside
the body tag, here, I'm going to take
Htag HT Element, this one, heading two, and I'm going to assign a class, and I'm going to assign text. After that, inside
this H two tag, I'm going to type colorful text. And I'm going to set this file. After set this file, you can see the taste in my document. Next, I'm going to jump
into the style CSS file. At first, I'm going to use
Universal selector star, and then inside the aliases, first, I'm going to assign
merging to this page, margin from all of the direction,
I'm going to use zero. Then I'm going to assign
padding, padding, and I'm going to
set padding value also zero from all
of the direction. Then I'm going to use
box sizing box sizing. I'm going to use
bottle box value. After that, I'm going
to use font famiy. Font. Family here I'm
going to use aerial font, area I'm going to set this file. After set this file,
you can see the result. Then I'm going to style
the body section, body. Then inside the Cali
re says, first, I'm going to define display, display and I want
to make it flex. After that, I'm going to
assign justify content, justify content center
align item center. We use it because
we need to align this element vertically
and horizontally center. After set this file,
you can see the result. Now it's horizontally center, but if we provide if we
provide minimum height, mean height, then if I set
it 100 viewport height, then set this file, you
can see the result. Now you can see it
horizontally and vertically center of this page. Then I'm going to
select H two tat using its tag name H two. Then inside the Kali
versus first property, I'm going to use position and I want to use
position relative. After that, I'm going to
use font size font size, and here I'm going to
use font size three EM. Then I'm going to use Ppertico
later letter spacing, and I want to use
letter spacing, 0.2 5:00 A.M. And then
I'm going to use text, transform property,
text transform, I want to make it uppercase. After that, I want
to define fontut. I want to use little bolder
font type font weight. I want to define 500. Next, I'm going to define color, color to this text, color to this text,
some type color. And here I want to use
kind of dark gray color. So I'm going to use hass tag F if if two. I'm going
to set this file. After set this file,
it's barely visible because of my background
color because how do not set any
background color. If I use dark background color, let me show you
background I'm going to set it hashtag 222,
dark gray background. If I set this for, you
can see the result. We done our CSS styling part. Now we need to jump into
the script dot js five. Now we need to put all
the text character inside this Pantag. At first, I'm going to
declare a variable, who's going to select the H
two element using class name, some type t, and our
variable name is text. Late text equal to document, CID selector, CID selector, inside the round brasses, inside the single codes, I want to select
the H two tag using its class name dot TXT, text and sinag in this line. Next, I'm going to
select the inner text of this variable. Here, I'm going to
type another variable. I'm going to declare LET
late and our variable is HTML HTML, span spans, TML spans equal to text, dot, inner ML inner DML, and semi going to this line. Now, if I set this file
and print in my console, some type console, dot log
inside the round process, if I print this TML
span variable HTML span and then set this file and
if I show you my Console, inspect, Console, here you can see it
print colorful text. Now we have the inert
text of this T eliminate. And now I want to
select all the letters. So here I'm going to
use dot speak method. Spit. And inside the
round roses here, I'm going to use empty string. I want to spit it using empty string and Semgrodon
to end this line. After set this file, here
you can see in my console, now we have to tell 13
character, including a space. Now it's create an array, and these are all
array elements. And then I want to
create a new array, which can wrap each
letter inside a span tag. And to create it, we are
going to use method. So to type dot map. Then inside this map method, we need to pass to parameter. The first parameter I
want to pass later. The second parameter,
I want to pass index and I stands for index. After that, here,
I'm going to use arrow function equal to arrow. Then I'm going to use Ciss. Then inside the Cali verses, I want to return, return. Then I'm going to use that tick is a template string method. Then inside the backticks here, I'm going to use span tag, span, then closing span tag. And here, I'm going
to use dollar sign. Then inside the aliases, I'm going to pass
the letter variable. I'm going to call this
letter variable letter. So I'm going to put all the
letter one by one inside this pen tag with the help of this function,
and map method. Now, I'm close this line, if I set this file, you
can see in my Console, Harry, create a new area. But you can notice now we put all the character
inside a span tag. Next, we need to
convert this array into regular string because we need to insert it
in our Eval page, and we will do that
using join method. So here t dot join. Then inside the roundresses, you need to pass empty
string as separator. Now after set this file, as you can see, now it
converts to a string. And it is ready to insert
to our estimate page. Now I want to put these estimL
spans inside this text. For that, here I'm
going to type text, and I want to set
the inner estimL some type dot inner DML equal to here I'm going to pass the variable name HTML span
and subcon to this line. Now if I save this
file and back to elements section and if
I open this two tag, now you can see we
have span tags and I put all the characters
inside the span tags. He will basically insect this
span tag using JavaScript. We do not use any estiML work. Now let's go to the CSS
to work on the animation. To set this file, I'm going to jump into this tile or CSS file. At first, here, I'm going
to create the keyframe. I'm going to type at
the rate keyframe. This is animation keyframe and our animation name
is animate text. Then at the Class
at 0% duration, 0%. And comma 20% duration
of animation. I want to say color, color, I want to say colored. I want to say the same colored, this one, this dark grey color. After that, I'm going to
duplicate this section, then at 21% duration
and and 79% duration. I want to use green color. I'm going to use has
tag zero F zero. And then I do get this section
and at 80% duration, 80%, and 100% duration of
animation, again, I want to use this
dark background color. This one, and I'm going
to sub this file. Next, I got to slate
this span tag, which is inside the two
tag of type two span. Then inside the caribrass first, I'm going to define position and I want to make it
position relative. After that, after that, I want to define animation, animation and animation name
is animation text, this one. I copy the animation
name and put it here. After that, we need to define the duration and I'm
going to set it 1 second, and then we need to define
the animation direction linear and Animation
count inflight. Now to set this file, you can see the green color animation. And now I want to add different animation duration
for each of the letters, and I want random values. So if I reload my page each time you going to return
different result. For that, we need to go jump into the script dot Jas pile, and here inside this Pantag I'm going to apply
style property. Style. Style equal to and here
inside the double course, I want to set animation
duration property. Animation, duration. Animation duration. Here, I'm going to use
inside the calibrases. I'm going to use random values, so I'm going to
use math function. Math math, math dot
random. This one. After that, after I
use math dot random, I want to multiply with. I'm going to use multiplication
sign with five do. Every time it's going to
return a different result, different different
duration value. After that, we need
to use for second because we need to provide
duration value in seconds. After set this file, now after set this
file, you can see randomly growing the
characters one by one. We don't know which
one going to do. Now let's change the
color of the text. For that, I'm going to
use filter property. After llicolin I'm going to
use filter property feeder, colon, and here I
want to use Hu value, HUE, Hu, cache, rotate. Hotate inside the
round bruss here, I'm going to use dollar
sign and inside the curses, I want to multiply index
means I multiply with 50. I'm going to subi
file 50 and also to pass and also in the
pass unit BEG degree, 50 degree. I'm going
to set this file. After I set this file,
you can see the result. After chase the U lod value, this is how our
colors look like. Now the text are blinking
with random different colors. I hope now it's le for you how blinking text
animation works. So thanks for
watching this video, stay tuned for our next
JavaScript animation project.
9. Clip Path animation using JavaScript Part 1: Hello, guys. Good
to see you back. Once again, I'm back with a new project related
JavaScript animation. And today in this project,
we are going to create this beautiful scroll
text animation. So as you can see,
when I scrolled down my page, otherwise, scroll up this page, you can see it increased the circle radius. We had to roll two circle at two corner at top left corner
and bottom right corner. It is a key path animation
effect with JavaScript. At first, we have the big
heading center of this page, and when you scroll
down this page, those two circle get bigger
and overlap with the text. Now you can see in
overlapping area, we have the text stroke. It covered the test with stroke and create this
beautiful effect. This is what we are going to
build today in this project. Let's jump into the
result studio code io. So finally, I am in my
sul studio code editor. And as you can see in my
current working directory, I already create scrip dot
js file and style CSS file. And now I'm going to link this to file with this document. At first, I'm going to link
stylet CSS file type Link. Inside this link tag, I'm
going to pass style dot css. Then inside the body tag here, I'm going to use Scripg script. And as a source here, I'm going to pass script dot js, this one, and I'm going
to sub this file. Then inside the body tag here, I'm going to take a section tag. Section, this one. Inside this section tag, first, I'm going to take a H two tag, H two and herald type scroll. Then after that,
I'm going to use deep tag for two
circ some type D, and in this deep tag,
I'm going to assign a class class circle. Then I duplicate this dip tag. Now we have total two
deep tag for two circle. Basically, I'm going to name it circle one and this
one is circle two. Then I'm going to set this pile. Now, let's jump into
this tile or CSS pile. At first, I'm going
to select universal selector start then
inside the arises. First, I'm going
to assign margin. I'm going to say margin zero
from all of the direction. Then I'm going to say padding. Padding, all of the direction,
I'm going to assign zero. Next, I'm going to
assign box sizing. Box sizing, here I'm going to use Border Box probity,
bottle box value. After that, I'm going to assign font valle and I'm going
to use Aerial font area. After that, I'm going
to select the body tag. Body. I'm going to
style this one. Then inside this body tag, I'm going to assign height. I'm going to assign minimum
height, minimum height, here, I'm going to assign
it up to 200 VHt height. After that, here, I'm going
to select section tag. Now inside the
section tag, first, I'm going to define top
position from the top, I'm going to assign
zero from the left. As I'm would assign zero. We are going to start
our section tag from this corner at
the laptop corner. Then I'm going to define
height and here I'm going to define height 100
V viewport height. Then I'm going to define
dground color background, and I want to use dark
dark gray background. So I'm going to type has tag 333. I'm going
to set this file. After set this file, if
I back to my browser, if I open my browser, this is how it look like. Here you can notice this
scroll bar because here we assign 200 VH viewport
height to our body tag. That's why we have
this scroll bar. This is our section tag, which height is 100 VH. Now you can notice
when I scroll my page, our section tag go upward,
but I don't want it. I want to fix this
section element at that place, for that, I'm going to use position, position, and I want
to use fixed position. Now to define the position, also, I'm going to define wet. I'm going to type we and
here I'm going to use 100% wet hundred percent.
I'm going to set this file. Now I set this file if I back to my browser and if I try
to scroll down this page, yes, we can scroll,
but our section tag fixed to this position.
And this is what we want. Now, let's get to the the
studio code inter again. Next, I'm going to
cargt the H two tag, the H two tag, which is
inside this section tag. After that, I'm
going to type space, I'm going to type H two,
then inside the car vis, first, I'm going to
define position. Position, I'm going
to make it absolute. Then after that, I'm
going to define to, to, and here I'm going
to assign to value 50%. Then I'm going to define
transform property, transform and here, I'm going to use transform
translate translate Y, translate Y -50 perse. After that, I'm going
to define W W 100 pers. Next, I'm going to
align the text, Sletypetext, align,
and her type center. After that, I'm going
to define font size. Font size, and I
want to make it. I want to make it 18:00
A.M. And at last, I'm going to define color, color of this font, color, and I want white color. For that, I'm going to
type has tag if if if. I'm going to set
this file. I'm set this file if I back
to my browser, This is how it looked like. Let's reduce the size little
bit. It's look too big. So I'm going to make it 17 Em. I'm going to set
this file again. Next, I'm going to work
on this circle one. I'm going to select circle one, inside the car Libs, first, I'm going to define position, position, and I want
to make it absolute. After that, I'm going
to define width Width, here I'm going to use
100% width, 100%. Then I'm going to define
height, height also 100%. And next, I'm going to define the background
color, background. And for background color, I'm going to use kind
of green variant color some type 22e, 760. This green color variant. But before I satisfy, we
need to make it correct. It's a class, so you
want to use dot, and I'm going to satisfle
After satisfied, if I back to my browser, here you can see
the green element. You can see the green element
above the section tag. I covering the
whole section tag. And now I want to clip
this green background. I want to show only the
circle at the top lip corner. For that, let's back to
the Visal studio code, and this time, I'm going to use the property call
clip path clip path. Then here I want to create
a circle, some type circle. First, I'm going to
define the radius, which is 150 pixel ph at, and I want to place it zero from the top and from the
left, also zero. Now after set this file,
if I back to my browser, this is how our
circle look like. Lip this diagram with circle. Now I'm going to
do the same thing for the bottom right circle. For that, I'm going to duplicate this section and this time I'm going to
select circle two. Also, I'm going to change
the position of this circle. First, I'm going to
change the position. I'm going to make
it 100% by 100%. After that, I'm going to
change the background color. I'm going to make it a B six, two E. I'm going
to set this file. After set this file, if
I back to my browser, this is where we place
the second circle. Basically, here we
clip the second circle deep background and create this theta circle at that pace. Now we have the orange circle
at bottom right corner. Basically, here we clip the second circle background and test it at that position. Now I want to
increase the size of this circle when I
scrolling to this page. For that, we need to jump
into the JavaScript. Let's back to the studio code again and jump into
the scrip dot js file.
10. Clip Path animation using JavaScript Part 2: And here we are going to start with targeting this circle. First, I'm going to
declare a variable late and our variable
is circle one. Circle one equal to, I'm going to pass
document dot ir selector. Coy selector inside
the round bases inside the single course, I want to select this circle, circle one, circle one. Then semicon in this
line then I duplicate this section and this time I
want to select circle two. This is circle two and also I'm going to change the
class name circle two. Next, I'm going to
listen scroll event. I'm going to tie Window,
dot even listener. Inside the rounds, inside
the single course, I want to activate
scroll event SCR OL L, scroll, and then I want to use a callback
function for that, I'm going to use arrow function. Inside the Carlss then here, I'm going to declare
a new variable late and I want to
extract the scroll value. Sometime name scroll, scroll value equal
to Window scrollY. So basically, we are going
to extract the value from the top of the window
and scroll bar. And as we scroll down,
this value increases. And if I scroll
up, it decreases. So it's changeable value. And we are going to
use this value to change this circle radius. So next, I'm going to type
circle one dot style, style, dot, clip path, clip path, equal to, and to use
tramped literals method. I use backticks.
Inside the back ticks, I'm going to type circle, then inside the round brass, here, I'm going to
use taller sine. Then inside the clivss here, I'm going to do a calculation. We're going to add 150. It is the default
radius of circle. With that, I want to
add scroll value. This one. With that, I want to multiply
this scroll value with zero point with 0.75. After that, we define
the pixel. It's a pixel. It's a pixel value
at then we need to define the position position
of the circle centered. And as you know, we
place our first circle at zero and zero, and semi going to end this line. Here we extend the radius. First we define, first we pass
the initial radius value, which is 150 pixel, then we add the scroll value, which you get after
scroll the scroll bar. And then we multiply
this scroll value 0.75. And as you know, when
you scroll down my page, otherwise scroll the
page, it increases. So let's try that. Set this file, if I dug to my browser and try to scroll
this page, as you can see, after scrolling, it increases the circle size and
copied the text. Until you completely
scroll down the page. And if I scroll up this page, as you can see, it reduce
the circle radius. So when we scroll
down, it increase the radius of the circle
and when we scroll up, it decrease the
radius of the circle. Now, let's do the same thing
for the next second circle. So for that, we
need to jump into the studio cod eater again and I'm going to
duplicate this line. After that, I'm going to select the second circle
and apply this style, and this time, I want to just going to
change the position. Here, we need to make it 100% percent from the left
and 100% from the top. That's it. And I'm
going to set this file. After I set this file,
lets that to the browser. Now you can see when I
scroll down my page, it increase both of
the circle radius, and when I scroll up this page, it decrease both of the circle. Next, we need to make this H two element colored transparent. For that, let's go to the
strat code here I'm going to jump into the index
table file and I'm going to copy this code and I'm going to place it inside
this circulative element. Also in the circle to elemate circle one and circle
two, both the elemate. Then set this file and
back to style or CSS five. Next, I'm going to target
the H two element, which is inside
the second circle and for circle deep
some type dot, circle one, space H two, coma. Next, I'm going to target dot
circle two, space, H two. Then inside the carlrassF I'm
going to change the color. Color, I want to change this
circle color, transparent. Transparent, and then I want
to add stoke on this text. For that, I'm going to
type webt take stroke, dash, stroke, this one, and here I want five
pixel take stroke. Five pixel takes
stroke and also, I'm going to define color. I want to use the gray colors
of the type Haztag 333, and I'm going to set this file. Now, after set this file, I back to my if I back to my browser and scroll
down this page, here you can see we achieve
the desired result. Once this circle interst
with the H two element, then H two element
has this effect. That is happening because we add a stroke around
the H two tag, which is inside the circles, and we make the
color transparent. And the white H two
element inside here, it is outside the
circle element. So I hope now it's clear
for you how we can build this beautiful
Javascript animation. So thanks for
watching this video Stune for our next project.
11. Scroll Trigger animation part 1: Hello, guys. Good
to see you back. Once again, I'm back with a new tutorial related
JavaScript animation. Today in this tutorial, we are going to create
Scroll Tigger animation. Yes, we are going to create ScruL tigger animation
without using any library. We are not going to use fair. We are going to use
PO JavaScript code. As you can see,
whenever I scroll down my page at the second section
reach certain distance, now you can see the animation. It is transform animation. If I scroll down my
page a little bit more, now you can see it's
scaling animation. And if I scroll down
it a little more, now you can see it's
rotating animation. So in every section, we use different
animation style. If I scroll up this page, also you can see it
vanish the animations. It vanish our contents. It is pretty similar with
schooltia animation. If you are familiar with that, then you know how we can
execute scroll tiger animation. But in this tutorial, we are going to create
it by ourselves. We are not going to use
any library for that. It is very effective animation
for single page website. Let's see how we can create this animation using
JavaScript, CSS, and DML. So finally, I am in my
studio code editor, and as you can see in my
current working directory, I already create script Dogs
file and style dot CSS file. And in my current
working directory, there is a folder called images. And inside this folder, we
have some images such as cats, horse, and lion, we are
going to use these images. So at first, inside
this estimate page, I'm going to create
some section. So I'm going to use
section tag, section. Then I'm going to assign
a class to this tag, class, and here I'm going to assign this is
section Section one. With that, I want to assign another class to this section, which is show Animate. Then inside this section tag, then inside this
section tag here, I'm going to take a H
one tag, heading one. And also, I'm going to define a class to this
heading tag class, and I'm going to
make it animate. Then inside the tag, I'm going to type first section. Then I'm going to
take a paragraph inside this section
using T tag, P, and also I'm going to assign a class and our class name
is animate, this one. Here I'm going to type
some dammitextOwise, you can type
animation on scroll. HTML, coma, CSS, and JavaScript. I'm going to set this
five. After that, at the same way, I'm going
to duplicate this section. Basically here we need to create total five different sections. I duplicate this section, and this is section number two, and I'm going to use
the same content here. I'm not going to use
this class to animate. I don't need this for now. After that, again, I'm going
to duplicate this section, and this is section
number three. Again, I'm going to
duplicate this section, and this one is
section number four. Also, you to make some
changes in heading one tag, it is fourth section. Fourth section. This is third section. Third section, and this
one is second section, and I'm going to sub this file. After that, I'm going to
duplicate this section aight. But this time, I'm going
to name it Section five. Inside this section five, I want to put some
images, not the text. Here I'm going to take
another Delement DV and our class name is class. Here I'm going to
assign a class images. Then inside this deep tag, I'm going to use some image tag. Here I'm going to
assign to three image. So type image IMG
image as a source, and as a source, here, I'm going to use the first
image, cats dot JPG. Which is inside
my images folder, images slash cat dot JPG. With that, also,
I'm going to assign a class and our plus
name is animate. I want to sub this file.
Oops, here I did a silastic. We need to provide the path
in source, not in old. I'm going to review
this file path from this place and I'm going to put it inside
this source attribute. Then I'm going to set this file. It's cats dot JBG I'm
going to sub this file. After I set this file, I'm going to duplicate this section. Next, I'm going to
assign the next image, which is hors dot GPG. Instead of using cat
type hors dot GPG. Then I duplicate this line
and this time I'm going to use the third image
lions lion dot JPG. I'm going to set this file. After set this file, if
I back to my browser, if I show you my browser, this is our browser, this is how our page look like. Next, we need to
style this page. Let's jump into this
style dot CSS file. Basically, we done our CSS part and we need to jump into
the style dot CSS file. As you can see, here
I openstyle CSS file. At first, I'm going to use, I'm going to import a font, which is pop ins from Google. After that, I'm going to
select Universal selector. I'm going to type star
inside the levoss. The first property I'm
going to use margin, margin, and I'm going
to say it margin zero. Then I'm going to
define padding, padding also from all
of the direction zero. It's a universal selector. That's why it's going to apply all the margin and
padding all the elements. Next, I'm going to
define box sizing, box, sizing, border box. After that, I'm going to
style the section tag. Section. Then the
Cali says, first, I'm going to at first, I'm going to use
display property, display, and I'm going
to make it flex. Then justify content,
Justify content center. Also, I'm going to type align I tabs center because I want to horizontally and
vertically center the elements. Then I'm going to
define flex direction, flex direction, flex direction, I'm going to use column value. After that, I'm going to define minimum height
to this container. Minimum height mean height, and here I'm going to use
100 V H viewport height. Next, I'm going to define
the background color. Background background and head, I'm going to use hashtag one, A, two, four, two D, this color code, this
dark gray color code. It's not gray, it's a
dark blue color code. Then after that, I'm going
to hidden the overflow. Sometime overflow hidden and
I'm going to set this file. After I set this file,
if I back to my browser, this is our section
tag looking like. We have PtolFive section
and for all this section, it apply this CS scope. That's why all the
section look like same. Now, let's style
the other section, we need to change their
background color. For that, let's back to the visual studio
code, and this time, I'm going to target section
two dot ACC, Section two. Then inside the Carlras
I want to change the background color
background color, and I want to use GBlorGBF red, I'm going to use 96
for green, here, I'm going to use 30, and for blue, I'm
going to use 158. It's a kind of purple color,
and I'm going to save it. At the same way, we need to change the other
section background color. So I duplicate this code, and it's for Section three. And for Section
three, I want to use background color,
this color code, Haz dag zero, five, six, nine, six, four. Then I'm going to
duplicate this line, and this time I'm going
to select Section four. And here I'm going to
say background color. Has tag, F if a six double
zero, this orange color. Next, I'm going to style
section number five. I duplicate this section and I'm going to change the background
color of Section number five and I want to make it here I'm going
to apply RGB color, RGB for red, I'm going to use 255 high value
for the green, here, I'm going to type
zero and for the blue, I'm going to pass 85. Then I'm going to set
this file this file if I back to my browser, here you can see
all the different color for all the sections. Now, we need to work
on the H two tag, and now we need to work on H one element,
heading one element. Let's jump into the
result studio code, and this time, I'm
going to target H one. Inside the colssF I'm going to define font size, font, size, I want to use font size 90 pixel and then I'm going
to define color font color, color and I want
to use white color sometimes hastagFFF I'm
going to set this file. Now, let's apply the font style. To apply the fonts style
inside this universal selectd, I'm going to use
font family property font family font family have to use font family pop ins. Pop ins, and it's come from
SanseriFont family. Senseri. And I'm going to satisfy to satisfy feed back to my brother. This is how our
font look like now. Next, I'm going to
style these paragraphs. Let's jump into the
code editor again, and after that, I'm going to
select the paragraph tag, P. Then inside the color recess, the first property I'm
going to use font size, and here, I'm going to
type font size 35 pixel. After that, I'm going
to define color, color and for color, I'm going to use
this color code, zero, zero E F, this
light blue color. After that, I'm going to
define font to eight. Font to eight, font eight, I want a little bolder, I'm to use 600. Then I'm going to
change the color of paragraph from Section two, Sum type dot EC two
space paragraph. Then inside the
color re says, here, I'm going to use color, and I want the same color code, so multi hastag zero, zero, a zero here I'm going to use green color variants somtHtg 00, this green light green color. Then I duplicate this
section and this is for section number three
and here I want to change the color FF zero, this light yellow color, then I'm going to
change color for section number
four, Section four, and I'm going to use
and at the section, I'm going to use a
different color 05, 69, 64, this color code, this dark green color code. After that, we need
to work on images. So at that section, first, I'm going to select SEC, Section five, then I want to select the images which is
inside the Section five. I want to target the
class dot Images. IGES. That inside the
clires Basically here I target physically
here from Section five, I want to target this
Dip element images inside the colses I'm going to use display
propriety, display. This play, I want display flex. With that, I want to provide a little gap between
these items, some type gap, and I want
40 pixel gap, 40 pixel. And I want to satisfy. After satisfied
back to my browser, this is how our paragraphs
text look like, and this is how our
images look like. Now, let's come
next to each other. Next, we need to work
on these images. We need to provide
maximum width, we need to set maximum
weight to these images. For that, let's back to
the users to your code. And here, I'm going to
select Section five, dot SEC section five, Section five, and
from Section five, I want to target the images. Images Div and from Images De, I want to target image
IMG in each tag. Then in the Cariss here, I'm going to use
property call max wed, maximum width, and
I'm going to set it 350 pixel. I'm going
to set this file. After I set this file,
if I back to my browser, now you can see the result. This is the first part
of this tutorial. At that section, we work
on the layout design. At the next part
of this tutorial, we are going to
start JavaScript. Thanks for watching this video, stay tuned for our next part.
12. Scroll Trigger animation part 2: Hello, guys. Good
to see you back. This is the second
part of this tutorial and at that section, we are going to
working on JavaScript. We're going to starting
working on scrolling effects. Let's jump into the studio code and jump into the
script dot js file. At first, inside
the script js file, I'm going to target
all these sections. I'm going to declare
a variable AET late and our variable
name is section. Section equal to here, I'm going to type document, quirselector Quielector
inside the roundresss inside the single course, I want to target all the section tags using
its class name section, section, and Semgon
in this line. After that, I'm going to type window dot on scroll method, on scroll, equal to here, I'm going to use arrow function. Then inside the Clss, basically, this function is executed whenever we
scroll through the page. Inside this function,
we need to look through all of the
section one by one. Hemotp sections,
I'm going to use, I'm going to use for
each loop, for each. Then inside the
round resses here, I'm going to pass section
AEC and arrow function. Then inside the Cal resis, here we look through
this section and each section named sec. Then I use a arrow function
for callback and inside it, I'm going to declare
a new variable T late and our variable
name is late. Here I'm going to declare a variable name scroll distance. Scroll distance equal to
window dot, scrollY, scroll Y. Basically this variable going to store the distance value of the scrolling from the top of the screen to
how much we scroll, it's going to store the
value at that variable. Next, we need to retrieve
section distance. I will declare another
variable late and our variable name is
six section distance. Section distance equal to
sec dot, offsite, talk. And so we're going to this line. This offset property
is the distance from the section outer border to
the top edge of its parent. Let me explain
this with example, what is Oset top value? Here you can notice
the distance. This is our first
section and this is our second section and
the distance between the browser top position to second section top position is called offset top distance. We need to extract this
scroll distance is equal to the distance from the
to the top of the page. I want to apply some sty on this second second
section element. The same thing, we
need to apply for third section and fourth
section and fifth section. So whenever we achieve
certain distance from the section from the
top of the browser, then I want to
trigger a animation. Otherwise, I want
to trigger a style. Basically, it's
pretty familiar with scrotal animation in Giza. But here we are not going to
use any library for that. We are going to use
Raw JavaScript. Let's back to the studio code. And here I'm going
to use condition. If inside the roundresses
scroll distance, scroll distance greater
than equal to sec distance. Then inside the Carl says, here, if this condition is true, then here, I'm going to
type sec dot class list. I want to add a class. Class list dot add. Inside the round ss, here, I'm going to define a class and our class name is show animate. Show animate. And semi go on to s line. As you can see, I
distance squals equals to the section
distance, otherwise, greater than section distance, then the IP statement
will be execute. Now let's go to the browser and see when this condition
is happening. So here int top page. Sorry, top section. The section distance
is the fixed value. The distance between top and the second section is the
height of the first section. It never change unless
we change the height. Meanwhile, the scroll
distance is changing value. When we scroll down
the page, otherwise, scroll up the page,
it's changed the value. In some point, those two
value are exactly equal. This is where the IP
condition becomes true, and that will happen
until we scroll down it up to top edge
of the second section. So whenever it touches the
top edge of the browser, it triggered the animation. To clear this concept more, let's inspect the page. Here I'm going to
inspect the page. Now here you need to close
look on the second section. Here I scroll down my page and the sections touch the top. As you can see, it's
not working because I did some syllamistic later
jump into the code editor. Yes. This is the syllabistic.
It's not a class. It's tag. We need to select it using tag name because if I show you my index Still
page, it is a tag Name. We do not use any class name
to select this element. First, we need to use tag name and also we need to
make some correction, the spelling of distance. DI, not E, distance, DI, this one, and we need
to set this file again. I'm going to set this file
and back to the browser. This time, if I
scroll down my page and hit the second
section, top position, touch the top of the browser, then you can see
it added class to our section in our
second section. At the same way, if
I scroll down it more a third section, top position, touch this
section, touch the top. Now you can see
this time, again, it add a new class. In our section three. Also, if I scroll down it
a little bit and again if the fourth section top position
touch the top of browser, you can see it add in class. This is how it's
work. After that, now we need to target
this show animate class and style this section and
implement the animation. We are going to do
it later before, but before I want to set some condition in my Javascript,
let me show you what. Let's jump into the studio code and and here we need
to handle the s part. So to type s inside the calices. This time, I want to remove
this show animate class. If the condition is not match, so I type SEC section
dot class list, dot, this time I'm going to
use remove method, remove. Then inside the rounds, inside the single course, I'm going to pass this
class name, show animate. So whenever condition
is not true, then it's going to
remove the class from this section and semicon
to end this line. Let's set the file and
back to the browser. Now, you can notice if I scroll down my page
and the condition is true, as you can see, it at the class through animate
in our section two. But if I school up this page and this condition become fails, again, it removed the
class from this section. At the same way, if I
scrolled on the page and Section three touch
the top position, now you can see it at
the class, show animate. If I fail the condition, you can see it remove
the class from here. Using it, we can
trigger the animation. Also we can remove the
animation from our sections. Now before I work on this class, I want to set another condition. Now I want to add the class
before this third section, otherwise, second
section reach the top. I want to add this class, show animate in our second
section when it reached this distance before we touch
the URL bar of the browser. For that, just need to minus. From the distance here, I'm going to minus
150 pixel, 150 point. If I set this file and
back to the browser, now you can notice Weboy
scrolled down my page and this section
reach that position, now you can see it at
the class show animate. At the same way, if I scroll down the page
and this section, the third section top
reach that position, so as you can see it at the class in this
section, show animate. We do that because
when I scroll down my page and the content of
this section become visible, I want to run this animation. That's why I do that. This is it for the second
part of this tutorial. At the third part
of this tutorial, we are going to style the class. We're going to style
Show Animate class in our style section. So thanks for
watching this video, stay tuned for our
next tutorial.
13. Scroll Trigger animation part 3: Hello, guys. Good
to see you back. This is the third part
of this tutorial. In our second part, we learn how to add a class
in our section. If I inspect this section and scroll down this
page at certain point, if our second section
reach a certain distance, then it add a class in
our second section. Show animate. At the same way, our third section reach
certain distance, it add the class, show animate. And if I scroll up this page
and condition becomes false, then it removes the class
from these sections. Now now in the studio, we are going to style
this class, show animate. Let's back to the
isal studio code, and I'm going to jump
into the style CSS file. After that, now at that section, I want to target the class of animate which is inside
the section tag. Here I'm going to type here I'm going to select
the animate class, which is inside the section, section past animate Animate. Then inside the Cariss
the first property, I'm going to use opacity. Opacity, I'm going
to make it zero. If we apply opacity zero, then it become hidden. Then I'm going to
apply filter property. Filter, and here I want to apply blur and I want
five pixel blur. After that, I'm going
to apply transition. Transition and for
transition I want, transition duration
is 0.5 second. If I set this file and
back to my browser, now you can see all the
elements are hidden. You cannot see any element which is linked
with animate class. Let's back to the code again. Now, whenever we
scroll this page, I want to make this
section visible again. I want for the HH two tag
and the paragraph tag. For that, we need to
target show animate class. So time section, show animate. Show animate space, dot, I want to target animate
class. I want to style it. Then inside the
liver says, first, I'm going to make opacity, opacity, I'm going
to make it one. Because I want to
make it fully opic. Basically, I want to say I
want to make it visible again. After that, I'm going to apply
filter Filter, Blur, blur. And here I'm going
to pass zero pixel. I'm going to set this file. After I set this file,
if I back to my browser, now you can see
whenever I scrolled on my page and this
section is active, now you can see it
appear the text. So when the show animate
class added to this section, then it's going
to show the text. So as you can see,
whenever I scrolled on my page and the third
section is active, it shows the content. At the semis work
for fourth section. And if I scroll up this page, as you can see it hide the text, it become invisible
again now you might have why the first section
is already visible? Because if I show you my
index dot estimate file, as you can see, her use
show animate class. We manually pass this
class at that section. That's why our first section
contain all become always visible and now we can add different effects
in different sections. Let's work to the CSS file, and now I want to target the animate class which is
inside the second section. So type dot SEC section two, and from here, I want to target the animate class, animate. Then inside the Carras I want to use transform
property, transform, and I want to move
this element at 100% in excess at
excess direction. I'm going to use translate
X, translate X, 100%. Then I must this file. I set this file, if I
back to my browser, now you can notice let's move this element 100%
at XX direction. Now, whenever I
scroll this page, I want to move this element from this position
to zero position. For that, I'm going to
duplicate this section and whenever the show animate class is active inside this section, some type, show
animate, show animate. Then I want to make it 0%, otherwise, zero, simple zero. And I'm going to set this file. After I set this file,
if back to my browser, now you can notice whenever
I scroll down my page, in our second section, it's
come from this direction. At the same way, we can add different effects for
our different elements, such as third section. So let's do that. Then I'm going to
duplicate this section, and for the section three, then I'm going to target
the section three, and here I'm going to
use scale property. Scale. At first, I want to scale down the heading
tag and the element. I'm going to make it 0.70 0.7 time whenever we
act show animate class, in that case, I want to scale
up this element, scale. Here I'm going to use one Val. And I'm going to set this file.
Let's get to the browser. As you can see, when we're going jump into
the third section, it scale up the alienates when condition become
false, again, it disappear. Now, let's work on
the fourth section. Again, I'm going to
duplicate this section. And this time, I want to target fourth section here I want to apply rotate
property, Transform, transform, rotate
and by default, I want to rotate it 30 degree and whenever the show
animate class is active, I want to rotate to
the zero degree. I'm going to set this
file. After set this file, if I back to my browser, and reach the fourth section. Now you can notice this
element is rotating. Again, you can see this is
how it's rotate the content. Now, let's work on last
section, fifth section. In our fifth section,
we have three images. For that, let's jump into
the visual studio code, and first, I'm going to
duplicate this section. And here, I'm going to
target Section five, and at that section, I want to apply translate X
with rotate value. Translate X 100%, 100%. With that, I want to
apply rotate value, rotate, and I want to
rotate it up to -90 degree. Then here, I'm going to apply
translate g translate g, I'm going to make it zero. If I set this file and
back to my browser and scroll down to
the images section, you can see the result. Now I want to add little
delay between these images. Also in the paragraph. I want to say this paragraph. For that, here, I'm going
to use the animate class, which is inside
the paragraph tag, some type P dot animate. Inside the carvers, the property I'm going
to use transition. Transition the and I want to add 0.2 second transition delay. After set this file,
whenever I back to my browser and scroll
down this page, now you can notice
after H one tag, it's appear the paragraph tag because here we add detail transition delay
in this paragraph. At the same way,
if I'm going jump into the Fourth section, after I rotate the H one tag, it rotate the
paragraph because of this 0.2 second
transition delay. Next, I want to add little delay on image number two and
image number three. Let's back to the
user's studio code. If I show you my
index estimate page, as you can see here
inside this image class, inside this deep element, we have total three image. We need to target image
nth child two and three. For that, let's get to the
style SASS file and here. We are going to use
child selector, some type dot, which
is from Section five, some type section five, space, I'm going to target the
image, ING, image tag. Then inside the colon, I want to sag second
child some type N TH, nth child, Nth child, I want to target the second one, I'm going to pass to here. Then inside the carnivorous, I'm going to use property
called transition delay. Transition transition
delay and I'm going to pass 0.2 second
transition delay. Next, I want to select
the third child, three, the third image
here I'm going to add transition
delay, 0.4 second. I'm going to set this
file. After set this file, if I act to my browser and going jump into
the fifth section, now you can see here
you can notice we add detail delay on second
image and the third image. This is how we create this scroll trigger animation
without any library. We can easily do that
using GSAP animation, but here we do not
use any library. Here we use basic pure
JavaScript to do that and CSS. Thanks for watching
this video stay tuned for our next JavaScript
animation project.
14. Blinking star animation using JavaScript part 1: Hello, guys. Good
to see you back. Once again, I'm back with a new project related
JavaScript animation. And today, we are going to build this beautiful animated star
background using JavaScript. As you can see, there are a lot of star in this background, and all the star
blinking differently. And then we have this circle. And inside this circle, we have a text. Welcome to our page. And this text is floating
above this circle. And all the star
drinking randomly. If I reload this page
and a relate this page, as you can see, randomly, it changed the
position of the star. If I reload it again,
as you can see, again, it changes the position
of this star randomly, and all the stars are
drinking randomly. This is what we are going
to build in this project. Let's jump into the visual
studio code editor. So finally, we are in my
vis a studio code editor, and as you can see in my
current working directory, I already create index dot
EstimLFle styled CSS file and script doot JS file, and now I'm going to link style dot CSS file with
this estimL document. I'm going to type ink and here I'm going to pass style dot css. Then inside the body tag, I'm going to insert the
script dot Gs file. I'm going to type
Script tag, script. Then as a source is Rc source, I'm going to pass script dot js. I'm going to set this file.
After I set this file, I'm going to jump into
the body section. Inside the body tag here, I'm going to take
section tag. Section. Then inside this section tag, I'm going to take a H two tag, H tube here I'm going
to type, welcome. Welcome to our then here I'm
going to use Ba tag, BR. Here I use Bateg because
I want to break the line. Then inside the T tag, I'm going to take
a span tag, span. Then inside the Span tag, hemo
type, welcome to our page. I'm going to set this file.
After I set this file, if I show you my browser, this is how our web
page look like now. Now, we need to
style this section, going to style this text. So for that, we need to jump
into the style or SASS file. Then at first here, I'm
going to import a font, and our font name is Poppins. So I import these pop in fonts. After that, I'm going to use universal selector, song type, start, then inside
the crass, first, I'm going to define
margin to this page, margin from all of
the direction zero, then I'm going to define padding and also the direction I
want to use padding zero. Then I'm going to
use box sizing, box sizing border box. After that, I'm going to
define the font families, I'm going to type
font family here, I'm going to use Poppins font. Inside the single course,
I'm going to type P, O PINs Poppins and it's come from
SansarionFamily, San Serif. Next, I'm going to
select the body tag, body, and here inside
the alia says, I'm going to use ppotalOflow
overflow heading, and I'm going to set this file. After set this file, let's
style the section tag. Now I'm going to select this section tag using its tag name. I copy the section
tag and I'm going to select this section tag
in my style or CSS file. Then up that inside the arises, the first property I'm
going to use display. This play and I want
to make it flakes. A that, justify content,
justify contained center. Then I'm going to align this item align
items also center. Then I'm going to
define height, height, I'm going to define height,
100 viewport height. After that, I'm going to define background
color, background, and for this background, I'm going to use hashtag
222, dark gray color. I'm going to set this
file. After set this file, if I back to my browser, this is how our
page look like now. Now to order to create this
circle around the text, we will use the before pseudo element of this section tag. Here I'm going to type
section colon before. Then inside the car resis, the first property I'm
going to use content. I want to create
a blank content. Content equal to content
is a blank content. After that, I'm going
to define the position. Position, I want to
define position absolute. Then I'm going to defined, we. Here I'm going to define
width 30 viewport width. According to viewport area, it's going to change
the circle size. Then I'm going to define height. Also 30, it's Vw not H, 30, put W. Here I use similar height
and to make it squared. Up a that, I'm going to
define the border border, and I want five VW border
and I want solid border, solid, and our border color is, I'm going to use this blue
color variant for the border. After that, I'm going to define border radius, border radius. Here I'm going to pass 50%. Then I'm going to set this file, but before I set this file, I did a mistake, it's wrong
spelling it before E. Then I'm going to set this
file and back to my browser. If I back to my browser, this is how our
border look like. After that, we need to
add little box shadow. For that here, I'm going
to type box shadow box. Shadow, and I'm going
to use a value, this box shadow value, and
I'm going to set this file. After set this file, this is how our circle look like now
with this box shadow. After that, I'm going to style
this text, this H to tag. For that, let's back
to the studio code, and this time I'm going to
target H to tag, H two. Then inside the class,
the first property, I'm going to use position, and I'm going to make
the position absolute. Then I'm going to define
font size font size, and here I'm going to define
font size V W viewport, we. Then I'm going to define color, color, and I want to make
it color fully white. I use this simlor code, if if F. After that, I'm going to
define font to eight, font to eight, and I want a little lighter fonts
so I'm going to tie 400. Then I'm going to define text
align text align center. Also, I'm going to define
little line height line height. I'm going to pass line
height two M Z index, and I'm going to pass
five here, Z index five. Next, I'm going to
transform this text. I want to skew this
text a little bit, type transform
property, transform, and here I'm going to type
and Hembus skew value, skew skew Y, skew y
minus seven degree DG. Then I'm going to sub this
file and back to the browser. Now this is how our
text look like. Welcome to our page. Now you can see our text
is center of this circle. Also, we skew the text at minus seven degree and we
need to add some text shadow. Let's work to the studio code, and here I'm going to use the property called text shadow. So type text and
herm reuse this. This takes shadow value, and I'm going to set this file. After I set this file,
if I back to my browser, this is how our
text look like now. Basically, here I step by step, increase the take shadow value. If I show you, as you can see, first to use one pixel then two pixel then three
then four then five, and here use gray color
for the take shadow. Now, let's work on the San
tag, which contain page. For that, I'm going
to select H two, H two, inside the H two tag, I want to select the span tag. I'm going to use
its tag name span. Then inside the Calibra
the first property I'm going to use font weight. Here, I'm going to use
little boulder fonts so I'm going to type 700. Then I'm going to define
the font size font size. Here I'm going to
define font size three EM little bigger
than previous one. Next, I'm going to
define it take shadow, text shadow, and here I'm going to pass
multiple take shadow. I paste this code, and I'm going to set this file. After set this file if
five back to my browser, this is how our page look like. Now, it's too big. It's look too big
for this website. I think we need to reduce the size to reduce the
size of this circle, also the text content. So let's experiment with that. Instead of using, let
me show you first, I'm going to decrease the
size of this before element. Here I'm going to make it 20 V. Then I'm going to decrease
the size of this border. I'm going to make it three VW. After that, after that, I'm going to decrease
the font size. Here, I'm going to make
it five W. Then also, I'm going to decrease
the line height and I'm going to use 1.5 Em. Next, I'm going to
decrease the font size. Here I'm going to
use two EM font. Satify and see how it look like. After satisfy the back to my browser, this is
how it's look like. Now it's look perfect. Now I think it's look pretty
cool for this example. Otherwise, in our
previous video, it's look too big
for this example. Now we need to
work on animation. We need to work on
floating animation. So we're going to create
the keyframe for that. Let's jump into the
video studio code. So here, at first I'm type, add the rate keyframe keyframes. Then our key frames name is floating because it's
a floating animation. SmotypFLA TNG. Floating then inside the liss at 0% of duration with that
at 100% of duration. I want to apply
transform property, transform, transform
heterotype skew. Skew Y, skew Y minus
seven DEG degree. With that, I want to apply
another property, translate Y. Translate Y -20 pixel, 20 pixel. Then I'm going to duplicate
this section and at here, I'm going to type
at 50% of duration. At first, I'm going to
at 50% of duration, I want to change the
transit Y value. I'm going to make it positive. Make it 20 pixel. I'm going to set this file.
After I set this file, I'm going to call
this animation. I copy the animation name
floating and I'm going to jump into the two
tag, this selector. Here I'm going to call
animation property. Animation. First, we need to provide the animation
name which is floating. Then we need to define
the animation time. Here I'm to pass five second. Then we need to provide
the animation direction, which is is in out. After that, we need to
provide the iteration count, and I want to run
this animation for infinite time out infinite. I want to set this file.
After I set this file, if I back to my browser,
this is our animation look. If you want to make this
animation more faster, yes, you can just you need to reduce the animation
duration time. If I make it three second and then set this file
and back to the browser. Now you can see this is how we can increase the
animation speed. This is the first
part of this project. And the next part
of this project, we are going to creating
this start and also we are going to working
on JavaScript. Thanks for watching this video stay tuned for the next part.
15. Blinking star animation using JavaScript part 2: So if the previous part of
this tutorial we work on this floating animation,
text floating animation. Now we are going
to create the sir. We are going to create
this stir randomly. Let's go to the JavaScript file. I'm in my result studio
coditor and from here, I'm going to open
script dot js file. At first, at first, we need to select
this section tag. But for that, we need
to declare a variable AET late and our
variable is section. Late section equal to
document, dot, yy selector, then inside the round brss
inside the single codes, I want to target
this section tag, so I'm going to pass the tag Nin section and semiconn
to end this line. After that, I'm going to declare a variable, another variable, late and our variable name is J, late J equal to is
assigned with zero. Next, I'm going
to create a while loop and set a condition. Why J, less than 200. Y J less than 200 then inside the calibr I
want to create the star. So here, I want to
create stars to declare another variable late and
our variable name is sir. Sir, equal to document, document here, I'm going
to create element, create element, then
inside the round bases inside the single code I
want to create I element, I and semiconm to end this line. After that, we need to
create some variables that we need later
to create the stars. Here I'm going to declare
another variable late, late X equal to math, math, MD dot, floor. Then inside the round dresses, here I'm going to use
Matt random method. Math, math dot random. Then inside the round dresses, and I want to
multiply with window, inner with inner W and
semicon two in this line. I want to satisfy. Window
dot inner return the width of this browser window and
it's returning pixel value. Then we take the value and multiply with Md
dot random value. Next, we convert this value into intser using floor method. Next, I'm going to type, start, dot, style, dot, P equal to inside
the back ticks, I'm going to use dollar sign. Then inside the arises, I'm going to pass the
variable called X. X pixel. And semicon to this line. Then I'm going to
duplicate this section, I'm going to change the
variable name X to Y and also to change Window dot inner
height, inner height. I'm going to replace X with Y. Then instead of late, I'm going to use
to value T. Next, we need to create the width
and height of the star. For that, I'm going to
define another variable late and our variable is size. Late size equal to math
random function, random. I'm going to multiply with. Here I want to
multiply it with four. So we're going to end this line. And then we will use the size to set the
height and width. At first, I'm going
to define width of the star type star dot style. Start style dot weed, equal to inside the bat ticks. Then I'm going to
use Dollar sine and inside the clivus Head, I'm going to addition
one with the size, and we need to pass the vary in pixel Px and semicron
to this line. You can notice her addition with one because sometime math
dot random returns zero, and if I multiply
zero with four, also it's going to return zero. If we directly pass
only the size, in some case, it
can return zero. That's why he plus
zero with one. So the minimum value we
pass, it's one pixel. And if we pass zero, that's
not good for our project. To avert this situation, we
just use one value here. Then we need to do the
same thing for height. I do get this line,
and I'm going to replace and here I'm going
to replace with height. So now we have the position of this star and dimension
of this star. And now in appen the
stars in our section. For that here I'm going
to type section dot, apenhil method, append hide. Inside the round recess, I'm going to pass the star, star, and semicon
to end this line. Also, we need to
continue this loop, so I'm going to increment
the J variable, J plus plus. Until J value becomes 200, it's going to run the loop. So basically, it's
going to create total 200 star in
our background. Now if I going jump
into the browser and inspect this page, inspect, and show you this section tag, now you can see inside
this section tag, we have total 200 I element. Using ITAg we
create these stars. Now they are not visible because we do not
style these stars. We need to style all stars. Let's look to the
studio code again. Remember, all the star
have randoms type. They are not same. Their
size is different, their location is different, everything is different
from each other. Let's display this star. I'm going to jump into this
tile css file and here, I'm going to target the I tag which is inside this section. Section, then inside
the car levers. Here, first, I'm going
to use position. Position, I'm going
to make it absolute, position absolute, and then I'm going to define
background, background. And for background, I'm
going to use white color, so I'm going to use
this value HtgFFF. Also, I'm going to
define border radius. Border radius, I'm going
to make them circle, so I use 50%, and I'm going to set this file. After I set this file,
if I back to my browser, you can see all the stars in different size and
different locations. And now we need to
glow this star. For that, we need
to use box shadow. Now let's back to
the strial code. And here, I'm going to use this property called box shady, this one, here and here, I'm going to pass
this box shadow in. I'm going to set this
file. After set this file, if back to my browser, now you can see all
the stars are growing. Here you can notice the
growing effect of the stars. And now we need to work on the animation effect
on the stars. For that, I'm going to
create a new animation. Let me show you so here
I'm going to type. Here I'm to type key
frames, addate key frames, Addate key frames, and our
animation name is stars, stars inside the
carbss at 0% duration, I'm going to he put
opacity, opacity is zero. At that position, I want
to set opacity zero, then I duplicate this section. Then I'm going to duplicate
this section here at 10% of duration, I want to set opacity one. Then at 90% of duration,
90% of duration, I want to set opacity one EGI, at 100%, let me show you
at 100% of duration, I want to set opacity zero agi. And I'm going to call
this animation stars, copy the animation name, and here I'm going to
call the animation. Animation. First to provide
the animation name stars, then we need to provide
the animation direction. I'm going to pass linear. I want to run this animation for infinite time I'm
to pass infinite. I'm going to set
this file. I set this file if I back
to my browser. Now I set this file,
as you can see, nothing is happened because we did not set animation duration. And remember, every time
if we reload this page, it randomly create the star
in different positions. You can see the result and
we are going to provide the duration using Java State because we want to grow
the star randomly. We do not want to grow
all the star at once. For that, we need to
jump into the JS file. Here, I'm going to
create another variable, late and our variable
name is duration. Late duration, equal to, I'm going to use map
dot random method, Mt dot random, Random. Then I'm going to multiply with, and here I'm going
to multiply with two and semicolon to this line. After that, I'm going to apply this random value to
the animation duration. Sumtyp start dot style, that animation duration, animation duration equal to here we need to use backticks. Basically, it is
Tabit string method then inside the dollar sign, then ult to pass
dollar sign and inside the Cali ress I'm going
to provide duration, duration, and here, I'm going to addition with duration one. Then I'm going to pass means seconds and semicolon
two in this line. It's going to set
random duration value to our stars animation. So satisfy if I
back to my browser and now you can notice
now stars are blinking, but it inking randomly. This is how we create this
beautiful animation effect. Randomly we place the star in different position
of this background. Also, it ding the
start randomly. If I reload the page, now you can see now it plays all the star randomly
in different positions. I hope now it's
clear for you how we can create this beautiful
animation project. Thanks for watching this video, stay tuned for our next project.
16. Day mode night mode Road animation part 1: Hello, everyone. Welcome to the new lesson in this course. In this project, we
are going to create this interesting road animation. As you can see in this scene, we have a background
of sky, sun, and a roll, and two car
moving against each other. Also, background is moving. That's why it give us
a realistic effect. And whenever I click on Sun, it turns into moon and the
whole scene become dark. So this is basically dark
mode and light mode. We are going to switching
dark to light and light to dark with the help
of JavaScript. And it is a good example of
JavaScript toggle animation. So let's start so
as you can see, we are in my studio code editor, and as you can see in my
current working directory, we have index
stimLFlescre dot js file, and style dot CSS file, and we have total two image, big dot PNG, this image, and also we have a car dot GIA, this image, and we are going
to use both the image. Now, at first inside my index dot stimLFle
inside the body tag, I'm going to take a section
tag section, section, and I'm going to
assign a class class, and I'm going to name it SIM
then inside the section tag, I'm going to add another class. Here I'm going to add
a deep element, DV, and I'm going to assign a class to this deep element class, and the class name is sun. This de element is for the sun. Then I'm going to add
the background images. For that, I'm going to
take another Dev element, Dv Dt, and I'm going
to name it BG, BG stands for background. Then inside this DV element, here I'm going to
use total two image. IMG. Basically, I'm going to use the same image two times, so I'm going to tie car, it is for carimage cart GIF. And I'm going to assign
a class also class, and I'm going to
name it card one. Then I'm going to
duplicate this section, and this is for card two. Here I use Same
card and I'm going to move the cards in
opposite direction. Then I'm going to set this
file and back to my browser. Now this is how it look like. Now we need to jump into
the style CSS file. We need to start styling. Now, let's jump into
the style CSS file. Now we are in my CSS file, and I'm going to start styling. First, I'm going to select
the universal selector star and ins Cali the first property,
I'm going to use margin. From all of the direction, I'm going to use margin zero
to all of this element. Then I'm going to use padding, padding, I'm going
to pass zero again. Then I'm going to
use box sizing, box sizing border box. After that, here, I'm
going to target the scene, this one, the sin section. I copy the class name sine and back to the stylo CSS file. I type dot sin then
inside the Cariss the first property
I'm going to use position and I want
to make it relative. After that, I'm going to assign height to this
area, scene area. Height, here, I'm going to
use 100 viewport height. With that, I'm going to assign over property, overflow hidden. I hid in the overflow area. Then I'm going to assign
around a gradient background. Background here I'm going to use a gradient Video,
linear gradient, Soo typed, linear gradient, and I'm going to pass
three color code. Here, I'm going to pass this three color code and
I'm going to zip this file. After set this file, if
I back to my browser, this is how it look like. Basically, it's going to
provide me a sky view. Here we create a
sky for our sin, the whole sin, and next, I'm going to work on the sun.
We need to create the sun. For that, let's back to
the result studio code, and this time, I'm going
to target its class name. I'm going to target the D using
its class name dot N Sun. And inside the
carniv says, here, I'm going to use
property position, and I'm going to
make it absolute. After that, I'm going
to use top value. Top top, from top, I want to move it 100
pixel and from the lab, from the lab, I want
to move it 55%. Otherwise, 50%, you can
use it on your way. Next, I'm going to assign
within height to the sun with 100 pixel and also
height, 100 pixel. After that, I'm going to
assign a background color. Background for background,
I'm going to use hashtag if if if if if this color code. After that, basically
it's a white color. After that, I'm going to
assign border radius. I want to make it circles type border border radius and hero pass 50% and I
want to make it circle. After that, I want to
transform this element. But before I transform
this element, let's add little bog shadow. Next, I'm going to
add bog shadow. Box shadow box shadow. Here I'm going to
use box shadow, zero, zero, 50 pixel. Then I'm going to
provide the color. Hashtag, has tag,
and I'm going to pass if if if this color code. Next, I want to make cursor pointer when I move
my cursor on the sun. So I'm going to type cursor, and I'm going to
make it pointer. Now to set this file,
let's back to the browser. Let's see how our sun look like. So this is our sun, and
this is how it look like, and as you can notice, it's glowing because
of box shadow. Let's add little transition on this sun for smoothing
effect when I animate it. For that, I'm going
to type transition, and for transition, I'm
going to use 0.2 second. This is our transition duration, and I'm going to set this file. Now, let's work on the
background of this scene. Let's add the background image. So I'm going to jump into the is a studio code
eater and here, I'm going to target
the background using its class name Tat BG. Then inside the cars,
the first property, I'm going to use
position and I want to make it position absolute. After that, I'm going to
use another property Width, I'm going to assign Width, here to assign 100%, 100%. Then I'm going to
assign height, height, herm to assign height,
280 pixel pixel. Next, I'm going to
assign background, background and from background, I want to add the image URL, image URL, and here, I'm going to pass this image
big dot PNG, BG dot PNG. Then I'm going to
add background size, background size, and I want
to make it 1,500 pixel. This much of area. Next, I want to repeat
this background at XX direction to type background repeat,
background repeat. Here I'm going to pass repeat X, and I'm going to set this file. Now let's back to the
browser, how it's look like. This is how it's look like. Now we need to place the
background at bottom. For that, let's look
to the studio code again here I'm going
to type bottom. You need to position it bottom, so type bottom zero. Let's certify and see
how it looked like. After set bottom zero, if we back to my browser, this is how it looked like. Next, we need to move
this image at left side. For that, we need
to use animation. We need to use
keyframes. Let's do it. Here, I'm going to
create a keyframe at the ate keyframe and I'm going to name the
animation animate. Background BG. Then inside the carliss
at 0% of duration, I want to move this background. Here, I'm going to propriety
call background position X. I want to move
this background at XX some type
background position X, background position
X, zero pixel. Then at I duplicate this line at 100% of duration,
100% of duration. I want to change the position. This time, I want to
make it -1,500 pixel, and I'm going to set this file. After I set this file, I'm
going to call this animation. Here I'm going to
type animation. Our animation name is animate
BG Animate background. Then you need to provide
animation duration and I want to run it
for very long time, so I'm going to
make it 25 second. After that, I want to make the animation direction linear, and I want to run this animation for
animation infinite time, so I'm going to
make it infinite. I'm going to set this
file. After set this file, if I back to my browser, now you can notice this is how our background move
right to let side. It's going to give us
car running effect. Now let's look to the
user studio code again. Now, let's tile the cars. First, I'm going to target
the first card using its class name dot car one. As you can see here I use tal two card and
for the two car, we use the same
image, card dot GIA. Inside the Cress, first, I'm going to define
the position of the car position and I
want to make it absolute. Next, I'm going to
type bottom value, bottom and from the bottom here, I'm going to place it 20 pixel. After that, I'm going to
assign maximum width. Max with maximum width, I'm going to make it 200 pixel. Next, I'm going to
provide Z index, Z index, and Helm to pass one, and I'm going to set this file. After I set this
file, let's back to the browser and see
how it looked like. So this is where
we place our car. Now, we need to do the
same thing for this car, the second card, but we need to move this car at
opposite direction. Now, let's place the second car. So here, I'm going
to dug this section. And instead of using
class car one, I'm going to type card two, position absolute,
and bottom, here, I'm going to pass 50
and maximum is same, and z index value, I don't want z index, so I'm going to make it
and commend this line. And I'm going to sub this
file. After sub this file, if I back to my browser, this is where we place the card. Next, I want to move both the card from the
opposite direction. For that, here, I'm going
to use a value from late. I want to move our first card from the left side
tie from the late. I want to move it
-200 200 pixel. And our second car from
the opposite direction. So Hemoty from the
right from the right, I want to move it -200 pixel. If I set this file and
back to my browser, now you cannot see the cars because this time these
cars are out of frame. We move both the
car out of frame. We move our first car
-200 pixel and we move our second card -200
pixel at right side. Now, this is the first part. At the next part
of this tutorial, we are going to work on
animation of this car. Thanks for watching this video stay tune for our next part.
17. Day mode night mode Road animation part 2: Hello, guys. Nice
to see you back. This is the second
part of this tutorial, and at that section, we are going to start
with card animation. So let's jump into
the W a studio code. Here we place our first card p -200 pixel and our second
card right, -200 pixel. Now, both the cars are
outside of the road. Now we need to create
an animation that can move the car inside this road. Now let's create the
animation for our first car, Hebotype at the rate keyframes and our animation
name is car plan. Then inside the
calibras at 0% of duration here inside the calibrs I want to use
transform property, transform, transform,
and I'm going to use translate X because we need to move this
car at x direction. At 0%, I want to
make it zero pixel. Then at 90% and
100% of duration, 90% and 100% of duration, I want to transform this
element, the car element, somebody use transform
probability, transform, translate X. Then inside the roundss I'm
going to use lfunction CALC. Then inside the
round grasses, here, I'm going to pass
100 view port weed. H plus concatenate with 200 pixel and I'm
going to satisfy. At the same way,
I'm going to create the second animation
for the second car, so I duplicate this section
and I'm going to replace the animation name
Keyframe name car two here with the
translate X value, I want to rotate the car
in opposite direction. We need to use another
property called rotate Y, rotate Y here I want to rotate, the car element 180
degree DG degree. Also, in our elf function, we need to change the direction. We need to pass negative
Vu -100 vs and here, I'm going to concatenate
with -200 pixel. Physically, rooted y feed the car vertically,
here and here, I use the negative V 100 vw, not H. To replace HV W. Also in our first animation. And from this -100 VW
value, we -200 pixel. Also inoted this element, so I'm going to copy this value, and I'm going to paste it here. Now, this car, the second card, move right to the left side. Now let's call the
first animation. In our first car section here, I'm going to type animation. Our animation name is car one
and our animation car one, and our animation
duration is 18 second. With that animation,
direction is linear and animation iteration
count infinite. I'm going to sub this file. After set this file, if
I back to my browser, now you can notice
from the left side, this car moved to the
right side and it takes total 18 seconds to
complete the animation. Now we need to do the same
thing for the second car. This time we need to move the second car from the
right side to left side. As you can see, hero
use infinite value, so this car is moving
again and again. We need to do the same
thing for the car two. So let's jump into
the studio code, and here I'm going to call the
second animation card two. Sono type animation
and animation name is card two and animation
duration is tw second. If you use animation
duration quilt second, it's going to increase
the speed of this car. Then I'm going to type linear, Animation direction linear, then animation interaction
count is infinite. But before I set this file, we need to make some correction because hero use
wrong round dresses. We need to move the
inside this round basis and we need to separate
the rotate Y value. Now it's correct. I'm
going to set this file. After I set this file, if I back to my browser, let me show you
after set this file, if I back to my
browser, this is how it move both the card from
the opposite direction. You can notice the
right side card is much more faster than left side card because we use 12 second duration
for this card. So this is how we can
run this animation. Now, we need to work on
the day and night mode. If we click on this sun, I want to change to
day to night mode. For that, let's jump into the Visal studio
code eater again. Now we need to change
the scene into nightmde. For that, we need to jump
into this script dot Js file. And at first, inside
this script dogs file, I'm going to target the sun. And to target the sun, I'm going to declare
a variable C N is the cost sun equal to here, I'm going to type document, Hemotype document dot Kiri
selector, Kiri selector. Then inside the round dresses, inside the single codes, I'm going to select
the Sundiv using its class name sun and
semiconm two in this line. Then I duplicate this line
and I'm going to change the variable name here,
I'm going to make it. This time I'm going to this
time I'm going to select sin. Here I'm going to make it sin. Sing equal to document dot cod, selector here, I'm
going to type. Here I'm going to
target Sindep using its class name dot dot sin. Then I want to add an event. I want to add click
event, Song type, sun, dot, add event listener. Inside the round Bress, I want to add click event. Click. Then I want to run
and call the function. I'm going to type arrow
function round recess and here equal to greater than
sine for arrow function. Then inside the color recess, I want to add in class. I want to add in
class to our syndep. For that, I'm going to
type Sin class least, class least dot Toggle. Here I use toggle method
because whenever I click the toggle inside
the round brasses, I'm going to pass
the class name and the class name is night and
semicolon to this line, and I'm going to set this five. Whenever we click on
this Sandv element, it's going to add in class to this Sindiv element,
which is Night. If I click twice, then our towel method remove the class from this div element. That's why here we use tobul
now after I set this file, let's back to the browser
and inspect this page. After inspect this page, let's see is it worked
properly or not. Whenever I click on this
Sundev element, this de, as you can see, it added
class night Aptar sin. It added a new class Aptar sin. If I click this sun again, as you can see it
remove the class. Using this class, we can jump into the
night mode and again, we can jump into the D mode. Now we need to go jump
into this style of CSS file and we need
to work on night Mode. Now after the keyframes, I'm going to work on the SM for the nightmde type dot CN Night. Hit the scene
element, class Night, then inside the Caris I want to change the background
color. Background. Background, I want to
make it hashtag two, two, two, eight, double three. This navy blue color. Otherwise, you can use dark
gray color, it's up to you. I'm going to set this file. Now, if I going jump back to the browser and click the sun, now you can notice it's turn into this dark blue navy color, and it gives us night mode. Now let's back to the
Visal studio code again. Next, I want to move
the Sundiv element at lap side when I click on it. I'm going to dug this
section and this time, I want to select
the Sundiv element, which is inside the scene and the night class
is activated, then I want to target the
Sundiv element the SUN sun. Here I'm going to use the
property called lept. Now, instead of using 55%, I want to move this
element at 45%. With that, I want to
change the box shadow. Here I'm going to type
box shadow, zero, zero, zero, the box color is
Hasa if if a fully white. I'm going to set this file. Now to set this
file if I back to my browser and make
it day to night, now you can see this sun moved
to the left side, it 45%. It's moved to the left side
when I make day to night. Here, first we move this
element 45% at left side, then we remove the box
shadow and make it solid because we need to remove the growing
effect of sun. Next, we need to work
on the moon shape. For that, I'm going to duplic this section again
and this time, we need to work on before pseudo element of
the Sund element. So to type colon colon before. Then inside the calibraces, at first, I'm going to
create a blank content. Content is absolutely blank. Then I want to position it. I want to position
it absolute because I want to move this element with this sun when it
move 55% to 45%. After that, we need to place it. We need to place from the
top here I'm going to use -20 pixel and from the
left from the left, I want to place it 20 pixel. Then I'm going to define
within height to this element with 100%, also height, 100%. After that, I'm going to
define the background. Background. For the background, I'm going to use this
color code Haztag 22283. Basically, this background color match with this sin
background color, the night syn background
color because we need to hide this
portion of the sun. Then I'm going to
convert this square box. Basically, for now, it's a square box let
me show you if I set this file and back to my browser and click on the sun, now you can see a square
box which is above the sun and if I make it round, then it's going to
create a shape of moon. Let me show you how. So
if I use border radius, border radius, I'm going to
make it 50% or border radius, then I'm going to set this file. Now if I back to my browser
and click on this sun, as you can see, now this
shape turned into moon shape, the harp moon because now we
have another circle above the moon and this circle color is matched with this
background color. That's why it is invisible. That's why we can see
only the moon shape. This is how we can create this beautiful animation using
Java Strip, CSS and HTML. And this is how we can turn day to night and night to day. I hope now it's clear
for you how we can build this beautiful
animation project. So thanks for
watching this video Stune for our next project.
18. Circular navigation menu using javascript: Hello, everyone. Welcome to the new lesson in this course. In this project, we
are going to create this circular menu towel effet, this beautiful towel effect. As you can see, when I
click on this towel button, those six circular links appear, and it plays around
the towel button. And if I click it again, those items are go behind the towel button
and hide itself. To create this effect, we will use little
bit of JavaScript. Without wasting your time,
let's start the practical and see how we can create this
beautiful towel menu. So finally, I'm in my result studio cod
editor, and as you can see, I already create index
dot estimate file, styled cssfle and
scrip dot JS file, and I link all this file
with this estimate document. Now, at first,
inside the body tag, here I'm going to
take a container. I'm going to take a
deep container to type deep dot container. Deep container inside
this Dev element, I'm going to create
another DVelementF toggle. So type Dev dot Toggle. It is for the Toggle button. Then inside this toggle button, I want to add the
Toggle button icon. For that, we are going
to use this website. Ionic dot IO slash Lncons. We are going to get all the
icons from this website. To get the icons, we need to click on usage. After click on Usage, here, we need to copy the
two Script tag. So to select both the Script tag and I copy it and I'm going to put it inside this body tag, but before the
script dot js five. I want to set this file. Now we are able to use icons
from the website. Let's add the togle icon. For that, I'm going
back to the website and going to the icon
section and from here and from the
search section, I want to search for add icon. I'm going to use this
icon. I select this icon. And then I select this icon. From here, we need
to copy this code. I copy this code and back to
the salt studio code editor. Inside this toggle DV I'm
going to put this icon. I'm going to paste
this icon code. I'm going to set this file.
Then below the toggle, I want to add the menu. For that, I'm going
to use UL tag UL. Then inside this UL tag, I'm going to take LI tag. As I'm going to assign variable Css variable to the LI tag, so type style attribute, style, and heterotypei or variable name is I here I'm going
to assign value, somebody use colon and
her to assign value one. So this variable I equal to one. Also, I'm going to
assign a class to this UL tag class and
the class name is min. Then inside this list item, I'm going to add Nora A. Then inside this anchor tag, I'm going to add the icon. First, I want to
add the home icon. I'm going back to the browser. And from here, I'm going
to search for home. I'm going to use this icon, copy the code, and I'm going to put the code inside
this and get tag. That's it. I'm going
to set this file. Now I press set this file. If I back to my browser
and show you the web page, here you can see the toggle
button and the home icon. So I'm going to fast
forward this process, and I'm going to add all
icons one after another. I fast forward this process
and one after another, I add all the icons, such as camera outline, Parson outline,
uplanOline, mail outline, key outline, et cetera. So satisfy if I
back to my browser, this is how it look like. Now we need to start
this styling part. For that, lets jump into the user's studio code and jump into this styling section, the style page, style or CSS. At first, here I'm
going to import a font. I'm going to use pop in
fonts for this project, so I'm going to pass
so I'm going to import a font pop
ins from Google. After that, I'm going to use
universal selector star. Then inside the
Calibra says, first, I'm going to define
margin margin zero from all of the duction. Also, I'm going to use padding. Padding, also, I'm going to assign zero for all
of the duction. Let's it's going to remove
the margin and padding. Then box sizing, box
sizing border box. After that, I'm going to define the font family, font family. Inside the single course
I'm going to type pop ins and it's come from Sans font family Sansal I'm
going to set this file. After I set this
file, I'm going to open my browser and the
code editor side by site. Now, as you can see here I open my browser and code
editor side by side. After that, we need to
remove the list items. Next, I'm going to
style the list items. So I'm type LI tag, set the AI tag and from here, I'm going to remove
is style tag, List, style, and I'm
going to pass Nan wd. After that here I'm
going to select the anchor tag
using A and inside the Carlss I want to
remove the underlines. I'm going to use text
decoration, text decoration. I'm going to make
it none. Then I'm going to style the body tag. So to select body. Then inside the body tag,
inside the calices. At first, I'm going to
define minimum height, some type mean height, minimum height, 100 VH. Then I'm going to use display property
because we need to align the content center of the page type display and
I'm going to make it flakes. After that, justify
content center. Also align, align items center. With that, I'm going to add
an gradient background. So type background color. And here I want to use
linear gradient color, linear gradient,
then in the cools, I'm going to pass the
linear gradient value. For this gradient color, I'm going to use this value. 45 degree, I want to rotate this gradient
at 45 degree angle, then I use this color variants, light purple and red color. I'm going to set this
file. Up to set this file, it's not working because here we need to use only
background, not the color. Now, if I set this file, as you can see,
now it's working. It align all the it middle of this page vertically
and horizontally. Also, it changed the
background color. Next, we need to
target the container. We need to style this container. Let me show you this
continent element. For that, I'm going to
copy its class name and back to the style CSS five. Here I'm going to select the continent element and
inside the calibrass first, I'm going to define weed and I'm going to have
to pass 270 pixel. Also height, 270 pixel
is a square box. After that, I'm going
to use distal property, display, and I'm
going to make it flex, Justify content center. Align align IM also center. After that, also,
I'm going to define the position and I'm
going to make position. I'm going to make it relative. I'm going to set this
file. After I set this file, you can
see the result. And to understand the area how much area we use
for this container, you can use background
color for now. Let me show you somebody use background, you
can use any color. I'm going to use red color, ED I'm going to sell this file. After set this file, now
you can notice the area. It is for temporary purpose. At first, we create
a square box. Then we make it disfix to align the toggle icon
middle of this container. Now let's style
this towel button. We need to style this towel
button using its class name. I'm going to copy the class name and back to style or CSS file, and here I'm going to select the towel button using its class name then inside
the color recess at first, I'm going to assign
wet for this button, I'm going to use 70 pixel. Then I'm going to assign height. Height also 70 pixel. After that, I'm going to
define daground color. Background color, I'm going
to go with white color. White. Also, the next property, I'm going to use border radius. Border radius, I'm
going to make it 50%. After that, I'm going
to define color. Color, and here I'm
going to use color, dark gray, Hazteg 222. Here we use color puberty because icons are
literally fonts. After that, I'm going to use
display property Display, I'm going to make it flex, justify content,
justify content center. Align item also center. Then I'm going to
define the font size. Font size, I'm going
to make it 30 pixel. I think 30 pixel
is enough for it. If I set this file, this is how it looked like. Let's look good. Then I want to make cazar pointer when I hover
my casa on this element. So I'm going to take cars ar, I'm going to make it pointer. Also, I'm going to provide this data index
value S index 20. Then I'm going to use
transition property also transition and I'm going to
provide transition duration, 0.3 second. I'm going
to set this file. After set this file, this is
how our button look like. If you hob on my
curds are on it, now you can see our cards
are become pointer. That's the first part
of this tutorial. And the next part
of this tutorial, we are going to start JavaScript and also we're going to
work on this toggle button. When I click on this
struggle button, I want to make it a
sign, the cross sign. Thanks for watching this video stay tuned for our next part.
 Jayanta Sarkar, Behind the Code: Jayanta Sarkar