Transcripts
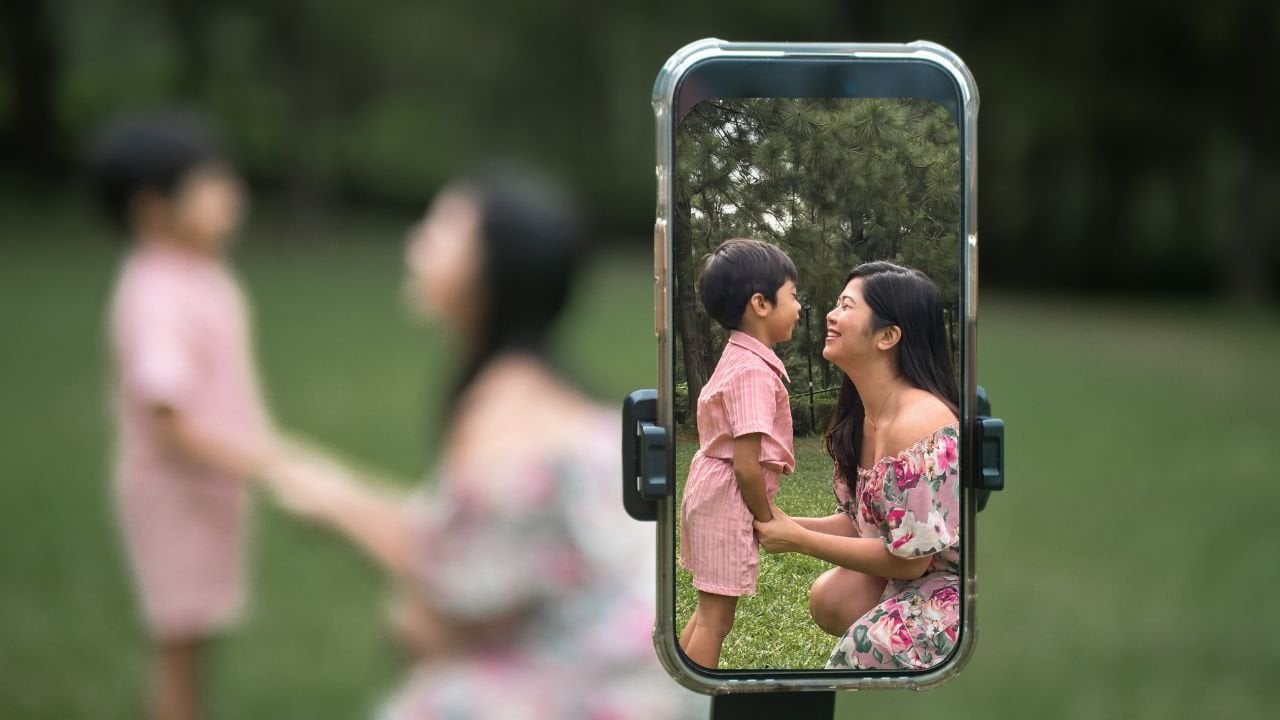
1. Class Introduction: Have you ever
looked at someone's iPhone photo and thought, Wait, how does it
look that good? The colors are vibrant, the lighting is perfect, and somehow it just feels like it was taken with
a professional camera. Meanwhile, your
photos, they're okay, but they don't have
that same wow factor. I know exactly how that feels
because that used to be me. When I first started
taking photos, I used to think the magic ended the moment I
hit the shutter. I believe that professionals
just had fancy cameras or perfect lighting every single
time. But here's the truth. Even the best photographers
edit their photos, not to fake the moment,
but to honor it. So once I embraced
editing as part of my creative process,
everything changed. My photos started
to feel more alive, full of warmth,
depth, and emotion. I realized I could turn an ordinary iPhone
shot into something truly beautiful without needing expensive gear or
complicated tools. And that's exactly what
I want to help you do in this class. Hi, I'm Rose. I am a mom, a photographer
and Skillshare top teacher. But more than that,
I am someone who deeply believes in the
magic of everyday moments. Over the years, I've taught
thousands of students how to capture beautiful photos
using just their iPhones. And in this class, I'll show
you how to bring your images to life through intentional
heart centered editing. In this class, you'll learn the essential editing tools that instantly make your
photos look better. How to fix dull lighting, adjust colors and enhance
tiny details like a pro, the secret to creating
consistent aesthetic edits, even if you've never
edited before. And most importantly,
how to develop your own unique editing style so your photos feel like you. By the end of this class, you won't just know how to edit. You'll start seeing your
photos differently. You'll understand what
makes an image stand out and how small tweaks
can make a huge difference. So if you're ready to level up your iPhone photography
and finally create scroll stopping photos that reflect your story and your
style, let's get started.
2. Why Editing Matters: Welcome to class. You're
one step closer to creating photos that don't just look
good but feel like you. Now I know editing
can seem a little intimidating at first. I get it. I avoided this part of the process for years,
telling myself, maybe if I just keep
practicing, someday, my photos will magically
look like the ones I admire. But that day never came. What did come was a
quiet realization. My photos didn't
need to be better. They just needed to be finished. Editing wasn't the extra
step I was skipping. It was the part where
the photo came alive. If I'm being honest, I
used to think editing was for the tech savvy
or the professionals. Younger me didn't want to learn anything with
sliders or buttons. She wanted the magic
without the effort. But life has a funny
way of changing us. Today, that same girl teaches thousands of
students around the world, not because she became
a perfectionist, but because she fell in
love with learning and with helping others see their
own magic in the process. Here's a little secret I
wish someone told me sooner. Those stunning scroll stopping
photos you see online, they didn't come straight
out of the camera. They were shaped, crafted,
loved into being. Not to fake the moment, but to reveal what it felt
like to be there. Editing is the difference
between this is what I saw, and this is how it felt. Think of editing like seasoning. The photo is already there. Light, subject emotion. Editing is just the seasoning, a little salt, a little spice, and suddenly the dish sings. It enhances the mood,
brings back the warmth, adds depth to the
moment you captured. And here's the best part. You don't need
expensive software. You don't need a desktop setup. Your iPhone in a free editing
app is more than enough. And don't worry. I'll walk you through everything step by step. Together, we're going to
transform your photos from flat to alive from nice to I
can't believe I took that. We're going beyond
filters and presets. This is intentional editing. Editing that comes
from your heart. So if you've ever
thought editing is hard, try replacing it with editing is the part
where I shape my story. You don't need to
get it perfect. You just need to start.
Now, in the next lesson, we'll explore the three
pillars of a great edit, the foundation that makes every photo feel
intentional and magical. I'll see you there.
3. Editing Essentials: Understanding Light, Color & Composition: Have you ever taken a photo that felt like a perfect moment, only to look at it
later and think, Why does this look so dull? Maybe the colors don't pop, the lighting feels off or
something just isn't working. That's where editing comes in. But let's get one thing clear. Editing isn't about
fixing bad photos. It's about enhancing
what's already there. A great edit doesn't
magically turn a bad photo into a masterpiece. What it does is
elevate a good photo into something stunning
and full of emotion. So what actually
makes an edit great, it all comes down
to three pillars, light, color and composition. Let's break them
down one by one. Light is everything
in photography. It sets the mood,
brings out the details, and makes an image feel alive. But sometimes your
camera doesn't capture light the same
way your eyes do. A very common mistake, photos that are either
underexposed or too dark or overexposed, too bright. The good news in editing, we can fine tune the light
using tools like exposure, highlights and shadows to bring back what we
actually saw in real life. Let me show you an example. In this family photo right here, I accidentally had my exposure
set to negative seven. I usually go for negative three
to avoid blown out skies, but I was caught up in the
moment and didn't realize it. Now, the photo feels a bit
too dark for the light, happy nostalgic
vibe I'm going for. So in this case, adjusting the lighting isn't just
about balancing brightness. It's about bringing the
emotion of the moment to life. Color isn't just
about aesthetics. It's what gives a photo feeling. It sets the emotional tone of
the image. Think about it. Warm tones like yellows
and oranges feel cozy, nostalgic and full of life. Cool tones like
blues and greens, create a calm, dreamy, or even moody vibe. High contrast adds
boldness and drama. Through editing, we
get to fine tune these colors so they match
the emotion we want to share. This is where tools
like temperature, vibrance and
saturation comes in. Now, let's go back to
our family photo again. Does the color reflect the
feeling of that moment? Remember, I wanted this photo
to feel warm and nostalgic. Right now, it's
looking a bit dull. So what happens if we
warm it up a little bit or add some vibrance and
saturation? Let's try it. Adjusting the temperature slightly, boosting the vibrance. Saturation, not so much. But now we're getting
closer to that cozy, heartwarming look I'm going for. See how subtle color tweaks can completely shift the mood. Last but definitely not
the least is composition. Even when you capture
a great moment, sometimes the way things are positioned in the frame
can feel a little off. Maybe the subject
is too centered or there's too much
empty space on one side. The good news, editing gives you power to refine
your composition. You can crop to create
a stronger focal point, straighten the horizon
to bring balance or use the rule of thirds to make the layout more
visually appealing. To continue with my example, let's go back to our family
photo one more time. Here's the original crop. There's quite a bit
of background space, and we feel a little
too small in the frame. Now, let's experiment. What if we crop in tighter to show more of our
faces and emotion? What if we align our
smiles along the rule of thirds intersections
to naturally guide the viewers' eyes? Just like that, the
photo feels more connected, intentional,
and expressive. Sometimes a simple crop makes all the difference,
and that's it. Light color and composition. These three pillars can
take your photo from nice to Wow with just a
few thoughtful edits. In the next lesson,
we'll dive into different editing apps you can use to bring
your photos to life, including some of
my favorite tools that are trending this year. But before we move on to
another juicy lesson, I want to invite you to pause
and do a quick self check. Take a moment to
look at a few of your own unedited photos
and ask yourself, does the lighting
need adjusting? Do the colors reflect the
mood I want to convey? The composition be stronger
with a simple rot or shift. Remember, understanding
what to edit is just as important as
knowing how to edit. And now that you've got a
fresh eye for the essentials, you're already
ahead of the game. Take your time, have fun
exploring your photos, and when you're ready, I'll be waiting for you in
the next lesson.
4. The Power of iPhone Editing Apps: Which One is Right for You?: Now that you know the three
pillars of a great edit, you're probably getting
excited to dive in. But there's one
big question left. Which editing app
should you use? It's no secret that editing can feel overwhelming when
you're just starting out. And to make it even trickier, it feels like the
universe throws every single editing
app ever made at you the moment you
decide to give it a try. It's kind of like walking into Baskin Robins for the first
time. So many options. So you end up stuck
wondering what to choose? Should you go for
something simple or something bold and
loaded with features. Editing apps are just like that. Each one has its own
flavor, its own strengths. So in this lesson, I'll help you figure out which one is
the right fit for you. I've tested a bunch of
mobile editing apps, both old favorites
and newer ones, and I'm going to break
them down so you can confidently pick the
best one for your style, skill level and workflow. Whether you're
after quick edits, pro level control or just something that
makes your photos pop, there's an app for that, and we'll find it together. Let's start with the
trusted favorites. These editing apps have
stood the test of time, and they're still
incredible this year. This one's already
on your iPhone, and honestly, it's
so underrated. Apple Photos is perfect for
beginners who want to make simple yet powerful adjustments without downloading
anything extra. You can easily tweak exposure, contrast, color, and crop. It's clean, quick,
and user friendly. Here's a photo I edited using just the built in
Apple Photos editor. Amazing, right? If you're
looking for more control, tro mobile is your go to. You can start for
free and unlock Pro level features
with a paid version. It's perfect for those building a consistent editing style
or personal aesthetic. You get tools like Selective
Edits, preset creation. And powerful HSL sliders, which means hue,
saturation and luminance. For example, in this photo, I wanted to desaturate
the greens in the background and brighten
up the skin tones. And Lightroom's HSL tools
made that super easy. Whether you're
going for soft and natural or bold and tropical, Lightroom gives you
total creative freedom. Snap seed has been
around for years, and it's still a hidden gem. It's totally free and
packed with tools for precise editing like
healing brushes, curves, selective
adjustments, and more. The best part, it's powerful
without being overwhelming. Here's a quick edit I
did using Snapseed. It's clean, simple, and surprisingly polished
for a free app. Not bad, right? VSCO is
a classic for a reason. It offers a free version
with optional upgrades, and it's known for
its beautiful filters and creative community. If you're after
that soft, dreamy, film inspired aesthetic,
VSCO is your best friend. Perfect for nostalgic vibes, lifestyle shots or any moment
you want to romanticize. That you're familiar
with the classics, let's talk about what's new and buzzing in the editing world today because
mobile editing apps just keep getting smarter, faster and more fun to use. Dark Room has professional
grade tools with an intuitive beginner friendly
interface and is great for batch editing or editing
multiple photos at once. Curves and advanced color
grading and smart AI mask. Yep, available on
mobile right now. Photo AI was recently revamped and gaining
popularity fast. This app uses AI to help you
instantly enhance portraits, clean up blemishes and color
correct with just one tap. So it's perfect if
you're short on time, but still want polished
professional looking edits. Lensa AI is known for its
viral portrait filters, but now a full featured editor
for all kinds of photos. It's great for creating bold, social media ready looks
with vibrant tones and punchy effects
that really stand out. Last but not the least is the aesthetic queen of
the editing world, Tesa. This app is still a go to for lifestyle and branding creators,
especially on Instagram. If you love dreamy overlays,
film inspired tones, and trendy presets that
instantly elevate your feed, this app is perfect for you. And that is it per the new
and trending editing apps. So which app should you use? And my annoying answer is, it really depends on you, your goals, your style and what feels fun and intuitive to use. But here's a helpful breakdown. You're just starting out, try
Apple Photos or Snapseed. If you want full
control or consistency, go for Lightroom
mobile or dark room. If you need fast polish
edits for social, try Lensa AI or Photo AI. And if you're craving
aesthetic dreamy vibes, you'll love via CO or Tesa. There's no one size fits all
answer, but the best part, you're allowed to use
more than one app depending on the vibe
you're going for. So don't overthink it. Pick one that feels easy to
start with and just begin. So here's your mini class
project for this lesson. Pick one app from the list, edit a photo using
its key features. Notice how it feels.
Is it intuitive? Did you enjoy the process
and compare the results? Did it help you bring your
photo closer to your vision? Experimenting is the best way to discover what works for you. Know, because that's
how I discovered my editing style and
cultivated this skill. I personally am still
learning and evolving, so don't ever feel limited. Photo editing isn't about perfection or following
a rigid formula. It's about finding your rhythm, expressing your style, and turning everyday photos
into something special. The right app can
make that process easier and way more fun. In the next lesson,
we'll dive into step by step editing
techniques so you can confidently
bring your photos to life no matter which app you
choose. I'll see you there.
5. Simple Adjustments That Make a Big Difference: This lesson is all about
foundational edits, the adjustments that
make the biggest impact with the least effort. You don't need advanced
editing skills. You don't need to be a
professional editor. To make your photos
look ten times better, most of the magic actually happens with just a few
simple adjustments. In this lesson, we're
focusing on the editing trio that matters most light,
color, and detail. Start with the most essential
part of any photo Light. Even the best shot
can fall flat without the right balance of
brightness and contrast. Luckily, you don't need to be an expert to make a photo shine. You just need to understand a few key tools,
starting with exposure. Think of exposure as your
photo's overall brightness. If it's too dark,
gently bump it up. If your photo is too
bright and blown out, try to pull it back until
you see the details again. Exposure is your first stop for breathing life
into a dull image. Next is contrast. This adds drama by deepening shadows and
lifting highlights. If you want your photo to
feel crisp and punchy, a bit of a contrast
does the trick. But be careful too much can make skin tones look
harsh or unnatural. Next is highlights and shadows. Highlights control
the brightest areas, great for bringing back
detail in the sky. Shadows lift the darker parts, especially helpful if your
subject is in a shady spot. Use them together to balance your photo and make
it more dimensional. Last tool under light
is whites and blacks. Whites equals pure brightness
and Blacks deep darks. These are your
fine tuning tools, so use them when you want
to add depth and clarity. Now, let me show you an example. I'm pulling up a photo
from my iPhone favorites, and this one feels
a little flat. So let's walk through
the edits together. I'll adjust the exposure. Tweak the contrast. Then bring back some detail
using highlights and shadows. Can you see the difference? Suddenly, the image
feels more alive, like you can feel
the light again. That's the power of just a few thoughtful tweaks under light. Now that we've
balanced the light, it's time to bring in some
emotion through color. Color isn't just aesthetic. It shapes the mood
of your photo. Whether you want your image
to feel warm, cozy, cool, and moody or bright and vibrant, this is where the magic happens. So let's start with temperature. This controls how warm or
cool your photo feels. Warmer, more yellow orange creates a cozy golden hour vibe. Cooler, more blue gives
a calm dreamy feel. You can use temperature to reflect the feeling
of the moment. You want to create morning
sunshine, try warming it up. If you want to create that
cloudy afternoon vibe, maybe cool it down a little. Next, we have tmp. This adjusts the green
to magenta balance. This is super helpful for
fixing odd indoor lighting. If your skin looks a bit green
under fluorescent lights, add a touch of magenta. It looks too pink or purple, pull it back toward green. It's a subtle tool, but it makes a huge difference in keeping
skin tones looking natural. Last tool under color is
saturation and vibrance. Both make colors pop
but in different ways. Saturation boosts
all the colors, which is great for bold edits, but can easily go too far, while vibrance is
a gentler tool. It enhances the muted tones
while protecting skin tones. If you're going for a natural, soft boose without over editing, vibrance is your best choice. Let me show you an example. Editing the same
photo from earlier. This time, we'll adjust
the temperature, tint, and vibrance to better match the
feeling of the moment. Just a few small tweaks
and a lot better, right? Doesn't it feel more alive, more like how it actually
felt to be there? Color has that power. It tells the emotional
story behind the image. Last but definitely
not the least, let's talk about detail. This is where we fine
tune things to make your photos feel clean,
crisp and complete. Think of it as the final polish that pulls everything together. Let's start with clarity,
structure, slash texture. Different apps may call
it different things, but they all do a similar job, enhancing edges and textures. You can use this tool to
bring out detail in clothing, food, hair or landscapes. But go gently because
too much clarity can make skin look rough
or overly processed. Next is sharpening. This makes your
photo look crisper, especially if it's just
slightly out of focus. It's a subtle tool
that adds definition. But again, less is more. A small bump most of the
time is more than enough. Less for detail is
noise reduction. If your photo was
taken in low light, you might notice some
grain or fuzziness. Noise reduction helps
smooth that out. But, again, just
be cautious with each tool because too
much and you might lose important details or end up with a plasticky look like this. Now, let me show you how
this works in real life. We're going back to the same
photo we've been editing, and this time, we're zooming in. Notice how just a
touch of clarity, sharpening and noise
reduction makes everything looks cleaner
and more polished. These final details
may seem small, but they really elevate the
overall feel of your photo. So there you have it,
light, color and detail. These three simple adjustments
can completely transform your photos without making
them feel over edited or fake. Editing doesn't have
to be intimidating. Once you master these basics, you'll start trusting
your eye more and developing your
own unique style. And the best part, it only
gets better from here. In the next lessons, we'll dive deeper
into color magic, retouching, and how to create your very
own signature look. You're doing amazing,
so let's keep going.
6. Color Magic: Enhancing Colors Without Overdoing It: Let's be honest, there's nothing quite like a photo where
the colors just hit right, not too dull, not too fake, just vibrant, natural
and full of life. But how do you get there? In this lesson,
we're diving into how to enhance the colors in your photos without making them look over edited or artificial. It's about balance, subtlety and trusting
your creative eye. By now, you already know
how powerful color can be. We talked about
temperature, tint, vibrance and saturation in
our editing trio lesson. These foundational tools help
set the mood and bring back the color accuracy your
iPhone sometimes misses. Here's a quick review with a few notes to take
your edits further. Still essential for
setting the mood, use temperature to shift
your image warmer or cooler based on the feeling
you want to express. Warm equals cozy, nostalgic, and cool equals
calm, clean, moody. Tint is especially useful
in trickier lighting, like indoor or mixed lighting. If you feel like your photo
is a bit green or purple, tint can help neutralize it. And here's a top tip. Use tint with vibrance when you're editing under
artificial lighting. It helps restore more
accurate skin tones while keeping other
colors balanced. You've already seen how
vibrance gives you a gentler, more natural color boost. While saturation turns
everything up at once. So here's another top tip. Try combining vibrant with a slight saturation
decrease when editing colorful scenes like
markets or street photos. It gives you rich colors without making everything
look oversaturated. Now, if you're ready
to take control of specific colors
in your photo, the HSL, which is
hue, saturation, lumina and sliders, are where
the real magic happens. Think of HSL as the tool
that gives you precision. So instead of boosting
or muting everything, you can tweak just
what needs attention. Que changes the
character of a color. It could make your green
more minty or foresty. Saturation, it adjust how
bold that one color appears. And finally, luminance controls how bright or dark a
specific color looks. Now, here are real
life examples. If you want muddier skies, shift blue hue and then
lower luminance slightly. If your skin looks too red, lower orange saturation and adjust the hue toward
a more natural tone. If the greenery is too neon, soften it with a mix of green
and yellow HSL sliders. And of course, here's a top tip. Don't overuse HSL. Stick to one to
three color groups per photo to keep
things natural. Some apps like light room and Snapseed allow
selective color edits. It's a powerful way to make one part of
your photo stand out or tone down distracting elements without affecting
the whole image. It's best to use this when
a specific color is pulling too much attention or if you want one object to really pop, or you need to tone
down busy backgrounds. And here's another top tip. Selective color is
also great for fixing problem areas like
yellow indoor lights, making just one part of
the photo look weird. What you can do is adjust
that spot using this tool. Now, it's your turn to try it. Choose a photo that
feels a little flat or imbalanced in color. First step is to quickly
review your temperature, tint, vibrance and saturation,
just like we did earlier. Next step is to move
into the HSL sliders, adjust just one or two colors and notice how it changes
the overall feel. For example, make the green softer or the sky
a little deeper. Step three is to try a selective
color edit if you want to isolate one area
and enhance or mute. See how just a few
mindful color adjustments can completely shift the vibe. This is how we go from O to oh wow without making our
photos feel overdone. Color editing isn't
about perfection. It's about expression. You're not just making
a photo look better, you're shaping how it feels. So experiment, play, explore. And remember, color
isn't just a tool. It's part of your
creative voice. In the next lesson, we'll
dive into retouching tools, how to clean up distractions and keep the focus on
what matters most. See you there.
7. Retouching Like a Pro: Fixing Imperfections & Removing Distractions: Have you ever taken a
beautiful photo, one you love, only to notice later, there's a random trash bin in the background or a stranger
walked into the frame. Or maybe your toddler has spaghetti on their
shirt and their face. I've been there. And
here's the good news. Retouching isn't about
making your photos perfect. It's about helping
your viewer focus on what really matters. Which is your iPhone
and the right apps. You can clean up small
distractions and refine your photos without losing
their natural charm. Retouching is often misunderstood
as making photos fake. But that's not what
we're doing here. Think of it like tidying up a room before your
guests arrive. You're not changing the room. You're just removing clutter, so the beauty of the
space shines through. Retouching helps
remove distractions that pull focus
from your subject, reviine small imperfections that are not part of the memory, like dust, zits,
crumbs, et cetera. And finally, retouching enhances the overall clarity and feel without making things
look over processed. Now let's talk about key retouching tools
and when to use them. First is the healing
tool, AKA spot removal. This tool can be
found in light room, snaps, touch retouch,
even apple photos. This tool is best
for stray hairs, small blemishes, food smudges and tiny
distractions in the background. To make sure you make the
most of the healing tool, zoom in and tap gently. Big smudges equals
a natural results. Small taps, cleaner blends. Next is the clone tool, AKA copy and paste affix. This tool can be found in
Snapseed N touch retouch, and is best for replacing larger or patterned
areas like a sign, a stain or repeating textures, as well as filling
in gaps when you remove an object and want the background to look seamless. And here's a top tip. If cloning looks obvious, lower the brush
opacity or switch sampling points for a
more natural blend. Next is blur or selective
blur tool found in Snapseed, Lightroom and Photoshop Express. This tool is best for softening messy or
cluttered backgrounds, blurring out distractions
without deleting them and creating a subtle
deep to field effect. The key to using this tool is to not overdo it. Less is more. A soft blur draws the
eye to your subject. An overdone blur can make
the photo feel fake. Last but not the least, texture clarity and
structure sliders found in light room mobile. These sliders let you reduce clarity on skin for
a softer portrait. Add texture to fabrics, wood grain or hair
for visual interest, and soften harsh lines
like wrinkles or strong shadows without
erasing detail. You can use a selective brush to apply these to only one area. That way, you keep
the natural feel while still polishing the photo. Now, let's make
this more fun with more real life retouch
examples for family photos. You can remove food
smudges on a shirt, but keep the mess on their face. It tells the story
for portraits, lightly smooth of
blemish or shadow, but keep the freckles and smilines because that's
where the emotion lives. Lastly, for flat
laser food shots, clean up crumbs, dust or fingerprints to make
your subject pop. Now it's your turn. Pick a photo you love, but that has a
small distraction. Use the healing or clone
tool to clean it up. Then save a before and after screenshot and upload it
in your class project. After retouching, ask yourself, does this change help the
viewer focus more on the story? Am I enhancing the moment
or trying to erase the realness and a final
retouching top tip. Zoom in to edit,
Zoom out to check, but don't obsess
over every detail. Remember, you're aiming for
clarity, not perfection. Touching isn't about making
your photo flawless. It's about guiding the
eye to what matters most. Once you start practicing, you'll begin to see
things differently. You'll notice the
little distractions and know how to gently remove them while still keeping
your photo honest and real. And when you get the hang of it, even the photos you almost skip might become
your favorites. Up next, we'll talk about
presets and filters, how to use them
intentionally and create a look that's
uniquely yours.
8. Presets & Filters: Should You Use Them?: Let's be honest, presets
and filters are everywhere. One tap, and suddenly
your photo looks moody, vintage, cinematic,
bright, or dreamy. But here's the truth. A
preset is not a magic fix. Used well, I can
elevate your photo, speed up your workflow, and give you that cohesive
professional look. Used carelessly, it can
make your photo feel off, over processed, disconnected
or just not you. So in this lesson, we're talking about how to use presets and filters
the right way. So your edits stay authentic and feel like an extension
of your creative voice. Let's clear this up first. What's the difference between
filters versus presets? Filters are one tap effects you'll find in apps
like Instagram, Apple Photos, or VSCO. They apply a fixed set
of edits all at once. No adjustments
needed or allowed. Presets, on the other
hand, are customizable. They're like editing recipes
you can apply inside apps like through
mobile or VSCO. But you still have full
control over every element. With all of that said,
presets are often the better choice because you can tweak the settings
to fit your photo. They help create a
consistent visual style, and you get more natural
polished results. So no overdone filters here. Presets are great for speeding
up your editing workflow, bringing a cohesive mood
or look to a project, feed or album, and helping you develop your own editing
style over time. But the key is this, a
preset is a starting point, not the finish line. So here's how to use a
preset like a P. First, always adjust after applying. Every photo is different. Lighting, tones, contrast. So one preset will
never fit all. After applying a preset, tweak exposure and contrast
based on the photos lighting. Fix white balance, so collars and skin
tones stay natural. Adjust shadows or highlights so nothing feels blown
out or too dark. Next is to match the
mood, not the trend. Ask yourself, what story
does this photo tell? Do I want it to
feel warm and cozy, clean and airy,
vibrant and bold. Choose a preset that
supports that feeling, not just one that looks trendy. Third and last is to use HSL
sliders for fine tuning. Presets often shift color tones. So jump onto the HSL or the hue saturation luminan panel and make small adjustments. Fix two orange skin tones, make skies feel deeper, or adjust greens to
feel more natural. A top tip, preset
should enhance, not overpower, so watch out for neon greens or
weird skin tones. If you find yourself making the same adjustments
over and over again, that's your style
trying to come out. In Lightroom Mobile, edit
a photo from scratch, tap the three dots
icon or the menu, choose Create preset,
and name it and save it. It's now your signature look ready for one tap
use in future edits. This is how you stop chasing other creator styles and
start building your own. Now it's time for more
real life example. Let's say you took a
cozy morning photo of your breakfast table. A bright, clean preset
might make it shine, but a cold blue
tone filter could make it look
unappetizing or flat. This is why intention matters
more than aesthetics. The best edit supports the
story you are trying to tell. Now it's your turn. Pick a photo you love. Apply a preset or
filter from Lightroom, VSCO or one you downloaded. Make at least three custom
tweaks like exposure, white balance or HSL. Save A before and
after, final version. Share it in the project section. This exercise will help
you see how presets can enhance your image
without taking over. And more importantly, how to start trusting your own
creative instincts. And here's your gentle reminder. Presets are like seasoning. You want them to
bring out the flavor, not overpower the whole dish. Used with intention, they can help you develop a consistent, signature style that feels
effortless and feels like you. And once you start customizing presets or even
creating your own, you're no longer just editing, you're crafting your
visual language, your unique way of telling stories through color,
light, and tone. With all that said,
in the next lesson, we'll talk about how to actually define
your editing style. It's all about consistency
without copying, how to create a look
that's recognizable, but still real and
personal. See you there.
9. Finding Your Editing Style: Consistency Without Copying: Can I tell you another secret? When I first started
editing my iPhone photos, I had no idea what I was doing. I'd scroll through Instagram
staring at these dreamy, curated feeds and then
look at my camera roll, wondering why my
photos felt like a scrap bookmd during
a sugar crash. But here's what I've learned. Consistency isn't about using the same filter on everything. It's about building
a visual language, one that feels honest, intentional, and deeply you. And that's exactly what we're going to explore in this lesson. First, let's but a few mites. You don't have to be. If you take pictures of your family, your food, your life, you already have a visual voice. We're just going to
help you listen to it. Yes, you do. It's
in the light you're drawn to the tones
that feel like home, the emotions you try
to hold in a frame. You might not have named it yet, but it's there waiting
to be claimed. Maybe, but not by you. No one else sees the
world the way you do. You perspective, your timing, your memories,
they're unrepeatable. Think of your editing style
as your visual fingerprint. It's the tone, the light, the rhythm your photos carry. It's the thing that makes
someone pause and go, Oh, I know who took this. Your style doesn't
have to be loud. It can whisper or sing. It can shift with the seasons. It can be nostalgic, soft, joyful, dramatic, or
even beautifully messy. What matters is that it
feels like truth, not trend. Your. Now, here are a few
common styles to inspire you. First is bright and airy. Think of soft whites, glowing skin, feels like
sunshine and Sunday mornings. Next is warm and cozy. Imagine golden
tones, soft browns, like coffee at home or
handwritten letters. Then we have vibrant and bold, saturated colors,
punchy contrast. Think of street food, sunsets, and high energy. We also have moody
and cinematic, rich blacks, dramatic shadows, feels introspective
and timeless. And for my last example,
muted and minimalist, desaturated tones, clean space, calm,
intentional, poetic. You might feel drawn to one
or none, and that's okay. You don't need to fit
neatly into a box. You're allowed to mix and
make your own recipe. So how do you get started
in finding your style? Step one is to scroll
through what moves you. Look at your camera roll, your Instagram saves or
your Pintres boards. What photos make you pause? Notice the light, the
colors, the emotion. That's your style
quietly calling to you. Step two is to edit one
photo three different ways. Take one image and give it different vibes.
Bright and airy. Warm and vintage,
moody and dramatic. Then ask yourself, which
one feels like me? Style isn't about what's better. It's about what
feels most honest. Step three is to build a
small editing toolkit. Choose two to three
presets that feel like home or even
better, create your own. Keep a short list or go
to tweaks like contrast, warmth, vibrance, and trust yourself to
adjust from there. Consistency doesn't mean rigid. It means recognizable. If you're sharing
your work online, your style becomes
your signature. It builds recognition,
connection and trust. People start to associate your visuals with a feeling,
and that's powerful. But even if you're not
sharing for an audience, having a style turns everyday snapshots into
something more meaningful. A style says, This is
how I see the world, and that is a beautiful
thing to honor. If you're still unsure,
here's your permission slip. You don't have to figure
it all out today. You don't need a
perfect aesthetic. You just need
curiosity and courage. Start messy, start now. Your style will evolve
with your seasons. Let it. Now, it's your turn to
really discover your style. Choose one photo you love. Edit it three different ways
using different styles. Ask which version feels most me. Then apply that same vibe to
three to five more photos. Screenshot your edits,
compare them side by side, and look for patterns. Not chasing perfect. You're chasing honest. That's
where your magic lives. And if you're building a brand
or sharing on Instagram, this step can shift everything. Your visuals become your voice and your voice, it matters. In the next lesson,
I'll walk you through a full start to finish edit
on one of my own photos, so you can see how
I bring all of these ideas to
life step by step. Are you ready? Let's do it.
10. Before & After: A Live Edit Walkthrough That Brings It All Together: Okay, we've talked about tools, we've explored
adjustments. We've started shaping
your editing style. Now it's time to bring
it all together. In this lesson, I'll
walk you through a real time edit, side by side. No fluff, no gatekeeping, just exact steps I take and how I feel
my way through them. Because editing isn't
just about sliders. It's about intuition, emotion, telling the story
the way you felt it. Oh, here's the photo
I'll be editing. It's a self portrait
I took in one of my favorite quiet
spots near our home. There was no fancy
setup, me, my husband, and our son playing the role of assistant with
his usual charm. It was golden hour. I was wearing my
favorite floral dress, a flower tucked behind my ear, romanticizing a simple afternoon and feeling something I
hadn't felt in a long time. Peace, confidence, gratitude
for the season of my life. That's the story I wanted
the photo to tell. But straight out of the camera, it felt a little flat. So now, I'm going
to show you how I bring it to life
using Lightroom mobile. Why Lightroom mobile,
you might ask? Well, it's because I wanted
more control over my edits. It's perfect if you're
aiming to build a consistent editing style or create a signature
aesthetic for your photos. One of my favorite features is the ability to create presets. If you're editing a batch of photos from the same session, with the same
lighting and setup, you don't have to adjust
every single slider over and over again. You can simply create a preset and apply it to the
rest of your photos, saving you tons of time. Another thing I love
about light room is its powerful HSL sliders. That's hue, saturation
and luminance. You'll see me use this
later in the demo to really fine tune
the colors and make the image pop without
overdoing it. Actually started
with a free version, and it was already amazing. But when I realized this app had become my go to for
all my photo edits, I upgraded to the paid version. And honestly, it was one of the best decisions I
made for my photography. Now, let me take you through my full editing process
step by step so you can see exactly how I transform a simple photo into something full of
life. Let's dive in. I always begin with the light. So here are the exact
slider settings I use. So under light, first
thing is the exposure. So we took this
photo around 530, so it's getting a little dark. And as you can see at the back, the sun is really
low in the sky. So I'm adjusting the exposure to plus 25 to make it
a little brighter. Now, for the contrast, I'm adding just a little
bit, so plus ten. For the highlights, I'm
setting it to negative 30 to recover details in
bright spots like my skin. For the shadows, I'm
setting it to plus 30 to live depth and softness
in the darker areas. And then plus five for whites, and then negative
ten for blacks. So as you can see, even
with these simple tweaks, the photo already
begins to glow. It feels softer, more alive, like, I'm inviting you
into that moment with me. Next, let's bring in warmth
and feeling through color. So here's what I adjusted. So for the temperature, I set it two plus ten because I wanted a nostalgic,
happy warm vibe. And for the tenth, I set it two plus five, so
towards magenta. And I just added plus ten for the vibrance and then negative five for saturation
because as you can see, this is how it looks
with saturation, so just negative five. Now for the HSL sliders, this is where the
polish happens. So let me show you
how I will do this. So for the reds, I'm
not adjusting the hue, but I'm adding a bit of saturation because
as you can see, there are reds or pinks in my dress and the
flower in my ear. And then the
luminance I'm adding just plus ten to
make it brighter. For orange, this is the
sunset and my skin. So I'm just setting the
e to negative five, and then the
saturation to negative ten and then luminance for
that glowy peachy skin. So I'm playing around
with 15 and 20. I think 15 looks more natural. So next is green, so I'm
setting the hue to plus ten. Y plus ten because we want
more minty and sage green and then setting the saturation down so it doesn't
compete with the subject. So I can set it
all the way down, but it doesn't look natural, so maybe just negative 40. Okay, that's good.
And the luminans I'm setting it all the way down. So again, it doesn't
compete with the subject. These adjustments help color tell the story without shouting. Now for texture and
clarity, for clarity, I just added plus five
to add dimension without harshness and then negative five for texture to keep
skin soft and natural, leaving the haze to zero
because it's not needed here. And then I'm just adding
plus ten for sharpening. And then for noise reduction, as you can see, I'm adding plus ten to smoothen
the subtle grain. Then for the vignette, I'm setting it to negative 20 to lead the e in our subject. And to really bring
this photo together, I am adjusting the
crop to create a stronger and more
polished composition. Light room has built
in crop aspect ratios, so I am selecting the
classic one by one square. Then I am aligning the rule
of thirds grid with my smile. This helps draw the viewer's eye exactly where I want it to go. And already, it's feeling
softer, more cinematic. It's subtle, but it wraps the
whole photo in a feeling. Next, I am removing
a few blemishes. This photo was
taken during a time when my skin wasn't at its best. Stress, hormones and life
just doing their thing. And while I'm all for
embracing imperfections, this particular breakout didn't feel like something
I needed to keep, so I am editing it out. That said, I am
intentionally leaving my wrinkles and smilines
because those are a part of me, and I love how they
tell my story. I am also using
the selective tool to gently smoothen my skin. Since my face was a
little textured that day, I am brushing over my face and neck with the
selective tool. Then slightly
lowering the clarity and texture to soften the look
while keeping it natural. And here's the before and after. I love how it turned out. Since I'm happy with
how this turned out, I'm saving these
edits as a preset. That way, I can apply
the exact same look to all the other photos from this
hot because the lighting, setup, and colors
are consistent. No need to start from
scratch every time. With just one click.
All the photos feel cohesive and have
the same beautiful vibe. So easy, right? Before I call it done, I step back and ask, Does this feel like me? Does it reflect the peace and
joy I felt in that moment? Would I be proud to print
this, frame it, share it. If it's a yes, then I know
I've edited with intention. Honestly, this is a
big guess for me. Sometimes I'll apply one of
my own presets just to keep a consistent look and adjust it slightly for this
specific photo. This is the final step where
technique meets intuition, and here's our final result. It's a subtle but huge
difference, right? As you can see, it's not
about making it perfect. It's about making it feel
the way the moment felt. That's the power of editing. Editing isn't about
hiding flaws. It's about honoring the story. And the more you practice, the more natural and
intuitive it becomes. You don't need to copy
these steps exactly. Start with one of
your own photos. Follow what feels right
and trust your eye. In the next lesson,
it's your turn. You'll create your very
own before and after edit, and I can't wait to
see how you bring your stories to life.
I'll see you there.
11. Your Final Project: You made it here, and I just want to take
a moment to say, I am so proud of you. You've explored tools,
practiced adjustments, shaped your style, and maybe discovered something new about
the way you see the world. Now it's time to bring
it all together with a project that's not just about showing
what you've learned, but about celebrating
how far you've come. So first, choose
one unedited photo from your camera role, something simple,
something real. Then apply the techniques
we've explored together. Light, color, detail,
style, intuition. Your mission, should
you wish to accept it, is to share your before and after in the class
project section. Let us see your transformation, not just in the photo,
but in your vision. So make sure to include
your journey and story. If you want a bonus challenge, try editing that same photo
in two different styles, maybe one that's bright and airy and another that's
moody and cinematic. Notice how the emotion shifts, how each version tells a
slightly different story. That's the power you
now hold in your hands. And remember, there's no
one right way to edit. This isn't about
perfect technique. It's about your voice, your rhythm, your story. So go experiment, get curious, play, and most importantly,
have fun with it. I'll be checking
the class projects and cheering you on
from the comments. And if you're feeling
proud, as you should, tag me and Skillshare if you share your
edits on Instagram. We'd love to celebrate
your creativity with you. The next lesson will
officially wrap up this class. But this is just the beginning. Let's keep telling stories
that feel like us.
12. Final Thoughts: Wow, look at how
far you've come. Just think about
where you started. Maybe you felt unsure
about editing, overwhelmed by all
the sliders or hesitant to even touch your
photos after shooting. And now you have the tools. You have the confidence. You've learned to bring
your images to life with nothing but your
iPhone and your eye. But more importantly, you've started to see your
photos differently, not just a snapshots, but as stories, stories
filled with light, emotion, color, and connection because editing isn't just about
making a photo look better. It's about revealing the
heart of the moment. It's about saying,
This is how it felt. This is what I want to remember. If right now you're thinking, I'm still not a photographer. My edits don't look like theirs. I'm not sure I'm doing it right. Let me pause you right there. You showed up. You tried, you created, and that matters
more than any filter, preset or perfect
photo ever will. This class wasn't about
chasing flawless. It's about capturing
the real, beautiful, honest, perfectly imperfect
moments in your life. The more you practice, the more your photos will reflect
what matters most. You. This is just one stop in your
iPhone photography journey. If you'd love to explore more like capturing self portraits, understanding iPhone
camera settings, or capturing cinematic
family moments, I've got more classes
coming your way very soon. So make sure to follow me here on Skillshare so you
won't miss a thing, including fun little giveaways. And if this class brought
you joy, clarity, or even one aha moment, I'd be so grateful if you
could leave a quick review. Words help this class reach
others who need it too. Again, if you post your edits on Instagram or anywhere else, tag me in Skillshare. Would love to see your progress, cheer you on and maybe
even feature your work. From the bottom of
my heart, thank you. Thank you for trusting
me, for learning with me, for allowing me to
be a small part of your creative journey. Knowing that you're out
there, documenting your life, chasing light,
preserving memories, that is the most
beautiful thing of all. So go on, capture the magic
in your everyday life, your story is unfolding
every single second. And now you have
the tools to frame it beautifully. You
in the next class. And until then, keep creating, keep playing, and keep seeing the world through
eyes full of wonder.
 Rose Nene, Photographer & Videographer