Transcripts
1. Introduction: Java is one of the easiest programming languages to learn, making it perfect for beginners. In this course, I'm going
to walk you through programming and
Java step-by-step. By the end of this course, you will create to a real
programs using Java. And you'll have a
solid understanding of programming basics
and fundamentals. Oven programming in
Java since 2011. And I even use Java to create my own game servers
startup into this and 14, I made a full-time income from his project for a few
years before selling it. So I have a lot of experience
using Java and I'm looking forward to
sharing my knowledge with you throughout this course.
2. Installing IntelliJ: Before we can learn Java, we need a place where we can actually write and run our code. This is known as an IDE, which stands for Integrated
Development Environment. That's a super fancy
way of saying it is a text editor that will also convert your code into
an actual program. Now the industry
standard for IDEs and Java is going to be
called intelligence. So you can simply just
Google intelligent download. This is a free software. Go ahead and click on
the top link right here, and make sure that you
select Community Edition. And they also select the correct operating
system that you're on. I'm on Windows, which
is the default. So I'm going to stay
here on the Windows tab. I can then click on Download. And your download should start. And on most browsers
who will have to agree that you wanted
to download this file. Once it's done downloading, you can click on it right here. Here we have the
actual installer. This is a pretty
standard installer. Well, you just click
Next around 800 times and then you
should be good to go. I'm just going to
go through and keep everything here, the default. And then I'm going to
go ahead and pause the recording while the
installation is happening. After us uninstalling, we can go ahead and click on this
checkbox right here, and then finally
click on Finish. Once you open it, you
should be sent to a page similar to this one. You're going to want to
click on New Project. Now on this page you
want to make sure you selected Java at the top. That should be the default. And for the project SDK, we can go ahead and select
whatever the default is. But if you don't see a default, you can download a JDK. So we can click on this and you can select the
version you want. Any version should do. We're not going to
be doing anything. That's very version
dependent process course. Just simply click on download. Now assuming you
already have an SDK, we can just simply click on
next and then next again. And then finally we can give a path to our
project and a name. We can click on the three
dots here to browse. I'm going to select my
Java folder right here, and I'm going to
create a new folder. This one will be called a
workspace. Within here. I'm just going to select
it and then click on Okay. Now the project name by
default is workspace. That's fine. I'm going to go
ahead and click on Finish. Now intelligent is finally open. On the left here we
have this project which we can toggle by clicking. This is going to
show all the files and folders within
our workspace. Now, everywhere else in this giant panel right here is where our code will be shown. But we don't have any
code open right now. But now that intelligence
is successfully installed, we're good to go
and start writing some code with the next video.
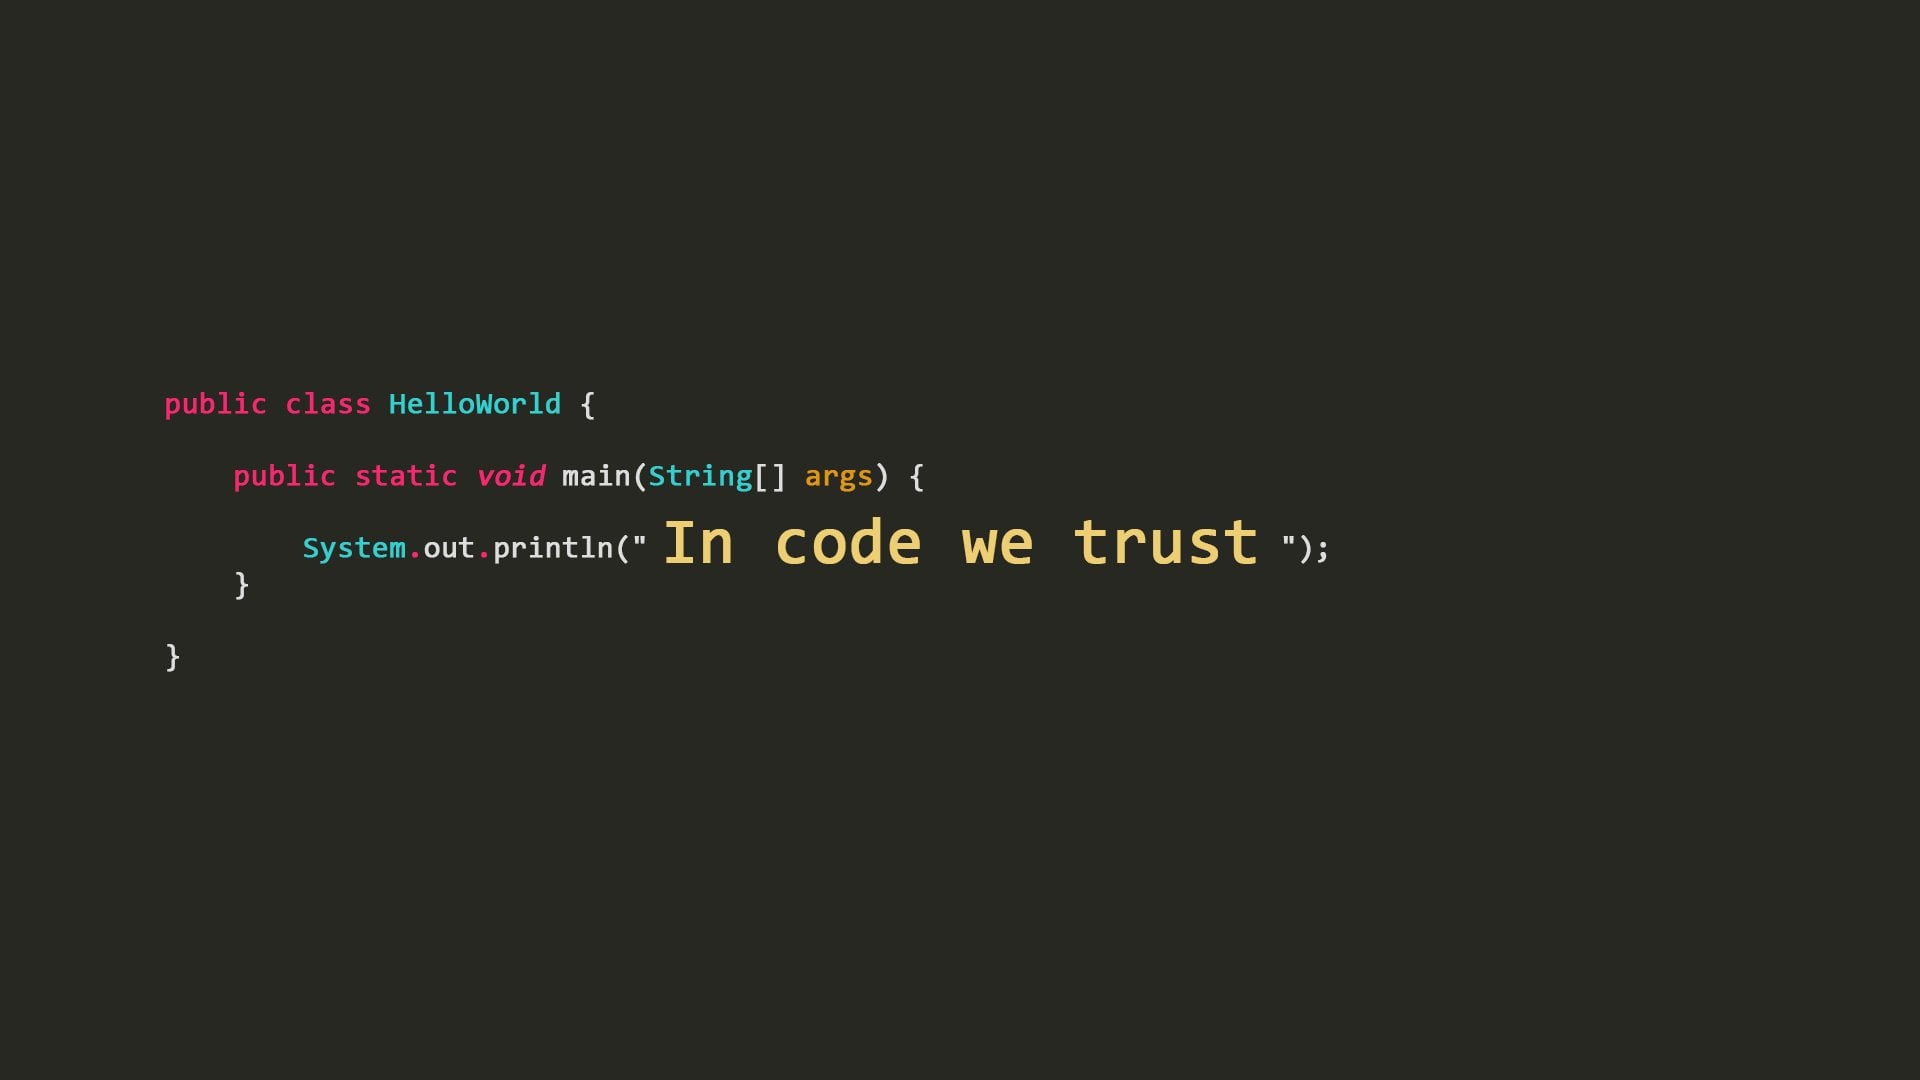
3. Hello World: We're now ready to finally work on our very first Java program. And it is a common practice
to simply print the text hello world to the screen
as your very first program, no matter which language or learning will
continue that here, navigate over to
the source folder. And here we need to make a
new folder inside of it. You can right-click, go to
New and select package. A package is basically
just a folder. And a Java programmer
uses packages, a way to organize all
of your code files. You can have multiple
code files inside of packages and you could have multiple packages
within your project. For now, we're just going to
work with in one package. So go ahead and left-click here. We now need to enter
in a package name, and this needs to be unique. Now a common practice is
to use a reversed domain. For example,
com.google.com.YouTube. But obviously, this shouldn't be one of the popular domains, but rather your own domain. And if we don't own a domain, don't worry, you don't need to. You can technically
enter anything you want. But for example, to follow with the standard
naming conventions, Let's do something like com dot alex dot Flores or
something else like that. Obviously this has my
name and you could use your own name if you want or something completely made-up. I'm going to name this package the exact domain that I own. So for example, com
dot worn off keys. Now if I press Enter, we see this folder has been
created right here. Now within here I can
create my own file, so I can right-click,
go to a new Java class. And here we have a couple
of different options. We're going to stick
with a standard class. I'll explain the
difference between all of these in future videos. The class name I'm going to
call this Hello World with a capital H and a
capital W and no spaces. It's very important that none of these files have
spaces in their names. Once you press
Enter, you'll have a few pieces of code
written right here. If you expand this folder, you now see the hello
world-class right here. Now the details of what each of these things do will be
covered in a future video. For now, we're just going to
add onto this existing code. Now if you click onto this opening curly
brace right here, you can press Enter and you can tell that we're
automatically tabbed. And once now tabbing, it's very important within any programming
language because it makes your code much
easier to read. And the benefit of
that becomes much more apparent later on once we
have much larger files. But for now, we don't have
to worry about large files. Our goal right now is just to print the text hello
world to the screen. I'm now gonna write some code. Go ahead and follow along with
me and throw those course. We're going to understand
what each part of this code does. But most of this is not going
to be explained right now. To start off, I can say
public, static, void, main, and then parentheses and ending parentheses should
automatically be generated. And then afterwards we can put a space and then a curly brace, and similar to the
parentheses and ending curly brace will
automatically be generated. Now in-between the
two curly braces, if you press Enter or C, There were also
tabbed end once more. We need to go back into
the parentheses and type string with a
capital S space. Then a square bracket and an ending square
bracket will be added. And then we can type in arcs. Now we just wrote a lot of code and most of it looks
very confusing to you. Don't worry about that at all. As long as your code looks
like this and there's not any red squiggly lines anywhere,
then you're good to go. And my red squiggly lines, I made something like this. Here we see this red
squiggly line right here. This is intelligence
for letting us know that there is an
error in our code. We hover over it.
It's going to say that a ending
parenthesis as expected. So I can add one in here, and then that error goes away. Again if you're confused
right now, don't worry, everything will be explained as we continue throughout
the course. The next step will be explained
her right now though, our goal is to print
something to the console. We can do this by typing
system with a capital S, dot out, dot print LN. We can add an a parenthesis and an ending parentheses will
automatically be added. Within here we can add in a double quote and similar
to everything else, and ending double
quote will be added. Now we have an error
at the end here. If I hover over this, we see a semicolon is expected. I can add one and here,
similar to a period with an English sentence is semicolon ends a statement or
a Java sentence. At the end of most lines, you're going to add
in a semicolon. And you might have noticed
that we don't have a semicolon right here
on line six or seven. The reason for that will
be explained later on. But generally, most of
the lines of code you're gonna write should have
a semicolon at the end. Now within these
double-quotes here, we can add in whatever
text we want. And as we printed
to the console, for example, I can
add in Helloworld. Then from here I can
go to Run at the top, because then click
on Run right here. Alternatively, you can use
a shortcut displayed here. We get this pop up right here. We wanted to click
on Hello world. And now we see that
it's building. Now we can just
pop up right here. I'm going to go ahead and lower this height just so I have more room to work with the code. But we do see the
text Hello world, and that the process finished
with an exit code of 0. An executive's 0
basically means that everything went well and
there were no problems. Now if we wanted
to, we can add in different exclamation
points within the string. And instead of going through
all these drop-downs here, we can actually just click on this green arrow
near the top right. Or you can press Shift plus
F2, whichever one you prefer. If I click on this, we now see it's going to
rebuild our project. And we now see Hello World
with exclamation points. Afterwards. You've now completed your
very first Java program. I know a lot of this code looks
very confusing right now, but everything will be explained as we go on further course.
4. Comments: When programming,
we can't just write anything we want because
this isn't valid Java code. And so if I hover over these, these are going to say
that there's going to be errors related
with this code. But sometimes you may want
to add in different notes or was properly known as
comments into your code. This will help you or co-workers better understand what is
happening within the code. For example, I can do two
forward slashes here, and then I can say print
hello world to the console. Now in this exact example, we probably do not want
to add an a comment for this line because the line is fairly
self-explanatory anyway. But this is how you
properly add in a comment. This wouldn't have any effect on the program or what's
printed to the console. It is just there as a note for other programmers
and yourself. Now as we move forward
through this course, you're going to see
what should and shouldn't have a
comment attached to it. Again, a line like this
is very self-explanatory, so we do not need to
add in any comments. Now, alternatively,
we can add in multi-line comments by
doing forward slash star. And then an ending
star forward slash and intelligent actually
does the ending for us. Within here I can say
this is a comment. All of this text
here is grayed out because it is not
technically code, but rather it is a comment.
5. Variables: We're now going to talk
about arguably one of the most important concepts
when it comes to programming. And that is the
concept of variables. Like you think of a
variable as basically a container that holds
some kind of value. Your computer's RAM or memory is basically a bunch of shelves
that hold these containers. Now, each container is
going to have a name and the value inside can be read
or changed at any time. So for example, let's create an integer which is basically
just a whole number. I can say int space. And now we have to
name our variable. This should be something
that is descriptive. We should not have
variables named a or X or things like that that
aren't very descriptive. So in this case, I want this
to hold my current age. So I'm going to type age. So I'm naming this variable age. You can name it basically
anything you want. But there are some rules which I'll go over later
in this video. Afterwards we're going
to add an equal sign. And then after the equals sign, we can add in any number. In this case it will be 28. And then finally,
we have to add in a semicolon what is
actually happening here? Well, the int is
basically going to tell Java that we want
to create a variable, and this is going to hold
an integer type of value. There are different
values of variables can hold and we'll cover those
later on in the video. Now, every variable
needs his own name. In this case, we give
it the name of age. Afterwards we have
an equal sign, which is technically known
as an assignment operator. This will take the
value on the right and assign it to the
variable on the left. And then of course we
have the age and you can add in whatever
number you want here. It could be 999, it could be 0, it could be negative 5 thousand. Any whole number will work. But for simplicity,
I'm just going to add in my current
age, which is 28. So what can we actually
do with this variable? Well, the most basic
thing we can do is probably to print it
out to the console. Instead of writing out
system.out.print line each time, intelligence actually
gives us a shortcut because that is a rather
long line of code to write. So I can type in S0
UT for system out. If I press Enter, it will automatically generate
this line of code for us. Now it does not generate the double-quotes and
that's intentional. If I were to add in
the double-quotes and then age at which
we run this program, we simply see the word
age and our console. But that's not what we want. We want to see the value
inside the age variable. We have to remove
these double-quotes, so it will not display
what's known as a string. A string is basically like a sentence or a
collection of characters, something that makes
up some actual texts. Now without the quotes, it's going to try and reference the value inside of
the age variable. In this case, it will reach into that container I
mentioned before, and it'll pull out the value of 28 and then send that
to the costumer. Far bind us again. We should now see 28 in the console like
we do right here. That's one example of what
we can do with variables. We can also reassign a value. For example, let's say
I have a birthday, I could say age equals
29 with a semicolon. Notice how I do not use
the int right here. When I do that,
there's an error. If I hover over it, it says variable age has
already been defined. So basically the int is only there when we're
creating the variable. But after it's created,
we can still change this value by reassigning
a value just like this. Now to prove this, I can
print this to the console. So OUT, I could print out age. And if I run this, we now
see 28 and also 29300. So an integer is
just a whole number, but there are various
other types of variables. For example, if I
delete all of this, I can now say string with a
capital S name equals Alex. And notice how I'm rapidness
inside of double quotes. If I were to just say Alex here, it would think that
we're looking for a variable with that name,
but there are none. So to tell Java that we're
working with a string of characters such as a sentence or a message, some type of text. Then we're going to add
in our double-quotes. Java will not look for
a variable named Alex, but rather we'll treat
this as a string of text. Now of course we can put
this to the console. I can print out name. And if I run this, we will
see Alex in the console. But there are many
other variable types. For example, we have a Boolean. Boolean Jeff represents
either a true or false value. That's all it does. So for example here, I can say is programming
equals true. Now true is not in quotes because that is
technically not a string. True or false, which is the only other option
for a boolean, are technically
keywords in Java. We're able to just write
them within our code. For example, if this is true, I can now print is programming. Now if I run this, we should
see true in the console. Of course, just like integers, we can reassign value studies. So I can say is
programming equals false. And if I run this,
we're now going to see False within the console. Now I'm going to
delete this line here. And you might notice how
I named his programming. I have a lowercase
I and a capital P. Within variable names, we cannot have spaces. So whenever we have
multiple words, it is a common practice
to use something known as CamelCase notation. Camel case notation
is when a word is written with the very
first capital letter being lowercase instead. But then every word after that has an uppercase
letter at the start. This makes it very easy to
read without any spaces. Compare that to
camel case notation. This is obviously a
lot harder to read, especially for other
people who are just reading your code
and didn't write it. So they don't know
exactly what it is. Other rules involved
that variables cannot have a name that's
hard for the number. Typically, you shouldn't
do this anyway, so that's not very descriptive. But if for some reason
you absolutely want to, you can add it in an
underscore to start. It then becomes a
valid variable name. As we move forward
throughout the course, you'll see more examples of
variable names so we can get a better idea of what is
a good naming convention. Now let's move onto
other variable types. Next we have a char, which is similar to a string, but it represents only
one single character. For example, I can
say letter equals a. And these use single
quotes, not double-quotes. If I was to add in
multiple characters here, it's not going to like it
and it's going to complain. So again, these only use
a single characters. We also have a double, which is similar to an integer, but of course this is
going to be any number. It doesn't just have
to be a whole number. For example, age equals 28.5. This would be a valid double, but I'm using the same name
as an existing variable. So I'm going to
say age as double. That is another
rule for naming is that every name
has to be unique. Otherwise it wouldn't know which variable you were
exactly referencing.
6. User Input: So far we've just printed
things to the console. But what if we wanted
to receive input from the users who are
using your program? In this case, it
would just be us. But what if we want to enter certain numbers or
names or other things like that and have
it actually be understood within
our DAW program. Now in order to do this, this is going to be a
couple of concepts. There'll be slightly
confusing and very much out of the scope
of this video here. These are concepts that will be explained later
on in the course, but they're far too complicated
to explain right now. So go ahead and
code along with me and be aware that these
will be explained later on. So let's start off by making something known as a scanner. This is what is used to receive
input within our console. So I can say scanner with a
capital S, I press Enter. We're now going to
import scanner. This is something that
comes built-in with Java, but in order to use
it within this file, we have to import all of
that code into this file. That's what this line
right here does. Now that we've created a scanner similar to the variables we
looked at in the last video. We have to give this a name. I'm going to call this input. Then we can use an
assignment operator or an equal sign to assign
a new value to this. Now, this is going to be
something that will be explained in much more detail
later on in the course. But for now, just go
ahead and code along. Here. I'm gonna say new space scanner with a capital S and then
parentheses afterwards. Now I get this error here. When I hover over this, it says cannot resolve
constructor Scanner. Again, the concept of a constructor and why
this error is occurring, it will be covered
in a future video. But for now, let's let go inside the parentheses
unless add in a system with a
capital S dot n. This should get
rid of the error. Now we're ready to
start receiving input from the console. Let's start off with
a simple string. For example, I can say string
name equals input dot next. And this is going to return
a string by default. Then I can print out the
names of the console. So OUT and name. And let's make sure the
user knows what to do. I can say S OUT, then I can enter in. Please enter your name. Now if I run this, we're going to see
please anterior name, but it doesn't immediately
close like a data and other situations here is actually waiting for us to
enter our name. In this case, I'll add an Alex, and if I press enter, it
will then print Alex. And here's where it says
a process finished. The green texts will be the
texts that I entered and the white text will be coming
from a Java program itself. Now if I run this again, I added my full name. For example, Alexander
space Flores. If I run this, we now
just see Alexander. That's because the next
function here is going to count every single character up
until a certain whitespace. So if there's a
space or a tab or a new line and things like
that are going to make it. So it'll just stop looking for new characters and just
return what his found so far. If we wanted to
get the full line, we can say next line. Similar to variables, this is going to use CamelCase notation, meaning that we
have a lowercase n because it's the first
letter of the first word. But the first letter
of every other word. For example, L, is
going to be uppercase. If I run this, I can now enter
my full name with a space, so Alexander space for us. And if I press Enter, we see the full string has been
printed back to us. Now we don't just
have to do strings. For example, I can say
please enter your age. Then here I can say int
age equals input dot next. And here we see a bunch
of other options. In this case, we want next int because that's our variable
type, which is an int. Then I can use S0 UT. I could print out age
without any quotes. And if I run this, it's then
going to ask us for our age. In this case, I'll enter 28. Then it'll print 28 back to us.
7. Arithmetic Operators: Oftentimes when we have numbers, we don't just want to print
them out to the console. We might want to add, subtract, multiply, or divide
with those numbers. For example, I can say
int number equals 50. Let's go ahead and start off by printing this
to the console. Just we can always
see what's happening. Now I'm not going
to run this because it's very obvious
what would happen. But let's say we want to
add one to this number. A couple of different
ways to do it. One example will be number
equals number plus one. Now if I run this, you're probably going to know
what's going to be printed. In this case it'll be 51. We can add ten or a 100 or
any other type of value. What we want to this intruder. Now there is a shorter
way to do this. So I'm going to use
control forward slash to go ahead and comment
out the current line. And then I'm going to say
number plus equal to 100. This is basically
the same exact thing as what we have right here, is just a shorter way to add
a number onto a variable. So if I run this, we're going
to see 150 in the console. We can do the same exact concept when it comes to subtraction. Instead of plus, I have minus. And if I run this,
we're going to see negative 50 in the console. Of course we have
multiplication. So if I run this, here we see 5 thousand
and division, which has a forward slash. If I run this, we're
going to see 0. Now the 0 here is because we're using integers which
are whole numbers. If I were to change
this int to a double, which allows decimal points,
and I were to run this. We now see 0.5. And of course all
these symbols can be used on this original syntax. For example, we can say
divide it by 100 times 100. Anything like that
will still work. Now you might be wondering,
why would anyone who uses this type of syntax if
this is just shorter? The main reason for using
this type of syntax here is because if you
have multiple variables, then this was the only
way to do things. For example, I can say int
number two equals ten. Then I can say number equals
number two times 100. We cannot do that with
this type of syntax here, because this type of
syntax is going to only modify the variable mentioned in this case, that
will be number. Now I'm going to delete most of the stuff and I'm
going to create another integer called
number equal to five. Now let's say we want
to add or subtract one from this variable
with what we just saw, we could do number
plus equal to one. If I ran this, of course
it's sort of work. We would see six in the console. But increasing and
decreasing a number by one is so common that most
programming languages, including Java, have
a way to do this, an even shorter syntax. This is known as incrementing
and decrementing a value. So I can say number plus, plus. If I save this, we're still going to see six in the console. This is going to increase
the number by one. We could also do
number minus minus. If I run this, we're
going to see four in the console because we're subtracting from the
original number, which in this case is five. Now the pluses and minuses can go on either assigned
to the variable, and they do a slightly
different things. In this use case, if
I were to run it, we're going to see
no actual change. And we're still going to
see six in the console. But that's only because of
how our code is written here. Having the pluses before or after will be much more
clear on the difference. If I add the pluses directly
on the variable right here, if I run this brush still going to see six in the console. That's because the pluses
before the variable name, first going to increment the
variable and then use it. Using, in this
case, we passing it in to the print line function, basically printing
it to the console. But if I were to add
pluses afterwards, that means we're
first going to use the variable and
then increase it. If I were to run
this, we're going to see five in the console. But technically in the
memory of our program, number still holds the value six. We just didn't print it. To prove this, I can
print this out again. Check our print out number. And if I run this, we're
then going to see 56. The same exact concept applies when it comes to minus, minus. If I go to run this,
we're going to see five and then four. Now of course, if I do minus, minus before, we're
then going to see 44. That's because we
are first decrease in the number and then using it. Then of course we're just
printing out the results again. As we move forward
to the course, you're going to see a number
of different ways and instances where this is
going to be useful to use. Especially when it comes
to our first project, which will be around
halfway through the course.
8. If Else If Else: We're now about to dive into a very important concept
known as control flow. Control flow is basically
where we get to control the flow of the
program who would've guessed. And this is most
commonly done with something known
as IF statements. Basically, if something
equals something, then we're going to run
a certain piece of code. Otherwise, we might not think of a favorite
shooting game. If you press the Reload button, it's going to check if you
have a full Magdalena. Not If you do is
not go into reload. But if you don't have
a full magazine, it will then reload. Let's start off by
creating some user input, striking create a scanner. I'm going to call this input. I'm going to assign the value of new scanner passing
in system dot n. Now that we have access
to this input object, we can actually read
input from the user. So I'm going to say int number
equals input dot next int. Now I'm going to just simply print this out to make sure
everything is working. All right, Mike, and run
this with shift and FTN. Here it's expecting
me to enter a number. I'm going to enter 50 and
then we get 50 printed back. Everything is working fine. But instead of just
printing out the number, I'm going to use
an if statement. The syntax for an if statement
would be if parenthesis, and then a curly brace and an ending curly
brace on the next line. Now inside the parentheses
is where our condition goes. And this condition is going to be typically comparing the two. Thanks. For example, I can
say number two equals signs, 52 equals signs is very important because
a single equal sign, as I mentioned before, is
an assignment operator. This will take the
value on the right and assign it to the
variable on the left. But two equal signs
is a comparison. This is going to see if
the value on the left, he calls the value on the right. I'm going to add in a comment
here it says comparison. Now, what happens if these
two things are equal? Well, this will basically
become a Boolean expression. And if you remember before, a Boolean equals
either true or false, there's no other values
of Boolean can use an IF statements and
inhabit conditional like this is basically going
to look for a Boolean value. Hypothetically, let
me comment this out and let me just
enter in the number 50. Now in this case, our
text editor gives us this yellow warning
by hover over it. It says condition number
equals 50 is always true. Now, obviously that's
the case because our value right here is 50
and that's never changing. Now, the important part here
is that it is always true, which is a Boolean value. So this is basically the same
thing as saying if true. Now if this is the case, then the code inside these curly braces
will always be ran. If this was false and the code inside the curly braces
will never be ran. The condition inside
the parentheses must be a true condition. I'm going to use Control Z to backspace up until here where we're actually
receiving user input. And within here I'm
going to simply print to the console saying
the number is 50. Now I'm gonna get rid of
some of these comments here, just to make our code
a little cleaner. I'm gonna try running
us with shift and F2. And here it's expected
me to enter a number. If I enter 50, going
to say the numbers 50. And if I run this again, I enter anything else. For example, 99. It's not going to print anything because this condition is false. Therefore, the code
inside will not run. But what if we wanted
to check other numbers? Will in theory, we could just add a bunch of if statements. For example, a number
exactly equal to 51. But what if we only want one thing to be printed
to the console? Now every time we
create an if statement, this is going to
create something known as an if statement chain. An if statement chain. This is going to contain up to three different
types of statements. We have our if statements, we have our else-if statements, and we have our
else-if statements. Let's take a look at
else-if statements. If I get rid of this
if statement here, I could then say else, if number is exactly
equal to 51, I can then print out
the number is 51. Now an else-if statement has to be directly after
an if statement. These will basically look at all previous if and
else-if statements. And if they're all false, then it will go ahead and try and compare
these two values. In this case, IF
statement online 16, it's going to compare number 50. If that is true, we're then
going to run this code. And then we're going to
jump down to right here. We're not going to actually even try and compare
the number of 251 because the else-if statement sees that the if
statement was true. It sees that there is no point to even check the two values. But if we entered a
different number, for example 51, this
condition is now false. The else-if statement, we'll see that will then try and
compare these two values. In this case, the two
values are the same. So this code we ran,
but if I enter 52, nothing here will be ramp. To prove this, I can run our
program. I can enter 50. Here we see the numbers
50, foreign run it again. I can enter a 51, and here
we see the number is 51. Finally, I can run
it and I can enter 52 and nothing happens. Now for each IF statement chain, for example, this right here, we can have only
one if statement, but as many else-if
statements as we want. For example, I can say else if number is exactly
equal to 52, I could then print
out the number is 52. And to make things a
little more interesting, I can say else f-number
is exactly equal to 52. Again, I couldn't print out test just to make sure that this print statement is very
different than the others. So if I run this, I
enter 52 in the console. We now see the number
is for the two, but we do not see text. That's because this
condition here was true. Therefore, this
else-if statement is not going to even
bother comparing these two values and
will certainly not print out anything
within the curly braces. Now of course, our IDE
is complaining because these two things should
not actually be here. This statement
here will actually never be ran no matter what. Because if the number is 52, then this code right
here on line 21, we ran instead, because our condition online
20 will be true. I'm going to remove this. And the final thing
I wanted to show you is the else statement. This has to be at the very
end of an if statement chain. This is basically
just a catch-all. If nothing else in the
if statement chain was true, for example, I can print out unknown
number and I can run this. And if I enter 5352, we know what's going to happen. But what happens if I enter 53? It says unknown
number because all three of these if statements
right here or false, therefore the else
statement we ran. But if I were to run this
and I want to enter 52, then it says the
number is for the two. And the else statement is
not ran because it sees or one of the previous f or
else-if statements were true. Basically the program is going to go through all of these and try and find the
first true statements and ignore all the rest.
9. Switch Statements: In the last video, we had
a look at if statements, but that is just one
example of control-flow. Another example is
going to be something known as a switch statement. Now this is less commonly
used as if statements, but you will see it
from time to time. So it's important to
understand how it works. I can simply say
switch parentheses and then curly
braces afterwards. Now antibodies parentheses
is going to be a value, not necessarily a condition, but any type of value. For example, in
this case a number. Now inside, we're
basically going to have something known
as case statements, which are kind of
like if statements. I can say case 50 with a colon. If I press Enter, I could
then add in the number is 50. Then I have to add in something known as
a break statement. I'm gonna go ahead and
run this with Shift F2. Within here, I can
enter the number 50, that's going to say
the numbers 50. Now if I run this again, I enter anything else.
For example, 51. Nothing's actually
going to happen because obviously we're not
handling 51 anywhere. This is different
than an if statement and it had its own use cases. It actually most
commonly used for my experience when
comparing strings, but you can use it instead of if statements if we
really wanted to. But there's more to this. For example, I can
add in more cases. So case 51, I can add in. The number is 51
and I can break. Now of course, if
I run this and add in 51, it will just say that. But what happens if I want to check for two different numbers? Well, I can also say case of 52. And then the print
statement will say the number is 51 or 52. Now if I run this, I can then
go ahead and enter in 52. It says the number is 51 or 52. Of course we'll get
the same output if I enter the number to one. Now the ability to check two
different values with an if statement will
be explained in a few videos in the course. It's much easier to explain
that with switch statements. So that's why I'm
covering it here. One thing to keep
in mind, it has basically if any of
the cases are true, the code will continue to run until a break
statement is found. For example, I can change
this to the number is 52. Then I can print out the
number is 51 right here. Notice how we do not have a break statement after this
print statement right here. This right here is the
only breaks him when we have four hundred fifty
one and fifty two. So if I run this
and I inherit 51, what's going to happen
is it will continue to run the code until it
finds a break statement. We see the number is 51. It doesn't care if
there's a case here. It's just going to ignore that. And it's going to run
this line right here, the number for the two, and
then we're gonna break. Now one last thing
for switch statements is going to be default, which is something that
typically goes at the very end. And this is kind of like the else statement
for if statements. Here I can print
out unknown number. And technically you don't
need a break statement even though a lot will
argue it is proper syntax. But the code work just fine even without a break statement,
because of course, the default should be
the very last case that your check within
your switch statement. If I go ahead and run this
and I enter any other number, for example, negative 500. We then see unknown number. Switch statements are
fairly simple and they can be used instead of if
statements and some use cases. But typically you're just going to be using if statements.
10. Comparison Operators: We're now going to jump back
to if statements and take a look at comparison operators. These are different ways that
we can compare two values. Previously, we had to look
at double equal sign, which will just simply
check the value on the left and compare it to
the value on the right. But there are many more
operators we can use within Java or pretty much
any programming language. For example, we have
a greater than sign. There were less than sign. We have greater than or equal to and we have less
than or equal to. And we also have a not equal to. Now most of these are
very self-explanatory. But let's take a look
at some examples. Like I say, if number
is not equal to 50, I can then print out
the number his not 50. And if I run this
and I enter 50, of course we're not going to see anything because the
number does equal 50. Therefore, this condition
right here is false. But if I run this
again and I enter anything else, For example, one, we see that the number is
not 50 because of course, one is the same thing as 50. Now let's try some other things. For example, I can say
number is greater than 50. I can also the number
is greater than 50. And if I run this, I can now enter whatever number I
want, for example, 900. And it'll say that the
number is greater than 50. But if I enter anything
less than or equal to 50, then nothing's going to happen. The equal to part is important because 50 is not
greater than 50. It's equal to it. If I enter 50, nothing's
gonna be printed. If I wanted that functionality, I can say greater
than or equal to 50. If I run this and I
enter 50, of course, we're now going to see the
number is greater than 50. But that's just because I
did not update this text. But the important part
here is that number is now a greater
than or equal to 50. And of course, the
less sign operators will work the exact same way. I'm sure you can
imagine how those will work and we can
use these to have more complicated
expressions within our if statements to then have a more complex and more
meaningful programs.
11. Logical Operator: Let's have a look at
logical operators. These are other ways to add in more complicated checks
within our if statements. So a few examples of this
will be the NOT operator. This will also be the
logical AND operator. And the logical OR operator, which is by holding Shift and pressing the key above, enter. The NOT operator is going to basically just reverse a value. The AND operator will
basically make sure that thing to the left and the things on the
right are true. The or operator will
make sure that thing to the left or to the
right or both are true. Let's take a look at all
of these with examples. I can say if number
exactly equal to 50, number is exactly equal to 55, I can then print out 50 or 55. And if I run this,
I can now enter 50 and we see 50 or 55
running this again, entering 55, we see
the same thing. And of course, if I run this
and I enter anything else, for example, 70, we don't
see anything in the console. Basically, this wants to see that the left side
of the or operator, or the right side, or both are true. And it might be obvious
because this is the logical OR operator. Let me go ahead and add
in what these stand for. The logical OR
operator is going to be this or that, either one. Now the AND operator will make too much sense
in this use case, because the number
variable cannot hold a 5055 at the same time. Better example of
the AND operator is when using greater
than and less than. So for example, I could say number is greater
than or equal to 50 and number is less
than or equal to 55. So anything from 50 to
55 should be included. I'm going to change
this to 5255. And if I run this,
I can now enter 52. And we see that this is true. Essentially if the number
is greater than or 50 and the number is less than or 55 than the entire if
statement will be true. If either of these two
expressions are false, then the if statement
will be false. For example, if I run this
one more time and I enter 56, nothing's going to
actually happen. While this part
right here is true, because 56 is greater
than or equal to 50. It is false right here, because for the six is not
less than or equal to 55. And the and operator requires both a left and the
right to be true. Now let's take a look
at a NOT operator, which is basically
just going to reverse a Boolean expression
with an if statements, we can actually pair certain
conditions together. For example, I can wrap a parentheses around
this entire thing. And if I were to run this,
the same thing would happen. But now we can use a NOT
operator or beforehand. This entire expression
will be either true or false depending on whether the value of number is the NOT operator is simply
going to reverse that. So I'm going to say not 5255. If I run this, I
could then enter 52. Nothing happens. But if I run this
again and I enter anything that is
not between 5055, for example, all 34,
we see not 5255. The NOT operator is going to simply just reverse a
Boolean expression. And throughout the
course we're gonna see more use cases of the not operator and the
other two operators as well. And how useful they can be.
12. While Loops: We're now going to
look at the most simple example of a loop. And this is a way to make
certain pieces of code continue to run again and again as long as we
want them to run. So there's a few
different types of loops. But in this video
we're gonna take a look at the while loop. So we can say While parenthesis
and then curly braces. And inside this condition is going to be a
Boolean expression. This is going to
be either true or false for if this loop
should continue to run. For example, I can
make an integer called counter and
set this equal to 0. I could then say, while the
counter is less than ten, I can then go inside of the while loop and
everything inside the curly braces will be ran as long as this condition
right here is true. Now currently this
would be known as an infinite loop because
counter is never changing. It's always 0. So counter
lift and tin is always true. We want to make sure
that we actually changed the state of counter, where it being ten or
greater is a possibility. That way we don't get
stuck in a sleep forever. Do that. I'm going to first print
out what counter is, like. I say counter, colon space. And then outside of the string, I could do plus counter. This will add on the contents of the counter variable onto the overall string that has been passed in to the
print line function. Now afterwards I can
say counter plus plus. Or if I really wanted to, I could put this right here. As we learned before,
putting the plus, plus to the left of
the variable name will first increase it
and then you use it. Using, in this case, we
printing it to the console. So before run this, let's
go over what I just did. I created an integer
variable with a value of 0. And we're saying while that
variable is less than ten, we're going to run all the code inside of these curly braces. Now this code simply
just prints out counter. But before we actually
print out counter, we're going to
increase it by one. This means that our
loop is no longer infinite because they
first time this runs, it'll print one, then two, then three, and so on
until it gets to ten, where counter less than tin
would no longer be true. So we can then break out of our loop and continue with
the rest of our program. Let's see this in
action. I can do Shift F2. It should run our program. And if I expand this window, we now see counter one
all the way through ten. This is a very simple
example of a loop. Basically, while this is true, we're going to run all the code inside of the curly braces.
13. Do While Loops: Let's now take a look
at the do while loop. This is similar to
the while loop, but it's slightly
less commonly used. The syntax with us will be
due, then curly braces. And then at the ending
curly brace we would say while with our parentheses
and a semicolon. Now the condition is going to be put inside of this right here. Basically the concept
here is we are going to run this block of code
immediately, no matter what. Then afterwards it's basically just going to become
a normal while loop. We're going to continue
to run that block of code while this
condition is true. But no matter what this block of code we ran at least once, that is different
than a while loop, where this block hook code is only ran even the first time, only if the condition is true. Now a practical use
case for this is receiving user input and making sure we get
the correct type of input or a correct number. For example, I can say scanner
input equals new scanner. I can pass in system dot n. And then here I'm
going to say int number. I'm not going to
assign a value to it. And that's something we
can do with variables. We can create them, but you don't have to assign
a value to them immediately. Now inside the do block
of code right here, I'm going to say number
equals input dot next int. Then I'm going to say while
number is less than ten. So essentially what this
code is going to do is we're first going to receive
some input from the user. We're going to create a number which we're going
to use later on. And then we're going
to run this code. No matter what the
walk condition is, it always runs once. So essentially we
are going to receive input from the user,
ideally a number. And then we're going
to continue to run this as long as this
condition right here is true. Therefore, we have to provide
a number that is ten or more in order for it to
actually receive valid input. Now, afterwards I'm going
to print out the number. I'm going to run this
with shift and FTN. Now inside of here, I can
enter whatever I want. For example, five or seven. Anything less than ten will be completely ignored because
the while loop will continue to make this
block of code right here run over and over again until
this condition is false. I can even enter
negative 5 thousand, for example, and it's still
going to continue to work. But as soon as I enter anything ten or greater, for example, 84, it's going to break
out of that loop, and it's going to
print 84 right here.
14. For Loops: Let's take a look at
the most powerful loop, which is known as the for-loop. This is the best way
to count things or to iterate over a list
of certain elements. That might sound confusing, but over the course you'll
see examples of that. For now, let's just simply
try counting something. In previous example, I
created a counter and then he used a while loop to go ahead and count over that. We can use a for-loop to achieve this and a
much cleaner way. For example, I can say for
parentheses, curly braces. And inside the parentheses
there's going to be three different
elements that are going to be separated
by semicolons. The first one is going to
be the initialization. This is where we
can actually create variables that can be
used with our loop. So I can say int
counter equals 0. The second one is going
to be a condition similar to a while
or a do-while loop. This will be if the loop
should continue to run. In this case, I'm going to
say counter less than ten. Then afterwards, this last section is going to be code that we ran every single time
the loop completes. In this case, we want to
say plus plus counter. So each time we're going to
increase counter by one. Now within here I'm simply just going to print counter
to the console. And if I run this
with shift and F2, we should see a count
from 0 to nine, as we see right here. Still in the loop. First starts, it creates this
variable only once. Then seats if this
condition is true, if so, it didn't runs all the code
within our curly braces here, simply just print 0 to the
console as we see there. Then once it gets to the end, it realizes there's
nothing left to do. So it goes to loop back. As it's doing that it
increases counter here. That gnosis, that counter
is now 11 is less than ten. So cute repeating the process until this condition is false, which we see right here. Because once it's nine
and it increases to ten, the condition is no longer true. Therefore, we break
out of the loop.
15. Break and Continue: Let's take a look
at the break and the continue keywords with how to look at break
within switch statements. And it works in a
similar way here. But these are two key
words that can be used within any of
the loop types. For example, I can say
int counter equals 0, while counter is less than ten. Now in here I'm first
going to increase counter and then I'm going
to print it to the console. But let's say that I
went to skip the number five after I increase it. But before I print to the
console, like I said, if counter is exactly
equal to five, I can now continue and
continuing or basically just skip everything else in a loop and just go back
to the start of the loop. It will still check
the condition. But everything passed this continuous statement here, well, basically be ignored in this
case is just this line here. Essentially, once we hit this, we're just going
to jump back up to the start and they continue
looping normally from there, I'm going to press Shift
and F2 to run the code. And here we see one through ten, but five is missing. We see 46 immediately
afterwards. That is the continue keyword. It will automatically jump
back to the start of the loop. Now let's take a look
at the break keyword. Some of you might already guess
what this is going to do. Essentially, instead of just
jumping back to the start, if he's going to break
out of the loop entirely. If I run this, we see one through four because
once five is reached, it's immediately going
to break and start running the code outside
of the while loop. You can use these two
keywords to have better control over your loops and what is executed and when
to break out of them. And both these keywords here
work on every loop in Java, including the three
types we've seen so far.
16. Calculator Project: Let's put all the skills
we've learned so far into US. Let's make our very
first project. We're just going to be
a simple calculator. Now, most of the things
you've learned so far will be directly applied
inside this project. What this project is
designed to still be difficult if you're brand new to programming when you first
started this course. If you run into any problems
or you're struggling with this project that is
expected and don't worry, There's three main things I wanted to do when it
comes to this video. The first one is going
to be going over a plan. When designing any program, even just a simple calculator, it's important to
have a plan and an overall idea of
what you want to do before you start
writing code. The second thing is I want
you to try on your own. So I'm going to show
you step-by-step how I would make us. But before I do that, I want you to pause
this video and try making it on your own
after we go over a plan. While courses like
this one help, the best way to get better at
programming is right code. I highly encourage you to
get as far as you possibly can on your own before you watch how I would
implement this. Now the third thing
is going to be, I will show you how
I made this program. After we've designed
our plan together and after you've tried to
make this on your own, I'm going to show you how
I would make this program. Let's start off with step one, going over a plan. What should this project do? And what do we need to do
in order to achieve that? Well, the first thing is it
should ask for two numbers. Then it should ask, or a math operation. This will be a plus, minus multiplication
or division. So it'd be one of
these four characters. Afterwards, we need to display
the result and then loop back to the start of the program where
we ask for numbers. This is a very, very basic plan when it comes
to this project. Some of these things
should be simple. Other things will
require you to think, perhaps even going back
to previous lessons. Again, try and pause
this video right now and get as far
as you possibly can on your own and then come
back once you've completed a project or once your 100% stuck and you
can't get any further. And I'll show you step-by-step how I would make this program. Hopefully you've already
tried on your own. Now, let's go ahead and implement each one
of these steps. But our plan here shows an important use of reading
all the instructions. For example, here we see, we will loop back to the
start of the program. That means that
this entire program could be inside of a while loop. I can say while true. Now this will be an infinite
loop that will run forever, which is fine for this use case. Now it's gonna say it
should ask for two numbers. So I'm going to just
start off by making a scanner calling inputs, setting this equal to a new scanner passing
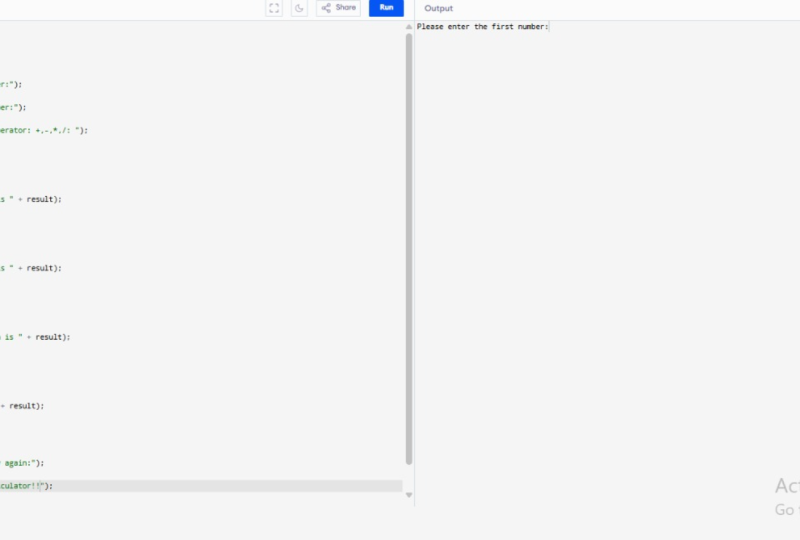
in system dot n. Then I'm going to print out
enter the first number. Then I'm going to say int number one equals input dot next int. So far we've asked
for one number. Let's basically do the same exact thing for
the second number. I just print out enter
the second number. And then we're going to
have another integer, int number two equals
input dot next int. So far at the very
first step is done. We now have the two numbers. Now we should get
a math operation. So plus minus star or four
slash will be addition, subtraction, multiplication,
or division. Next, let's tell the
user what to do. I can say enter an operation. Then we're going to say
what options there are. Plus, minus star and slash. Like I say, String Operation
equals input dot next. So now we have access to both the numbers and
the operation we want. Now using if statements
for comparing two strings does not work correctly with everything
I've taught you so far. With that said, we're going to be using
switch statements here. I can say switch operation. I could then say
case with a plus. I'm going to add in break
and then I'm going to say case minus break. I'm just gonna go ahead and
add in all four of these. We have case, star, break, case, forward
slash break. Now in order to get a
result in all of these, I need to create it outside
of this curly brace. The details of why that is will be explained
in a future video. So I'm going to create an
integer called results. I won't assign a value yet. We're going to do that inside
of our switch statement. So if they entered a plus, I'm then going to say results equals number one
plus number two. Also make sure you spell
a number of correctly. Then from minus, I'm going
to say result equals number one minus number two. For multiplication, I
can say result equals number one times number two. And then for division I
can say result equals number one divided
by number two. Now, outside of the
switch statement, I can then print out the result, like I say, results space. And I can add on the
results right here. Now here we're actually
getting an error and our IDE by hover over this, it says variable results might
not have been initialized. We can go ahead and click
on initialize a variable. It's simply going to
assign 0 right here. Even though we're going
to override that value, it's still likes to see that we're going to
have a default value because it doesn't
know for sure if one of these four
cases will be ran. Let's go ahead and run this
and let's see what happens. If I press Shift and F2, it's going to say enter
the first number. I'm going to enter five,
enter the second number, three, and turn operation. I'm going to enter
multiplication. The result is 15, and now it looks back into
the first number. So for example, I could do
105 and then subtraction. And here we get five. So it's going to keep
looping over and over again and keep asking for
the first second number. And we can then do any type of operationally we want
with those numbers. Now keep in mind that we
are using integers here. So if you try to vision it is only going to give you a
whole number of results. If you wanted a more
accurate results, you can use double and instead of integer for the
result variable. Now if you can put it
this program on your own, then congratulations
and good work. But if he needed
to watch some of the extra video in order
to do it, don't worry, that's perfectly
fine, especially if you're new to programming, because this is a
brand new skill. As he move on
through the course, more things become more apparent to you and easier for you. It just takes time to
learn all of these things.
17. Methods: This is where
things start to get a little more complicated
but also more fun. This next topic
is about methods. Methods are basically
just a block of code that are ran and their goal is
to do one specific thing. In fact, we've been working
in a Methodist entire time. This main method
right here is ran by default whenever we
run our own program. But we can create
our own methods outside of the curly braces
for the main function, I can say public, static, void, example, parentheses,
and then curly braces. And in here we can write
whatever code you want. For example, I can just
simply print out hello world. Then in our main method, I can say example. And it'll automatically
know we're trying to run this function. If I press Shift and F2, it should run our program. And here we see HelloWorld
in the console. So a lot is happening here. And I also have
mentioned methods, and it also have
mentioned functions. And functions are
practically the same thing, although there is a
slight difference. Function is basically
what we see right here. This is technically a
function and so is this. But whenever a function
is inside of a class, which I'll explain
in a future video. These are now called methods, but in most cases
it won't matter. They're interchangeable
for the most part. But technically a function is outside of a class and
a method is inside. Now again, we'll cover classes in more detail in
the future for now, just think of them
as a container will all of your
methods can sit in. Adding these
parentheses here will invoke or run or
fire this function. These are all
interchangeable terms basically of a way
to run the function. Those are also common
terminologies that are used when we're actually
trying to run a function. Now you might be
wondering why called the example method
when we can just print Hello World
in the main method. Well, that's because
this is obviously an oversimplified example. In a real program, you may not want to just use
this example function once. You might want to use
this example function multiple times
throughout your class or have been throughout
your entire project. Having the ability to abstract certain pieces
of functionality into their own methods makes it much easier to reuse
that functionality. We'll see this in real examples as we move forward
to the course. But now let's explain
what these parentheses are and also what this
void means right here. Basically a function can receive input and it can
also return input. I'm going to get rid
of these comments. And if I click on
the example name and I press Shift and F6, I can now refactor or rename
this entire function. I can say add. Now if I press Enter, it renames the function as well as
the function invocation. Now inside of the parentheses, we can add in something
known as parameters. For example, I can say
int num one and int num2. These are separated by a comma. We can even have multiple
types of variables. For example, string example. But in this case we're
just adding two numbers. So there's no need to
have a string here. Now, automatically
intelligent gives us this red arrow here, saying that we cannot call
it without any parameters. So we can pass in
some information here, for example, 510, and now we no longer
have any errors, but this code does not
work as we expect it to. That's because we're still just simply printing Hello World. But what we wanted
to do is we want to return the sum between
num1 and num2. I can say return num1 plus num2. Now it gives us error here. If I hover over it,
it says cannot return a value from a method
with a void result type. This avoids right here, means nothing is going to be returned. We have to be very
clear what type of data will be returned
from each function. In this case, we're
returning an integer because we're adding
to introduce together. So we could change a void to
int and the error goes away. Now over here I can say
int sum equals add 510, and I can print out some. Now if I run this
with Shift F ten, this'll print 15th
to the console. Now if we wanted to, we could also just pass in this function call inside
of the print line function. And in fact, print line has been its own built-in function that we've been using
this entire time. It has its own parentheses
and we're passing in information to it just like we are with this add function. And here's a perfect example of why we want to make functions. Because I can copy and paste
this a couple of times. And I can now add in different
values of I wanted to. This now gives us three
different results of 1520 and negative three. And it's all because we have a simple add
function right here. Now obviously this is a
very simple function. But if we had more
complicated functions with more code inside of them, you can see the benefits of having to only
write the code once and then a running that from different places as many
times as you want it. Now one last note
is that these here are technically
called parameters, but when they're passed
in, such as right here, or these numbers directly, these are known as arguments. You have parameters
and arguments. Just like functions or methods, these are often used
interchangeably, but technically,
what you write in the function itself is
known as parameters. And what you pass into the function is
known as arguments. But again, just like
functions versus methods, they're often used
interchangeably.
18. Method Overloading: In the previous
video, we created a simple add function that returns the sum
between two numbers. But what if we want
to add strings together to create a sentence? For example, I can print
out add hello and world. And obviously this doesn't work. But of course I could print out add 55 and this would work. Now, typically, you can only have one method
with the same name, similar to variables,
but we can do something known as method overloading. This basically means having multiple methods
with the same name, but different parameters
and different return types. For example, I can say public static string with a capital S, String s1 and S2. Now within here I can return
s1 plus a space plus S2. Basically putting the
two words together. Now we have a two methods
that have the same name, but we have overloaded them
where Java is now going to know which one to call depending on the
parameters passed in. Online, five are
passing and strings. So what's going to
call a method here? Lines stick for
passing an integers. So what's gonna call
the method here? I can go ahead and run
this holster the output. Here we see HelloWorld and ten. Method overloading is often useful in situations like this, where you have similar
functionalities, but you want to pass in
different types of variables. You can overload those methods, basically coning them and having different parameters and possibly a different return type if it makes sense to you.
19. Scope: Every time we create an
opening curly brace, such as this one right here, It's creating something
known as a scope. And the scope is
going to limit what can and can't use
certain variables. For example, I can say
int counter equals 0. And then I'm going to
create a while loop to increment this counter. While counter is less than ten. I can then say
counter plus plus. Now we can access as
counter perfectly fine, so I can print it right here and everything works as expected. But what happens if I create
a second variable inside? For example, I say int
example equals 15. And I were to print this
out for whatever reason. Obviously it doesn't
make too much sense, but this is just an example. Everything works so far. But what happens if
I try and access example outside of
the while loop scope? So I could try
printing this out. I can add an example and
we get an error here. If I hover over this, it says cannot resolve symbol example and it
even has a solution here. Or I can click to bring the int example into
the current scope. Note that example is created
online 14 right here. But if I go to click
on the solution, we are now creating the
variable on line nine, which is inside the
main function scope. This means everything inside the main function can use it, including the while
loops own scope, because I is also inside
of the main function. So it has changed our
code to simply just reassigned example
with the value of 15. But we're creating it
outside of the while loop. Now, even with all this said, it's not a good
idea to just simply blindly put all of your variables at the
top of your function. For example, let's
say that I am not printing out this
variable here on line 20. In this case, the
example variable has no need to be defined
in the main scope. And instead, it could be just simply defined in the
while loop scope. I could say int example. And then I can get rid of the variable
creation right here. Typically, unless you
have a good reason to, you should always
define your variables as locally as possible. By that, I mean, right here, this is locally as possible because we are using
the variable online 16. So it is going to your local
to the scope right here. There's no need to define it
outside in the main scope, because right now
with this code, we're not using an anti,
the main scope at all. We're just using it inside
the while loop scope.
20. Ternary Operator: Sometimes you might want
to write an if statement, but in a more condensed way, this is often the
case whenever you want to have a single
value or that you're assigning to a variable depending on a true
or false statement, we can achieve
this was something known as a ternary operator. This is basically going
to be some type of condition followed
by a question mark, then a true value, colon, and then a false value. Now this might seem confusing. So let's take a look
at a real example. I'm going to create
a Boolean called is member until
this equal to true. This might be if you're
paying for a membership somewhere and they offer
a single onetime payment, they might give you a
discount on that purchase. So for example, here I can say int price equals is member. Now again, this
is our condition. A condition is just a
Boolean expression. So a simple Boolean statement
will work just fine. So question mark, and then
we have our true value. In this case the
price might be $10. But what's say that
we want to charge a higher price for people
who are not already members. So I can add any colon and then the price here could be at $40. Now I can go ahead and
print out the price here. And I can run this
with shift and FTN. Here we see ten in the console. But if I change is member
to false and I run this, we are then going to
see 40 in the console. The reason for this is now
this condition here is false. So what's going to use this code here which was
partly false value, anything after the colon
is going to be used. If the condition is false, anything before the colon is going to be used if It's true. Now obviously we could do
something similar to this. If I say int price equals 0, then I can say if is, remember, I can now
say price equals ten, else price equals 40. And this will work in
the exact same way. But a ternary operator really shines here whenever
you're using very simple if statements where you want this to be on
a single line of code. Because obviously
writing this one line of code is much easier than
writing all of these.
21. Arrays: Let's now talk about arrays, which are basically just a
collection of variables. As an example, let's say I have a number of different
student test scores. I can say int student
one equals 96, int student two equals 49, student three equals 76, and so on and so on. Unless I have a bunch
of these, well, I don't want to necessarily create a bunch of
different variables. Instead, I can create one variable which is
known as an array. This is basically going
to be a collection or a list of a bunch of
different variables. I have to first specify of variable that array
is going to hold. Each array can only hold
one, a single type. You cannot mix and match them. For example, you cannot
have an integer with a string that all have to
be the same exact type. So I can say int, opening and closing
square brackets. This represents an array. I couldn't say student scores
equals a new int width, the square brackets as well. This is going to
create our own array. But whenever we're creating
array without initial values, which I'll show you an
example of here in a moment, we do have to specify how many different types of elements we want
to make room for. In this case, I wanted
to make room for three. And so now I have created in
array that can hold up to the three integers to
assign a specific value. I can say students
scores, square brackets. And in here is where we specify something known as an index. This is basically
just a counter for which exact slot we're going to use out of the
three we are given. This starts counting at 0. So I can say students scores
index of 0 equals 96. Students scores index
of one equals 49. Students scores index
of two equals 76. Now I'm going to go
ahead and get rid of these three integers
right up here. And now I want to print out each one of these
to the console. So to do that, we can use a
very similar syntax to this. So I can print out students
scores index of 0. I'm going to go ahead
and copy and paste this using Control
C and Control V, or Command C,
command V on a Mac. And now I can change
these indexes to 12. Now I can run this
with shift and FTN. Here we see all three numbers. But what happens if I try
and access index three, which doesn't actually exist. In fact, we get this
little warning right here. If I hover over this, it says array index is out of balance. If I go to run this,
we're actually going to get an error
in our console. And this is known
as an exception. An exception is
something will take a further look at in the future. But for now, just think
of it as an error. The reason why we got this
is because we're trying to access something that the
array does not have room for. We only assigned space for
three integers in this array, and we have used all three. Again, remember, it
starts counting at 0. So the three spots
we have our 012. Therefore, index
three cannot exist. And it says trying
to access something outside of the boundaries
of this array. One more example I want to
show you is how to create an integer by setting specific
values when creating it. So instead of specifying
three, we can delete this. And then after the
square brackets, we're going to create
our own curly braces. In here. We can add in any
number of elements. We want Example ninety six, forty nine, and seventy six. And now we have
these warnings here. If I hover over it, it says a variable is already
assigned to this value. So essentially these
three lines of code here are not
necessarily whatsoever. By delete them and I
run the program again, we're going to get
the same exact output as you see right here. Now we can have arrays for
any type of variables. For example, we can
create an array of strings or an array of booleans, but this is a very simple
example with integers. And one last thing I wanted
to show you is how to access the length or the number of
elements within an array. And one last thing I wanted
to show you is how to access how many elements are, how many items are
inside of an array? I can print this out. I'm going to access
students scores dot here. We can access length. This is going to be an integer, and it's going to say
how many elements are inside of this array. So I can go ahead and run this. Here we see the number three because there are
three elements. If I added an extra one here, I can then run this one
more time and we should see four as we do right here. Now of course we don't
see the 100 printed to the console because we're
not printing index three, which now exists thanks
to this 100 right here. But we are only printing
the initial zeros or to the 100 is on
display to the console.
22. For Each Loops: In the previous video, we
had a look at how to create arrays and also how to access
each individual element. But what if we had
a larger number of integers and we don't want to
mainly print out each one. We can use a standard
loop or something known as a for each loop to go ahead and loop
through each element. Here, I will show
you two examples. Here we have a
standard for-loop. I'll also show you a new concept which is a for each loop. But first we have a standard
for-loop, like I say, for parentheses, curly braces. And inside I'm first
going to create my own integer int
counter equals 0. While the counter is less than students scores dot length. We can then increase counter. And then in here I
can certainly print out students scores
index of counter. We can pass in variables
as an index here. And this will access index 0, then 12, and so on until we loop through every
single element of this array. To prove this, I can run
this with shift and F11. Here we see all four
numbers in our console. Now looping through arrays is so common that they made
a shorter syntax. I'm going to comment
out these three lines. Here. I'm going to use something
known as a for-each loop. I can say for int number, colon, then the
name of our array. In this case a student scores. Within here the number of
variable is going to hold each individual element
as it loops through them. So the first iteration
of this loop, the number variable
will hold the value 96. The next time it loops through,
it'll hold 49 and so on. To prove this, I can print out number and I can run
this with shift and FTN. And here we see the
same exact output. Now, typically a
foreach loop will work, but in some use
cases you might need access to the index
that you're using. For example, this counter
variable right here. This situations, you can simply just use a standard for-loop. But again, in most situations the for each loop
will be just fine.
23. Multi Dimensional Arrays: In previous videos we've had
a look at simple arrays, but now let's take a look
at multidimensional arrays. Basically a Raisa have
arrays as values. Here I'm going to create an array that has
an array of scores. For example, I can say
int two brackets here, scores equals curly braces. And within here is going to expect another array of values. But to define these arrays, we're just going to be
using the curly braces. For example, we have our
curly braces with ninety, six, forty, five, and eighty. Now to make this easier to
understand listed at now, to make this easier
to understand what this is going
to be for Test1. We then have test2, which has different scores, let's say 8666 and then 90. How do we want to loop through
each individual element? We first have to loop through
each individual array, where the value then becomes
each individual array here. So we can use a standard for-loop as well as
a for each loop. I'll show you an
example of both. For the standard for-loop, I guess it for int
counter equals 0, while counter is less
than scores dot length, I can then increase counter. Now within here, we
need something known as a nested for-loop. Where does, where we have
a loop inside of a loop? I can say for int
counter to equal 0, while counter two is
less than scores, index of counter dot length plus plus counter to
what is happening here. Basically, we're doing
a standard for-loop, which I'm sure you
understand already. But then we have a
nested for-loop. I'm creating a second
counter variable and I'm using it everywhere
aside from right here. Basically what's going
to happen is we're looping through each
individual array. And this is what
we're going to have access to on the first for-loop. Index 0 of the first
for-loop will be this entire array index one, or the second iteration as
it loops through again, will be this entire array. But now we're going to access each individual element inside scores index of counter at first is going to access
to this array right here. We're accessing the length
property from the first array. And then as the initial
for-loop loop's again, we're going to get access to the second array because
counter with an equal one. Again, remember this is index 0. Index one. The indexes start counting at 0. So to access each individual
value I can print out. First, I will print
out test plus, I'll add in parentheses and
I can say counter plus one. The reason for this is
because counter starts at 0 and we want to say test1, test2 and not test 0, test one. We're simply going to
add one to the counter. But this has not going to
modify the counter-variable at all because we're
essentially taking the value of counter
and then adding one. But we're not assigning that
to the counter-variable. Afterwards, we're going to
add in each individual score. For example, scores
index of counter, and then a second bracket, index of counter to stop. I run this with shift and F2. We now see test1 is 9825
and test two is eighty six, sixty six and ninety. Just to simplify
things a little bit, if I get rid of these
parentheses and I run this, we basically get the same exact
thing except this counter here is going to show index 0 as we're looping through
the very first array, and index1 as we're looping
through the second array. The only reason why
I added plus one here is to make it
more human-readable. Now, as you can tell, this
code is a little confusing. And typically you're not
going to working with multi-dimensional
arrays that often, Ideally there are better
solutions to handle your data, especially if your data needs three or more
dimensions of arrays, there's usually
always going to be a better solution than using
that many nested arrays. But just to be complete here, I'm gonna go ahead and show
you how to loop through a nested array or a multi-dimensional
array rather, with a, for each loop, I
say for int array, I can call this array
one colon scores. This is going to loop through
each individual array. Now within here we have
access to each array. So for the first
iteration of that, for each loop, we're going to
gain access to this value. And then the next iteration we're going to get
access to this value. We can use a standard for
each loop on this array. For number, colon array one. Now within here we
can print out number. Now I can run this
with shift and F2. And here we see all six
individual numbers. This is a good example, like I mentioned
in the last video, that for each loops do not
have access to the index. Here we're saying
that test number because we're essentially
using the index right here. Both for each loops. We don't necessarily
have access to that. If you wanted access to the index to print
out the test number, and then you'd have to
use a standard for-loop.
24. Varargs: Now that we have a better
understanding of arrays, we can tackle a concept
known as varargs, which is a different
way to pass in as many different parameters
as you want into a function. So I'm going to make a
very simple add function. I can say public,
static int add. And here I can have int num1, int num2 within here. It's very simple. We just simply return
num1 plus num2. Now to make sure
everything works, I can print out add
passing in 1015, and I can run this
with shift and F11. Here we see the sum as 25, so everything seems
to be working. But what if I want to add
on another number here, or multiple different
numbers as many as I want. The problem here
is I have to now add in an individual parameter for every single input and a number of inputs
could possibly change. Well, the concept of
varargs solves this. We essentially can pass in any number of integers
into our parameters. For example, I can say
int three dots and then nymphs or numbers,
whichever one you prefer. Numbers is essentially
going to be an array. With that said, we no longer
have access to num1, num2. Instead, we now need
to loop through each individual
element of this array, like I say, int sum equals 0. And then I can return some. But before we return, we need to actually add on every single
number to the sum. I can use a standard for-loop or it can use a for each loop. So for int number,
colon numbers. And then I can say sum
is plus equal to number. So now I can run this and
we should see the sum of all these numbers
right here, which at 53. We can even lower this to as many or as few
arguments as we want. For example, I can just have tin and it's going
to print out ten. Now one thing to keep
in mind is that varargs need to be the very
last argument. Because if we had
additional things here, for whatever reason we, let's say we have a
student integer here. It doesn't know where the
start and where they stop. If we have additional
arguments that we'll need to add them before the varargs. Varargs should always
be at the very end. So it knows where they start, and it knows that every
further parameter passed in, it's going to be accessed
as that varargs. For example, ten here is
going to be students, and it actually identifies
that right here, but any additional numbers here. So just 515 are now going to be part of the
varargs parameter.
25. Constants and Casting: Sometimes you might not want your variables to
change the values, and also sometimes
might want to change the type of variables
that your variables are. Let's start off by
taking a look at something known as constants. And this basically means that a variable value cannot change. If I say string
name equals Alex, I can print this
out to the console. And of course before I do so, I can actually change this to my full name, which
is Alexander. But let's say hypothetically, I don't want this
value to change. I can add the final keyword before we create our variable. And now I get an
error right here. If I hover over this, it's going to say
that you cannot assign a value to
a final variable. Name might be wondering, why would you want to do this? Why not just simply not change
the value of the variable? That might be the
obvious solution when it comes to a simple programs
such as this one. But in a real programs
where you have hundreds of files on hundreds of thousands of lines of code potentially, and potentially even
other coworkers. You might not remember
everything your code does. And you also might not remember
that certain variables might have side effects
if you change the values. If you're going to
have a variable whose values should not change, then you should make it a final variable with this keyword here. Now next, I'm going to show you something known as casting, which is basically where
you can take a variable and assign it to a different
variable of a different type. For example, I could say
int amount equals ten. And I can then create a double which holds
a decimal value. So therefore, we can
have non whole numbers. And I can say new
amount equals amount. Now if I go ahead and print out new amount and run this
with shift and FTN. We now see ten points 0. And in this case we don't
actually need to cast anything because all doubles can
technically still be integers. But once we create a double, it's going to add on
the decimal of 0, but let's assume that this
was going to be reversed. I can say double
amount equals 10.5. I could then say int new
amount equals amount. And we get an error here. If I hover over this, it says the required type is an integer, but provided type as a double. Well, we can do something
known as casting this integer except the double value
as an integer value. And to do that, we can add in parentheses and
the variable type, in this case int right before
the target variable name, which in this case is amount. Now if I run this, we now say ten in the
console and not 10.5, because integers can
only be whole numbers. So anything that
is not acceptable, for example, this 0.5 is
just going to be ignored. The whole number that is
leftover in this case, tin is going to be assigned into our new amount
variable right here. Now this is how you
cast primitive values. And I'm going to discuss
the difference between primitive and reference types of values in a future video. Let's take a quick
example of how to convert an integer
into a string. So for example, we
have an integer ten, but we want the string
ten, something like this. Well, I can say int
number equals ten. Then I can say string, string equals string with
a capital S dot value of. Here we can see
all the different possible parameters
we can pass in. We can pass in an integer, a char along afloat
and so many others. In this case, we just
want to pass in a number. And then I can print out
string to the console. And if I run this, we're
going to see ten as a string. Now if I wanted to
do the reverse here, I can say string, string
equals ten in quotes. I could then say int number. I could then say integer with
a capital I dot parse int. And here we see we
can pass in a string. And this top function is going
to also return an integer. I can pass in the
string arguments. Then I can print out
number to the console. If I run this, we
should still see ten. But now this is an
actual numerical value. So I wanted to, I could increase this by one
before printing it. Now with C11, beforehand, we were converting a
number to a string, so we could not increase that once it was already
in string form.
26. Common String Methods: At this point, you
should already know how a basic if Stephen works. But if you ever tried comparing strings
with an if statement, you might notice that it
doesn't work correctly. For example, let us start off by asking the user for some input. I could say enter your name. Then afterwards I'm
gonna create a scanner. I'll call this input. I'm going to make this equal to a new scanner passing
in system dot n. This is all pretty similar
stuff that we've seen before. I could say stream, user name equals
input dot next line. This will retrieve the entire line that the user has entered. Now let's say that if I
enter my name as Alex, it will then say hi Alex. Of course, in a real program, we could just use
the variable value. But I want to
specifically do this in an if statement to
demonstrate something. I can say if username is
exactly equal to Alex, I couldn't print out Hello Alex. I can run this with
Shift and left him. I could then enter my name
and I'm going to enter the exact string we're looking
for in the if statement. So Alex, with a capital a, if I go ahead and enter that
and then I press Enter, we don't see anything
printed to the console. That's because
strengths cannot be compared by using a
double equals sign. If I hover over this, it says string values
are compared using double equals and not
equals as a method. In order to compare strings. Instead of using dough equals, we can take the string,
we can press dot. And here we have access to a bunch of different functions. We'll look at a couple of these towards the end of this video. But the one I want to
show you is called equals as well as
equals ignore case. So we'll start off with equals. Here we can pass
in another string, for example, Alex
and I can run this. And I can now enter
Alex with a capital a. And it will then say Hello Alex. If I run this again, I can
enter Alex with a lowercase a. And nothing we printed. If I wanted to ignore the capitalization
of either string, then I can say equals ignore
case and then pass on Alex. So if I run this, I can now enter Alex with a lowercase a. And it'll print out Hello Alex, because it is not going to care about the capitalization
of either string. This is how we compare two strings within
an if statement. But now let's take a
look at a couple of other examples of commonly
used string methods. I'm going to go ahead and
delete all this code. And I'm simply just going to
say string name equals Alex. And then within here
I'm not going to print theme, adopt to lowercase. I couldn't run this
and we're going to see Alex that has a capital a. Now we display them all
lowercase in the console. In a similar way, we
also have to uppercase. And of course if I run this, we see Alex in all
uppercase and the console. There's a couple of
other functions we have, such as length. If I run this,
we're going to see how many individual characters
are inside the string. In this case it's for. And we can actually just
press a period at the end of name and we see a bunch of
other methods we can use. For example, here we can get a character at a specific index. Here I can get index one, which should be a lowercase l. If I run this, we can
confirm that in our console. Here we see a
lowercase l went back. We have a bunch
of other options. For example, we can concat, which means concatenate, basically adding on an
extra part of a string. So I can add all
my last name here. And if I run this, we
now see Alex Flores. And the space that has added in the console is because of the
space I added right here. By default, it won't
add any spaces. It'll only do exactly
what you tell it to. Feel free to mess around with some other string
functions here, there are a number
of useful ones that you can actually use to change the string or to use
the string in different ways.
27. Escape Sequences: Let's now dive into
another string concept known as escape sequences. This is basically going to be individual characters that have specific meanings
within restraints. For example, I can say string, string equals hello
space, world. I'm gonna go ahead and
print this to the console. And of course this would
just print out hello world. But what if I wanted hello and world to be on different lines? Well, I can use a
forward slash n. Now this becomes
an orange color. That's because this has known as an escape sequence for slash
n is going to be a newline. To prove this, I can run
it swift shift and FTN. Here we see Hello World
on the next line. Another one is forward slash n, which is going to be a tab. For example, after
adding a new line, I can now add on a new tab. And I can run this again. Here we see Hello world, but the world is now indented
once by a tab character. We can also do two
forward slashes, which just becomes a
single forward slash. Because of hours we add on
a single forward slash. It's going to assume that
this was going to be an escape character or
an escape sequence. But if I wanted an actual
forward slash and the string, I didn't have to escape
that forward slash by basically just adding
200 words office. I can then run this. Here. We now see a forward
slash in the string. Whereas beforehand
it's going to assume we're going to try and
escape with a capital W, which doesn't actually
mean anything. So it's now going to
give us an error. We can also escape
double-quotes. So this will just become
a normal double quote. And the reason for this is
because a double-quotes represents the start or
the end of a string. If I were to simply just
add a double quote here, it's not going to know that this has going to be
part of the string. Rather a thinks we're trying to in the current string
as a variable. If I went world to be in quotes, I can add in the double-quotes, but I have to escape them by adding a forethought
beforehand. Now this is looking
a little confusing. So I'm going to replace all the previous
escape sequences with just a simple space. So now I can run this and
we should see Hello World, but world is wrapped
inside double-quotes. Now there are a number
of other escape sequence characters
that you can use, but these are by far
the most common ones. You're going to see.
28. The Math Class and Random Numbers: Let's take a look
at the math class. And this has a couple of
different things that we can do when it comes to
basic math operations. The first example is
going to be getting the absolute value of a number, which is basically
just going to convert a negative number to
a positive number. But more technically,
this is going to count the distance
from that number to 0. I'm going to print out math
with a capital M dot abs, which stands for absolute value. And here we can
see we can pass in a number of different
numeric values. In this case, we can
pass in positive ten. I went to copy and paste this
and pass in negative ten. And then I can run this
with shift and FTN. And here we see
tin in both cases. So in basic terms, this will just
convert a negative number to a positive number. I'm going to go ahead
and comment this out. Moving forward, I can print
out math dot minimum. And this is going to take in at two numbers of the same type, and this will return the
minimum value between them. For example, I can pass in 107, also going to print
out math.max, which is a similar concept, but we will return the
maximum value between them. I can also return
107 here as well. So if I run this the first time, we're going to get seven because that is the minimum value. But the second time
we're going to get ten because that is
he maximum value. Now if we say math dot and
we'd go through all of these, there's a number of
different math operations. So you might be familiar
with depending on how experienced you are
with math in school. But some more basic
examples will be floor, which will basically just
rounded number down. And it also seal, which will run a number up. For example, I can pass in 0.2. I can wrap this inside of
printing this out here. Then I can also print out Math.floor and I
can pass in 0.9. Now if I run this
within our console, we're going to see
one and also 0. This is going to round up, no matter what, it doesn't matter if it's lower than five. And it's going to round
down, no matter what, it doesn't matter if it's
higher than or equal to five. Now one more thing I wanted
to show you is how to generate a random number. There are two ways to do this. There is an older
way which you're most likely going
to see her behind a time within working with other code are following
other tutorials. And there is a newer way. The older way, I can say int
random equals new random with a capital R parentheses here at the press Alt and
Enter to import this, I could then say nextInt. I can then print out
random to the console. So if I run this, we're going
to get a random number. Obviously this is going to
generate any random number, but we don't
necessarily want that. Lot of times we want
something between 010 are just 0100,
things like that. So we can pass in
an integer here. For example, ten, run us. It's now going to generate
a random number between 09. But if we wanted
one through ten, we can just simply add
one to the end of this. So if I run this again,
here we see two. I don't know if I keep running
this, we're going to get your random number between 110. This is the old
way of doing this. There is a new way. So random number knew, I could say int
random equals thread, local random dot,
current dot next int. And this works in the
same exact way as before. And also with both the old
and the new way of doing this weekend generate
other random values, for example, Booleans. If we wanted a random
true or false value, which will come up
from time to time. You can use next Boolean. You can get ram next, doubles and other
things like that. But for example,
here we can pass an int and then the
boundary will be ten, and we'll add one
to the end of it. And I can then print out
random to the console. So these are the two
different ways to generate random numbers within
your Java program.
29. Primitive vs Reference Type Variables: This video is going
to be a little more advanced than
previous videos. We're going to learn
about primitive versus reference type variables and how certain variables
are stored in memory. So I'm going to minimize
my project right here. So we have more room
for these diagrams. Here we have the stack and
here we have the heap. These are two
different places where information can be stored
in your computer's memory. We'll start off by talking
about primitive type values. For example, I could say
int number equals ten. This is known as a
primitive type evalue typically store basic
pieces of information. All primitive type values are stored directly on the stack, and this goes from
the bottom up. Other examples would be Boolean. I can say is programming
equals true? I can then have char
letter equals a. I can have a double,
I can call this pi. And so that equal to 3.14159. And these are the main primitive type values that
you're going to see. Let me go back. Let me delete a couple of these and let's
go back to our number. But what happens if I
were to assign a number to equal to the
value of number one. For example, number two
equals number boldest will actually still create an
entirely new value on the stack. Now number two equals
the value of number. What would happen
if I were to modify the value of number one
that affects number two, I'm going to print out number. And then on the next line I'm going to print out number two. Before this, I'm going
to say number equals 15. What's going to happen here is because these are
two separate values. Number two is not going
to be affected at all. So this will print
15 and then ten. To prove this, I can run
it with Shift and FTN. Here we see 1510. So primitive types will have their own individual
value on the stack, even if we're assigning it
to an existing variable. This will simply just
create another variable in your computer's memory and
assign that value to it. This means line
eight is going to create a separate integer that has no correlation at all with that line number seven, aside from the fact that they happen to share the same value. That's nice, but what
is a reference type? And whereas the heap used. So I'm going to
leave all this code here and I'm gonna
create an integer array. I can say int numbers
equals 51015. And this is going
to create something on both the stack and the heap. But the values 51015
are stored on the heap. And the variable numbers is going to be stored on the stack. But this is only going to be storing something
known as a pointer. Not the exact details of
how pointers work behind the scenes aren't too important
when working with Java, because Java handles
a lot of this for us. But this will basically just, it points to the actual value which has stored on the heap. For example, I can create
another array here. I can call this example. I can set this equal to numbers. What happens here is
our array values 51015. It's still only exist once
in our computer's memory. And those three
values are stored in the heap as an array. But the variables, numbers and example are
stored on the stack, but they are now pointers pointing to the
array of integers. That means if we
modify 510 or 15, we will actually
see that change no matter which variable
we're trying to access, whether it is
numbers or example. To prove this, I
can say numbers, index one, which is going to
be the ten here, equals 11. I can then print
out numbers index1. And then I can print
out example index one. I can run this with
shift and FTN. Here we see 11 on both cases. That's because
these three values here are stored on
the heap just once. And then the numbers
array and the example of Ray are just going to
point to that value. Meaning we have two
separate variables that we see here when
running your code, but the values are stored
only once inside of the heap. And this is a difference between primitive and reference types. Reference types are going
to have their values only once in the heap with
a pointer on the stack. But primitive types
are so simple that we can just simply store
the values on the stack. So I can say int
num1 equals five, int num2 equals ten. And then I'm going to
call an add function, which will make
here in a second, and I'll pass in 510. Going outside of our main
function, I can say public, static int add, int
num1, int num2. Within here I can
return num1 plus num2. What's going to happen here
is when we pass in 510, it's actually going to
create two more variables on the stack called num1 and num2 assign the
same exact values as the arguments that we're
passing in right here. To prove this, after
our add function, I'm going to print out num one with a comma and then num2. But within our add function, I'm going to say
num1 equals ten. Now if I run this, we now see 510. But we actually changed
num one equal to ten. And in fact the sum
of the add function. If I were to put this inside
of a print statement, this is going to print out 20. So if I run this
warmer time with the 20 in the console and then 510, only break this
down line by line just in case it's a
confusing for you. Were first creating
two variables that are stored on the stack, 510. We're thinking went to print
out the sum, passing in 510. Notice how we're
not changing num1, num2 at any point at all. That's important to note
when we reach line ten, when we were passing in num1
and num2 to the console. These two variables are
not changing at all. Once we actually invoke
the add function, we're passing in 510, which are going to
create two more variables stored on a stack. And we happen to just
modify the first number or the first argument right
here, to the value of ten. Essentially meaning
that we are adding ten to whatever the
second argument is, which in this case it's ten, and that's why we
get 20 right here. Now the important part
here is that we are modifying the very first
argument that's passed in, but this has a
brand new integer. Primitive types are just
going to pass in their value. And it's going to basically
just be a copy of that value. Any modifications to that
within the function will not actually affect it in the function that
originally called it. Basically we're modifying
our first argument here. But it's not actually modifying anything from our main function. That's because these
are primitive types and just the value is passed in. But what happens if we pass
in an array of integers? For example, we have an
array with just two values. Instead of num1 and num2, I can say int
numbers equals 510. I could then pass in numbers. And then I'm going
to log numbers index 0 and numbers index one. Now we have a problem
with our function as she cuts were expecting two
different integers. But instead, I just want to add two numbers together
from a number array, like I say int,
brackets, numbers. Then I can return numbers, index 0 plus numbers and X1. ******* run this
with shift and F11. Here we should see
both the some printed out and each individual
number as we see right here. But what would happen if I
change numbers index 0 to ten, which originally is
five in this array, keep in mind that this array
is not being changed at all. And we're passing in the first element of the array into this console
log right here. So if I run this, we
now say 20 printed out as a sum Kf are changing the first index
which has index 0, which is five, to the
value of tan right here. Meaning we're basically
printing out ten plus ten. But then numbers index 0 printed to the console
is now changed. That's because the
reference or the pointer to that array is passed
in as an argument, not the actual
values themselves. So when we go to Modify
numbers index 0, it's actually modifying
the same exact array that we created online five, because we're just passing in that pointer that is on a stack which just points to
the actual values which are stored on the heap. And this is an important
difference between primitive and reference types whenever you're working
with functions, is important to
know that when you modify something as an argument, for example, int
numbers right here, that it might or might not actually modify that
with the rest of your program
depending on if it's a primitive or a reference type. Now a lot of these concepts are new and I know that this is probably one of the
more confusing concepts when it comes to programming. If you're new to programming. So if you're having
any problems, I suggest watching
this lesson over again and really try and focus on the stack and the heap at visual representations as
an explaining everything.
30. Object Oriented Programming Basics: We're now going to dive
into a concept known as object oriented programming. And a short form way of
saying this is hoop or OOP. And this is definitely
where Java gets a lot more interesting and we can actually build some real-world
programs with it. But first, let's talk about what is object oriented programming? Well, this is a concept that
is not exclusive to Java. Other programming languages
have this constant as well. This is basically
where we can represent real-world objects
within our code. And in these upcoming videos, I'm going to be explaining
what further keywords meant, such as class and static, and other keywords that I mentioned I'll be
explaining later on. Let's quickly take
a look at what a class is versus an object. Class is basically going to be the actual code that represents the blueprint of
a certain type of functionality or
certain type of object. Now when I say blueprint, I want you to think of
a Houses blueprint. For example, if you
ever see a bunch of houses that looks
similar to each other, there's only one, a single blueprint that they
basically copy and pasted. And each house is going
to be its own object. A house is going
to be an object or the blueprint is going
to be the class. So we can have a
mini instances of each individual class and
those are known as objects. What's actually used
this house example in a real programming example within our main package
here, I can right-click. I can go to New, and then
Java class within here. I'm going to name this house, but I'm going to be using
a Pascal case notation, basically meaning
that we capitalize the very first letter
of every word. If I had house example, both the H and the E
would be capitalized. But in this case I just want to credit class called house. Go ahead and press Enter and it should automatically open. And now within this class
or within this blueprint, we can add in
various properties. Now what is a property? These are basically variables
and methods that are specifically defined
within this house class. And it helps us access
different values or work with different functionality within
the context of a house. Diving into a lot more detail
of what would actually go into a house class
over the next few videos. But first, let's
take a quick look at how this house class can actually be used within
our main class here. I'm gonna go ahead and delete
some of these comments. I can now say house
with a capital H. And here we see it's
going to try and import from our
local file system. I can go ahead and press Enter, and then here we can go
ahead and name our variable. In this case, I'll say
house with a lowercase h, I'm going to assign us
equal to a new house. Now the new keyword is part of object-oriented
programming and classes, but the details of that
will be explained later on. For now, we can think of this as basically just
having a new house, a house class right here. This is going to
be the blueprint, but now we've actually created a real instance of our house. Let's take a very simple example by having the house
print helloworld. I can say public void. And notice how we do
not have static here. I'll explain the
difference between static and non-static
methods in a few videos. But for now, do not include
static in this example. So public, void, print. And then I'm going to
have no parameters. I'm simply just going to print out hello world to the console. Now if I hover over this, we see that the method
prints is never used. Let's go ahead and try using it. Going back into our main class here we have access
to this house. I can say House press a period. This is going to have
a drop-down with all available properties and
methods that we can access. In this case, we have access
to our print function. I can go ahead and press Enter, and I'm going to run this. And here we see Hello
World in the console. I'm going to go ahead and
rename this variable. I can click anywhere
inside the variable name, and I can hold Shift and
press F6 at the same time. Now we can go ahead
and change this. I'm going to change this name to my house with a capital
H and lowercase m. Now, I'm going to create
a brand new variable. Like I say, house. Your
house equals a new house. And these two variables have
nothing in common aside from the fact that they were
created with the same class. Basically they are
neighbors to each other, but they're not the same house. If your neighbor has a
similar house to yours, doesn't mean that
it is your house. If just a similar house based
off the same blueprint. For example, I can say
your house dot print. And I can go ahead and run this. And now we're going to
see two instances of HelloWorld and our console,
as we see right here. This is the very
basics of classes and how to create objects
around those classes. And over the next few videos, we're going to be
diving much further into object oriented
programming, where we can create a
functional house object that really represents an actual house within
our programs.
31. Constructors: We're now going to talk about a concept called constructors, which is basically
just going to be a built-in method
into every class that is ran or invoked whenever a new instance of that
class is created. There's actually a
default constructor in every single class. Whether we create one
ourselves or not, it's going to
automatically have one. So a constructor, we'll look
at something like a method, but slightly different
because it was not going to have a return type, such as the void right here. And also the
constructor name has to be the exact name of the class. So I can say public
house with a capital H. This is now known
as our constructor. To prove this, I'm
going to print out a new house was made. And I'm going to run
this in our console. Here we see a new house was
made because we created a new instance of our
house class right here as the variable my house. And so that made
the constructor be ran within our printing
out hello world. But then we're creating
another house, which means the other
constructor is ramp. And then of course we're
printing out hello world again. Now a constructor
cannot return anything, but it can't take in
different parameters. For example, I can have
string owner name. Then I can say a
new house was made. The owner is like an
add on owner name. Now we get two related
problems right here. That's because back
in our main class, we're not passing
in any arguments. So for example here
it can pass an Alex. Of course you can add
in your own name. And here I'm going
to pass in Bob. Of course you can add in
any other name you want. So if I run this, we can now
take a look at our console. And here we see a
new house was made. The owner is Alex. And that's because we
created a new instance of a house class right here. And we passed an ALEKS as a
string to our constructor. And then of course, when
we create a Bob's house, we see the owner is
Bob and the console. Now, similar to methods, constructors can be overridden, so we can pass in
different types of values into the parameters. Like I say, public house. I couldn't say floors. Here, I could print out
new house was made. It has I can add on floors and that can add
on the string floors. And I'm also going to put
parentheses around the S because we might pass in
a single story house. So now we have two
different constructors, and these are going to be
ran at different times. For example, backup Bob's house. Instead of passing in Bob, I'm going to make this
a two-story house. You might notice that
automatically IntelliJ IS going to notice that this is now going
to be the floors parameter. This is not going to be owner named like it says right here. That's because it understands
that we're overriding the constructor to pass in two different
types of variables. And here we're
passing an integer. So that means we are
going to be using this constructor right here. So now if I run this and if
we look into our console, we now see the first instance of our house is
going to print out. The owner is Alex. But the second instance
of our house is going to print out
a has two floors. That's because we are using the different type of constructor that passes
on integers only. Now in this example, we've just printed
out some text, but in real use cases, which we'll take a look
out in a few videos. We're going to
basically use these as set-up functions to make sure everything else is
set up and going to work correctly for our
house to function.
32. The "this" Keyword and Properties: We're now going to look
at the, this keyword, as well as how to create different properties
which are going to basically just be variables
inside of our class. I'm gonna get rid of
these comments here. And I'm also going to get rid of these print statements
within our two constructors. Now inside of our class, but outside of the functions, I'm going to create a couple
of different variables. For example, I could say private string with a
capital S, owner name. I couldn't say
private int floors. And the private part of this, as well as the public on some of these methods are going to be explained in a future video. Now I've already demonstrated how we can overload
constructors. But in this case, we just
want a single constructor with both pieces of
information being passed in. Here I can say int floors. And now inside of this, I'm going to want to assign
the new owner name and the new floors from
the parameters to our local variables. Because these two
variables here are different variables then
our parameters right here. But before I do that, we have two related problems
because if I go back, We are now using incorrect
syntax for a constructor. Here, let's say my
house has two stories, unless say that this is
still a Bob's house, which of course you can use
any string you want on these, but it is also two stories. So going back into
the house class, we no longer have any problems. But how are we going to
set the owner name online for equal to the parameter
that's being passed in. Because of course, they're
the same exact name. Saying owner name equals owner name doesn't
really do anything. It doesn't actually modify
line for whatsoever, because this is
going to reference the most local
variable in the scope, which in this case
is just going to be the parameter under
name right here. Now technically, we could change the names of
these variables, so they're not exactly the same, but that's not the
most correct solution. The most correct
solution would just say this dot owner name equals owner name and this
dot floors equals force. What is actually happening here? Well, this represents
the current object. Whenever this constructor
is ran for my house, which has the owner name
of Alex and two floors. The, this keyword
right here is going to reference the my house
object right here. When we're creating Bob's house, that this object right
here is going to be referencing the your
house object right here. The, this keyword right
here is going to represent the current object that is
being used for this class. To prove this within
our print function, I can say this
house is owned by. I could then print out
this dot owner name. And it has plus this
dot floors force. Of course, I'll put parentheses
around the S just in case you want to pass in
a single story house. Now we're still using
this print function, as you can see right here. I'm going to go ahead
and run this program. And here we see in
this house is owned by Alex and it has two floors. We also see this house was owned by Bob and it has two floors. The names and the
number of floors are going to be saved
locally. Right here. We're not accessing
the parameters that we added in right here, because these are
bounced who only be accessed within the
constructor's scope. So basically we have
our own parameters or our own variables
within this class. We're assigning
those whenever we're creating the object
from the constructor. And then we can access
these variables anywhere within this class. For example, within
this print function by saying this dot owner
name and that stuff wars. Now, technically
in this use case for the print function, the, this keyword is optional
because by default it will assume that we're going to use the current instance
of the class. So I can go ahead
and delete these. And if I run this
again, it's going to work the same exact way. Now, technically this is not good practice because
saying this.name and desktop floors makes it
very clear that we're trying to access variables
stored in the class, but it is technically optional in this case of the
printf function. But our constructor has
these to be required because they have the
same exact variable names as our parameter. To be very clear, which values we're assigning
to, what variables. We can say this
dot on her name to reference our local
private string here. And this dot floors
WHO reference our local private integer here. And then assign those to the
owner name at perimeter. And the floors parameter.
33. Encapsulation, Abstraction, Getters and Setters: Diving further into object
oriented programming, we're now going to
introduce two more concepts which are going to get
slightly more confusing, but hopefully I can explain them well enough for you
to fully understand. These two concepts are
going to be known as encapsulation as
well as obstraction. But also we're taking a look
at getters and setters, which are kind of an
example of abstraction. Encapsulation is
basically going to be a concept of object
oriented programming where we want all of
our functionality to be encapsulated into
one single place. And even a class itself is kind of an example
of encapsulation. For example, here we
have a house class. So any functionality we're going to have regarding a house, such as how many doors that has, how many floors it has, different windows and rooms
and other things like that. Basically, anything to do
with a house should be enclosed or encapsulated
inside of this house class. Now another concept is something like some medicine
or a pill where you have all the functionality encapsulated inside
of a single pill. That means that the users of this class or the people
taking the medicine, don't necessarily have to know the inner workings, everything. They just have to see
the outside object and know that everything is
encapsulated inside. That's more of a
concept that can't really be demonstrated
to clearly, but it's something
that is important to understand that when
writing your own Java code, you want everything to be capsulated inside
of its own class. Now the next concept
is abstraction, which is slightly similar
to encapsulation. But basically this
means that you only want the user who is using the class to gain access to things that
they actually need. For example, I'm going to change these private properties
right here to public. And I'll explain what private versus public in this video. But for now, just follow along and change these to public. And now inside of our main file, after I create the first house, but before I print it, I can say my house dot. Now here we have access to all the properties and
methods within this class. And we can see the owner
name and the floors. I can change the
owner name to Bob. Let's say Bob just hijack
my house, for example. And if I run this, we now
see Bob twice in the causal, as we see right here. Now this is technically
a bad practice. And I'm going to
change these variables back to private by using Control Z or
Command Z on a Mac. And now we see one
related problem. If I hover over this right here, it says owner name has a private access inside of com dot worn off
keys dot house. So I'm going to remove this
line of code right here. And now we cannot
directly access who owns the house without actually
being inside of the house. For example, I could say
this dot name equals Bob, and this would work just fine. And that's because the private
property right here is something known as
an access modifier. This is going to
restrict the access that certain things have
when it comes to different properties
and methods. A private method or private
property in this case, is going to mean that the
only thing that can access this is things within
the same exact class. That's why we're able
to access it right here, as well as right here. Even though it's private, we're still inside of the class. That's also why we had
the error right here. What I'm trying to
access it because we're not inside of
the house class. We are inside of the
Warnock keys course class or whichever you
named your class. Now, public, as you
can probably guess, means that anything can access it by accessing its own object. For example, we have
a public void print. This method is public, which means if we have an
object for this class, for example, my
house or your house, we can then access the
print method on it. Now you might be
wondering why not just directly access
anything we want. Why restrict certain access? Well, that's the
whole concept behind abstraction is
basically going to take all the inner functionality
and how the house works and only give you access to what's necessary for the House
to perform its job. Now in some situations, you can give inner access to certain things using
getters and setters, which we'll take a look
at here in a moment. But typically as a
good rule of thumb, you should only give access to what's absolutely necessary. And you should never
give direct access to variables directly like this. Instead, you should always
use getters and setters. Let's take a quick look
at how that works. I can say public, string get. Now here it's going
to auto populates the concept of get owner name, which is actually what
I'm going to use here. The reason why I knew this is because it's going
to return a string. And whenever I type Git, it's going to
assume are creating something known as
a getter method. Basically, this is
just a method that returns a private property. In this case, I can
return owner name. Now I can actually
access owner name which is private from
this getter method. We also have setter methods, which is a similar concept, but obviously we're
not getting the value. Instead we're studying
the value, like I say, public void because we're
not returning anything. Set owner name within here. It's going to have
one parameter. I can say string owner name. And then within this I can say this dot owner name
equals owner name. Now if I wanted to, I can actually go over
to my house, Like I say, my house dot set owner name. I can pass in Joe. And if I run this, we're then going to see Joe
and Bob in the console. And actually we see
Bob twice because of mistake I made here in
the print function. As an example, I said
we can use this here. I'm going to go ahead
and delete this and then run the
program one more time. And now we see Joe and
Bob in the console. This is an example of a getter method and
a setter method. Now you might be
wondering why bother with any of these
getters and setters. Why not just completely remove these functions here and just
make our properties public? When I was first learning
object oriented programming, I would have the
same exact question and I was very confused. Why do all this extra work and just for the
same exact results. But as I wrote more and
more code over the years, I realized that using getters
and setters is much more convenient and it makes
things much more organized. For example, imagine
that we have a very large project
with dozens of houses. Oliver, our project,
and we want to change all the owners names to,
let's say uppercase. Or we want to log
all the owners names whenever they're changed
or anything like that. I want to perform some type of functionality whenever the
owner name has changed. For example, here we can say this owner name equals
owner name dot toUpperCase. And to make things
even more convenient, we can change a line ten
right here of this owner name equals name to set owner name. Passing in owner name. This will make it to
the default constructor will also have it
be an uppercase. If I run this, we should see both on our names and uppercase. And if we had everything set to public without any
getters or setters, and we had dozens of houses
in a larger project, we'd have to go
through and manually change all of our
names to uppercase, which sounds very tedious
and very annoying. But because we use
the correct rules of abstraction and we
use getters and setters with private
properties right up here. We now have the ability
to easily change certain aspects of our program from one single
change right here.
34. Inheritance: Let's take a look at something
known as inheritance. This is basically
where we can add on or extend another class to
give it more functionality. For example, I can make a new Java class and I'm
going to call this hotel. And I'm going to extend house. Like I say extends house. What this means is
it's going to inherit all of the functionality
within the house class. But then we can add on more
functionality and side. For example, we can now specify a lobbyist square footage, or the number of staff,
things like that, that it hotel has a
house doesn't have, but a house is still going
to have an owner and a certain number of floors
which a hotel also has. Instead of making a hotel class, which would have these
properties inside, we're just going to extend house which already has
these properties. That way we don't have to
actually make them again. But we're getting
this error here. If I hover over
it, it says there is no default
constructor available. If we go over to the house, we see that there is no
default constructor, meaning that there
was no constructor that has 0 parameters. So we have these two
parameters right here, the owner name and floors. And that means that our hotel, which extends house, also has to have a
similar constructor. So I can say public, hotel, string, owner name,
and then int floors. Now we get another error. If I hover over this, it says there's no default
constructor available. This means that we
have to use something known as the super method. So if I call superheroes, I could then pass in
owner name and floors. And the super function
is only going to be used within classes that
extend another class. This will basically just
call the constructor of the class we're extending
in this case house. So now we've created
a hotel constructor. This is going to
call a constructor of the house constructor. Therefore, we are going to
set the private properties of owner name and floors equal to the properties
we're passing in. In this case, we're
simply just going to pass those and from
the hotel constructor. Now if this seems
confusing, don't worry, let's go ahead and make
a new hotel instance, and it'll make a lot
more sense after that. Here in our main class, I'm going to say hotel. My hotel equals a new hotel. We can then pass in the owner. And then the amount of
floors, let's say ten. I can now print out my
hotel dot gets owner name. But inside of the hotel class, we don't have an
owner name at all. That's because we are still
extending the house class, inherits all the previous functionality inside
of this class. For example, get owner name. So of course if I
were to run this, it'll just simply print
Alex to the console. I'm not going to bore you
with that simple concept. I'm sure you understand that. But let's dive further into how these constructors work and
how the super method works. Basically, I'm passing
in ALEKS and tin as parameters into the
hotel constructor. Therefore, the owner
name and floors will be Alex and ten were
then calling super, which is going to
call the constructor of the extended class. In this case, that is house. Essentially we're going to
call this function right here, which will set these to private properties
equal to Alex and ten. Now we can access these
within hotel if they are public or something that
is known as protected. So, so far we've seen
private and public. There was also another
one which is protected. For example, inside
the constructor. I cannot print out
this owner name. We see in the drop-down here, there is no option. And also if I just leave it like this, we're going
to get an error. If I hover over this, it says owner name has private access. That's because the
private access means the only things directly in
this class can access it. Not necessarily things
that extend this class. If we wanted the extending
classes to access it, we can change private
to protect it. Now the error goes away and protect it basically
means that anything inside the class can
use it as well as any classes that extend
this class can use it.
35. Polymorphism: Let's now talk about a concept
known as polymorphism. This is basically something
that means many forms because poly means many
and morphism means forms. To take a look at the problem
that polymorphism solves. Here we have the my
hotel object as well as your house object
and my house object. These two are using
the print function. And because the hotel
extends the house, we now have access to
the print function. I can say my hotel dot print. Now if I run this, we see that the houses owned by each person and it
has so many floors. The hotel is still
says the houses owned. We want to basically override the exact functionality for the print function
within the hotel class. To do this, let's take a look at the house class real quick. Our print functions
as public void print. Our hotel class needs to have
the same exact function. I can say public, void, print. And now for simplicity, I'm simply just going to copy and paste the
previous line here. I can use Control C on
Windows or Command C on Mac. And then I can go ahead and use control V on Windows
or Command V on Mac. Now we get an error because these two properties are private and they're
not protected. So I need to use their
corresponding getters. So I could say Get owner name. We don't have a gift
for his method yet. So if I say git floors, it doesn't actually exist. Plus go ahead and make one. There should be pretty simple, I guess a public int
get Flores within here, I can simply just return false. So now we have a getter
that we can use. Within hotel. We no longer
have an error here. We can change. The house is owned by two, the hotel is unbiased. Now if I run this and
we look at our console, here we see the hotel is owned by Alex and
it has ten floors, or the previous house
objects still say house. This is what polymorphism is, that we have many forms of
the same exact function. So here we have a print
function in our house, and here we have a printf
function in our hotel. Whenever we're trying to
access a print function, we're always going to use the closest one to the exact class. For example, now that we have this printf function,
it'll use this. But beforehand it
didn't have it. So it would look to the house class which we are extending. And of course, house did
have a printf function. So it would then use that. Now, this is also known as a concept of method overwriting. Now this is not meant to be confused with
method overloading. This is where we have two
methods of the same exact name, but perhaps different
parameters. For example, I can
say public, void, print, and as an argument
I can say int times. Here I'm going to loop
through a certain amount of times depending on how
many times is passed in. I can say for int a equals 0, while a is less than
times plus plus a. Now within here I could just copy and paste this
line right here, or I can just simply
call the print function. So now going back
to our main class, we're simply printing this, but we also can say my hotel
dot print and pass in five. And now I can run this. And here we see it is printed
out five different times. Now of course, we see
five times right here. But we also have this
sixth time at the top. And that's because
right here we're saying my hotel dot print without
any actual arguments. So therefore it's going to use the normal printf
function that we created. Now we've already gone
over method overloading. This isn't really a refresher. This is just to
clarify that method overriding is different
than method overloading. Obviously, they can get confused because there's similar words, but they are different
concepts as you can see here.
36. The "static" Keyword: So far we have different
properties within our classes, for example, owner
name and floors. And these are going
to be tied to each individual object
that we create. For example, my house, your house, and my hotel. I'm not going to
introduce a new keyword, which is the static keyword, which you might see right here. This basically is
not going to tie the properties to the
individual objects, but rather ties of properties
to the class itself. Now every single
house is different, so it's hard for me to describe a static example when
it comes to houses. So we're going to
use birds instead. I can right-click
new Java class. And I'm going to
name this a bird. Now let's say that each bird is going to have its own name. So I can say private
string type. And then here I can say
public bird at a constructor, we can have a string
in here called type. And then within the
constructor we can assign the local variable type equal to the parameters passed in
from the constructor. Here I can say this
dot type equals type. Everything seems
pretty basic so far, Let's go into my main class and I'm going to comment these out. We will uncomment them in future videos when we go
back to the house example. But again, static is much
easier to understand and for me to explain
without using houses. Here I can say bird,
bird equals new bird. I have access to a bird, but now I have the pass
in a certain type. For example, I can
pass in a crow, and now we have
access to a bird. Everything seems pretty
standard so far. Now, static properties such
as variables and methods come in once you want to bounce
something to the class itself. Like I mentioned, the house has the owner name
and floors that are bound to each individual object created from this house class. So in our main file
here we have my house, which is going to have it on properties of owner
name and floors. And then your house will
have different properties, also called older
name and floors. And my hotel had the same thing because this is extending
the house class. But if I go into bird here, I can create something
known as a static variable. Like I say, public, static, int wings equals two. Now if I go back into
my main file here, when I go to access bird wings, we see it doesn't
actually exist. That's because again,
the static variables are not tied to the
objects bird itself. The object being this object
that we created right here. Instead, they are tied
to the actual class. So bird wings. So now if I run this, we're going to see the amount of wings at this bird house. In this case it is two. But why use static here instead of just making
a normal variable? Let's because this is only
created one single time. And otherwise, for
example, with string type, this variable here
is created each time we make a new instance
of our Bird class. Going back to the house example, we have three different
instances of owner name and floors because we haven't three different objects
that are going to use them. But if I had three
different birds, we would still only have
one integer called wings. So static variables like this one here are
going to be used whenever you have a class that has a shared piece
of information. So for example here birds have two wings and that's
never going to change. Having it as a local
variables such as private int wings equals two. It doesn't make too much sense because this is never
going to change. So therefore, we
don't need to have a wings variable tied to each individual
object we create. Instead we can just tie
it directly to the class. Now we can also have
static methods. I can say public, static, int, get wings for example. Here we can just
simply return wings. Now typically static methods are only going to be used
whenever you're trying to access or use a static
variables or some type of functionality or to return things such as a simple
getter right here. Now in my main class, I cannot print out
bird dot get wings. And of course this will
have the same result because we're just simply
returning the same variable, but similar to the variable
bird dot get wings doesn't actually exist. Because again, static properties and static methods are
tied to the class, not tied to the object
created from the class.
37. Abstract Classes: So far we've had a look
at normal classes, such as our house, our bird, and our hotel classes. But now we're going to
take a look at something known as abstract classes. This is a different
type of class which we cannot directly use. For example, if I go
to my bird class and I make this a public
abstract class, nothing directly happens here. Everything looks normal. But if we go back
to our main file, here we have an error
because we cannot directly use abstract classes. These are classes that
are designed to only be used with classes
that extend them. For example, here I can make a new class and I'm going
to call this a crow. This is going to
extend the bird class. Extends Bird. And now we have to create
our own constructor because we have a non-default
constructor here. So I can say public grow the parameter being
the same exact one as bird. So string type, as we
can see right here, going back into our CHRO class, we can call this super
function passing in type. Now all the arrows
should go away. If we go back into
our main class. And instead of using
bird directly, I am now going to say cro, gro equals a new CRO. Now we have access to this and we'd had that still
pass in a string. In this case, we'll
pass in Crow name. And this technically is a bird
because cro extends Bird. But why would you want to have an abstract class that
needs to be extended? We cannot use this directly. Well, that's where
the concept of abstract functions come in. So for example, here I can
say public abstract, void. I can call this Singh. And I'm not going to
include any function body. If I were to do that,
we have an error. If I hover over this
and now it says abstract methods
cannot have a potty. So here I am just
going to create the declaration of a function, but there is no body
attached to it. Now every class had extends, the bird class is forced to
extend this sinc function. If I go back to a crow,
here we have an error. If I hover over it, it says
the class Crow must be either declared abstract or implement
the abstract methods. Seeing in bert here I can
say public, void, sing. I can then print out a sound
that a crow might make. For example, this. Now if I go back
into my main file, I can now say Crow dot sin. And if I run this,
we're then going to see that this we
printed to the console. Now let's say I have
another class here. I'm going to call this a Robin. I can have this extend bird. So we can create our
own constructor. So public Robin, string type. Then we can pass in this two are super method which we'll call
the constructor of bird. Now we still have to override
the toString method. Public void, sing. Here I'm going to print
out tweet, tweet. And now I can make a robin
instance by saying Robin, Robin equals new robin, passing in Robin here. And then I can now
say Robin dot sin. If I run this,
we're going to see the two different sounds
that birds will make. And this is useful because the bird class is
an abstract class, meaning it has a lot of setup, but it's not meant
to directly be used. It's meant to be used
with other classes that are going to have a
specific functionality. For example, each bird might make a slightly different noise. And so we want to
force each type of bird to implement that
functionality directly.
38. Interfaces: Let's now take a
look at interfaces, which has some similar
concepts to abstract classes, which would just
have to look at. But they have some
key differences. For example, here we have
an abstract class of bird. And abstract classes
will typically have just normal
things within classes, for example, different
methods and variables. However, we also are
usually going to have an abstract function
which any class that extends the bird class
is forced to implement. We've had a look at
this in the last video with our CRO and Robin class, where we need to now
override the sing method. Now one thing to keep in
mind is that each class in Java can only extend
one other class, but we can use as many
interfaces as we want. For example, here in my project, I'm going to make
a new Java class. And I'm going to change this
to an interface right here. And I'm going to
name this animal. Now within this animal, we cannot have a constructor, for example, public animal. This is going to cause an error. The only methods we can have in here are abstract methods. Let's say I want my Robin and Cro class to implement
this animal interface. This will also mean that every animal I make in the future, whether it be cows, dogs, snakes, anything will
have to implement this. So this should only
contain things that are specific to any single animal, let's say public int,
average lifespan. And again, these are going
to be abstract methods. So I cannot write an
actual function body here because again,
this is an interface. We can only have
functions themselves. But if I go into micro class, for example, I can make
this implements animal. Now we get an error. If I hover over this, it says class Crow must
either be declared abstract or implement the abstract method average
lifespan in animal. Here I can say public
int average lifespan. And this is going
to return eight. Now we no longer get
an error anywhere. I go to my Robin, I can now say implements animal. We'd have to do the
same exact thing. Public int, average lifespan. Here I can return to. Now I can go back into
my main file and I can print out grow dot
average lifespan, and I can print out robin
dot average lifespan. By run this we're going
to see 82 respectively. And you might be thinking we can achieve this same
exact concept with just adding in the function has an abstract method
to our Bird class. And that's true. And after classes are similar
to interfaces in some ways. But the main difference
here is you would typically will want
to use an interface whenever you only have abstract functions and you don't have any other
type of functions. And one key difference here, like I previously mentioned, is that we can implement as many different
interfaces as we want. For example, if I had another
interface called animal to, I could implement it here. These are separated by commas, but in Java we can only
extend one single class. So that is one advantage
that interfaces have is that you can use as
many of them as possible. So you typically want
to use interfaces unless it makes sense to
actually use a class. For example, you have
default functionality that should be inherited or technically extended by
every single child class. But otherwise, if you just
have these functions here, that each individual
child class, such as Robin and Cro, should actually override
and implement themselves, then you should
use an interface.
39. Instance Of: What if you wanted to
check certain types of classes against other
types of classes? For example, I'm going
to start off with the code I left off
with in the last video, but I'm going to get rid of all the print
statements right here. We just now have a
crow and a robin. I cannot have an if
statement saying if a crow is an instance of a bird, I can print out Crow is a bird. And here we get this warning. If I hover over it,
it says conditioned grow incidence of
bird is always true. That's because this row right here is just a variable
that we created, but we're never
changing it at all. It knows for sure that this
is an instance of a bird because cro extends Bird
as we see right here. Now of course, if I run
this, it's co-invest, say a crow is a bird,
as we see right here. But this also can be
done with interfaces. So a crow is an
instance of an animal. Now if I run this,
we're going to get the same exact response
as we see right here. Of course, technically we should change the
sentence to say a crow is an animal.
But you get the idea. Instance of can be useful
if we wanted to check if a certain object is an instance of another class
or an interface. And this is one
more use case for interfaces because
technically you don't necessarily have to
have anything inside of your interface and
it will still work. For example, a robin is
still implementing animal, and the CRO is
still implementing animal average lifespan
now just becomes a normal method
that is attached to the crow class and attached to the robin
class respectively. And has nothing to do with
the animal interface. But now that a robin and CRO are both animals because we're still implementing
the interface. We can still use them
and checks like this.
40. Enums: We're now going to
be moving away from object oriented programming and moving into other
aspects of Java. For example, in this video, we're going to
learn about enums, which stands for enumerations. Basically, these are
specific types of values that are kind
of like variables, but they cannot change and they can be used in very
specific ways. So let's go ahead and
make a new file here. So we can select Java class. Then here we can select enum. I'm going to call
this days of week. You can have enums to have
whatever values you want. But typically these
are going to be things that should never change. So they're not technically like a variable where you could have input from a user or some
type of random number. These are things that
are going to be concrete and always use in
the exact same way. A good example of this
is the days of the week, which will not change. Here, I'm going to add
in a Sunday comma. I noticed how I'm typing
in all uppercase. This is a common convention
when actually using enums. So then we can have
Monday, Tuesday, Wednesday, Thursday,
Friday, and Saturday. Obviously you spell correctly. Now we have these seven different
values within our enum, but how do we actually use
them and how are they useful? So going back into
our main file, here, I can say days of week dots. And then I can access each individual value
if I wanted to. Or I can get all of
them as an array. Here we see the values
method is built into enums and it returns days
of week as an array. But for example, if I
wanted to print out days of week Friday,
I can then run this. Here we see Friday
in the console. We can also use these
with an if statements. Now, each individual enum value also has a set of
different methods. For example, we
can compare it to another instance of days a week. We can get the name, we can get the ordinal unless to hit quick
look at these two things. So I went to print out the name. Then I'm going to copy
and paste this line. And I'm going to print
out the ordinal. Now if I run this here, we see Friday again, and then 55 is going to be the actual index
that this is used. For example, Sunday is 0. Now you don't have to
add in these comments, I'm just doing this
to make it easier for us to actually read this. So here we have 012345, and of course Saturday
would be six, but this is why we see
five and our console. I'm going to get
rid of all these. And now let's expand
on this enum. For example, let's
say I don't want Friday to be an all uppercase, but rather I want to rewrite a specific string as
a name of that day. So similar to classes, enums can actually have
their own constructor. I'm gonna put a semicolon at the very end of all my values in this case had a Saturday. And then here I can
say days of week. Now you might
notice I don't have public or private or
anything like that here. That's because if I
hover over this error, it says public modifier
not allowed here. The reason for that is this
constructor function right here can only be ran
within the enum itself. For example, within
Sunday parenthesis. Here we would pass in at different arguments
into the constructor. We cannot access
this constructor outside of this eNode file. But why would we need a
constructor in the first place? Well, we can actually store at different values for each
individual enum value. Similar to private
properties of a class, I guess say private string name, I guess a private
boolean, Workday. And then within the constructor, I can require these
two properties. So string name,
Boolean, Workday. Then I can say this.name equals name and this dot
workday equals workday. Now we get some errors
on each of our values. And that's because by
default it's going to call a constructor with no
built-in arguments. But of course, if
I hover over this, it's going to expect a
string and a Boolean. Here. I can pass on Sunday and then I can say false
for it being a workday. I'm going to do the same
thing for all of these. So for example, Monday and true, like I say Tuesday and true, Wednesday and a true. I can then pass in Thursday. And true. Here we have a Friday and true, and then finally,
Saturday and false. Now we have no more errors
unless trying to use one of these within
our actual file here. Instead of days a week
dot Theta dot name, can I access the actual
values such as weekday? And we can't, we
actually have to make our own public getters
in order to do that. Here I can say public,
string getName. I can now return name. Then I can say public
boolean is Workday, and I can now return workday. Getname is not a really
good name for the method. The reason for that is this can be easily mixed up with name. For example, we have
name and getName. It's very unclear which
one does we will want. One thing we can do
is we can rename this to get Display Name. Now a display name
as something that typically is going to
be shown to users. So something with a
uppercase F and lowercase, everything else would be a better display name that
everything being an uppercase, everything being an uppercase, it looks a weird to the user. And so a capital F with
everything lowercase, it's actually how
you'd say this. Normally, this would be
a proper display name. Going back instead of getName, I can now say kids display name. Then of course here I'm going to say Friday dot is workday. I think go ahead and run this. We should see the display name as well as if it's a workday, which in this case S
has Friday and true. Now you can actually use
enums as a variable types. For example, I can
say days of week, day equals days of week, Monday. I can then say if
day is workday, I can print out
going to work today. Otherwise, I can print
out it's a weekend. Now if I run this, we're
going to see going to work today because we were accessing the value Day,
which equals Monday. But of course, if
I change this to Saturday and I run this, we now see it's a weekend. Now there's just
one more thing I wanted to show you with enums, and that is the ability to
loop through all of them, like I say, four
days of week, day. Here I can pass in days
a week dot values. If I hover over this,
we see that this returns an array of days a week. This will be an array of
each individual value as its own element. Within here I can
print out day dot, get us by name, then a colon. Then I can add on
day is Workday. If I run this, it's going to loop through every single day. It's going to print
their name as well as a Boolean if it's
a workday or not. Obviously with an enums, we're not receiving
any external input from other parts of the program. Everything with an
enum or self-enclosed, meaning that the arguments
passed into the constructor or just static values that are
not actually variables. As you can see, I'm
just passing it a string and a passing
in a Boolean value. I'm not passing
in any variables. Enums are useful whenever you have something
like the days of the week where they are concrete and never
going to change. Not even the variables passing the constructor, they
are not going to change. This has very useful
if you ever have things that are very
concrete like this, because then you can
easily access them and reference certain values without worrying about them
ever-changing.
41. Try Catch Finally: In a previous video, when we use scanners, we saw what an error looks like. Let's go ahead and
recreate that. I can create a scanner. I call it input and I sine is equal to the value
of new Scanner. Here I can pass in System.in. This should all be
pretty familiar to you from earlier in the course. Now here I'm simply
just going to print out input dot next int. And if I run this, it's going to expect me
to enter an integer. For example, if I enter five, everything works well
and the process finished with a successful exit
code, which is 0. But if I run this again and I enter a string such as test, we now get an exception. This is basically just an error. And at first glance this
might look really confusing, but it's actually very simple. Basically we have
an exception in the thread main
and it's going to have a list of where all
the errors came from. This is known as a stack trace. And this is basically tracking down exactly where
the error came from. Now these are all
actually clickable, and in fact we see the
name of the error right here as input
mismatch exception. That happens when we enter something that is
not the proper type. I can actually click
on one of these, for example, scanner dot Java. And this is going to
open the skin or class, which has a bunch of stuff
that we actually don't have to worry about. I'm
going to close out of that. But what's more important is we can click on our own code. We can actually
see this in blue. If I close out of all my files, I can then click on
this right here, is going to open
it and put me on the same exact line
where the error is. Nice, but how do we
actually fix this? We can use something
known as try-catch. I'm going to add
an a comment here. We have try-catch and also we have another option
known as finally, the syntax for this would
be try curly braces, and then afterwards you
have to add in a catch. This is going to
have an exception. I will call this
an exception here. And there are different
types of exceptions. Typically, you do not want to have a generic exception here, but rather you want to use the exact type of exception that you're expecting to catch. In this case, it is an
input mismatch exception, as we can see from the
stack trace right here. So instead of just
saying exception, I'm going to say input
mismatch exception. Now within here I can say
e dot print stack trace. And this is basically
just going to do the same exact thing that we see in our
console right here. To prove this, I can take
this print line statements. I can put it inside
the try-catch. If I run this, we're going to
get the same exact results. If I enter in
something that is not an integer, for
example, this string. Here we see the exact error. So what exactly is
happening here? Well, basically we're going
to try this code right here. If something doesn't work, then it's going to
throw an error. Now by default, if we
do not catch an error, the program is going to crash. To prove this, I can bring
this line back right here. And I'm going to comment
out our try-catch for now. And to do this with
multiple lines, you can just select all of
them and then do control forward slash or Command
forward slash on a Mac. Now within here I'm going
to print out worked. This is after we were
receiving the next int input. If I run this, it's going
to ask me for a number. I'm going to enter five
and it has worked. But if I run this again
and I entered test, it is not going to say worked. That's because the
program actually crashed. And so everything past
this is not gonna be ramp. This is the main reason why
you want to use try-catch. Because if I print
out worked after this and I run the program here, I can enter in test. And it's going to still throw
the error because we're printing it because of line 14, edit, print stack trace. But it's not going to
crash the program. And we see that
because we're printing out worked directly afterwards. Whenever you have some code that might throw an exception, you wanted to make
sure you catch that exception and then
handle it accordingly. In some cases, this
could be printing out. You did not enter a number and we don't necessarily need
to print out a stack trace. So I'm going to remove that. Now if I run this and
I enter intestine, we're not going
to see the error. Instead, we're just
going to see it. You did not enter a number. Now I mentioned
this finally thing. What exactly is that? Well,
that always comes after. Try and catch. Here I can add. And finally, this
is something that will be ran no
matter what happens. So try we ran one
line at a time. So it'll run this line and
this line and this line. If there's ever an exception, it will immediately stop
trying to run this code here. And it will immediately jump
to the catch statement, basically running whatever is inside these curly
braces right here. And obviously with that said, this highlighted code here will only be ran if
there's an exception. If everything works well within
the try-block right here, then the catch code
will never be ran. But finally is going
through ran no matter what, no matter if everything
worked perfectly fine or if there is an exception,
I can print out. Finally ran. And I'm going
to run this within here. I can enter a number,
let's say ten. And here we see
finally it was ran. If I run this again, I can enter a string. We see you did not
enter a number, but we still see finally RAN. Now, this is useful in
a lot of use cases, but a very specific one is outside the scope
of this entire course. That's basically when it comes
to database connections. Essentially with
our try statement, we would try to connect
to the database. Within a catch, we would
handle any errors and example being invalid
login details. And then finally is going to
close any open connections. Now at some use cases, you will see connections like this, and this is a good example in theory of wind
finally can be used.
42. Throwing Errors: In the last video,
we had a look at how to handle different errors. But whatever we want to
create our own errors. For example, I'm going to delete all of this and I'm
going to change this comment here to
throwing an error. And that is what we're
going to call it whenever we want to
create our own error. For example, here I
can say a string. Next string equals
input dot next line. Now within here I'm
going to say if next string dot equals
ignore case error, I didn't want to
throw my own error. To do this, I can say throw new exception and I
can pass in a string. And this will be the message that is printed to the console. For example, an
error was given from the user because the user enter the string right here as error. But we get an error right now. The solution here is to add the exception to
method's signature. If I click on this,
our main method now says throws exception. This will basically tell Java
that within this function, we're going to be throwing
our own exception. Now, outside of
our if statement, I can print out whatever the next string
is from the user. I'm going to go
ahead and run this. And within here I'm going
to enter HelloWorld and it should print out hello world and everything works
just as expected. But if I run this one more time, I cannot print out error. And this will then make
this if statement true. So if I press Enter, we're now going to get our own exception. Here we have the string. It says an error was
given from the user, and we can click on this to then see where the
exception was thrown. Now you might be wondering, why would we ever want to do this? Why not just tell the user to
not enter the string error? Well, one reason you
want to do this is so programmers who are
using your code or yourself with other parts
of your project are then forced to catch certain errors
and interact correctly. For example, if you're
creating your own program that other developers will be
downloading and importing. You can then throw
different errors so that developers are then forced to catch them and handle it according to
how they want to. Depending on the
type of error it is. The same concept goes
for your own projects. You can throw certain errors whenever certain
things are happening. In other parts of your program, you can use the try-catch system in order to actually
solve that problem.
43. Lists and Array Lists: New the start of the course, we had to look at arrays, but now we're gonna take a
look at lists and ArrayLists. These are basically going to be more advanced ways
of using arrays. And in a lot of situations
that are going to be more user-friendly
and more powerful. So let's say I want to
have an array of integers, like I say int numbers
equals brackets. And here I can add in my list of numbers, for example, 123. Now let's say I want to go ahead and add on a fourth element. Well, if I say numbers
index three equals four, we're now going
to have an error. If I hover over this, it says
array index out of bounds. Basically meaning that any array cannot have new
things added to it. You'd have to create an
entirely different array. For example, I could
say numbers equals a new integer array with 1234
in it. And this will work. But obviously I don't
want to have to do this. I want the ability to just simply add something
to this array. But by default, arrays do
not have this functionality. That's why we have array lists. These are much easier ways to use arrays where we can
easily remove things, add things, of course, access, things similar
to existing erase. I'm going to go ahead and
comment this line out here. And I'm going to make
a new ArrayList. Now the first step is to
create a generic list. This is going to
be from Java util. This is going to
be an interface, as we can see from the
green icon right here. Now within here we
have to pass in what type of data we're
looking at a store and we cannot pass an int because this has
a primitive type, we need to pass in
a certain class. Within Java, we have access
to integer, which is a class. And this is going to allow us to use integers within this list. So I'm going to call
this list numbers. So we can assign this
equal to a new ArrayList. Now here we have just less
than and greater than sign. And then these parentheses, the less than and
greater than sign, could hold what HEPA
value you want, for example, an integer. But in modern Java, we don't need to do this. It's going to basically
just access what type of value we need from the integer
we passed in right here. What exactly just happened? Well, if I hover over list here, we see that this
is an interface, as we see right here,
public interface. And this gives us a number of different built-in
functionalities that most different lists
are gonna have. Now after saying that, I should've mentioned
that ArrayList is not the only type of list, but it is the easiest one to understand and the easiest
one to demonstrate. We're going to use it
for this tutorial. Now, ArrayList is its
own class that is going to implement
the list interface. So it's going to get all the functionality
that list offers, but also build onto it. This is cool and
all, but how do I actually use the numbers list? Well, here I can
say numbers dot. The first option is at all where we can pass in a
different collection, such as another list and
add all the elements to it. Or we can add an individual
elements such as an integer. For example, one. Now if I had numbers dot here, we can add a certain element
into a certain index. We also can clear the list. We can see if it's empty, There's a bunch of other options such as removing
certain elements, getting the current size or the amount of
elements in the list, and many, many more. Let's go ahead and add all three numbers we
wanted to this list. Numbers, don't add two
numbers, dot add three. Now the numbers
ArrayList is very similar to the numbers array
which has commented out. Now obviously in such a simple
example, it won't matter. But if we really want to add, let's say, ten or 100 numbers, we can easily loop through
those numbers and then pass them into the add
function right here. Or if we wanted to, we can pass in an array into the new array list
constructor right here. Now we can't just pass
in a generic array. We have to say arrays with
a capital a dot as list. Now within here,
we're gonna have a varargs with any number of
integers. So I can say 123. Now if I delete
this, we're still going to have the
same exact result. So if you have an
existing array, you can easily pass it in, similar to syntax like this. But typically you're
not going to do this. Most of the time. You're going to just
create an ArrayList and then add things
onto it as you need. So let's go ahead and
print out everything here. I can print out numbers. And if I run this,
we now see 123. Let's go ahead and try or
moving some elements from here. I can say numbers dot remove. Here we can pass in
a specific object or a specific integer. An integer is not going to
remove that specific element. This actually going
to remove the index. I kind of move index one, which is going to
be the value two. I run this, we now see just 13 in our array, like
we do right here. But what happens if I want to actually just remove
the number two? Well, like I say, integer
value of and pass into. Now if I run this,
we're going to see 13 as we do right here. Now this might seem
a little weird. Why do we actually
have to do this? Well, if I say numbers
dot remove here, we see that this is
an overloaded method. We can pass in an
index or a capacitor, an object for passing
in just the number two or the number one or
any type of basic integer. It's going to treat that as
a primitive type of int. It'll uses topic
sample right here. But if we pass in
a specific class or an object that
represents something, then it's going to use the
second option right here. This is exactly what we're doing with this line of
code right here. This is going to pass in an object and not just
a primitive integer. It will then go through the
ArrayList and trying to remove any elements that
match this value here, which in this case it does, as we see, we do not
see the number two. Now let's print out how many elements there
are in the surrealist. So I could say numbers dot size. If I run this here, we're
gonna see two in the console. And we can also clear this. So let's go ahead
and say numbers. Dot clear. Now if I run this, it's
going to actually clear this after we print out the two
numbers as we see right here. But our size is now at 0 because we've actually
cleared the ArrayList. Now an ArrayList and listen general is known
as a collection. It's basically a custom
class that allows us to add certain things on
and remove certain things. And there's a bunch of
different examples of them. In this video and
the next video we're going to go over two examples. But honestly covering
every example would warrant its own
course just on that. So we're just going to stick
to some of the more basic, more commonly used collections, such as ArrayList and HashMaps, which we'll take a look
at in the next video.
44. Maps and Hash Maps: We're now gonna take
a look at HashMaps, which are a way to
store something known as a key value pair. Basically meaning that
for every single key, there is a corresponding value. Let's take an actual
look at some examples. Here. I'm going to have a
map, and this has going to store a key and value, which can be two different
types of variables. For example, the key can be a string and the value
can be an integer. Similar to ArrayLists,
these have to be the actual class types. So we cannot say int here. We'd have to specify
integer with a capital I. Within here, I can add in
different types of scores. And I'm going to assign a
equal to a new HashMap. Now similar to an ArrayList, we can add in a string and
integer if we want to. But in modern Java is not
necessary, so I'm not going to. Now, what exactly is a key value pair listed at these scores are
for a certain video game. I can say scores dot. And here we can see we're
passing in a string, which is what we have from
this string right here. And we're also passing in an integer from this
integer right here. This is a key value pair. For example, let's say that I have 77 points in this game. I can say scores dot put. Bob has PD points in the game
and scores dot put here, joe has 30 points in the game. Let's go ahead and print
this out to the console. So I can print out scores
and I can run this. And here we see Alex equals 77, Joe equals 30, and
Bob equals 80. But what other options do we
have when it comes to this? I can say scores dot here. I can get an, a certain thing. And this was where we
would pass in the string. For example, I can pass an Alex. And I'm going to cut this
entire line here with Control X or Command X on Mac. And then I can print this out. I can paste it in with Control
V or Command V on a Mac. And if I run this, we're
going to get the scores for the string Alex,
in this case is 77. If I say scores dot, we could then clear it
similar to an ArrayList. This will just remove
all the entries. We can get an entry
set or a key sets. We can also get the values
and we'll take a look at what those three things
do here in a moment. We can see if it's empty. We can replace certain things. We can get the size. Here's where we can
get the values. We also can see if
it contains a key, horrific attains a value. And there's a bunch
of other options, such as removing them. Most of these are
self-explanatory, other ones you might have to experiment with or look
up the documentation. Let's go ahead and try
looping through all of the keys or all the
values or both. I'm going to get rid of
these print statements here. I'm going to say for string key. And then here we're going
to use a for-each loop. So we have our colon here. I can now say
scores dot key set. And this returns a
set which is similar in concept to a list which
we saw in the last video. Now within here I can just
simply print out key. If I run this, it's
going to print Alex, Bob, and Joe, as
we see right here. But now what happens
if we wanted to get access to the values? I can say scores dot v, and here we have values. Now we'd have to
change this to an int, I guess I int value. And then I can print out value. If I run this, we
can now see all three of the values
from this exact map. But what if I wanted to
gain access to both? Well, I can say for
entry with a capital E, we're going to use this
from Java util map. Here we have to specify what
types of variables we need. So in this case a
string and an integer. I'm going to call
this variable entry. Then with a colon, I can now
say scores dot entrySet. Now if I hover over entry sets, this is going to return a set of an entry
which has a K and V, which stands for key and value. So essentially, I
can say entry dot fgetc key or entry dot get
value to gain access to it. For example, string
key equals entry, talk KCI, and then int value
equals entry dot get value. I can then print out key
which has the username, has plus value points. Now if I run this, it's going
to print out what each user has and their corresponding
points, as we see right here.
45. Building a Jar File: We're about to approach the
final project for the course, which is going to be remaking the game Battleship within Java. But before we do that, we need to make
sure we understand how to actually convert our Java code into
an executable file. You might be familiar with dot EXE files where you can double-click them and
it'll open up a program. In Java, we have
a dot jar files, which you probably
have seen before. How do we exactly convert
all of our source code into a dot jar file that
we can actually run. Well, the first step is
to click on the gear at the top-right and then
go to project structure. Or you can use this confusing
shortcut right here. Once you're here,
you want to go to the left and click on artifacts, and then click on
the plus hover over jar and then go to from
modules with dependencies. From there, we need to
specify a main class. This is basically the class
where our main function is. If I click on an Open Folder, it'll automatically select
all the different files that have a main function in
them. So we only have one. We can simply click on Okay, and then click on Okay again. Now from here, I
can click on Okay. Then I can click on
Build, build artifacts. And from here we
can simply press Enter or you can
also click on Build. We see that it is building
something near the bottom. And now that is done, we can expand our OUT
directory, go into Artifacts. And here we see our
workspace dot jar. I'm going to
right-click on this. I could then click on Copy
path slash reference. And then from here I'm going
to click on absolute path. If I paste this in,
this is going to be a file path to this
exact jar file. Now to run this, we can't
simply just open it up. We need to actually run
it through a terminal. The reason for that if this
is a console application, meaning that we
are working within our console like we've seen throughout this
entire program. So therefore, we don't have a custom window with
buttons and images and all that stuff that is outside the scope
of this course. We haven't covered any of
that within this course. So how exactly do we run this? We have to open up
our own terminal. If you're on Windows, you can go ahead and do a
search or command, and then go ahead
and press Enter. Now if you're on a Mac
because I don't own a Mac, I'm not sure how to do that, but you can simply just
google how to open terminal on Mac and it should
have a bunch of results. So I'll help you out. Now, either way, once you have your command prompt or
your terminal open, you could type in Java space, dash jar space, and then you
want to paste in your path. But be aware if you have
spaces in your path, you need to rapidly entire
thing and double-quotes. I'll add into double codes here. And then inside I can right-click
to paste in the path. Here we see the Warnock keys
folder has spaces in it. So I have to add in
double-quotes on either side. If I press Enter, we see that
nothing actually happens. That's because our code
doesn't actually do anything. Let's go ahead and print
out the text, Hello World. And then I'm going
to go to Build, build artifacts and press Enter. Here we see it's
building one more time. Going back to the terminal, I can press the up arrow to
go to the previous command. If I press Enter, it's now
going to say helloworld. The actual code is now ran
through this jar file.
46. Battleship Project Intro: We're now going to be diving
into the final project for the course that is going to be making a single-player
Battleship game. Here we see this board and we have five different
types of ships, and they're all randomly
positioned around the board. We can then enter
coordinate, for example, a 0, which is actually empty
as we can see right here. And it will then say miss. But I can select H for this
coordinate right here. And it will then say hit. And this is now
replaced with an x. If I do I, then j 0
is then going to say, use sank their battleship and this entire ship
right here is sink. Now, unlike previous videos in the course where we
wrote code together, during this project, we're
going to be working on the plans for each
individual feature together. And then I wanted to try and make that feature on your own. Now once you've
completed that feature, or once you feel like
you've done as much as you can and you still
need additional help. You could then go to
the next section of the video where we will actually
be building it together. But I highly encourage you to
try each individual part of this project alone before watching the
step-by-step tutorial. This is how actual
software developers work. So it's a great habit
to get into that way. You can build a skill of problem-solving
using programming.
47. Files and Coordinates: To start the project, I would delete all the files you have in your project
as safe home, the file that has
your main function I was in creates these
five different files here. And keep in mind that
battleship Maine file. This contains my main
function right here. Now there's a lot
of pieces within that project that
rely on each other. For example, if I hover
over my main function here, I'm creating a player object, and I'm creating a board object. In order to make
things step-by-step, we want to start with the
smallest possible piece that is going to not
depend on anything else. And it's also going to be
used and various other places in this project here that is going
to be a coordinate. Now I mentioned that you
should write everything yourself before actually
following along. But this file is very simple. So I'm just going to run over this file real quick with you. And in future videos
with this project, you're going to want to try
things on your own before you follow along step-by-step
with my own explanations. Here we have a chord class
which stands for coordinate. This is going to
represent an x and y-value on the board itself. Also going to have
a Boolean property, which is going to represent
if this has been hit. Therefore meaning
that if a ship is there and we actually
guessed that coordinate. Now, when we create
a coordinate, we're simply passing
in x and y through the constructor and we're assigning it to the
local variables here. We then have a getter
and setter for all three private properties, the x, the y, and
the is hit Boolean. So essentially we're able
to get the x, get the y, C If this coordinate is hit, as well as those
individual values as well. Now here we have a
toString function. Whenever we print an
object to the console, it's actually going to run the toString function
behind the scenes. So essentially if we were
to print out a coordinate, it's going to print
out x comma y. Now, just for clarification, if case you don't know
what a quarter is. Each individual cell here is going to be its
own coordinate. For example, this has be 0, this is a one, and so on. We are eventually going to
create our own board here. We're different ships
are randomly placed and the board columns are represented from the
letters a through J. And the board rows
are represented from the numbers 0 through nine. Now this x and y value
is going to represent where they are depending
on the columns and rows. And the hip value is
going to represent if this has been an actual hit. So therefore, we've
guessed where a ship is. Here we have a C5, for example,
for this cell right here. If I say C5, then going
to change to an x. So therefore, this
coordinate and my program has the
value changes to true.
48. Ships: Let's now create
our very own ship. And before you actually write
any of the code yourself, I highly suggest that we
actually look over the plan for this class and exactly the
tips that I've given here. What exactly is a ship? Well, obviously within our
program here, if I open it up, this is going to represent an actual ship where here we have four different
coordinates. And the situation we have
five different coordinates. This one's a smaller ship, was just two of them in
total, five different chips. So if we look at this class, the first thing we
see is a private list that's going to hold a number
of different coordinates. Of course, this is the class that we wrote in the last video. As we see right here, each ship requires its
own list of coordinates, so we know exactly
where they are. Now we also see all possible
ship sizes right here. And keep in mind that
every comment I add in, such as this one right here, this block of comments right here is designed to
help you as much as possible and give
some useful information of what's inside
these functions. But here we have a static method that returns an integer array. This is basically just
going to return 54332. And if I go over to my
program and I run it again, here we see a ship
that is five long. Here we see a four long ship,
but it's just a vertical. Here we see a too long a
three and then another three. So if I were to add
in a six long ship, and then I run that
program again. We now see it right here. This is going to determine how many different ships there are in the sizes of each ship. So keep that in
mind moving forward by default, I have 54332. Now next we have
the constructor. And because this has
only one line long, I can't really hide the
functionality from you, but obviously it's very simple. We're just receiving a list
of coordinates and we're assigning that to the local
coordinates list right here. Then we also have a getter for both the coordinates and the amount of
coordinates we have. Basically get size
is going to get the size of the ship as it
kind of describes by the name. Meaning that right here, this three will return three lists to overturn
two and so on. Now these are probably
self-explanatory, but the next few
ones might not be. And again, I highly
encourage you to take a look at the different
comments I added in. For example, this is GET index returns an integer and it
takes in a quarter in it. And if you remember correctly, an index is where a
certain element is within an array or a list starts at 0. Here the description is, this returns the index in the coordinates list where
the perineum cord was found. This is the perimeter
coordinate and we're referring to the coordinates
list right up here. Now scrolling down further, we see that this returns
the index of its present or your
returns negative one. If it is not present. If you cannot find the index, then you want to
return negative one. Now next here we're going to see if this is already in use. Here it checks to see if a
coordinate is within the ship. Here's a tip. Use the GET index method. Essentially get index should return negative one
if it is not in use or it should return
something else if it isn't US. And then here we have a
more complicated function, which is it checks to see if a given coordinate
would be a hit. Now the complexity from
this function comes from a, returning a Boolean array. This array is going to
hold two different values. The first one is going
to be a Boolean, true or false if it was a hit. In the second one is
going to be a Boolean, true or false if
it's sank the ship. So for example, if I guess
something and it's a miss, we will have false and false. Here we'll say mes
equals false and false. If it's a hit, but it
does not sink the ship, there'll be true and false. If it doesn't sink the ship, then it's going to
be true and true. These are the possible
return values when it comes to
the functionality. This has all the functionality
that a ship has. So go ahead and pause this video and try and add in
as much as you can, try and get as far as possible. And once you've
completed everything or you've tried your best and you really just need extra help. Then go ahead and resume
the rest of this video and I'll go over my solution
for how I made the ship. Alright, so starting at the top, here we have a GET index. This is the first hidden method that I did not go over yet. So let's review what
this is trying to do. Here. We have a coordinate arguments
and we're trying to see where exactly this is within
our coordinates array, which has stored locally on his class at the top right here. Essentially it'll
return index or it will return negative one
if it cannot find it. So we're going to start
off by looping through each individual coordinate
within our list. We're saying int a equals 0, while a is less than
the coronet list size, we're going to increase a
pretty standard for-loop. Within here. We're going to get our
target quarter in it. And this will
change depending on each iteration of the for loop. Whereas then simply
just going to check if the x value equals the target x-value and the y-value equals
a target y-value. If both of these are true, then that means this is
the same exact coordinate. And we wanted to return
to the current index, basically just returning a. Now if this statement
is never true, then we're eventually going to break out of this entire loop. And therefore we're
going to start just returning negative one, meaning we could not find it. This would be the
GET index function. Now let's move on to
the end-use function, which basically just
use the index method. Here. We're creating a
Boolean called is in use and assignment equal to get index passing and coordinates is not
equal to negative one. So negative one means
that nothing was found. And if something was found, that that means
something between 0 and the total number of
coordinates would be returned. So basically, if the index
is not negative one, that means it is news. Now we can actually
simplify this code. I wrote it in two separate lines just so I can minimize this, because single line
functions cannot be minimized as we see right here. If I minimize this function, we still actually see the code. So going back down to
simplify this code, I can just simply return, get index, passing and coordinate is not
equal to negative one. This will return true
or false depending on if this coordinate isn't
used for the ship. Then here we have the
more complicated function which is did hit. And again, this returns a Boolean array where the first
Boolean value is going to be if it was a hit and a second Boolean value is going to be if its think that ship. If I expand this here, we're first going
to get the index from our GET index method. And if the index
is negative one, that means that this was a miss. So therefore, a
miss should return a Boolean array with
false and false, as we see right here. Here we see this negative one, which is going to be the
same exact negative one that is returned if we
can't find anything. Now, after that, once we
get to this code here, we know that we
actually hit something. Now what he says, see
if we actually sank that ship or if it's
just normal hit. First, we're going to
get the coordinate at that certain index and we're going to set its
hip value to true. If you remember in
the coordinate class here we have this Boolean hit. And so we're now
assigning this to true because we did actually
hit that part of the ship. Now going back into ship here, I'm going to create
a Boolean called sank and set this equal to true. Essentially meaning
that by default we're going to assume
the ship sank. And then here we're
going to loop through every single coordinate
of the ship. If it is not hit, then what's to say
that sank equals false and we're going to
break out of this loop. So essentially, all this
code does right here. It's a seat if the ship has any coordinates left
that are not hit. If every single coordinate
of the ship is hit, then the ship will then sink. Then finally, we can
return our Boolean array. At this point of the
code right here, we know that there
was an actual hit. The first Boolean
is always true, but the second boolean is
going to be true or false depending of it actually sank ownership depending on
his logic right here. This is going to be
the dead hit function. And this is probably
the most complicated function in the ship class. But hopefully all this
explanation made sense to you and hopefully you got most of those
functionality down. Now, of course, in
programming there are many, many different ways to write
this same type of code. So if your code
achieves something similar to what mine
does, and if it works, then don't worry, if it
looks slightly different, that's perfectly fine as long as it's still
does the same thing.
49. Player: Let's take a look at
the player class. This is basically
just going to handle all the ships for
a specific player. Now in this project we
only have one player. So basically, this is just where we handle
all of the ships. So I'll show you a few
pieces of basic setup code. But when it comes to the
actual functionality of how everything works, I highly encourage
you to try using my examples here and go ahead and write the
functionality yourself, and then come back to the video. One has showed you
my own examples. To start off, here we
have a list of ships, the ship class,
That's something we made in the previous video. We also have a constructor here, which is going to
receive the board size. If we go to my main file, here we see we are making a new player and we're
passing in the board size. Now, going back, we also
can return all the ships, just a very simple getter. Now, moving forward here
we have a random function. The goal of this is to randomly assign a starting point for a ship depending on the board
size and the boat size. It also should make sure that the boat can actually
fit on the board. For example, here we have
this five long boat. And if this starting point was, let's say J4, where to
actually ends here. Then there'll be
four characters, there'll be off the board. We can't have that. So we want to make
sure we can actually the boat on the Akron board. Now this returns an integer
and the return statement says the starting position for the ship to
fit on the board. For example, if this starting
position was right here, this would be six because
G is equivalent of six, I'm just displaying
letters here, so it's easy to distinguish
if its rows or columns. But let's say it's
starting right here. This would be six and
this would not fit the entire board because
this is a five long ship. We have ten total
columns and ten rows. Six plus five equals 11. So we would go off by one. It's going to return
five instead. Basically meaning we're
going to adjust for that change to make sure that
the board can fit the boat. Now moving forward, Here, we're going to have a
guitar coordinates with a starting coordinate and
an ending coordinate. This is going to
create a list of coordinates from a
starting ending point. An example is a start of
zeros 0 and an end of 03. But let's return would
be 00010 to the goal for this is to pass in
a starting coordinate here and an ending
coordinate here. And it will then
return all coordinates needed in order to
fill the entire ship. Moving forward
here we have is in use or basically going to check a coordinate and see if any ships are going to
actually be using that. Then here we have placed ships, which is actually the most complicated function
within this class. We're going to run the
ship, it gets sizes. If I go over here
and this is going to return a new integer array. In my case, I have five
different ship sizes. I have a five long,
uh, for long. Two instances of a
three-level ship, and finally A2 long
ship with them player. Here I'm going to run
ship dot get sizes to get all ships and randomly assign if each ship should
be vertical or not. If I go into my board here, we see that five is horizontal. But this three right
here is vertical. But this three right
here is horizontal. Twitter going to randomly assign a vertical Boolean to each individual ship that
we're gonna try and create. We're also going to randomly
assign a starting coordinate and add the ship size to
get the ending coordinate. For example, here, this RNA
coordinate will be five for, but we're going to
add the ship size to get the ending
coordinate right here. This is going to be 94. Keep in mind that
a is basically 0, which is why J is nine. Next it says a mixture
that all coordinates allow the ship to fit on the board and are not
being used by other ships. You can use previous
methods we've made in this class for that. Basically making sure that is a unique coordinate that
will actually work. Then finally, add the resulting
ship to the ships list, which is declared
right here at the top. Now here's a tip. The starting coordinates x and y values should be randomized. So for example, this right here, this 54 coordinate, this
will be randomly generated. But the ending coordinates
x and y values, will simply be the ship size added to the
starting coordinate. For example, here we
have a five long ship. So we're going to take
this and add five to it. Obviously will count that
starting one as one and not 0. So we're basically just going to end with a five lordship. Also, you should only add
to either the x or the y, depending on if it's
vertical or not. Never both. So basically here, this has a horizontal ship, which means we are
only adding to the y. We see that the x is four. The entire time for this entire ship is only the
y-values that are changing. For example, f through j. If we were to add
to both of them, we would have a
five-by-five grid here with a giant platform, but we want an actual
representation of a ship. This is going to be
slightly more complicated, especially on a place ships
function than the last class. But try and get as many of
these things done as you can. And then once you feel like you've gone as far as you can, or once you've
completed everything, go ahead and play the
rest of this video so you can take a look at what
I did for the solutions. Let's start at the top
for the random function. If I expand this here, I'm going to start off by
making a random integer. With a maximum value
of the board size. In this case between 09
because the board size is ten. Then I'm going to say, while the random number plus the boat size is greater
than the board size, I'm then going to subtract
the random number. So let's take a look at this
five long ship right here. If our random number started
right here, which is six, we now know that six plus five, because randomness six boats
heisst five in this case, that is greater than
the board size of ten. We're going to continue to subtract it until
it actually fits. In this case, we're
just subtracting once, giving us this position. And then we're going to return
the new starting position. This is one solution in order to randomly select a
starting point and making sure that the starting
point will actually work when it comes to the
boat size and the board size. Now next here we have
get all coordinates. At the start, we're going to
make a list of coordinates, and we're also going to
return that list at the end. Then we have to actually
mutate or modify that coordinate list in order to have all the
values that we want. Now we're going to be
adding to the x or the y, depending if it's
vertical or horizontal. Here, I'm first starting
off by checking to see if the x values are the same between the start and
the y-coordinate. If we take a look at
the boat, for example, this right here, the x-values
are always the same. They are always four. Therefore, this has
a horizontal boat. So with that said, I need to continuously increase
the y-values. Now in here I'm going to get the minimum and the
maximum y-value. And we see right here
I am only using Git. Why? Because again, the
x-values are always the same. I'm then going to loop
through all the y-values. I'm going to add
a new coordinate to the coordinates list
that we made right here. I'm going to always use
the same exact x-value, but I'm going to pass in the
y-value from a for-loop. That way the exit always the same as it should
be for this boat, but the y-value is
voice changing. Now in this else statement, this is the exact same concept, but instead of the y-value
is for the x-value. Then after either these are ran, then going to return the
list of coordinates. Moving forward, we now have the easiest function
in here which is going to pass in a coordinate and see if any of our ships are
going to be using it. So basically we're looping
through all the ships. If it's unused, we're
returning true. Otherwise we're going
to return false. Now, moving forward here we have the most
complicated function, which is to place all the ships. We're going to start
off by looping through all the possible
ships that we want. Then we're going
to randomly assign a Boolean if this should
be vertical or not. We're then going to create
a list of coordinates, but we're not going to assign
anything to it just yet. Now you might see a keyword or to hear that you're
not too familiar with. For example, what
is this main colon or before this while loop? And what are we doing
exactly right here? Basically because we have our main loop and we have
a loop inside of it. With this for-loop, I need to make sure that I label
each loop correctly. For example, if this is true, I want to continue
on our while loop. But because I'm
inside the for-loop, it will assume I'm continuing
on the for-loop itself. With that said, I have to add
a label to the while loop. And then I can continue on that specific while-loop
and not in the for-loop. Let's take a look at what
the for loop is doing. First of all, this
is an infinite loop, basically meaning we're
going to continuously run all this code until we eventually reach this
break statement here. So as I start, I'm going to get this starting x and y-values. I'm then going to use those to create a starting coordinates. Then I'm going to get
the ending coordinates, but I'm not going
to randomize these. Instead I'm going to say
index and end y are going to equal to the start x or
y plus the boat size. If it is a vertical boats, we're going to take the
starting x, and that's all. But if it is not
a vertical boat, we're then going to
take the starting x and add on the both sides. Then it is the
reverse for the end. Why? If it's a vertical boat, we're going to take the starting y and add on the both sides. Otherwise, we're just
going to use a starting Y. And then we'll use
these two values to create an ending coordinate. Then we're going to assign a new value to this
coordinates list right here. That value is going
to be the results of guitar coordinates from
the start and the end. This will take the start
and the end coordinates and everything in-between
and add them to a list. And this is the function
we previously made. Now afterwards I'm going to loop through all the new
coordinates that we just got, and I'm going to make sure
that they're not in use. If they aren't used, we're
going to jump back to the start of the while
loop and basically just keep trying again and
again and again until you find a bunch of boats that
have not been used before. Now if all the boats we
found our exclusive, meaning that they are not
overlapping over each other. In this for-loop is going
to just run through itself and going to continue on into this
break statement. Now this break
statement will break out of this entire while loop. And then here we're
going to create a new ship passing in the
coordinates we just got, and then pass the entire ship into the ships list right here. So this is definitely one of the more complicated functions. I don't believe we even
covered these labels here, but there are definitely
other solutions that don't require these labels that he might have
been able to find. But if you weren't able to get the place ships or anything
else in the player class. Don't worry, the place ships
functions specifically was more complicated than most of the stuff
we've covered so far.
50. Finishing the Game: This will be the last video
on the battleship project. Within this video,
we're going to create our board class and
our battleship class. So let's start with
support class, which we are making
a New England sub within our main function. And here we are passing
in the board size as well as the player which
we have already created. Now in the board class, I'm going to go over some
basic functionality, and then I'll go
over the concepts behind these different
functions here. So you can go ahead and try
to make them on your own. And once you get stuck or once you complete
the functionality, you can then see how
my solutions look. So starting off, we have an
integer for the board size. This just simply comes
from the actual parameter. Then we also have a
multi-dimensional character array. This is going to be the
actual board itself. For example, this is index 0, index one, index 10, and so on. Then we have a letters
list which has all the different letters
for the column identifiers. So basically all the letters
we see right up here. That way we don't have a 00 as a coordinate or 10 as a
coordinate where it's unclear which one is the
columns and which one is the rows using letters
makes this very clear. Which one is the
columns and rows. Then we have access
to a player here, which also we are just
getting from the perimeters. And so we're just
assigning it right here. We are first creating
a game board, which we'll take a look
at here in a moment. And then we're going to place the ships for creating
the game board. This is going to fill
each coordinate with the board with a certain
space character. So for example, board index
zeros, 0 equals space. Now of course, you
shouldn't manually assign each one of these. This should be done
through a for-loop. Now moving forward, here
we have placed ships. This is going to loop through
player dot get ships. And to review that real quick, under gets ships right here. This just simply returns a list of all the ships
attached to this player. So we're going to get all
the ships with a player, and then we're going
to get the ships coordinates in order to
get the x and y-values. If we go into the ship class, here we see get coordinates. And this just simply
returns a list of all the coordinates
associated with that ship. We're then going to
assign the ship size as the character in
board X and board. Why? For example, here this
five long character, each individual board
index, for example, this one, this one
and so on are called five because this is the
five long ship over here. This is the four long ship. Here we have the
three long ship. So the characters are going
to be how big that boat is. That way it's very clear where
the boat starts and stops. And here's a tip. An integer will count
as a character, but not in the way
that you want. You need to convert ship dot
get size into a string with string dot value of and then access the first
character of the results. The reason for this is because every single individual
character is going to have a number associated with it when it comes to
its ascii value, which is going to basically
just be a table of what each individual character on your keyboard represents
in a numeric value. You can go ahead and
Google ascii value or ascii table to get a better understanding of
what I'm talking about. But with this said, you need to make sure that
you're actually converting the ship size into the
real number you want, because by default it will not
represent the real number. But basically this means
that ship dot get size is going to return a number
that you're not expecting. And so you need to
convert it into a string first with string dot value of. Here we're going to
get a letter index. And you can actually
see this function here because it is only
one line long. But let's go over it real quick. Here we're going to return into America value for each
letter in the letters array. So we're passing in a
certain letter here. And this is the literacy
could be index of, and we're going to
return the index of this letter from
the letter array that would define
a fraud appear. For example, a would
be 0, and so on. Now next we're going to attempt to hit a certain coordinates. This would see if a coordinate
would be a hit or not. We're going to pass in the x and y value of the coordinate, and it's going to
return a string. If we missed, it will
return mess right here. If we hit, it will
return hit right here. If it is a hit, that
would sink a ship, it would instead return, you sank their battleship. Now, finally here
we have two string. Whenever we're printing
an object to the console, IF function is
going to be called. So we can override this
method to make it. So whenever we're
printing the board to the console that we're going to print
exactly what we want, which is going to
be the full board, as we see right here. This is printed because
our pal ship class, whenever we're running
the game loop, we're going to print
out the actual board, but we'll cover that
here in a moment. This is going to loop
through all the board coordinates and prints the correct characters
where they should be. And a tip here is to print
the column labels first, which is the letters, as
you can see right here. Then print each
row one at a time, starting with the row number, and then each coordinate
for that row, we're going to just print
out the row number. And then we're going
to go through and add an each individual coordinates. And keep in mind that
these lines right here, also known as pipes, are by holding Shift and
pressing the backslash button, which is right above Enter. Then I have a space. Then I have the actual content for the individual coordinate, then another space
followed by more lines. So this function here
is going to return a string that represents this
entire board right here. This is going to be the
entire board class. Go ahead and try
and make as much progress on this as possible, and then come back
and see my solutions. And then afterwards,
we'll go over the concepts behind
the battleship class, which just has two
main functions. But for now, go over the board functionality and
try make as much as possible. Alright, so hopefully
you were able to add the functionality
for the board class, or you were able to get as
far as you possibly can. Let's now go over
my solution for how I implemented
these functionalities. So here we have
create gameboard. If I expand this,
we're going to loop through each individual
array of the board. So each individual
row is going to be a nested array within the multi-dimensional
array right here. I'm then going to fill this
entire row with a space. And if you created a nested
loop to go ahead and do this, that's perfectly fine as well. Like I've mentioned
before, there are multiple different ways to solve each problem when it
comes to software development. If you wrote this
code, that's fine. If you wrote code similar
to it, that still works. That's fine as well. Next we're going to
look at place ships. If I expand this, we're
going to loop through every single ship
that the player has. Then we're going to
loop through each coordinate of that ship. We're going to get the x and y value from that coordinates. And we can then assign
board index XX and XY equal to this
expression right here. This goes back to what I
was mentioning of using the ship size passed
into string dot value of dust because we are looking
for a specific character and each individual character
has his own integer value. Because this is a
character array, we cannot simply just assign
an integer to it because each individual character on your keyboard is represented
by a specific integer. And it will assume that that is going to actually be the case. For example, the character 0 as represented by numeric 48, the character one represented
by numeric 49, and so on. What we want to do is
make sure that we were actually using the
correct string. We're going to
take the ship size and pass it into a string. But of course, this
gives us a string variable when we want
a character variable. So we can simply just
access the char at index 0, which there's only
one index because this has only a
single digit value. But basically, this will
convert the ship size of five into the character five and then assign that to the correct board
position right here. So this will go through all
the ships and basically just placed the 5's where
the five long ship is. The threes are, the three
long ship is and so on. Now moving forward here
we have get Letter index which was covered earlier
on FSS single line of code. Moving forward again, he, we're going to attempt to
hit a certain coordinates. So first we're gonna
create a coordinate with the x and y-value. And then we're going
to loop through every single ship for
this exact player. If you remember from
the ship class, we have a did hit function
by go over to that. Here this is going to return a Boolean array where the
first value will be if it was a hit and the second
value is going to be if it's sink
the ship, false. False means it was a mess. True false means it was a hit, but it did not sink that ship. And true, true means that it did hit and it did
sink that ship. So going back to my board here, I'm going to get access
to all the hit data. And then I can create
two separate Booleans. Or did hit is index
0 and sink is going to be index1 with zinc
went to see if he is true. If so, we're going to X out
that specific coordinate. So for example, if I
run the program here, I can select B1 to
represent this right here. I can enter B1 and
it changes that three to an x because
that was an actual hit. And it also returns the
string hit right here. So in order to do that, here, we're going to return if a
sink using a ternary operator, we're going to return us
think they're battleship, but otherwise we're
going to return hit. And this is actually
where the strength comes from that we see in
our console right here. Now after this for-loop, if nothing actually matched, that means that it missed. So we're simply just going
to return the string miss. Moving forward here we
have a toString function. This is basically
just going to print the entire board to the screen. We're going to use a
StringBuilder class. And there's nothing
wrong with using a normal string and
just adding onto it. They're basically going
to do the same thing. But I'm using a StringBuilder, which basically just
allows me to add more things to the
string in a cleaner way. But behind the scenes it's basically just adding
onto a string. Here I'm starting off
with these extra spaces. Because if I go to my program, that's what we see right here
with us highlighted text. This is the starting
spaces to make sure that the column labels are lined up with each
individual column. Then I'm credit something
known as a delimiter, which you can kind of
think of as a separator. And this will be a space
followed by a pipe, followed by another space. And that's what we see
right here in-between each individual character
for the exact coordinate. Then I'm going to
add an a comment. I'm going to say that
this is going to be adding on the columns. So I'm going to loop
through the board size because boards are
always a perfect square. I can loop through the board
size two different times. One for adding the columns, one for adding the rows and
the individual content. Here I'm going to append
the letters dot get a, which will start at 0 and loop through the
entire board size, which is why we see
this right here. I can now loop through
this entire thing. Next, we're going to append the delimiter to
the actual string, basically adding on the space, the pipe and the extra space. But we do not want to
do this when it comes to the very last element here, as we see, j does not have an extra line at the end of it. To check this, we can say if a is less than border
size minus one, if I were to change this, and I will run this
one more time, we're going to see an extra
line on the edge of j. Which I don't really like, but that is up to you if
we want to have that. So I'm going to change
this back to what it was. Now moving forward. After we've
added on all the columns, we're going to add on a new line using the four slash
n escape character. From here. It's then going to go to the next line
right down here. Now here we're going to add on each individual row and the
actual content for the board. So essentially we're
going to have a nested for-loop,
looping through it, basically twice, one for the x values and one
for the y values. Inside of this nested for-loop. We're then going
to have a and B, which basically can
represent x and y. In fact, to make things easier, I'm going to click near a, and I'm going to press Shift
and F6 and rename this to x. Then I'm going to do
the same thing like be shift and F6 and I
can change this to y. Now this makes us
more clear when we're accessing the board values are basically just looping
through the entire x and y coordinates for
the possible values. Now one thing I want
to do is when y is 0, that means we're at the
very start right here. And so we want to add
on the row number, for example, 012 and so on. So we're going to add
onto that right here, and then we're going to
append the delimiter, that being a space, pipe space, which
we see right here. Now afterwards
we're going to add each individual character. We're going to add on the
board at index X and index y. Here is 00, here is 01, is 0, to here is 10, and so on. Now, most of these
are gonna be spaces, but of course, when the
ships were created, they were placed specific
random characters with where the boats
should actually be. Afterwards, we're
just simply appending the delimiter that way after we print out
this space here, we'd have another
space with a pipe and another space to create some whitespace to make it
easier to read everything. And then afterwards we're
going to append a new line. This is going to what's
taking this line right here and wrapping it
down to the next row. Then at the very end
of the function, we're going to return
results at ToString, basically just returning the
string that we just created. So this is everything
when it comes to the actual board and
printing things out. If this was a
complicated for you, don't worry, that's
completely normal. This project here
is assigned to have some easy aspects and
some challenging aspects. If he gets stuck in these parts, don't worry, this
perfectly normal. But now that we have our
board class created, Let's go over to our
battleship class, and let's take a look at
the final two functions we need in order to
make everything work. So, so far we've created a
player and created a board. And now we're going to run, run game loop passing
in our board. There are two functions similar to the rest of this project. I'm going to explain
the concepts behind it and then you can
go ahead and see what you can do with
those concepts and then afterwards check my
solution compared to yours. So here's a description of how this game loop
is going to work. We're gonna create
an infinite loop that will do six
different things. The first is to draw
the current game board, basically just printing
out this board object to the screen because we created a toString
function down here. Whenever we print a port object, it's going to run this function. Next, we're going to
print the last action. So this was either a miss, a hit, or sank their battleship. We're going to actually want
to create this string that's mentioned here before
our wild loop. Then we're going to ask the
user for a coordinates, or they can input
the string quit. As we can see right here at
the bottom, enter coordinate. Here's an example, or
quit to stop playing. If I enter quit, it's actually going to
close the program. Basically meeting, we're gonna
return from this function. Notice that four is what
I've just described. Quit the game. If quit
was entered, that five. Now this is where
most of the logic is. Step five is to check if
they coordinate is valid. Basically meaning it's going to have to individual characters. The first one is a valid letter that is part of this
array right here. And the second one is a valid
number between 09 if either of those are false or it is
not a character long string, it's going to continue to ask them for the correct
coordinates. For example, if I run
this and I enter or simply just a, it's
gonna ask me again, if I enter Z 0, it's going to ask me
again, if I enter a 0, it's going to actually work. It has to be a valid coordinate. And this is actually
what we're going to do in this next
function right here. But I'll describe that
once we get there, we're going to first check
if a coordinate was valid. If so, we're going to attempt
to hit that coordinates. Then we're going
to store the last action string to print it out after the board is displayed on the
next loop iteration. That's why I
mentioned right here. Basically we're going
to have a string before a while loop, but we're going to
assess value once we actually had determined
if it's a valid coordinate. And after we've tried
to hit that coordinate, that way when we loop
back to the start, we're going to draw
the current gameboard. We're going to print
the last action. That way the game board does
not cover it up and then we're going to continue
on afterwards. If the coordinate is not valid, then we're going to jump back to step three, which is right here. Ask the user for a coordinate
input or to enter quit. This right here is
what we're going to do to loop again and
again and again, if they do not enter
a valid coordinate. And this is where all the parts of the game come together. Now, this function
here is going to use this next function which
is valid coordinate. We're going to pass in a string, which will be the
actual user input. When I enter b5 right here, the string B5 is going to be entered within this
parameter right here. We're also going
to have a board. And if we look at the
exact description here, this is going to check if
the user input is valid. Now there are two requirements. The first one is it must be
a two character long string. The next one is it
must be a letter. It a through J only, followed immediately by a number which is 0 through nine only. Now here the tip input
is received and strings. So getting an int value
of the second character, which should be 0 through nine, will not act like
0 through nine. Instead, it's going to act
like it's ascii chart values, which I mentioned
earlier in this video. This means the character
0 would equal the integer 48 and the character one
would equal the integer 49, and so on up until the character nine equals the integer 57. To check if the string input of the second character
is 0 through nine. You actually said
check to see if it's integer value is greater than or equal to 48 and less
than or equal to 57, basically meaning 0
equals 489 equals 57. So we want to be within
these two values right here. Go ahead and write the
functionality for this. I would suggest starting
with the is valid coordinate function because it
required for the game loop. And then once you
have this done, go ahead and try and
tackle the game loop. And then afterwards you can compare your
solutions to mine. Let's start off with the
is valid coordinate. If I expand this, here are first going to see if the length of the string
is not equal to two. If that is correct, then
we're going to return false because this has to be a
two character long string. For example, if I enter B5, which is three characters long, It's then going to ask me again, if I entered test, which is
not two characters long. It's going to ask me again, and it will continue
to ask him again until I enter a valid
coordinates such as J nine. Now obviously this is a mess,
but it actually worked. Now afterwards I'm going to
create a character array to separate the exact coordinates into the individual characters. The first thing to do
with that information is to check if the
letter actually exists. Board app.get Letter index,
as we see right here, it's going to return the index from all of our
letters right here. Meaning that if it
does not exist, It's going to return
negative one. This will basically make sure
that a through J was used. Now if it's not, we're simply going
to return false. But if it is used, we're
gonna continue and move on and check
the next values, which will be checking
0 through nine. Here we're creating
an integer and a string is equal
to a character. Remember, array is
a character array, meaning that they're going to be individual characters which have numbers that represent them. For example, the character 0, represented by integer 48. Character one is represented
by integer 49, and so on. We're going to actually make
sure that this is nine by seeing if the value is greater
than or equal to 48 anion. If the value is less
than or equal to 57. If this condition
right here is true, that means that
everything is correct when it comes to the
valid user input. So now let's scroll
up and let's make the very final function
for this entire project, which is run game loop. I'll take all the
functionality and put it together to
actually be usable. If I expand this, we're going to start off by making a scanner. And we're going to
create a string, which is called last action. And we're assigning
this equal to null. We're going to assign
this later on. This will be either
the mess or the hit, or the US sank their
battleship string. And we're going to go
ahead and make this first because we're wanting
to print out the board. And then immediately
afterwards we're going to print out
the last action. That way it is not automatically
replaced by the board. For example, if I were
to print this out beforehand, an hour to run us. If I enter a 0, for example, the
board covers it up. If I scroll up here,
we see the mess. So this is why we need to create a string outside
of the while loop. So it's not going to
be reset each time, and we can then print it
out if it actually exists. Next, we're gonna create a
string called coordinates, and this is going to
receive the user input. Here we have a do-while
loop, which if you remember, basically this is going to run this exact code at least
once, no matter what. Then afterwards, it
will continue to run this code as long as this
expression right here is true. So let's take a look at
what this code inside is. Here we're printing
out inner coordinates, example a 0 or quit
to stop playing. We're then going to get the next word that the user enters. And we're going to convert
this to uppercase. So anything like lowercase a 0 would become uppercase Israel. And this makes it easier
for us to compare things. Afterwards, we're
simply going to see if the input was quit. If so, we're going to return
from the main function, which would in turn return back here and then
just exit the main program. But assuming they
did not enter quit, we're then going to see if
it is a valid coordinate. We're also going to use a
NOT operator right here. Basically meaning if this is not a valid coordinate with the
cord ended board given, then we're going to
continue to live through until the user enters
a valid coordinate. But if they do enter
a valid coordinates, we're going to continue on and run all this code right here, starting off by getting
a character array. And this is a similar
concept to what we had before with the is valid
coordinate function, we're going to get a
character array with index 0 is going to be the letter and index one is going
to be the number. So scrolling back up here
we're going to get the column which is board dot get
Letter index, array index 0. Now getting the index of
this is basically going to convert a through J
into a 0 through nine. The user sees a through J, but the program does not
actually use a through J. We use different numbers
for the actual columns. So to 0 through nine. And this is actually the index of each individual character. If we go to our board,
this has index 0, index one, all the
way up to index nine. Getting the index
from this list is going to give us the
correct y-coordinate, therefore giving us the column. Now for the row,
we're simply going to take that exact character
and we're going to subtract 48 for the
same exact reasons as we see down here with
all the ascii examples. Basically character 0 equals 48. So if we subtract 48, that means that
any number we have is going to be a valid integer. It's going back up here. The last action is going to
equal board to attempt hit, passing in the row
and the column. And this is going to call
the attempt hit function, which would then
loop through and see if a ship was
actually there. And then return a string, depending on if I actually hit or if it missed or if
a saint that ship. And this is how this
entire program works. If I run this one more time, now that we see how
everything works, I can now enter B3, for example. And it's going to excess out. If I enter b2, which is above
it, It's going to say Miss. And I can keep on entering B4, B5. Finally be six. And now it says, do you
think they're battleship? Because all coordinates are
now x out for that ship. And now we have a completely working single-player
Battleship game, which we built
together using Java.
51. Conclusion: This concludes my entire
Java course for beginners. I want to thank you
for taking the course. And if we want to
learn more about software development
from my tutorials, then checkout my YouTube
channel, worn off keys.
 Worn Off Keys