Transcripts
1. Introduction: Have you ever
opened that blender and immediately
felt intimidated? You know you've got ideas and you want to
bring them to life, but just don't know
where to start. Well, you're in the right place. Welcome to the Blender
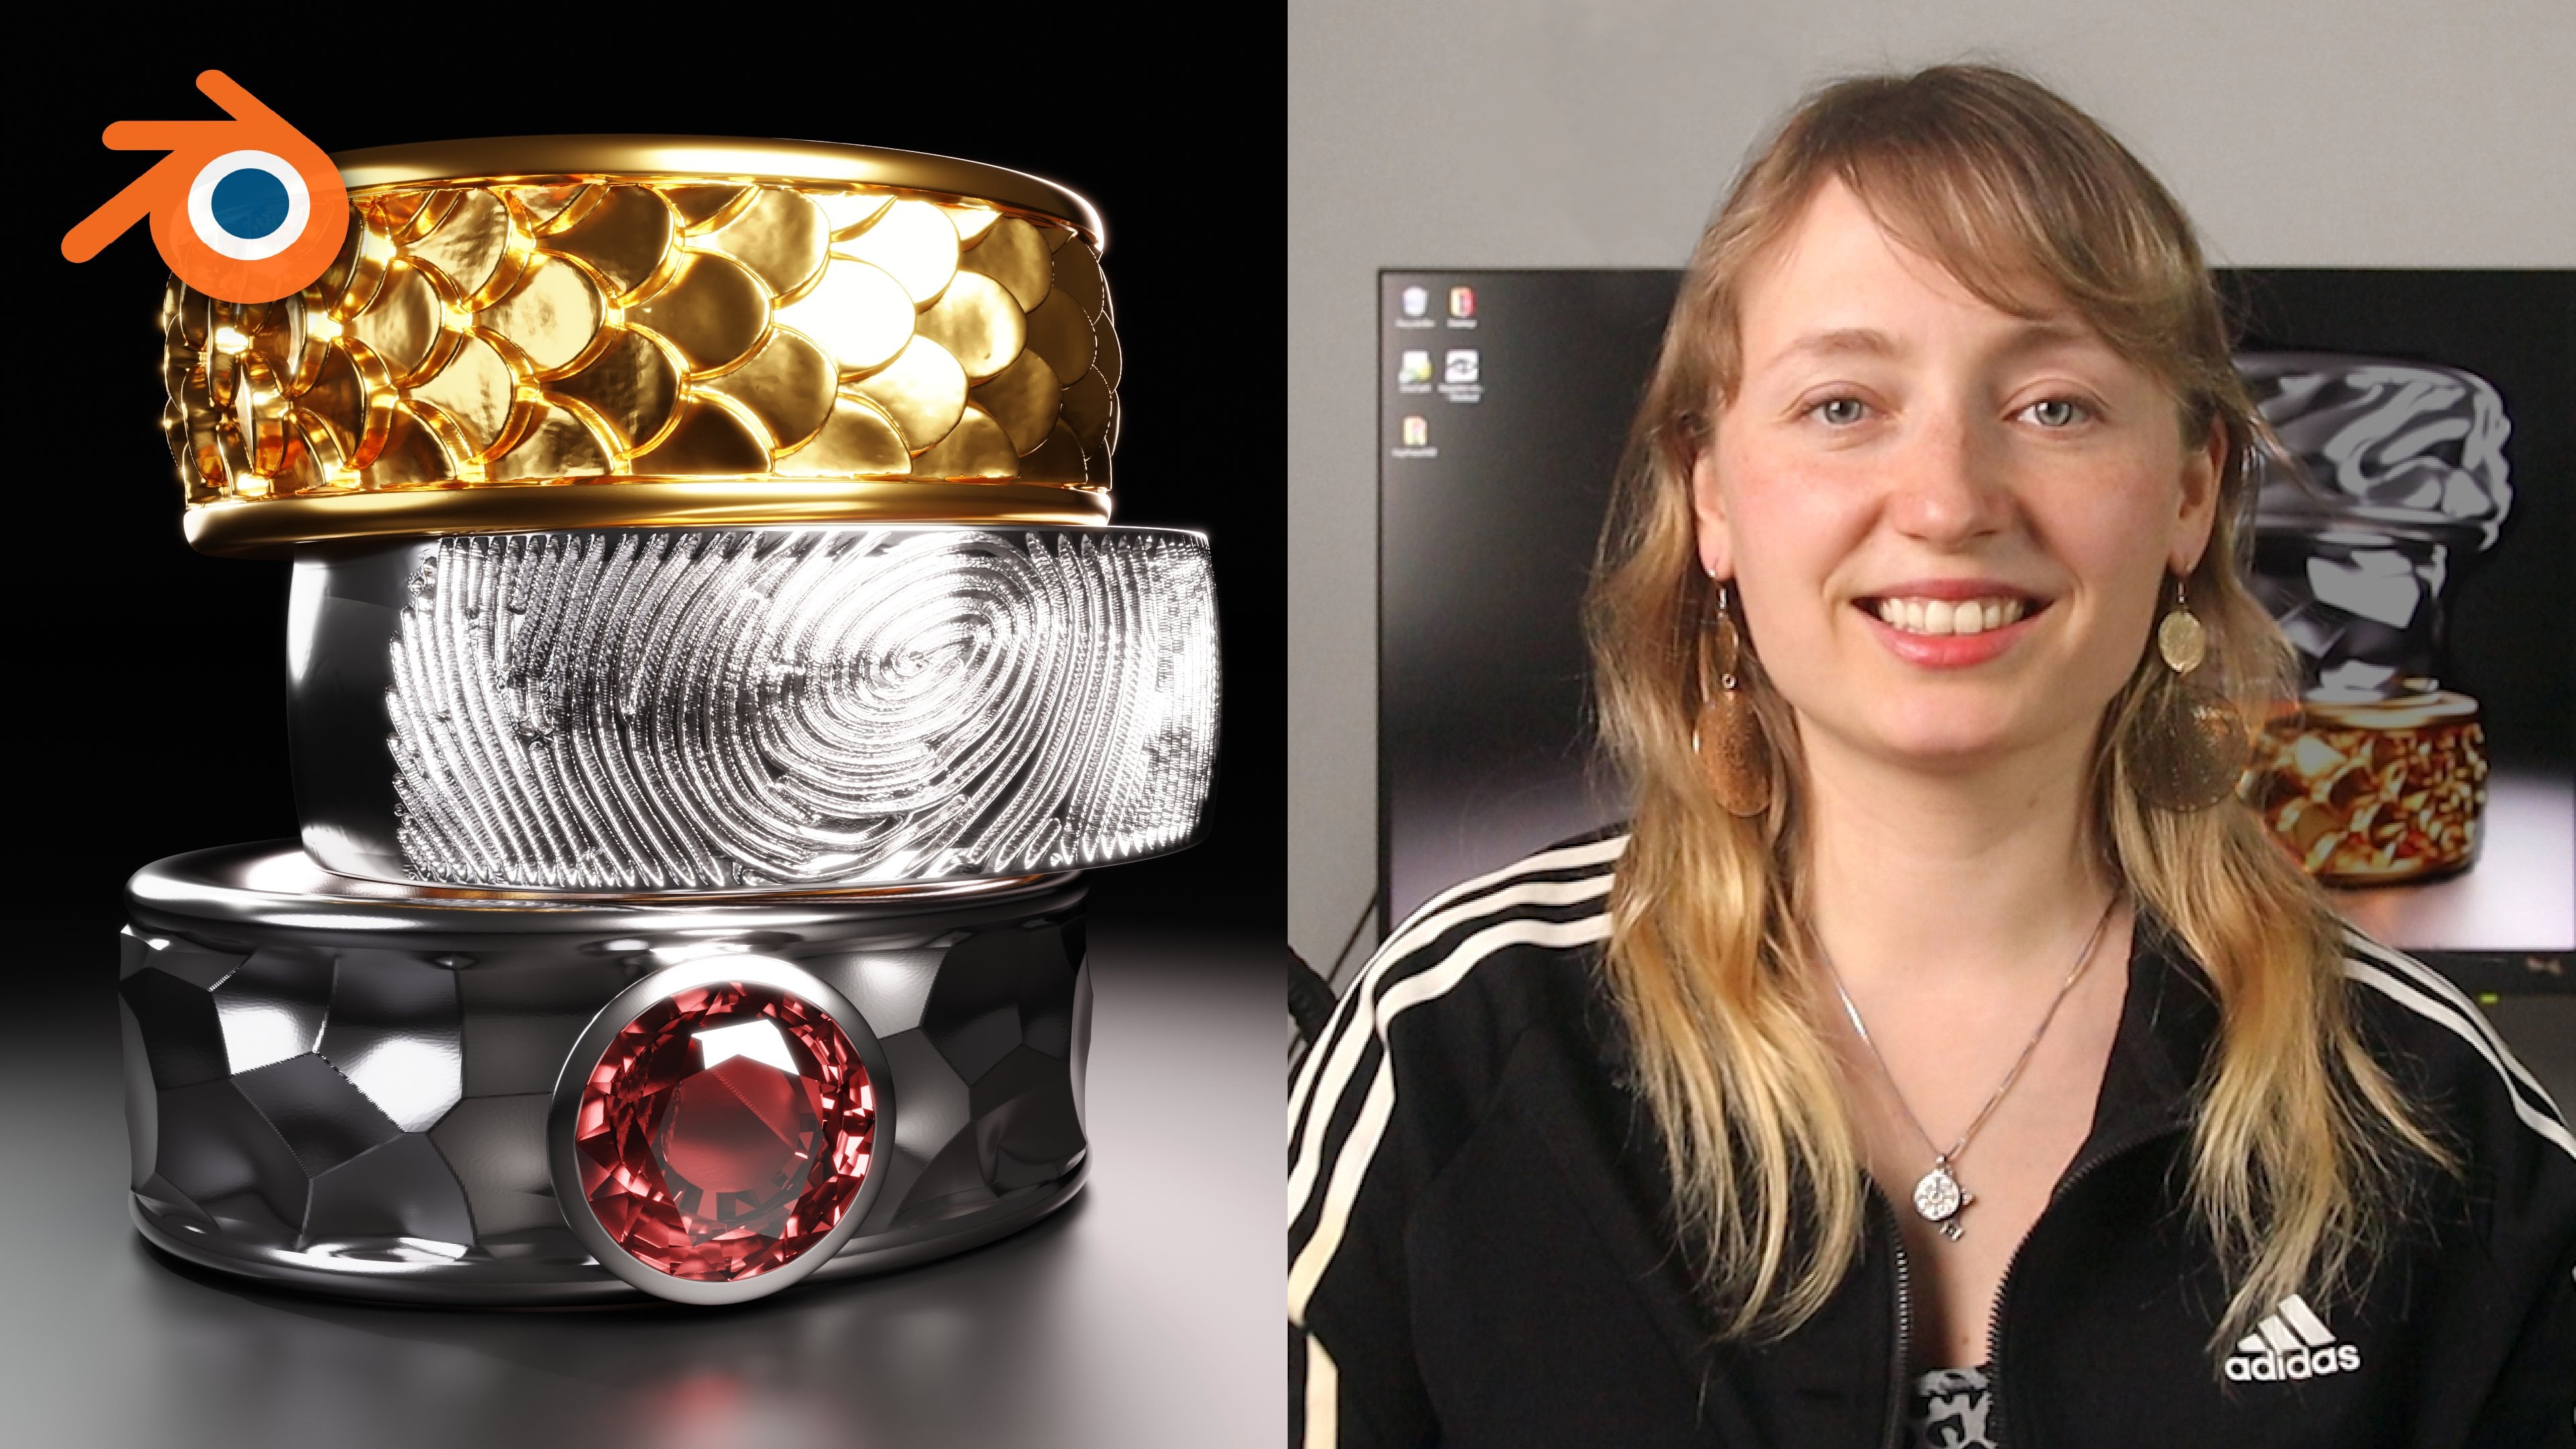
baddy Boot camp. Hi, hi. Welcome to my class. My name is Danielle, but everyone knows
me as Ebonics. I taught myself how
to use Blender back in 2016 because there were very, very limited options
when it came to Black hair styles
for the Since fourth. And as well as there
being no options, there were no tutorials. So I've pretty
much been teaching myself along the way
and learning how to piece together all of the knowledge that
I've learned about Blender to make it applicable to what I was trying to make. Today, I work with some of the leading studios and brands, consulting them on how to
make the best assets for us, as well as support the
development of initiatives which combat the lack of authentic representation
in gaming. The reason for this class
is I don't want you to start out the way I started
out, anxious, nervous, and just not knowing where to begin when it came to
attacking blender, to create things that I wanted to bring into
the games that I loved. I'm going to introduce
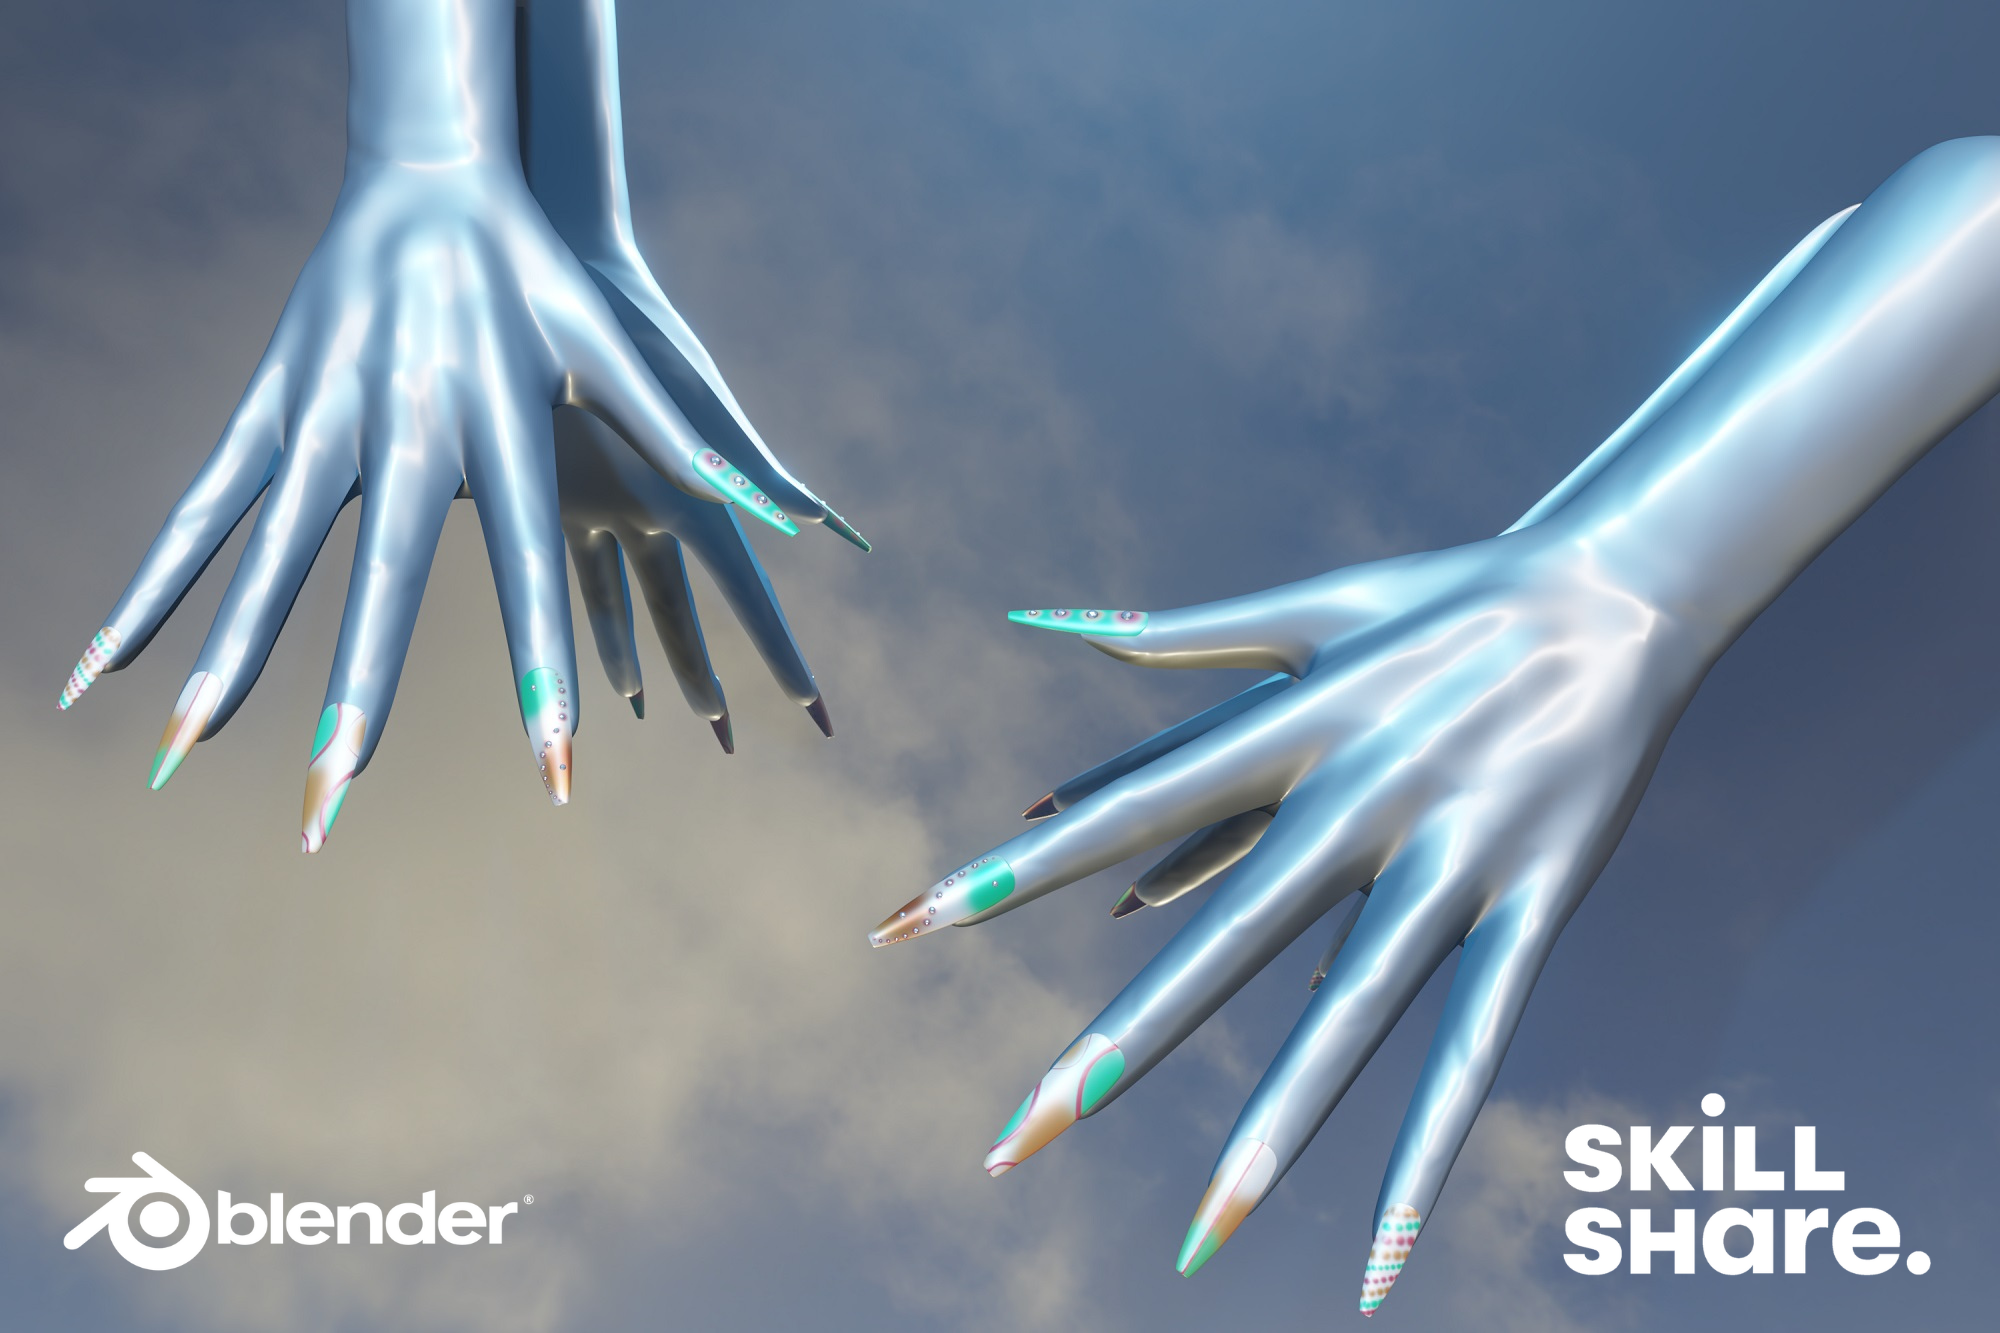
you to some of the most basic blender tools whilst you're creating
your own set of nails. This felt like the
ideal first lesson for me to share with the world, mostly because I have my own
set of nails in the sims, and it was my very
first piece of content that I ever made that
is officially in the game. So, you know, it makes sense. This class is ideal
for beginners who have got little
to no experience when it comes to blender and
who just want to learn about the very basic and
beginner tools as well as just kind
of figuring out the mechanics of
how Blender works. I hope you enjoy the
class, and I really, really hope that
this is going to be a very unique and
fun introduction to what may be a very long loving
relationship with Blender. Here are some of
the main takeaways and key learnings that
you'll get from this class. We'll start by preparing
your mindset and work space. We'll figure out what
you need to get started, as well as finding your designed inspiration
for your nets. You'll learn how to add a base color to your base
nail that I've provided, as well as some of the
basic blender tools and key binds and all of that to just help you
get around and blender. You'll then learn how to use
the texture paint tool to create the design that you've chosen for your inspiration. You'll also learn how to use the sculpt tool to add some
dimension to your design. You'll then learn how to use
the Gizmo to move, scale, rotate some gems, to add some razzle
dazzle to your nails. And finally, you'll learn how to set the mood for your scene, position the camera, and
then render an image, which you will then submit
as your final project. It seems like a lot, but I promise I promise, I promise it's not as
hard as it sounds. Go at your own pace, replay as many times as you
need until it makes sense. But you got this,
and I'm just very, very excited that you're
here to learn how to do something really
cool in Blender. You got this. So Let's go. Make these meals.
2. Installing Blender And Finding Inspiration: Let's get you into the mind and body to take on this
really, really fun project. If you don't already have one, I would highly recommend getting a mouse
for this project. Bender can be a little bit tricky to navigate without one. And even if you're on a laptop, a mouse is so much
easier for you to perform a lot of the
blender functions, and, I don't think you'll be able to do it
as easily on a trackpad. Right, so if you've
got your mouse ready, you're going to be
downloading blender now. Bender is a free open
source software which allows you to pretty much create anything in a three D space. One thing I love about blender, as well as it being free,
it's constantly updating, and they're always bringing
you some of the best features to pretty much make your
workflow a lot easier. For this tutorial,
you're going to be using a version at 3.6 0.9, and you can find the link
for this in the resources. This blender version
also runs on a 64 bit operation system. So you can check if your system is compatible with
this version by going to the settings and about section on your
computer or laptop. You can download the
blender version as a program or within a zip file. So the zip files
sometimes pretty useful if you are constantly
using different versions. However, if you plan to use this version of blender often, then feel free to download
it as an application. Before you get into blender, there's a question that I have for you that
you've properly had if you've been to get
your nails done before. What shape do you want? So I've gone ahead and created three base nail shapes for you to choose to
create your nail bonds. I wasn't going to throw you into the depend on your
first day in blender. So I have created some nails
for you to start with. But down the line,
if you ever feel like creating the
base nails yourself, that's something that I'm happy to teach you in the future. So go ahead and select a base
nail from the resources. Great. Now it's time to
decide on some inspiration, what design are you
going to be making. So I tend to get a lot of my
inspiration from Instagram, Pinterest, or even
sometimes my own designs. If it's your first
time using blender, then I suggest going really simple or just following
along with what I'm doing. And then once you've built up
some confidence, go crazy. You can go as far as
your mind takes you. So if you've got
a favorite place to draw inspiration from, whether it's Pinterest or
Instagram, your own nails, or if you've got
a brain that can just pull something
from it from nowhere, from nothing, then now's the time to bring that
design to the floor. So now it's time for
us to open blender.
3. Importing Reference and Basic Blender Controls: Every good nail design
requires a great nail base. Before we get started
in your yours, though let's make sure
we've got your preferences set to go to edit preferences, and then system, and
make sure that you've got your undo steps
set to the maximum. The area that you see here
is called your viewport. It's where you'll be able
to see all of the objects, lights, and cameras
in your project. When you left click
on the nails, you'll see that an orange
outline has appeared. What that means is that it
has been selected and is the active object that you're currently editing or working on. So go ahead and select the
index nail on the left to start and then navigate to the right
hand side of blender, where you'll see what
looks like a sphere. And this is your materials tab. In the materials, you'll be able to change the
settings which affect how mat or shiny your nails will be by playing around
with the specular, roughness, and metallic levels. For now, let's get you
moving around in blender. So your mouse wel will let
you rotate around the space. Shift plus your mouse
wheel will allow you to pan across where
you're currently viewing. To zoom in and out, you'll roll your mouse wheel
towards and away from you. Get your nail into
position where you can see your index nail clearly and then select it of your
left mouse button. Get to the top of the
screen where it says object mode and
select texture paint from the drop down menu. You'll see the nail turn pink in our render window,
but don't worry. What that means is that it doesn't have a texture set yet. Press n on your keyboard
and a tool bar will appear and hit the little arrow that has transformed to
expand the menu, and then select the tool option. And here is where you'll create the texture
for your NL base. Right now there's no
textures to work from, so you're going to
hit the plus sign next to the texture set, and then you're going
to add base color. Here you'll select the
color for your base. I'm going to go with
a light peachy color which will act as a
nude for my base. Before you confirm, we need to copy the Hex
code for our base. Highlight the Hex code and
hit Control C to copy. And now you can confirm. As you can see, my
nail's got a nice, peachy tint for my base, and I want to make
sure that I can save this color for
the other nails. So scroll down to the color palette and
create a new palette. Then hit the white color under
the color wheel and paste your base hex code by hitting control and V on your keyboard, and then hit the plus button in your palette
to add the color. So, now you've saved
your nail base color and can do what we've just done
with the rest of your nails. If you want to give your
nails a bit more shine, you can adjust the
specular roughness and metallic levels that I showed you earlier in
the materials tab. I recommend putting the
specular to one and then adjusting the metallic and roughness levels to your liking. Then by pressing down
your mouse wheel and rotating around the nail, you can decide what
looks best for you. Time for you to
practice what you've just learned on the other nails. I will see you at
the end of class. Amazing. I can already tell these are going to look so good. So now that you've
got your base, let's go and make your design.
4. Texture Painting Your Design: For the design that I've chosen, we are going to be using
the texture paint tool to get the initial design down, and then we'll move on to using the sculpt tool to add some
dimension to the design. So that you're getting
the best angles to start texturing and
reviewing your work. Here are some of my
favorite hockeys to use. On the num pad, one gives
you a direct front view, four rotate you incrementally
to the left, six, rotate you incrementally
to the right, eight will rotate you upwards, while two will rotate you down. Seven gives you a
direct top for you. And three will give you
a direct side view. And then you'll also be able
to change the perspective. So five will change
how your viewport looks between the user
perspective and orthographic. You'll notice these
differences as you use them. Here's how to get your
reference picture in. Navigate to add, then
select image and reference. Then you'll locate
where you saved your reference image if you
have one, then loaded in. I'll be quite big at first, so we're going to scale it down by hitting S and the keyboard, and then pull the
mouse towards you. Pushing the mouse away
would make it bigger. Left click to confirm. If you want to move the
reference closer to the hand, click on the green
and red arrows that appear above it to move it
along the x and the y axis. You make the adjustments that you need until it works for you, and you can also tuggle the
visibility of the reference by hitting the little i in the right corner of
the highlighted line. Let's get back
into texture pain. So you already know how
to select the color. So put the color you want to start with on the color wheel. Make sure that you add the
color to your palette. Play around with
the brush settings including the size and
strength of the brush. Left click to start
drawing on the nail. If you want to use the
base color as an eraser, you can press control
and left click, but make sure to set the alpha
color to your base color, or it will erase black
like it just done here. To do this, switch the arrows
going in a circle to switch between foreground
and background colors until the left color is black. Select your base color
from the color palette, then switch back to
your foreground color. Then when you hold
control and left click, it will erase using
the null base color. Now you can spend some time
working on your design, and don't forget to
play around with the metallic levels
if you'd like to give your null a
chrome like texture. My tip for adding dots here, that vary in size is
actually really simple. You can change the radius if you have a specific size in mind. But I found that
zooming in makes your radius smaller and
zooming out, makes it larger. This is because
you're drawing from the view rather than on the
PNG texture, for example. Don't forget that when you're ready to design your next nail, you first need to
go to object mode. Left click on your desired
mail to select it, and then go back
to texture pain. You can also achieve this using the hot key Control plus tab. And navigating to the mode
that you want on the wheel, followed by releasing the
control in tab to confirm. If you want a cleaner stroke while you're creating
your design, you can enable the
stabilized stroke, which is under the
stroke section here. With this enabled, you'll
be able to control how much of the color appears on
the nail in one instance, and you have a better chance of getting the design
how you envisioned. This technique is
really helpful if you want to create more of an
ray effect for your design. You can also change the
method of your stroke. Here, I use the space stroke, which gives you
more defined lines rather than the airbrush
we were using previously. By changing the radius and strength and testing how
it looked on the nail, I was able to distinguish
the right amount needed to add a really strong pink
stroke for my design. You can also achieve this really cool poka
dot effect by lowering the jitter rate in the
airbrush method to zero and slowly dragging your mouse
with your desired color. You can also achieve this with the space stroke with a
low dash and ratio length. Let's make sure that
you've saved your texture. Otherwise, when you re open blender, it will not be there. Trust me, I know. In
the bottom window, I've already set up
your image editor. Hit the dropdown button
that looks like a picture. Then select the same
name that corresponds to the texture set you created
earlier in the toolbar. Once selected, you should see your design in the image editor. In the editor window, select the image dropdown menu
and select Save as. Save it to wherever
you'll find it easiest. For example, by making a texture folder specifically
for your textures. Give it a file name
and then hit save. You'll see that there was
a little asterisk next to the image drop down,
and that's disappeared. What this means is that your
texture has been saved, and when you reopen blender, you'll still have a texture. Let just make sure
that you do this for every texture you create. In our next lesson,
you'll learn how to add some definition to
the amazing design you've created
using the sculptor.
5. Using Scuplt Tools To Create Dimension: Now we'll be using the sculptol to give your design
some definition. Sculpting is changing
the way the mesh looks by using different types of tools to create the
desired effect. I'm currently using
the draw tool, which is the very
first selection to increase the
depth of our dots. Before you start drawing, make sure that you enable the view normal in the
auto masking in section. This is to ensure
that you're only affecting the parts of the
mail that you can see. Adjust the strength of the sculptal to your desired effect, and it's okay if it
looks a bit pointy as we'll be smoothing out some of the sharper
points in a moment. So for now, just keep
drawing on top of the dots until you see a
noticeable difference in the definition of them. Now we can smooth out some of the sculpting that we've done
with the smoothing tool, which is the first red tool
option on the left hand side. Once selected, adjust the
strength and the radius, keeping the strength
pretty low to ensure you don't entirely smooth out
everything you just did. Lightly go over the
dots by pressing the left most button until
you see it smooth out nicely. As you can see, after this, we added some really nice
definition to your nail. I now want you to give this
a go with your design. This really takes your nail to the next level as they're now noticeably more than
just the texture. In the future, we'll
be exploring and experimenting with bump, normal, and displacement
maps, which can also help you with this process of
adding detail to your work.
6. Adding and Placing Gems: You should be so proud of how
much you've done already. In this lesson, you're going
to be learning how to use the Gizmo to move
some gems around, and you're going to
be scaling them, you're going to be rotating, moving them around,
and placing them on your nails to add a little
bit of razzle dazzle. This lesson will focus
on using edit mode, duplication, and merging
objects together. I've provided you
with a base gem, which you can find
in the resources. Once you've downloaded this, you're going to add
it to your workspace. Firstly, make sure that
you're in object mode. Had to file and
navigate to a pend. Locate where you saved the Gem resource that
you've just downloaded. Once you've found it,
double click on it. Then navigate to object. And finally, double
click on GEM. Now you should see the
GEM in your viewpot. This is how you would add another simple object to your project that is
already a blend file. We're now going to be
working in edit mode. Hit tab on your keyboard to
quickly toggle to edit mode. To resize the gem, you'll hit S on your keyboard and use your mouse
to adjust the size. To rotate the gem, you'll
hit R on your keyboard, which you'll rotate it from
the view you're looking at. Alternatively, you
can rotate it more structurally along
an axis by pressing x y or z after pressing r to rotate it
along one of these axises. You can also double press
R for a free rotate. And just like I
showed you earlier, you can move your gem
along the axises by clicking and holding the
green red and blue arrows, or by pressing g
followed by x YL Z. Let's get your Gem
onto your nail. I'm going to show you how to use some quick and easy
blender functions to save you some time if you want an object to go to
a specific place. First select your nail and enter Edit mode by H hidden tab. Then you're going
to locate a spot on the nail that you want
to place the gem. Here, I think I'd like to place
a gem in the green space. So whilst in edit mode, I left click on one of
the little black dots. This is called a vertex. Once you've selected
your vertex, head to the toll bar and
hit the mesh dropdown menu. Navigate to snap, and then
select curser two selected. You'll see a little
red and white circle appear around the vertex, which means the
three D cursor for the project is now centered
around this vertex. You'll need to now
head back into object mode and then
select the gem. Go to the tool bar and select
the object drop down menu. Navigate to snap and then
select selection to cursor. You should now see the gem has snapped over the
location of the cursor. But as you can see, it's
a little bit too big. So what we'll do is scale
it down to fit the nail. So hit tab to Enter edit mode and then S to scale and
left click to confirm. To get it to sit perfectly
on top of the nail, you need to rotate it a
bit until it looks right. Here, I need a free rotate, so I press r twice and rotate until I'm happy
with the position. Now I need another gem to start decorating the
rest of my nail. To do this, you press shift and D. You'll see
another gem appear. Once you move it in
another position, left click to confirm
the duplication. Now you'll repeat
this process with your new gem to start placing it where you like on
the rest of the nails. If you feel a bit more
confident about placing your gems through rotating
and moving them with RNG, you can also just duplicate
and move the gem to a new position without snapping
it like I've done here. There's no right or
wrong way of doing this, and this is just an
alternative method to approach this process. Once you've placed
your gems on one hand, I'm sure you'll look over
to the other hand and think you've got to do
that all over again. Never fear. I'm going
to show you how to use the mirror
modifier to do just that. Firstly, you'll need to
select all of your gems. You do this by selecting the
top gem in your object list. Then scroll down
to the last gem, press shift, and then
click on the last one. You should see an orange
outline around all of the gems. Now move your mouse cursor into the viewport and press Control
plus J to merge them all. Now there should only be one
gem in your object list. Head over to the modifier tab on the right. This
looks like a wrench. Hit the ad modifier, drop down menu,
and select mirror. To get them in the right place, you need to give them
an object to mirror. So in the mirror Object bar, left click and select hand mesh. And now you have mirrored your gems perfectly
to the other side. In our next and final lesson, you'll produce a render to show off your amazing work to submit.
7. Setting Up Lighting, Camera And Rendering: We're almost there, and you've pretty much
done all of the hard work. But now it's time to create a rendered image of your nails, which we'll also then use
to submit as your project. In this lesson, you'll
learn how to set up your lighting, the camera, and see your nails in
the EV render mode, and that's how you are going to create an image to signit. I set this window up
so that you could see both your working viple and what your render
will look like. Take your mouth to
the tool bar above your render window and roll your mouse wheel to
make it scroll across. At the end, you'll
see for spheres. Click on the last sphere, which will enable the
corresponding shading, AKA textures to
the render V ple. To expand the view of
your render window, move your mouse to the
border between the two until you see it change
arrows left and right, left click and drag to expand. I've created a render
starter setup for you, head to your object
list and mark the chat box on the
render setup line. You'll see the mirror
and cloud images appear behind the
hands and your nails. In the future class,
we'll explore how you can change the H BRI, which is your environment
background in Blender, which is what the
clouds are here. Expand your working
viewport a bit so we can set up your
lighting and camera. Scroll your mouse well until you can see a lot of gray space, and then in your object list, reveal your camera by
clicking the little eye. You'll see the camera appear
with an orange outline, and in the render window, you'll see that this is what
it's currently looking at. Let's add some new
lighting to your project. On the tool bar in your
viewport, click Add. Then on the drop down menu, click Light, then point. You'll see the light appear
on the scene and the render, but to take some
effects you have to reposition and change
the settings of it. On the left, click
on the Move tool, which are the arrows pointing in all directions to
activate your Gizmo. Once a Gizmo appears, you can use it to reposition
the light as you wish. When the light is in
a position you like, navigate to the light
settings on the bottom right and adjust the
power and radius. And here you can even change the color for an
even cooler effect. I've gone with a light
blue tint for my color, and now I'm going to set the camera angle to the angle that I'd like to
create my render from. In the render window, decide on the position. Once you're happy
with that position, you're going to press control, ult, and num zero to set
your position of the camera. If you're too close
to your object, the target will be out of frame. So now we'll have to
zoom out so that we can make sure that we get what
we want rendered into frame. Select the camera in
your object list, head down to the
camera settings, and adjust the focal length. You can use your
mousewll to zoom without affecting the focal length
to get a bit closer. And once you're happy
with the frame, you can adjust your
lighting if necessary. I noticed here that the light was reflecting in the mirror, and as I didn't want this, I had to select it
and move it out of, move it around until I was
happy with the result. In the light seen, I adjusted the radius and strengths more
to fit my render vision. Now you're ready to set up
your render export settings. In the Seton tab, open
the render settings, which is the third option
that looks like an old TV. You can adjust the amount
of samples your render has. The higher the samples, the
more detailed it will be. You can leave it as it is or
adjust it to your liking. You can also toggle
the bloom settings, which adds a really nice, glowy, hazy effect, and adjust a settin to
your liking, as well. Once you've made all
of your adjustments, make sure that you delete
the reference image that you imported earlier, but should be called empty
in your object list. Just right click
and delete this. And then at the top left, you'll see an option on the
tool bar that says render. Select this and
hit render image. And after a few seconds, Tra, Houston, we have a render. You did it. All that's
left is to save this render as a PNG and
upload it as your project. I can't wait to see what
you've done, Superstar.
8. Final Thoughts: Guys, you've made it to
the end of the class. I'm so proud of you, and congratulations on creating such a beautiful Mail set. For your project, I'm so proud. You've learned so much in
such a short space of time. You've learned how to move
around and blender for one, how to create a design
using texture pain, how to sculpt to add
dimension, like, hello. Sorry, you are now
a Blender genius. If you haven't already, it's time to show off
your final project, which is your rendered image
in the project gallery. I can't wait to check out
all of your amazing designs. So if we look back to
our original objective, which was to create and design
your own nails in Blender, I'm pretty certain that
you've achieved that goal. And again, I'm so proud of you. Thank you so much for
tuning into this class. I can't wait to see you
at the next one. Bye.
 Danielle 'Ebonix' Udogaranya, Creative Visionary In 3D Modelling