Transcripts
1. Intro to Resin Basics: Hi, I'm Katie Krell, and this is my intro to
resin basics course. This is the first in my updated
suite of courses where I teach you everything you need to know to get started
working with resin. In this course, we'll start
out with the very basics, where I talk a little bit about resin and using it
as an art medium. I'll go over some of my recommendations for
brands of resin and types of resin to use based on the project
that you're creating, and I'll help you pick a resin that's best
suited for you. I'll be going over all
the technical bits of correctly measuring out
and mixing your resin, as well as some
safety precautions you'll want to take
while working. We'll go over all the materials you'll need to
set up your workspace, and then I'll get into some more creative aspects of how to color your resin and different
additives that you can add in to embellish
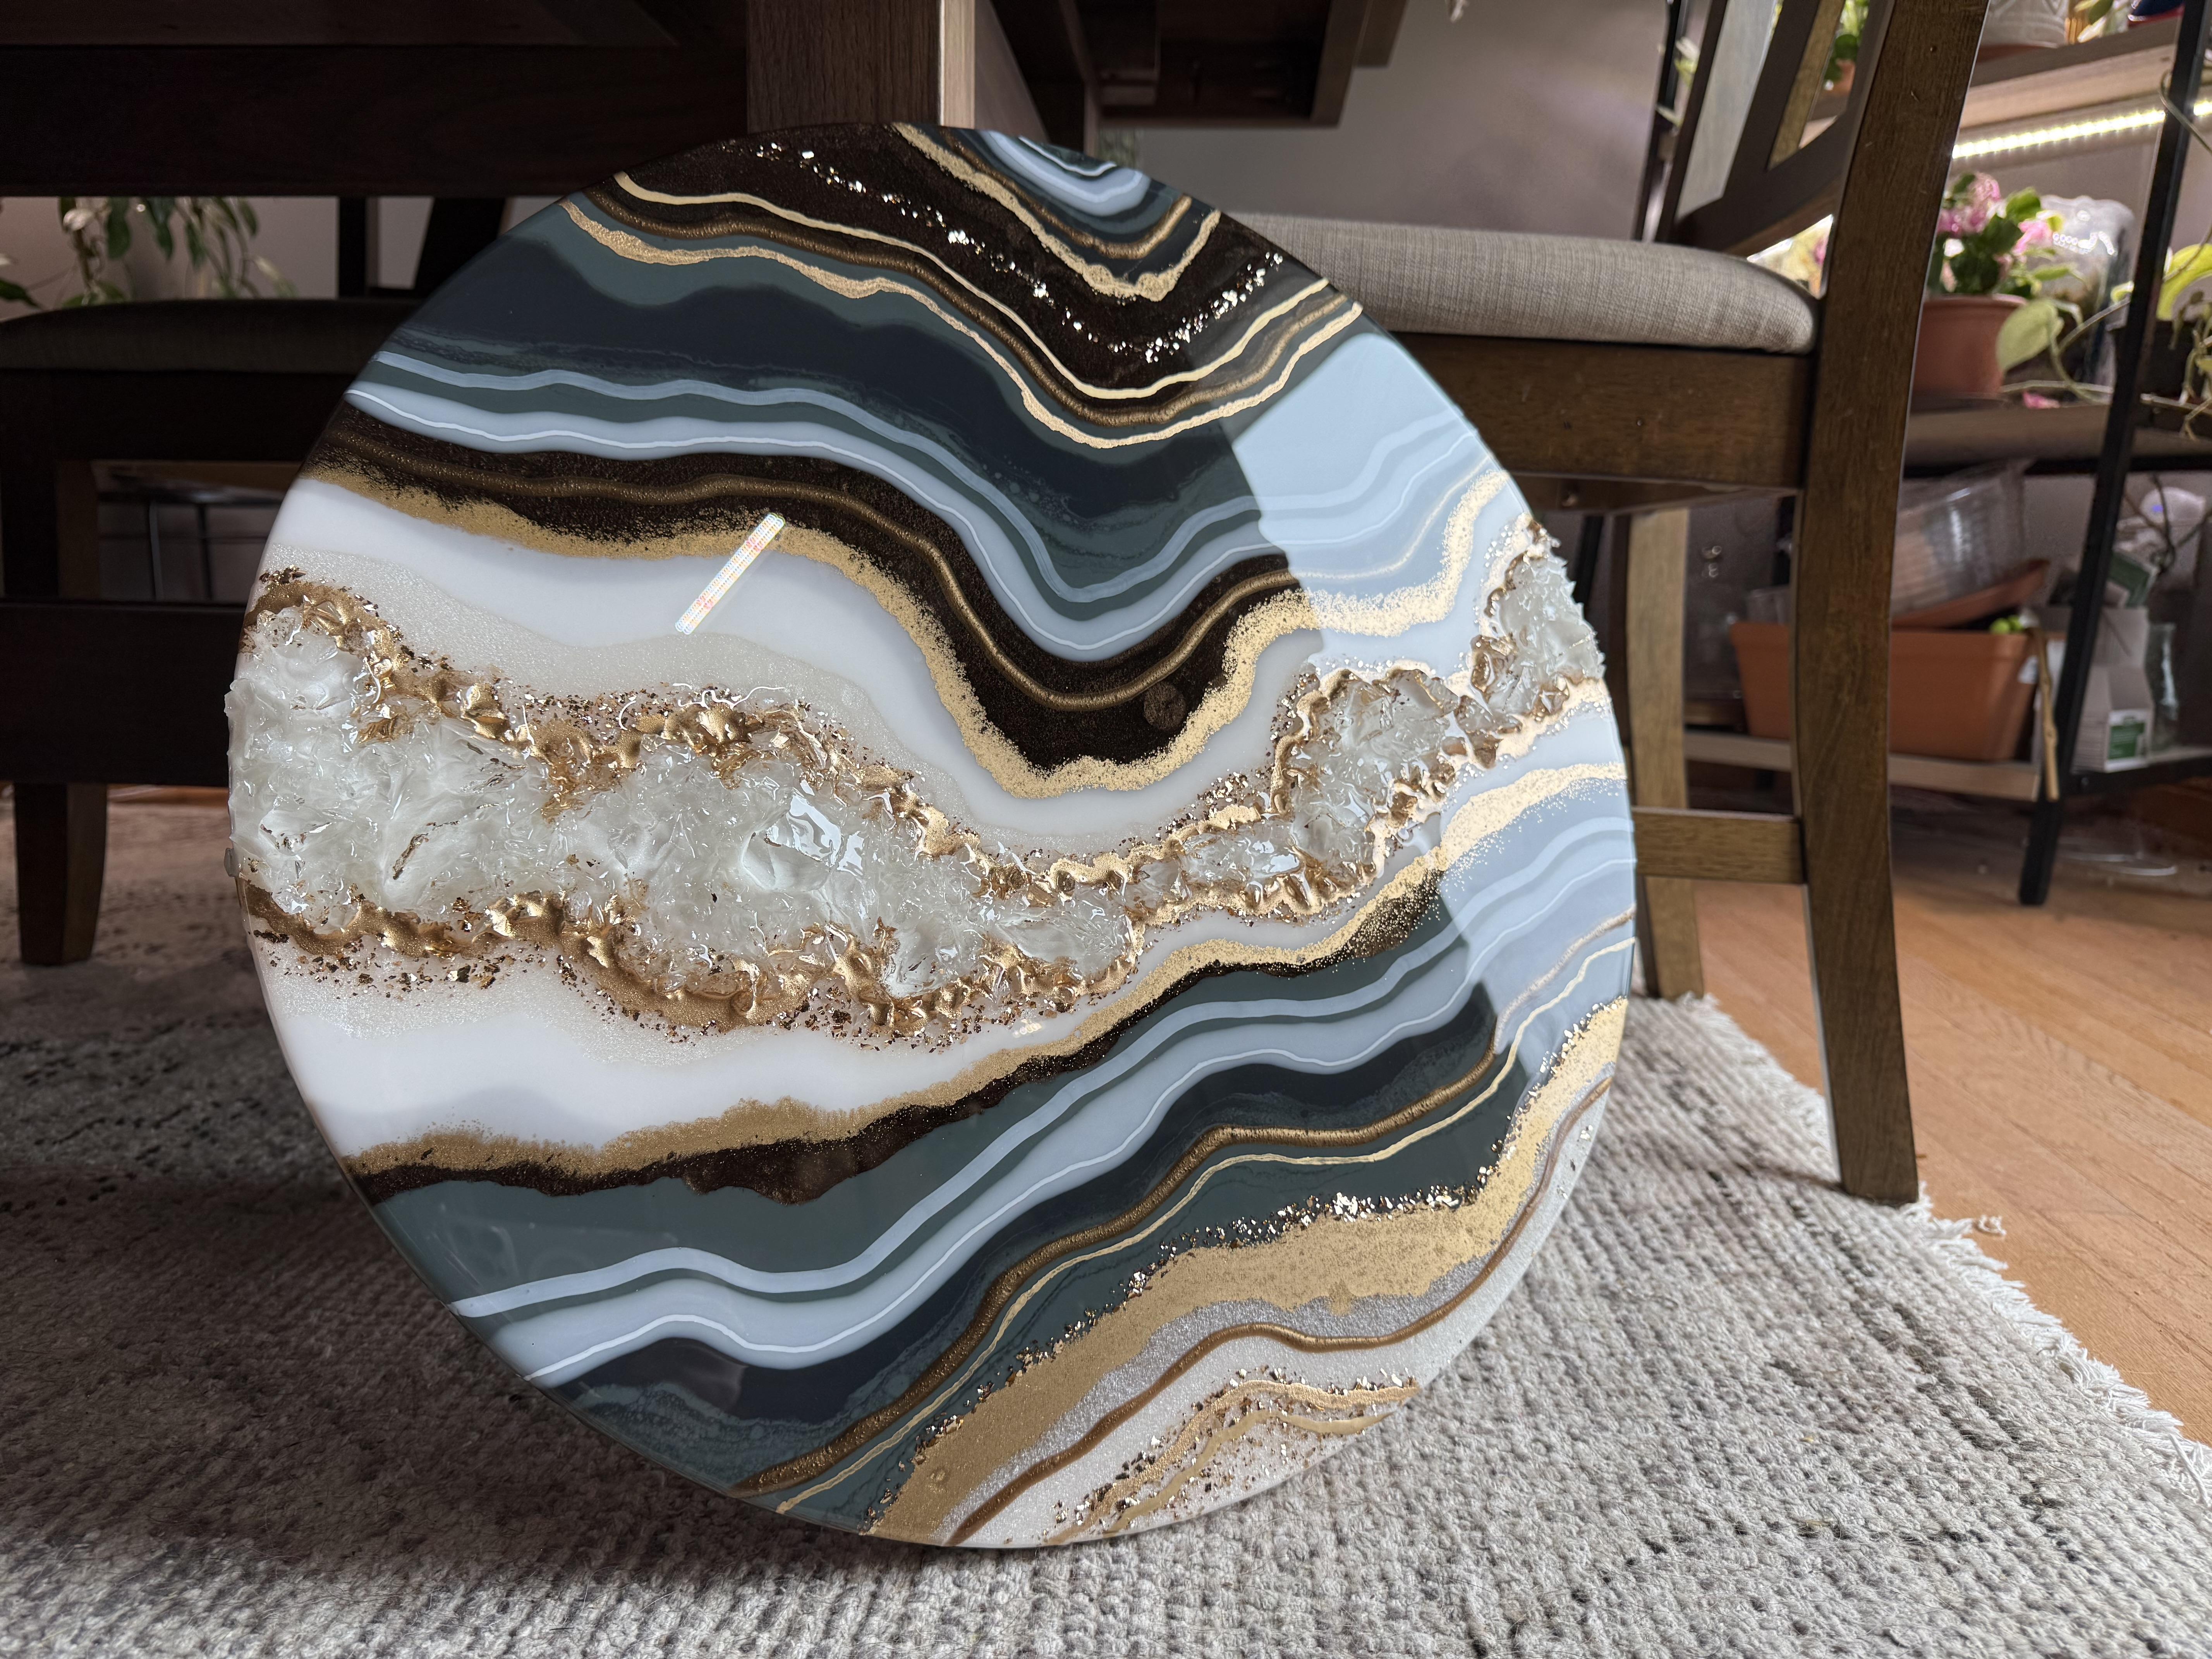
your artwork. At the end of the
course, we're going to apply everything that you've learned and create
a smaller geode inspired resin piece together. You'll get to see
my full process of how I typically go about
creating resin work. You got to be quiet. I'm getting
in the way of recording. You got to be
quiet. My goal with this course is to help
you become confident and excited to get working with resin and help
eliminate a lot of the questions one often has when starting a new artistic medium. Alright, let's get started.
2. Using Resin: M So what is epoxy resin? Well, basically, it's a
two part epoxy system. You have part A, which is the resin and part
B, the hardener. When you mix them together
in the right ratios, it results in a chemical
reaction as it cures into a very hard plastic like
material with high shine. When I started working
with resin way back, there weren't many
brands of resin, and you didn't really
have a lot of options. But now resin has
become so popular. And because of
that, there are now tons of different companies
making epoxy resins, giving you so many options. In this class, I'm
going to focus more on the artist resin out there, but there are other resins
made for thick castings, coating tabletops, and UV resins that you
can use to make jewelry. Resins also come with
different viscosities. Viscosity is important when you're trying to
create a certain look. Maybe you're creating
a geode resin piece of wall art and you want a thicker resin that
areas can stay separated. Maybe you want a thin, more runny resin when
creating coasters or casting because thinner resins tend to release bubbles a lot easier. Important to keep resin at a certain temperature and
humidity level as it cures. And that's just basically whatever you comfortably
keep your house at. You know, that kind of
temperature range and humidity level is
perfect for resin. One fun thing about
resin is that it does not stick to plastic
or silicone very well, which we use to our advantage. We can use silicone as a
molding material for resin, and we can use silicone and
plastic as mixing vessels that we can reuse over and over to cut down on
the amount of waste. I love using, like, plastic, solo cups, paper Dixie cups, paint buckets from
the hardware store or other measuring cups to
measure and mix my resin. Once cured, you can easily peel the resin right out of
these cups to reuse. I often have a stash of dirty cups that may have
some cured resin in them, but I can still use them
to mix new resin in. It's very important
to recycle and reuse as much material as you can to cut down on the amount
of waste you produce. This can be a very messy, wasteful medium if
you're not careful. Keeping a tidy and organized workspace can really
help with that. I find that removing the
resin after about 12 hours is best because it's hardened to a point where it's
not sticky anymore, but it's still very bendy
and can come out of the plastic much
easier than rock hard, fully cured resin will. Safety is really important
when working with resin. You want to make sure
you're working in a well ventilated area or an area that you
have the ability to air out once you're
finished working. You also need to
make sure you have the proper PPE to protect
yourself while you're working. Latex or nitrile gloves are a must to keep your
hands resin free. If you do get resin
on your skin, don't use water to
try and rinse it off. It's kind of like
oil in that respect. What you want to
do is use, like, a baby wipe or just
liquid soap lathered up and then wipe it with a dry paper towel to
take off the resin. Repeat this as many
times as you need to, and then you can
rinse with water to get any soap residue. Other thing you may
want to wear is, like, an apron or designated clothes that you wear only when
you work with resin. Like I said before,
resin is very messy, and if it gets in your
clothes, it's not coming out. Lastly, and most importantly, you will need a respirator. Don't be fooled by resin brands claiming
that you don't need one because their resin
doesn't produce any VOCs. Reason they can claim this
is that their resin is very stable in its separate parts and also when mixed together. But as soon as you introduce other materials to the
resin like pigments, some inks or acrylic paint, it changes the chemical
makeup essentially and becomes unpredictable
with the amount of VOCs that get emitted. Also, when you create resin art, a heat tool is necessary to pop air bubbles
in your piece. Whether that's a heat
gun or a butane torch, adding heat to your resin will
release VOCs into the air. Wearing a respirator
with filters rated for fume protection is recommended for this stage of
your resin making. Will often mix my resin
and separate it into cups before I put my mask on and then mask up
towards the end, once I go over everything with my heat source and further
working with the piece. The respirator I prefer is a full face mask
because your eyes are just as susceptible
to soaking up VOCs as your lungs
are at inhaling them. The last thing I want to
talk about in regards to safety is exothermic
reactions with resin. Resin cures, it heats up. It's part of its
chemical reaction that it needs to
cure and harden. But if left to cure in
a cup or a mixing pot, it can generate enough heat to actually melt plastic or burn your skin or possibly ignite surrounding
combustible materials, which sounds scary,
but it can easily be avoided by not mixing more resin than you
can handle at once. The resin needs the ability to spread out to release
gases and cure. That's why if you have too
much in a small vessel, an exothermic reaction
could happen. Is also why it's
important not to add more than 6% to 10% of colorant to your resin because any colorants specifically
like acrylic paint, they kind of mess with the chemical reactions
that resin has, so it definitely will trigger an exothermic reaction if you're adding way too much
paint into your mixture. So let's talk about
mixing the resin. Mixing is pretty simple. There's two methods you can
mix by volume or by weight. If you're mixing it by volume, it's pretty much mixing equal parts visually
of part A and B. You want to measure
equal parts in each cup, that will give you
a one to one ratio. You have mixing cups
that aren't see through or aren't
clear so that you can see if you're
mixing equal parts, say if you're mixing a smaller amount in
these Dixie cups, for example, there's a method that I like to use
with a popsicle stick, in which case, I pretty much
use the popsicle stick as my demarcation line or measurement line for each
amount of part A and part B. So I'll just grab a popsicle stick that
is clean and dry and pop that into my mixture of
resin and pull that out, and that gives me
a clear line of where I need to
measure out my P B. So this is pretty handy to
do if you, like I said, have a smaller amount that
you need to mix up or are using cups that
you can't see through. So I'll just pop that into
the second cup and then go ahead and pour in my
Part B up to that line, and then I know that I
have equal parts of both. And then I can just
mix these up and combine them into one
cup to mix together. So you just want to
make sure that you are getting as much out of
that other cup as you can. You want to scrape that
cup and get as much of that resin out of
it as possible, just to make sure that your
measurements stay accurate. And then you can go
ahead and mix this up and combine it fully. Another way to measure
by volume is to use a mixing container that already has measurements
printed out on it. I love these that you can
get from the hardware store. So if I say wanted to mix
up 16 ounces of resin, I would measure out 8 ounces of resin and then another
8 ounces of hardener to give me that 16 full ounces
of combined epoxy resin. This is really handy if you've got a larger
measurement or you can grab some cups that already have pre measurements
printed on the sides. But what if you
need a measurement that's not already printed out? Well, you can create your own. So you could measure out, say, 4.5 ounces of water and pour that into a
cup and then mark that line off and then pour another 4.5 ounces of water in and
mark that second line off. Now you have your equal parts that you'll need to
measure out of A and B. So you want to make
sure that you dump the water out and you
completely dry that cup. You don't want any
water droplets left over because resin and
water, like I mentioned, don't mix, so you want
to make sure that's completely dry before you
start adding in your resin. And it's always a good practice to get in the habit
of measuring out your resin first regardless of which method of measuring
out your resin you're using. It's just a good
habit to get into. So you're not confused
or you can't remember. Did I start with a resin or
did I start with a hardener? Because that has
happened to me before. So just always get in the habit of measuring
out your resin, part A first, and
then your hardener. So you would just
measure to equal parts, your demarcation lines that you placed on your cup,
and you're good to go. You can just mix it up in this cup and get started
on your project. The second method of
measuring resin is by weight. To do this, you'll
need a kitchen scale and just place your
mixing container on it after you turn it on, and then you want to
make sure that you tear the scale out to get it to read zero so you're
not measuring the weight of your
mixing container. I like to make sure
mine is set 2 ounces, and then you can grab
your resin part A and start pouring in whatever amount that you
need for your project. Now, this method requires you to plug in some numbers
into an equation, and all the resins
that I've talked about pretty much have
the same equation, and that is required to make sure that you
have equal parts, since resin and hardener
have different densities. To plug that into our equation, we have every 100 parts resin
needs 84 parts of hardener. For our equation, we have
22.5 ounces of resin. 22.5 times 84/100 gives us 18.9 ounces of hardener
that we need to measure. And that gives us
the correct ratio. Then we can plug
that into our scale, we just tear the scale out
to get it back to zero. And then we can grab
our Part B of hardener, which usually has a
different colored cap to help differentiate
that from your resin, and then just measure
this in and get as close to that calculation
amount as we can. Now, if you're measuring out a larger amount of
resin like I am, little discrepancies and
differences are okay. It's not going to affect the
caring of your resin much. You'll notice that I
actually measure out a little bit more than I
needed, but that's okay. It will still cure the smaller amount of
resin that you have, the more crucial
it is to get close to that measurement as close as you can to
that measurement. And that is basically
how you measure it by weight. Pretty simple. Now that we have
measured out our resin, we need to mix it up thoroughly. It's a good rule of thumb to stir your mixture
for about 3 minutes. That's usually about
as long as it takes to make sure everything
gets fully mixed in. When you first start mixing, you'll notice there's a string almost like a spider
web look to the resin, and that is the
resin separated out. You want to make sure that
you're mixing it until you no longer notice
those stringy bits. You want to make sure
that you're constantly scraping the sides and the bottom and
switching directions just to make sure that you can fully incorporate that resin. And that includes periodically
stopping to kind of scrape off your stirring stick and just reincorporate
that resin as well, just to make sure that it's
mixed completely together. And once it is mixed,
it'll be clear. You probably have
a lot of bubbles, but it'll be
completely clear and look like it's a
homogeneous mixture. So keep mixing for
about 3 minutes, and that should do the trick. So resins have a
pretty thick viscosity like the one that I'm
using for this class, and if I'm mixing
up a large amount, sometimes it can be
a little tricky to mix it well without
incorporating a lot of air bubbles into it. Sometimes I like to
thin out the resin a little by giving it
a warm water soak. I'll just pop these
into my sink and add some warm water and
let these just sit in the warm water for a
couple of minutes and that really helps to thin the
resin out a little bit, and it makes mixing
it so much easier. So I want to show
you an easy way to figure out how much resin that you'll need
for your project. I'm just over here on
Mas epoxies website, and if you scroll over to this learn area and down
to resin calculator, they have this really
handy tool to help you determine how much
resin you'll need. So if we just scroll
down a little bit, we can enter in the
dimensions of your project. So if you have a
square, for instance, 12 " by 12 " or a rectangle, whatever the dimensions are that you're going
to be working on, you can input those here. And then in the last box, we input the thickness. So the resins that
I've talked about and the Art Pro need to level out to about
an eighth of an inch. So here we're just going
to enter that amount, so 0.125 and then if
we scroll down here, we can select the specific resin that we're
going to be using, which would be Art
Pro in this case. It's pretty handy. It will tell you exactly how
much you need for Part A and Part B if you're mixing by
volume or by weight. This is really handy, especially for your final flood coat, which doesn't have
to be anything more than exactly what
your project needs. You won't have any wasted
resin using this calculator. But if you are creating your
design in your first stages, I always recommend to mix up a little bit more than this calculator would
tell you to do, maybe a couple ounces depending on the
size of your piece, just to give yourself a little
bit of a buffer to create your design and have a little bit of extra to put
where you think you need it. Mixing up your colors
can sometimes be a little bit of a
guessing game to see how much of one
color you might need. So if you have a little
bit of extra resin, it's easier to, like I said, have that buffer so you're
not scrambling and, um, needing more resin
than you've mixed. And if you scroll down a
little bit more on this page, you'll see there's
also a spot to input if you have
a circle piece. So I'm going to be using
a circle for this class, and it's really easy to determine the resin
for that as well. You would just input
the diameter of your circle and then
also the thickness, which would be 0.125, and then it'll
tell you the resin that you need for
the circle as well. So really handy
calculator to use if you are brand new to resin and you don't know how to estimate
what you're going to need. This calculator will give you a good starting point for knowing how much
resin to mix up.
3. Materials: Okay, so let's go over
all the materials you're gonna need to create this geode piece at the end of the course. So everything on this table is pretty much all the things
that you'll need to gather up and make sure you have before you get started.
So let's go over it. First, you're going to need some sort of mixing container. This size is probably good
enough for what we're going to do for our smaller piece
together. I like these. I get these from
the hardware store. I like them because they have the measurements
printed on the side, so it's easy to
measure by volume. There are two ways to
measure out your resin, either by volume or by weight. If you want to do it by weight, then you will need
a kitchen scale. Um, these are really handy to just keep in your
workspace for measuring resin alone and not
kind of swap it out for your kitchen stuff
and your resin stuff. If you want to kind
of designate that for your resin stuff if you choose to use the scale
to measure your resin. You're also going to want
some different sized cups for mixing your
pigments of resin. I like these clear solo cups
because it's easy to see the resin colors that
you're mixing and if the opacity is right or if
you've mixed it enough. You could also use different
sized Dixie cups just depending on how much resin you need to mix
up in that color. And then you're also going to
want these stirring sticks. So I have different
sizes of these. I just prefer to use
these wood stirr sticks because they're pretty easy
to find and they're reusable. So as soon as you're
done working with it, just wipe it off and let that
resin cure on the stick, and then it's good to go and
you can keep reusing these. You're also going to want
some PP E gear just to protect yourself from any resin. So you're going to want to grab some nitro gloves to make sure that you don't get
resin on your hands. You're also going to want to use a respirator that is
rated for VOC fumes. And also, you might want to
grab an apron or something, some designated resin clothes. Just in case you get
any on your clothes, it's not going to come out, so don't wear your favorite outfit. You'll also want some plastic just to protect your workspace, and resin doesn't stick
to plastic very well, so you can easily peel a resin off when you're done and reuse this plastic
over and over. You'll also want some sort of heat element to pop the
bubbles in your resin. I prefer butane torch. It's refillable, and
I just think it's a little bit more
effective than a heat gun. But if an open flame
kind of intimidates you, you could always
opt for a heat gun instead to pop
those air bubbles. You'll also want a leveler to make sure that your piece is nice and level because resin
is a self leveling material. It's going to want
to level itself out. And if your piece isn't
level to start with, then the resins is
going to kind of slide off the edge and
ruin your design. You're also going to want paper towels around just to make sure that you can
kind of clean up as you go so you're not
making a huge mess. And then any sort
of colorint that you choose to use to
create your piece, and I will go over kind of all of your options
in a little bit. And then, of course, any other embellishments that
you'll want to include any sort of glass chips or
quartz points or glitters, anything else that
you may want to include to kind of
embellish your work, that also includes
paint markers, which I'll also go
over my favorites and other ways to kind of embellish your
work at the very end. And then, lastly, the
resin of your choice. So let's talk a
little bit more about different resins and what
I can recommend to you. Alright, guys, let's talk about resin and what I can
recommend to you. So I'm going to
go over, I guess, four of my favorite resins that I use and have used in the past, and I'm going to go
over kind of why I recommend them for you to try out and what I like about them. So first, I guess let's
start out with these two. I don't use these
as much anymore, but I definitely
have used them in the past and really
enjoyed working with them. The first one is stone
coat countertops, art Cat and then
Colorberrs geode resin. So these are great
resins to use. They're both thicker resins. The viscosity on
those is pretty high. They're very thick
resins to use. Viscosity is just something
that you're going to have to kind of test out for yourself and see what
you prefer as an artist to see what you like working with because resins come in all
different viscosities. Generally, I would say that the thicker viscosity
resins work better for geode art and kind of
art with resin in general, just because it
helps to keep things sort of less flowy and more, like, separated as far as, like, colors and banding. And when you're creating
your geode pieces, you want that kind
of separation. So thicker resins are
really good for that. Next up is probably I think
my very first used resin, I started using
this way back when, when I first started
working with resin. It is a very good brand. This is called art resin. And yeah, the viscosity
of this resin is probably the thinnest out of all of these that
I'm going to talk about. It's still thick, but it's
just a little bit more runny. And I do actually prefer that. I like this resins
viscosity the most. But yeah, nothing more
to say about this. They have a really great website with tons of information. Any question you could ever have is answered
on that website. I guarantee it. Okay.
And then finally, this is, I guess, the resin that I've been
gravitating more towards lately. That is Mas Epoxys Art Pro. This resin is amazing. They have sales and giveaways on their website all the time. They also have an
extensive amount of information on their
website about their products. So if you have questions at
all, check out their website. But yeah, the Art Pro is
definitely one of my favorites. So why do I recommend
these resins? So for starters, they are
all very non toxic to use. They are VOC free, BPA free, very non toxic to
use when they're in their separate states and
while mixing together. Art resin boasts
that you don't even need a respirator while
working with their resin. However, I don't condone
that message entirely. I think that these
resins are very safe to use separate and
when you mix them together, but as soon as you add colorants and other additives
and especially heat, that's when you want to
make sure that you're using a respirator because that will end up releasing some
VOCs into your environment. So but for the most
part, on their own, these resins are very non toxic, and that's something that's
very important to me. And also, I guess, most importantly, these resins
are very non yellowing. They have excellent UV
inhibitors in them, which just means that
it's going to take a lot longer for them to start
ambering or yellowing over time. I kept in the proper conditions, you don't ever want
to keep your art pieces in direct sunlight, and you definitely don't
want to keep them anywhere where they're getting
exposed to UV rays. In artificial lights as well, a lot of people
don't realize that some artificial lighting
also has UV rays in it, that can yellow resin, if it's, like, a
spotlight on the piece. So as long as you're keeping
it away from a window, and you should be great, you should be fine
with non yellowing. Okay, so those are my
recommendations for resin. Feel free to go ahead and try whichever one speaks to you. Alright, so let's go over all the different
things that you can use to color your resin. I have a ton of options here
that I want to kind of go over what I can
recommend the most and what I might stay away from. So first, we have probably
the most easily accessible, and that is acrylic paint. You could use, like, a craft kind of acrylic paint, or you could use more
of an artist brand. They have different
thicknesses of acrylic paint. So this is a fluid and
what's this called? High flow and a fluid acrylic. These just mix really
easily in the resin. Pretty thin viscosities. So those mix well with resin. Or you could use an acrylic ink. The thing with acrylics is that they have water
in their binders, so water and resin do not mix
very well at all, actually. So when using acrylics,
you need to be careful. To only use no more
than about 6%. And that, you know, is going to come
with experience on how much 6% is in your resin. You really don't
need a whole lot of colorant to tint your
resin appropriately, and you really don't
want to use too much because if
you use too much, then you run the risk of um, an exothermic reaction
happening with your resin, which is essentially just the curing process gets sped way up and it could become warm to
the touch, like, really warm. Could start curing way
faster than it needs to, and could result in, like, clumpiness happening and, um, Actually, it could
get so hot as to melt plastic and combust
materials around it, which sounds a little intense. I've never had
that happen, but I have had exothermic reactions happen because of mixing too
much pigment in the resin. So you want to make sure you especially if you're using
any sort of acrylic paint, that you don't mix too
much in the resin, about no more than 6%. Other option would be
to use alcohol inks. Plenty of people use alcohol ink in their resin work.
Nothing wrong with it. The alcohol tends
to evaporate out, leaving just the pigment. So that's nice. You're
not going to have much of an exothermic
reaction risk with this. But alcohol is flammable. And if you're not
letting that evaporate out quick enough
or you're adding your heat heat torch
too soon to it, um, you could run the
risk of creating a flame. So alcohol really needs to be handled with care
because it is flammable. Now, I don't recommend
alcohol ink just because I've had some
mixed reaction with it. Some brands and some pigments tend to color shift when
you put them in resin. I don't know why, but
it's kind of weird, like a brown will turn blue. And also alcohol
ink isn't the most reliable in terms of fading. The colors tend to
fade pretty quickly, especially when
exposed to light. So I just tend to stay
away from alcohol ink. It just isn't very
archival, in my opinion. But I do like to use
metallic alcohol ink. To kind of create
finishes on my pieces, like a gold accent
line or something, I will use like a metallic
alcohol ink mixed with some type of
metallic powder to create kind of a paste
to then paint on my work. So I do like to
use that. I'll use either alcohol ink or
sometimes I like to use this, which is a spray
paint, actually. It's like a spray paint
base, so it's got, like, a solvent in there
that I like to mix sometimes with the
powder as well to create that kind of
paste to paint on my resin piece and then outside of those are
the more traditional, I guess, methods to
color your resin. These methods are formulated specifically for
resin in most cases. So you have your dry
pigment powders, and these come in many
different brands. A lot of artists have their own brand line
of pigment powders. These are great because a little goes a long
way with all of this, but these, especially just you can't add too
much, honestly. It doesn't really affect the
curing process of resin, but you don't really
need to add too much. I mean, you'll kind of understand the more
you work with resin, how much pigment
you need to add. But these are great because they just come in so
many different colors. Usually, pigment powders
have mica sheen to them. They have this sort of glittery almost like sheen to them, and they're not
really a flat color. So if you're looking
for a flat color, I do have to recommend that
you try out pigment paste. This is my favorite
brand of pigment paste. I haven't really found
any other brands of the paste out there, but I haven't looked very far because this brand
is just amazing. I think this is an Australian
brand, if I'm not mistaken. So it's a little harder
to come by if you're not from Australia,
but it is worth it. They have an extensive
line of colors. Anything you can
imagine, they have it. They also have Mica
Shimmer pigments. So if that's what you're looking for, you could also find that. But these are just some
really good flat colors that are super pigmented. So a little bit goes a long way. These pastes are created
with resin as the base, as the binder of the pigment. So that's really pretty perfect
for working with resin. So you won't have the
actual hardener in here, so it's not going to harden. It's just the resin part of it. So it just works seamlessly
with your resin creations. So, yeah, I would definitely recommend giving these
a try if you're looking for a nice flat
pigment that's not going to interfere at all with
your resin curing process. Alright, let's talk
about the fun part of accenting your artwork
with different things. So first, we have glitters. Glitters come in a lot
of different sizes. You could get extra fine
or, like, a chunky glitter. I really like this brand. Glitter babes, they have a lot of great glitters
to choose from. And this just adds a
little bit of shine and a little pop of something
extra in your piece. And markers are also a great way to add little
accents to your work. At the end. My favorite to use are these
pasta paint pens. These are an acrylic
water based marker. So the cleanup is really easy. If you make a line
that you don't like, you can easily remove
it from your piece. And these come in so
many different colors and tip thicknesses, you can really accent
your piece however you want to with thicker thin lines. These are really great.
Metallic markers are also a great option to add a little shine to your artwork. These are really handy
in the marker format, but the older the marker gets,
the more crusty they get. Brand new markers are best,
but the older they get, the more unreliable
that line is. You also might want to use real semi precious stones
to accent your artwork. You could use quartz
crystal points or smoky quartz points or any sort of gemstone
you can think of. You can even get them in
crushed up chip format. So these can be
really interesting to add an extra element of
interest to your work. You can get all
different kinds of semi precious stones
to really accent the colors that
you're working with or maybe if you're into the healing
properties of crystals, you could incorporate
that as well. I get most of my
semi precious stones from various sellers on EtS. I use glass chips for the
bulk of my resin work because they're inexpensive
and they still give the look of kind of a
real kind of quartz. I like to use various different
sizes of crush glass, and I prefer crush glass over fireglass because it looks
a little bit more organic. And I love to use
various different sizes. I think that gives it an interesting organic
look as well. If you have some
bigger chips and then some really fine smaller chips, I like to use, you
know, different sizes. So I get most of my crush glass from either Amazon
or Etsy as well. A lot of artists like to use
fireglass for their work. This is created by basically
crushing a plate of glass, you're going to have two
smooth sides to this glass. Freglass also comes in a
lot of different sizes. I used to use this
champagne colored fireglass a lot and I found this
one at Michael's. I also found these black
ones at Michael's as well. I wanted to go over
what I recommend to use as a substrate
for your artwork. The only thing I really don't
recommend is to use canvas. Canvases aren't that rigid, especially with
the larger you go, the more flexibility that
canvas is going to have and your resin could want
to pull up in the middle. So for that reason, I just
don't recommend using canvas. Wood is a much better
option, in my opinion, just because of its
strength and versatility, you could go to
the hardware store and pick out a thicker piece of plywood and cut that to whatever shape
or size you wanted, or you could go online and order premade
cradled wood panels that have a really
nice cradled edge to them and look really professional
and they're well made. You could also get
these cradled panels at any of art store. Blick art materials,
I know sells these cradled panels and so does Michael's and Hobby Lobby. Your options are pretty endless with where you can source
these wood materials. But like I said, wood is
definitely my favorite go to form resin substrates. Are a couple things that
I like to do to prepare my wood substrate before I get started
working with resin. The first thing would
be to seal the wood. To do this, I give it a couple coats of
just a white gesso. You could use house paint or acrylic paint if you wanted to. You could also
tint this paint to any color that suits
your project needs. But sealing the wood is
important, in my opinion, prevents any air bubbles releasing depending on
the wood that you chose. It gives your artwork
a really flat base, none of those wood tones.
Going to show through. Then after I seal the wood
with the gesso or paint, I like to tape the backside just with
blue painter's tape, and this is to help me
remove the drips that accumulate on the back of the piece after we're
done pouring the resin. It just helps to remove
those drips really easily, and then we use the heat gun to make those resin drips a little softer and
they peel right off. But if you're not going
to use a heat gun, then you don't need to
tape the back at all. You could just sand these
drips off with a power sander.
4. Getting Started: Getting started. So the
first thing we're going to do to get started on our piece is to get some inspiration. And I love to turn to
Pinterest for this. There are so many images on
Pinterest to inspire you. I have this AI board that I've created and where
I made a bunch of AI images to give
me some inspiration for geode pieces to
make these AI images, I used a program called Firefly. That's an Adobe program. I think you might
actually need to pay for Adobe to be able
to use this program, but it is pretty great
for creating AI images, it's pretty simple to use. All you have to do
is pretty much type in all your keywords
into the prompt box. You know, keywords like colors and the shape of the geode, keywords like God slice, agate slice, any sort of
colors you wanted to include. You can even input images
of actual slices of Geodes to help the AI kind
of generate its own images. And then when you
generate the images, AI just goes to town and creates these amazing AI images.
They're so cool. But so this is a great
way to get inspired. For your piece, just
with colors and shapes and just seeing
what AI can do. But if you don't
have this program or if you don't want to use AI, you can use Pintrst to find
inspiration in other ways. So I love to look up just
different color palettes that are on Pinterest, and I just pin my favorite
ones that kind of inspire me or remind me
of a certain room in my house or give me an idea for a new piece with different colors that
I've never used before. So color theory is something
that if you're struggling with looking at Pinterest can probably help
you out with that. Looking at actual agate and God slices is another
great way to get inspired, seeing how this natural
stone looks when it's cut into and how the
different striations and banding happen and
how the colors radiate out from this
central crystallized form. Really gives you a
good idea of how geodes actually look
and can help you with just the layout of your
piece and different ways to create a piece of your own
based on actual stones. Those are just a few
ways to get inspired. I really do recommend
going out on Pinterest and just looking
at different images. If you do find another artist's work that
you would like to emulate, I do strongly recommend that
you don't copy it directly. You can take inspiration
from other artists work, but it's really
important that you add your own creative spin to it and really make it
your own creative piece. Next, we need to decide what shape and what size
you want your piece to be. I'm going with this
19.5 inch circle. I just got this from,
I think Hobby Lobby, and I'm going to go
ahead and prep this with just on the front and
then I'm going to turn it around and tape off
the back just so that the drips are easily removed
with my heat gun method. After I tape the edges, I can go around and remove
the excess tape with a exacto knife to really get
that tape flush to the edge. These are the colors that
I'm going to use in my piece and you can follow along and try to create the
same piece that I'm making, or I strongly encourage you actually to use your
own imagination and your own inspiration and make a piece with
colors that speak to you, not necessarily the same
ones that I'm using, but just in case you're curious, I'm going to go over exactly
what I'm going to use. So first, I have a custom color that I mixed up with
my pigment paste. This is like a
charcoly greenish gray that looks pretty similar to the paint I have in the room that I'm
going to hang this piece in. I have this created using
a mixture of these. We have black, sage and a little bit of yellow
to create this color. I might do a couple of variations of this just to
give it more dimension. I'll create a mixture that has a little bit more black in it just to give it that extra pop. And then I'll be using white. We have here colorbrris
karat shimmer. I love this pigment.
It is so shimmery. It's so nice. Then I'll be adding
a little bit of white to it to give it a more pearly look to it
so it's not transparent. Then I'll probably also
use the white on its own. Then over here we have
two different browns. We have a chestnut and almond shade just
for the variation. I think this brown
goes really nice with this green color
and I have a lot of wood colors in
that room as well, so that'll look nice. Then for the gold, I
chose this AicGld by JCK Designs and this is just a really
beautiful antiqued gold. If you wanted a
true yellow gold, Colorbry has a great gold for that and that's in the
pigment powder, obviously. Then for my detailed
work at the very end, probably going to use
either one or both of these to draw in some
gold detail lines. This is the gold spray paint
in a can really beautiful, and then this is
the alcohol ink in the color brass and these two
look really good together. You could just use a gold marker if that's easier for you. When you get the new markers,
they tend to work better. This one's pretty old
and dried up and rusty. I'll use it for adding some shimmering details on my glass chips at the very end. Then I've also got
some white markers. I just have a couple
of different sizes of the pasca paint pens and these are great because
they're not permanent, they're acrylic based, so
you can wipe them off if you decide you don't like the
lines that you've created. I like that. They're
not quite so permanent until you add
the resin over the top. And then lastly,
instead of glitter, I'm going to be using
these sheets of gold leaf, which are super delicate. I get these on Amazon and I
just like the look of this. It looks like glitter, but it's just got this
really beautiful shimmer and there's different sizes in the pieces once
you mix it up, Um, I just love the look of
this compared to glitter. But if you wanted to use
Glitter for accent lines, that's completely up to you and there's tons of
options for that. This is, I think, what I'm going to be
using for my piece. If I added anything else, um, I'll be sure to let you know, but I'm pretty sure this is
what I'm going to stick with. Now that we have gathered
all our inspiration, we've picked colors and the size and shape
of our substrate. We're ready to get started
creating some designs and concepts for the
look of our piece to give us a blueprint
to move forward. We're just going to be
using regular old paper and pencil or paper and pen
to sketch these out. If you want to use
colored pencil and get a little fancy with it, you're more than
welcome to do that. If you want to get
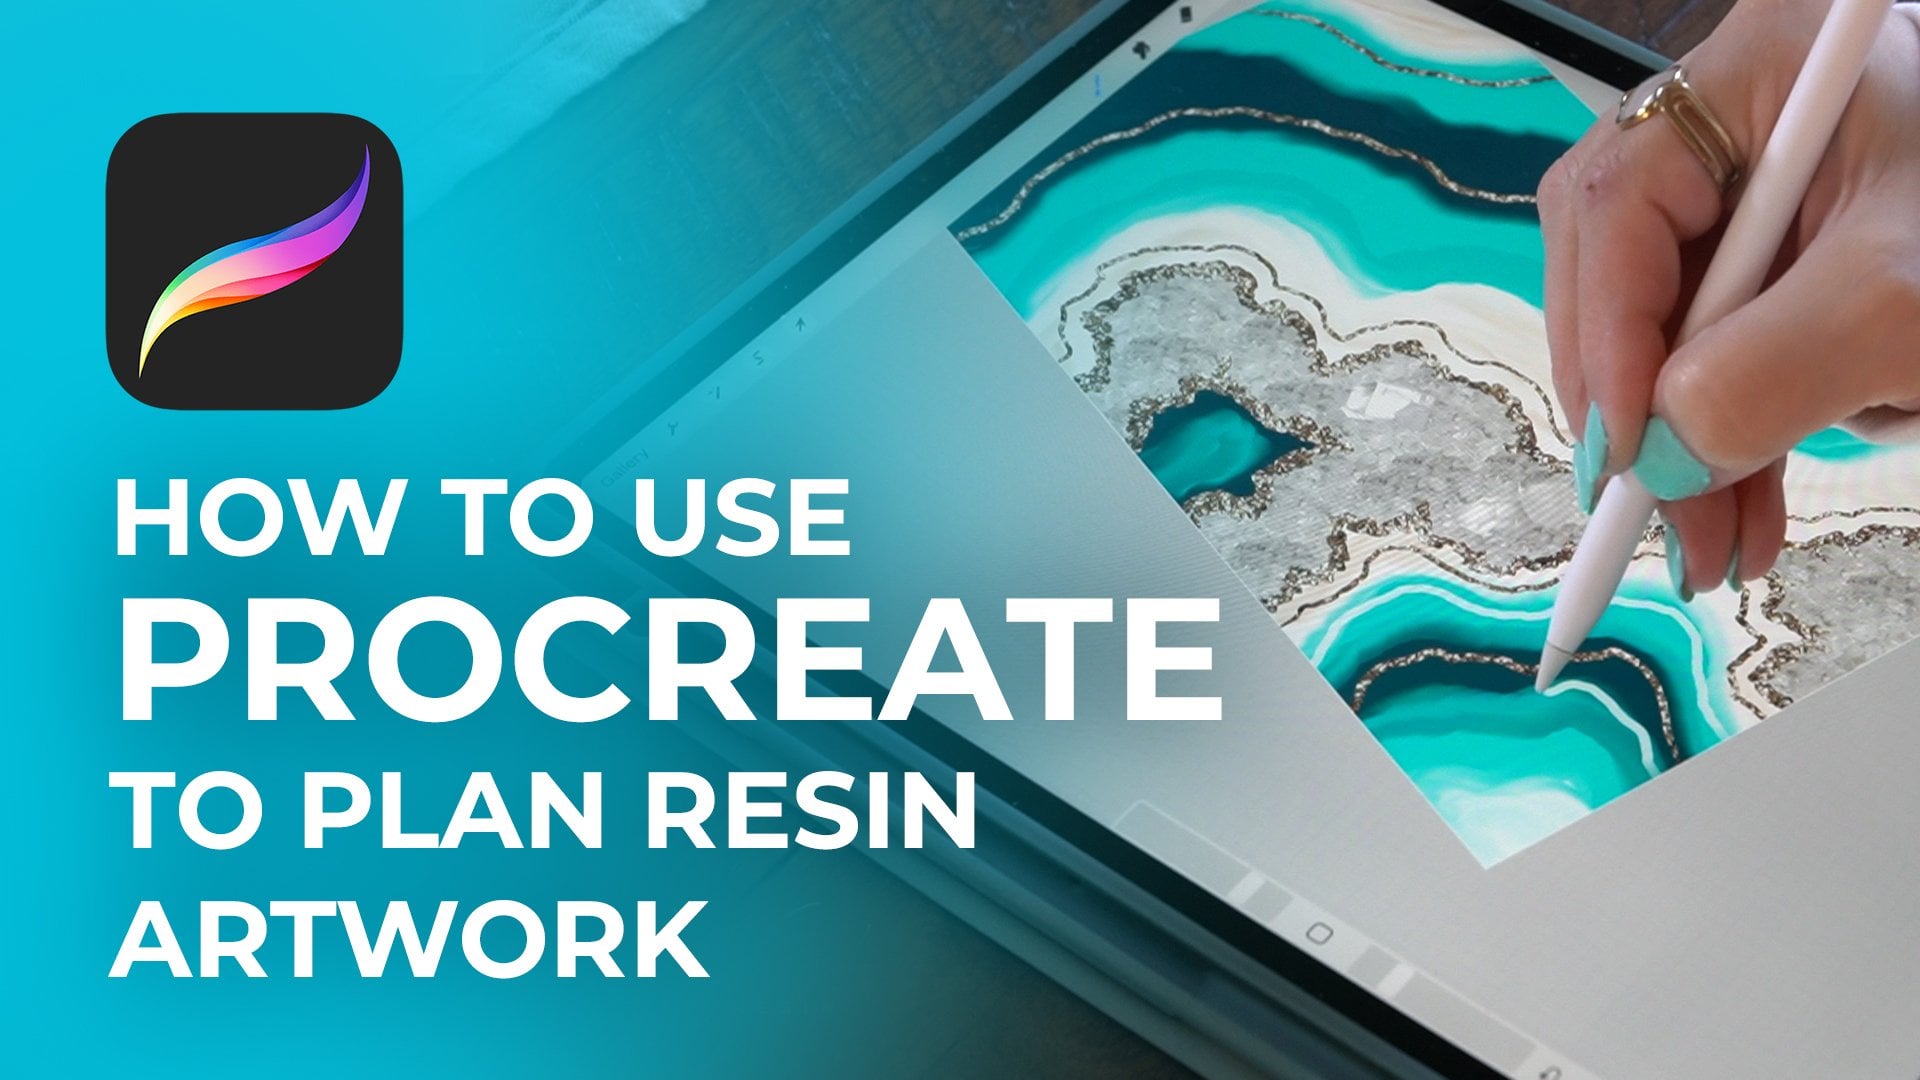
even more fancy, I do have another
mini course about how I use the app
Procreate with my iPad and Apple Pencil to give full detail color renderings of pieces and concept sketches
of pieces that I do. I use this a lot
for client work, just helps to give the client a really good idea of what
they're paying for it also helps me to create multiple
versions of something and make easy changes
using the app Procreate. So if that's something
you're into, you can check that out. But we are just going
to be using paper and pen for this class, just to create some
simple sketches and get our ideas out on paper. So since I know that my piece
is going to be a circle, I'm just going to
trace a couple of circles onto a paper
to get started. I'm just using a coaster
for a circle template here. It's just important to make sure that you have the
correct proportions. If you're making a
rectangle piece, make sure you have the same proportions for your sketch so it doesn't
mess you up later. So we're going to
start by sketching out a couple of different ideas until we find one that we like. I always like to start
my sketches with kind of the crystal or glass
chip formation first. In my opinion, it's kind of
the anchor of the piece. It sort of holds
everything together, and I like to base
my designs off of this formation of glass
chips and kind of have my design radiate out from
it in sort of banded ways that kind of help resemble an actual slice of Dod or egot. It just looks more
natural that way if I'm trying to emulate
a natural stone. So we're just going
to start by creating a shape for our glass chips, and then I like to just
do some squiggles in the middle of it to kind
of represent glass chips. And then from there, I just start kind of creating a design. So like I mentioned, I like to radiate out kind of around that
glass chip formation. And if you'll notice,
my formation of glass chips isn't super
uniform or perfect. I really like these
to be mismatched and not perfect because nothing
in nature is perfect and I want this to look
natural and organic. I like to make the shapes
a little bit wonky, a little bit rough
around the edges. And then I just create
my banding around that and emulate those dips
and curves as best I can. Then I try to keep in mind, based on the colors
that I'm using want a good balance
of dark areas and light areas to make it kind of balanced and not too heavy
of darkness on one area. And I just want to make sure that I kind of have
everything balanced out. I'm also keeping in mind, my color palette
and where I think I might want to use
certain colors. And I'm just doing simple
light shading around areas that I think I might
want to put the darker colors, and I'll just leave the areas white where I want the
lighter colors to be. You can get really
detailed with this. If you just feel
more comfortable having color introduced, you could use colored pencils. But I'm so versed
in this that I need a sketch to help my brain
in the creative process. I'm just sketching
things out. I don't need to get too
detailed with this. I like to add my
final detail work at the end and just see
what the piece needs. I'm not getting too crazy
with the details here. I just want to get the general
shape and layout there, so I have a base to work from. Now I'm going to start
with another design, one with a little bit
of a different motif, a different flow to it. Again, I'm starting with the crystal and
glass chip formation and getting that base in
there of a starting point. Then I'm going to add
my bands of colors to complement that area of crystal
and glass chip stonework. Keeping in mind dark
and light areas and really balancing those out. And just having fun
with it and seeing if I like certain movements
or certain patterns. And just have fun with it. Just get creative and draw up some sketches and go for the
one that you like the most. All right. I did
one more sketch, and I think this is the one
that I'm going to go with, so I'm just going to fine
tune it a little bit more. It's similar to that
second one that I did, but a little bit different
and I'm just really thinking intentionally
about the colors that I've chosen and where
I'm going to fit those. Yeah, I think this
is going to give me a great starting point and I'm going to create my piece
with this sketch in mind. All right, so we are
ready to get started. Let's first begin by
prepping our workspace. We're just going to lay
out a sheet of plastic to really protect our table and make cleanup a lot easier. And then we'll set
up our canvas, our wood panel and make sure that we get
this as level as we can. I just have my wood panel propped up on a
couple of Dixie cups, four Dixie cups, and
then I've just used a couple shims to really get this piece
as level as I can. You want to make sure
that you're checking the level on a bunch
of different angles. You don't just want one angle. You want all sides to be nice
and level to get started. All right, we are ready
to start pouring resin.
5. Final Project Part 1: In this first stage
of the artwork, I'm only going to focus
on kind of gluing my crystal glass pieces
to my wood panel first, and I'm going to let that cure. And the reason I do
this is because I want my design not to kind of flow underneath the stones in case I didn't get
it completely level. Sometimes your resin design can kind of do things
you don't want. So I want to make sure
that these crystals have a nice clear base underneath them with no colored resin
kind of tainting that space. First, I'm just going to
mix up the amount of resin required to glue those
crystal pieces down. I'm going to use the method
with popsicle stick and measuring by volume that I went over earlier
on in the class. And full disclosure, this was too much resin for
what I needed it for. I probably only needed to
mix half of this amount up, but I ended up using the excess to make a couple coasters, so no waste, but if you're trying to
follow along and you have a similar sized piece, I'd probably only mix
up half of this amount. But we're just mixing
equal parts here, and then I'm going to combine this resin and get
it fully mixed up by mixing for about 3
minutes and just to make sure that it
gets fully incorporated. I'm going to tint
this resin with the karat shimmer
and a little bit of white so that it's
not transparent. I want it to be a
little bit opaque, like a pear leescent
shimmery color. And this will just be visible
underneath the crystals. If you wanted to do a dark base, that would look probably
pretty cool depending on your um inspiration and
what you're going for. But I want this to kind of be bright and shimmery
underneath the crystals. So I'm just going to tint this resin with a little bit of that pigment powder and then add just the tiniest
amount of white to give it a little bit
of opaque color to it. All right. I've got
my reference sketch here that I can look back to, and I'm just going to
go ahead by pouring this area where my glass
chips are going to go. You could sketch this out if you feel more
comfortable doing that, but I'm just going to
go in straightaway by pouring the resin right on where I best think that it's supposed
to go based on my sketch. I'm going to choose
my glass chips. I have two different sizes here. I've got a really chunky
sized glass chip and then a smaller size because I want that dimension and
differentiation of size. I just think it looks
natural and organic. I'm going to use these two sizes and then just start by going in with my resin in that general area
that my sketch shows. I'll kind of use a
popsicle stick to kind of push that resin
out and get it exactly where I want to make sure that my crystals all have enough resin underneath them to get cemented on for
the next stage. All right. I like what
this is looking like, so I'm ready to go in and
add my glass chips now. I'm starting with a larger size, and I'm just randomly
adding these in little clustered areas where
I want some dimension to be. There's no rhyme or reason to
this really, based on feel. I just do what I think
would look good. Then once I've got all
these bigger pieces on, I'm going to go and fill the gaps with my
smaller glass chips and just really make sure that it's exactly
how I want it. I can go and add a
little bit more resin if I think I need a little bit. Um, of a different area or if
I didn't add enough resin, I can always go in
and add more and just fill the space with the remaining
smaller glass chips. Okay, and I think that is looking good for
our first layer. So I'm just going
to go ahead and let this cure and come back to it the next day and start pouring the rest
of the base layer. Now, if you didn't
want to do this and you just want
to go straight in and pour the rest of your
design for this first layer, you can definitely do that. But I'm just showing you
kind of my typical process. I like to get these crystal
chips really cemented on there and leave no room for other colors of resin to
sort of seep underneath. Okay, it is day two. I have come back the next day, and we are ready to get started
pouring our base layer, our first kind of underpainting
layer of our resin. So I'm going to
mix up the bulk of the resin that I'm
going to need to cover the entire piece, and I'm going to mix up
about 19 ounces of resin. So using the weight
method in my scale, I'm just going to measure
out the part A and part B. Using the calculations
that I went over and showed you earlier in the class on how to measure out with using this
weight method. I'm just going to follow
that and mix this up and get it ready
to divide into my cups and add my color. Right, so I've gone ahead and laid out all my colors
that I plan to use. I've got some cups and some mixing sticks all
set out and ready to use. I'm just going to start
dividing my resin out into these cups to
add my color into it. So there really is no good method for the amount
of resin I'm adding in. I'm just eyeballing it. The more you work with resin, the more you understand how much you're going to
need of each color. But this is something
that you're going to have to experiment with. I know exactly what
colors I'm using. I know how to divide the resin up based on the amount that I think
I'm going to use. I end up having a little bit extra that I'm not quite
sure where it's going to go. So I just pour that
into another cup and I'll decide where
that needs to go. Towards the end. If I have
maybe a blank area that needs more resin in a different
color that maybe I ran out of, I can always mix up more with that little
bit of extra resin. Don't forget to wipe off your sir stick and set
your mixing container to the side so that you
can easily peel that resin out and use
those tools later. Okay. And now I'm
going to start adding my colors into
these cups and just keeping in mind that
I'm trying not to add more than about six to
10% of these colorings, so you can kind
of get an idea of how much color how much that looks like adding into
cups of this size. You really don't
need a ton to tint this resin accurately
and opaquely enough. So I'm just going to go ahead
and add in all my colors. I want to point out
that I usually add more than you need
for the gold pigment. I just like my gold to
be super concentrated. And when we add
heat to the resin, it really pops that
gold and brings that gold metallic
pigment to the surface. And this is definitely
way more than 10%, but I find that with
pigment powders, it doesn't really jeopardize the curing process of the resin. So for my metallic pigments, I usually go a little
bit overboard and add a little bit more than
is probably necessary, but I just want that gold
to really pop in my piece. Okay, I am starting
with laying down my shimmer pigment right up against this glass
chip formation. So this is pretty much the same pigment that I used
underneath the crystals. But I'm planning on adding white right next
to this pigment, and I really like the subtle color shift that the white has when it's
next to this pigment. I think it looks really pretty. Now I'm going in with a
thin band of my gold. And if you can see, I'm just pinching that cup
together to give me a little more control over the amount of resin
that I'm pouring down. I love Dixie cups because
they're malleable. They're the paper,
you can really pinch them together and get a
really detailed pour. I'm just adding my gold
next to the white. And then I'll go in immediately
with my butane torch and add some heat to that to really pop that gold
to the surface. For some reason,
that heat gun really works to bring that gold pigment to the surface of the resin, and it helps it kind
of feather out a little bit and make it
look really pretty. Now, I'm adding a little bit of that brown that
I have mixed up. This is the chestnut brown
color right next to the gold. I think that's going to be a
nice complement to the gold, having that brown kind
of right up next to it. I'm going to do a little bit of a thicker line than the
gold was with this brown. I'm still, checking in
with my concept sketch. And now I'll go over
this with my heat gun. And if you notice I'm making quick passes
with the heat torch. You really want to make sure that you're
not concentrating that heat for too long
on a concentrated area. You want to keep it moving
and keep it pretty fast, kind of sweeping over the
area as quickly as possible. Otherwise, you're going to
run the risk of burning your resin and you
really don't want that. Keep it fast and brief. You don't need to heat
it for very long to pop those bubbles or to bring
that gold to the surface. And now I'm going to go in
with my lighter sage green, my deep charcoal green
color that I've mixed up. And now right up against that, I'm going to be adding a little
bit darker of that shade, just to give it a little
bit more dimension. And you can use a popsicle
stick to kind of push that around to get exactly the
shape that you're looking for. I'm going to kind
of sandwich that in with that lighter
green color. Now, I'm taking my
popsicle stick and I'm just dragging it lightly
across the surface. I'm just trying to really slightly mix these
colors along the border. I want to give it a little
bit a different look than just a dark light
green to dark green. I want it to blend
a little bit and meld and give a little bit
of a cooler transition. Going over once more with my heat gun to pop
the bubbles as I go. It's important to touch the
edges a little to break the surface tension to help that resin to flow
over the edge. This just gives it
a cascading effect of continuous design
over the edge. Then I'll go over
everything once more with my heat torch as I see
more bubbles surface. Now I'm adding a
little bit more of that shimmering pigment
along the bottom here. I only have a little bit of
resin left at this point, but I'm going to add the remainder of
my brown pigment up here towards the top. My resin has been sitting probably for about 40
minutes at this point, so it's getting a
little bit thicker. It's not as runny as it
was when we started. I know that I'm nearing the end of my working time
for this resin, so I've got to pick
it up a little bit. Now I'm just doing a
little bit of cleanup. I'm going to see if
I have what kind of leftover resin that I have. I'm going to kind of wipe off my tools that I know
I'm done working with to get them ready to
cure and be reusable. And this cup had too
much white in it, and I know I don't
want to pour any more white on my piece, so I'm just going to pour
that out on the table so that it has enough surface
space to offload any gases, and it doesn't create
that exothermic reaction because if you leave too
much resin in these cups, it does kind of do that exothermic reaction that
I mentioned before. You can kind of see
here that this resin is starting to become kind
of really sticky and, like, a thick molasses, and that's how you
know the resin is nearing its end
of its working time. So I'm just going
to go in and add whatever leftover resin I have left and kind of trying to use up as much of it as I
can and completely cover this piece to finish this
first layer of resin. Okay, so I have used up all of my resin and we are finished
with this first layer. I'm going to kind of monitor
this and see if there are any more air bubbles I need to pop with my heat
gun or heat torch. And I'll just let
this do its thing and cure overnight and
come back to it tomorrow.
6. Final Project Part 2: My second layer is all
about the details. I'm not going to
completely flood this with another coat of resin to completely cover the
whole piece again. I'm just going to be
selectively pouring certain areas of color and some glitter to kind of give it a little
bit more dimension, like I mentioned before. I just have mixed up a
little bit of a translucent white and then my second brown color,
which is that almond. Then I just have a
cup for my gold leaf that will act as my
glitter in this piece. And I'm going to use about
three sheets of this. And what I do is I just dip
my stick in the resin to kind of give it a wetness so that it can grab
onto the gold leaf, and then I'll just shove it
in that cup and mix it up. So I'm just trying to make sure this gold leaf doesn't
fly everywhere, but it's very delicate,
so you got to be careful. We're just going to transfer all these colors
into a baggie and then let this start to cure for about 45
minutes to an hour. By doing this, the
resin is going to start curing and getting harder
because it's hard, it's going to keep its
shape a little bit better than cured or freshly
mixed resin will. That just helps the design
stay in place more. The longer you leave
the resin and the more sticky and hard it gets, the less the resin is going
to want to spread out. So for this first accent line
of the translucent white, I'm starting to pour this
when it's not super tacky. I mean, this resin
has been sitting for, I would say 45 minutes, and I'm just going to
add this to the piece. I know that it's going to be spreading out a little
bit, and that's okay. That's what I want for
this detail accent line. I'm just going to add
this white to my piece and kind of finagle that until it looks
how I want it to look. All right, so I'll
lightly go over that with the heat gun or the torch just
to pop those air bubbles, and then we can dive in
with my gold foil accent. This is a little bit
stiffer than the white one, but I don't need this to
be a super thin line, so I'm okay with how
cared that this is. I'm going to start applying
this and see how that goes. I know that this is
mixed into clear resin. After I add my flood coat, you're not going to notice
the clear resin at all. You will just notice where
the gold flakes are. So however dense you make this is going to give
a different look. Because mine isn't super dense, it's going to look more
like a flaky gold accent and less like an actual
line of glitter. So if that's what
you're aiming for, I would mix a ton more
glitter or gold foil into this mixture so that
it becomes super dense and looks like an
actual line of glitter. But I want this
to be more flaky, so I didn't mix as much
gold foil into it. So I'm just going to
go through and add some accents where I think
this gold would look best. I'm going to put it in some of these brown areas and up
against the other gold. I think it's going to look
really pretty next to that. Okay. Now for the final
part of this gold accent, I'm going to add it to the
border of my glass chips. I just love how this looks, so I'm going to create this edge of gold glitter
gold foil along my stones, and I'm just bring it up into the glass
itself a little bit, just to feather it
in a little bit. Then lastly, we have
the brown pigment, which has been sitting
for the longest. I think this has been
about an hour now, so this is going to be probably the most structured
line that I have. I'm just going to add this
in where I think looks best. I'm going to trail it along
the other brown pigment area. Then I'm going to also add it inside this other brown layer. I'm also going to come
down here and follow this natural curve
next to this gold. And then one more line detail in the middle of
this green area. And I think that's
going to do it for all these detail lines. And again, I'm just trying to follow the natural
flow of the piece. I like to, you know, keep these a little bit structured in that they're
not haphazardly placed. I like to kind of
follow the structure and form that the piece
is already showing. And then we will
let this sit and cure overnight and come
back to it tomorrow. And This is one of my favorite
stages of the piece. We are adding the
final detail accents. So I just have this
drawing glove on my hand. It just helps to protect from getting any
oil on the piece from my hand and it helps my hand glide over the
piece really easily. So we're going to
start by drawing in some white accent lines
with my Posca paint marker. So I'm starting in
with the thinner line. And I'm just going to add this to the white areas
that I poured. Since the white was
somewhat translucent, I think this opaque
white marker is going to really pop over that white
and give it a nice look. I'm just going to add some of
these detail lines kind of trailing along the natural flow of what I already
have laid down here, making sure that I continue
the line over the edges. So this is an example of how you can remove a line
that you don't like. So I put this line down and
I decided, You know what? I want this line on the
other side of the white. So I'm just taking
a damp paper towel, and I am wiping this
line right off. The great thing about
those posca paint pens is that they are acrylic
water based pens, so they are going to come off if you decide you
don't want them. So I'm just wiping this
white completely off, and I'm going to
restart by drawing the line on the other
side of that white. I'm just going to continue
adding these details. It's just by feel. It's wherever you
think they need to go. There's no right or wrong
way to add details, and the fun part is you can add as much or
as little as you want and make this as jam packed or as sparse
as you want as well. So now I'm going to go in with a little bit of a
thick white marker, and I just love
adding dimension and differentiation by using
different sized markers. I think it adds a lot to
the piece for interest. And then, wouldn't
you know, I decided to remove another one
of those white lines. So I have removed one of the thinner lines and decided I wanted it to be
a thicker line. So I took that off,
and now I'm going over that same spot with that
thicker white marker. Okay, so now after I've got
all my marker lines down, I think that I want to go in
and add some gold details. So I just have
poured out some of this pinata alcohol ink and
brass into a little cup, and I'm just going to
use a paint brush to paint this around my glass
formation in the middle. I don't want to
completely cover up the gold foil flakes
that I had laid down. I want this to kind of hug the crystals a
little bit tighter, and I'm also going to bring
it up into the crystals, just like I did with
that gold foil flake. So I'm just going
to follow along the entire border and kind of coat this all with
this gold pigment. Now I'm taking that gold marker, and I'm just really
lightly dusting it over a few of the high point tips
of these glass chips. I just think that adds a really interesting
element to it. And then I'll just continue adding a little bit
more detail with my pinata alcohol ink
and my paintbrush. And then I'm also going to add a couple more linework
gold accent lines with that Montana liquid gold
that spray paint in a can. And once I'm happy
with these accents, I think this piece
is going to be done. And now all I have to do is wait for these
lines to fully dry, which for me, that's just
going to be overnight, and then we can come back and
add our clear final coat of resin to cement all of
these details in place. Alright, it is the next day, and we are ready for
our final flood coat. So once you're happy
with your piece and you are ready to seal it up, we can go ahead and apply
that last layer of resin. So I just have mixed up
another 19 ounces of resin, and I'm just going to start layering this over
the whole thing. And I'm just going to use my hands to kind
of smoosh it all together and make sure I have every spot covered by resin. And again, I'll use my
hands to run them along the edges just to make
sure that the resin is flowing completely over
the edges, as well. Then I'm also going
to drizzle some resin on the crystal formations
just to make sure that everything is cemented
in place and I want to clear coat any gold
details to make sure that those stay in place and just make sure
that the piece is completely and 100%
covered with resin. After I'm sure
that it's covered, we can start going in and popping all the bubbles
with our butane torch. And you want to
make sure, again, that you're making quick
passes with this torch. You don't want to concentrate it too long and you
want to keep that torch moving and just so you're not burning the
resin in any one spot. Keep that going and go
over the entire thing once and then put that torch down because we don't want to
overheat the resin. We're just going to make one
pass to pop the bubbles and then we can get down at an angle and look against the glare
to make sure that there's no more air bubbles and go over those spots that you might see some micro bubbles
rising to the surface. Then I also like to
grab a toothpick and just start to pick
out any fluff or hair or dust that I
might see in that coat of resin to really get that
finish as nice as possible. Getting down at eye level and looking against
the glare really helps you to notice
any imperfections that might be lurking
in the surface. Okay, so once we have completely eliminated
the air bubbles, we don't see any dust or hairs, we can let this finally cure. I'm just going to
close my workspace up. I have the vents closed, so there's going to be
no circulating air and no chance for any hairs to kind of fall in the piece
while it's caring.
7. Last Look Recap: Okay, guys, our flood
coat has cured. It is looking beautiful. I hope yours looks amazing. But now it is time to get rid of these resin drips that have
accumulated along the edges. So the tape is going to do
most of the work for us. It is going to make
these resin drips just peel right off. All we need to do is add
a little bit of heat. I prefer to use a
heat gun to help with this if you don't have one
or don't want to use one. You can sand the edges as well or ascend the back as well, and these drips
will just sand off. It takes a little time,
it's a little tedious. That's why it's not
my favorite method, but if you do want to sand them, you don't have to tape the back. You'll just leave it and
then you'll sand the back. But we are using a heat
gun to speed things up, so let's get started. So I have my piece
sitting against my couch to protect the surface from any
scratches or dents. Since this needs
a full seven days to cure to its full hardness, it can be dented and
scratched at this point. So we're going to use
our heat gun to remove these drips as our final
stage of this piece. So what I like to do is heat up an area about six
to 10 " at a time. And that's just what
I prefer to do. It gives me enough time to remove the drip
before it cools off. So we're just going to go
around and start heating this up in small increments and
then ripping the tape away, and those drips just
come right with it. So pretty satisfying. Let's get to it. All right. And that wraps that up. We have all the drips removed, and she is looking beautiful. Let's take a closer look
at some of those details. All right. That wraps up
our resin geode class. We have finished with
our resin geo beauty. I hope yours looks great. I'm really happy with
how this turned out. I hope that you had a lot of fun and learned a lot about
resin along the way. And most importantly,
I hope you gain the confidence to get
started working with resin. All right, thanks for
taking the class. Bye.
 Katie Krell, Artist, Designer, Animal Lover