Transcripts
1. Intro: Hello and welcome
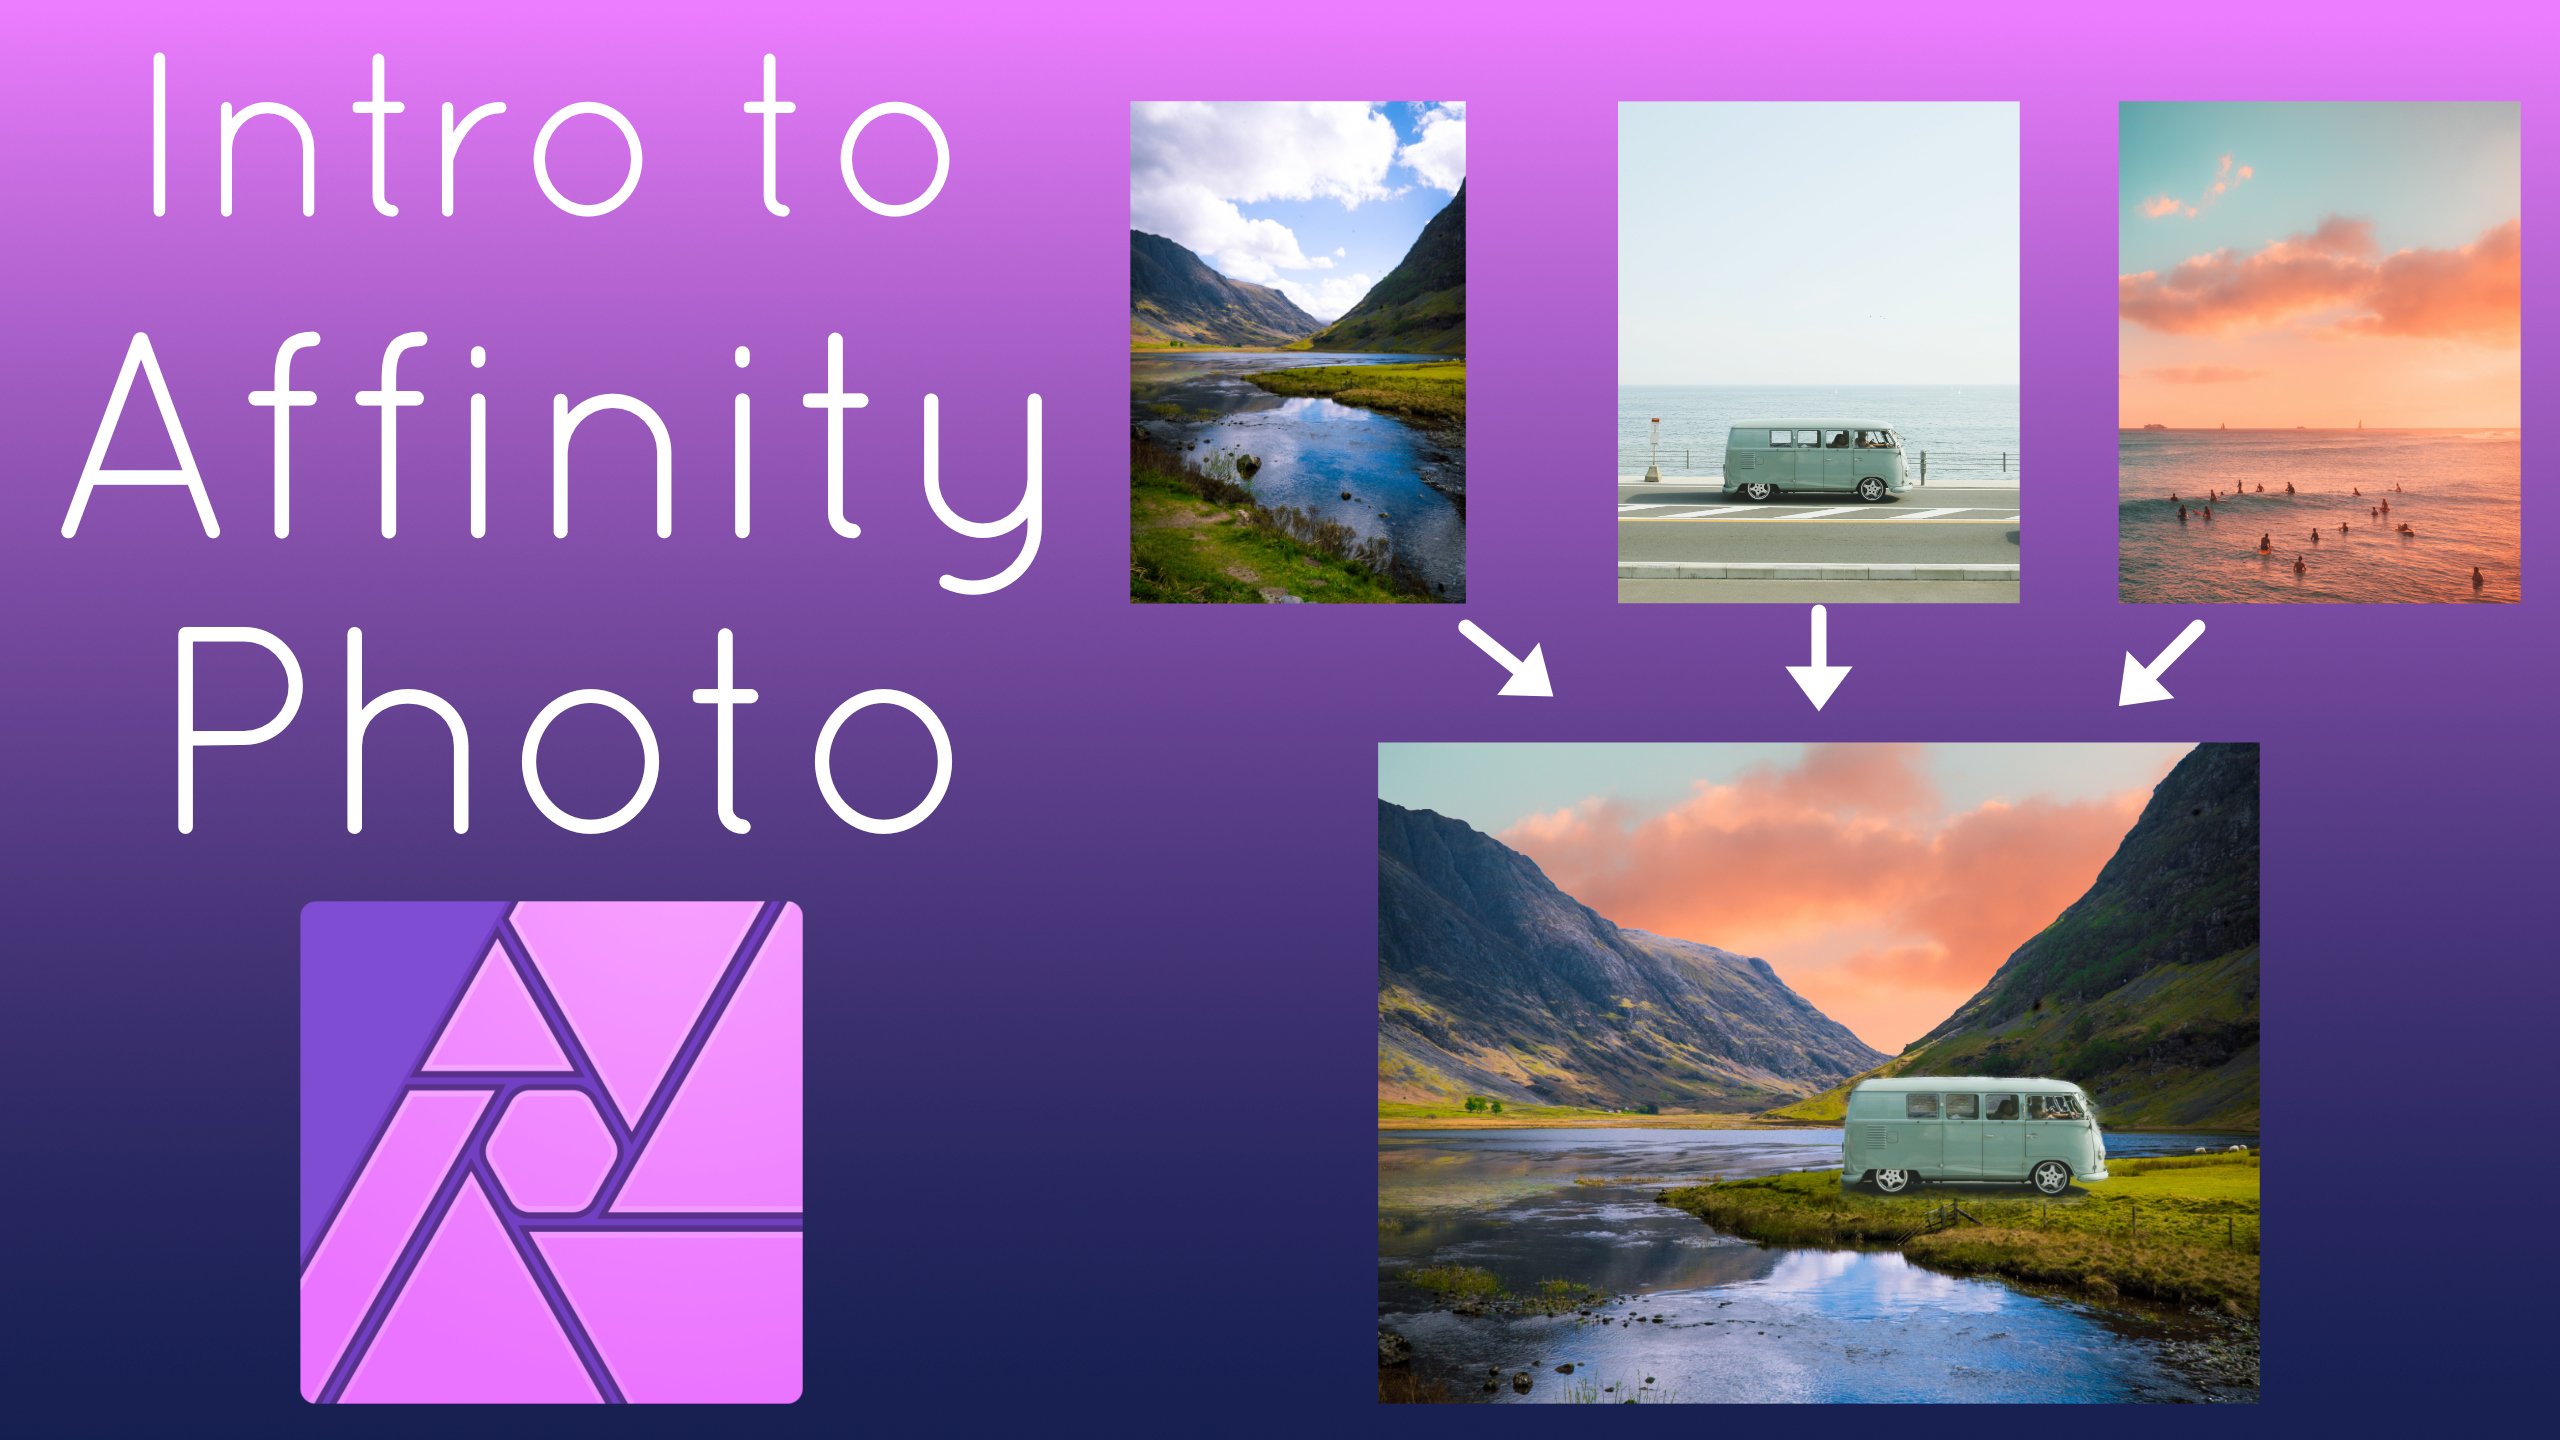
to this course, introduction to Affinity Photo
version two on the iPad, my name is Ben Nielsen and I will be your instructor
for this course. I'm immediate design educator
with over seven years of experience teaching
creative programs both in-person and online. In this course,
we'll be covering the basics of how you can get started with Affinity Photo
version two on the iPad, which means we will
be diving into the core concepts of
photo compositing. We'll be covering things like layers and adjustment layers. And how do you
selections and masks to modify just
portions of an image. And we'll also be talking about
some non photo objects in a fee photo like text
and shapes that you can add to your designs
in order to learn these concepts
will be completing a project as we go
through this course, the project will be to
create a YouTube thumbnail. Now you might not all be
YouTubers or even video makers. But the reason
we're going to use this project is because it's
a great place to be able to combine all of
these core concepts together and use them
in one document, lots of other types
of documents. We'll use just a few
of these concepts, but a YouTube thumbnail
will use all of them. So it's a great place for
us to showcase our skills, even if we're not actually
making a YouTube video. Now you might be wondering,
how do I do that? Well, in the next video,
I'm going to dive into the details of the project. I'm going to walk you
through each piece of it throughout the course. And then at the
end of the course, I will show you how to do a
completed project so that you can follow along now that
you know what you're going to learn in this course and what
you're going to do, you might be wondering
what you need to be able to
complete this course. Well, there's just a couple of things that you
actually need. The first one, of course,
is going to be an iPad. You're going in
iPad that can run Affinity Photo version two, this means your iPad
will need to be running iOS 15 or later. Then of course, you'll need
Affinity Photo version to download it onto the iPad if any photo
version two can be downloaded from the
App Store for free, but you're going to need a
license in order to actually use it or sign up for
their free trial. You can do either one of those things in
order this course. And that's all you're going to absolutely need to be able
to complete this course. There are a couple
of other things that you might find helpful. One is an Apple pencil. I find this a really good way to navigate the interface of
the affinity programs, but we aren't going
to be doing any drawing in this course, so that is definitely
not necessary. It's just a nice to have. You also might want to keyboard just because that makes
it easier when you're dealing with texts or doing modifier keys like shift,
Command and Option. But it's really not necessary for you to
have because all of those fixtures are
actually built in to a funny photo as well. The last thing that you
might be interested in having you some of your
own photos that you might want to put into your thumbnail that can make it a little bit more personal, but it's also not
necessary because Affinity Photo has a
stock photo library built-in you can use to complete the project if you don't
have your own photos. And that's all you need
to complete this course. I hope that you're excited
to dive in and get started. Please follow along
with me as we go through the course
that will help you to be able to learn all of
the concepts that I'm going over as you
run into any trouble, please go ahead and
ask me questions in the discussion tab
for this course, I am more than happy to
answer your questions. I don't want you to feel
like you're in this alone. One last thing before we
go ahead and get started. If you find this course helpful, I hope that at the end you
will leave a review of it. Those reviews really help
people to be able to find the course and
know if the course is going to be
valuable for them. So please don't forget
to leave a review. Okay, I bet you're wondering
about this project. So in the next video,
we're going to dive in and go over the details
of the project.
2. Project: Okay, so we all know that the best way to learn
something is to do it, since I want you to learn
to use Affinity Photo. Well, in this course we're going to be completing
a little project. This project will help
you to practice all of the tools and skills that we will be learning
in this course. The project, as I
mentioned before, is going to be to create
a YouTube thumbnail. And as I said in the last video, this isn't because I think
you are all going to be YouTubers or even
creating videos. But it's because this type
of document is really useful in that it can utilize all the different
skills that we'll be learning throughout the
course will help you to synthesize them and have
them ready for use later. Because we are using this
project to learn things, there are going be some
requirements for your project to make sure that you've gotten all the concepts in the course. The first one is
that you need to use at least one photo
in this project. This is a funny photo after all, the next one is that you need
to make sure that you've used at least one
adjustment layer. And the third thing is that you need to make
sure that you've used at least one mask
from a selection. Now, don't worry if
you don't know what all of these concepts
mean right now, because you're going to
learn them in the course. You don't need to know
them ahead of time. The last two things are to use at least one text element
and one shape element. This will help you
learn how to bring non photo elements
into your project. And don't worry, we'll be
going over that as well. So no worries if you
don't know what texts were shaped elements
are right now, and don't worry if you
forget any of this, I've listed all of
it in the project section for the course. Now, if you have all of those
things in your thumbnail, you will have a
really good grasp of the basics of Affinity Photo and be able to use
it in the future. If on the other hand, you choose not to complete the project, then you will not learn
the concepts as well. And when you need
them in the future, you probably won't be
able to remember them and you will have to look
them up and learn them again. So do take the time to
complete this project. It will really help you
in your learning process. Once you've completed
the project, go ahead and export it as a JPEG image and upload it in the project section
for this course. This really helps me to know how I'm doing as a teacher
because I can see your projects and whether
or not I am correctly conveying the concepts that I'm trying to convey
in the course. It also really helps you
as a student because it gives you a chance to receive
feedback on your work, which is one of the
critical pieces in your design journey. Now, speaking of
your design journey, we should go ahead
and get started in Affinity Photo on the iPad. So in the next video,
we're going to go ahead and make a new document.
3. New Document: Now let's time to get started. And if any photo, the
first thing that we need is a document to work in. This main area shows you the documents that you
currently have open. I don't have any open right
now, so you can't see them, but we'll see that in a second after we opened the document, there are a bunch
of options along the left-hand side doing a
lot of different things, but the option that we're
looking for is new document. Let's go ahead and
tap that and you can see there are more options here, different ways to
make a new document. We're still just
looking for the one that says new document. Go ahead and tap on
that and it will open up the New
Document Dialogue. We're going to see a bunch
of different options and templates here along
the left-hand side. Some of these are for print,
some of these are for web summer press ready,
some are for photos. It really just depends on
what you are doing now because we're looking to create a YouTube
thumbnail in this course, the one that you're
going to use for your project is going to be a web template known as WQ HD, 2,560 pixels by 1,440 pixels. This is the correct dimensions
for a YouTube thumbnail. So it's always good
if you can know what you're making before you create your new
document so that you can size it appropriately. Because if any photo is
a raster based program, you aren't going to be
able to infinitely resize things the way you
would in a vector program like a faint designer. So let's go ahead and
make sure that we are clicked on WQ HD. And you can see that it
shows that at the top. And then we have all
of our options here. We're not going to worry about adjusting all of these
options right now, because these options are set up the correct way for what
we are going to make. So go ahead and click Okay. Once you do that, it's going
to take a second and it's going to generate
your new document. As you look around here, there's a lot of different
pieces and we're going get into this in the
next video on the interface. The only thing that I
want to point out right now is the way that you
get back to that screen that we were just on is to press the arrow in the
top left corner. Go ahead and tap
that, you'll go out. It's really important
that you do that before you switch apps, because sometimes when
you leave a funny photo, if your iPad doesn't
have enough memory, if any photo will be
rejected from the ramp. All that means is that
what you've done won't be saved unless you've clicked
that button to go back. I know that that can
be a little confusing, but just make sure that you get into the habit of doing that. Now, when you look at this here, you can also see that there
is a little hamburger menu. When you tap on that, you get the save option, your project while it's
here in the project area, it's not actually saved anywhere except in the
Affinity Photo app. So when you want to save
it to another place, like the internal storage
on your iPad or to an external hard
drive that you've connected through
the USB-C port. You want to go ahead and
click Save or Save As here, so that you can actually save
that document elsewhere. When you want to open a document that you've saved
somewhere else, you're gonna go to Open
and choose Open document. That's going to take you
into your file structure. Okay, those are just
some tips to know. Now we're going to tap back on the document to dive back in. And in the next video,
we're going look at what the different areas
of the interface are.
4. Interface: Now that we are in the main
workspace of a theme photo, I want to get you oriented to the interface before
we start working, there are four main
areas of the screen. The canvas in the middle, the menu bar along the top, the toolbar on the left, and the studio
panels on the right. So we're going to take a look
at each of these in turn. First up, we want
to take a look at the menu bar on the top. This one actually contains
several sections. The first section has
regular menus which will be there no matter what
tool you have selected. The first button is the Back button that we
looked at last time, where it takes you back
to the document screen. The second button is
the persona button. It looks like the
Affinity Photo logo. If you're in the photo persona, the persona you are
in can completely change the tools that you
have available to you. So if you ever feel
really confused, chances are you've just switched
persona's accidentally. Now some of these persona's
can't even be opened if the right kinds
of things haven't been put in the document, e.g. if I try and click on liquefied, it's going to say
cannot liquefy, please select a pixel layer
mask before liquefied. So because they don't have
anything in document, I can't even use a bunch
of these persona's. The only one that I can
actually get into right now, is the export one, which we
will not need in this course. We're going to be
doing everything within the photo persona. So just make sure if
you ever feel confused, just makes sure that you
are in the photo persona. Next, there's the hamburger
or three-line menu. This is the document menu
and we'll have a lot of things that you might be used
to seeing in a file menu, in a desktop program
will use some of these, but not all of them
throughout this course. Next to that, we have the meatball menu
or three dot menu. This one has a lot of things
that you might expect from an edit menu or from a right-click menu in
a desktop program, the last option here
is the selection menu. This will help us as
we make selections and we will go into
more of these, though not all of them, as we get into the selection
part of this course, which will be a little
later, this next area, it doesn't show anything
right now because it is a contextual tool menu and it changes to pay in which
tool we have selected. If we change from the hand
tool to the arrow tool, you will see that
some options up here. If you ever feel like
there's something missing from this area that I'm using, but you can't find, chances are you are just
on the wrong tool. I need to switch to the
same tool that I am using. The last area contains
three sets of options. The magnifying class
is the zoom option, the windshield wiper
is the Preview option, and the magnet is
the snapping option. These buttons serve
as toggles and the small buttons on their sites have more detailed menus. The next area we want to look at is the left hand toolbar. This contains all of
the tools you will use, as we've already seen, the tool you are on, will affect the different
options you have available to you in
the context menu bar. And also what's you're able
to do in the canvas area. You won't use every
tool in this course, but we will cover the
most important basics. At the very bottom
of the toolbar, you will find the trash can, which is not a tool but will
serve as the Delete key. On the right-hand side,
we have the studios. The studios are
ways you deal with lots of the details
in your work, things like color and effects. And of course our favorite, the layers which we will
be talking about shortly. Once again, we
won't be looking at every single studio
in this course, but we will look at
the most important ones for getting started. One important thing to know
is that the very bottom of the studio bar
is a question mark. This is not a studio, but when you hold down on it, you will be able to see what
all the different buttons on screen are called. The last area is the
main part of the screen, which is the Canvas workspace. This is where all of
your work will happen. It's where you will place
and manipulate your images. A couple of things to note
here are that you can use gestures to execute some
commands on the screen. A two-finger tap will undo. Three-finger tap. We'll redo pinching in and out will control
your zoom level. Lastly is the command controller minus down in the
left-hand corner. When I tap on it, you can see
the command buttons appear. If you don't see the
command controller, go up to your document
menu and choose toggle command controller
that turn mine off. I'll turn it back on. When you tap on this, you can see that you have all of the four buttons that you would have on a
standard Mac keyboard. This controller
allows you to use those modifier keys without
having a keyboard attached. You just have to slide over to select them and
to keep them on. You just slide past
them if you need it, shift and command on
at the same time, you could make that happen here. Okay, I think that's it for
introducing the interface. In the next video, we're
going to get started learning the concepts by placing
an image on our Canvas.
5. Placing Photos: In this video, we're
going to go ahead and place some images on our Canvas. So we have something
to work with. We're going to look at two
ways to bring in images. First, how to bring
in our own pictures, and second, how to bring in stock photos from
the stock studio. First of all, I want to point out that since we
are going to be creating a YouTube
thumbnail in this course, that needs to have a
specific aspect ratio and it will contain
multiple elements. We're going to
place our images in the document instead of just
opening a single photo. If you just want
to edit a photo, you could just open the photo. It's specific size,
but because we need the entire thumbnail
to be a specific size, we're going to place them here. If you just want
to open a photo, you would do that from the
Open menu that we saw earlier. So here in our document, we just need to go up to the document menu and we
need to choose place. This is going to
open up a dialogue where we can choose whether we want to place from our files
or place from our photos. If you have your image
in the file's app, like in a folder somewhere, you'll want to choose that. That would include
anything that's on an external hard drive or in Cloud Storage if you've
connected those to your iPad, but if your photos are
in the photos app, you will choose the
one on the right. My photo is in the photos app, so I'm going to click that. I'm going to go ahead
and click in my recents and choose this photo
of the yellow van. You can see that
it loads it up in this place menu on
the right hand side, all we have to do then is
tap on the canvas and it will be added to our
document at full resolution. Now, you can see that
that is fairly big, but it doesn't take
up the whole screen because the resolution of our canvas is larger than
the resolution of the image. Let me go ahead and do a
two-finger tap to undo. And I'll show you
how we can add it at the resolution we choose. Let's go ahead and go
back to document and place place from photos
and choose our photo. We're going to go
ahead and drag it out and we can place it at
whatever size we choose, as opposed to tapping
it which places it at its full resolution. If we want to move
this photo around, just make sure we are
on our move tool, the black arrow, and we
can move the photo around. Okay, so that's how we
would place our own photo. But what if we don't have our
own photo or we don't have a photo of the thing that
we need for our thumbnail. We're going to go ahead and use the stock library found
in the stock studio here. There are two stock
libraries here. If you tap where it says pixels, you will see that you can
choose from Pexels or Pixabay. It's worth searching
in both of them to find the image that you want, make sure that
you've checked this. I understand button down here to agree to the
terms and conditions. These are both free
stock libraries that allow you to
use your images. So let's go ahead and search. I'm just going to search for a VW van to match our other image and
we'll see what we find. Now we see there are a bunch
of different options here. I like this one of
the man on the beach. So I'm just going to tap on
that until my finger picks it up and then I
can drag that out and place it in my Canvas. Now, these always placed at full resolution and they
can be very, very large. So just be aware of that
it can take a second. Now if we zoom out, we can see the bounding box
for this image is huge. So making sure that we're
on the move tool again, we're just going to drag down on the corners to make it smaller. We can use our finger
pinch to zoom in. And that's how we add
a stock photo from the stock studio
and Affinity Photo. Now that we've
placed our images, you can see that they are
covering each other up and things can get a little
cluttered and confusing. So in the next video, we
will learn how to use the layer studio to select
and organize things.
6. Layers: Now that we have some
images on our Canvas, it's time to talk about our first core concept
in if any photo, that is layers, this
is really one of the most important
concepts when it comes to making
photo composites. It is one of the things that separates
professional programs, like a funny photo from consumer programs like the
photos app on your phone. You open up the layer
studio by tapping the first icon in the
studios bar on the right. Conveniently, it looks just like a bunch of sheets stacked
on top of each other, which is essentially
what layers are. When we open that studio, we can see that we have two images stacked on
top of each other here, whichever image is on
top in this stack will cover up the image on the
bottom wherever they overlap. If they're the same size, you won't be able to see
the bottom image at all. We can change the order
of the stack just by tapping on one of
them and dragging it. You can see that
at that van with the waterfall is now on top
of the van with the beach. This can seem pretty simple, but once you start
adding lots of layers, it can get more
and more complex. Almost everything
that gets added in Affinity Photo
resides on a layer. So complex documents
can end up with dozens or sometimes even
hundreds of layers. For our thumbnail projects, we will end up
with at least five or six different
things in our layers. Panel layers essentially
act like a stack of papers, but there are few cool things we can do since
they are digital. First, we can turn
them on or off using the little
dot on the side. If I turn off the top layer, I can see everything that
is underneath it without the need to move
it or delete it, which is really convenient. Let's turn it back on.
There are a number of options along the
top of this studio. Most of these we don't
need for this class, but I wanted to
point out a few of them that will
likely be relevant. First up is the folder's icon. This is used to group
multiple layers together. You just select multiple
layers by swiping over the top of them and then you can press the folder icon to group them. This is really helpful for
organizational purposes because it can keep
things that should be together together and stop
you from losing them. If you ever want
to ungroup layers, just make sure that you
have it selected and go ahead and tap the
Group icon again. Next up, we want to talk about the three dots or
meatball menu here. Let's be just be
selected on one photo and then let's hit
that three dot menu. This is going to take
us to an area with a lot of different details. But the important ones are the visible lock
and solo options. Visible acts just like that little.in the first
part of the studio did, which means it will
turn it on and off the lock button makes it so
you can't edit that layer. This is great if you
want to make sure that layer will never get moved
or changed accidentally. Lastly, we have the Solo
button which will turn off all the other layers and just let us see this
layer on its own. Let me zoom out here a little bit so you
can see this better. You can see when I solo
this one disappears. You might want to see it from the other perspective as well. Let's go to the van on the
beach and let's click solo. And we just see that this
is great when you have a lot of layers and you want to be able to work on
just one of them. Come in and solo it. And that will make it a lot simpler to work on
just that layer. The only other thing that I
want you to worry about in this panel is if you tap on the name of the
layer at the top, you can go ahead and rename it. So I could call this one
van beach and click Okay, That's just going to
make it easier for me to identify it in a
long list of layers. Okay, let's back out of here by tapping the layer options and now we're back to the
regular layers studio. Lastly, if you ever
need to delete a layer, you just make sure
you tap on the layer and then hit the delete button. Now I don't actually
want to delete that, so I'm going to use the
two finger tap to undo it. And that is your
introduction to layers. Again, it can seem
simple right now, but make sure you have
a good grasp of it because it's foundational
to what comes after. In the next video, we're going to talk
about a special kind of layer called an
adjustment layer.
7. Adjustment Layers: Now that we know
what layers are, we're ready to learn about a special kind of layer
called adjustment layers. Previously, we've only had
imaged layers on our document. We have two pictures of vans, but if we want to change
the way these photos look, we're going to need to
add adjustment layers. This is where we start
to edit our photos. We add adjustment layers from, you guessed it, the
adjustment studio. This is the fourth
one down and it looks almost like eight
Yin and Yang symbol. If you scroll on this list, you will see that there are
lots of different types, adjustment layers,
basically anything you might think about doing
in your normal photo app. And then sub, we're
going to start with a basic one that you will
probably end up using a lot. And that is the brightness
and contrast option. Tap it and we will get a brightness and
contrast layer applied. We can see this if we go back to our layer
studio and we can see brightness contrast
adjustment layer on top. You can also see that we
now have a set of controls down in the bottom right-hand
corner of our screen. Different adjustment layers
will have different controls. In this case, we have
a brightness wheel, it contrast wheel, and an opacity we'll dragging bright on
an adjustment wheel will increase that attribute and dragging left will
decrease that attribute. If you ever wanna make
fine tuned adjustments, you can always just tap on the wheel to get the calculator. In this case, I'll just
reset it to zero and I'll reset the contrast
is zero as well. So you can see how
you can make a lot of different adjustments using
these types of things. Let's take a look at one more of these after we adjusted our
brightness and contrast, Let's say that we also wanted to adjust our color
mix a little bit. So we'll come down
here and we'll come to our color balance. Now, Color Balance is
a bit complicated, but I just want to show
you a little bit here. I can add in more red, I can add in more magenta, add in more yellow or blue. I can just adjust the
mix of colors here. This is an adjustment layer. And the reason I wanted to show you that is so that you can see when we go to
our Layers panel, we now have two
adjustment layers stacked on top of each other. Just like before we had to photo layer stacked
on top of each other. And these can be
turned off and on, just like other kinds of layers. And the way that they interact
depends on how they stack. Now you might be wondering, after I've added a
new adjustment layer, can I get back to the last adjustment layer and
still adjust it? Say can I adjust
the brightness and contrast yes, from
the layers panel, just tap on the icon
for that layer and you will bring those
controls back up again. So there's lots that you can
do with adjustment layers. I encourage you to play around with some of them,
see what they do. And remember that
in these videos, I will often show you
an extreme so that it's easy to see on screen when you are actually editing
your photos. Subtlety is the
name of the game. Now one thing that you might
notice is that these adjusts the entire canvas and
you might want to adjust just one image or
just part of an image. So in the next video, we're
going to learn how to do that by using selections.
8. Selections: Now that we know about
the Layers panel and how to use adjustment
layers to edit photos. It's time to learn how to edit
specific parts of photos. It ain't just a part
of a photo involves the next core concept
which is selections. Now because we want to add it
just a portion of a photo. You can see that I've turned off those two adjustment layers
that we started out with, the color balance adjustment and the brightness
contrast adjustment. So we're going go ahead and try and make a selection here, all of the selection
tools are found partway down the toolbar. There is firstly,
smart selection brush, the Flood selection tool, and the rectangle marquee tool. If we hold down on the
Rectangle Marquee will find a few other
selection tools as well. All of these tools
can be used to select individual parts
of an image or layer. But for our purposes, we're going to focus on using the smart selection brush
because it is the most useful. The other tools make selections
based on shape or color. The smart selection brush
instead tries to make smart selections based
on the image itself. For this reason, it's
the most useful brush when it comes to selecting specific objects or
even people in a photo. So I'm going to go
ahead and try and select the van in
the beach photo. So I'm going to drag that up in our layers panel to the top. Remember, that's how you can rearrange and then
makes sure that I'm selected on the layer so that this tool will sample
from this layer. When I take my
brush over the van, you can see that it
starts to select whenever you see
these marching ants going around something
that shows you the area that is selected. So let's just try
and brush onto here. Now you can see that this
is not exactly perfect. So we're going to need to add a little bit just
bumper down here. And we're also going
to need to erase parts that we don't want to erase. We just need to
hold down Option on our keyboard or on
our control wheel. And you can see that it will erase different
parts from there. Now one thing to note is that on the left-hand side there's a little slider that
appears and this determines the
size of the brush. So the smaller the brush, the more particular
it's going to be about what it is selecting. So I'm going to go ahead
and make that a little smaller hold down Option. And coming here,
try and de-select. Select little bit here. Places where there's
less contrast or less distinct lines are
harder for it to select. So you can see where the yellow is blending in with
the background here. That's where it's getting
a little bit tricky. So let's just go ahead
and make it smaller. You can see the
size of the brush there in the middle
of the screen. There we go. That gives us a better one and we
want to add here, and let's make
sure we get these. So making a good selection
can take quite awhile. So you need to decide how
precise you want to be based on your use case for something like a
YouTube thumbnail. You want your
selections to be good, but you do not need
to spend a lot of time making them
absolutely perfect. Thumbnails are generally viewed
a pretty small sizes and so tiny details don't
show up most of the time. So I think this is good enough for our purposes right now. I wouldn't want to spend
an extraordinary amount of time on this
particular selection. But there's a few more
things that I want to tell you about selections, particularly using the
selection menu up at the top that we mentioned earlier when we looked
at the interface. There's a lot of options here, and I don't want you
to feel overwhelmed by them or feel like you need
to know what they all do. They're not all important
to us right now, but there are a
few of them that I want you to understand. One of the important
ones is how to get rid of a selection after
you've started it. Because you can only work within that selection
once you've made it. You will often,
once you're done, need to de-select it. So there's a de-select
button right here. So you can just go ahead and hit de-select, then it
will disappear. Now, if you did
that by accident, you can bring it
back by going to the selection menu and
choosing, re-select. It will bring back
your last selection, which is really useful in case you de-selected
accidentally. Another one you want to know is the invert selection option. Sometimes it's easier to make a selection of the thing that
you don't want to change rather than the thing that
you do just because of the contrast between it and maybe the background
or something else. So in that case, you want to know how to
invert the selection. If you come to invert selection, you can see that we
now have marching ants going around the
edge of the border. You can just barely
see them there. It still looks like
our van is selected, but that is actually
the area that is not selected and everything
else is selected. So that's how you
invert the selection. Let's go ahead and
invert it back. You can see those marching
ants go away from the border of the canvas and we just
have the van selected. Now once we've made
this selection now it's time to go ahead and apply
our adjustment layer. We want to do this by going
back to our adjustments. And then let's just say that we wanted to make this
van black and white. We'll go ahead and we'll tap
the black and white layer. And you can see that it has
applied only to the van, not to the entire image, and not to the entire canvas. Now within the black and
white adjustment layer, we can make further adjustments. This van is yellow,
so I'm just going to adjust the yellow one here. And you can see I can change
how black and white it is. That's how you can apply the adjustment just
to a specific thing. So if you had an area
that needed to have its brightness and contrast
controlled separately, or you needed to just mess with the color and in
particular area. That's how you would use
selections to do that. Well, we haven't
learned yet is how we could get rid of all the rest of this image in case
we wanted to bring this van into another picture. So that is where our next video
about masks will come in.
9. Masks: With our understanding
of layers, adjustments and selections, we are now ready to move on to our last key concept,
which is masks. Masks are a way of
hiding part of a layer. And if any photo just like
a mask you would wear, would cover part of your face. Masks are added two layers. To add a mask to a layer, we need to be in
the layer studio. Then we're going to go
to the plus icon and we're going to
choose mask layer. Don't worry about
the other types of mask layers for this class, we just need the basic one. Right now our mask
is completely white, which means the entire
layer is showing. If we want to work
on our mask first, we need to select it by making
sure it is highlighted. If your layer is highlighted, you'll work on your layer. But if your mask is
only highlighted, then you will be
working on your mask. This can sometimes
be made easier by opening up the layer
group by clicking the little chevron on
the left and seeing that the mask is highlighted
either way will work, but sometimes this
way it's a little bit easier to see what's going on. Then all we need to do is
switch to our paintbrush tool, which is a little
over halfway down on the toolbar with our
paintbrush selected, we want to go to our color
studio and make sure that our first color
drop is set to black. With that set to black, we can now paint on our mask, make sure that we're on the
mask and now we can paint. When we do that, you can see that
wherever we paint black, this layer will disappear. Now if we want to
bring back part of it, we just need to make it white again by switching
to the white color. And then going back just like
our quick selection brush, we can control the
size of our brush here with the
slider on the left. And we can just
paint that back in. When we look at our layer, you can see that
it is all white. Now, the important
thing to remember is that wherever
the mask is white, you will be able
to see the layer. Wherever the mask is black, you will not be able to see the layer that the mask is on, which consequently means that layer is underneath
will show through. This can be a little confusing, but it's very important
to get because this is a very powerful tool. Use when you're doing
photo compositing. Now, if you've been
paying close attention, you might notice that
we've done a mask before. The black and white
adjustment layer that we used on the van has a mask on it. We can see that if we
come here, click on it, and then we go
ahead and solo it. You can see that this mask is white where the vanishes,
which means that, that black and white
adjustment layer is showing through its
black everywhere else, which means the black and
white adjustment layer is being hidden, which is why we have color. Let's un-solo that so
that we can see it again. And that is how masks work. So being able to use a selection and your mask
together can be really helpful. Let's go ahead and delete this mask that we put
on the van beach photo. And then let's reapply
our selection by going up to our selection
space reselect. And now let's apply a
mask to just this layer. We're not going to apply an
adjustment layer with a mask. We're just going to apply
it to this layer when we do that click mask
layer and that will automatically turn
everything that was selected white on the mask and everything that was
not selected black. So you can see
that we've now hit in the rest of the layer. Now we call this
non-destructive editing because nothing from that layer
is actually gone. If I turn the mask off, you can see that
it all comes back. So this is how you might
get rid of something in a photo without actually
getting rid of it just in case you needed
to bring it back. And of course, these can be turned off separately as well. So if we want to
bring the color back, we just turn off our black
and white adjustment layer and we have a yellow van again, we turn back on, it's
black and white. We can of course, always
come in and paint over particular parts to hide
them or not hide them. So say I wanted to get rid of the windows so that it looked like the windows
were going through. I can grab my paintbrush. I'm going to scale
that down a long ways. Make sure that I have my
black color selected. And now I can go in
here and I can erase. I'll need to be a
little bit bigger. You can see that on the mask. If I go ahead and solo it again, you'll see those areas that
I have removed master, really important concept to get. And so it'd be good to take some time to just
practice with them. Practice making them
from selections, practice using brushes
to paint on masks. Make sure that you paint on the mask and not on
the layer itself. Because if you paint
on the layer itself, you'll just paint
black onto that layer, which is not what
you would want. And it's very important
to realize that mass can be applied to
any kind of layer, just like we've done here
with the black and white we've applied to choose
part of it by using a mask. They can be applied
to image layers, adjustment layers as well as layers that
we're going to talk about in the next couple of
videos like shapes and text.
10. Shapes: Now that we know
the key concepts of working with images
and if e1 photo, it is time to move
on to other types of objects we will need in order to complete projects
like thumbnails. In this video, we're going
to talk about shapes. The shape tools are found almost at the bottom of the toolbar. Most of the time, it looks like a square. But if you tap on
it a second time, you will find that
there are all kinds of different shapes
available from basic shapes like
circles and triangles to more complex shapes
like cogs and clouds. For our purposes,
we're only going to need the basic simple shapes. We can use the rectangle to make a background or
border for our image, we want to draw a shape. You just select the one
you want from the toolbar. I'm going to choose
the rounded rectangle and then go ahead
and drag it out. You can see that it
uses the color that's selected in the color panel
to draw out the shape. As you can see when you
finished drying your shape, you can then adjust it using the handles on the bounding box. You can adjust both proportions
using the corners or you can adjust just a single
proportion using the sites. You might notice that there's another handle that is
orange off in the corner. Orange handles indicate
a special attribute about a shape that
can be adjusted. So in this case, because
this is a rounded rectangle, we can affect the
roundness of the corners. We can go all the way
out, perfectly sharp. We can come all the
way in to perfectly rounded or anywhere in-between. Some shapes will have multiple
orange handles because they will have multiple
properties that can be adjusted. If we want to change the color
with the shapes selected, we can go to the color
panel and we can select a different color from the color wheel or
from the swatches. One of the things that shapes
are particularly useful for when making thumbnails
is backgrounds. So let's go ahead and
let's drag this rectangle back behind all of our layers. And now we can go
ahead and we can just take it out to the edges. Now you'll notice that
it's not snapping and that's because snapping
is not currently turned on. So let's turn on snapping, which is very useful when
working with shapes. And let's go ahead and snap
this bounding box into place. Then to make sure we can see it, Let's go ahead and take our rounded corners all
the way to the edge. Now, you might notice
that something funny is happening here with these
gray border around it. That appears to be
where our mask or a black and white
adjustment layer is interacting incorrectly
with our shape. In order to fix that, all we need to do is go
ahead and clip this. In order to clip it, we just grab that
layer and drag it onto the thumbnail of the
layer we want to clip it to. And now we don't
have that anymore. If we want to see
what's going on there, we can go ahead and
solo this layer. And we can see that when
I moved to the van, it opened up a white
part of the layer there. We could go ahead and
paint that black, but it's going to be easier
to just clip that layer in. When you clip a layer,
it can only show through in the layer
that is clipped to. Alright, let's go ahead
and un-solo that. That's how you can
work with shapes as you're going along
in Affinity Photo. Now one thing that I would
like to note is just how you can adjust the shapes
with your move tool. So let's go ahead and
get another shape. This time, let's
use the triangle. I'm just going to
drag one out here. And let's change
its color to red. We can use our attribute handle to make this
a right triangle, and I just want to
put it in the corner. So using the Move tool, I can move this shape around. I can also use the handle
at the top to rotate it. If I hold Shift, then
I'll be able to get it in correct increments. And then I could just move
that into the corner, let it snap into place there. And that's how we
move them around. If I want it to be smaller, I can just adjust it a
little bit holding down Shift to keep it
incorrect proportions. And that's how you
work with shapes. In the next video, we're
going to go ahead and talk about another non photo element, the element of text.
11. Text: The last non photo
element that we're going to talk about
is called text. Text is a really important
element of thumbnails, especially because it can
help to draw a viewer in. But it is also very
important to not try and do too much with texts. You want to limit texts to just the essentials on
documents like this. Let's take a look at
how a text works. In Affinity Photo,
the text tools are found all the way down at
the bottom of the toolbar, just above the delete button, you'll see that this first one is called the
Artistic Text tool. But if we tap on it again, we will see that
there are two tools here aren't texts
and frame text. To understand the difference
between these two, it's easiest to just
see them in action. So first let's start
with the art Text tool. When we go to set up
the art Text tool, we will tap and drag like
we would with the shape. As we drag, we're going to see the size that we're
going to set it up. So however big we make it is how big our text is going to be. So then we're able to
go ahead and type out. Now you can see that my
text is currently black, so I'm going to go
ahead and set that to read just so that
it's easy to see. I can then type, I'm
going to use my keyboard. But if I didn't have a keyboard than the keyboard would appear, or I can make the
keyboard appeared by tapping the keyboard icon
in the bottom right, then I can get all
my keyboard tools. Just like with shapes, I can use my move tool
to move my text around. And because this is art text, I can also resize it freely. Now one thing that
you will note if I tap back in here so
that I can type more, is that no matter how
much I type here, It's never going to
move on to another line unless I make it by
hitting the Return key. That's because it is art texts. And that is in comparison
to the frame text tool, which we will look at now
with the frame text tool, when we click and drag out, instead of drawing
out a letter size, we drag out a frame size, which is how big our
textbox will be, not how big our texts will be. I'm going to go up and in
the context menu at the top, I'm going to actually
make this text bigger. Let's just go up
to like 48 here, just so that it's
easy for you to see. Let's change this color to blue. And you can see that when I approached the edge of the box, it will then move on to the
next line of its own accord. If I grab my Move tool
and I resize this, I'm only resizing the text box and where the line breaks are. I don't resize the text
itself for this reason, when you're doing headline texts like you are in a thumbnail, you almost always want to
be using the art Text tool, whereas the frame text
tool is much better for creating documents
like you might do in Affinity Publisher. That's a much better
program for that. Now of course, once
you have any of these texts tools
down on screen, you can click on them and then double-click on them to edit the text and you get all of the regular thing
we saw size before. Well, there's also
justification, decoration. All of those
different texts tools that you might need
will appear in that bar if there's ever
a text tool that you find you need but you
don't find it there. It's going to appear
in the text studio on the right-hand side, this is where you can
see all of those again and get even more options. So now that we know the core concepts of
photo compositing, as well as the shapes and texts. We're ready to start
on our project. In the next video, we'll
talk about sketching our thumbnail before
we start designing it.
12. Sketching: One of the most
important processes in any design work is sketching. You always want to sketch
out your ideas before you start to make
them in the program. So we're here in an app
called concepts right now, so that we can go ahead and sketch out our thumbnail ideas. Now normally I would
suggest that you sketch on paper with pencils, but it can be a little hard
for you to see me do that. And so right now I'm going to
use the concepts so that it can screencast this and you
can see what I'm doing. Now. You want to know what you're
making your thumbnail for. In my case, I'm going to just pretend that I'm having
imaginary video. That's a review of
fidget spinners. I'm going to pretend
that that's what I'm going to create something for. So I'm just going to draw out here just a rough
thumbnail shape. It doesn't really matter
how well you do this. You really can do
it very roughly with just simple shapes just to block out your
ideas and you don't want to use color or anything
like that at this point, I know that I'm going
to have a photo of a person who is very excited because that
works well on YouTube. And I'm just going
to sketch out what that person might look like and what spot they
might take up here. And then I'm going to want
to have the fidget spinner. And fidget spinners are normally something like three
circles together. Now I know that that's
not exactly what they look like, but
it doesn't matter. It gets the idea
across so that I know what I'm going to be doing here. And then I might want to put
some words down here that says Best Spinner or
something like that. It doesn't matter if the text
is exactly what you used, were just roughing it out here. So as I go, I'm going to try out
some different ideas. I might try to switch up
where I'm gonna put them. Bearing in mind where
things should go. It doesn't matter if you go
outside the box a little. You can always adjust that when you're actually doing yet. But I know that I don't want
my text down there because I remembered that that it's where the timestamp goes in
a YouTube thumbnail. So I'm gonna go ahead
and just try out a different one where maybe I don't have a person at all
and I have just some text. And you can see that
you can very quickly mock up a bunch of different
types of thumbnails. So we've got a couple
of ideas here. Now that we've sketched,
Let's go ahead. We will jump into Affinity Photo and we will start working
on the actual design.
13. Making the Thumbnail: Alright, now that
we've learned all of the key concepts and how to combine different
elements together, it's time to go
ahead and complete our project of making
the thumbnail. So I'm going to walk you through this parts
of this video. I will speed up as I go
ahead and just do the work. But I want you to be able to see the entire process
from beginning to end. And I want to be able
to remind you of all the things that we've
learned as we go through the process of creating an actual project
as opposed to just learning the skills and kind of a hodgepodge collage
like we did before. So let's go ahead and
start with a new document. We're just going to click on
New and then new document. We're going to make sure that
we're still on the WQ HD, which is the 2,560
by 1,440 pixels, because that is the
appropriate aspect ratio for a YouTube thumbnail. Let's go ahead and click okay, and we will get started here. Now it's important
to refer back to our sketches so that we
know what's going on. So I'm just going to
swipe over two concepts here so they can see
what I was creating. And I think I like the one
with an excited person. And then I want to make sure that we get it
in the right spot. We can always move
our concepts around, but I want to at least
get them in here. Let's go ahead, let's go
back to Affinity Photo. And I think we're going to
start by placing an image. And the image that
we're going place is going to be of the spinner because that is going to be the focal point of
this whole thing. So let's go ahead and go to the stock photo
library right here. And I'm just going to
search fidget spinner. When we do that, we're going to get a bunch of different ones. Now, I'm going to select
for this project, one that I think will be
really easy to cut out, one that should
be simple to make a selection and then
make a mask on. So I'm going to go ahead
and choose this one. I'm just drawing, drag
it out onto the screen. Now, it's going to
take a second because that's again a high
resolution image. So I can grab my move tool
and I can scale it down. And then I want to
also do this search in Pixabay just to see if there's something that I
would like better. So I just switched to Pixabay
here and I'm just looking to see if there's
anything good here. Let's see this blue one. Be easy to pull out. So I'm going to go
ahead and drag that down, make sure that you click. I understand if you haven't done that for that service yet, I can just choose which one
of these I want to use, or I could end up
using both of them. So this is a very large image, so let's go ahead and
scale it down here. The background on this one
might be a little bit more difficult to get rid of than the background on the other one. Just because, as
you can see here, this one is much more plain and this one
is much more busy. So it might be a little
bit more difficult, but I think both of
them should be fine. I now want to bring in
and excited person. So let's go back here. I can take a picture of myself, but for the sake of this class, I'm just going to go
ahead and just search. Excited here. Let's go
ahead and try pixels. Alright, this guy
looks very excited, so I'm gonna go ahead
and pull him in. And that is very large. So let's go ahead
and scale him down. Now the next thing
that I want to do is go ahead and mask these things out so that the
backgrounds are gone and I can see how I want to
arrange them on the page. So let's just start
with this guy. We might have a little
bit of trouble here with his hair because
it's kind of curly. So this is more of a
difficult mass job than we've done except that the background
is pretty plain here, whereas with the vamps, the background was a
lot more complicated. So we'll just have
to see how it goes. So check our brush size here. I want it to be fairly big. It should be easy enough to
get his bottom half here. And then his head is
going to be the prom. I just hold down option
here to erase part of this. Make sure that we get it right. Scale our brush down to
make it more refined. Selection. If we can just get
it over to his arm. Now remember, these are
viewed at very small sizes, so we're not super concerned about getting this 100% perfect. If we miss some of his hair, that's not going to be
the end of the world, but we can try and
see if we can get it. Make sure we don't leave out any part of his face
or something. Okay. We can spend more
time doing that. But just for the
sake of showing you how this refinement brush works, I'm going click
on the refinement brush up here and we're going to refine over where his hair is. The refinement brushes useful
when it comes to hair, especially because it
will really go in and reevaluate that and see if what parts look
like the background, what parts look like
part of the object. So we're just trying to
get it to the point where most of that white is gone. There. You want to refine the edge
of his arm here slightly. That's looking
much better. Okay. So now that we have that all
set up and correct there, Let's go ahead and make
sure that we click the check mark to
accept that refinement. And then we'll go ahead
and mask it by going to our layers panel and
choosing mask layer. So now we can go ahead and deselect that and see
how it turned out. And I'd say that's pretty good. We did a pretty good
job on selecting that. Now, if we try and
move this right now, we're going to move the mask, which is not what we want
to do. So let's undo that. Let's make sure
that we click onto the layer itself and then
we can move that layer. For now I'm going to go ahead
and just hide this layer. So just turn off the little dots so that we can move on and work on the fidget spinners continuing with our
selection tool here, we're going to just go ahead. Select this. That's almost perfect. You can see it had a little bit of trouble
here in the middle, so we'll just run
back over that. Makes sure we have
all of the center selected and we'll go
ahead and mask it. No need to refine this one. It's got a clean edge. Let's go ahead and turn
that one off as well. And now we will go
ahead and select the yellow spinner and
select the Move tool because I want to make sure that I have the whole thing on
the screen because otherwise it won't mask
out all of the background. And then if we move
it around, we might have a problem later. Grab our selection brush
again and that's run over it. Now this one is
going to be slightly more tricky simply because those parts in the middle are going to be blue
and we don't want that. Now you can see
that the first one is already not selected. So it already didn't
go over that. But down here in the bottom too, you can actually see where it's actually
taking out the black. And we don't want to
take out the black. We want to select that, but we don't want to select
the blue in the middle. So we're going to have to scale our brush down a little bit. And then we'll go in
while holding down option and we'll try to get this
blue in the middle app. So the contrast was
still pretty high there, so it worked okay, but we need to
remember to do that. Otherwise, it would look
weird to have this blue showing through if we didn't
have a blue background. So let's go ahead
and make our mask and de-select to see how we did. Now let's turn on
our other objects and we can move them around. So let's select our
blue fidget spinner. And you can see what we've got a problem with here
is the centers. So we didn't think
about the centers on this one because
they were darker. They didn't stand out as much. But now we've got the
wood chips centers there and we need to
take care of that. So the way that we're going
to do that is to select the mask remembered that
white is where we will see. In black is where
we will not see. So we need to paint
black with our brush on the mask so that we
can get rid of that. So let's grab our brush, check our size here, and go in and we're
going to paint this out. Okay, so now if we
look at our mask, we can see we have three
black dots in the center where we have now masked
out that background. With all of these, we can go ahead and start
setting up our image. Now one thing that
we might want to do is change the color
of a fidget spinner. So let's say that I want this
background to be yellow, but I wanted to be able to
use this yellow spinner because it was easy to
cut out and convenient. So we're going to do that
with an adjustment layer. So let's go ahead and grab
our adjustment layer. And you can see that currently wants to apply it to everything. So we don't want that to happen. So there's two ways
we can do this. We can either make
a selection on this or we can go ahead and
clip the selection to it. I want to show you
one thing here. If I come to this mask, I go to selection and I
choose selection from layer, it's going to select
just that layer. Then that's an easy way
for me to make a selection without redoing all of the
selection work that I've done. So now let's go ahead and grab our adjustment layer and
we are going to choose. It's still showing that it's hitting everything,
but it won't. Once we actually make it, we're going to go
ahead and choose a color one to HSL here, with HSL selected, we're
going to change the hue. So if we want it
to be on yellow, we might want it to be orange. Now the way that this works
is I'm not dragging to orange because it's interacting with
the layer underneath it. To get this orange color, I have to drag into the blue. And that's just because it
was yellow to start out with. I can bump up the saturation. I can make it brighter or
darker, double-tap to reset. And now I have this
orange object instead. If I wanted to make
it yellow though, I would actually want
this to be purple. So I'm gonna go
ahead and make it purple and then I'll try and
making my background yellow, blue and the purple
would both show up nicely on a yellow background. So that's how we could use
an adjustment layer there. Let's go ahead and deselect that so that we can
continue to work. And we're going to
make our background by dragging out a shape, drag out a rectangle
shape behind, looks like snapping
is turned off, so let's turn that back on so
we can snap to our corners. And we'll make sure that we drag this layer all the
way to the bottom. The black is actually
not bad either. But let's go ahead and try
and change this to a yellow. So we'll drag our color
wheel around here. And you can see that something
very funny is happening. And that is because of
our HSL adjustment layer. Now, that's actually not the worst effect in
the whole world. But I want to show you
why that's happening. And that is because our mask, if we come down here and we click on our mask
and we solo it, we can see that the mask is
applying just to this layer. So it worked initially for
us to change that color, but there's still all
this white around here. We can either go in and
black that out or we can do what we talked about before
and we can just clip this. So let's go ahead and
clip this layer in. And now we have all yellow. So that might have been
a little confusing, but it's just the
way that that mask is interacting with that layer. Because we had masked
just that picture. But that picture when we
took up part of the layer, it only masked out part of it, which I know that can be
a little bit confusing, but as you play around
with it more and more, it will make more
and more sense. I'm going to hop out of
here just to make sure that it gets saved in the
memory before I switch apps. So I've hopped out
now I can go back in. That will just stop me from
having any problems later. I'm going to swipe back
over here to concepts. And I'm looking here
at what I've drawn. And I'm thinking about the place where I
want the text to be, and I really want the
text to be at the top. So that's what I'm going
to try and add here. So I just need to rearrange
this a little bit first. I'm going to go ahead and
select the excited person. And I'm going to
place him off in the corner here because if his arm gets covered
up by the time, that's not going to
be such a big deal. And then I'm going to move
blew down a little bit, and then I'm going to
move purple down as well. Maybe re-size purple,
slightly bluish needs to come down just a little
bit further so that we have room to put the text. Alright, so let's go
ahead and add our text. So I'm using the Artistic
Text tool because that makes a lot more sense
for what we're doing. Easy to resize. Know what I might wanna
do is size this up a little bit too far and then
move it behind his head. Because that can create a
three-dimensional field which is pretty useful. And then I obviously want
to make this stand out. So I might try using the same purple color as we
have on the fidget spinner. So let's come down here. I'm just using the
eyedropper tool from the color panel right here. So let's make sure that
we select the text here. And then we'll apply that and we'll see
how that stands out. The one thing that I might
wanna do is change the font. So let's go ahead
and click back in, select our text again, and then we'll try some
different font styles here. Quicksand is one
that I really like. There's also some larger, thicker, those often
stand out better. So let's try rough all caps. I think that one's pretty good. Now might not be one
that you have on yours depends on if
you've bought it or not, but you can try some
that are thicker, those tend to stand out better. Now, see that it's overlapping
with the blue one. So let's just move
this all the way to the bottom so that it's
behind everything else. And then let's
reposition it slightly. So a lot of this is just
positioning things here. Now the next thing that I
want to do is just check over the project details and make sure that
we've met them all. So we've got at least one photo? Yes. We have at least
one adjustment layer. Yes, we've put that onto
our purple guy here, use at least one mask
making a selection. We did that three times. Perfect. We have a text element and we have a shape element. So that's perfect.
This is a done deal. We have been able to
create a thumbnail and now all we need to
do is export it, which we will do
in the next video.
14. Exporting: All right, Now that we've finished designing
our thumbnail, it's time to export it. In real life, we would
be exporting this two that we were able to upload
it with our video to YouTube. In the case of this class, we're going to export
it so that we can upload it to the project
section for this course. Exploiting is fairly easy here. And if any photo, you
just have to go up to the document menu and then
you're going to choose Export. There are a bunch of
different options here. I don't want you to feel
overwhelmed by this. You don't have to
worry about all of these options and knowing
what they all mean right now, the most important thing
is what format we choose, which is the little
rectangles at the top. We want to make sure that
we're on JPEG because that's going to be the best
for uploading the project. The other thing
that we want to pay attention to is the file size, which is down at
the very bottom of the screen right above the
cancel and okay buttons. You can see that this
says it's 2.32 mb. We want that to be below 2 mb because that's what we would
need for a YouTube video. It has to be below 2 mb. So in order to adjust that, we just need to
adjust our quality. So this quality circle, which is towards the top
middle of the screen, we can just scrub that down just by clicking
and dragging on it. And we'll try going down to about 98% and see
what that does. And 98% we're at 1.33 mb
and so that's perfect. That's exactly what we want. If we want to see what our
thumbnail is going look like, we're going go ahead and hit the Preview button
in the bottom right, and you can see what your
thumbnails going to look like at full resolution.
This looks pretty good. Bear in mind that people on YouTube would never view
the thumbnail this large. They would always
see it much smaller. So the little jagged
edges that you see around the fidget spinners is not going to show up to them. This is at 100% and they
will never see it that big. So it's fine if we lose
a little quality there. Let's go ahead and hit Close. It's always important
to keep in mind what you are making something for. And in this case, it would
be to go onto YouTube. Now, we're gonna go
ahead and click Okay, so that we can export this. Now, this is going to pop
us into our file system. We're just going go
ahead and save this to our Affinity Photo folder. We can name it down
at the bottom. So I'm just going to call
this one fidget thumbnail. And then for some
reason this button is called move
instead of export, but it just says move up here. When you click that,
it's going to go ahead and actually export it. And now it's been export to whatever location that
you told it to go to. You can then take
that and then go ahead and upload
that to Skillshare. When you do that, make sure that you upload it to the main body of the Skillshare project and
not just the thumbnail area, even though this is a thumbnail, Skillshare's thumbnails are not size the same as
YouTube thumbnail, so I won't be able to see
the whole thing if you don't upload it into the
body section project. Now sometimes when you do that, it takes a minute
for Skillshare to upload it and you may think
that nothing is happening, just wait patiently and it
will eventually show up. So don't let that
discourage you. If you just wait patiently,
it'll show up and then I'll be able to
see what you made. Alright, now that
we've export our file, the last thing that we
need to do is wrap up this course and talk
about your next steps.
15. Next Steps: Thanks so much for
watching this course on Affinity Photo version
two on the iPad. I hope that you've learned
a lot of the ins and outs of using this
amazing program. Now that we're done,
you might be wondering what your next steps are. Well, I've got a
couple of suggestions. First of course, you should
submit your project. If you haven't
done that already, make sure you go to the
project section for this course and upload it. Then you might be wondering
what you should learn next. Well, if you purchased all of the affinity apps for your iPad, then you might want to
check out my intro courses for Affinity Publisher and
a fiend designer as well. You'll find those
really helpful as you get started on your design
journey with the iPad. Then if you're also interested in any videos on your iPad, you might want to
check out my course on Da Vinci Resolve for the iPad. This is a new program that is an amazing video editor that will be really
helpful to you if you want to be able
to create videos. As always, if you
have any questions, please go ahead and reach out to me in the discussion
tab for this course. I'm happy to do my
best to answer them. Thanks so much for
watching and I will see you in the next course.
 Ben Nielsen, Good design is the beginning of learning