Transcripts
1. Welcome to the course!: working today in scape course. Thank you so much for signing out on joining me in this course about escape on vector design. I would like to take some time to explain you. Other course is a structure. Um, would you get respect? This course is about escape and the basic tools journey to know to start designing in the escape. It's a hand on course with a lot of a sample. Some practice. First. I was so your heart and still in escape, we will see the most use tools and escape. I will briefly explain some. The same concepts that will help you to make better choices were in creating loose stations . Then we were practice creating sounds. Simple illustrations from Cereal on, I will introduce a few more tools that you can use an escape. Then we will create two more illustrations from scratch so you can practice all tools you learn during the course on at the end, I will show you how you can make money selling your hallucinations or lying in guest. That's something that you would like to consider doing. By the end of this course, you will be able to create your hallucinations, so that's the course I really excited that you're doing. Unless get this started
2. What is vector art and Installing Inkscape: Hi. Let's get started with illustration design. My name is Marta, and now we're happy to its toe in escape in your computer so you can start signing your own illustrations in this section. I will introduce you to the concept off back to right, which is world we will be doing in the scores also would in escapees, and then we will have stole AIM escape. So let's get started. Firstly, Wood is back to Robert EM backed Gerard. We use better illustration software programs to create clean images like the ones you can see here that scale indefinitely without loosen inequality with a means is that you can make your emit as biggest you like. On day meets will never become really to achieve days. These programs use mathematic equations on geometric primitives. In other words, basis apes like Boeing circles squares. So we talk about we're better artists, and now it's time to talk about the tool you can use to create bacteria. In this tutorial, we will learn AM Escape Escape is one of the professional backed a graphic. Editors in the market. There are all the editors, like out of illustrator CorelDraw on a few more escape is available for Mac and windows, and it's an open soul and it's completely free as a motivation. Bees here are son of illustrations you could make with escape with some word you could not save really good looking illustrations. Now that we know we're backed Erard, a name escape are we can start stolen aim, escape. First we need to open the official in skate website. Then we will go to downloads. Once you are there Selected platform you're using. In my case, that will be Mark and I quickly here to download the DNT Stoller. Then I will follow the link to download this a specific person. We tease the latest persons that offer the Indian Stoller. This will trigger the download once in still escape, you will need to follow these instructions to a stole esque worth which is a program that aim escape used to run once in escape is a store you can open if I click in the in escape icon. Well, this is still a mess cape. This will be the end of this section. We learn or vector art in escape are and we're still in escape. So we're ready to start the same in the next section, I will show you the main tools and am escape that we're gonna use to the sign or lows. See you in a bit.
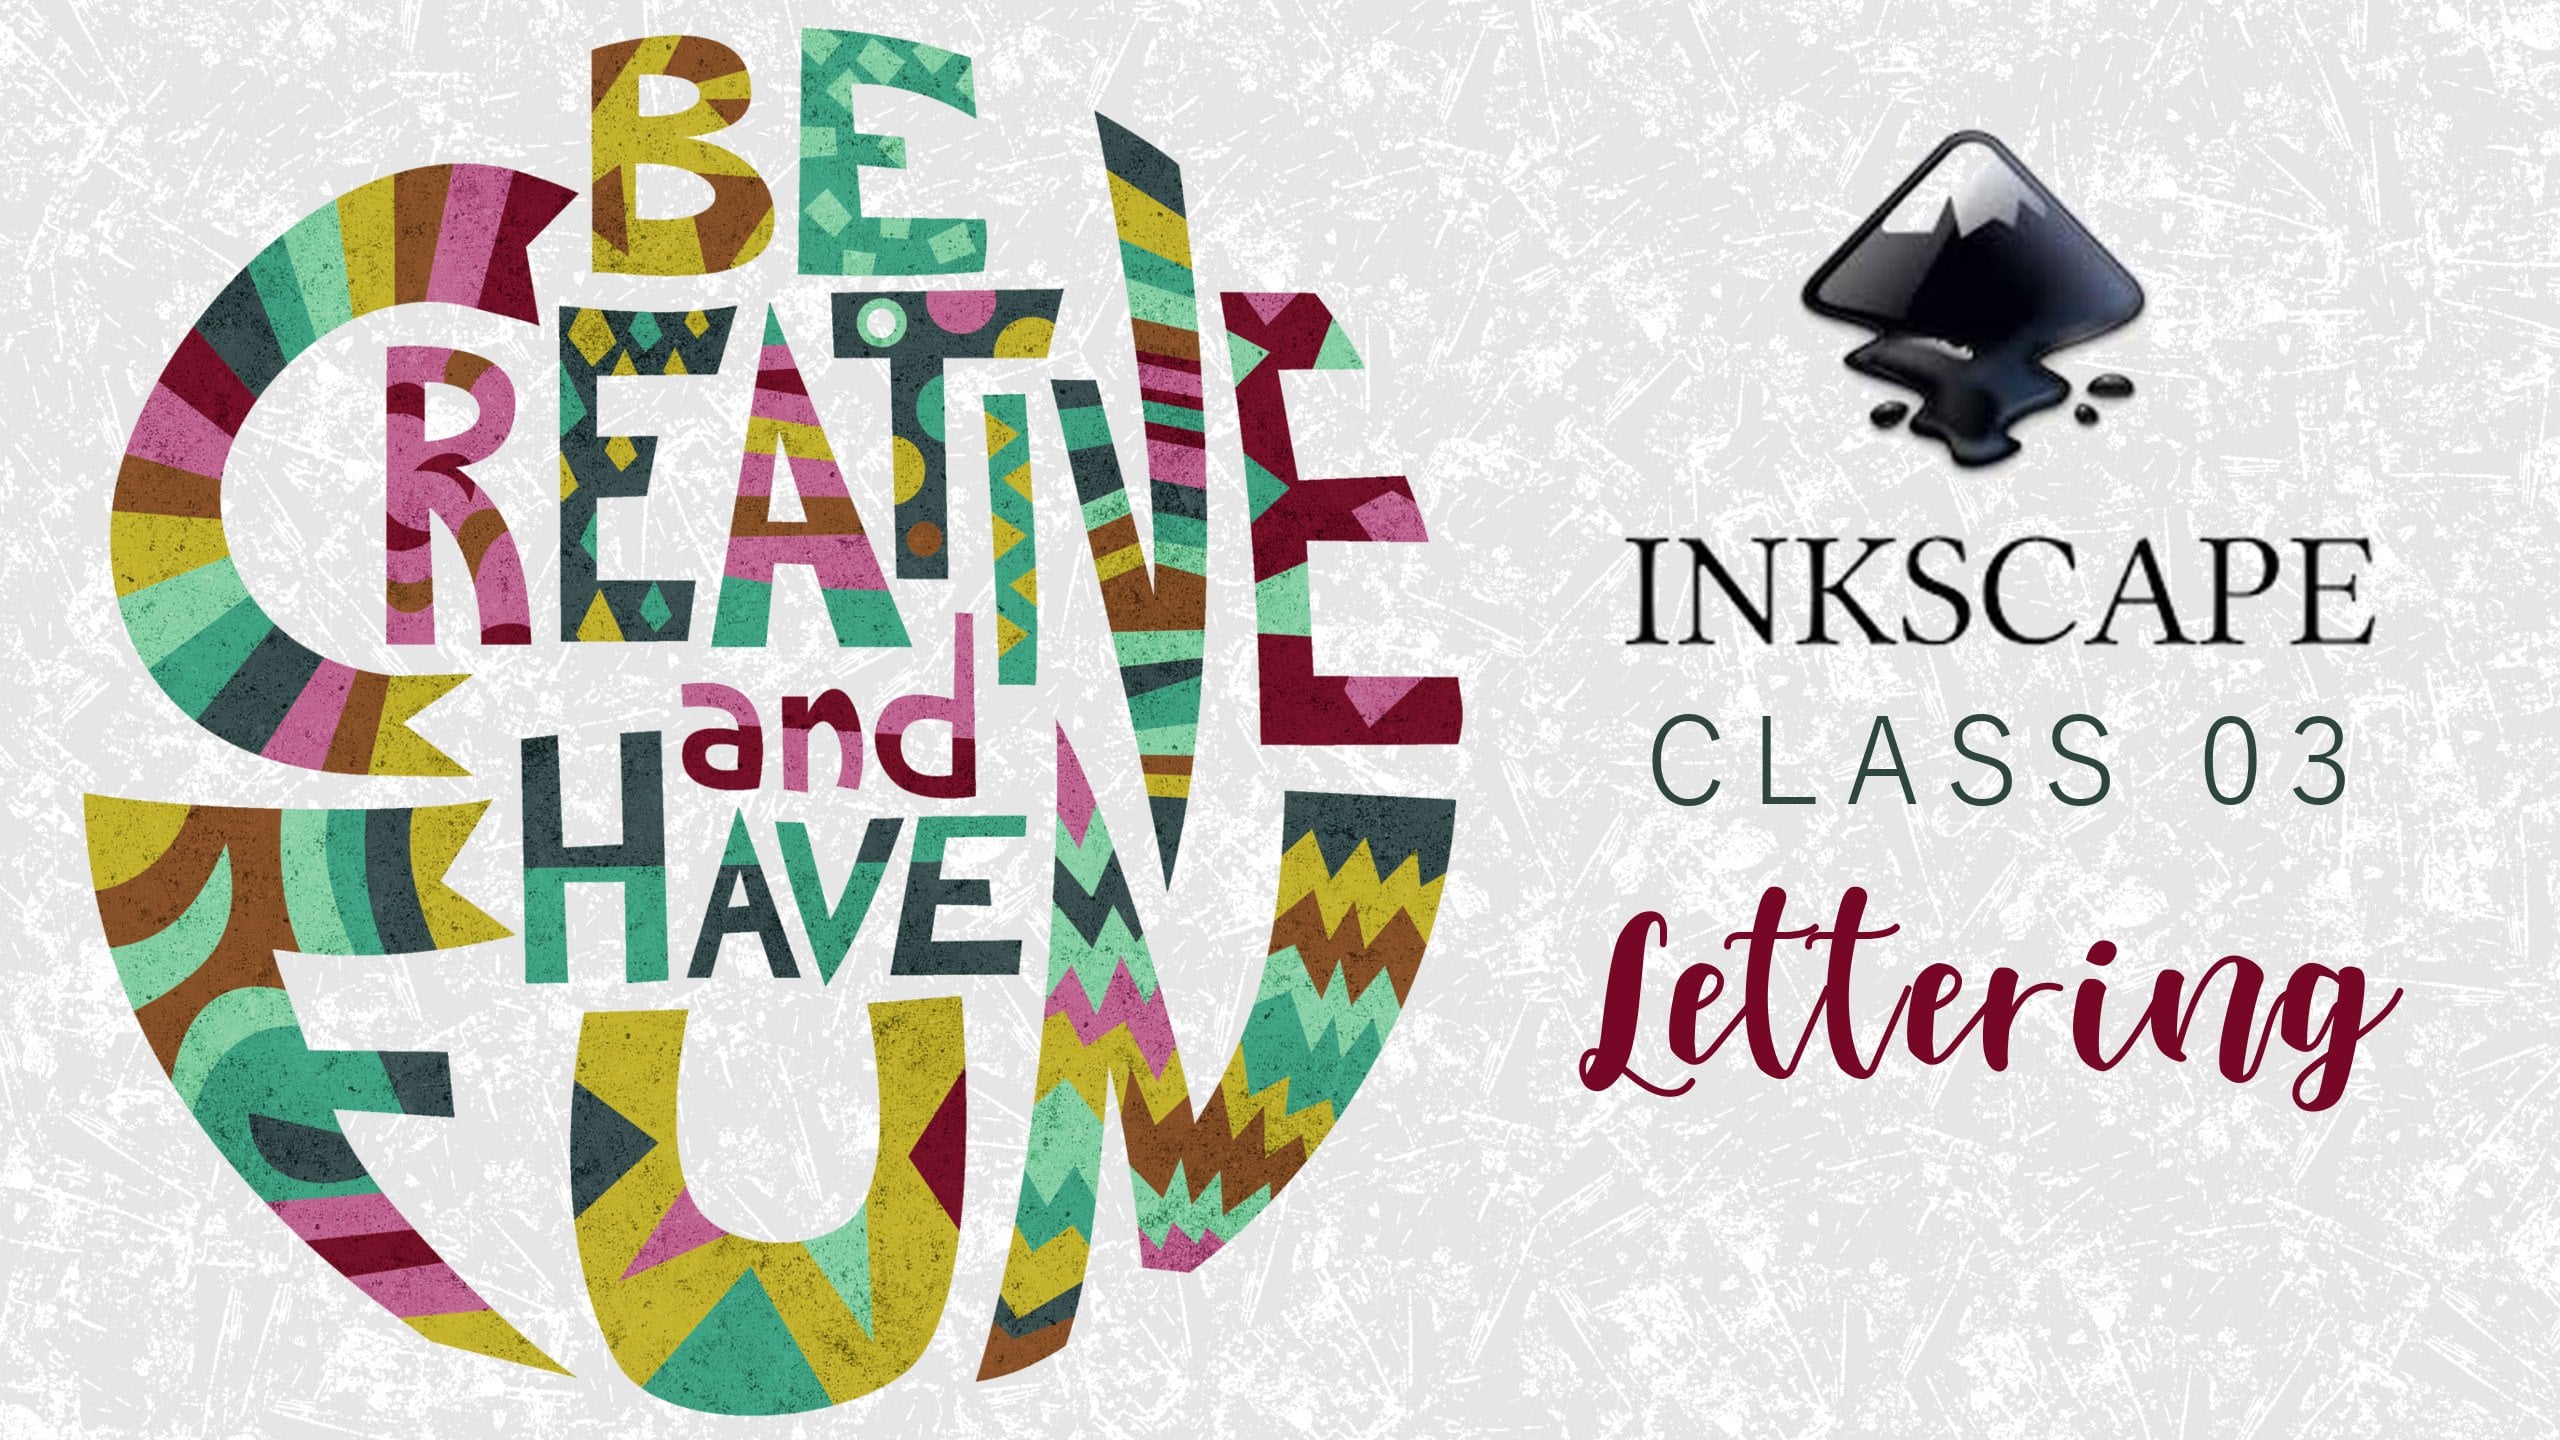
3. Introduction - Key Inkscape tools: Hey, there you are now in elector to off the course in escape Vitoria Design your own illustrations where I will show you son off the main tools in the in escape program. This lecture is divided into three smaller sections. First, I will show you how you contain the size of your document and create simple saves and saying their color In section number two, I will show you the main panels inning escape, which are the layer on the object panel wheat. We will be using their in the course A next, I will introduce you to a very useful tool. Go with sir cars which you can use to create any say be like So let's get started.
4. Change document size & simple shapes: hello there for sex in in Lecter number two, where we will see how you can modify your document size. I create some basic states. In this case, I will create the circle and saying this color Let's start by modifying the document size here is saying to face You can see when you open escape by the fourth in SK use based size a four in portrait orientation. Let's say, for instance, we want to take their orientation to landscape a mental wreck. Tango. It's a smaller do this. So we will go to, filed and then document properties in this window. I can select their invitation. I would change it to landscape now to modify our base size, I will go to the gas in size banner which is right here. First thing that we do is saying the unit two pixels. This because pixels is Caesar for me, however, you can leave it us millimeters if that makes sense, is it for you now, he said, I would like to make a rectangle a disorder. I can achieve this by reducing the wave off the document so I will make 100 pics of sorter as you can see as I change something. Our document is immediately updated. So we discovered how to modify our local in size. Now, I will talk a bit about how to create a simple shape in this case, a circle. But you can create any other shape, like start Square or any other to create a circle. We will click the circle, Eichel them press on drag. Um, we just create a circle in layer number one. If you elect it saying the color you will need to go to the feeling this rope banner on the right side. You can open this pan about, go into off debt and then select feel on a stroke. Here, the fearless, representing the color off the sape on the stroke, is representing the line off this shape. So to say, the color of the circle, I will go to the field top and then select flat color right here and then used the corner bar to say in the cooler. In this case, I will make it dark blue. And now I'm thinking I will like to make the line off the same visible. To achieve this, I will go to the stroke pain top. Then select flag color. Um, I will make are lying light view are lying is now visible, but it's too theme, so we can a seat. If you wanted Sanda, you can go to the stroke a style and then make the line a bit sicker. In this case, we continue to four or to eight. You can also change this style off. You're lying. So instead, off a continuous line, it could be darts. As you can see, that are many obsessions. You could also create the star and then saying the color off the start on saying the color off the lying on saying the style to a continuous line, for instance. So that would be the end of this sexy, um, week over how to detain orientation and size off our baits on how to create simple shapes, which would be very important and useful while the signing your illustrations. Next, I work over how to were with layers on opiates. See you in a bit
5. Understanding layers and objects in Inkscape: Heather second section in the electoral number two off the course escaped Vitoria, where I will show you how to work with layers and Soviets in an escape. How opiates are organizing layers. So let's a star with the layers. This is a circle from the previous section. First thing I will do is opening the layer panel to the soul hours click in layers in the top menu, and then I will select layers. Now the layer panel is visible on the right side. You can create a new layer by clicking the plus icon. I will quickly other rectangle to the layer. No, our new layer is. Suppose I have that below. Owing to the layer will also be a bles. You can move layers using the arrows. Now layer one. He's under layer to that. You can saying these and then the circle will be a bus on. Then you can move it back to the topic ing. You can also high layers by using the I can't ride next layer, and then the layer on all the opiates stop belong to the layer. Want to be display? We have seen how the layers panel works. Let's open. They are worthy opponent now to the so I will click in the opposite item and then I will select. Only it's then they're off. The panel will be visible on the right side. You can move this panel toe its own window by dragging the panel out. When you're the Senate. An illustration. You have many objects in the same document, so making this panel bigger is gonna be very useful. In this course, we discovered how to display their orbited panel. So we will see. Know how office organized in layers, every safe you grade is an opiate, and they were alone to a layer. For instance, you can see how the circle we create before it's an object that belongs to lay your one on the rectangle is an object that belongs to layer to If you like to move the square underneath the circle, you could do this by pushing down the layer juicing the IRA button. However, you can also do it by selecting your object on then and then moving it to another layer. Our saves are now in the same layer. If I want to move the rectangle underneath, I can do So just in the arrows you could also hide the up high in object by clicking the icon. That would be the end of the section week over how to work with layers. House saves our objects a name escape on. They are organizing layers. This is a really important tool on you will use it all the time. In this course, while you're the signing jury illustrations in the next section we will cover how to create Kasten saves using the this year course Si una beat.
6. Bezier Curve: Create any shape: hither ther section in collector number two off the course escape Vitoria, where I will show you how to create any save you, like using the Sir cars. It is a really useful to that is heavily used. When you are designing, lowers or any sort off bacteria on, I will show you how you can draw saves using images that didn't love from the Internet. So do they need to be an artist to draw some cooler stuff in escape? Let's get this started to create at a Serie of course. I need to use the ICA right here. I will click the icon, and then I will define the points off my Kurt just by clicking. So my points will be there. They're here, and then I will click on the first point to close the Sape. Now we need to sell a the edit pass cycle, which is the second icon in the menu right here. Do you can click on any line on, then drag to create the curve. You can also use the handles to modify your curve. As for any other Sape, do you can say in the cooler? I know so saying the line. I discover how to create a vizier core and now our great adversary core based on a Nimitz. In this example, I'm gonna draw son lives If you are not very good at throwing. Don't worry. You don't need to eat. I will throw the saves based on images. You can find a lot of inspiration on the Internet. You can go to Goa. An immediate are find sign. Nice pictures off san lips. I have big One image already. This one right here. Now I'm gonna impor this in a escape. To do that, I was clicking file and then import. Then dame, it's will be imported as enough debt. As you can see. Right there. Now I will recess. Theme. It's on sentry. Um place the leaves in the center off our document. To draw the sleeps, we will need two saves. One for the pink part on another one for the black Say boned up. So I will click the survey corps Aiken. And then I will define the curve points. If you like to be very precise, you can sue me and then you can see Be better. My points will be here. I will do this quickly. The first point will be here. Here on. Then I was closed the Sape. Then click the edit. Pass a muddy five, your curve. And now I will say the color on I will remove the line. Now we will create another Baseer curve for the black part. So I will click on the set. Of course, on defined my points. So we yes, dress our lives. Using that is Sarah. Occur on we use any meats to the final covers. So this is the end of the sexy. We cover how to work with the Sir curve, which is a really useful to I know solar how you can draw your saves using images. Now you know the main Tosi name escape. So in the next lecture, we gonna start designing our first illustration, see you name it.
7. Design Basics: Understanding Design Principles: Hi there. In this section, I will introduce you to the same principles. The reason why is that I found out the same principle is one of the most useful things you can learn. A good understanding will really make a difference in your designs. It's important to understand that a graphic designer is someone that not only know how to use a graphic tool like escape were makes. A designer good designer is knowing how to visually communicate a message view. Same visual elements like color lines forms when we create an illustration that are too mingles the illustration is trying to achieve. You're trying to tell the story or communicate a message so you want to make sure your messages as Claire s possible, and you also want to maximize him back. So you will ask yourself questions like Is my illustration eligible? Is a meaningful? Does a cat say I? So those are your mingles. So how can you activities or what was, Can you use to achieve these? That's a good question, and that's when the same principles become just full. An illustration you can find we have all or sandals fundamental design elements, which are lined shapes form, color tester, the space and value. You can just this element, along with the same principles, to help you make better decisions and achieve the facts you want. There are seven design principles that you can use to make your message clear. Made illustration more impactful. In this section, I will talk about seven design principles, and so you send examples. These principles will help you to create a focal point toe. Set the mood off a piece, Um, guide the beauty which ultimately will lead to mats more impactful the signs. So let's start with the first principle. Butter butter is known as a repetition off a specific Bissell element. Korea Sape, a form a line. It has to bring the son of consistency on course iveness on it. Increase the visual excitement by other in surfacing dressed, for example, I have this plane the same here, just a square with some letters and you can see how are they in san? Simple butter can made a piece more pleasant. A more interesting next principle is the Contras contrast refer to a bizarre difference in the properties off. Too obvious. You can create contrast using color tester saves forms lines. It can be used to create attention to sun object in your design or to communicate relationship between objects. Maybe you want to communicate the one upped. It is more important or unique to show you an example. I have this illustration here in this illustration. They are instantly go to the bigger heart as you scholar here to create a contrast and get of your attention Toe war. One of the hearts you could also use texture on communicate than two updates are different . You close to you, say Po, as a way to create contrast. Or you can use ice to create contrast. Some many communicate. The one element is more important than the others, so next principle will be emphasis. Emphasis is define as certain part off the artwork. Weeds dominates attention, and it's soft them the place where the bueller look first. Here there is an example in the civilization that, as some goes to a pinball, the emphasis is achieved by using color on also place in the beam board in the middle. You can also create emphasis by isolating one of yet these will guide the viewer attention to the isolated top. Yet I make you wonder what is different about this element, and you can also use size to create emphasis here, making one bore bigger than the others. Insulate, Get of your attention. The next principal lives. Balance balance. Refer to the distribution of beach await on both sides. Off the bees balance can create a sense of a stability. There are two type of balance, symmetrical and asymmetrical, which means that all the both sides are not identical. Basically, they're equally weighted here. There is an example off a symmetrical balance. Both sides are exactly thing. I here is an example office magica just the same number of elements, but I reorganized them, and still the piece looks balance. Next principle is proportion. Proportion refers to the relationship off two or more obvious, it's in a composition. Ah, hardly compared to one another. Usually in size, an artist can use proportion for effect. You can a SCIRI proportion to enhance meaning, or to point out the importance off one element in the base comfort to the others. Next principle is harmony. Harmony can be described as question off the blowing off, one up, dead with the rest off a piece. You can use any off the elements off art like color line saves to create harmony. For instance, in this illustration here I discolor two great harmony. I just the red color in different states. In the Hopis. This creates a sense that all elements are part of bees or, in other words, all elements belong to the same piece. In this other example, I just saying over saves on this made a piece look simple on create the police. In effect on next principle is movement. This principle issues to create impressing a faction in an illustration. Typically, it involves arranging elements in a way that lays the bureau. I from one point to another in this way you kept up your eye and gates in the piece. Do you can achieve movement by placing saves out of the frame boundaries or use in diagonal lines? In this example, I at the lines on the rocket with create a moving effect. I have another sample here itis lines to guide of your eye from the runner to the end of the past. We'd also create a sense of movement, so this will be the end of the sex a week over the same principles. We since an example of how to use them To put this into practice I really encourage you to look for image is for illustration you like on allies Were principal were use on what was the purpose in the nice section I will give you an introduction to color theory. See you in a bit.
8. Design Basics: Understanding Colour: color is a key element in the same sir colored. You can guide the viewer. I, too, was important and set the piece mood. Based on your message. You're the Sankoh communicates sadness, rascal urgency or any other motion. By choosing the right color in this section, I will give you a basic introduction toe color, Seri said. You can know how to go about just in color. I will start explaining the color wheel, then the different emotions. Different colors can evoke what value and saturation are unless the different color schemes . These concepts will be very handy when you're choosing the colors for your illustrations, and it will help you to communicate your message more effectively. Let's get started to understand. Color is good to start from the basics. In other words, the primary colors. The primary colors are blue, jello and red. Mixing those Jewell obtain the secondary colors, which are green, orange and purple. I'm mixing those Jewell attain that there's hair colors. All those form the color wheel. Each other's colors can evoke a different emotion. Usually Jello disassociated with cheerful attention, life nous and energetic. Then we have blue, which about tranquility, death, Horner dress productivity, and it's also known to the crease hepatitis. Next, we have red, which is you still associate it with bonus love life, and it can also be used to the note warning. Green is associated with snatcher safety optimism, growth, harmony wells lack, and it's also known as a stress relief. Next is Sauron's ordinances of Iran color that the notes new beginnings and to assess, um um creativity. Purple disassociated with royalty, nobility power on west. Next color. It's pink being disassociated with femininity, love, Romans and tenderness, and it can produce a calming effect. Next we will see the brown color. Brown is a color that notes stability and Sally foundations on its social associated with nature. Next, we have great great can be associate it with being conservative, traditional and serious and essentially a good base. Next color is black black can the note power and authority, sophistication and elegance, and it also provide the emotion off mystery. Last color hang in a mansion is quite the white color is often associated with purity, cleanliness and use. So we have seen a color wheel and a bit off the color psychology. Now let's talk about saturation and color saturation refers to the intensity or purity off color. When the saturation is really high, as you can see on the left, the color looks really bright when you reduce the saturation. Already saturated, the color started looking more great. Valley refers to the degree off lightness or darkness off a color. This means having white or black to color. High saturated or bright colors can be used to guide. The viewer attends him in the same. It's the viewer. I goes insulin to the high saturated, red in center Saturation can also be used to set the mood. Vibrant or pure colors are associated with lightness and cheerful mood. The saturated colors, like the great red years around the circle, can create the sense off low energy atmosphere. Now we understand the very sick concepts. How do we know what colors look good together tensely? There some formulas about this, also known as color harmonies or schemes. Color harmonies air basically sand rose to pick colors that go well together and create pleasing effect. Today, I not assimilating not a chaotic yes, right first color. Harmony is the monochromatic, skim monochromatic means that Jesus, different tones off the same color, for example, that is an example off a monochromatic image. In this same, it's the only color use was yellow on different tones off yellow. The next color harmony is the analogous. The analysis came. Say that colors that are next to each other in the color wheel work nicely together. In these emits, for instance, these three different blues create a sense off tranquility and harmony. We have seen moral chromatic and analyses. So next is that complementary scheme. Complimentary means colors that are opposite to each other in the color wheel. When you said this is came, one color is usually more dominant than the other one. In the same, it's you can see an example off the complimentary skin. The color. Use our light green as a dominant on the red weeds. Get a tense into the house in the middle. There is another color harmony, which is there. Try attic skim. The try Alex came, can be created by selecting three colors that are equally a space in the color wheel. Just in. The three pure colors can result in and where power in effect, usually one color is dominant over the other two, so you can dio is seducing intensity off Son of the colors. Tow. Avoid this overpower in effect. As an example, I would like to sell you the same. It's green, blue and pink ideas in the same, it's being green, the dominant color. As a side note, there are many online color pickers tools that you can use when you are creating a color scheme. For instance, you could use the other color picker, which is available in this website right here. This will help you to create colorist games. Plus, if you go to the Explorer on the trend tab, you will find a lot of images, which you can use house desperation. This will be the end of the lecture. We talk about the color wheel, the color psychology, saturation of value on the different color harmonies. These concepts are really good help when you are selecting the colors for your illustrations. So now seeing the next lecture
9. Introduction: Time to Practice!: working to another lecture off the escape course. In this section, I will create two illustrations running scratch a step by step using all the tools we learned previously. This lecture will be divided into sections in the first section. Our show you how to create the following simple illustration, and I will introduce two new toes guides on the clip to In the second section. I will show you how to create this logo, and I will give you some tips to get inspiration. When you're designing, let's get the study.
10. Practice: Your first illustration: working to another lecture off the escape course where we will see how to great this leaps illustration a step by step while and creating this illustration. I will show you how to your skates on a new tool called Clip. Let's get this started. I will create this illustration in three steps. First, drawing the lips use in the adversary curve weeds we have done in the previous section, then drawing the dots, juicing the guys to help me place the dots on, then merit in the leaves under doubts dosing the klepto. We'd rather lives already, so let's move on to a second step, which is other adults to know where to place it out. We will use Gheit's guides are lying that you can place on a document really helpful for lighting up elements. You can place a guide by clicking the ruler on, then dragging. We will use some vertical guides and son horizontal guides. No, we'll create a circle and place it where the two guys close. Next, I will duplicate the circle and place it again somewhere else. To duplicate it, we will, right click, then click duplicate and then using the select tool move it somewhere. It's as you can see we use create our dot pattern. However, there are many lives in the off the panel. We're going to group them so we can treat them all as one of you to do so. I will select all the idiots to group selecting the objects while holding the control key. Then right click and select group and we were named this group dots. We discovered how to create the live Sape. Ah Hajto creates the dots using IEDs. So now we were merged their two layers using the clip toe clipping off. This is basically saying than cropping. The opposite of balls will save the object that is underneath. In this case, I need clipping because adults are coming out of the lips. We need to correct that to do so. First, I will duplicate the leap off yet and place it Abu's the dots, then say, like the two opiates anklets setting birthday. As you can see now the dots are no coming out. Hi there. There soon be ducts inside the mouth. You can fix this by placing the black piece. Are both adults Great. We has created our first illustration less safe with us on SB defile That is the stance and that we use when we save back to write work. This is the end of the section we have seen How toe were with guides us in the clip to and we create our first illustration Really amazing work In an a section we will create another local on. I will give you a few tips to find inspiration. See you in a bit.
11. Where to find inspiration: in this sexual were good and create the logo for the brands that promote fitness. First, I will walk you through a professed you could follow to get inspiration When the sign in the local Let's get this started, I would like a local data percent fitness. I will star with some brainstorming this listens and words and images that come to mind when thinking about fitness. If nothing comes to mind this a researcher line to get inspiration, read San articles about the topic and see what concepts are important and seem to appear off them. When I think about fitness, the first Sim, it's I think, is a Bring Jessica's Ginny's so much willpower or ahead to represent determination or the gym or lifting do weights. I also think about running, so at this point I gather a few ideas, so I will do some sketches off the different wars and images. Here are the son of this gets is I come up with, as you can see journey to be an amazing artist to do these. If I don't know how to draw something, I will sex san images on Google images. Then I will start combining ideas ahead with a gene wait inside or a brain with aging weight in the middle or a brain that this running there's different layout as well. The ring could be resting on top of the Jewish play around, as matters you can on. Don't worry if son of the sketches look bad. What is important is making us many combinations as possible and experiment until you find a few nights. This gets is Don't worry, either. Sketches are looking to simple. While we're Sal, join an escape. You're gonna be surprise. He will look a lot better. And police. This process is really good exercise because they help you toe start thinking in a more creative way and also combining ideas. I will advise you to come up with a list down the sketches. So after some thinking, I am gonna choose the brain with the teen, wait inside Jessica's loose, simple unclean. Although I quite like the brain running a swell, the choice probably depend on what the logo is trying to. 3% ive. Jacqueline wants brand to look fun and playful. Then I will choose the brain running perfect. We covered the inspiration process. You can follow to come up with the signs and we also choose one of our sketches. Now we're ready to create our law. In the next section, I will show you how to use our skates and create a logo. Any escape Syrian of it?
12. Practice: Let's create a logo: Hi, everyone. In this section we will see how to create the face and slow. We will reduce their skates that were signed in the previous section. Juicing escape. I would be creating the logo in three steps. First, I will draw the bring the Sape on the lines. Yes, and the vest, Sir Corp on the pencil tool. Next I was wrong. The G weight that goes in the middle, this in the vizier curve to Alas, I will create the background for the logo. So let's a star with throw in the brain. First thing I will do is updated a document to make it square and so mean a bit. I will update the ways So its sequel to the height on then I will soon mean now how we place a guide horizontally in the middle off or documents which is right here. I found an image off a rain that I will import and use as a guide. And now we make this emits a smaller on center to bring in the middle of our document. Now I would use the serum occur to create the brain shape, so I will click on the research curve Aiken and then defying the points off the curve. - And I will choose the color off this shape, which is gonna be black. I need exactly the same sape on the other side. So I will duplicate this ape on, then flippy using the record right here, um, movie to the other side. Since these two saves are part of the brain, I'm gonna grouped in so I can move them both at the same time. So it's a bit more convenient, and I would reduce their capacity to see the name. It's that is under the I have yes, created the brain Sape. Now I'm going to draw the lines around the brain to the sell our only to use the pencil tool. The pencil is similar to the seer curve to in the unifying points on. Then you defined the line Justin headed path. The pencil is used to draw lines while the research occur is used force apes. I will click on the pencil like, um and then if I in several points and now I will click edit on a just the lines so they look as the brain lines. - We can select all the lines and then update the color on the style off the light. Now, this group, all the lines so we can work with them as if they were one single update. Now I will duplicate the object on their flip it. So we have the same sape on the other side with this finished throwing our brain. We drove the Sape and then we draw the lines. Now we're going to start drawing the gene. Wait four days, I will create a new layer. Ah, well, Dro, did you wait in the middle? Do seem the rectangle tool. Then I will convert this red tango to an update it so I can modify son of the lines. So we'll click bus Opiate to bus and then click the edit bus. I will do the same for this rectangle. Now scenes we need these safe. This is exactly the same on the other side. Our first group This two rectangles on. Then flip it. I'm moving to the other side Now we will move our Jeanne wait to the center of the brain. We just finished creating the Jenga. Wait! So now we need toe at the background to our logo we two week a new using their rectangle to to the self first, that we create any layer which our place at the bottom. Now we will select the color off our rectangle. You can made the corner off your rectangle ground if you click at the point that this place at the corner on Draghi del I know So we need to update the capacity 200. We just rode the bring Did you wait and also at the background? All we need to do now is placed the brain in the middle off the square. This will be the end of the sex and we create the fitness local Using their skates we created in the previous section we're creating the local. We introduced two new tools the pencil tool and also how to convert a note yet to a path in the next section I would repeat a similar process to create another longer to do with pets . See you in a bit
13. Bezier curves and pencil tool: in this section, we will talk about the pass. Parts are used to create custom shapes. I will explain what Issa bus, how you can create the past in in escape how you connected. Pass using the note tool. All these will make sense in a second. Let's get this started. What is a bus in escape allowed you to create basic saves like circles, squares, regular saves like starts. Um, you can also create arbitrary, say Bob gets weeds. You can create use in the past, and now how can you create a bassanio escape? There are two main tools you can use to create the bus Davis here, Ben on the benzoyl. Let's look at the serpent first, so you will need to click on the syrup in and then click anywhere to create the node and then click again to create another note and then click at the start to close the sape. You can also right click if you want to create an enclosed shape. To do so, you will need to right click. Once you place the last note of your shape, you can also use the pencil to to create the bus. The pencil tool is mostly used to create freehand rowing. You will click on the icon and then click and drag to draw the line. If you like to. Greatest Moussa lying You can achieve this by increasing this Muslim factor. Simplify or making a smoother line means that the path we have less notes. In both cases, you are creating a pass that you can modify later on. We have seen what is a path, how to create one, any escape. Next, I will show you how you can modify or edit the past using the note tool. Once you create a bath, you we have the notes and the segments that define your shape. You can ST any sermons using the No. Two tool. This is the icon off the no tool, so you just need to click on it and then select the safe that you would like to modify. Now you can see all the notes that form your shape. You can click on any off the lines on drag it to modify. You can also modify the lines using the handles. This is the end of the section. Now you know how to create any save you like next section. I will show you sanest Robson's that in SK provides to modify butts si una beat
14. Understanding the node tool: in this section, I will show you son of extra functionality that every pass provides. Edit path is a tool that you will use very often, so knowing their options available can be very handy. There are a few s options, like adding a note, removing an old married in two notes together s played one note into two notes connecting to notes with one segment removing a segment between notes. I know So tending the no type I will go through each of deceptions and so you how you can use them first as before, you will need to click on the every pass Aiken and then select the past that you would like to change. If you want to add a note, you first select the two notes while holding the safe key and then click on add node. You're not will appear between the two notes that you selected. If you like to remove a node, select the note that you want to remove and then click on the remove. No Dyker. If you like to merge two nodes, but you will select. The two knows that you want to merge together while holding the shift key and then click on Mert, and now you will have only one note. If you have two notes that are no connected, you can create the segment between those two notes to connect them as before you first select the notes that you would like to connect and then click on the icon on the segment will be added between the two notes, if you like to the opposite on Disconnect those two notes is quite similar. Select the two notes that you really like to this connect and then click on the disconnect I Go, then the segment between the two notes. With disappear, you cannot attain the no type. The no type will define how to segments are connected. There could be a smooth line, urine in segments or it could be a corner. There are four types of notes. The caps. No, this note looks like diamond and issues when you want to create a corner between two segments, the handles on both sides are independent in this case. Next, you have the smooth note. This note is represented with a square, and you can use it if you want the two segments to be connected by its most lying. Next, you have the same metric note, which is also represented by a square. At last, you have the oh, too smooth. This note is so so represented by circle. The handles are Jess automatically when you move the notes. And it's those who used to achieve its most lines. To use any of these notes, you first need to click on the note that you would like to convert and then select the no type you need. For instance, I have this a star here. I would like to tain son of the corners to be a smooth curves instead. So I was like, first that every pass, then select my Sape and then click on the note that I would like to convert. And now I will click on this moose node on. There you go. Now I have on this most car instead. This will be the end of the section. Now you know how you can verify a pass in any way you like, have in over moving notes, creating corners, making a corner smooth or disconnected nodes. See you in a bit
15. Introduction: More Practice: working to another lecture off the escape course in this lecture, where we create two illustrations from the scratches step by step, using all the tools we learn in the previous lectures, you will see a few more examples that we're happy to be sure that you understand the tools we learned so far. This lecture will be divided into three sections in the 1st 1 hour. Create this illustration related to the bed knees After I will show you how to use to new tools. Grady in some filters on in the Sara Wanna We show you how to create administration to do with gaming? Let's get started.
16. Practice: Create an illustration from zero: first sex an elector number four where we will see how to create a logo for bed run from scratch. I will be creating the logo juicy mainly basis apes like rectangles, circles that I will emerge use in the past union Also I will use the this year occurred. I will be creating the body off the animal first than the ears eyes a most next, the legs and lastly details. Let's get started. I will create this logo. You seen mostly basic saves Wheats. I were combined to create more complex apes to so how using simple saves can give a really clean look to your design. First, I will import a Nimitz with the colors. I will be used him with our place on the side to create the body. I will use a circle for the head and then a triangle for the core. - I would like the corners to be round So I will come. Bert, They hoped that to pass so I can at some points to adjust the pass. Well, doing this, make sure the shape is symmetric. This is important if you like to achieve pleasing to the eye results the way I had saved days is adding a guide in the center and sec to say Messer the same on both sides. You can use a rectangle as a ruler to do this. - And now I were murdered. Both saves yes. In the past, the union. Since the cat body is a secular missing, I will duplicate this shape. And yes, make it a bit of smaller. Now I will create the ice. Yes, in circles, making sure I place the opiates symmetric to center. Next, I will create the dark mouth using circles as well. Now I will create the cat mouse use in a triangle that I were compared to pass so I can adjust the pass. - Next , I will draw the years. I will star with the dog years. I will create the years years in circle, then rectangle that I were compared to past to a guest. And then we're Mert both saves. - No , I will duplicate the year and place it on the other side. Next are the cat ears. Are we just triangle for the ears and I were murdered to the rest of the body. - Amazing . We create the dog and the cat using basics. Apes next hour create the legs at the front using rectangles. Um, the surf occurs combined. Now I will create the daily using their circles as the last detail. I will add a rectangle as the background off our logo. Perfect. This will be the end of the section we create a local for Appel Brown. Just him previously learned tools, So you get some more practice in the next section, I will introduce you to two new tools. Radiant on filters, seeing a bit.
17. Gradients and Filters: Hey there. So far, we've seen the main tools in name escape and create a few locals to practice in this section of the course. I will introduce two new tools grading some filters great, and some filters help you to create a new dimension to your designs on. Now that that's off realism, let's start with radiance. Grady in Issa, bland off two colors on a usually are death on a new dimension to your design. Let's see how you can use them. First, I will create a circle shape on the square. Now I will click on the Great Inacom and select the radio Grady Um, and then click on the shape on drag. Now the color off our sape is gradually changing from purple to transparent. Instead of transparent, you could use another color. To do so, click on ingredient node and then select. The color you would like to use are grating. Here has two colors, but ducal include more colors. By anymore, Grady notes, You can achieve that by clicking on the square note and then click on the at No taken. The other Grady in available is the linear Grady, Um, to use it select the linear radiant on as before clicking the sape on drag. Now that we know how to use Grady INTs, how are they useful for us? You can use them to create sad owes another Soto add volume to your designs. Let's create the saddle effect. So if we have a circle like the one you can see there, you can create a great circle and then at radiant to make the saddle effect. To create the valiant effect, you can use a Grady, um, with multiple colors. In this case, I will use four different colors all the same time, going from lighter to darker color. We discover Grady INTs what they're on, how to use them, and we seen San examples. Now we will talk about filters. ASG Radiance Filters will happy to add more realism to your designs. Filters are effects that you can apply to a safe or an object like lightening effect or adding annoy will paint in effect, um, anymore. To apply filter first, you need to select an object, then click on filter and then select the filter tell you would like to use now just to illustrate this every better. I will apply a filter in a bigger design. I will use the filter in the design to give more realism. I will have some lighting effects to the dog and the cat knows to achieve this Are we first select the nose and then apply the combined light in effect. - Dockery An example off How you can use futures. This will be the end of the section. We talk about Grady in what they are and how to use them on. We also cover filters In the next section. I will create another logo so you can get a more practice using all in escape tools will earn. See you innovate.
18. Practice: Creating a gaming illustration: working to another lecture off the in escape course where I will show you how to create an illustration inspired in gaming from scratch are we were creating the elucidation. Juicy, mainly basics. Apes obviously curves. I will display the illustration creation in six steps. First, create the body and the head then or her beard mustache the helmet. Next the eyes. After I will let a controller under the Viking unless I will add the sore which goes on top of the controller. Let's get this started before you start creating illustration, I will import the colors I will use and I will create this more rectangle, as in previous sections, to measure distance. No, I will start with illustration. First, I would draw the body on the head so I will create two circles. I will continue with hair, which is formed by three pieces. The beer, the hair that goes on the size and the most eyes to create a beer. I will use Mr Curves on. I will draw health off the beer on. Then I will duplicate it and flip it. - Now I will merge both pieces together with the past the union, so the beer is one piece. How we go ahead on dro the hair on the size years Imbecile occurs and now duplicate on sleep to have the same shape on the other side. And now I were murdered with the rest of the beer. Next base is the moose does. I will create inducing a circle I never served girl on . Then merge both spaces together. The hair is now ready. Let's continue with helmet to try to hell my pace. I will use a circle on. Then I will make the corners round. Always make sure as you are at the Nuggets that everything is symmetry. Next I will create the home using the circulars. First I will create one hole and then I will duplicated. - Now I will draw the horn base using a rectangle with round corners. - Now I were Camembert, the Soviet to pass a modify a bit the shape, um duplicated and place it on the other side. A last bit of the helmet is Santa Gration wheat. I will add using circles. The hair on the helmet are ready now. Next faces the eyes. The eye is formed by two pieces. A circle on a rectangle for the eyebrow. So first I will create a circle and next with the Sir curves, I will create the eyebrow. Now I will merge Both saves on Duplicated There's only two steps left to finish her illustration. The controller and the sore to create a controller, shape our just Baseer curves and now I will add the direction bottom using a rectangle with round corners. Then I will duplicate and rotate the rectangle to create across next to create the four bottoms on the other side. I will use circles. - Perfect . We have our controller now. So next, unless a step is the sore first away Create the sword handle years in a circle on a rectangle that I will mert and to create the rest of the sword I will use for Cirque Er's amazing work, Julius Venous Another illustration using all the same escape tools learning this course. This is the end of the lecture. I hope you enjoy it and see you in the next lecture
19. Sell your illustrations using shutterstock: in this section, I will talk about Sattar stock. I will explain you word satirist. Our case. Um, how is useful? Then I will show you how you can become a satyr Star contributor on You will see how you can upload your first illustration. Let's get started. Satyr stock is a website that provide high quality life's an illustration some photos, basically a marketplace where you can buy lice indemnities. You can also find videos, a music people pay a subscription monthly or annual and then the camper chase a number off images, depending on what's description we got. How could Center Star could be useful to you? You can. We can. A contributor Insider stock down means you can upload images on those images who will be available for people to Sirte number taste, and you will get a percentage of its sale. Do you earned about 20 to 30% off the sale price, which is your royalty fee. So E, for instance, your sale price is 1 28 You receive 25 cents. That means if you sell your illustration 100 times, you will make $25. This is an easy way to create son income without any of four. Once you blow your work, you can sell it over and over without any farther. Work on your part. Blas yearning us. A contributor is completely freaked. That cover would satirist our case on Why is useful. Now we show you how you can become a Saturn start contributor. All you need to do is sign up. Once you created profile, you can start uploading your work which will be review on them. Pavel is to Sattar stock to create a profile. You can go to the following website and then click on Sign Up. Then you will need to provide your full name even on password, and then click Knicks. Now all you need to do is to go to your email so you can activate your account. You have create your contributor profile, so it's time to upload our first illustration. So to have low the Nimitz go to portfolio and then click on upload. In this case, I would use a Nimet that I know meets the satyr. Start conditions. Then I worked like a next. Now I will click. They meats. I'm provide some farther details. It's a title that describe what Issa name it's and please note that you need to describe what is the name. It's not the purpose or possible use cases. For example, this is a pet illustration. So other stuff like logo for Bad website will not be a proof a value Tyto would be CAC Dog Back Toe Khartoum illustration And now I will select Took a Tavaris where your illustration We released it for these case I will choose animals and audits. Alas, I would choose the keywords which saint as the title they need to describe things that are appearing on a minutes You need at least seven keywords So I will bake back to bed Animal dog anything that appears in name it's will be valid And now I will click on to meet um A Me too were move to review. Now they meets need to re review but the Satyr stock team this take about 1 to 3 days. Usually one day unless you upload your dream It's on the weekend Then it takes to be longer . This is the end of the section Wheeler What is Saturday stock? How you can we can a contributor on you learn how to upload your first name? It's See you in a bit
20. Fiveer freelance marketplace: in this letter, I will explain what is fiber, how you can use fiber to sell your skills in back to illustration or any other skill you have blessed started. First, I will start explaining were five Berries. Five dot com is a freelance marketplace where you can hire someone for a small piece off work. It offer services from $5. Um, most services on the side are under $100 and you can find graphic on the sign services. Deter marketing services programming um, anymore. For example, you can find a freelance to help you to create a mobile application or a website, or to create a logo for your brand. So high seas useful to you You could serve your services by creating what is called a gig, which basically means and at birth, you can create an advert where just planete tapes off the service. You offer South Korea small that you can do in two or four hours, said the price and time in which you can deliver the work. Um, poster gig. In this case, you can offer to create illustrations. Let's see an example in the sad Were this Raylan's is offering to sell illustrations. As you can see here, see us playing would seize offering. I would see with the lever your sunny to other prize on the delivery time. People usually contact you before making an order on displaying you what they need. Then you will offer them a quote on a delivery time. Once there, Seb, your quote, the clock will start ticking. Once he delivered a piece of work the buyer will review on. If they're happy with it, they will accept on the order is complete. Usually people don't accepted a straight away. They may request a review. Andi, as you did, saying something using fiber is south in that you can consider if you would like to do son a strike come just in their skills to learn. In this course, this will be the end of the section. Willer would describe er how fibre works on how you can use it to create illustrations and sell them. See you in the next lecture
 Marta Rey, Never late to learn something new! :)