Transcripts
1. Welcome to Class: If you've ever stared
at one of those inks statins and started to
see maybe some faces, animals or other creatures
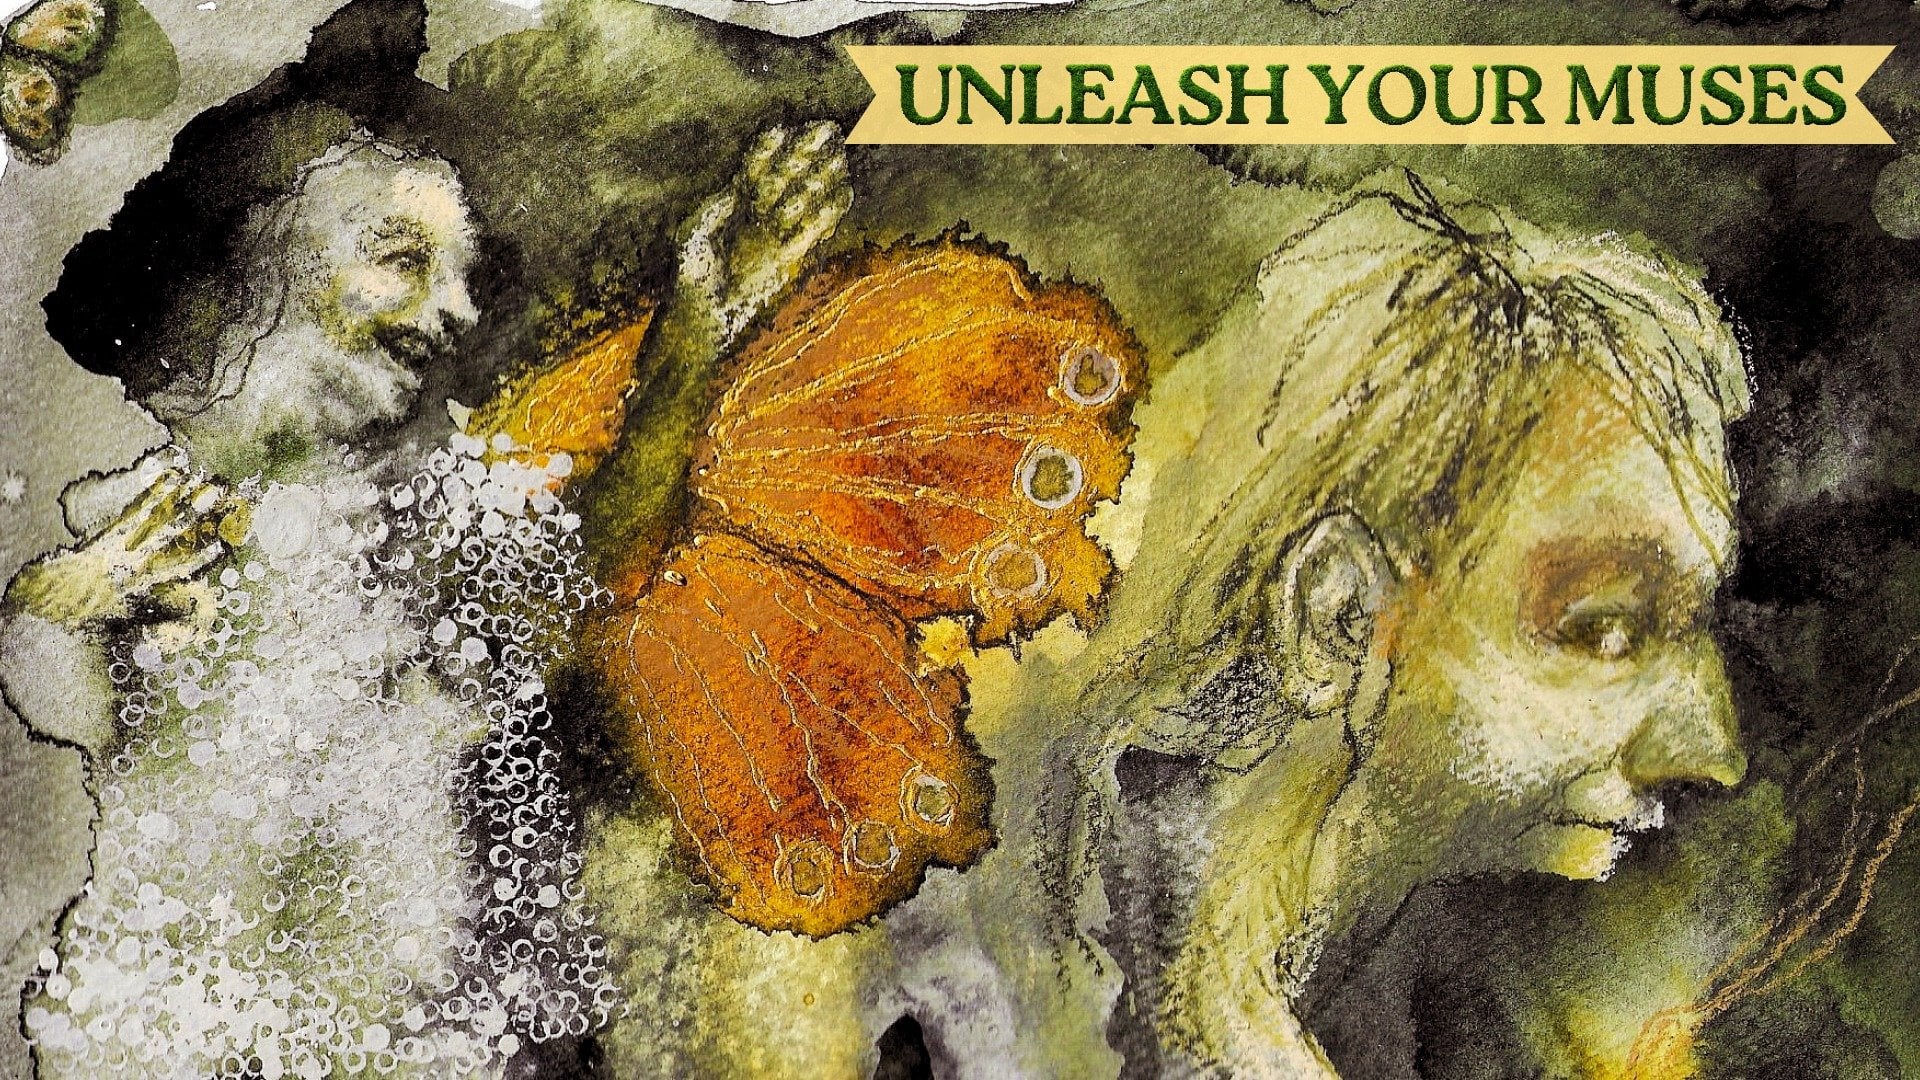
or maybe even a story, then you're in the right place. In this class, I will
guide you step by step to turn those random shapes into an awesome and
surreal Rournal page. The best part,
there are no rules. It's all about letting go, getting weird, and
surprising yourself. By the end, you'll have
a fun art journal page that came straight
from your imagination. This is a sequel to my
previous class Ink Blot Magic, creative activation for
artists who feel stuck. So if you haven't
watched that yet, maybe check it out first, make yourself an
inspiring journal, and I will show you how
to manipulate the ink in order for you to find
these little quirky faces. But if you're ready, then grab your journal and your
crayons and let's dive in.
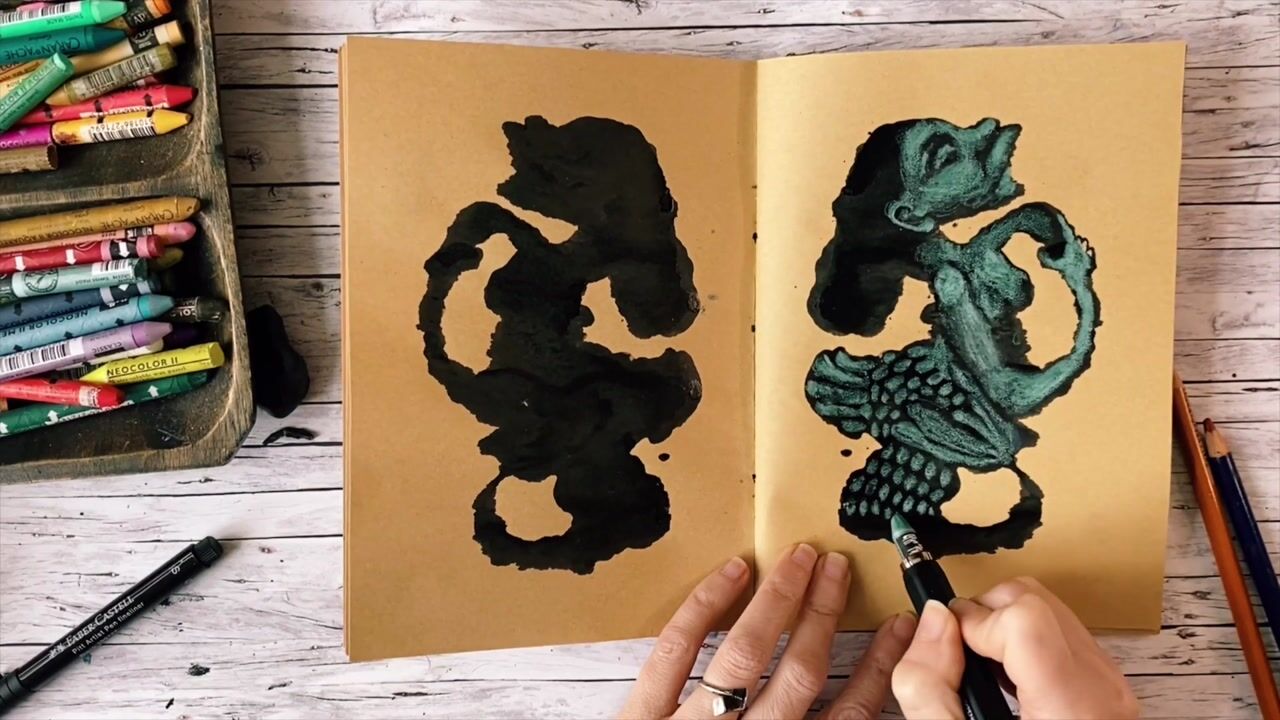
2. Finding Faces: Let me show you how I
prefer to find my faces in this journal with just two new color crayons
and sibilo pencil. All these tools
are water soluble, but I really prefer to use them dry because they
layer so beautifully, you will see and now it's time to take my lighter
colored Neocolor crayon. And I really enjoy layering these two
colors to create form. If you're not sure
how to do that, but you want to learn
in a relaxed way, then I can recommend my class
loosen up your charcoal drawing that go of perfectionism
with six exercises. And I think you will like
it and you will understand how you can make your faces
look more three dimensional. But it also helps you just watch me create these
faces right here. It doesn't really
matter what you do with the colors as
long as your values, the lights and the shadows are approximately
in the right place. And if your face looks a little
bit awkward in one spot, then that item
needs to be darker or lighter, and
that will fix it. And don't worry about getting it right from the start
because you can keep layering these two colors on top of each other
until you get it right. That is why I love to use them. It's a really nice way to try
and understand these phases in an intuitive way
without the stress of the pressure
of perfectionism. Our journals are place to
explore and practice anyway. It's not about creating the perfect little book
full of amazing art. No. This is a place for you
to relax and to experiment. And hopefully in a
very enjoyable way. Now, let's move on to a
more challenging phase. I'm seeing a big
open mouth and I'm just going to put
down that dark color. It's always nice to start
from a darker base. Now, watch me create the eyes. They are the eyelids and
the white of the eye. And it's as easy as that. And I'm not sure if I'm doing it right at mouth there because I don't
have a reference photo, but you know what?
It doesn't matter. Our brains are trained
to recognize faces, human faces has something
to do with evolution. So relax and just enjoy
the process and learning. If you ask me, I think the wonky weirdos
are always more interesting than
photorealistic portraits. And, you know, they're
more fun to create as well to figure them
out as you're going. And as you can
see, I switched to the very black Stabilol
pencil to reshape that mouth. Don't panic if you don't
like your portrait. Just keep going. And now I think I'll just let you
observe for a little while. You know the basics, and I really want you to
focus on what I'm doing. I hope you enjoyed this. Now, let's move on
to the next lesson where we will get a
little more freaky.
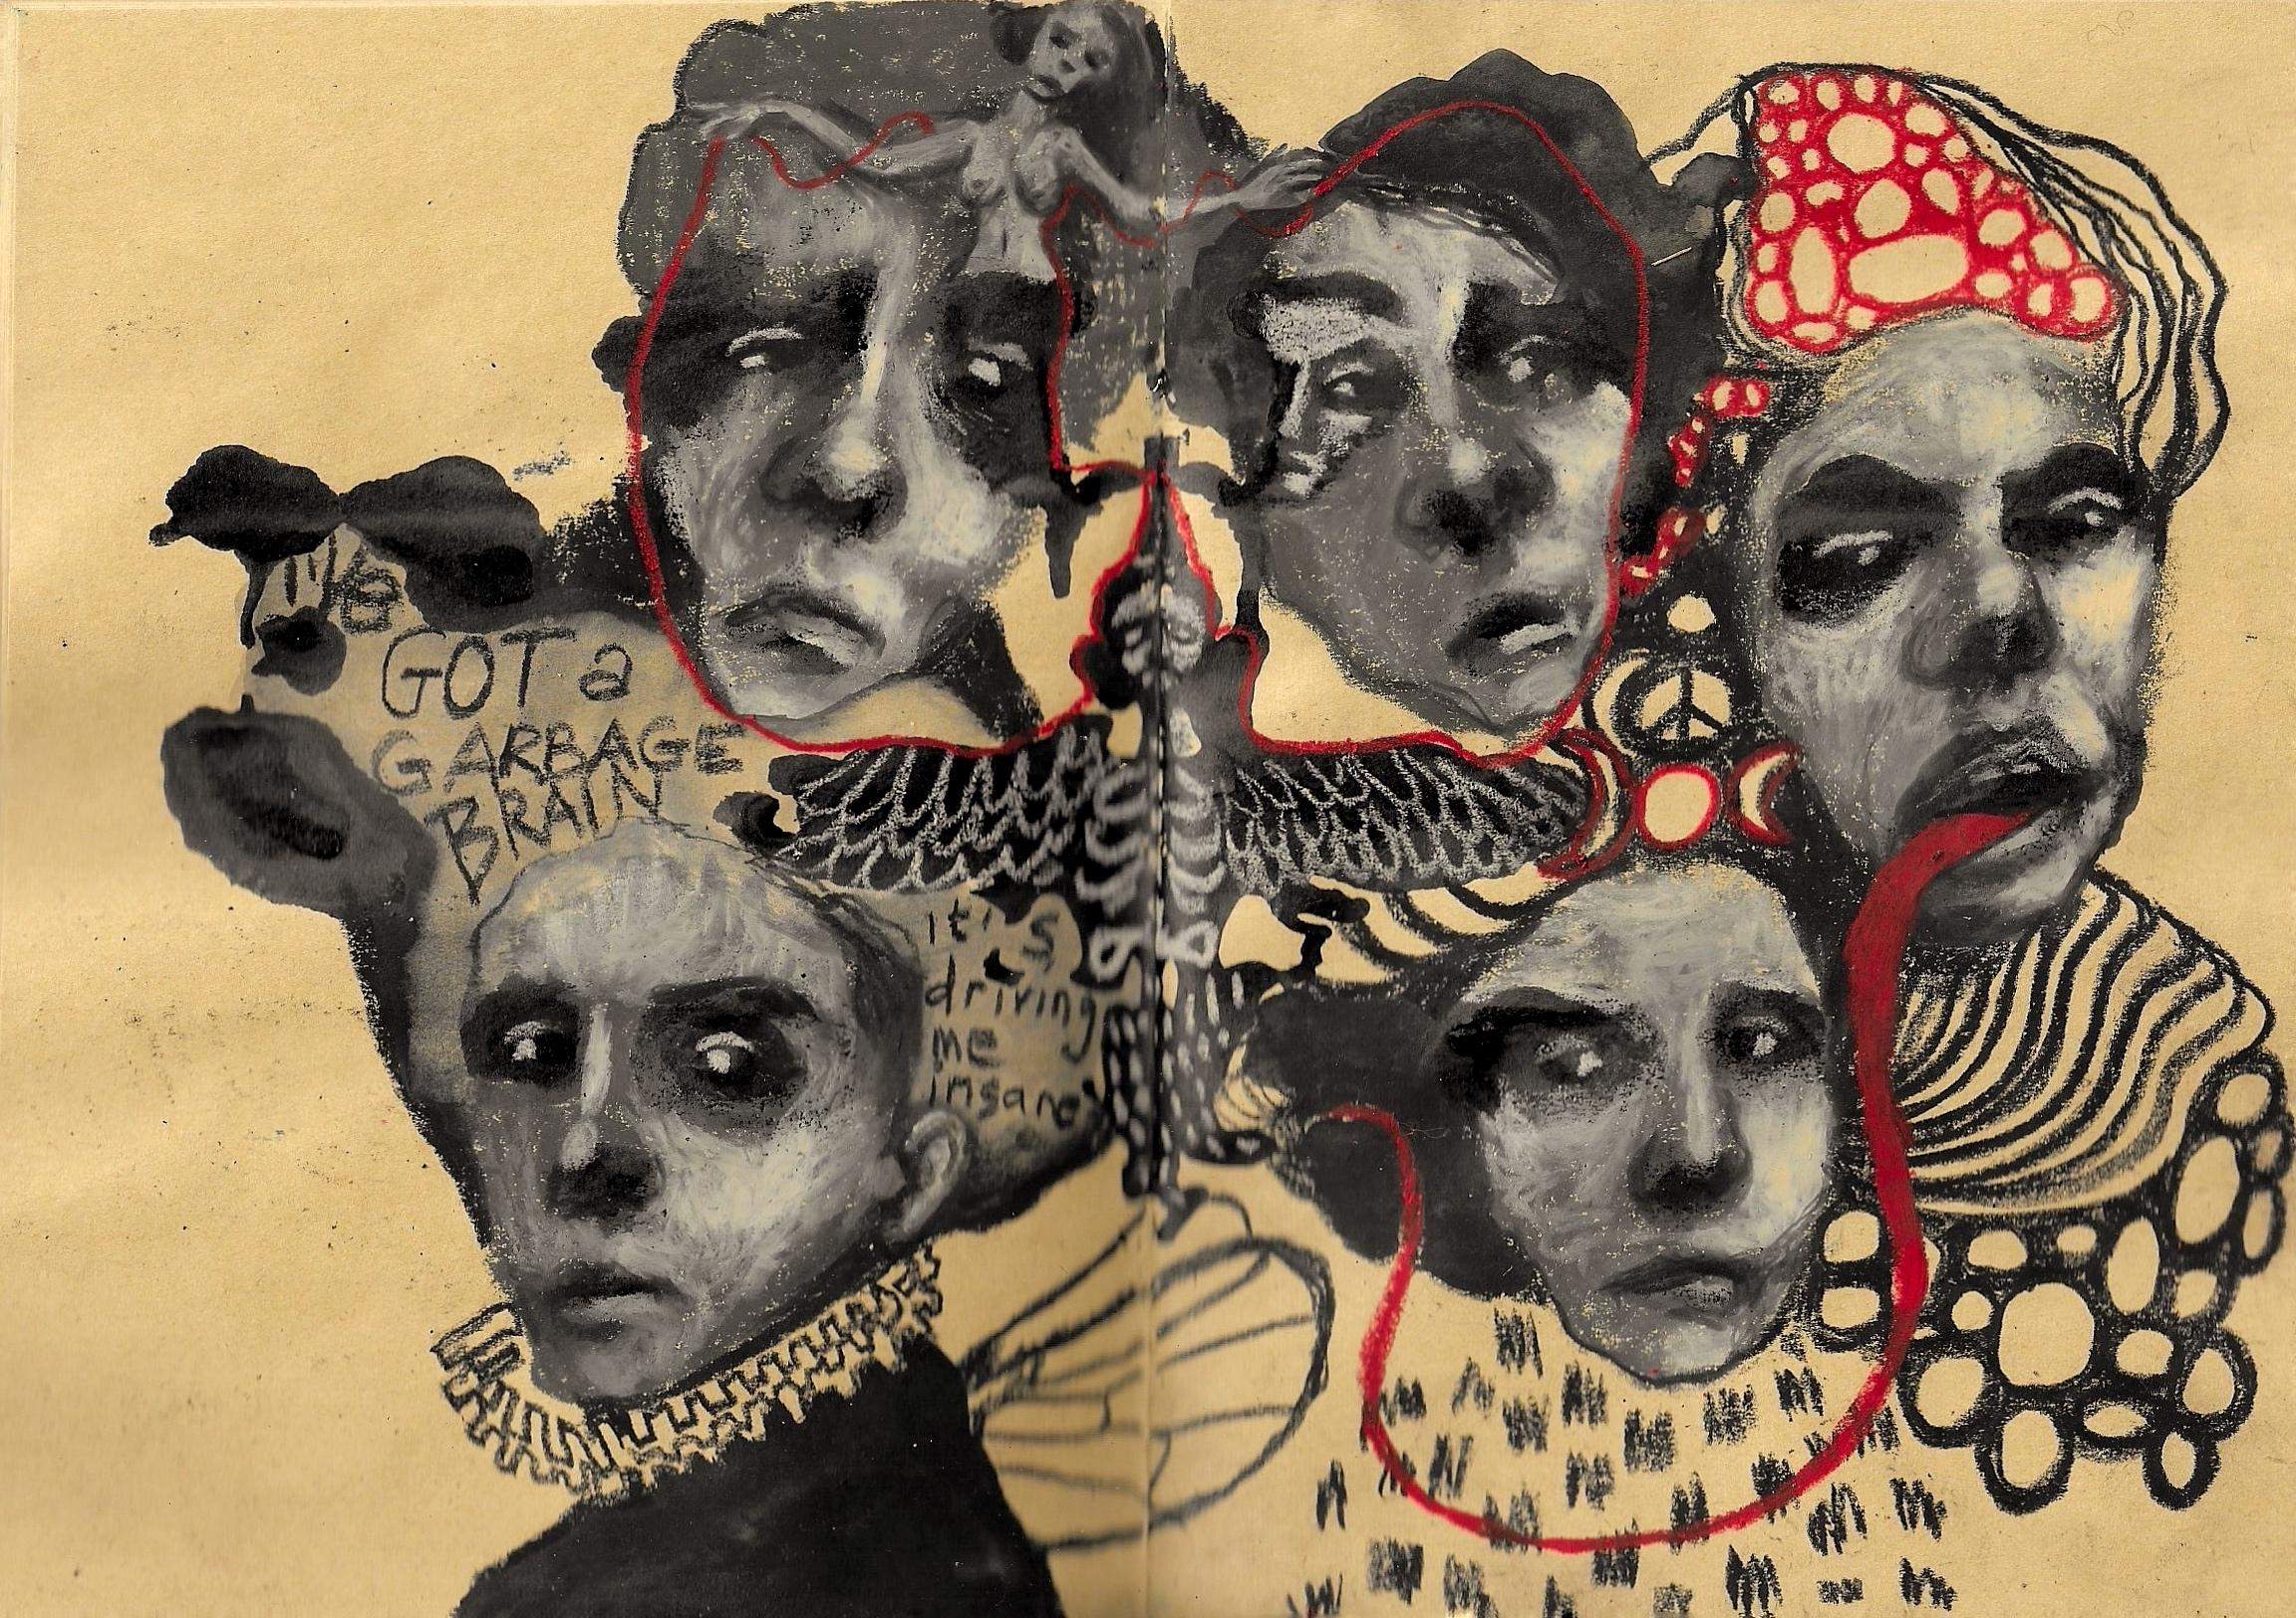
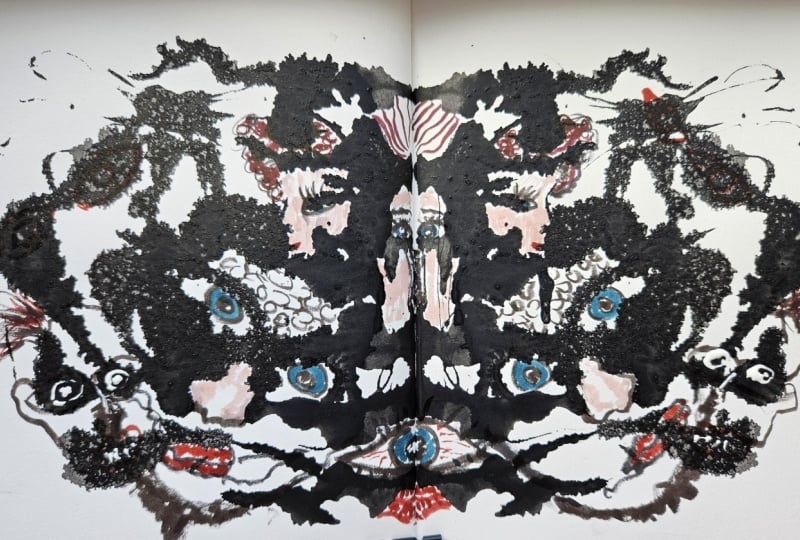
3. Get Your Freak On: In this lesson, I will
show you how you can use your inkblots to add some surreal elements
to your journal page. I will show you how two
identical mirrored inkblots can inspire you in
different ways. We're so used to symmetry, but if you look a
little bit longer, try to challenge yourself to do something different
with the same shape. It's good for our creativity. In this case, the slight
nuances within the ink, it reminded me of a
face that I'm seeing, and I'm making them share
an eye in a moment. And I really enjoyed that. Observe your pages for
opportunities like this. They really make the
process so much more fun. And it doesn't
matter if it's not within another
figure or something. Just look for familiar
shapes and bring them out, no matter if you can actually draw the thing
or not, just try. Now, let's move on
to that other phase. First, I'm going to map
it out more or less. The more you practice, the easier it will be. And if you get stressed out, then just find yourself a
reference photo and observe the lights and the darks.
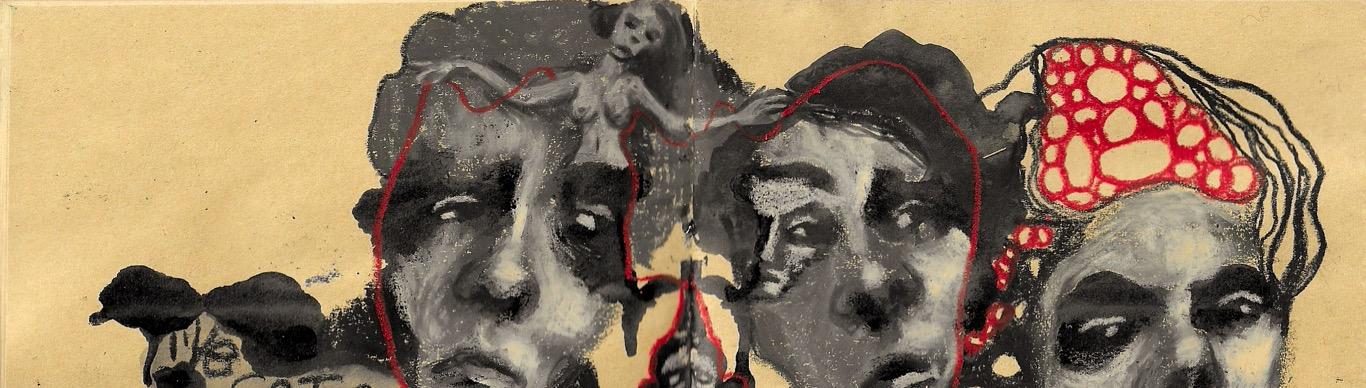
There's no shame in that. Okay, now, in that
second ink plot, I can see a mermaid still. So that's what I'm
building up right now, trying to find the
volume of an upper body. I'm going to take my sibilpencil
and reshape that body. And while working this small can be a
challenge with screens, there's always something you can do like what I'm
doing right now. But also, it's a good way to practice drawing
more loosely. There. I'm just making
two eye sockets, shadow underneath the nose
and a weird little mouth. I'm sorry that I'm in front
of it, but it was too small. Just have some fun
finding shapes across the page to
mess with like this. I think they really add
depth to your pages and the story that's
coming to the surface. And try to do this without judging
whatever you're seeing. Just bring it out. The
weirder, the better. And right now, I'm going
to make a correction by blackening it out
with stabil pencil. But you can also just take
a brush with some water and get rid of it that way
or a baby wipe or something. Because remember, these crayons and this pencil
are water soluble. The fun thing about
this process is that personal themes tend
to rise to the surface. You know, there's a reason why they use these
inkblots in therapy. So this is a great
way to explore your subconscious
and emotional world. It's a great way to get
very personal pages. So give it a try. Now, let's
move on to the next lesson.
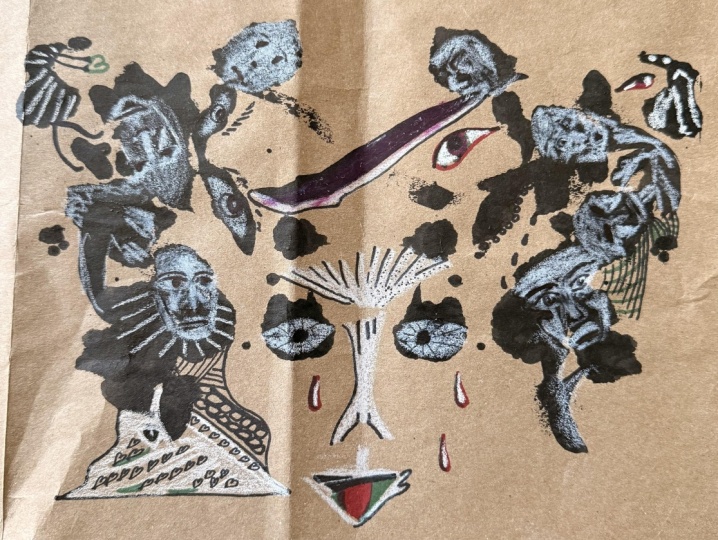
4. Upping the Contrast to Add Drama: I'm looking at
these little faces, and even though I
quite like them, I've decided that some of them are looking
a little bit flat, and a great way to tackle
that is to take your Neocolor and press a little bit harder in those spots where the
light would hit them. This extra contrast also
will add a bit of drama. When you look at the
paintings of the old masters, you can see how they also
played with the lighting and the dramatic gestures and expressions like in this
painting from Caravaco. Now, look how just
three simple highlights can really make this
face much more dramatic, especially this one on
the tip of the nose. I'm also taking
my stabilO pencil to reshape the
nosewings a little bit. It's little tweaks
like this that can really make a difference
in your portraits, even if it's in a slow way. And I know noses can be
a bit of a challenge, so I'll show you right here
how to create a nosewing by putting a highlight right next to it without
really having to draw it. I hope you will
experiment with this. You know, everything is
hard until it gets easy, and these journals are
perfect for a little bit of portrait practice without
taking it too seriously. Just be kind to yourself
and have some fun with it. No need for perfection. Now, let's move on to the next
lesson where we will give those floating faces
quirky little bodies.
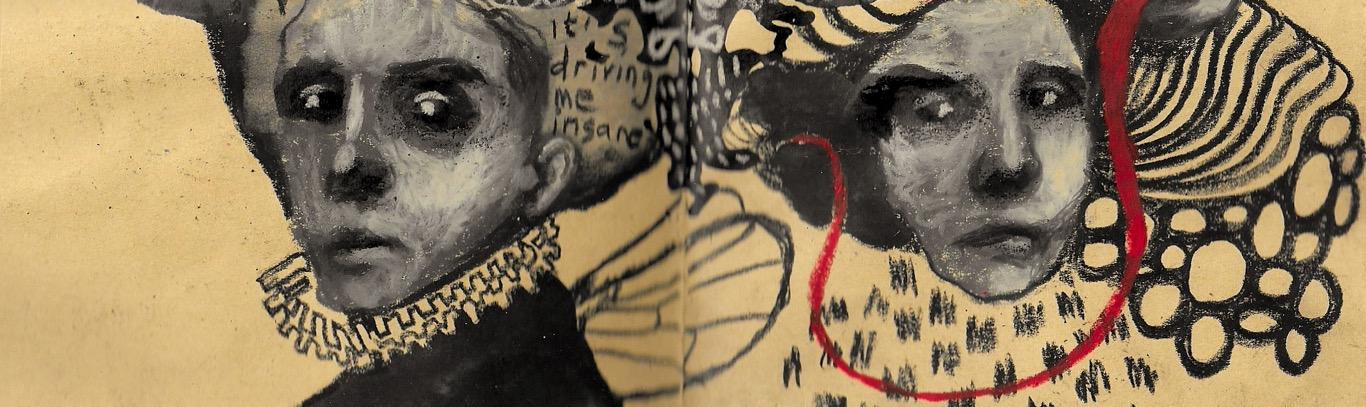
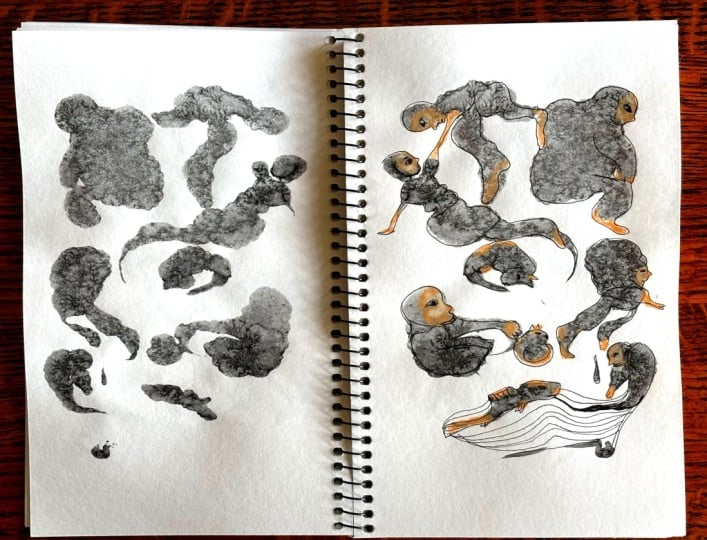
5. Pattern Play: For many budding artists, drawing hair, hands and bodies can feel a little
bit overwhelming. You know, the faces are
challenged as it is. So let's just create some hair and bodies
through some pattern play. You know, it's a
relaxing activity. It really calms down the
mind and reduces stress because of that slowed down
and repetitive nature of it. If you're into Zentangle, you can go nuts in the step. I think it would
look really cool. I myself am going
to keep it rather simple simply because I'm
not at great at Centango. But, you know, I'm just
going to have some fun. If you are like me and
you're an overthinker, just put on some music, and that will help to, you know, quiet down that inner critic that's
inside of all of us. We can't get rid
of it completely, but what we can do is relax
it with our favorite music. Now, let's go to the next lesson for some finishing touches. Oh
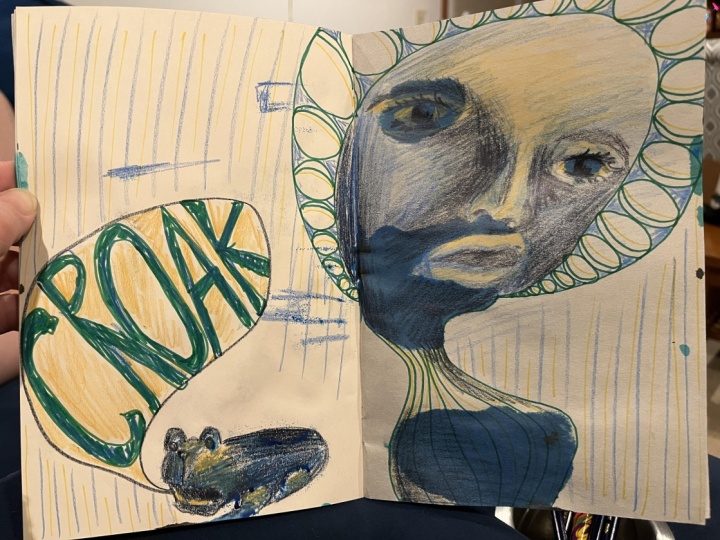
6. Add a Bit of Storytelling: In this lesson, I'm
going to watch my faces. I'm going to observe
them and what's going on on the page so far. And I'm going to take
a red new color cray. It's a nice in your face color to add a
little bit of storytelling. And don't worry if you're
not feeling it right away. Just start by doing a
bit more patter play and just some very relaxed
doodling to get you started. I find that it's
better to just do some random thing than to wait until you get
inspiration, you know, some epiphany, because
nine out of ten times, that is not going to happen, and you're just going
to stress yourself out and get stuck
into perfectionism. That's not what we
want. We want to have some fun and now
that I'm warmed up, I think it might be fun to add a long tongue and let it
travel around the page. There's not really a reason
that I want to do it. I just saw it open mouth, and I put it there. Okay, I still don't really
know where this is going, and something that I
like to do is to give my figure some kind
of a red thread. Don't be annoyed
with yourself if you do something over and over. You know, it's not uninspired. It's just our own
symbolic language. And sometimes it can even
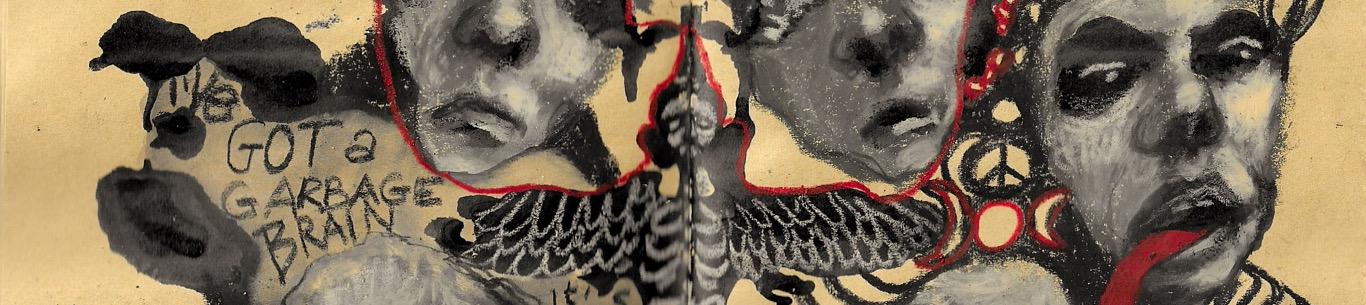
become a part of our own style, you know, so keep at it. Just do what you want. And while I'm doing this
freestyle doodling, you know, the seemingly randomness
of it all, suddenly, I am reminded of the lyrics
of a song that I like. And it's really
fitting to this page, as well as what
I'm going through. And I'm putting in those lyrics, bonus points if
you know the song. It always makes me laugh. And isn't it funny how
seemingly random shapes and actions can lead to something
that's really about us? Usually, it's something we
still need to process now, and art is a really nice way to do that in a very gentle way. And inspired by the song, I add one last hint
of what it might be. And that is how you build an
intuitive page, you know. There's still a lot
of mystery left, and it's a really fun way to
sneak in some creative time. Now, let's move on
to the last video. And remember, when you complete a whole class and upload your
project to the classroom, Skillshare will give you a cool certificate in your
achievements. Let's go.
7. Your Turn: Thank you so much for joining
me on this adventure. I hope you had fun watching me demonstrate how you
might go about it. And now it's your turn. I'd love to see what you have
created, so please, please, please upload it to the classroom because not
only am I very curious, but it's also very inspirational
for everybody else, and maybe your pages will spark some inspiration
for someone who need it. If you enjoy this class, then I would appreciate it so much if you would
leave a review for me. I always like to learn
what you enjoyed about the class and maybe what
you missed so that I can, yeah, take that into account
for my upcoming classes. Thanks again for
being here with me. I hope you will have lots
of fun and heavy creating.
 Jerney Marisha, Making Art Fun Again