Transcripts
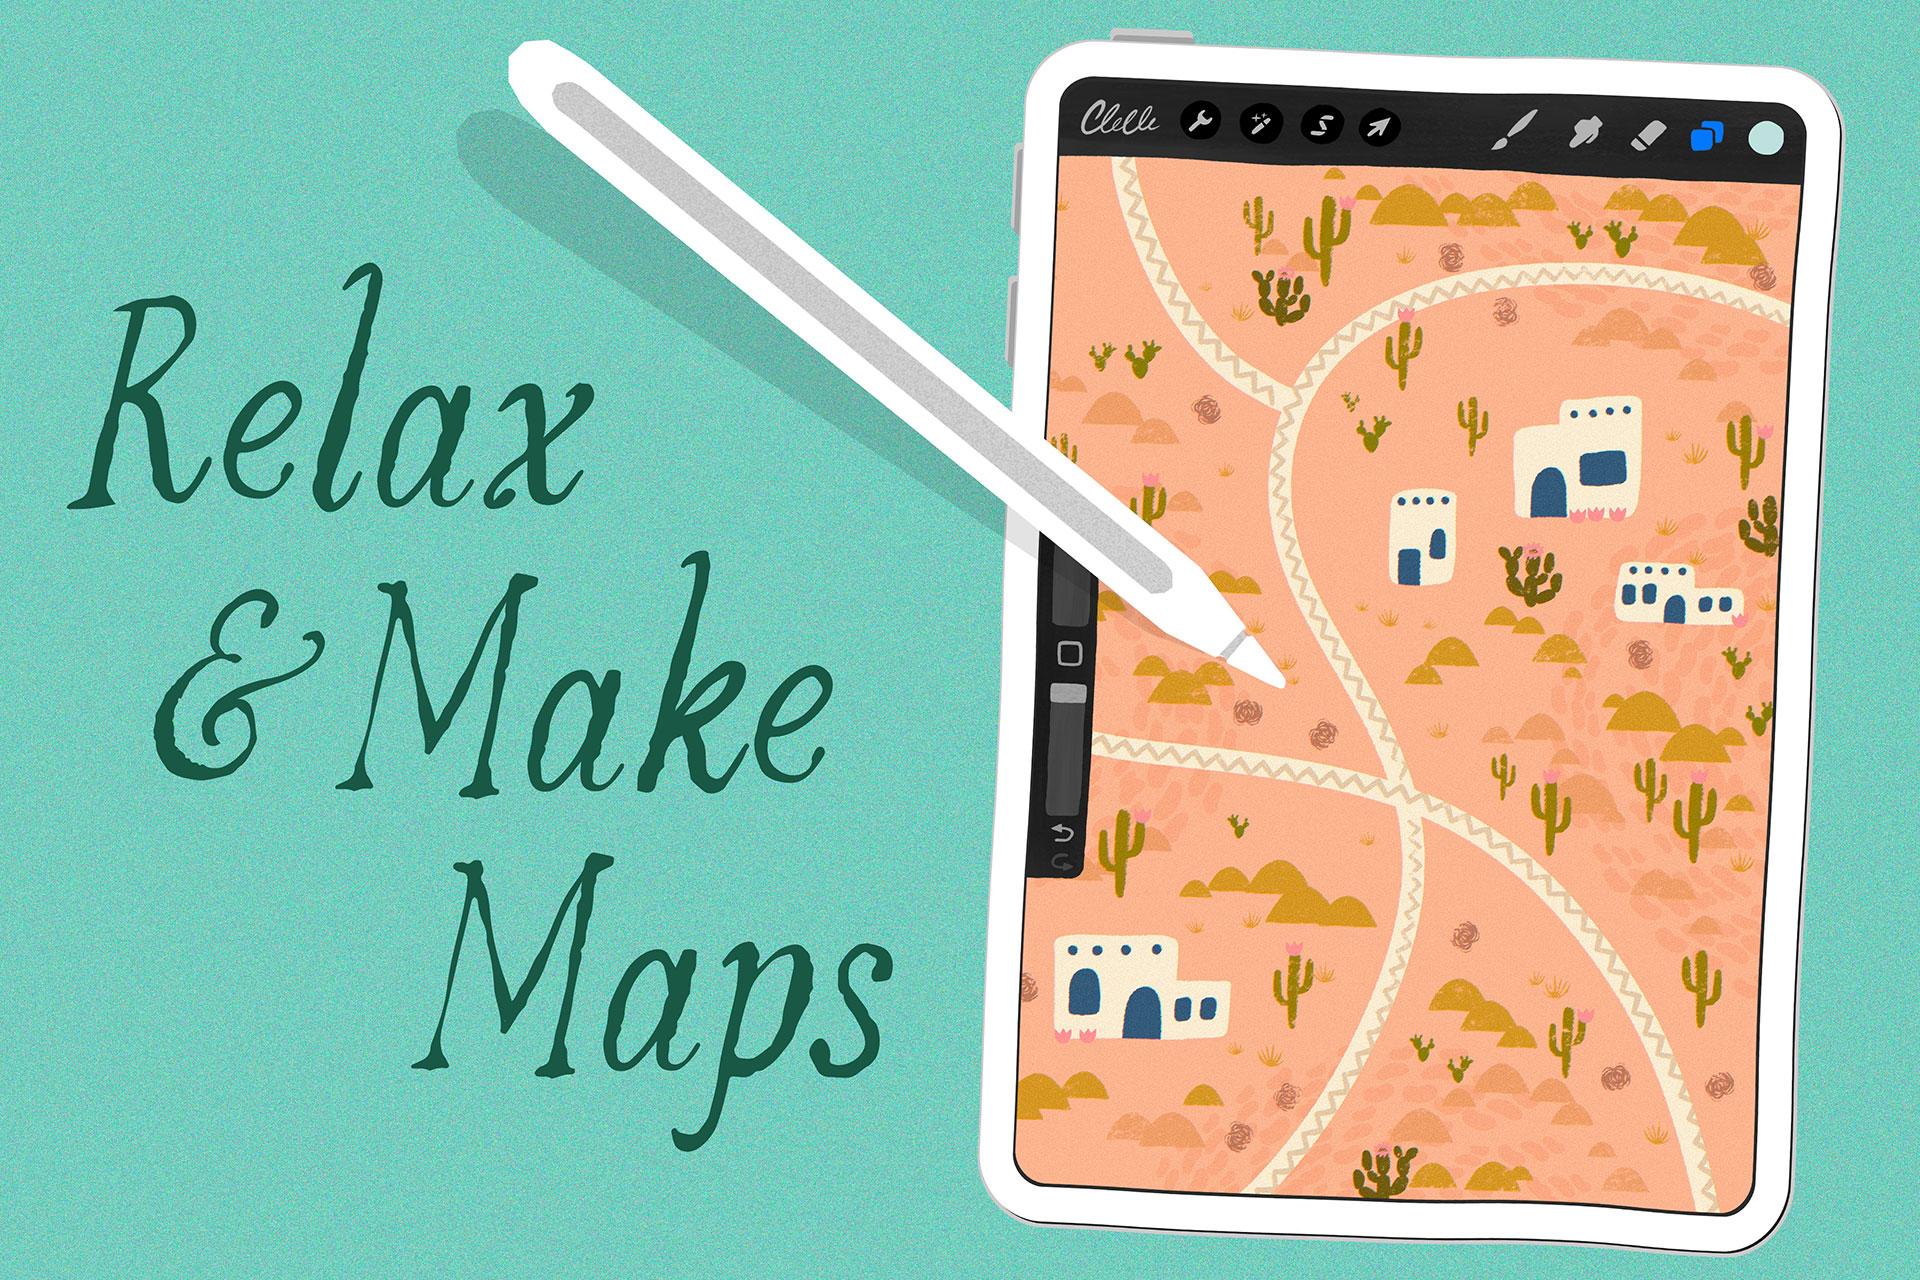
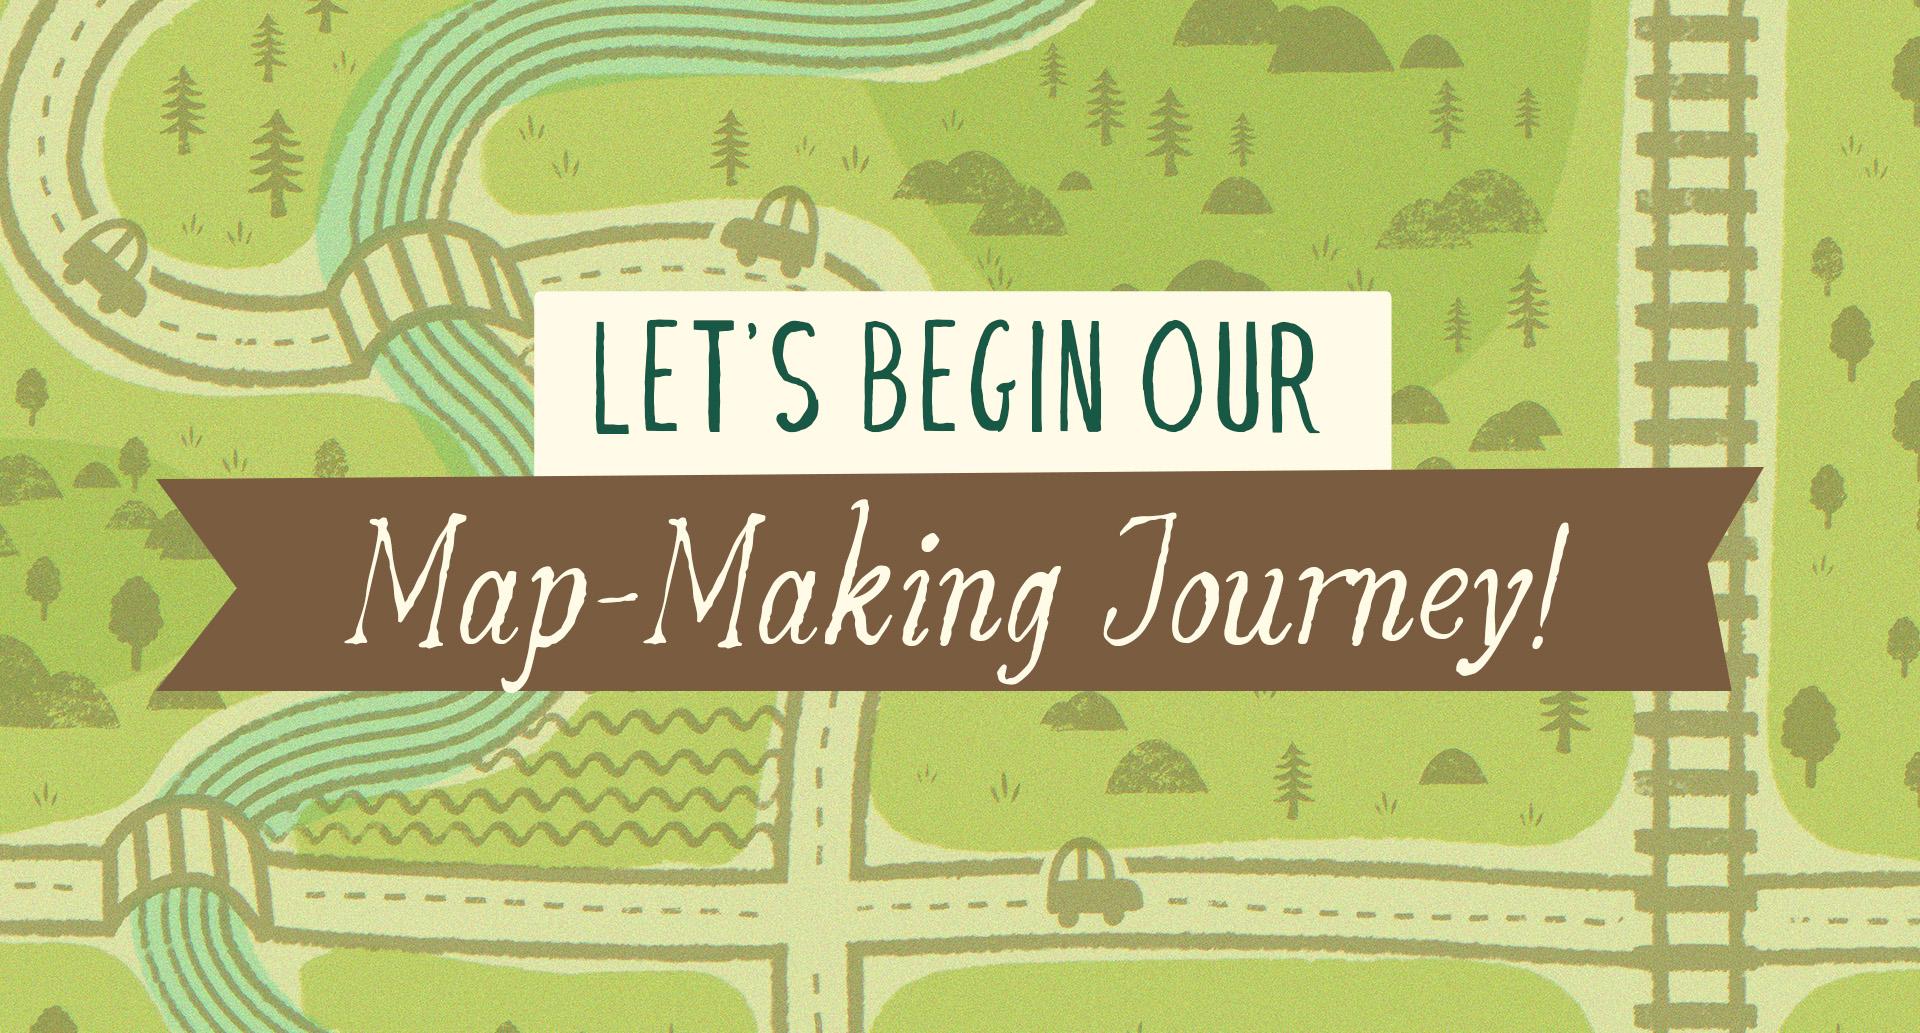
1. Introduction: Are you seeking a peaceful
getaway from your busy life? Imagine you could
escape to far off serene locations crafted
by your own creativity. In this class, you'll
find a perfect blend of relaxation and
creative expression. Welcome to imaginative
mapmaking in Procreate, where self care
meets creativity? In this class, we'll
create stunning maps that will whisk you away to
tranquil countrysides, dreamy deserts, and
enchanting islands? But creating art
is not just about the final product, it's
about the journey. It's a wonderful way to relax, destress, and let
your creativity flow. I've designed this class
to be the ideal escape, offering a serene
and creative way to relax and rejuvenate. Hi, I'm Lisa Bardo. And for almost a decade, I've helped millions of
people all over the world find their creativity
through drawing on the iPad. I teach pro create classes, make digital art tools. I've been writing an ongoing
art challenge and recently authored my first book all about learning how
to draw on the iPad. Through all of this, I've built a supportive community
where people can overcome creative fears and
find joy in making art. Creativity is my
form of self care, and this class is designed to share that
experience with you. You'll explore various visual
styles and color palettes, and as a student of this class, you'll get access to my
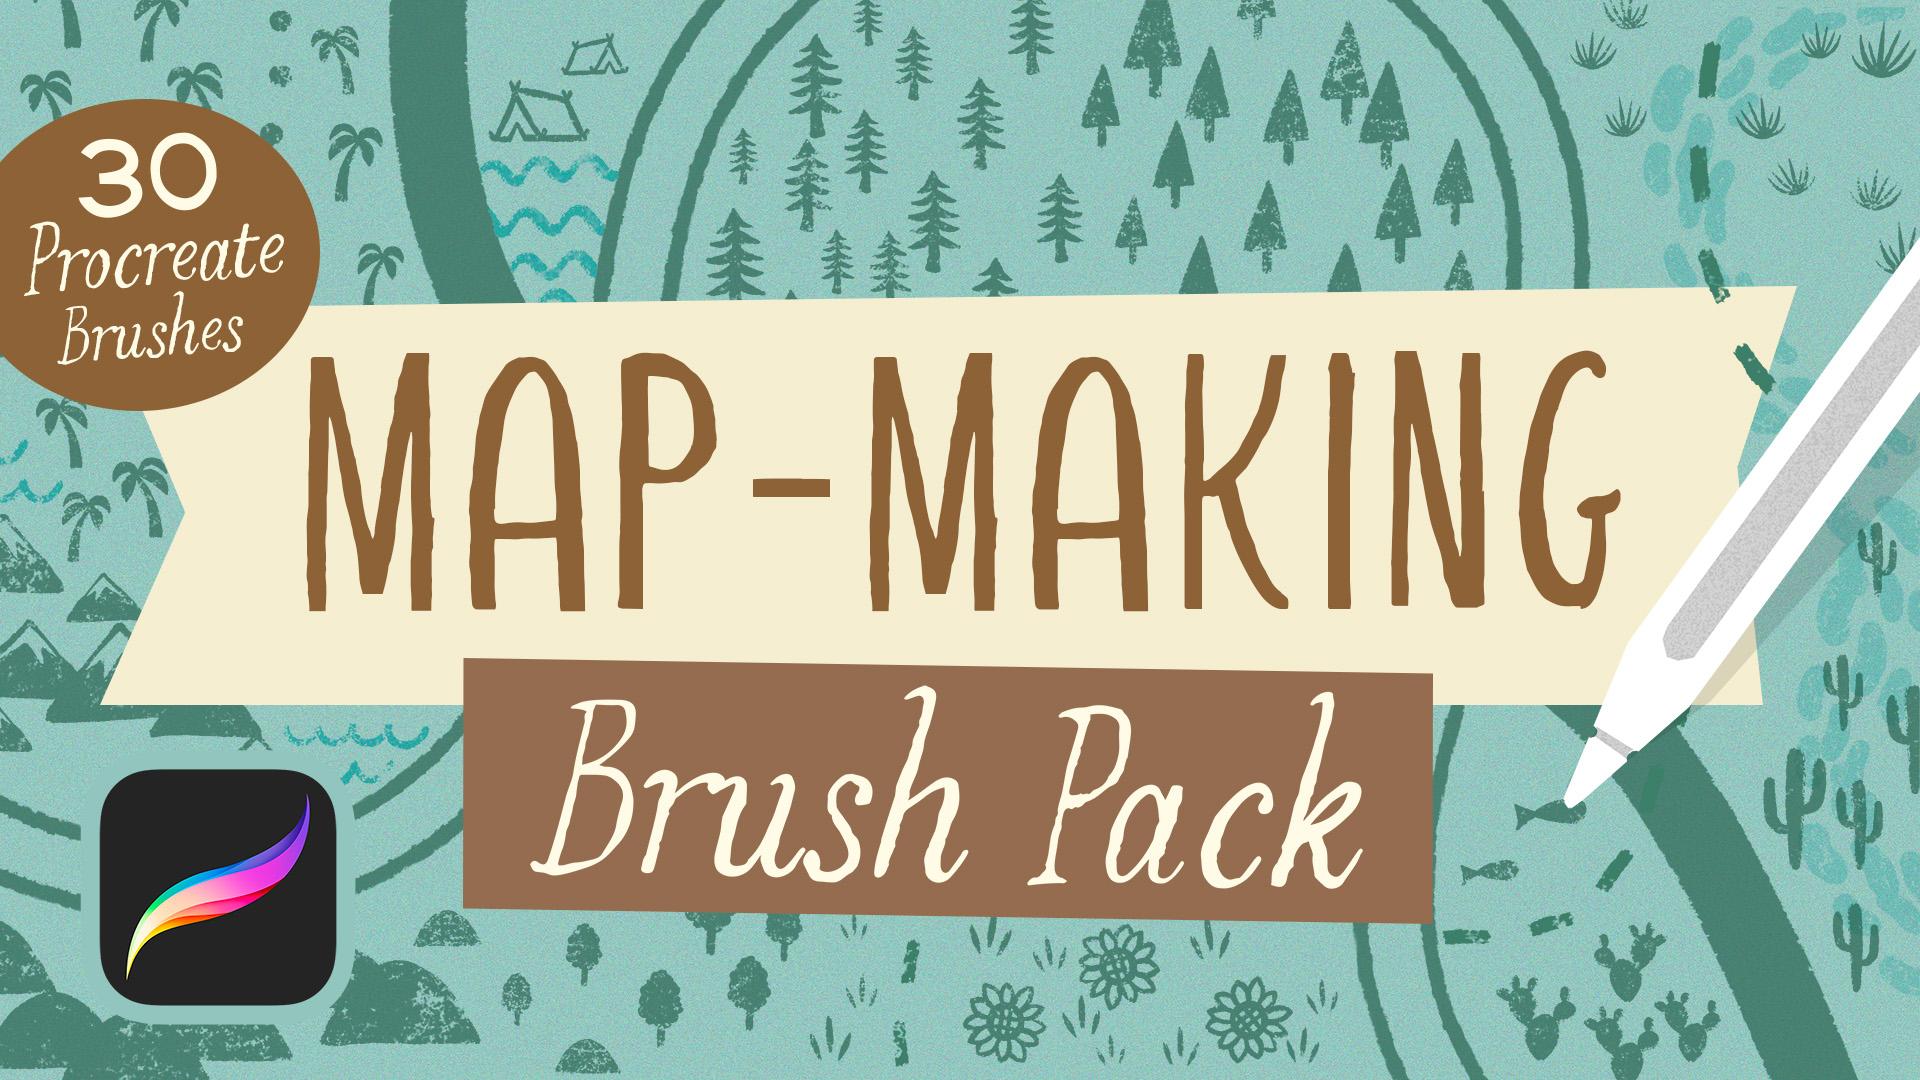
mapmaking brush pack. Set of 30 procreate brushes
for easy creative mapmaking. From roads and rivers
to trees and rocks, you'll have everything you need to bring your maps to life. This class is for artists
of all skill levels, and it's perfect
for anyone looking for a relaxing, creative escape. Some experience using
procreate is helpful, but don't worry I will guide you through
every step of the way. You'll need an iPad
running procreate, an apple pencil, and of course, my map making brush pack, which you can download
in the class. I'll also teach you how to create your own custom brushes, adding a personal
touch to your maps. Along the way, you'll pick up
procreate tricks and tips, like working with layers, using clipping masks,
and applying effects. This course isn't just
about making maps, it's about making
art for relaxation. I'll share techniques to get
you in the right mindset for your creative
practice so you can unwind and immerse
yourself in the process. By the end, you'll
have the skills to create your own maps anytime, anywhere, and find joy
in your creative flow. I'm so excited for you to join me in imaginative mapmaking in P create and discover how creativity can be a
form of self care. Together, we'll create
beautiful maps and enjoy a calming, fulfilling,
artistic journey.
2. Class Project: Welcome to class. I'm so
excited for you to join me as we dive into relaxing
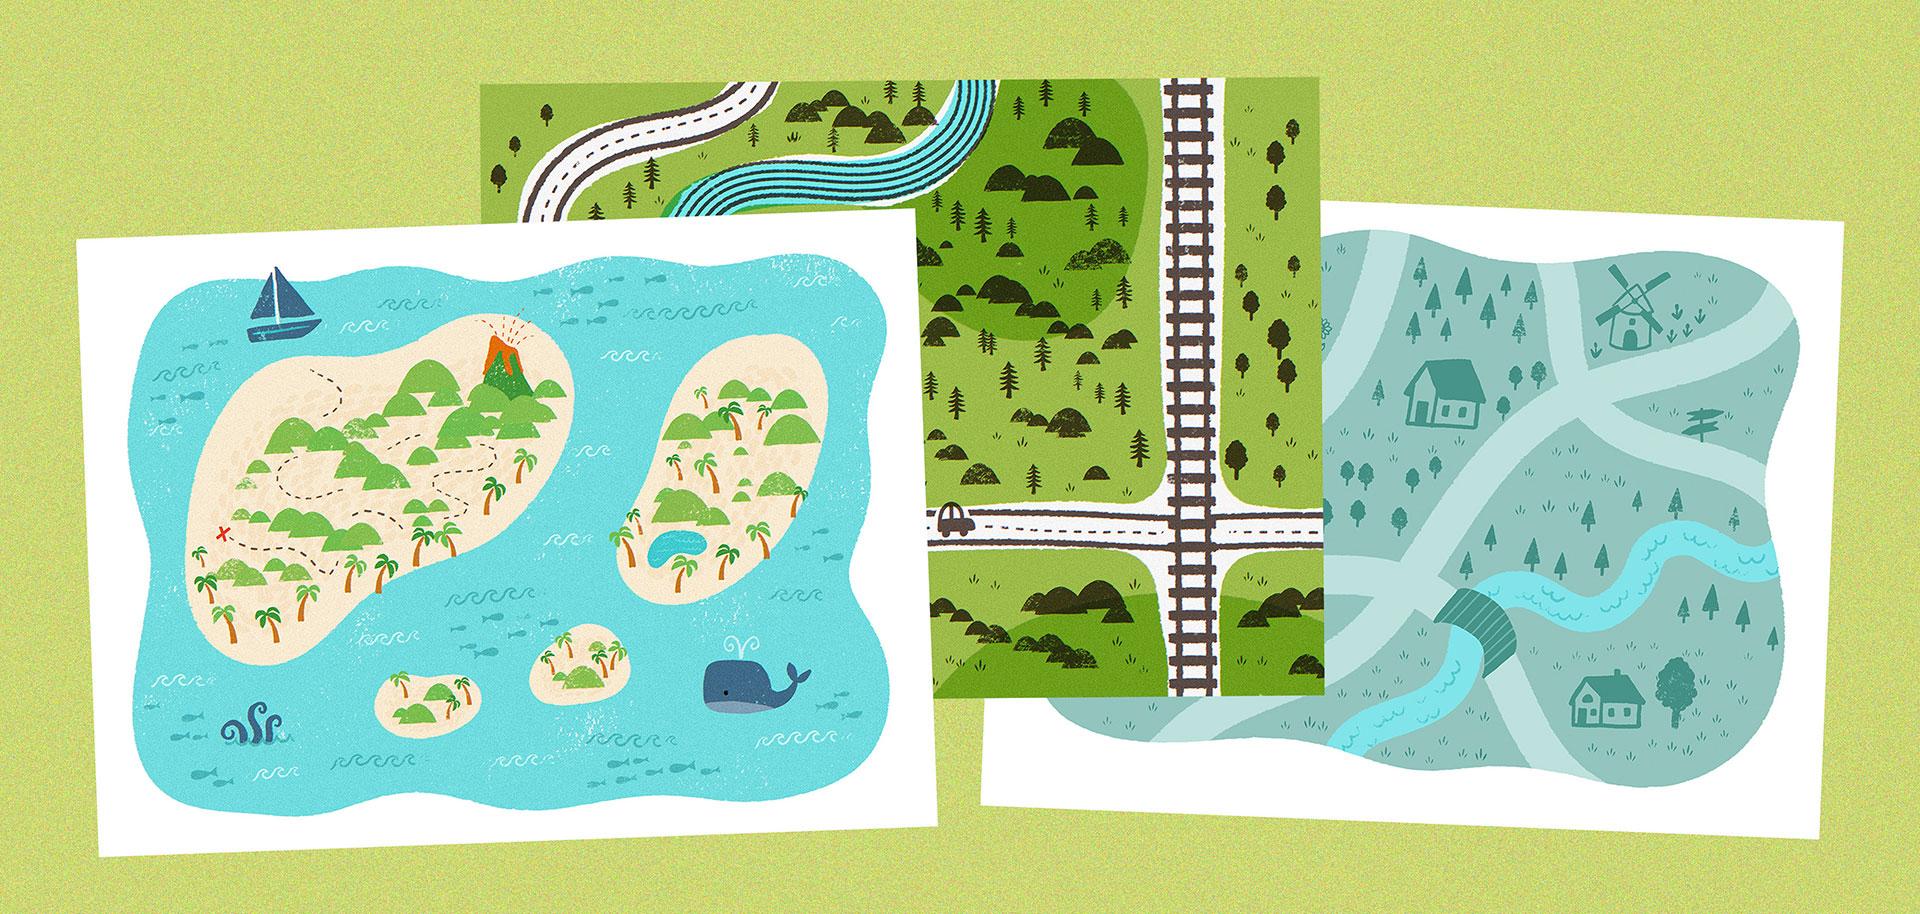
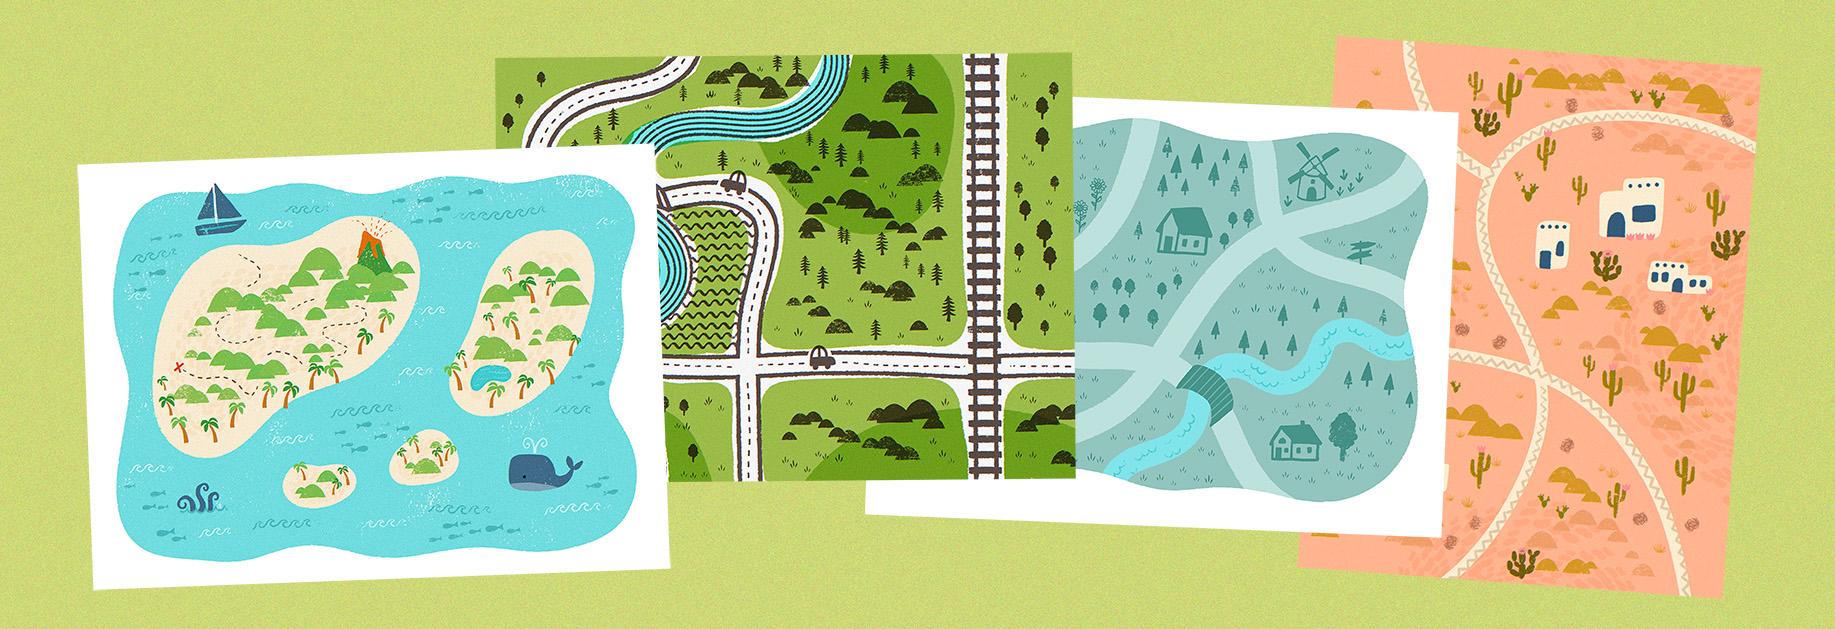
mapmaking and procreate. We'll be exploring
different environments such as the rural countryside, tropical islands,
deserts, and more. As you take these lessons, you're welcome to
follow along with me and replicate what I'm doing. However, I do
encourage you to just let your own imagination
take center stage. The beauty of the method
we'll explore is that you can really get into a flow state
and follow your whims. It's incredibly relaxing,
so I do encourage you to do your own thing as
you listen to these lessons. For example, as
you're going along, you might play something here and then put
something over there. It can be whatever you want. The key here is to immerse yourself in the
process and not go into a mapmaking session with an idea of what the final
piece will look like. Just relax and
enjoy the process. Once you've completed
all the lessons and you're familiar with
the map making process, you'll be ready to sit
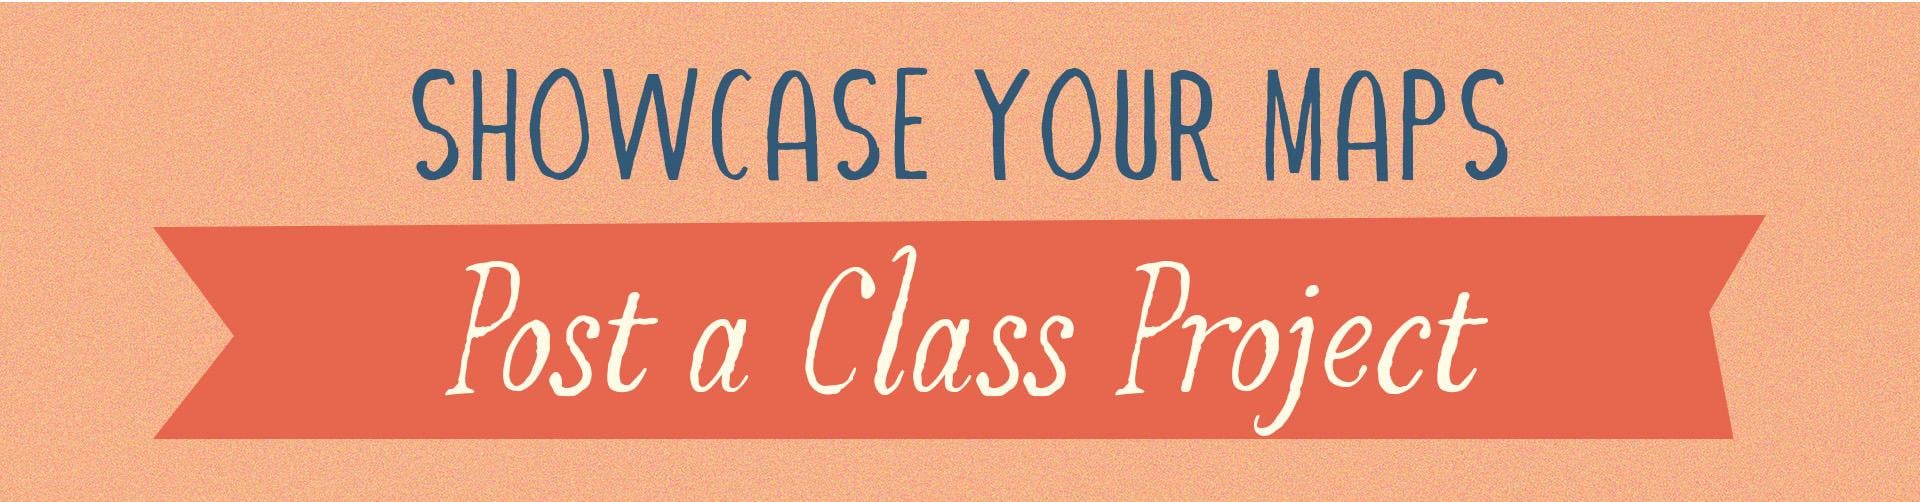
down anytime you want and enjoy the relaxing experience of making maps and Procreate. Be sure to share your work
by posting a class project. On the Skillshare class page under the Projects
and Resources tab, click the button that
says Submit Project. This is where you can
showcase the maps you've created by following
along in the lessons, as well as your
own original maps. And also take a moment to write about your
creative journey. Describe any techniques
or ideas that you use and explain how
you approach the project. And then also reflect
on how you helped yourself relax and get into
the flow of art making. And then you can, of course, share any tips and tricks that you learned about
how to get into that relaxed state with
your fellow members by posting them in your project. I've got a lesson
that will give you some relaxation techniques for getting in the right
mindset for art making. But if there's anything that you found that works
really well from you, it'd be really nice to
include that in your project. I can't wait to see
your beautiful maps and hear about your
creative process.
3. Tools & Materials: To follow on in this class, you're going to need an
iPad running Procreate. I am running version 5.3 0.9. And then I also recommend
an Apple pencil. It's absolutely the best tool
for drawing on your iPad, and I cannot
recommend it enough. And then, of course,
you're going to need my mapmaking brush pack, which you can download
on the projects and resources tab of the
Skill share class page. Let me give you a little tour of the mapmaking brush pack
and show you what's inside. Let's take a look inside
the map making brush pack. The first couple brushes are
great for drawing details. These are the liner brushes. So the first one is liner, and this one is pressure
sensitive for size. And then we also
have the liner mono, and this is a monoid brush, so it is not pressure sensitive. And then we have a few
brushes that are good for drawing pathways,
roads, and rivers. So this is the pathways brush. Pathways outline is really cool because when you
overlap a stroke, they connect together as long as you don't lift
your pencil up. And then multi line. I really like this
one for doing rivers. There's a gritty texture
brush for adding a weathered touch
to map details. This is the same
texture that's built into all of the next
groups of brushes. There are seven
creative line brushes, including dashes, dots, zigzags, loops, squiggles,
scallops, and waves. And there's even a
crosswalk brush. There are also several
vegetation brushes to create different
kinds of trees, cacti, grass, and more. And then there's a few
brushes for making land texture information
like hills and mountains, and a couple more fun things like these fish and some tents. Your download also includes
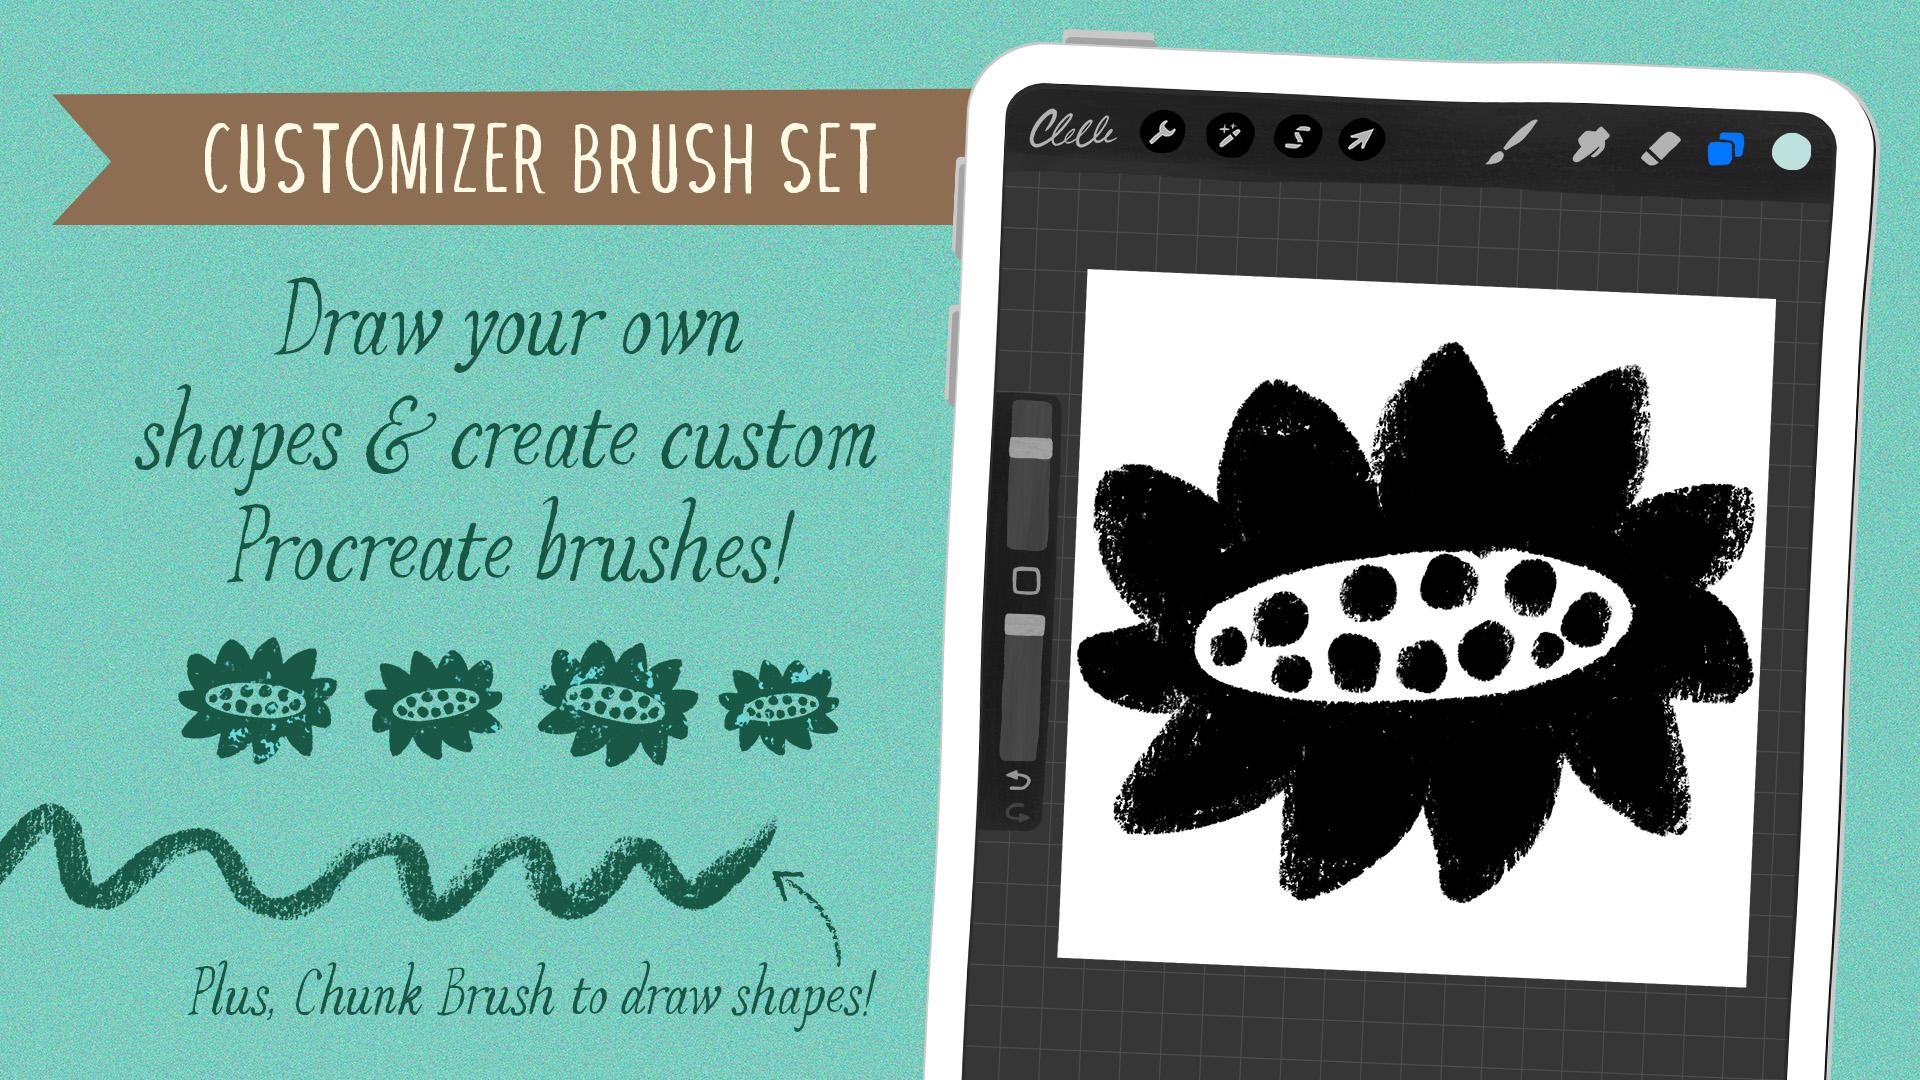
a map customizer set. And in here, we've got
five template brushes that help you create your very
own map making brushes. We're going to explore this
in the dreamy Deserts lesson. And then we also have
this chunk brush, which you can use to
draw the map elements. A couple of notes
about these brushes. All of the brushes have
a saved brush size. So when you draw a map, you can use the brushes at
their save size to keep all the elements in more or less the same scale
with each other. But of course, you can
adjust the size of map elements by adjusting
the brush size slider. If you're following
along in the lessons, I will be using the
saved brush size unless otherwise noted. All of the stamp
and scatter brushes will be oriented to
the iPad screen. If you wanted to change
the angle of map elements, you can just turn
your canvas a little bit to adjust the
angle of your stamp. And most of the brushes are pressure sensitive
for size and texture. So the harder you press, the bigger will be, and the
denser the texture will be. If you tap lightly, you'll get smaller shapes, that will show a
lot more texture. That's it for now.
In our next lesson, we're going to explore
a few relaxation tips before we jump into
our first map.
4. Relax into Map-Making: The idea to make this class
came to me one day when my 7-year-old daughter asked
me to draw maps with her. It had been a really
long, stressful day, and all I really wanted to do was go veg out on the couch. But I said, yes, grab some crayons in a piece of
paper and sat down beside her. I had no idea what I
was going to make, so I just started drawing meandering lines
across the page, which became roads and adding little houses
here and there. Then I drew a creek with
some bridges, a little barn, windmill, trees all around, and why not a
sunflower field, too. As I let my mind wander and fill the spaces with whatever
came to my mind, I felt my stress melt away. It was surprisingly soothing. In that moment, I was reminded how important creativity
is for relaxation. That spontaneous, make
it up as you go map was tremendously helpful for me
achieving that relaxed state, and I really wanted to share
that feeling with others. So that night, I sat down
with my iPad and started making brushes and developing the process that you'll be
learning in this class. Yes, what you'll learn
in this class will help you make adorable
illustrated maps, but you'll also learn techniques to help you achieve a relaxed, creative state
whenever you need it. So before we dive into
the creative process, let's take a moment to
explore some techniques that will help get you in the
right mindset for art making. These methods will
set the perfect mood for your mapmaking journey, and can be used to support your creative
practice at any time, whether you're
painting, sketching, doing digital art, or any other type of
creative expression. I wanted to remind you that
these are just suggestions. Don't feel discouraged
if you can't implement all of these before you start
your art making session. Even if you only try out
one or two of these tips, it can still make
a big difference. The key is to find what works best for you and your routine. So take what resonates, experiments, and most
importantly, enjoy the process. Tip one, creating your
relaxation space. First things first, let's set up your space for some
relaxing art making. Find a quiet and comfy spot where you can work
without interruptions. Think about things like
lighting and ambience. Some people love natural
light streaming in, while others prefer a
cozy, dimly lit space. Play around with
different setups until you find what
feels right for you. Tip two, mindfulness
and meditation. Mindfulness and meditation are great for calming your
mind and getting focused. Before you start
your art session, take a few moments to do some deep breathing or a
short guided meditation. Close your eyes, breathe in
deeply through your nose, and slowly exhale
through your mouth. Notice any tension and let
it go with each breath. Get fully present, letting go of any stress
or distractions. Tip three, engage your senses. Engaging your senses
can really help ground you and spark
your creativity. Try adding some sensory elements to your art making routine. Play some soft music or ambient sounds to
create a soothing vibe, light a scented candle or use essential oils to bring
in some pleasant aromas. Tip four, rituals and routines. Having rituals and routines can signal to your brain that
it's time to get creative. Setting up a pre art making ritual can help get
you into the flow. It could be something simple
like brewing a cup of tea, jotting down your
intentions for the session, or doing a few stretches
to release tension. Find what resonates with you and make it a part of your
creative practice. Lastly, don't forget to
embrace imperfection. Art making is all
about self expression, and it's totally okay to
make mistakes along the way. Let yourself
experiment, take risks, and play around with different
ideas without judgment. The key is to enjoy the process and trust your
creative instincts. As you start your
artistic journey, remember that relaxation is a crucial part of the
creative process. By incorporating some of these relaxation techniques
into your routine, you will cultivate
a sense of calm and openness that will help support you in your
artistic endeavors. So take a deep breath, relax, and let your
creativity flow.
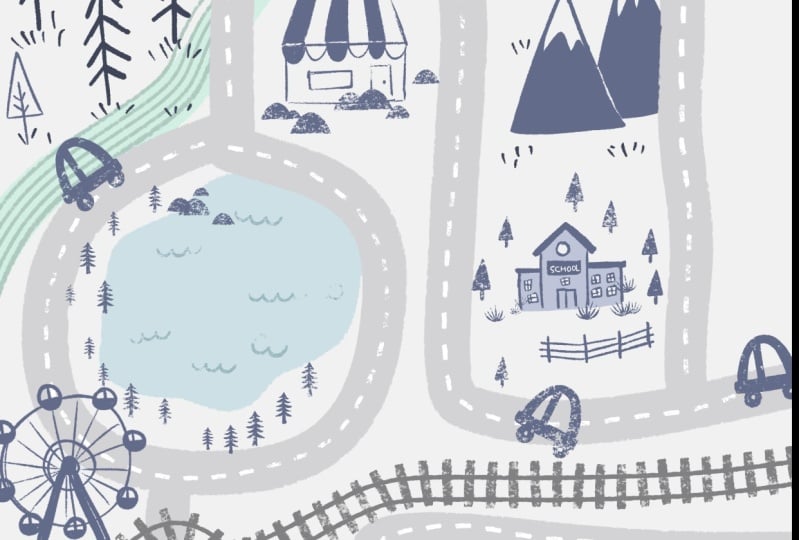
5. Map 1: Carefree Countryside: Welcome to our first
mapmaking lesson. I hope you're comfortable
and excited to get started. For this first map,
we'll be creating a carefree countryside to help get you familiar with
the mapmaking process. I don't want to
overwhelm you with instructions before we begin, but I do want to
let you know that I'll be guiding you
through each step. However, don't feel pressured to draw exactly
what I'm drawing. The beauty of this
process is that you can let your
imagination run wild. There are no rules and no
right way for things to be. Let your mind wander and create your map in whatever
way feels right to you. Without further ado, let's get started crafting
your first map. Let's begin by
creating a new Canvas. Tap the plus sign
in the upper right. The Cvas size we're going
to be using today is 3,800 by 2,800 pixels. If you don't already have a
template save for that size, here's how you can create one. Tap this little rectangle right here in the
upper right corner. Make sure you're down
here under pixels, and we're going to type in 3,800 for the width and
2,800 for the height. And you can give
this Canvas template a name. And then tap create. Let's start by
choosing a base color. Now, you can choose any
color you want for your map. I'm going to do kind
of a dusty teal color. So something kind of like
this, not too saturated. I'm kind of going for calm here. So that's the color that
I'm going to start with. And then I'll head
to my brush library and go into the Map
making brush pack. We're going to start with
the brush called Pathways. So we're going to create sort of a blob shape for this map. So go ahead and move your apple pencil all the
way around the edges of your canvas and sort
of a waby line like this until you have a
completely closed shape. And then you can fill
it with color drop. Once you have a base, you can
start adding in some roads. We're going to go
up to our layers, and we're going to
tap the plus sign to create a new layer. And we are going to set this
layer to be a clipping mask. So just tap this new layer
that you just created. And in the menu, you can
choose clipping mask, and you'll see a little arrow pointing down to
the layer below. Whatever we draw on this
layer will only show up within this blob shape. So that's perfect for our roads. Now, let's go into
our color picker, and we're going to
pick a color that's just a little bit lighter, and we're going to
kind of move this direction in this color disc. So go a little bit lighter. So something like
that. Can test it out. I think that's a good color. And we're going to
use the same brush for our roads, this
pathways brush. And now we're just going
to draw some kind of meandering roads that
go through the blob. And you can do really
whatever you want here. I'm going to draw kind of
a curving one up that way. And maybe we'll have one kind of slicing
through like that. And then we can have one kind of connecting and going
through, sort of like that. But you can place your roads
wherever you would like. Now that we've got some roads, we can decide if we want to add some water elements like
a little stream or river. And I'm going to do that
on a separate layer. I'm going to go up to my layers. I'm going to tap the
layer with the blob. And then I'm going to
tap the plus sign. That's going to
create a layer in between the two layers
that we've just made. And then for my colors, I'm going to go into I'm going to go into the
these cooler blues over here and just get like a
nice good color for water. I think that's a good color. It's always good to test a little swatch to see
if you like the color. And then I'm just going to draw kind of a wavy sort of riy
line going through my map. Okay. So now that we've kind
of made the lay of the land, we can start adding in
some little map elements. I'm going to go into my layers. I'm going to tap the
topmost layer here, and then I'm going
to tap the plusin to create a new layer
right above that. Now, all of my map elements
are just going to be a little bit darker color
than my base color. So I'm just going to
sample my base color here. I'm going to go into
my color picker, and I'm going to move this
way in the color disc. So I'm getting just
a color that's a little bit darker
and more saturated. A little bit darker than that. So those elements really stand
out. I think that's good. And we're going to
start by drawing a few structures for our map. So to do that, we're going
to go into our brushes, and we're going to
choose the liner brush. It's the first one. Now we're going to go ahead and
draw some houses. So go ahead and pick a spot where you
want to put a house. I'm gonna zoom in to this
little spot right here. And we're gonna draw
these really simple, kind of like two
d, three D houses. So I'm going to start
by drawing kind of a long rectangle that's
open on top like this. And then I'm going to draw
another line that's not quite halfway, kind
of off to one side. And then we're going
to draw our roof line, so it's going to be a
triangle like that. And then the line
from the bottom of the triangle is going to go off parallel to the
bottom of the house. And then it's going to
come back up like that. And then I'll connect those
two to form the roof. And then I can fill the
roof with color drop, because I'm going to
make the, my roofs dark. I'm going to thicken up
that side a little bit, and then I'm going
to close off this end right here like that. And there's my little house. And now that I've drawn that, I can add doors and windows
and things like that. So add a little door to your
house, wherever you'd like. And then maybe a couple
of windows, too. I'm just kind of filling in both the doors and the
windows with colors like that. So there's our
first little house. Super cute, very simple. Now let's pick a spot
for another house. Let's go down here kind
of under the river. Maybe there's a little
house over here, so let's do that again. Start by drawing a long
rectangle like this, and then divide the
rectangle like that. And on the smaller part, we'll
add our little roof line. Draw a line parallel to
the bottom that way. And then the other side of
the roof in parallel with this line here, and
then close it off. And then we can fill
that with color. And then just kind of close off that triangle on the other side. We have our little house. Now we can add
doors and windows. So maybe I'll do like my door off to the side on this one, little window next to it, and then maybe like a kind of semicircle window above that. And then a couple windows
on the side of the house. And then maybe this time, we can add a little chimney. Just draw a little rectangle on top of the house
and color it in. There we go. So now we've got two houses in
our little map area. Let's do one more,
maybe over here. You can add as many
houses as you like. But this is kind of
a countryside scene, so we don't need to
do too many houses. You can draw them
all in the same way. Draw a big rectangle, divide it. At our little roof line. Draw a line across,
and then up and back. And then connect and
fill it with color. And then we can add
our doors and windows, Maybe our doors on
this side this time. Let's add door right there. Rectangle. And a window. Then maybe two narrow
windows on this side. You design your house
however you like. Little circle window. You're just kind of like doing
a lot of the same things, but just a little bit different. And then let's put a chimney on. You can draw your chimney
as an open shape too. You don't have to color
it in, it's up to you. So now we've got three
little houses on our map. Let's add one more. Since this is a
countryside scene, let's add a little barn. And I'm going to put
that for me over here. You can put it
anywhere you'd like. So if you want to draw
barn, it's very similar. Again, we're going to
start with our rectangle, really long, that, three sides. Then we're going
to divide it this. And the barn has a little bit different roof line
than a normal house. So we're going to draw two
lines kind of like this. Like partial roof, and then two more lines
that kind of are at, like, a little bit less of a slope to create
the barn shape. And then just like
with the houses, we'll draw a line back and
parallel with the ground. And then we're just going to mirror these angles
over on this side. So here's that angle, and then this one kind of
comes in a little bit more like that, and then
connect the top. Okay. We can fill that
in with color drop. As. L that sit in like this. And now we get to add
our doors and windows, but we get to do a barn style. So let's add a barn
door on one side. So it's going to be a
nice, big rectangle. We're going to divide the
rectangle in half like this. And then put Xs on it. Super simple. There we go. Simple barn door, and then a
little kind of barn window. Just a long rectangle kind
of above the barn door. And then to make it look
even more like a barn, we can add some like
barn wood slats. So if you do really light
pressure with this brush, you'll get a very
faint line like this, and this will be perfect
for showing the kind of, like, slats of the barn wood. So just add little vertical
lines down your barn. And then also along
the side of the barn. We have windows to your barn on the side if you want or not. It's up to you. Okay. So's your cute little barn. And why don't we
go ahead and add a silo for a barn as well. So we'll have the silo kind of behind the barn a little bit. I'm going to draw a line kind of extending out from
the side of the barn, and then it's going to go
up for nice tall silo. And then this is
going to end up being a big rectangle,
sort of like that. And then it's going to
have a top like that. And then we can just
add some lines. Again, I'm doing a
little lighter pressure, so the lines aren't
quite as thick as the outline. There's our silo. O. Okay. Our little map is coming along. We're going to draw
one more structure. Right over here. I think
we need a windmill. So here's how we can
draw a windmill. I'm going to start with a
triangle shape for the roof. And then kind of a round kind of bottom to that
triangle shape. And then two lines kind of coming down and out
just a little bit, so it kind of tapers out. And then another curve kind of similar to this one for
the bottom of the windmill. And then this is
going to be like our little center point
where the sails attach. And we're going to just draw some lines like that that cross. And then the sails. These are just more rectangles. And then you can color
those in as well. Is a little better colored in. Or you can use color drop
since they're close shapes, that makes it a little easier. There's a little
windmill, maybe a little circle right there
where they connect. And then our windmill can have a whatever shaped door
you want to have. Color that in, maybe
a little window above it. And there's a
little windmill. Okay. I think we have plenty
of structures for our map. Let's start adding some of the fun details like trees and grass and things like that. So let's create a new layer
for all these details. Let's go ahead and
tap the layers panel, and then tap the plus sign. We'll create a layer on
top above everything else. We're going to stick
with the same color, but now we're going
to switch brushes. So let's go into
our brush library. And if you scroll down, you'll find all of the fun
trees and things like that. Let's start with oval trees. And now, let's just start
adding in some trees. As you'll notice when
you work at this brush, it kind of staggers
your trees and also gives you trees
of various sizes. So all you have to do
is really paint a line, and then you've got some trees. So you can add in trees wherever
you think you need them. Maybe a here a little
bit over by my house. And maybe we need a
tree for our barn. If you want to make
a bigger tree, like, maybe that tree looks
a little bit smaller, you can always make
your brush size bigger, and you can paint
in a bigger tree. Maybe there's some bigger
trees down on the farm here. If you go back to where we have the brush size saved
for these brushes, we'll kind of make trees that are in the same proportion
as everything else. So you can always go back to that little saved
brush size. Okay. Um, let's do some
different trees now. Maybe we'll go to
these triangle trees. Maybe along the river, we've got some of these kind
of, like, triangle trees. But some above and below. Maybe above this house. There's some more
of those trees. You can draw with
this brush or you can tap to add individual trees. If you don't like where a tree landed, you can
always, you know, erase it or use a
selection tool to move it around. That's good. And then maybe we need a little bit of grass
around this one. So let's go and find the
tufts of grass brush. And maybe we'll just
add in some grass. I'm just going to draw a few
lines of grass everywhere. And I'll fill that with
like a nice grassy texture. Maybe down here, near the
river, there's a lot of grass. Wherever you think
it needs something. Just add a little bit of grass. Maybe up here. Yeah, maybe around our little
barn, to grass. Okay. Now, some other elements,
I think would be fun. It's maybe a little
sunflower field over here by this house. So let's go into our brushes, and I have a brush for that. It's called sunflower stamp. And this one is a stamp brush, so wherever you tap, I'll draw a little sunflower. We can make a little
sunflower field over here. They've got the heads
of our flowers, and then we can go ahead
and grab that liner brush. And we can draw some stems, so you can make them how tall. You want to make them. I'll
just draw a bunch of stems. Then we can fall in some leaves, just kind of alternating
sides of the stem like this. However many leaves you want. To. Hey, I think over
by our windmill, while we've got the
light of brush selected. Why don't we draw on some
really simple little tips? I always think of, you know, holland tips with windmill. So I'm just going to do
my tulips as kind of like ovals with some kind of like long leaves kind of
sticking out the side. So like oval with a stem
and then some tall leaves. So add some tips
to little area by the windmill. Whatever
many you want. E. And then, since we
have our farm over here, let's add some lines
to kind of represent, like, rows of crops. So in the brush set, we've got a few different
kinds of line brushes. And I think for crops, either the zigzag line or the squiggle line
look really good. So I think I'm going
to do the zigzag line. You can choose
whichever one you want. And for this, since
I kind of want them to extend from the
edge of the blob to, like, underneath this road,
I'm actually going to place a layer right
above the blob layer. So I'm going to tap the blob, and then I'm going to
tap the plus sign. And now I'm going
to draw. Some lines with this zigzag brush. Kind of all in a row like that. And for this one that's kind
of overlapping the silo, I'm just going to get my eraser, and I'll choose that
liner brush and just erase because this
would be behind the silo. L. We've got some like
farm land over there. Now, let's look at our river. We haven't done
anything for our river, and I want to add some
fun details into that. So let's start by
adding some kind of, like, waves and
ripples to our river. So I'm going to tap the
layer with the river. I'm gonna tap the plus sign
to create a new layer. And then I'm going to
select this river color. And then I'm going to go
into my colors and get something that's just a little
darker, more saturated. So again, going this direction in our color disc.
Test that out. But I don't want to use
this zig zag brush. So I have a couple of
ones that will work well. I've got the squiggle lines, which will make a fun little
texture in your river, or I have the scallop lines, which are kind of
like little waves. So I like to do these. Just like a few like this,
kind of all throughout. So however you want
to represent water in your map, you do it that way. Just keep in mind when
you're using this brush, you want to always go
in this direction. If you go this direction, you'll get, like, upside down. It Doesn't look like waves, but it could be cool
for something else. There you go that way. So now we've got some
waves in our river. And how about we need
a little bridge? We just have a road that's kind of like over the
top of the river. So let's draw in
a little bridge. I'm going to go to
layer with my roads. And I'm going to grab
my eraser brush. Again, I'm using
the liner brush. And let's erase part
of this road away, and we'll build a bridge. There we go.
Something like that. I'll be a nice
long bridge. Okay. And then for the
bridge, let's just use the same layer with
the houses, this one here. And the color is going
to be the same one that we're using for all of our houses and trees and things. So this darker color. And for the brush, let's go
back to our liner brush. Now we're going to
just draw kind of like a big arch on both sides, the same shape on both
sides and then connect. And this will be our bridge. There we go. And then we can add some little lines like
planks of wood on the bridge. So let's just turn on
alphac on this layer. We're going to take two fingers
and swipe to the right, or you can tap on the layer
and choose alphac right here. And then for the color, let's just choose a
little bit lighter color than what we have
now, like that. Just kind of going this way. And then just very lightly, draw some lines over
your bridge. Here we go. Maybe over here, we add like a little like a way finding sign. So let's choose
our darker color. So I'm just going to sample it from this windmill up here. And I still using
my liner brush. And then on our layers, we
still have alphaoc turned on, so that means we
can't draw anything new on this unless
we turn it off, so we can swipe with two
fingers to the right or tap the layer and unselect alphaoc,
so that there's no check. And then let's just
draw kind of a line. This will be like our sign post, and we'll draw some kind of
parallel lines like that. On one side, we'll draw like a triangle pointing that way with like an inverted triangle on
the other side, color it in. And then we can do one
that's going the other way. L. Maybe that'll help people find their way in our little imaginary
countryside. Since we have kind
of this grass, that's like competing
with our signs. Let's go to the layer
with the grass, and then we'll just erase these little bits
of grass there. There we go. I can see your
sign a little bit better. So now, if there's any
other details that you want to add to
your scene, you can. I think I'm just going to
add a little bit more grass. So I'm going to go find my
grass Tufts grass brush. Then I think up here, we
could use some grass. There. Maybe over here. Maybe we'll put some over there. Just kind of wherever you think needs a little bit of filler. Or maybe you want to
add some more trees. Maybe this house
needs a big tree. So I'm going to go
find those oval trees, and I'll make my
brush size bigger. We can do, like a nice big tree, maybe even bigger than that. Here we go. Now we have a
nice big tree for that house. And once you've decided you've
added enough to your map. It's all done. I hope you enjoy drawing this
first countryside map. In our next lesson,
we're going to be creating some restful roads. We're going to be
exploring making maps with a three color palette, creative ways to use
some of these brushes, and I'm going to teach
you how to create an easy, authentic print effect. I'll see you in the next lesson.
6. The Map-Making Process: H I hope you enjoyed creating
your first map and found it to be a
calming experience. Before we dive into
our second map, let's take a moment to
review the map making process that you learned through crafting your countryside scene. This process serves as a
blueprint for creating any map, including the ones we'll
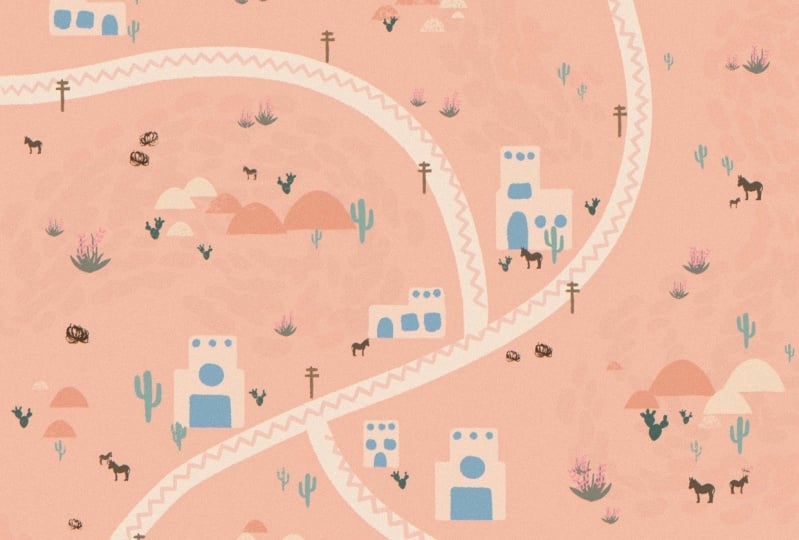
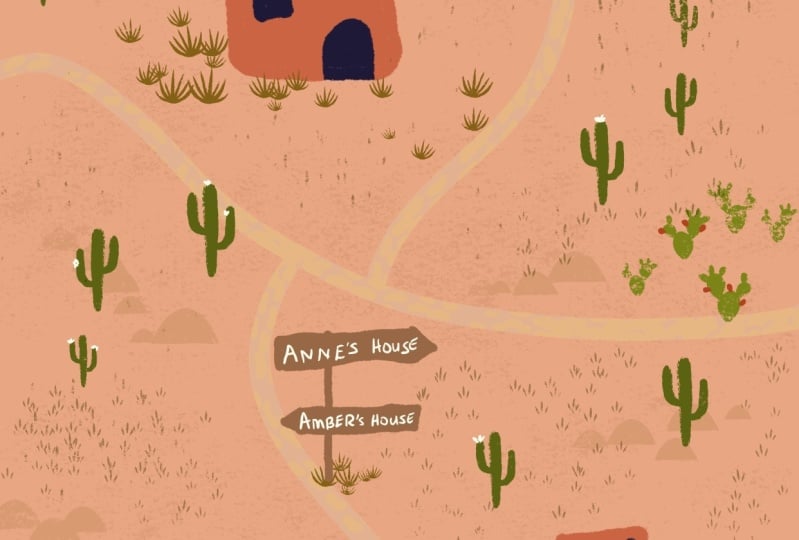
explore in future lessons. Step one, choose a theme. Before you draw anything, you want to decide on the theme or environment of your map, and you have a myriad
of options ranging from a serene countryside scene to
a coastal or beach setting, majestic mountain area,
the vastness of a desert, or the coziness of
a neighborhood. Step two, create a background. Next, establish the
backdrop for your map. This could involve
creating a blob shape, like in our first map,
selecting a background color, or just leaving it blank. Step three, add the roads. Set the layout of your map by drawing meandering
lines across it, representing roads and pathways. Step four, water features. If desired, incorporate water
features such as rivers, creeks, waterfalls, lakes,
and ponds into your map. Step five. Draw
buildings or structures. Next, add houses and other structures as they are often prominent
features of maps. You consider including
houses, cabins, barns, windmills, green
houses, bridges, tunnels, shops, camp
sites, and more. There are a lot
of options there. Step six, natural elements. Now, introduce some natural
elements to your map. Begin with large
land formations, like hills and mountains, and sand dunes, and then
proceed to add vegetation. Start with the larger
plants such as trees, and then work your way towards smaller ones like bushes,
flowers, and grass. And step seven, fun details. Finally, infuse your map with personality by
adding fun details. Consider, including
wayfinding signs, vehicles, storytelling elements,
animals, characters, or any other creative additions that enhance the
charm of your map. With these steps in mind, let's embark on our next
map making adventure.
7. Map 2: Restful Roads: In this lesson, you'll be
creating a road map of swords as you learn some creative ways to
utilize the brushes. I'll also teach you
how to create an easy, authentic print effect for a
finishing touch to your map. Let's get started. Let's start this map by creating
a new Canvas. Tap the plus sign
in the upper right, and we're going to
use the same size that we did for
the previous map, so we can use our
same Canvas template, that's 3,800 by 2,800 pixels. For this one, our
map is going to take up the entire canvas. So let's start by choosing a
color for our map elements. In the color picker,
we're going to go kind of into the
oranges over here. And I don't want to get
something that's super dark. I want to come up
just a little bit, so we have sort of
this kind of, like, really muted, almost
grayish brown. And then in our map
making brush set, we are going to start with
the pathways outline brush. Now, the cool thing to
note about this brush is that as you're drawing
your pathways, if you overlap something
you've already drawn, it connects the paths together, which is really, really cool. And we can use that
to our advantage to draw our map roads.
Let's undo that. And it makes it a lot easier if you zoom out a little
bit like that. So just zoom your canvas out. So we're gonna draw a couple
of intersecting roads here. Again, you can draw your roads
in whichever way you want. But I'm gonna start here
at the top and kind of make a winding curving
road like this, and then maybe go
all the way down. Then I'm gonna keep my
pencil on the screen. I haven't lifted it
up. Then I'm gonna draw a road that kind of
goes across like this. And then I'll lift my pencil up. And I'm going to
draw another road that's going straight down here, and this one is actually
going to be railroad tracks. So I want to make a road
that's super straight. So what I'm going
to do is I'm going to use the quick shape feature. So I'm going to draw my
line going straight down, and when I get to the bottom, I'm going to hold my pencil
on the screen like this. And then I'm not
going to let go. And I'm going to take one other finger and
put it on the screen. And you'll see that it will snap to a perfectly straight line. So now I have a
nice straight road for my railroad tracks. And then I'm going to
zoom in right here and just do a little erasing
to kind of clean that up. So I'm going to go
to my eraser tool, and I'm going to I'll just use a liner brush from this
set for my eraser. And I'm gonna erase the horizontal lines on this
road here just a little bit. Yeah. Okay. So like I said, we're going to make
this a railroad. So to do that, we're
going to use one of the brushes in a little
bit of a creative way. Let's go into our brush set, and we're going to find
the brush called crossing. Now, I made this brush to be, like, a little crosswalk that you can put on
your roads like that. But since it's a bunch
of horizontal lines, it also makes great
railroad ties. So I'm gonna zoom my canvas
out a little bit like that. And I'm going to increase the
brush size to about 35-40%. And then we're going to use
that same quick shape feature to draw our rio ties. So I'm going to start
out here outside the canvas and then just draw line straight
down like that. That's kind of wavy.
I'm gonna hold my pencil down on the screen when I finish drawing my line. And you see now that it becomes. Actually, the shorter
the line you make it, the closer the
ties get together, so you can kind of
adjust that way, but I'm going to put
them where I want. And then as soon as
I lift my pencil, I can also tap here where
it says, edit line. Now I have these little
nodes that I can manually adjust my line like that. I have a cute little railroad. And just tap anywhere
to get out of that. So, now you've got a couple of roads. You've got a railroad. Let's add a water feature. I think a winding
river would be nice. So let's go up to
our layers and tap the plus sign to create a
new layer for the river. And then let's go
over to our brushes. And we're going to find
the one called multi line. This is sort of like
a rake style brush, and I think it's kind of a
fun texture for a river. So let's zoom out again. I think anytime you're
drawing, you know, something that kind of
goes across the canvas, it's best to zoom it
out a little bit, so you can start
outside the canvas. But go and draw a
winding Curvy River. You can have it cross a couple
of your rows like that, and we can make
those into bridges. Perfect. So let's go to
our the other layer, the one that has all
the roads on it, and we'll do a
couple of bridges. So tap that layer, and then go to your racer tool, and we're just
going to race just like we did with
our country scene. Race away part of our roads, where they cross the
river like this. And then let's go
back to our brushes, and we will choose
the liner mono. This is a mono width brush, so it's going to
be the same width, no matter how much
pressure you use, which is kind of how the
lines of the roads are, so I thought it would be a
good choice in this case. And now let's draw
some little arches or a bridge over the river. There, and I'll do
this one as well. And then let's go back
to the river layer, and then we can race away. Part of the river, that
would be under the bridge. There we go. And then once
you're done racing, go back to the roads layer
in your layers panel. And then you can draw some little lines on
the bridge like this. There we go. Okay. Now let's add an extra
little detail to our roads. We're going to go
to our brushes, and we're going to find
the dashed line brush. And this makes nice, like, dashed lines in the road, like you would see on a road. You can see, kind of like that. But those feel a little bit big. So let's just make the brush
size a little smaller. I'm going to take it
down to like 15 or 16%. And now we have a
little daintier dashes. So just kind of draw a line through the
middle of the roads. I'm going to stop
where the roads cross right there.
And then keep going. D. There we go. And then I'll
do it on this road as well. Then we'll trawl down the
middle here. There we go. So for this map, we're doing
sort of a rural scene, so let's not worry about
adding any structures. Instead, let's dive into the natural elements
of this map. So let's create a new layer
for these natural elements. I'm going to go to my layers and top the plus sine to
create a new one. And then I'm going to
go over to my brushes. And let's start off
with this brush called Boulders. And this
brush is great. If you draw sort of kind
of, like, wavy lines, you get these really
fun little kind of boulder rock formations. So you can draw a
few little lines of boulders here and there. You can make the brush
size a little bit bigger if you wanted
bigger boulders. You also press a little heavier and you'll
get bigger boulders. Got some boulders
there, maybe up here above the
river, a few there. Maybe over here. Just kind of wherever you think
could use it in your map. Okay. That looks pretty good. And now let's dot some trees
in amongst our boulders. Let's go and find the
pine trees brush. Love this one. And we'll just paint in
pine trees here or there. And if you wanted to make the pine trees a little bit bigger, you could always know, make your brush size
a little bit bigger. Let's there. Kind of
wherever you want. And let's do multiple
kinds of trees. We'll also do the
oval trees brush, and we'll put some over here. These boulders and maybe
down here in this area. I want to do something else
with this little section, so I'm kind of leaving
it blank for now. But let's put some
little trees over there. That looks pretty good. Maybe
a couple of there. Okay. And now I mentioned
I wanted to do something a little
different in this section. And this is almost just for visual interest and
do something else. But let's choose this
squiggle line brush. And I'm just going
to do some like, little stripes of that. It could be rows of
crops, could be farmland. It could be it
could be whatever. But I just thought
it would be fun to add something else
for visual interest. So draw some lines that cross over the river and the road. We're kind of making a
little bit of overlap. And then we're going to
erase what we don't need. I'm just going to draw lines over this whole section here. And then, once you've gone
out the whole section, you can grab your eraser brush. I'm using again, the
liner brush is my eraser and just erase away the
parts that you don't need, and that will fill in
the section fully. Now, I think maybe just a little bit of
grass would be nice. So I'm gonna find that
tufts of grass brush. And then just Wever it
needs a little bit more. I'm gonna add some grass to make it look a
little bit more. Natural and nat Maybe down here. You just a few over
here and over here. You know, amongst the
trees and the boulders. There we go. That's
looking really nice. So now we've pretty much drawn
all of our map elements. Minus a couple of other things. I'll show you in just a sec, but let's add a little bit of
color to the scene now. We're going to approach color a little bit
differently for this one, and we're going to create
sort of a kind of, like, vintage overprint effect. So what we want to do
for this effect is helpful if all of
your layers are merged into a single layer. So to do that, let's
go up to our layers, and we're going to select
these three layers that we use to
create all of this. And we could merge
them all together, but I like to keep
my layers separate just in case I want to go
back and add something later. So instead, I'm going to select all these three layers and
then I'm going to group them. And I'm just going to close that group by tapping
this little carrot. And then I'm going to swipe to the right on the group
and choose duplicate. And now we have two
copies of the group. We're going to tap
this duplicate. And in the menu, we're
going to use flatten. So now we have all of the layers merged together
into one layer here, but we also have our
layers all separate here, just in case we wanted to go
back and change something, or I always like to keep my options open when
I'm working digitally. So go ahead and uncheck the
group. We don't need it. We're just going to
disable it for now. And the last thing we're
going to do on this layer, the one that's all
merged together. We're gonna tap
this little n here. And then in this list of blend modes, these
are blend modes. We're going to scroll up until we get to the
one called multiply. Now, when we have multiply on, it's going to interact with any colors that are in
the layers underneath it. So you'll get to see what that looks like
in just a minute. Let's create a new layer now, so we can start
adding some color, and we're going
to put this layer underneath the layer that has everything all
merged together. And now we're ready to
start doing some color. So let's go to our brushes, and we can just use the
pathways brush for this. We're going to do a lot
of big chunks of color. So choose pathways. And then we're going to choose, like a grassy green. So something here in
the yellow greens, not crazy, saturated again. We don't want it to be
too intense and bright, so we're going to
come in a little bit. Not too dark either.
So something about right there,
I think is good. And then we're
just going to very loosely kind of color
in the areas of green. And I'm leaving a lot
of white space here. I really like the
way that that looks. So let's do all these
little sections here. You know, leave a little white. It's okay if it like, touches
the roads a little bit. Let's do this one. I'm going
to leave some room around. The river will be
a different color. I do this little area here. And then I can actually
fill that in with color drop because
that's a close shape, so I can just fill that
in. And then down here. Again, this is meant to be
pretty loose and imperfect. It's always best when you can lean into the imperfections. I think it makes it
more relaxing. Okay. Couple more areas to do. So let him with color drop, and then this one right here. Okay. So now you can see that all the white space is
the color of our road ops. I forgot one right here.
There we go. Okay. So now I want to add
just a little bit more color to make
this more interesting. Let's go to our layers, and we're going to
turn on Alpha lock. So we're going to
take two fingers and we're going to
swipe to the right on that layer or you
can tap the layer and choose Alpha lock
from the menu here. And then we're going
to go to our colors, and we're going to get a
color that's just a little bit darker, like that. Maybe a little bit
darker than that. Maybe a little bit cooler, like closer to a
bluish green that way. There we go. That looks good. And then we're just
going to add some like chunks of this other color. Again, this is just for,
like, visual interest, so it's not just all one color green over
the whole thing. I'm going to do like
a section down here. It's kind of arbitrary. You know, Wherever
you think it needs a little bit more, you know, variation in color, you can add some little splotches
of this darker green. Maybe a little bit more over
there. Yeah, looks good. And then let's also
paint in our river, and that's going to go
on a different layer. So we're going to
tap our layers menu, tap the plus sign,
and we're going to set the blend mode of this
layer to multiply as well. So tap the little n, and then just slide up
until you get to multiply. And let's go ahead
and choose like a nice bluish color,
something like that. And then we're going
to paint in our river. And what I love about this
is anywhere that kind of overlaps the grain a little bit, kind of has this multiply effect and makes this other color. So that's kind of fun. And then I think it
would be super cute to add a few little
cars on the road. So let's just go ahead
and do that as well. So let's tap on our layer, the top one, the one that has
like all the map elements. And then we're just going to create a new layer
right above that. So tap the plus sign. And then we're going to
select this color that we've been using for all the roads
and everything like that. So just select that color. And let's choose our
liner mono brush. So go ahead and pick a spot where you think you
might want to add a car. I think I'll add one right here. I'm going to make the bar
size a little bit smaller. Maybe like 10% or so. So to draw a super
simple little car, we're just going to
draw a line like that. Add some wheels. In the bottom. Let's go skateboard. And then we're going to
draw a big bump like this. And then add, like a little
kind of hood to your car, fill in the body, like that. And then draw line
down the middle, and then I'll make
our little windows. And then you have a
super simple little car. Now, you might notice
that it's kind of blending into the
road a little bit. So let's go back
to the layer with all the roads in
the map elements, almost like that layer. And then we'll grab our
eraser and we'll just kind of erase away a little bit, almost like you're
outlining it in white sort of and erase anything that it's kind
of like overlapping in a weird way so that you
can see your little car. And now you can see it stands
out a little bit better. And if you wanted to have
some more cars in your scene, you could draw them again, or you could just
duplicate this one. Let's go up to our layers and we'll find the
layer with the car, swipe to the left and
choose duplicate. And then we can
grab our transform tool here, little arrow. And we can move this one. Maybe we'll put
this one up here. Be driving this way. I
can rotate it by grabbing this green node here, maybe
it's going like that. It's coming around the bend. And then I can go back to the layer with all the roads and then just race a little bit
around the edges like that. That way we can see
our car really well. Yeah. Maybe I'll
do one more car. Go in that way. I'm going to go back to that original
layer or the one with the original car and swipe to
the left, choose duplicate. Go to my transform tool. And This one, I'm gonna have it facing
the other direction. So let's choose where it says down here in the tool
bar. Flip horizontal. I'll have the car
go the other way. And so now I'll put this one. It's going on the other
side of the road there. Coming around the bend this way. And then, like before, I'll
go to my layer with the roads and just serace a little
bit on either side. So I can really see the car
very well. There we go. And once you've done and once you're done
adding your cars, I would merge all
those together. So the three cars
merge all three. You can do that by taking your fingers and pinching
all three layers together. And then tap the little n here. And we'll set the layer
to multiply like we did with all of
our other layers. And you can see
here I didn't quite erase enough away in
the roads layers. I'll just erase that little bit. Look everywhere else looks
good. I'll race that. Lots of cute little cars. Oh, and I just noticed our rivers kind of running
through the bridges. And this is why it's
nice to have things separated out onto different
layers because 'cause I can just go over to
my river color layer. And I can grab my eraser
brush and just, like, erase away the part that's going under
the bridge like that. There we go. All right. Well, I have one more finishing touch
to show you for this map, since it already kind of has this sort of vintage feel to it. I'm gonna show you
how to add an easy, authentic print
effect to this map. So the first thing
we need to do is we need to copy the entire canvas, and that basically is
going to create a copy of all of our layers and
put into one layer. So the easiest way to do that is to go up to the actions menu, add and choose copy Canvas. And then you're going
to choose paste. And if you go to your layers, you'll see that now
we have this layer, which is essentially a copy of all of our layers all merged
together into one layer, including the background,
like white color. So to do this effect, we want to make sure
that this layer that just pasted in is
at the very top. So we're going to tap hold and drag that to the top
of the list like that. And then we're going to go
to the adjustments menu. And you're going to find
chromatic aberration here. And then tap over to it says
displace in little tool bar. And then it helps
if you zoom way in so we can really
see the effect happen. But if you take your pencil and you drag it
across the screen, it will separate all the
colors out into the three, you know, colored primaries. But we just want to offset it just a little bit like this. Want too much. And even
that is really intense, and it almost hurt your eyes. So we want to turn down
the transparency here. Let's turn the transparency
to about 50% or so. So you can still see it, but it's like less intense. And then zoom out.
You'll see that it's already started to have sort
of a kind of print effect. But there's one more thing
that we're going to do to really enhance that effect. Let's go up to the
adjustments menu one more time and go to noise. And then you're going to run your pencil across the
screen to the left, and that will
increase the noise. But we only want to increase
it to about 15% or so. However much noise you
think looks good to you, but I think 15%
looks really nice. And there is our finished map, our restful roads with a
fun little print effect. I hope you enjoy doing this design. It's
a really fun one. We got to introduce a
couple more colors, and I got to show you that
really fun print effect. In our next lesson, we're going to be creating
some imaginary islands. This is going to be
a full color design as we dive deeper
into mapmaking. There's going to be a
little bit of storytelling, some playful elements, as we add some fun
illustrated details. I'll see you in the next lesson.
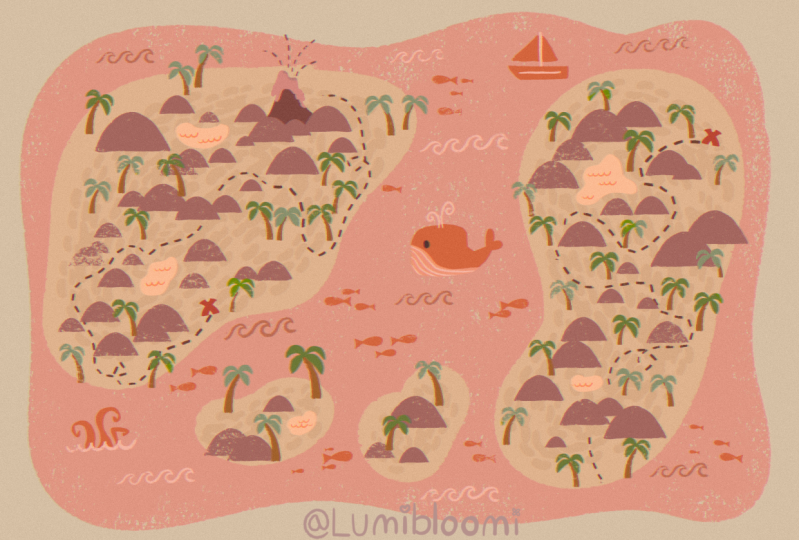
8. Map 3: Imaginary Islands: In this lesson, we're
going to head to the beach and dive
deeper into map making. We'll be creating a
vibrant full color scene as we bring imaginary
islands to life. Just like with our previous map, you have the freedom to shape your islands however you want. But this time we're adding
an additional layer of creativity with some storytelling elements
through illustrated details. These details will enhance the charm and
personality of your map, making it something
truly unique. I think you'll have a
lot of fun crafting your own little
world and inventing the stories that unfold there. Then possibilities are
as vast as the ocean, whether it's pirate
adventures, hidden treasure, serene, beach resorts, let
your imagination run wild. So, let's get started making some imaginary islands together. Let's begin our next map
with the new Canvas. Tap the plus sign
in the upper right. And we're gonna use
the same 3,800 by 2,800 pixel canvas that we've been using
for the other maps. And we're going to
start this map off with a big blob shape for our ocean. So let's start by choosing
a nice ocean color, kind of like a bluish green. Not too light, not too
dark. A right there. And then for the brush, we're going to use the pathways brush. And then you'll want
to draw a blob shape. Draw a wavy line around the edges of
your canvas like this. And then fill it in
with color drop. And now we're going
to add some islands. Let's tap our layers panel and create a new layer by
tapping the plus sign. And then we're going to
choose a different color. So we're going to
move this outer ring over into the kind of
yellowish orange area here. We're going to choose a really light version of that color. It's almost white, but
it's a little tan. It's going to be our
sand for our island. And then you can draw some lobby island shapes
kind of like this. It can be whatever
shape you'd like. Fill that in with color. Then you can add another
island over here. It's kind of like bean shaped. And then maybe even some
smaller islands down below. However many you want. Now let's add some
texture to our islands. We're going to go
to our brushes, and you're going to find
the brush called beans. This is kind of a fun brush that I like to use for texture, and it looks like beans,
so I called it beans. We're going to choose
a color that's just slightly darker
and more saturated. So again, we're gonna go
this direction in the disc. Just a little bit
darker more saturated. You don't want it to
be too different. T that color. It's very subtle, but I think it'll work
really well for this. And then you're
just going to trace around kind of the
edge of the island, but leave a little
space between the edge. So kind of like this. Just
trace all the way around. When you get to the
beginning, just keep going, kind of
like the spiral, like fill in the entire center
of your island, like this. You want to do the same
for your other islands. I leave a gap along the edge
and then fill in the center. And then of course, our
little islands down here. The brush seems a little too
big for that small island. You can always make the
brush size a little smaller. This. I'll have to be perfect. It's just a little
bit of texture. I'll do this one little
one here. There we go. Now we'll start adding
some land formation. So let's go up to our layers and we'll
create a new layer. And then we'll go
over to our brushes. And we're going to use this
brush called boulders, create some kind of, like,
hilly land formations. And for the color,
we're going to choose a nice green for that. So I'm going to choose a green that's kind of a little
bit of a yellowish green. But again, not too saturated. I'm going to go about
right here, I think. A little cooler. Test that out. Maybe a little bit darker. Kind of see how you're liking the colors. I think
that looks good. And then we're
just going to draw some hills across our
island like that. However many hills
you think you want. Just add a few lines
here and there, kind of fill in and some hills on this
smaller island here. And then even on the tiny ones. Now let's add some
trees to our island. Of course, we're going to
want to add some palm trees. So go ahead and create
a new layer for those. Just like to keep
everything separate onto separate layers.
To the plus side. And let's go over
to our brushes. Now, there's a few different
palm tree brushes. I have this one that's
just called palm trees, and that's like a full
palm tree like that. And then I also have palm
tree brushes that are separated out by trunks
and the palm fronds. So you can actually do the trunks and the palm
fronds as different colors. So let's choose the
palm trunks brush. And then for a color, I'm
going to go over to orange. Choose kind of like a know rusty orange color,
something like that. And we'll use that to
draw some palm trees. So I'm just going to
kind of trace along my beach and at a bunch
of palm trees like that. And then I'll add some
to this island as well. And maybe some peppered
in my hills over here. And, of course, on my
little islands as well. Alright, got a whole
bunch of trunks, and we're ready to
add some palm fronds. So let's go and find the
palm fronds stamp brush. And this is meant to
be tapped instead of kind of drawing a line
of trees like we have been. This is a stamp brush
that we're meant to tap, tap, tap it into place. So let's go over to these
palm trunks over here. And I'm just going to select this green color that I've
been using for these hills. And I'm just going
to tap right on the tip of my tree
trunk like this. That's going to add
some palm fronds that. You can also turn your canvas a little bit so that the tip of the palm trees facing
the top of the iPad. And that will make
your palm fronds turn that way a little bit. So like on this one here, if I turned it this way, so that's pointing up,
a little palm frond. I think I'm going to do a
couple of different colors for these palm
trees for variety. So I'm just going to do some
of them in this green color. And then I'm gonna do
a different green. And if your fronds are
coming out too big, you can always scale your
brush size down a little bit. Make them a bit smaller. That one there. See, that's
too small. Make a bit bigger. And a few of these here. Maybe that one. Maybe make them a brush smaller for these. Okay. So Jon a bunch in this
kind of lighter green. Now I'm going to choose a darker green to do some of
them just for variety. So I'm going to go to my colors
and let's choose a color that's a little darker and
maybe even a little cooler, so closer to the
blues like that. Test that out. I think that
colors pretty good. Ale bar. Okay. So we will go ahead and fill in the rest
of your palm trees. Looking good. Still
in all the rest. Make that a little bit bigger. Staff on dotting
these palm trees. Okay. I think we've got them
all. Now, maybe we want to add an extra water
element to this scene. Maybe a little lagoon in
this little spot right here. So maybe I'll reuse
the same layer, the one that has
the hills for this. I'm going to sample the
water color that I have. And then I'm just
going to go to color. This is a little bit,
more saturated this way. And I can use the liner
brush to draw my lagoon. So I'm just going to kind
of draw a shape like this. A little pond or a lagoon. And then I can add
a little bit of water detail to this one
with the scallop line brush. I'll just get a color that's
a little bit lighter. And then maybe scale my brush size down
just a little bit. That's a little bit
too big, still, 8%. And then draw some
little lines to show that this is
water. Like that. And now, let's add some extra illustrated elements to kind of build this world. So I think it'd be fun to add a little volcano
to our island. So maybe right in this
little area here. Let's make a layer that's
in between the island and this layer with the
hills. So right there. And let's sample this
dark green color, and we're going to use
that to draw our volcano. And for the brush,
let's go back to that liner brush to draw this. So we can make the volcanoes
kind of coming out from behind some of these
hills like this. Make a shape clothe shape, and then you can fill
it in with color drop. And then on top of that, we want some lava coming out of this. So we can start by sampling
this brown color here, and then maybe just get a color that's a little more redder. Like lava. I don't want to go full
red because I want to kind of keep a muted color palette. And then we can have
some lava kind of spilling out like this downside. Color that in. Here we go. And then we can
even have some kind of sputtering out the top. And we can use one of our
fun brushes for that, like, maybe the dashed line.
Brush will be good for this. Make it a lot smaller, though. Let's go to, like, 8%.
Yeah, I think that's good. And we'll just draw some
lines kind of curving out. There's lava kind
of exploding out of this volcano, like that. Now, let's think about our ocean because things are looking
pretty plain out here. And some fun
illustrated elements that you can add to
your map are things like fish and whales and
an octopus or sailboat. So let's add some of
those elements here. So I'm going to put a little
whale down in the corner. I'm going to sample
our ocean color. And then I'm going
to get a color. It's a little more
a cooler blue, so kind of going this way. And then just like a little
bit darker, like that. That's a good color, but
not the right brush. So let's go ahead and choose
that liner brush again. And we'll draw a cute
little whale down here. So we'll start with kind of like a roundish rectangle like that. Get filled out in color drop. And then we'll draw
a tail kind of curving out from the back,
and then coming back in. So it's kind of a sort of a tapered shape for
the curves like that. There we go. And then we'll add a little
fins to the back. There's a little whale body. And we don't need
a lot of details to make this look like a whale. But let's go ahead and
turn on Alpha lock. So swipe with two
fingers to the right. And then we're going
to get a color that's a little bit
lighter like that. And then draw a line across
the belly like that. And then you can get black, and draw a little eye. And then turn off alphack, so take two fingers and
swipe to the right again. And we'll draw in some kind of, like, a little spout. I'll start by sampling
this blue whale color, and then just get a color that's like
much lighter than that. Well, even lighter than that. Maybe I'll go a little
warmer, don't we? Yeah, that color looks good. And then just draw of a little curly line coming
out of the whale like that. And I think I'm going to
get my eraser and just kind of around off that
corner of my whale. There we go. I've got
a cute little whale. Now, let's add some
other sea creatures. Maybe over here, we've
got a little octopus. Let's sample our
blue whale color. Lease the same color to do
some octopus tentacles. So these are pretty easy. You just kind of
draw some S curves that kind of twirl
around at the end, and just make them
thicker, like that. Know. There's one, and then maybe we'll have another one kind of
going off this way. Like that. And then we have one more going the other way like a big curve
around like that. And then we'll add
a little wave to kind of have it like
coming out of something. But we'll come back
to that in a minute. And over here, why don't we add a cute little sailboat
in the same color? So let's just draw a
line across like that. And then the front of
the sailboat will here. We'll kind of make
it pointy like this. And then connect it at the back. And fill that in. And
then we'll add our sales. And it's fun sometimes
to make some elements pop out of the kind of
like background blob. I'm going to make the sales
kind of pop out over the top. S draw front sails, a little triangle like that,
and then the back sail. Then we can fill those
in with color drop. Then we can grab white. We can just actually sample our background to
get white and then draw the mast. That's
what it's called. And then maybe sample
our ocean blue. Get a version that's
a little bit darker that little ale
stripe to the boat. Super simple. I feel looks good. Okay. While we're
focusing on our ocean, let's start to add some
like wave textures to it. So let's create a
new layer for this. I'm going to tap the plus
sign in the layers panel. And let's sample
our ocean color. And we're going to
choose a color that is just a little darker
and more saturated. I think that'll be good.
Do a little swatch. And let's look at our brushes that might
work well for water. So we've got, of course,
the scallop lines, but we also have this
wave line brush, which is really fun,
and I feel like that feels really appropriate
for an ocean. So let's just draw some lines of that
kind of here or there. Just a few lines.
I'm going to do a mix of these darker waves
and then some lighter waves. So I'll leave some space. That looks good. So now, I'm going to get
a lighter color. Again, I'm going to
sample that base color of the ocean and get a color
that's much lighter. Looks good. And then add
a few little rows of these lighter waves. All
throughout the ocean. Don't forget about our
octopus friend down there. Let's actually go ahead and choose our scallop line brush. And I'm going to choose
this darker wave color. I'll just sample that. And
then I'm gonna draw a line. Let's make the brush
is a little bier. I'm going to go back to
that saved brush size. Then draw kind of
a line of waves that The octopus is
out of that. Okay. I'm kind of thinking now,
since this is feeling a little bit like maybe a
pirates map or treasure map, might be fun to add
an element like that to our scene here and add
even more storytelling. So let's go ahead and
create a new layer. And I'm putting this one right below the layer with the hills. I think that might be
a good spot for it. So I'm putting a
new layer there, and we're going to add
kind of a little trail. And maybe this leads to a treasure or
something like that. So I'm going to choose
the dashed line brush. And I'm going to sample the kind of brownish
color I already have. But I think it might
be a little too light, so I'm going to get
darker version of that. So something like that,
like a nice dark brown. And size of the brush, lets see, I'm at, let's do like 10%. I think that'll be a good scale. And then draw sort of a little line that
kind of meanders. It can go through your hills, it can go back and forth. It comes over here, and then
it kind of ends over there, and maybe that's where
X marks the spot. And we can draw a
little x right there. So for the x, I'm going
to do kind of like a reddish orange
color like that. And then I'll use the
liner mono fresh and draw. That's probably too
big. Let's go smaller. Okay, like a 6%, five or 6%. I'm going to draw
a big X like that. Let's do seven or 8%. And then draw a big X. A little bit bigger than
you want it because you're going to
take the eraser and just erase away these kind of rounded ends to get more of a x. That's kind of, like, more I don't know rectangular,
like that. And another thing
that I think might be nice for this map. Maybe some little
fishes in the water, and I have a brush for that. So all the way down
at the bottom, we have a brush called fish. I'm going to choose
a fish brush, and let's choose
this kind of like darker wave color for the fish. And then just paint some
little schools of fish by drawing lines kind of across
little areas of your map. Now, the fish will always
be facing this direction. So if you wanted your
fish to go the other way, just turn your canvas over and
then just paint more fish, and they'll we go in
the other direction. So go ahead and add
as many fish as you would like. More here. Now, this map scene is
looking very nice and full. I think one last nice
finishing touch would be to add a little bit
more of the kind of, like, weathered texture that we see in the hills and
some of these brushes. Since we have like
our ocean background, it's a solid color because we just filled it in
with color drop. But I have a brush
that can help us add some of that
weathered texture. So if you go into and I like to do this
with the eraser tool, so go into your eraser
tool and find the brush called gritty texture and
choose that for your racer. Then go to your layers and let's choose the layer with the ocean. So I have this big blue
blob at the bottom. And then you're just
going to kind of lightly paint over or ase over areas of this blob just to kind of give it some
weathered texture. You don't need a
ton of pressure, and you don't need to
do too much of it, just a little bit kind of
here or there like that. Especially like maybe
along the edges. There we go. That looks good. And then anything else
that you think needs a little bit of this kind
of, like, gritty texture. You can do a little
erasing on those. So maybe the layer with the
sea creatures in the volcano, choose that layer and
then just kind of erase a little bit away from those. So just kind of lightly
go over the sailboat and the whale and the volcano and
all these little elements. And then even if you
think your hills need a little bit more texture, you can erase a little bit
away from some of them too. Now, I think this
map is all done. If you wanted to
add that, you know, print effect that we
added to the last map, the one with the Roads,
we could do that. Again, you just have
to copy the Canvas. I showed you one way to do
it, but here's another way. You can take three fingers and swipe down to bring up
the copy paste menu. You could choose copy all, and then swipe down
again and choose paste. And that will paste all of
your layers merged into one. And then again, you want
to make sure you put it at the top of
your layers list. Go to your adjustments menu, chromatic aberration, displace. Zoom in a little bit, and then just offset the
layers a little bit like that, and turn the transparency
up to about 50%. Something like that. And then go to your adjustments menu again and choose noise. Set that to about 15%. I think this effect looks
especially nice with this map. It feels like it could
have been printed in like a children's book
or something like that. And there's all these fun little storytelling elements to it. We've got our sea creatures, and then we've got maybe a little pirate that
had come through here, and maybe they were
hanging out at the lagoon. So I think it's a fun one, and you could really
get carried away and add lots of fun little
details to a map like this. So I hope you had
fun with this one making up your own
little island worlds. In our next lesson, we're going to be drawing
some dreamy deserts. And in this lesson, I'm
going to introduce you into ways that you can create
your own map making brushes. I'll see you in the next lesson.
9. Map 4: Dreamy Deserts: Let's turn up the
heat and head to the desert for our next
map making adventure. Get ready to make a map
filled with Sandy Dune, cacti, adorable adobe houses,
and endless horizons. The highlight of this lesson
is something really special. I'll be teaching
you how to create your own custom
mapmaking brushes. These brushes will help you add unique illustrated
details to your maps, making them truly one of a kind. Before we start, make
sure you've imported the customizer brush
set into procreate, which is included in
the class download. This set contains six brushes, five customizable
brush templates, and one drawing brush, which I call the chunk brush. This is the brush
that I use to draw all the map elements
of my brushes, and I'm giving it to you so that the brushes you make can match
the look and feel of mine. Once you learn how to
make custom brushes, the possibilities are
literally endless. I cannot wait to see how your creativity blossoms
in this lesson. So if you're ready to draw some dreamy desert maps,
let's get started. Let's begin our map
with a new Canvas. Tap the plus sin in
the upper right. And this time we're going to do a vertically oriented map. So let's create a new
Canvas template for that. Tap this little rectangle here. And for this vertically
oriented canvas, we're going to do one that
is 2,800 by 3,500 pixels. And I like this size
for vertical canvases, mostly because
Instagram won't crop it if you decide
to post it there. So give it a name.
And tap create. Let's kick this map off
with a little color. We'll go into our layers
and tap background color. And we're going to go
into the kind of, like, orangey red cues over here. And then we're just
going to choose kind of a light sort of Bejish color,
something like that. And then we'll start
by drawing some roads. And for the roads, let's
go into our color picker, and we're going to
go into kind of, like, orange yellow and
choose a really light, kind of creamy color. Very, very light.
Work good for this. And then we'll go
into our brushes and we'll choose the pathway
brush for our roads. And so far, we've been drawing
these really thick roads. But for this map, I thought we'd try doing some thinner roads. So let's take the brush size
down to about 15% or so. So they'll be about that thick. And then zoom out your
canvas a little bit and draw some roads that kind of curve around and go through
your canvas like that. And then maybe
we'll have one that kind of goes across and down. And then we can even have
one that kind of comes down and connects
to another road. They don't have to always
go all the way through. Okay, we've got some roads. Let's go on to the next step, which be to add some structures. And for this desert map, I thought we could do some
fun little adobe houses. So let's go up to our layers, and we'll tap the plus sign
to create a new layer. And then for our brush,
we're going to choose the liner mono brush to
draw these adobe houses. We'll stick with the same
color that we've got. And let's start in this
kind of like open area. You can put your houses
wherever you'd like. So these adobe houses
are so simple, you're just going to draw
a rectangle like this. And then we're going to
have another rectangle that kind of stacked on top of that. And then you can fill
those with color drop. Then we'll do another little
adope house over here. That's maybe just a
rectangle like that. And then maybe one
over here that's more like long and skinny. So a long rectangle with another rectangle stacked on
top, and then fill those in. And then if you think you
want to put another house, maybe we'll do one over here. So let's draw a big rectangle. And then maybe we have a little rectangle kind of jutting
off the side like that, and then fill those in. Okay. I think that's pretty
good. Now let's add some doors and
windows to these houses. We're going to do that
using a clicking mask. So go to your layers, tap the plus sign to
create a new layer, and then tap this new layer and choose clipping
mask from the menu. And then let's go over
to our colors and. We're going to choose kind of
We're going to choose blue. I'm going to choose kind of,
like a dusty navy color. So something like that. And then we'll zoom on
in and can add a door. Maybe an arch door over
here, a big window. Do. And then on these adobe houses, one thing that's really
characteristic is the beams that kind of jut
out of the front of house. So that's what these
little dots are. And let's do this
little house over here. Maybe I'll do, maybe I'll do
a little rectangular door. And then the arched window. And then our little beams
going across the top. And then we'll do this
little house over here, we'll do, like an arch door. We'll do a couple windows, maybe a couple
windows over here, and then our beams. Yeah. We got a few little adobe houses over there, super simple. We got one more down here, so you can add doors and
windows, however you'd like. We do a arch door
and an arch window. And then maybe a
couple of windows over here in this little section. Then our beams. Okay. Al right. Let's add some
land formations now. Let's create a new layer. We're going to go
to our brushes and choose our trusty
boulders brush. And then for the
color, let's sample our background color
and then choose a color that's a little
darker than that. Maybe even a little more
yellow. I try that color out. I really like that. And then add a few holders here and there. And I'm actually going to do two different colors
of the boulders. So I'm going to go to my
colors now and I'm going to go over to the yellows a
little bit more like that, and choose kind of, like
an olive sort of color. Something like this, maybe
a little lighter than that. That looks good.
And then add some these olive colored
boulders throughout. C. And now let's
add some plants. Let's create a new layer
for that to the plus sign. And then over in our brushes, we've got a few
desert type brushes. We've got a couple of cctive, we've got the saguaro, and then we've got
some prickly pear. Let's Let's choose a saguaro. And then for the
color, I'm gonna choose a color
that's a little bit darker than this
green I'm Already using or this kind
of olive color. So I'm gonna go a
little bit darker. And then I'm gonna also go even closer towards
the greens this way. I try that out. I
a little darker than that. A little greener. Yeah, I want it to look
good against that kind of, like, yellowish
color. All right. And then you can just add some
cacti, wherever you want. W here and there. Save
some room because we have a few different kinds
of cacti that we can do. I think that looks good. And let's try our
prickly pair cacti. Maybe we'll go even darker. Greener for these guys, and just add a few of
those here and there. Now, there's lots of things that you could do in
your desert scene, and maybe you want to go beyond, you know, the brushes that
I have supplied here. And that is why I've given
you a special set that comes with your download
called the Map customizer. And in this set, we've got a few different
types of brushes. We've got a couple
scatter brushes, a couple stamp brushes, a line brush, and then
this chunk brush. And you can use these to
create your own brushes. So I'm going to show you
how to do that next. Let's go back out to
the gallery view. And let's create a new Canvas. We're going to tap
the plus sign. And this time we want to
create a square canvas. So we're just going to create a new Canvas template that is 3,000 by 3,000 square. And I'll just call
this 3,000 square. And create. I'm going to use this Canvas to draw some
stuff for our custom brushes. The first thing I'd like to do when I'm drawing shapes for brushes is to go into
the actions menu, Canvas and turn on
the drawing guide. And then I go into
edit drawing guide. And here on this
grid size slider, I just turn that up so that I can kind of just see
about that much. I just want to see these kind of like cross hairs
in the middle so I can know where the middle
is. And then tap done. So here in the map
customizer set, we're going to select
the chunk brush. This is what you're
going to use to draw all of your
little drawings, whatever you want to
make into a brush. And then for the color, we're
just going to choose black. And then the other thing that I like to do if I'm going to be drawing a lot of different
shapes for brushes, I'll go back to the
Actions menu and turn on page assist down here. And you'll see why in a second. It'll make it so that we
can kind of see each brush individually without having
to turn layers on and off. So now, in the map
customizer set, we're going to choose
the chunk brush, and this is the brush
you use to draw whatever you want to
make into a brush. So, for example, I'm
ing out a little bit. If you wanted to do, like, a different kind of cactus, like, those kind with, like, the oblong sections that kind
of are connected together like this. I don't know
what they're called. But when you're making brushes, you want to have, like, bold, chunky shapes, especially
when you're making these mount brushes
because they'll look really small when
you stamp them on. So you don't want anything
too fine or delicate. Big chunky shapes
work really well. So there's a fun little cactus, and then you're going
to go into the brushes. And so there's a few
different kinds here. We have our scatter brush, which is like what
we use for like the fish and the trees
and things like that. And when you use this brush, I'll show you, all the stamps
go in the same direction. Well Zoom in, you can see that. And then we have the
scatter brush flip flop, which they'll change
direction kind of randomly. Sometimes they'll
point that way, sometimes they'll
point that way. So if you wanted it to have a little bit more variety,
you could do that one. And then we have a stamp brush, which is meant to
stamp like that. And then we have the
stamp brush randomize, which this will change direction
every time you stamp it. So depending on how much control
you want over the shape, whether you want to
be randomized or not, you can decide which
brush to customize. And then, of course, we
have the line brush, who wanted to make
your own kind of lines and add
different shapes in. You could do that one. Let
me get rid of all that. So, let's say for this cactus, I want to do the scatter
brush flip flop. So the first thing
that I'm going to do is I'm going to
copy this canvas. So I'm going to take
three fingers and swipe down to pull up
the copy paste menu, and I'm gonna choose Copy All. You want to make
sure it's copy all. And then you're going to
go up to your brushes, and you're going to want to duplicate whatever
brush you want to use. That way, you always
have the original. So let's choose the
scatter brush flip flop. I want it to be going different directions each
time it's stamped across. So I'm going to take this
scatter brush flip flop, swipe to the left and
choose duplicate. And I'm going to
open this duplicate. And you'll go to the shape tab. Top edit, top import, and then top paste. And there you can see our
little cap di top done. And there's a preview
of your brush, and you can test it out and see if you like it. It's cute. And then I would always
go over to about this brush and give your
brush a descriptive name. You can delete the name
that I've given it. You can call it, you
know, Cactus two or, you know, some other
good descriptive name, whatever you want to call it. And then tab D. So
we have that brush, and you can try it
out right there. So we could go back to our scene and start
using that brush, but I that may be fun to
do a few more brushes. So if you're ready
to draw something new to make into a brush, just tap new page here. And now you've got a new
page to start working. So let's go back to
that chunk brush, and I think it
might be fun to do some flowers that we can add to our cactus, like desert blooms. So I'm going to draw kind of a It's almost like a
tulip shape, so, like, a big U, and then kind of, like, you know, pointed sides, and then I'll do
one in the middle. So we've got kind of like
a three pointed flower. And then we'll fill
that in colored in. It's really textured
brush, though. You might not want to use
color drop to fill this in. There you go. So
there's a brush. And then maybe we'll
do one other flower. I'll tap new page. And for this one, I'm
going to do kind of, like, an oval like this, and then little petals
that kind of go around. Something like
that. Color it in. I'm going to leave the middle. Open, and add some
details into that. So make my brush a
little smaller and just do some, like, big dots. In the middle.
Something like that. So that can be a brush. And maybe I'll do one more. I think it might be nice to
have, like a tumble weed. So let's tap a new
page and then do, like, a tumble weed. So tumble weeds, kind of, like, round, lots of, like, little twiggy
branches, I guess. I'm sticking out like this. Make the brush a little smaller. Okay. If that works
for a tumble weed. So now let's start making
these shapes into brushes. So let's go back to
our first flower. I'm going to swipe
down with three fingers, choose copy all. And then for this one, I'm going to do a stamp brush, not the randomized one, but
the other one because I want it to be the same
orientation every time. So I'm going to duplicate
the stamp brush, swipe to the left and
choose duplicate. Then open it up. Go
over to the shape tab, choose edit, import and paste. And then tap done. And there we have our little tulip
brush. It could be a tulip. It could be a desert flower. But I'm gonna call it tulip
stamp. And then tap done. And then I'm going
to do this other flower in the same way. It'll be another stamp brush. So swipe down with
three fingers, choose copy all from the menu. Go brushes, duplicate
this stamp brush. And then we're going
to open it up. Go to the shaped
tab, go to edit, import, and then paste.
And then tap done. And then we can name this one. Maybe I'll just call it
desert flower stamp. If it's a stamp
brush, I like to use stamp in the title,
and then tap done. And then we have
our tumble weed, so I'm going to copy that. Swipe down with three
fingers, choose, copy all. And then go over to our brushes. And for this one, I want
it to be very randomized, and I want it to kind
of, like, rotate as it does a different stamp. So I'm going to choose the
stamp brush randomize. Duplicate that, swipe to
the left, choose duplicate. Go over to the shape tab, go to edit, import and paste. And then tab done. And we're going to go
to about this brush, and we're going to
call it tumble weed. Tumble weed. Stamp. D. Alright, so we've got a few different brushes
that we just made. Let's head back over to our map, and we can use them. On tap gallery, and then
open our map back up. So let's make sure we're on
the layer with all our cacti, and we'll use our
new cactus brush, cactus two, very creative name. I'm going to sample this darker cactus
color that I have here. And I'm going to
get a color that's even darker, like this. I think that's good. And
then I'm going to increase the brush size. Maybe
a little bit bigger. I want these to be kind
of big. I like that. So add a few of those here and there, wherever you would like. And then maybe let's
also add in our flowers. So let's start with
this tip stamp. And for my color,
I'm going to do like a dy kind of rose color. So over here kind of
like a warm pink, bit dusty like this. Let's test it out, see
how that color looks. Maybe a little lighter. Okay. Okay, I think that
color is good. So I'm going to reduce the brush size of this a
little bit because I want to draw little tiny flowers atop. Some of these cacti. We go on that one. Over there. Im to do all of them, but
however many you want. And then maybe we can even draw some little flowers kind of in front of our toby
house. Why not? Who knows what they
are in real life? They're just like pink
bushes or something. That looks good. We can also do our desert flower stamp and
reduce the brush size a bit. Stamp that on top
of these bigger. Smaller. Do that incorporate some additional
color. That's nice. There you go. And let's add a few of
those tumble weeds in, so I'm going to go to
the tumble weed stamp. And for the color, I'm going
to sample my background, and then I'm going to choose, like a kind of dark
darker version of that, like brownish,
something like that. I'm going to make my brush
size a little smaller. That's probably a
little bit too dark. And then you could draw
some tumble weeds kind of tumbling through and
you can see because of the randomizer kind of changes rotation every time
you stamp it, which is nice. So we've got some tumbleweeds
tumbling through. Let's add a few more details. Back in the map making brush. Let's choose this spiky brush, and I'm going to choose this kind of olive color
that I already have, but maybe do a variation on it. Little lighter, and just pepper in some
little spiky plants. The desert is very full. Quite lush now, all these
plants. Looks nice. And then one last thing
that I like to do is add a little bit of
background texture. So let's create a layer, a new layer, and we're going to move this down under
all the other layers. Look at that. And we're going to go
over to our brushes, and we use our beans brush to add a little texture
to the background. So I'm going to sample
the background color. And then I'm going to
get a color that's ever so slightly darker. No. And then just kind of draw in some areas where it's a
little bit more textured. You can kind of add
these wherever you want. Just kind of doing some, like, little round shapes like that. Maybe one more right there. Just give some visual
interest to your map. And then one more thing that I thought would be a
little fun is to add a bit of pizzas
to these roads. So let's tap on the
layer with the roads, and we're going to tap the plus sign to create a new layer, and we're going to make
this one a clipping mask. So tap the layer and choose
clipping mask from the menu. And then head over
to your brushes, and let's choose one of
these fun line brushes. I'm going to use
the zigzag line. And then for the color,
I'm just going to sample my kind of cream
color I have for the roads. I get a color that's just
a little darker like that. And then just kind of
trace over the roads. Which I'll add a little
bit of zigzag to them, which I just think is kind
of fun for this desert map. And if you don't quite
line it up perfectly, this is where liquefy can
come in really handy. You can go up to the
adjustments menu, liquefy, and choose
the push option. And then you can kind
of just push them into place so that they're
kind of more if you want. I'll have to be. There you go. And there you have our
finished desert map. I think this one is so cute. And as you can see, when you start getting into creating your own
custom brushes, you can make whatever elements
you want for your maps, and the sky is really the limit. So I can't wait to
see what kind of brushes you make using
those customizer brushes.
10. Bonus! Map 5: Tranquil Trails: I have something
special for you, a little bonus lesson
for this class. In this video, we're
going to be heading to the mountains to draw a
sweet little trail map. Let's create a new canvas, tap the plus sign
in the upper right. We're going to do
a horizontal map. So I'm going to use
my template that is 3,800 by 2,800 pixels. We're going to keep
things really simple for this map and just do
a one color design. Let's start by setting the
background color of our map. Tap into the layers panel
and tap background color. And we're going to choose
a nice light creamy color. And the outer ring, select kind of a yellowish orangish color, and then move the inner
little dot just over into just kind of like that way a little bit so
that you get like a nice light creamy color. You're really not moving it
too far away from white. And then for all
the map elements, we're going to choose
a nice brown color. So tap into the color picker and move the outer ring into
the kind of orange yellow. And then we're going to
go somewhere over here, kind of like a
grayish brown color. You can always do a little test to see
if you like the color, but I think that
will work nicely. Let's start by adding
some roads to our map. Go into your brushes, and we're going to choose
the pathways outline brush. And then zoom out
your canvas a bit. This will make it
easier to make sure the roads are going all
the way across the Canvas. And we're going to
draw a few roads, but we're going to do them
in one continuous stroke so that way they will
intersect with this brush. So I'm going to start over here and kind of draw
a road this way, maybe it curves down. Then I still have my
pencil on the screen. I'm going to come
back up and maybe curve around this way
and come over this way, and maybe one more time
all the way across. There we go. So I did that
with one continuous stroke, and you'll notice
that when I do that, all of the roads intersect. Next, we're going to
add our water feature. I think it would be nice to have a cute little lake
or pond in this map. So let's go up to our brushes, and we're going to select
the liner mono brush. And then pick an open
spot and we'll use this brush to draw kind of
this like organic shape, which will be our pond. And let's add a little bit
of texture to the water. In the brushes, we're
going to choose the scallop line brush
really nicely for water. Then use that brush to draw a few lines to create
some water texture. And the next step
in the process is to add in any buildings
you might want. And for this map, I
thought it would be fun to draw a little log cabin. And I think this little area right here would be
perfect for that. So this spot on your map,
and we'll draw a cabin. Let's go back to the brushes, and we're going to go back to the liner brush to
draw our little cabin. And we're going to draw
the front of the cabin by drawing a few stacked
circles like this. These are kind of like
the ends of the logs. So we're going to
draw four there, and then four over here. And then we're going to connect. And then we're going to draw the side of the cabin by drawing a line coming off the
bottom of this circle. And then we're
going to draw one, two, three, four
little scallops, kind of going up that way. And then connect. And now, we'll add a roof, so we'll
draw a triangle here. And a line going back, kind of like we did when we drew our houses
in our other maps, and then finish off the roof. And you can fill that
in with color drop, color it in as needed. Go. Just add a few more lines to
give it that log cabin look, and now we can add some
doors and windows, so I'm going to add a door here. My little cabin.
And then a couple of windows on the side. I think this little cabin
could use a chimney. So just add a really
simple chimney. Okay good. So we've got our
cute cabin there, and I think this map could use a little
camp site as well. So find a spot. I think over
here looks good for me. And we'll go into
the brushes and find the brush called tents. Got a little tent brush for you. And then you can
use this brush to either tap in your
tents or you can just draw, add a few
tents like that. Now, let's add a few trees, of coe to this map.Gt a few
different kinds of trees. I'm going to start with
the triangle trees. And I'll zoom over
here and just kind of add a few trees over there. A few trees up here. So
I'm over by my cabin. Few over there, but I
think I'm going to switch to different style of tree now. With this pine trees
brush. I love this one. Let's add in a few pine trees. L be here around the camp site. If you ever want to
do, really big tree, you can always increase
the brush size. We do a really large tree. We do a few of
these. Really big. And then maybe down here, you can do a different
kind of tree. We have these oval trees. We can do kind of a little
grove, those down there. It's looking pretty good. So now it's time
to turn this map into a trail map
by adding a trail. Let's go into bushes and
choose the dashed line brush. And then we're going to put
this trail on its own layer. So let's go over to our layers. Tap the plus sign to
create a new layer, and then zoom out a little bit. And you can put your trail
wherever you want on your map. Just kind of have it mender around. This part's pretty fun. I'm gonna have mine start up here off the edge of the canvas. Oh, kind of go
around these trees, go through the campground. Across the road, and then
past a little cabin. Then we can do a loop
around the lake. It's always a nice hike. C then maybe finish off
by going down this way. And now where it
crosses the road, we're going to a
little crosswalks. So that's why we put
it on its own layer. Now we can get the eraser brush, and you can use the liner
brush as your eraser. And anywhere that it
crosses the road, just erase, like that. Because it's on its own layer, it's not going to
mess up our roads or anything else. We're racing. And then we're going to grab
our little crossing brush, this one here, and add some
little kind of crosswalks. Make that. Here. And
then right here. And then if you want to
add anything else, like, maybe some little signs or
markers or things like that. Maybe we can put in a little
way finding sign here, draw a thick line, and then two little vives, and then connect the tops. Yeah. And maybe we
put one down here. And then another fun map
element that you can add, if you have room is a
little compass rose. I have this little
space down here, so maybe we can add that. Just going to do a
really simple version. I'm gonna draw two lines
that intersect like this. And then two shorter
lines that intersect. And then the long line
and the short line. And then we're going to color
in every other section. So I'll color in this section. Skip that one. Color
in this one, ski. Do that one. That.
And then finally. And then you can add
in your directions just north south east and west. And our final little touch
for this map would be to add just a little bit more
vegetation by adding some grass. So let's go to our brushes, am fy our tufts of grass, brush. No one. And just da in, grass, kind of fill
everything else in. Make this seem like
nice lush foresty area. D. D, And there you have it, our
sweet little trail map. Hope you could imagine yourself hiking through the woods
as you made this one. Be sure to share your trail
map in your class project. I cannot wait to see
it. Happy map making
11. On Your Own: Congratulations on completing all the lessons in this class. You now have the
skills to repeat this map making process
anytime you want. Encourage you to
create your own maps, get creative, and
explore new ideas. Let's quickly review
the map making process. Step one, choose a theme. Decide on the type of
map you want to create. It could be a countryside, a desert, a city, or anything else
that inspires you. Step two, set the stage for your map by creating
a background. This could be a simple
color, a textured base, or an abstract shape that
represents your environment. Step three, outline
the main pathways, roads, or trails that
traverse your map. These can be winding paths, straight highways, or
anything in between. Step four, incorporate
bodies of water like rivers, lakes, ponds, or water falls. These elements add depth
and variety to your map. Step five, Add houses, cabins, barns, windmill, shops, or any other structures
that fit your theme. These elements help populate your map and make it
more interesting. Step six. Introduce natural
features such as trees, hills, mountains,
and vegetation. Start with larger elements, then add smaller details like
flowers, bushes, and grass. Step seven, finally, add any extra details that
bring your map to life. This could include way finding signs, vehicles,
characters, animals, and any other storytelling
elements that enhance the charm and
personality of your map. Now, on your own, make a map. Follow these steps and let
your imagination flow. Don't be afraid to experiment
and try new things. If you haven't
already, be sure to share your work by
posting a class project. On the Skillshare class page under the Projects
and Resources tab, click the Submit Project button. This is where you can
showcase the maps that you've created by following
along in the lessons, as well as your original maps. And please also take a moment to write about your
creative journey. You can describe any
relaxation techniques that you used and how you
approach the project. I'm so excited to see
your amazing map. Let's continue to inspire each other and keep the
creativity flowing.
12. Conclusion: Congratulations on completing Imaginative mapmaking
in Procreate. I'm so proud of
the creativity and dedication you've shown
throughout our journey together. By now, you've
learned how to create a variety of maps from serene countrysides
to dreamy deserts and lots of stuff in between, and you've got the
skills to create your own procreate
brushes for mapmaking. You've also explored
techniques to enhance your map with unique
illustrated details. Remember, mapmaking is not
just about the final product, it's about the journey, relaxing and letting your
imagination run wild. Whenever you're feeling
stressed or uninspired, you now have a
creative outlet to help you unwind and rejuvenate. And you have the tools
and techniques to create beautiful maps whenever
inspiration strikes. I hope this course has been both a relaxing and enriching
experience for you. I encourage you to
keep practicing, experimenting, and
exploring new ideas. And don't forget to share your wonderful creations
with our community. Your work can inspire
others just as much as it reflects your own personal
growth and creativity. Thank you for joining me in
this artistic adventure. I can't wait to see the amazing maps you make in the future. Keep creating, keep exploring, and most importantly, keep
having fun with your art. Until next time, have you
mapmaking and take care.
 Lisa Bardot, Happy Art-Making!