Transcripts
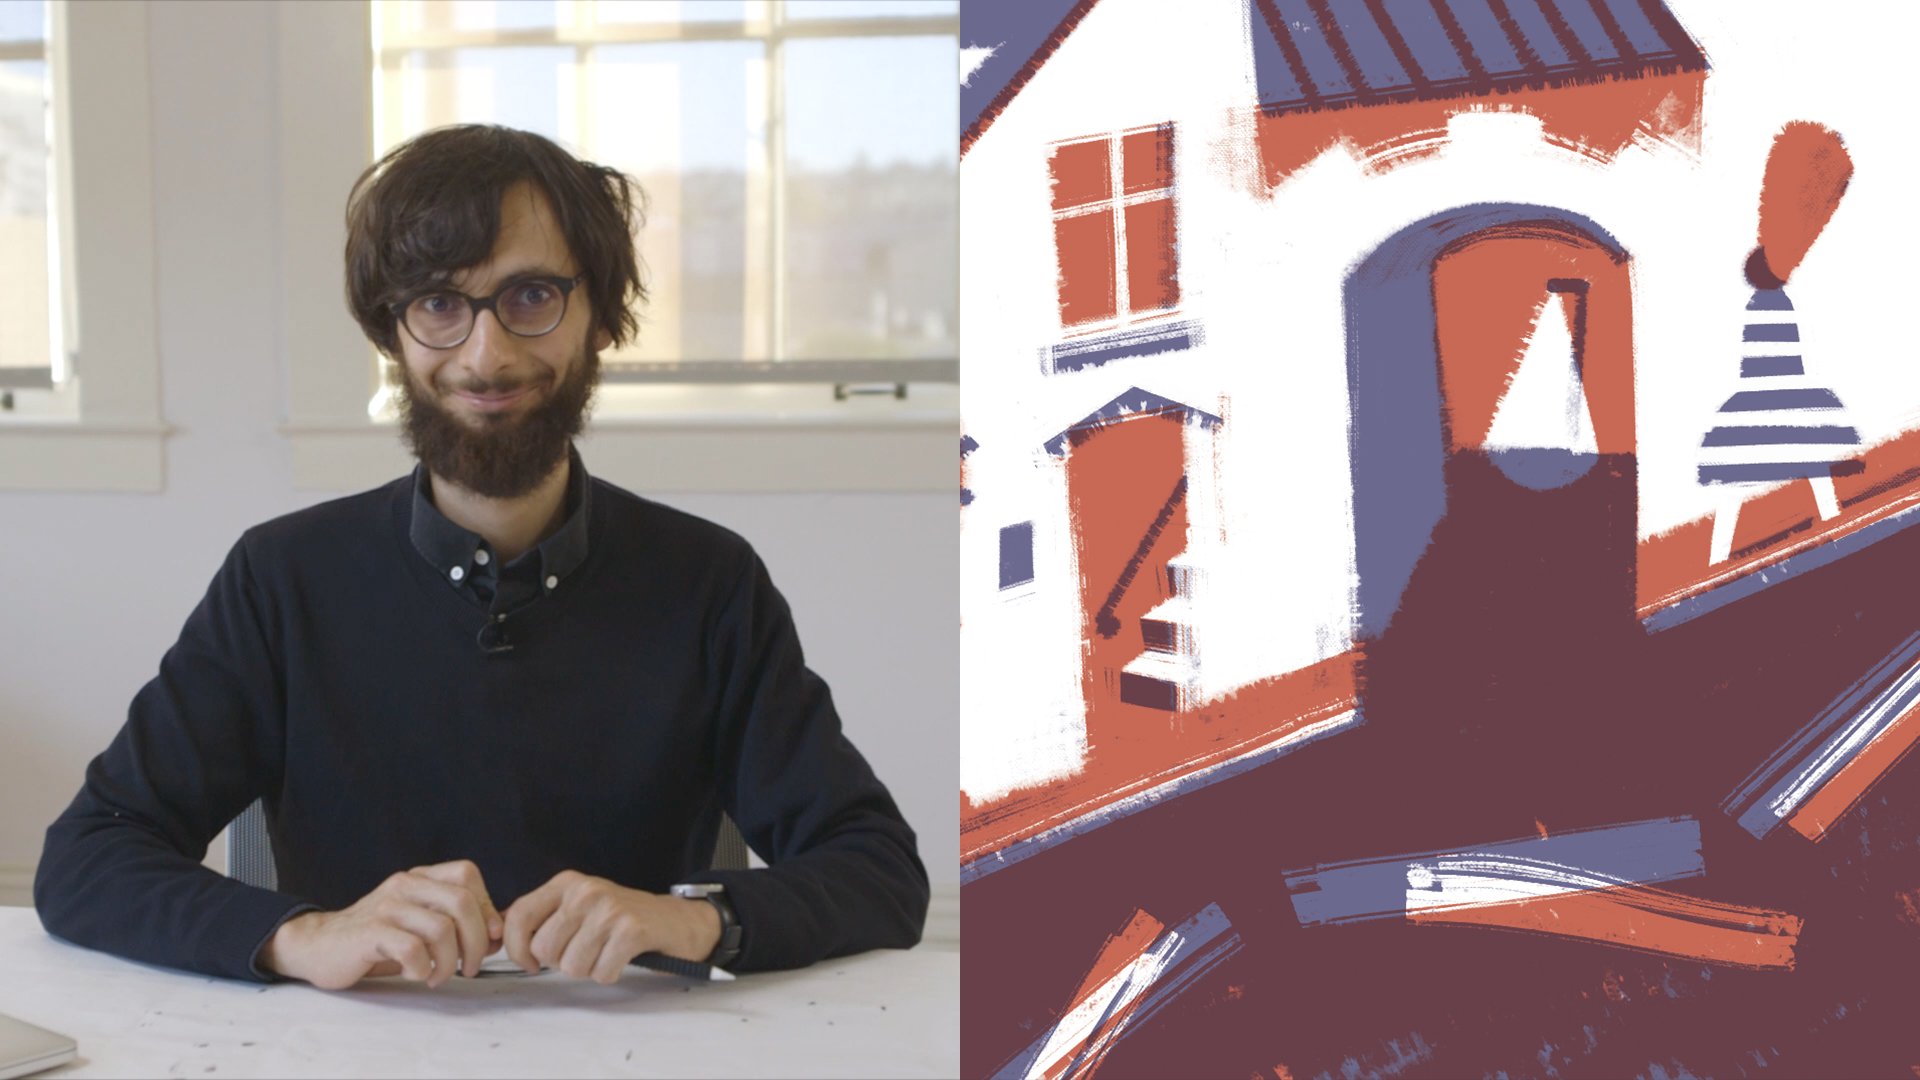
1. Introduction: Hello, I'm Roman Muradov. I'm an author and illustrator. I've done work for New Yorker, New York Times, Penguin, Random House. I'm also a professor at the California College of Art where I teach an illustration course, and I've also authored several books of my own, usually short graphic novels. When I started working as a professional illustrator, I developed a very rigid and tight style using mainly ink and brush, but over time I got really bored with it and I started exploring different techniques and tools. So, over the last decade or so, I've amassed a huge variety of different styles that I can use and combine, and today I'd like to share some of these ideas and techniques with you. We'll start with the very basics, how to handle a brush and a pen, how to dip it in ink and what to do with it afterwards. We'll take it in small steps. We'll start with simple mark making, just trying to figure out how many different ways we can use this tool. Now, we'll gradually move on to more advanced techniques, I'll end up combining these techniques to create something that is entirely yours. We will also be looking at some of the masters of ink as well as people who use it in unconventional ways, and see if we can learn something from their work. Even if you don't want to use ink in your process, it's still a really good way to hone your skill using this tool because it's very subtle and very hard to handle. So, if you get good at using this, you'll get good at using anything else. On top of that, the brush is a perfect lie detector. It shows you what you are and what your personality is, and figuring that out is one of the most important parts of figuring out your own style. Another thing that's great about ink is that you don't have the undo button, so every mistake that you make will stay on the page. I think this is increasingly important in our digital age because it allows you to see the process of your own learning and to learn from seeing the process itself. Don't forget to upload your creations into the project gallery and I can't wait to see what you come up with.
2. Materials and Tools: So first and foremost, of course we'll need ink. This is the ink I like to use. It's Black Sumi Ink by Yasutomo. As you can see, it's being very generously splashed with other medium. You can also use Waterproof India Ink if you're planning to color your drawing. Or you can also use pigment ink which has a slightly different texture. For our purposes, there is not a huge difference between these so, I would suggest just buying a new Sumi ink that you can find that seems affordable and nice. For the paper, you can use pretty much anything you like. I prefer pretty cheap sketch paper. But if you prefer something nicer, you can get thicker paper which will be easier if you plan to use a lot of ink or especially if you plan to use washes. Then, we'll need a bit of water in any container. And if you'd like to invest in cleaning supplies, I can suggest this brush soap and this hand cleaner. Of course, you can use regular soap for our purposes. And now, the tools. So first of all, the brush. This is a fancy Pennsy Winsor and Newton brush that cost quite a lot but it lasts for ages. I think these two I've had for about five years and you can certainly tell. In general, you would want to buy a watercolor brush and that can be natural, like the Winsor and Newton, or it can be synthetic. That means it depends on your budget but also your preferences. So here I have a couple of very very cheap brushes. Their entirely synthetic and they have a very different texture as opposed to natural brushes. But regarding on your style, you may want to prefer that to the fancy Pennsy expensive ones. You can also get slightly wider brushes if you want to make washes. You can get a brush like this if you want to create wide strokes or something fuzzy if you want to play with the Sumi style inking. So as for the nibs, we'd need nib holder that looks like this. And of course, the nibs. This is the one I've been using lately. It's called the Spoon Nib by Tachikawa, and it's very similar to that G nib that's very commonly used in manga and whatnot. And you can also get a so-called Mapping Narrow Nib that is very narrow and used usually to make small details. As far as the nibs go, it's also a matter of preferences. I like the Japanese names because they're a little more rigid. But a lot of people prefer the American names, like The Hunt ones, because they're a little more flexible. Finally, if you're feeling adventurous, you can get a toothbrush, preferably not the one that you actually use. And maybe a wipe-out pen or some kind of wipe-out liquid if you want to play with negative space. It also doesn't hurt to have a bit of tape nearby so you can tape your ink bottle, or use the tape as part of the actual inking. As the final touch, you may want to drape your table in some kind of cloth, or paper to prevent ink from splashing around. And you may want to have some paper towels and napkins so you can wipe the brushes and clean up a little bit. So, that covers our tools and for the minimum application, you would need a brush, any ink, any paper and the nib. So next, we'll learn how to use these tools and how to make different marks with them.
3. Warm-up with Brushes: Before we dive into it, I want to show you a couple of examples of practical application of all these techniques, and tools, and my French collection that was published by Dargaud a couple of years ago. So for instance, for these pages, I used the combination of pen and ink, and backgrounds down and wash and ink, and sometimes they don't quite connect and that creates a surreal, sort of blurry effect that goes well with the story about the people getting drunk. For this story published in English as Jacob Bladders and the State of the Arts, I used only ink and nibs, and the whole thing was drawn half or to a great extent with my actual fingers. What I would do is I would make this line and then smashes the ink around to create this weird, dark, nocturnal effect, which goes perfectly well with the setting of a store in New York in the 1940s. This story is also a good example of accidents being used as part of the design. For instance, when I was drawing this page, I accidentally started slashing the actual paper with the nib that wasn't working so well. Then I saw it it looks a little bit like rain, and so I took that broken nib and used it on purpose to create the rainy effect. It looks very accidental and same time, it has a very unique texture. Or here, for instance, in the bits where the newspapers are duplicated, what they did is I would wait for the ink to dry and then simply stamp it with my finger, and press it a few times here. Now, let's dive into making some marks ourselves. So, let's take a sheet of paper. If you have bought some fancy paper, I would suggest using something less fancy for this because we'll be simply making marks. So, let's begin with the basics, how to handle ink. First, you open the bottle, then you take a brush in your hand, and you dip it in. Now, the important thing here is not to dip all the way to the point where the hair of the brush, and I know there's a better term, meets the actual brush. This way the ink doesn't build up here and the brush lasts much longer. As you can see by the state of my brushes, I'm not very good at following my own instruction. When we dip our brush into the ink, we'll get a bit of a blob on top of it, which you may not want. So, to get rid of it, you do something like this, and while you're wiping it off, you can do it slightly counterclockwise or clockwise motion, and another thing that it achieves and it makes hair brush a little bit more sharp, and this works even on brushes that have seen a lot of action, like this one. Next, is how to hold the brush. Well, however you like. Some people will tell you that you should hold it like this. Others prefer to hold it like this, but really whatever fits for you is best. One note I will make is the firmness of the grip. You shouldn't clutch the brush too hard because it will make your hand shaky, but same time it probably shouldn't be to lose because then you wouldn't have enough control. It's quite a delicate balance and the only way to find it is to practice a lot. Now, for the actual application of ink. Once we have a nice tip, we can try and make in little marks like this, and you can see I don't have a lot of ink on it, so we get these tapered edges. This for instance can be a little waves. A good way to practice is to try making straight lines. So, you simply try to think where the line would go. You can even mimic doing that, and then you try to play equal pressure and make something like this. This is not very good, so I'll try it again. It's a little better and a little better. So with enough practice you'll be able to make straight lines at any speed. Of course, it's much easier to make them fast than to make them slowly. Another good way to practice is to make a continuous shape, for example, a wave that just goes like this. Then, you can look at it and see where the lines are inconsistent and where they're pretty good. Although, I said that you should wipe up the excess ink. You can still keep it on. This will create a blobby line like this. The line will be much more consistent and it may be better for your style or it may be worse. For instance, if you want to use a very textured style, this will not give you a lot of opportunity, and you may want to get rid of all that ink and make something more like this. Finally, when you make a lot of motions of this order, the brush stops being pointy. This, however, is not really a bad thing. What you can do is flip it to the side and create very nice lines like this one. This can be great for textures or for outlines or you can use that slightly flat side to create wide textured marks. Here you have a nice perfect straight line that also has a lot of texture and also has a bit of width even though this is not a wide brush. So, even with a single tool like this, you can create completely different marks just using it in a variety of ways. If you are starting out, I wouldn't bother too much about making perfect lines, and I would just try to get as many different movements out of your hands as you can, and study them and see which ones you like better or worse and where you think they can improve. The main difference between a synthetic and a natural brush is the bounciness and the feel of the bristles. So, the natural brush is very delicate, which is why it can be quite hard to master. While a synthetic brush is a little bit closer to pen, so it's much easier to control and to create perfect lines with it. Of course, there's no better or worse brush and some people prefer toothbrushes and they achieve better things with it than with the expensive ones. For others they absolutely have to use their natural one, and again, the only real way to find out which one you want is to try. A brush is a good way to figure out how you want to draw. Simply because there's bristles they record the way you feel better than words, for instance. So, if you're a quiet and patient like me you'll find it easier to make a single line that goes from the beginning to the end, rather than to make this line in small increments. Other people, would prefer to do something like this. So, I think it's really important to pay attention to how you feel while you make this, and what feels natural to you and what feels uncomfortable. So let's try to explore what else can be done with a simple brush like this. Well, you don't really have to make lines, you can simply smash it against the page like this. You can make fast and furious strokes. You can even take the brush and make little splashes like this, it can be cool effects. Finally, you can use the finger. So, for the mark-making exercise, let's try to get out as many different variations and as many different styles of mark-making as we can. For instance, you can make a grid and fill it up or you can pick a single object, let's say an apple or a water bottle, and draw it in many different styles and see how many different ways you can come up with of drawing the exact same thing. Try to feel lose and don't think about it too much. Just experiment and have fun and as long as you enjoy the process, I think it's all good. Some things you may want to try is to experiment with the amount of ink you have on the brush and see what feels more natural. You can try doing curves like this, and straight lines, combinations of them. You can also try to use the side of the brush to create a bit of texture, and this way, you can use the brush for shading almost as you would a pencil. So of course, it depends on how letters you draw and how much space you need, but I would suggest filling up two or three pages of little marks like this before moving on. So, we should have a little bit of water around. First of all, it's good to dip our brushes before we begin, so this way they last a bit longer and they have watery foundation. Also, once you're done drawing, if you don't want to clean your brushes right away, it's good to put them in water a little bit, so this way they're not drying up. So, all you do is you put them in the water, and you wobble them around, and then you leave them lying on a flat surface. Do not leave them in the water otherwise, they might lose their shape.
4. Warm-up with Nibs: Okay. Let's move on to our nibs. So, I'm going to take a spoon nib, plug it in like this, make sure it's firm. And then, we dip it in the same way we dip a brush, not all the way in. Again, we take that excess ink off. Here definitely, is good to take the excess ink off otherwise you will create splotches, and blotches, and whatnot. So then, you hold the nib usually like you would any pen, and then you apply it to the page, the same way you would a normal pen. Now, the beauty of this tool is that, it's made out of metal unlike the brush. Why is that good? Well, because it gives you much more control. It's incredibly easy to make, oops, I didn't have enough ink here. It's pretty easy to make straight and perfect lines with it, or at least much easier than with a brush. So, the natural flow of the nib would be top to bottom, which doesn't mean that you can't use it in other direction, especially if you have a flexible name like this one. You can make horizontal lines that can be great for textures, or if you want to have very, very thin lines which is quite hard to do if you are going top to bottom. It's not that easy to go up, although it is possible and American nibs are a little more forgiving in that respect. Some of the things you can try with a nib, is a little texture effect, going from wide to narrow, and the other way, which is a little harder. You can make the same line in different widths variation. For instance, a thin one and a thick one, and then wobbly one. So, to adjust the thickness, all you need to do is press harder. Of course, you don't want to press too hard but at the same time, being made of metal, you do need to press quite a bit harder than with a brush to achieve this result. So, although this tool may look a little rigid, it doesn't mean that you can't go sketchy with it. You can try to write your name. So, let's quickly look at the nothing nib. It's very tiny. It takes a little while to get going if you have a new one. With all nibs, I think a good way to start is, instead of going straight to the drawing, to take a shade like this and to do a few marks. It's really good to go side to side because that way you wear it off a little bit so it's not quite as innocent as when it comes out of the packaging. With this nib, it's virtually impossible to go up. It simply tears the paper. The most natural direction would be top to bottom. You can make horizontal lines but you can see that it's a little uneven and it's a little harder to perform. This nib is perfect for the little details, for instance, eyelashes. It can be quite good for lettering if you lettering is pretty type, for instance, something like this. If your lettering is more loose, it can be difficult. So, that's arguably not quite as much room for aeration as with the brush, but you can make a lot of different kinds of lines. So, for instance, line can be more or less straight, or it can be a little jagged, created in little increments. Then, this increment, you can press hard and create these little stamps. You can also adjust while you're going. Finally, you can build it up with movements like this, which will allow you to create cross hatching textures and all kinds of cool effects, that we will talk about in greater detail in the nib section of this class. For now, as usual, let's just exhaust everything that comes into our mind before we think about it too much, and have it as a reference for later. So, while this is a good starting point for those who have never tried this tool before, I think it's also a great thing to do if you are more experienced, simply to get the hand to custom again to the tool, and to just fill up some space that you don't really need for anything else. If you want to take a break, then grab a little napkin and wipe your nib just like this. You can use the cleaning solution if you like, or you can simply wipe it for now. As for the brushes, same thing, plug it in a bit of water, wobble it around, and then let it rest. So, this simple cleaning is okay if you need to take a break, but if you're done for the day, I would suggest using soap. There isn't a set number of pages that you need to fill up, but as long as you feel like you've exhausted all the initial ideas, we can move on and look at these tools in greater depth.
5. Brush Techniques: So now, let's focus on the brushes. But before we begin drawing, let's take a look at a couple of books that I brought that I think are exemplary of great use of the brush. So here is a book by the French cartoonist, Blutch, and he's great not just in this scale but also in the way he uses a different [inaudible] to create illusions of depth and also to combine different styles within one picture. So here, we have a very geometric structure of the building, but it's made much more lively by the use of the natural tool as opposed to say digital composition. So, in panels like this, we can see a couple of things happening at the same time. First of all, we have quite a lot of detail on the figures that suggest different movements and the tightness of the garments that they're dressed in, but same time he uses the same technique to create different depths in the background. So, he uses this marks to create a certain shininess to the surface, but same time he creates cross hatching by giving them an extra layer of depth and putting them more into the background. Here's a comic book by Tim Hensley, who directly references old time comics and puts different elements together to create sometimes jarring and unusual effects. So, he uses the brush in a much more straightforward and uniform way, and some of these lines are so perfect it may almost seem impossible to believe that they're made by hand. At the same time, Hensley often creates very strange, almost abstract shadows, using the various techniques that come not from abstract art but from traditional American cartooning. So, very often, when I draw, I don't really think so in-depth about what I'm doing. So for instance, in this photo of my friend, I just went along and did this whole thing in a few tens of minutes. But you can see a few things happening at the same time. So for instance, you have a very wide flat areas of ink applied to her hair and at the same time there a dry brush shape of her chin and a much stronger profile of the nose. So, you have three different things working together, but they all work fine because it's the same medium, and more importantly it's the same hand of the creator. So, let's go into more in-depth techniques with the brush. So first of all, let's try doing simple traditional elegant lines. So, to create a simple elegant line, what you can do is imagine the starting point and ending point, and having this in your mind is actually a great way to keep it consistent. So, you press a little bit, you hold it, and then you go over it and you let it taper right at the end if you want that kind of effect. To create a tapered line, all you need to do is release the brush very fast like this, and of course the direction that you pool will affect the way that it tapers. So, it can go pretty far or it can be almost imperceptible. You can create a whole line just using that tapered edge. For instance, I will start here, and instead of dragging anything, I will simply make this curvy motion and lift it at the same time. So, now this kind of looks like someone's head and this can be the bangs or the fringe if you are British. Now, we have so far neglected this simple idea of filling the space. So, this can be as simple as simply applying ink to paper but same time you can also think about the other side of the brush where it ends, where it creates effects like this. You don't really need to draw with a tip of the brush, you can also draw with the bottom of the brush, which can be very unpredictable and hard to control but that may also be good. So now, if I want to continue making a head out of this, I, of course, notice that this width is a much larger than this and I may want to unify them by going over that line, and then I may want to establish where the ear is. Let's say here. Then put a straight line here. I think in terms of design, it's really important to maintain a certain sense of awareness between straight lines and curves, do note that I said awareness rather than balance. I don't like to preach and say that a good drawing should have equal number of curves and straight lines. But for a tight solid balance, that usually is the way. However, you may want to create something deliberately unbalanced, if you want to go for that effect, and of course in that case, you may want to completely disregard what I just said. So, for the features, we can use a simple, short finish line, something like this, that doesn't taper and doesn't have anything extraordinary about it. It's simply applying ink, dragging a little bit, lifting it off. This could be her eyes. Now, for the eyes itself we will probably want to use the tape, and then we can rotate it in small circle in motions to create circles like this. We can make a mouth by simply button the brush like this which will create a nice little shape. As for the rest of her outfit, we can try something different. For instance, delineated using just that pattern, let's say the pattern is stripes because that's what I usually draw. We can give it a shape like this. Of course, it makes more sense if we plan ahead and have a pencil drawing, but for our purposes, it doesn't really matter. Now, we can go and break this line by doing something like this and saying that it's a table. Now, using the back of the brush we can create a much smoother transition. So, that can be quite useful if for instance, you have a character that's being cut off, and if we cut off using a straight line it may look like their limbs are disjointed or something like this and using this accidental breaking point will make it look like the drawing stops rather than the character itself or themselves. As the final touch, I can keep a lot of ink on top of the brush and give her a hat, just by dragging it like this. You can probably see that the ink is very visible here, and if you touch it, you will create the smear. But this kind of effect allows you to get really big blobby shapes that you wouldn't necessarily get if you carefully trying to outline it. So again, it allows for accidents that you may or may not want. Here, we'll also use a negative space, using the curve over the hair to suggest where the rest of the face goes without actually drawing it. It doesn't work that well here, but in a more planned drawing, it can work much better. So, this is a simple traditional technique called feathering usually. What you do is you let go with the tape brush like this from the same point or from parallel points and you can create this kind of very exciting actually effect. It can also work from the other way. So, you start small and go large. You just barely touch the brush to the page and then you press it harder. This allows you to create a more controlled effect. Of course, it's also a little harder to do as you can see. So, you can always go in and try to clean it up. So, the other fact can be used for shadows, Charles Burns uses it quite a lot than Daniel Clowes or it can be for something like an explosion. So, everything can come to the same edge. I think it's quite good to keep the paper moving instead of taping it. This way, you allow yourself more freedom of movement. It's also good to discuss the scale. So, you may want to draw a quite small and make little lines like that. But this way, you're drawing with your fingers then mainly your hand but you can also go large. This way, you use your entire wrists. This can allow for much stronger lines. Of course, to do that, you'll need more paper which means more money and more space. So, let's look at dry brushing. So, to use dry brushing you can have a little bit of paper next to you and before putting a mark, you can test and see how it looks. So for instance, if you have let's say this circle whatever that is, you may want to use dry brushing and create a bit of texture on it. So, it can be something like this or it can be something that's a little more elaborate. It creates a certain sense of movement. You can also start drawing with the dry brush right away. So for instance, do something like this which looks like let's say it's garlic. Again, I'm using it in both directions to create different sense of movement. I can exhaust it of all the ink almost, just barely there. Then I can create a little bit of texture. So, this brush has seen a lot of action and a little hard to control, it used to be more pliable. Then, you can also use the same technique to create shadows, that can be fairly convincing and realistic. You can also use it to create textures of the background. So for instance, she can have a bit of texture going around or something that accentuates her presence. If we want a greater effective depths, we can go parallel and then these lines can fade by applying less pressure until you barely touch the paper. Of course, drawing with a brush doesn't have to be so precise and clean at all, it can be a completely messy and in fact I think it can have much more life and energy, if you don't try to make everything so tight. So, if you look at people like Pierre Bonnard, they always or use the brush to create a sense of movement and they drew with it quite loosely and often from real life to make sketches that may not be perfect in terms of their capturing of reality, but they have a greater sense of life to them. So, you may want to use the large side of a brush and create shapes instead of creating lines. You can in fact make pictures using just shapes and no lines at all or you can take your existing picture like I did, and transfer it into shape drawing, simply by covering the spaces until there are no lines visible. There is also something to be said for a shaky line which is actually quite hard to do if you spend a lot of time and make your lines more [inaudible] So, if you look at someone like Charles Schulz the author of peanuts, it's almost impossible to imitate that quality of line and of course there are well known reasons for that. But even for other artists like Sampaio who have a very peculiar shaky line, it's quite hard to do something like this, and it's in fact much easier to do perfect life than a shaky one. So, the best way to practice brush is probably to do it a lot and maybe do it from life, doing quick drawings without worrying too much about their quality and without making preliminary drawings. In calligraphy, people used to give their apprentices just a barrel of water to exhaust before they can move onto the brush. When I was a student, what I would do is I would water down my ink quite a lot, and then I would go over the same page many times. So at the end, I wouldn't have anything presentable to Instagram or any other form of public. This way, you lowered the pressure and you think more about the process and the fun of making marks on paper rather than the idea of creating that beautiful perfect piece. So, although I've been mainly doing lines that go from beginning to the end, you can also make lines that are little jagged, and this can create a sense of nervousness. For instance, it can also be more lively, it can be gritty or just simply lose. You can use the side of the brush to create effective lines like this. As I said, you can mess up the brush a little bit and then use that for a different effects. Of course, you can combine all these things together. You can also create more realistic effects let's say, here, you have something of an eye. Let's say we wanted to be a little more realistic. Well, what we can do is deplete the ink on the brush and then start building up some gradation almost like you would with a pencil. Then, you can use the brush from any side you want to create that sense of depth. You can even go with the whole thing just very, very, lightly, to give it an overall texture. You can go the opposite way if you want to give that texture a bit of extra depth. So now, we have our eye and quite a lot of shadow. So, while you are watching this demonstration, I don't want you to think of it as a tutorial on how it's right to use the brush, it's simply the way I use it. Of course, the probably wrong way to approach it would be to simply try and copy what I'm showing you. Perhaps a better way would be to try other few things and then try to find techniques that feel natural to you, because drawings with a brush is all about individuality and expressing yourself rather than trying to do what feels right to others. I think a really good way to develop a style is to pick an artist that you like and try to copy them in a way that transports the medium in something else. So for instance, you can take a pencil drawing and try to render it in ink, which will inevitably look different and that difference will be your style. So by the end of this little exercise, what I'd like you to do is make two, three simple sketches like this, try now as many different techniques as you can. So toward end, you have kind of an expanded version of our first exercise but it may have more of a sketchy quality and something little more tangible, than simply marks on the paper.
6. Experimenting with Brushes: Feel free to use the brush in slightly unusual ways. So for instance, you can create splatter like this or by putting your finger and beating yourself. You can also do it against the page like this. You can attack the bristles a little bit. All these create different kinds of splatter. Of course, you can do even use things that are not brushes. For instance, a toothbrush. You can just dip in and create very strange effects when there is a lot of ink, and slightly more predictable effects when the ink is depleting. It can be good for texture. I've personally never used it, but I know people who have. Then, the brush is probably the easiest way to create splatter because it's very much how you would use it anyway. Even the back of the brush can probably be an instrument. Never tried it. But look, I think it's quite good. Or some stick that you find outside if you ever go there. You may also want to play it with brushes that are a little different in shape like this flat brush. So, we use it the same way we use every other brush. Again, removing excess ink. But here, the right hand movement is somewhat limited and this brush can be really good for textures. You can do this kind of lines by keeping it consistent or you can do a tapered line by lifting it off. So, this can be great for creating shadows, little bits of movement. You can build on it and create a lot of depth. Of course, let's not forget there are those different side to that brush and we can use it like this. It may not be conventional, but you can see that the line it creates is quite different. You can also simply press the brush, and create these kinds of marks. Finally, you can rotate the brush and create strange little circles. They don't have to be circles. They can be slight movements like this, which can also be parts of texture, or highlights, or chattels. You can make an entire drawing using just a brush, for instance. It blends itself well to say animals. You can make a figure like this. Not sure what that animal exactly is, but has four legs. Therefore, it's an animal. Let's say it's a dog with a fiery mane, and a fluffy hair, fluffy tail. Now, let's look at our little jar of water. So, we can also use it for drawing itself. For instance, you can moisten the paper a little bit and see what happens when you apply ink to it. Well, it will be something like this. Of course, the longer you wait, the difference in the effect will be more apparent. So, if you wait quite a bit, then the effect won't be quite as strong. Therefore, we put quite a lot of water right away, then we can make a little explosions like this. Could be great for foliage, for instance. Finally, we can use the water in the opposite way. So for instance, we can create a bit of inky surface, then we can go into the water, and then we can start diluting it, and this will give us a gradient. This is what people usually call a wash. Of course, sketch paper isn't far from ideal for this sort of thing, but it is quite good for practice. For the simple reason that this paper is not very absorbent, so you have to act very fast. Once you figure out how to do it with this kind of paper, it will probably be easier with normal paper, and by normal I mean highly absorbent watercolor paper that is meant to be used with water. You can create a simple drawing with ink. Something again like this. Let's not try to be too creative here. Then, we can go with wash and give it a little bit of definition. So for instance, here, we can go like this, and we can still keep everything quite flat. But at the same time, allow it a little illusion of depth. Of course, it doesn't have to go flat. You can go in many, many layers of wash and then you can create beautiful and varied effects. Now, I'd like you to explore these things on your own. Once you have a bit of water, you can also go back and add more ink to it. This way, you can create different gradations and if you're impatient or if you want to get an unusual effect, you can use a napkin to make it dry faster. This can be a bit risky, but sometimes it produces very nice effects. For instance, I like the way it turned out here, and perhaps not so much the way it turned out here. Of course, we can combine our different techniques and we can use our dry brushing technique to cover up this a little what appear to me like a mistake. Although I should note that the whole idea of mistake is pretty arbitrary, and one person's mistake in another person's triumph. So, now that this thing is dry, we can see that it created a very nice gradient by starting with water and then add an ink here and allowing it to slowly take place. So, let's try to create several simple sketches and drawings with the brush of your own, and note down the techniques and styles that you feel you may want to use later because you will probably use them later. For this, I'd like you to pay attention to the material of the brush and the way it makes you feel whether you like drawing quick, small lines or whether you prefer something wider and more delicate. All this is part of your style and I'd like you to explore it on your own.
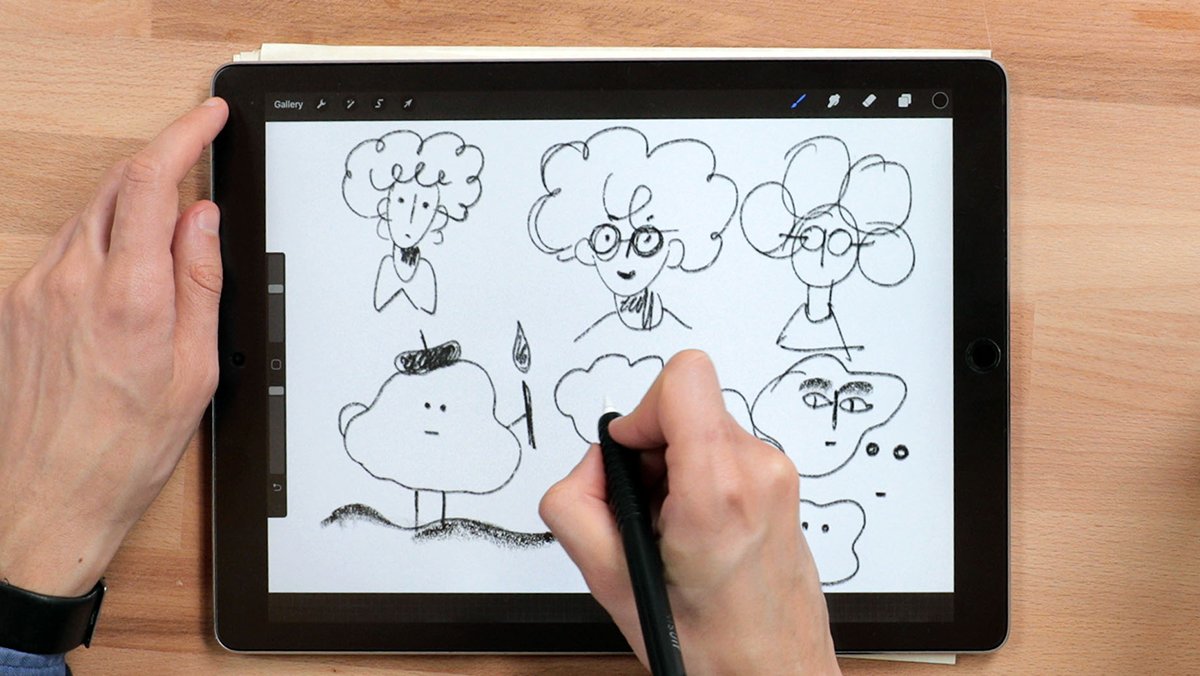
7. Pen Techniques: Now it's time to explore the nib, but before we start drawing, let's once again look at the few books that I brought on the subject. So, here is Osamu Tezuka, the grandfather and godfather of Manga. His books are pretty much a masterclass on what can be done with pen and ink. Tezuka pioneered a whole range of styles and modes of storytelling, as well as symbol of visual techniques. For instance, here we see the character drawn and quite simple minimalist style, while the rest of the environment is very lush and detailed. The two work together quite well because, we know that we see the scene from the perspective of that character. Here is a book by the Norwegian cartoonist Jason, who is heavily influenced by Hergé and the traditions of clean line style. At the same time, Jason's work doesn't look exactly like Tintin. It's much more simple in some ways, the backgroundS usually are more minimalist and he allows more breathing room within each panel. Here is a book by Catherine Meurisse, whose name I'm probably pronouncing very, very wrong. She uses the nib in a much more sketchy style. It's much lighter and more loose than the work of Jason. Here the nib flows through the page freely like a pencil would. So, let's grab our nib and plugging into the nib holder, just like this, make sure it's in. The worst thing that can happen is for the nib to fall into the ink and, well, that's not very nice. So, once we dip our nib into the ink and remove the excess ink, we can try to play around with different ways we can use it. So, as we started with brush using simple clean line, that might also be a good turning point for the nib. So, a fun little exercise to begin with would be to do a little self-portrait in the clean line style. Of course, what it is you can define yourself. You can reference Tintin books, which are often seen as the sacred text of this style, or you can just go ahead and do it on your own. So, you may want to keep the line with completely even like on the glasses here, or you can give it more variety like on the hair. A good way to practice nib and to figure out your style, is to start once again with different types of marks. Then see which one feels more natural to you, and then try to build a look based on that. So, I'm quite impatient and I like to draw pretty fast. Therefore, the clean line style is not very natural for me. I would prefer to draw on something like this. It's a little sketchier. It's bit faster and, I think, the portrait is altogether more believable. So if you don't think about it too much, you can discover a lot of things about yourself. If you stop to analyze in the middle of the process, that might be a little difficult. Once you did something like this, you can go back to it and analyze it as much as you want. For instance, I can point out that I really like this lines and I'm not too crazy about the mess here. Let's talk a little bit about cross-hatching. So, it can be a simple as simply hatching. Although, I'm not sure if that's the correct term. In other words, providing the texture without having it in the opposite direction, or we can add something to it. So, let's start by making some parallel lines, which by the way is also not a bad exercise. Now let's see what kind of depths we can get out of it. So, what if we do completely perpendicular lines, then we get a checker pattern. That pattern might be a little too obvious for some people, so, you may want to go at an angle. But lets go at an angle and cross over our previous pattern and see what happens. So, it will be something like this. So, now we have three different areas of depths. If we go over it once again, we get even more areas of depths. Now, there is no particular rule to this but I think a good point to remember is the angle at which your lines cross. So, if it's around 90 degrees that tends to work. Then, if you have lines that run in parallel and then you can create a subtler effects by doing something like this. Then, if you have one that goes completely against it, that usually works. However, if you do a very slight variation on your second or your first line, for instance, something like this. This can create a very muddy effect almost like you don't know which one you want to go with. Of course, these are just my observations and you can take them or leave them, and I'm sure you'll find something of your own. And just as with the brush, you can use mistakes to create something out of it. So, when I was drawing my book called Jacob Bladders, I started with a simple line drawings because I wanted to reference the old time in New Yorker style. But at some point I made a smudge, something like this. Then I thought, I don't remember what I thought but I probably thought, "Cool, this is a nice nose shape. Maybe that's how I draw the entire book," and that's what I did. So, I would draw very nice lines and then I would ruin them by making these kind of movements. Of course, this would not have happened had I not made that accident, but I'm sure a lot of people had made accidents like that, but takes a certain kind of, let see, inquisitiveness and perhaps playfulness rather than talent or skill to take that and just go with it. I think that's not really a mark of an artist to do anything like that. It's rather a kind of childlike attitude and giving yourself permission to make mistakes and see if there's anything in them. And if there isn't, then, we can just move on. We can try to create some textures using just the nib. It can be something like this, it can be a scales or maybe clouds of steam. It can be a pattern or it can be something a little more elaborate like different motifs that come together and create something together. So, the small nib can be really good for making something precise. For instance, let's say it's this kind of shape. I guess it could be a knife, a very elaborate sort of fantasy knife. It can be also very good for precise sayings like drawing board balloons to make this nice tapered edges. If you have very precise details, for instance, a very sharp nose or eyes that have to be tiny. While there may not be depth much to discuss in terms of different applications of nib, I didn't do it in vertical and horizontal way and some combination thereof. We can also talk a little bit about combining nibs and brushes. Which not a lot of people do, for some reason, but I think it can be really fun. So, for instance, you can draw the features with a nib, which will give you a lot of sharpness. I can use completely different styles for the eyes and the nose, and the whole different style for the mouth. He's in a very shaky line and it will probably quite incongruous, but who cares. Then, we can draw the hands in yet, another style, and maybe the other hand in yet another style, why not? Now, I can take my brush and see if I can combine all that. I can give a bit of hair. Maybe colored at pen that's not so nice. We can use a texture of a dry brush to give it a bit of a blush and even some kind of transition, although, I don't think it's very appropriate in this simple style. It can be the other way, for instance, the figure can be drawn with a brush. Let's say to show a sense of movement and urgency, and then the background can be drawn with a nib to make it look more stable. And the combination can be on a much closer scale. So, for instance, it can be a hand that starts with the nib like this, and then you can finish that with a brush. Give it a bit of a sleeve here and make the whole combination a little more organic. You may look at it and think, "Well, perhaps it can be entirely with a brush." Then you can use nib simply as a guideline almost like you would a pencil drawing. Another useful technique is a combination of finished and unfinished lines. So, for instance, if we have a candle, we may draw the body of the candle in simple straight lines. Then we can have the light itself in the slide down finished lines. Line like this. And this gives us an effect of light. The same idea can be used to reflect light and dark in simple drawings. So, for instance, if you have some kind of fruit, the dark side of that fruit where the shadow is can be heavier while the light side will be a little lighter. Then, of course, you can go and give it more definition, if you like. So, once you've done a few drawings with brush and ink, and pen and ink, set them aside and maybe outline the ones that you like most or the ones that seem to have some kind of interesting idea behind them. Next, we'll move on to creating a full illustration that will use two of these techniques together.
8. Create an Illustration: So now, let's make an illustration using two of the techniques that we developed throughout the course of this class. But before we do so, let's look at a couple of examples of people who use two different or more than two different techniques in an interesting fashion. So here's a book by Yoshihiro Tatsumi, who was one of the pioneers of the gekiga genre of manga which offers a much more gritty and realistic outlook on the events depicted. So, one of the things he does here, for instance, is combining the cartoon style depiction of the main character with a much more photorealistic style depicting the events that happened in reality. So this way, he has two techniques merging in the same page. Yoshiharu Tsuge is another influential artist in the more alternative experimental manga. In his work, we can see the play with style is even more apparent. So here, we have the outline, and the shape of the plane with a very detailed sky against a very detailed ocean and almost no excessive detail on the character who even seems grotesquely out of style with the rest of the environment. Tsuge uses the different applications of ink to tell the story, not just in words but also in the way that ink is applied. For instance here, we have a stark black and white as opposed to much more detailed application in the previous panel. Here, the sun is beaming in almost unbearable fashion. We can just about feel the heat. While here, it's more about the decrepitude of the buildings. Let's now take a look through the drawings that you've made and pick something that you think can work together. So for instance, when I look at this, I like the minimalist fashion of this drawing. So, I'm going to try to merge this and say the more unwieldy quality of that toothbrush and ink experiment. So I can see if I can merge in one drawing something that's quite clean and simple with the nib, and then something much more free and loose drawing with brush. Here is also a couple of examples in my own work where I combined two or three different things to come up with a new look. So for instance, for these little paintings, I would start using just pen and ink, pretty much using the pen as a sketching tool. Then on the bits that I don't like, I would cover in paint. So this way, I'm using paint as a white out and it creates a very unusual combination that's almost deliberately unfinished. For this illustration, I deliberately used two completely different mediums, pen and ink, and then gouache. This highlights the alienation of this character among the group of dancing figures that almost merge and become a little intangible. So for our final illustrations, pick the tools that you want to use. Also, I would suggest sketching out the scene first. So in the previous exercises, I think it's better to just do it straight with ink. Here, you can do it as well but if you're doing a full illustration, it doesn't hurt to think about composition and design first and then go to ink. So the goal in keeping with the whole idea of two different mediums, I'll maybe try to draw one character that seems to be out of place. So, maybe she's spying on someone with a little camera. So when you're sketching, you can of course do it any way you like. But I think it's pretty important sometimes to be very loose and to more importantly allow yourself to be loose during this stage. So if you do a perfect drawing with your pencil, then it might not be particularly fun to ink it. In other words, you'll just go over it and have to do the same thing twice which may not be all that fun. So instead, it's good to take advantage of each stage and do whatever you can get away with here. So when we're just penciling, it means that you can make as many mistakes as you want unless you erase so much that the paper becomes invisible or it wears off. But let's try not to do that. So let's say she's peeking behind a garden foliage wall thing. I'm not sure what I'm saying. But we can establish the very simple perspective going on here. Sometimes when I feel lazy, I will just write foliage and then draw it later. Maybe there's a building behind. So let's say this is our very simple scene. She can cast a shadow. Maybe we can have another shadow over here. So this looks pretty abstract for a shadow but if we have a similar shadow coming from her figure, then we kind of established the language that this sort of shade qualifies as a shadow. Therefore, we can get away with it. So this is my sketch. Of course, the way I sketched is extremely loose and my sketches are usually pretty unattractive. But I like to keep it this way because then, I don't feel precious about them. So as you create something like this, you can plan ahead. For instance, you can decide the figure will be done in pen and this will be done in brush. You can even make little marks to note that. Or you can just play along and see how it feels. Also within the same picture, you can have different levels of detail and planning. For instance, I planned a decent amount of detail around her face because I want to make sure that the eyes are proportion, so I even used an eraser before then. But as it come to the foliage, I'm not that particular about it and I can just let myself improvise. This is the technique you can see all the way through to the classical paintings. Although more commonly, their masters would ask someone else to fill in the boring bits. But for most of us, we'll have to do it ourselves. So I'm going to start with the bits that are probably a little more difficult and more important which is the face. I'll start with the nib, and I'll try to remember my idea about doing it in a pretty minimalist fashion. So in order to do so, I'm not going to let myself get carried away as is for most of us, our natural inclination. So I'm going to stop every now and then and try to assess what I'm doing. Of course as we go along, I think we can and we should in fact change things around. So in the end, it's probably better to draw with ink rather than to ink. What I mean by that is quite simple. By inking, a lot of people imagine just filling in the blanks, covering what you already have with the final layer of polish. But I think we can think of it more as drawing with ink, which means using this sketch simply as a guideline and allowing it to evolve while we're drawing. Our character here, for instance, has a much fuller lips. As a result of me applying the ink, and it makes sense because with a pencil drawing, if I were to finish it in pencil, it would have looked quite different. But I think it makes sense to give it more volume to make it stand out. Now, here I seem to have made a slight mistake by making her chin a little too prominent. I think I'll go have them try something else. Even though I decided on a combination of styles, I can still go ahead and change things around as I go along. So, I'm going to try this, and I really encourage you to go with the instincts and try out different things even they are not exactly what you planned on. Because I think this is the beauty of the medium as it allows you to experiment, to try things out that you weren't planning for. Unlike say most digital applications where you can more or less easily follow your plan without any hiccups. I'm going to add a couple of strands on her hair but not too much. Now, this way because I made this mistake I'm kind of establishing a stronger sense of light. Because this is where her shadow was, so it almost looks completely intentional or at least it can be mistaken for existential. Now, on the other side I will go pretty lightly on her hair. Let's be a little more dramatic and the greater shadow here. So, as you go along with your illustration, it's good to remember what happens. Why not share all these little discoveries, mistakes and other surprises when you upload the final thing. Because seeing the process and all this little details are as much a part of the drawing as the final piece. Now that I'm inking, I feel that the whole scarf is a little of an overkill, so I'll try to just give her something more of a cape like appearance. Since we're experimenting, I'm going to try to mix different techniques, so I'll use cross-hatching alongside with the big swab of ink. I have no idea if it will work or not but that's the whole point. It's also important to remember that when we have the pencil layer going on, it's hard to see exactly how your ink is looking. One thing you can do is use a lead box instead and then you can switch it on and off and see the effects that you are producing. Or you can simply wait for a bit and not finish the whole thing and then erase the pencils and then take another look and see what difference there is. On this hand, since the position of the other fingers is not particularly important, I can simply merge them into one mass. I think whatever medium you're using, it's really important to take advantage and do things that you can only do in that medium. Something like merging the fingers would be a good example of that. You can't merge fingers with a photograph, at least not as far as I know. Now I can use the side of the nib, to get this perfect straight lines because here we have a mechanical thing. Now that we have a bit of cross-hatching here, it would make perfect sense to put a bit of cross-hatching on the flesh. This makes sense not only conceptually, but also in a way where establishing a visual balance between two. Finally, we can have a big, black shape around the shutter. Now, that we've done that, I feel that perhaps it's good to keep the rest of the camera and the rest of her body more or less without detail. Just to give this one shape a better sense of contrast. Of course, we can just wait until we're done with the whole piece and then scan it in, added things out with any software or we can also use white out or any kind of correction fluid. I'm going to extend her appearance a little bit into that hedge just to give the scene a little bit of immediacy and to show that this hedge is organic in nature. Now, let's establish the rest of the main thing with the shadow. I can draw the channels in a very dramatic, furious way, almost like they're escaping from her body. Then as we get towards the top of the shadow, I can use some bits of it to correct things that I don't quite like about the drawings, and I can also let it taper off a bit and just go a little more abstract, and a little more loose. This way I'm still using elements of reality like just like the fading of the shadow, but I'm using it in a very stylized fashion. So, I'm still saying that observation is really, really important but if you pay a lot of attention to the world it doesn't mean that you have to recreate it in a straightforward manner. In fact, it can be the exact opposite. Let's say we're done with her and now let's approach the rest of the scene in a slightly different manner. I can start with my toothbrush. The foliage can be completely unrealistic. It will be more of an ideal foliage, then if we have our character and a spine and someone, that actually makes a lot of sense because out the periphery of her vision, she would only perhaps register it as an idea of the surrounding rather than taking every single leaf that we have lying around. Let's see if we can get any interesting effects with the other side of the brush. Can be a little bit of depths. Now, we seem to be getting to the point where it's quite easy to overkill things, and I think one of the most important things to learn is when to stop and I'm really better at this myself. I'm going to do a very simple edition of this tree instead of a building, since we have mainly a natural scenery, otherwise, and I'll have that shadow that she's trailing. Now, to unify our different mediums, let's try to go back with the brush and give it a little bit more smoothness, just so they don't look too different. I can add a bit of foliage or leaves, or whatever you may think it is. It can give our foliage a little bit of depth as well by giving it a few more controlled marks here and there. But, let's try not to overdo it. I'd say we should call it a day. Because I want it to be a pretty simple drawing, rather than an elaborate illustration. You should aim to make something like this in half an hour or so. I wouldn't spend too much time on that. I think for learning purposes, it's much better to create a bunch of different things that don't take a lot of time than to spend lots and lots of time publishing one single thing. Now, we can finally delete the pencils within the razor and see how it looks.
9. Further Inspiration: So now that we've done our final drawing, let's take a break and look at a few more books. So here's the book with illustrations by Paul Clay. And here he has several drawings of angels that are quite funny and strange. And you'll notice that he uses a pretty awkward line for most of these, and it's not what you may call conventionally beautiful. But I think the ideal standard of beauty is very relevant and if you are going for that kind of look and end up making a perfect brush line, then in a way you've failed their own standard. Also it's good to note how he does the same thing several times here. I think repetition is a really important process of learning and also a really important artistic tool. In this little xeen by Anna Haifisch, the author uses deliberately jagged lines to create a certain charm to her characters. You will notice that most of the compositions and the character designs are very minimalist. So the jaggedness of the lines actually compensates for it and creates a more compelling and charming picture. John Broadly uses an amalgamation of slightly archaic techniques. And he often draws in deliberately very awkward, almost outsidery style and then making lines that are very uneven, that obsessively retrace themselves and combining completely incongruous fonts and lettering together to create a very naive and very unique style that is at once referencing a lot of old timey works and at the same time is obviously done on purpose. The poet, Matthew the Horse, illustrated his little books of poems with these little naïve beautiful drawings. You can see that some of them look very accidental, like they're done on the first try but actually, he makes lots and lots of versions of these and not just to make that perfect nice line but rather to get the right feeling out of them. Likewise, Disa Wallander deliberately draws in a slightly unfinished, sketchy way just to get that feeling onto the page. Her work is really about the intersection of writing and drawing, and it's not really about the beauty of a drawing. Having these simple charming drawings then help to get the writing across much easier than if she were to use very detailed and elaborate ones. In this book of sketches by Nicolas de Crecy, you can find all kinds of drawings that are done on napkins and any other surface that he had on hand. Some of them are pretty straightforward observational drawings, and some of these drawings take reality and twist it, and do something a little strange and awkward with it. But all of them show his really great power of observation, while in this xeen by Y.Y. Pang, we have a great range of expression using pretty much the simplest tools imaginable. Just a pen. And here, the observations range from pretty straightforward live drawings to drawings that go straight into abstraction or somewhere in between. So, myself, I'm not a huge sketcher, at least not nowadays. When I was starting out, I used to sketch quite a lot. But then I started writing more and more, and nowadays most of my sketchbooks are just filled with words and notes for different stories. But still, if I do sketch, I try to just capture the impression instead of going for any sense of realism. Often I would go to a museum and do very quick and simple sketches which allows you to trace the same marks that the painter or the artists have done without actually trying to replicate it completely. In a way, it's like reliving the process of the creation of that piece without really risking any ineptitude. Sometimes a sketch I make just captures the mood I'm feeling at the moment and it doesn't mean anything else. This is done with a simple Muji pen that I'm very fond of because it has a great flow and you can write with it easily. Sometimes I make quick observational drawings. Here for instance, she had a very elaborate shirt but instead of drawing all of it, I just made some scribbles to get the impression out of it. Meanwhile here, I had cakes with a fellow painter and because I had a lot of time, I made quite a lot of detail on the table, actually much more than there were. To do this I used a brush pen. You can find all kind of different brush pens in stores these days and these are really great tools that allow you to practice drawing with ink without the pain and suffering of dragging around the bottle of it. Again, in defense of repetition, occasionally I would just have a stupid idea like, why not draw a dog with a flowerpot on its body. So I would do it many, many times, over and over again. This is not really about getting the perfect dog, it's more about having fun with the process. When we draw from life I think it's sometimes easier to capture the gesture rather than the anatomy and in that way that picture can become more convincing than if we were to very accurately copy everything in its placement.
10. Conclusion: A few concluding words about inking. While we said quite a lot about practice and the importance of practice, I think it's just as important to actually not practice, to spend a lot of time doing nothing, to allow yourself some time off, to observe and just process things in your mind. Also, to think about more, not as a skill, but as a way of applying one thing to another thing, and just distancing yourself from the whole pressure of an art practice and treating it as a pastime, even if it is your job. I also think it's really good to apply what you learned in one discipline or in one medium into another. So, a lot of my personal work is actually heavily influenced by writing rather than by visual art. In the same way, you can take the things that we learned today in inking and apply it to painting, or writing, or dance, or maybe even embroidery, although I don't see how. Thanks so much for watching the class. I hope you enjoyed the exercises and I hope you created something that was fun to make. So, please do share all your work with the rest of us in the Project Gallery, and you can just upload the final illustration that you made. Or if you had some fun experiments that you think would be interesting to look at, you should show this as well. So, as you go off on your own, I will just remind you that there shouldn't be any standards of excellence in art in general, and especially not in this practice. So, there isn't a good inker and a bad inker. It's simply different ways of doing the same thing. Whatever brings you enjoyment and fun in doing it, is the one for you. Whether it's a career or a hobby, really makes no difference.
11. What's Next?: way.
 Roman Muradov, artist