Transcripts
1. Introduction: Uh Hi, everyone. The capybara, which is native to South America is one of the
most unique living creatures, being a semi aquatic herbivore. Despite being the world's
largest living rodent, their distinct barrel
shaped bodies and neutral facial expressions have made them beloved
throughout the world, with their popularity
soaring in recent years, which is why I can't
wait to teach you how to sketch and paint three different capybara
poses in watercolors. In this class, I will point out some anatomical features
of the capybara using my capybara anatomy
sheet that features numerous different poses of the capybara that I've provided
in the resources section. I will then simplify the sketching process of each capybara pose
in this class. Next, I will teach you how to lay down a varied base wash, followed by adding
subsequent layers of paint to build up the bristly
texture of the capybara fur. We will then add the
final details using a black fine liner and white gel pen to bring
our capybaras to life. This class is suitable for intermediate to advanced
watercolor students, as you will be required
to know how to use some watercolor
techniques such as the wet-on-wet and wet
on dry techniques. However, if you are
a complete beginner, you are more than welcome
to follow along as I will be explaining and demonstrating
each step clearly. So if you are ready
to sketch and paint three different poses of acute capybara in
watercolors, let's begin.
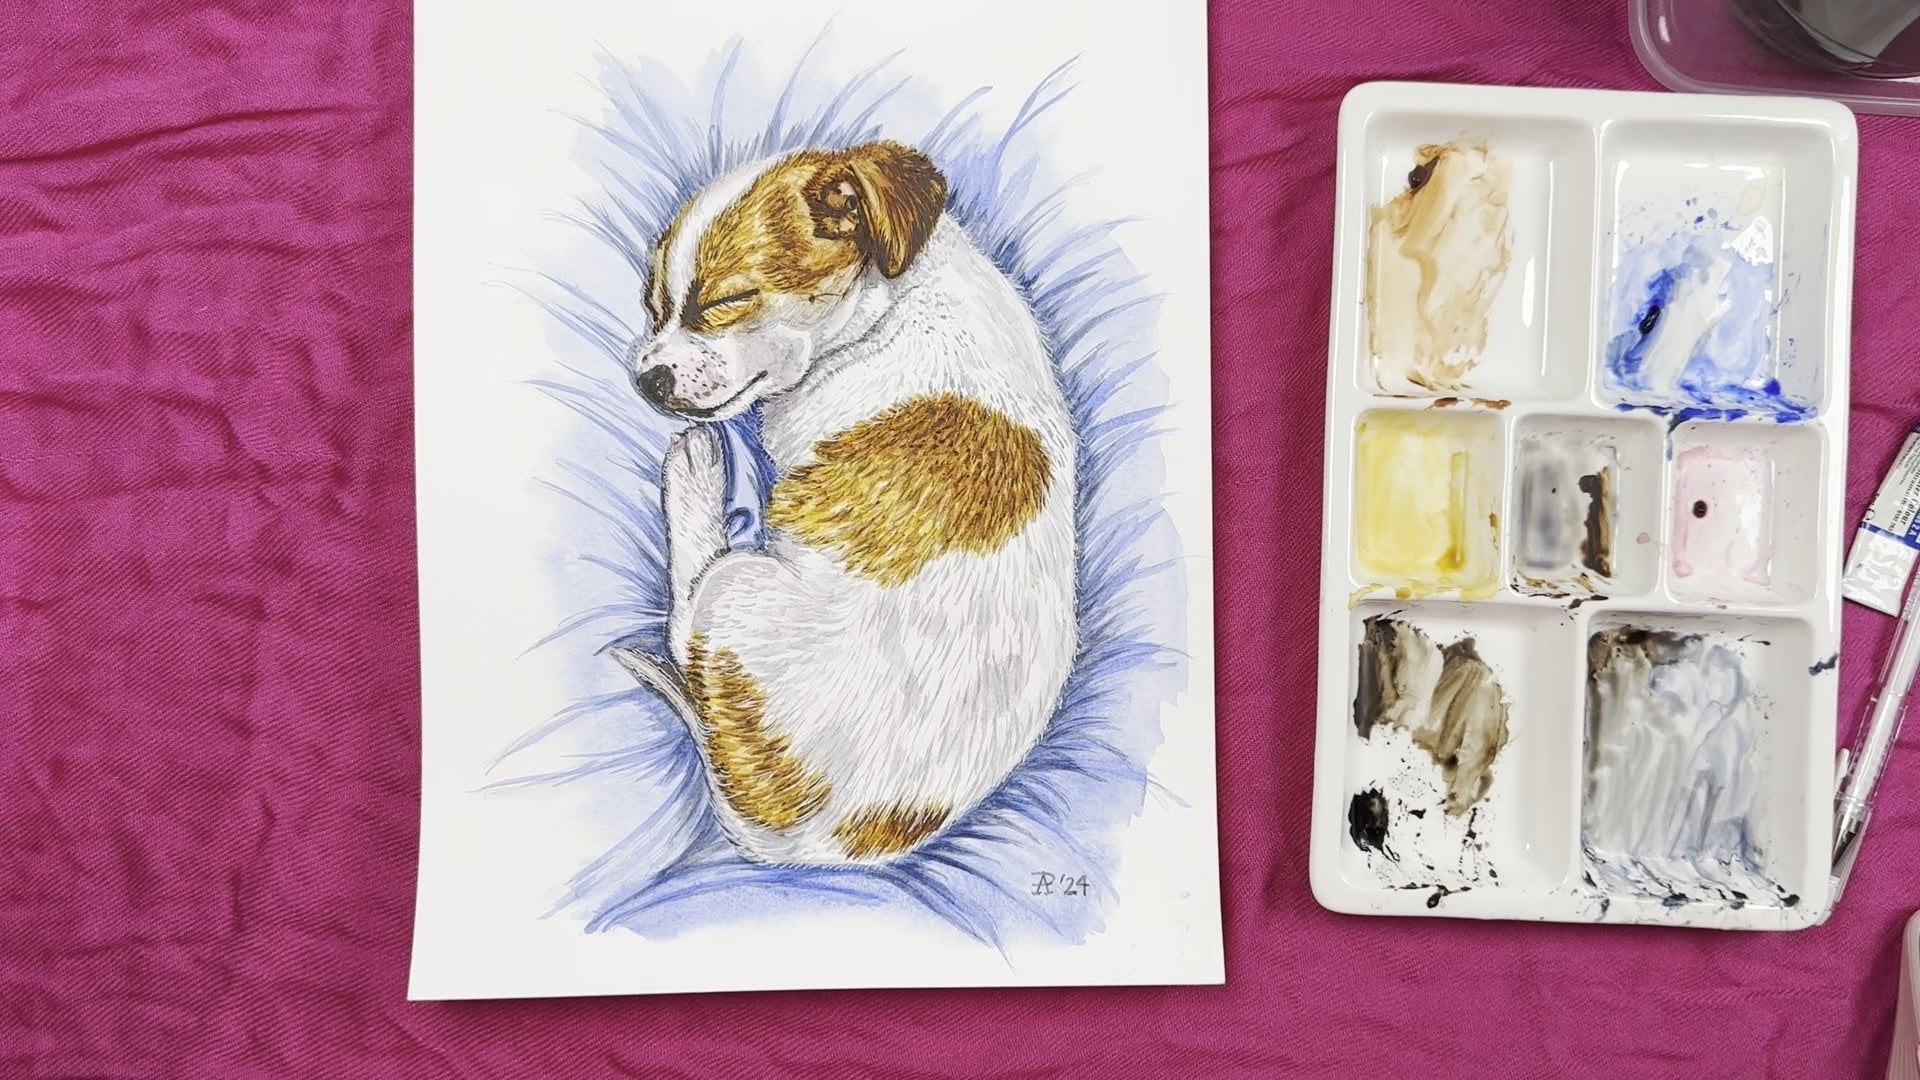
2. Materials: Hi, everyone, and welcome
to the material section of this class where I will list all the materials that you
need to do this class. Starting with the
paper, I decided to use my six inch by six inch
watercolor sketchbook, which has a paper weight of about 300 grams/meter
square or 140 pounds. You don't have to use a
watercolor sketchbook, and you can also
use loose sheets of watercolor paper of
whatever size you want. But please try and use
watercolor paper that is artist quality and is of a similar weight to
get the best results. Next, I will show you the materials are used
for sketching. I used a mechanical pencil by the brand pilot and it
is a Super grip 0.5. I also use two different
mechanical erasers. One is by Statler, which is a mass plastic, and one is B tombo
which is a mono zero. These are very handy for
erasing small areas. Next, let me take you through the materials
I used for painting. I always use two jars of water so I don't have to
keep changing the water. I used a ceramic palette
to mix paints on. I also use paper
towels or a rag just to wipe off the excess water every time I rinsed my brushes. For this class, I use three different round brushes all by the brand
silver black velvet. In the sizes four, eight and 12, the larger brush is used to wet larger areas and to lay
down the base wash, whereas the size four and eight were used to add finer details. Now, let me talk about the paint that I use for this class. I use the colors raw sienna, burn Siena, raw umber, burn umber, as well
as Alizarin crimson, French ultramarine,
and sap green. It's also handy to have
paints gray if you want to do shadows
really quickly. And very finally, I used
a black fine liner pen. This one is by Faber Castell, and it was a size S. And I also used a white gel pen, which is by UIBL Signo, and these were to add the very fine details
to my capybara. So if you are
ready, let's begin.
3. Capybara Anatomy: Hi, everyone. I just
wanted to take you through a little bit of Capybara anatomy before we start sketching. And this is a sheet that
I've prepared for you. I've done various
pencil sketches of the Capybara from
different angles just so you can observe their bodies and faces in
these different poses. And a copy of this
is available for you in the projects and
resources section of this class. So as you can see, very diverse poses for
you to choose from. I will be covering three poses in this class, which
will be these three. And just to point out a few
little facts about them, they are the largest
living rodents on Earth. They are from South America. They are semi
aquatic herbivores, meaning they spend
a lot of time in water and land and
they are vegetarians. They are known for
their distinct heavy barrel shaped bodies and blund snouts. In fact, that makes
their head look a little bit blockish or bricky. They're known for their
reddish brown fur, which is actually very coarse. They can grow up to 134
centimeters in length. Females tend to be slightly
bigger than males and they have slightly webbed feet because they
are semi aquatic. Acute fact is they
have four toes on each front foot and three
toes on each back foot. Those are just a few
facts, and as you can see, there are a lot of
different poses for you to choose from if you would like to do other sketches
after you do this class. This is a resource that's
available for you. Now, how about we get
going with the sketching? See you in the next
section of this class.
4. Capybara 1 Sketch : Hi, everybody, and welcome
to my capybara class. And I'm so excited that
you've decided to join me. I'm just really,
really thrilled to just teach you how to
sketch a few cute, varied poses of the
beloved capybara, which is an animal that whose popularity has really
soared in the recent years, especially in countries like Japan and China and Thailand. So yeah, I myself, I am a huge fan of the capybara. And I have to say it is
quite an interesting animal. I've been lucky enough to have a meet and greet with well, a capybara at one cafe in Tokyo, and I was lucky enough
to go to another one recently that had
three capybaras, so just three times
the capybaras, and it was amazing. And they are just very, very like, there's no
way to describe it. Just like an animal that I've never, ever
encountered before. They are just adorable. And yet they have such
amazing personalities, very different personalities, especially when I got to
encounter three of them. One of my daughters
loves to say that it's a very smug creature and
it looks very proud. But yeah, they're kind of hilarious because
they look adorable, and yet they don't seem to have a lot of
expression in their face, and yet their personalities
really shine through, which is why for this class, I've decided to use
one of my sketchbooks. Which is about 6 " by 6 " wide. So yeah, it's a cute sketchbook. And the reason I chose to do sketches in the
book this size, as opposed to how
I usually do it on A four size paper or
A three size papers, just so we can have
a few little poses so that we can then look at, you know, like a
little collection. So I thought that would be quite cute this time to do it in my little travel book
because I'm actually, um, compiling a book that has a few of my different
experiences in Japan. It's still very empty because I only just got back from my
trip a couple of weeks ago, but part of the of the one of the more incredible
experiences I had on this trip was just encountering the
capybaras and the cafe. So because of that,
I really wanted to include that in my
travel sketchbook. And I also just think the
size makes it like, you know, really convenient
so that we can do a few small sketches in
different poses as opposed to, like, one big, you
know, like painting. So before I end
up talking a lot, how about we get started? I did include a
couple of pictures of the capybara in the projects
and resources section of this class that you
are more than welcome to look at if you want to sketch more because
I've just chosen a few, a couple of poses. I want to start with a
pose that I think is maybe easier for
those of you who have never sketched
a capybara before. I just put the word capybara here, and I just want to check. I'm just standing up to check that you can see what I'm doing. There is a very cute pose that, I think shouldn't
be too difficult to do I want to just do it
on this page, actually. Let me just take you through a few features of the capybara that are quite unique to it. It's very solidly built. They are built like a barrel
is what people like to say. They've got this
really solid body, this very cute arch to its back, this cute bottom as well. The funny thing
about the face of the capybara is that
it's very blockish. It looks like a brick and
it has very blunt snout. So yeah, that makes it quite unique yet it has these small
dark eyes and these very, very adorable ears
that can wiggle, which is so cute when
you see it in real life. And they also have
very coarse hair. When you pet a capybara,
you're very surprised. It really feels
like you're petting straw or like a broom. And they also have these, um toes that are adorable, yeah. So those are a few of the
features that I pointed out. And without me talking too much, I would like to start sketching. So how about we start
with a simple pose first? I'm just checking that you can see everything in the camera, so I'm just going to put this
guy aside over here. Okay. So let's start first by
getting the shape right, and then we can add the details. That's what I always like to do. Okay? I mean, sometimes
I might, you know, get a more fluid like, you know, just drawing the
face and then going out. But I think it's
important because I'm working within
the confines of this page to try and get
the shape right first. So just there's an angle here where I'm starting with the face, where the mouth is. What we're going to do first is just get the shape going first. It doesn't have to be accurate, but I just want to make sure
that my whole capybara is going to fit a is going
to fit on this page, the face, we start
here with the snout, which is very blunt and
then we're going to draw a line at an angle coming
down here and this one also. It's just going out slightly from this
line on both sides. We're going to get
something that looks like. I'm just going to draw
an imaginary line here, but this is where the head ends. It's quite a small
bricky looking head. And it's going to end there. That's just what
I want to market, I can definitely
refine this later. Let's just get the
whole shape going. Now we got a curve and then we got the chest
coming out here, and then we're going to go
down to the legs, all right? So I'm just getting
the shape going, and the feet are going
to be somewhere here. Now, just to check
the proportions, I want to come back to the
head and I'm just going to extend this a little bit. Now if you feel
like you need to, you can turn your
page if you want to just draw that curve naturally. We have a line
coming down here and then it goes a bit flat for
a while, but just slightly. Then we go down to this
beautiful curvature of the back. I love this about it. In fact, I wouldn't even
mind making it more prominent because I love the way this curve
comes out like that, and then it goes
back in to where the back leg is where
it's sitting down. We just want to make sure we got the proportions right first. Starting with the head, I
just want to just look at the angle of the
reference photograph where he's sitting down, and now I'm going to start
just refining this a bit. I looked very like blockish. I'm just adding a little
bit of a curve in here now, just rounding it up a bit. And as I go down
here, I notice I made the chess come out
a little bit too much, so I'm going to cut it
back a bit like that. So I'm going to just erase
this part on the outside, and I'm also just going to
erase this line over here. Okay? So the chess should
only come out a little bit. And then where the chest goes down here and
becomes a leg, I'm just going to do an
imaginary line across here, and that's just where
the leg is going to, um, the elbow, so to speak of the front leg is just going to
come around here. I'm just checking that
because this is art, it doesn't have to be crazy, accurate dimensions, but it's good to have the
scale as close as possible. I'm drawing the leg that's right in the front
here that we see, and I'm just drawing a little
silhouette of a toenail. They've got very interesting
feet, by the way. They've got these
individual toes that, actually the feet are semi webbed as interesting
as that sounds. So I'm just going to draw a
little bit of a nail there. We see a little bit
of the other leg. There's also a bit of a curve
in this leg, all right? I just want to emphasize
that curve and just erase this
line a little bit. Now we're going to see the
other leg come through. The one that's hiding behind and we only see a
little bit of it sticking out. Okay. We got two legs
going and that's great. I'm pretty happy with
the proportions now. Obviously, we're going to
round this up a bit because it looks a little bit
like chicken legs now. I just have to I'm starting to refine the shape a bit now
that I got the overall, feel of the capybara. I'm just going to draw a little curve here like
I see in the picture. I'm going to just
follow this down here where it's tummy is curved. Down. And now we
see a little bit of the Tammy and we still see this angle this line coming
down like this, right? So we're on the right track. And now I'm just
trying to see how, um, I think we're going to now put the back leg that has a shape that when a
dog sits down, you know. This is not very detailed because the back leg
is covered by the fur, you only see a little bit of it sticking out and
then we're going to just do a bit of a furry
texture over here. Now that I look at this,
now that I've drawn this, I just want to just
bring this down here. That is the overall
shape of our capybara. It doesn't look like
much, but actually we've gotten now this
is the hard part, and now we can do the
easy part because we've gotten the main
proportions down. All I'm going to do now is just erase some lines that
I don't need anymore. Okay. And let's work on that gorgeous
gorgeous head of it. So over here, we're going to just erase this
little lime here. And so this is going
to be the upper lip, and we're just going
to do a little bit. Please feel free to zoom in if you can't
see this clearly. We're doing the
bottom jaw or lip, you know, of the capybara. I also feel like
maybe this looks a little bit like too big, so I'm just going to shave
this down a little bit. This is the top lip
and the bottom lip. Now I want to do the nose. The nose has the
nostrils are surrounded by this patch that we
see. That's pretty cool. The nose the nostriuls
are surrounded by this little cute patch
that comes down here. Okay, and kind of blends into the fur a bit
into that area. And I'm now just going
to do a little nostril. You don't have to spend
too much time doing this. It's just a bit of, you know, a dark shape that's
kind of irregular, but then kind of tapers
a little bit inside. So we don't have to
color it right now. Now we can start refining
this nose shape a bit. So I'm going to end the head. I'm just going to just
add to tell the truth, we've done a pretty good job
with the shape of the head. So what I want to do
now is add the ears in. Now, I think since the
head ends somewhere here, I think the ear
should go somewhere over here at the very
edge of that line, the imaginary line
that we drew it has very cute ears that look almost
like a type of mushroom. Which is why, one of
the capybaras that I encountered in Tokyo was called Kiko aje and according
to the staff members, she was named after a type of mushroom because of her ears, which I thought was
a very cute story. Um, yeah, the capybara
was treated like a queen. She was very, very spoiled. Yeah, so she was very cute. And I'm just drawing
this little what I see, which is the ears are
quite an unusual shape. So yeah, something
that looks kind of like that looks is
kind of like the ear. And the ears themselves
can move quite freely. So that's the year that we see, and then we see a little bit
of the other ear behind it. Now, I just want to do the I. The I, I feel, let's do the shape
of the I first. I can refine this again later, if this is not as accurate. So So kind of kind of goes down like that. Then this top part, which is the eyelid kind of
connects to it. Yeah, that's unusual shaped eye. But yeah, as you can see, it's coming together
really well and I feel like I can erase
this line now, like, um and I don't have
to fill this in, but you can imagine
the eye is quite dark as it is from
the photograph. Yeah. But we can always
paint that later. Right now, I just want
to finish the sketch. So I'm just going to see what
else we need to do now to make this to finish this because it looks
like it's already there. Like what you can do
now is if you want, you can add a bit of shading, even though we're
going to paint this, but I like to do a little bit of shading and just a little bit, just so I know that, hey, this is where the
darker colors are going to go and you
don't have to do this. But we are going to
paint over this. So I just feel like
it kind of helps to map out a little bit,
what we're going to do. So as you can see,
there's a lot of, like, This area around the nose will be a little bit darker
towards the bottom here, and then I feel like maybe this ear goes down
a little bit too much here, so I'm just going to refine that a little bit by bringing it up. Okay. I might just need to use my smaller eraser to erase this line in here too. Okay, that's looking very cute. Okay, I just want to check
that this looks right. I think maybe, maybe we could just extend this
part a little bit more. Like, so yeah, just extend this line now
that I'm looking at it. But no big deal. I don't think that was
too inaccurate, a sketch. So this is going to be
the hip of the capybara. I'm just going to stand up now just to check that the
proportions are right, and it actually does look a lot like our reference photograph. I think we got it quite well. If you want, you can
just maybe add a few of these lines
just so you know, it just helps us to, as I said earlier,
map it out a bit, maybe give it a bit of a three dimensional feel
because it looks very flat now because
obviously we haven't added any color or shading. But I just like to do a
little bit before I paint it. This is just a preference thing. I know where the shadows are
supposed to be on each pot. Obviously, I'm not going to do this all over the
whole painting, but I'm just like, okay, there's a little
bit of shading here. I guess we could do that eye, just shade it a little bit. But you know what? I
think we might stop now because I think
this looks really good. I'm just going to erase any
line that I don't need. But as you can see, it has
this very blunt cute face. And yeah, I love it. I
think this looks great. So how about we go
and take a break, just refine your drawing. And when we come back,
we're going to start adding some color
to this little guy, and it's going to
be so much fun. So I can't wait to see you then.
5. Capybara 1 Base Coat: Hi, everybody, and welcome back. And I hope you're
really excited to paint your first Capybara pose. So this one was I felt a simple one because it was sitting down and
it's a side profile. So yeah, I love how cute
my little guy looks. And before I start, though, I don't think I need to, I
might just erase this line. I don't think it has to be
like all the way to the back there and maybe not as curved. So before I start, I just want to maybe
fix that up a bit. Like, I think it just kind
of goes somewhere like here. And, yeah. And that's the
only change I want to make. I just wanted to show you that
before I started painting. Now, some of the colors that
I wanted to use for this, just looking at the
reference photograph is, I wanted to use raw
sienna, burnt sienna. Raw umber and burn umber. Now, depending on the
brands that you use, sometimes there can be
a bit of variation. But for example, this brand of raw umber appears to be darker than a color
called burn umber, which is from a different brand. But even though these two are
artist quality watercolors, for some reason, I don't know.
They look a bit different. My advice to you is no matter what brand of artist
quality paint you're using, if you can get shades
that are similar to this, something like raw sienna, maybe if you don't
have raw sienna, yellow ochre would
be close to it. This burned sienna
I have is quite red compared to some other burned siennas
that I've used in the past. But if you could
get a color palette like that, that would be great. I'm just going to put
some of this color. I'm starting with raw sienna. I'm just going to put some into my clean palette now.
That's raw sienna. I'm just going to put some
burned sienna over here. And so I don't even know if I'm going
to use all these colors. For instance, like,
the raw umber, I'm sure, it's quite dark. So we'll just see
whether it's, um, whether we're going to use it or maybe burn
umber will be enough. Oh, my bun umber is
a little bit dry. I might have to take
some bone umber actually from that I've already bought in my travel palette
just to keep things going because it seems to
be a little bit stuck. So I'm just going
to put out some of this color over here now. As you can see, yeah, it's just a nice brown that's a bit darker
than your burn sienna. Maybe, um. I'm just going to put
some of that out here. Yeah, I feel like this one's
gone a little bit dry, but I did put it in a palette
before I went on a trip. I might have to cut it.
It's just not really budging right now right
when I want to paint, so I had to use some of this. I hope you don't mind. I'm just going to rinse my brush now. What we're going to
do is I'm going to take I suppose I could just
use my big round brush, which is size 12 to just wet the entire capybara because I want these colors to spread
in it nice and evenly. Even though I can
later build up some, you know, layers of color
and hair texture, it's okay. We're going to
just paint Whoops. I don't know why I got some red. I think some of it
came out of my jar. My jar was used for
painting earlier, and even though I
thought I cleaned it, I might have left a
bit of paint on it, so I'll just be very careful to not
touch the edges of it. Okay, so I'm just going to
no big deal, no stress. I'm just going to try and paint, I mean, put water within the boundaries
of the whole Capybara, and just make sure it
has a nice even glaze. Okay, so nice even glaze. I'm going to start dropping
in the lightest color here, which is raw sienna. I'm going to try and emulate
the color that I see here. But also please remember that, it's okay if the color doesn't
look exactly the same. As long as we capture it's nice, golden brown sort of color. I'm also intentionally
leaving a few white areas. I'm not painting
the entire thing. Just to let a little bit of
that lightness come through. But mostly mostly I painted
it, like all of it. Yeah, maybe some parts are a
little lighter than others and maybe where we
see the darker areas, I might just drop in a
little bit more paint there. Even though I'm just
about to drop in more color now, other colors. I mean, other brown colors. But this is where the
shadow area would be. But enough of that, let's have fun now and add some of this, I mean, burn sienna. And what I'm going to do
is I'm going to start using little hair like strokes. I'm just using the
very tip of my brush. I'm just going to put it where I see a bit of the darker
areas down the neck here. So remember, this is
just a base coat. Okay? So we are going
to build up the color, but the reason I want
it light, I mean, the reason I wet the entire areas because I just want to build
up color slowly. I suppose I could
go over the ears. I don't think that's a big deal. And also under the nose here,
we go a bit of color there. And then I'm going to take
some of that color down here. That's why we wet it
because we don't really want even though we're
going to add hairs later, we don't want harsh
lines on the base coat. I just want everything to kind of blend quite well and over here is where we've got the some of those hair
strokes that we see. Try to leave the very
top edge maybe not as darkly painted because I think that's where the light
would be reflected. I'm learning some of
that raw sienna that we painted below come through
by not fully covering it. I'm already starting to
do little like I said, hair like brush strokes to try and start building that illusion that it is the hairs
are very coarse, you know, feel free to go
outside the line a bit, you can do that with
the hairs right at the edge at the edges. Whoops ended up going
to the wrong pane. So I'm just changing my I'm just cleaning my brush, I mean. Sorry, I guess I got
a bit excited there. Yeah, we're building
up the color, adding some of those
brush strokes. But letting some of that
color below come through. And as you can see,
it's blending, so it's providing you're
getting a nice soft, like, you know, soft fur
like texture here, and then later on
we can build it up with some dry brushing. And so I'm just going to do little hair like strokes,
you know, having fun. This is very, you
know, relaxing. You shouldn't feel stressed. So we're just doing
that and these are all going to blend
together anyway. Okay? And I might bring some of that color
down here a little bit, even though the feet the
legs do look a bit darker. They're like a darker brown.
But we can do that later. And, yeah. I think
I might just do the mouth a bit over
here. That's very cute. Okay. So like I said, I want some of that color
below to shine through, so I don't want to
cover it completely. But I think we've already
done Alphas layer, maybe just like I'm
just going to do very tiny little strokes like this with the
tip of my brush. I think this looks
really good already. I don't want to overdo
it. I just want to let this
completely dry first. I was actually thinking
before I do that, I might just swap to a very small round brush a
size four and maybe drop in a little bit of that
darker color that we got raw which is burn umber. I think I might actually
start dropping in while it's wet some of this darker color to try and start
building up the shadow. Okay, 'cause I just think
since it's wet, why not? Right? Why don't we just start, maybe building some of
that up a little bit. So I'm not going to get I'm only very lightly
doing the chess. You know, I don't
want to overdo that. And also, this
area down here has some darker hairs or shadows. So my pain is starting to dry, so let me just try and
do this quickly now. Just watch where you
rest your hands. I've made that mistake many
times before with wet paint. It's going to drop
a little bit here, but I'm leaving the
top part of the nose unpainted because I feel like there's a
bit of light there. Also, the shadow
at the bottom jaw. Maybe let's just drop
in a little bit of that dark color over over here. Where I see the ears
are a little bit dark and at the
back ear over here. Very quickly now
before it dries, let's just add we see a little bit of that
color over here. I haven't added
my darkest brown, which is the raw umber, which actually looks darker than this other brand of
brown that I have. I'm just going to take
a little bit more of the color out of my travel palette, but
everything is good. Let's just, we're just doing a little bit more of this hair texture,
especially around that, that beautiful curvature of the back because
we might as well, try and build up varied
a varied base layer. I think that makes the
most realistic fur. I'm just going to add
a little bit where I see is the darkest
parts of the fur. As you can see, all this is blending together very softly. And we will build
more layer later. So I'm just gonna And down here. Okay. I'm just going to, like, spread that out a
little bit over here. This is looking very
good as a base layer. I'm really sorry. I have
to take more of this pain because it seems to be
getting used quite quickly. So just a few random
strokes like this. Whoops. Just make sure it's
not too heavy handed now. But as you can see, they're all blending and we're
already starting to create the illusion
of fur, aren't we? I don't want to
overdo this part now. I don't want to
make the base coat too dark because
like I said before, I want some of this
color to shine through. So as you can see, all
the little strokes that I'm doing with the dark color are all blending into this
wet background, I mean. I think we can stop
now because yeah, there's more to do
later that we can just add on later when it's dry. But right now, I think
this looks really good. So why don't we
just let this dry? Every time I say that when
I'm going to finish it, I end up painting
a little bit more. I just noticed the feet could just use a little
bit of that color. The feet are I'm just going
to blend this out a bit. I applied the color and then
I just blended it towards the outside because it looks like the toes are a bit lighter. We can build up more color
later with the feet, we don't have to do it
now and I might have to use the darkest
brown that I have, which was the raw umber
because I feel like maybe this brown is
not dark enough. Let's end this by just doing a few more strokes here
with the brown and then I went out a
little bit there, but it's okay because
I was going to do some fur later anyway. So I might just, like, anyway, scale it back with a damp brush, but we will paint over that. Okay, I think that's a
sign for me to stop. So there, we've done
a varied base coat. That means we used more than one color to do the base coat. And I think let's let this
completely dry first. And when we're done,
when this is all dried, we can come back
at it and build up that fur and add more detail. So please go and let
it completely dry. Have a break, rinse
your brushes, and change your water, and
I will see you in no time.
6. Capybara 1 Adding Fur Detail: Hey, everyone, and we're back. And as you can see, um, my capybara is nice and dry
and ready for me to layer on more colors to build up its
very coarse hair or offer, what you want to call it,
that feels like a brush. So I'm just gonna get
right into it now. I just want to use my very
small round brush size four for this because I just want to do
some fine lines now. But as you can see, even
though it's dried and some of the colors have kind of
blurred out or kind of, you know, blended
into the background, I still love it still creates
that overall look of fur. So what I want to do now is
I'm going to I just want to try out this color
that I put down here, raw umber, which, as I
showed you over here, actually turned out to be
darker than burn umber. I'm just wondering
if I could maybe, um, use some of that later, but I think I could use it
on the very darkest parts, which are just around the back. But how about I
just start building up a little bit more
colors right now. I'm going to just use a little
bit of the a little bit of raw sienna to just
build up a couple of just in the areas
where it's a bit light, I'm just going to kind of use very small short hair like
strokes to just kind of yeah, create that illusion of
around the eyes here. This is our lightest color. I'm also going to
maybe go a little bit around the top of the head. I'm not going to
overdo this though because I like some of that light color to show through that light
background color. So just a little bit. See, I'm
just creating a little bit of that hair texture. Maybe just in the light
areas where we can see it. That's all I'm going to do
actually with that color because I'm going
to move on now to Sam Burn Sienna and I'm going
to do that in the areas that are a little bit
darker around the eye here. All you have to do
is look at your reference photograph that I provided and just start doing these little short
brush like strokes. See, try and follow the
direction of the hairs that you see in the picture. And I'm just going
to follow maybe the contour here of the eyelid. So just trying not to overdo it, but just kind of
building up a bit of that nice furry texture as well. So I'm just going to do
some short little hairs. This is just very relaxed. I don't feel any stress. I don't have to focus too hard. I'm just filling in
the blanks so to speak of where I see it
being a little bit darker. Maybe down the chin a
bit we can do some too, and maybe just a little
bit in the lighter areas. But I want some of those
light areas to shine through, because I think it looks it adds a three D sort gives the
body some dimension. So I'm almost done. I'm just going to,
like, as you can see, we're building up the hairs. It's looking good. He's Well, rather she is quite pretty. Yeah, but you have to
watch out for some of them can actually
be a bit nippy. They can playfully bite you
or when you're feeding them, you just have to watch
your fingers because they actually have they're
a large rodent, but they have incisors, the front teeth that
are quite well, they can give you a
nasty nip if they want to, is what
I'm trying to say. Right now, I'm just doing some hairline strokes
that kind of go a little bit outside that line that we drew on the very
outer boundaries of the of the capybara just
to make it look like, you know, kind of make the fur look more
three dimensional, it's coming out of the body. We want to try and
don't make it too long, but we're just going
to try and make the hairs in curl slightly as they protrude out of the body. I'm also going to color
this leg a little bit more in bun sienna. As you can see, we're slowly
building up fur and I might start doing this
a little bit faster now that I've got
the flow of it, follow the direction that you see in the
photographs, okay. That's going to really make a difference
and then because hair follows a direction. Definitely, I know I'm
jumping a little bit, but I definitely see this
area is very densely covered in fur m and maybe a few more hairs here. I don't want this
guy to look too red, and I will tone it down a bit once we start layering
with the darker brown. Maybe I might just start using it a little bit
more sparingly now. As you can see, the hairs
are coming out over here. How about we just do a
few more hairs out here. And maybe just a little bit around the Okay. We did that pretty
quickly. I didn't take too long and just finish up a bit, with a few more strokes
of burn sienna. Now I'm going to move
on to Au daka brown, which is this one, burn umber, which unfortunately,
I have to get out of my other travel palette because the tube
has suddenly gone really dry when I
wanted to paint this. But I did squeeze it
out of that tube. I'm just going to
put some on here. Okay, so you can see, we're
starting to get some nice, like, starting to come alive, starting to get a
bit of dimension. So now let's just start
doing more of this. So just this dried
pretty quick because, you know, I'm just doing
little individual strokes, but just be wary. And I've learned to start
over here on this side, on the left and make
my way to the right. So I'm just going to
start doing a few more of these dark strokes around this area of this patch that
goes around the nostrils. That is kind of like a wide. So I'm just going
to do some of that and maybe just go into the area around
the nose a little bit. I also want to just do this little darker area around
the mouth that we can see. I'm going to start doing some
hair like strokes around that lower jaw and around the face. As you can see, this
brown is starting to tone down the reddish tones, but we still see some of that reddish tones come
through, which is what I want. A little bit up here, but the
area above the eye doesn't have as much shadow, just a few little
strokes over here. I'm also thinking that
maybe we could also use a brown pen to do a few more
of the more obvious lines. So I'm just following
I'm just really using the reference
photograph as a guideline. The area here is a
little bit dark, but then it gets lighter
as we go down here. I don't want to do
this all the way. We got some um darker area here where the bottom of
the foot is, um, we also see this dark
colour like kind of in the elbow and just bring
this up a little bit, blended into the red. And then we also so I'm going to make some
of those hairs come out. Okay. And even here, I'm just going to
do some down here. Definitely, there
is a little foot there that I will add
more detail to later. But right now I'm
just more interested in getting that fur going. So just like get into that flow where you don't
have to think so much of it. You're just seeing, oh, look,
that area looks darker, so I'm just going to let my hand wander over that area a little
bit more with my brush. So it starts becoming very organic where you don't have
to think about it too much. Like you're just kind of see my hands kind of in a rhythm. As we can see, this
area is a lot darker, so we're going to try and concentrate some of the
darker brown in this area. But you can also see, there is some of it over here. Very important here, follow
the strokes of the fur. As you can see, me
doing this now, I can actually see the fur
coming to life and it's looking really good because
I'm following the strokes. So it looks like it
has flow and movement. That's looking very cute. This area up here
looks a little bit dark around the nose. I'm just going to try and
remove some of that color. Just using a clean damp brush, just removing some of it. Later on if we want, we can
maybe use a clean damp brush. Or we could do that now as well. We could just use a
clean damp brush to try and remove some of that paint at the very edge of the nose to add a little
bit of light on that area. I'm also going to just use
the damp brush to just remove a little bit at
the bottom of the lip. Use a clean damp brush keep rinsing your brush and
then patting it on a towel or a a paper towel, is
what I was going to say. This is looking
great. I just want to add a little bit
more of that brown, which is the burn umber. Just a little bit more in some
areas where I can see it's obviously very golden.
It's not as red. Just a few more strokes
in this area that we can see definitely around the neck, we see a lot more of
that darker strokes. I think I will have to
use the darker brown that I have raw umber that
we haven't used yet. But let's just finish up with this color first so we don't get too confused about
what browns we're using. Yeah, but I love this part
because I can see very obviously the direction
that the hairs are growing. I love that. And maybe just a
few strokes here, even though I want the
color to come through, but I just felt it looked
a little bit bare. So just very lightly over it. Okay, I think our little
guy looks really cute. I'm just going to I'm just going to try and blend
this part out a bit. Actually, I might
just have to use a little bit more burn sienna here because it felt it
was a little bit empty. Okay. While we're at it, why don't we use some of that burn umber to do a little bit more
detail on the foot? I might have to use a
darker color for this, but let's just try and use a little bit of this
brown here first. Okay, I'm just swapping back
to Burn Sienna here just to, like, fill in this
part over here. And I'm just going to fix
the mouth a little bit with the with the raw umber now
that I've removed some color, I just want to add a little
bit more right where the bottom lip meets the top lip. There's
some color there. Okay. Now, I'm just going to let this all dry
now before we start adding more details
like putting some of the darker color over
because I just want to let everything dry just so I can
see everything very clearly. Yeah, it's not going
to just blend into the surroundings
anymore because now I'm doing some dry brushing, like applying, wet paint
over a dry surface. So it's wet wet
on dry technique. Sorry, that's why
I tried to say. So how about we just
let everything dry now? And when we come back, so
just go take a little break. We will go over the fur
with just the darker color, add a little bit more
details for the feet, and, of course, do the gorgeous eyes and the ears and the nose. So just a little
break, and I will see you in a really short time.
7. Capybara 1 Final details: Hi, and welcome back. And as you can see,
all these lines have dried really well. And if you're standing above
your painting like I am, you can see there's
that beautiful flow of the fur that looks
really, really cool. I really like, love that. I think it's starting to come
to life quite beautifully. And it is just so cute, as well. Now, what I want to do next is before I do the
really fun things, like, you know, start to darken the eyes and things like that, I just want to use the smallest amount
of pink for the ears. I just want to get out a little
bit of Alizarin crimson. I'm just going to put that on my palette. I hope
you can see that. I'm just getting
some of that out of my travel palette once more, the palette that I take
when I go traveling. I am going to dilute
this quite a bit because Azaren crimson is a very
strong staining pink. But what I want to do is
I just wanted to paint just a little bit of
that ear over here. So it's still very strong. I'm just going to
dilute it as we go outwards here
towards the edge. And I also like to put a little touch of
it near the nose because I feel like that's
just very cute to see a creature with a pink nose. It just reminds me
a lot of my dogs. Yeah, I just want to blend
that slightly outwards. So yeah. Because it is a strong pink. I just want to blend it
a little bit outwards. I also want to use a very diluted amount
of it on the feet just to give it that
slightly pinkish tone. And I've covered these
feet a little bit here, but I can darken them later. I just really wanted to do that, maybe add a little bit of pink around the nose
area there as well, but I think that's enough.
I think that's enough. I'm just going to use the
tip of my brush to just um just fade it out as it gets towards the outside because I still want
that part to be lighter, and I might have taken out
a little bit too much, so I'm just going to
put a little bit there. Maybe I might try that again
when the paint is dry. But while that's going, what I want to do now is just start using that raw umber
that I put down on the palette that I never actually
used just now because I just wanted
to darken some areas like the area where the
mouth meets I also, um, like to do these parts of the ear
that are a little bit, you know, dark as well, and just the back of this ear. And I also want to, um, sorry, I want to just, um, dark and more like
the very dark areas, which is where the
elbow is that I can see this to the area between
the legs over here. Interesting fact that
capybaras have a total of 14 toes just when you thought
it couldn't get any cuter. I'm also just going to put
a bit of that color on the toenails just so I can
start to see them come alive. They have four toes on each of their front feet and
three toes at the back. I've seen them
walk and I've seen these toes up close and they're
the cutest things ever. So now I'm just going to
go between the hairs here, just darken that
underbelly because it makes sense because the
shadow is falling on it. And this is the darkest
brown that we're using. So I'm just going to show a bit of that toe
sticking out over there. Okay. I'm then going
to just go over these these lines just due some of that fur effect. It's a little bit darker. If you look at the
reference photograph over here and towards the bottom. I just want to try
and capture that. I'm just going over that
beautiful back again, the lower back that has this gorgeous round
shape that's so cute. Yeah, like I said, built like
a barrel, this cute animal. And also I can see it around
the back of the neck here. It's a little bit darker. I can't wait to do the eyes. It's really going to bring
our cute little go to life. This was based on a female, a female capybara that was
at this capybara cafe. There are lots of pet
cafes, um, in Japan. They're like normal
to just go and spend time with these animals. And, um, yeah, they're
always like booked out. You have to have a reservation because they're so popular. Especially with tourists
who don't live in Japan. I'm just going over these just putting a few
dark strokes over it. As you can see,
it's just bringing the whole picture together.
It's looking great. And where else? Did we
already do the chin? Maybe we could just
do a little bit more and let some of
those hairs come out. Do a little around the eye. And maybe just a couple
at the top here. I don't want to darken
that area too much. Okay, that's looking good. I don't want to overdo that. Right now, I also think
we can maybe use some of this darker shade to go over the toe a little because it looks a
little bit too bright there. And just darken this area
here between these two toes. And also to add a bit of
shadow below the toes. I know I'm talking a
lot about the toes, but, they are important. Just going over this a bit. Okay, so make sure you take you just stand
up and have a look at the overall effect because
you don't want to make the overall effect just
become too dark, you know? Okay, I think that's
looking good. And what I'm going to do now
is I just want to stop for a sec because I just want to let everything kind of
dry a little bit before I come back here with
a black fine liner, just to do the eyes
because I feel like the eye is a very small
area and I don't want to, um, I don't really want to use a brush just to
be a little bit more careful. So when I come back here, let's just let everything
dry and then when we do the I, it's going
to look so good. So let's just take a
tiny little break. Hi, and we're back and it's time to now just do the little I. I've got a black fine
liner that is about 0.3, and that means MM and
it is water resistant. I've been waiting a
long time to do this. I can't wait now
that it's dried. I just want to do that I'm going to actually
just fill in the eye. Okay. This one I feel like
this pen's drying up a bit, so let me just walk
to my Other pen, which is also 0.3, but it's just a different brand. Yeah. Okay, so this is good. So I'm just going to fill in that whole eye and just go very carefully to where
that lash line is. And I'm just going to leave the smallest amount of white there. So just a tiny little
light reflection there. I think that makes animals
look a lot more like, um, alert and magical, there's a reflection in the eye. I also want to use this for
the nostril because I feel like the nostril could use this amount of darkness as well. Yep. As you can see, our little guy already
looks like she's coming together a lot better. I'm just noticing what can
I do about the eyelids? I feel like the eyelids
look a bit too, I'm just going to
take a little bit of burn sienna and I just
feel like this eyelid just looks a little bit too I also feel like Okay. Yeah, I think I just
felt like it looked a little bit too blank. I still think it
looks a little bit. I'm just going to cover the
very bottom eyelid with just a little bit
more pain because it just looked a little
bit too light to me. I also feel like this line above the eyelid is a
little bit too dark, so I'm just going to try and lighten it by lifting
a bit of paint off it. Sometimes you only
notice things like that after you've had a break. I just want to
lighten this part. And I feel like, yeah, I'll come back to that. But in the meantime,
let's try and fill in the blanks for all the
other parts of it. I think I want to
just add a little bit of of raw sienna pin to
the top of the ear here. And a little bit in here
just to color the ear a bit. And I just want to also
I think at this point, um, the nostril looks okay. I think I might just take
a little white gel pen to just add a few white lines and to also maybe
add some highlights. I hope this pen works. Every time I want
to film with it, I don't know why it just
doesn't seem to work, but let's just see
if it works now. Okay. Let's just try that
out on the painted area. It's very faint, so I feel maybe like I've got a fader pen. This is a 0.7, but
let's just try it out. Okay, so what I'm doing now, I hope you can see that is
I'm just going to break up this part a little bit and
also add a bit of a highlight. But still within the pencil boundary
because I don't want to lose the definition there where
the faces and everything. I'm just going to
add a little bit of white gel pen to just kind of define some of the things a little
bit, like the ear. I might just make that sparkle in the eye a little
bit more obvious. Don't get too carried away. I can get very carried away. I just want to maybe lighten
that bottom lip a bit. But then I'm now going to use a clean damp brush
to just kind of, uh, blend it a little bit
towards the dark like that, just so you can see
that bottom lip. You can even make it
look more natural by maybe using a few broken lines like that to make it
look like that's fur. I can also use the white
gel pen down here. You can see there are a
few marks around the toes. So I always use a white gel pen. I always end up using it
with a watercolor painting. It's just kind of like fake. I'm just going to
do this part again, within the confines
of the pencil. I'm just leaving
the very outer edge of the pencil still visible. Yeah I don't think I
need too much now. It's already looking
really good. There's only one
thing I noticed that I I want to try and remove a bit of that
paint around the top eyelid. Then don't worry, I
used a waterproof pen, so this is not
going to affect it. I just wanted to make that
area slightly lighter, and then I'm going to use
my burn sienna to just outline around it
because I felt like it was just a little bit
too dark just now. And some of that fur, we can see it go in to the eye. So it depends on how much you
want to copy the picture, but, um, now I did it again. Okay. Maybe I'll just
erase this line. We don't need that. But yeah, it goes into the corner of
the eye a little bit. And, uh and below
the eyelid there. I'm just going to use
the smallest amount of burn umber to just outline
that bottom eyelid. I'm just going to stand up now. A guy looks so cute. The only thing that I
think this needs is, let me just fix that eye. Sorry, that was bothering me. Just looking around now, stand up, have a look
and see what else. Maybe I might just
do a little bit more burn Sienna over there. Okay. Using my finger to
spread it a little bit. I think this looks
good, actually. I don't want to do
too much to it. Like, I'm actually now
removing some of that pain. I think I shouldn't
have put that down. Alright, I think this looks good. I don't want
to do too much. And the only other thing
that I would like to do now is add a little bit of a shadow underneath our
beautiful girl just to make her. Oh, there is something I
want to do that I forgot. Sorry, I'm going to use
the white gel pen to just go ever so slightly into the lower lip
here to separate it from um the upper lip. I think I removed too much
of that with my finger. Using your finger as a tool to spread to just absorb
very gently to absorb some of
that white gel pen if you feel like it went
a little bit too much, if it was a little bit too much. I'm also going to use my brush to just remove parts that
I think are too much. I think we could probably
stop it somewhere there. Yeah. And then just spread that. I don't want to play
with that too much. Yeah. Let's wrap it up. I'm just going to try and
finish that year a little bit. I think that looks really cute. Let's do the shadow now. So for the shadow, I'm thinking of mixing up. We could just use pains gray
if you want to save time, we can do that, or we
could mix brown with blue. Um I'm just wondering, since we used this brown, since we already used
what was that color? Burn umber or even
with raw umber, how about we just use one
of my favorite blues, which is French ultramarine. So French ultra Marines
is gorgeous blue that you can dilute down to
make into a sky color, or you can also,
I'm going to mix this with the darkest brown that we have actually
that we're using here. I'm going to mix this blue with a little bit of raw umber
and as you can see, we get this gorgeous
shadow color. So what I'm going
to do with this is I'm going to very carefully put it underneath the toes, the feet, I mean,
and the toes and um now that I'm looking
at the toenails, I think we could probably
go a bit darker. How about we use a little
bit of that shadow color on the part of the toe that's a part of the toenail that's closest to the toe is
what I'm trying to say. Let's just put that shadow color underneath and it should
also go over here. Okay. Because it's nice to have a bit of a shadow underneath. And so if the lights
coming from above, your shadow is also going to
be underneath your capybara. Okay? Since that foot goes
all the way out there, I think I'm going to put the
shadow over here like that. It's going to go all the
way up into the fur. Very finally, we're
going to see some of it we have some toes
sticking out there, but we're going to also have it underneath its bum where it's
sitting down on the floor. Maybe it might just extend
a little bit outwards because the back
is sticking out. There we go. I'm just trying to make the shadow
look more realistic. I'm just doing little lines protruding out
because that could be the I think the shadow should
also go to the same height, so to speak, as what
we did underneath. That's looking so cute. Can you believe we're
almost finished. We've almost finished with
Alphas capybara pose. Oh, look at our little guy. So if you want to go
darker with the shadow, even though I think this
is quite cute, you can. But while this is drying, I just want to re
emphasize the toes, the toenails, I mean, I just want to make them more visible. So this is where it
comes out over here. I think I accidentally
erased some of that toenail. Let me just put the
highlight back on. Highlight there. Maybe I might just put a
bit of black for this very distant toe
that's just barely visible. And I just realized
I need to just paint that part of the
toe that's behind that. It's small, it's not
really a big deal, I'm just going to keep
um I just decided to add some of that dark
brown in just to blend the shadow
into the bottom fur. Just reinforcing some of that
shadow and the fur meeting. But I'm going to finish
this soon actually. I'm just using the
tip of my brush with the raw umber to just
make a few hairs, stick out a little bit, just to add that natural look, but I really do think it's finished and we don't
have to keep doing this. I'm just a little bit addicted. Whoops. I just want to remove the stain because my finger
accidentally touched it. But honestly, I'm
someone that likes a bit of imperfections
in a painting. Accidents happen, you know, so yeah. The, no big deal. It's gone. So I'm taking one last look and standing up and looking at my little guy. And I just want to just do the outline
of the ear over here. I just felt like that
part looked a bit blank. Yeah, these are very strange
shaped ears, aren't they? It's okay if the ear doesn't
look exactly the same. Yeah. That looks good to me. And just doing that part again. But I really do think it looks great and fixing one
more little thing. I'm just going to go with
just a little bit of the darkest brown that
we're using and just go right underneath the white
line that we put in. And it's a few more little
lines. What a cutie. I do think we just to
give him a bit of a glow, let's just add some
of that raw sienna up here because I don't
want this to be too light and just a
bit of raw sienna where taking a last step up. I think this looks so cute. I just want to end this by just really outlining that eye, shaping the eye really well. But I think this looks amazing. It looks so cute. Look at that. We've done our first
little capybara. If you are happy with
it looking this way, like, I think we're done. You know, some of the
suggestions that I could make is if you want a
more cartoony look, you could even use
a black pen and outline the capybara and
maybe do a few strokes. You know? So these
are just ideas that I have that you
could use if you want, but I think that she's quite ready here and
she looks really great. So I hope you've enjoyed
doing your first capybara. And if you are ready to
move on to the next pose, I can't wait, so I will see you in the next
section of this class.
8. Capybara 2 Sketch: Hey, everybody,
and welcome back. And as you can see,
our first capybara was finished in the last video. Mine has completely dried
and she looks gorgeous. I think she looks so, so cute. So how about we move
on to our next sketch. Now, I have a lot of
reference photographs, but I wanted to choose different poses for us to do because I thought that
would be more interesting. Since we have one of Al capybara sitting down and looking
up very endearingly, I thought I would
choose a pose where Al capybara is
walking in motion. So I have a picture, as you can see in the reference projects and resources section of
this class, sorry. So we can start
sketching right now. I'm just going to, um, I think, sketch over here. This pose is one of our
capybara on the move. So they do walk pretty slowly from what I
saw in real life, but they're said to be
quite formidable swimmers. For this one, I'm
going to start with the now, I'm just
going to bear in mind, I tend to draw big and
this is a smaller, um, a smaller size area for me to draw
on that I'm used to. Usually, I tend to work
with A four or A three. I just have to keep that in
mind when I start getting the overall shape down. Once more, we're doing this very blunt
snout and this very, um, barrel shaped creature. This one is an above view, we just have to
keep that in mind. I'm just going to get this shape going first of the head
before I do the body. So we see a slight
inclination here, and then down to the chest, and then I'm just
going to continue now. This is obviously where the nose and mouth are going to be, and we're just going to go
up slightly, and over here, there's a bit of this is the top of the head and over here is
where the ear is going to go, but we don't have to
do the ear right now. I just want to map
that shape first. I can already tell that these proportions are not right here, but I want to just maybe
continue with the top first and then fix the bottom. This is the where the ear is, and we're now going to just
go a little bit of flat, but just with the slightest downward curve and then up here. I'm going to change my hand once more to suit the
direction of the curve. If you have to move your book, I tend to do that a lot like my paper when I'm
sketching to try and get that make it easier for my hand to draw in
a more organic way. So here's where we start
to see that cute curvature and kind of where the tail bone would be if
it had a prominent tail. So I've got this
weird shape going on, and it may look a bit strange, but let's start refining this a little bit more now because that's the hardest
part for me of art is just doing
the initial sketch. So let's just try and make this a little bit more refined now. I'm just going to shape
that nose mouth area a bit. And I want to just start
maybe putting down a bit of a of a line about where
the nose is going to be. Like I said, this is
a slightly above view of our capybara. I'm just keeping that in
mind when I do this sketch. Okay, so this is a
nose mouth area. I'm just going to add maybe a little nostril just so I start to see the picture better. I mean, I'm not going to put in lots of details or
anything like that, but I just want to just kind of maybe I don't have
to do this right now. I'm still getting the
proportions, right? So yeah, let's just do something like that
roughly right now. Then over here is
where the head is, and I might just add an ear
in here right now just to, um, Map out everything. Yeah. This pose is just a little bit harder than the first one that
we started with, so it's just
important to try and get that right
first and see now I feel like I had made the dip in the neck a
little bit too prominent. So now it should level out a
little bit more like that. And now let's just check that arch out of the top of the back. There's a very obvious arch that goes even above the head, as you can see from
the photograph. So let's just keep that. So yeah, they are very
barrel shaped, aren't they? Like that's how
they're described. And they look very
heavy, don't they? But they are supposedly
really good swimmers. I mean, if you think
about it, a hippo looks heavy and it's
a good swimmer. I'm just going to look at
my photo very quickly, so the part that sticks out
the most should probably coincide with where
the nostril is. Just bearing that in
mind when we do it, it's about if I use my my pen, pencil, I mean, my eraser, just like a rough guide. I can see that it's over there. But like I said, this is art. You don't have to
be crazy accurate. It also depends on what kind
of art you're creating, but I do like my
proportions to be good so that I think this shape looks
a little bit better. I also want to do
something right now. Because this is an above view, I just want to put
some guidelines here about the orientation
of the of the head. Over here is where
we're going to see. This is where the
eyeline is going to be as it goes up over here. I think I can add
another ear here, which is just going to go This is going to
go slightly behind. It's going to start a little bit after this ear,
if we look at it. Let's just check the proportion. The ears like I said before, they're really very
strange shapes and resemble a really weird fungus is how I would describe it. But you don't have to put too much crazy detail into the ear. It also depends on the
position of the ear. When they're all perked up or
when they're more relaxed, obviously, that's a
little bit different. What I'm doing now is, I just want to trace where
the eye is going to be. So the eye line is going to
be somewhere along here. So what I want to do
is I just wanted to trace to just kind
of map the eye out, so this also gives us, I'm just wondering if my ear
is a little bit too close. I might have to move it
back just a little bit. Don't feel frustrated
by sketching because, you know, just think about it. You're adding a very
accurate map guideline to then do a really
great painting on. So I'm just going
to redraw that ear. I just want to show
you all this in real time because it's not a race and it also depends on what kind of effect
you want to create. If you want to create an animal that looks more realistic, then maybe you would
put a bit more time into mapping out,
sketching it properly. I think that's enough
detail for now. I'm just checking whether
the position of the eye, I think that should be
all right or should I just move it slightly towards the nose,
maybe just slightly. Let's put the eye over here. So as you saw previously, the eye is, we got
this big eyelid. That kind of really, it's like a hood over the very, very dark eye that we see that seems to
occupy the whole eye. We don't see much of
the white of the eye or the vitreous humor as it's formerly called. I
think that's a good eye. I'm just going to shade
this in a little bit just so I get a good idea. I think my head is a little bit too it looks a little bit too narrow and I feel like a when I look at the
whole animal now, I think this eye is too
big and that's okay. I'm just going to draw
it a little bit smaller. This is just part of
the sketching process. But I just want to
get this right. I think the eye is just way
too big now that I've drawn. I think this should
be the whole eye. I'm going to start
here where I did the black and I'm just going to This is going to be the eyelid and this will
be the black of the eye. I think that looks
a lot better. Okay. What I want to do now is let's refine the head a
little bit more. I'm just going to there is quite a prominent a
little hump over here, so to speak, like a raised area, and then we see this here here and then it kind of
goes down a little bit, and then we go all the way I'm just wondering if I should extend it a little bit more. I think now that I check
the proportions out, I think we should extend
this a little bit more. I don't always get the
sketch right straight away, but I'm willing to what
you can do also is look at use the head as a bit of a guideline
of how many lengths. I think this should
actually come more towards the end of our page. I think maybe it stopped
a bit too prematurely. Yeah, because the head
looked a little bit small. Like I said, I don't always get it right
the first time either. Yeah, I think this is more
proportionate, for sure. And so the hits about four
roughly four head lengths. Okay? So this looks
a lot better, and I'm much happier with this. I also encourage you to
stand up and, you know, to see the overall look
of it and to see whether, you know, the
proportions look right. I'm just going to clean this up before I start doing
the bottom part of my of my capybara. So let's get going. I feel like this part could be a
little bit thicker. So we're going to just extend this downwards a little bit. We can see that right where
the ear starts is where it starts the jaw becomes the neck and then
it comes down here. Yeah, that's a lot more accurate now now that I got
the length right. Now we've got the
shape of the body. I just want to just
do an invisible line here to just map out the body, and I will do the legs over it. But it's just nice
to see this shape. So I know, okay, this
is looking much better. Let's keep going now. As you can see, right before
this ear starts, in fact, I might just take this back
a little bit more right before the ear starts is where Yeah, that looks better. The capybara is a bit
strange, isn't it? It even reminds me sometimes
a bit of a pig, doesn't it? I actually makes
the cutest sound. The cutest sound when
it's tickled. Okay. Let's start doing
these legs now. Just a little bit
of an angle there, but we will be doing the
legs and everything. If you've got a shape like this, you're on the right track. Let's now start
putting down that leg. I'm going to start sketching one of the front legs that
is in the background. They don't have very long legs in proportion to
their barrow bodies, think of this as
a triangle shape. Going to do. Then
you've got your foot. I just need to check if
I curve this too much. Let's just put those feet out. We've got one toe at the back that we can
see and then we've got this big middle
toe with the nail, might as well just do the nail. Then we've got another
little toe coming down here. Slightly webbed feet up here. We got a little leg
there. All this part will have a bit of
hair coming down so it won't appear
as long as it is. If you want to, you can map the area where we
see bright pink. We can map that. I'm
just wondering if my foot looks okay. Yeah, I think that looks good. He is on the go after all. Now I'm just going to
do the other front leg where there's a natural line that comes down here that
I can see quite nicely. I think it has to
be a bit wider. We got another foot
coming down here, but this one's not
fully down yet. It's about at the same I
just noticed something. I think this should be a
little bit more arched up here like this angle
here at the bottom. Okay. I think that looks better. Now we've got this arch
here going down here and we're going to just I'm just going to draw a
sketch the back of the leg. I might also do that little
toe now that's just hanging. Like I said before,
they've got four toes in the front and three toes on
each of their back feet. Four toes per foot at the front. I'm just going to draw
might as well just draw the detail now
just so it's easier for Letter since I already got the whole shape mapped out, and then we've got
this toe over here, the main toe that
extends out like that. Then we've got this other
little toe over here. That we can just
see the top off. Okay, there. We've got this
cute little feet going on. I'm just going to fix this. Sorry, I just want this to be. We can just erase that
very bottom part. Okay. We're almost there. Then we've got this
belly over here. Then we've got the back leg. There's a bit of
distance here and then we've got the back leg. Wow, this only just made it
onto the page, actually, see? Like earlier, I had
drawn it way too small. So this kind of thing, to draw, um it just takes practice. It just takes practice and it's very rare that you're not
going to have to make any corrections to
your initial drawing once you stand up especially
and have a good look. As you can see, the back of
the foot should only extend a little bit past the tailbone. I should only extend a
little bit as we can see from the
reference photograph. I'm just going to do a
rough foot shape right now. Obviously, this is not accurate, but I just want to map
out where the foot should be and where the knee, the back knee and
the thigh should be. Okay, so just checking that is, that does look long enough. Let's just remove all the
confusing lines right now. Okay. This is our back foot. I think the angle should be
a little bit more curved, if I'm going to be honest, might as well just do that right now. Yeah. We have a knee that comes down here
and then plateaus, it goes straight like that
and then we've got the foot. Okay. Yeah. So poses take a little bit longer to sketch like this one. But it will be fun to
paint, I promise you. After that, it's going to be
much easier to just like, we're going to do is just paint it very similarly to
how we did earlier. Let's give this toe. The back feet look
weird, don't they? Here's a toenail. Now I'm just going to go up here to where the toe starts
to meet the foot. I'm also going to do
the same over here. We've got these two
very prominent toes that look a lot like pigs
trotters, don't they? That's why I was
saying, this looks like a this animal looks like it
could be related to the pig, but it's a Roden. It's in the Roden family. Then we tend to see a little
bit of the very little more the shadow of the back toe. Now we can only really see two toes in the front
and that's fine. So let's just just erasing
all the lines we don't need and now let's just do
that very back foot. For me, it always pays to
I'm just going to draw a little line that
comes here just as a guideline for where the
back foot should land. It's going to land
somewhere along this mark of using this
foot here as a guide. I tend to use different parts of my creature that I already drew to check proportions
a little bit. The backfoot should land
somewhere over here, and then um let's just do a bit of a toenail and then
we got this little digit, I guess is what
you could call it. Then we've got another toenail. All right. I think
that looks good. Okay. So we've drawn
our little guy. I know that took longer
than the first sketch because this one
involves some movement. The feet can be seen more
feet can be seen four feet as opposed to just the
front foot earlier. I'm just cleaning this up a bit. Just erase all the
lines you don't need just so when
you paint later, you've got a nice
clean area to work on. So what else can we do? We can make our guy
look a lot more alive. I know our guy looks
a bit flat right now once we start doing
the fur and all that, but the most important
thing we can do right now is let's
clean this up and then let's finish this
section of the class. We don't need this guideline
anymore that we drew earlier to just map out
where the feet are. Also here. Okay. Let's get rid of this line. Now I just want to
look a bit closer at the nose just to
map that properly. So let's just what
we got here is fine, but I'm just erasing
this line to just draw the nose
more accurately. What we got is a bit of a curve looks a bit
triangular but curved here. Then then it's
going to come down. Now I'm going to start sketching the area just around the nose. A, let me just put the nostril down because that would
be easier for us. Let's do that nostril. And this part is
going to be dark, so I don't mind just shading it in a little bit
because I'm going to paint over it just so I can
map everything accurately. We got that nose.
As you can see, he's starting to look a
lot more capybara like. This goes like that shape. Yeah. And then there's this area around the nostril. Okay. That looks better. I had to actually zoom in on
the nose to do this part. Now just think about it. It may not look great right now. It may not look very
realistic right now, but we can definitely
work on that. I just want to just
shape that eye better. Okay. I will look great
when it's painted. It will look more like, but they always have such a
board look about them, right? Just cleaning up now, I just want to fix the ear anywhere. I think I might just make
the ear slightly bigger. Yeah, those are very
weird B shaped ears. I'm just going to map
out now a bit where the dark areas are in the ear. You don't have to do this,
but I just feel like it gives me a good guideline. I just want to make that ear
look a little bit more um That is a very
strange looking ear, but that is what I see and
I just sketched what I saw cleaning up the lines
a bit around the ear. But yeah, that is the ear. But I also think I
just want to make the eyelid just a
little bit thicker. They've got these very
padded looking eyelids, don't they that are surrounding their
eyes, the actual eye. Such a strange animal,
but very, very adorable. Don't forget we can do things
like we can make this. I just want to also just bring the jaw line
down just ever so slightly now
that I'm just going to round this up a little bit. Okay. Yeah, I think that
looks a little bit better. I think maybe the draw was
a little bit too high. So I'm taking a final look at my capybara. I think
it looks great. I know this sketch took a
little bit longer for me, but I can't wait to paint
this guy. And, yeah. So why don't you just go
and get your palette ready? And we're gonna basically be using the same
colours as before. So just get your palette and your brushes and
your water ready, and I will see you back
here in just 2 seconds.
9. Capybara 2 Base coat: Hey, everybody, and I'm back. And as you can see,
our cute little guy is just waiting to get
painted, and I can't wait. I'm just checking the camera
right now just to make sure you can see
everything. And, yeah. So basically, I'm using
the same palette that I was using in my
first painting. So I just want to
make sure that yeah, I just wanted to point that out. I did top up some
more Alizarin crimson and some more burn umber. But it's all the same colors, and I think I just had a little
bit of gray here because I was actually working on
another project earlier. This is the same
palette that we used before, but I'll just recap. This is raw sienna, burn sienna, raw umber, Alizarin
crimson, burn umber. This was the gray that we
mixed with a little bit of raw umber and
ultramarine blue, and this is just Paine's gray. Let me just get that
all out of the way. We're going to use basically
the same technique. I'm going to use my big
round brush and I'm going to just Paint. Well, wet, more like it. Wet the entire area
inside our pencil drawing until it is a
nice even sheen. Okay? You don't have to be too
precious about this. See, I'm just holding the brush like that using the tip of the brush to just get
those little toes in, but you don't have to be
too neat because we will be painting slightly
outside the boundaries later when we make some
of the fur come out. Okay, so try your best for
it to be an even sheen, but just bear in mind, some areas that you wet earlier
might have already dried, so I'm just going to redo that. Once more, I'm going to start
with the lighter colors. Actually, just when I said
that, I realized something. I'm just going to drop in
the pink first because I just like it when the
pink shows up first. I'm just going to put
it in areas like we can see a very obvious
pink over here. Don't worry if it spreads a
bit, that's absolutely fine. We're going to cover that
a little bit in the ear, um around the nose
area, which is so cute. I'm just going to do that maybe a little bit
around the eye. These are very I can see the leg over here is
a little bit pink too from the yeah
I can see that. Maybe we can drag a bit
of that color down here. I'm painting in a
pretty loose way, maybe around here,
back of the foot. I just thought I
would do that first. I still I'm holding my other
brush with the raw sienna. Let's drop that in. This
is the lightest color. And We're going to just brush it on
basically everywhere, because this is our light
color and I'm just going to avoid those pink areas because I just want some of that
pink to shine through. Yeah, not really thinking
too hard about this part. I'm just putting this
on and it's beautiful. Maybe I left a little
bit of white areas. Bring it a little bit down
into the leg. All good. Now, just going to rinse
my brush and I'm using the same large round brush size 12 to we're going to start with our second
darkest color now. I'm going to put it
around the areas like the nose where you see
it's a little bit darker. Just like the other
painting before this, we are just going to Follow
the reference photograph a bit as in put the darker
colors where you see darker areas of your capybara. The great part is the wet
on wet technique allows this to blend into
the background so we don't see any really
hard lines right now. Just look at your
reference photograph that I've provided. That's
all I'm doing right now. I just notice these
darker areas. I'm going to start
filling them in a bit and then just
letting that pain spread, but also just letting some of that raw sienna come through. As you can see, the back
over here is darker, especially near that tail bone. That area is always
a little bit darker. I don't think it just has
to do with the contours. I actually think I
don't know, maybe the fur there is actually a little bit darker,
more concentrated fur. Right now I'm using the tip
of the brush, as you can see, to go a little bit outwards a little beyond that,
pencil boundary. Making sure you leave spaces
so that the white I mean, the raw sienna below can
shine through a bit, we're not just
completely covering it. I'm letting it shine through slightly in
between and near the top. The, we've already done oura our raw sienna and
our bun sienna colors. I'm just going over
a few areas with it, but But I think
I'm going to start switching to T AdakaKalasun. The burn umber. That looks good. I don't
want to overdo it. Now I'm going to rinse my brush. Maybe I don't need such
a big round brush. I might actually use my small
one to take up this color. This color is going to go around places like around the nose. I'm still letting some
of that pink come through. This is the color. See, as you can see
in the photograph, the face near the nose
here looks darker and I might start using the tip of the brush to draw out
some of those hairs along the pencil line just to yeah, create that cool
furry silhouette. When I say furrier, I mean hairy silhouette that they have. Oops, I went out a bit there, but it's okay. Just
following that. Like I said, with the
earlier painting we did, we're just following
those lines. Brush strokes are
just going to follow the flow of the fur, I keep saying of the hairs, the really rough brush like
hairs of the capybara. All this is mixing very well. Later on as we did
with the last one, we will add more more
features more details. As you can see this
color down here, we see it near the chest, it's a little bit darker and make the hairs come
out a little bit. But we will layer
again over this. As you can see, the pain
is starting to dry, which means that we're starting to see more
defined strokes. I'm going to try and do as
much as I can with this brown before I swap to
my darkest brown. As you can see, we see
a few darker strokes also throughout the
body, also near the top. As you can see, look,
we already have this nice flow created. I'm just going to
take a little bit more I seem to run out of
this brown very quickly, so I'm just going
to take it out of my travel palette again. Just putting a lot more down
here. Think that will do. And just around the
neck, you see that area. I can see pain the water in
the paper starting to dry. Looking really cute.
Maybe some hairs up here. Maybe they can stick
out of the bum a bit. Actually, that's not the
bum, that's the lower back. Maybe just a little here
because I don't want it to look too there. Okay. Al capybar is starting to I might just bring some of that
brown down into the feet, leaving the top parts of the
toes untouched over there. But over here we
definitely see a shadow. I'm just going to let this
pain just spread a little bit. Okay. Um, how about I just drop in a little
bit of this over here. Our pain is starting
to get quite dry. I'm just dropping
in the pain where I see in the darker areas and maybe down in the feet here for sure because it
looks quite light. But I'm going to leave
the very top of the toes in unpainted to just
suggest a bit of shadow. Very finally as
quickly as I can, I'm going to start using the darkest brown that
we've used earlier as well. I'm just going to put it in the nostril here,
even though later on, I might probably use a pen, the dark black pen to do that. I'm just going to use this
around this nose area. I'm just dotting it in. Now once more, this
always depends on the kind of effect
you want to create. I like a semi realistic effect. Anyway, I'm going to
work quite quickly now. My paint is a little bit dry. I'm just very quickly just doing a bit of the eye around the eye. I just noticed
something. I actually didn't erase that pencil
line I left just now, but that's okay. I
can paint over it. Let's just do remember, we don't want it too dark,
the top of the head. I'm just kind kind of interspersing some
of those strokes. I'm also just going to add a little bit more
definition to that ear. Use the darkest brown to
go into the ear like that. Bit of shadow around the ear. But this color is really
starting to I mean, it's really starting to
dry the surroundings. Going to work as fast as I can, add a little bit
of shadow there, add some dark color
down the feet. Around the belly here. We
got some shadowy color. I hope you're having
fun doing this. Yeah, the Capybara is just a
really, really cool animal. Maybe you can check one
out at your local zoo. The last bit here. I just want to put some of that
color around the feet, of course, around that tailbone, this parts a bit darker. I'm still following the
strokes of the hairs, which I think are very
important that you do. Then we see the hairs are
coming this direction. They all follow a flow, right? But we want to not put too many. We want to leave it quite sparse at the top with
the dark strokes. We don't want to put too
many of them down there. Maybe we just do very
tiny strokes at the top, very tiny, very short ones. Okay. I think I'm
going to have to wrap it up soon and then
we're going to let this completely dry before we start adding on more
details in the later part. But I think we've
mapped out the shadows quite well now and
the darker areas. As you can see, we can
see that flow that we saw earlier with
the first painting. I think I'm going to just I'll just blending that
part a little bit. I think we should
just stop here. Every time I say
that, I keep going. Um, That's just stuff. And we can look at
this all later, right? And how about we just let
this completely dry us? And when we're done, you know, go have a break, go
stretch your back. And when we come back, we will finish it up with
a few more details like a few more brushstrokes
and also using our pens, and that's gonna really bring
our little guy to life. So have a little break, and I will see you
back here shortly.
10. Capybara 2 Adding detail: Hi, everyone, and welcome back. And as you can see, our
capybara is nice and dry. So why don't we get
right into it with a small size four round brush? I'm going to start
just dry brushing on to try and build
those layers of fur, you know, the hair like strokes that we did in the
previous painting. So just to build up those
hairs in a realistic way. So we're going to do is
we're going to start with some light raw sienna. I'm going to just start maybe
putting some fur details. I keep saying for
these hairy brush like hairs that
the capybara has. I'm just going to start just building up these layers and I always start with the
lightest color first. We're going to just go with
the raw sienna near the top. And I'm just going to also intentionally going outside the pencil line a little bit to create that furry look that sticks out those hairs. Not too much though. We don't
want it to be too obvious. Maybe just stick a few of those out of the back over here. That's very cute.
Yeah, just going to add some bold strokes, maybe in the lighter
areas there. So this shouldn't
take us too long. We're just laying down
some brush strokes. Maybe we can put
some down here too. Make sure some of those hair stick out over here
where the chest is. Yeah. Just getting a good
overall view of it and, um, as you can see, it starts to build up
the density of the hair. On the top here a
little bit there. I think that looks cute. I think we've done enough already of the raw sienna. I'm going to move on
now to burn sienna. I don't want to take too
long doing this because we already had a lot of practice
doing the first one. Using pretty reasonably
concentrated um, paint to just um, doing the going around
the islet here. We're just going
to build that up and I'm just going to go over this pencil
line a little bit more. I'm just going to
do as you can see, part of the eye looks
a little bit darker than of the eyelid, I mean, I'm also just going to
go under the eyelid there and just build up a few Um, Yeah. There we go. Our capybara is
getting some cute texture. I'm going to just let some of
these strokes go down here. Follow the direction of
the brush strokes that you see in the
reference photograph. Zoom in if you have to, but I think you can see
it pretty clearly. I'm also just going to go over the dark area that
we did already. Maybe we can have
just a couple of those strokes coming
out like that. M So I'm just letting my hand. I think Burn Sienna is the color that I'm
the most liberal with, with the capybara because
you do see these guys have a very nice overall
reddish brown tone, but then the raw sienna
also adds as highlights. But I'm just yeah, going just going
with the flow here, just feeling it,
letting my hand. As long as I follow the
brushstroke directions of the hairs, yeah, I can just kind of do
this almost kind of semi kind of on autopilot mode because as long as I just know where
the darker areas are, as you can see, it's
just are cool, um, really cool effect and
I think this color is the most seen Okay, so I'm concentrating around
that tailbone area again, and definitely we have to bring this color onto the
legs because I see it. The legs look kind
of reddish brown. And There we go. I don't want to get
too carried away. I'm just going to maybe
stop in a little bit. But I really want to just add a few little hair
like textures around that snout just to make
it that's looking cute. I just want to add a
little bit of paint around the ears because that
areas a little bit darker. And just a few hair sticking out like
that. It's very cute. Okay. I think that's quite a lot of that
we've used already, and now we just want to use our darker browns
just sparingly. I'm going to have to
get more of this color which is Burn umber. I seem to go through burn umber very quickly.
I don't know why. Let me just put some onto my palette and let's keep going. Shall we? It's
looking very good. I just stood up to
have a good look. The burn umber is going to
go in those areas that is more around the nose
that are darker. We're going to see it used a bit like a little bit
on around the nose, just working its way
slowly up the head. But we're not going
to use this color. As you can see, it's
starting to get more sparse as we go up
the top of the head. So we just want to try and yeah follow follow
the brush strokes. With these darker colors, they are more
concentrated around areas like where I'm
doing now the neck. Then we're going to
use shorter strokes as we go past this area. I'm just a feeling it again. Obviously, I can see that this area lots a lot
darker around here, so it's okay to put some of those strokes over
here and let them come out in a natural way
from the pencil line, pass the pencil line a bit. But as I said, I don't want to get too carried
away with this step. This area is a little bit
darker and then obviously, the underbelly as well. As I said, I run out of this color very quickly
for some reason, so I'm just going to
have to top it up again. Sorry about that. Let's just get a lot out. It's a great brown to use. Let's just do this where we see that fur at
the bottom here. And maybe around this
leg around the knee, and then we the bottom of the foot I'm just
going to fade this. We even see things I don't know how detail
you want to do this, but the knuckles, the division
of the knuckles as well. I just want to darken
this a little bit, but we might have to
use the stronger brown later this leg to and a few more of those
Daka heads over here. And There's a bit of fur here, actually. So, I hope that. I'm just going to dry brush on a little bit
more for this toe, for this foot yeah actually
see some lines here too. Okay, that's looking
really cute. I want to use some
of this dark brown. I know we're going
to take a break in a little while because I know we've been painting
for a long time, but I really want to
use this brown to go around the ear to
add a bit of a shadow. A little bit around that year. And I can't wait to start doing the eyes
when we get back. I think we should take
a little break though. I'm just going to kind of paint in the nostril a little bit. This is what we got so far.
I'm just taking a step back. I'm just seeing if
we need to maybe put a few sparse short
strokes around this part. But I don't want to
darken the face too much. Just want to make that clear. Even though I'm starting
to see that there are a few dark strokes
around that eye. Maybe I think if I put a bit of this brown just
behind that eyelid, it might make it stand out more. Okay. So we've been painting for Well, we've been painting for
less than 20 minutes. So how about we just
continue and use our darkest brown and
then we can stop. So far, our darkest brown, we want to use this
color mainly, I think, for things like the nostril
around the nostril area. So I'm just going to dab
this on quite lightly. Because I don't want to
darken the nose too much, and this is a color
that I'm only going to use very sparingly because
it's the darkest brown, but maybe just around here, maybe just slightly
around the eye, already put it around the
ear and I'm just going to just use this very sparingly now. Maybe just the smallest amount sparsely located
around that chin, going down to the chest. It's going to paint this part in a little bit because
it looks a bit. Now we're going to do this leg. If you feel like it
looks a bit dark, just use a damp brush to just spread the
color a little bit more evenly and to just fade it out a little
bit with a damp brush. Oops, I'm using the wrong brown. Sorry. I'm going
to use this brown, which is raw umber, just to add a bit of color
and dimension to the feet, which is very important. You can add these little
lines if you want, little like lines that kind of show little sections that kind of divide up the
toe into little sections. Um, I don't want to make it too dark because this part looks a bit
lighter of the foot, and I'm going to
probably start kneading, um I'm probably going to have to put a little bit
more Raw umber in here. I've run out. No worries. Sorry, fiddling
with the lid a bit, trying to put this
back on. All right. Just going to rinse my brush, take a little bit more of this, dilute it down a little bit, and we're now on this foot. I just want to make
sure that we We're just adding a bit more dimension by just emphasizing
the shadow at the bottom of the foot and maybe just putting a few
strokes to just darken it. As you can see, I didn't
even paint this one yet. If you feel like you put
too much color down, just fade it out a
bit with a dam brush. And now just a few just a few of these strokes, these dark strokes in the areas that you see
a little bit darker. I just feel like
maybe the top is a little bit too light now. It looks a little bit I want to just use a bit of that
brown to just break up the raw sienna a little bit, but without taking away
the lightness of it. I'm going to finish this soon. Don't want to put
too much dark color down because we don't need it. Go, look at the
reference photograph. As you can see, it's darker
around here, around the bum, around the lower the belly, around the legs,
around the chest. That's where it is
and I might just put just a few little strokes around the face and maybe
right under the eye. But it's looking so good already and I don't
want to overdo this, so I think I'm going
to have to stop. I think this is looking good. I'm just using very
diluted raw umber now to just shade that mouth
area just ever so slightly. While this is going before
we take our little break, I just noticed I would like
to put just a little bit of diluted um of diluted, Elozarn crimson to just kind of pinking up those areas
that I just noticed, that's a little bit dark,
so it's a very strong red, so it's very staining, so you can just kind of lift off if you feel
you've put down too much, too strong a concentration. But I think that's
acuteness to having a bit of pinkness to the toes, you know, I think it's
pinkness to its extremities, the toes, the nose. It just seems like cute to put down a bit of
pink in the ears. That's my preference. But other than that, I
think it looks really good. How about when I said that, I just want to put a little
bit around the eyelid. How about we let everything
completely dry now. Look at our guy. He's looking
so good while she is. And when we come back, we are going to
add just the very final details using some pen, and we're probably going to
add a shadow at the bottom. So good work if you've
gotten this far. Like, go take a break,
rinse your brushes, and I will be right back to finish up this cute little guy.
11. Capybara 2 Final touches: Hey, everybody, and we're back, and we're just at the very, very final stage of this
painting to bring it to life. And the first thing
I want to do is reward myself by using a black fine liner pen to bring that eye to life that's going
to make such a difference. Yeah, you're just
going to literally see A capybara come to life
now with this magic pen. So all I'm going to do is, I'm just going to do
what I did just now by just kind of just
very carefully just shading coloring the
eye in with black. If you want, you could
leave a little you know, circle of uncolord
area in the eye, but I prefer to add that on later on with a white gel pen. I think it just stands
out a lot more, kind of gives it that twinkle
in the eye, so to speak. I'm just going to
make sure I got that lash line going because
they do have beautiful. Just like that, you can see
it's already coming to life, once you fill in that eye. I find that with all paintings, all animal paintings,
once you do the eye, just really comes to life. What I want to do as well
with the black pen now is just outline that very
corner of the nostril, just to add that makes it look a little bit more like
that is, you know, more three dimensional and
that it's actually going in the light's not escaping
from that part of the nose. I also want to use this black gel pen
just very sparingly to just add a few definition, a few shadows, just like that. If you feel like you
did it too much, you can just use your
finger or quickly wipe it away before
this is permanent. I'm using waterproof ink
because like I said before, I like to pair that
with watercolors just so nothing runs, the
ink doesn't run. I'm also going to use a
little bit of this black gel, not black fine liner, sorry, it's not the same
as a white gel pen. The black fine liner,
this is waterproof. The white gel pen isn't just
going to do those nails, just adds like more depth to it when you use the pen and I can also outline it quite
accurately. There we go. See it's already
coming to life a lot. I'm just going to do the
same with these nails here. I'm just going to add a bit of this little mark here to show there's a toe in
hiding behind there. And just using it
wherever I want to add some dark details. There we go. If your eye is dry already, you can then use a small
white gel pen to just add that little as you can
see that twinkle in the eye, I'm going to add two actually, one slightly bigger than
the other, just to make it. No, look a little bit more. A little bit more a little bit more extra
as my kids like to say, just making it look cute. I also want to use
the white gel pen for this picture to
add a few whiskers in. Sorry, I have this problem with white gel pen where
whenever I'm filming, it doesn't seem to work, so I always have a spare one on hand. I'm just going to very lightly
use the very, you know, I'm not going to
press down too much because I don't want the
white to be too thick. I also want to try
and make them look a little bit more natural. I don't want to
do this too much. I also use the white gel
pen to add a little bit of little few broken lines here to indicate this
area is more lit. It's more reflecting the light more, but
at the same time, I'm using broken lines to kind of give the impression
that this is, um, fur that this is
hair on the snout. I also want to use the
white jaw pen over here, I noticed that the ear has
a bit of a reflection here, just like that, and just seeing where else
I want to use it, maybe just on the tip of some of the nails just to
add a bit of shine. I don't want it to look
too manicured, but yeah, I think that just
kind of makes it look if you ever feel
like you put too much on, just use your finger to kind of, yeah, remove the
intensity a little. Al gay is looking
pretty good already. I just want to see what
else I want to do. I do want to paint a shadow
on underneath as well, like I did for the other
capybara that we did. Standing up for a sack,
just taking a look and, um, but she already
looks quite complete. How about we just
add the shadow in, like what we did just now, and then I can start just scrutinizing what else I need to do before we
finish this painting, but it's pretty much done. Like before, I like to
make my own shadow color. So I'm just going to mix the
darkest brown that we're using with some
French ultramarine and you can make shadows just by mixing blues and browns
together. That's what I do. Because they produce a gray when you do that with
blues and browns. The great thing is
this shadow color looks more natural and it also complements the capybara because we're using a brown that we actually used on the capybara. What I'm going to
do is this shadow is probably going to go
underneath the head, so it's going to come
out somewhere over here. Then I'm going to also
put the shadow underneath the foot. A little bit dry. Let me just use a bit of
water to get it going. Just watch out for that nail that we worked really
hard on already, so we don't want to lose that. I'm just painting
on a rough shadow, how I think it would
look if we have the capybara standing
with the light over it. I'm just going to turn my hand here because it's
easier for me to do a straight line like this way where my hands
not at an awkward angle. As I said before, you can
even move your book around if you feel like the angle
is not helping your hand. I think I should have enough to go we got this foot
sticking out here. I'm just going to then we have the butt just
sticking out a little bit. I think the shadow should
come somewhere like that. Maybe I can bring the shadow
up a little bit here, too. So that's the shadow that I got. I don't want to make
it too dark, actually. I think it looks great. I might just emphasize the
darkness around the feet. Yeah, but he's looking
really good already. I think I might just take
some of this gray that we made and just maybe use it to add a few of
these lines around the feet that look like what
we have on our fingers, where our knuckles are just to even though I think
he already looks good, and maybe use a little
bit of that gray to darken certain areas
a little bit more. Yeah. I mainly think around the toes would
be a good place to put them and to emphasize just some
shadows a little bit more. Where else do I want to
darken? Any other area? Maybe around around
the nose a little, if it looks a little
bit too pink. But I don't want to touch it too much because I actually do think our guy looks very cute and I
don't want to overpaint it. This is an important step to remember when to
stop because I think a lot of people sometimes have
problems stopping like me. I'm just going to use some of this shadow around
the eye just to make it pop a little bit more
and also around the ear. Yeah, I might as well
make use of this gray, maybe just darken
some of these areas. See, I feel like maybe I'm doing too much already,
maybe that's too dark. I'm going to remove
some of that color. In the process, I ended
up lightning that area. I'm just going to go
over it with some brown. Yes, as I'm
demonstrating right now, it's good to know when to stop. Right now, I really should
stop. Yeah, I will. I'm just going to
use that. I honestly think it looks
really good already. But you see because
I went a little like I was a bit too
eager to apply the gray. I'm just going to fix it up with a little bit of burnt sienna. I think I'm going to stop. There is just one little
use of the gray that I want that we made and it's just to
add a little bit of shadow. I'm using broken lines for this just under the jaw
because we do see some shadow there and I'm just going to bring this down
a little bit to the chest. Because these are the areas that are the most
heavily shadowed, just a little bit whatever's left
there and I'm not going to make this
mistake again. I think I put down
too much gray there. Okay, maybe just a little
bit, a little bit. Yes, a little bit. Okay, but I think I
want to stop now. So as you can see, we got another cute pose of our capybara to go
with our first one, and this one's a
little bit different because it's standing
up, it's walking around. And yeah, I think this
looks really cute. And I hope you've had fun
doing this pose as well. When you come back after
having a well deserved break, I just want to do one more pose that's going
to be different and it's also going to give us a good look at the
face of the capybara. It's going to be
a different angle and it's also going
to be very cute. Even though this painting
is finished, later on, I'm going to show
you how you can make this this picture even cuter, even more magical, even a little bit more
animated, you know, by giving you another option
that you can add to this. If not, if you're
happy with what you have here, that's great. Anyway, please, have a break, and I will see you
back here really soon.
12. Capybara 3 Sketch : Hi, everyone, and welcome
back to our capybara class where I'm going to
take you through our final pose that I've chosen. I hope you've had fun
doing the last two poses. So this one that I chose
is a very adorable pose of our capybara lying down on its belly and chewing very
playfully on a stick. Now, for this one, I
chose this pose just because it's different from
the last two of, you know, the capybara standing up and and the other one
was just strolling by. This one will just show us a different angle of
the capybara as well. Because of that, I've
chosen this really, really cute pose as well, and you can find the reference
photograph for this in the projects and
resources section of the class as you can for
the other two poses. Now, I want to start this one by doing that very bland snout that we're all familiar with
now that the capybara has. I'm going to start with that. And I'm going to start
working my way up already, and I want to bear in mind
that because I'm working with a very small piece of paper, smaller than what I usually work with because I wanted to do a few different poses and I also wanted to make
sure they fit. I want the whole
body to be seen. I have to be quite
mindful here about how big I draw and I also wanted to include
that stick in here. I'm starting with that
blond snout that you see, which is just that line that's slightly curved and
now I'm going to work my way up to the head and it's curved and then it's going to plateau
where the top of the head is. So we're going to start
with this shape first. Now we can start to slowly
refine it a little bit. This is where the mouth
is going to open. I'm just doing a
little curve there. Down here, we're going
to have the lower jaw. And this is going to also we're going to get a shape that looks something like this, and that's going to be the head. Well, here's the mouthpiece and the nostrils are going
to come somewhere here. What I want to do
now is I want to just start refining
this a little bit more. I also have to bear in
mind that I want to draw I want everything
to fit onto the page. What I'm going to do now is I'm going to start just trying to get the feel the
body, so to speak. The had ends somewhere here. Now I'm going to start
sketching that body I'm just getting a feel for it because I want to
be able to fit the entire um The
entire capybara in. Okay. So this looks very strange. It looks a bit like a dinosaur, but what I want to do
is I'm just mapping out the shape the rough shape of the capybara right now just to make sure that everything
fits on the page. So it looks a bit like a
dinosaur, but we will fix that. I just want to check
in the photograph, I checked that the head was almost three the body is
three head lengths long. It's roughly about that. I just wanted to
check that I could fit everything onto
the page first. Now I can start
refining this a little bit more and making it
look more like a capybara. I like this curve
at the front here, and I want to keep that. But I just want to, um I think that the bottom part
is a little bit too curve, so I just want to fix
that a little bit by making it less curved. Now I want to fix this nose. I'm going to map the nose first because I think
it's so important. The nose area is going to go
somewhere from here to here. That's important. I just want to put that nostril that we see. We see a nostril that's very prominent towards us near us. I might have drawn that
a little bit bigger or maybe I could just extend
this a little bit more. Then we only see part of
the nostril over there. I just thought that was
important to map out. Then we have this mouth that's open and going curved
around the stick. Then we have this
cute little mouth that's a little bit open. I just want to draw that here. Okay, so it's starting to get a little bit more capybara i. So what I want to do here is I'm just looking
at the angle, and I think it should go all the way to
the top here like that. We're now going to level
this out a bit, the head, and now I'm going to just
erase this lime that was here. And this is where our
ear is going to fit. I'm just going to draw a very
rough shape of an ear now. I can refine that later. I'm just in the
process of mapping out my whole
capybaras body first, and then we got that
other little ear that we see just peeking out
from behind the head. Now I'm also just going to
just extend this line over here or actually up here and
I'm going to do a curve line here up to the ear because this is going to be
where the eye sits. The eye sits closer to the
ear than it does to the nose. I'm just going to
sketch that in now. Oh. Okay. There we go. We've got the head. You can start to
see it coming alive and it's looking less
like a dinosaur, so we know we're on
the right track. We've got that shape going on. Now let's just fix.
I'm not really happy with what's going on here, let's just fix that a little bit and also erase this line. I was trying to get I was in the process of getting
the feel of it and you see that very obvious part of the fur sticking
out over there. I think I've shaved
it down a little bit, now I'm just going to as you can see, from
the photograph, the top part of that back, it just really arches
and it's definitely higher than the head
than the height of the head when the
capybaras recline. Now I'm just refining that
shape a little bit more. So that is that to me, the capybara, I always think
of that really arch back. And then we've got
another little kind of hum kind of sticking
out a little bit. I think that's where, you know, just some of the
bones in the back. And then it comes
down to over here. And let's just do it,
check out proportion. So that's one headline, two
headline, three headlines. So that's about three headlines. So that's good. I'm
very happy with that. And now I want to focus on just finishing this
finishing the sketch. Yeah. If you're finding this pose a little
bit challenging, let me just tell you
you're not alone. I had to practice this a couple of times to
make sure that I could draw within the
constraints of this paper. As I said before, I don't
usually draw this small, but I just really wanted
this in my sketchbook. Now that we have
mapped the head out, I'm sure later on we'll make the first stick out a
little bit more, that will also play a part in making it look more capybara. I will fix the ears later,
make it more detailed. I just want to get that
whole body completed first. Now we can see that the legs
the back leg especially starts somewhere around here and it ends somewhere
before the chin. I'm just going to put, This is where it's
going to I think we got another little
toe here, a toe here. Now I think this one goes a
little bit more backward. We've got this toe here. That is our leg done. We got one leg done. I'm just wondering if that
looks a little bit skinny. Maybe I should just
try and fix that now. I just felt like maybe it's
leg looks a bit skinny, but I'm just drawing it from what I see in the photograph. And then later on we can
put some detail into it. Let me just do
that toe properly. So there we've got these
very strange looking feet. Then we have another foot that's going to
come out somewhere. I'm just using lines some guidelines just to
try and map this out. The other foot should
come somewhere here, we can see that there's already just a small space over here between the feet,
the two front feet. In fact, you don't even
there's a very small gap here, so we don't even
see much of a gap. Let's start drawing now. Whoops erasa just broke, so let me just get
that. All right. So, these are just the little
details that I noticed. I still feel like maybe these two toes are a
little bit too long, so let me just shave
them down a bit. Okay. And then we can add more detail
to that later. All right. Let's just finish
these two feet. We got a little toe here. We got another toe
coming out here. I know it's such a
strange animal, isn't it? And yet another toe here. Then we've got that very small tiny fourth toe
is somewhere over here. It's their little
pinky toe, isn't it? What a pinky toe is for us. And then the leg goes in there. Okay. All right. I can just erase the lines that we
don't need now, this guideline that I drew. I also feel like maybe we should just take the fur
back a little bit. I just did put that
fur down there, but I think you can
see a little bit more of the feet if I
take the fur back. But we're not changing
anything else. I'm just, you got this
hair coming down here. And then we're just going to expose the foot in the
front a little bit more. So the fur is going
to fall somewhere back here. That's
all we're doing. Yeah. That looks good. I know it's looking at a little bit too
blockish right now, even though they are
barrel shaped and I know we have a bit of that
blanket blocking it. But if you notice it kind of somewhere over here is where we see a bit
of a curve inwards, and then um then we see pretty much just
broken lines over here. That's the shape
of our capybara. We've done that
already, and if you got this far, you
should be very proud. Let's just finish this off now, by adding a little
bit more details because I'm just going to stand up and check the proportions. Am I happy with the
overall look of it? Yes, I am. Let me just
move that ribbon. Yes, I think the
proportions are right. Okay. So that will make for
a semi realistic painting. And now I just want to add a
few little lines that I see. This is where I
believe the elbow is, and I also see a line here. I think this just kind of maps where the elbow and the
shoulder are going up here. So let's just see
what else we want to correct first before
we we move on. What I want to do also
is just maybe map things like this is where there's a dark area around the nostrils. I'm just refining that guideline
a little bit more now. Now I'm just going to erase
the lines that I don't need. So now that I've gotten the
overall proportions, right, I can start doing things like this to refine
it a little bit more. And we haven't got to
that stick yet, have we? I also feel like this lip
is a little bit too long. So how about we start drawing that stick that's going
through the mouth? So what I wanted to do is
I wanted to turn this into a cute little maybe a bamboo
a little bamboo shoot. So maybe we can do
that. So this is where we can get a
little bit playful with the art and not copy
it, like, exactly. So I just want to map where I think I'm going to end my
bamboo stick over here. So it's going to be a little bit shorter than what you see in the photograph because I'm just working within the
confines of the page. So let's work on that mouth now. So we're going to see a bit
of this upper lip over here, and we see just a tad bit of the upper lip
of the other lip. The upper lip on the other
side that's away from us, we see a little bit of it
is what I'm trying to say. I think it's hanging down a
little bit on this stick. And we see this little tooth sticking out here,
that's very cute. I definitely want
to draw that tooth. The tooth is curved. Yeah, no, this looks
a bit weird to draw, but there is a tooth
that's curved. We could even get a little bit more playful and maybe since we have to draw the stick a little bit short there to
fit onto the page, maybe I can just extend this
a little bit more just so I can have a bit more
fun working with the texture of the bamboo. Now I can start doing
things like erasing this line that I had drawn for the mouth to make it
look more realistic. Let's just focus
on that upper lip, which is now going to kind of curve around The bamboo. And I'm just going to
fix that mouth as well. I'm going to extend the
mouth a little bit. And then you see a
little bit of tongue, as well, a little
bit of the tongue, which is just sticking out here. I mean, this depends on how
much details you want to add, but I just want to add it. So I'm just going to add
the little tongue shape. Yeah. Okay. Let's just fix the gum a
little bit, the gum line. This one has a little bit
more detail for the face. Even though we're still
seeing a mainly side profile, we do see a little bit of the face tilted a
little bit towards us. And now because I did
all those changes, I just feel like maybe I need to just just lower the
jaw just slightly. Yeah, because I've opened
the mouth, but that's okay. Our proportions are
all still right. I think our capybara
looks better with that jaw as well and
we can do things as well like adding a few of
those heads coming out. Obviously, we don't have
to do all this right now. This can be painted on later. Right now, what we
want to do is focus on getting getting the proportions right and getting
our sketch right. This whole thing is the nose. We can add details in later, but it's looking very good. I also just want to
check up on that ear. I think I drew the ear
shape really roughly, let's try and fix that ear. I feel that maybe the ear
shape could be better. Let's just try and it's
more like I said before in the previous videos that it has an almost strange looking
fungus mushroom ear. I don't have to do too
much detail with the ear, I just wanted to get
that shape right. I think that's important. It has a strange looking ear like that. I also feel like maybe the just checking whether the eyes the position
of the eye is right. I think that's okay. I think maybe I'm
nitpicking too much, but I just want to make sure
that I do the shape right. I'm just going to turn my arm a little bit when I sketch this. It's they have these
very distinct eyelids. Just getting that shape right
because that's important. They are very, you know, they're known for
their dark eyes. I really want to get that right. And then you got this little
lighter area under the eye. Just like the other
two, we will use some black ink to achieve that blackness of the of the eye that I feel
really gives it character. This eyelid is very important. It's quite distinct
in the capybara. So yeah, I'm very
happy with that now. Now, I'm just going to finish
up the sketch now because I know we've been
sketching for some time now and let's just finish it. The reason I drew
that line is there is a bit of a shadow there
where the chest is, and then it let's just
bring it out here. This looked a bit chunky here, so we'll make it look
more feathery later, but let's just check the toes that we're
happy with the toes. I am. I just want to make
this toenail a little bit bigger and a little bit
rounder, the toenails. And I think there's a bit of a dip here, but then yeah, let's
just fix that arm. See, all I did was refine
the hand a little bit. This one doesn't have as much detail because it's
in the shadow, but let's just make those
rounded thicker toenails. It is such a strange animal. And then this is where
the foot's going to go. I just want to refine this
foot a little bit more. Even though it's in the shadow, I just want to make
sure I do this right. And I think we see a
little bit of the nail sticking out there and a bit of the knuckle and then
it goes in like that. Even though that's in shadow
and it will be quite dark, but I just wanted to
make that look good. There's our guy
looking really good. The only thing I can think of is there is a bit of a mark here. I think that's where the hip is. So let me sorry, I might just have to just turn
my book a bit to get that, you know, to just draw a
little easier with my arm. We do seem a little bit of a I just think this should stick out a
little bit more. Yeah. Okay. I just want to stick out a little bit more just to
get that shape, right? So the hips are going to
be somewhere here. Okay. And then we got this,
but everything else looks really good. I'm
really happy with it. Obviously, we will do
some lines over here later for the flow of the hair. I don't know, maybe I might just map it now to make it a little bit easier for
myself when I paint, so I can see the direction very clearly of
where it's going. So we can see that
very clearly now. Okay. So Okay, how about we stop now? I'm just taking a
final look at it. I really love the
way this looks. I'm just going to erase
any lines I don't like. Obviously, we'll do a little
bit of a shadow later. I just find this a little bit chunky now that I've
stood up and had a look. So let's just refine this a little bit more
and then we're done. I'm just going to and then we see a little bit
more of the hand there. This is going to
look very cute and something you can do as
well now if you want is, let's just make this
look more like a bamboo. We're going to just introduce make it look a little
bit hollow here. We're going to also
introduce some segments. All you're doing is you're
just doing a curve line and then going over that and just making them look
like separate segments. And that looks really,
really cute already. I think that looks
beautiful. And there you go. We've got a really cool
little pose of our capybara. And, yeah, I can't
wait to paint this. But why don't we just
take a little break, go get your paints ready, your same palette that
you've been using just now. I hope you haven't
thrown your paint away. So let's get started
painting this, and I will see you back here
in a really short time.
13. Capybara 3 Base coat: Hi, everyone. Welcome back, and I hope you're ready
to paint your capybara. And you've gotten your by now very familiar palette of colors that you've used
for the previous two. So I just want to say, like, yeah, by now, I think you guys
are quite familiar with this technique of
mine where we're going to wet the entire
capybara and drop in a base wash of varied colors
starting with our pink, our Elazarin crimson,
for the pinkish parts, and then doing the
fur with raw sienna, burn sienna, this brown, which is burn umber and then raw umber for the
very darkest parts. And I also mix the
gray for the shadows. And I also using a
combination of raw umber and some ultra
French ultramarine, sorry, or ultramarine if
you don't have it to make a gray because I
do think that we will have to go a
little bit darker. We will have to use some gray
to kind of darken some of those feet the feet that are in shadow because I don't know whether this brown
will be dark enough. So just bear that in mind, but by now, you're
familiar with it. So all I'm going to do again
is wet our entire capybara, but maybe not the
little bamboo that it's chewing because I do want to
paint that a green later. So just the same, I'm
just using my size 12 round brush to kind
of wet the entire area and we do that just so we don't have harsh lines when we're
laying down the base coat. I'm going to go all the
way up to the nose here. Even over the eyes
because in the end, I'm going to put black
fine liner on the eyes, it's okay to go over this
right now, the bottom mouth. Just bear in mind the
parts that you wet earlier will might dry. So so by now, you
know the process. I think I can work
quite quickly. I'm just going to use the tip of my brush first because I
love to add a little bit of pink around the
mouth and the nose. Some of this will get
diluted down as well as, when we start coating it with the browns I love to make
the ears a little bit pink. Some of the eyelids around
the eyes can be pink too. I think I might just
drop some of this into just so it has a slightly
pink tinge to the toes. Okay. So that's the
first color that I use, but this will get very diluted down and we'll probably have to
touch it up later. Now I'm going to drop
in my raw sienna. I'm still using
the same big brush because I don't have to be too precious right now
with the base coat. It's nice for the
colors to mix anyway. I'm just going to
do the same thing, bring the raw sienna
all the way around the It's the lightest brown, so it's okay for it
to go everywhere. By now, I hope you're
quite confident. We don't have to start really worrying about
the direction of the fur right now because
this is still a base coat. There we worked
quite quickly and we dropped in a good amount
of raw sienna already. Now, this is where
I like to change brushes because I'm
starting to use less, um, I'm starting to concentrate
more on the darker areas. I'm going to use my small size four round brush and
I'm already starting to drop in some of that
burn sienna up here. As I did before, I'm
going to use the tip of my small round brush and
I'm starting to purposely go outside the border
of the pencil just to start laying down
those hairs strokes. At the same time, we're still letting everything
mix together, see? It's blending quite beautifully. I might just take some
of this color down here. Definitely below the chin here. Just following some of the
hair strokes now and trying to avoid the The bamboo is the
word I was looking for. I'm just going to do this following as you can see,
following the strokes, the direction of the fur now and making sure I use
the very tip to try and start bringing some
of that fur out just so the border doesn't
just look like a line. We can start doing that now just doing this in
a very relaxed way. Yeah, we're just
helping to create that overall fur
hair silhouette. Honestly, after petting well, a couple of capybaras at
this Capybara cafe in Tokyo, they actually feel very
coarse, as I've mentioned, I think before, it feels a
lot like a broom, really. I've used a bit of concentrated color here, but that's okay. It will slowly blend out. I really worry about is getting the stroke
direction right. That's all I'm doing
now. As we go down here, you can see the stroke
direction changes. It's going down and then it
goes out like that towards the Then here we go again. I'm letting some of that
raw sienna come through. Okay, I don't want
to cover too much of this and maybe some of that raw born Siana we can start putting it a little bit
towards the nose as well, and under the chin
just because I'm going to make some of
those hairs kind stick out with the tip of the
brush because it does have quite a shaggy look on its chin and on
its chess hair. Okay. Now I'm already
going to switch. As you can see,
we're working quite quickly and confidently because
we've done this before. It's the same technique. We're just doing
a different pose. I'm going to start also dropping
in a little bit more of this color burnt umber, sorry, around the nostril
because I do want this area to get a little
bit darker around the nose. Then using the reference
photograph, once more, I'm just painting the area around the eyes a little
bit darker, as you can see. Just around the eye,
and then it gets a little bit lighter
towards the top again. But just around the
eye around the ear, it does get just a
little bit darker. I'm going to go behind
this ear as well. Let's just follow those
strokes again, the direction. On the back, it's just going to go all along the back like that. And the color is more
concentrated up here. You can definitely see that
in the reference photograph. It's a little bit
darker up here. But we're also going to bring some of that color down here. Definitely under the
chin is where we see quite a bit more shadow. On the shoulder,
we see that too. Just short stroke lines.
Where else do we see? It's definitely
darker down here. Around the bum and we can bring some of those stroke
lines outside as well. Once more, I always
seem to run out of this color and I have to steal some from my
travel palette. I really do have to
buy another tube of this color as I'm
totally out of it, the burn umber.
Sorry about that. Let's keep going now. The chest. We're going to put
some hairs down there, maybe some here to just
fill in the gap a bit. But definitely it's darker
around the shoulder area here. Around where the arm
is. And what we can do here is just do
some lines going out. Okay. There we go. I think that's done.
Let me just check. There's a little bit more
darker areas around here. But I think that's pretty good. Let's just finish up right now with our darkest
color, the raw umber. This is definitely going
to go around the nose. I. Just using the tip of the brush and also I don't
want to cover up those other strokes I did
in the burn sienna color, but I am definitely going to darken this area around the eye. We can clearly see that. We can even paint the little
ear silhouette over there. I'm even going to
go around this ear. I think I can see that
there is some brown there, some dark brown color
around the ear. They have the cutest
ears when I look at it. Very expressive ears,
like my dogs, actually. Sorry, the reflection is making it a little bit
hard for me to see this, but I'm going to use some
more concentrated paint of the raw umber to try and just darken this
area around the eye, but bear in mind, I don't
want to make that too dark. That's definitely a
darker around the eye, but leave the bottom area
around the eye untouched. Then maybe just put a few more strokes like that here just to marry the colors so
they're not too separated. We definitely see a lot more of these darker strokes below here. So this is looking
great already. I think all that experience
we've gathered already. What I'm looking at is where does it look darker on
the reference photograph? I'm just trying to do
that overall, you know? Definitely around the bum is where we see it's darker too, and you can even
make some of that. As you notice, our water
is starting to dry. So if you want your strokes to still be
blended into the background, we do have to work a bit quickly because the
strokes are already, as you notice, starting
to become more prominent. They're not just blending
into the background anymore. But this is all good. It's not really a real
race or anything. I'm just pointing
that out to you. But as we did for the last two, we will re emphasize some of those hair strokes using the
dry brush technique later. I'm just going to do
that because I want to I think that's looking
really good already. And what I want to do now is remember this is
still the base layer. I can see some of
this dark brown around the mouth here
around that lip. Let's just do that lip. Even underneath the gum line even on the very inside of the
tongue in the mouth there, we're just going
to put that down. I think I'll paint
the tooth lay up. But right now, I
just want to try and also paint the legs. This one's in a lot of shadow, but I'm going to just leave
the knuckles unpainted. I'm just going to leave,
just that top part. There we go. We've already
painted that bottom layer. If you want, you can add a
bit more shadow by applying more paint over the areas
that we've painted. That little toe has
disappeared, but don't worry, we'll definitely
highlight that later. Right now, I think I'm done. I'm ready to put my brush down. This was quite fast what
we did with the base layer because I think
by now we all got a little bit more
experience doing it. Why don't thing we can do first. Let's just try and go over just the bottom area
here with some broken lines, some short broken lines
because this is where the most shadow falls, right? So I just want to do that. But I can always layer on
some more colors later, okay, when it's dried as well. As you can see, it's
starting to brush strokes, I don't want to lose too much of the color variation now by
going over it with the dark. So I'm going to stop now and
just let everything dry. I think it looks wonderful. Let's just let everything dry. And when we come
back, we can start dry brushing on some more
hair or fur strokes. Why don't you go have
a little break now, maybe go change your water jar, and I will see you back
here really quickly for us to start doing
the hair in detail.
14. Capybara 3 Adding details: Hello, and we're back. And we
are so close to finishing. And as you can see, this has
completely dried and you can see the strokes that
I've done have kind of faded into the
background and created a wonderful base
layer to work with. And now, what we're going to do is the same as what
we did before. We're going to start building
up those layers of fur. Before I do that, I just want to start with
the pink as usual. So a little bit more of my
Alizarin crimson just to get the that pinkness of the nose,
I don't want to lose that. I just want to maybe
that looks a bit pink, but it will fade a little bit. I might just put a little bit of that into the feet
because it's nice to see a little bit of pink and just around the eyes and maybe a
little bit on the ears again. I also just want
to bring that down here to the lip and the tongue. Okay, so now, same thing
as what we did earlier, but I am going to use my size
four round brush because now we're starting
to do details more. I'm just going to
move this a little bit just so my hand is not resting directly on the palette, and so I don't make
a mess with my hand. Same thing. I'm starting with
the light raw sienna color. I'm going to focus that
on the lighter areas in the reference photograph and
near the top of the head, it's a little bit lighter there. I'm also going to
do some hairs here. If you feel confident
with the process, you don't have to watch me do all this again,
you know what to do. You start with your lighter
colors and then you just, you know, follow
the brush strokes, follow the direction
of the hair. I'm just filling up the
lighter gaps, I would say, because this is a light color, so it's not going
to really stand out on top of a darker brown. But it provides some
nice golden highlights on the lighter parts that we can still
see shining through. Okay, I won't spend
too much time doing this because I feel like, maybe just a little bit
around the ear here. Oh, yes, the lighter
area around the eye, we can definitely use some, um, And maybe down here where
the lip is as well, I can just put a little
bit of that color there. Oh, N, that little tooth that we can see is
actually kind of yellow, but it's kind of off white. I will paint it a
bit yellow here. I mean, raw sienna. But I might go over
that later with a white gel pen just
to make it stand out a little bit
more. There we go. We've already done
the raw sienna bit, and now we're going to do the the reddish tones
with our burnt sienna. Obviously, this
layers on top better. Once more, focusing on the
areas around near the face. We also see it near
the top a little, but let some of that raw
sienna shine through. As you can see, I've made
the effort to make it go create that hairy silhouette. Now we're going to
start putting it putting it down here, maybe
a little bit underneath. And on the neck. So just using the reference
photograph, okay? Okay, so I'm not going to paint it all over
in the parts that I felt a bit darker and just following the
direction once more of the and trying to get some of those heads to stick
out a little bit. Maybe a little bit here because I don't see
much hairs here. Judge, if you feel like you
can't really see the strokes, maybe that's because
your paint is too watery and it's
just blending in. Then maybe just use less
water to make these strokes. If you can't actually
put a stroke down because the brush the
paint is just too dry, obviously, then you're going to need a little bit more water. I think I've used enough here of the of the burn sienna because it does give
a very reddish tone. Now we're going to take some
of the burn umber once more. Yeah, you know the process. As I said, if you feel
confident doing this, this technique, you can just feel free to fast forward this. Yeah. But let me just start with all the darker areas now. I'm going to start down here
where there's some shadow around the chest is what I think I would
call it, the chest area. Then we see it also coming in this direction
over here, darker. This will tone down some
of that red that we see. But personally, I like the reddish brown look we see some over
here at the bottom. That's looking good. I've
run out of that color again, so I'm going to get
some more. Yeah. By the end of this class, we're going to have a cute
little capybara collection. Just applying it a
little bit outwards, beyond the pencil
marks just to create that little furry silhouette
as I said earlier. So I feel like my strokes
looked a bit too stiff there, so let me just break
that up a little bit. Maybe using shorter strokes. Definitely around the neck, it looks darker here. And I'm just going to
get more of that pain. I really do need to buy
another tube of it. Stealing a lot of it
from my travel palette, as you can see. Yeah. Yeah, I must have used a lot of it
in the travel palette. That's why the tubes
dried and empty. So I'm going to
just start now just sparingly using a bit of this color because we don't want such a very obvious light patch. But I want to leave
as you can see, that part is a little bit
lighter, so let's leave that. And a little bit more detail in the ear that I'm
doing here with just coloring in some stuff. The area around the eye as well is darker and it helps
the eye to stand out. So I've never done a
class like this where I've done a few different poses. This is new for me too, I hope you guys like
that because I just thought I didn't want to just do one big
one of the capybara. I just felt like it's such
an animated character, like a creature that I just felt like if we could capture
a few different poses, I just thought maybe you
guys would like that. Yeah. I also want to just leave this area
around the mouth is a bit darker and I also want to just put a
few rogue hairs here. H, and maybe a few there. I don't want to make
the face too dark. I already feel like it's getting
a little bit dark there. So how about I just
clean my brush out? Just removing the
pain and wiping. I'm just going to
lift a little bit of that color off
because I don't want to I don't want this
area to get too dark. So just be a little
bit conscious of stuff like this when you're painting
because it's easy to now, just, you know, kind
of get into it and, you know, not really
stand up and have a look. I think that's good.
I don't want to but put down too
much color here. At the same time, I don't
want to remove too much. I feel like maybe I did. I might just leave that for a little while and move
to another section. But I think maybe
with this brown, we can just use a little bit of it here on
the legs too to darken it, but we will need that
darkest brown at the end. Just darkening the
feet a little bit, leaving the top of the knuckles lighter just to give
that three D look. And we're going to have to
fix that little toe later. Then I might just dot on a little bit of
texture like what I see in the picture. Okay. Finally, now, before we
take a little break, I'm going to finally
use the dark color which is raw umber for us. This is our darkest color that we're going to use
and obviously we're going to use it on
places like over here. See, my paints a
little bit too dry. That's why I need to start
adding a bit of water. Using the hair like
broken hair like strokes, I'm just going to go around
here near the bottom. We also see it a little bit
here, but use short strokes, don't use too long strokes because then they can
look a bit unnatural. I'm going to do show
the dark areas first, definitely around that the neck, we see how it's a little
bit darker in that area. And we'll also see it over
here a little bit here. Use broken short broken
strokes for that. There we go. And I'm also using this dark paint
over here near the nose, and I might just use,
like I might just dot a little bit of
paint on here just to darken the overall effect. And, um, just around that lip and inside the mouth, it's going to be a bit darker, so I might as well
use these colors. Just taking a little step back, now I remove some of that
pain here and I'm just going to put down just a couple of strokes because of this
color because I don't want to darken the
overall effect again. I just have to tilt my
book up a bit because the reflection of the paint is making it a little
bit hard to see. I'm just going to now go around the eye a little bit in very, very tiny strokes. That looks good, and let's
just fix that year up a bit. Let's just do a couple
of defined strokes. But then the whole area is still lighter than
it used to be. Just a couple down here because the shadow where the chest is. Okay. And just a
couple of strokes that kind of change
the direction of going straight like that and just kind of coming down as you can see in the so they're just kind of turning the strokes,
if that makes sense. Kind of gradually,
like, you know, Okay, so I don't want to darken the
overall look too much. I think I'm going to stop now. When I say that, I
just want to put a little bit more
shorter strokes around the eye at the top of the head here because I think it will really make
the eye stand out. And just a couple of these
transitional strokes that go from this direction
to this direction. A couple of them like that. I just feel like maybe this just needs to go
out a little bit like that too. Okay. That looks good to me.
And I also just want to use the darkest brown that we have to just kind
of add more of this, turn it more into the shadow, especially this arm that we see here just a little
bit over here. This one's more exposed. I'm really going to have
to fix that last toenail. I'm going a little
bit outside the line, so I just have to
stick to it and adding a little bit more texture here by dotting on some paint in this corner to just depict the texture on the
hand that we can see. While I'm at it, I might as well paint the toenails a little bit. I feel like I'm giving them a manicure every time I do this, but we are going to go over
it with the black fine liner. Maybe just try and leave a
little bit of a lighter spot. That looks really good. I might just use the last
thing I want to do is maybe just just
supply a little bit more of a shadow there. Underneath it, even though
we will do the shadow step. And I'm just going to, like, kind of add a little
bit more darkness at the very bottom because, you know, that's where
the shadow kind of lies and the hairs all kind
of clumped there. So I think that's
enough for now. So why don't we just
take a little break now, let everything dry. And when we come
back, we get to do the really fun
stuff that I love, which is using the
black fine liner and a white gel pen and
adding a bit more detail, as well as painting this
cute little bamboo. So we've done all the hard
work, and now it's just fun. So I will see you back
here in a short time.
15. Capybara 3 Final details: Hey, everybody, and we're back, and I hope you are ready to finish our cute little Capybara. And I just want to
move this aside for a sec because
I'm actually dying. I've gotten to this point
that I really want to get the I done because I just love
the way when we do the I, it really starts bringing
the capybara to life. And what I want to do is I
want to start with the I. So what I'm going to
do is what I always do with the marker
just coloring in that entire area of
the eye, look at that. I just love the way
he starts to Well, she starts to come to life. I just want to make
sure I get that shape of the eye right. I'm just going to go
over it, There we go. That looks really good. I just want to make sure
the bottom should also be a little bit
rounder, there we go. While I'm doing that, I also
want to do the nostril. The nostril is just going to
be a weird shape like that, and it's not going to be
the entire dark area. The part of the area is a little bit light
around the nostril. We don't really see
the other nostril as clearly because the
head's slightly tilted. Now I want to give our little
guy I keep saying guy, but this is a female capybara. I'm just going to give her a
little bit of a manicure by filling in the nails, which is fun to do. Those nails are quite rounded. Then we got a nail here. This little nail here
is just barely visible, but this is the
fourth little toe that I was talking about, what I call the pinky toe. That looks a little
bit better now. I also just want to use a
little bit of the black just very sparingly inside the ear there. That's
looking really good. Yeah, that's why I want
to use the black for now. I I'm just going
to grab my brush, and now I'm going to start
using the paint again. I hope you can see
that. Yeah, you can. I just want to do that
eye a little bit better, and I'm just going
to use some of the burn sienna to just do the very corner
of the eye here. How it's supposed to be
a little bit darker. May burn Sienna is a
little bit too red. I think I might use
the burn umber, just to do a little bit of shadow here, a little
bit over here. But leaving that eye
area quite light, maybe just very
lightly dotting it. Yeah, that looks good. What I'm also going to do
is I also want to now just use a little bit of diluted
raw umber to just kind, I just felt this area looked
a little bit too bright. Darken that mouth area, the nose area.
Around the nostrils. That looks good. Now I just want to use my white gel pen to add that little twinkle
in the eye that just really brings our
capybara to life. I also want to use it for a
little bit of whisker effect. It only has a few
whiskers that we can see. I don't want to get
too carried away. I think that will
be enough already, and maybe we might
see a little bit of fuzz coming around
on the other side. Now I want to make
that tooth just stick out a little
bit stand out a little bit with the um Oops. I feel like I'm
just going to use the black pen very sparingly to just do the bottom
shadow of the tooth. Yeah. And it's just going to line and just use it to line
the inside of the mouth, leaving that nice lip
that we've left there. And I'm just going
to use it underneath the bamboo stick because
there's a bit of shadow there. So we've made the mouth a little bit more
three dimensional. So that's looking
good. Now we're just putting the
finishing touches in. It looks very pretty
complete already. I'm just looking to see
where else I can maybe just make this ear a
little bit bigger because I think maybe it got a little covered with some pin. I'm just going to make that ear slightly rounder
and more visible. But everything is looking so good that I don't
want to overdo it. Maybe also the feet could use a little bit of white
gel pen very sparingly to just do a reflection of the a little bit of a highlight, so to speak, on the nail
and on the knuckles. These are just the
very final steps. Also, I notice around the nail, you might just add
a little bit of white around it where the
nail meets the actual flesh. What I do is if I
feel it's too bright, I use my finger as a little bit of an
eraser, so to speak. Over here, this nail is a
little bit hard to see. I'm just going to highlight
this finger over here. The nail has a little
bit of a mark there. I'm just going to
go over this again with the black because I feel like this nail
is very hard to see. I might just go under it with a little bit of black just
so we can see that foot. This can be the shadow
underneath later. Just be careful with your pen, but I just felt like I
really needed to do that. I'm just going to use a
clean damp brush to just soften that white a little
bit, the white gel pen. Yeah, then just add a little bit a white dot on this nail just
so we can see it a little clearer and maybe just
kind do that where it's like kind smudged
a bit, but that's okay. I just wanted to add that line just going over it
with black the final time, just to make that nail stand out and that other little foot. The other little toe,
I mean, I'm just going to use some black now to go in between the toes just so they stand out a
little bit more and they also act as a shadow underneath. A I think I let me just erase some of
this line while it's still wet because I think it might
have looked a little bit. I might have drawn it a
little bit too far in, but now I'm starting to worry about tiny little
details when we already I think it looks good. There, right. And let's just stop doing anything
else weird to it. Maybe we could just use a little bit of white
gel pen to just make this part look a little bit brighter
around the eyelid, and I'm just using a damp brush to just kind of blend
that a little bit more. Just to make the eye
kind of stand out a bit, but I think it looks good and I'm probably just nitpicking
a little bit too much. Okay. Also, I just want
to use a little bit of this white gel pen
around the nostril. The very bottom of the nostril and I'm just
going to blend it out at a damp brush is
what I meant to say. See? It looks like you can see the reflection of the light. I also feel maybe let's
just put a little bit of white here and just
blend it out a bit because we want to create this cool highlight
of the upper lip. The white gel pen is
actually quite blendable. That makes it a
cool tool to use. I'm also just going to just
make that lip at the bottom, just a little bit lighter
as it's binding down. I just want to fix
that tooth as well. This is a time to do all these tiny little
changes that you feel going to make your
painting really just stand out. I just feel like when
I put raw sienna, the tooth just kind
of disappears. I'm just going to leave
it white, I think, after experimenting a
lot so that we can see. I'm just going to dot the eye one more time to just
make it brighter because the white gel pen kind of got a little
bit absorbed in there. Okay, I think this looks good. The only little
thing I can think of is just without
darkening this too much, I just want to put a couple
of hair strokes here. This is where we put, we make our tiny little changes and add the details
as you can see. I feel like this is looking
really, really good now. I don't want to mess
too much with it. You always have to
know when to stop. And I'm just going to lift
a little bit of this color here off here just to make
that last toe visible, with a clean damn brush. Now, the last things that
I want to do for this is, I want to paint that
beautiful bamboo. I'm just going to
move my palette out of the way and I'm just
taking a clean palette here. What I want to do is
I'm just going to use some sap green also from
travel my travel container. So sub green would be
a great bamboo color. As you can see, it's
this nice light green. But what I want to
do is I want to make this look a little
bit more natural. It's a little bit
too bright now. So what I'm going to use is, I'm going to take
a little bit from my palette that we've
been using all this time of the raw umber, which is our darkest brown. So we're going to just mix
this with the green to just tone it down
slightly, as you can see. Okay, so we get this
pretty cool green color that looks a little
bit more natural. So what I'm going to
do now is I want it to I'm only going to paint
the very bottom part of it because I'm going to leave the very top edge unpainted, and I'm doing each segment
individually, as you can see, because I want it to have a little bit of a
three dimensional look. Also, I'm just going to not
connect it with the next one. As you can see, I left a little gap
between the two greens. And this part's kind of going
into the mouth a little. But as you can see, this part's going to be
nice and light. And over here. This part's going to go inside the mouth here. Isn't that cute? What you
can do also is we can just dab on a little bit more pain at the bottom and
let it spread up. So this is how I
just improv this. I just thought the
green would look would stand out more
than just a brown stick. And while that's drying, we can also still add a
little bit more shadow to it. So we can make our shadow
color like we did last time. This is just the shadow color
that we made last time. So all we did is we took some raw umber and let me
just move this aside now. We took some raw umber and we're going to just add
a little bit of French ultramarine to it to
make a nice shadow color. So French ultramarine
also from my travel kit. You could use just a Paine's grave you
want, but personally, I like making a shadow color because I'm using some
of the colors that were that were used inside
we used for the capybara. That way, it creates a bit of color harmony, if
you think about it. This is our shadow
color that we're also going to use for the
shadow for the capybara. What I'm going to do is I'm
going to just apply this at the very bottom while it's still wet and letting
it spread to the top. That gives a very
three dimensional look to to our bamboo, if you're interested in just making it look a little
bit more realistic. It looks really cute.
I'm just going to sorry one of my hairs of my brush have come loose,
I just noticed that. I also just want to paint
the hollow part in here, just dark to just
show it's hollow. So that's the idea I had for this little guy and
he's looking so cute, and I think the green actually really stands out
against that brown. And now very finally, what I'm going to do is I'm going to start
doing that shadow. So with the shadow color, and it's going to stay
quite close to the body, it's almost just
underneath the body. So I'm just going to
use some broken lines. Like I'm well aware that
the photograph shows our capybara lying down quite comfortably on a mattress
and whip material. So I'm just kind of
improvising with little broken lines where I
feel the shadow would lie. And just following very closely, between the fingers, fingers, toes, whatever you
want to call it. We don't have to do
a lot of shadow. In fact, this hands
even in more shadow. If you want, we can go
over this part with the gray if you want to
be accurate like that, and leaving that very
top part unpainted. What we can do with
the gray as well is besides it being
in the mouth, again, I just want to maybe
just put it right underneath the opening of
the mouth where the lip is. Actually, I notice now
that this part of the lip shouldn't be so bright because it's in the
corner of the mouth. I can also use the gray to go right underneath
the upper lip that's grasping this bamboo as a snack. As you can see, he's just coming to life really beautifully. We can also use the
gray to kind of put some of these
little dots, right, that kind of look a little bit kind of like the
pores on the skin, so to speak, that the
whiskers kind of grow out of. So just very sparingly because this is a dark
color and I don't want to darken the overall
look of the capybara. So as you can see, that's
looking so good already. And maybe a few gray
strokes where we've got a little bit of shadow
going on underneath the face, and I'm just going to use very sparingly a few
little strokes around the eyes because I
just feel like it just kind of makes the eyes kind
of stand out a little bit, just very tiny strokes, broken strokes as
well around the eyes. And around the ears. But let's not darken the overall look. That's not our intention here. Everything's looking
really good. You can see our bamboo
is drying quite nicely. I'm also just going to use
the gray to maybe just go between the hairs over here to just look like the hairs are
casting a bit of a shadow. But I don't want to mess
too much with this area. I don't want to
make it too dark. We've already drawn that
shadow area around the body. U and maybe just a few little dark
strokes at the top. But like I said, I have
to control myself at this point to not make the
overall look too dark. If you want, maybe where it is a little bit darker on the body, we can maybe just put a
few of those dark strokes. But I'm going to start
raining it in a little bit. Don't want the whole Yeah. Okay. I'm going to put this down now because I think
it looks really good. I just want to add
just one last thing. I just want to some of that green has faded
all the way up, so I just want to re emphasize the shadow at the
bottom of the bamboo. And maybe what we
can also do is just, use the shadow color
to just kind of, um, just do this little
section here. Yeah, but I think it's done. I think I'm kind of not
wanting this to end, but right, I'm just going to remove a bit of
that white color. Or we could just use a bit
of the g pen over here. All right? Yeah. So
that looks really, really cute. Just look at that. Our capybara looks like so
full of personality and just a very curious
little person just chewing on their little
stick, exploring the world. I think this looks so good. This was our third capybara. I think that it chewing on the little bamboo
already gives it like, um you know, something
cool to look at visually. So I don't feel like I need
to add any more stuff. Of course, you can do a
background if you'd like, or what I want to show
you later in this class, at the very end is some ideas
that I have if you want to create a different
type of look for your Capybara we will use
this same pose as a model, but I will show you how to
achieve an edgier look, a sketchier look, using a black marker all
over your Capybara. I just want to say
first right now, thank you so much for doing all three poses with
me of the Capybara. I hope you had a lot
of fun and it's a lot. You really love what
you're seeing right now. I think it looks so cute. And while I say that, I
just noticed something. I just noticed that I'm just going to use a little
bit of brown here. I just noticed that we lost
our hump a little bit, the little part that
stuck out a bit. I just want to do that. Maybe I should do that with
So I painted a lot of stuff. I'm going to use the raw sienna to just kind of make it
stand out a little bit. Yeah, so we kind of, like, lost that little hump formation because I kind of started, like, bringing the
hairs out a bit. So this is just a small thing, but I just wanted to keep
that same kind of shape. I think it kind of comes out a bit more actually over here. And then it goes
down and then it comes out again to do that big back and then back again. So, yeah. Sorry. So what I was saying is when I interrupted myself
is I'd like to say, thank you very much for doing all three poses and
please stay tuned for a very short section that will be sped up
that just shows you how you can create different
edgier looking effect to your Capybara. But please, I can't wait to see all your Capybara paintings and how you might have added
your own personal touch. So please feel free to upload it in the projects and resources
section of this class. Other than that,
please stay tuned for that very final section about how you can
create an edgier look, and thank you so much again for watching and participating
in this class.
16. Capybara Adding pen strokes: Hey, everyone. By now, you have probably
finished all three of your capybara paintings that
I've taken you through. And I just wanted to
talk very briefly about another sort of effect that you could add to your
capybara painting. For this example, I've chosen to use the very last
capybara drawing that we did of the capybara reclining and chewing on a
piece of bamboo. So I basically repeated
all the steps that we had previously done for
this capybara painting. But at the very end, I decided to use a black fine liner to just
outline the entire capybara as well as to add a
few bold strokes to emphasize the texture of
the fur of the capybara. So in this technique, it creates a bolder, edgier look that also
looks more animated.
17. Final Thoughts: Once more, as always, I would like to extend a
heartfelt thank you for watching this class or any of my other classes or for
following me on Skillshare. Your support really
means the world to me. I hope you've had a lot of fun creating your little
capybara paintings. So please please please upload them in the projects and
resources section of this class so that myself and others can
admire your beautiful work. I'd also like to encourage you to experiment around
with your paintings. Like, for instance, you
could paint a background, or you can do what I did at the very end of the class where I demonstrated
how you could use a black fine liner to
outline your capybara and add a few bold strokes
to give it a more edgy or cartoony look if
that's what you're after. Once more, I just want to say, thank you so much for watching this class and all the best
in your watercolor journey.
 Alicia Puran, Artist, Musician, Teacher