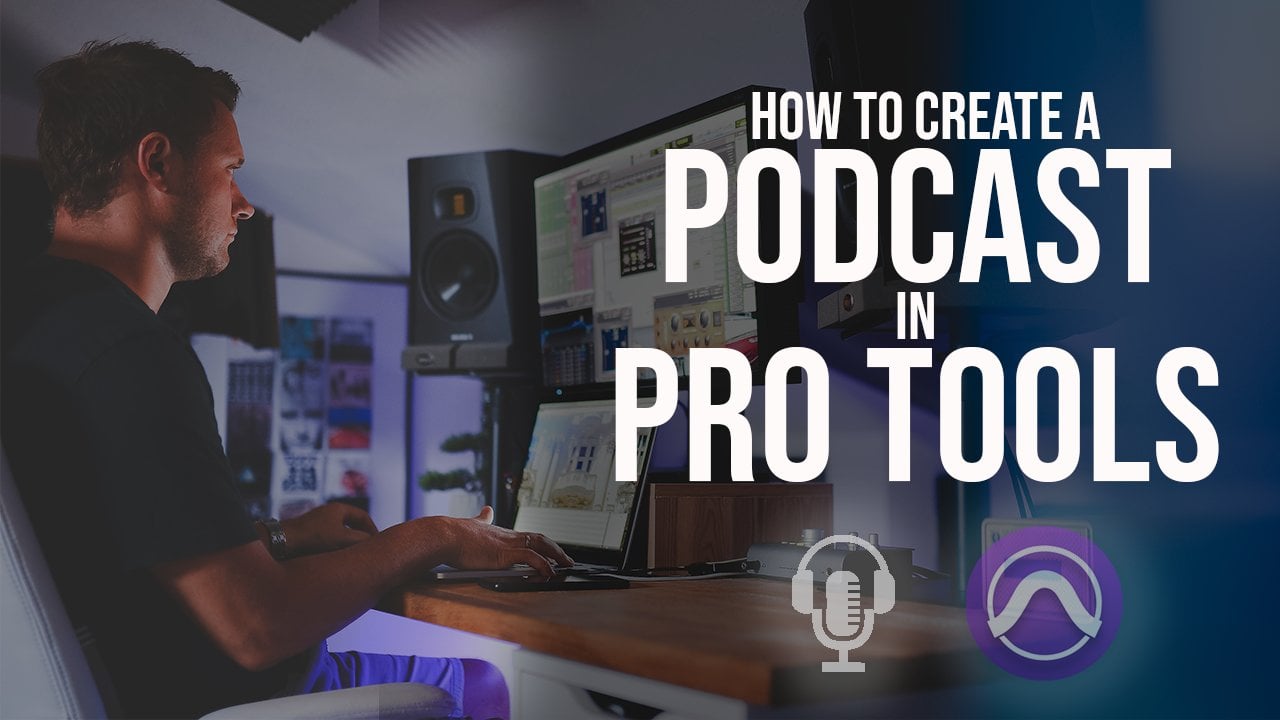
Transcripts
1. Intro: Podcasts are huge these days. According to
Statista, there were 65 million podcast
listeners in the US in 201788 million in
201920 million in 2021. Podcast tears. Alex Cooper and Joe
Rogan recently signed deals with the Spotify
worth $6,000 million. Respect Italy. Even
though it takes time, effort on luck to get
to those numbers. Producing and recording of
professional quality podcast. It's not expensive
or complicated. This course, I'll walk you
through the whole process. I have more than 20 years of
experience recording audio. I produced and published my
own podcast back in 2019. I hope this course will help you see how the technical part of producing a podcast is
relatively easy to master. So let's get started.
2. How Audio Works: When we speak, we create sound waves in the
air around us. If there's another
person in the room, those sound waves in the air will reach
that person's ear. Inside of that person's ear, there is an eardrum
that will vibrate. That vibration will be
translated to nerve impulses, the world travel,
that person spraying. That is how we communicate. When we are recording
our voice though, instead of another person's ear, we have a microphone in the room which acts in a
very similar way. Instead of an eardrum, it has a coil that is inside, a magnet that lives
inside of the microphone. When that coil vibrates, it produces an
electrical signal that travels out of the microphone
through the cable. That electrical signal will reach our audio interface that has this piece of hardware called an analog to
digital converter, which will convert
the electrical signal to digital basically
to ones and zeros. Then that digital signal, those ones and those
zeros will travel to the computer
via the USB cable. And then in the computer
we can store that file in our hard drive or we can
upload it to the Cloud. When our podcast is in
the Cloud and with sand, the link to the
different services like Spotify and Apple Music, etc. Then users can go on their phones and they can
listen to our podcasts. When they hit play, their phone will pull the
audio file from the Cloud and then the phone will
stand via Bluetooth. That digital signal in ones
and zeros to the headphones. The headphones have a
digital to analog converter, which will convert the
digital audio signal to an analog or
electrical audio signal. That electrical audio
signal will go through that tiny speakers inside
of the headphones. And those tiny speakers will
convert it to physical air, sound waves that
will read our ears. Then our eardrum
will do the rest.
3. Hardware and Software Needed: In order to record your podcast, you are going to need some
hardware and some software. For hardware, you
are going to need a computer and audio interface. Microphones, wind screens for
the microphone's, cables, for the microphone's
microphone stands, headphones, and a
headphone amplifier. For software, you are
going to need a DAW, which stands for Digital
Audio Workstation, and a cloud starts service. Here are some gear
recommendations. I have no affiliation with
any of the manufacturers. I'm just recommending them
because I liked them. Any computer with any
operating system will do it as long as it's not
a very old computer. Just make sure you have
space in your hard drive. Because audio files, even though they are not
as heavy as video files, they can get heavy when the
recordings get very long. Your audio interface
will effectively limit how many people you can
record at the same time. Make your choice based on that. Here are my recommendations
for solar recording. I recommend the focus
right Scarlet Solo for recording up to two people or recommend the focus
right scarlet to I2, which is the one I used for
recording up to four people. I recommend the focus
right, scarlet, 1 eighth. If you're on a budget, mao do on bearing gear, they both may really nice 124 input interfaces that have
very similar functionality. I use Shure, SM58 eighths. These have been a standard in the live music and live
comedy industry for decades. They are pretty much
indestructible. And they are very direct signal, meaning that they will only pick up what's in front of them. They will pick up your voice, but they will not pick
up any background noise. On each microphone that I use. I use a windscreen that will reduce pops and breathing noise. You will need a
standard XLR male to female cable for
each microphone. I use the Amazon
basic six feet once. Just make sure you're
there an extra one. In case a cable fails
while you are recording. You will also need a stand
for it's microphone. I use newer suspend some
bombs, scissor arms stands. But any other desktop SSIS, IR arm, Stan will do it. You will also need a set of headphones for each microphone. I recommend tascam t, h, m, x2. They are durable
and very reliable. Lastly, unless you
are recording solo and using only one
pair of headphones, you will need a
headphone amplifier. I recommend the
newer super compact for channel stereo
headphone amplifier, which is very nice
and very easy to use. You are also going to
need a cable to connect the amplifier to the
audio interface. That will be a 1
fourth of an inch TRS to 1 fourth of an inch TRS cable. Daw stands for Digital
Audio Workstation. And there's lots of
options in this category. I'm going to recommend for
everybody our Udacity, which is free and
open-source and works well on Windows, Mac, and Linux. It doesn't look as nice
as some of the paid ones, but it is very powerful
and very reliable. You will also need cloud storage to backup
your audio files. I would recommend Google Drive because it is very easy to use. In the resources section, there's a list of
all the hardware and software that I mentioned
in this lesson.
4. Equipment Setup and Test: Go to our Udacity team.org, download Audacity and
install it in your computer. Connect the audio interface to your computer using
the USB cable. Open Audacity. It should recognize the
interface automatically. And here where we have
the microphone icon, we're going to select
it as the input. In my case is scarlet to I2 USB. We are also going to select the scarlet audio
interface as the output. Then in here in my case, since I'm using the
scarlet to I chew, I want to select two, because I want to use the
two inputs that I have. If you are using a
four input interface, you'll want to
select four in here. And if you are using an interface for solar
recording with only one input, you will only have the
option one available setup. The armor stands on a desk, please, the microphone in the clips and connect the microphone to
the other interface. You've seen the XLR cables. If you are recording solo, plug your headphones into the headphones output
of the audio interface, if you are recording with
two or more microphones, plugged the headphone amp
into an electrical outlet, plug each pair of
headphones into a headphone output
in the amplifier. Set all the knobs to 0. Lastly, connect the
headphones amplifier to the audio interface using the 1 fourth of an
inch TRS cable. Now you have to set
up the interface. I'm going to use the scarlet to i2 for the example because
it's the one I have. But the process is very similar
for any other interface. It doesn't matter if
it's focused, right, or if it's any other
brand on each input, make sure line is selected. We would use instrument for plugging in a guitar directly, which is not what we're doing. Today. We're going to click
here where it says Click to start monitoring while
speaking on its microphone, adjust the gain knob, check the signal in our Udacity, it should be moving
somewhere between minus 20 and minus six decibels. If it's higher than that, lower the gain a little. If the signal is too weak, turn it up a little. Try to speak loudly. If the meter in Audacity
gets yellow or red, turn down the gain a little bit, make sure the 48
volt proton is off. You would have
that on if you are using a microphone that is specifically requires
48 volt power, which is also known
as phantom power. If you are using Shure
SM58, like I am, they don't require 48 volts, so that bottom should be off. And lastly, make sure
direct monitor is on. This will let you hear yourself in your
headphones while you are recording for adjusting the
levels of the headphones. If you are recording solo, speak on the
microphone and simply adjust the volume of the
headphones in the interface. As an important note, changing the level of the headphones either
in the interface are in the headphone amplifier
has no effect in the recording input that is going to be sent to our Udacity. This is only for
monitoring purposes. We should put them in a
level in which we are comfortable the way we
listen to our own voice. If you are recording using
more than one microphone, you will need to use the
headphone amplifier, set the headphone knob in the audio interface
close to ten, and then adjust the volumes on the headphone amplifier for
each set of headphones, the large knob labeled as
monitor is not relevant. We're not going to use it
because we are not using a speaker monitors and this
is what that would control. Okay. Now hit the
Record button on Audacity and record something
for a minute or two. If you are using more
than one microphone, record something on
each microphone. Now, listen to the recording. If everything sounds good, it means everything
is working properly.
5. Recording the Episodes: The room in which
we are recording should be relatively quiet. Dynamic microphones
are usually very good at only picking up
what is in front of them. Your mouth, in this case. Some traffic noise outside or some steady noise in general, or even some radiator
noise or some AC noise inside should not
be a problem if you are using something
like a Shure SM58. The content of your podcast is out of the scope
of this course, of course, but I still
wanted to give you some tips for different
content types. If you're, is going
to be highly edited, one kind of like 99% invisible or like
NPR's Planet Money. Then you will need to script
pretty much everything. But then on the script you
can leave room some parts for some improvisation or some natural axions are
some conversations. If your podcast is an open format and you're
recording it by yourself. In my experience, it is very helpful to have an
outline or some kind of reference of the
topics we'll be covering in front of you at all times
while you are recording. If you are recording
with a guest, I always recommend having a
list of topics you want to discuss and having that list in front of you while
you are recording. I always like to
give that list in advance to my guest
just so they know. But I mean, this is
really up to you. This is a very important one. If you are using Shure SM58 or some other
dynamic microphone, the guests should
be very close to the microphone at all times. If guests are not used to
recording and a microphone at some point that
will get far from it under voice will be lost. In my experience,
the best way to deal with this is before you record, explaining to your
guest how they should be close to the
microphone at all times, but also explaining
to them that during the recording it's
very normal to get far from the microphone and that you will remind them
during the recording. And that is a normal thing that happens in all the episodes. And then if you tell them
during the recording, hey, can you get a little bit
closer to the microphone? If it is an edited podcasts, you can edit out that part. But if it's
spontaneous podcasts, It's not a big deal to
leave that and it's very normal and it happens a
lot even in big podcasts. But it is very important that
your guests know that just so when you ask them
to get closer to the microphone while
you are recording, they expected and you
don't interrupt your flow. This is also up to you. But in my experience, it helps a lot
telling a gas that if they say something weird or something that
they don't like, they can e-mail me after and
we'll edit out that part. I don't do Sorry,
I have to do that, but it makes people less nervous knowing that
they have that option. You can control the volume for each set of headphones
individually. I recommend testing
their headphones and a microphone with your gas and asking them how
well they hear themselves. And adjust the
volume individually for it headset until
everybody's happy. Very important one,
have water for everybody on the desk
while you are recording.
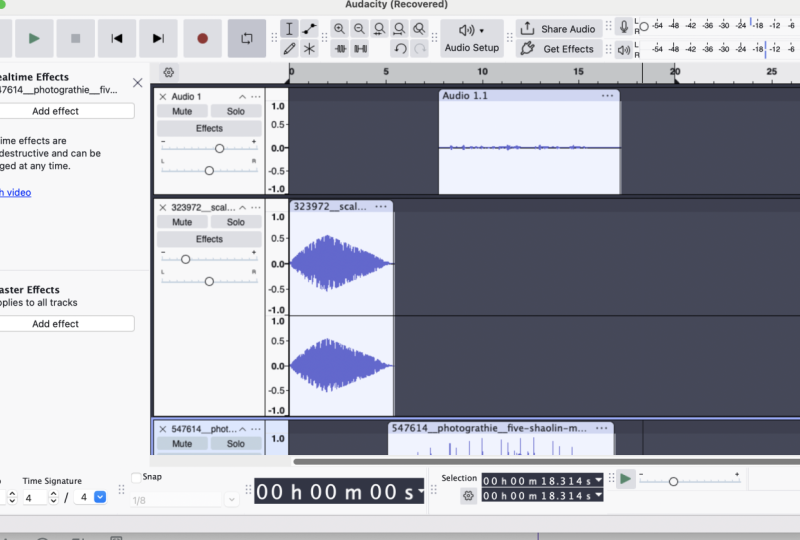
6. Editing: Okay, so I have here a sample super short
podcast that I recorded. And I'm going to
edit it with you. For editing, I'm basically
going to do two things. I'm going to take out
some parts in the audio, and I am also going to add music at the beginning
and at the end. The first thing that we have
to notice in here is that since I was to use
in two inputs, because my interface
has two inputs, audacity, when you do that, it automatically merges
the two inputs as one stereo track or stereotypes just attract that
has two inputs, usually one on the left
and one on the right. If you were using
in here one mono, you would not have that problem. If you were using for
inputs may be Audacity, would merit 122 on a stereo track and inputs 34
into another stereo track. But anyway, it has
a very easy fix. So we're just going to
click here audio track, then split stereo tracks. The only thing that
we have to fix now is that when we've split them, audacity is keeping this one on the left and this
one on the right. We need to move this
thing here from pan left to pan center. And this one here from
Penn right to pan sender. And there we go. Now we have two separate mono tracks
that have a single input, or in other words,
sustainable microphone eat. This is one of the microphones. I was speaking on it
for a little bit. The other microphone
I spoke at some time later here I am speaking
in the second microphone. So let's give it a
listen in that city. You can click here in
this area anywhere and it will start
playing from that point. Let's start here. Hello, and welcome
to my fake podcast. In this episode. I'm sorry, Let's start again. Hello and welcome
to my fake podcast. As you can see, I messed
up right at the beginning. The first thing that
we're going to do is to take out this whole
part of the beginning, this whole path intro, and start with the good intro. In order to do that, we
need to make sure that we have the selection
tool selected. And with this tool, we need to click right here. And then we're going to need
a keyword shortcut on Mac, which is what I'm using
is going to be Command Shift K. In Windows, it's going to be Control
Shift K. When I do that, Basically the selection
happens on both tracks. Now to split the clips at
this point on both trucks, we're going to need a
second keyboard shortcut. And this one is going
to be on Mac Command I. And on Windows Control. I am going to do that
command I. There we go. Now we just need to delete
these sections in here. So I'll just select them by clicking here
at the top part. And then I'm just going
to press the delete key. So this one is gone,
and this one's gone. And the last thing
that we need to do is we need to move these tracks to the beginning here. And same for this
one. There we go. Let's give it a listen. Hello, and welcome
to my fake podcast. This episode. I'm not going to have a guest. It's just going to be me. Okay. So the other thing that I
don't like is that in here, there's a long pause, so I'm going to get rid of it. I'm going to do the same thing. I'm going to click here. And then I'm going
to do command shift K or control Shift
key on Windows. Then I'm going to do Command
I or Control I on Windows. And I'm going to do the
same thing right here. So command, shift K, command. I am going to get
rid of these two. And I'm going to drag the clips. Okay, Perfect. The second thing that I'm going
to do is I'm going to add music at the beginning
and at the end. For adding short music clips and other sound effects, I
recommend freesound.org. I have an account
in here already, I'm logged in and now I
can download anything. Just keep in mind that different clips have
different licenses. So you need to check that. My case, I'm going to use
this distortion guitar. And this one has an
attribution license, which means I need to give
credit to this person. In my case, I'm going to add this person's name in
the course description. If you're using it
for your podcast, you can mention them
in the podcast itself, or you can mention them in the podcast description
when you publish it. I'm going to go ahead
and download this clip. The clip, download it. Now I'm going to drag
it into Audacity right on this gray area in here. Okay, Perfect. Already looking at the wave, this looks like it's
going to be very loud, so I'm going to bring
down the gain in here. Let's bring it down to minus 12, for example, and then
we can adjust it. The other thing is that
right now if I hit Play, this is going to play on top of the voice and
we don't want that. Let me play to show you. I'm not going to have
from the beginning, this is still pretty loud. I'm going to bring
it down minus 17. I need to drag all
this to the right. Before we do that, I'm going to join these two
axioms. For doing that. I'm going to make a selection that includes the part where
the split is happening. Then I'm going to say edit,
clip boundaries join. And the same thing for this one. Clip boundaries join. Perfect. Now I'm going to move them
to write after guitar part. Okay, perfect. So let's see how that
sounds from the beginning. Hello and welcome to
my fake podcasts. Okay, great. I think I can bring
the volume up a bit. Hello and welcome to my fake podcast in this
episode, I'm perfect. So basically the other thing
that I need to do is I need to trim the Andean and I'm going to add music at the end as well. Here I am speaking in
the second microphone. I'm just talking
some non-science. I'm here. I am in. Welcome to the podcast. How are you doing today? Then the other Dan responded, Dan, I'm good. How are you? Nice to be here? And this is the end
of my podcasts. So again, I'm going
to click here. I'm going to do command
shift K and then command. I. Going to get rid of this. And I'm going to
get rid of this. I'm going to copy
the guitar part, going to do Command C for copying or Control C
on Windows, of course. And then right here I'm
going to click here and do Command V or Control V on
Windows. And there we go. And let's listen to the n Then. Hayden, I'm good. How are you? Nice to be here? There we go. That's our whole podcast.
7. Mastering: We are going to
master our podcast. So for that, we need to
export it as an audio file. So we're gonna do File Export and we're going to
export it as WAV. I'm going to save it
right on my desktop. And notice that it
ends in dot wav. Save. Your trucks will mix down and explain it as one stereo file. Perfect, That's what we want. And we don't need to
fill any of this. Okay, good. And it's been exported. Now we're going to create a new Audacity
file, an empty one. And I'm going to drag
the WAV file that I just exported in here. There we go. Now this is one stereo track
with everything together. Now we're going to need a shortcut for
selecting everything. It's going to be Command a on Mac or Control a on Windows. Once everything is selected, I'm going to click effect. I'm going to go to
loudness normalization. Here we need to make sure
this number is minus 16. Loves That's the
recommended number. We'll leave this like that
and we'll click, Okay. I'm going to export, again. I'm going to export it as
Mp3 this time just so I get a smaller file,
Export As MP3. And I'm going to save it in
my desktop. There we go. The last thing that
we're going to do is we're going to run
that file through an online mastering tool that is free and it is really amazing. It is called band lab. And you can find it at band
lab.com slash mastering. They do other things but they're mastering tool is free to use, using it to create an account. I've already done so and
I'm logged in already. I'm going to import the MP3
track that I just exported. Now it is mastering.
Just a note. If your file is very long, this is going to take awhile, so just be patient. Okay, there we go. I'm going to choose
the clarity setting and you can listen to the master version
and the original one. So I'm going to download it. That is going to be
our final product. Our podcast is ready
for distribution.
8. Publishing: So in order to publish your podcast in all
the major platforms, unit to host it, add up podcast hosting platform. I personally use paths proud, but there are other
ones that are grayed. Here is for example, pod bean. I have no affiliation
with any of them. I just liked proud, it works really nicely. And I personally
use this plan here, which hosts the
episodes forever. The way it works with
partners proud is just manage your podcast here
you can add a new podcast. I already have mine here. Then here under episodes, you just upload a new episode
when you have it ready. So after you've uploaded
your first episode, you want to publish it to all the different
big podcasting apps. So for that you just
got to directories and you follow the
instructions for each one. So for example, to get it
published on Apple podcasts, you need to do all these things. The steps are different
for each service. To me, the most important ones are Apple podcasts, Spotify, of course, Google podcasts, Amazon music, and the stator. You get listed in all of them. Your podcast will be available
pretty much everywhere.
9. Outro: Podcast in both as
a podcaster and the listener is one of my
biggest choice these days. I'm happy to share my Audi
related knowledge with you. And I'll make sure to
listen to your podcast. I've command on it. If you upload or linked to an episode in the
project section.
 Dan Berges, Entrepreneur & Web Developer