Transcripts
1. Welcome : Hey there. My name is Nikki. Try coz of Life by design. I'm excited to share with you my very first watercolor class. This watercolor class will teach you how to simply paint a winter themed watercolor read. I'll even inspire you to add a word or phrase to your design. I've known for my modern calligraphy and lettering classes, and I'm happy to show you how to naturally progress and grow your artistic skills by introducing you to watercolor painting, using my simple techniques. Together, we'll use a limited water color palette, and I'll teach you how to paint for very simple but complementary wreath components as we paint a few modern fun and easy winter inspired Reese. Using the simple palette and minimal elements that I teach, I'm confident that with some practice you'll be painting your own winter wreathed in 15 minutes or less. In fact, I demonstrate doing that in one of the lessons where a paint a wreath in real time. In under 10 minutes, this class will show you how to use a dry water color palette with my favorite brown brushes or even water brushes too easily. Paint stems and leaves, so you can create designs for fun for greeting cards and maybe even frame herbal pieces that you can give as gifts. I feel that watercolor is a natural progression for anyone who's doing calligraphy or letters to venture into learning watercolor and adding this painting skills. Your arsenal will open up new opportunities for you to express your creative side and even broaden who you are. Creatively. I hope you click and roll and take this water class with me. See you in class.
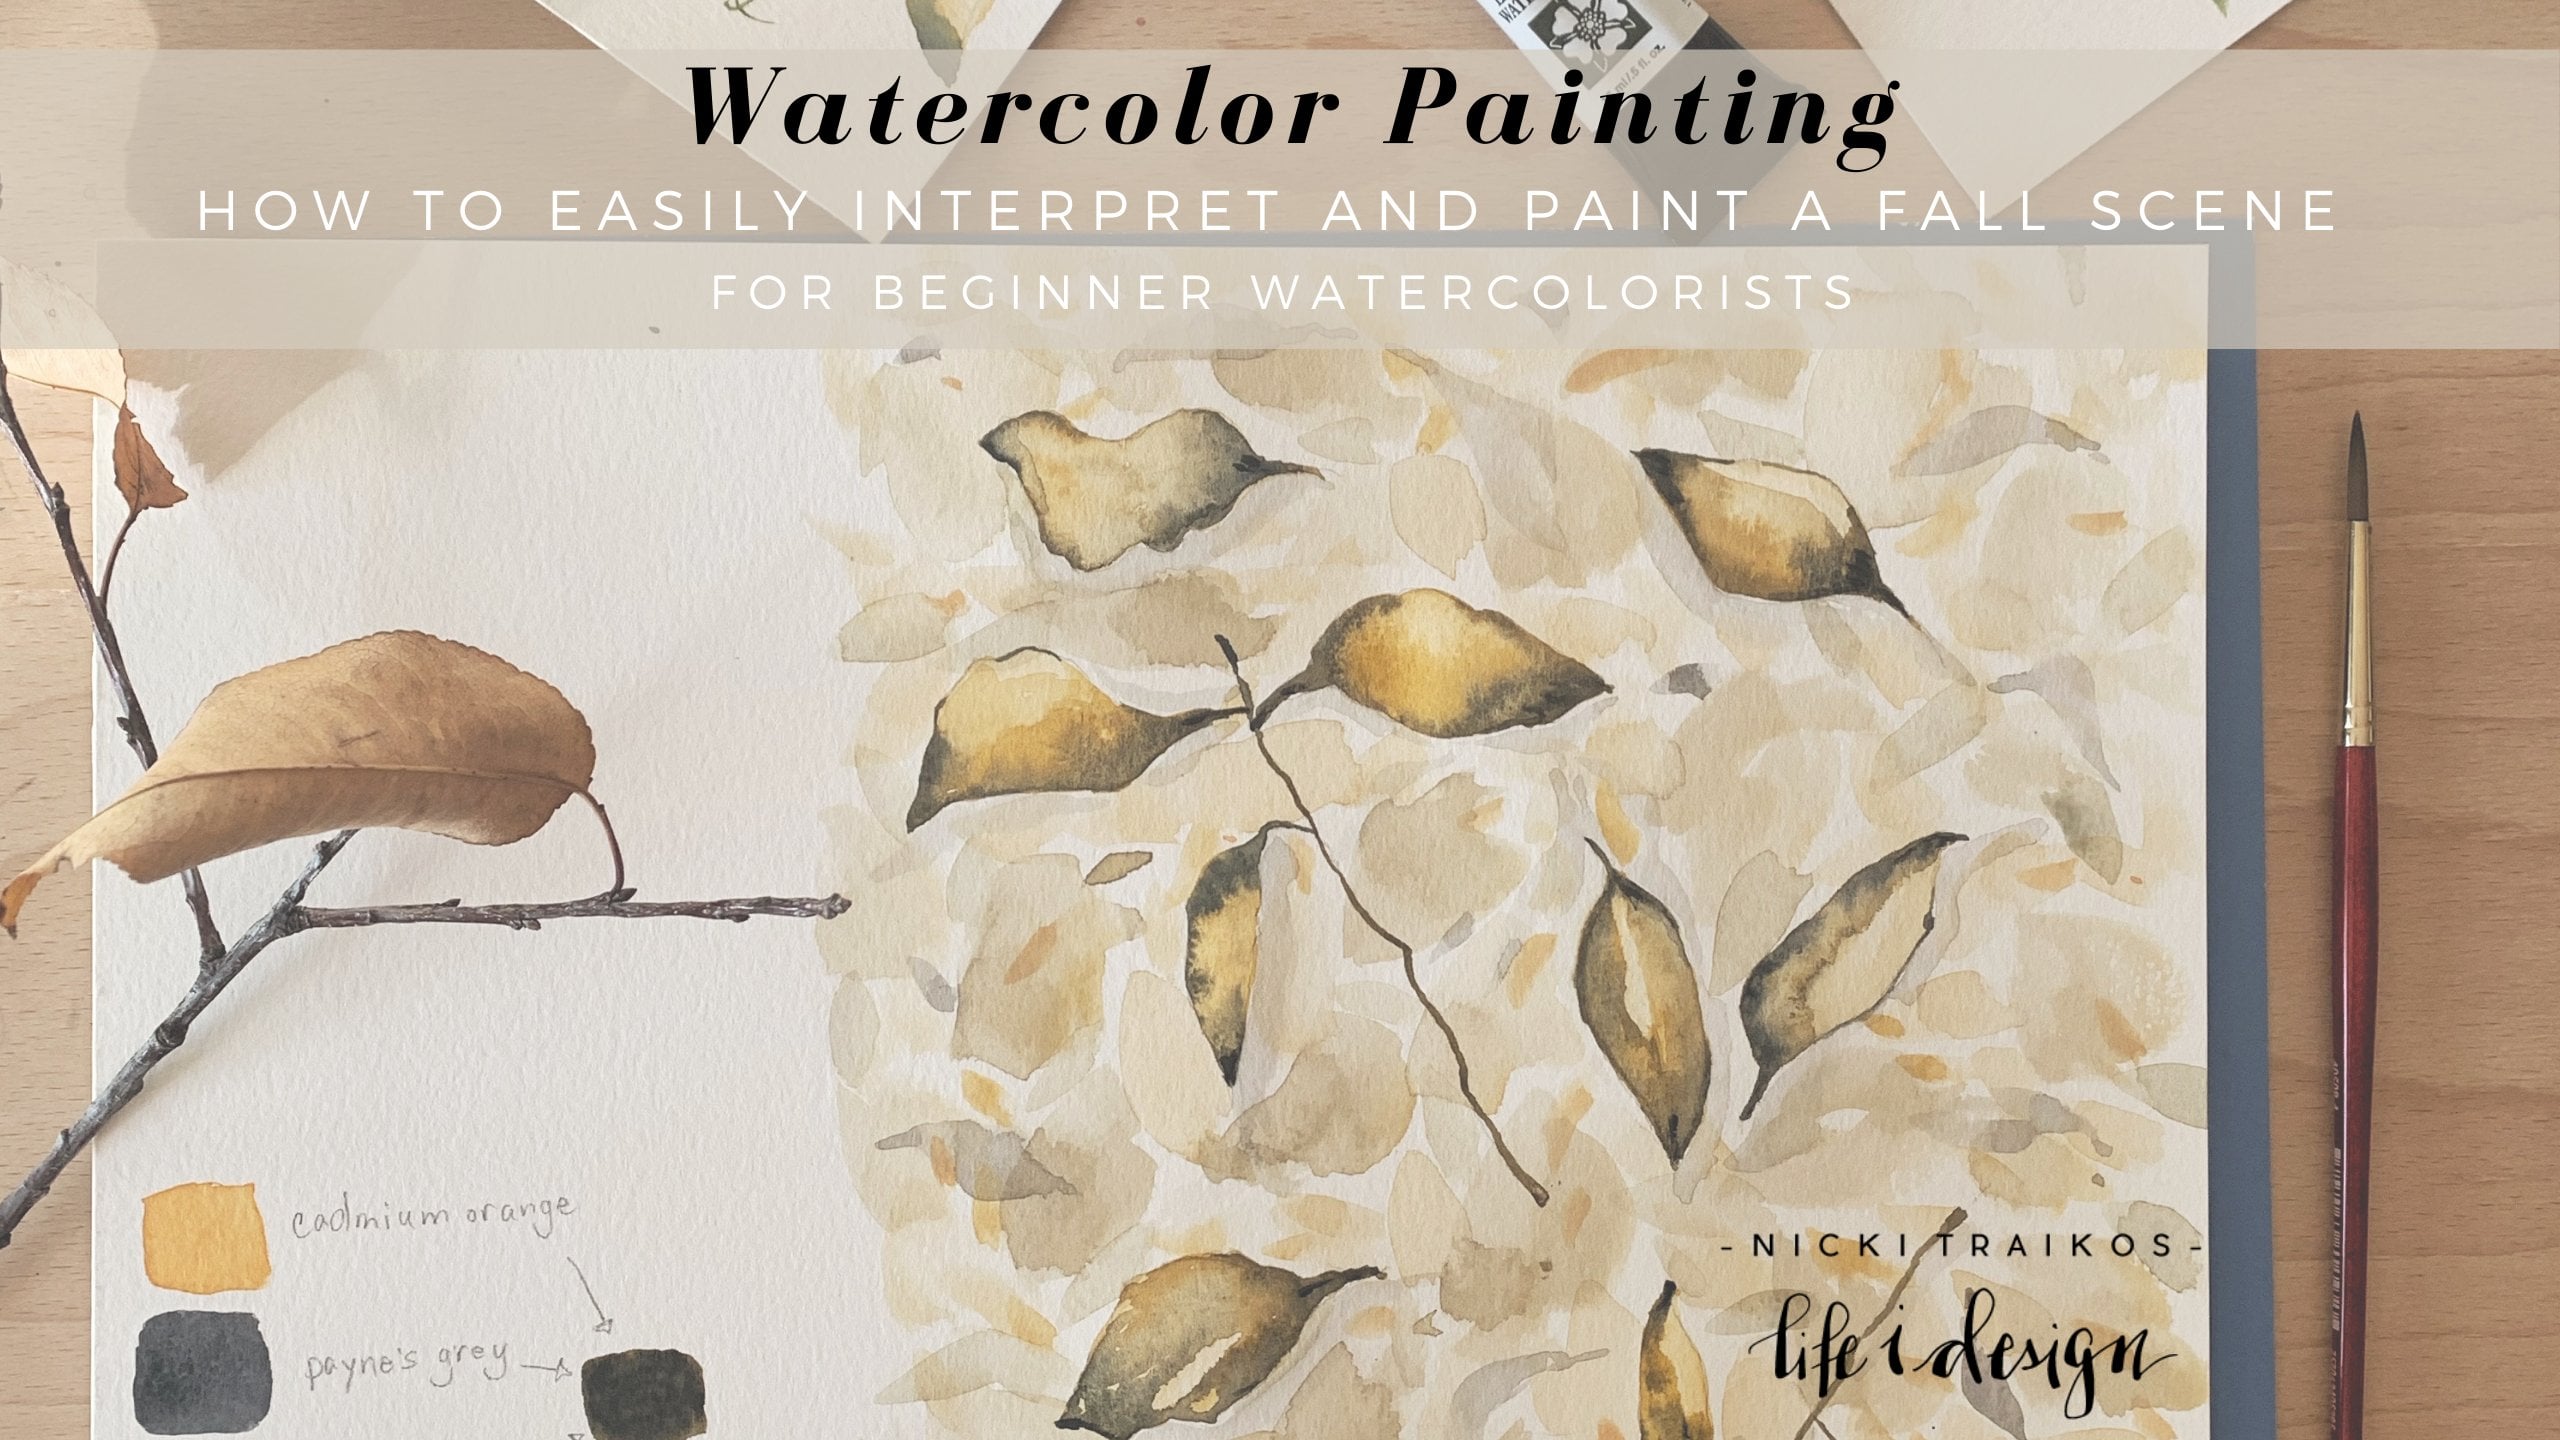
2. Supplies & Tools I recommend: Okay, So before we get started working on our winter Greece, I want to show you some tools that I suggest you have on hand. So I don't want you to worry too much about having the right watercolor or using exactly what I'm using. I've just decided to use this dry palate. It's a prima palette that I have actually customized. So I have maybe three or four different palates, and I've taken a few colors that, um, speak to me and that I wanted to use over and over get in some of my recent watercolor to science. So for today I'll be focusing on using these okra, gold ish yellow tones as well as this deep, really sappy, yummy green. And I'll include some of the reds for Berries, as well as mix up some of the browns and probably even pick up the blue. So yellow green, a bit of blue and a bit of red will be my main colors that will use for my first read that will show you with this dry palate. I also like to make sure that I have a dropper on him, because often when I work with a dry palate. I like to activate the colors that I'm choosing to use. So here I'm just dropping in, and I want you to be able to see that this is handy. So picking up a bit of water and I'm just activating some of the colors that I intend on using. So that way it starts to get the pigment flowing because the key really with watercolor is that you want to create a nice pool of liquidity. Watery pigment. Okay, so in terms of brushes, thes air, some larger brushes, this is a Princeton brush that I just picked up larger brushes that I intend to use on larger paper and thes round tip brushes. Allow me to create really fine strokes with my brush as well as really thin story find strokes as well as really thick strokes. So let me grab this watercolors. Do you concede that I have some really nice fine line work here, as well as some really thick, beautiful broad strokes for the leaves? I achieved that using the same brush. OK, so a rounded brush is something that I recommend that you pick up If you don't have them. Andy brushes do make a difference. But if you've taken my water brush letter in class with me, you'll know that I love the's. A quash water brushes as well. This'll is a fine tip. I will be demonstrating how to paint with these two because I love being able to go back and forth from lettering and painting some botanicals with, um, this is a larger brush. Drop the fine one again. So again, depending on how wide or thin your brush is, will depend on how wide or thin your strokes can be and again in the next section. All start to demo. How to use your brush to create those broad and then strokes. So those are the brushes that I recommend. I like to have paper towel on hand so I could blot my watercolor. We'll be using this very technical tool, just my painter's tape, to create the circle for a wreath. And again, really simple. I can create a small circle or a large one, depending again how large my paper is and what my goal is. If you're working on greeting cards, then you'd want just smaller circle to begin with. And it's just a guideline so that we know where to place our leaves. Okay, Also last see a, um, eraser as well as a pencil. I like to use ah, heart tip. So this is a four h. Because I don't want the lines to be very thick with watercolor, you'll be able to see the line because the water color is transparent and you don't want to . You want to make sure that you don't have a thick line are dark, heavy pencil line to begin with. Okay, so this is what we'll start off with. Those are the tools that I recommend you get going with, and let's get started with practicing a few simple stones and strokes.
3. How to Paint a Simple Pine Stem: Okay, so let's get started painting some stem. So think of Wintering. Um, really simple. Maybe some evergreen stems or Cem leaves that have still remained on the branch to go ahead and just get my brush nice and wet. I'll be working in this palette here to the size. Bring that over for you. I'll activate this puddle that I have. So I've done a few wreaths this week already, So this green tone that I'm working with is already here. But what I'll do is add a bit more pigment to its. You can see that my puddle has become a little bit creamy. You want water color to resemble water, so that consistency should be nice and flowy. Your brush should have a lot of water on it. And you can change the intensity of your pigment based on how much water you've added to your color. So for right now may be able to add a little bit of black to the top of this green. And all that does is it deepens the green for me. So I like to have another pallet on hand here in case I really want to test the color and you can even have just a spare piece of watercolor so you can swatch what your water color mixes look like. So I'll be working with this more of a dark green tone, and I don't want it to be too, Um, highly pigmented. So I'm going to work with this puddle right here. Let me move that over so you could see in the camera. There it is. So just adding a little bit more water to that puddle, and then we can create. Let's create some evergreen stems here. So with the brush you can control how thin or thick in a white boss little excess water you can control health thin or thick. Your stroke is by the pressure that you apply on your brush so you can eat. See, hear. I'm just applying very little pressure on the tip, and I'm holding the brush almost at a 45 degree angle so that I can get the right angle of the barrel of the brush here. I don't want it to be too thick, because the stem needs to be nice and thin, and we think about painting, um, the pines of leaves. We want to create really thin strokes. Okay, so I'm just free flowing. I don't have anything that I'm using for reference at the moment, but you certainly can. I love Pinterest for that. One of my favorites platforms to create inspiration boards with and again different links and cross your sometimes over a little bit so that you have some interest there. And I don't want you to worry about it. Looking uber realistic, we really just want create the idea of this being a pine stem. So again, you can curve your stems a little bit, cross them over, make some short some longer, okay? And when I want you to do is turn your page as you're working. Okay? We're not taping down our sheets of water color. You want to turn the page and make sure that you're working in the same direction? Always. That's when I started a little differently. I started working with the outer kinds and I'm just with very little pressure on my brush. Hi. Very little pressure. Go ahead and load it again. Take off the excess. I don't want there to be a bubble of paint on the chapel. Show what? That looks like so you can see how heavy it is. It's almost going to drip. So just wipe off the excess to make sure I have a really nice, um, find Cipto work with. So let's do one more stem right about here. And pine Nieto's just working in that motion. Okay, So what we'll do now is I'm actually going to turn the page again. Hey, and I want to make sure that I'm working this way. Feels more natural, so I don't want both sides to be exact. And the reason being is because of nature, there isn't complete balance. Okay, so I don't want you to worry too much about I'm looking perfect. Um, even stop there. I won't add anymore, but I want you to work in the same direction. So I'm working away from my body as I'm dropping the strokes on my page to make sure that, um, I have the similar brushstroke on either end churning one more time. I think I will just grab a little bit more paint here to paint in the last stem from my pine. My God, that cross yourself. Okay, so there you go. Very easy. All you're doing is painting straight thin lines to create this pine stem for your wreath. Okay. How easy is that?
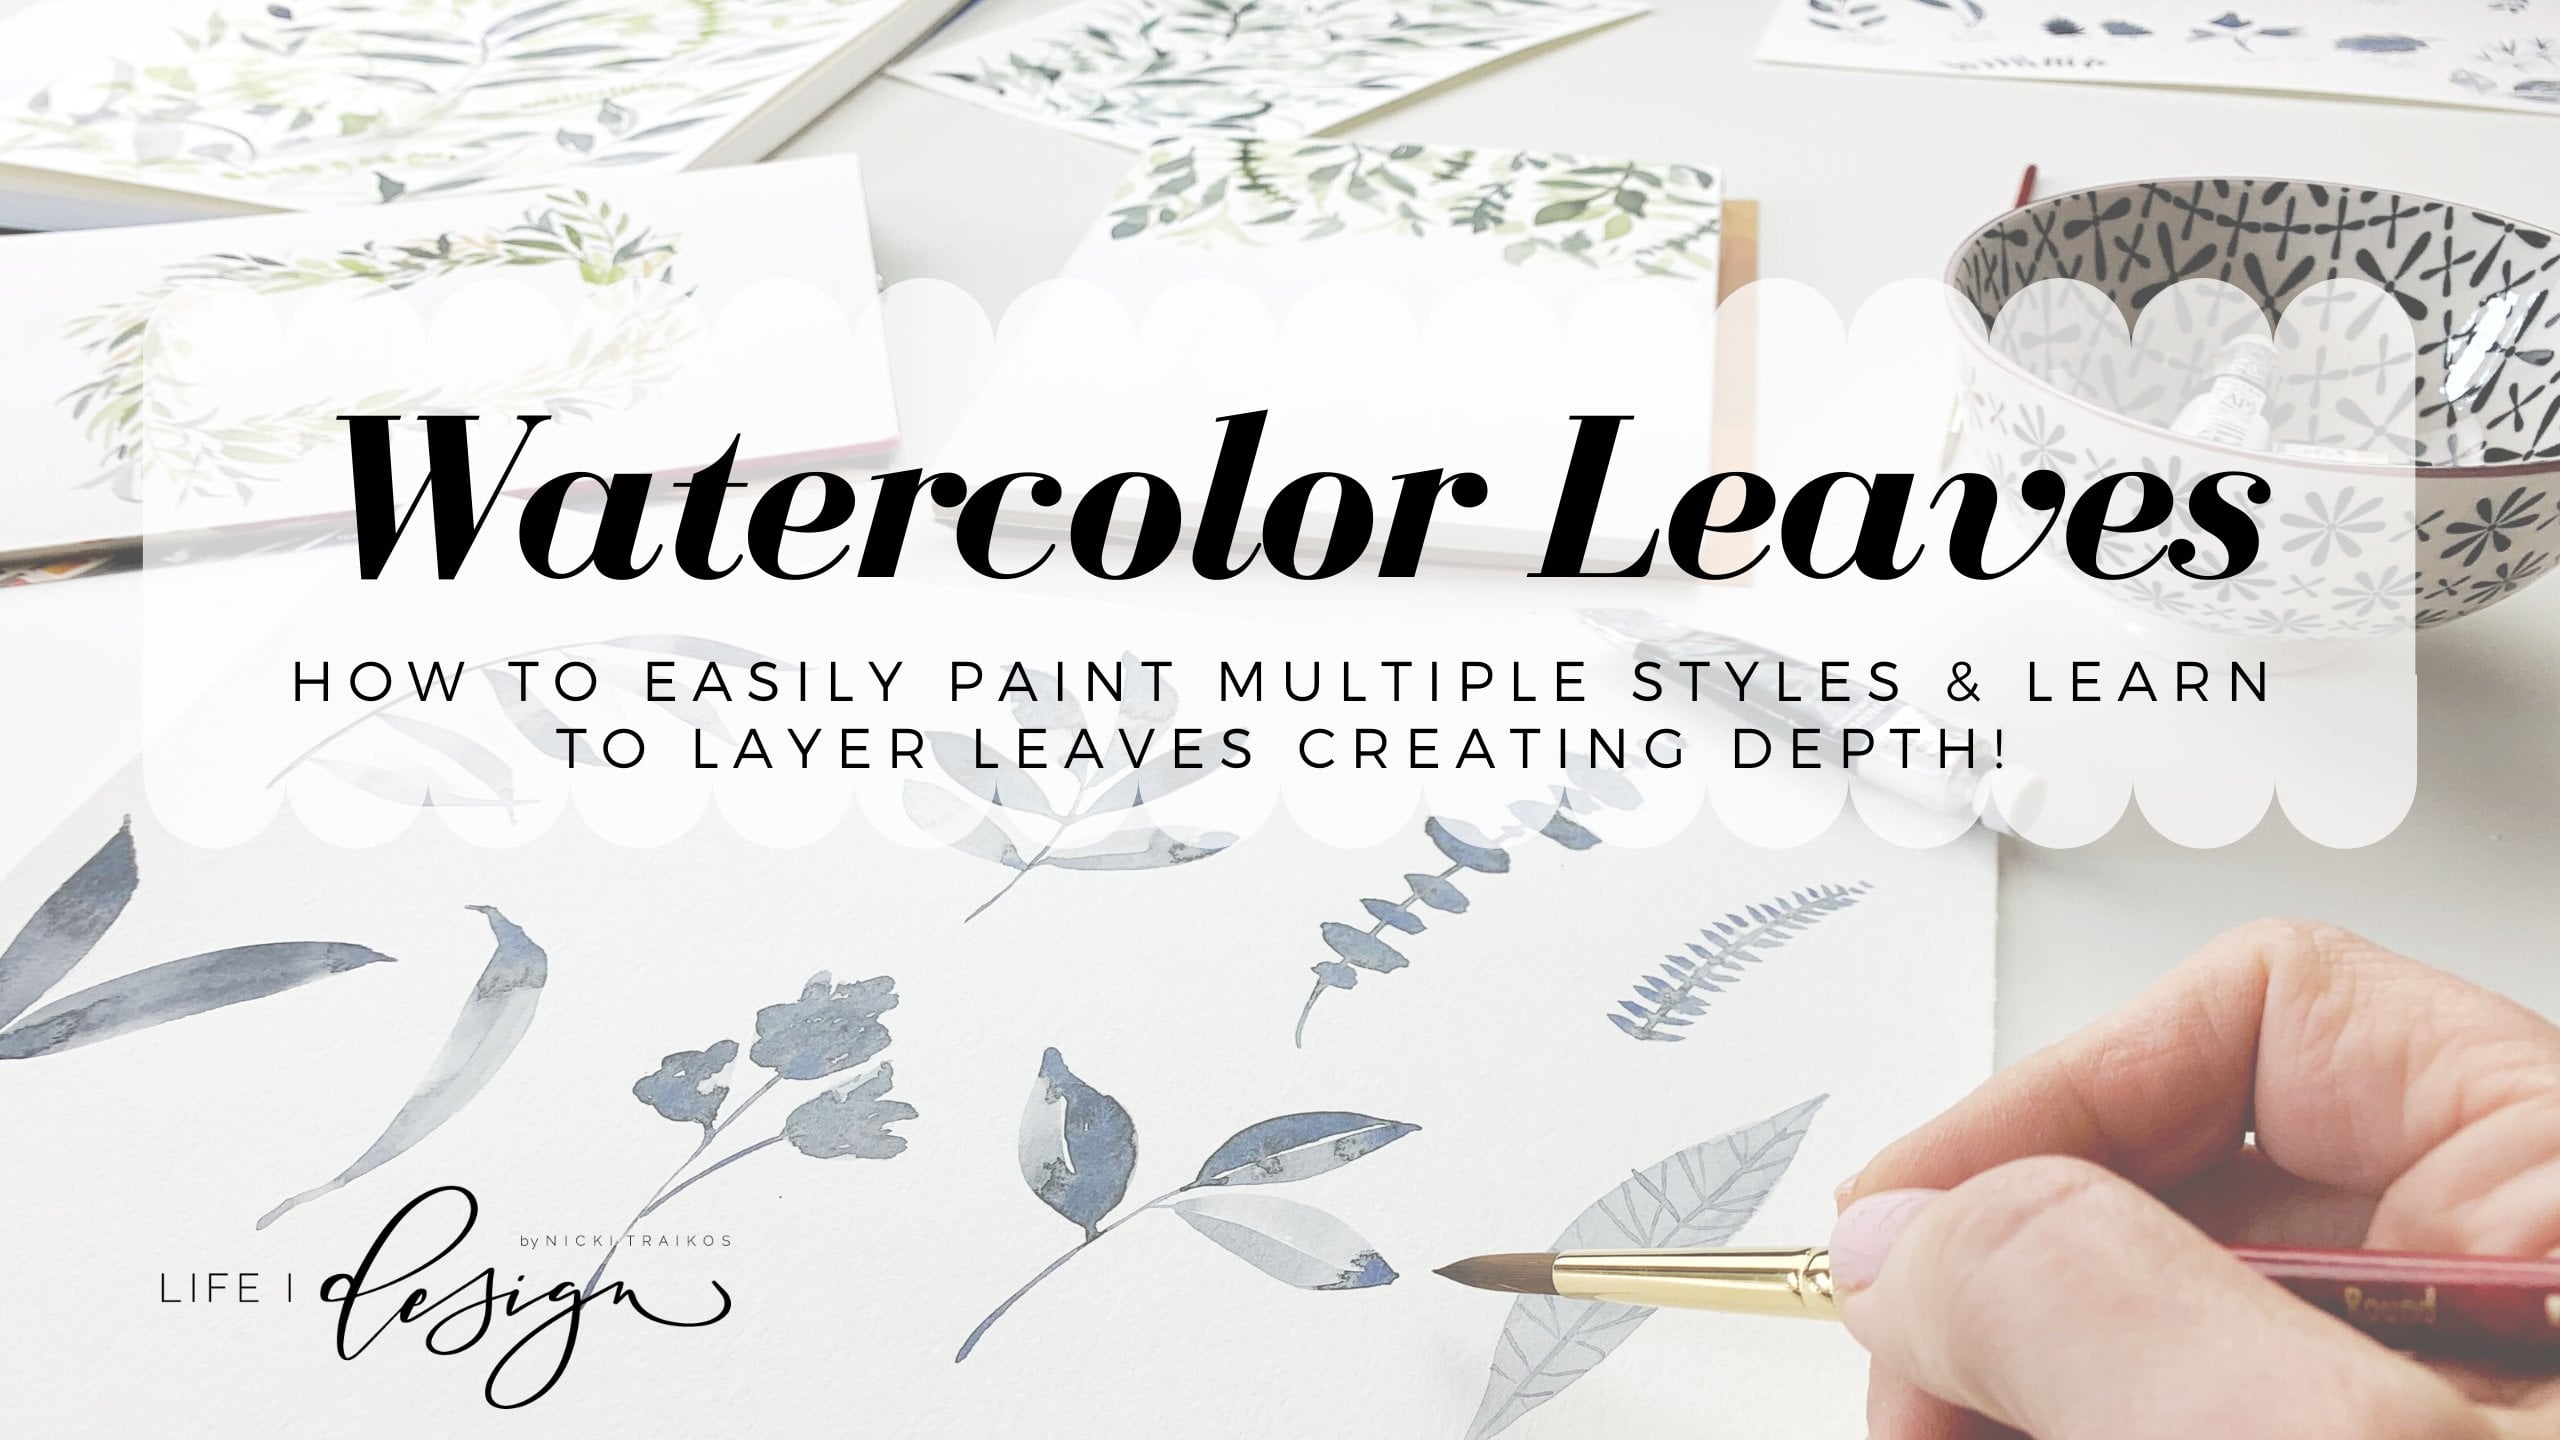
4. How to Paint Large Leaves: Okay, so now that we've painted this stem, what I want to do is maybe I'll turn my page this way is show you how to use the same brush to create a nice, broad loose leaf. Okay, so, pickups, more of this green. I'm gonna make it a little bit more pigmented so that you can see how water color looks when it dries. Girl, this is an example, but I love how there's texture. One difference between the opacity and the transparency and watercolor. Watercolor is basically the only paint that you can create that effect with, and it's so pretty when it dries. So what I want to do is make sure that I have a lot of water and pigment on my brush and I will place the brush on the sheet and I'll exaggerate this a little bit for you so you can see how my brush strokes starts off, then Ah, press down and I'm opening up the broad end of my brush and then I will release is I drag my brush. So what I'm doing is just working the pedal a little bit. This doesn't feel like a great shape, but I wanted to demonstrate that for you and see how I've left a little bit of transparency in spots. So go ahead and add a little bit of pigment here by dropping pigment, and that looks really pretty when it dries. So I want you to make sure that it's not completely even, or that your stroke isn't filled evenly, because that is a really great way to add texture naturally to your leaves. And even here you can see how my brush skipped a little bit. I'm gonna go ahead and paint around it because it's automatically creating a highlight for me. Okay, so that there's nice puddles. And if I wanted to, I could even grab a little bit more of my water color pigment and drop some pig, mention where it's still wet, and then it will just seep in together. So again, very little pressure on my brush. I can see that I have a drop that's ready to drop. I might shake that off, and I'll go ahead and just start heading a bit of pressure and just moving my brush around . So this is one way again that you can create some nice leaves and I'm dragging and just intuitively, I want to create some white space and make my leaf look like again that it's highlighted. And then I have some nice texture. OK, do another one here. But again, I'm just gonna let the leave be, because when we're working and not very flowy, open wreath style, the more texture, um, an interest that you have in the finished product, the better it'll look, it'll look like, um, you've added more effort into your stroke. Then it seems, if that makes sense, OK, so again I'll demonstrate another one. So just adding a little bit of pressure. May will create a little bit of a stem. And I'm gonna build a leaf off of that here again. I'm not even completing the shape of the leaf. Go ahead and build it up here and what you can do as I do want a little bit more definition in there. A white buff, my brush So it's dry, and I'll place it on that leave and I'll remove the water color paint so the dry brush I can remove the water color little bit. Bring it in a bit more. Here had some red on my paper towel. That's OK. We'll go ahead and flip it over. Okay, So that's how you use your brush to create some thin lines. Look how nice and watery that is. So this had less pigment, and I used less pressure for thes pines. And then over here, ones that drives will be able to see the really pretty texture and difference between the opacity and the transparency in this leaf here that we've really easily created. Okay, we'll move on to the next leaves in a second.
5. How to Paint Small Leaves: Okay, So maybe we want a few smaller leaves, and I'm gonna change up the color a little bit. Let's make a little bit of this yellowy gold ish choker tone. And where do I have a clean spot? My palate will go over the green here. Haysom was gonna go ahead again, adding a puddle of water. Remember, I already activated my dry palate when I used the dropper, the eyedropper to drop in some water, just looking at the color here. And I think I wanted to be a little bit more yellowy agree. So let's move over this way a little bit. I'm because I'm staying within a few colors. It's nice that I have a bit of the green in my yellow here, because then my finished breathe will look uniform. Okay, So same brush. I'm going to do a similar approach with the leaves. Just gonna go ahead and make shorter strokes. Okay? So just really fine. Shorter strokes here. This has a little bit too much water. So go ahead and remove or pigment. Go ahead and remove that access. And what i'll do is create again a bit of a stem and just some smaller leaves here because what we want to do is have variation. When we start to build our wreath, we want some fine wispy stems. And we also want some nice, thick wins to ground our wreath. But we also want to be able to put in a few fine leaves in our step. Okay? So, again, I'm not using anything for reference. I'm really don't want as much pigment. Someone's gonna go ahead with some water and what's left of my brush. I really want to just be intuitive again. We don't want anything to reflect completely. Um, what a leaf or winter stem looks like. We want it to be more modern looking, and to have the impression leaves in wintry steppes. So we do that by the colors that we choose, as well as the style of the leaves and stents. Okay, Now, what I want you to see is when you're working with watercolor, you can drop different colors into a wet puddle of water color. However, you want to make sure that you start with the lightest color first and then drop in dark tome. And I'm gonna demonstrate that right now, so I wiped off my brush to make sure there isn't pigment on it. I'll pick up some of the screen. It's a darker green that we used for the other leaves and see where it's still wet. Here. I'll just go ahead and drop a little bit of color. You could even move it around. Looks okay, Okay, And then when it dries, it takes on a really interesting texture and finish. OK, so always make sure toe work dark toe light. When you're dropping in color, go ahead and clean off my brush. I'll demonstrate, adding a little bit of yellow to the greed you'll still be able to see it. It just won't be as prominent, so I can see that I've got a bit of a wet pedal here. Still, we'll go ahead and drop that in, and I'll make sure that I give it time to dry. So this is easier to achieve with higher quality pigmented watercolors. I like the prima palate because it does offer really good pigment payoff. Okay, so we'll let that dry and mostly what that looks like in a few minutes. And let's start painting some Berries for our wreaths
6. How to Paint Berries: Okay, so let's start painting some of our Berries again, using the same brush. Returned my palette here. I have a little bit of red there at a bit more water. Let's see what this end of the palate starts to look like. So it's a little bit on the brownie or tone, but I don't mind, because I want my stems that some dry paint there. I want my stems to be a muted red versus a really bright red. So go ahead and pick up. Have made this little color swatch. I'm gonna show that you, actually. So I remember what the's darker tones look like. So I like a little bit of that navy blue sari. Bring that back into the camera. So this is a little swatch of my palette that I made here. I didn't move that for you, so I know what each color looks like in this custom palette. So this is a little bit of, um, more of a deep purple blue, and I'm gonna mix it with the brown to achieve a little bit more of a maroon itoen when I add some rest. Okay, So the fact there So you can see that. So it is a little bit on the brown tone. Sure What that looks like as I dropped some stems for our Berries. I have a little bit too much pigments gonna wipe that off. Go ahead and lay down. Just a thin line. Okay. So, Berries. We need the stumps to be very wispy, and we want them to come off one another. So go ahead and draw these stems for you. Gannon, turn your page. Don't turn your hand. Turn your page. So you want to always work in the direction where you're going away from your body. You wanted to be comfortable making sure not to get your hands in your wet water color. Go ahead and draw the stems out again. I don't have reference. I'm not too worried about it. Looking super realistic. Says you can see how I got heavier there cause I wasn't working away from my body. Do that. I don't mind them if they don't look super realistic. I just want to be able to lay down some stems that I can play some of my Berries so that color I feel looks good for the actual stem But what I'll do is drop some of this. Red might be a little too vibrant. Go ahead and white boss might brush taking excess. Read off of my brush there. Let's go ahead and make that read a little bit more muted, so that, to me, looks really good. I might even pick up this darker tones. I'm looking at my swatches here, but I know that darker tone of bread. We'll be nice cleaning off my brush because I feel like I have enough right there, mixing it into the brown. I'll pick up even some of this blue. Remember, I'm only working with a few colors. Fourth this brief, and I couldn't see that ever really nice opaque wash of paint. Here it's My Berries will be nice and deep and opaque, so it's nice in your water color to have transparency as well as bold or pick brushstrokes and some nice, thicker elements to. So I'm using my brush, almost holding it at a 90 degree angle, and I'm just going to swirl it. But I can even do is just add some stems at the top of the berry here, and if you want you can leave a little white spot in the berry so that it looks like it's highlighted just like that There. Okay. And even though there isn't an end of a stem here, So at another berry kind of like how that looks. So we'll leave that and just really very little pressure on my brush. We're gonna add just these little buries here because this is what will give us a little bit of punch and our winter. Okay, So again, I like to work in threes and then build from there so you can see that's a really pretty cluster. I don't care that it is filled with Berries. I'm actually really happy with just a nice, pretty, very stem like this one. Okay, there you go. Those were the basic strokes that I'll be using to create a few different styles off our wreath. You don't need to make it complicated. I don't have a lot of color happening. I do want it to be more monochromatic and make sure that again. We've got some nice, bold elements. Everything flows together. I don't care that it doesn't look realistic and that you don't see the actual stems and some of the leaves or the veins. I want it to be more impressionistic and really just fun and light and flowy. Okay, so go ahead and practice thes stems and we'll go ahead and start painting a rape. See you in the next video.
7. Let's Paint our First Wreath Part 1: Okay, I'm gonna show you this re for a little bit of inspiration. I just got these mats off of Amazon, came with a board for the back. And, um, I thought it would be really fun to show you what you can do with your wreath and have. This is another inspiration. And you think about what your project iss. So for me, I painted a few five by seven wreaths that I was selling at an upcoming market. I want to offer something that was wintry and handgun original versus a print. So I picked up these maps and thought, What a great idea for a gift for someone if you wanted to use it to decorate your own home . So that's our inspiration. I'll put that away and I will show you how I've cut some five by seven pieces of water color. So that's the read that we looked at for inspiration. I have some four by six on watercolor sheets as well. So these air just larger watercolor pieces that I am got from a pad of water color my cancer and X l and cut them down to different sizes to use for various projects. I don't want you to feel intimidated by having to paint on a large sheet of paper. What we'll do is just start small. We're gonna work on a five by seven sheet and will have the intention of maybe giving it as a gift for Christmas or using it in your own home decor. Okay, so now we're gonna grab her very technical circle maker. I'll use my shape here. I really like going right to the edge of the page. I'll show you in this watercolor here. I actually think that it's more modern when you can crop something on and have it. I have a few that have cropped over, so it's actually gone over my res. I like that look and may not be for you. You decide what you like todo I didn't put that back. So I'm going to use the tape and used the outer ring to trace my circle. Go ahead and very lightly so you don't want the pencil. Marks should be dark, if you convey. Barely see them pencil mark on the camera than that. I'm happy. So I don't have to worry about erasing too much because it will show through if we're especially if we're doing a light wash of water color. This is just a gum eraser that I love. You can even go ahead and remove any of the darker lions. Make sure you take away your erased or strokes with the government race, or you don't actually get the eraser bits, which it like. Okay, so now we're ready to paint. So what I like to do first is using a very, um, water down. I've got some red on my brush here. Let's go ahead and clean my brush so we'll go ahead and use this brush that I used to Demo can make sure that I have most of the red. Take it off. I don't want the paint to be very opaque, and this is feeling very opaque to me. So go ahead and use my tray here. And I want a water down version. So a transparent version of this green here, Okay. And I'm gonna work a little bit more quickly and intuitive leaks. I find if you concentrate too much and what your brush strokes look like, it can feel really restricted and constricting pay, so I want my brush strokes to be very loose and fluid. I've got a nice sized puddle here, and I'm going to lay down some big leaves first, Okay? And the reason why we're going transparent Because I can always drop in pigment. Afterwards, we'll start with their green. So remember, working away from your body, I'll go ahead and start just putting in some leaves here, making sure that I'm leaving white space and I'll work around the circles. And I don't want you to think too much about it. Go ahead and work in pairs. You can even add a little bit of ah, smaller leaf there. Go ahead and reload against. You can see that my pigment is darker and against later as I drop the breast strokes onto the paper because the paper is absorbing my strokes. Okay, go ahead and pickups more. So just with applying a little bit of pressure at the beginning, I get that nice tip Applying more pressure as I brought in. My brush allows me to create a larger leaf there. I'm going off ethics. I don't want to look to contrived and perfect because your head tends to work the same stroke just easier for your brain as well. I'm to communicate with your hand. So again, just very intuitively. I just want these first leaves to be really nice and large will go ahead and take a second to look here to make sure not going too far outside of my circle and a smaller leaf there and I didn't notice. I created a longer leave there, which is fine again. We're going to layer. So sometimes I like to work wet on wet meaning. I'll drop some water color onto wet pedals, and then we'll go ahead and we can work on top of dry water color. There we go. So there's our first layer. So go ahead and pick up some of this pigmented watercolor here. I want to define a little bit. So where my leaves are a little bit wet still, so focusing on the tips of the leaves, I'll go ahead and drop a little bit of darker color here. These ones are kind of dry, so they won't. The water color won't move as much, so I think what I'll do is wanted to demonstrate that you will go ahead and pick it up So just with a clean brush and a most of dry brush, I'm picking up the excess water color. So doesn't pool And remember that yellow that we mixed? So it had spend my large palette here. I'm gonna pick some of that up to, and I think that it'll look really nice if I drop a bit in some spots where it still feels , which okay again, doing that means that it will just look really pretty when it's all done time. So cleaning off my brush again. I really like this yellow that I'm working in, but I kind of feel like I want it to be a little bit more golden, so it's take a bit more of that yellow, and I'm okay with the fact that this is a bit more opaque. I want the smaller leaves that I'll be bringing in to be a little bit more opaque, and then I can always water it out if I choose. So we started here the first time. I think I'll go ahead and begin here, and I'll odd a little bit of that yellow, so I'm going over the tip of the green and that's okay I kind of feel like this. Yellow is maybe a little too golden. So what I'll do is maybe at another stroke of it here, it's going here. It just feels a little too bright for what I was imagining. So that's okay. I'm gonna add a bit agreeing to it, and we're gonna make it a little bit more muted. Okay, let's see what that looks like. Can just gonna add a few. So I want you to think about the smaller stems that you worked on even if you were just to create, um, very small breast strokes in between. That looks nice, but go ahead and fill. And I'm almost working in, I guess like a teardrop shape. Here, let's build a stem and just again, very intuitively go over top of this green so you can can't tell if it's above or below that leaf. But it's starting to really fill in. You're wreath here, but moving our little puddle of water we're going to I feel like the Aedes a little bit of color. They're gonna go ahead and work in short strokes. I'm gonna leave a little bit of white space. I feel like white space. It's a nice way to have your I rest when you're working in a wreath, and I'm not looking at composition yet. I just want this to be really intuitive and flowy again. Turn your page. I don't want you to work with it. Just being in one direction. I want you to turn your page and really play around with fitting in color and different styles. That leaves. So we'll take a second there to see how it's starting to look. You can see I do have some leaves that are almost completely dry. And I do have some pedals here, which again just makes it look really interesting. Okay, go ahead and mix a little bit of the blue, so I'm picking up the blue here. I didn't show you that picking up the blue here and I want to add that to the green. So I'll pick up a little bit of green from this palette, and I'm almost moving into the side, so I'm gonna add this greeny blue tone and again, I don't want it to be very opaque. I almost want there to be a fine wash of this blue color, and I'm going to paint something in between the large leaves as well as thief thin leaves
8. Let's Paint our First Wreath Part 2: Let's go ahead and just drop a little bit of a darker tone. It will start here. You can see how that's a little bit more pigmented. Actually wanted to be a tiny bit more blue. Yeah, that's a really nice I picked up a bit of the green there. That's a really nice in. Keep bluey green for a little bit of definition. I'm gonna have a look here. I feel like you can probably go over Chuck and remember leaving white space so that looks unintentional and just really natural and flowy changes. Little clusters of small leaves. Kind of feel like I can probably add in something here. Let's bring it over, though. And see how that just pools nicely. Going to dry beautifully. Okay, so looking again, a composition. I feel like I don't like it to be completely proportionate balanced, but I do want it to make sense and feel good when you're looking at it as a whole. Maybe let's put one right here. Okay, Cocotte that's starting to look. So now let's go ahead and drop in some of our pine. So again, cleaning off my brush and I think I want those to be really transparent, so I'll grab my references. I have it to the side here and cry. So there is our pine right there. We've added some of our large leaves. Some of our small leaves will do our Berries at the end, But let's add a few of our point now because I'm working a lot smaller than I didn't my practice. She I think what I'll do is I'm going to go ahead and grab my favorite. It's a fine, a quash brush, and I want to make sure that I don't do anything to the tip. I want the chip to be very fine and pointed, and let's pick up some of this. I was thinking Berries, but we're actually going to work on her Stems, thinking about what color here I want it to be. So go ahead and use my tester, and I think that's a bit too yellow. So I'm going to grab some of this green, drop it down and see what that looks like. And I think that'll be a nice contrast to what I'm working with here. And I want you to think about having these, um, Pines sort of stick out and to be a little bit more bold. So I'll go over top here and remember, we just want to create fine with me. I had a bit too much water on my brush. It's OK. I wipe it off and you can see how it's pulled. I'm not stressed about that. I don't get a worry too much about, um things like that, because again it's very intuitive and flowy versus Sorry. Concentrating can talk versus being realistic. OK, you can even add just a few stems here. So we're like how that six there. I'm gonna wash off my brush and just tuck in a little bit here. I didn't like how that finished. So go ahead and make that look like it belongs in their pay. That stem member one. Go ahead and pick up a little bit more paint. So I like how that's filled in there. Try maybe at another small one in here, I'm gonna tuck it in so it looks like it's behind this one. Go ahead. And just with very little pressure, you can see I've even had to go back to make sure that the brushes touching the papers So I'm just kissing the surface of the paper, turning around, member to always work your strokes in the same direction so that as a little bit more interests, you can see how that pops a little bit. I think I'm going to put one more. Probably in here. I'll took it in behind this. Leave right here and overlap it. So I've got a wet pedal here. Still, and that's okay, because this one can be a little bit more subtle versus a strong is this one is here. I may have been looking at the 1st 1 and I'm not completely crazy about it. I'm gonna show you a trick that we can use. There we go. So I'm not crazy about this one. I feel like I had way too much paint on my brush. So again, with a dry brush, I can even go back and use this one because it's a larger brush. Absorbs more so you can see how my brush really picked up all that excess paint. By picking up the excess water color, it'll soften these pines a little bit. Okay, great. So I feel like I want to add a few more leaves before we put the Berries in. So using this brush is well, I'll go ahead and create again another loose, watery puddle. I don't want it to be too opaque and looking at my wreath here. Maybe my wreath will go this way, so it sort of looks like it's starting in that direction. Oops. Or perhaps it will even sit this way again. We're working intuitively, so we don't know for sure until everything is done and it's dry. That's when we'll get out our Mac. We can decide at that point. So I think in here I just watch a little guy. That's nice, because I feel like that balance is here. Yeah, I feel like that's really all. Maybe in here. Yeah, I like that. And then we can put the Berries on top. So what I'd like to do is make sure this is a little bit more dry before it put in the Berries. But let's go ahead and see how that starts to look so again, with our very the same brush women make sure our tip is really nice and fine. I'll go ahead and pick up just a little bit of that paint, and I feel like I want to put some Berries here. So there's my very thin, very stem. I'll go ahead and start hope that got a little too thick because I didn't turn the page. So again, make sure you turn your water color so that your stems not you thick and go ahead and start putting in. You're Berries and I don't mind that it's getting to put early. There got a little under control. Little trick. What you can do is take some of your paper towel and it absorbs almost instantly songs. You catch it when it's wet. Maybe we'll let that dry completely before we go back in. But there you go. It's almost completely disappeared there. OK, so that's one berry stump. He will add a few more buries here, turn my page. I like to put one here. I think Go ahead and make our stem a little bit longer, adding, in here are guides for where we want our Berries at you. Okay, just again. Contrast. So I want this to be more opaque, so not as transparent and washed out as are other strokes. Go ahead and put one here just like this, adding our stomachs again. Go ahead and pick up more pigment. So I want again the Berries too Stand. Oh, you can see I'm putting some on the chips of our stem, but also around as well because I feel like it needs a little bit more color definition. Que may well put one in here can just trying out. So I don't mind that it bled there. Think that'll dry really basically and adding a few more Barry's there and I think one more just in around here. So let's go ahead and chuck it in here. I want to make sure it doesn't compete with that pine there, so we'll go ahead and drop in a few Berries here, but this one will be a little bit more sparse. Okay, so there you go. I've got some Berries in there for interest and good. Like this looks okay. I probably will go back when it's dry and add in a few more, um, leaves, or I might leave it again. I kind of do a few in a row. I may have four or five that I'm doing at a time, and then I can always go back after I finished the 1st 1 to see what it looks like when it dries. Okay, so there's our first read.
9. Let's Paint a Half Circle Wreath & Letter a Word: Okay, so let's work on a different reason. But this one I'm thinking what we'll do is we'll do 1/2 reef. So what I'll do is I will draw using the inner part of our very technical tape ruler. And I'm just creating 1/2 circle. Okay, Maybe we want something that's a little bit more modern. I want to demonstrate how you gonna add some words within your wreaths to or if we wanted to create something that just has a little bit of a flow. Sound good. So what I'm going to do to start is I'm actually going to start with a stem. I think of pine needles again, intuitive. I'm just gonna go with the flow and that Let's see what happens. Let's see how it unfolds. It's to that. So the color is not right for what I'm thinking of. And that's OK, because what I'll do is I'll just pick up this dark green and because my water color lines are wet, I literally can go in and just touch the stem. And it'll feeling with that darker color. So, like that much better. So again, working on the pine, he knows maybe it'll be a little bit longer and wispy er because we will be layering over chop clusters here, So using the same you leave that demonstrated at the beginning. What we're doing is really still developing muscle memory. Just like I teach with my lettering. Every time you drop your brush, you are practicing working on the strokes and you're building your confidence as well. There we go. It's our 1st 1 And I wonder what it would look like if I I did it there. I'm not going to, but I was just thinking Might be nice. Let's go ahead and pick up a bit of water. And from here, I think I'll work downwards. So from about here hot and some leave kind of go in the opposite direction just to make them flowy and to compliment. But contrast is Well, I'm gonna go ahead in touch this stem here so I can drop in a little bit of contrast in green. See what that looks like. He's almost remind me of flowers somehow to Okay, that looks good. We will go ahead and add a few leaves here. A swell Go over chop again. I don't mind if it bleeds together, even bring in a leaf here, see what that looks like. You just yours layering and being really confident that it should look watery and flowy. Hey, maybe as we go to the end here, I want it to be leaves to be a little bit smaller. We're not completing the circle. I didn't take a budget for color. We kind of want to make 1/2 wreath. That must feel like I need to come out a little bit here. A swell that there. So it's had some jerker almost opening up. So just impressions of leaves here got to wide here. But that's OK. So with very little pigment on my brush, I'm really just creating the impression of a leaf there. I'll do that Here is, well, toe layer through here as well as here. So I didn't pick up any other pigment. Maybe just a little bit. But I do have more of a drier brush so that I can create the impression of some leaves there. I'm starting to like that. Maybe do that here a swell here because I kind of feel like they they're going in a single line which is okay, I guess I almost don't know if I want to add large berry stumps. I'm kind of liking that. It's monochromatic, actually. Before go ahead. I feel like in each about something here. Maybe we will add another pine system right over here. It's probably work better if it was dry, Too much paint on the tip of my birth. Okay, go ahead and again. That kind of compliments. That tone there, the same green. I think I actually ended it, mixing it up. See if we can pray that in key Bluey Green again. I really like that. I'll go ahead and take off the excess of just picking up a little bit of color and go ahead and drop it in here and remember, because it's still wet. All I have to do is drop the water color and it will travel where it needs to travel. Let's go ahead and had it's a more pine. He hurt Here is well, I can just working intuitively. I was like, I need something here. We'll go ahead and with a dry fresh please. Right there, There we go. So it comes out just slightly too much maybe. Who knows? Again? I don't want you to worry too much about it being perfect. I really like that monitor. Um, look, I am probably going to keep it that way. I don't think I'll and Berries to this one. But what I want you to see is I want you to think about because you know me for lettering and calligraphy. I want you to think about what it would look like to add a little bit of lettering before you commit and add it to your final piece. Think what I'll do is a letter to words here, a letter, peace and joy. Go ahead and just tear this. So that's why these little strips are quite handy. I like to keep them so that I can do some tests. So I will put this one to the side and I think using a muted red so we'll use this color that I mixed for the Berries and see what it looks like if I contrast it versus maybe using one of the yellows, let's go ahead and let her the word joy and see what that looks like when we added to our wreath crisis is a really great tip you want to add? Um, some lettering, but not sure how it
10. Watch as I Paint a Wreath in Real Time: okay for this last one. I think I'm just going to go big and intuitive. I probably, um I'm not even gonna talk myself through the grief because I want you to see how I work. So play some music for you as a paint, but I am trying to change my brushes up. This is a much larger brush. I will stick with the same color palette because you can't see my desk right now. But it looks so pretty cause everything is balanced and is the same color. Um, and I'm just gonna paint and let you watch as I go. Okay. Here we go. Okay. So I'm really liking how this is all kind of blended in together. Thorough, very strong lines. And when it dries, all of this water color that have running together is gonna look so pretty. I'm really happy with this. I'm gonna go ahead and let it dry. And then again, what you could do if I take some of that lettering that had created earlier if we go headed , make ends a bit shorter here. So place within my read when it's dry. If I decide that I want to put some lettering in the center of the reef. I can. I can even use my jet pen to add a little bit of a bit of lettering. But look at how pretty and sweet that looks. So again, if you think greeting cards will are make such a great gift. And what better way Teoh share your art, but to make something for someone? Okay, so in the next video, I'm gonna show you something simple that you can do with lettering and adding just a little bit of a stem. Casey on the next video.
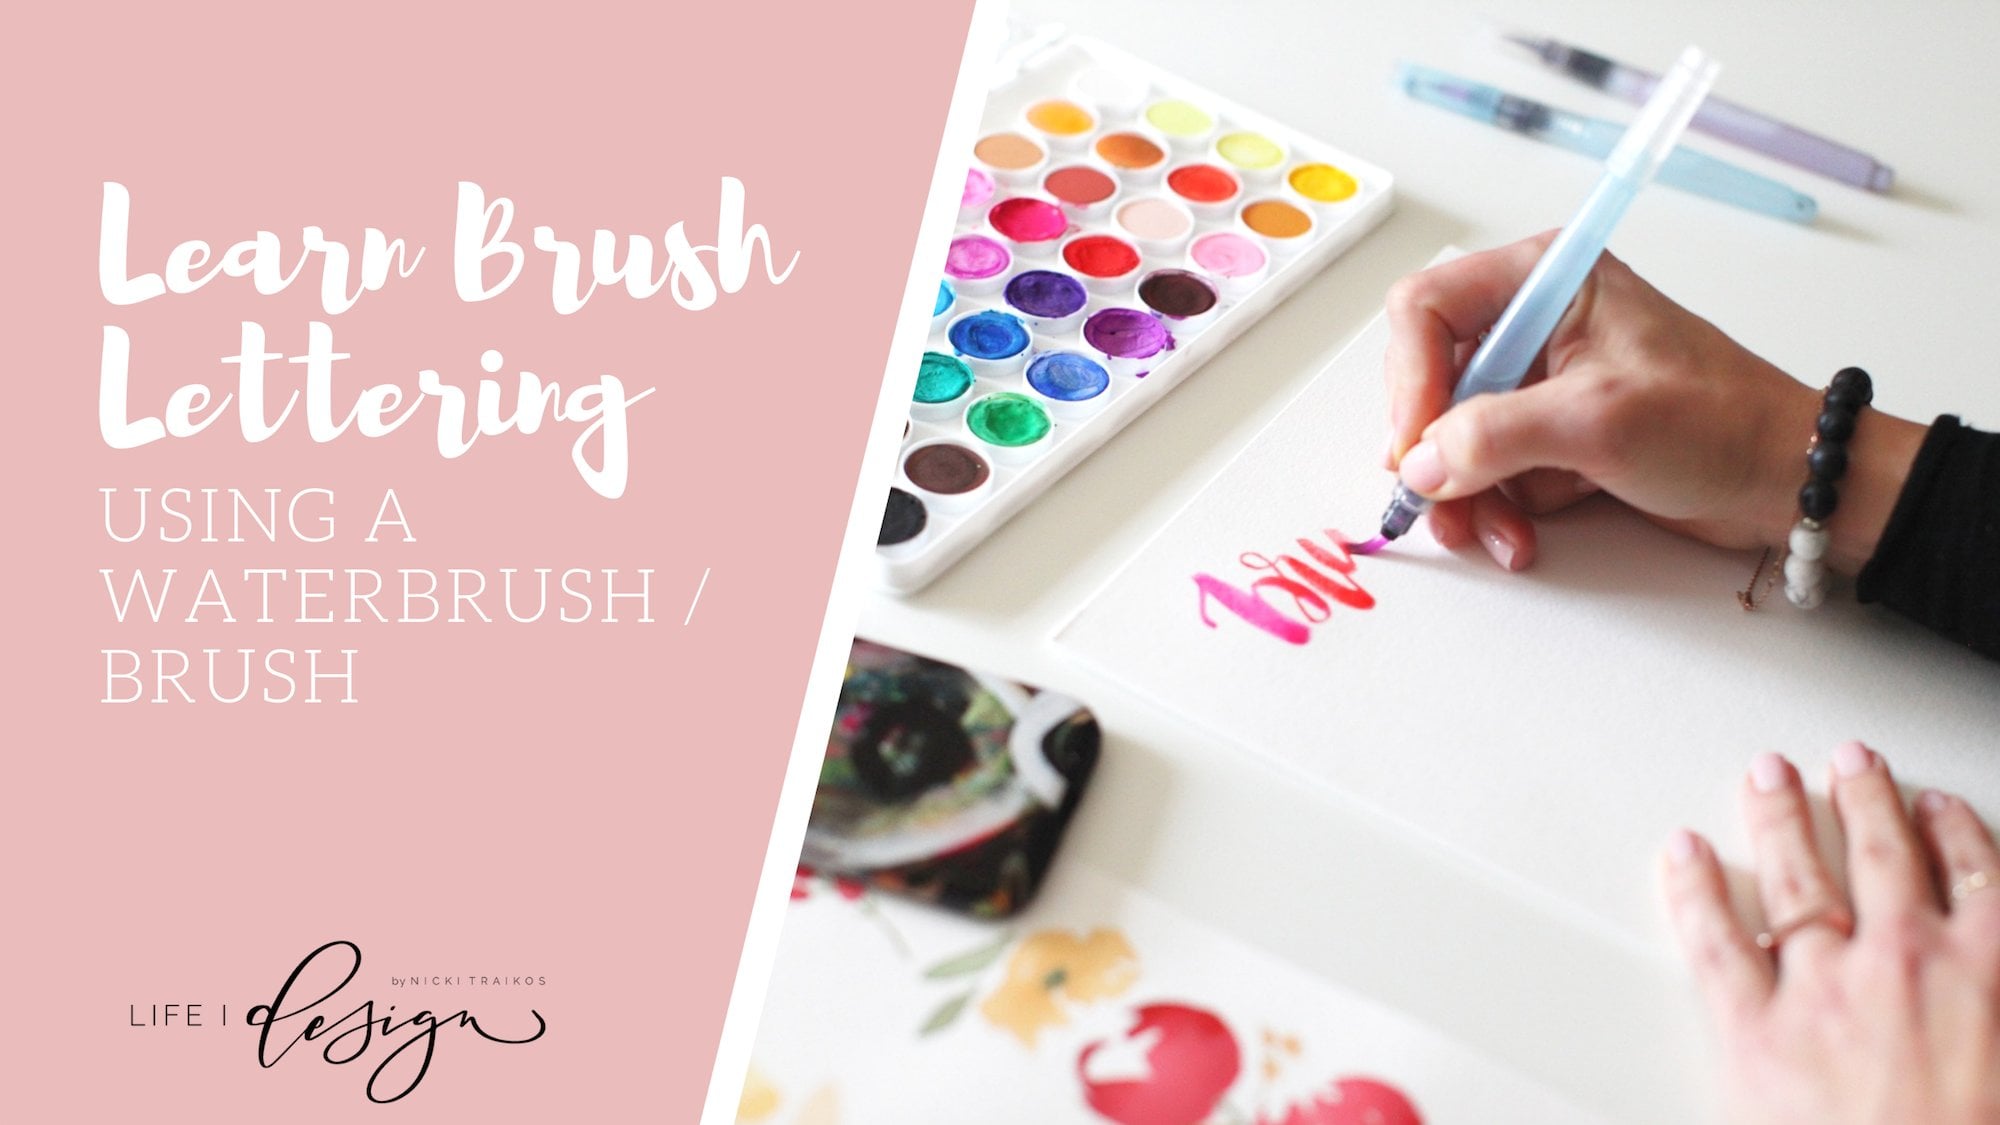
11. Letter the word "Peace" and paint simple berry stem: okay for this last demo? What I want to show you is how to letter a word again. I'm gonna use my m a quash brush just because it's one of my favorites to use for lettering . I think we'll do the word peace. And then we'll just add a few stems underneath the word. Okay, So using my brush again, if you haven't taken a lettering class with me, I recommend that you to especially this water brush lettering because it is so easy really been. Paint the stems with the same brush so you can see what that looks like. So I wanted more of a gold yellow, but we'll go ahead and use this yellow now and then. What I could do is pick up some of this more Gordon color causes Just look like it's a bit on the orangey side. I must have had read my brush. Go after dark in some of the strokes here while the paint is still wet. Okay, so let's do peace. And then well, let her the words on earth. So you can see I haven't put down any pencil lines. I'm just going to wing it. I am all about not being perfect. I I think when things are done by hand, it's nice when they look like they're done by hand, earth head and that just a bit more pigment to my wet lines. You can see with the same brush. I'm able to create monoline lettering as well as nice modern clicker ceased out lettering gonna pick up this reddish brown and then add a little bit of a deeper Louis purple, too. Hey, so what I'll do is go ahead and just outlying it. That's really nice, actually, like that contrast with the lettering. So again, Bradbury's to this one. I am all about minimalistic and modern again. This may not be your style. If not, you can add more detail. But sometimes I would even just leave the stem as is. But we had a few Berries to it. Okay, I think that looks good. Go ahead and rinse off my brush. Pick up some of this thinking about what Red would go nicely with. That looks good, actually, Maybe I'll pick it up right from the palate and very fine Berries. To begin with, just add a pop of color. So this is more Christmassy versus winter theme. But we are approaching the season like just how very fine and simple that looks. I just wanted to give you another option to use some of the elements we learned for our wreaths and apply them to different things. So this would make a really pretty greeting card again, maybe even a tag for a gift, and just let it dry and see how you feel about it, okay, And the next video, we'll wrap up some project ideas and you'll see in the next video.
12. Thank you!: I hope you enjoyed it, and you're inspired to practice your watercolor painting more. Using a limited palate and breaking down simple elements of the reef really will help you to build your painting confidence as you explore this medium, Or remember that practice will help you grow your techniques and knowledge. With working with watercolor, you can even practice blending your own colors and creating your own unique and interesting designs. Thes winter reeks that we painted together would make great designs on stationary, even wrapping paper or perhaps greeting cards. And well, I invite you to have a look at my previous classes where I teach different styles of calligraphy as well as digitizing to help get you going or to provide more inspiration for you for your class project. I'd love to see a photograph of your painted breathe and even share with me what color palette used. I can't wait to see what you upload to the student gallery. Make sure you follow me as I create and publish more water color in painting classes. Thanks again and see you next time
 Nicki Traikos, Letterer, Watercolorist & Instructor