Transcripts
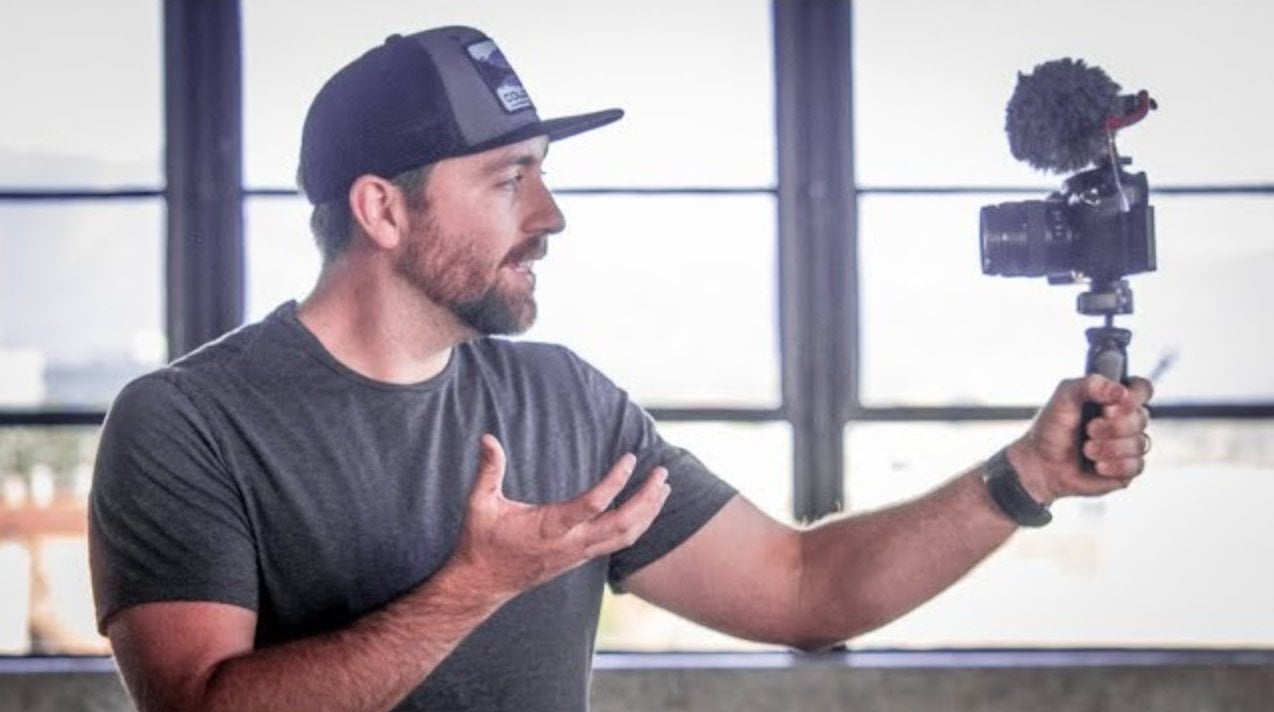
1. How To Film YouTube Videos: Welcome to your course on
how to film a YouTube video. What you're going to learn
is how to set up this. We're going to go step-by-step on how you set up your lighting, your audio, your camera, basically everything
you need to get going and start making your
own YouTube videos. My name is Jeven Dovey
and I've been on the platform for
around six years. In that time, I've learned a
ton about how YouTube works and the things that
you need to do to find success on the platform. Now, doing a talking-head video like this where you're
just talking right to camera in a spot in your house
is the easiest way to get started and it's also
one way that you're going to be able to stay
consistent on the platform. If you can build a
space that you can come back to and just press Record, it's going to make
it a lot easier to actually press Record. We're going to go through
all the things that you need to think about
when you're filming this kind of a video
and you'll see a few different
variations of how you can set up this kind of a look for the types of videos
that you want to make. By the end of this course, you're going to
be ready to start filming your own videos. One thing I want to mention
before we get started in this course is that I'm
going to talk about a check and when you're
first starting out, it's a good resource to use because it's going
to help you make sure that you don't miss anything when you're setting
up your shot. Let's just dive right in and
we're going to get started on how you film a YouTube video.
2. Gear Prep: I've provided a checklist. This is dummy-proofing
in the entire thing. I've broken down my step-by-step-by-step in an
easy-to-digest checklist, so that as I do this, I'm going to follow
the checklist that I have created
for you guys, and as I go along, follow along on the checklist
and you'll be able to see how everything comes
together to build this. Let's get into the
demonstration on how to build this kind of
lighting-audio-camera setup. Now the first thing that you
do when you're getting ready to shoot is you lay
out all your gear, and the reason that
you do this is just so that you
don't miss anything. One of the worst things that can happen is you get
ready to shoot, you have everything set up, and you're missing one
connector cable that basically connects your
audio to your camera. This is something
you do before you leave if you're on location. If you're at home,
just lay everything out before you start
setting up just to make sure you have everything and you haven't lost
a piece of gear. Few simple things that
make your life so much easier when you
actually start shooting.
3. Find a Background: All right. So all
your gears good and now you are ready to
start setting up. Well, the first part is
figuring out your background. When we talk about background, what you want to
find is something that makes sense for what
it is that you're shooting. If I was shooting a
piece about film making, I wouldn't put a bunch of
dolls and makeup behind me because that's not
what I'm shooting. I'm shooting something
that has film making in it so I'm going
to want to put my computer screens behind me. Whatever it is that
you're shooting makes sure that you
have something in the background that
makes sense for the subject matter of what
it is that you're shooting. If you're just trying to do a basic background or you just want something that looks good, but it's not necessarily like exactly what the
subject matter is, just think about
different things that you can put
in the background. Could it be windows, could it be a long hallway. Is it that you want to be outside in nature
with the trees? You got to think through
the background because it's important and if your background doesn't make sense for
the subject matter, or if it distracts from the subject matter
where people are thinking, why is this thing
in the background, then it's going to detract
from your content. It's super important
to think about, and that's why I put it towards the front of the
whole process because you want to make sure that
your background makes sense before you start
setting everything else up. If your background
doesn't look good and you set up all your gear, when you go to press
record and you realize that this background looks awful then your
wasted a bunch of time and you wasted
a bunch of energy, especially if there's
more people with you besides just you
working on the project. First things first, think
about your background. Try to come up with an idea. Try to come up with a look
that looks good in camera. You don't necessarily
have to set your camera up to get the shot. You can hand hold your
camera, walk around, just look through the
camera lens and see what different
backgrounds you can find in the space
that you're at. Here is a sample of a background where I
just wanted it to look good and try not to necessarily tie it exactly to
the subject matter. I just wanted
something that looked decent out of the
space that we had. As you can see, there's a lot of different angles I could
have chose in the space, but I decided to
do something nice with the windows just to give it some texture back
there so that when I lit my subject and I
put them in the shot, they have the focus, but as a whole, the
image looks good.
4. Setup Camera: Okay so now that you have
your background idea, what you're going to
want to do is set up your camera and frame your shot. You've eyeballed it or you've used your camera
to kind of find, roughen what your
shot is going to be. The next step is finding the level that you're
going to want to shoot it. That's about your eye line. You're going to
make adjustments to where you're shooting later, but the first thing
you just got to do is set up the tripod and put your camera on it and frame up what you think
you're going to get. Now if you're sitting down, obviously the camera's
going to be lower. If you're higher up, you're going to want the
camera at eye level. You never want to be
shooting up at someone. When you shoot up, it looks really bad. It's just not a pretty angle. If I was shooting like this, I'd have to tilt my head down and you get that
really awful look. See, here's my
mic, but it's just like it's a very fattening, just gross look overall. What you want to do is shoot eye level or a little
bit above eye level, because having a
slight tilt down actually makes people look
much better in camera. You have this eye level shot or just above eye level and you
just got to rough it in. What we're doing first though is trying to figure
out the background. Because I'm sitting, I have
it about eye level where I sit and I set up this shot. Now when I sit, it's obviously going to be
a little bit different. The idea is just to get the
camera setup and kind of get you in the space of what
it is that you're doing. We're not worried about
the other gear yet. We're just setting up the
camera and the tripod.
5. Light Background: Start your cameras setup. You have the background, roughly what you think
you're going to get. You have to light
your background. If you're using a space that has natural daylight
spilling in, then you could just expose your camera for the background. But if you're like this,
where you're bringing lights in to set up
your background. Maybe you're adding some
lights like I have back there, some colors, or you
have some lamps. There's different ways that you can add light to the background. What you're going to want to do is light the background first. The idea being that once
you light the background, you can get your exposure roughed in where you want to go. Then from there when
you light your subject, you make sure that
you're not having a huge difference between the background and
the foreground. For the background, take a look at some
different backgrounds round on the web of different videos that
you like or different people that you like
when you're watching content online or on TV, see what's in the background. Sometimes people
use small things like lamps to give
it some texture. They'll use color lighting. Sometimes they'll just put like a shaft of light
across the wall. There's different ways that
you can bring in lighting that subtle but gives some
texture in the background. What makes sense for the
background that you have? Once you see your background, take a look and if
there's no lights whatsoever and it's
falling a little dark, that's when you got to think, maybe I'll add something to it. With these lights off, it's a pretty dark background.
It could work. It definitely does not have the same texture that it has
once I turn the lights on. The idea with the
background is just to give your image
more depth and it's separate from your foreground because we're creating two
different areas to light. When you have a background that's lit separately
than your foreground, you have more control over
your image as a whole, and you can create this awesome textured look where the background looks
really professionally done. Then your foreground is lit nicely so that it works
well with your background.
6. Camera Settings: Now you've put some lighting
in your background, and you're ready to dial in your settings to
make it look good. This section in particular
is just to get you going so that you know what to do with your camera
to start shooting. The first is frame rate. I shoot everything in
30 frames a second. That is an aesthetic choice
for me that I have chosen. I think it looks good
when you jump down to 24 frames a second which is the standard for
Hollywood cinema. Basically, you're putting
less frames in each second. What happens is the footage actually looks a
little more chopping. This doesn't mean that you can't work with 24 frames a second. A lot of people do, and a lot of people think it's the standard for
creating videos. But I know a lot of you
this doesn't really matter. What only matters here is that you do what
looks good for you. I suggest shooting
a couple of videos, shoot one in 24, and shoot one at 30, and watch them side-by-side
so you could see the difference between 24
and 30 frames a second. This way you could see aesthetically what
looks better for you, and what you prefer to shoot in. But what I've found is that
especially for this content, for a shot 30, and people
loved the way it looks. Even my high-end clients, I've shot 30 for all of them. They all love the
footage that I get, and nobody really cares as
much about the frame rate. The next setting
that we're going to talk about is white balance. White balance is how your camera is reading the color of a scene. Light is broken down
by color temperature. At one end of the
spectrum you have 10,000, and that's like a cloudy overcast day and
at the other end, you have a 1,000 which
is like candlelight. To our eyes, we don't
see the difference. But when you're using a camera, the camera will pick up
the difference between daylight, and say candlelight. Candlelight and incandescent
lighting is orange, daylight and when you get into cloudy and all that it's blue. In the center, you have a mix which is
fluorescent lighting. Now, this is important because depending on
where you're shooting, you might have a mix of light, and you have to deal with that. You can't walk into a situation, have daylight spilling in, and then light your subject
with tungsten balanced bulbs. What will happen is
that your subject will turn bright orange
because you're lighting them with orange light. Same thing will
happen if you're in a space where it's all
tungsten lighting, and then you bring
in say a fluorescent or an LED light to
light that person, they're going to turn blue. You have to understand
what color temperature is. You have to look at
your scene and first ask yourself what lighting
do I have in the scene? Is it daylight? Is it tungsten? What lighting do I have? When you purchase lights, you can make a choice
either daylight, tungsten, or a by color. What by color is, is basically it gives
you the ability to adjust your Kelvin from 5,200 down to 3,600 and basically you can dial it in depending on
what situation you're in. All the lights that I use
are balanced to daylight. They're all at 5,200. The reason for that is most of the situations
that I shoot in, I use daylight-balanced because I normally have
daylight spilling in. For you guys when you're
trying to figure out what color temperature you should be shooting at
your white balance, I would say first set it to auto and see what the
camera adjusts to. Then just look at your lighting, and do you have daylight? Is it a little overcast? Are you in tungsten, or
are you in fluorescent? There's usually settings for
each of those as presets. You want to use a preset
because when you're on auto, the color will fluctuate depending on what it
sees in the scene. If you move around a little bit, it might try to re-correct the color up and down
the Kelvin scale, and you'll see this
shift in color. That does not look good
while you're recording. You want to lock in
your color temperature, and that's why you
would use the presets. A lot of cameras also have
the ability to dial in your white balance manually where you can put in
the number of Kelvin, but most of the time you
can just use a preset. Just look at your scene. Are you working with
daylight-balanced lighting? Then you're going to put it
on the daylight setting. Let's talk about shutter speed. Shutter speed, I've said has
to be at 160th of a second. Now the reason for
that is because we're shooting at 30
frames per second, and your shutter speed is
double that of your frame rate. Now why the shutter speed has to be doubled out
of your frame rate? While it comes down
to motion blur, and the threshold
look for cinema is achieved when you shooting double that of your frame rate. If you can't keep it at 160th, and you've used all your
other exposure settings and you still have
to bring the light down in your image, that's where ND filters will
come in and basically what an ND filter does is its
sunglasses for your camera. When you're outside, there's a lot of situations where your camera
settings won't work to get the exposures
that you need and keep your shutter
speed at 160th. Another aspect of
exposure is your ISO. When you're setting your ISO, you don't want to push it too
high because what happens is your image gets very noisy
and it doesn't look good. The idea with ISO is you
want to keep it at its base, or just above it depending on what camera
you're working with. With the GH5, the
base ISO is 800. I'm not going to try
and shoot above 800. I'll push it to 16. In this setting right here, I'm shooting at 1,600. But you're not going
to want to go beyond 1,600 because your images are going to start
getting noisy. But you can go under that. If you are outside, you can shoot at a 100 ISO, and your image will look great. For ISO you have a
range to play with, but don't push it too
far above your base ISO. If you're not sure what
your base ISO is that's something that you
can quickly find doing a Google search. Just go and type in your camera and see
what its base ISO is, and try not to push it
too far above that. The next thing that you're
going to adjust when you're doing your camera
settings is your aperture. Now I would set your shutter
speed and your ISO first, and then go into your aperture. Your aperture is basically how much light is coming
through the lens. You can make the whole either huge or you can make it small. When smaller, less
light comes through. Edit F2.8 which is as big as
possible on a lot of lenses, you get a lot of light
coming into the camera. Then in reverse when you're at F22 which is a tiny pinhole, you get very little
light coming through. You'll use this to dial in your settings to get the
exposure looking good. Right now, all I want you
to understand is that using your aperture will
brighten or darken your image, and that's your main tool to be able to dial in your settings to get the image to look good. The last thing that
we're going to talk about is your color profile. A lot of cameras have
different color profiles. I shoot on one called Cindy v in the J5. I like
the way it looks. It's more contrasted. I don't have to do any
color grading and post. However, you could use
the standard profile. It also looks good. A lot of cameras will have
a series of color profiles, and they have different looks. Depending on which
camera you have, just do a quick Google search. There's so much information
on the web and look for the color profiles
in your camera. You'll be able to identify which menu settings to get
to be able to find them, and then record
each color profile. The best way to figure out
what you like best out of your camera is to record
every color profile, and just look through them
on your computer screen, and see what looks good. You might want something
that's more contrasted, or you might want something
that looks a little more flat depending on your subject matter
and depending on what you are shooting. Those are all the camera
settings that you need to understand when you're
setting up your camera. One thing that a lot
of creators want to get is the blurry background. If you look behind me,
it's out of focus. You get that by opening
your aperture up. If you're shooting
at a 1.8 which is what I'm shooting on
a full-frame camera, you'll get this
blurry background. You could shoot at
a 2.8 or a 1.2. Basically, you just
want to open up your lens as much as possible, and that's going to throw
your background out of focus depending on
your sensor size. If you're using a micro
four-thirds camera or something like a smartphone, you'll probably not
going to be able to get the same look as you would
on a full-frame camera. It's just something
to think about. If that's the look
that you're going for, you open up your lens wide open, it gives you that
shallow depth of field. Now, when you do that, you're going to let a lot
more light into your lens. One thing I do want to mention
is that I've talked a lot about shutter speed and using
double that or frame rate. You don't have to use double that of your
frame rate which in my case would be 160th unless you really care
about motion blur. I like to have my
videos looking natural which having motion blur makes
your video look natural. That's the standard
across Hollywood movies, and anxious the standard
across making videos. When you boost your
shutter speed, it'll give you a more
jittery feeling. Now it's not wrong
to have that look, but if you're just
getting started and you're newer to filming, don't worry about
the shutter speed. Just dial in your settings to make the exposure
look good because that's more important than having motion blur in your shot.
7. Lighting Yourself: You've got your camera setup, you've got your
background setup. Now it's time to
bring in your subject and light your subject. You're going to bring
in your subject, whether it's you
or someone else, and you're going to put them in the position that
they're going to be in. The idea now is to look at
how they look on camera. If they're super dark, you're going to have to
bring in some lighting. Now if you position
someone so that the window is right in front of her face so right
behind the camera, you can create a nice look, but you have to watch it because you could overexpose
really easily. It's also going
to bring a lot of light into the scene
and the background will start to fall dark because
sunlight is so strong. Something to think about
if you want to use natural daylight to
light your subject, just be able to control
that light in some way so that you're not completely just blasting people with light. If you're bringing in lighting, I like to use aperture lights. These are my favorite
lights to work with because the lights
work very well. They're LEDs, they don't get hot and you can dial in the
settings so easily. My favorite light to work
with for this setting is my aperture 120
d. I put it at a 45-degree angle
with my softbox and my light grid on that but
the idea that you want to get is put your light
at a 45-degree angle to your subject because
when your light is at a 45-degree angle, it creates some shadows
on the other side, which actually gives
the image more depth. If you have the
light fully frontal, you're going to
blast the subject, which for some people, that light is what
you're going for. You're going for
that beauty light, if you're doing a
makeup tutorial or you're doing something
where you really want to look bright than you
want full frontal light. Instead of having your
light at a 45-degree angle, you want to put
your light front. A lot of people will use a
ring light for this situation because a ring light
will go completely around the camera
and it will fill in any shadows in the face and it's a beauty light it makes
you look really good. For those of you who are doing anything where you want to
have that really bright look. A ring light is what
you're going to go for. My light, my aperture 120 with my softbox is right
here at a 45. I have a second light over here so you can start bringing in two or three lights to build your scene and
light the individual. This side over
here is being used to light part of my
face on the side and give me a rim which basically separates me
from the background. If you wanted to do
three-point lighting, which is like the traditional
lighting style for interviews or a person
just sitting here. What you'd have is
your key light, you will have a fill
light right here, which basically fills in
the shadows on this side, but not to the degree
that a ring light would. Then you'd have a light
straight behind out of frame a Pi that would give me a perfect rim around
my body and my head. That's the traditional, what you call three-point lighting, and what it is is
your key, your fill, and your hair light, it just
makes people look very good. If you have three
lights and you really want to have that high-end, high production look to it then you go for
three-point lighting. It can make your
production look way more professional than if
you just had one light. Personally, I'm
using a two-light that's doing something similar, but I don't need the whole three-point lighting
and I do want things to follow darker just for the
look that I was going for. I have a two-point lighting
some fill some hair, but I have some shadows
mixed in there. You've got to think about what your subject is that
you're shooting. Do you need beauty lighting or do you want something
a little darker? Now, I could pull
this light even further to the side and make it even more aggressive
with harder shadows. One of the best ways
to figure out what lighting you like
for the situation that you're shooting is to
sit behind camera and have someone just hold the light and walk around your
subject just use one light. Just use your key
light and go from directly behind camera
and walk all the way to the back because it shows you how light is
affected on the face and in different kinds
of looks you can get as you move the light
around a subject. Once you're done lighting
the whole scene, you might have to go
through and reconfigure some of your settings because when you're lighting
the foreground, you're hopefully
not going to change too much of the background, but sometimes it happens. This is a good time to talk about foreground
versus background. The reason I set you up to light the background
and then bring your subject forward
and get them away from the background
and light them separately, is that you want separation. If I was pushed back
here against my desk, you're going to see shadows. You're going to see a
big black shadow across the wall or the desk or
somewhere like that. What your goal is when you're lighting is to get
the shadows to fall down there on the
floor and not in your shot. One of the biggest
beginner mistakes is that you put yourself
right against the wall. As soon as you put yourself
right against a wall, your shadow is going to fall on the wall and then
you're going to see that shadow in your shot. The idea is that you really just want to
create separation, you want space between you and your background
because it makes the whole image
look way better and it makes you look way
more professional. As soon as you start seeing shadows and they're
unintentional, that's when your production
will start looking cheap. Create that separation makes sure that whatever
your lighting in the foreground here is not affecting the lighting in
the background back there. You're creating two spaces and you're lighting
them independently.
8. Audio: Now that you have
your camera set up, your lighting set
up, everything is good to go except for
you don't have audio, so that's when you're
going to set up your microphone
and I do this last because you want to
make sure everything looks good in terms of lighting, in terms of camera, and you don't want to be
fumbling with your audio, trying to get that going
until you're ready to shoot. For audio, there's two ways
that you can go about it. You can use a lavalier mic, which is something that
just hooks right on you. You've seen those,
I've been using them in my demonstrations. They sit on you, but you also do have that visual
component here. You're always going to see it. Now there's ways to
hide lavalier mics. If you're using a
button-up shirt, it's a lot easier to
put a lavalier on, but for t-shirts, you always have a black
thing right here. Other way to mic, is from above using a
shotgun mic and this is the way I recommend if you're in this kind of a setting. Now with a shotgun mic, what you do is you set it up so that the microphone
is pointed at, so it set up right in front
of her mouth right here, the arrow is pointing straight down there
because what it's doing is it's getting the audio just as it
comes out of your mouth. The best way to do that is to set up a C-stand and
get the microphone pointed straight down towards your lips right where
the audio is coming out, and that's where you'll
get the best sound. Let's talk about
setting your levels. This is something that
I really want to stress because this is something that will make or break
your video shoot. If you have your
microphone set too high, it's going to over modulate
and what that means is that as soon as it hits that top barrier of what
the microphone can handle, you're going to get this
distortion and it's going to get staticky and
it sounds awful. You can really pick
out when someone doesn't understand what they're
doing with a microphone. On the other side, when your microphone is
set way too low and you barely have any levels
coming into your camera, then you're going
to have to bring it up in post and what happens is it brings the noise floor up and basically that means static, so you're going to get
a ton of static in your noise and again, it
sounds unprofessional. There is a sweet spot between negative 12 and
negative six decibels. That is where you want audio to land and ideally when
you're shooting, you want all your audio to hit between negative 12
and negative six. Now the issue is, is if you have a consistent
sound throughout a shoot, but then you spike and
you start yelling, you're going to start
over modulating, so you have to judge what it is that you're
shooting and if there's going to be a lot
of dynamic range going on in your
audio soundtrack. Now with the GH5, there is an option
to put a limiter on your audio so that it never goes above negative six.
Now, this is good. You just have to
understand how to use it. You can always get
decent audio using this, but you also don't want to have your audio so high
that it's just sitting at negative six because it will sound
awful at that point. You still want the
dynamics of voice going up and down
with the wavelength, and when you bring it into
the editing software, you really see this. You'll see the
dynamics of vocals. But if you ever have audio set too high and you have a limiter, you're just going
to have a flat line and it's going to sound awful. Now in the iPhone,
you don't have the option to bring your
levels up and down, it auto-adjusts
for you depending on the vocals that are
coming into the microphone, and you just have to rely on its software to be able to put the audio where
it needs to be. With auto audio, it basically puts your
levels between negative 12 and negative six
but if you spike, it's sometimes doesn't
catch it and you'll have moments where you
have these high spikes, so I always set my
levels manually and I adjust them for the situation and for the person
that I'm shooting.
9. Test Record: The last thing you do before you shoot your project
is do a test record. This is just so that you make sure everything is functioning, and so that you get a little idea of what it
is that you're shooting. Obviously, the better you get at this, then the
more you do it, you don't necessarily have to
always do this test record. But it is a good idea
to just do a recording, and then look at it
on your computer away from the camera so you get a sense of how
the audio levels are, how the image looks, how the lighting looks. You just want to look
at everything and make sure that you're happy
with it before you go, and then go shoot
an hour-long take. Because the worst thing is
to shoot an entire sequence, and then realize something's
not working properly, or something just looks
awful and you didn't catch it until you saw it
on your computer screen. So do a test record. Just take a few minutes, check it out, and then you're
ready to start rolling, and shoot your video.
10. B Roll: Beginning to end,
that was everything for shooting this scenario. However, that's not what
videos are always made of. Not everything is just a
person sitting there talking. It is a very important
part to figure this out because once you've figured
out how to shoot like this, you'll start getting
an idea of how to shoot other situations. But if you're shooting
these videos, you're going to
always need B-roll. You've been seeing me add footage throughout
all these videos. You've been seeing me add
what's called B-roll. And B-roll is footage that is additional to what it is
that you're shooting. So to explain B-roll, I'm just going to break it
down very simply at first, and I just finished shooting a conference down in San Diego, it was a fitness conference, and my production company was in charge of basically
covering the event. It's a great way to explain
what B-roll is versus A-roll. At this conference, I was
shooting a mix of interviews, and then footage of
the actual conference. the difference between
the two is that A-roll is the main subject
in the main story. On the other hand, B-roll is all the footage that basically stitches everything together, it's the glue that holds the
entire project together. B-roll is that extra footage, it's the footage that gives
you a look more into what's going on around the
specific subject. To make this very simple, when I was at this conference
shooting the event, the A-roll was the interviews, so that was going to each
booth and talking with the different people at each of the booths and that is A-roll. That is the main things that we needed to capture was
these interviews. Now the B-roll is all
the footage that I captured off the booth
without the interview. To really break it down, A-roll is your most
important footage, it would be your interview,
or your storyline, your talking bits, and then your B-roll is the sexy footage, the slow mo, the
different shots that really show what's going on. When you're working
on a project, say you're working on a
YouTube video on a vlog, your A-roll is going to be this, it's going to be
those moments when you're talking to camera, or if you're out vlogging, walking around, it's when
you're talking to camera, and basically moving
the story forward. Your B-roll is all
the extra footage, so if you're in a specific
location and you're getting wide shots of the city, or you're getting
like a drone shot or like a slow mo
shot of the food, whatever it is
that you're doing, that is all the B-roll. You need both, you need A-roll, you need B-roll, but your A-roll is your
main story bit, and the B-roll is actually
a lot of fun to shoot, because once you
start diving into different creative
ways to shoot B-roll, you can also tell your
story using B-roll. However, it's more
in a visual sense rather than your A-roll, which a lot of times is
the talking head bits. B-roll is that added footage
that enhances the story, or enhances whatever that
you're doing so that your viewer becomes more engaged with the content
that you're creating, and it's also the
footage that just shows more of what's going on.
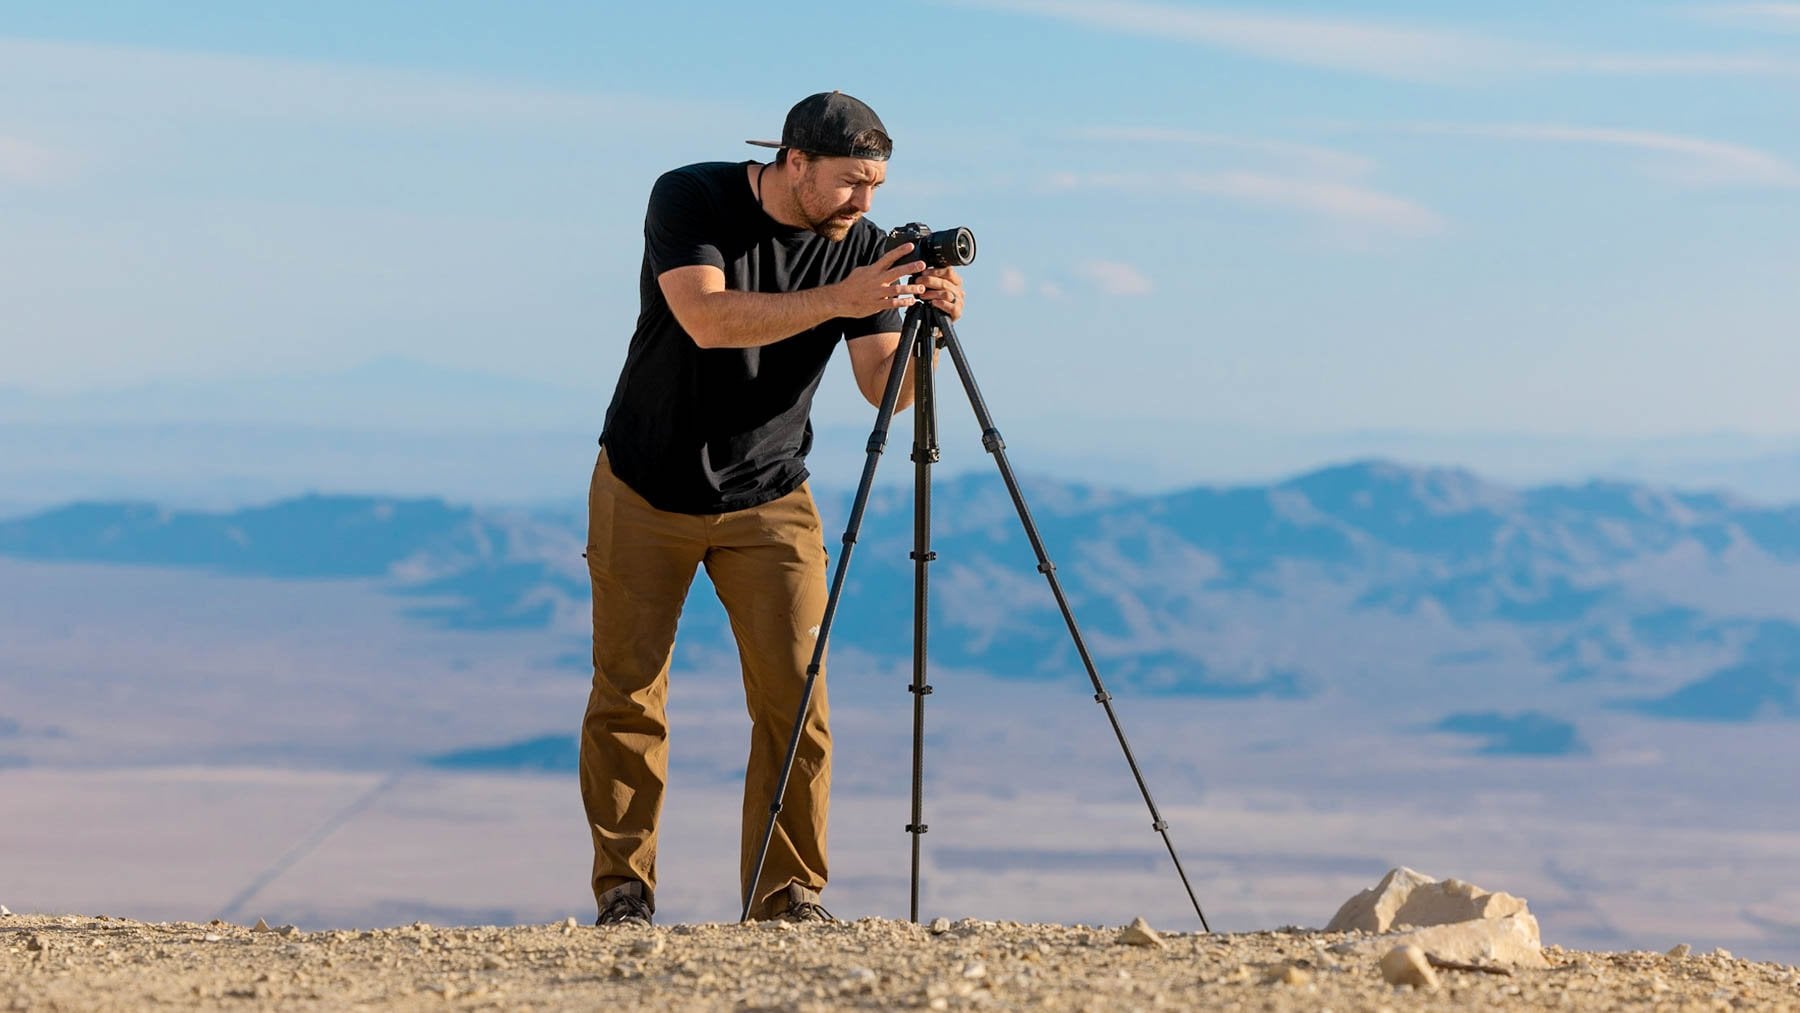
11. Demo #1: We're going to go over just
a quick demonstration of how you set up your shooting
space from beginning to end. Now I've included this sheet, which is basically your
step by step guide. I'm going to follow it just
as you would follow it when you're at home doing this or
wherever you're at shooting. The first thing I have on the sheet is layout
all your gear. The reason for this is that you just want to lay
out and see everything. I'm using two lights for this. Then I have two stands which
I already have set up. You'll have all your power
cables to make it work. You'll have your camera, your cards, your batteries,
your microphone, your cables, your tripod, everything in that gear list, you want to lay it out. It's just all here and
you can visually see it. That's step 1. Then when you have
all your gear, that's when you're like,
let's start shooting. Let's move on to step 2. Check all the batteries. So that's one thing
that you don't want to start shooting with
a dead battery. You're going to check
your batteries, makes sure that all your
batteries are charged. Once you've know that all
your batteries are charged, will go to the next part which
is check your memory card. When you check your memory card, what you're looking for
is, that it's cleared. If you have some footage on, it makes sure that
footage is backed up and if it's not backed up, go back it up and
then come back, erase the card, reformat it in camera.
That's a key thing. You want to reform it in camera and then you're good to go. You have a full fresh card. Our next step is going to
be finding your background. From my office, my background is
basically my computer. I've set up this mirror
over here of mountains. I have this picture of me standing on a cliff
in Laguna Beach. The idea behind
creating a background is something that's going to
make sense for your videos. For my videos on YouTube, I do adventure, I do travel,
and I do film making. I have my film making, my whole editing stations set up so that you're going
to get that sense that it's the film making
station and I got some pictures that
represent who I am, my adventure in my travel. Then once I close this mirror, I have all my gear, so that is my background and
beyond just the background, I've also added lights
into the background. This is what you're
going to do is you're going to let your
background separately, then your foreground, whatever it is that
you're shooting. If you're shooting yourself or you're shooting someone else, you're going to have a separate
lighting setup over here. You're going to get
your background though, to look like something that you want as your background.
This is our setup. I've got my blue
lights over here, my orange lights here, but basically that
is my background. Now one thing that I personally don't like is how
bright it is in this room. But what I do is I
go through and I shut the windows and I
basically blackout the room. All you're seeing are
these colored lights. I'm going to wait a second to do this because, well is exposure. Now the next part
is find your shot. You're going to set
up your camera and your tripod to try and
find the best shot. You're going to want to
try and set up a shot that looks good for your background. Essentially, when you sit down and you're
going to have to decide, do you want that as
your background? Do you want more of that? You basically come up with
your framing, which you like. My framing somewhere
around there. Obviously the exposure is
not where it should be. It don't worry about your
exposure, any of that yet. We'll get to that soon. Right now it's just overexposed
and just is what it is. But I have the
general idea of what my background is going
to look like so that now I can start figuring out
where my subject is going to be and how I want to
position my subject. Before we get into putting me here because I'm
lighting myself, we're going to figure out the exposure and the
lighting for the background. Because that's like you're
going to start with that and then you'll work to your foreground,
to your subject. I'm going to black
out the windows. I don't need the
exposure from this. Sometimes you might want to
use the light from a window, but I personally am going to
do all the lighting myself. [NOISE] I've got
this fancy way of blocking out my light,
a couple of pillows. We're going to
adjust our settings so that we get an exposure
in the background. Now this isn't going to be
completely set right now. This is just to get
an idea of what it's going to look like.
We're getting closer. When you're dialing in your
settings for your camera, the things you're
going to want to focus on our white balance first. A lot of times they'll start
with auto white balance, but depending on what
you're shooting, I particularly liked to find a white balance that works for my lighting so that the
color is not fluctuating. I'm going to start
with this one. I liked the way it
looks when you do that. We're going to adjust your shutter speed so that
it's 160th of a second. We're going to adjust our
aperture and our ISO. We don't want to go
too high with it. My settings right now
are to 2.8, 1/60, 1600 and we're going to hang out there because I'm going to adjust some things later on. The last thing you want to think about is your color settings. Every camera has color settings. My photo style, I
like using this CNEV. But you could see as
I flip through these, there's different
types of settings. Depending on your
camera, you can use your just standard that's
going to look good. Or you can go through and find maybe one that has
a different look. I like more contrast, so I'll use CNEV in my
camera. We've got that setup. Now we're going to
set up our subject and we're going to
light the subject. I'm going to sit
here in this chair. The good thing about
having a flip that screen is you can see yourself. Here we are. I'm not lit at all, so now we're going to
set up our lighting. I've got two lights
and the reason for this is this is
my [NOISE] key light. It's a big soft light. This is going to
focus just on me. [NOISE] We've got my
big soft light here, which is going to
be my key light. Obviously as you can see, it is way too bright, but we'll get to a second. The second line I'm going to use is just to give some detail, to give some separation
from me and the background. It's a film making
concept when you light, your hair or your shoulders, it gives you separation
from the background. [NOISE] I've got my hair
light setup and this is basically to give
me a rim around the edge of my body so that I've separate
from the background. You've got your setup,
you've got your lights. I've got this slide over here, this light here that's
lighting me the subject. That's your foreground
and your background is exposed for those
lights back there. [NOISE] Now, super bright, this is way too bright. What we're going
to do is dial in our lights to look good for this exposure because
I already set the exposure for my background. I just brought my
light down to 20%. This is a reason why you use aperture lighting because I can just dial it in by 1% and you can actually
do it with a remote. You could be having
these lights over there. I can be dialing in that
light with a remote. This is looking really good if you have any issues after you've dialed in your lighting
for your foreground and you need to adjust
your background, this is where you can go
in and start tweaking. You do a little bit
of lighting tweaks, you check it on your camera, do a little bit more
lighting tweaks, go back and forth until you find a look that
you're happy with. We're going along the chart
here that I've made for you. The next thing is just focus your subject because you don't want to have
it out of focus. I always shoot manual focus. That's the thing because
you don't want your focus dancing around when you're
actually recording. Cool, set the focus. Now you're lighting
setup, your camera setup, everything is good
to go [NOISE], but we don't have your audio. I'm using a shotgun mic
right now for this video, I'm using a lavalier and you can use either. They
both worked great. Shotgun mic goes right overhead
and you basically want the position of your shotgun mic to be right in
front of your face, but just out of your frame. I've set up a C stand here. The C stand, I
have a cable going from my microphone and it's going to be
going into my camera. The reason I use a C
stand is that I can get this microphone
positioned exactly where I need it to go and have it right overhead and not have a bunch of gear falling
over and stuff. C stands are very stable. Bring this into my camera. We'll turn on the microphone, play with the
settings on the side. It looks like that now we have audio and so you'll
just from here your levels on your microphone, you can go into your
settings on this camera, particularly I
haven't XLR adapter, which basically allows
me to use XLR cables. If you don't have a
way to bring an XLR, you're going to be just doing a configure within the camera. You can see right here, there is a icon right there to basically
adjust the levels. But on here, you could see
how I'm just way too hot. Whereas if I bring this down, it's just you don't
hear me at all. The idea with audio, you want to make sure that
your levels are bouncing between negative
12 and negative 6. On a visual representation, that's the 75% of
your audio meter. If you're going too high, what happens is if you get
excited and you get louder, it's going to spike and
it's going to destroy the audio and vice versa
if it goes too low, you're going to try to
bring that up and post and then that audio is going to be very noisy and it's
going to sound awful. We want professional looking
videos and audio in this. Now we're set up, we have our audio, our
lighting, our camera. Everything's set, our exposure, we're happy with.
Everything looks good. We're going to do a test record. I'm going to hit
"Record". Hey guys, what is going on in this video? I'm doing absolutely nothing. Great. I did a
little test record. Now what we do is bring
them to the computer, makes sure everything
looks good. Make sure your audio is
not spiking too high. Make sure lighting is
good and then we come back and if you're ready
to go, you start shooting. If not, you do a quick
little adjustment, do another test, go
back to the computer. But once you're set up your ray, start shooting and start
making awesome content. That's all the steps it
takes to actually get going when creating
this entire setup. Whether you're shooting yourself or if you're doing an
interview with someone else, it's the same setup. Just you're behind camera and not necessarily in
front of camera.
12. Demo #2: I'm going to show you a quick demonstration with how you set up using minimal gear. We're just talking a few pieces of gear on top of your iPhone. It's the same process that I went through with
the other demo, but this one is less gear and you're just trying to
use more natural light. If you have my
handy-dandy checklist, then we can go through
it the same way. The first thing you
want to do is lay out all your gear to
make sure that you have everything that you're going to use for the shooting. As you can see here,
I've got a tripod, I've got a holder
for the iPhone. I've got my iPhone. I've got a microphone and one light just so you have
one light to work with. You're not using a ton of gear. This is a very cheap, inexpensive light and
it's a great one to use just to give you some
nice feel on your face. There you go. All
the stuff is here. I'm going to check and make sure that my batteries are charged and that I have enough
memory on my phone. It looks like we got
plenty. We're good to go. Like I said before, you want to make sure you have
battery with what you're shooting with
and you want to make sure that you have space. With a phone, it's a
little bit different. You're not going to wipe
your entire memory card, but you just want to make sure that you're going to
have a decent amount of space so that you're not
running into a situation where you're running
out of space on your phone during recording. The next step is we got
to find a background. Let's take a look at the space. Mike, what would you
like for a background? If you're shooting out
here what encompasses you? What I talked about earlier is that your background
is something that maybe gives your viewers a look into who you
are as a person. Like mine is adventure
travel, filmmaking. You, you have that
beach lifestyle. I know. For around here, I mean, the bikes are obviously
a good indication of the beach lifestyle. You've got this furniture
and all this good stuff. I don't really want
to shoot this way because when we shoot this
way, you see the kitchen. If you look over here, this isn't very pretty
for a background. We're going to go
with this over here, but we're going to find
a background which is essentially this region and we'll play around with
that a little bit. The next is to set up the
camera and find your shot. Let me get the handy-dandy
little tripod. Another inexpensive
piece of equipment. A very simple tripod. You don't need to go
all out on tripods, but you just need something
to keep your camera stable so that you don't have to handhold
it all the time. For this one, we're going
to do a standing shot. Unlike the other
one, I was sitting, this we're going to
stand and what you want to do when you do
a standing shot is, get your camera above eye level. I'm looking at Mike
because Mike is going to be our guy on
camera. We're good. Another thing when you're
shooting with an iPhone is that your iPhone
is not going to go right on a tripod,
just doesn't work. I've got this handy-dandy
little attachment that you just stick
your phone and it has screw holes for your tripod. But I also like this one because you can
put microphones on top and some other things so that if you want
to use this handheld, you can have a light on here, you can have a microphone
so you could have more of a setup rather than
just hook on a tripod. We've got the camera
mounted on the tripod here, and I'm looking for a
shot that looks good. Something like that is
not bad for a background. We have some
information back there. We're going to put
Mike in front of this. We'll tweak it.
We'll go from here. One thing to note when
you're shooting with the iPhone is that the camera in the iPhone is great but the app to actually control your camera
settings is not good. I suggest downloading the app. It's called FiLMiC Pro, and it basically gives you
complete manual control over all of your
camera settings, whereas if you're using the app that comes with your iPhone, then you're basically
going to have issues figuring out exposure
on that because you don't have as many controls. Now that we have the app up
and we have the background, I'm going to dial
in my settings. First things first, we
got to make sure we're shooting 30 frames a second. Resolution, you
could shoot 1080, or I usually shoot
everything at 4k, just so it gives me
some extra flexibility. You can actually do some
cool things and post. We are going to set the
background exposure. Now, on this app you have the ability to adjust
your settings, and differently
than other cameras. But one of the issues is, remember when I said
we want to shoot at 160th of a second. If you're in a bright setting, there are some situations
where you're going to need to put ND filters to be able to
shoot at 160th of a second. We don't have any ND
filters with the setup, so we're going to get
as close as possible, try to keep our shutter low, but still get a good
look in the background. It's a little overexposed, but we'll see how this
plays out in a minute. For white balance, we
could use the auto, but it's daylight, so we
also could use daylight. I'm going to set it to
daylight so we don't have any fluctuating with
the white balance. Then in terms of color profile, I'm just using the standard
that is on the iPhone. Now the next step would be
to bring in our subject. If it's me, I would
step in there, but we're going
to bring in Mike. Mike, let's have you come stand. I'm going to have you right
in front of this table. We have a shot of Mike, but he's not lit very well. That's where our light comes in. Basically, we have a
nice-looking background, but we need our
subject to look good. We're going to grab our light. Mike, you can hang out.
Sorry for the wait. We've brought in
our one light and we just put it as
close to the camera, right off to the side at
about a 45-degree angle. That's your standard
interview lighting trick is put it at about
45-degree angle, a little bit closer to get both the ice field and
make it look good. Now, as you can see
on the screen record Mike is still a little bit
darker than the background. That's going to be
one of the issues that you'll encounter
when you start doing this setting and you're
using your smaller lighting is that they're
just not powerful when it comes to
something like the sun. What I do is I compensate. Now that we'd have this setup, we're going to
readjust our exposure for Mike because that's more important than the
background. That's not bad. I actually can get my
shutter down to a 160th, which is perfect
because that's exactly where I wanted to shoot it at. We've got a decent
shot going here. The next part, now that we have the shot set up, what
we're going to shoot, we're going to get
the microphone set up. Last part of the puzzle. This microphone is
a Lavalier mic, unlike Shotgun mic, which I
was using on the other one. Lavalier sits close to you. It's basically what I've been using to shoot this whole thing. You could use either both
are good to shoot with. I prefer when I'm shooting in a situation
where I have a Shotgun, I prefer using a Shotgun, but for these kind
of situations, we can use a Lavalier. Lavaliers will get you
a nice close sound, but there is a little
bit of a visual. You'll see the Lavalier, but
it's not that big a deal. Now we need to set our
settings for the audio. We're going to go to
our audio in this app. We have a headset microphone. We're going to set that
up. Great. Mike give me a little audio test. Testing one, two, three, four. Testing one, two. We got audio. Now we're
going to do test record. Hit record. Mike give me a little just,
"Hey, this is Mike. Welcome to my house." Hey, guys. This
is Mike Karpenko. Welcome to my house
with Javan Dolby. Hey, I've been part
of this great. [LAUGHTER] Now what we'll
do is we'll bring that onto our computer and just check to make sure
everything looks good. Readjust lighting from there. Maybe we'll reposition
Mike somewhere else because if we don't like
the way this is looking. All right, guys, that's it for setting up with your iPhone.
13. Time To Start Filming: That's everything that
you need to know to start shooting YouTube videos. Like I said at the
beginning of this course, the easiest way to get
started on YouTube is to do talking-head
style videos, just talking directly to camera. It makes it a lot easier than
having to try and shoot in a bunch of different
locations and trying to capture
all of this B-roll. It's just a great
way to get going and get the whole
process started. Now if you're just getting
started with filming and editing and building
your YouTube channel, then I highly suggest
checking out some of the other courses that I
have here on Skillshare. I have one all about editing, and I have another course
all about YouTube, how you come up with your ideas and how to actually make
your videos so that you can build and engage audience that enjoys watching the videos
that you're creating. Make sure you check
those out and I'll see you on the next one.
 Jeven Dovey, Filmmaker & YouTuber