Transcripts
1. Tomato Basil Sauce in an Instant Pot Introduction: Hi, I'm Vicky wells. Welcome to my class How to Make Tomato Basil Sauce
in an Instant Pot. This recipe kind of
ticks all the boxes. Like a tasty sauce to go with your pasta dishes or
for use in other recipes? Check! Like your food to be
made from fresh ingredients? Check! Like your sauces to
be vegan or vegetarian? Check! Trying to eat
whole food, plant-based? Check! Avoiding oil
in your recipes? Check! And, for all your kitchen
gadget lovers out there. And you're my kind
of people.
Want to use your Instant Pot for
just about everything? Check and check! This class is suitable
for beginners who know a bit about their Instant Pot and have used it once or twice, right up to the
seasoned cooks who use their Instant Pot on a
near daily basis, as I do. What are we going to
learn in this class? We'll start by showing
how to prepare and sterilize glass jars. Then we'll explain how
to do that several ways. In the dishwasher, in the
oven and on the stove top. Then we'll move on to gathering all the ingredients
needed to make the sauce. It's always a good idea to get all the required ingredients
together before you start. That way you'll be sure
not to forget anything. Trust me, I've learned
this from experience thinking I can just grab the ingredients as I need
them and then later, often when it's too late, I remember the one
critical ingredient that I totally forgot. With all the ingredients
accounted for, then we'll go over
how to prep them, so they'll be exactly what
is needed for the recipe. With all the
ingredients prepped, it's then time to cook
everything in the Instant Pot. And we'll explain
that step by step. I know I keep mentioning
the Instant Pot by name because that's what I do I use. However, there are many
different makes of electric programmable
pressure cookers, and they should
work just as well. So don't despair. If you have some other brand, it will work just as well. Once the cooking
portion is complete, we'll move on to how to package
and preserve your sauce, by canning, refrigerating
or freezing. Then comes the class project. That's where you'll apply
what you've learned by making your own
Tomato Basil Sauce. Not to worry, I supply a PDF copy of the recipe
and all the instructions. I encourage you to
experiment with your recipe, to put your own spin on it. Then let me know how it went for you and add a few pictures of your process and your
results, too. Please follow me, so you'll know what I'm up to. Just click the follow
button on my profile. I'll be adding baking, cooking, Instant Pot, vegan, vegetarian, and whole food plant-based classes, frequently. Click on the next video. Let's get started.
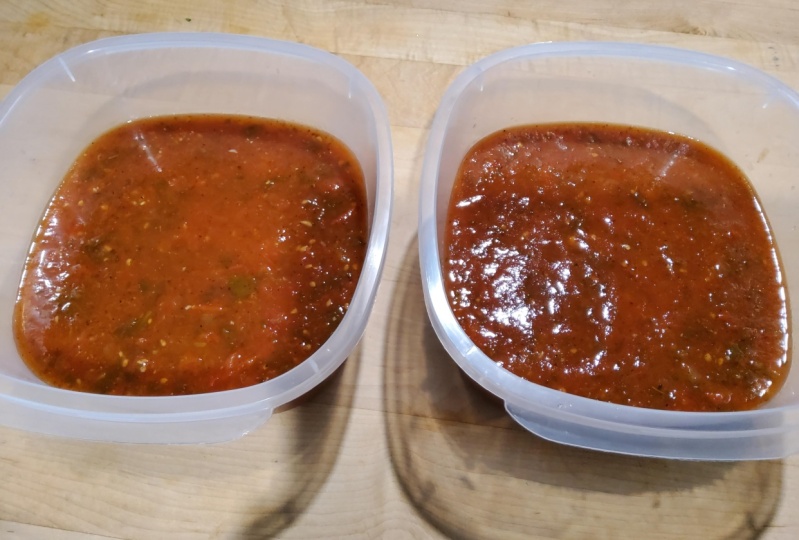
2. Prepping the Canning Jars: Welcome back. In this video, we're going to prep the jars so that we can fill them with salsa or either of the tomato sauces
that we're going to show you in these lessons. These jars are already clean but
they're not sterilized. They are also the jars that
we used last year in order to can are salsa and
to can our tomato sauces. You may not be able to see that, but it is written
on the top that it says tomato basil
sauce on this one. We don't want to reuse
last year's lids. The reason for that is that
they may not seal properly. There may be a
little nicks in them, it's not safe to use them. However, don't throw them away. If you put dry stuff
in your mason jars, you can always use those. I've got peppercorns in
that one and you don't need a fresh new lid to
do something like that. But we are going to this year use brand new lids
with sterilized jars. Now, we're fortunate
to have a dishwasher that has a steam sanitize cycle. And that's perfectly good
for sterilizing these jars, particularly when you're
using a high acid food, which we are, all of these
recipes are tomato based, very heavily tomato based. You can also sterilize jars by boiling them in water
for 15 minutes. Or you can wash
them and leave them wet and put them in the oven at 350 degrees for 15 minutes. That will achieve
the same thing. The lids of course, needs to be sterilized as well. The rings - no - the rings are never going to get
anywhere near the food. They don't need
to be sterilized. Anything that might touch the food does need
to be sterilized. My measuring cup is
going to get sterilized. These two, I'm not even sure what they're called,
but - funnels! These funnels that we're
going to use to put the food into the jar without slopping over the
side of the jar, they need to be sterilized. Anything
you're going to stir it with needs to be sterilized. This doesn't need
to be sterilized. It's actually a little magnet. What it's for is so you don't have to
touch the lid at all, after it's sterilized,
to put it on the jar. You put it, you would put it
on the jar like that, put a finger on it
and just remove it so the interior of the lid,
you never touch it. This is just for
getting the jars out of like I steam
can on my Instant Pot. That's just for getting them
out of the Instant Pot. That doesn't need to
be sterilized either. That's pretty much it. Now
we're just going to load up the dishwasher with jars, lids, all of this equipment, and get it sterilized
and it's the best thing to do first. Before
you start prepping. Before you put the salsa, or the tomato sauces in
the Instant Pot to cook. You can start up the
dishwasher and have, because you'd like you, it's best to put hot
food into hot jars. You never want to put
hot food into cold jars. You never want to put
cold food into hot jars. You want hot food in hot jars. So if we run this through the
cycle and it's going to go through a good high
dry cycle as well. They're gonna be hot jars. Hopefully if we
time it correctly, by the time the salsa or the tomato sauce, whichever recipe we
make next, is ready. Okay, now we're going to load up the dishwasher with the jars, with the lids and with
the various accessories. So just get them in there. Like I said, we're not
using the old lids. Do a few here. We'll get that later.
It doesn't matter. I want to make sure that we have the funnels, spoon,
measuring cups. And, of course, the new lids. You can't trust that they're sterilized right
out of the pack. You gotta sterilize them. Get them in here. Stand them up as best you can, but they'll get thrown
around in the dishwasher anyway and get nicely
sterilized as they're going I'm gonna put these up here. Now there's no point in you watching me load the
entire dishwasher with all these lids and jars
so I will finish it off. We've now got the dishwasher, load it up with 24 jars and 24 lids and
various accessories. We're going to put
it on a steam sterilize cycle. On my dishwasher. that means I need to
use a normal cycle. High temp water, steam
sterilize, heated dry. We're just going to start it up. There we go. It'll run through its cycle, we'll have clean sterilized jars, no soap in this. This is just to
sterilize the jars. This is not a wash, this is just a sterilization. So we'll see you in the next video where
we're going to start. We're going to show you what ingredients
you're going to need for the next recipe
and how to prep it. See you in the next video.
3. Gathering the Ingredients: Welcome back. In this lesson, we're going to be doing
Tomato Basil Sauce. It's a pretty simple
sauce to make. You shouldn't have
any difficulties. I'd really like to
be able to say that we grew all these
ingredients ourselves. The truth is, the only thing
we really grew in our garden this year is the parsley, and it's very fresh parsley, I just picked that this morning. The tomatoes at this time
of year, late August, early September, particularly plum
tomatoes are like super cheap in the
grocery stores. And we live in a climate where we don't have a
really long growing season. We've not had a lot of
success with tomatoes. The basil I usually
grow every year, but this year it
stubbornly refused to grow. But this whole pot here at the
grocery store was like $4, so no big deal. So we're going to need
four-and-a-half pounds of plum tomatoes. We're going to need a quarter
cup of chopped basil, chopped parsley, and chopped basil. Now a quarter cup may not
seem like a whole lot, but by the time you get it all packed in and I really
liked to pack it in. We're going to lose at least
half of this basil. And we're going to use
probably almost all of this parsley once it's packed into this little
bitty quarter cup. We also need a
medium yellow onion. We're going to chop that. And on top of that it's going to be eight cloves of garlic, chopped. We need a quarter teaspoon of red peppers,
red pepper flakes, and small to
medium Bay leaf. We need a tablespoon of either sea salt or
Himalayan pink salt. We're going to need
a half a teaspoon of freshly ground black pepper. We're gonna need 1-1/2 teaspoons, each of marjoram and oregano. Now if you don't have either marjoram or
oregano separately, you can substitute both for a tablespoon of
Italian seasoning. That's pretty much it. One thing I wanted to tell you
about the tomatoes though, a lot of recipes you're going to find that they tell you to skin the tomatoes and to seed the tomatoes and that's fine if that's what
you want to do. Personally, I see that
as a bit of a waste, and I don't see that it
affects the taste that much. Sometimes you'll
get a little bit of not ground down
skin in the sauce. Whoops, that's fine. It again, it doesn't change
the taste at all. So what we're going to do with
all these is we're going to chop the tomatoes,
chop the onion. We're going to chop
up the basil and the parsley and get it in the Instant Pot and
get it cooking. And once it's finished
in the Instant Pot, we're going to have to blend it. I personally like to
use a stick blender, but you can use just
a regular blender and just do it in
batches to get it to its sauce form. But remember, when
you're doing it, as soon as you've got it
out of the Instant Pot, take out the Bay leaf.
You don't want to grind that up with
everything else, I mean, you can, but I
prefer to take it out. That's the ingredients
that you're going to need. So, get them all together
before we get started. And I'll see you
in the next video.
4. Prepping the Ingredients: Welcome back. We're now going to prep
the tomato basil sauce. We went ahead and did prepped most of
the tomatoes and half of the onion because I didn't
want you to have to sit through watching me chop
all of those tomatoes. Now, unfortunate enough to have what I call
my choppy thing. I use a Great That's ice. But you can chop them up like
any size you want almost because it's going to be blended anyway when you make
it into a sauce. But I mean, you don't
want them too big, then it takes longer to blend
and it's harder to get. Make sure you get an even sauce. Try and chop them up into cubes. But you can either do it with something like this or you
can do it with a knife. Let's finish up the tomatoes
and then we're gonna go on and add the rest of
the stuff to the pot. Now, this is actually a ten core or no,
sorry, eight quart. Instead of hot liner. This one, you'll notice
it's a little different. It's actually a non-stick. It doesn't come standard
with an Instant Pot, but you can certainly
get one if you want it. I don't find it as either better or worse than the
stainless steel one. I just wanted one to have one. I'm using it this time. Let's get the rest of
the tomatoes prepped. Be careful that you put the cut side to the back if
you're using a choppy thing. Because if you put it the
other way from experience, I've found I get tomato guts
shooting at it this way. I can make quite a mess and I'm making enough messages. It is. Also may notice that I've got paper towel under the
chopping board that makes him clean up a little
bit easier because you are gonna get tomato
juice everywhere. This is the end of the tomatoes. And we're gonna do the
last half of the onion. This is really good for onions. Saves a lot of tears. Righty. We'll just get the
rest of them in there. I'm going to throw
in all of the ****** that we pre-measured
in the previous video. So, you know what's
going in there. Now? That's the belief. The parsley and the basal
have all been rinsed. I cut off stocks into
three stocks from this plant because I think
I'm going to use that much and I know it's
only a quarter cup, but just watch what happens. I am now going to
start cutting up. It doesn't matter if you get a little tomato juice on this. But I'm just going
to start cutting up the parsley and packing
it into this quarter cup. I love scissors for doing this. Just watch your fingers. There are some people that I
know that have actual Herb. Herb however you want to say it, knives and it's
like five blades. I want one. So we'll start
packing this in here. That smells good. This is
fresh parsley from our garden. It's no more than a couple
of hours old at this point, if that remember, I told you it looked
like an awful lot of parsley and a quarter
cup seems pretty small. There we go. I'm going to dump that in the, but that was it used
all of that parsley. Now we're going to do
the same thing with, with the same thing
with the basal. The basal I'm gonna treat
a little differently. I'm going to snip off most of
the leaves, but they don't. Well, I suppose I could
do with the scissors. But generally what I do, I'll get a whole bunch of leaves together and do something that's actually
called Schiff a nod. And all that means
is cutting it. Slicing it. Normally grow basil
in my garden every year and this year it
absolutely refused to grow. I don't know why. We had an odd summer
cool but somewhat dry, just didn't really want
to grow much at all. So I ended up buying some basal. But at this time of the year and the grocery stores,
it's fairly cheap. All right, so we're just going
to gather this altogether. Bunch here. Just squeeze it altogether, kind of rolling a
little bit if you can. We're just going to do this. That's like I said,
that's that's actually called shipping odd. Not a shift, but
I've heard the term, I've seen what it,
what it means. But really do want
to cut it too, because any of the herbs, it releases their oils,
they're volatile oils. And so you get much
more flavor out of them than you would if you
just put the leaves in intact. Again. All of that basal
quarter cup measure. There we go. All of that, just a quarter cup job. That's for our
tomato basil sauce. I'm gonna give it a good stir. We're going to get that
cooking in the Instant Pot. So stay tuned. There'll be right back.
5. Cooking the Sauce in the Instant Pot: Alrighty, So now we're ready to cook the
Tomato Basil Sauce. We've already got it loaded in the liner and we're
putting it in the base. Then we're putting the
lid on and locking the lid. Now you've got to make sure that the pressure relief valve
is always on sealing. It feels kind of
loose and stuff. So it's just kind of
pointing towards sealing but pointed towards sealing
as far as you can. The other way is
venting and we'll do that later when it's
finished cooking. Let's get this started. It
has to cook for five minutes. And then when it's
finished cooking, the display will change to an L in front of it and it
will start counting up. We wanted to count
up to ten minutes after it's finished cooking. We want five-minutes cooking, ten minutes of a timed
natural pressure release. And then when that's done, we will turn it off and we will release the
rest of the pressure. So let's get started. The button you're gonna pushes
pressure cook. On older. Oops, It's got to be five minutes. There we go. On older Instant Pots, it's going to say Manual where this one
says Pressure Cook. Both of them are the same. So if you have an older one and don't worry that you don't have one that says Pressure
cook. Use the manual button. Now it's turned to "ON" and it will stay there until
it gets up to pressure. And that can take I
should have timed it, but it can take up
to half an hour, sometimes, sometimes less.
This is an eight quart. It may take a little
longer in the six quart. It may not. It also depends on how much you actually
have in the pot, how long it takes to
get up to pressure. Now what we have in
this eight quart would easily fit in
the six quart. It should not take a long time to come up to pressure. That's it for this. We can we can wait
until it's done and then we're going to have to blend it to finish the sauce. At which point we'll
can the sauce. So we'll leave it
until it's done. We'll come back and show you blending it and
putting it in jars. I'll see you in the next video.
6. Blending the Sauce: Welcome back. We, we now have the - ouch! That's hot! - tomato basil sauce done. It's been through five
minutes under pressure. It's been through a 10-minute natural natural
pressure release. Then we released the pressure. We can now take the lid off. You can see it's quite hot
from the steam rising there. We want to remove
the inner liner to a heat proof surface that I've got ready and
waiting right here. You want to be very careful. It's very hot. You want to make sure
you have a good grip on it before you move it to here. You never want to have
to move it very far. Let's do this. Good grip. I can feel that I've
got a good grip on it. Quickly move it to there. We're done. Now. We want to blend the
tomato basil sauce. It looks really good. It smells great. I use a stick blender.
You don't have to. You can use a regular blender and just blend it in batches
until you've got sauce. Now, first of all, we
want to find the Bay leaf. We want to get
that out of there. I will stir this. Usually if you stir it, it'll kind of float to the top. There it is. We're going to get rid of that. Then we're gonna give just
the whole thing a good stir. It all mixed together. Get stuff off the sides. Doesn't look like
there's much in here. This could've actually be
done in a six quart. This is an eight quart, but
I don't have two six quarts. So anyway, let's
get this blended it up. You want to leave
it so that you can, there's actually some
discernible basil in the sauce. It's mostly, it's
going to be a little, you don't want to blend
it so much that you don't even see any green from
the basil anymore. There we go. That's enough. I'm just gonna give
it another stir. Yep, that looks good. We're just going
to I'm going to can that. How you decide to
keep it is up to you. I cannot recommend my method of canning because I do it in
an Instant Pot and that's not actually approved. For
safe home canning methods, I'm going to put a link either in the PDF or
here on the video so that you can go to
a website that will show you approved
safe canning methods. You can also freeze this sauce. You do, don't put it in jars, put it in either plastic
containers or plastic bags. Glass in the freezer
doesn't seem to go well, I know I've tried it. I've had the jars crack on me. Then you've lost the jar
and you've lost the sauce. That's this will keep
in the fridge for about a week in either
in glass or plastic. That's tomato basil sauce. I hope you enjoyed the recipe.
And thanks for watching.
7. Filling and Steam Canning: Welcome back. Our sauce is now all ready. So we're going to
want to store it. And there's several
different options you have for storing it. What I'm going to show is steam canning it
in an Instant Pot. Now, I'm pretty sure I
mentioned it earlier. And I'm going to mention again, this is not an actual
approved method of canning according to
whatever agency covers safe home canning and safe
food preparation and whatnot. However, on the printable PDF
included with this course, there are links to both the US and the Canadian sites
for safe home canning. So take a look at those. But I find that this method, steam canning it in my
Instant Pot works okay for me. Well, it works well for me. But I only ever use it
with high acid foods, which is what we're doing today. Now the other ways
you can package up your sauce is
you can freeze it. And if you're going
to freeze it, be just don't put it
in glass jars at all. You want some really
clean plastic containers. Because if you use glass, the glass can shatter
in the freezer. And I've had that happen. And it makes a mess. And you lose the sauce, and you lose the jar. And, you don't have to do it hot. Now, when we're
doing it in jars, you want hot food and you want hot jars because that's
the best way to can. You don't want cold food
and hot jars and you don't want hot food and cold jars. So right now we have, the sauce is hot. The jars are hot and sterilized. They've just come out of
the sterilize cycle in the dishwasher and also has all of the equipment
that we're going to use. And I do have the lids as well, which we are going
to handle with this magnetic implement so that we don't
actually ever have to touch the lids ourselves either. This has been sterilized too. So we're going to start
filling the jars. Oh, and, if you're using if you're not using the steam
canning method, as I said, you can
freeze it in plastic. You can let the sauce cool. If you're doing it
that way, that's fine. Or some people even put it in plastic bags and let it
cool and then get as much air out of the bags
as they can and freeze it that way to take up
a little less space. But let's
start filling the jars. So as I said, everything here has
been sterilized. I'm not touching anywhere that's going to touch the food. So
always handle it by this, handle it like this. I'm gonna give it a stir. This has been
sterilized as well. Let me give the sauce
a good stir. And that's all we
really need to do. And then we're going
to start filling. Now, you want to fill the jars just up to where the neck is, just where the threads start. And you want to be careful. The reason we use the funnel is because we don't want to get any sauce on the edge of the jars because that would prevent them from
sealing properly. Each jar holds about two cups. And i've I've probably
got more jars here than I need right now. But it's better to have
too many than not enough. Too many already sterilized
There we are, we're just up to the threads there. And like I said, sometimes it can be a little
fun getting these. There we go. We have our first lid. I'm going to move carefully, move the funnel to the next
jar that we're going to use. Here we go. We're putting that on there. And we're gonna put this on
finger tight. That's fine. And we're gonna continue to
fill all the other jars. Now, you don't need to watch me fill all of the jars. So I'm going to stop
here for a bit. I'm going to fill the
rest of the jars. And then we'll come back and we'll show the canning process. We've filled up the
rest of the jars. Now you'll notice that one jar
isn't full. We actually got four full jars and one
about three-quarters full. Now you can't can this one because there's
just too much airspace. It won't can properly. So we're just going
to put that one in the fridge and use it up for a recipe or on some
spaghetti or pasta of some sort. These four we can, can, and I'm using an eight quart
Instant Pot for canning. You can use a six quart, but you'll only get two or
three jars in a six quart. So you'll have to
do couple of cycles four fit comfortably
in an eight quart. And you're going to have to
put them up on a trivet. Now, the eight quart
comes with this trivet, which is fine for
a lot of stuff. But I have chosen instead to use a silicone trivet
because it sits flatter and therefore the
jars sit flatter and it's easier to make
sure that the jars go in there properly
and don't touch. So I would recommend this. You can use this, but you've gotta be careful
how you put them in there because they get
they get a little rocky. I have done it with
this one before, but I prefer this one. So that's what I'm going to use. So, we're going to open up the eight quart. I don't know. Some people don't know
this, but the handles, that hole and the
handles is actually a place to store your
lid if you want to. I don't do it all the time. Sometimes it just feels you know,. not safe to me, but that's what we're gonna do. Now in order to steam can in the Instant
Pot in an eight quart, you're going to need
three cups of water, which I have available here. This is the one and only time. I'm not going to
tell you to take the liner out of the Instant
Pot before you load it because we don't
want to be jostling the jars when we try and
put the liner back in. So this time only, this is what we're gonna do. We're gonna leave it
in the Instant Pot. We're going to put
water in there. And we're going to add two tablespoons or
an eighth of a cup of white vinegar. That just helps it build up the steam and then we want
it to build up the steam. So we'll put that in. And then we're going
to put the jars in. Now this is. This is particularly
helpful when you're removing the
jars when they're hot. But it's good to get into the
practice of using it to put your jars and place
them in there properly, too. This is rubberized, this part, and you just grab
it under the neck there and squeeze
really, really hard. And then just start
placing them in there. And like I said, you want to make sure
that they don't touch. They can be close, but
you don't want them touching during the
canning process. Get them all in there. You can manipulate
them in there to make sure that they're not
touching. There we go. Got them all in there
and all not touching. Alright, so we've got
them all in there. They're not touching. And we're going
to close the lid. And now I'm going to tell you something that is also
counter-intuitive because when you're
using an Instant Pot and all the recipes, of course I'm going to
tell you make sure it's in the sealing position so it'll build the pressure so
it can cook the food. Well, in this case, because we're steam canning, it kinda doesn't apply. Now it's
still going to seal, but we don't want it to
build a lot of pressure. So you're going to leave
the vent on venting. And we're going to select
the steam function. We're going to set
it for 15 minutes. Now. Like I said, it will seal. But because we've
got on venting, it's not going to start counting down because
we don't have it on sealing. So you've got to watch for
the float valve to seal. And at that point
you're going to have to manually time 15 minutes. And that's to make sure that
it's canned for long enough. So it's gotta be 15 minutes
once the float valve seals. But you're not gonna
get any change. It's going to it's going to
it'll go to the 15 minutes. It's done. No, it's gone to "On." But it'll never, ever
start counting down. So we've got to watch
for that to seal. So we're going to wait for it. We'll we'll come back
when it's sealed, will count down our 15 minutes and we'll continue
on from there. Okay. So the instant Pob
has just sealed, the float belt has just sealed, but you still hear
the steam coming out. That's because the
pressure valve, the vent, is still on venting and that's the way
it's going to stay. We're not going to set and that took 10 to 12 minutes for that to seal. We're now going
to set a timer, a manual timer, for 15 minutes for it to
remain in this state. And as you see, nothing
is changing here. And we'll be back after
the after the 15 minutes. We're just going to turn
the Instant Pot off. It's still going to
take a little while for the float valve to
drop after that. Then we'll remove our jars. So we'll see you then. Okay. The float valve has been sealed for 15 minutes
and at that point, we just turned the
Instant Pot off. And then you have to wait
for the float valve to drop because you cannot remove
the Instant Pot lid while it still thinks
it's under pressure. So, the float valve has to drop. It took three minutes. Once we shut this off, it took three minutes
for it to drop. We can now open it. Be very careful. There's gonna be steam, it's going to be hot. And then we're gonna get the, the jars out of there. So let's open it up. Lots of steam. Oh, did you hear that
pop? Another pop! All four of them. That was the jars sealing. I want to move them to
a heat proof surface. I'm using a wood cutting
board on top of the island here because we don't want
to damaged the island. So let's go in and
very carefully, As you, and you've got to make sure that
you're under the neck. And as you're taking
these out, good grip. Be careful not to knock any of the other jars
because at this heat, you could shatter the jar
if you give it a good bump. So that's bubbling nicely. And like I said,
we've heard them all, all four of them pop, that's the pop you want to hear. That tells you that
they're sealing. Very carefully squeeze
and move them. The nice thing about silicon, is you can touch these
handles, it doesn't get hot. And one more. There we go. Now, you want to just leave
them and let them cool down. You heard them seal. But you want to
double-check that they're sealed
after they're cool, you can do that easily, but by just pressing in
the middle of the lid. If there's any movement at all. It's not sealed properly. If it's not sealed properly, put it in the fridge, use it
within a week. You're fine. Sealed properly. I've kept ours for up to a year. How much longer than that?
They can I don't know. It doesn't last that
long in our house. Anyway, we're just going to leave
them, let them cool. So this is the end of the
canning part of the lessons. So we'll see you in the class projects and then
in the wrap-up. Thanks. See you later.
8. Tomato Basil Sauce Class Project: Okay, It's class project time. Because I just know you're dying to make your own
tomato basil sauce, now that you've seen
how easy it is. I'd love to hear
about what you did. Did you change some
of the ingredients? Did you increase
or decrease any of the ingredients like more
or less basil, garlic, salt, or other seasonings. Did you decide to can,
refrigerate or freeze your sauce? Are you planning to use your
tomato basil sauce with pasta or as an ingredient
in other dishes? I've used it both ways and
it's delicious, either way. Be sure to print
out the PDF with the recipe, directions
and links to the US and Canadian
safe canning sites. That way, you can make notes on the paper of any
changes you make. I do that all the
time as I look at most recipes as suggestions, and almost always change
or add something. I can't wait to hear from you.
9. Tomato Basil Sauce Wrap Up: Well, that's a wrap for
tomato basil sauce. Let's just review everything. Here's what we covered, How to prep and
sterilize canning jars. Gathering together
all the ingredients and equipment you're going to need before you start.
Prepping all the ingredients so everything goes smoothly
for cooking the sauce. How to cook the sauce
in the Instant Pot. Don't forget to check the printable PDF for the complete time
in the Instant Pot. That's the time it
takes to come to pressure, the cooking time, the natural pressure
release timing, and the time it takes to release the rest
of the pressure. Then we covered how to store your completed sauce by canning,
refrigerating or freezing. Remember, if you're going
to freeze your sauce, don't use glass jars. Whether you're using glass jars, plastic containers,
or plastic bags, you'll want to label everything. Trust me on this one. Many times I've thought,
"I'll remember what this is." Well, if you use it within a month or so, that's
probably true. However much longer than that, and you're going to start
thinking, is this salsa? Is it marinara sauce? Maybe tomato basil sauce? The only way to be sure is
if everything is labeled. Let's continue The recap. Finally, we got to
the class project. You are gonna do
the class project. Right? Thank you so much for
choosing my class How to Make Tomato Basil
Sauce in an Instant Pot. Please be sure to follow me. As I have many, many more
classes in the works. Also, if you'd like to
follow me on Facebook, you can follow me at
facebook.com/ReluctantVegetarians or facebook.com/WFPBunderpressure WFPB is short for a
whole food plant-based. Once again, thank you
for taking my class. I hope to see you in
my other classes, too.
 Vicky Wells, Kitchen Gadget Aficionado