Transcripts
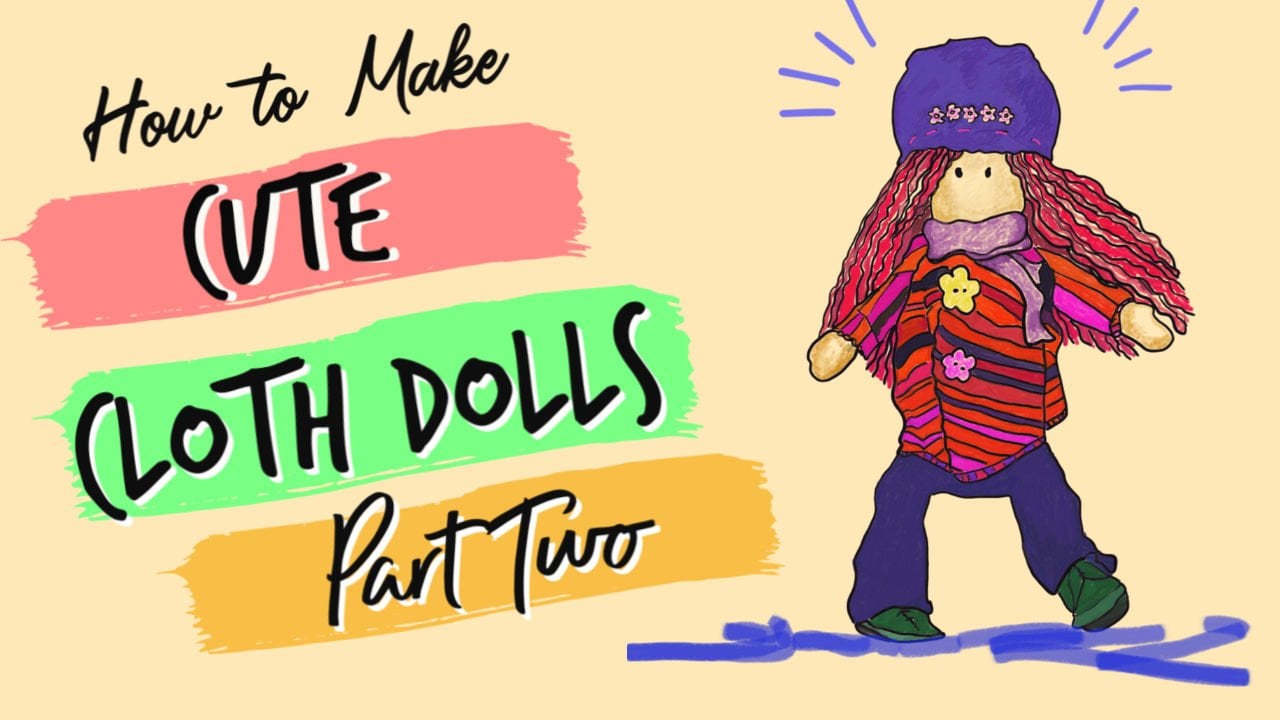
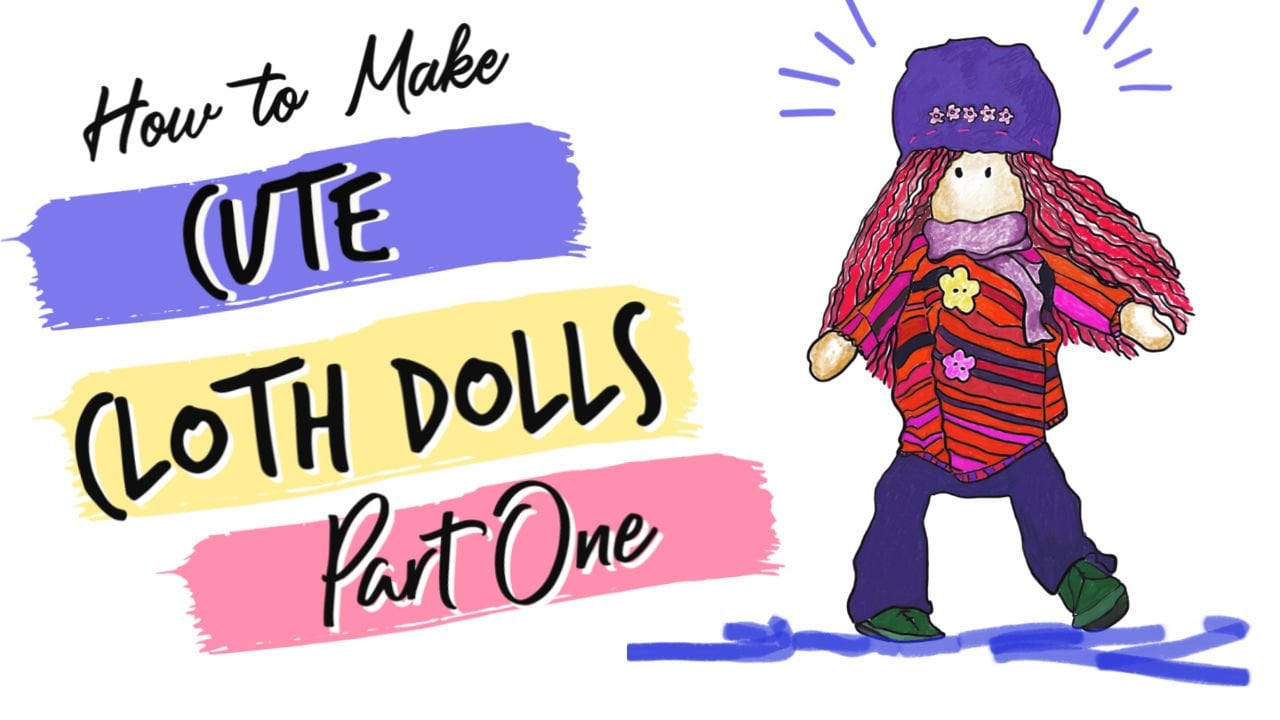
1. How to Make a Professional Puppet: Hi, my name's Adam Kreutinger, and I'm a puppeteer. Over the years, I've built a countless number of professional puppets for all sorts of different productions. My puppets have been seen on Comedy Central, on Kidzone on TVNZ, as well as many commercial on film projects. In this class, you're going to learn everything it takes to make a professional style monster puppet. We're going to go over the patterning, simple sewing techniques, cutting and gluing foam, texturing techniques for fur, and all the other aspects that go into making a professional puppet for television and film. For years, I've been teaching puppetry and puppet-building online, with hundreds of videos covering all different topics of building puppets. But in this course, it's streamlined all in one spot. You don't have to go digging through countless videos trying to find the next step anymore. It's all broken into small, simple chapters that are easy to follow, and it's not required that you have any experience at all in making. Now go ahead and grab all your materials and join me on this puppet-building journey.
2. Tools and Materials: Here's some of the tools and supplies you're going to need to make this puppet. some plastic bowls that we're going to use to make the mold for our puppet. The bigger the bowl, the bigger the puppet. Some plastic wrap, a hot glue gun, superglue, scissors, a utility knife. I like to use Personna blades for cutting the foam. These are the best. Some Super 77 spray adhesive, brown paper for pattern-making, tin snips, professional level contact cement. Make sure to use this in a well-ventilated area. Upholstery thread, a sewing needle and pins, a sewing tracing wheel, and plastic from an old storage bin. You'll also need some scrapped fleece for pattern-making. A sharpie, a ruler. I wouldn't be surprised if you already have a lot of these supplies lying around the house if you are already a maker. As always with puppet building, just use the resources around you. Think of this list more of suggestions, because you can really make a puppet out of anything.
3. Foams: Now I'm going to go over some of the different foams I'm going to use in this bill. Don't feel limited by these choices though, you can really use whatever materials you get your hands on. My favorite foam to use is this. This is a reticulated foam. If you look closely at it, it has really big pores in it. This is also known as a dry fast foam. It's used for a lot of outdoor cushions. The reason it's used for outdoor cushions is it doesn't absorb water. If this gets wet, you just shake it and all the water just drops right out of it. This is great for puppets because sometimes your hand can get sweaty and you don't want the foam to absorb the sweat that can cause it to mold and rot really fast. I usually use this in a half inch thickness. This dry fast foam is my favorite foam to use for puppets. I get it from a website called Foamonline.com. I click the dry fast foam, I get it in a half inch thickness and add a medium firmness. But feel free to experiment with a super soft and firm foam too. Another type of foam, I uses L200. A lot of people also use something very similar called EVA foam, and some people call it EVA foam. One thing that's really nice about this is, it has a lot of body to it. It's much stiffer, so it's not great for all applications, but I really like to use it for the body of the puppets. It's really good for sculpting and patterning. I typically use about a half inch thickness. This is a type of foam that you'll find in a life preserver. This mat can also be substituted for the EVA foam. You can find this at most department stores and hardware stores. One side usually has a texture and the other side is typically smooth. A lot of times they go together like puzzle pieces. Like the EVA foam, this is rigid, so it uses the same places. This green polyester foam can be found in almost any craft stores. I usually get this in about a one inch and half inch thickness. Today I'm using the half inch thickness. The next type of foam I'm going to use for this project is actually the same as the green foam, it just of a higher density, but you could use the green foam too. This is a block of foam from a couch cushion. You can usually get this at any craft store as well. These are just a few of the foams that I like to use in my puppets. In the next video, I'm going to show you my favorite fur to use for puppets.
4. The Best Fur: In this video, I'm going to show you my favorite fur to use for puppets. When building a puppet, you can really use any fabrics you want and you can use any types of furs too. There are hundreds of different types of furs and they'd all make a great puppet. However, my absolute favorite fur to use is the shaggy Mongolian fur. What's nice about the shaggy Mongolian is it's really long, which allows you to trim it to get all sorts of different effects. Also, it's much easier to texture than a lot of the other acrylic furs that are on the market. Absolute best place to get this Mongolian fur is from fabricempire.com. They have the best prices, almost half the prices of other places. But this project today, I think I'm going to use this yellow. Now let's get started with our puppet building in the next video.
5. The Best Sewing Techniques for Making a Puppet: Let's go over a couple of stitches that we're going to use to create this puppet. There's two main stitches that I use. The first one is a whip stitch, and that's what we use the most. The second one is called a slip stitch. It's also known as a ladder stitch. For this demo, I'm going to use some contrasting color threads so you can see a little better. The type of thread I like to use is an upholstery thread. Briefly before we get into the whip stitch itself, I want to show you how I thread the needle. It's a little different than the average person does. Most people thread the needle and then double up the thread like this. So they have two strands that are equal in length. But I like to stitch the way that a tailor does. What they do is they have one strand much shorter than the other. The hard thing is sometimes as you're stitching, this shorter thread will want to pull through, so you just got to make sure you're holding the needle by the needle hole. That'll keep it from slipping. The other thing I do a little differently is the way that I knot the thread. Again, I use a tailoring technique. Rather than tying a knot in a thread, this is what I do. I go in the backing of the fur and then in the facing of the fur here, and pull it until I have just a small tail left. Then what I do is I stitch exactly in the same spot, trying to go through the same hole. Then just pull it loosely. Don't pull it tight. Then you do that two more times so you have three stitches on the same spot. Once you have those three stitches, you just give this thread a little tug like this. That's is a knot that will not come out. If you just tie a knot in the thread and then start stitching, there's a good chance that that knot could pull right through the fabric. This one will never come out. But anyway, let's get into the whip stitch. Now that we have it knotted, I'm going to start doing my loops. One of the nice things about the whip stitch is that it is very easy. But the reason why I like it is, it is the strongest hand stitch that you can do. You're just going in the backing of the fur through the facing of the next piece and pulling around. Then you continue that in the backing on the same side and then pull round. What you're really doing is you're looping this thread around like this. It's creating a spiral. That's part of how the stitch gets its strength. You want to do your stitches pretty close together within an inch or have about 10 stitches at least. You don't want to pull too tight on this thread either. Definitely you don't want it to be too loose or else you'll see your stitches through the back. But if you pull too tight, it can pucker up the fabric. When I come to the end, I knot it the same way that I started, doing three stitches in the exact same location and then give it a little tug. When you cut the end of the thread, make sure to leave a little tail too. This is going to be a very strong sim. Now I'm going to show you a slip stitch. This is a stitch that I only used in certain parts of a puppet. You wouldn't want to use this stitch to put your whole puppet together because it's really not very strong. Its best usage is closing up small parts of sims after you've turned it. I mainly use this at the wrists where the arm rods are, and sometimes in the back of the head of the puppet, but I try to avoid it anywhere I can. The thing that makes a slip stitch handy is that it is a stitch that you do on the front of the fabric. First thing I'm going to do is just knot my thread, and I'm going to knot the exact same way that I showed you earlier. This is how it works. With the whip stitch, we're going into the backing, with a slip stitch, we're always going into the facing of the fabric. I'm going in and out on the same side here. Then we're going straight across trying to keep my stitches even. I'm going in and out on this facing then I'm going to come straight back across and go in and out over here, and then you continue this process. I'm just partway through and you'll notice I haven't pulled it yet. I'm keeping it loose right now, but I want you to see this is why it's also called a ladder stitch. Each of these threads look like the rungs of a ladder. But once you get about an inch and a half across, what you do is you gently pull on this thread and watch what happens. This fabric start to just come together just like that, and it brings that fabric right together. I'm going to keep stitching till I get to the end. Just like with the whip stitch though, you don't want to pull that string too tight or it will start to pucker. The last thing you want is the fabric gathering in unexpected places. Then yet again, I'll knot the fabric the exact same way. There we have it. A nice closed sim. From the front, they both look the same. They both hide the sim really well with fur, but from the back, you can see where the strength comes in. This thread here, since it's all wrapped up, it's really strong like this. I can tug at it. It's going to be really durable and last a long time. Whereas this stitch, the only strength it has is in the thread itself. There's only one line going across. When I pull on this, it's putting a lot of strain on that thread. Since this one is coiled up a little bit, it has a lot more resilience. That's really important because the act of puppeteering puts a lot of stress on that puppet too. You want to make sure it's going to last a long time and hold up for an entire production.
6. How to Use Contact Cement: Another tip I want to give you before we get started is how to use contact cement. A quick warning though, any contact cement that you want to use in your puppet must be used in a well-ventilated area. The fumes that they emit are toxic. It's recommended to do it outside. But if you're inside, make sure you have good ventilation and use a respirator. Contact cement is the best type of glue to use for a puppet. There's a few different kinds you can use. The most common you'll find is the Weldwood contact cement. This can be found in almost any hardware store. It comes in bigger bottles too. My favorite contact cement to use is called Master. It's a glue that shoemakers use and it's extremely strong. Even though Master is my favorite contact cement, I would have to say the industry standard is to use Barge. That's what most puppet builders use. It's very similar to the Master's though. I prefer this just because I can get it locally. Any leather shop or shoe repair shop should have one or the other. Let me show you how to use it because it seems really easy, and it is easy, but there is a little trick to it. There's a few different ways to apply contact cement, but before we get into that, let me show you how it really works. I'm going to do a test by gluing these two pieces of foam together. What makes contact cement different than other glues is you have to let the glue dry on both sides before you put it together. Most other glues you put on wet, you put it together and then let it dry. That's not how you use contact cement. If you do that with contact cement, you're going to have a seam that won't hold together very well. It might not come apart right away, but again, it's just not going to last for a very long time. What you're going to want to do is a very thin layer on both edges that you want to be glued together. Now, with the Master's, I find that I have to let these glues dry for about 3-5 minutes before I can attach them. The Weldwood glue seems to dry a lot faster. But you can speed up this process using a hairdryer or a heat gun. If you use a heat gun, make sure to put it not too close to the foam, or else you could burn it. This is a heat gun I like. It's a Milwaukee. Having cordless tools can be a real time-saver too. Now if I touch it and it's just a little bit tacky, that's a good time to attach it. Also, if you move the foam around, you can see if it's glistening or not. Often, if it's glistening, that's a little wet spot, you want to wait a little bit longer. But when it looks ready, you just have to carefully put these two edges together just like that. Then I'll give it a little firm push. That is not going anywhere. It's extremely strong. Even with this reticulated foam, it works the exact same way. But since I'm going to do another quick demo here, I'm going to show you another way to apply the glue. You noticed that I was using the brush in the can. That's the way I like to use it. It's the way I've been gluing ever since I started making puppets. But one thing a lot of other people like to do is to use an applicator. What they do is they get a little scrap of paper or cardboard and they put a little dollop on to the paper like that. Then they'll take a little scrap of foam, just like this, and they'll use it to dip into this glue and use it as a little applicator like this to stipple that glue to the foam because you really do not need a whole lot of glue to glue any of this foam. Again, this technique could be used with the reticulated foam, or with the L200, or really any foam. Again, this is a very common technique that a lot of puppet builders use. To be honest, it's not a technique that I tend to use very much. The reason for that is because of the fumes. One thing that's nice about using the brush that's in the can is that each time I'm done, I'm putting the cap back on. When I use this technique, I have a pile of glue here that the fumes are just emitting off of the entire time. Then again if you're in a well-ventilated area, this really shouldn't matter. It's really up to your own preference. I'm going to let these dry a little bit too, and then I will stick it together. Yet again, we get another strong hold. For professional puppet building, I highly recommend using some contact cement. But if you're not comfortable using the contact cement because of the fumes, you can absolutely use a hot glue gun to put together your entire puppet. It's definitely the safest option and will work. However, because of longevity, I prefer to use the contact cement. The hot glue just isn't as strong. Also, the contact cement won't loosen up the same way in hot environments. I once used a hot glue gun to put together an entire puppet and I had that puppet in my car on a hot day and some of the features started moving around and the foam shifted. It's a rare case, but it is something to think about, especially if you're going to end up making puppets for a client.
7. Part 1: Patterning the Foam Head: In this section, we're going to start making the pattern for our puppet. Now to get started with the pattern-making process, I'm going to use one of these bowls that I showed you earlier as our template. I have a link to these in the notes, but you can use any bowl that you have in your house. Though I do like these because they're a little bit smaller. The bigger the bowl you use, the bigger your puppet will be, and if you want a smaller puppet use a smaller bowl. Now the next thing I'm going to need is that plastic wrap. This is going to keep the tape from sticking to the bowl. That is perfect. Next I'm going to start wrapping it with two layers of this duck tape. There we have one layer done, I'm going to do one more layer just to make it a little stronger. I'm going to change the direction of the tape though. Last time my pieces were going this way, so now I'm going to have them go around this way. Make sure to press down the tape really well. You want it to be as flat as possible. Now that this is completely covered, we're going to start drawing our seam lines on it. Now since I have a mat here on the table, I'm going to line up the center of the bowl with this yellow line here. I'm going to find about the center there. That looks good. That's going to help me keep my lines pretty straight. Then I'm going to use a ruler to try to get the center line on this piece. That would make about here our center mark. Since this is the foam, I'm going to have two darts on there. The more darts you have, the more accurate the shape is going to be, especially in the foam patterning. I'm going to have one dart here, and one about there. I want it to be about as even as possible. I'm going to bring these lines down not all the way, but most of the way down like that. Now before we peel this tape off, I also want to make a line going around the base of the bowl. Our line is going to go right there, all the way around that edge. This is especially important because I wrapped some of the tape all the way around. This edge needs to be flush. Now we're going to start peeling the tape off of the ball which is going to be really easy because of that plastic wrap we put on it. You might just need a little snip. Now as you can see, it came off like a little tape bowl, which is exactly what we wanted. Let me trim some of these edges off. There we go. Now I'm just going to trim on all of these lines. There we go. Now this piece just become scrap. You could have just covered the bowl halfway, but wrapping the whole bowl keeps it all together a little better, especially if you're using a plastic wrap. Now you could just start tracing this onto the foam for your puppet but I like to make a paper pattern to make it a little bit nicer and easier to use in the future. I'm going to get out some of the scrap paper here and then trace this onto the paper. You want this to be as flat as possible, so really hold it down when you're tracing. Now you could just use this pattern too and get started with your puppet. But one thing that I really like to do is called truing up the pattern. That's a process of making this pattern perfectly symmetrical. Again, it's a really good idea if you plan on using these patterns again in the future. Now to do that, we just trace it twice, once this way, and then we flip it in the same spot and trace it again. Now flip it over. When I flip it over, I'm going to line up the two edges there, and as you can see, it doesn't line up perfectly. That's what I want to fix. Now that we have this traced twice, I need to find the center between these lines. So I'm just going to draw it out. It's about there and about there between those two points, so I'm going to do the line in between these two lines. There we go. Now I'm just going to cut around here and follow that center line when cutting this out. Also to make this pattern a little nicer, I'm going to double it up. I'm going to do that by gluing two pieces of paper together. Let me spray this down. Now we going to let that sit and get tacky for a moment because spray adhesive works good as a contact glue. If it's too wet, it'll slide around a little bit. That's pretty good. Now I'll cut it out. There's our pattern. In the next video, we're going to be using this pattern to put together our foam skull.
8. Part 2: Making the Foam Head: Now, that we have the foam pattern done for the head, we're going to start putting the skull together. Now, you can use any of the foams that we talked about in the material section, but today I'm going to use this reticulated foam. Now, to start off, I'm just going to trace this onto the foam. Then I'm going to trace it again. I like to line them up as close as I can without touching to maximize my foam. Now to cut these out, the best way to do it, is with a Personna blade. These are the industry standard for cutting foam. You want to make sure that you're cutting it straight down. If you're at a little bit of an angle that's going to create a bevel on the foam, and if the foam is beveled, it's not going to glue together as nicely. Now, if you're in a rush to do this project and you don't have these blades, you can just use scissors. Though, I wouldn't recommend attempting to use any scissors on foam that is thicker than a half inch, either method will work. Now, I'm going to use the contact cement to glue this together. You can use any of the ones that we mentioned in the materials list. I'm just going to glue around these edges here on both of them. There we go. Now, we're going to let this dry until it gets tacky. These are dry now, let me start putting them together. You want to do it very carefully and make sure you're lining up these edges as nicely as you can. Nice and evenly lining up those corners just like this, so they all meet at the same point. There is one. There we go. Now, we have to put these two halves together. I'll do it just like this. Now, we have a foam bowl. Now, that we have our foam skull finished, in the next section, we're going to make the mouth plates.
9. Part 3: Patterning the Mouthplates: Now that we have our foam head here, we're going to make the mouth plate pattern and mouth plate for our puppet. I'm going to draw it out on this piece of paper here. How I'm going to do it is just by laying this foam head on the paper and tracing around it with a Sharpie. I'm going to mark where the seams are here, the top and bottom. That's where the seam goes all the way down to the front. That's a little cheap for finding the center of the circle. Now I'm going to use my ruler again and trace that line. Because of the thickness of the foam, I want to trace in a little bit around this edge. I'm going to come in just a quarter of an inch. Just like that. I'm going to cut on this line. Here's what I do to make it symmetrical. I'm just going to cut straight up here and then I'm going to cut straight up here. If I take this and line up these two bottom corners here, when I cut it out, it'll be perfectly symmetrical. Just like that. You can use this mouth plate pattern as the top and bottom mouth plate for your puppet. But for my design, I like to often make the bottom mouth plate a little bit smaller. That gives the character a little bit of an overbite, which is really cute with puppets. To do that, I'm going to trace this again. Actually, I'm going to mark the center middle and center top, right on that fold line there. I'm going to transfer that here too. To make it smaller, you could bring this side down, but I'm actually going to bring the bottom up just a little bit. Again, probably just like a half-inch or quarter-inch depending on how you want yours to look. I'm going to take it in a little bit on the side too, so it's not as wide. This is completely optional though. Be sure to label your patterns. Now we have our mouth plate patterns. In the next section, we're going to make the actual mouth plates.
10. Part 4: Making the Mouthplates: In this section, we're going to use our mouth plate patterns to create the mouth plates. We're going to use this storage bin material that we talked about in the materials video at the beginning. I'm just going to trace these out. I'm going to use these snips to cut it out. I like to take the little tiny corners off too. That keeps them from poking into the foam later. Once you have these cut out, I like to gently sand the edges too. For this, I like to use a 60 or 80 grit sandpaper. Now after I sand these edges, I also give it a really light sanding to the front and the back using the same sandpaper. This gives the glue a little more something to hold onto when we glue it, and also it makes it a little bit more comfortable for your hand because otherwise, this plastic can be pretty slick. That looks pretty good. Now we have our mouth plates. In the next section, we're going to make the foam jaw for our puppet.
11. Part 5: Patterning the Foam Jaw: Next, we want to create the foam jaw pattern for our puppet. Now if I put this foam head on my hand like this, I can start to get an idea of the shape of the puppet that a need. Since I'm having a slight overbite on my puppet, I want the jaw foam to start about here and a wrap down underneath down to my knuckle. Now, we could pattern that from scratch, but why reinvent the wheel? I'm going to reuse this tape piece to create the new pattern for the bottom jaw. First thing I have to do is tape these pieces back together. There we go. We're back to our half shell now, But you can still see that our old seam lines are right here and right here. I have a feeling that if I just cut down to these lines, it will make a pretty good shape for what I want. I'm going to connect these two lines here and then have this go all the way to the edge like that. Now, let's see how this looks. If I put my puppet on back up like this, and I take this as the bottom jaw, I think that creates a pretty good shape right there. This is what I'm thinking. I think we can actually do this in just two pieces instead of three. I'm just going to cut straight up the middle here and mark this as my center front. Now let me trace that as a pattern. I'll put two registration marks here so we know that this is the middle. Now we have the foam pattern for our puppet's jaw. In the next section, we're going to trace it and cut it out of the foam.
12. Part 6: Making the Foam Jaw: Now that we have the foam pattern for our puppet's jaw, we're going to trace it and cut it out of foam. Then we're going to glue together like that. Then we'll carefully put them together, just like that. In the next section, we're going to assemble the foam head and mouth plate.
13. Part 7: Assembling the Head: Now we have all the pieces for the foam head. Let's put it together. We have the top of the head, the top mouth plate, the bottom jaw, and the bottom jaw mouth plate. Now I'm going to line up the center line with the top center of the mouth plate like that. Just as a guide, I'm going to put a little sharpie marker dot so I know where to stop gluing, just like that. Now I'm going to glue it right up to that edge. Then I'm going to glue along this edge too. Just going about a quarter of an inch into the mouth plate. Now we're going to let these dry quick while we do the same with the jaw. These are mostly dry. Let's do a fitting. Now when I fit this on, I like to put it a little more than halfway onto the foam. Not all the way. I like to have a little bit of foam peeking out from the edges right there. I'm going to do the same for the bottom jaw. Lining up the top front edges just like this. Having this curve around, just like that. Now that these are glued, I'm going to put a little bit more glue around this edge right here. There you go. Now while these are a little bit tacky, I'm just going to curl that little bit of foam around the lip like this. That makes it a really strong attachment. There we have it, our puppets head. Now that's coming up pretty nicely. Now that we have the foam head and jaw done, in the next video, we're going to be doing the foam body.
14. Part 8: Patterning the Fur Head Cover: Next we're going to make the fabric pattern for the head. For this, you're going to need your foam head as well as some scrap fleece for patterning. Since this is where the mouth is, we want the stretch of the fabric going across the face. You never want the stretch going up and down on a puppet anywhere. On this fleece, the stretch is going this way. It does not stretch as much this way. This is exactly how I need it. Now to make this patterning a little bit easier, I'm going to put some tape as a hinge for the mouth. Now, this tape is not going to be a permanent fixture in the puppet, is just to hold these pieces around so that they don't flop around. Don't forget to take this out later. There we have a nice little puppet. You're also going to need some sewing pins. These are very handy when patterning with a puppet. Lastly, you will need a Sharpie. Now that we have that hinge, we can test out the puppet and see how the mouth moves. The mouth moves pretty nice, but I think a little bit of this foam is blocking my thumb from being able to open the mouth even wider. I'm going to trim just a little bit of this away. What happens if I trim out a little loop of it like that? I think that might give me a little bit more movement. See that, gives me a little bit more space to open up my hand. For most of my monster puppets, I like to just have foam on the top of the head. That gives me a lot of freedom, but it's nice to have a chin sometimes depending on the design of your character. Now let's start draping this pattern. I like to drape it with the mouth about halfway open. I'm going to hold the puppet down like this and I'm going to cover the top just like that. Now this is like the pattern-making process with the tape. You want it to be snug but not too tight. I'm going to wrap it around like wrapping a Christmas present or a birthday present. I'm going to try to make sure that my seams line up with the center seam of the puppet. I'm wrapping it around like this. A pin, this closed here, right there. Also put a couple of pins into the foam so that this doesn't slide around on me. There we go. Now, I want to create a little bit of a center seam on the front of the face. You can try to line it up. The overall goal is to get this fabric to lay down as flat as possible. Let me see where the front is, right about there. Trying to get this to lay down as flat as possible. Now, looks like I have a little too much fabric up here. I'm going to get some of this out of the way for me. There we go, Check my seams here. This is just about on the center seam here, the front of the head. Putting these pins in to keep the foam attached to the fabric so it doesn't float up on me. That looks pretty good. Now let's create these darts here. This is the front of the head. You can see, let me lift up and show you the jaw. There is the jaw. This is the front of the head. There is a dart going down the middle two small darts on the side and of course to the whole back seam. Now that I have the top of the head draped, I'm going to make sure that that mouth is slightly open. I'm going to create the rest of the pattern like this. Getting this all to lie down as flat as I can on the chin. Let me come over here, get this mouth open. Again, put pins through the fabric right on the seams. I too to much fabric here, it's getting a little bulky, so let me cut that away. Make it a little easier to use. How they do on getting that center seam pretty good. Let me get all the way up to the mouth here. All the way down to the bottom of the chin. Now let me put my hand in and see how we're doing here. Starting to see a puppet for sure. Now I can feel where the mouth plates are. I can feel that the corner of the mouth plate is right about here. I want to make sure that this goes all the way back to that spot. I'm going to push that fabric back and put a pin into the foam of the corner of that mouth. That way I know where to draw the line to with the Sharpie. I'm doing that for the chin and for the top of the head. Right now it may not look like too much, but I'm going to start tracing on the seam lines and see how it starts to come together. Now I'm going to start tracing these lines. Then I'll get the chin here. Now I can really feel where the edge of the mouth plate is. I'm going to start up where these pins were and trace right on the edge of the mouth plate where I can feel it through the fabric. That seems pretty good. Lastly, I just got to find a spot for the entrance hall. It looks like it naturally wants to come right about there. Now that I traced all those lines, I'm going to take all these pins out and lay it down flat to see what I have. There we have our rough pattern. Now that we have this fabric pattern, we want to trace it out and true it up on paper. I'm going to lay this underneath here. This tool you can get at any sewing supply shop, it's called a tracing wheel. I like the ones with the spikes on it, works a little better for me. All you do is you lay this down flat and then carefully trace this right on the lines. Make sure to not let your fabric slide around. If you have any fabric weights, those can come in handy. Now you might not be able to see it in the camera well, but there's tiny little holes there that I'm going to trace right now. It creates this dotted line that's very easy to see in person. There it is. Now I'm going to cut this out. That step with tracing with the marker you actually don't have to do. I just did that so you can see the pattern better. If you can see those dots, you can skip straight to cutting it out. There, we have it. Now, just like before, this pattern is not perfectly symmetrical. I would like to true this pattern up as well. Now with the form it was optional, with the fleece, it's really not optional. It has to be perfectly symmetrical. We're going to use the same techniques that we used last time. I trace it once like that, and then I flip the whole thing over. I'm going to align it up best I can. I'm going to line up these two corners and you'll see how drastically different they are. Look at all that sticking out. As you can see, I've got some fixing up to do here. Just like before, find the center between all of these lines. I like to mark the points first, the center points, and I just do it by eye. Putting a dot in between the corners and then carefully tracing out this line. It seems like these corners happen to have lined up. Any sections they cross is the middle. Now I have my center lines marked and I'm going to cut it out. If it helps when you trace out your center line, maybe use a different color marker or pen. There we have it. Now, one thing to keep in mind on this pattern is that there is zero seam allowance on it. If you're going to end up stitching this on the sewing machine, you're going to have to add the seam allowance to this pattern. Now that we have the fabric head pattern done, next, we're going to make the fabric mouth pattern too.
15. Part 9: Patterning the Fabric Mouthplate: Now, to make the fabric pattern for the mouth plate, you're going to need the mouth plate pattern that we made earlier, because what we're going to do is trace these to make that next pattern. I'm going to get another piece of paper and I'm going to start off by tracing the bottom of the mouth plate pattern. Make sure to mark those notches there just like that. Then I'll take the top mouth plate pattern like this. Now, you don't want to butt them together. You want to leave a little bit of space between them. I like to leave about half an inch between them. That looks good about there. Make sure to line up the notches. Then I'm going to trace around this just like that. Then I'm going to carefully connect these. Then I'm going to label it. Now, this is going to be our pattern for the fabric mouth plate. Keep in mind that, again, there's no seam allowance on this so if you stitch it on the sewing machine, you're going to want to add some seam allowance. Just like that, we have the pattern for the fabric mouth plate. In the next section, we're going to use this pattern to cut a mouth plate out of velvet.
16. Part 10: Making the Fabric Mouthplate: In this section, we're going to use our mouth plate pattern to cut out a fabric mouth plate. Now for the mouth plate fabric, I like to use some velvet, some shade of red and black are great choices. Today I'm going to choose black. It's nice to pick some velvet that has a little bit of stretch to it. If it does, make sure the stretch is going across, just like before. I'm going to carefully mark the top and bottom so I don't get them confused. Then I'll cut it out. Now that we have the mouth plate fabric together, in the next video, we're going to use the head fabric pattern to create the forehead.
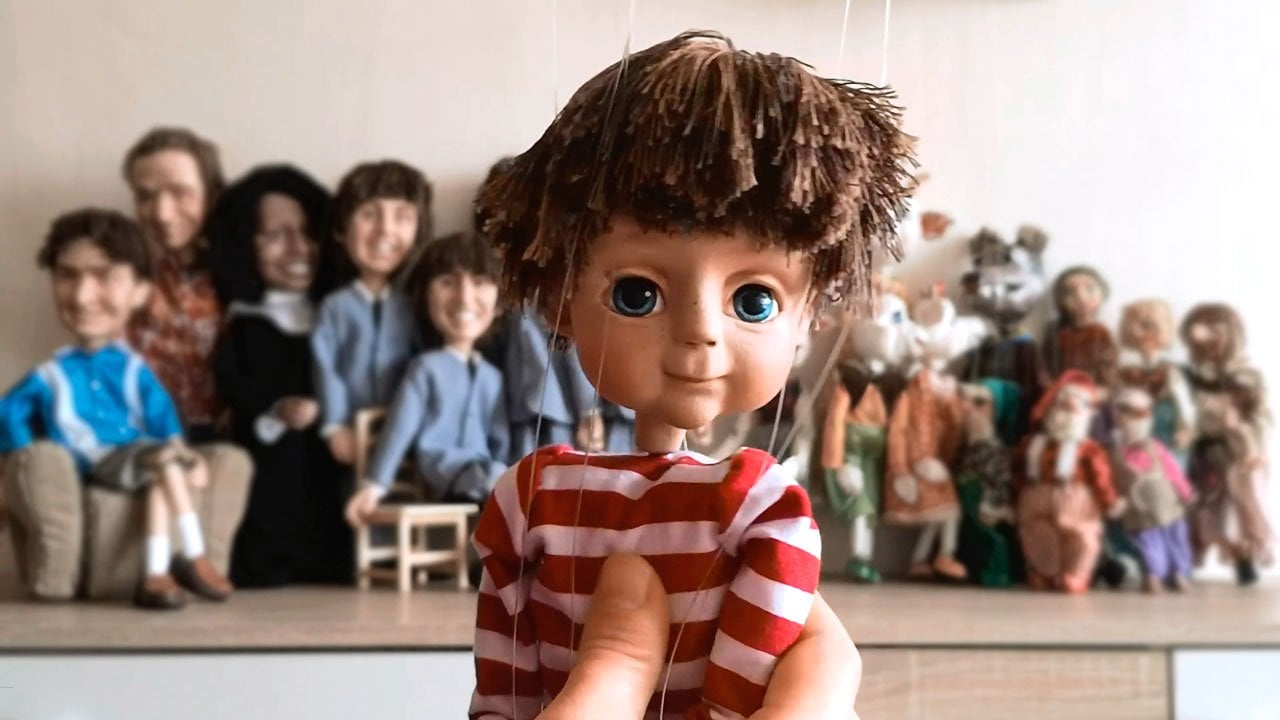
17. Part 11: Sewing the Fur Head Cover: In this section, we're going to use the fabric head pattern to put together a forehead. Now for this puppet today, I chose this golden yellow. I think it's going to look really nice. Now one thing to pay attention to, is the direction of the fur. You can see this fur is all flowing down and that's the way I'm going to use it today. I can see the edge of the fabric, the salvage edge. I'm going to make sure that I keep it going across, keeping the salvage edge on this side. What I'm going to do is trace out this pattern just like this. Now when you're cutting out fur, it's very important to cut it from the back. Otherwise, you're going to make a huge mess and have a bunch of fur pieces come off. There's two ways to do it. If you have a Personna blade, the best way to do it is to carefully cut from the back just like this. When you cut just the backing of the fabric like this, what it does is, it makes it so none of those hair fibers get cut, it'll save you a lot of mess. But if you don't have one of these knives, you can use scissors. All you have to do is cut very slowly and make sure you're cutting just the backing. You just do tiny little snips like this, making sure that you're sneaking the tip of the scissors under there and just cutting the backing. This is time-consuming though, but if it's your only tool, then it's the best way to do it. I'm going to continue with the razor blade. If you want to machine sew this puppy, you'd have to add the seam allowance before cutting this out. This is the upholstery thread that I mentioned in the materials list, and it's my favorite thread to use. Now when you're sewing, you only want to use about an arm's length of thread at a time. Now, there's a couple of different ways to sew and you can use whatever technique that you are most comfortable with. But most people do is they double up the thread like this and then tie a knot at the end and that'll work fine. But the technique that I use is more of the technique that tailors use. They don't tend a knot their thread at all and they keep it out jogged a little bit. One strand is much longer than the other strand that's hanging around. Now, the hard thing about that is sometimes your thread wants to fall off of the needle. To prevent that from happening, hold the needle by the base of the hole there, so that way the thread won't just slip out. Now the first thing I'm going to do is close up these darts on the sides of the head. Let me show you how I knot the fabric. The stitch that I'm going to do is called a whip stitch, that's the strongest stitch to do for your puppet. Now, to get started off, here's what I do. I find a spot where I'm going to start. I go in, pull the thread until the tail is about that long, just about a half an inch or so. Then I'm going to try to go into about the same spot, to actually trying to go into the exact same spot. Don't pull tight or else it will all pull through and go into the same spot again, and one more time. Now that I did three times, this time, I am going to pull tight. That just last sew around it and that will never come out. That is actually stronger than a knot, because technically a knot can pull through, this will not be able to pull through. Again, this is the technique that a lot of tailors tend to use. Now for the whip stitch, all I'm going to do is go in one side of the fabric and through the backing, come in through the first side and out the backing again. You're just going to carefully stitch it just like this, bringing just that backing together. Try not to catch any of the fur in there. It helps you keep it straight. Like to use pins too. But this section is so short, I don't really need it yet. You're going in one side of the backing and out the other. Don't pull the thread too tight. I want your stitches to be as close together as possible. Some people try to save time by making their stitches further apart and that just makes your puppet not turn out as good. You might be able to get away with a fur puppet like this, but definitely if you end up making a fleece character in the future, it's just going to show up and be a really ugly seam. Now that I'm at the end, I'm going to do the same thing that I did at the beginning. I'm going to go in the exact same spot three times, just like that and then give it a little tug and then cut, leaving just a little bit of a tail there, and that is a nice strong seam. Now, I'm going to do the same thing on this half of the head, closing up that seam. Now I have these two darts stone together. Next I'm going to bring the chins together. Now, you want to tuck all this fur onto the inside. This is again where the pins can come in handy. Make sure you're lining up these seams. Lining up these corners. Now, this is the mouth that's open and this is the entrance hall for the puppet. The next thing we're going to do is start stitching together the top of the head. But I'm going to actually stop when I get about an inch or two past this top scene this is going to make stitching the neck to the body a little easier later on, make sure that these top two darts are lined up perfectly. Again, the two of the pins come in handy. Let's take a peek at how that's coming out. That's looking good. Now we have the forehead sewn together. In the next section we're going to stitch in the fabric mouth plate.
18. Part 12: Attaching the Fabric Mouthplate to the Fur Head Cover: In this section, we're going to stitch in our fabric mouth plate into the fur head. Here's our fur head that we were stitching together before. Let me turn it back inside out. We have to line up this mouth plate on the inside. As you can see, I labeled this as the top notch, and that's going to line up with this front top notch there. Let's pin that in, lining up those notches, trying to keep all the fur on the inside. I'll pin that there, and then I'm going to do the same thing on the bottom chin, lining up that bottom notch with the bottom seam of the chin. Then the rest of this, you can just ease it in, and it should all fit perfectly. There we go. I have it all pinned in now. Next, I'm going to get my thread ready. This time, I'm going to use a black thread so that it blends in with the mouth plate fabric. For this, I'm going to use the exact same stitch. I like to start at the bottom of the chin, but it doesn't really make a difference where you start. There we go. It's all stitched together. Now that our fabric head is complete, in the next section, we're going to glue it to the foam head.
19. Part 13: Gluing the Fur Head Cover to the Foam Head: In this section, we're going to take our fabric head covering and glue it to our foam head. Now that it's all stitched together, we want to glue the fabric to the foam head. Don't forget to take this tape out if you didn't take it out yet. I'm going to use the same contact cement. I'm going to do a very thin layer just around the rim of the mouth, right where were we stitched it. Make sure not to use too much of the glue though because it can soak through the fabric. You don't want that to happen. Make sure you do a very thin layer. Then just go just around the edges here. Then we'll let that get a little tacky before we attach it. All right. Now I'm going to line up the foam head into the foam mouth, lining up that center notch with the front seam of the foam head, just like this, and then evenly spread it all the way around the mouth. Just like that. Then I'll do the same with the bottom jaw, lining up that center seam with the center seam of the foam, and then lining it up just like that. If you did it right, you should still have about a half-inch of space there, and if you remember, that's the same half-inch of space that we left to right here. That gives the mouth a little bit more flexibility. But once you have that down, you can turn this around inside out. Now, as you can see, you've got a puppet head. Just like that, we've got a little puppet head. In the next part of the video, we're going to be making the pattern for the fabric body.
20. Part 14: Making the Foam Body: To make the foam body, we're actually going to be using the same pattern that we used for the top of the head. If you want, you could use the same foam. But this time, I'd like to use a stiffer foam for the body. This is the L200 or EVA foam, but you can also use that mat foam or any of the other foams that we talked about in the materials video. Now for the foam body, I'm going to trace this four times and then cut them out using the same techniques we used before. Now I'm going to glue these seams together. We'll let these dry off and get tacky. Now let's start putting it together. Now we have these two bowls, and what we want to do is glue them together like this. There we have a pretty round shape. Now we have a nice shape for our body, it's going to look like this. We're going to have some fabric in-between. We're going to do that soon. But before we do that, let's talk about the best way to use this. Because this is not perfectly spherical, It's a little bit wider this way. I'm going to use it just like this. Instead of this side being the top, I'm going to have this side be the top of the body. What I like to do is to cut a four inch hole into the bottom of the body. That's going to be the entrance hole for the puppet. Now you could measure or draw that, but I like to use a PVC pipe. This is scheduled 20, a four-inch PVC pipe. I'm just going to lie it just like this centered and then carefully trace a hole with a Sharpie. Now, this is going to be the hole that I cut out as the entrance hole for the puppet. I'm going to cut into it at this angle. I'm going to go in slightly a little bit from the line. There I have the entrance hole for the puppet and I'm going to do another hole on the top too. Now that I have this hole here, this won't roll around when I set it down. This makes it much easier to find the very top center. We're going to trace this again. Now, this one I'm going to bring in even more. I'm actually going to draw it first, about a quarter of an inch smaller. Now, if you need to make this a little bit bigger for your hand, that is totally fine. You can do that. But for mine, I'm going to try here because it's always easier to take foam away than it is to add foam. There we go. Now I'm going to bevel it a little bit more too, taking away a little bit more material. Let's see how it's fitting now. I'm going to mark the top and the bottom. I'm just going to put a T up here and a B down there just so I don't forget. That seems pretty good to me for this little puppet. Now that we have our foam head and foam body, next, we're going to be draping the fabric part of this pattern for the puppet.
21. Part 15: Patterning the Fur Body: Now, we have our head covered. In this section, we're going to cover the bottom part of the body. For the bottom part of the body, we're going to use the same technique that we used before. I'm going to use some of this scrip fleece here. Again, make sure that the stretch is going across. We're going to wrap this body in a similar way, although it's going to be much less intricate of a pattern. I'm just going to wrap this just like that, line it up on that seam there. Now again, I'm going to trace along these lines here. That looks good. Now, let me take these pins out. Let me true this up. Now, there's dots from the tracing wheels there and I'm just going to cut it out. Right there is the body pattern though I have just true it up to make sure it is symmetrical. Then just like before, find the middle lines. I only did half of it. What I'm going to do is fold it in half and just make sure to line up these corners. Then I should get something that is perfectly symmetrical since I have the center lines on this half. Let's try it out. Now, we have the pattern to cover our body with fur. In the next section, we're going to use this pattern to create the fur covering.
22. Part 16: Making the Fur Body Cover: Now that we have our fabric body pattern, let's cut it out of fur. Again, make sure to lay up the fabric so that the fur is going down this way. As you can see, it's all flowing down. All right, now our fabric bodies all stitched together, let's wrap it around the foam. I'm just going to wrap it around like this, see how it fits, and it fits perfectly. But I'm not going to stitch this together yet. What I'm going to do is just pin it for now, so that we can make the torso. So I just pinned that together in the back, because I like to stitch the whole back of the puppet down at one time. In the next video, we're going to be making the fabric torso.
23. Part 17: Patterning the Torso: We're going to be making the fabric torso. Now it helps to have a puppet stand. If you look on my website, you can learn how to make one of these too, but you can really use anything as a stand. I'm going to put the body through like this, and then I'm going to put the head on top. The next thing I want to do is to create the torso between the body and the head. Now that's just going to be hanging fabric, but we have to decide how long we want it to be. We could make the head pretty close to the body almost like Elmo. But if you look at a purple like Grover, his torso is a little bit longer. Decide how you want it to be for your character. For mine, about that far it looks good. Let me measure that with a tape measure here, so on the side seam, it's about five inches on my puppet. Let's draft a torso. I'm going to need some paper to do that, and my head pattern right here. What I want to find out is the length of this neck hole. Again, I'm going to use this tape measure and measure how long that neck hole is. Having a flexible tape measure helps a lot. It's about four inches there. Since there's two of them, that means it's about eight inches. About eight inches with that gentle curve there. Now let's measure the length of the body. Let me take the fur off of this body here that'll be a little easier to measure. I'm going to take the length of the top of this here, and this is about ten-and-a-half inches. Let me make a center line on this paper first before we start drafting. Now one thing I know is if you look at this shape of the top of the head here, you want something that's going to connect into it quite easily. Holding the paper at this angle shows you the shape that that pattern should be. The shape should start coming out from the front of the neck and then curve up and straight out like that. That's the shape we're looking for, but it might not be quite long enough. We have to make sure this is four inches. We might have to adjust it. It looks like four inches is about here. Let me bring this up as a gentle curve. About two inches would be our side seam. If you remember, we had ten-and-a-half inches, which would be five-and-a-quarter going this way. Let me measure down that five inches there, about there. We're going to do five-and-a-quarter going this way. That looks good. We go five inches there, five inches there, and a little less over here. We want this to be a gentle curve, like that. We want to connect these lines here. This should be a torso. That works out pretty well. Then we have a puppet torso, just like that. Now we have the fabric pattern for our torso. In the next section, we're going to cut this out of fur.
24. Part 18: Making the Fur Torso: Now that we have our torso pattern, let's cut it out of fur. Now that we have this pattern, let's trace it and cut it out. I have some fur here. Make sure that the nap is still going in the same direction as the rest of the pattern. I will trace it out. I'm going to mark the center front here just like that. That's how you got the torso out of fur. In the next section, we're going to put all these body pieces together.
25. Part 19: Sewing the Fur Body: Now that we have our foam, head, body and torso, let's put it all together. Now that we have our torso cut out, I want to stitch it to the top of the body. This seam is going to be stitched to this seam right here. Make sure to lineup that center notch with this center dart. There we have our torso attached to the body. Next we have to attach the neck to the head. This is going to be a little tricky since it's already on our foam, but since it's fabric and it's flexible, it's going to work out just easily. I'm going to line up this notch with the center seam on the bottom of the neck. I will put a pin right there, and then I'll line up the corners of the neck. Now that that's all pinned, I'm just going to stitch along that line. Now what we're going to do is we're going to stitch from the top of the head to all the way down to the bottom of the body. There we go, we have our puppet body. In the next section, we're going to add the foam body.
26. Part 20: Inserting the Foam Body: Now that we have this entire body sewn together, we're going to put the foam piece inside. Now, this is really quite simple. Just make sure you have the bottom side facing down that we marked earlier, and then I'm going to force it in here. Now this hole is a little bit small to hold for this to fit smoothly in, but since this is foam, we can crunch it up a little bit, and then we can easily sneak it inside, and then when we let go, it can take the shape, and we have a nice snug fit there for the body. One more thing I'd like to do is to put a ring of glue around the bottom edge to glue this fur to the foam body. Keeps your whole puppet nice and snug and one piece. For that, I'm going to use contact cement. I pull all the fur back just like this, which shows the netting, which is going to be really handy in a moment. Now I'm going to glue all these edges here. The edge of the fur. Now once it's tacky, I'm just going to bring it up and gently roll it over the edge of the foam. Just like this. Try to do it evenly. Just like that. Now check out the shape of our puppet. Got a nice big bulbous head, guinea torso, and a nice big bottom. In the next section, we're going to be making the hands for our puppet.
27. Part 21: Patterning the Hands: In this section, we're going to draft a hand pattern for our puppet. The first thing you're going to need is some paper to sketch it out on. You will need a ruler. On my puppets, I like to make the arms about one inch thick. I'm going to start by just measuring out one inch here. I like to make them about 12 inches long from the tip of the finger, to the edge of the arm. I'm going to create about a 12 inch long line here. I'm going to draw our hand within this rectangle. This is how thick our arm is going to be. But now the actual hand portion, is going to be about four inches long. That's how I like it. Now this can change depending on the design of your puppet. Maybe you want your puppet to have really large hands. Maybe you want it to have really small hands. This is just a good standard. From here, I like to have the thumb come up about like this. I have my fingers at about a half an inch is a good width for the fingers. I'm just keeping in mind that this is going to be a hand, let me block out a pedal here for the fingers. It's going to be within this shape. I like the fingers to be about two inches long, so let me measure down about two inches. That would be a line about here. If our fingers are about a half inch wide, then we can just draw out where our fingers are going to be. We have a hand here. Let me say that this is one of our fingers. Here's another one. I'm going to make that middle one go a little bit longer. I'm going to make this pinky come a little bit shorter. That's a pretty good hand. You see how long my thumb is? Is my thumb long enough? It's about an inch and a quarter. I'm going to make my thumb at least an inch and a half, so it's not too short. I'll bring that up. Now, these are, again, just general guidelines that work well for my puppets. I think that is pretty good. Now I'm just going to cut it out. You know what, looking at this hand, I think I actually want it to get gradually just a little bit wider. I'm going to have it line up with here. I'm going to have this line come down like that. I think that look really nice as an arm. If you look at that, that looks like a pretty good arm for our monster. Now we have the hand pattern for our puppet. But before we start cutting this out of fur, we have to make the armature arm rods and foam. We'll be doing that in the next section.
28. Part 22: Making the Armature Wire Hands and Arm Rods: Underneath the hand pattern we made earlier, a thin armature wire, this is 18 gauge, thin metal for the rods, these are bicycle spokes, small dowels that are either half-inch or five-eighths inch wide, superglue, a hot glue gun, I'm using my snips from before, a rotary tool or Dremel, and some needle-nose pliers. The first thing I'm going to do is make the armature wire for the fingers. I'm going to use this wire and cut it into little sections, and twist it up. Let me see how long these fingers are. For my puppet, it looks like about seven-inch lengths will work well and this will cover two fingers. I'm going to make two sections that are seven inches long and then I'm going to twist them together. Now, these might need to be a little longer depending on the design of the hand that you are making. Now, I need to make four of these, two for each hand. There we go. We have all four of those ready to go. Next, I'm going to take the tips of the arm rods and bend them into a P shape. These are the bicycle spokes. This end has this little flat end. I'm going to bend that into that P shape just like this with the pliers. There we go, just like this. Then I'm going to thread two of these through and bend it right in half. I'll give it a little twist. Then I'll do the same with this one. Once I have this wrapped around, to keep it from moving too much, I'm going to cover this with hot glue. I'm going to let this cool off a little bit. Now, that this is dry, I'm going to bend these fingers to fit the hand. All right, now I'm going to bend the very tips of these over. This is a really important part because it keeps the metal from poking through the foam and fabric later, so make sure you always bend the tips of these fingers, just like that. It fits in perfectly. Next, to make it a little stronger, I like to encapsulate these wires in hot glue, so I'm going to give them a quick layer. There we go. I'll let this sit for a moment. Now, that we have one done, I'm going to do the other one. These fingers are looking nice and sturdy. Now, let's get some handles on these rods as well. For the handles, I like to use these wooden dowels. These ones are half-inch wide, but a lot of times I use five-eighths with two. You're going to need a drill bit on a drill that matches the width of your rods. Now, on these rods, when I drill the hole, I don't put it right in the middle. I actually put it a little bit off-center, that gives my thumb a nice little place to rest on the edge here. It can give you a little bit more control and leverage when you're doing the puppetry. I'm going to make the drill holes right about there and here. Be careful when drilling these holes. Now, before I just glue these in, I want to make sure that there's no chance of these arm rod spinning inside of this hole. Now, how to help prevent that from happening, I'm just going to put some little notches into this metal, so that way the glue really has something to grip onto. For that, I'm going to use the Dremel. Make sure to use eye protection when doing this part. This should work out pretty well. Now, I'm going to fill this with some superglue and a little tip is to use some accelerator to make it dry much faster. Let me put some right onto this too though. That accelerator makes it dry almost immediately. Just like that, we have our arm rods finished. Now, that our armature wire and arm rods are finished, in the next section, we're going to be making the foam hands for this puppet.
29. Part 23: Making the Foam Hands: In this section, we're going to make the arm rods and armature fingers for our Puppet. You're going to need the hand pattern we made earlier, a thin armature wire, this is 18 gauge, thin metal for the rods. These are bicycle spokes, small dowels that are either half-inch or five-eighths inch wide, superglue, a hot glue gun. I'm using my snips from before, a Rotary Tool or Dremel, and some needle-nose pliers. The first thing I'm going to do is make the armature wire for the fingers. I'm going to use this wire and cut it into little sections and twist it up. Let me see how long these fingers are. For my puppet, it looks like about seven-inch lengths will work well. This will cover two fingers. So I'm going to make two sections that are seven inches long and then I'm going to twist them together. Now these might need to be a little longer depending on the design of the hand that you are making. Now, I need to make four of these, two for each hand. There we go. We have all four of those ready to go. Next, I'm going to take the tips of the arm rods and bend them into a p-shape. These are the bicycle spokes and this one has this little flat end. I'm going to bend that into that p-shape just like this with the pliers. There we go, just like this. Then I'm going to thread two of these through and bend it right in half. It'll give it a little twist. Then I'll do the same with this one. Once I have this wrapped around to keep it from moving too much, I'm going to cover this with hot glue. I'm going to let this cool off a little bit. Now that this is dry, I'm going to bend these fingers to fit the hand. All right, now I'm going to bend the very tips of these over. This is a really important part because it keeps the metal from poking through the foam and fabric later. So make sure you always bend the tips of these fingers. Just like that, it fits in perfectly. Next, to make it a little stronger, I like to encapsulate these wires in hot glue. I'm going to give them a quick layer. There we go. I'll let this sit for a moment. Now that we have one done, I'm going to do the other one. These fingers are looking nice and sturdy. Now let's get some handles on these rods as well. For the handles, I like to use these wooden dowels. These ones are half-inch wide, but a lot of times I use five-eighths with two. You're going to need a drill bit on a drill that matches the width of your rods. Now on these rods, when I drill the whole I don't put it right in the middle. I actually put it a little bit off-center. That gives my thumb a nice little place to rest on the edge here. It can give you a little bit more control and leverage when you're doing the puppetry. I'm going to make the drill holes right about there and here. Be careful when drilling these holes. Now before I just glue these in, I want to make sure that there's no chance of these arm rods spinning inside of this hole. Now to help prevent that from happening, I'm just going to put some little notches into this metal. That way the glue really has something to grip onto. For that I'm going to use the Dremel. Make sure to use eye protection when doing this part. This should work out pretty well. Now I'm going to fill this with some superglue and a little tip is to use some accelerator to make it dry much faster. Let me put some right onto this too though. That accelerator makes it dry almost immediately. Just like that, we have our arm rods finished. Now that our armature wire and our rods are finished, in the next section, we're going to be making the foam hands for this puppet. In this section, we're going to be making the foam hands for our puppet. For the foam hands this time I'm going to use this green foam that I can get at Joanne's. Although you could also use the reticulated foam, though I would not recommend the L_200 or Matt foam, that type of foam's a little bit too stiff. I'm actually going to use the same hand pattern right here. I'm just going to bend it right at about the wrist so I can decide how big to make the hand. Since this is only half-inch thick, I need to cut up four of these hands. To cut them out, you could use the razor blade again. I'm just going to use scissors. Now we're going to sandwich the armature wire in-between two layers of this foam like that. For this, we're going to use the contact cement again. Now we're going to let that sit and get a little bit tacky. But you can also speed it up with a hairdryer or a heat gun. Once it's tacky, you can lay these fingers in. You want to think of them like bone, so try to get those wires directly into the center of those foam fingers like that. Then I'm going to sandwich this right on top. Now if you remember, we bent the tips of those metal fingers so they don't poke through. Just for a little bit of extra protection, I'm going to put a little bit of glue on the tips of these fingers and give them a little pinch. That'll also keep it from poking through. Then I'm just going to pinch these fingers just like this. Now I'm going to do the same for the other hand. Now we have those foam hands on the last thing to do is to just spray paint these handles black. For that, I just use black spray paint. I'll let that dry for a while. Just like that, our handles are painted black. In the next section, we're going to create the forehand coverings for these.
30. Part 24: Sewing the Fur Hands: In this section, we're going to be cutting out the fur hands. We're going to use our trusty hand pattern again, and I'm going to trace it out with this fur. If you remember, we've been paying a lot of attention to the direction of the fur. You can decide how you want yours to be. I like to have the fur going in the direction of the fingers. That gives a nice long finger movement of the fur at the tips. I'm going to have to cut out four of these. There we go. I'm going to cut it out with the razor again. Now it's time to stitch these hands together just like this. However, I do keep a space open. I keep it open from about the bottom of the pinky to the wrist. That way I have room to slide the foam hand into the hand. I also keep the very ends open. Let's start sewing. Stitching around the fingers can be a little bit tricky. I like to try to make sure I'm budding together the backing of the fur like this and pushing those fur strands inside, that way we have a good surface to stitch. Once I get around the finger, then I start pushing that fur into the finger just like this, right as I turn around the top. Now that we have the hand stitched together, we're going to put in the foam hands and the foam arms in the next section.
31. Part 25: Stuffing the hands and Arms: In this section, we're going to turn and stuff the hands. Before I put these foam hands in, I want to stuff the arms. To do that, I'm going to use this half-inch foam again. I'm just going to cut it into small strips. I might cut it down to about the length of the arm. Now, if I turn this hand inside out first, it's going to be virtually impossible to stuff this foam into the arm, there would be just way too much friction. So what I'm going to do is stitch it to the tip of the arm and then turn the whole thing at once. That's why I left this end open. So I'm going to stitch through this whole thickness. Just going to knot knot thread first, and now what I'm going to do is stitch through all three layers, both fur and then the foam. I'm going to use the same simple whip stitch. Now that I have this attached, I'm going to use a pencil to start to turn this whole thing inside out. So I'm going to push in right on this edge, and then you'll notice that the foam is just going to get sucked into the hand as it turns inside out. Once you get to this point, you want the rest of the arm to turn out of that little side that we left open on the hand. Once I'm there, I can just pull this through. Then there we go. I have an arm that's turned and stuffed with fur. Now, unfortunately, because of the finger wires, we're not going to be able to do that with the rest of the hand. So I'm going to start off by turning these fingers inside out right now. Might need something a little skinnier, this is the back of a paintbrush. There we go. Now, this hand is completely turned. It's a little hard to tell because of how fuzzy it is. But later we're going to trim that down. First. Let me stick this hand inside that glove. Now, this is definitely more difficult than it may look. Even though it may look difficult. There's a lot of friction in there for the same reason that we wouldn't have been able to put this piece in. But the difference is that at least this has the armature wire in it. Since this piece is so flexible, there's no way we could really push it in. But since this has the wire in it, it has a little bit more body to it. So let me bend these fingers up so that I can put them into this little opening we have down here and try to fit it in like a glove. It's going to take some wrestling though. These have to feel around. I'm getting the thumb up into the thumb, the pointer finger into the pointer finger. I like to get each of them started, and then slowly just work it in. There we go. I have all the fingers started now. It's going to keep turning it and pressing it in, and then when I come over here and I'm pressing here, when I'm doing is pushing in, to these spots on the glove. That's bringing it in, almost like putting pants on. You can tell if it's on all the way by pinching the very tips of the fingers. If you still feel an empty piece of fur there, then you know, you have to go a little bit further. So I have to go a tiny bit more. I can feel that it's not getting all the way to the tip yet. Now, all I'm going to do is stitch this last little bit closed around this foam, then we'll be in business. Now, here the stitch you want to do is what's called a slip stitch. It's also known as a ladder stitch. Follow the demo in the beginning to get more specifics on how to do this. But you're going in and out on this side of the fur, and then going back in and out on the other side of the fur. It creates these lines going across the fur. To give you a closer view, you can see those strands of thread. Now watch, if I pull this, it's going to bring all that fabric together tightly and you won't even see the scene. This is definitely not a stitch you want to use to put the whole puppet together because it's not very strong. But it's really the only way to close up the final parts of some project like this. There we go, and we have one hand finished. Now, I'm going to repeat the process for this hand, and just like that, our hands and arms are covered. In the next section, we're going to trim these up to make them look really nice.
32. Part 26: Trimming the Fur Hands: In this section, we're going to trim the fur so that you can really see the fingers and the whole arm. Now for this, I just use scissors. Some people like to use electric trimmers, but they're expensive and they wear out easily and sometimes the trimming is just too perfect. Sometimes, those little imperfections are what make it seem more real. I show you how I do it. I'm going to start off by trimming the arm. It's really important that you don't actually cut the fabric and that you are just cutting the length of the fur. You're going to keep it as long or as short as you want, and then also you can keep some parts longer than others. Sometimes, I like to keep the fingertips a little longer so I get a little bit of sympathetic movement. But for right now, I'm just going to start trimming it up. If you think about the techniques people use when they cut your hair, they use their two fingers to pinch the hair so that keeps it from cutting too low. I'm going to do the same thing, at least to start off. That way I know I'm not going to accidentally cut the body. After a while, you will just get a feel for it. Notice how I keep pulling at the fur to make sure it's standing up. Now when you get to the fingers, I spread them out a little bit and use the same techniques, I pinch up to the finger so I don't accidentally cut the fabric. Now you really don't want to get too close to the fabric, not just so you don't cut it, but also so you don't get bald spots. Though if you accidentally get a little bald spot, I can show you how to fix it. Now I'm going to repeat this whole trimming process on the other hand. Just like that, the hands are all trimmed up. In the next section, we're going to trim the body of the puppet.
33. Part 27: Trimming the Fur Body: In this section, we're going to trim the fur on the body of this puppet. Now, this is optional, and technically, it is for the hands as well. It really depends on the design of the character that you want to make. You can style this character any way you want. Let's say you trim the whole thing down as low as you could, but left like a Mohawk on top. That would be a style choice. Most of the time on my puppets, I like to keep the top a little bit longer, but I shave down under the chin and the torso, often tapering down to the bottom of the body and tapering up to the head. That's what I'm going to do today. I'm going to use the same techniques that we used on trimming the hands. Just like that, this puppet is all trimmed up. In the next section, I'm going to stitch the arms onto this puppet.
34. Part 28: Attaching the Arms to the Body: In this section, I'm going to stitch the arms onto the puppet. For this, I'm going to use the same needle and thread. The only difference is I actually am going to double up the thread for this part. I did loop it completely, so both ends and at the same spot. I'm going to start by knotting my thread on here the same way I've done it everywhere else I stitched. There we go. I have it started and knotted there. I'm just going to find a good place that I like. Depending on the design of your character, you may want it up a little higher, you might want it a little lower. It's just going to change the look of your puppet. The most important thing is just to make sure you put it in the same spot on both sides. If you're really not sure on what's going to look good, you can pin it on in different spots to see which design you like. I'm going to put this guy on the stand here and then use some pins to find a good position. I think above there looks good for this character. I'm going to mark it with a pin, that way, I know where to stitch. I'm going to put my hand inside of the puppet here. It's going to make it a little easier to sew. I like to line up the arm with the corner of the mouth. I'd say the spot that I like is about an inch down from the neck seam. I can feel it from inside the puppet. I'm doing the same old whip stitch. It's one of the strongest stitches you can do. Then I'm going to knot it right in the armpit. Another thing I like to do at the end of finishing a stitch of a puppet is to do what's called bearing the thread. What that is, is rather than just cutting the thread really close like that, which makes it a little bit weaker, what I do is I actually push the needle through the fabric and let it go through the arm. That way, the tail is buried inside of the puppet. That's going to make it much stronger, and that's looking nice for the puppet. Now our puppet's looking pretty nice. In the next section, I'm going to show you some different grooming techniques to style the fur of your character.
35. Part 29: Texturing the Fur: In this section, we're going to look at different ways to style the fur of your character. Let's take a close look at the fur. With this Mongolian fur it has a real specific texture. It's very distinct to this type of fur and that's why it's my favorite. Now both of these pieces are the same, but look how different it looks if you just comb it, get a really comb it out well. Now just by combing it, look how different the texture of the fur is. This is a lot more fluffy and this looks a little bit more mangled. Even the spots that are trimmed down have a little bit of that mangled look to it. If I was to comb this out, the puppet would suddenly get a lot more fluffy. Now if that's a look that you like, you can do that with your puppet. Personally, I like to keep my monsters a little bit more monastery looking so I actually distress the fur a little bit further. Take a look at this. If I actually take this fur and trim it down the same way the fur is trimmed down on the rest of the puppet, it still has a raw look to it. But watch this, I'll take an identical piece of fur that I trimmed down as well and watch what happens when I just start distressing it with my fingers. I just start teasing it. That's what this technique is called, teasing the fur. All I'm really doing is just knitting it between my fingers like this. You don't want to do it too rough, because if you do it too rough, you could pull out some of the fibers. It's inevitably going to happen a little bit, but you really want to minimize it. Take a look at that. Just after a minute of knitting that fur, you can tell it has so much more texture to it. This looks a little bit more like a stuffed animal, and this looks like something you might pull off a strange monstery creature. Just like trimming the fur, you can choose places where you do and don't like to do this. Again, I like to tease the fur on the short parts of the puppet and leave it a little bit unteased in some of the longer spots. That's what I think I'm going to do with this puppet. One place that's really important is to do it around the mouth, so you don't get those furs hanging into the mouth like this. You really want to tease that back as well and give it a little rub, perhaps to have one hand inside of the puppet too. I'm just giving it a rub like this. This can also help but this seems a little bit, not that they were really that visible to begin with. I already see that monstery look that he's getting. Also, this look tends to happen just in a lot of use. We're really just distressing the fur a little bit. If you see any high spot, just go ahead and give them a little trim. Now I'm really liking how that looks. There we have it. It might not look that different from a far shot, but up-close it really makes a big difference. Teasing the fur is one of the easiest way to change the textures. Now there's many other ways to change the texture of the fur too, but most of those methods require heat. The most popular one that puppeteers use is boiling the fur. This is very tedious and hard to get accurate and it's a big mess. But I've even used a heat gun to do some light texturing before too. There's a ton of different ways to texture and distress fur, experiment and discover your own favorites. In the next section, I'm going to show you one more quick styling technique that you can use on your puppet.
36. Part 30: Styling the Fur: In this section, I'm going to show you another technique for styling the fur on your puppet. We're going to use our bowls again, but this time I filled it up with a little bit of water. But I'm also going to mix in just a little bit of Elmer's glue. My favorite is the all-purpose, but I'm sure this glue would work well too. I'm just going to squeeze it into the bowl. Now I don't exactly measure it, but I do about a one-to-one. You don't need much water in there at all. Just make sure you stir pretty well. I think I need a little bit more blue. Should be like a thick milk. Now once it's mixed well, I'm just going to use it like a regular styling gel. I'm just going to carefully dip my fingers in it, mix it around into my hands, and just style the puppet. This can help to keep the fur staying out of the mouth too like we did by teasing it. Just gives it a little extra support there. I can just hold some of the textures and shapes you're creating with the fur. It's literally like a hair gel. Now I don't like to do way too much of it. But I just mix it on my hands like this, and just put it in a couple of different spots. Be careful not to use too much though. If you use too much your puppet can get a little bit stiff. That's why you really want to water down well. Never go directly onto the puppet with it. I always rub it on my hands like this, and just work it in. It almost acts like a fabric starch. Now that's how I like to style it on a monster, but you can actually use the same technique with a comb, and get some really nice shapes out of it. Like part of hair, or a really nice flow of the furs direction. Anyway, when you are finished, you want to let your puppet dry probably overnight. That's it for this section. In the next section, we're going to focus on making the eyes for the puppet.
37. Part 31: Making Eyes for your Puppet: In this section, we're going to talk about making the eyes for your puppet. There's so many different things you can use. First of all, there's tons of different wooden shapes that you can find. This is like a half of an egg shape. This is half of a wooden ball, and these can paint up really nice to create a good eye for your puppet. But I've also found these wooden disks too, and a lot of puppets have an eye that is a ball. These have two different names. Some people call them doll heads and other people call them wooden knobs. But they have a flat edge and even a hole in it, which makes it really easy for screwing into your puppet. But if you'd like to be even more simple, you could just glue on some ping pong balls too. These are jumbo ones that I like. They're little bit stronger and they're a little bit bigger, which is nicer for puppets. You can also use Wiffle ball balls. They work really well for puppet eyes, they are nice and big and there's super strong. But with a ball like this, I would cut the ball in half and just make it a half spherical eye. Really, what you can use for puppet eyes is limitless. I have tons of other videos on that too. With most of the eyes that I make, I make a mold of them and then cast them in plastic. But there's one more interesting technique that I want to use today. That is again, using these bowls. These are the same bowls they use to make the pattern and they have a nice curve to them, I noticed. So if I were to cut a circle out of the side of this, it would probably make a pretty good eye. It's a nice strong plastic too. Let me show you how I do that. To do that, I use a compass. Now, I have mine set to be about one inch. What I'm going to do is line up the point in about the center of the bowl here. Then press down and carefully trace around on the bowl like this to make it a perfect circle. Then I'm going to do that again. Now I have two circles there. Then I'm going to use these snips again and carefully cut them out. There I have two eyes. Now, what I like about this is again, they still have that slight curve to them, which gives them a little bit more of dimension for your puppet, which is really nice. But we still have little bit more work to do on these. This cutting isn't perfect. I have some little straight edges there and some little corners there. I'm going to send them off. I'm using some 80 grit sandpaper. I'm just sanding the edges. After you sand them both down, I like to actually put them back to back like this and then sand them together. That'll make them a little bit more symmetrical. After I do that, I'm going to sand the inside. As you can see, they're really shiny on the inside, which means it's not going to take glue well, so I really need to rough this up a lot. I'm going to hit it with some sandpaper. Now, after the backs are sanded, I sand the front too, but for that I'm going to use a 200 grit sandpaper. It might be a little hard to tell, but this actually isn't white plastic. This is pink plastic, and so I still have to spray paint it. If I don't sand this first, the spray paint won't attach as well, and you don't want your paint to chip off. No matter what you use for your eyes, I highly recommend sanding them and priming them with paint. Now, our eyes are prepped for paint. In the next section, we're going to paint them.
38. Part 32: Painting the Eyes for your Puppet: In this section, we're going to paint our eyes that we've prepped in the last video. Like I said before, these are technically not even white, they're light pink, but even if they were any color at all, I would definitely paint them. Plastics can discolor over time and for many other reasons, so paint is always the way to go. To paint them, I'm going to use a white primer Krylon. I'm going to just give it a light coat. Make sure you do this in a well-ventilated area. Another little trade secret that they use on puppets in major movies and TV shows is that do a little bit of a stippling paint job on the eyes. The reason for that is professional film equipment has a hard time focusing on white, so a lot of times, there'll be a really super light gray or a baby blue, but in my opinion, the best ones have a stipple effect on them. It also gives a little bit of texture. It makes it feel real. To do that, I just use a little bit of a contrasting color paint. You can really use whatever you have lying around. Sometimes I'll use black, sometimes I'll use blue. In this case, I have some purple, and it's perfect because purple is a contrasting color with yellow, which is the color of the puppet, so it might make these eyes stand out even more. Now, this is not how I'd leave it. I always make sure I do a final coat with the white. I just want to cover it up enough so it doesn't stick out too much so I'll do a little bit more white on top. That looks perfect. Here's another close-up shot. Little time-lapse there. This is about a couple hours later and they are completely dry, and as you can see, they have a real nice little texture to them. Again, if you're having trouble see it, I'll put one more photo here of the finished eyes, but it's really going to be perfect for this puppet. Just like that, our eyes are ready to go. In the next section, I'm going to show you how to attach the eyes to your puppet.
39. Part 33: Attaching the Eyes to your Puppet: In this section, I'm going to show you how to attach the eyes to your puppet. I have my eyes here dried and ready to go, and all I have to do is attach them to my puppet. Now, the biggest mistake that people tend to make is they just stick it onto the fur like that. Now the problem is this fur still has some length to it and that can make the eyes a little shaky and make them easier to come off, especially if a kid was to get a hold of it, they can rip it right off. Instead, best practice is to trim the fur down, all the way down to the netting and then glue the eye to the netting. But to get really good placement for your puppets eyes, I like to pin them on first. Find an eye focus that you think you'd like. You can have them really close together. You can have it further apart for your puppet. I like to have mine with a little bit of space between them, right about there. Then what I'm going to do, is put some pins going all the way around these eyes. That way I don't lose the spot. Now, this isn't going to hold the eyes in place, but it is going to act as a registration mark so you know exactly where to put the glue. Just like that, I have it all pinned up. Now, what I'm going to do is very carefully just trim the fur down to the netting, just inside of the circle of pins. There you go, you can see it's down pretty much to the netting. You want to get as close as you can. Then I'm just going to use contact cement. When you do this, make sure to be careful that you don't drip the glue onto the fur. If you do accidentally get some in a spot that you don't want, like a string, just let it sit there as long as it's not a big glob, because sometimes when you try to wipe it away, you're actually pushing it deeper in. If you just let it sit and harden, later, you can peel it off like a little piece of dried spaghetti. But I'm going to do a nice layer of glue right where I trimmed it, and then add the glue to the back of the eyes. Now, just like before, you want to let these glues settle a little bit before you attach them. It's been a couple of minutes, so now I'm going to take these eyes on. I'm going to carefully make sure I stick it right into the spot. Then I'll do the same over here. I'm going to push from the inside of the head too. Make sure to take these pins out so you don't poke your fingers. Now, since it's glued all the way down to the netting, the eyes look like they're sunken into eye sockets, which looks much more realistic. Anything you can do that makes this look more real and less like a toy or stuffed animal, the better. Sometimes after you put the eyes and you find little spots that you need a trim a little more too, feel free to do that as needed. Now that we have our eyes on our puppet, in the next video, I'm going to show you how to make pupils.
40. Part 34: Making the Pupils for your Puppet: In this section, I'm going to show you how to make pupils for your puppet size. Here, we have our puppet, but now there is many different choices for eyes. You can get a lot of store bought things, such as these small round animal eyes. These ones are so small that they don't even have pegs on them. Now, the nice thing about these is, they would just take a little dot of super glue, so I will just take a little dot of super glue and stick it on there, and then I'd have these really cute little eyes. Now, look at the expression on this character. He looked shocked. He looks like a really zany character because of how small his pupils are. But you could easily get some bigger pupils to give him a completely different look. Now, these are more traditional animalized. These are also known as safety eyes, and their are use in stuffed animals. Now, these ones have pegs on the back of them, like this. Now, often with these puppets, sometimes I'll drill a hole in the eye, and then glue this in. However, because of how thin these eyes are, if I drill into this, it's going to go into the foam and start ripping the fabric, and it's going to be a mess. You can only really use that technique if you have the thicker wooden eyes as the base. Another way you can still use these bigger pupils, is you just cut that little peg off, and I'd use my handy clippers here and then that peg is gone. There's still a little bit of a bump there, so all I do is sand it down like this, and sand it down until it's completely flat. Once it's flat, again, you can superglue these on and look at the change of the expression with this puppet. Now all of a sudden, this puppet looks a lot more friendly. He doesn't look crazy or zany anymore. He just looks like someone cute and cuddly that you want to hug. But again, there's still many other pupil choices you can use. You can use eyes like this. These are virtually the same eyes, but they have color around them, and they can give your puppet a completely different look. If you want to get really fancy, these are glass taxidermy eyes. Now don't be nervous by the fact of these being glass. They're really sturdy and the last a long time, and it's really thick to source. It's not like they're going to crack and be dangerous, though I'd probably use something like a epoxy to attach these. But another really nice way to go is to use these little velvet dots. Some people even use little Velcro stickers, but I don't like the look of them. I like to use the velvet instead. Let me show you how I make these. To make these, I used this velvet paper that has a sticky back, and then I also use a punch set. What's nice about these, is they have all different sizes of punches, so I can just pick one that I like. Take the handle here and then you will need some mat to punch into. Then I just line this up right here and give it a little hit with the mallet. I'll do it twice. Just like that, I have some perfect little velvet dot eyes. Now, let's take a peek how these lock. One thing I like about these is using a pin to place them. It can let you be much more precise. Now the placement of the pupils is extremely important. If you place them in the wrong spot, your puppet won't look like it's looking at you. The most common mistake people make, is they put the pupils right into the center of the eyes. Now this, all of a sudden, looks like some sort of a sort. It doesn't have a connection with you. As you can see, this puppet cannot make eye contact with the camera. This makes it seem more like a toy, and it's not alive at all. It really looks like a weird stuffed animal. However, if we really put a lot of thought into where we're placing these pupils, this puppet can really come to life. Notice how with good I focus, this character immediately comes to life. This is what you really want to try to capture with all of your puppets. That's how you put pupils in your puppet with really good eye focus. In the next video, I'm going to show you some other little design techniques you can use for your puppet.
41. Part 35: Adding Other Design Elements to your Puppet: In this section, I'm going to show you how to add some different design features to your puppet. Now there is no end to the different design elements you can add to your puppet. Some simple things to think about are a tongue, some eyebrows and maybe a little bit of hair on top. Here's a few examples. The first thing I'm going to make as a little tongue. There's so many different materials you could use. A lot of people use ultra swayed. You could even use some foam. But right now I'm going to use some felt. I'm just going to cut off a little square of this, felt like this. I'm just going to cut out a heart shape. The easiest way is to fold this in half. That'll make it symmetrical, then I'm just going to carefully cut out a little heart shape, like that. Now watch, the second I put it in my puppet. Again, they really brings it to life. It adds a little bit more dimension to this character. Now there's many different ways to attach this to the inside of your puppet. You could use context cement I like to use fabric tech. This is an off-brand of fabric tech called three in one, it's just as good. This is used for gluing fabrics or really any other type of fabric glue should work and I would just code it all over the back of it and stick it on just like that. But to add even more details, I like to use some colored sharpies. I might use a purple sharpie like this and add some more details to the tongue. I'll add some red to and maybe even some purple just to get a little bit more definition. Creates a lot of shape too. That's something you could definitely add to the inside of your puppet. Another thing you can add is eyebrows. You could use felt again, but I like to use some scrap fur. I found this brown fur lying around and snip off a little piece, and you could simply just glue it on like that to create a little bit of an eyebrow. But I like to stitch my eyebrows on. I'm going to cut a little piece of this off. Let me see the size that I want, probably something like that. I'm just going to fold this in half and stitch them closed. Once I have these little caterpillar shapes, I'm just going to stitch them in. Just like that, you can attach some little eyebrows on your puppet. Now you could glue them into but the reason why I like to stitch them in is because it's not as permanent. If I change my mind, I could just use a similar fur and pluck these out. If I tried to remove them, then I'd have a big glue mark there. Give me a little bit of flexibility for the future. Another fun thing to do is to add a little bit of hair on top. Sometimes you can do that just using some other scrap fur. Now this character probably wouldn't have a full head of hair, but it might be really cute just to have like a little tuft of something like that. Again, this is something you can stitch on or glue in. If you want to be able to change the look of your character, you can even just use a pin and pen it and temporarily, just to get a couple of shots of the puppet. Just like that, That's one example of how your puppet can work. Don't forget, you can use some double stick tape on things and make some features temporary if you want to change your puppet for different shows or for different types of effects. One thing that's nice about having little fluffs of hair like this on top of the head is it adds a little bit more sympathetic movement. That way, even if the puppet is sitting still, even the smallest breeze of another character walking by can just make elements of this puppet move around, that again gives you a puppet a little bit more life. In the next section, I'm going to show you how to make a foam brain for your puppet that will make it a little bit easier to perform from the inside.
42. Part 36: Making the Foam Brain for your Puppet: In this section, we're going to make the foam brain for your puppet. Right now, this puppet's head is hollow. When my hand is inside it, when I try to open the puppet's mouth, there's actually room for my hand to move up. That makes it a little harder for me to actually open the puppet's mouth. What I want to do is fill that space inside the head, so it acts like a little pillow on top of my hand giving me more to push off of. To make that, I'm going to use some scrap foam from a couch cushion. You really could just use any type of foam. If you only have thinner pieces of foam, you can stack it up in layers to make a bigger chunk. Or you could even literally make a little pillow using fabric and some stuffing, just make sure it's about the right size. Luckily, we know the right size because of the bowl that we used, though, I would try to make sure it's just a hair smaller than the ball. It should be able to fit on the inside. I'll show you how to make one with this foam. This foam is about as thick as the bowl, which is perfect. I'm going to cut off a piece of this. Now that I have a hunk of foam, I'm going to trace this bowl so I get about the right size. Now keep in mind, we want to cut to the inside of this. I'm just going to use scissors to start hacking away at it. I'm going to start off trying to make like a cylinder. To cut this foam, I was using a box cutting knife, but a common tool makers like to use is an electric turkey carving knife. There you go. Looks like a hamburger bun. Now it doesn't have to be perfectly smooth, this is just for something structural inside. But as you can see it fits inside my bowl, which I know is the right size because we used this to make our pattern. Now let me put it inside of the puppet. Just going to scrunch it up and shove up into the head. There you go, it's right inside of his head there. Now, this puppet is much easier to perform. Just so you guys have a better idea of where the foam is, the foam is like right about here. It's lined up to the butt of the front of the head. Just like that, this puppet is much more comfortable to perform. If you want to, you can stop right here with your puppet. You have a perfectly functioning puppet that would be great for a classroom or any types of school shows. But if you're going to use this puppet for TV or film, there's one more little piece I like to add to it. In the next section, we're going to create the puppet sleeve.
43. Part 37: Making the Puppet Sleeve: In this section, we're going to create the puppet sleeve. Now this is really important for any puppets that are going to be used in TV and film. You may have noticed for some of those shots on the white background, when I held the puppet up, you may have seen the bottom of my arm a little bit. That might be fine for a live show, but if you're doing something for TV and film, that just can't happen. What they do is they add on what they call a sleeve on the bottom of the puppet. That's just a simple tube of fabric that matches the rest of the puppet. I usually like to make mine about seven or eight inches long, depending on the size of the puppet. Let's make one quickly for this character. The first thing I'm going to do is measure the circumference of this entrance hole. Today I'd like to use my flexible ruler and looks like it's about thirteen-and-a-half inches. I'm going to get out some more of the exact same fur. Again, I'm going to make sure that the fur direction is going down. You can see the flow is all going down on this side. Let me measure this out here from the zero up to thirteen-and-a-half. I'm going to measure a line going straight down here, and again, I like to make mine about seven or eight inches long. I'm going to go seven with this puppet, and then make sure to use a razor blade to cut your fur. Then I'm going to start stitching these two ends together just like this. It's handy to pin this first, and then just stitch it up. Once it's all stitched up, I'm going to turn it inside out, and again, I'm going to have the fur flowing down and I'm going to stitch it around the perimeter of the bottom of this puppet. For this, I am going to use a slip stitch. I like to line up with the back seam of the puppet too. There we go, and now that's attached but I'm just going to trim this up a little bit. I like to leave it long at the very bottom, but I want to trim this up here, and I'll have it match the texture a little bit. Just like that now you have a professional film style puppet to use for your own productions. If you use any of these techniques and make your own puppet for production, I'd love to see it too. I love seeing and sharing all the creative creatures that people come up with. Make sure to tag me @AdamKreutinger anywhere on social media. I can't wait to see them. Now use your puppet and play like a pro.
 Adam Kreutinger, Play Like A Pro!