Transcripts
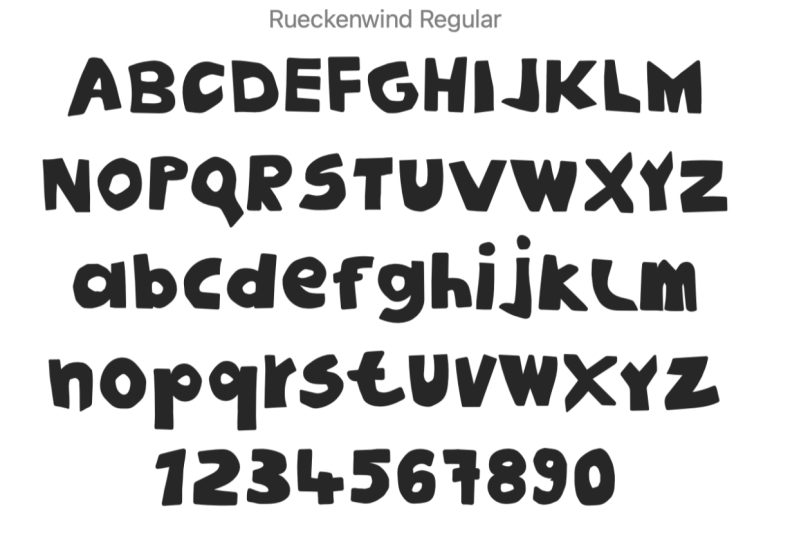
1. 1 Intro How to make a font with Your Own Hand Lettering using Fontself and Adobe Illustrator Fon: Hi, I'm in bracket and I'm a graphic designer
and illustrator. You might know me from my
YouTube channel where I teach short little
graphic design tutorials for my Facebook
groups where I help other designers with any graphic design problems
that might come up. I've been designing
fun little fonts for about four years now, and I absolutely love
it today in this class, I'll show you how to take your hand-drawn font, vectorize it, and then clean it
up and then create a type of bold font
using font self, along with Adobe Illustrator. And you'll end up
with an OTF file that you can install on any machine and then
type with it like normal back when I was starting out as a designer fonts software, it was so expensive. I mean, prohibitively expensive. You can pay anywhere
between 600.3 thousand depending on the font stuff where
you wanted to buy. But then font self came along and their creators
figured out a way to make fonts right within Illustrator and is
only $40 or so. You will need to purchase the extension to
take this class, but you only have
to pay that once. It's not a subscription
or anything like that. Now I made sure to check
with Skillshare first, but they're allowing me to use a referral language has a 10%
off coupon attached to it. So if you use that link, you'll be able to purchase
fonts self at 10% less.
2. 2 A Few Things to Know: I wanted to mention a few
things before we get started. First off, I'm not what's considered a
professional font maker. I'm a graphic designer, first and foremost,
in this class, I'll be showing you how
to take a basic alphabet, capital letters,
lowercase numbers, and a few symbols, and make those into a font if you want to become a
professional font maker, your fonts should also include the full 95 characters
in the basic Latin said. Most font designers add all 96 characters in
Latin, one supplement. Some include a total
of 516 characters. So it can take weeks or months to create a
professional font. In this class is just
a simplified version so that you can
see how it's done. And then you could go
ahead and take it one step further and add all those extra characters
if you wanted to.
3. 3 Download the Exercise Files: First off, you'll
want to download the exercise files so
you can follow along. Now here's how to go about downloading those on Skillshare. Now these files are actually
for a different class, but I just want to
show you the location. You'll scroll down beneath
the video and you'll click on this Projects and
Resources tab right here. Then you'll see the exercise
files dot zip right here. And you can just click on that. And when you do it'll
come right down here. If you're on Chrome, or sometimes it
comes right up here, but either way it'll end
up in your downloads. I'm here on my downloads and on a Mac you can hit
Option Command L. To get to that really quickly. On a PC, it's going to probably be over here in your
favorite somewhere, The open your exercise
files, dot zip. All you have to do on a Mac is just double-click
and it'll create this little folder that has the exercise files
in it on a PC, you can just
right-click and choose, extract or extract all. Let's take a look at
these exercise files. We have our photos and scans that I made
during this class. We have topography terms, a font template that I modified. Few ways to clean up letters if you're not that
familiar with Illustrator. And then this font template, which is from fonts self. And then there's
also a website that can help you with
quotation marks. And then another template
which is similar to this one, but it already has
the characters in it.
4. 4 Download and Install Fontself Maker: Now let's go to download
the font self software. You can either use
the 10% off link in the intro video or if you don't
really want that 10% off, you can just go to fonts
self.com slash store. Well, when they get the
one that says font, self maker for Illustrator CC, I'm going to choose by now. Then of course, you'll fill
out all your information. After you filled out
everything and paid, you'll get a download link. Then when you download, it'll come right
over here if you're using Chrome and
sometimes in Safari, but either way, it'll
go into your downloads. I'm going to choose
this little carrot into Show in Finder. Then I'll right-click and choose Open With archive utility. If you're on a PC, this will
be extract or Extract all. And then we can
toggle this down. And there's this little PDF
in here on the second page, and it tells you exactly how to install on Mac or Windows. So I'll just go through
the process on Mac. I'll open up the Mac folder and then I'll double-click
the DNG file. Next, I'll just double-click
this icon and it'll bring up the installer
will say continue, will need to agree that
all their terms and I usually don't change
the install location, but I'll just go ahead
and hit Install. You'll have to enter
your password. Then that's it. Then you can restart
Illustrator.
5. 5 Typography 101: Now before we jump
into making our font, Let's go over how
topography works. I've opened this PDF to explain
this part and is the one in your exercise files called
topography line terms. And if you want, you
can print this out to just refer to it as you
go through the class. When you're creating a font, there are a few guidelines
to pay attention to. First, we have the cap height, and this is the
height of your caps or your capital letters. Every capital letter will
hit this line right here. Then we have the
baseline right here. This is the bottom of your capital letters and this is where most of your
letters will sit. We also have the median. Now the median line
is where the tops of the lowercase
letters will sit. But sometimes they'll go a
little bit above this line, like you see right here
on the P. The space between the baseline and the
median is your x-height. Next is your ascender height. That is the top of these
two little lines up here. And this is for
little parts like serifs extend above
the cap height. By the way, serifs are these
little decorative parts, this little part
down here as a p, this little part
of the H and the I and the n here and there
on the ends of letters. This is considered a serif font. Sans serif fonts don't have
those little additions. Now let's take a look at
the descender height. So this line is for all the lowercase letters that dropped below the
baseline like this, P or G or why? For example. Now the x-height is the space between the
median and the baseline. And depending on
the type of font or just the font
makers preference, this can be higher or lower, and these are all
just guidelines. So for example, here on
this sans serif font, the x-height is
actually moved up, but I wanted to start out with the same guy so you could
see the difference. Wherever you decide to
put your median line, that is their decision. And it can really change
the way your font looks. So as I said before, these are just guidelines. Don't let them limit you. But it does really help to
keep your letters so uniform.
6. 6 Using Fontself's template and a modified template: Okay, Now let's head
back to Illustrator. I'm going to go ahead
and open up fonts self, come up here to Window
Extensions, fonts, self maker. Then it'll get this window. You can just come over here
to these three little lines, the hamburger menu and
choose font template. And this will make a
new Illustrator file. Now this is really nice
because it already has all of our guides built-in. It gives us a lot of
different character sets. Basic Latin, advanced Latin. And there's the second page
with a Cyrillic alphabet. And in advanced
Cyrillic alphabet. And there are also
lots of great tips in this document
about creating fonts. Now, I've adjusted this document so that it works better
for my purposes. And that's also in
the exercise files. It's called font
template modified. Let's go ahead and
open that file. And I'll show you how to use it. I'm gonna get out
of this by hitting Command W or Control W. Now the reason I made my own
template instead of using the fonts self
template is because when I'm done
adjusting the guide, I usually just print it out like this and then I
can just slide it behind the piece of paper I'm
going to actually draw on, and I use layout paper. This is layout bond
and it's translucent. You can kind of see through it. And I can see my
guides well enough to get everything really
uniform that way. Now the pieces on here
on different layers, they're really easy to modify. So I'm gonna hit F7 on my keyboard to bring
up my layers panel. That toggles the layers
panel off and on. Here are my guides. If I hide those, you
can see what happens. Let's say I wanted to
change my x-height. I can just select that layer. You can see the x-height
layer is right here. I can click the little
circle, decide x-height, and that selects all
of the x-height lines. And then I can
move those down or up or whatever I wanted to do. I also wanted this to
be a little bit bigger, but I wanted to still be able to print on it and a half by 11, I modified it that way. It'll be easier to draw
the shapes of the letters. If you wanted a
different style of font, you could also do that. Onkeydown my selection
tool by hitting V and then I'm just
going to click a letter, and that takes us to
the characters panel. Now I can click the little
circle decides that. And it'll highlight
all my characters. And then I could just choose a different font if I wanted to. Having a different font
there can help you see, if you're gonna make, for
example, a serif font. You could see where
serifs and normally go. When I'm using this, I always choose slightly see-through paper
like layout bond. But if you wanted to
go with tracing paper, that would also work too. You would just need to
put something white behind it when scanning
or taking a photo.
7. 7 Drawing your illustrations: Now it's time to actually draw the characters
for our font. There are a few ways to do this. You can do it on paper like this that
I showed you earlier. You can do it on an iPad and procreate using an Apple pencil. And you can also just draw
the shapes in Illustrator. Now I know that not
everyone has an iPad. So today I'm going
to show you the way with just drawing on the paper. I'm going to give
you a few tips and tricks on how to do that. Then will be vectorizing
the fight and then using font self to
space it correctly. And then finally make the font. I'm going to add my
guide behind my paper so that I just have a template for my letters to make them uniform. I like to use either a
Sharpie or this Tombow pen. This Tombow pen, the
infant has two sides. There's a small end and a large and that
looks like a brush, but is actually like a felt tip. I'm gonna use that
felt tip to draw. I'm gonna pay attention most who my baseline and my cap height. As I'm drawing, I tried to
keep everything really smooth. Although if you're not used
to practicing calligraphy, you're probably going to have
at shaky hand like I do. And that's okay. I actually liked the rough look. I think it can add
interest to a font. I tried to keep the width, most of my letters the same, although you're going
to have wider letters that you have to
kind of very like the W or the M. You'll notice that parts of my
letters are a little thicker. Downstroke usually it will
be thicker than across line. While I'm drawing,
I'm trying to keep that thickness consistent
across all my letters. Don't worry too
much about making mistakes because if you mess up, we can always fix
in Illustrator. Just don't worry
about that too much. Now on my lower-case letters, I'll need to pay attention
to the x-height. Now we'll move on to numbers. The numbers will have the same height as
the capital letters. And I'm also trying to keep the width really
similar here too. Now we'll move on
to punctuation. These are a little hard to see, so I'm having to check
underneath to see the character. Kinda go back over some parts of you think it's not going
to be smooth enough. I think we're ready
to scan these.
8. 8 Getting your images into digital format: There are two ways to get your letters into
digital format. And the first one
is with a scanner. And this is the way that
I really recommend. But if you don't have a scanner, you can also use your
phone. All right. Now this scanner is
an HP desk jet 2554, and I'm just going
to open it and place my sketch in there. Then I'm going to head
back to my computer, and now I'm here in Photoshop. You can either do
this in Photoshop or with the scanning software
that came with your scanner. First, I'll show you
the Photoshop way. I'll just come up
here to File Import and images from device. At first it'll do
an overview scan, and then I'll have
this selection area. So I usually start out
by hitting Command a or Control a to just
select the whole thing. And then I can pull
these handles up to just set a focus point
on what to scan. I'm gonna put this at
black and white, 300 DPI. And then JPEG here. I've got a scanning
to the desktop. You can change that
though if you want. I'll scan and it'll also
come up in Photoshop, which this is a very clean scan, so we don't really need
to do anything to it. But one thing I like to do to get rid of some of the
grays and that kind of thing is hit Command L or Control L to
bring up my levels. And then I'll pull
in this slide are a little bit and I'll bring the middle slider over
the opposite way. And that kind of gets
rid of that white. And we'll say, Okay, then I'll just save with
Command S or Control S. Then I'll repeat that process for the rest of the characters. Now if you need to use
your scanning software, you can search your computer
for your scanners name. Mine is actually called HP
desktop 2540 series two. This is the scanning software and it's telling me that it's in use by another application
which is Photoshop. So I'm going to quit this. Now everyone's scanning software is going to look different. But really the main things
you want to focus on are you on a black and white
300 DPI and you on JPEG. It's very similar to Photoshop. I'm gonna hit Command a or
Control a to select everything and then use these little
handles and bring those in. And this is going to
save it into pictures. I'm also going to put this
on desktop and we'll scan. Now let's show you how to take
pictures with your phone. If you don't have a scanner, makes sure that your cameras
parallel to the table. Then I like to zoom in pretty close and just get
sections of letters. That way you don't have to
deal with the distortion if you try to get all the
characters and one photo. And I'll add some
of my photos to the exercise files so you can see what I'm getting
in the frame. Now once you're done
with taking photos, you can either email those to yourself or if you have
an iPhone and a Mac, you can use AirDrop and
then it just sends it using Bluetooth straight
to your computer.
9. 9 Setting up your workspace: Okay, so now I'm going to
show you how to set up your Illustrator workspace
so that it matches mine. If you're pretty
comfortable with Illustrator and you like
where things are located, you can just completely
skip this part. But if you're not so
familiar with Illustrator, it might be a good idea to set yours up so that
it matches mine. Alright, let's go ahead
and open Illustrator. We'll come over
here to create new. Then I'm going to choose
Print and then letter. And we'll come over
here to create so that we can get the
same starting point. I'll come up here to
Window and then workspace, and then we'll choose
Essentials Classic. Then go ahead and come up
to Window Workspace again, and then Reset
Essentials Classic. Now your workspace should
look a lot like mine, except it might be
the dark settings. If you want to use the
light setting like me, you can come out to
Illustrator preferences. And then General, if you're
on a Windows system, this will probably be under
Edit, Edit Preferences. Now I'll come down here to the user interface and
here's your brightness. I know a lot of people
like the dark setting and that's totally fine.
There's no difference. This is just my preference
to make it light. Now we'll come down
and press OK. Ok, So now we all have a similar look for our
Illustrator interface. I'm gonna show you how
to customize this. You can get to the panels, you need a little easier. These tools over here
are your toolbar. And I like to pull these out
so that they sit right here. It gives me a little extra
space at the bottom. Do that. You just grabbed
the top right up here and then just
pull like this. Then I just put them
back in the same place. Up here is your control panel. Now if you're not seeing
your control panel for some reason
during the lesson, you'll want to come up here
to Window control right here. And all of these panels over here are also
available in window. First, I will open
this little fly out. So I'm gonna click
these two little arrows to expand the panels. First you'll see color
and color guide, and I like these right up
here in the upper right. I'm going to click in
this blank area over here to just pull
this out like this. And then I'll click on this hob and set
it right up there. You can see when you hover over different parts that you'll
get some blue areas. And that shows you
that it's going to snap in-between those places. We went to come up
here to the very top, you'll see you get a
rectangle around everything. But if you move up
a little higher, you'll get just a line. When will we see that line
will just release that way. It'll snap up to
the upper right. Okay, next, I also want my
swatches to be over here. I'm going to click in the
blank area, pull it out. Then I'll click
on this top here, hover under color until I get the blue bar and
then just release. Now for this next set, the stroke gradient
and transparency. I actually went transparency
to be separate. I'm going to click right
on the word and pull this one out and that'll separate it from
its little group. Then I'll get right on
the top and pull it right underneath
swatches like this. I want my art boards to be
right underneath transparency. I need to pull it out of this
group so I'll get right on the word itself and they
just click and drag. Come up here to the
top and hover right underneath transparency,
underneath art boards. I like transparency
align and Pathfinder. I'm going to come up
here to Window and I can choose any one of those. I'm going to choose
a line right here. It'll open this little group that has all three
of them in it. I want that whole group
underneath art boards. I'll come up here
to the very top. I'll click and then hover until I get the
line and release. Now, I don't use properties
are libraries very much. I'm going to get in this area of the group and just pull it out. And then I'll just click on
the X to get rid of these. If you want to bring
them back, you can, of course, just go to
Window and find them here. Properties is right here. Okay, so the right side of our panel is all set
up the way I want. Now, I'm going to work
on the left side. I like my character and
paragraph to be up here, so I'm going to go to Window. And then these are
a little hidden. You'll have to go to
Type and then you can just choose character
or paragraph. And it'll open that set. I'll click up here
on the very top, and then I'll hover at
the top of this column. Stroke is already exactly where I want it so
that it's perfect. And then I'm going
to open my links. I'll go to Window and links. These, I'll put it right
underneath my stroke. Next, I want to separate my appearance and
graphic styles. I'll go ahead and click on graphic styles and pull it out. And then I'm just
going to put it right above the appearance. Now, I have layers and
Asset Export down here, and I don't want either one
of those to be in the column. So I'll click here
and just drag it out, and then I'll click
the little X. Now I do use layers sometimes, but not that often. When I need those, I just hit F7 on
my keyboard and it brings them up and then I can
hit F7 to toggle them off. My Illustrator setup is
exactly how I want it. So now I need to
save my workspace. We'll go to Window workspace, and I'll choose a new workspace. I'll call my new workspace a. Now I already have a
workspace named a. I'm just going to override
it by hitting okay. Now as you're working, you might accidentally pull
some things out like this. You might be moving
things around. And when that happens, it's hard to remember
where they were. And that's why
workspaces are so great. To reset everything,
we can just come up to Window Workspace and then
choose our workspace. Then we can go back to workspace
and reset our workspace. And I'll put everything
exactly back where it was. The other thing is
a Zoom settings. When I hit Z on my keyboard, the way I like to zoom is to draw a box around whatever
I went to see better. Let's say it's this right here. That'll fill my screen then. But the normal way that
everyone else likes to Zoom is with the animated zoom. To get to that you
can hit Command K or control K on your keyboard, and that'll bring up
your preferences. Another way to get
to that is go to Illustrator preferences
on a Mac or edit. And it'll be, I think down
here somewhere on a PC. Once you're in preferences, you can come down here
to the performance. And you can see
that animated zoom on my system has been unchecked. So if you want your
Illustrator to act like mine, you can also uncheck yours, but if you'd like the animated
zoom, you can check it. So here's what the
difference is. If I'm on my zoom
tool and I want to see maybe the letter
C a little better. I click on the sea and zoom
in by dragging to the right, or I drag to the
left to zoom out.
10. 10 Vectorizing and cleaning up images: Now we need to get our
images into Illustrator. So I'm gonna go ahead
and create new. I'll come up here to
print, to use Letter, and then I'll go to Create, and now we'll go to File Place. Then I'll navigate to
where my images are saved. I'm going to use
the scans for this. I'm going to place this. Then I'll just click once. That'll put it in at full size. Now, I'm going to need to rotate this so I'll get just outside a corner like this hold Shift and then it'll snap into place. And I think I'm just
going to rotate it so that these letters
are straight. I'll hit Command or Control
R to get my rulers up and I'm going to pull
down a guide so I can get those a
little straighter. I'm going to click
on my image and rotate it again a little bit. Next we're going to
image trace this. So I'll click on this button
right up here at this hot. Now if you're not
seeing this bar That's right under Window
control right here. This toggles it off and on. I'm going to click that. And it's going to give us a
warning about a large image. That's okay, and
it'll take a second. Now I'm gonna come up here
and click on this button, which will bring up
the image trace panel. And let's come down
here to threshold. I'm going to increase the
threshold a little bit because I'm losing a
lot of my dark areas. I'm just going to keep
bringing it over a little more until I run into
a problem like this. So that's part of that light
leak that happened earlier. But this is looking at, I've toggled down my advanced carrot, and I'm just going to make
the noise about 50 pixels. You can play around
with this and see how your letters look when
you increase the noise. And we're also going to come
down here and ignore white. Okay, and this is
looking pretty good. Now I'm going to expand. Now we did this backwards. I started with k, So I'm gonna
move this off to the side. And I'm just going to
go ahead and go through that same process and
bring my other letters in. I'm gonna go to File place. I'll choose my other
scan, then place. I'll click once and
I'll image trace. We'll say, Okay, now I'm
going to rotate this one. Hold shift. And it looks like these are
pretty straight already. I'm going to leave my settings the way they were
for my other one. I'm going to choose
Ignore White. And then we'll expand this. Alright, I've got
one more document, so go to File, Place, open scan to up
at this one over here. I'll do the same process. We have all our letters, we have some duplicates
as some letters. And that's okay. We can actually just
pick which one we like better because they'll most
likely be slightly different. Okay, So I'm going
to save this file, save as I'm going to call
this letters original. I'm just going to put this
on my desktop and then save. And we'll say, Okay, now
I'm going to get back in my Exercise Files and I'll pull up that font
template modified by hitting Command or
Control O on my keyboard. Now I'm going to put each letter where it belongs
in this template. I'll close out of my
Image Trace dialog box, and then I'm going to
open my layers with F7. I want to make sure to
lock all the layers except for your artwork here. So I'll click and drag
across all those. It's okay if you
overwrite this document because you can always come back out to the Skillshare
class and read, download a fresh copy. I'm gonna get on
my selection tool by hitting V on my keyboard, I'll select this
part of the font. And then I'll hold Shift and select the other
part of the font. I'll copy those with
command C or control C. Then I'll come over here to the font template and paste with Command V or Control V. Now we have all of our
letters in here. I'm going to zoom
in by hitting Z on my keyboard and just
click and drag. And now I need to get
each letter separate. I'm going to use my
group selection tool and that's right here. And I have a keyboard shortcut
setup to easily jump to this as the letter G. If
you want to set yours up, you can come up here to
edit keyboard shortcuts. And then you can just
click right here under shortcut and hit the
letter G and say, okay, it does, I think it does replace somebody who may
be at your gradient, but if you don't like that, you can choose a different
letter here instead. I'll say, okay, with my
group selection tool, I'm going to draw
a box around the a. I'll cut with
Command X or Control X. I'll paste in front with
Command F or Control F. And then I'll group this
with Command G or Control G. Then I'll hit V to get
my selection tool. And I'm gonna put it right
where it belongs on the a. And you'll want to do
this same process and put all of the other
letters where they go. So we'll cut paste in front
and then I'll group this with Command G or Control G. First I'm going to delete
these two little marks, and then I'll move
this into place. So that'll be the same
process for everything. And I'm just going to speed up the video so you don't have
to wait for me to do that. And actually what I'm doing
is I'm cutting pasting in front and then grouping and
hiding with Command three. And that's just to get
them out of the way. I'll adjust them onto their
positions here in a moment. If you mess up, you can
always hit Command Z or Control Z to go back a step or a few steps by
hitting it a few times. Now all of my other
letters are hidden, so I'm gonna unhide with Object, Show All, bring everything back. I'll hit F7 to get
out of my layers. And then I'm going
to move these with my selection tool
right over here. And I'll move my j
over a little bit. I'll get it exactly
where I want it. And the A2, I'm gonna select that whole row and I'll come down here to my align palette. And I went to choose this
vertical align center. I'll click that. And I'm also going to choose Distribute Spacing so they're
equally spaced apart. To get the Distribute
Spacing up, you can just
double-click a line a few times until
you get this view. Sometimes this is hidden. I just tried to kind of visually center them in their rectangles. Now you probably noticed
that I've overshot the cap height on some of
these, but that's okay. It's really just a guide
and you can always adjust each letter if you
want to go that route. For example, these letters
are all little too tall. So I'm gonna select all
of them and just get on this center handle and
bring them down like this. Now if you're not seeing
that center handle, you can come up here to View and Show Bounding
Box right here. Now you've probably noticed that my letters are pretty rough and I'll show you a few ways
here in a moment to clean them up and keep in mind, you can use your pen
tool to actually draw them using these
letters as a guide. You can also use this
part of the Align panel, the Horizontal
Distribute Center. And that can give you
some different results that might work a
little better for you. Okay, so now we have
all our characters in, and now I want to go through and clean these F a little bit. So I'm gonna hit
F7 on my keyboard. Now I'm going to
hide all the guides, so we're just left with
the characters themselves. I'll hit Z and then I'll draw a box around
this one to zoom in. So if we click this with our selection tool
and then hit a, it'll show us all the
points in the letter. I'm going to hit
P and then minus, hitting P and then
minus will bring you to your Delete Anchor Point
tool right over here. And I'm going to start
deleting a few points here and there that look
a little messy to me. Now I'm gonna zoom
in a little more by hitting Z and drawing a box. And now we're gonna
get on my smooth tool, that is Shift S. And it'll bring you to
this tool right over here, which is underneath
your pencil tool. And I'm just going
to go over a few of the areas and
smooth them out. Now it might add some
anchor points back in, but I think those
help with smoothness. And if you don't like them,
you can always delete them. Now we'll hit a
this point up here. I think I want to just
move it over so I'll hit a on my keyboard to get to
my direct selection tool. And then I'm going
to click right on the anchor point and
just bring it over. And I'll move the handle
down a little bit and over, I want to move the other
anchor point away. A lot of times when
you use Image Trace, you'll notice you get
some rounded corners like this and you really want
them to be sharp corners. To fix that you can grab an
anchor point using a tool, click and drag and move it wherever you want it
maybe right here. Then click the other
anchor point that is causing that corner
and overlap it. And when I do that,
I like to keep this line looking
like a straight line. So if I move it over here, obviously that
wouldn't make sense. So I'll move it to where it would line up with
the other line. And that gives us
this little bubble. To fix that, I'll
come over here to Pathfinder and all unite, and that gets rid of it. Let's move on to
the next letter. So I'll select it
with my V tool, this tool right up here,
my selection tool. Then I'm going to hit
Shift S and just start cleaning up these areas a
little bit, smoothing them out. I'm going to delete
some anchor points with p minus, like this one. And let's see, I'm
using my a tool to select right along the line so that I can see
the anchor points. Now if you're right
on an anchor point, you can also use your pen tool. You can hit P to
get to that one. Now this part looks
really thick, so I'm going to hit a on my keyboard and
I'm going to click right on the line in
here, this inner line. Now I can grab an
anchor point and just move it over a little bit. And the handles, you can
grab those and move those to just be careful handles are one of the more challenging
things about illustrator. So they take a little
bit of getting used to. We'll just move
this one down here. Maybe I'll delete
this one and p minus. And this looks pretty good. I'm going to go
through my whole font and just smooth things
out with Shift S. Delete anchor points
that don't really needs to be there,
like this one. Now if you have something
like this happen, you can use your handles, but you have to get on
your a tool to do that. So I hit a to get to my direct selection tool and
then I can use my handle. And just pull it back out. So it looks right. Now there's one other
tool that I like to use, and that's my pencil tool. First, you'll need to
select your character. And then you can hit
N on your keyboard. And you can actually
redraw a line this way. First. Before you
do that though, double-click on your
pen tool and make sure you're on smooth all
the way over here. Then I can start going this way. You have to start right on
that line and come on down here and end up exactly on the same line going
the same direction. See how that smooth that out. And now I'm going to
try it right here. You can hold Shift and get
a straight line that way. Now I'm gonna get my
direct selection. I'll make sure
this inner part is selected and then I'll
do the same thing. I'll hit N on my keyboard. I'm going to click and I'll hold Shift to come up here like this. And I'll let off shift and
then come over like this. If you wanted to
do straight lines as a pretty good way to do it. Now I'm going to hit Shift S to get back on my smooth tool. And I'll just smooth
out this part of the D. I'll get back on
my selection tool, re-select, hit Shift S, and then smooth this
part of the D out to I'm hitting command minus or Control minus to zoom out. Now if your character comes to a point and you
don't want it to. If you use your direct
selection tool, the a tool to select that point, then you can use this
little round corner widget. You can click on this
little white dot with a blue interior and just pull
that into round that part. Now, I'd like this to
be a corner point. I can see here that
it has handles. So what I can do to fix
that is hit Shift C. Shifts C will bring us to
the anchor point tool. When I click my corner point, it gets rid of those handles and it straightens
everything out. So to get sharp corners
with no handles, use the anchor point tool. If you're a letter is kind of leaning one way or the other, you can hit E on
your keyboard to get to your free transform
tool right here, then you can get
on a middle handle and just drag it over like this. And that way you can
straighten it up so that it matches
your other letters. You'll probably
notice I'm skipping around from letter to letter. That's because I'm noticing the same problems
on some of them. You might notice that one
part of your letter like this doesn't line up kind
of where it should be. So to fix that, I'm going to get all my
direct selection tool. And I'm just going to
click and drag this up. And then I can just
round this part out. If you're having trouble
with an anchor point, it might be that
two anchor points are right on top of each other. So in that case, use your
p minus to delete one. You can always undo if it's
not the result you want. You can also select an anchor
point with your a tool, the direct selection,
and then use your arrows to just
nudge it over. And if it's going too far, hit Command K or control K and just change your
keyboard increment. I've got mindset at
0.1 points right now, But usually I keep this at
ten times this size, so 1. You might need to adjust that. I'm going to go ahead and edit all the rest of
these characters. And I want to do that offline because it will take some
time to get it right.
11. 11 Arranging letters for Fontself: All right, so we've got all of our letters cleaned up now. Now the wave font itself
works is you need to get all of your
uppercase letters in one line and then all of your lowercase letters
in a line also. So to do this, I'm
gonna go ahead and open up that font
self extension again. I find it easier to work
with letters like this, and that's why I
started out here. But to get them into a row, I just think that template
works a little better. So we'll go to Window
Extensions, font self maker. Then I'll come over here
to the hamburger menu and choose fonts template. And then I'll go ahead and
close fonts self maker. Okay, so now I'm gonna
go back to my letters. I'm going to select all with
Command a or Control a. If I hit F7 to get my layers up, you can see that all of my
other layers are locked. So the only thing
is I'm selecting right now are my characters. Everything else is locked. Okay, so I'll copy those
with command C or control C. I'll come over
to my template. I'm going to hit F7 to get
rid of the layers again. And I'll just zoom in
here and then I'll paste. Okay, and these are
quite a bit bigger. I'm going to hit S on my keyboard and that will
bring me to the scale tool. And I'm gonna make these
50% of their current size. We'll say, okay, I'm going to position them
where they should go. On the template from
the exercise files. These aren't guides, so
hopefully these won't be too light on your screen to be
able to see what's going on. I'm going to position the a and I've got all the
letters selected. So I'm going to
position the a up here, which is the cap height. And I'll zoom out with Command
minus or Control minus. And you can kind
of see how far off you are from where
the j should land. So I'm going to watch this, get on a corner, hold shift and just resize everything until those
letters look pretty good. Now we can just position
them where they should go. I'm going to pull
these out of the way. And I'll just select these. I'm using my V tool or my selection tool to
select the characters. I'm not being really careful right now about
where I put them. I'm going to go in and
adjust them later. So now I've got all 26
uppercase characters, kind of where they should go, and all 26 lowercase. And now I'll do my numbers. Now with the character
set in my own template. I don't draw some of
these characters, so some of them are going to
be missing, which is fine. Sometimes I like to
use my whole screen to view was on my art board. So to do that quickly, I want to hit the
Tab key and that gets rid of all of
these palettes. If you want to bring
them all back, you can just hit tab again. So I'm gonna zoom in here by
hitting Z on my keyboard. On these I messed up. I'm just going to
move these over. Now, this little carrot thing is not in the basic
Latin character. Set this down here in advance, but I'm going to
put it right here next to my dollar symbol. Okay, so now we can zoom in and adjust these in their area. We want to make
sure the cap height and baseline are the same. I'll hit tab to get
my Align panel back. When I'm doing this, I use
the character that already exists there to figure out
where I should put these. For example, on this aux. This is not centered
in this space. We have a tiny amount
of space right here, and we have a wide
amount of space here, but the OH, part is centered. So that's why it's nice to have that existing
character back there. You can see where the
O's placement should be. I'll speed up the video. So this isn't quite
so time-consuming. These are a little moved up, so I'll move them back down and center them
in their areas. I'm going to hold Shift and deselect everything
with an ascender. Now I'll use my Align panel to vertically align
these at the top. This to go right up to
this line right here. I'll hide all those with
Command Z or Control three. Now let's select
everything that's left. And I'll do the same thing. We'll do Vertical Align Top. These should be aligned all
at this cap height line. Okay, now I'm gonna go to Object and Show
All and that will unhide are bringing back
all the characters we had before with Command
Z or Control Z. Now I think I must have
missed this when I was fixing all of my letters, but this f is a little too tall, so I moved it to the baseline and now I
will just adjust the top. You can see that it's
taller than the cap height. I want the top of this
to be right here. So to do that, I'll
hit a on my keyboard. I'm just going to select
all these points up here, click one and then
pull them down. And of course I'll have to
fix this part right here. Now we'll go ahead
and save my document. I'll hit Shift Command S or
Shift Control S on a PC. I'm just going to put
this on my desktop. And I'll call it font
template. And we'll save. I'll say, okay, now
I'll continue on with the process of getting everything
where it should go. Moving on to punctuation. I'll move these over here. My dollar sign goes here. I'm okay with putting
this in right here. And the equals is right here. Okay, So now we're ready to open font self and start
creating our font.
12. 12 Importing Characters into Fontself: Okay, so let's open font self. I'll come up here to Window Extensions, fonts, self maker. And now we're ready to
drop our letters and characters onto
this little screen. I'm gonna make this a little bit smaller and move
it out of the way. Before we do this, we need to make
sure that there are exactly 26 letters here in
the uppercase alphabet. If you have any little paths that are not part of a letter, it's going to count
that as a letter. And when you drag it onto
the font self maker, you won't have the option to drop it on uppercase like this. And that's because
it needs 26 letters, but it looks like mine are fine. So I'm just going to drop
them here on a to Z. It'll take fonts, self maker, a little bit of time
to get them in there. But once you do, they should
already be matched up from a to Z as long as your letters
are in the right order. Now I'm going to select my lower-case letters
and do the same. I'll just drop them onto lower-case alphabet
Twenty-six letters. Then I'm going to run through
and make sure that they all have the right character
assigned and they look good. Now we'll get 0 through nine. I'll click and drag those on. We'll put those right on numbers and those
are looking good. Now I'm going to select all of my punctuation that are
together on one line. You can only do one
line at a time. So I'm gonna grab these
and pull these on. And now my only option is
this, any character batch. I'll drop it on there. Now when I do this with
my punctuation elements, I'm getting this
warning and I think this might be a font self issue. I'm going to go
ahead and reach out to the maker to see if there's something I'm doing wrong
here because I have it set up exactly
like the template. So I'm going to find that out
there generally responsive. I reached out to them
before, but anyway, we're gonna go ahead
and import anyway. Even though I have them in the right place over
here on my template, all of these are just
a little bit low. So I have to manually
move them up like this. Then I'll finally get the
last group of characters is the same thing. Now
this seemed to do. All right. Now you probably noticed that we don't have a
character down here, so I'm just going to
go through and put the right keystroke
for each of these. So that's a comma, I've got a colon. You can just tab between them. I'm going to skip these different styles of punctuation marks
for the moment, and I'll come back to those. Now we have these six
punctuation marks left. Now, open ear quotation
marks and apostrophe font, self maker Help Center website
in your exercise files. That'll bring us
to this article. Right here are what we need to use to copy and paste
into those areas. So I'm going to copy
this first character. Then I'll go back
to Illustrator. And this is this one. So I'm going to
paste this in here. I'll come back to
the article and get the next one and
paste that went in. And then we've got the single
angled quotation marks and the double angled
quotation marks. And depending on what
program you're using, sometimes the program
will choose these and sometimes it'll
choose the straight up and down quotations. So it really does
matter to put these in. I'm gonna go ahead and
look back through and just double-check that each character has the right
keystroke below it, okay, and they're
looking pretty good. Now, fonts self maker
lets you automatically adjust the spacing
and the kerning in your font and just one-click. This is a good starting
point in my opinion, but it's not perfect. I still like to make fine adjustments
afterwards to do that, all we have to do is click on this button that
says smart on it. Then I'll choose
Smart space and Kern.
13. 13 Adjusting Character Spacing: I'm gonna make my window
a little bigger here. Now you can manually adjust
the spacing by dragging this line so that it moves closer to the
character on the left of it. But I don't like to do
it here because it's hard to know how it looks
next to the other letters. So I'm gonna come in
here to Advanced. This gives us the ability
to space and Kern with a lot of examples so we can see exactly what
characters need work. So the difference
between spacing and kerning is when you adjust
your spacing and by the way, were on spacing right now, you're basically
defining the amount of whitespace on a character's
left and right sides. This whitespace is
called side bearing. It's different based on
the shape of the letter. And a good way to start out with spacing is to adjust
your straight letters, which would be your
capitals that have a straight line on the
right or the left. So let's look at the
capital letters. I'll choose a B
capitals up here. This would be the
letters like H in em, one side of the l,
one side of the B, just everything that
has a bar on one side. So when you're
adjusting your spacing, you'll want to start out with those letters like H or written. Then you'll continue
with curved letters. That would be like an O and
then move on to letter. So with more abstract
shapes like TX, v, y, or z, now the smart spacing actually did a pretty good job. I can see that my OH, because it has this
little thing on the edge, the space to the right of it needs to be reduced a little. I'm gonna come down
here to the o, and I'll get over here
to the right side. I'm going to use
my arrow keys and shift to move that quite a bit. That'll actually
connect a little bit to the next letter.
And that's okay. Maybe even a little more. Okay, That looks good. It looks like my L and Z, you need a little more space. They're almost touching
this a and the y. So I'm gonna go down
here to my z and increase the right side and also the left side a little bit, maybe not quite so much
on the right side. Let's take a look at
the uppercase and lowercase and see
how those look. It looks like my Q has a little too much
space to the right. So I'll click in that right
box and I'm just going to hold Shift and decrease
the size a little bit. Now if you want to increase all the leather space at once, you can click on letter
space plus right here. You can see it jump
over a little bit. You can also increase or decrease the space
between lines, and that's the line
space right here. Let's add a little bit. And if you don't like the
amount of space between words, for example, the space bar. You can also adjust that. And you don't need to adjust
the left and right here. You can just adjust this middle. This is the size of the space. If you decrease it, you'll get this result or increase to get
something like this. When you're doing this,
you'll want to go through and change your spacing, clicking all five
of these buttons to make sure the spacing is
right on all of them. So here's lowercase. We got uppercase,
upper and lower, then how the numbers
work together, and then characters that are not included in
any of the others. So I'm pretty happy
with the spacing.
14. 14 Adjusting Kerning: Let's switch over to kerning. Now when you use kerning
the differences, you're looking at
specific pairs of fonts. So an example is how ONJ go together when they're right
next to each other like this. So for example, if I want to change the kerning
between o and j, I can just type o up here. And then finally ONJ. Then decrease the
number between them. And I'll hold Shift to
decrease it by quite a bit. I'm just using my up and down
arrows with my Shift key. Once I've clicked in
this area right here, I'll switch over to
capital letters. Now I can also type up here. If I wanted to see how
the word have looks, then this would show me. And then if I wanted to move in the space between the a
and the v a little bit. I can just type a here, choose the a and the v and then decrease the current
in between them. The most common uppercase
letters that need Kearney, our AV, AZT and VA. Kerning is usually just
used for fine tuning. And if you want to correct
all of the pair combinations, of course I could take quite
awhile, days or weeks. I usually just fix the
most obvious ones. You can definitely
spend as much time on kerning as you like.
15. 15 Saving and exporting the font: Okay, so let's go
back to the home. Now it's time to save
and export our font. I'll come up here to save. Will want to pick a
name for the font. I'm going to call this
one hand letters. And I'll say, Okay, it'll ask me where I
went to save this. I'm going to put
it on my desktop. But if you wanted to choose
a different location and just click this down arrow, you can pick wherever you want. I'll choose Save. We'll get this little
green box here, and I'm gonna choose
Open saved font. Here's my font that's
ready to install. So I'm going to install this. I'm gonna come back
to Illustrator and I'll just get out of fonts. Self maker. I'm willing to start
a new document, so I'll come up
here to File New. I'll come up here to print. I'll choose letter,
and then I'll create. Now we'll hit T on my keyboard and I'm just going
to click once. And I'll type hello world. I'll get on my selection tool, just make it a little bit
bigger by grabbing a corner. And now I'm going to
come over here to my character palette and
search for hand letters, which is the one I just made. Oops, I need to select it first. And here's my font.
16. 16 Playful typography adjustments: Now I want to show
you just a couple of fun and playful things you
can do with your fine. First hit Shift T. And that will bring
us to the touch-type. You can just move letters
around like this. You can make them taller by clicking and
dragging this corner. You can resize them by clicking and dragging this
corner I'll just undo. Or you can make them wider by clicking and
dragging this corner. I'll undo that. And then this dot at the top will allow you to rotate them. You can get some really
fun bouncy texts by using this tool, which is the touch-type tool, I'll retype that word and this time we'll come out
to the effect panel. Let's go to Warp,
will choose arch. If we put our bend at 20 or so, we can get a cool little
arch effect for our words. We can also change
this to flag shape. Let's increase that a lot. There are a lot of things
under here that you can try. Now you have your own handwritten
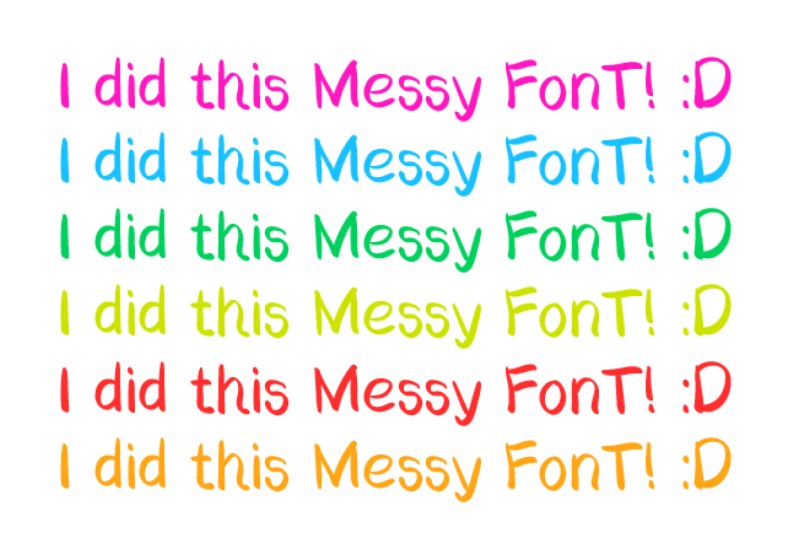
font that you can use it any program that
supports fonts like Word, PowerPoint, and of course,
the Adobe products.
17. 17 Project: All right, Now it's
time for your project. I want you to create your own font using
uppercase letters, lowercase letters,
numbers, and some symbols. You'll need to vectorize
your font and then clean it up using editing techniques that you learned in this class. Then use fonts self to create an actual OTF file that you
install on your computer. After you've installed it, you can either make a graphic that shows your alphabet or you can just choose a word or a few words that describe
how you feel today. Maybe you can even add a few other graphic
elements to add interests. All right, I can't wait
to see what you create.
 Anne Larkina, Graphic Designer, Adobe Max Speaker