Transcripts
1. Introduction: Hello, my name is
Braden measure. I'm an artist, YouTuber, and I make content for
the Internet of things. I'll be your instructor
for this one. And how to easily draw eyes. Now, what I've
done is I've taken the three most common
angles that you'll find when you go to draw
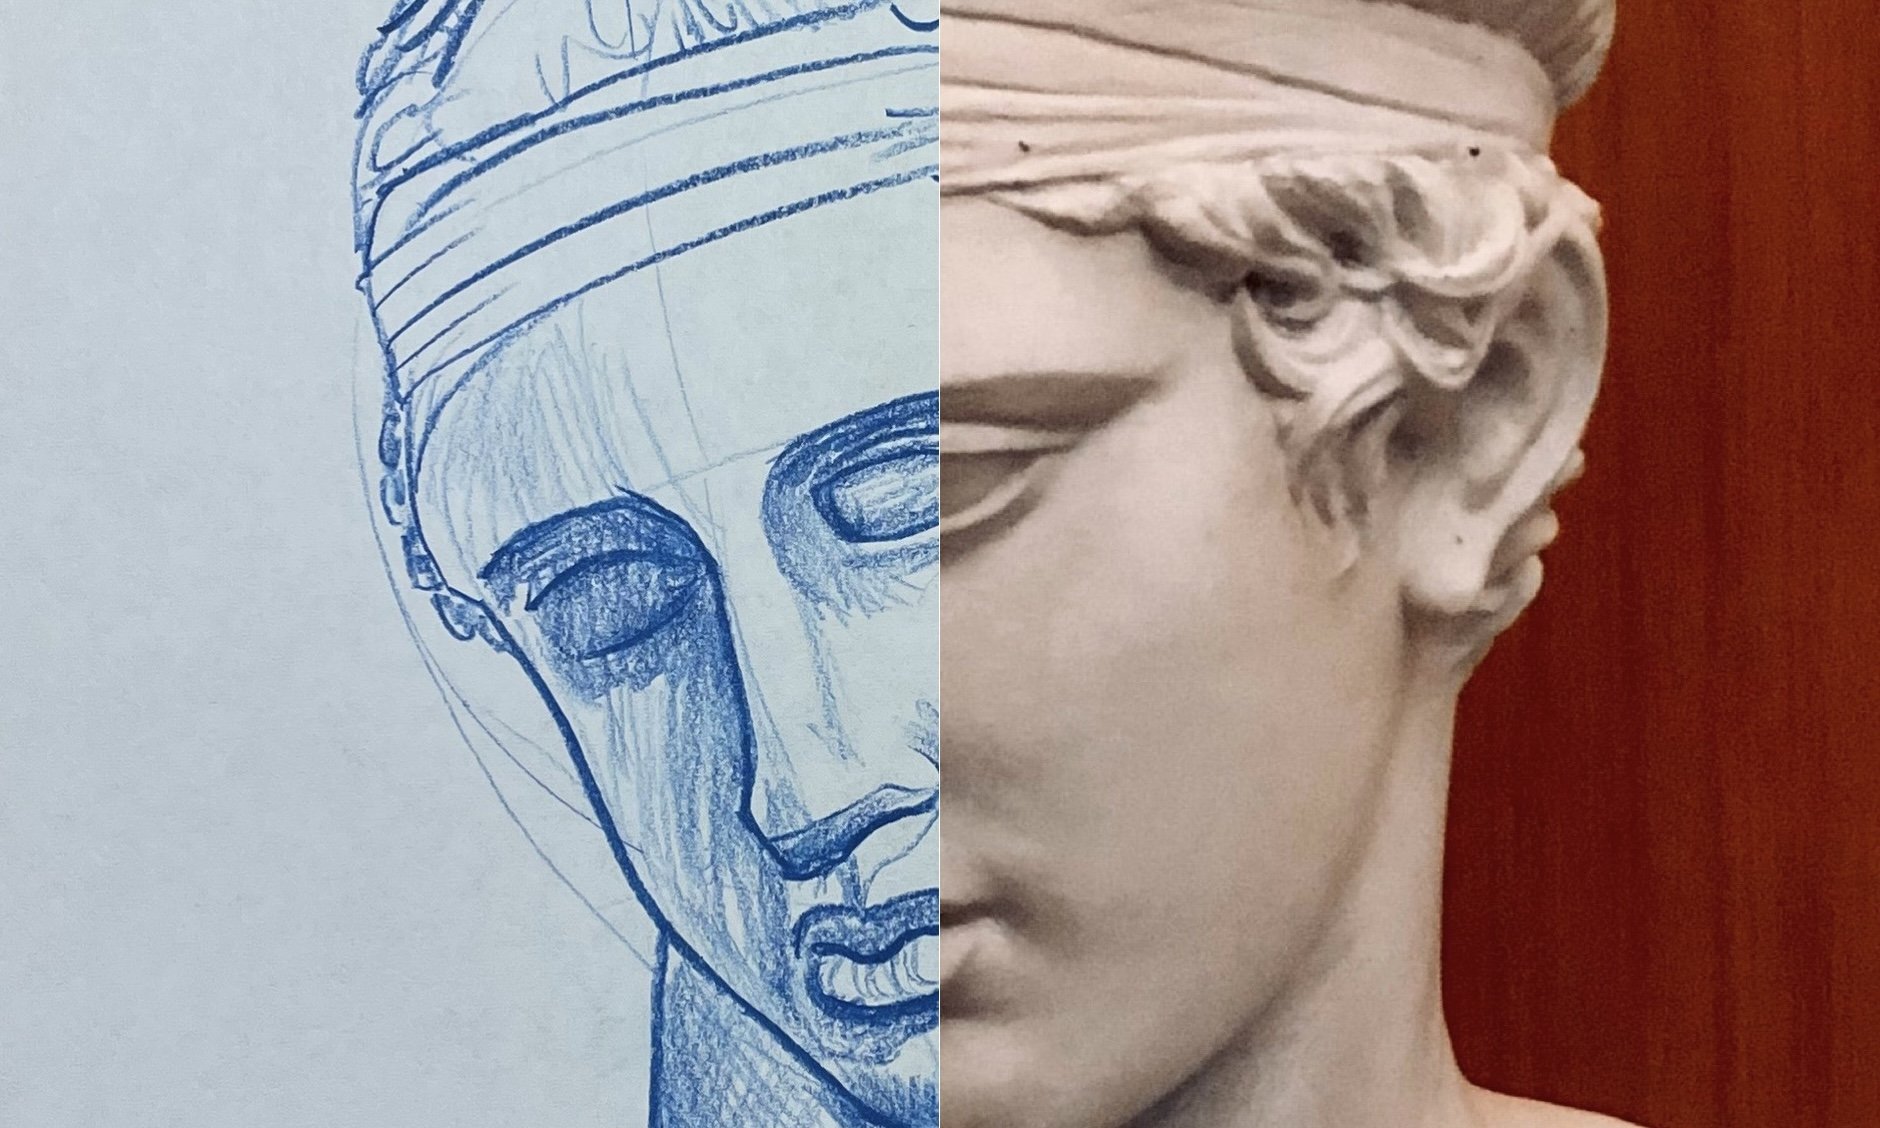
most intimate portrait. That is a profile angle, a three-quarter turn
angle, and then of course, the straight on and we're
going to start with the profile angle simply
because in my opinion, it is the easiest. And then we'll move on to the
three-quarter turn angle, which is slightly harder, right? There's two eyes and they
have to deal with one. And then after that, we'll move on to
lesson number three, which is the hardest, in my opinion,
straight-on angle. Most any face isn't
exactly symmetrical, albeit they're very close. And that in and
of itself is what makes the straight-on
angle the hardest. But don't use stress. I got this class
broken down into three digestible
lessons and we're going to go at it in real time. So what to expect? In this one? We're gonna
be starting off in lesson one with the profile angle. We're going to be using
a reference photo. And I'm going to
be showing you and explaining how we can
establish the brown. Once the brows established, we can then easily
draw out the eyebrow. From there. We can pull down what I like
to call our anchor points. Once we have the
three anchor points, will help us draw in
the top of the eyelid. And from there,
we basically just build out the eye
from top to bottom. Then of course we go in and
we can solidify details. Moving on to lesson number two, it's going to be the
exact same thing only we're going to be dealing with the
three-quarter angle. So I'm going to show you how you start off with your brow. Once the brows built out, exact same thing, we're going to establish our anchor points. And then once we have
that first drawn in, I'll show you how to
use reference points so that you can easily draw in that second eye and make the eyes pop and
look the same size. From there, we're
going to be moving on to less than three, which of course is
the hardest one. And it's the exact same thing. I'm gonna be showing you how
we get the brow established, our eyebrows, the anchor
points, the eyelids. And then using the first i in reference to be able to
draw in our second i. All in all, I hope that
it's comprehensive. But the biggest
thing is I hope you have fun a lot of times, especially if you're a fairly
new to drawing portraits, eyes can be tricky, right? So this is a method
that you can use on numerous heads, Riley heads. If you just wanted to free
hand, It's really up to you. I'm really excited to see
your guises projects. I would love to see full pages with half a dozen eyes
of the same angle. Angle number one, angle
number two, and number three. Of course, the biggest thing is I would love for you guys to review the class
when you're done and just tell the community
what you liked about it. And remember if this is maybe your first-class and you
haven't already make sure you fall semester creations on Skillshare and that
way you can be notified when my latest and greatest classes are published. So that's what to expect
and helps you in class.
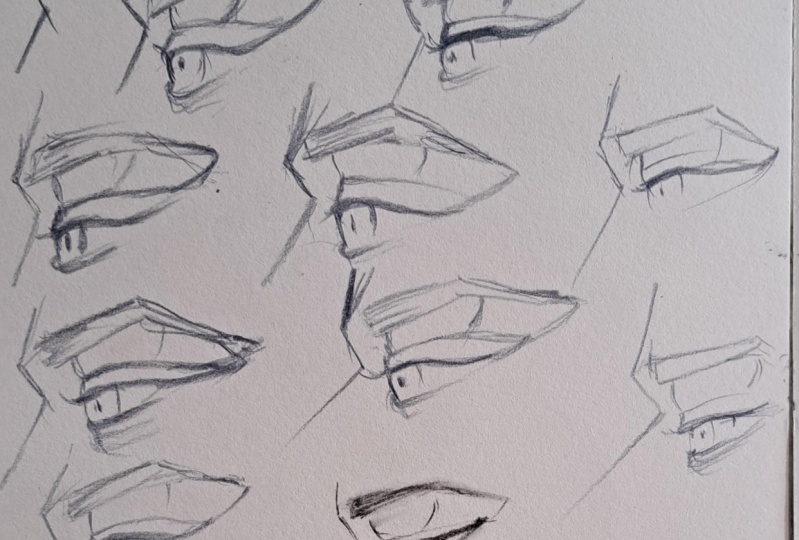
2. Profile Angle: Alright, so we have our
reference photo in the corner. And what we're gonna do
is we're going to start off with the edge of the brow. Okay, we're going to pull up
beginnings of our forehead. Then we're going to establish
the edge of the nose. Alright. Once we have that, we're going to begin to
draw out the eyebrow. Okay? Because this is just a
basic shape exercise. I want you to draw
out the eyebrows just like this. Make them boxy. We're doing this intentionally because this is all
about identifying and understanding the basic planes of the eye and the
eye socket. Okay? So now you have your
anchor points are in, pull that down, that one down. And then of course
on the edge we're going to pull this
one down and over. Now we're going to use
these anchor points for the top of our eyelid. Okay? So we're going to pull
that one back from there. That one there. Here's the bottom of
the eyelid, right? Where it lays over the eye. And here's where you
can start to play with your line qualities, right? And your line weights. You can beat them up, you
can keep them skinny. You can vary them.
Whatever you will. Doesn't have to look exactly
like mine so long as the planes themselves
are the same. But notice how I'm just
sticking in this up. And one of the things you'll
realize is the bottom of the eyelid is always
going to be thick because that's where
the eyelashes live. Of course, that is variable
depending on your subject. Certain subjects have
very thick eyelashes. Others don't. But we're not too worried about
details, right? This is just a basic
shape exercise. All three lessons in this class are designed
to get you to start thinking about basic shape and the planes of what it
is that you're drawing. Okay? This is very much what I like
to call a volume exercise. What you can do to build up that muscle memory is draw
the same I half a dozen times on a piece of paper and
then turn that paper over and draw out another
five or six eyes, right? Just that habituation doing
it over and over and over again will help you solidify
your muscle memory. Alright, well, I hope
you enjoyed this one. Now let's move on to lesson two and tackle that
three-quarter angle.
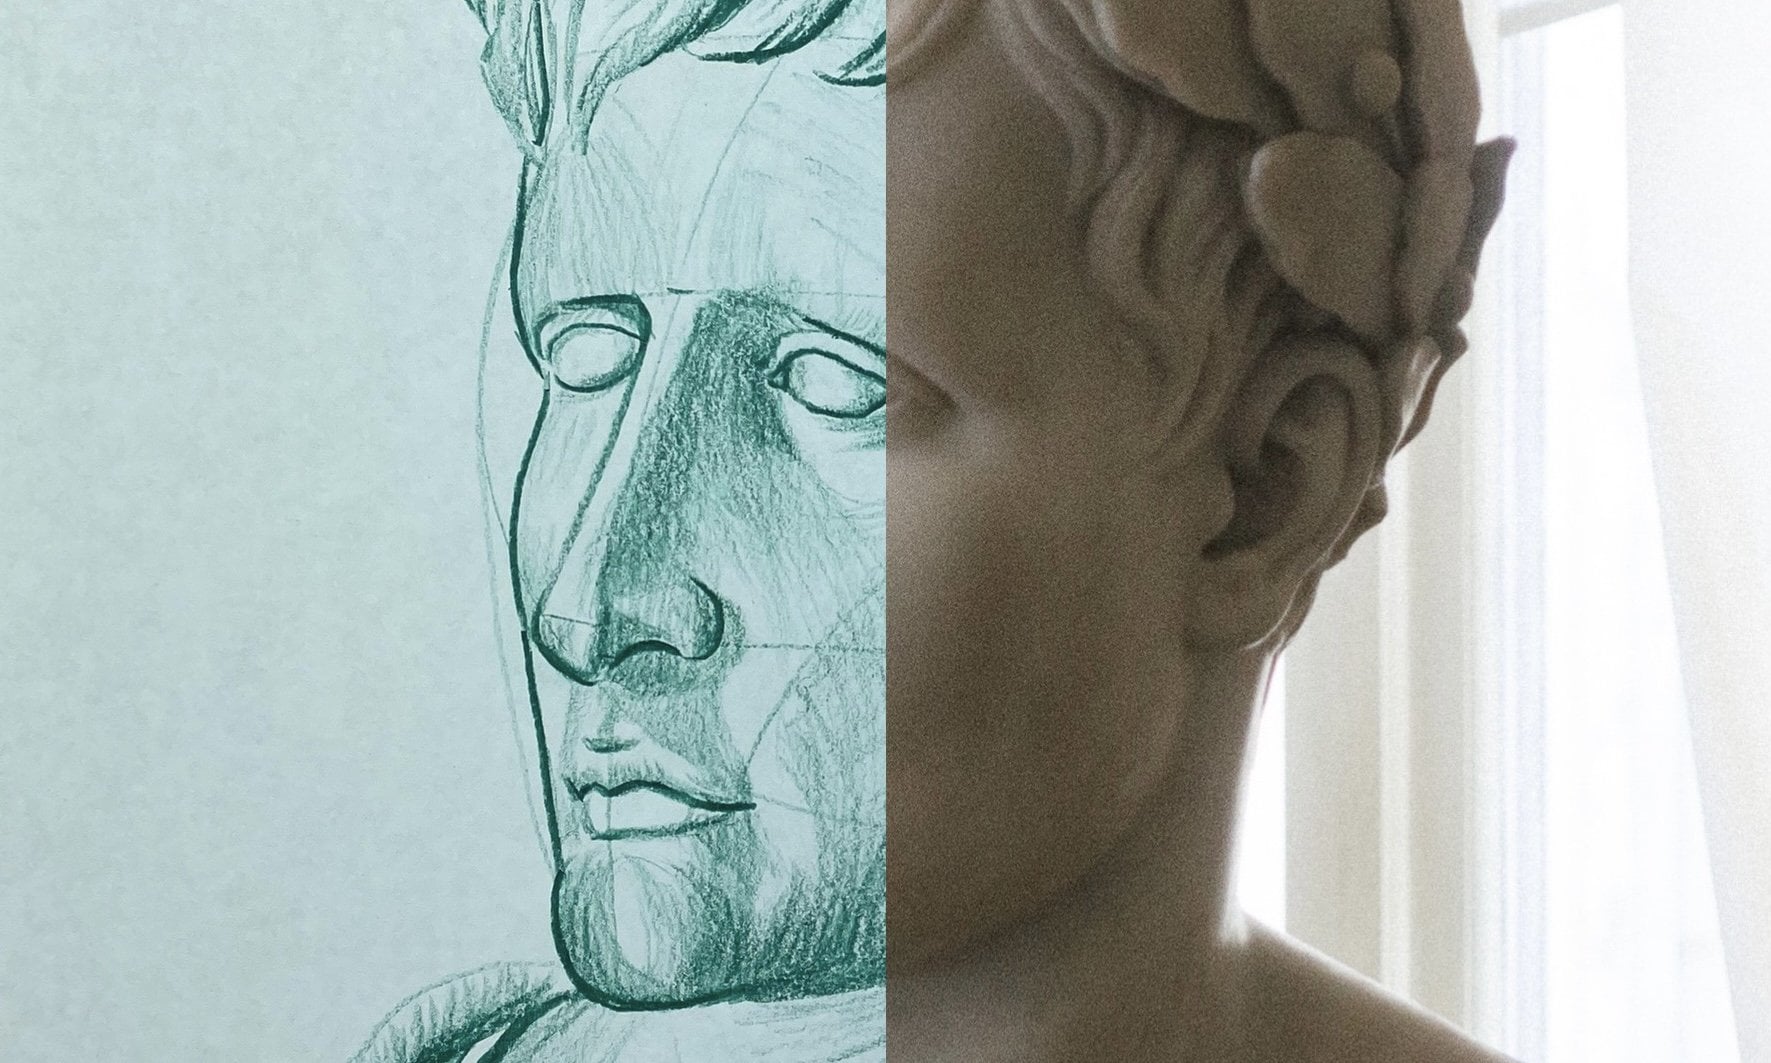
3. 3/4 Angle: Alright, so here we go. So this one is a little
bit more involved. Here we have our subject
at a three-quarter turn, looking at us with
a slight angle. So we're just going to pull our pencil over
like this and make sure that you are putting your pencil on its
side just like this. We have our upside down
triangle that's to signify the top of the nose
where it plugs into the brow. And then right here,
I'm just gonna draw some circles and this
is to help us gauge where exactly those irises are gonna be staring at, right? I always like to start with
the eye that's farthest away. Our answer is going to pull
it over like this. Pull up. And then right here
we have the eyebrow. Pull this over like this. Thicken it up a little bit. Remember it's just basic shape. It's not about details. It's not even about
getting the drawing to look exactly
like the reference. This is more just,
just practice. So now we have our
anchor points, right? Remember how we want to
use these anchor points as a guide to help us
establish that eyelid, right? Then of course, once the
eyelid is established, then we can start to be fit up. We can thicken up
the line quality on that eyelid like this and it's kind of pull this over. There we are. Remember start off light, use a light pressure
control first. And then when you have that
line exactly where you want, then you can start
to thicken it up, right and start to
bring out exactly where that eyelid should be
resting on top of your eye. Then here, kinda got the bottom. Let's pull this over
and lift up two, lift up as you kinda conclude. And always remember
that when it comes to sketching out eyes such as this, when it comes to the
bottom of the I, leave those lines nice
and light, right? Don't define them. And even if you do to
find them only to find maybe parts of them don't
define the whole thing. Now when it comes to
the eyelid, right? You can define that one because remember what we were talking about in the first one. Those eyelashes are
nice and thick. So here what I'm doing is I'm
just drawing out the iris. Alright, and then of
course we've got the, the pupil, it lives
somewhere in here. I'm not too worried about
the details, right? This is more basic shape. So now what I'm gonna do
is I'm gonna come over. I'm going to mark my
eyebrow right here. I'm going to pull over
something like this, right? Remember, we're not
trying to sketch out a picture perfect drawing
of our reference. We're just using
the reference as a guide to help us understand exactly how those eyes
live in a portrait. Alright? Just like that, we have a plane right there
for the inside of the nose, we have our first anchor point, our second anchor point, and then our third
anchor point, right? So now we're going to
use those points to identify the top of our eyelid. Comes down here just a little
bit, something like this. That's the top. And then
of course there's a space between the top
of the eyelid and then the bottom of
the eyelid, right? So now here's the bottom. The bottom line of
your eyelid is always going to be of a thicker quality than the top line will be. And then here, something
like you can bring this over and that'll
kinda help you line up the bottom of this. I compare it to
the other eyes so that they look
somewhat symmetrical. It's funny the more and
more you draw faces, the more you realize
that most people do not have a symmetrical face, it's off just slightly,
just a little bit. Okay, and then right here we
got the iris established, then of course our little pupil. Then we have a little
light reflection. Then what you can do is you can take your pencil just like this. And just, just very lightly. Let's go back and forth
and you can lower the value in certain
places such as the eyebrows and maybe the
inside of the eye socket, if you will, and
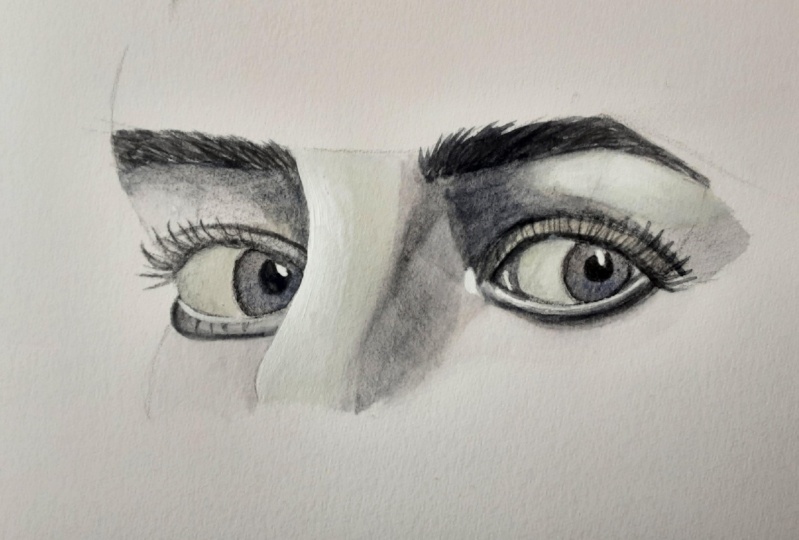
just play with it. Just like less than one. But the profile angle of the first die that
we did together, draw out half a dozen of these. Just draw this, these
eyes over and over again, use different reference photos with this exact same approach. And I promise you'll build that muscle memory and you'll
get better at drawing eyes. Now let's move on
to less than three and tackle that
straight-on angle.
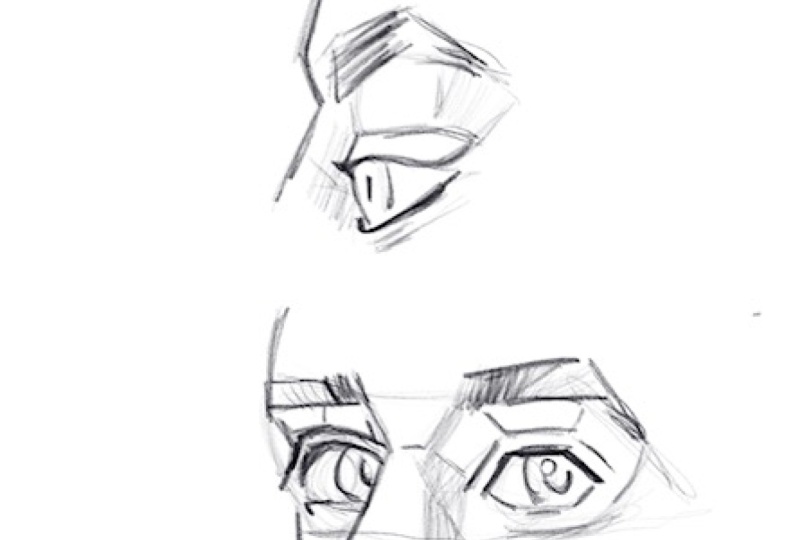
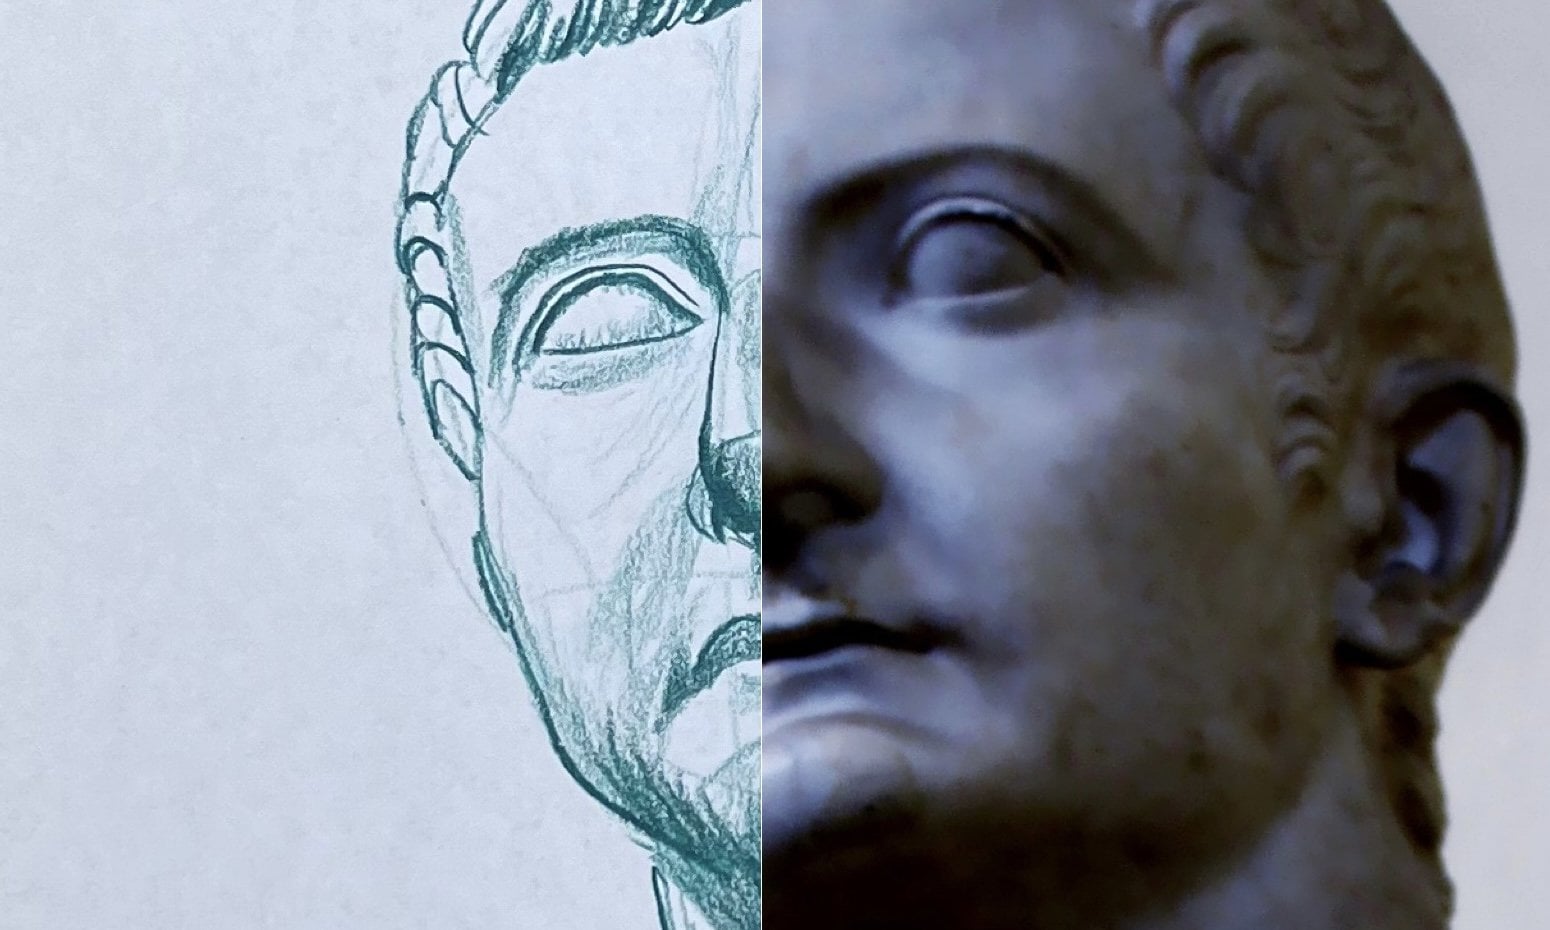
4. Straight On Angle: Alright, so I saved the best for last or should
I say the hardest for last? Okay, So what we're gonna do is this angle is
looking straight on. So just like the
three-quarter turn angle, we're going to establish
or upside down triangle. And then we're going to pull
our pencil over and down, right, over and then down. And then we're going
to come around. Just kinda have a
basic understanding of our eye socket, right? Something like that. Then of course if you're
kind of off like this, you can just kind of go back
over it and you can make that brow of your subject a
little bit more symmetrical. Okay? Once you've done that, then we're going to establish
our eyebrow, right? Remember this is more of
a basic shape exercise than it is actually trying to draw something.
Picture perfect. That's not what this
exercise is about. We're just trying to get
a basic understanding of what this shape looks
like and how we can start to approach it in our day-to-day
drawings of portraits. Out of all three angles
in this short series. This is the hardest,
in my opinion. Reason why is
because even though the human face very rarely
is completely symmetrical, it is still something where both eyes have to look
some somewhat similar. Otherwise it's not going
to look right. Okay. So right here, we have our planes for the inside
of the eye socket, right? We have our anchor points. I'm going to connect
those anchor points, something like that. And in this specific angle, your third anchor point. So this one right here
on the outside edge. Very rarely are you
going to connect that anchor point with
the top of the eyelid? Very, very rarely. Okay. Okay, so we have the top the top of our
eyelid established. Okay. So now this is where it
gets a little dicey. Little trick is we wanna
kinda thicken this up. And every reference is
going to be a little bit different,
right? So say e.g. the eyelids in this
reference photo or are tucked into
the subject's head? I'm quite a bit, not every single person's
eyelids are like that, but in this case,
this subjects is. So. Now we've established the top of the eyelid
with that first line. Now we are establishing the
bottom of the eyelid, right? And remember how I talked
about how you can go in and just go over this bottom
line again and again, you can kinda thicken
up the quality of the line because of
the eyebrows, right? Because when you look
at the reference photo, even though all those
eyelashes or individual, because of the nature
of the angle and because they're all
tucked it together, it actually looks like a
fairly thick quality line. So when you're
sketching like this, you can go ahead and
just make a line, right? Depending on how
detailed you want. If you want to go in
and kinda lift up certain eyebrows and
bring out the detail. Absolutely, knock it
out, you know, do that. But for this basic exercise, I'm just just kinda sketching it in something like this to establish the iris of the eye is nice and lay
something like that. Alright. Then of course, we have
a little reflection. We don't even
necessarily need to draw out our pupil and this, of course you will want to, that's totally up to you. So this is where it gets
kinda tricky, right? We're trying to, we're trying
to bring out that symmetry. We're, at the very least, we want to make sure that those eyes are on the
exact same plane as far as the same width and
roughly the same height. Because that's
what's really going to sell it for our viewer. Then we can kinda just
thicken up the iris on this side here,
something like that. Right? And just like any drawing guys, just like doesn't matter
if it's charcoal, graphite or even if
you're sketching like this and you're just simply
hatching and having fun. Once you have the basic shape
of your eye is drawn out, then you can start to
play with it, right? You can take your
pencil like this. You can turn it on its side. You can start to mess
with the shadows. I'm in the shading. So say e.g. you look at
the reference photo, the actual eyelids
themselves because they're tucked into the eye socket
in the way they are, they do throw a lower value. This will be variable depending
on the reference photo, but I would even say to just
have fun with it, right? If this is what we call
volume drawing, right? You just want to sketch out as many of these eyes as possible. You can play with it. You can sketch this even
though it's the same I angle. You can lower the value in different areas and
kinda see how it looks. See if it's something
that you like. You don't necessarily
have to be sequestered to exactly what the reference photo it looks like every time, especially in this exercise. The whole point of
this short series is to get you to start thinking about when you look
at a portrait reference, how you can start to
sketch out the i's based off of using planes. A lot of times artists
will go in with say, like graphite pencil and they'll
sketch out the planes of the eyes just to solidify exactly how to place them
on say, a luminous head. But then they'll go in
with an eraser later and they'll actually erase
a lot of those lines. Where here I am solidifying these planes because I
want you to see them. I want you to get
familiar with them. Once you're familiar and you're comfortable and you
can bust out eyes. No matter what the reference
photo with these planes, you can go back in
and you can erase those graphite lines and then you can blend
it with charcoal, or you can layer it with graphite or whatever your
medium of choice is, right? It's not about drawing
out these eyes and making them look exactly
like the reference photo. We used these reference
photos to give us a general understanding
of exactly what the planes look like on paper
based off of what you're trying to accomplish in the
reference photo, right? So that's it. That's all. I cannot wait to see
your guises projects. Be sure to leave a review and
stay happy, stay healthy. And remember, never
stopped drawing.
 Messer Creations, Artist | Author | YouTuber