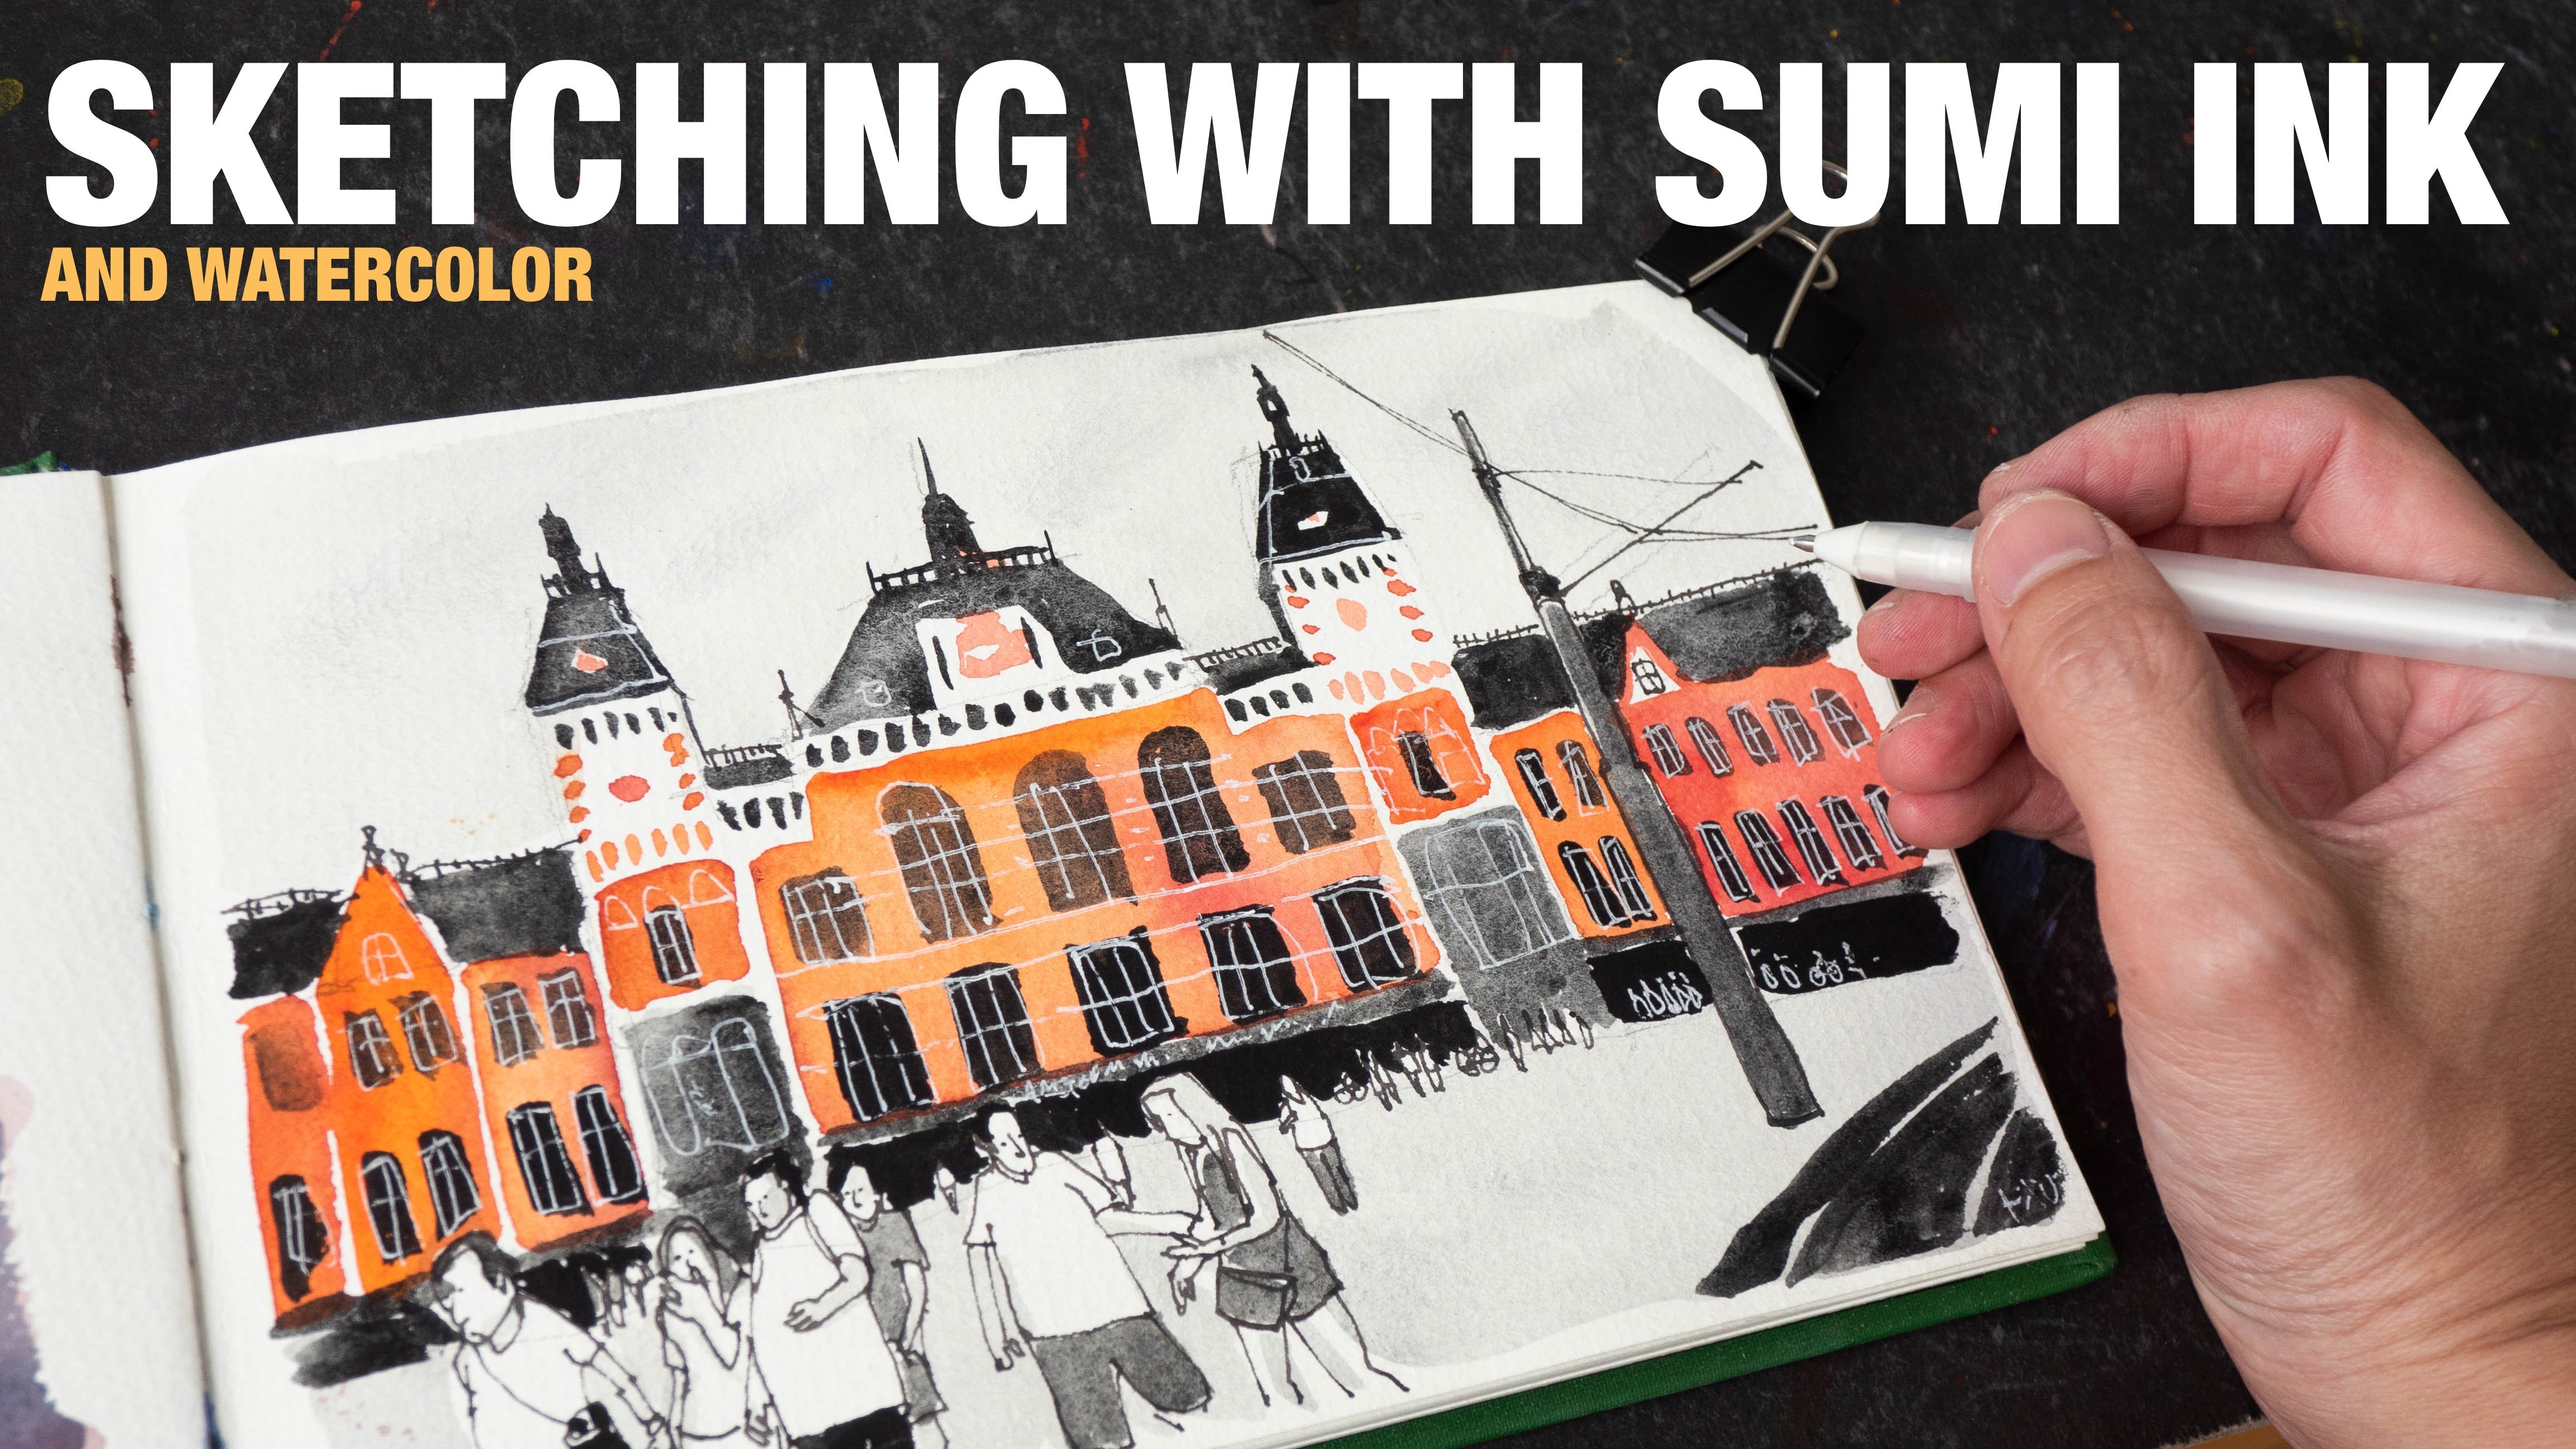
Transcripts
1. Intro: Hi, my name is Joe and I'm an artist and graphic designer. So I've been sketching fall more than 10 years. I'm really into urban sketching, which basically means I enjoy drawing out DOS on location, drawing from observation. I believe many beginners may find drawing perspective to be quite daunting. So in this course, I'm going to teach you some techniques to help you draw beauty things, cityscapes, and draw perspective. Without knowing perspective, I'm going to teach you how to analyze scenes, how to think before you draw, and how to draw without thinking too much or stressing yourself out by constantly worrying about how you can get the perspective to look accurate.
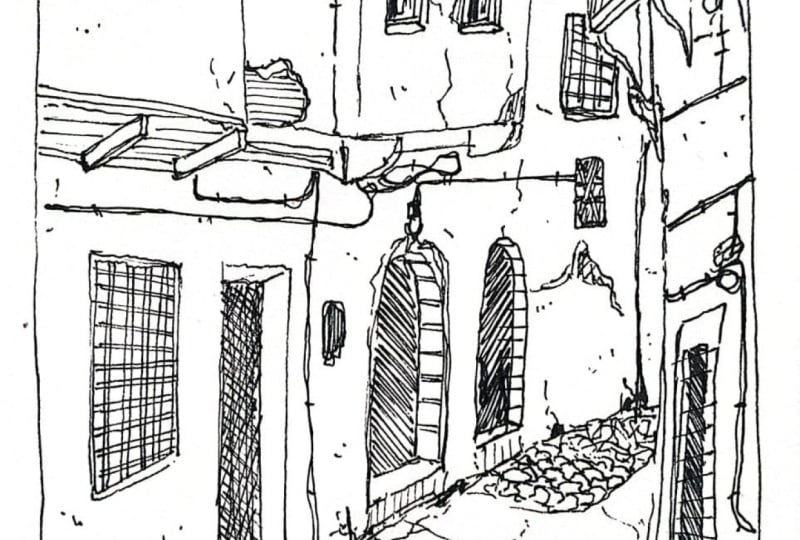
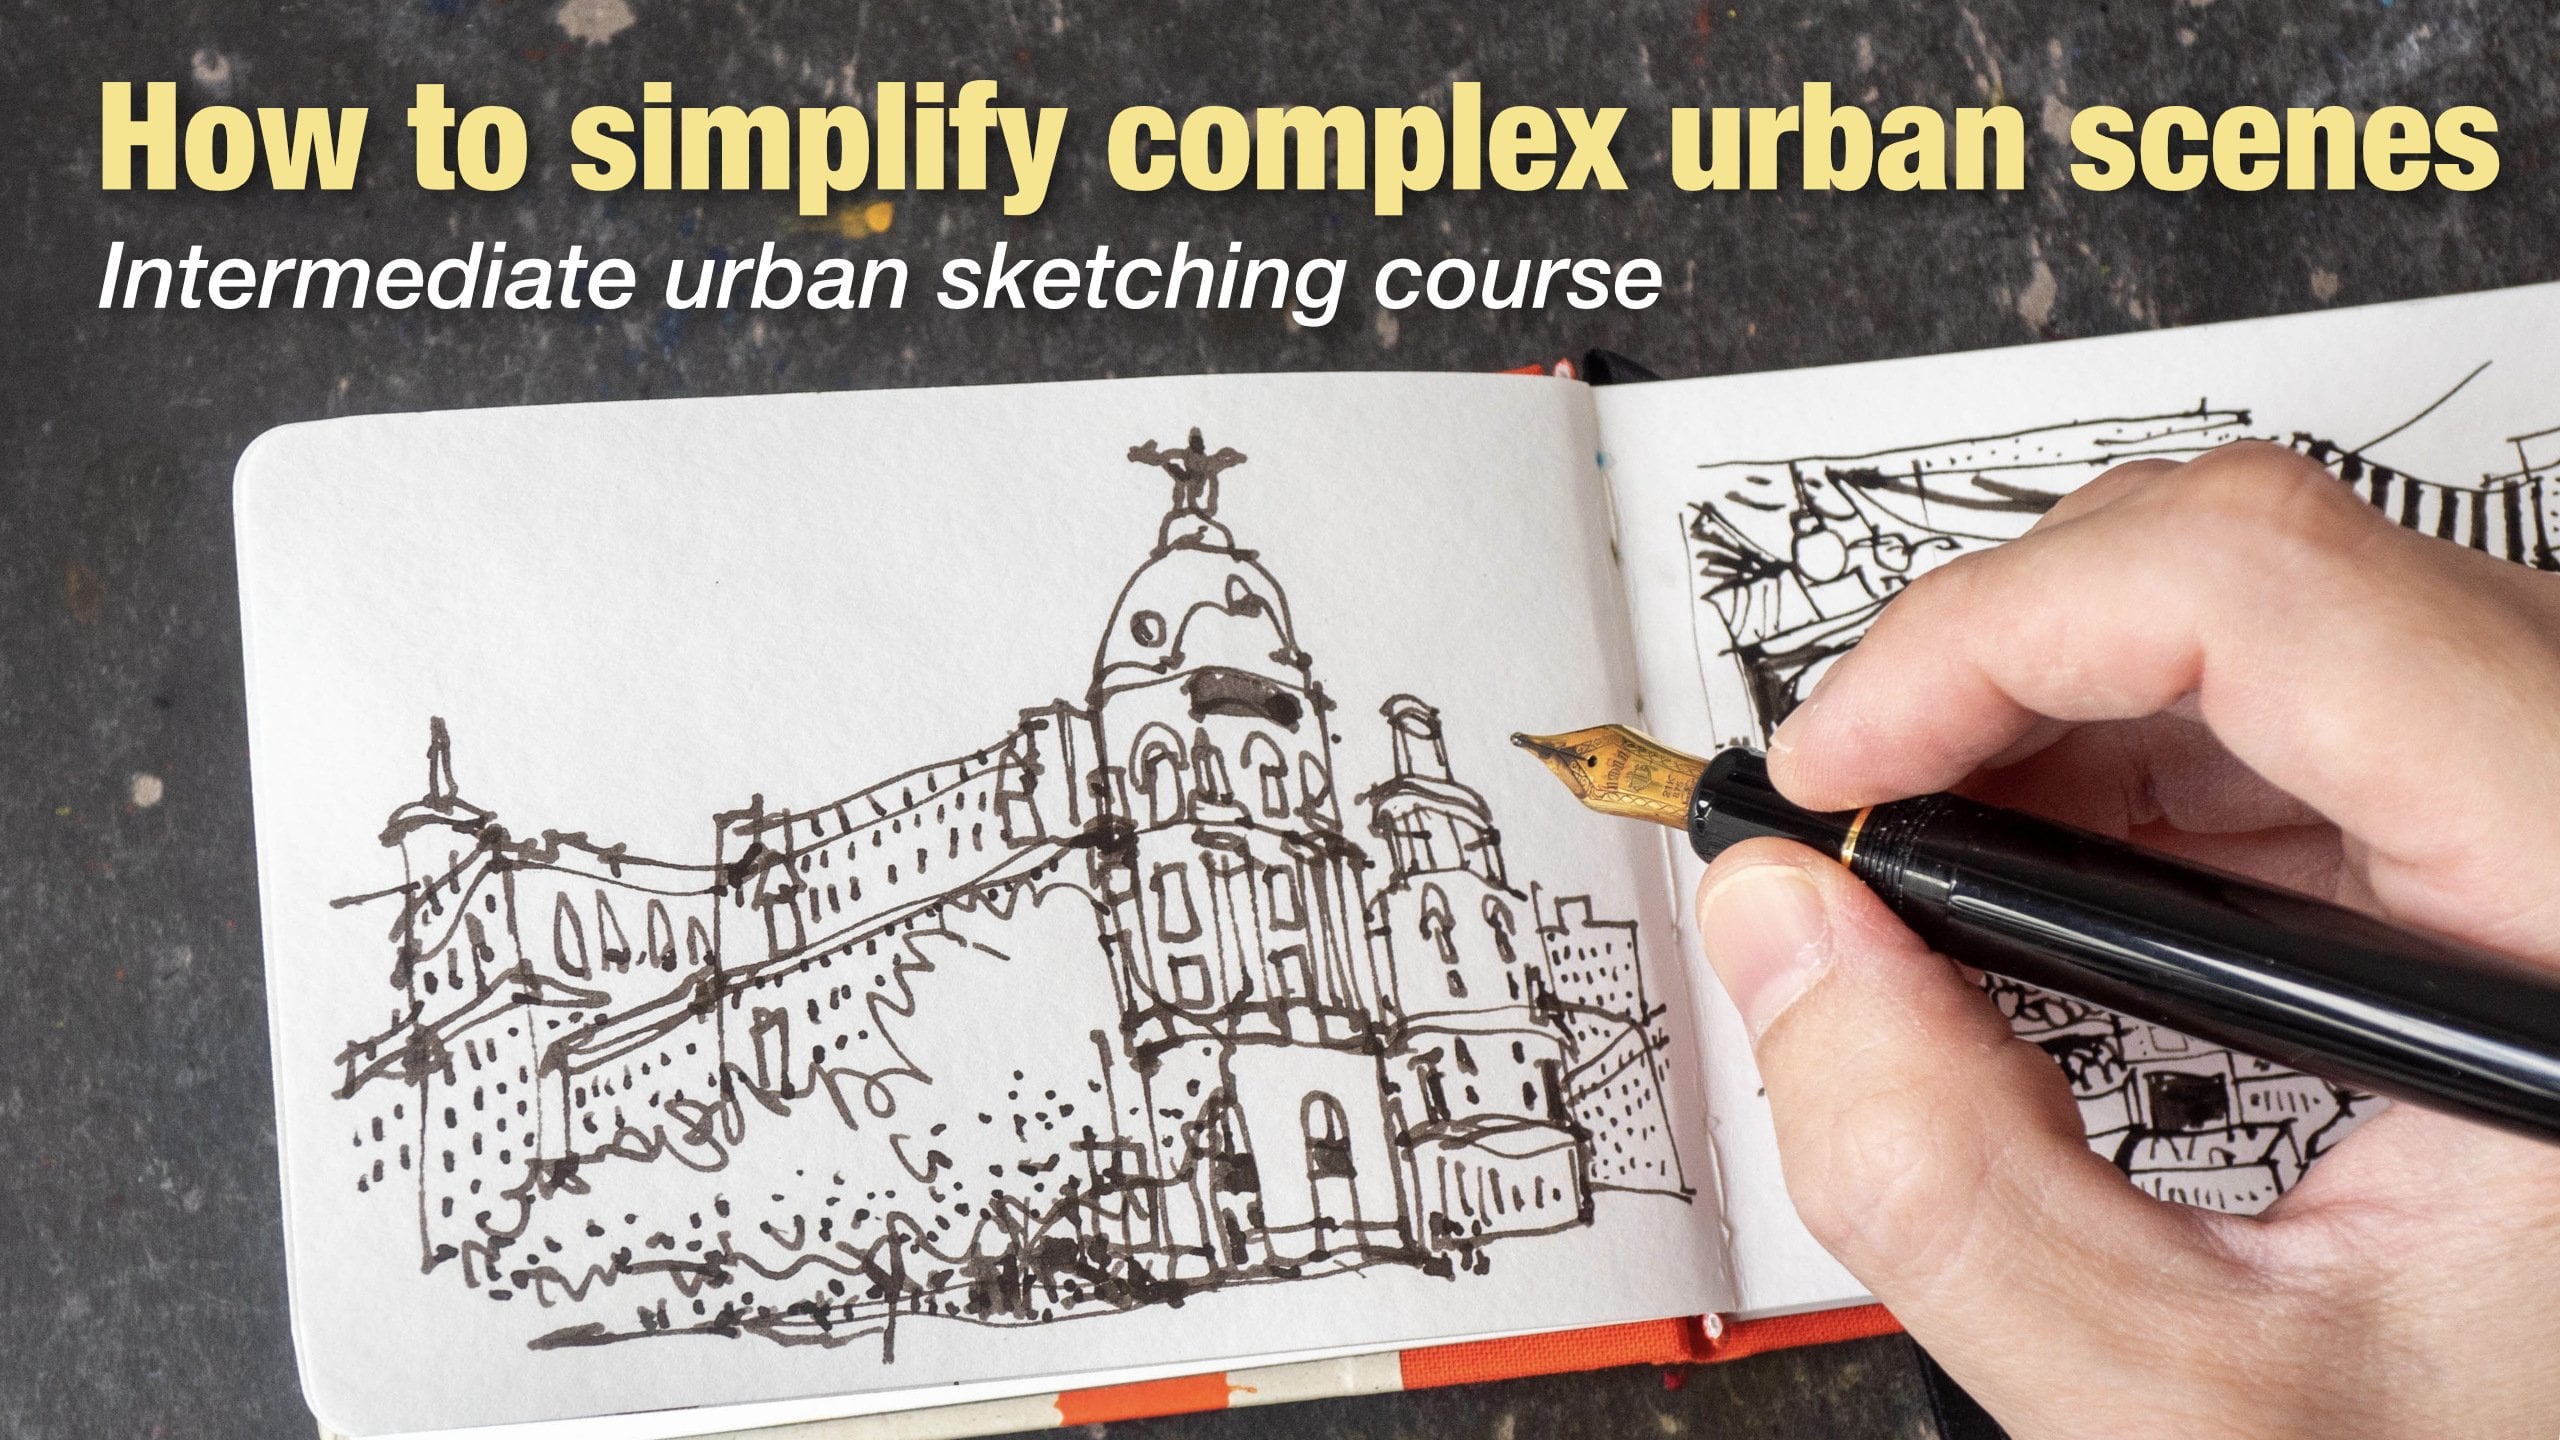
2. Draw 1-point perspective scene (part 1/2): So let's start with this particular scene. This is a very obviously one-point perspective scene. The first thing I look for when I see a scene like this is where all the lines converging. Now please bear in mind that you don't need to know perspective in order to draw perspective. However, if you do an OT perspective, you can use the knowledge to help you make your sketch more accurate. You can use the knowledge of perspective to help check your work. So here I just wanted to show you where is the vanishing point? It's somewhere around here. To draw perspective. Without perspective, you will need observation skills. You will need to spend more time observing what you are drawing rather than looking at your sketch. So the more time you spend observing a subject, the more accurate your sketch will beat. So for this particular scene, I'm going to draw that tall yellow building in the background first, I'm going to have to hide this. We've some space at the top for the sky and some space at the bottom for the ground. So this yellow building, or at least for this particular side of the yellow beauty, is just a rectangular block. So in this case, you don't really need to know perspective to draw a rectangular shape. Let's have does. Let's make this a tall rectangle. There is some extrusion at the bottom here. Because these Lock is on top of some Carmelo shows shops. And now for the site here, the right side here, there is an angle and angle will come down somewhere here. So I will know I have tried to make a mental note, bread that corner of that building will be, it's a bow, maybe 1 third or one quarter compared to the height of this. So I'm going to place my daughter year. And this reef here because its force shorten the width of this site of disputing it's narrow rule. And I'm going to compare this to the face of this building here, which I have already drawn and they are about the same wave or maybe this is slightly more narrow rule. So this is the corner of the building. And now I can just join this. And I need to join it at this point here. Notice I joined. I drew this line lower than a dog because I think this point is actually low with an a dot. So now I can draw this line all the way down and stopped right here, red there is another beauty in front. So I have not used the knowledge of perspective yet. I'm just drawing based on observation. I tried to find out where that corner is and try to find out a wave here and then just join it. On the left side, there is this BU, thing that is quite near to earth. And there is this roof here. The corner of the roof starts here. And a corner of the roof is about one face away from the face of this block here, but smaller. So it's going to start here. And this line, it's very steep. So again, when we are drawing from observation, we need to really go and measure how steep that line is. Usually I will stretch out my arms, locked my elbows, and use a pen or pencil to measure that particular angle. And I will remember the angle and draw it on paper. So this angle, it's really steep. So when you're drawing this, you have to remember the angle that you measure it. You don't draw this angle based on what you think that angle is. If you draw based on what you think that angle is, it's not going to be accurate. All right, so now let's draw this horizontal line to the left side and push is slide Tao. And there is another diagonal line here. All right? Again, we need to measure that angle. This angle is almost vertical. This angle it's going to be like this because it's actually effective by some vanishing point, be low. But again, we don't need to know perspective to draw this line. But if you know perspective, drawing the angle, getting the angle right, getting their precise angle is going to be way easier if you're just measuring like this. It's a bit tiring. It can really exhausting mentally because in this scene there are a lot of diagonal lines and share. I'm going to try to show you how to draw without knowing perspective and this angle. It's like this. So that's droid. This. Make sure that this angle is not the same as this angle. Alright? And then we have a NOT or have done this, we have an another angle here. This angle is also not the same as this angle. They may look like they are parallel in the real world, they are parallel. But when you're drawing, the two angles are actually slightly different due to perspective. And at the bottom here it goes to the left side. Now this line here, it's at the midway point compared to this block here. And then it goes down all the way to black area. We'll stop right here. There are some windows here. And there are some Lou fors here. And there are some shops here, and also some shops here as well. That's troll those shops. So generally speaking, I will try to draw the bigger shapes first and then draw the smaller ships. We even bigger ships. So now I'm drawing the ships within this. Again, we need to measure that angle. Now you may want to use a pencil. If you are a beginner, you may find that using a pencil to draw, to get some drafting lines on the paper that would make it easier for you to like, draw faster and more accurately later on. And it's perfectly fine. I'm using red pens over here to shoot a line as well clearly. And this is something I still do nowadays, even though I like to draw straight to ink. But for really complicated scenes such as this one, sometimes I still use pencils first to mock out Lines case. So here I'm just going to block out the shapes. Now it isn't written viewing here like this. Okay. So, so far I still have ups do not drawn anything using perspective knowledge yet. All right, so now I can draw and cars here, we'll dot, Let's draw the mic, this bottom part here. Longer, a taller. And the cars we will hear. Now when you are following along with this tutorial, don't have to draw like the DTUs, just block out the shapes. That will be enough. If you can get the shapes right. There is no, there's not gonna be any problems when it comes to drawing the details later on. But if you draw the big ships wrong than the details that you draw later on, doesn't really matter because you've already gotten the big ships wrong. And you're seeing will be inaccurate. So what makes you all seen accurate is actually the big shapes. All right? Okay, So let's draw this here. Notice now I'm just following the lines that I've drawn. This refuting here. The son of this rebuilding, this width here, it's the same as the front. Maybe the front is slightly on narrower. Now for this triangular shot, How's on the right side of this is a bit challenging because there are angled lines that go up and come down. There was a life that are supposed to be parallel to the ground, but they are pointing to the vanishing point. So it's, It's a bit challenging to get the angles right, so we don't need to use perspective to draw those as well. So what I'm gonna do is to draw the top of the shelf house versus molecular the semicircular part here. This part here will be higher compared to this pot here. And here I'm going to measure the angle and Freud, donald like this. So this pot here, a debtor is the loo for right here, is actually that was taught here. I am using this as a measurement tool. So this Luther will be angled like this. By the way, when you're drawing, try not to have too many lines like this. It's going to mean your sketch to look fuzzy. It's not going to look nice. So when you draw a line, just draw it with one line. Don't draw with so many lines. It's going to make your sketch look more confident. Okay, so let's draw the center line here. This line here, this line here actually comes down. Tilts down like this and we need to measure where the point here is going to end. It's going to end somewhere here. Somewhere here. So as Troy, this, I will also use my pen to align this point to this angled line there. Now you may find this way of drawing to be quite tedious. It is quite tedious, but the thing is with more practice, all of this will become second nature to you, right? So you will get better at observing the mall you draw. Basically, the more you practice, the better you get, right? And we have another line here. It's about 45 degrees, I will say. By the way, when you're drawing, don't let all of the other lines confuse you. But you have to take into account all the other lines that you have already drawn. And when I'm drawing, I don't think of myself as drawing a beauty things, shop houses, cars. I'm just drawing lines and I'm just drawing the angles. The thing is when you are, when you think you are drawing a building, your mind will sort of try to draw that building for you when in actual reality, one should be doing is actually to draw what you see in front of you, your scene, right? Focus on your scene. So now that we have this big shape here, you can draw the little DTUs within this. So once you have the big shifts, it's very easy to place all those little elements here. These are vertical lines for the windows. These are just suggestions for the windows. For this building here I will need to divide it into a few parts so that I can draw the windows within those parts more accurately, right? So this is basically how I would tackle this in. So now I'm going to draw like really fast. Sometimes when you draw really fossa, it can be a good exercise for you to draw what you see rather than what you think you see, because you don't have the time to think. And run really fast means you don't have to draw a lot of T2s. What you're doing here is actually to practice your observation skills and also your hand-eye coordination. And sometimes your sketch may actually look really nice because you are growing fast. When you draw slow sometimes your sketch kinda does look a bit. Steve. The lines are very rigid. Yeah. So when it comes to drawing and PFOS, sometimes it makes it easier for your sketch to look a bit more sketchy long. Natural, nicer. K is. So you see this scene is that in the common life, some people, some trees here, some vehicles in frond tried to draw with minimal lines. Don't draw so many lines when just one line we'll do case. This scene. It's almost done. For this block here. I can divide it into a few parts, 12, three, and this point here, it's much longer. And we can add some perspective lines here. The lies on this sort of buildings. They do have to follow perspective. Again, we can draw this without knowing perspective. Here I have drawn too fast. I made some mistakes. So how do you draw the lines on this site carried out on this side? So what I want do is to draw this line here, first. Observed the angles of the lines from what you see in real life. And then LET split, split, split. Just draw one line at the top, at the bottom, and then draw the lines in-between, an in-between, In-between, in-between. So this will actually help you get those those angles more accurately. So after that, it's just a matter of adding details. Now let's see what happens when our observation skills isn't that great? Or if we are drawing what we think we see rather than what is in front of Earth. So I've just drawn this vertical beauty, a gain and it looks a bit off because they're propulsion. It's a bit off. From the photo. I can see the wave. It's much narrower. Compared to the full height of the building. So right at the start, if you get the proportion wrong, then everything else. It's going to be a bit of because the mystics villages keep Hong Kong pounding. So in this case here you can actually, especially if you are a beginner, just use pencils to mock out the shapes very lightly. And later on, you can add a glance, look at where those, whether there's any arrow with your perspective. All right, Jenna's mock out the ships lines to diagonal lines very lightly with your pencil Plus, especially if you are a beginner right here that say I am going to draw on this seam roof again this time I'm going to have the roof angled like this, which is obviously off because if you compare the roof, that diagonal line of that roof, it's, it's almost vertical, but here I've drawn it off like this. And it's going to affect other lines as well. Because now that I have drawn this line like this, I cannot draw this line to balcony like this. It's going to look really off. So here I have to make the balcony like this. See how by drawing the first line wrong, it affects all the other lines later on. You can still draw the Belkin need, but perspective will be off. However, if you know perspective you can solve, you can still kinda rescued this sketch. Except one, your drawing will not be true, represent what you are drawing. We will not be a true representation of what's in front of you, right? When you get this part wrong, that when you get to n goes up this part wrong. Who will also have some problems when it comes to drawing the buildings here. So are you going to follow the perspective? I going to follow the angle of this line from real won't, or you're going to follow the perspective here that you have drawn wrong. So that's the dilemma later on when you are drawing and yeah, you can still complete sketch, no problem, except it's not going to be like a true representation. So the lines that you please, right at the start of your sketch, right at the beginning of your sketch, those lines are really importance. And here I've drawn this line on to angle it down again. Yes. And this is the rebuilding and for the rebooting, should I follow that line from the scene or should I follow the line here from this sketch that I've just drawn? K, Let's say I, let's say I followed the line from real life. It's going to be like this. In this case here, these two buildings, this is the rebuilding and this is the gray building. These two buildings will look like they are not parallel, not on the same route. In fact, it looks like they are overlapping each other when in actual reality, they are actually just side-by-side. So when you changed her perspective, that's what's going to happen. And also now that I have drawn this line much lower, this also means that I get to see more of this side of the beauty when in actual reality this idea is actually very compress. And I have neglected to draw this here. So now when I draw this, it doesn't look right. So everything, it's a bit off and it started with this pot here. And here. That makes it really throws off the whole sketch.
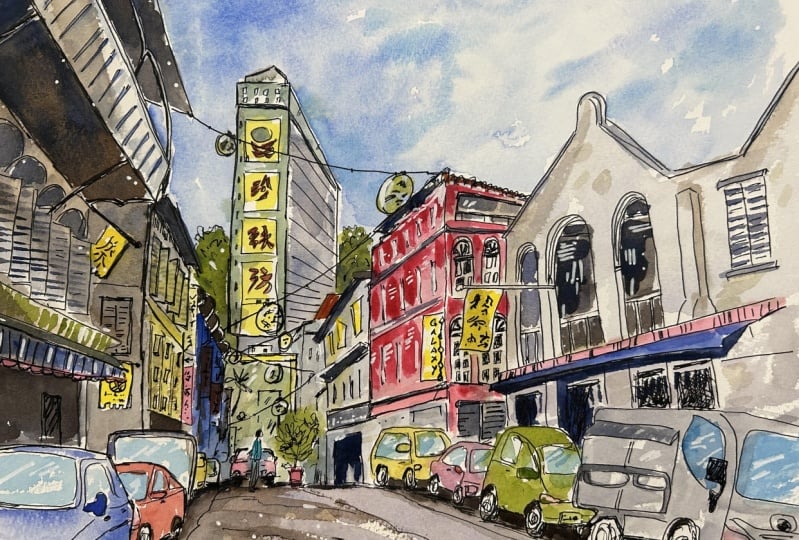
3. Draw 1-point perspective scene (part 2/2): Let's tackle and neither seems so this is another one-point perspective scene. Now I'm going to draw the big elements first. I'm going to start by drawing, does a balcony on top, loved that line points down like this. I'm going to use this pencil to draft out a lines like this. So when drawing again, measure measured angles, all right. We're stretched out to lock your elbows to measured angles. Is it comes down like this. Measure, this height here, compare it to the hide beneath. So the rule, it should end here because this is one unit, this is one unit and there is some space here at the bottom here. Now I can draw the circular science here, one to the small one, it's right here. So we have another one here. And not at balcony here. If you're using pencils for drafting, we don't have to draw the lines so solid. You don't press down too hard because you don't want to see your lines later on. I'm just pressing down really hot so they can see the lights. All right. So for the building here, debtor is disputing in the background here the diagonal lines come up like this. They would go to the, go up to this point here, aligned to the site here. So I'm just going to draw the diagonal line like this. Remember this is just drafting lines, alright. Is triangular shop house here. And we have their rule of shop houses like this where the line goes like this. These are just drafting lines. So even if you have drawn the lines inaccurately, it doesn't matter because at a glance you will know that those lines are inaccurate. So later on when you drove ink, you will make you can make the necessary adjustments, right? So some of us shop houses are like this and we'll come down like this. This is actually a sloping roof. Now there are a lot of vehicles parked on the side of this road. Let's draw them later on. I want to draw the lamppost there first. And lamppost is about, I was say, well, this is one unit, so we have one unit and two units. So the lamppost is about two units away here. So I've gotten to distance here based on this part here that I have drawn. So proportion, It's very important. Observation skills. It's really important if you want to get your, if you want to make your sketch accurate. And Islam pose is actually lower here because this part here will align to this corner here. Okay, and we'll go down all the way here. There is a van parked here. So I'm going to draw that fan. And now I can actually block out all the vehicles. Just draw the general shapes of the vehicles, like how many vehicles there are. And as the vehicles go into the background, you have to draw them smaller. Now, take the time to actually draw the shape of the vehicle. Here I'm just using a sound of fuzzy lines to draw those vehicles. But do take the time to draw the shapes of the vehicle. You don't have to draw the windows. We issued a we'll use but draw the shell, the shell to general shape of the vehicle. You can draw those details later on. And now that you have this particular scene, you can carry on and draw with pen and ink and block out. Draw the details later on. All you have to do is to just draw the big shapes and then divide ships into smaller and smaller parts so that you can draw the DTUs within those smaller and smaller parts. And what I would like to do is sometimes I would I mean, for this particular scene, there are actually black sign bots. So I would like to draw those black sign pots first to help me position the 10 elements in the scene. All right, so there's one left sidebar here. The bottom of this black sign one here is at the top of this sidebar here. So we need to draw it like this. Again, I have not used any knowledge of perspective for this in all I've done is to use observation skills and proportion to draw this scene. And this line here for the, what we see, It's like this, comes down at this angle. No prospective needed to draw something like this. Right? Now. Let's say you want to use perspective to draw this scene. All right, you can do so. All you have to do is to find a vanishing point of this particular scene. So that's point. Let's see where the diagonal lines are leading to. The diagonal lines are actually leading to a vanishing point that is somewhere around here. If the vanishing point is out of the page, I may actually please my finger some gray here to tell me that the finishing point, the VPs dare. So when I draw these lines, this diagonal lines, I don't have to look at a scene. I mean, I was do you have to look at a scene to sort of check? Now when I draw this diagonalized, I can just draw them pointing to the vanishing point here. Yes. So just draw them pointing to the vanishing point and those angles will be accurate. So here is how you can use knowledge of perspective to make your sketch look more accurate. But if you don't own perspective than you really had to rely on your observation skills. And now let's take a look at the third reference for dorm. So for this photo, there are some shop houses on the left side, the vanishing point, this time row, it's on the right side, somewhere around here. So for this sketch, I'm going to draw the big elements first. I always start with the big elements first. So maybe I should draw the lamppost first. Since deceased, like the longer or the largest element, back the toilet element here. Okay, so now I have the lampposts, I can draw the beauty. The beauty is shorter than the lampposts. We have the root here, goes up like this, comes down like this. And we have a roof here. This line is not vertical, it's slightly, there is a sidebar here which is not horizontal. So when you're drawing on some of those lines are going to look like they are horizontal, but those lies are not horizontal and you shouldn't draw them that way. It's going to seriously affect the accuracy of your sketch, alright? K. Notice how the sketch is slowly coming to live just by drawing a BUS first simple lines here. Really pay attention to what you are looking at rather than what you think you are looking at. K. Here, we have a person walking here and we have a truck here to hide out. A truck gets lower compared to the sign today, a street sign here. We can see some of you can see here some vehicles, Dara, which I'm just going to mock out as rectangles. And there is a tech see here. The text see it's about, I was say, Let's use this building as a measurement tool is building. It's about one unit, so detect, see it's about one unit per week is around here. It's about more than one unit away. This is the texts IV, the line here, the bottom of the text, see here it's actually not horizontal. It's tutors slightly upwards like this. Alright, so you have to draw that. So when you're drawing, really be observing. Ok. And now we can draw the streets. Oh, okay. I think I made a mistake. So I should have drawn this truck for the way. So again, I made a mistake here and it's going to affect my sketch. So, but this is not a very big mistake because I can still put that street sign here in front. Like this. Alright. And we have an honest, sorry, We have another poll here on the left side. And this poets further away from the text, see here, there is also another vehicle. The top of this vehicle is slower compared to the text. See. We have this line here. There are some declarations which I'm not going to draw now. So now we can draw the shop houses here. It's going to, and so it's going to end, oops, wrong. It's going to end somewhere here. And we have short-term shop houses here and here. Now this particular scene, I guess I could have made this more accurate by using my pencil first. But the prospective, it's not that off. Alright, Steve looks a bit accurate, just a bit off, but it's not too bad. And we can divide a shop houses into hopes. Gained. This line here, it should be taller than the height of the tech see here. So any mistake that you make earlier is going to come back to offend your sketch later on. And we have a tall residential blocks in the background. The height of the residential blocks will not pass this point here. Here I'm just going to block out those residential blocks. This is a shapes. Let's have some trees here. And we can draw, continue to draw this roof here. Yeah. So, yeah, so this sketch, It's it's pretty much done. So in short, draw the big shapes first and longest lifers. Pay attention to observing those angles. Make sure that lines that are not horizontal are not drawn horizontally. That is actually really important. Even though I've been drawing for salary or sometimes mine, mine who is tells me to draw those lines horizontally when they are not supposed to be horizontal. All right, especially for lines that are really close to the horizon lines, those lines are not up. As long as the line is not on the horizontal line. That line is not horizontal, horizontal, right? As long as the line is not on the horizon line. In this case, the horizon line is somewhere here. So as long as those diagonal lines are not on this horizontal line, they are not going to be horizontal. So why is that? You see here they are not going to be horizontal no matter how close they are to the horizontal line. If they are not on the horizon, on those lines are not going to be horizontal. That is something really important. All right, so that's it for this tutorial. If you guys have any questions, let me know in the comments section below and let me know whether or not you have any difficulties drawing perspective accurately. What are some of your problems? What are some of the issues? Why do you think you cannot get their perspective, right? Yeah. All right. See you guys in the next video.
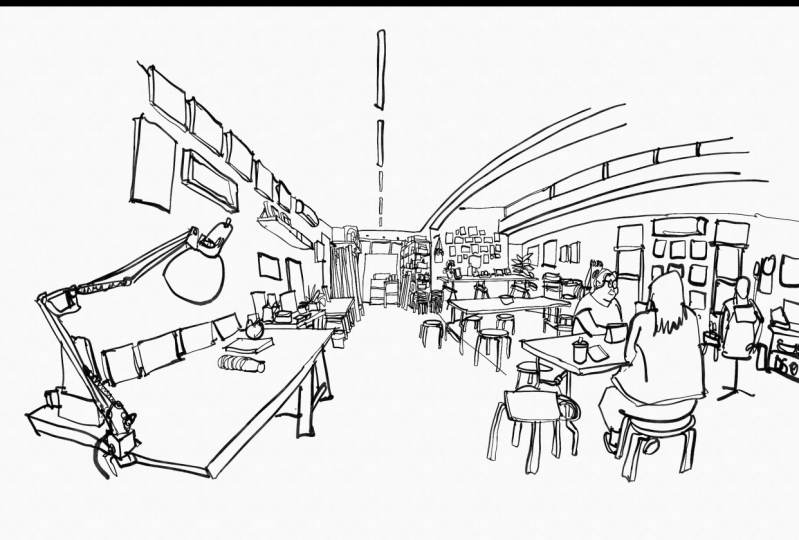
4. Draw 2-point perspective scene (part 1/2): Hello and welcome back. In this lesson, I'm going to teach you how to draw a 2 perspective scene without knowing perspective. Now, all the techniques that you are about to learn in this lesson are actually the same techniques that I have already shown you in the previous lesson. So when it comes to drawing, all you need is actually to practice the basic fundamentals. Drawing from observation, measure re, checking portion and you do finance. Emphasis really is on observing what you see, checking what you have drawn against, what you see in front of you. Let me start this lesson by giving you a really quick tutorial on 1.2 perspective. For one-point perspective, it basically means there is one vanishing point. And when you draw buildings, the side of the buildings, we'll meet at the vanishing point. So for example, we have of building here with sounds windows. The side of this building, the site war. This diagonal lines, they will go to the vanishing point. This. And when you draw windows on the side, you have to make sure that the diagonal lines for the windows will also go to the vanishing point. So you can add more beauteous. You can add a shot building here for some bowl like this. And the sidewall again should go to the vanishing point. See how I draw the line pointing to the vanishing point. And you can draw tall buildings like this that go to the vanishing point. So for beauty instead are very close to the vanishing point, such as this one. The diagonal lines, we'll be really steep. Like this. For example. If you know perspective, you can actually just draw that line pointing to the vanishing point. You don't have to draw based on observation. So that's how knowing perspective can help you with your drawing. It can make your drawing more accurate. It can help you check your work. But of course, as mentioned in the previous lesson, you don't really need to know perspective. In order to draw perspective, you just need to really observe what you are drawing. Observe your subject that's in front of you for two-point perspective, as the name suggests, there are two vanishing points. And this time the two wars, Beauty will go to the vanishing point. Like this. We have one war and the site here, sorry, we have another site war here. Like this. And you can draw windows on the building as well. Just make sure the diagonalized go to the vanishing point. Now, for this window here, this line here where it was appointed a vanishing point. But you can see the slide, it's almost horizontal though. That's because it's on the horizon line here. All vanishing points will be on the horizon line. So if you're drawing a window here that is below the horizontal line, this line here, we'll still point to the vanishing point here. And this line here will point to the vanishing point. And after you have drawn this, you can see this is almost horizontal, but this is at an angle. So we have this two vanishing points. You can draw more buildings. Anyway, I haven't enter in deaf cause on throwing perspective, you may want to check that out. So this is just a really brief quick tutorial on understanding perspective, all right, time for some hands-on drawing exercises. So this is the scene that we are going to draw. This is a 2 perspective scene because you can see the diagonal lines here. They seem to go in this direction. And if you actually extend a photo line, is there is actually a vanishing point here. So if you are working with photographs, sometimes vanishing point where we out of the photograph here as well. You can see that diagonalized a 0.2 in this direction here seems to be a vanishing point here. Anyway. Knowing those two vanishing points is nice. It's useful, but it's not crucial to drawing this scene because we can just draw this from observation. Let's start by drawing something easy. First, I'm going to draw the front of the building, which is just a tall rectangle goal like this. Make sure you have enough space at the top and at the bottom for the sky and the ground. So this is a very narrow rectangle like this. There is no need to be to focus on getting the details right in this lesson. So let's draw the bottom here. And we can do this pot into smaller parts. This, there is a reason why I'm drawing the windows here first. And that's because I'm going to use this to help me draw all the other elements in the scene. This line will go down at an angle. You have to measure that angle. And the corner of this building will be somewhere here. If you extent and imaginary line from this window here to the left side, it's somewhere around here. And you can draw this here to extend it all the way up here. So this is the pot. So this is the part where all of the DTUs are. And now you can draw this line all the way down here and saw somewhere out here because there is a tree in front desk. I'm plants in Finland. And we can draw this here and not a peeler on to crawl level here. This is the site of the peddler. There are some plants in front. Those Aj's rectangular blocks. Those rectangular blocks have perspective as well, but here I'm just going to troll them as just flat rectangles. Because my focus here is to let you see the perspective of this beauty. Some pots of disputing is coming up like this. And there is this thing here. So what I'm doing now is basically just drawing from observation. So there is another beauty which is attached to this butene. And it maybe it's like this. Sds viral up here. Sorry, desk is pull up here. And this beauty comes down like this. And we have another diagonal line here that goes here, comes down like this. There is another extrusion here. Alright, so this is what we have so far and this building will just continue all the way down like this. So now that you have drawn this, if you want to, you can select the VD, this beauty into different sections. For example, there are actually three pillars here, so I may want to use real it, the benign to do fight this building into three parts here, like this. And I can draw it a windows within the bigger shapes. Make sure this line is at an angle, it's not horizontal, so you really have to observe the angle, measured angle properly. All right. As the windows go down towards the ground level, those lines will become law, horizontal, but they are still not horizontal. And now we can draw the right side here. This extrusion here, it's actually pointing in this direction, and then it comes down like this. Again, you have to measure where this point is in relation to whether we can do is, again, there is a tree here. So now I'm going to draw again the big shapes first. And we're gonna draw this line I device the first floor from the other flaws. So this line is not horizontal, is tilted slightly NA and goal, and this line actually goes down lightly. And next we can draw shapes. We've been this shape that I've drawn. So now you can see the perspective. It's really coming to life. Even though so far I have not drawn, disputing using any perspective knowledge, this is just drawing piece on observation. Now for to grow here at the bottom, if you want to, you can actually use graphite pencil to maybe draw a line here for this diagonal line that goes to the vanishing point on the right side, which you cannot see any way. But having this pencil line therapy will help you draw the angles here at the bottom more accurately. This is good if you are a beginner starting out when it comes to drawing. So having those lines, those drafting lies, those guidelines set the bottom will help you draw more accurately. So all these pillars that you see, they were actually extend all the way up like this. And as disputing moves intuitive background here, all these peelers, they will become more and more compressed. So when you're drawing, you have to make sure that distance between the peelers day are smaller and smaller as they move into the back row. And now that you have this drawn, you can once again at the windows. So this sketch, believe it or not, is almost complete because we are really have to mean shapes. So now it's all about filling in the details. Getting the main shapes, right, the beak shapes, right, is very important. Adding details will make your sketch come to live. But if you get the main shape or wrong, I'm just catch we will not look accurate. And adding details later on, we will not meet your sketch look more accurate. There isn't a tall building here on the right side. And some tall blocks here in the background, which I'm going to draw with really thin lines. I'm going to add some Hindus for details. And we have some shops, you're onto ground level, you can draw the doors for them as well if you want to. So yeah. So this is it for this particular scene. As you can see, I did not use any perspective knowledge to draw this. This was drawn. We've just observation skills. And now let's take a look at this photo. This is also a two-point perspective sin, there is one vanishing point somewhere around here for this side of the law. And you can see the lines here. They are not horizontal or they tilted down like this. So there is actually another vanishing point to the right side of disputing outside all of this though. So if you're not confident and when it comes to drawing this scene, you can use a pencil. So I'm going to draft out faces of the beauty going like this. Just don't be too stressed out about it. I'm going to make this lines darker so that he can see more clearly. Now if you are drawing with pencil, you can make the lines lighter so that later on when you ink over the lines, the lines we'll just sort of disappear. Or you can erase the lines later on. So this is deciles a wall, There's diagonal line points down like this. And we have this side of the wall which is about three units. This will be one unit. This will be three units. Bear in mind that when I'm drawing this with pencil in real life, I will be drawing with very light pressure, very minimal pressure. So that tos lines can be seen but we will not be too distracting. Okay, so now we can draw this side of the wall, which is about, if you actually go and measure this, this is one unit to sign off. This wall is also one unit because it's very compressed. But in real life this wall is actually really wide, just that in perspective, it's compressed to become one unit and a corner. We'll start here. This is the corner of the building. It will join here. And just point here we would jaw here. It's at an angle. We have some new thirds here, and we have some cars parked here. Tables and chairs here, which I'm not going to draw. This is what we have so far and now you can divide disputing into smaller and smaller shapes to draw the details. We, then, we have some extension here at the top. Try to draw loosely. I mean, I know you would probably be very cautious when it comes to drawing, when it comes to like, getting everything precise at the right location by you don't have to really stress yourself out. Just take a look at your scene and your photo. If you're drawing on-location, look at our subject. See where the lines going. Don't think about the one thing that you are drawing computing. Don't think that we think of it as drawing a line and this line goes in this direction and dislikes stop there. This line is at this angle. Don't think of yourself as drawing a beauty in drawing a car. Think of yourself as I'm drawing shapes. So now I'm drawing the background here and there is a triangle here. Notice I did not call this house or building. I call this a triangle. And there is a horizontal line here. And there is a sign bought here, r square here. And that is square here. And behind a square is a vertical line that starts here, it goes up. This vertical line is actually the beauty. There is another vertical line that goes all the way down here. Below. Load this building here. This is actually the site law for and not abusing that is in the foreground. We have another vertical line here. This is the standard for the street signs. There's a person here, the height of the person. We'll start here, relative to where this new flower is. And we have this person here. So you don't have to draw this person in like grit T2, just draw shapes. This is really to help you practice and understand how to draw proportion. Get the proportions right. Okay, so now that you have the big ships drawn, you can't just add little details now. Where am I again that if I'm drawing this on location with my pencil, I'll be using really light. Earn minimal pressure went wrong. This we have a street lamp here. Oops, I drew this too tall. So you can see in the reference photo, this street lamb is actually, let me just draw this stop sign here. So this street land, we've actually stopped here and come up here, but I've drawn this too tall. So this sketch is actually conceded. Done because the general shape is already there.
5. Draw 2-point perspective scene (part 2/2): Let's tackle this scene up. So this is also a 2 perspective see, and you can see the diagonal lines, they go down in this direction. And we have diagonal lines that come down in this direction. So far. Side of the walls for this beauty can see all these diagonal lines. They go down in this direction and there are a lot of vehicles in front. So for this, I'm going to draw the biggest element for us was used to beauty on the right side. I'm actually trying to measure the angle, so I'll have this here. And is it come down here and this line here, it's almost horizontal, but it's not horizontal. So don't draw this as a horizontal line. So this is the site of this beauty and decide war here, it's very compressed. I would say this is about 1 fifth of this. And point here to Cornell disputing here will be lower than this point here. So maybe you want to draw this 0.1 and then joined a lines and then go down all the way. This point here will be lower compared to this point here. And you can draw the line. There are five pilus, so 1, 2, 3, 4, 5. And you can add thickness to the feelers like this. The beauty on the left side is following the perspective of this building here. So we need to leave a space here. And let's say this is one unit. This space between the left and the right, we'll be about two thirds of this. So this is the space between the buildings. And we can draw this doll. And if you sort of have an imaginary line from here that goes here, you know that you should stop drawing here. All right, So far we have not used any knowledge of perspective. So here we can draw a diagonal line down, make sure to measured angle correctly. It should start here. This will be two thirds. This will be sorry. This will be half or slightly less than half. This will be more than half. So we can draw this line here. And we can see this line. It goes down almost to this peeler here. And we have this diagonal line again. And here I've drawn the angle inaccurately. It should be like this. So while you're drawing, be careful. Don't draw from your imagination. So I got the angle for this line wrong because I was drawing from what I think that line should be what? But in actual reality, I should actually follow what the photo is showing me. So we'll continue drawing the beauty on the left. We have a cap here for this. And we have this beauty here. This. So this is a really quick sketch. We can draw the trees here and frond. We can add some DTUs. Again, if you find this seem to be challenging, you can always start with a pencil. You have another residential block behind or trees. Some plans here is a pedestrian crossing over hate pedestrian crossings here. Now for the vehicles on the ground, when you draw them, make sure that you draw them in proportion to the size of the buildings. So for example, there is this truck here at the bottom, the left side of the truck or the front of the truck. We'll start here. And this is the front of the truck. This is the site of the truck. The wheels are here, the back of the truck wheel, and some are L here. And this line will go up like this. The perspective of my targets, the bid off. We go. Again, I made a mistake of drawing from my imagination, drawing from what I think is still looking like. How does trump looks? Rather than drawing based on what I see in the reference photo. And we'd main thing to note here is you should draw this truck is Vico in proportion to the size of the building. If you draw this too big or too small, the whole scene is going to be true and off, you know what? Let me try and draw this truck again, this time with more care. Alright, so this line will be the front of the truck. This looks like a horizontal line. This is the front of the truck. And we have this container behind this. This line will come down slightly. And this line will go up slightly. We have two wheels here. They are almost black. We have another wheel here. All right, I think this looks slightly better. I like to draw on location. I like urban sketching. Now when you draw this on location, drawing this vehicles will be extremely challenging because they will be moving. So one tip I have for you, you want to draw this on location is too actually wait for the vehicles to stop at debt traveling like Geng Shen and quickly draw the shape of the beak will just draw the outline for the vehicle. Don't draw the windows or the wheels, just draw the shell of the vehicle. Because later on when the vehicle drives off, you can add the windows later on you already have the shape of the shell of a vehicle. You can draw the windows and the wheels later on. So this sketch is considered complete. You can add mod t dt Hughes to make this sketch common life. You can add more. He calls to make this seem more life really. But remember when you're drawing, try to draw what you see, not what you think you see. Alright. It will be good to have some overlapping shifts as well, like the vehicles overlapping each other because they do so in real life. When you have overlapping shapes, it gives you this sense of foreground and background. So here you can see there's vehicle overlaps, the van behind which overlaps his boss be high, which overlaps the trees and the buildings beehive and this tree theory, they overlap the hot del, this is actually a hotel behind. So when you have all these overlapping elements, it creates this sense of depth to make your sketch look more dimensional. So even if you don't know perspective, you can still create dimension just by drawing from observation and by incorporating some overlapping elements.
6. End: Thanks for following along with me in this course. I hope you have learned some thing. If you have any questions regarding perspective, feel free to contact me. And if you want to learn more about perspective, you can check out my other course called drawing perspective of the Gina's. Right before you leave, you can help others and help me by leaving a review for my costs. Thanks for watching. See you in the next course. I.
 Teoh Yi Chie, Sketcher, watercolour lover