Transcripts
1. Intro: In this class, I'll be
teaching you how to draw fun stylized birds
with a lot of texture. I'll be teaching you about searching the shapes
in a bird and all about finding
the quirky markings that makes it that
special birds. But after you've done that, you can create any bird
to your own liking. I'll be teaching this
class in Procreate, but feel free to follow along with every
medium you've got. Hi, my name is Brenda Baker. I'm an artist and teacher
based in the Netherlands. I've been using Procreate ever
since 2018, and I love it. I draw every day, and
I've been teaching here on Skillshare ever
since the year 2020. I love to share my
skills with you, and I hope you have as much fun as I have when
drawing in Procreate. That's what I'm here for. So if you're into drawing
happy stylized birds, let's hop in and
let's get started.
2. Importing canvas and brush set: So first, let's
start with importing the watercolor textured
canvas and my brush set. For that, you have to go to the web version of my
Skillshare clause. Go to the projects and
resources section. Please read the instructions. They are there for a reason. And if you scroll down, you can see my watercolor canvas and also my basic brush set. So if you tap on the Canvas,
you can download it. And once it's download,
you can tap on it, tap on it again, and you will find it in your
reasons at the top. So tap on it and it will
import right away into your Procreate and
you can find it in the upper left corner
as a new canvas. So for the Bushette, it works approximately the same. You can tap on it, download it. When it's downloaded,
tap on it again. You can also find it in
your recens at the top. Tap on it again. It will import right away
into procreate, and it will be visible at the top of your
last opened library. So if you go to another library,
then you can't find it. It's your last opened library. It will import straightly to the top of your
last used library.
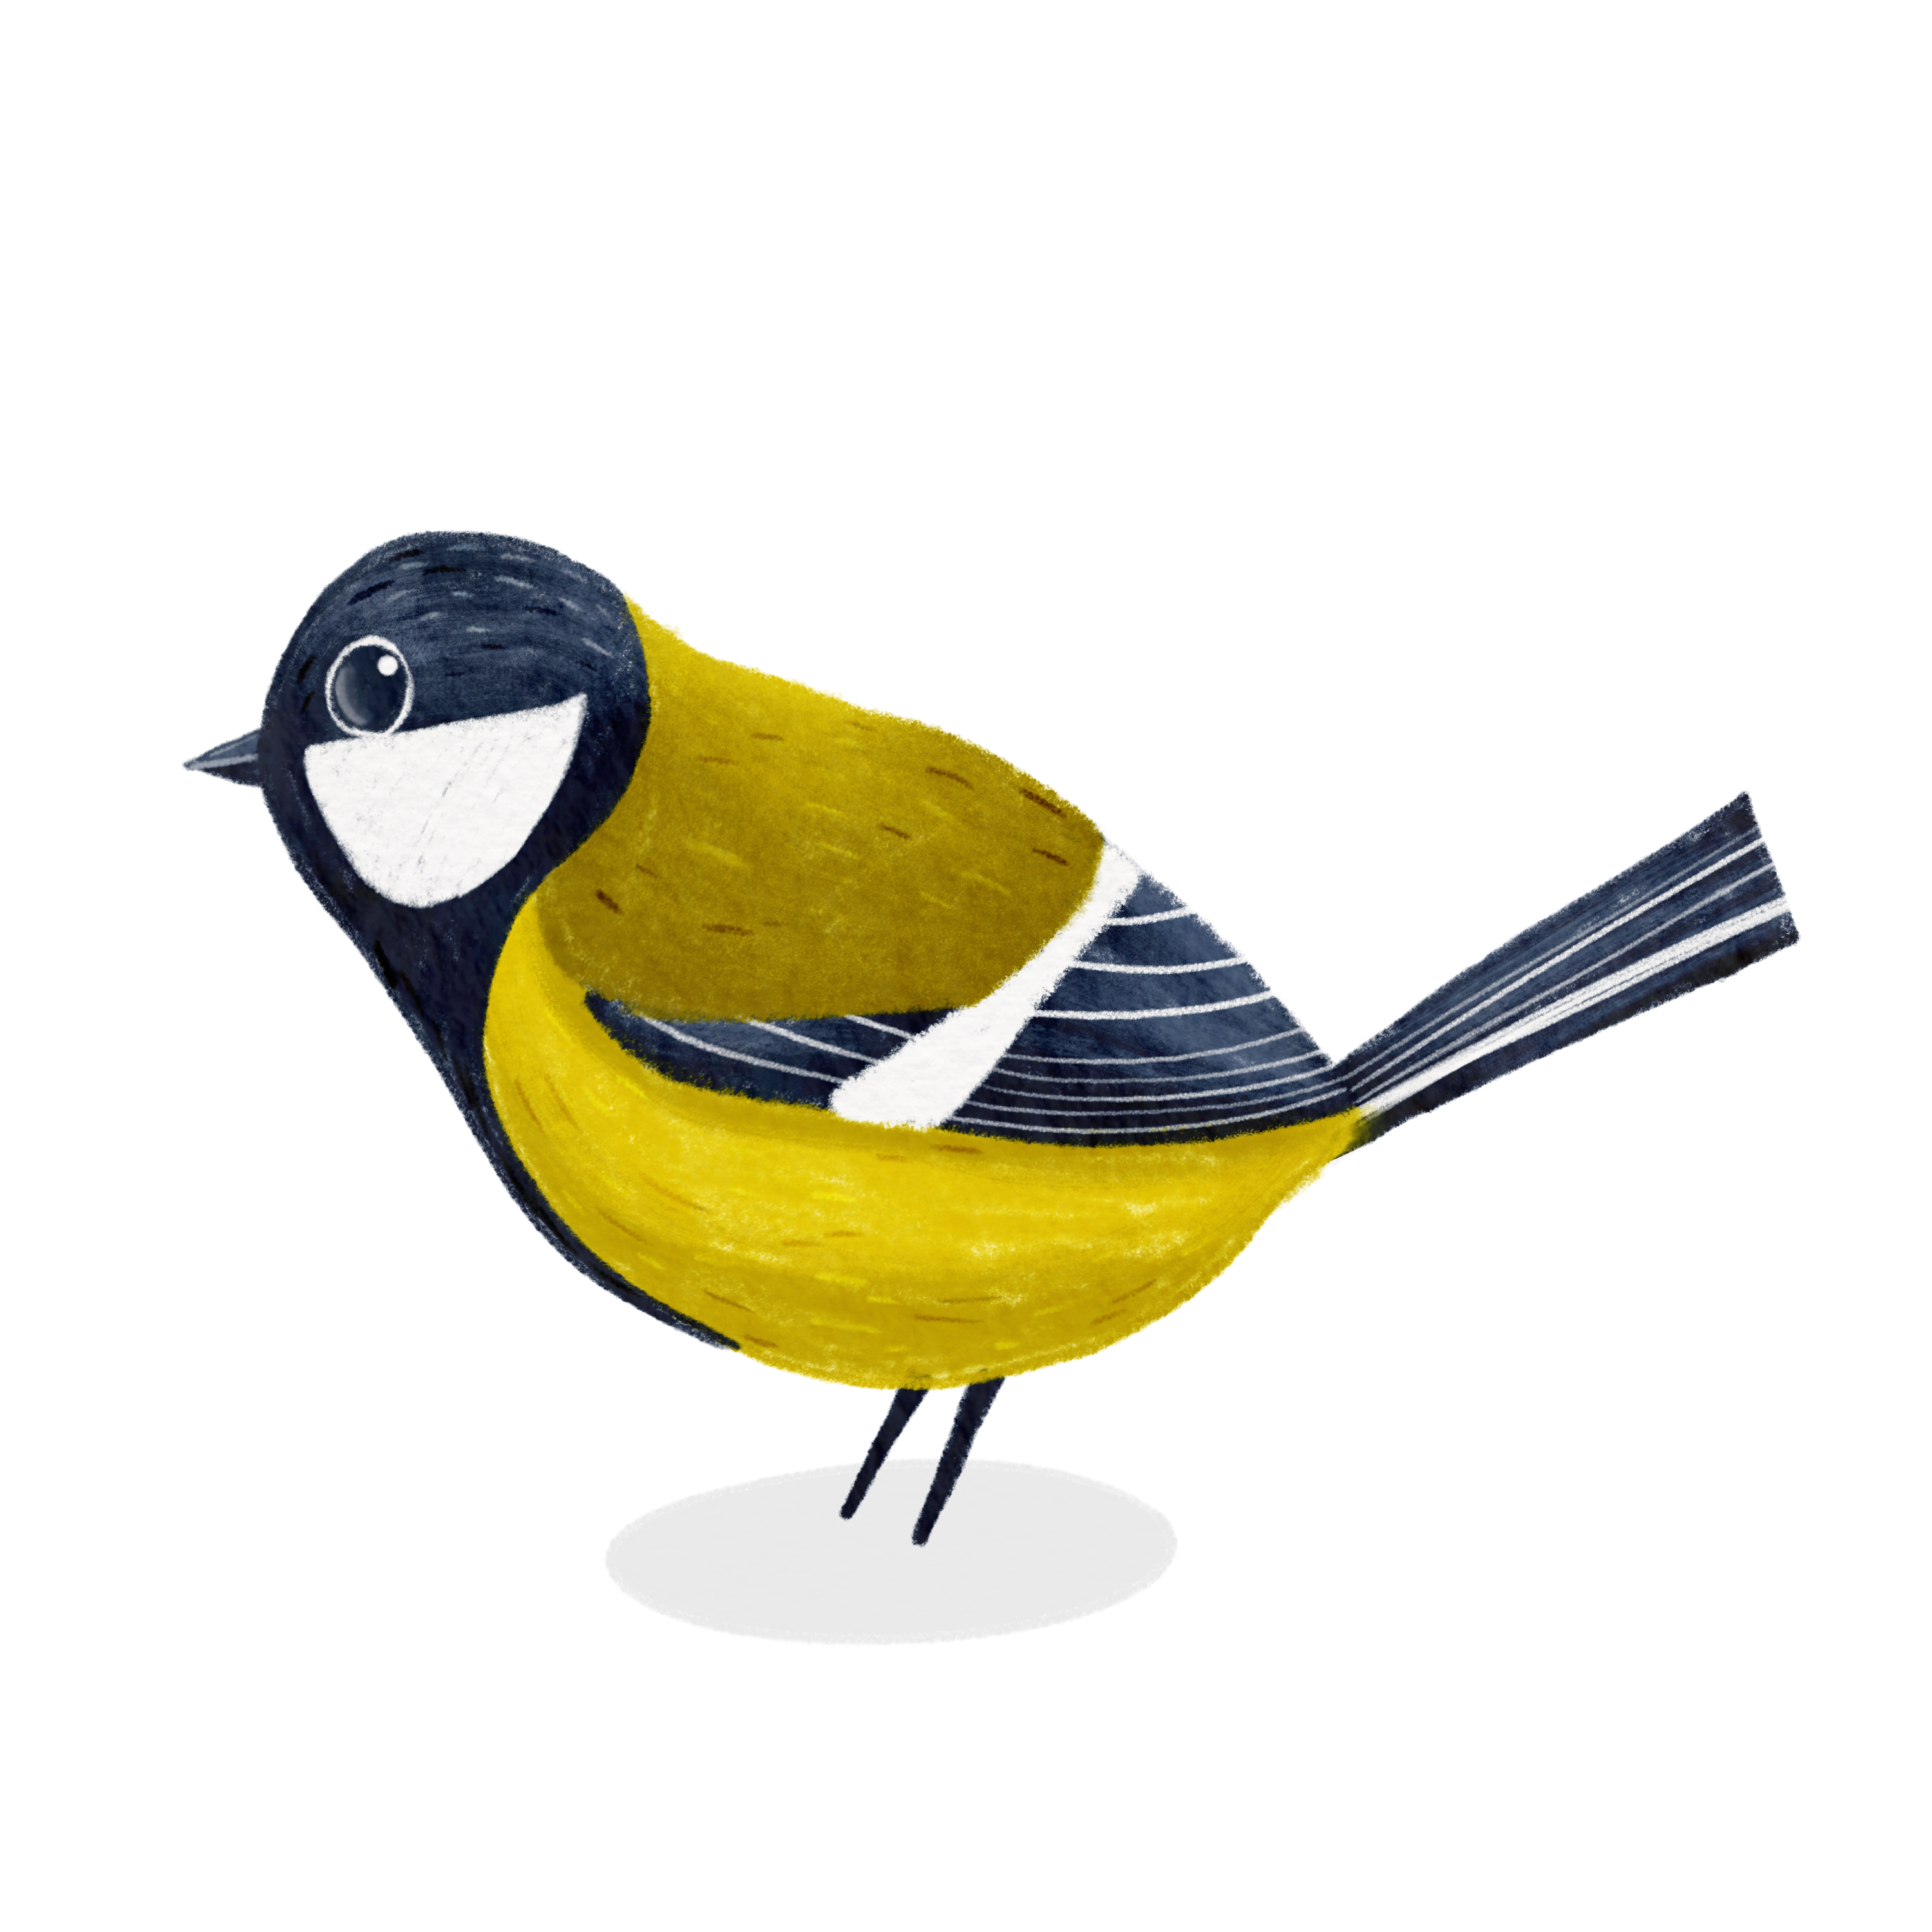
3. Learning about shapes and markings: So for this class project, we'll be using the great tit. And in the Netherlands,
we call that comasa. It's very common bird, and we see it every day. And over several years, I have the privilege of
getting a nest in my garden. So that is very funny. And one time I even
caught a little baby one that flew out of the nest
and directly onto my canopy. It became hanging upside down. You saw a little pause get elongated because the
bird got very tired. And so I put my
hands underneath it, and I caught it
when it fell down. So it sat well, about 15 minutes, I
guess on my hand, and then I set it
back nearby the nest. So it got home safe
and flew away later. So it was very funny for that, and that's why I love
this bird so much. So let's get drawing and see what this particular
bird is all about. You can see the shapes and you can see the markings
of the bird, and they are both very special. Let's get into the shapes
of the bird first. For that, I'll be choosing
a white and my pencil. You can just watch along. You can stylize
anything if you want. If you want to draw
everything at the same time, it could be very complicated. But what if you break it
down to simple shape? Like so. I create a new layer
on top of this, and I'm going to draw
very simple shapes. If you see this bird, a kind of rounded shape for the head, a kind of rounded
shape for its body. It has stick paws. It has a little
rectangle for the tail. You can see a little
triangle for the wings, and you can see a little
triangle for the beak, and you can also
see little eyes. Then you have the very
basic shapes of the bird. Let's do that to the other ones. We're going to take a
round shape for the head, kind roundish oval
shape for the body. You can see a rectangle for the tail and a triangular
for the wings, little stick pus, a little
big triangle, and its eyes. Let's try to do the same
thing with this one, a little round
part for the head, a little ovulish
shape for the body, a rectangle for the tail, triangle for the wings, stick pause, a little
triangle for the beak, and also round eyes. A little round
shape for the head, a little ovulish roundish
shape for the body. Stick pas. Here you can see an open beak, so it has two triangles. A little rectangular shape. It could be slightly tilting
to a triangle and you can see a triangle for the
wings again, little eyes. Now when I take
down the pictures, you can still see I created fun little stylized birds. That's
what we're going to do. We're going to choose
one of the shapes, and then we're going to build from these figures like this, like the pencil drawn birds. You know, it doesn't have to
be exactly like in nature. If you want an exact image, you could only have done
with taking the picture. We want to create a
stylized version of it. So now we broke down
the shapes of the bird, and of course, you can
do this with any bird. Like if you've got a swan, you can create a
rectangle kind of neck, little triangle feet. But we're going to keep on doing this for
this kind of bird. So now we broke down
the simple shape. Let's go and see
what the image is, what makes it this bird. It's the markings of the bird. You can see it
consistent marking. So what are we going to see? We going to see here it has a flawless kind
of white shape. The head is always black
and most of the time comes towards its belly all the way up to its tail. Here
you can't see that. Here you have a
little green area. They all have a
white stripe here. Let's color this in as well. It doesn't have to be
colored in very precisely. And the wings, it got stripes. The tail, it also
has stripes on it. It's dark with little stripes. And this overall is, well, kind of yellowish. The beak is gray. The eyes are black. So if we can put this
back together with the outline of the bird and
let's get rid of the drawing, you see the specific marks, like the white here, the
white here, the white here. And this white his
cheeks were white. And those, I think, are the most remarkable markings
of exactly this bird. So that's what we keep in mind, and that's what
we're going to use. So let's dive in and
draw this together.
4. Raw sketch and refine: So here you can see I have my watercolor canvas because it's got a little texture in it, and I've got this prepared
for you for this class. And what we're going to do now is take our referenced image. That's why we go to the
wrench tool, go to reference, at for Image, import image, and here we go to the
same birds again. And now you can see the
birds already here. And that's what we're going
to use for a reference image. I think I'm going to draw
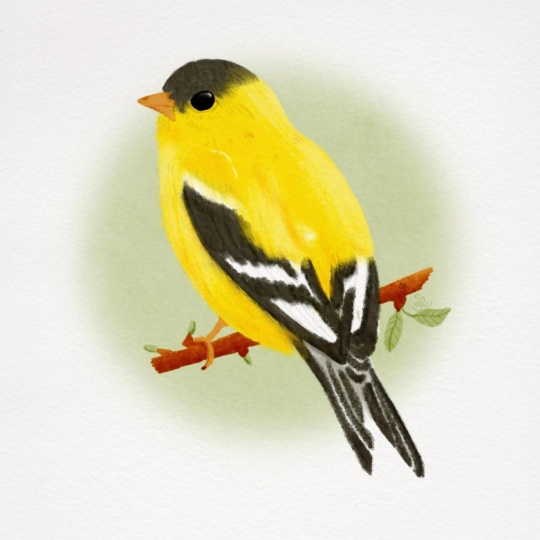
kind of like this bird, but I want to tail coming up a little bit more like this one. And what I want to do, I want to choose the colors also of this bird
or maybe this bird. Well, let's check in. These are a little bit more
yellowish than this one. This is also a little
bit yellowish, but also a little bit gray. So I think I'm going to choose
the colors of this one. This one, I think is
quite a young bird or not as much saturated
in the picture. Let's see, I want the bird
to kind of be like this. We're going to draw
underneath the textures, the textures, I'm
going to keep on top. It would help you with extra
textures in the drawing. That's very fun. We're going
to use a simple brushet. We're going to draw with
illustrated pencil, and I'm going to choose
black for this one. So let's see if we take a
closer look at the bird, if we've got the round
shape on top of it, I think it could easily fit one to maybe three times in the whole body to
where the tail starts. But if you want to
draw more cutish, let's make the head a little bit bigger and exaggerate
a little bit. That's the fun part. We can
create to our own liking. So feel free to follow this or make it
to your own liking. That's okay. We want
it to be your bird. So let's draw a little
shape for the roundhad. I'm going to feel the shape first before I'm going
to layer down the color. That's a little bit
round, so that's okay. Then I'm going two times round. So an ovalish kind
of shape, like so. So I'm going to start and feel again maybe the belly a little bit more rounded and the back a
little bit more flat. And then we go on to draw
a rectangle for the tail. And remember, I want the
tail a little bit upwards. The tail is just twice
the size of the head. So like this, this
one, this is two. Approximately, it doesn't
have to be perfect. That's okay. Maybe a little bit smaller from the
inside than the outside. The triangular shape of the wings will be
coming from, like so. A little bit over the wings. I want to have them. And then, of course, the stick pause will come from somewhere around here. And a little big, it's just very in front of him. And then we want
to have the eyes. You can see this
little white shape. I want to draw it
in just right now. Then I can measure the eyes, and the eyes are a
little bit small, but if we want to draw cute, we can take a little
bit more larger eyes. And I think the overall shape of our bird is already a bird. So let's take it a little
bit more to the center. Let's check in if we want
to create them like so. I think this is the shape
and in the middle of it, so that's okay with me. I'm going to lower the
opacity of this one, and I will put it on multiply. So it stays on top and
always visible, multiply. And I'm going to draw underneath this to clean up my
sketch a little bit. So let's dive in there. It doesn't have to be
perfect the first time. Tail coming from
underneath there. Go underneath the belly
and the beak as well. Large eyes. This lovely
color shaping here. And this is the overall sketch. Let's dive in with the
colors of this one as well. So here we can see this shape. Let's follow it alongside all
the way down to the belly. We can see this
white stripe here. I'm not going to draw
the other one around it because it makes
it more confusing. So let's draw the white stripe, it's somewhere in the middle. And here's some green area. This is a little
bit more grayish. There are these kind of
feathers underneath there, so I want to draw them as well. And these are more smaller. And maybe a little
bit bigger on top of them. Let's draw those. It's going over the tail. So the tail is coming upwards, and there we have
some stripes as well. And I think we have the color specifics and the markings of the
bird perfectly now. It looks like this bird already. So let's refine it
a little bit more. So let's get rid of
this one completely, set this one to multiply, reduce the opacity and draw
again underneath that. Okay. You can play with the bird a little bit. And you can draw to
your own liking. You can use your
own illustration style for this, as well. That's okay. But you can
now draw any bird you like. So if you want to try it with
another bird, be my guest. This is what we're going
to use now for class. The white stripe. Small
stripes down here. And bigger stripes. Here, let's create a little bit of this blackish and the white, the big and huge eyes. Yes. This now is going
to be my go to layer. And this one I'm going
to delete again. This one is the last
time I put it on multiply and reduce the opacity. And from here on, we're going
to draw this little bird. I forgot to draw it stick food.
5. Lay down your flat colors: This is my overall sketch layer, and we're going to
draw from here, I'm going to create a new layer and put that below my bird. And let's do some coloring now. And remember, I wanted to change the colors into these
brighter colors because I like that even more. And for that, I'm going to choose with my finger
my color drop. So now I'm going to
create the first layer, and I'm always working
from back upwards. So my back layer is my belly, and then the wings are
going to be over my belly, and then the head is going
to be over the wings again. So that's how I also
build my drawing. So let's keep the same brush, and let's draw the
whole yellow piece. And everything yellow is going to be here underneath this. It's up, and I'm going to color and fill it with my hands. Not going to use a
color drop because I want to have a
texturized look and I don't want it to be
perfectly done because it will get a digital look for me, and I don't want it
to be too digital. I just love the hand drawn style and look we're creating here. So you can see, I always
fill in the color, but not exactly the whole thing. I'm going to leave a little
bit of the sketchy look down there because it already creates some texture on its own. So then I'm going
to choose the tail. The tail is coming from behind the belly and behind the wings. So I'm going to draw a
little bit underneath there. And let's check what
we see in this color. I see a lot of colors, maybe a little bit grayish blue. I think that's a lovely
color for the tail. So let's draw that on a
layer underneath the belly. Maybe this is a
little bit too dark already because of the
color burn in this. So lower my size a little bit. You see, I'm going to
draw underneath this. And that's fun when we go to layer a little bit and blending
of the colors later on. And this is also the
same color a little bit of which we're going to
use for the head later on. So maybe it's fun to already create a new
color with that. And this one was not the previous color
I used, I believe. So this one was the previous
color we used for this. You see, it's a little bit
changing of the colors we use within the drawing
because of the textures. That's okay. And now I want to use a little bit of
the greenish yellow. I will take a little bit
from the top, little color, brighter color because
my color blending is also working on my canvas, so I want to choose the
lightest colors of those. I'm going to create a new
layer on top of this. Like so. You can see it's
already a little dark, maybe a little bit
too, but it's okay. I'm just going to
color that in as well. Maybe bump up the size
a little bit for speed. And don't press too
hard on your pencil because we want to keep
the textures in there. A little bit of the
textures. Not too much. I don't want any actual
white space in there, but just a little bit of color. And I know already it's
going to get lighter. I want to blend in san yellow, but I will do that later on. Let's get first over to
this part of the wings. That's also a little bit of this grayish grayish
darkish look, and it's lying underneath this because these feathers are
always on top of those. I'm going to create a new
layer underneath that. It's too big now. And color that in as well. I can bump up the size. You see, I keep a little
bit of texture in there, maybe a little bit
more from there. It's hardly visible for
you, but for me, it is. Okay. And remember that white
line. We can hardly see it. But if we keep this loose
now we're going to create a new layer on top of that and we going to
create this white. And let's set this
on there as well. Now we can see that perfectly. I'll be using black
on the whole head. And the reason for that, I will tell you later, the
head is on top of everything, so let's get into and draw the head and all the
blackish color down here. Et's color that in. Remember to fill in the whole head even where the
white part is going to be because then we're going to layer colors and you
get the textures already from the dark color underneath that,
that's very fun. So if you can look closely, we can still see where
the white is going to be going to create a new layer on top of that, create
with the white. And there you can see
the gorgeous textures coming through from
the dark background. Otherwise, it would be completely white if
we left it white, and these got more texture,
so that's more fun. And that's why I don't want
you to color drop anything. I want to keep these
lovely textures in there because it will help with the overall
outcome of your birds. It has some grayish beak, also a little bit of the
same color as this, as well. We can follow it.
Yeah, the feathers are coming on top of the beak, so the beak is behind the head. You can't see that
perfectly now, but we'll dive into
that later as well. And the ps, I want
to draw all the way on the bottom
underneath everything. So let's keep them there. Maybe a little bit triangle, so a little bit thicker upwards than where the balls are going to end, a
little bit thinner.
6. Defining the eye and beak: So, now the bird
is color blocked. Every space has
its own color now. Let's get rid of this drawing. Don't remove it all
the way, keep it off. I already want to
give it some eyes so it gets a little
bit more fun. And I'm going to
choose my white. And I'm going to
draw very big eyes because I like that in a bird. And I'm ready also keeping
a little bit texture. And in this same layer, I'm going to get in with well, my gray again because
it's dark enough. I don't want to use black. Leave a very small
white outline there. And also what I'm going to do is give it a little
bit of more shine. In my illustrations, my light
always comes from this way, so I'm giving a little bit of a highlight with
white in the eye. And what I'm going to do is to create a quarter of
a circle in there, it's going to give
him some glare. And now it's too obvious, so I'm going to blend it. A little smaller. I'm going
to blend this a little bit. So it's just a little bit there. And now I think it
looks cute and it's got a very watery glazy eye. So the eye is finished. I don't want to do
anything about it. The beak is also very simple. You can see here, it has
a lighter upper part. Then it has a little bit
of white lining in there, and this is going to be darker. So this is my darkest color. I'm going to choose
this color again. Go a little bit lighter. Go to use that for the
upper part of the beak. And even more lighter to
split the beak in half. And already it instantly
looks like a fun cute bird.
7. Highlights and shadows: Well, remember the textures
we talked about earlier. Uh, let's dive in to
create each layer. So for instance, I want to give him a little bit of
shadow on the yellow part. I'm going to the
yellow part, type plus for an extra layer and create
it to a clipping mask. And what a clipping
mask does is that it creates here in this line, but it will only be visible in everything you've drawn here. So I could go outside
the lines very easily. It wouldn't be visible. So it keeps my
drawing very precise. So let's, for instance, take a little bit of darker
color from a base color, and I'll be choosing my
illustrated texture. And I've got two of them. I'll put them more
closely for you. So this one is a lighter
version and this one is a harder version of
the illustration. So if you'll be using this one, you have to draw a little bit
harder to get the texture. And if you'll be using the other one, so let's clear this. The heavy texture, you have
to press slightly on it. So it's up to you which
one you're going to use. I'm going to use a little bit shadow underneath the belly, but also where the wings
will be overlapping. A little bit more shadow. Here you go. You can already
see it come to life. First be using only the layers of the highlights
and the shadows. So let's get back to this part, create another layer on top, set it to clipping mask. Remember, we can only
color inside what's here. So now we're going to take
a look at this wing part. So we take this
gray color again. We use it some more lighter. And maybe this is already
a little bit too light, but I like it. I like it a lot. So zoom in and out
every once in a while. And I will also
directly take this to the tail part where I'll
be doing exactly the same, put it on a clipping mask, and also give this a little
bit of a highlighted color. Very gentle. Stripe it because I've got
the heavy texture. If you think this is
too harsh for you, just try this and press
a little bit harder. And I can also do this with
the head at the same time, going over to the head space, create a new layer on top, put it to clipping mask and create a lighter
color as well. Try to follow the round shape of the head in this
case, a little bit. So And if you think
it's too much, go to the eraser,
press it down and you can erase with the
current brush using. And it will erase,
very properly. And then you're not going to erase all the textures at once. Yeah, I think it looks
already funny like that. And remember, here is a little bit more of a
yellowish color on top. So I'm going to take this yellow and do the same with the
greenish kind of layer, create a new clipping mask
so we stay within the lines. Maybe this is too hard now. So that's why I'm switching to the illustrated texture,
the softer part. And there I'm going to create a little lighter
and build that color, maybe even a little lighter. Yeah, I think I look it
looks lovely right now.
8. Adding markings and details: Now, for all the textures
within the wings and the tails, I'm going to go back to
my illustrating pencil, put them very small. If you're not sure
about the colors, you can choose a new layer. Also put that on clipping mask. And the fun part is you
can create fun lines, maybe even thicken them. And that is more playful, like so you can go outside
of the lines because again, there are clips to it. So the lines are longer, but they're only
visible on this layer. I'll be doing that for the wings as well,
create a new layer. Also put in a clipping mask. Remember, these are bigger than these are smaller and
these are bigger again. So we can create
thicker lines here. So smaller down here and go
with the lines of the wings. Create bigger up here. Also press harder, so the brush is already
getting thicker. And I think it's cute already, maybe even a little bit more. Oh, it's not
clipping mask there. So my details come back
there a little bit, so Yeah. What I also can do now is create some other
extra textures, and that I'm going to do all the way on top
of everything. That's when I set
them to overlay. And I only choose black
and white for that. So some black color. I'm going to draw in maybe
a little bit bigger. So, a little bit softer.
Not much pressure. Some soft strokes, and I'm
going to do that everywhere. And because I set it to black, it would darken everything. So if you took a darker color, if you're going on top
of a darker color, you can see darker
markings of that. And if I choose white
on top of everything, it will brighten that color. So And again, if you think that's too much, you can play with the opacity
or blend them a little bit. I love to blend it. Then I can play with the
individual highlights. On top of the head,
there will be more highlights than on the
lower part of the head. I don't think that's
necessary there. And I think our bird
is almost ready. We just have to crowd
in a little bit, and you can do that
to your liking. So I'll go all the way
to the bottom part, create a new layer
and drag it down. There I'm going to use black. Create a little bit of an
oval shape, let it snap. And most of the time, I
will do a color drop. If you can see a little
bit of a gap like so, we can use the threshold by holding your pencil down
when your color dropped it, so I'm going to hold
my pencil down. And here you can see when
you're thresholding it, you can bump it up to all the way where the
inner circle is gone. Maybe I'm going to tilt
it a little bit like so, and it's way too dark, so I can change and play with the opacity a
little bit lighter. And now our bird
is totally ground. And you can see everyone
can see which bird I drew. And it also has kind of a
little bit of a lemon bird. They could have called
it the lemon bird, but one particular part I'm not fond of is how it's ending here.
It's not blending. So there I go to this part, which is the basic color, and I'm going to
blend it a little bit over the tail part. So I'm going to choose
the blender brush. Which brush did I use? It's my illustrating pencil, and I'm going to blend
this a little bit in. Bring it a little bit back in. So I brush it a little bit
outward, a little bit inward. That's where the soft
blend is coming. And now I like it better. It's just a small
part. So for now, we've got this bird ready.
9. Final finishing touches: A I'm not very satisfied
with the neck here. I think it could be
a little bit more upward a little bit
more filled here. And that's what we can
do with this shape. So I go back to the green shape. Remember, I've got the
yellow part there as well. But if I'm not sure if
this is enough yellow, I'm going group this and play
with a whole group at once. And let me check. Go to my magic one, play with liquefy,
play with push. Now I can push it a
little bit more upward. Yeah. And I guess now it's a little bit
more precise for me. So this is the outcome
of my first bird. There are some changes I'm
going to make. And let's see. I'm going to do a little
bit of fine tuning. So now what I'm going to
do is I like the bird, but I do not exactly
like the shape. You see, we covered this piece, and I think it's
belly could also be a little bit
puffier and fluffier. So for that part, I'm going
to group the whole bird, everything of the bird. And group that as well. And now I'm going to play with a group. So I can move
everything at once. So I'm going back
to the magic wand, going to liquefy, push
him a little bit bigger. Let's keep the
whole bird in mind. And it instantly is a more fluffier and
funnier kind of bird. You know, it's a stylized bird. So you can draw however you want it to be. So that's okay. And
10. Bonus about printing and stickers: So now I like my bird and I
want to do something with it. I'm going to print
it. And I'm going to print this straight
to my printer, and I will show you
what's going to happen. So now I've got my print
directly printed to paper. And what happened? It's just plain copy
paper. That's okay. You can see my
print looks lovely, but why is there that gray area? Remember, I got that paper
texture look on top. This one. It's burning the colors also has a lot of details,
which I like. So what if I put them off? It instantly becomes dull. You can maybe not see it, but I can see it properly. It's duller than this one. It also has less texture in
it, and I don't like that. So I think I've got to
remove the texture, but I want to keep
it on the bird, and I've got a simple
way of doing that. Well, let's play with it. First things first, we've
got to duplicate our canvas. And then we can play
with the texture layers. What I'm going to do is here, I remove the textures and
I remove the background. I now only have my bird in
there without textures. I want to copy everything. I swipe a three finger
swipe down and said copy all I paste this on
top of everything, and I said, paste. So now I've got my bird
without the textures. What I'm going to do now
is put on my textures. And now you can see without
my background color white, you can see the gray that
is printed on my paper. That's the actual gray
it printed up here. So now I want to remove
everything here. So what I'm going to do now, I only have this picture
on without the background, is my PNG file, so my PNG file without
the background, but I want to keep the textures
only on top of the bird. So I'm going to
open these layers. Unlock done, I'm going to select this part of the
bird. I say select. And now the whole
bird is selected, but I want to select
everything outside of it. So I choose invert. And now I'm going to every
texture and clear the outline. So this is what happens. You have to see only the
bird on that texture. We don't have to do it
over again because when we go to select and
keep it pressed, you saw mask reloaded. So it's keeping the
same selections. So I go to every
layer and hit clear. Keep mask reloaded. New layer and hit clear. Mask reloaded, same
mask and hit clear. And now I've got a
perfectly textured bird, but no texture on the outside. So if I can draw
in my background, I have a perfectly
white background, but a textured bird again. So now let's print that. So here are my two birds. It's just printed
on plain paper. Let's get rid of my iPad by now. So now, this was the first
one with the textures. And now you can see I have a perfectly printed one
without the textures. This is just plain paper, but you can also print
it on watercolor paper. The same thing I do with that is I keep the textures on
top of my illustration, but I get rid of it for
everything around it. And also the same for stickers. When I want to create
a sticker out of that, let's get back to my iPad. I get rid of the background. So I have my PNG file. What I like to do is go to
that layer where the bird is. I'm going to choose selection. I choose automatic and choose
the outside of the brush. I'm going to invert
that, choose feather, and create a white outline
outside of my bird. Create a new layer underneath
that and press fill layer. And now you see it's
a white soft outline. I don't want to have it
soft. I want the hardline. And then what I'm going to
do is on this same layer, I'm doing the selection again. I'm selecting outside, and now
you can see your hardline. So I'm going to
invert that again, and now I type fill layer again. Now you can see the
stripe marks here. So I type fill layer and now if you've got a perfectly
stickered background. And that's what I'm going
to use to create stickers. And I'll be doing that with my Caesar Juliet
plotter machine. And if you want some
information about that, I can create a whole new class
about creating stickers, but let's do this for now. I share this as a
PNG to my computer. And look, here I have
my sticker sheet. It's a small and
delicate sticker, so here you go with a
perfect little outline. And now, I've got my
baby sticker there. And here you can see
the cutting lines in the reflected area. Perfectly done, Aiprocriate.
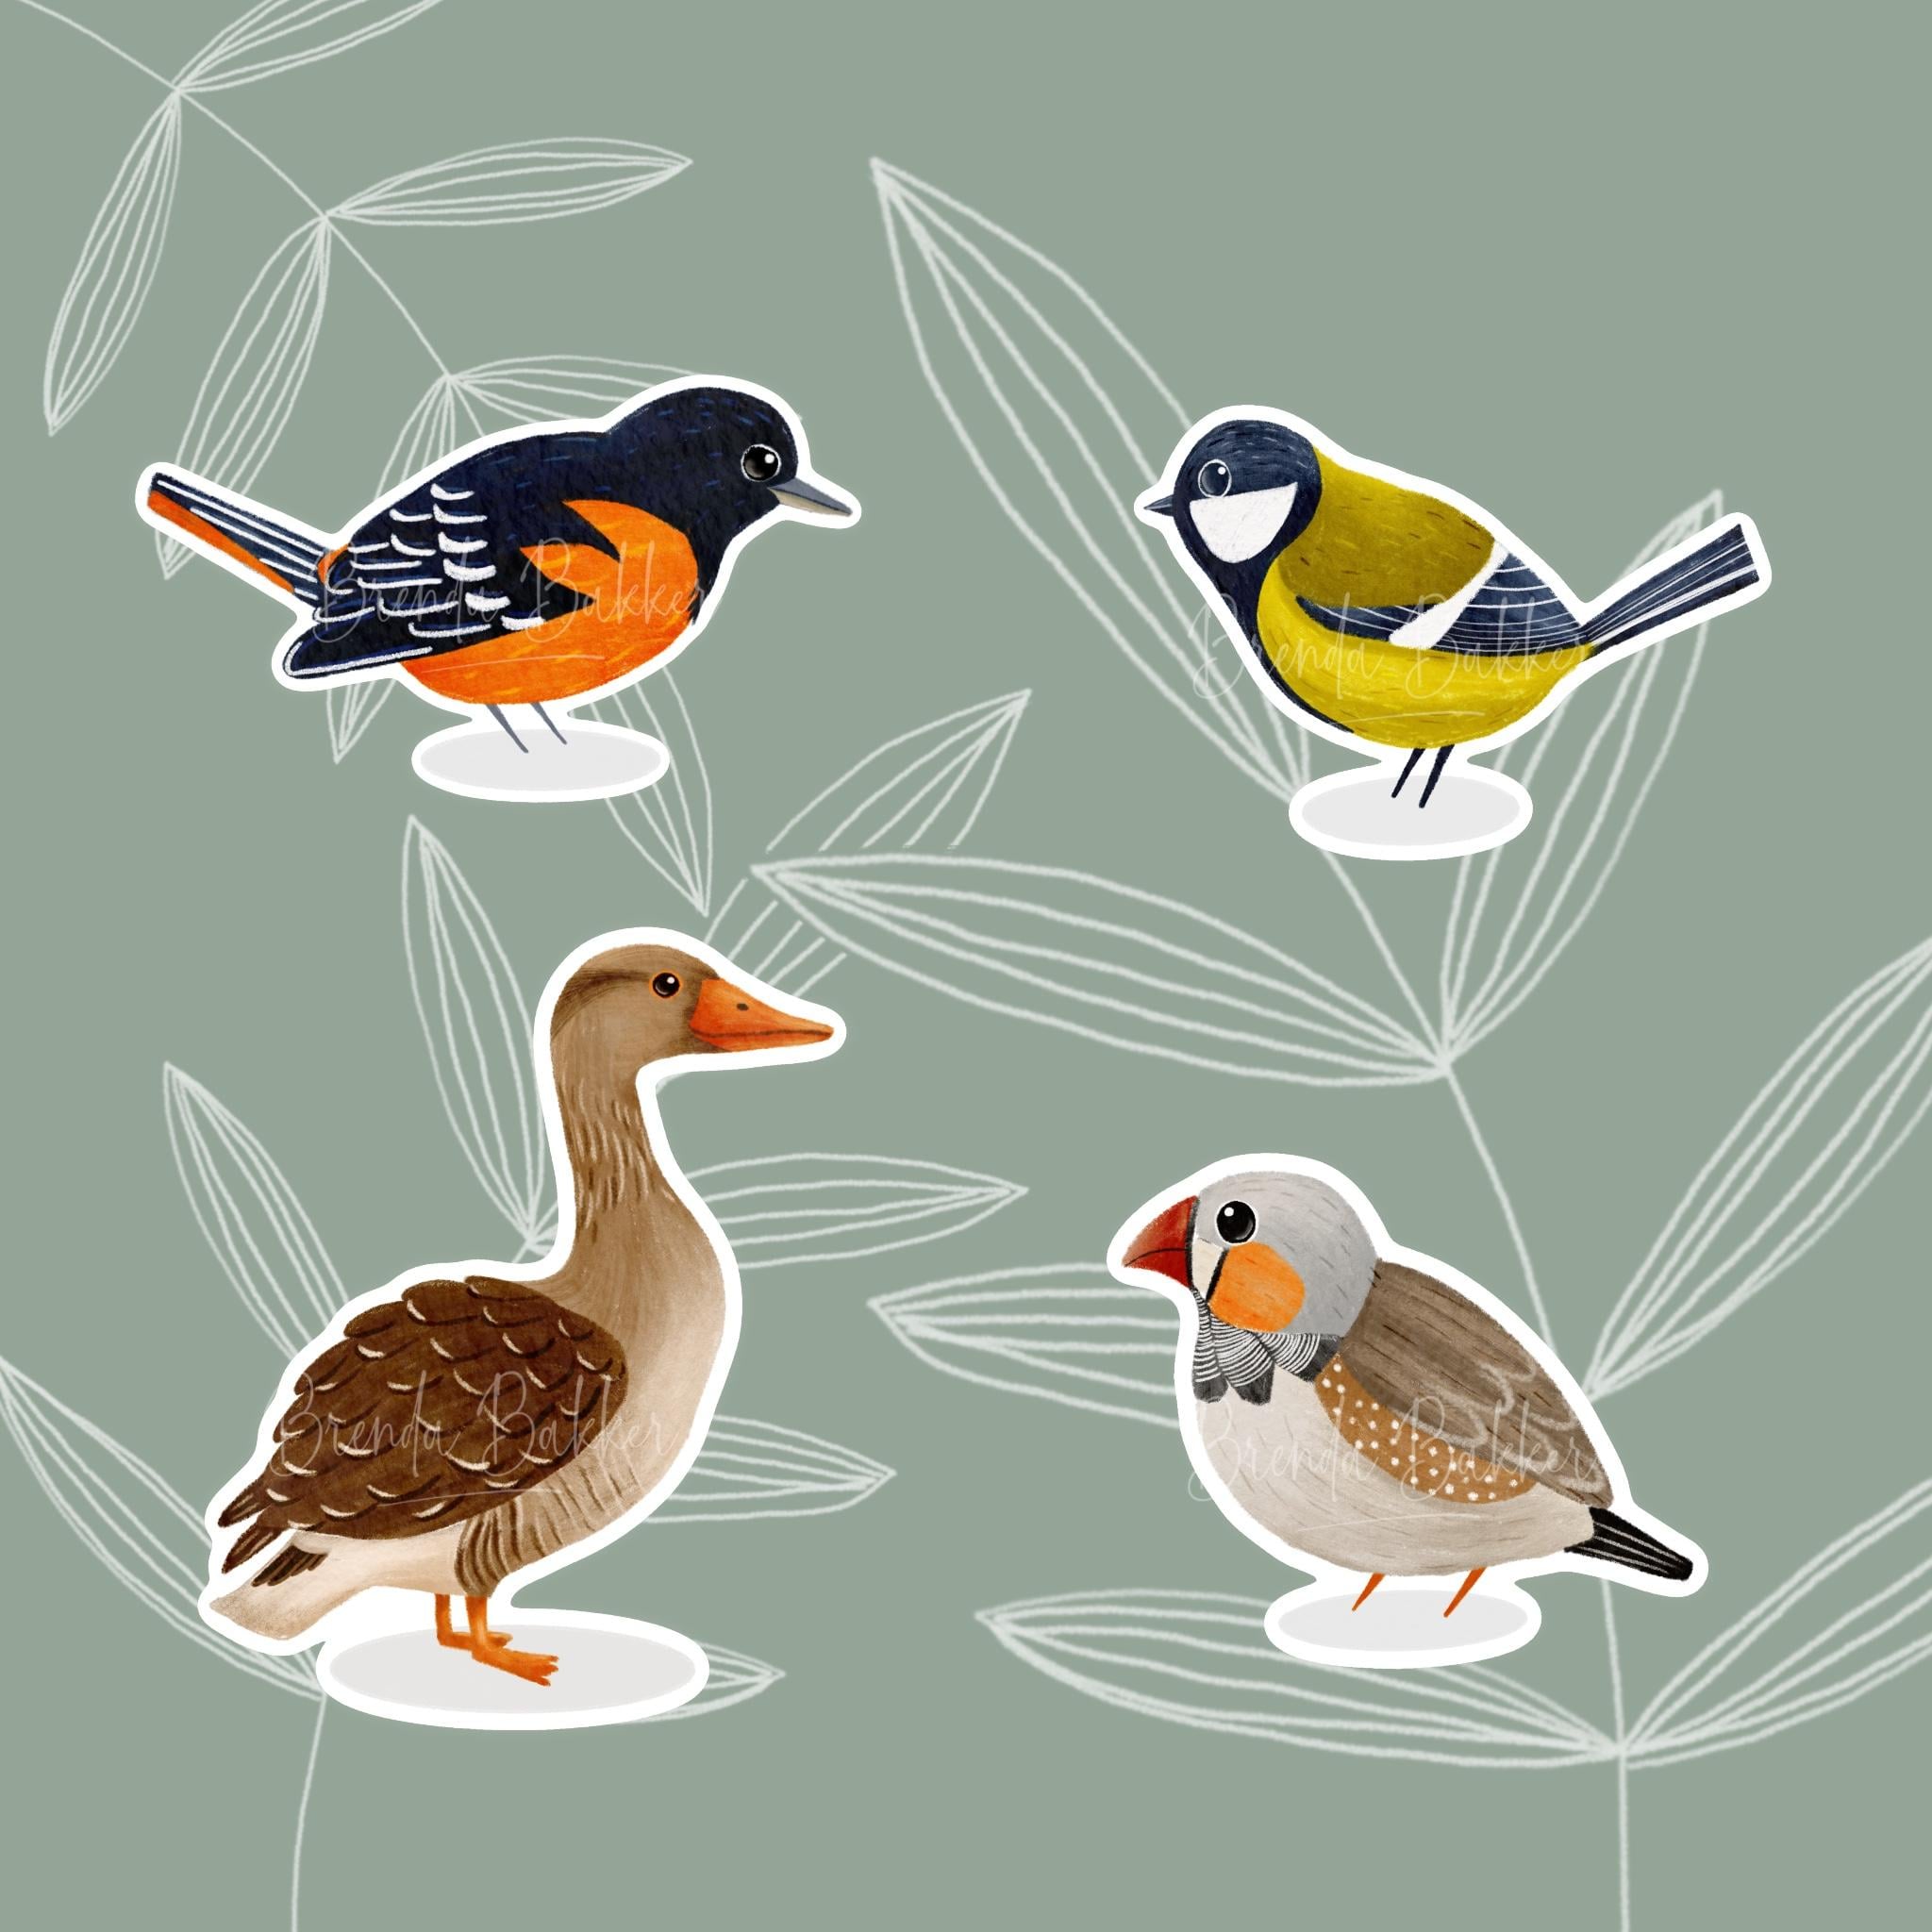
11. The walk through of some other birds: So here I want to
take you through the process of some
other birds I've drawn. This is a bird, and I
love it for its markings. It has it's orange
with black and white. It has some vibrant, flamable orangy kind of quirky markings here and
some white on its wings. So let me see this was the
first initial sketch I make. You can see these markings. You can see the stripes where the white markings would come. You can see this is a
little bit elongated, and the tail is coming this way. And then I went to refine it you can see I made
the tail come up. I make some improvements
to the wings, and I tilted the
bird a little bit. And I think it's a fun, recognizable bird this way. I've done it exactly in the
way I did the great tit, so I hope you like this one. Let's see another one. Here, I created a sketch of
the zebra finch, and you can see I
went in directly. Here is the head,
here's the body. And then I drew over it a little bit harder with the
quirky markings, the zebra neck the black
stripes with its nose. Here's black stripe here
as well as it yeah, what do you call it,
burnt umber cheeks. He's got a fun kind of
deer like pattern here, so that's how I created it. And this is my end result
of this illustration. I think it's funny and
quite recognizable. Here you can see my sketch
of the goose I made, and you can see I drawn a
head above here and its body, it's a little oval
shape right here. And then we have to find
a way to get this quirky, squishy neck in here. So I've drawn that with
little short stripes, be searching over how it flows. You can see this is a little
bit more flattened here, and I've created with the liquefied to after I
finished the illustration, I've created a little
bit more of its belly. This is now my end result. You see, I've brought its belly a little bit more
outward and downward, so now it's well fed. I hope you liked the walk through of this
illustration as well. You can see I made
a darker spot here. I've created some
little feather qkings. I didn't do this in these lines. I created some small
feathers out there, but still overall, it is a line. And yet, I created two
feathers down here, and I see a little bit of a few feathers
down here as well. So I think I take all
its quirky markings, and you can see it
recognizable as a goose.
12. Final thoughts: So thank you a lot for seeing this class
until the very end. I hope you have
learned a lot and I hope you have
fun along the way. Now that you've drawn this bird, you can draw any bird. Just remember what you learned, looking for the exact shapes in this class and looking for the quirky markings of every bird to make it
that specific bird. So I think you've got this now. Please remember to post your class project in the
project section of this class. So I and every other student can see what you made
out of this class. Feel free to experience with
a lot of different birds and also feel free to take this experience
into another media. So, for example, if
you would like to draw original watercolor or
pencils or alcohol markers, feel free to use everything
you've learned so far. Take it in another direction. Feel free to use your
own illustration style, and please also leave a
review after this class so I and other students can see how you experienced
this class. So thanks again
for watching until the very end and maybe see
you in the next class. Bye.
 Brenda Bakker, Sharing my skills is sharing my joy