Transcripts
1. Introduction: Hello and welcome to easy
Drawing, Cute Animals. My name is christer. I made it found in easy
Drawing course for you. And here are some things
that you will know. How to draw using basic shapes. What makes animals cute? How to relax and be playful. We will draw five animals in
three different versions. How to enhance your drawing
skills in easy ways. Tips for developing
your confidence. Also, drawing cute
animals is like two gifts and nodding a new skill and be very happy
at the same time. That is hard to beat
2. Simple Cat: The first drawing we will do is, I'm a simple Cat. And we will start by
doing rough circle. Something like this. Remember that this is just about playing around
and finding your lines. Nothing has to be perfect. When you have draw a circle, let's do a guideline. The middle of the head. And another guideline here. Then you will take
half of this circle, the height, and draw a
little guideline down here. So this will be the
size of the body. So this will be where
the cat will be sitting. We will do a little
bit of a box. It's not as wide as
the, this circle. So here's a little bit
further in like this. On both sides. There you have the body. Here in the middle.
It will put the nose. And you can make a little
triangle there. Little Cat. And then we will have two
big eyes. Quite circular. This is why it's quite
good to draw a guideline. It's easier to place things
like the nose and eyes. So try to keep these two circles about the same distance
away from the middle. So to quite rough
circles for the eyes. Then of course we will have
the Cat sliding a little bit. So that's go ahead and do these two bumps coming
down from the nose. And then we will place, Here's get there. So quite pointy. Imagined that from
there's almost like an invisible line going
up from this side of the eye here. Let's start here. We'll have another
one down there. And then the smaller triangle
inside of the arrow. Then they can do the same here. Just imagine that you have. And then miscible line
going up from here. Should probably talk
just a little bit more. Erase this part. Remember that the eraser
is your best friend. It's all about learning and
finding new ways of drawing. So just a little bit
tangled up there. And then you can have
another guideline here. You can find that the ears
are about the same height. And, and use this
guideline here to have the other ear
coming out there. And as you'll see, I'm taking keeping everything quite rough. Why I use a blue pencil in the beginning is that
I can just search around and find and play around
with the lines later on. Use black pencil to
define all the lines. Later on. If you don't have two
pencils into want to do it, you can go ahead and draw straight up with a black pencil. But if you have the
possibility to try to have a colored pencil first and then the
black pencil later. So Let's go ahead and define
eyes a little bit better. To give a little bit more life to the Cat is we will
draw a little bit of bubble there and showing that there's a
reflection of light and die. So two ovals, one
big, one small. And later on we will fill in these eyes so they
are quite dark. I will just do it slightly
with a blue pencil first And we can also go ahead now
and have all the details to draw the upsides of
the kind of the cats. And here I will look,
draw the whole, I'm heads down here, what I believe it
open the little bits. And with this Cat, I will draw this line. On top. Dilemma, draw the ears. And when you do this is like showing that the
ears are behind the head. Will draw another Cat
later on when we're done filling this lines. When you draw a line like this, it usually means that one part
is on top of another part. Now go back to the body. We can draw some small
pulls down here. Two ovals. Don't worry if they don't look
exactly the same. Sometimes it's quite
good that they are a little bit symmetrical, which should do is to control
the way the cat is sitting. And also that we will
do a little bit of a band here for the body. Going up like that. Then another band
for about Elf pair. And then we will draw the
front legs for the cats. And they will be starting about
where the head is ending. And just draw two
small ovals like this. So there you have the
front, front legs. And also the cat of course
should have a tail. So about halfway on disband, you can draw a line
out like this. And underline. Do a little
bit more of a button there. And then a line back there, you have the tail. Very good. Let's fill in this
lines just a little bit more than we can also do a little bit of
a pattern for the cats. You can, of course just
leave it like this. Just white oak can do is
we can do some triangles, shapes going in from
the sides like this. Lawsuit disabled daughter side. So small shapes like this. And of course we will
shade them also. So there we have some simple
patterns for the Cat. So now let's go and define the
lines with a black pencil. Can start with the
nose, their eyes. And then we will makes
sure that will leave these two areas open to give the Cat more over
the life in the eyes. Showing some reflection. We really appreciate this. Quite gentle. Don't have to press super hard when you're
shading in the beginning. Let's do something that is not as much pressure as to alter lights with
that your drawing. I'm just going to say
that you probably noticed that I have this
kind of Band-Aid here. And I'm taking care of
all the little stray cat and we play on goof around. Sometimes it goes a little
bit banana, Awesome. Maybe you will see that. I will have with some kind of Band-Aid and some of the videos. She's a real sweet tone, but she's still
very wild around. Well, that's what happens when you play around
with the Cat. On the other, I will fill
in the mouth for the Cat. Almost looking like an anchor. Well to shape of the head. And as you'll see,
you don't have to be drawing a perfect line. It's not about perfection. It's about learning something
new and having FUN. So feel free to have
a very loose line. Playful hand to the pattern
on the other side of the hub to fill in the path. Then of course the ears. The ears a little bit. Softer. Role top. Want to get to point D. Because when it
comes to cuteness, there's a few things to remember is that it's
very good to have very round and soft shapes
and have very big eyes, and also to have a head that is quite big compared
to the body. That's why we see things as cute when we have these
kind of proportions. Let's go ahead and do the poles. And as you'll see,
I'm not following the blue lines. Hundred percent. It's not necessary. The other side of the body. And lastly, we have the
Taylor, something like this. And I want to do some more
black lungs around the eyes. More contrast. This is how it works,
is that the higher contrast and the stronger lines you have in
a certain area, the more focus goes
to that diarrhea. When you see, when
I'm filling in, I'm just going to draw
some more black here. When I'm racing to contrast and the black around the eyes. You get the more of a
tension around this. Talks because to eyes are very important in drawings because
it's quite often that's the first
things we looked at. This is the face
and I'm a look at the eyes to see what's going on. Yes, that looks much better. And also before we
finish up this drawing, I think we should go
back to the blue pencil. We will just add a little
bit of a shade here. Some very flights with a blue pencil first to see you how big the shadow
we were gonna do. And we will get a very light hand out a
little bit of shade here. So the Cat is actually
sitting on the ground. Shade helps quite often to place a character
somewhere in the room, on the floor in this case. And also what we
can do is that we can add a little bit more of a strength underneath the tail, but mostly under the
the butt of the Cat. And I'm a little bit
underneath the feet like this. Now you can see the difference
is that all of a sudden the characters
connected to something, it connecting to the
ground that is sitting up. There you go, your first Cat. Look what you can do
with to simple shapes. A circle and rectangle
becomes a cute cat. Good work, and see you
in the next lesson.
3. Cross-eyed Cat: The next Cat we
will draw will also be starting with circle. We can draw the circle about
the same size as to other among something like that. Again, we will do simple guidelines across
the face like this. And in this case we will measure this part will be
somewhere around there again. To make sure that that is quite big comparing to the body. This body will be, if a, draw another
guideline down here. Wonderful here. Cat
will be a little bit fatter or fluffier.
Maybe I should say. Done the body. Let's do a simple
bamboo on this side. Simple bumble decide. Something like this. Just making sure it's chunky or fluffing. And then we will, of course to a nose again, but this time we can
actually do it with a row, knows, see how that works out. And of course we
will have to big, big eyes again and
this time we can do them as the little bit oval. Simple. Decide to
see what kind of different expression
we can give the Cat tools a bit like this. Of course, the same with Eared, you can draw another
guideline to see that you have their eyes
about the same size. And I think we will make discard
a little bit Cross-eyed. So let's go ahead and do to all those shapes on
each slide like this. And this time we will leave
a little bit of space here. I'm a space here for
the light on the ice. And I think we will not
have a mouth this time. So instead we will do whiskers. Can draw three
whiskers on each side. Like this. Can make them even bigger. A little bit further, I think he's got a
bit too crooked. And as you see, I'm
not freaking out if the lines are not
in the perfect place, you can always go
back and redo things. So don't freak out if your first lines are not
where you want them to be, you can always redraw them. Of course, this one
should have yours too, so we can beat, just
draw line there. Cat to look angry. But imagine that there's
a line going out there. And then align going Altair, that is a middle between these points in the middle
between these points. From there you can
draw your ears. Can have another
guideline going here. We have that. Here's
for this one. And of course we should have the inner lining tissue
in the shape of the ear. I'm just going to
define the little bit better with this Cat
compared to the other one. We would actually draw. The whole circle underneath. You fear, showing a different
way of drawing a head. But I would love to
close this line. Sara, either leave
them on both them Quick, this dilemma can define the ice a little bit better. Something like that.
Show him the pupils. See I'm doing the pupils maybe
a little bit more rounded, a little. Something like that. Let's go ahead and
draw some front paws. So this one, you imagine that
you have to paul sitting, standing on the ground there. Then we can draw lines up from those lines.
Something like this. Can even make them a
little bit more round. Little more soft of a shape. Very How to from pulse. We can go ahead and do the
other line of the body. Making sure to make
it quite round. Like this. If you haven't bit
too thick line or it's giving me Tennessee. Let's go ahead and
use the eraser and make maybe a little
bit more cleaner line. Of course, these Cat
should have a tail to I will place it
on this side also. This tail is more in the
same shape as this one is more of a softer
shaped like an angle. Let's go ahead and do the line
for a little bit stronger. So that's a good start. And then we can do the definition
with the black pencil. I don't know if you
own a cat or not, but feel free you
and your drawing these cats to add something from the Cat that you have in your house
or someone you know, or maybe a fan favorite
Cat on the Internet. Could, because there could be
a nice detail to your Cat, giving it more personality. And as you see you
when I'm drawing, I'm searching for the lines. So you don't have to freak
out that you have to have a perfect line that is going
all around in a circle. Just do small, small lines
and see where they take you. Because this is also about
not just your expression, it's also about to hand lie coordination that
you're training it. Depending on how far your
into your creative process. The way of your line making
will be quite different. I can say that even though I can do draw just a single line, I prefer actually to do
these kind of small lines. It's feels better for me. It's more on my personality. Has you see, I can draw a
line like this or I can draw a line that is built up a
more of a smaller lines. Both versions work with have the TBI party here. The small legs. Tale, Of course. There you have the main body. Of course we should do like with other one that we can
add a little bit of shade here to stick to
cute the, to the ground. Doesn't have to be a huge
shadow. A little bit. But a loose hand. Draw a little bit of a
shade with a black belt. So don't worry if the shaders going over the lines or maybe they are a
little bit too dark. It doesn't matter. What I hope that
you do is that you practice this several times. So each time you will do it a little bit better and
a little bit better. So of course, little bit of strength to
collect the Cat to the ground. This what we can do with also, if we have the same value of these two lines that
are on the same level. But if you're just draw this
line a little bit stronger, like this, you see that the head is popping
up from the body. So when you draw a strong
line on top of another line, usually means that this
part is more close to you. Draw the line a little bit
stronger all around here. Since we're
strengthening this line is always good to go back and make sure that the facial features or
have the highest contrast. So making sure that the
pupils are quite dark. Maybe we can just add a little bit more
strength to the ice. Just a little bit. A little line there
have jumped away. Of course, if you want to, you can always go back and erase all these guidelines, etc. but I will leave them there in the beginning
because it's not about making a perfect
picture. It's about learning. And sometimes it's good that you leave a very rough drawing in the background that reminds
you or what you're doing. So there you go,
your second Cat, a little shabby, one. Good work. And let's go ahead and draw the third Cat
in the next lesson.
4. Side View Cat: So our third kitty will be little thing
that is standing on four legs just to give a little bit of a
violation to the other walls. And also this had will be
not be hundred percent row. We will be more of
a lawful shape. Looking more like this. Also, I will tilt the head a little bit in this direction. So the guideline will
be going like this. Like this. It will cough course. The body. The body will
be slightly smaller than the herd and that
will be another oval. Looking something like this. You can also measure the
head and they'll see that the body is just a little bit smaller to keep the
keep cuteness level up. Something like that. And I'm of course is will have
a little cute moles, just a little triangle. And then they will
have some eyes. There are almost drown. They are a little bit oval, just a little bit oval. Like this. With this cats. Compared to other worlds, we will actually have them
yells completely black. Just to have a little bit of
variation and show you that. You can have different
kinds of appearances of a cats depending on what
your shoes for the eyes. Let's go have undefined. Have your solute in
a little bit better. We will just have the Cat having a little bit of hair do here. Just a small boat and then
we will place your solid. You just imagine that you
have a line going out from the from high up here,
aligned up here. We can have the 0.2 years lead side of alleles made
the males too little, bit more soft and
round. Looks cute. Or also if you have a little bit more to big ears and they
are a bit two-point. Did it look more like a flux? So let's go ahead, will have a little bit smaller and
softer ears for the body. Just imagine that you
have a line coming down from the year. Somewhere around here. You will have the feet. Then we will have a little
bit of the angle to decide. So this is the first
little poll here. And then we'll build
up, draw the body. And then another poll here. Keeping the leg lengths
angled like this. Little stomach. And
the other leg here. Let's try to keep these
polls about the same slice. Low note here. The numerous soft line over
to that called the Cat. Making sure that these headlines are pulling on top of the body. Something like this. Then we will have a little tail here. Somewhere around the
middle of this back line. We can make it a
little bit fluffy. They've kinda of
course, if you want to draw a tail that is more along, maybe more like a zigzag
pattern like this. If you want to try a little bit of a different
approach to the tail. Each time you draw this Cat. It's going to find is
just a little bit better. Well, of course we
should do some whiskers. What is Cat to? I think there will be somewhere around the guideline here. So let's go ahead and
draw some whiskers. Which side? First a long line and then a little shorter line? And you don't
always have to draw three lines or two lines, or four lines or five lines. When it comes to Whiskers, you can do whatever your field looks best in your drawing. In this case, I
prefer to have them. We also two because this
cast is quite clean and quite simple and I
don't want and have it too many things sticking
out from the side. We should also maybe add some small lines here
showing the fetal, the Cat. I think this looks good. So
let's go ahead and define the lines with a black pencil
starting with the nose. Number is the black
lot eyes here. What do you can
do is when you're drawing something
that you're shading it together a little bit even you can always
cross shaded. So one way this way and
then another way it is way. It's quite easy way to get
something quite smooth. Let's go ahead and
do the whiskers. And as you see, sometimes I
don't follow the guidelines. Sometimes my pencil is
just taking me places. Because sometimes you feel
that I think disliking sexually alluded better than
the first of all, I drew. It can of course,
you just go back and erase the blue line a little bit if it's interfering with your,
with your drawing. And as I said in
the previous video, try to keep as much of what you're putting
down on the paper. Because if you clean
things up too much, you don't actually see
what you have been doing. It's more almost like little road-map to your
drawing activities. So even though maybe allying this lots perfect
where revolted, just leave it there. Course it will
remind you later on what you were doing earlier. The soft lying. A little bit, little tail. It looks good. Then of course, little bit of a shade. And as you see, I have
not drawn the fourth leg. You can of course,
draw another leg, the coming down back here
next to this this leg. But I prefer to have
this more clean. I mean, when we're drawing something that is
cartoon and cute, it doesn't have the
perfect proportions or B. So to say realistic, it's more about how the
drawing actually looks like. In this case, I think
it's looks more nice to be not too cluttered. A bit luck with this Cat. You don't have to
draw the back legs. It looks nicer to
happiest these two lumps. And with this cute expression. Let's go ahead and do the
contact to the ground. Hair, health. So string thunder, nice. The poles. And also we can do a
little bit more strength, showing that the
head is on top of the other lines.
And the same here. Just a little bit more strength. Just over displays. And a little bit
more strength here. Just showing where the
lines are above each other. Memories of jade. Just a little, little, little bit like this. And I usually ask
dad sometimes to my drawings a little
wobbly lines like this. I think it gives the drawing
a little bit more of a life. You can try that
out if you want do and if it's something that fits, you, please use it. Whenever seeing the
downstream from this lines that I started
to disappear little bit. So let's go ahead and
strengthened eyes. With that. I don't know, almost spooky expression. There we go. Three cats. I hope you have
started to feel how easy it is to draw cute animals. Starting with simple shapes
and with small variations, giving them different
expressions and characters. Good work and see you
in the next lesson.
5. Droopy Eared Dog: So the next thing
we will draw is a little simple, Cute dog. And we will start like
we did with the Cat. The first Cat you drew. We will start just by drawing. A simple ball, very rough one. And we will have a
guideline in the middle. Add another guideline, middle of the head,
this direction. And we will take half of this bowl and do a
measurement down here, another, another guide layer. And I'm with a previous kept. It will be almost the body will be almost as
wide as the head. Your form LSA, very
rough box down there. So that's the start
of this little guy. And when it comes to the eyes, we will make big round eyes for this Dog to like that. And then we will not
put the nose up here, so we will have it a
little bit further down. You can have it about the
same level as the end of the bottom half of
the circle, Sarah, for the eyes, then they can make a little oval shape
here like this. And of course we should
big you put a big smile on her dog to have
circles like that. With this one, I think since dogs are panting quite a lot, we will add a little tongue
hanging out here and not following the middle of the line bus almost next to it. It will draw a line
down and down, a little half circle. And then a little
line up like that. Then you can draw a little line for the
middle of the tongue. So this tongue is not
completely in the middle. We'll put it a little
bit to the side. A little bit asymmetric goals. Because if you draw it straight
in the middle like this, it looks a little bit weird. So I think that's, it looks really nice. And as we are usually
doing with the eyes, I will leave just a little
bit of sparkle here, a little light on
top of the nose. And when it comes to the eyes, Let's define them a
little bit better. Something like this. And tried to use the guidelines. But don't worry if everything is not looking hundred per cent A-OK. you will find
this proportion. So eventually when
your practice, and I can say that sometimes
it's quite good that the drawing is not looking too perfect because it can
look a bit steroidal. You will find your style lines
as long as you practice. So let's filled in the eyes. This time we're leaving a
little glimmer up here. And with the Dog, of course, you should have some ears, but I think there should be
some kind of droopy ears. So let's go ahead and
first draw the top of top half of the hat. Then we will have ears coming
out like you to big lumps. And they will end
up not down here. They will add just a
little bit further up. They'll still little bit. And then they will be draw
this line a little bit better. They will go a little bit to decide compared
to the heads circle. And then do draw the
air almost all the way up to dislike. We can even make them Yes. A little bit thicker. There you have the first year. Let's go ahead and do the
second year. In the same way. Draw a sort of a bundle
of my shape here. And then of course, you can have very little guideline
going out here. You know, approximately
where other areas going And then doing the same, having to air going
a little bit towards this direction compared to the headlight and underline up, almost closing to
the top layer there. So there we have to
dig droopy ears. And when it comes to the head, we're not going to
close this circle. We ask them to draw
them about that far. When it comes to the body. We will make the dog
a little bit chunky. So from this line, you just make a half circle and about on the same side
and make another half circle. And as we did earlier
is that if you have too many lines
in the same place, that could be good to
go back with the eraser and clean it up a little bit. So there had the side of the Dog and we will
have this is going to be the dog is sitting
a little bump. The parents, depending
on where you're from. With regard to almost in
the same way as this line. We will do line coming
down like this. Here we will have a little poll. The lights are not straight. They're a little bit
bumps like that. And this one you can don't even, I draw it a little
bit too straight. So I've done the test a little bit to give it a more
nice and round shape. Something like this. And
then you can do the same. If this is the middle line, you will do a little line here. So none of pole, the pole there. And then another line going up towards this one
almost following it. Something like this.
If you need to, you can always put a lot
of guidelines here if you want to have them
exactly the same place. So don't be shy when it
comes to drawing and adding the things that removing
or just playing around, you can always erase it later, or as I said in previous videos, just leave it there
as a blueprint or a history mark for
what you're doing. And we should do some
little toes here. And this case, I will not
draw two lines on each pole. I will ask draw one of
the how that looks. I think does it
looks quite okay. And then we can close this line. They can draw this line
a little bit further. With this target sitting on this button also his hind legs should be somewhere around here. And the US to do it very, very simple is that
you draw this line, the hasta little bit
further out than this line. And a new Yoast make a
circle going in like that. This will represent
the hind leg. Let's go ahead and do the same
here. Let's draw this one. Here's a little bit further
out from, from this point. And undo another half
circle. There you go. Very Cute dog. So if you want to, of course, you can add a little bit
of spots on this Dog. And in this case, I think we can add so spots
on the head and the ears. Imagine that you do a line that is wobbly like
that on this side. Then you can do another
one on the other side. And these two doesn't have
to be exactly the same. It doesn't matter if they are not hundred percent
the same because most dogs doesn't have 100% the same pattern or almost no animal has the
same pattern on both sides. There are quite similar. Then we will do a little
slight shade here. That looks good. Let's go ahead and take the black pencil
and define the lines. We can start somewhere
around here with the nose. Remember to leave that
little little spot there. And on the mouth like that. Then the tongue that is hanging just slightly
to one side. Then we can do the eyes Big, big ice. As we discussed
earlier, is that wrong? Shapes, big eyes, etcetera, big stuff. Character, cute. We can do your light shade here. Same on the other eye. As you see on lots
freaking out just because the shade lines that are going
outside the line staring. This is all about practice. So play around and have FUN. I'll take this to serious. Because when it comes to
drawing and practicing, it's very important that
you are having FUN them. If it gets too serious, maybe it gets too much pressure and just relax and
play around and let the Pencil follow your
hand along the paper. When you finish your drawing, everything will
look okay anyway, because some detail
is a little bit odd. It doesn't matter. It's the complete drawing
that makes the impression. Finally, as you see, I'm doing the cross
shading there. You have to shade a
little bit more even. Number can go ahead and do a big droopy ears. Both sides. Previous skill and make it a very slight line for
the spots there. Not too hard because this line is not just as important
as the other banks. Light on your hand. No, of course, the shade
for the spots here. And it's the same here. Since
the ice are more important. Tried to make sure that
you do shading, etc. that they are not stronger
or black hair down the ice. Because the focus should go
to this part of the drawing. Light shade on both
sides like that. Go ahead and do the
legs. I'm done. Side so to Dog. The hind legs, he
also showing there. And even you'll see that
this is not realistic. We will understand that this is the two legs, the back there. And of course we should do maybe a little bit of a
shave their shadow. That's a little slight one here. Placing the character on
the surface where it's sitting on the black pencil. Let's go ahead
with a light hand. Pointer's surface here.
Something like that. And I'll of course,
Strengthening align sweater Dog is in
contact with the ground. And we can also do a little bit more strength
here if we want to pause to pop out a little bit
more from the back, feel free to experiment with how strong shadow you do or
was drawing lines you have. It's really, really
interesting to see what happens to the drawing. And I think we will have to
go back to the ice again, hair cells that were lost, a little bit of
contrast and focus. We can also do them a little bit darker, slightly more darker. In this case, I will not draw a table showing
up from the back. Of course you can do it
if you want to kill, of course, draw a little
happy tail like this. But I prefer to have
it quite, quite clean. It's very nice. Figure this. Have your first Dog based on the same
principles that we did. The first Cat looks very cute. Good work, and let's
continue with the next Dog.
6. Big Eyed Dog: So the next Dog we will do, we will start with the
same principles as the last one. Let's go ahead. Simple circle like that. Doesn't have to be
the same size as the other role is to say that I usually draw these
examples side-by-side. So you can do some comparison, but if you prefer to have each drawing on a single sheet
of paper, please do so. There's no set rules. Most important
issue that you will find a way for you to draw, that you feel comfortable via, that you will continue to
experimental and grow. So artists guidelines
then the same as usually that we do half of
the circle and then we will do another guideline here
showing the size of the body. We will continue
to do the the box that is a little bit slightly
smaller than the body. Flight is smaller than the head. Does be no quite
a warm day today, It's been almost 40
degrees Celsius. Where I am at the moment. I'm born, the
Northern Sweden them, we see this maybe a little
bit too much for, for me. So if I, if I say something stupid during these vessels,
please bear with me. So the same start
as the last one. With this Dog. I think we will do a
little bit different. We will add a little
bit of sheets. So imagine that you draw a
curve going out like that. And the same on this side. Current going out like that. The lingo going into
the whole circle like you have it something more almost like garlic shape,
something like that. And then we will
of course have to big ice using the guideline
to draw them with little guy. Here. Big guy on the other side. Of course, you can always add these guidelines.
So don't be shy. Yes. Mess around with your drawing
as much as you want you. Then we will add them, those down here and will be just a little bit slighter
higher than this slide. And it will be almost
like a triangle, but with round edges like this. That will leave a
little spot there for the lights on the nose. And of course, this dogs
should also be smiling. Then we will add a
little mouth for it. So just draw a circle
going down like that. Almost like an oval. And then we will
have another circle on top dirt and then they will do just a little
bit of a shader. So there you have him
off. Happy mouth. We will define the eyes
little bit better. And with this one we will
have very big pupils. So let's go ahead and draw two circles within the circles. Quite big malls like that. Then we will leave
some light here. The top half little circle. Then we can fill in the
pupils, something like that. And, um, we define the height so to have just a
little bit from both sides. Yes, leave the top part for now, we will add years later. I just wanted to show you that
you can, from this mouth, you can draw a little shim, draw a little dumbed down
here and then connect the lines from the sites. They're really puff it is dark. Then on top here, follow the first circle line. Leaving this open a little bit. And I'm from this side. Imagine that you
have a line going out from the side here. There's where the air starts Can actually make it a
little bit more route goes off like that. The bank comes back, goes down into the head. Can make the top a
little bit rattled. Like this. Of course you can do a
guideline to the other side's. Imagine that you have this line, a band coming back like this. Just imagine that you
have the same but all the same length from
the guideline here. Your draw the ear up to there. And I'm just going to draw this line is a little bit
further on this side. And then it will be just slightly over the
other line on this. But I believe this part
open because I want to do, Let's see now. Draw the inner ear. Draw this line up to here
and then I will follow the other line after
line up to there. So they have the inner ear
and do the same on this side, finding this lying there and then another line for
all of the outer line again. Up to there, there we
have to cute ears. As you see, you
can draw a lot of variation when it comes to dogs. Most characters are
almost the same, but dogs have a lot of different
shapes and variations. When it comes to the body. This Dog will also be
sitting on the ground. But what we will do is that if you imagine
that you following this line and drawing it
slightly tilted like this. Same on this side. Remember they don't have
to be exactly symmetrical. This is just a simple guide. And then you're draw the polls from there
and then you will have just a slight curve. Back out. Like this. On this line is not
going all the way. So it's going to go about there. But since they all
doing it straight, you will just do it
curved slightly. And it's the same on this side. Can of course do the guideline
here if you want to. And then a slight
curve like this. With this pose, I will do
two lines for the toes. Now you have
different variations. What you feel is fitting
mostly for your dogs, your drawing if you want to have one line or two lines and
maybe you have zero lines, it's totally up to you. Now we can draw the line
here, something like this. Then we will draw the back
pause a little bit different. We will actually ask draw the polls a lot
of the hind legs. So draw a line out like that. Oval shaped like this. Then you can do little guideline over
here if you want to. Them the same
length about there. I'll do another shape like that. Then we have the bag pulse. With a bag pulse, we can do two marks. There. Two marks. They're
showing the Tubbs. From where does this
line is going down? We can do abandon like that. So it's connecting
their and their to this box shape we drew earlier. Then it can do the same
without his side. Like that. Quite show cute little dog. Can defined is just
a little bit more. Because when your drawing
and you feel that you are a little bit lost in the drawing as trace
back and start to draw stronger lines in the
areas that you feel is most important or most correct. So to say, what do you
really want to draw? And don't PRB,
don't fear that is going to be messy or anything. It's just practice. And let's go ahead and finish this drawing by defining the
lines with a black pencil. Start with announced
again. Shading it Of course, doing the mouth. And as we did chat, if you have a dog at home or know someone has a dog
or you have a favorite dog, that you're falling
on the internet. Feel free you and
you're practicing this, that to add some
details on this Dog. Go ahead and define
the eyes, the pupils. We'll make them quite strong
these pupils, lot of black. Shem and Sheiks. As we discussed earlier also, you can of course draw just a
single line if you want to. You can always draw a lot
on lines and don't mad. Don't be shy if they are a little bit messy or
mobile or whatever. Everything is okay. As long as your drawing. Then the other ear will
continue with the body. The little pause. Pause. Yes. Very good. Will do. As usual, we will do the shadow where and when it comes to
my drawings structural, if you feel something is not fitting to the
drawing them all to do, You don't have to do it. I mean, if you don't want to add this shadow to
particular drawing, that's totally up to you. I just want to show you that you can have different options. And it's actually up to you to utilize whatever you want to. The drawing that you're
working on at the moment. Let's go ahead and
connected to the ground. Strengthening do is pause. Let's just see if I draw them quite strong
underside here, there are popping out
from the background. So these are in
front of the back. Pulse. Can do the same here. A little bit more weight to
the bottom half of the head. We should probably
strengthened the isolated bit. I will show you a little thing where you
can do with the ice. Dogs can look a little bit. How to say sad or concert, and it's quite easy to do that with your
drawing is that you, you just erase these parts of the eye and then you will make
the eyes go up like this. You have just a little
bit of an angle. You have the ice
angled like that. And actually the more you do it, the more I'll just say sad or you can actually add a little bit
of cuteness also. It doesn't have to
be us be sadness, but you can just add and then you can draw
these lines just a little bit further on this
slide. Just a little bit. And all of a sudden you have
a dog that is quite happy, but he's still a little
bit out to say concerned. So these are some
small variation. I'm just going to
add some strength to the nozzle so it doesn't disappear into the mouth.
When you draw them. Knows it should be more in front of the depth of the mouth. So make sure that
the gnosis stronger, darker and more, contrasts the
mouth on the inside of it. I'm just going to say
that you can always play around with these shapes
and you can do the same. If you want to make it
a little bit angry, you can have the eyes
tilted in this way. It will really look a bit
strange that is still smiling. So maybe you should make
the mouth more angry. So when you draw a cute animal, feel free to play along
with this upper line, so to say, since the
dogs have no eyebrows, you can play around with altering shall die
at the top half. So, and maybe in this case, we should add a
little, a little tail. We can have it on this side. Just a little while. We'll make, make it a little bit point. It should be a
really rounded edge, but pointing usually by I
do is when I draw cats. I usually have this kind of
L2 to the tail end with dogs. I tend to draw them
more of a sharp bend. It feel more Dog like for me at least strengthened alliances a little bit more here or so. So the Taylor's going
in to the background. There you go, a very
big Eyed, Cute dog. Good work, and see you
in the next lesson.
7. Side View Dog: The last Dog we're going to do, we withdraw it from the side
slightly as we the loss Cat. And we will start by doing, I'm oval shaped like this. Finding a nice shape will be tilted slightly
just a little bit. And just to show a little
bit of perspective, normally, this will be
the middle of the face. But imagine that
the head is tilted. It's looking a little bit back. So to say, this middle line will be slightly more to this side. There you have your
guideline for your hat. And then we will do the body. And as we did the Cat
from the side View, the body should be
slightly smaller. Done the add. This case it's that looks good. There we have the health
and the body starts for it. We'll start by defining the
outer edges of the summer. Robert, I will look, draw
it all the way to the top. We will add the
ears there later. That will do side
going up like that. Then we will have the most placing a tear in
the cross-section. Living in a light there
on the oval-shaped. Now we'll match the
dogs smile of course. Two bowls like that. Then we will do so small. Just to the side
here for the smile. And another shape
going down here. We will do to both. Think they're in the middle. Shonda talk a little dubious, little bit of a shade. There you have the smile. Somewhere around, a little
bit higher up than this line. We will do two ovals like that. Same oldest side,
something like that. And just leave those
those lower parts open. Course we're going to do to
both belt lines like that. Showing two to smiling eyes. These eyes we will just make completely
filled in like that. Then we will have the top
half here and I think we will follow this band up here. Somewhere around there. Follow up this belt
somewhere up here. We have the ears.
Start with this air. Looking a bit like this. Then we can follow the
headline in the shape there. Something like that. Don't do the top of
the head and then we will erase this line slightly. Going down here.
Something like that. Don't the inner ear. Yes, I think this looks good. And as you'll see,
everything else. Everything doesn't have to be hundred per cell symmetrical. It's when you complete
your drawing that you will see that everything is working
even though a few things, so maybe a little
bit crooked here and there is the overall expression of your drawing doesn't matter. Let's see. Dog is quite fluffy. And we can also do, before we around the hat, we will use draw a little shim. They're leaving these
to worry barrier. So then we will draw some legs. If this is the lower
part of the body, we can draw a little
guideline underneath here I'm from there we will
draw some small legs. We'll still do a little
bit of abandonment. I will do a little bit of a toaster that's leaving
a little bit the room. And then we can draw
a straight line, though in hair will do the
same as with this one. Draw them. A little
bit of the toes. Skill will see you follow the guidelines here so the
feet are in the same place. And then we'll try
to make this leg. That's why to start or wildlife
you have probable to find the length else,
use your pencil. I'm draw them whether
measured lines. It looks quite similar. We will continue with this
line here, the belly. And then we will
have hind legs here. I've draw this a
little bit too far. Imagine that you will
draw the hind leg, that it Standing slightly outside of what actually
linear with the head here. So I will place
behind like here, showing a little bit
of the murder TO SAR. And then I'm going
draw a line up here. Going back into the body. Here, about the same size. Let's do a simple measurements. Imagine that you have
shapes looking like this. The shape will go back up
being to the backside here. Nullable. Draw
this line up here, but not all the way because we're going
to draw the tail here to the fungus lines as
a little bit better. This slide title
should be quite puffy. So just imagine that you
have, I'm oval-shaped. Going up here. It's
disappearing behind the head. And then it's coming back. Exactly on this slide just
a little bit higher up. It's coming back there. You have the oval
shape going up there. And then you have a
alleles tip here. Can make it little
slight point there. There we have a
very fluffy tail. I'm of course we
can add torques. And as we did with last cats, we can of course leave out the fourth leg
here if you want to. But in this case, ugliest, added slight shape here. I will shade it. We can slightly see I see the
last leg behind there. Yes, that looks very good. Let's go ahead and
do the black lines starting with the nose, making sure that you get
the right blackness there. Remember you can always go forth and back in your drawing. If you feel something is not hundred percent
as you walked it, you can always redraw it or add more strength
or use the eraser. You see I'm not doing the blackness of the mouth
is strongest with loss. So the gnosis more
protruding him. During the welding,
the smile lines here, the shade shade in
other direction to do the gears Normally, when
you're drawing a lot and you have a very soft pencil, it gets a little bit
messy, etcetera. So quite a lot of artists
start to draw from this side of the painting and is continuing in this line not
to mess the drawing up, but this is something that you
don't have to worry about. I can actually say that if
your drawing is a bit smudged, it actually will help you. That means that you're having Malala Fund
and the US playing around and not focusing on doing something
that is perfect. Let's do the body and
the legs. Can say that. I've been to quite a lot
of articles and I have a French teacher
and use methods. We'll start if you
saw some I didn't like he would just
go up to if you also drawing and it will break your drawing and ask you
to repeat the exercise. Or if you had a painting, anybody else to take your
big cloth and just smudge your your paint so you
have to restart a girl. This was a quite a good lesson. Actually, I was a little
bit upset in the beginning, but it was really
good to see that when you are practicing,
It's just practice. You're not doing artwork. It's all about experimenting and finding a new experience. Finding your own type
of drawing, etcetera. That's why I encourage people
to let the drawing to be. You start practicing. To be a playground, a lot to be missing.
It's no problem. We can do a little
bit of shader to the slide dwell. A little bit. Like Pencil. Just a little bit. Just making sure that there's
a way to under the poor. I think this part is a bit
too much too strong nerves, so I have to go back yelled. Strengthening some of
the lines in the face. Start with a bow, the nose. Guys. Little bit more
black and noise. Slightly. There we go. Your third Dog. Now you have three kinds of
dogs that you can mix and match and play
around with good work. And I do hope you're
having a lot of. Let's continue with the next
animal in the next lesson.
8. Simple Hamster: So let's go ahead and
draw a cute Hamster. And we're going to start
with a simple shape. Draw off labile
shaped like this. Instead of us drawing
a straight line here, we will have a little
bit of a band like this. You can keep your lines
quite rough. It's okay. Them of course, we will do a guideline for the middle
of the little Hamster. Don't somewhere up here. We'll have about the guideline. So we know where
to place the face. So it's a little bit higher
than half of the this figure, a little bit higher than that. Then we're going to start by
drawing a little Cute nose. It will be just like a little
like this. Officer go. We will draw two to
round eyes on each side. You'll see using these
guidelines to place the lower part of
those two circles, the eyes can define them
a little bit pattern. We see what we're
doing. There we go. And underneath
this little notes, we will have them both. So let's go ahead and
do to dunks like this. Then we will put a little bit of sparkle and die and we will leave a little spots up here. Gifts, filial, dice slightly. We can fill in the outer lines, but we see where the outer
edge of the Hamster goes. Something like this. And then we're going to place
some whiskers. And we will place one whisker above this line and another whisker
years below the line. And then go ahead and do
the same odor, decide. They don't have to
be symmetrical. It can be a little
wild and crazy. Then we will place the ears. The ears will be somewhere
between these two points. When I was draw
them quite rattled. The top will be slightly over the top of the
head, slightly. Then go ahead and use
the guideline if you want to have them
approximately the same place. And other ear will be
somewhere around here. Maybe a little bit bigger. Then we will do
another line inside. For the inner ear. I think this looks good. Then
we will place some feet, some polls, some of those
stopped by the lower wells. The back pulse shape tilted
slightly to this direction. Then you can use the guideline
to place the other one. You can have another guideline
here if you want them to be above the same size. As I discussed earlier, don't worry about everything
is supposed to be accepted. It does. Same-size or same place. It will look very good anyway, when you complete the drawing, everything will fall together. Have the little Hamster, but there I think I will draw two lines on each pole here
to mark the little toes. And then we can have Two small from legs that can be slightly
bent in this direction. Just a little bit like this. Like dare hanging. Very
relaxed Hamster, this form. If you want to, you
can do the guidelines for this one too.
But don't worry. You will find the right place
in the right size for them. Then we will draw
two lines again. They're two lines again there. Let me ask him to fill in the
eyes a little bit better. So there you have your
basic shape for Hamster. Very simple to do. Quite quick. If you want to. You can go ahead and
do a little bit of spots or a pattern for it. So let's go ahead and do
a little curved line. Going down like this. We can do a little bit
of slight shade here. On this side. We can have maybe a little
spot on this side too. Yes, I think this
is a good start. So let's go ahead and define the lines with a black pencil. Start with the nose. Then we will do the mouth, making sure that the
lines going up in the joint line there. Then we can do the eyes. Make sure that I leave
a little sparkle. They are in the eyes. Shader eyes. Cross J them also, making them a little bit darker. And as usual, don't worry if
the shading is going outside the lines. It's okay. Number can go ahead and
do the outer line here. What is Hamster? I will draw
the line all the way around, leaving the peers on the
backside of the Hamster. This to the back pools. When I'm drawing,
sometimes I use the full line or sometimes
I do a lot of small lines. So feel free to use whatever method you
feel is best for you if you asked want to
have a wall along clean line or if you want abs, small jacket once
I can try both. The little toaster to them, we're gonna do the pattern. And beyond alone your hand here. Because the pattern
is not as important as some of the other
details of the Hamster. For instance, the strength of the whiskers are more important
than the spots there. Will be young too
long by hand again. When light shade this part, spots, shade the hair to
be our shading the side. That looks very, very cute. Done with other animals, I will just add a little bit
of shade where it's sitting. Placing it in the area where
it's where it's occupying. Go ahead and do shade
with black Pencil tool. If you want to, you can add
these kind of wobbly lines. That's something I like to do. It, we'll see it from
time to time when I'm drawing a little your leaves. Give some life to the drawing. We've of course, to the
strengthened dying to show where the Hamster is in
contact with growled
9. Standing Hamster: So the next Hamster we
will do will be starting with an oval shape. Like this. Draw a shape. This direction to the head, constitute a guideline for it. Just slightly where this
band is starting to go up. We will have another guideline,
something like this. Unless we did earlier
with other animals. Take this length. Stroke is just a
little bit clearer. They're going to
use this length and draw when two bodies ending. And I will do slightly toolbox. Again, that's likely
if it's smaller than the side on the, have their basis for the body. When I'm done this, we can do, go back to the head and I will do is that our slant a little
bit slightly to decide. They're not completely round. They are ovals. They are all words that
are tilted towards the middle level
do the same here. And if you feel that
you have problem to find with other eyes going as draw some
guidelines to find it. Don't be shy us play around and add and subtract things.
When you're drawing. Sometimes you can try to draw everything with a guideline and, and you can try to draw it without the guideline
and see how that works. Then you can go forth and back. When I'm done these lines, I can use this guideline to have a little pointed
mois, pointed nose. It's not a warm day here, so I might be talking
a bit gibberish. Sorry about that.
The last one we did roundels like that and this one time we will do
draw a little beep. Draw a little bit
of a happy mouth underneath two bands like that. Little bit too many
lines there. We haven't. And then we'll have
another oval shape showing that the Hamster
have an open mouth. And then in the end we will do another band like
that and then we will shade it slightly. There you have an
open smiling mouth. And I will leave a little sparkle in the
eye here in the top. This side this time. Making shader eyes like that. Super throw out the sheets slightly. I'm just going to draw him
up here to the guideline. I will show you why
we're doing that. I'm just going to
strengthen the lines just slightly so you can
see what we're doing. Because we will add a little
bit of hair lines this time. But first I want to
place the eyes, ears. And we will have almost like a video that you have
something that is halfway between
these two points. That you should be quite
smooth like that round. This one will be the same height as the top of the head there. Then you can go ahead and
do the same and that is side something like that. Don't worry about
that. They have to be exactly the same size. It will look good anyway, even though one there
is a little bit smaller or a little bit crooked or whatever
is happening. Now we have placed two ears. From these ideas, draw a little circle like that and we can draw another
circle on this side. We will draw some
hair long, slow. So just imagine that you
have some jagged lines going out from the
from the mainline. Can actually, they've
got to beat too straight up will actually
angled them before like this. So they are little bit softer. Now we can draw off to ear. And other airline that is
going don't like this. The top of the head. We will also have a
little bit of how to draw a few airlines there. To. All of a sudden, the Hamster is a very
cute hairstyles. That's going to define all
dice a little bit better. About from the ear, from the ice style, somewhere around here. Somewhere around here. It will start to have
hello like this. And on this side
where you will draw some feet sticking out because this Hamster is
actually standing up. It's not sitting on
his butt. There. You can have a little
foot like that. So used to build their
alleles been there. And then it can go
ahead and do the same here. Handling it there. Hold on another line on their
apparel, very cute feet. And multimedia and add somebody else to be a
little bit higher up. You can do a big line-like
that, a big band. And then it kinda style the
awesome little bit more hair. So they have this
on top of the body. And it can do the same here, not in the edge, just
a slightly higher up. And coming back
to line up there. I can earliest slides there. Instead of doing, hence
looking like that or pause, we will just have very
simplified frog's legs. Very small balls. Looking about like that. I'm not going to put
out any lines for the tolls or anything. There you go. Very cute. Standing Hamster. And in this case, I think we will add
a little bit of a pattern for the
top of the head. I think we will do something that's like a baby line going up underneath I coming across like this and then
going out on either side. Don't worry. It
doesn't doesn't have to be hundred
percent symmetrical. It will look good anyway. I'm just going to slide lists, shade this very, very little. So it's just a reminder for me. I've shaded with the
black pencil later all. Yes, I think this
is a good start. So we can go through the
details with a black pencil. And I will start with the little V. Happy mouth. And I'm very ugly. Shade the mouth there. Don't leave this little area across shaded to same with other eyes. Something like that.
Then we can do the outdoor lines here,
small hair lines. And this is a very good thing to think about is the
Dog let too many lines, cortex sector the same place So when I go over
with a black pencil, you see I changed actually
this line a little bit. So these two lines are not meeting any of the top
lines at the top line here. Because if you draw too many
lines to the same place, it kinda looks a bit
strange and you lose focus. So this is why it's so good that if you
feel that you have done something wrong with
you do the first gifts, you can always redo
it and just move the line a little bit
and it looks better. So don't play with
the line here. We can go ahead and do the body. The little frog, legs, back feet are back poles. And under little fat
belly hanging out there. Yes. This looks good. I'm gonna do the
shading for this and I will be quite gentle. You can, of course, when you're
drawing these characters, instead of just having
a black pencil, when it comes to spots, you can draw a color instead. So when you're doing
this character, maybe this part is very light, maybe a yellow color, and the top part is maybe
more of a brown color. This is something that
is totally up to you. Maybe you want to keep
it black and white. That's totally fine too. Unless you see, when I filled in this place,
I have to go back. Strengthened the ice a
little bit so it doesn't disappear into the
into the spots. Can make the ice Torque
your two we're shading. So always see the exercises we do together as a guideline. And from there you can
go out and do all kinds of things that you feel is
found them working for you, adding color, drawing
the different materials, maybe you use crayons
instead of a pencil. Yes, let your
imagination run wild. We will, of course, do the shade to hear a
little bit of shade. This case. I will also do a
little bit of erasing here. I want this area to stay open. Since we strengthen dot
line is to slightly, I just wanted to remove it. And then lastly, we
will help you shade here a little bit of strength. Underneath the feet,
under the belly. We can of course also. Strengthening dislikes also. Give me a little bit more
importance to the head. There you go, your
second Hamster standing up and maybe a
demanding some kind of cookies. Good work, and see you
in the next lesson.
10. Side View Hamster: The last helps to reveal draw will be in the
slide side View. We will start by doing a bowl
like this. That's a circle. On top of that circle, we will have labile
shape. Like that. Shape is going to be a slightly smaller than the the bowl. A little bit messy there.
Use your friend eraser. And since we're not going to do a fraud
to you or we're not going to make a
complete side View. It will be somewhere in-between. We will have a guideline
going somewhere around here. And just imagine that
you have a guideline here, something like that. And then we will have another guideline here to show where the
middle of the faces. Then we will start
by doing a little. Now somebody will do the little
V-shape again like this. Then we're going to make to
to belt lines like this. There you have to
start on the face. And just above that shear, we will have two
circles on each side, Something like that and
they will be completely filled in like this. Now when we have these places, we will actually do follow
this line a little bit. It's all going to be the sheiks. Then we will do
just a little bit on top here, just a little bit. Another line will go
back to this point. Slammed going all the way
down to the other bowl. Very happy or back
of your Hamster. Here, we can actually flatten. The ball will slightly out just a little bit of
fluff here on the side. We can also do when they do
it a line you can do it. It goes back out
together like that. Just a little bit. So you
have this kind of light. There. We have the body.
It's quite, quite fat. And then we will
have two small feet. So it's not going all
the way back here. It's far droughts. And they will go out
from this line slightly, will do the same here. From this corner there will be another set of another poll. Go out like that. We can erase this
line a little bit. Same here. See I haven't
oval-shaped going there. 11, draw this line on
top of the other line. And then I will draw
this line on top of that line to show a little bit of Bellefonte
will do shape here. I think we will leave
this line like this. I can go ahead and
define the back Little bit more strength. And of course, this
little creature are supposed to have
some kind of years. So just imagine a line coming up from the nose here and going back slightly in this direction. So it will have here
star or folded a little bit back like that. Then we will have the inner
ear looking beat like this. So there's more thickness to
decide on to the backside. And I think I drew
this line a little bit too long and I'm
going to erase it. Connected to decide
their other ear will be on the
backside of the heads. So let's go ahead and
fill this lining. And then again from the nose, about from the middle
here up to here. It will have the start
of the other ear. This ear will be folded back to like an oval
shaped like this. It will some polls, but before we draw them, just imagine what this little
creature is chewing on. It could be a cookie
or not or something. In this case, I think
very to be able to be shoeing on some kind of almonds. So I will draw a normal
shape coming out like this. I'm going back up there. There you have your all melt. And then we will draw some
short for all poster. We will erase this line. There, we have one. Then
of course it should have another poll on this
side. Crossing the line. Slightly. These posts are almost touching each
other but not completely. Then you draw these.
Yes. Yes. Makes sure that the little hands here, the poles are covering
the Alma lines. You don't get too many lines
going into each other. So they are so to
say, overlapping. And very happy, a little nuts. Then we can draw some
How is called not lines. Slight wells like this. Why I left a little
room here between these two lines is that I wanted to have a compete line going all the way down there. It got a bit, a bit Tomasello, something like that. If you want to draw
some small paul lines, they're just make sure that
you don't draw the lines. I can show air. If you
have the poll like that. The line there that you
don't talk to like this, that you draw the line here because it's a
little bit confusing. You don't know where the
line is, exit representing. It's always good to separate the lines slightly
from each other. Not everything is
interconnected. Yes, I think this looks very
cute with this creature. I think we will also do
some kind of pattern. And I think on the
back here we can have for Rawls soft
line going like this. This is something you
can experiment with, your redrawing and practicing these drawing drawings to add different kinds of patterns. Let's see what happens
to be creature. Maybe some patterns
are more slimming. Maybe the maybe
some patterns are more volume is for
the for the Hamster. So please feel free
and play around. I think I will will do something that's
touching them. I like that. I'm drawing this line
in-between these airlines, so I'm not connecting it
to either UCSD in-between. We can do some slight bands. They're shaded spot, leaving the inner ear unshaded. This case, I will also
shade the back here. Yes. Since we put little
Towson different poles, we can also have them Will the back pulse like
this heals two lines. Let's go ahead and do
the black lines here. Starting with the nose,
the little mouth. I will start by drawing the poles here because there are more
important and all men. So I know that the poor lines are exactly way I want them. I can draw the will be a
little bit more precise here. Draw the lines. It doesn't get too cluttered. I can go ahead and do the eyes. When you draw eyes
looking like this, it looks a bit mischievous. Maybe a stalling this
stolen, this almond. Little not thief
will do the shapes. I will do yours. Under the curve up going. Making sure that
this line is top of the other line. Same here. Two toes. Going to remove idea
that we're stupid extra. This is something
when your drawing, you having to do it
with the blue person. So it's not so distracting
us with a black belt. So if I will draw
this line here, a curve going like that, then another line
coming up like this is the thing is that
quite often maybe you will draw them that they
are crossing like this. Then it's very hard to actually
read, read the drawing. So just be a little bit of an eye out when you're
drawing the lines, if they are going like this, or if you actually
have drawn it, that is, the line
is going like that. First in this case is both. Well, in this case the cheek
is on top of the body. This case the body is
actually on top of the shaky. Just different ways of doing it. Let's try to avoid
this situation. Because it can be quite hard to understand what
what's going on in the drawing will do. The spots. Being gentle line here. I'm being gentle
with the shading, shade all the and if it happens that you have a few more lines that are more stronger when you
do the shading, don't worry about it. You can also leave it. That is, you can erase it or you
can actually tried to have the same strings over
the whole shade. Same here. I can always go back. I'm out a little bit more
pressure to my hands. Slightly. Just be careful so the spots are not dominating
the picture too much. Little strengthening the eyes. Disappear. Feel them, you know, we will do a little bit
more of a shade here. Don't want them to shade
with a black pencil. When you're doing shading, sometimes the table or whatever your drawing
is not very smooth. So if you go over something
that is a little bit bumpy, it will actually
show your drawing. But don't worry about it. As I said, it's
more of a practice, but when you start
to do something that's How to say
more finalized, make sure that you have
a very even table or Drawing Book or
whatever you're working with to get a little
bit of a smoother, smoother lines and shapes. I'm just going to
strengthen the lines here. So we know that is actually sitting can earliest
a little bit more of a strength
to actually shade, giving it some
more weight force. But they're also able to go back and add a little bit more
strength to the the mouth. Lastly, I will just do a
very quick light shade on the LCL slightly like this. So there you see that little
pulse are popping out. Just young to like that. You can try back-and-forth, makes sure that the all melt. It doesn't get the same string so we shade as the spots here. So you can try to
make this a little bit stronger or maybe it do the spots a
little bit stronger? Yes. It looks really
good. There you go. You have three different
kinds of hamsters. And now you have a little bit
of a gallery that you can mix and match the different
kinds of hamsters. Maybe it is Hamster
is very fluffy, so you've allowed a lot
of these lines along it. And maybe this
Hamster doesn't have this little hairdo which
just more of a flat one. You can always try out different
kinds of patterns that, as we discussed earlier. So good work and see
you in the next lesson.
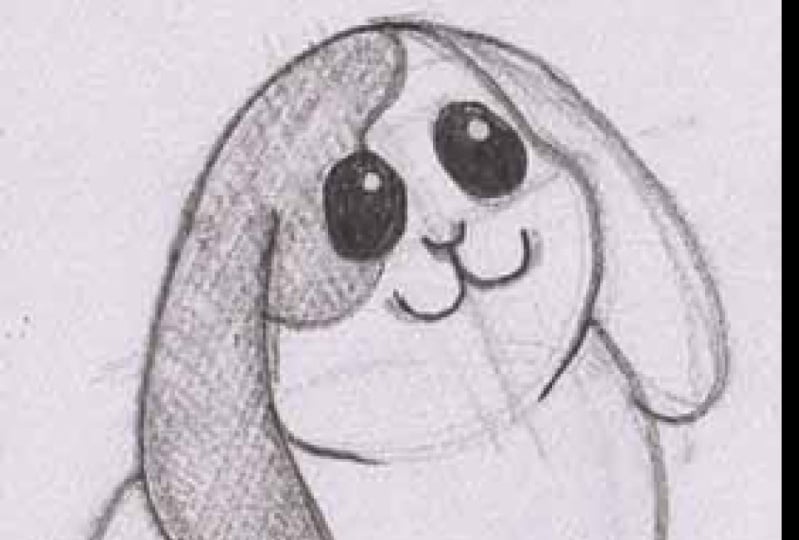
11. Standing Bunny: So the next animal we
will do a little Bunny. And we will start
by doorway doing a circle, something like this. Then we can draw a guideline. You know, the drill by now. Maybe this is actually sort of automatic for you at this point. And then we will have halfway will do
the guideline here too. As you see, I'm
quite free and put the guy and I'm perfectly in the middle or
anything like that, and don't worry about being
in some kind of perfection, but there's no point to that. It's all about having more FUN than doing something
that is perfect. We will do also a little
bit of an oval shape here. Something like this. That will be the sheiks
of the little creature. We will do the measurement
to see where the body, somebody taking
half of the circle. And I'm almost all the
way out to dance there. We will do line up here. So we know approximately
where the body is going to beat them. We can start by putting
a little nose here. And I wonder if you
actually should do with different nodes this time. Yesterday, drawing a little, a little bit of a pointer. Course. Happy smile. To host like that. I'm done. Two big eyes. About almost in the
middle of this line, maybe a little bit higher. Something like that. We
can also do them a bit more clear. Like this. Yes. We will leave some spots
in the eyes up here. We'll have another one, smaller one down here. This is too small glimmers. Show you the eyes slightly. Then we can go ahead and do
the outer line or the face. And we will do this massive
sheets, both sides. We can completely line here down the hat,
Something like that. Control the lines just
a little bit further. And then we're able to go
ahead and draw the top bar, half of the head. And as you'll see, I have
drawn the cheeks on top of the top part. Yes, that looks really good. And then we will have two ears and bunnies usually
have quite big ears. So let's go ahead
and just imagine a middle point here
between these places. Have some ears sticking out from both sides that are slightly, slightly bumped,
slightly curved. Then we can have a smaller
piece for the inner ear. That looks good. If
you want to kill. Another guideline up
here so we can place the other ear about
the same place. But in this case, I believe, show you that if
you do something, you should supposed
to be exactly here, but if you want to, you can place the ear symmetrical if you hold to
and they will look good. Yes, play around with this. Then you will discover
that not everything has to be in the right place. So to say. Very happy. I will make just a
you didn't little bit wider. A little bit wider? That abundance deals
that looks good. What do you think? When it comes to the body? This body will be standing
up on its back legs. What we'll do is
imagine that you start from this position and you
make a band like that. And it goes up to
the point where the guidelines are
touching the hat. And then you can do the same
on either side like that. And then we have a little
bit of a foot here. And then we're going to draw another line up here and it's standing out towards
slightly, just a little bit. Then they can do
the same, although decide that's going out
a little bit like that. We'll have another
slightly curved line here. There we have the back legs. The front legs will be quite high up and it will
be touching this slide. So go ahead and do some front legs are
quite round like that. There are more round than
these because I don't want these two legs to
look exactly the same and, and I will do another set here. Another lucky. That is also quite route. Yes. There you go. One cute
Standing little Bunny. Let's go ahead and
to find a lines with the black pencil
and a big smile. But we can go ahead
and do the eyes. As you'll see. I'm moving
this I slightly to decide a little bit because I thought I was almost a little bit too
close to the mouth. Small Sparkles. Number shaping. The other. I got the
lipid carried away there. See if we can get cleaned up. Racer up a little bit. See if we can get this
little sparkle back. So there we have the eyes. Tried to get the
whitebark little bit better using a different
kinds of eraser. Lcc. This no problem
to erase things. I'll start over. Because one, a really, really want this little shimmering dice to show. I hope this looks better. Then what we'll do, the cheeks, the bottom half of the big ears. Maybe you have thought of
it. I will see you in it. That's quite a lot of these. So to say, cute
animals are looking quite the same. Big heads Almost the same kind of
roundness to the features, but we just small things
like how you make two ears. How you place the
eyes and the nose, what kind of knows you choose, and you get a different
kind of animals. For instance, if I will
draw this little creature, but I will choose Cat
moles here instead. And of course have
to reach all the ice modal sudden you have a
cat to get there too. Hello of a sudden done. You have Cat instead of a Bunny. Built a little bit
carried away there. Strengthen the
lines a little bit. We can go ahead and
do a little bit of a shade here showing
where the Bunny Standing. Probably waiting for
some kind of treat. Some way to, to the legs. Slightly like that. Slight shade. When to shade something. You will see it mostly when you're having something
that is Standing. Just make sure that the
biggest strength of the shade is centered
under the character. It looks better. Let's go ahead. I'll strengths on this slide to make the head pop out
a little bit better. Hello, of course we
have to go back into the ice so they don't disappear. Strengthened blackness
here quite a lot. To do. A little bit of cross J to go multicolor, forget that little part. Little bit darker. I think we can give. The mouth feels
slightly more strength. There you go. One
standing cute Bunny. And as you see, I didn't get the full shining, the sparkle as little
light here as another one, but I'm not freaking out. I really want to repeat
this message to you. If you do something
that you're not super happy with, just leave it. Because in the next drawing, you will make very much
better version of it. You just leave your drawing and he has continued
to draw next one. Please save your drawings so
you can see your progress. It's really, really important
and also makes sure to post and share your drawings with
your fellow students. I'm 100% sure they are. There will be very happy
to see what you're doing. Good work and see you
in the next lesson.
12. Dancing Bunny: So the next part we will draw will be a little dancing while, and let's start to find
the hat with a circle. And we will have a little bit different
proportions for this one. So when you have the circle, go ahead and draw
the same links down. Here will be the
bottom of the bunny. And the width of the hand. We have a little bit
of a little box. Because this bundle
will be quite fluffy. We will of course do guideline. We can find a facial feature for this little creature.
There you go. I want to start by doing
a little nose for it. I think we will do
that little V-shape. Something like this.
Smiling mouth. It will be the mouth
will be open like this. Then we can shade
it just slightly. And then we will have two eyes. We can have them touching
the guideline here. Also, we can slap
them inward slightly. Do the same here.
Slight disliked it. Ice. Towards the middle. Yes, something like that. And when it comes to this bunny, I thought it will
have its pulse. They are in the air. If you follow these lines, we will have force
going up like this, almost touching the
guideline there. And the other one will be
even a little bit higher. So it goes over the guideline. Underlies that not
only proceed straight, they're a little bit curved. Now when you have
found this position, we will start by
drawing the feet. They will be over the edge here. So one pole here. Then from this corner there, we will draw a round
shape Altair up to the shoulder, arm, so to say. Then we will have
another poll here, but this one we will
have it facing up. So start just a
little bit before the edge there and draw
a bow up like this. And then we have find
the other other foot or something like that. And then we will of course have lower part.
Going like this. I'm just gonna do a little
bit of erasing here. I don't want well, the underlying going
in this direction or that direction is just
touching each other. They're we will do a fat
fluffy side on this. Also. Just do a little bow. Continue up into
the into the arm. Like that. You just made sure that you draw this line somewhere in the middle of this. So it doesn't connect
into here or into here. It's just harder to read. Now when we add the body, we can do the head. And of course it should
have fluffy sheiks. I'm going to follow up the
bowl of the circle first, but the level of
bounded dilute it a bit slightly inwards. And going up like this. And do the same on this slide
to slide down like that. Almost get some kind
of a pear-shaped And then the will of
course have two sets. So a set of air. We will do them. They're not
completely in the middle. Let's go ahead and draw just a little bit toward
the top half of the head. So let's start by drawing
the one ear here. And it can be angled
out like that. Figure. Bo, going like this. So there you have one ear. The inner ear we
can draw like this, making this side a little bit wider than the other side,
something like that. And this air, we can have
it more angled down here. And if you want to, you can
of course, do a measurement. You know, approximately how
long does ear is going to be. But as I discussed earlier, Don't worry about
it doesn't have to be hundred percent symmetrical. Once you complete drawing, everything will fall into place. Though. As with other ear, little bit thicker on this side. There you go, one happy
dancing or bouncing bunny. Maybe this one is closer to the food and other worldliness. Why it's sort of celebrating you going to put out any
lines here for the tos. I prefer it to be very clean. This money. You can of course,
go ahead and draw some spots on it to feel, feel, feel free to play around. But I will keep it clean
in this. And destroy. Start with the arms. Go ahead and do the
rest of the body here. It's time to sharpen the pencil. Yes, this is much much better. Out there foods. In this case, maybe we will See if you can add a little bit more
fluffiness to it. I'm just going to draw this
line slightly more curved. Yes. I think I liked
disliked much better. Strengthen the line for the
fall a little bit more. Giving it some more weight
than the head with the ears. As you'll see. There are
several ways to do bunny ears. I'm just going to
draw a couple of different wells,
few tissues from. The only thing you
can remember is that just make sure to
draw them quite big. Because if you draw
them quite small, it's maybe hard to read,
but kind of animal, this is my window
where they are, what kind of shape you choose, make sure they are quite picky. On the slide shade here. Strengthened the
mouth little bit more so it doesn't
disappear into the mouth. Eyes. See that we have a park outside
our building here, and there were so many
bunnies, bunny rabbits there. I never seen so many before. Me. I didn't bring my camera, but I will try to
do it next time. They were very cute.
Probably helping the guys on fixing the laws. But you'd think the
grass their eyes and we will do some shading for the ground here to the Black Panther. I'm just going to draw
a few more lines here. And then we had to touch the
little fellow to the ground. Even though it's emotion. I'm sure that these
lines are stronger. So they go on top of
the Sheikh lines. Got a bit carried away. They're always see that the frog pulse are waving
in front of the lights. So there you go, one
happy bouncy bunny. Good work, and see you
in the next lesson.
13. Side View Bunny: So the last Bunny we will
do will be side View. We will start by drawing a circle for where
the head is going to be. Something like this.
And this had will be slightly tilted to decide. So I'm gonna draw a
guideline for the head would be looking somewhat like this. Then we will be doing an
oval shape for the body. Somewhat like that. And I think the body and this
time will be quite similar. Since we have a side view. We have neither a little bit
more space here in the back. Let's go ahead and do the nose. Now wonder what we'll
do is that we will also turned slightly to decide. So just make the guideline
going in this direction. Erasing this slightly. Just a little bit to that site will draw a little
nose here, right? Will be almost like the V-shape, but we will be
slightly more curved. Using the guideline there. Smile. And I think in this case we will have very
droopy ears for the Bunny. Before I place the eyes, I will draw the ears. And there will be
somewhere around here. There will be not as big as
all the top as they are here. So use the side of the
circle you drew earlier to find ears coming down there. So it's a little bit wider
there in the middle. We can throw the top path. Instead of having a
round shape like this, I will draw a bit of a chic. I had will go like
this a little bit. You have a big cheek there. Draw continue to draw
the hand down there. Then we can draw the other ear. And it will be slightly
on the backside. So I will not all the
way on the top here, but there's little slight in
more detail there other draw another line that goes
outside the hair. I can draw another
line going up there. Something like that. Can
help it just a little bit. Just to have it a little bit
smaller, just a little bit. So we have to big droopy ears and now
we'll place the eyes. Why I did this was because I
wanted to have this shape. And before I did that, I don't know how big is I can
draw all this little will have the possibility
to choose the size. We will have overlies this time. Looking at that and then
we can leave a little bit of sparkle on top there. It's a little bit
above this guideline. I'm going to do the
same old data side. Well, of course you can
use a lot going on here to see if you want is to
be about the same size. Can make this just a
little bit smaller. Like that. Random shades them. Slightly. Yes, that's
a very cute head. And let's go ahead and
do the rest of the body. And we can actually
start by doing the back of the Bunny.
Seems perhaps this Shape here. Let's continue
along the of a line there. We will have the back
leg here and we will actually tried to make it makes sure that
is quite wrong. They're going up like that so that the leg will
be a little bit longer. The loan from the air there. There we have the back leg. And then we will have
to for all poles here, can go ahead and
draw a line here. The two legs coming down here. There will be angled
out slightly like this. I believe Let's do another
angle line like that. Then we can have a third one. They're not going to
touch completely. We will leave a little bit
the rule there to show the belly and don't
a small curve there. Number 11 out a
small current adult place lines connecting together. So just leave a little bit
more of a space between them. If this line goes too long, just erase this around a bit. Now we can draw the
belly line here. This is really fluffy animal to. And then we can
draw the back poll starting somewhere around here. And again, don't draw
it into this corner, collecting all the lines, so draw it a little
bit further out. Like this. And I think I will have to make it a
little bit shorter, I think. Because I want these lines to be forming a line going like that and I don't want this
poor to stick out too much. I will just make it a little
bit, a little bit smaller. Like this is much better. Erase this line.
Because we're going to put to share that we are also so it doesn't interfere with it. And as you see, it's okay to go back and forth and trying to find a better position and
a better line if you want to use your eraser. It's the good, good help. We should also have
continuing on the belly here. Just a small line going up. Not touching all the way,
but just a little bit. And then we can draw some
lines for the tools doing to each pole like this. And we should have a little
tail for this Bunny to. And I will make waveshape
going up like this. A little bit further up
along the back here. Yes. It looks good. I think we should have
some spots on this since we didn't do any
spots on the other ones. Let's go ahead and
do a line going up under the eye and
on top of the hat. Then curving back. Now we can shade it here. Slightly. Show you
the other one, layer two. I love course. You can add some
more spots to it. We can also do the Taylor little bit darker to and then it's, you'd have maybe spots
looking like this. We can also use to
make sure that we see that there's a lot of
sheet here for the Bunny. We can draw this line
out from welder the ear. So you get to be a bit
more of a round robin, less to the head. Let's go erase
this one so we see that the cheek isn't
top on top of the ear. Lastly, we will do defining the lines with the black pencil. Start with the nose. It's very nice to draw a happy, smiling animals
because you will be Affected by this, you will also be probably smiling a little
bit when your drawing. So there's like
two gifts in one, being creative,
being in good mood. So that's shade the eyes. Then we can start to do
the head with the ears. I don't know what which
kind of Bunny you prefer. Do you like those that have pointed ears or
do you like these? Moreover, droopy look. I think great. I like both of them. Both quite cute and funny. Appearances. So there
have the other ear. The little poles. Forgetting the little tail. Though. We did earlier, ESBL told with the lines for the spots that
adult kept too strong. We can do a little
bit of shade here. One do drawing these animals. You can given name
to them. At least. It works for me.
When I'm drawing usually right on the
also little name of the character I'm working on. It helps me start to develop. It's sort of a backstory for
the creature I'm drawing. It always add something
to the under assault. And I know, I don't
know which name this most popular when
it comes to Bunny, but probably fluffy or
something like that. So there you have the shading
and have to go back and strengthening the eyes so it doesn't disappear
into the back. Draw them quite, quite, quite dark. On the other way. We can all a little
bit more strength to the mouth and also since
it's connected to the ice. And let's go ahead and do a little bit of a shade or
shadow on the ground there. Yes, feel free to experiment
with the with the shadow. Make a very small and very dark, or it can make a very big,
well-known, quite light. And see what works best for the drawing that's
your doing at the moment. I think I will go back
down hills through, draw a little bit stronger here, closer to the body. Just a little bit
Terrell in the middle. And as as usual, don't worry
if the lines are shallow, lines are crossing the other
lines. It doesn't matter. It's just a practice. Remember that some
connecting strength here. So the Bunny standing on
the grounds that we can do some strengths
differences here. So the leg lines or on top of the belly lines.
Strength or two. So strength over the tail. We can also go back to draw
little bit more strength to decide how dare we don't have to maybe do it so
much on the other side. But most law the underside. So the air is really
on top of the rest of the body. We can do. So strings also to his cheek. You don't just make sure that the roundness of
the sheets are still there. It doesn't get too yeah. I don't worry if drawing is
getting smashed. It's supposed to
look like that Bunny or you're experimenting and having FUN growing
as, as an artist. So there we had
three bunnies with three quite different
appearances and probably very
different personalities. Good work, and see you
in the next lesson.
14. Simple Pig: So the next animal we will do is little Pig. A little piglet. We will of course, start
by doing a simple shape. Circle. The light
days, rough and easy. Guideline. Other ones, it
will get a lot of phase. We're going to take
half of the circle. So we know where to place
the bottom half of the body. We have done this before,
so you know it already. And I'm almost all
to dead stare. Almost all the way
to edge there. So we form a box
there for the body. And then we're gonna do a
little snout for picky. And we're not going to place it, it straight in the middle. We have a lower
depth a little bit, so we will do it
them oval-shaped. So things like this. And the top path will be
touching the guideline. I can go ahead and
find a snail to immediately looking
something like this. It will have the most trials. To all those shapes like this. She drew draw two big eyes. The eyes will be going Yes, below this guideline. Slightly. It can draw another
guideline there. So you'll know where to
place the other eye. Unless you she'll don't worry
if it looks a bit crooked, uneven, let's try to be
looked very good anyway. And you complete your drawing. So there you have
the eyes and then we'll go on to draw some pupils, very big ones like this. Then we will leave a little bit of light and the top half there. So there we have two big eyes. Let me can go ahead and
draw the outer shape here. We will complete this
circle all the way around. Looking like that. Then we will have two ears. And let's go ahead and imagine that you have a middle point on both sides and this will be
in the middle of the ear. You know, by now, to find
a middle point there. Pig ears are quite
pointed. They can do. I'm not going to draw these
lines completely straight, so they are a little
bit, little bit curved. And this is C, The fears or just a little bit above
the top of the head. So let's go ahead and
draw the other ear. Something like dance
bands out there. The inner ear. Yes, I think just a good
start for the face. And of course, the
Pig should be happy and we can draw the mouth, smiling mouth, a little bit. Symmetrical. Smile to one phase, to one side of the face. Now, we will draw up
the Pig standing. I'm going to use this
point on this point. Imagine that you have
dumped line like this. Can do is same and I decide
line going out there. And then we will do a little bit of roundness hair down here. The same old data
side, curved line up. And then we will draw another
curve going over there. So very, very rounded legs. I'm going to remove that
little line that got away that Yes, this looks good. Then of course it should
have some frog legs or arms. Making draw them very simple. Sort of two lumbar sausages. Both sides here
can have another, the guideline here
if you want to. So a round shape. And another round shape here. There you have to cute lumps. Now, we can go ahead and go over the details
with a black pencil. I'm going to start
with an ulcer. Most drills. And we can go ahead
and do the eyes. The other eye, the pupils. I'm trying to draw
different eyes. So you have salting tissues between course with
all these creatures, the animals who killed, use different kinds of eyes. You'll start to experiment. We'll see what is best-fitting
for your drawing. Maybe it's completely dark eyes or it's the austenite with a glimmer or eyes looking
like this with pupils. So feel free to use
their imagination. How to worry about jagged lines or if something
is not completely around. It will look very good. When you're finished
the drawing anyway. Ears, slightly pointed, the body, do the arm also. When I'm on this
side of the drawing, those soft line curve up here. The legs got to be to roll their heels towards the line to go
up first like this. I'm done. Like this. So you see you can always
go back and redo things. If you're not hundred
percent happy with your your drawing. Then we can string folder. Mindful the herd. Can answer strings
here on the knees, the feet also secretes a Davis with my pencil today. Let's go ahead and do a
little bit of shade here. This time. Do a little
bit of a different shade. Will always shade the parts that are actually straight out. Quite soft, shade
their soft shade here. Maybe a little bit more weight. We can go hard on self
strength to the nose or snow. The low, of course, that's all strength to the ice. Also. Focus goes up
to the, to the face. A little bit. Strings
older pupils. Slightly. I think it looks quite good. I'm just going to show you that you can do a shade like that. And then you can see what
happens when you close the shape. Be gentle. When I do this. Just adding strength
little bit at a time. You see that the drawing looks a little bit
different though before. So try to use different
kinds of shades when you're redrawing this and see
what works best for you. So very happy your first Pig. Good work, and see you
in the next lesson.
15. Dancing Pig: So the next Pig we will
do will be dancing one. We will start with the head. Drawing a solo sarcomere. Think I found the
right size there. We can do the guidelines. And, um, we will do body and we will do
it in measurement that quite often do
half of the circle. We will have almost all
the way up there side. Forming your think I made a
guideline a little bit to to verbally do a terrorist
and the body. And with this little Pig weevils do it with us with
other one that we will draw an oval shape and it's going to talk will
be touching this place. But the source node
will not be as big. Hope is, is called
slots for pigs. Correct me if you're wrong. If I'm wrong, I'm allowed to have all shapes and they will be smaller than other ones. Then we will have
centered around the guideline here where
we'll have to eyes. There will be a little bit smaller and they
will be filled-in. Then we will do Mao will be an oval shape like this. So that the highest point
of the oval is, is here. So it's going inwards before
it's touching the nose. And I'm will have the
frog legs going up. The equivalent of the frog legs going up somewhere around here. Like two sausages will
be to sausages with the legs and another
leg up here. Something like this. I just wanted to have a little
bit more of a sheet here, so I will add little
bit to the sides here. We luck draw the line
completely up materials to Bob. The guideline will do the
same without his side here. Slightly there. Let's go ahead and defined the
ice a little bit better. We will draw the top half of
the Pig. This the same here. I will leave this area
because we're going to draw a little bit different
kinds of air this time. So just a little bit
lower bound of this one. We will draw a line
out like that. And I'm going above this
line. Going in again. You have an ear that is almost like you're a little
sausage on top of the head. Will do the same here. A little bit lower
than this point here. And on a line coming out from there doing a belt and don't quite straight
the rest of the way. There you have a different way
of drawing ears for a Pig. Before they're quite cute. And we're gonna do the body and having this point us a
little bit of a reference. I didn't do a bound up here. Going towards the other leg. Dog draw it up here because don't draw too many
lines to the same place. It looks better, but you have a little bit of a
more open area there. And following this line, we will draw a leg here. And it will not go
all the way Altair. So we will bend it before
it touches this line. Done it falls back. One or the back legs Um, where the boxes you
can draw a little line, but you can just bend it
slightly out like this. Somewhere. Before this line. It will start to other leg. And it can be pointed not
completely straight down, but a little bit downwards. Then we can have it going back towards the body like that. Then you can imagine that
we started this line here. Then we will start
his line there, but they will be going up here. Somewhere out here
we will have a bend. It goes back into the body. I will do it a little
bit more round. It's gotta be to flutter. Little bit more out. Get a very round, a nice spline there. Unless we decide,
makes sure that these lines are touching,
keep them open. And as we discussed earlier, that if you have too
many lines intersecting, it doesn't look so good and it's hard to read your drawing. Let's go ahead and defined
drawing with the black pencil. Can start with the nostrils, the nose. We can do them. And just shade. It. Makes sure that you
shaded quite gently. Will have the eyes. They will be black. So let's go ahead and
shaded quite strongly. Quite strong. Then we can do with the ears that are flap to
the sides there. Top part of the herd. And on the other ear. As you see, you can draw lines
that are along the lines. So you can draw else also
along the line if you want to. Encourage you to
do and try both. We'll see what is
most fitting for you. I think in the beginning,
as we discussed earlier, is it's easier to draw many lines to train your
eye-hand coordination that way. Sometimes when you feel like it, you just draw one
low compete line. When it comes to this point. Don't draw them overlapping us trying to make
your single pointer. And along nice
shape to one side, the other side of the body. So there we have one
little crazy dancing Pig. We can do a little
bit of shading here to do a little shade
here, to start with. Standard up like that isn't
connected to the ground. A little soft touch
with the black pencil. A little, little shade. Add so way where it Standing. We can go back and add some more focus to
the facial features. Some strings to the mouth. It looks very good. Unless I
did with the other Pig here. Probably less draw a little
bigger shades. Going out. Just a little bit further. You'll see that you can play
around with when you're drawing the shades
for your characters. Because it will make some
different appearance, different weight for
your characters. So there we have a
little bit longer shade. I think both kinds
of shading works. Just try out different versions. And there we go,
dancing, crazy Pig. Good work, and see you
in the next lesson.
16. Side View Pig: The last paper will do, will be side View. Pig resting on fat belly. We will start by drawing
circles for the heads, you know, the drill, like this. Then we will add
some guidelines. This circle, Let's call it shapes this slightly. Let's see what I've
actually decided. Then we will have an oval
shape and it will be about little bit smaller
than the first circle. So yeah, them
oval-shaped on here. That is it's like a smaller bit. There we have the head and
only have bought it on here. We can draw a little
bit different. Most of these types notes will be almost like
an oval shape, but they will be more
round on the top. Like this. Slightly. This side. We will have the nostrils, prefer to actually draw them. Although like this, I
think it looks better. Then we will have to round
eyes and there will be about about the middle of these lines,
something like that. And then we will do,
instead of having a completely round
of withdrawal. Sheiks, to be a little
bit more to say square. So they are a little bit
more flat on the side here and be around
again on the top. And I think I will way you can actually
do it if you change your mind when your
drawing is that I want to have a little bit
more room on the side here. So because I want to
be turned slightly to decide what else can do is add a little bit
more room to your face. Like this. Now you see that feels like to Pig is little bit looking in this direction compared
to the other lines. I will erase the
circle on this side. Hello, there is a
little bit more room here between die
and dad's shoulder. A little bit less obvious side. Let's go ahead and
do lighting eyes. Then we will have a different
set of ears, I think. So somewhere in the middle here and somewhere in
the middle up here. We will have air's going out and then we'll be It's kinda hard, droopy ears looking
something like this. This line will be on
top of the line here. So it feels like there's
some depth to the ear. Yes, a little cute ear there. Let's go ahead and define the lines here a
little bit better so you'll see what's
going on here. Same on this side. All the way up here because this ear
will be on top of the head. So let's see that the ear is
slightly higher up there. So you can draw a shape up
their beer to this side. We can make this area's little bit bigger than
this dollar euro. So the other ear resulting here, another one is just
a little bit lower. Another little line
here. The error is This part of the year is
on top of this slide. And yes, I think this
looks very cute. And then we can also do a
little bit of a gene for it. A slight will also define the also little bit better eyes. This one, I like
smiling animals. So let's go ahead and do a little smile for
this one to one. I don't want to draw another
line here because it will be a bit too
similar like this one. So let's go ahead and do it
a little bit as symmetrical. So let's draw. Smile here. I'm just adding some extra
lines there so the office just slightly or it looks good. Then when it comes to the body. Let's go ahead and follow the
oval-shaped VUDU earlier. Somewhere well, where
this line is going down, we will have a leg oval-shaped
going a bit like this. Then becomes full
of the line again, little bit further back. And then we will
have another flag will be angled more
towards the ground. And it will be slightly smaller, slightly smaller. Two legs. We can draw the back of
the Pig also helps make sure that this line is going
up a little bit further. So it can help this line
on the interrupted. Don't just fall
off the bundle of your oval-shaped back
towards the head. And then we can do
a little tail here. The tail is called
smaller in Swedish, I don't know excellent
English name for this. I hope it has redefined
the name in your language. Notice, it is really
funny. A Swedish. There you have the tail line
on the a band like that. And then when it comes
to the last leg, you can see that I will
have a little bit of a band here when it comes
to where the legs are connected to the ground. So the last leg will
be somewhere around here touching that line. And then we will have
line going up like this. It's luck complete. This trait is a little
bit curved like that. So there you have
the body to them. We can do a single line. Show where toes. So this little creature is. We can also erase this. Belt line. Costs. We're going to draw a shadow
later. All dumbbell. Yes, it looks good. Let's go ahead and do the definition with
the black pencil. Start by doing the nostrils. Eyes. By now. Maybe I was talking
to get the feel of what kind of eyes
that you favor. But just because you
favor something, don't forget to draw
different versions. Of course, it's very
good to practice all kinds of variations. Because you bought
you're doing right now as you're
building a library. Different things you
can put on paper. They're quite black. And then we can do
going back there. And up here. I think
I will think I will prefer to have a single
point there instead of Hagglund having to here
going on top of the head, somebody else make
one point here, go like that to draw the other side on how
they're going up today. Because I think it
looks better to have this part overlapping
the heads up there. I'm Pig us slowing stare. Let's specify them a
little bit better. The big smile, a little
bit more of a wide line. Opening the mouth slightly. The little tune their well, we can continue to do
the rest of the body of the closet. Little tail,
something like that. So it looks good. Let's go
ahead and do some shading. Shaded older role, the body. So it's really,
really connecting to the grow, their jangly unclean. So strengths to this shade or shadow was trying to have the strongest part of
the shadow close to the body. Cannot. He'll be here to my favorites. And I'm issued some
weight to the wax also to the to the belly. So it's really sticks
to the ground. Can I just a little bit more than blackness here underneath. Let's use your preferred to go back and see if
there's some place we can add some more
contrast if it's needed. It's quite often it's
the facial features. You'll some more strength. And also we can add salts
Drawing fair to the sites that had become a little
bit more Herbie and going on top of the body. Yes, this looks good. Very cute. So there you go, three happy little piglets. I want to thank you for
taking this course. I hope you had grateful that you learned a
lot on smile a lot. And finally, please
Show your drawings. It is the best way to
grow your confidence. So Show your work to
friends and family, post and share your drawings
with your fellow students. It will make a huge difference
 Christer Hägglund, Illustrator / Author / Game Developer